Fluffy Snow Cheese Cake

Hi Guys, today we are making these classic “Fluffy Snow Cheese Cake”. Ultimately soft, moist and cheesy sponge cake that you cheese lover will surely love!

This cake bakes up so nice and beautifuly even on the top, making it perfect for layering.

Fluffy Vanilla Buttercream

A light, moist and fluffy vanilla sponge cake, lightly filled and frosted with fluffy vanilla buttercream on top.

Finished with a generous topping of shredded cheddar cheese.
The combination of soft cake, sweet vanilla buttercream and salty cheddar cheese are perfect match in every bite.

And if you are a true cheese lover, feel free to add shredded cheedar cheese in the middle of the filling if you want.

Pillowy Soft Crumb

Look how soft and pillowy the crumb is. They are amazingly fluffy and stay moist even if you keep them in the fridge for a few days.

This cake is perfect little snack to go with your afternoon tea or after dinner time with coffee or tea. You will literally could not stop eating it!
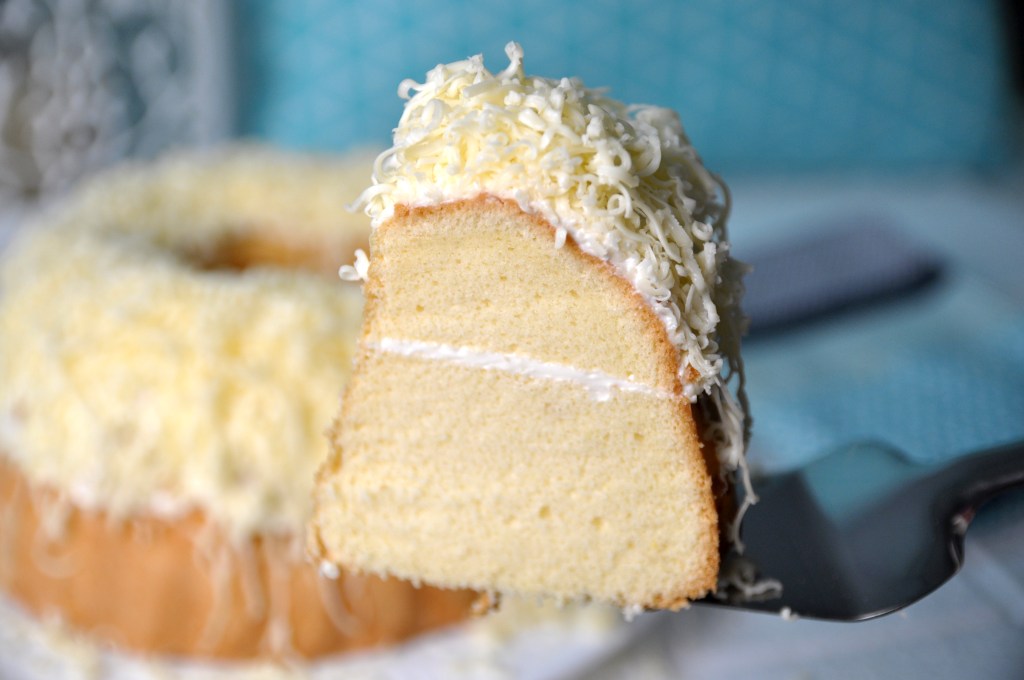
There’s something about milky and creamy cheese that really gives depth of flavor of the cake.
If you not exactly a sweet tooth, these Snow Cheese Cake might be just right for you!

SNOW CHEESE CAKE
Yield: One 8-inch bundt pan 
Active time: 1/2 hour
Total time: 1 1/2 hour

INGREDIENTS
Sponge Cake :

  • 150 grams Egg Whites
  • 1 1/2 teaspoons Lemon Juice
  • 150 grams Granulated Sugar
  • 90 grams Egg Yolks
  • 135 grams Cake Flour
  • 20 grams Corn Flour
  • 1/4 teaspoon Salt
  • 40 grams Milk
  • 25 grams Vegetable Oil
  • 1 teaspoon Vanilla Extract


Vanilla Buttercream:

  • 140 grams Shortening
  • 35 grams Salted Butter
  • 35 grams Condensed Milk
  • 1 teaspoon Vanilla Extract

Grated Cheedar Cheese


INSTRUCTIONS
Sponge Cake

  1. Preheat the oven to 150° C, grease the pan (I am using my bakery pan grease https://www.youtube.com/watch?v=ilWe6_4ZDuI or  you can brush it with some butter and sprinkle flour to grease them).
    One important tips, if you are using bundt pan, just make sure that you coat all of it’s nooks and crannies or else the cake will stuck inside the pan.
  2. For the wet ingredients;
    In a medium bowl  combine the milk, vegetable oil and vanilla extract. Mix that all through, set aside.
  3. For the batter;
    – In a large bowl, pour in the egg whites, whip at low speed until foamy, then add the lemon juice and continue mixing it (by adding small amounts of lemon juice helps to stabilize the egg whites, help prevent overbeating and allows the beaten whites to reach their full volume and stiffness).
    – When the mixture start become white, add the sugar gradually, continue beating until it reach a stiff peak (they will look shiny and the tips can stand straight up).
    – Add in the egg yolks, mix slowly until just combine.
    – Sift all the dry ingredients into a bowl in 3 batches. Mix after each addition, stirring just top part of egg mixture
  4. Take about 3 tablespoon of the eggs mixture and mix them to the wet ingredients.
    Then gently pour it back to the egg mixture.
    Scrape down and fold with spatula until well combined (this technique is used to make sure that the batter is well combined and there’s no liquid left at the bottom of the batter).
  5. Pour the batter slowly to the pan. Pour it from above 15 cm height to help get rid of air bubbles and then shake and tap the pan against worktop for 2-3 times. 
  6. Bake this off at 150° C for 40 minutes, then increase the heat to 170° C and continue baking for another 5-10 minutes.
  7. Take it off from the heat.
    Tap the pan immediately about 2-3 times against worktop so the cake won’t shrink too much.
    Put the greaseproof paper and cooling rack on top, flip the pan and let it sit for about 10-15 minutes.
  8. After 15 minutes, remove the pan and let it cool completely.

    Vanilla Buttercream
    In a large bowl, combine the shortening, salted butter, condensed milk and vanilla extract.
    Mix it all through until it becomes pale white, light and fluffy.

ASSEMBLY

  1. Using serrated knife, divide the cake horizontally into half (make sure the cake is perfectly flat all the way around).
  2. Apply about half of the vanilla buttercream as a filling, spread evenly.
  3. Place the other layer of the cake on top
  4. Spread the rest buttercream over the cake
  5. Coat the cake with a generous amount of shredded cheddar cheese.

*If you are a true cheese lover, feel free to add shredded cheedar cheese in the middle of the filling if you want. 

NOTES

  1. This basic sponge cake recipe is perfect for many other delicious treats.
  2. After the cake cooled completely, if you are not gonna assembly the cake immediately, wrap it with a cling wrap to prevent the cake dry.
  3. They are amazingly fluffy and stay moist even if you keep them in the fridge (in an airtight container) for a few days.
  4. To serve the cake from the fridge; let it the cake sit at the counter (in an airtight container) for about 20 minutes and enjoy.
  5. You can keep them in the refrigerator (in an airtight container for 3-4 days.

Baby Eeyore Spiral Mantou

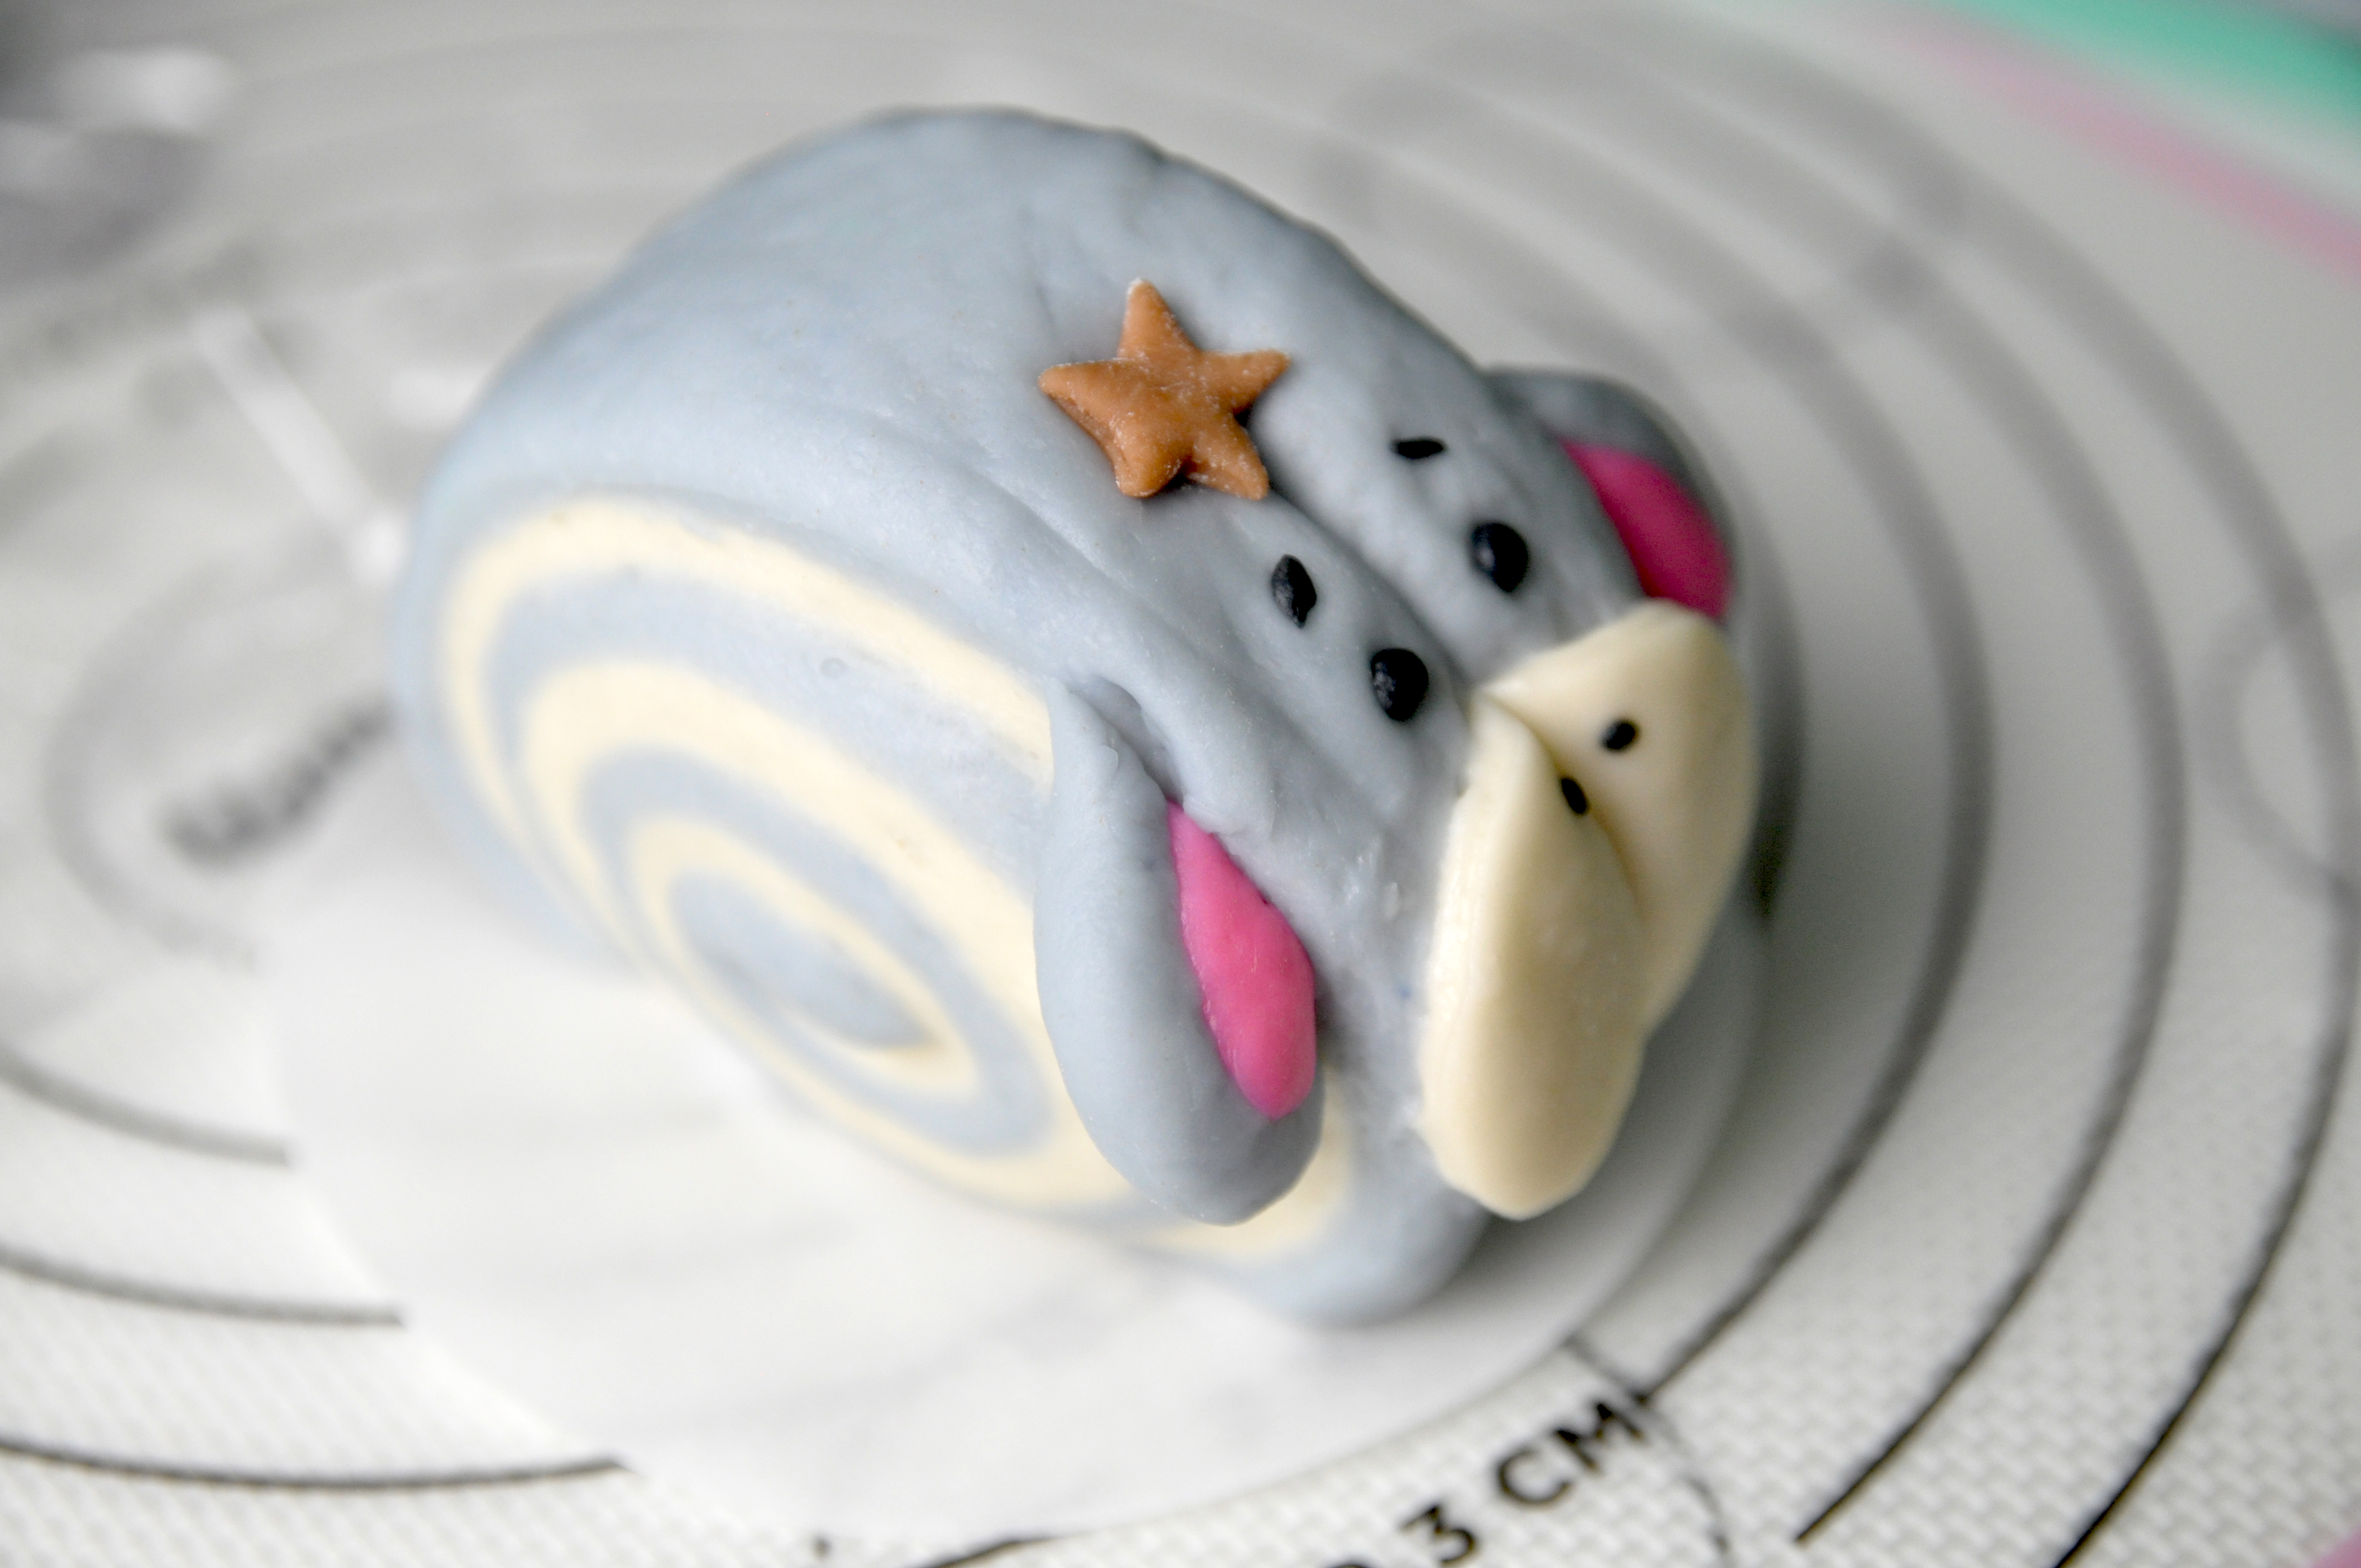
Hey Guys, today we are making these adorable “Baby Eeyore Spiral Mantou”.
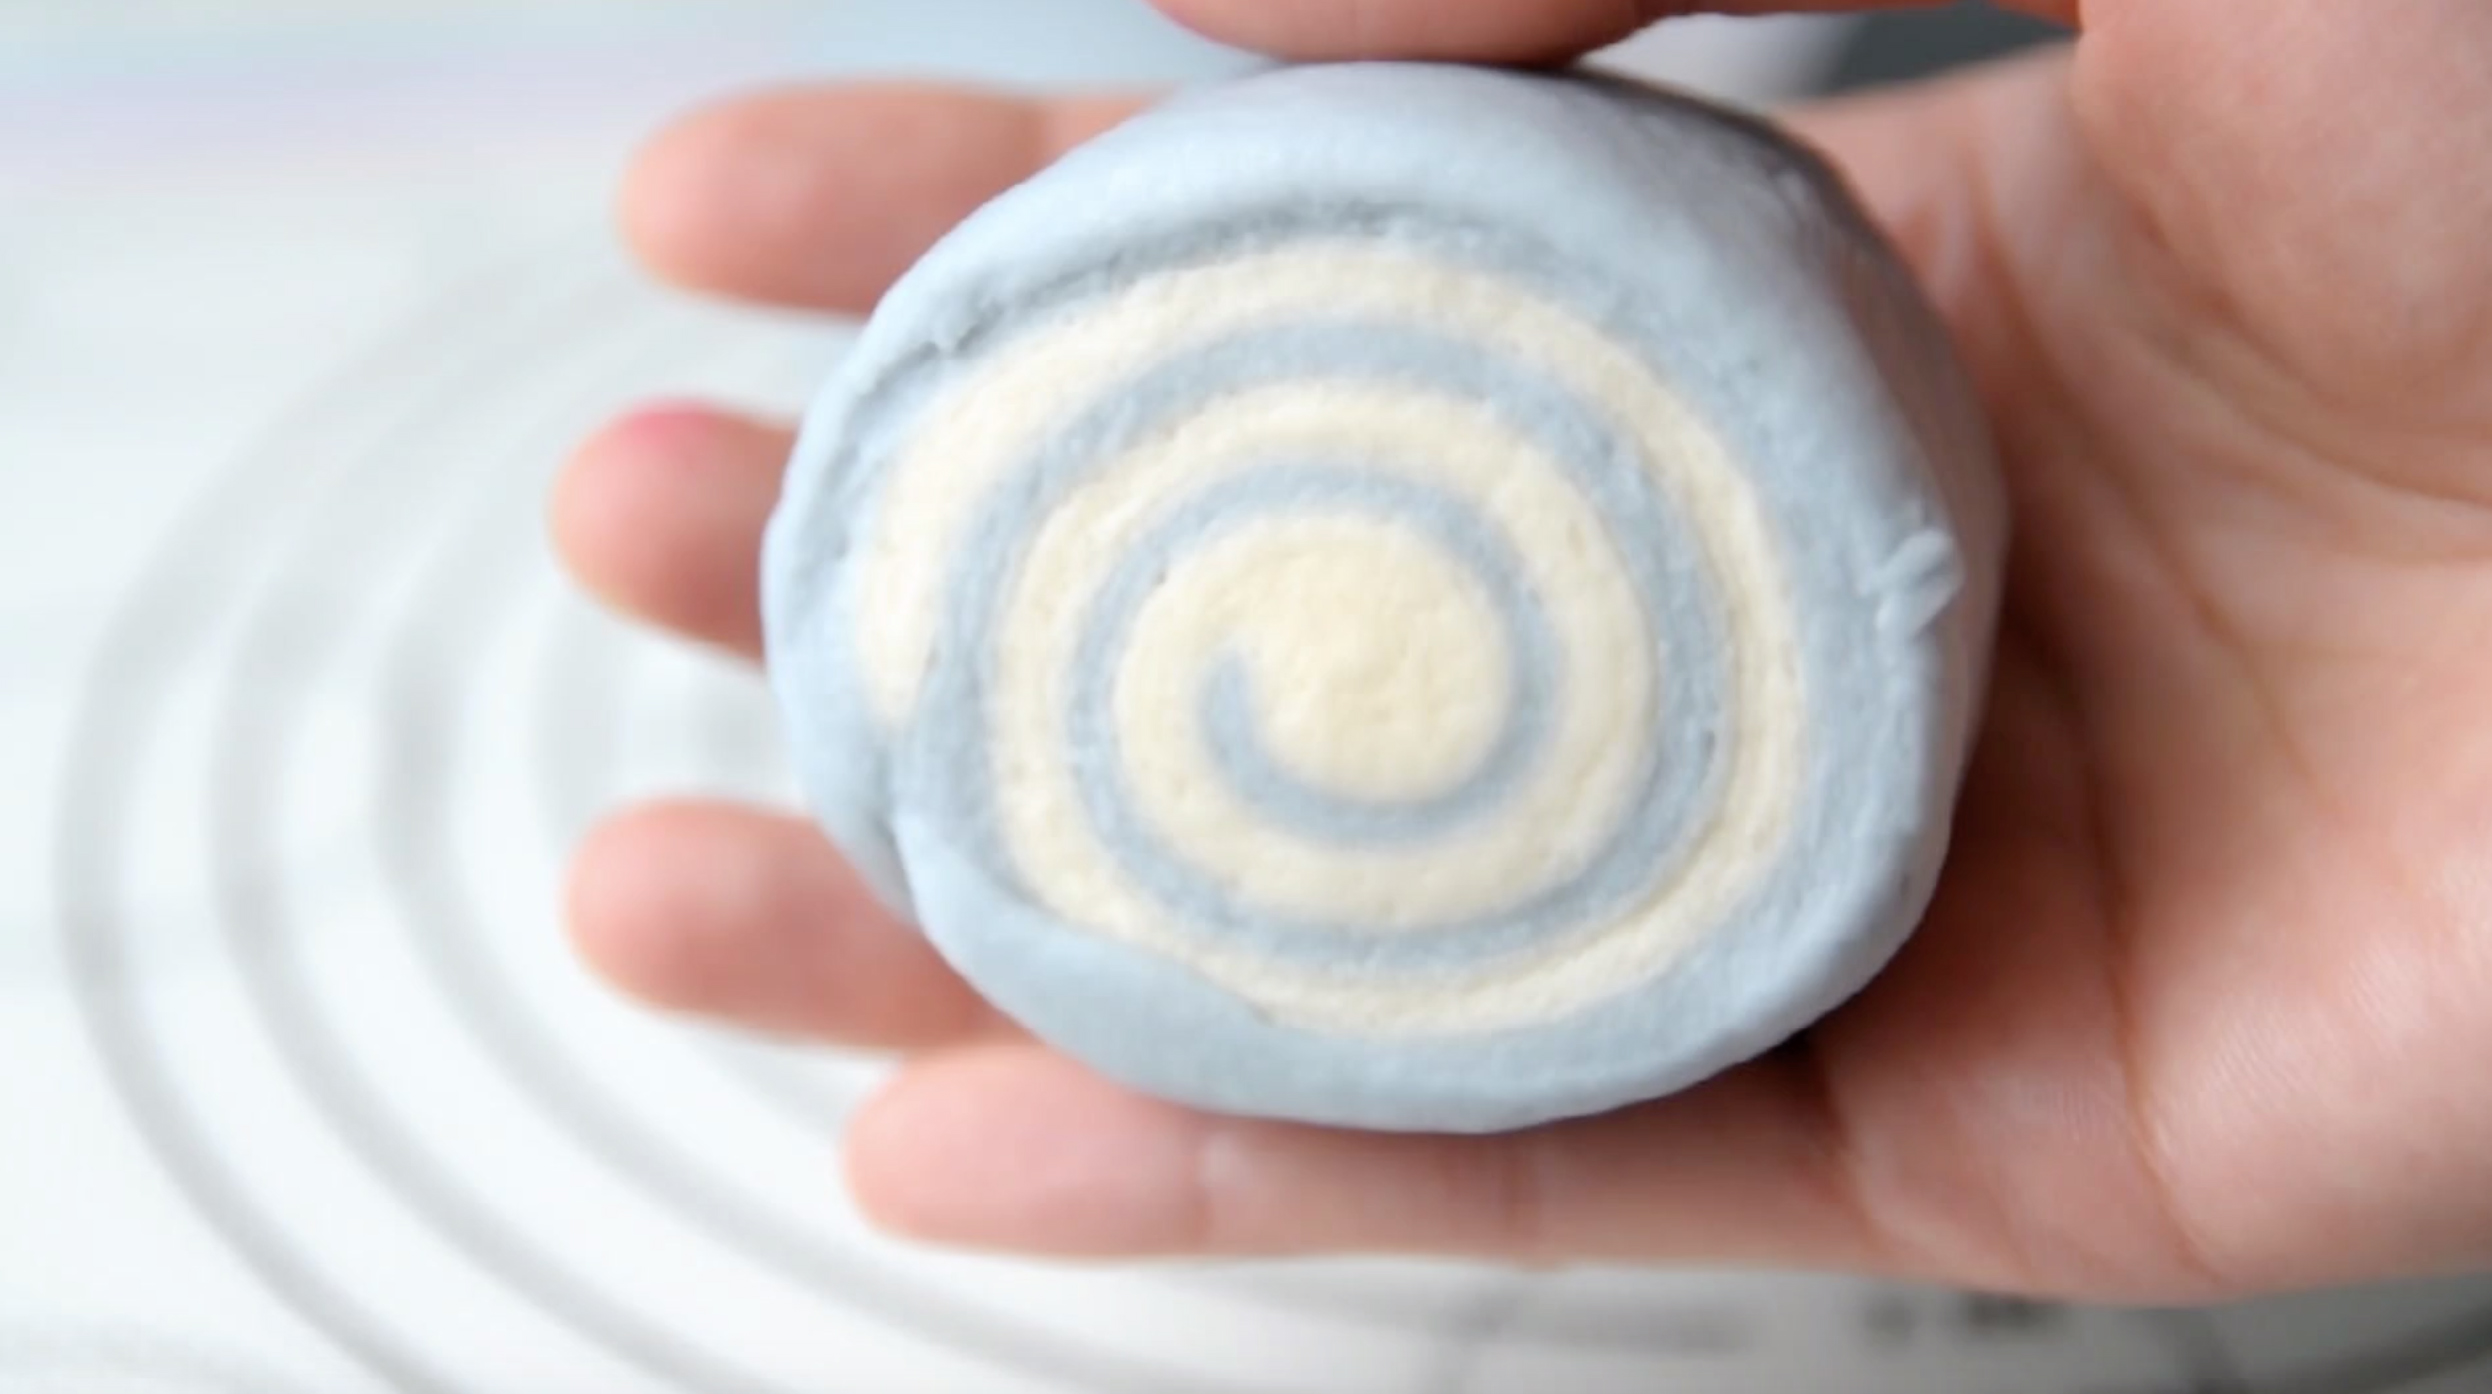
They are fun to make with a super soft fluffy texture and pretty spiral patterns.

The pattern is created by using doughs with two different colors; one plain dough and the other soft blue has been coloured with this natural Blue Butterfly Pea Flower powder.

It’s more expensive but healthier and a great way to add more visual and to infuse flavors.
You will only need a small amount to achive the right colour tone, add the powder gradually until the desired colour is reached.

If you not keen to buy this kind of natural colour powder, kindly substitute it with standard food colouring.

And to cut the dough, you can use serrated knife if you want.
For me, the best way to do this is to use unflavoured dental floss, where as a knife kind of pushes from the top down and squished the slices.

When attaching small details, make sure to apply just a bit of water, coz the dough will not stick firmly if too much water is used.

Please do remember always cover them with a plastic wrap to prevent the dough dry while they are waiting working on the details.

These buns are favorites from kids to adults and it’s super easy to make at home. I grew up eating it a lot.
I remember having that for breakfast and great options for snack too.

Mantou was my childhood favorite and still is. I fell in love with this swirls since the first time I saw them, it looks beautiful and so tempting. And I know you’ve gonna love them too.

The texture so soft and fluffy, you won’t be able to resist them. If you keep them at room temperature in an airtight container, they even will stay soft moist on the next day.

These buns are great for whatever you’d like to fill them.
It can be eaten on its own or with some sweet spread like jams, condensed milk or to accompany savory dishes like your favorite floss.
I hope that you will enjoy making mantou as much as I do, and I really love to see what creations that you have been made from this recipe. Love you Guys!


BABY EEYORE SPIRAL MANTOU
Yield: 5 pieces
Active time: 1 hour
Total time: 1 1/2 hour

INGREDIENTS

  • 315 grams Cake Flour
  • 2 1/2 tablespoons Granulated Sugar
  • 1 1/4 teaspoons Instant Yeast
  • 1/2 + 1/8 teaspoon Baking Powder
  • 165 grams Cold Water
  • 16 grams Shortening
  • 1/2 + 1/8 teaspoon Salt
  • Food Colouring (Blue Pea Flower Powder for blue, Cocoa Powder for brown, standard food colouring for pink and black)


INSTRUCTIONS

  1. In a large bowl, mix in the flour, sugar, yeast and baking powder.
  2. Pour in the cold water and mix until just combined. By using cold water yeast becomes less active, so it give us more time to create the dough details.
  3. Add in the shortening and salt (you can use your hands to mix this or a stand mixer) keep on going until it’s create a dough ball.
    Place the dough onto a work surface, continue kneading it for 5-10 minutes until it create a smooth ball (sometimes different brand flour can have different moisture level, so if it’s too dry add a tablespoon of water, if it’s too wet add a bit of flour).
  4. After the dough is ready, spare some dough for the details; 30 gr for white; 10 gr each for brown, pink and black.
    And for the rest dough, divide it into 2 equal portions for the spiral dough.
    Cover all dough with a cling wrap to prevent it from drying out while waiting the rest of the dough to be coloured.
  5. Colouring
    – Take one portion of the spiral dough, add about 1/2 teaspoon Blue Pea powder, knead it to even the colour. You’ll only need a small amount to achive the right colour tone, add the powder gradually until the desired colour is reached.
    It will be much harder to color the dough evenly this way (be patient), should the dough become dry when kneading, spray it with some water and continue kneading it.
    * Please note that the colour will be darker after steaming so be mindful with the colour.
    If you not keen to buy this kind of natural colour powder, kindly substitute it with food colouring.
    Spare 30 gr of blue dough for the ears.
    – Add some cocoa powder for the brown colour
    – Using standard food colouring for pink and black.
    After finish with the colouring, let all the coloured dough covered and rest for about 10 minutes so the gluten can relax a bit.
  6. Rolling
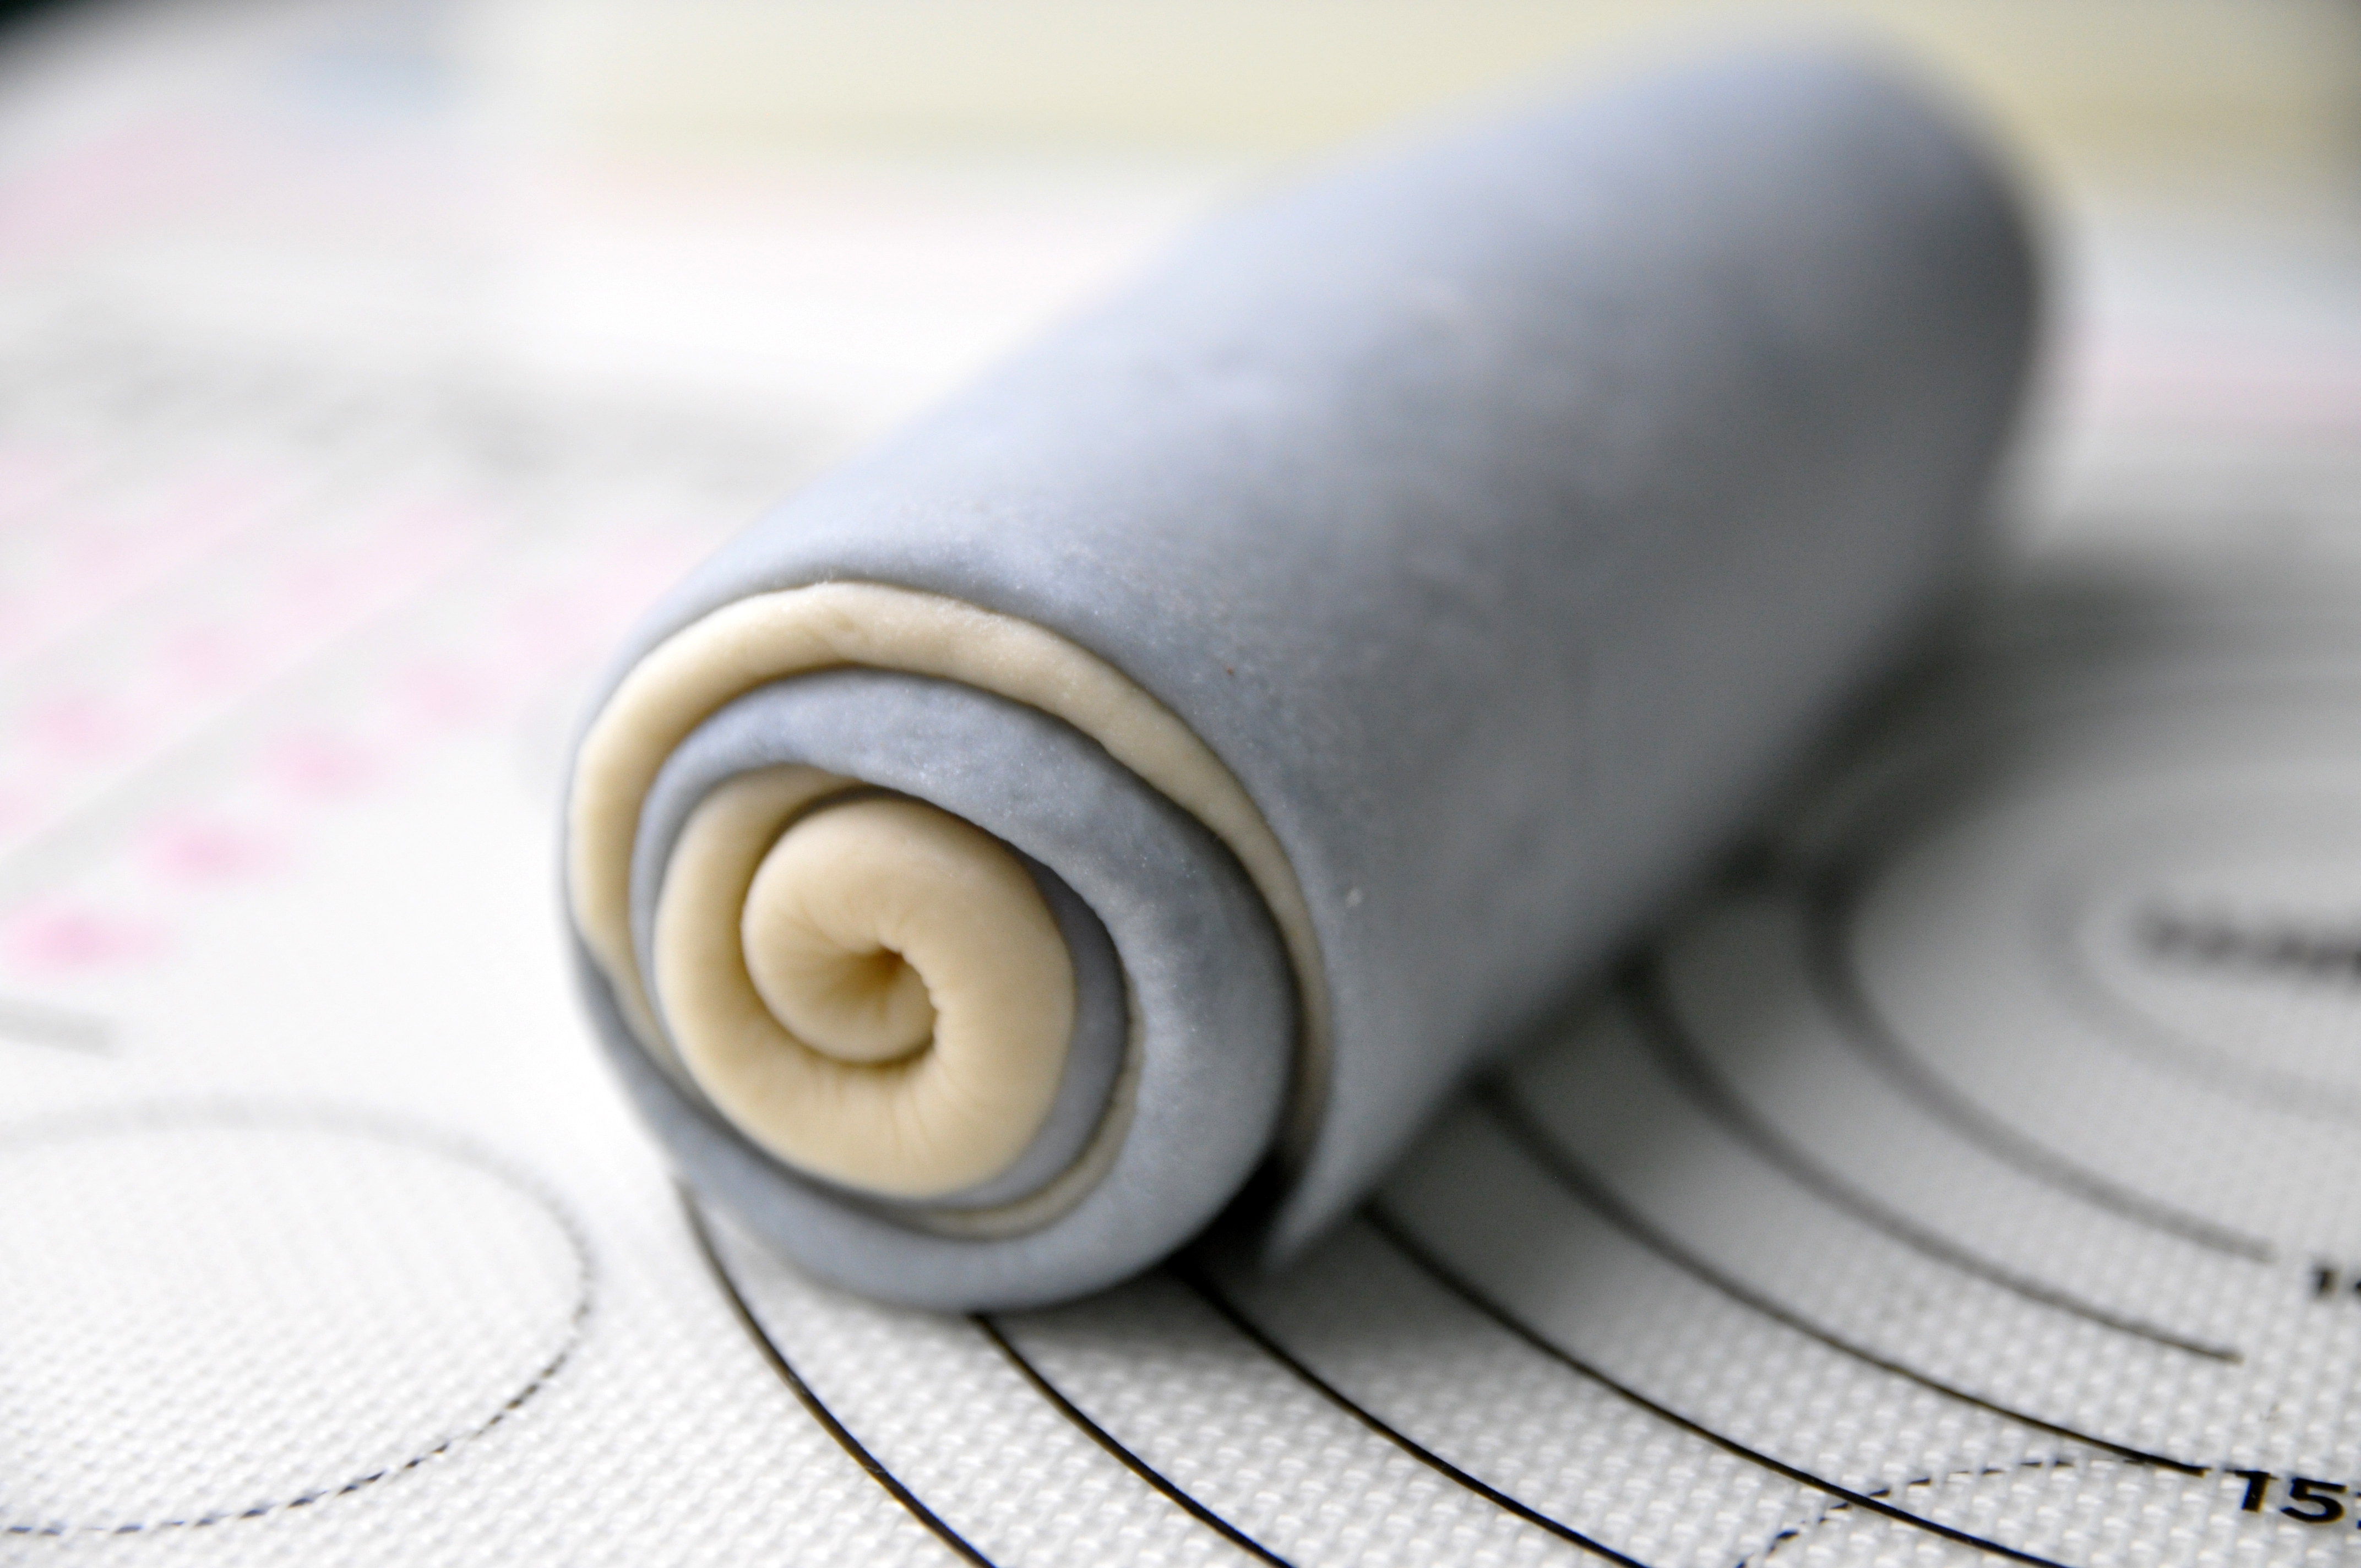
    Using rolling pin roll both white and blue spiral dough into about a same size thin rectangle.
    Brush a thin layer of water as a glue on top of the blue dough, and then place the white dough on top of the blue dough.
    Using rolling pin, roll the stack dough one more time to make sure that they are stick well and the surface is even.
    Cut the edges of the dough to make it more tidy, brush a little water on top of the white dough.|
    Starting from the side near you, roll them up tightly into a log.
    Mark the dough into 5 equal pieces (you will have 2 extra ends).
  7. Cutting
    The best way to do this is to use unflavoured dental floss, where as a knife kind of pushes from the top down and squished the slices. You can also use serrated knife to do this.
  8. Detailing
    Place each cut spiral mantou on each parchment paper.
    Always cover all the dough with a plastic wrap to prevent the dough dry while they are waiting working on the details.
    When attaching small details, make sure to apply just a bit of water, coz the dough will not stick firmly if too much water is used.
    – Face: roll some white dough thinly, cut with oval shape cutter ,apply a thin layer of water as a glue, stick it to the front side of the mantou.
    – Ears: roll some blue and small pink dough into a teardrop shaped, stick and press the pink dough on top of the blue dough. Cut the sides of the dough and stick them each side of the head.
    – Eyes, nose and eyebrows: roll some black dough, place and stick it according to position.
    – For the Hair: cut some brown dough with star shape cutter and stick it on top of the head.
    – Mark his face line verticaly from hair down to face with blade tool.
  9. Final Proof
    After finish with all the details, cover mantou with a clear container or cling wrap and set it aside to proof.
  10. Prepare steamer
    Preheat the steamer (the water level should be no more than 3 cm deep as excessive steam will ruin the look of the buns).
    Wrap the lid with kitchen towel to prevent the water drops to the buns.
  11. To check if the dough has been optimally proofed
    The dough should look larger in size. rounded and airy, they also feel soft and spring back slowly when the surface is touched.
  12. Steaming
    Arrange the buns in the steamer and place the lid. Place a chopstick under the lid to create a small gap to allow the steam to escape. Steam over a medium heat for about 10-12 minutes.
  13. Turn off the heat, let the buns rest in the steamer for 3 minutes and then remove the buns, serve them immediately or place on a wire rack to cool completely before you store them (this will prevent the bottom of the steamed buns from getting soggy).


NOTE

  1. If you keep them at room temperature in an airtight container, they will stay soft moist on the next day.
  2. You may keep them in the fridge for up to 4 days or in the freezer for up to 2 months.
  3. You may make lots of these mantou ahead of time and freeze it. To serve fridge or freeze mantou; steam for 10 minutes or wrap mantou with cling film and microwave on high for 1 minute.

Fluffy Banana Cinnamon Rolls|No Egg

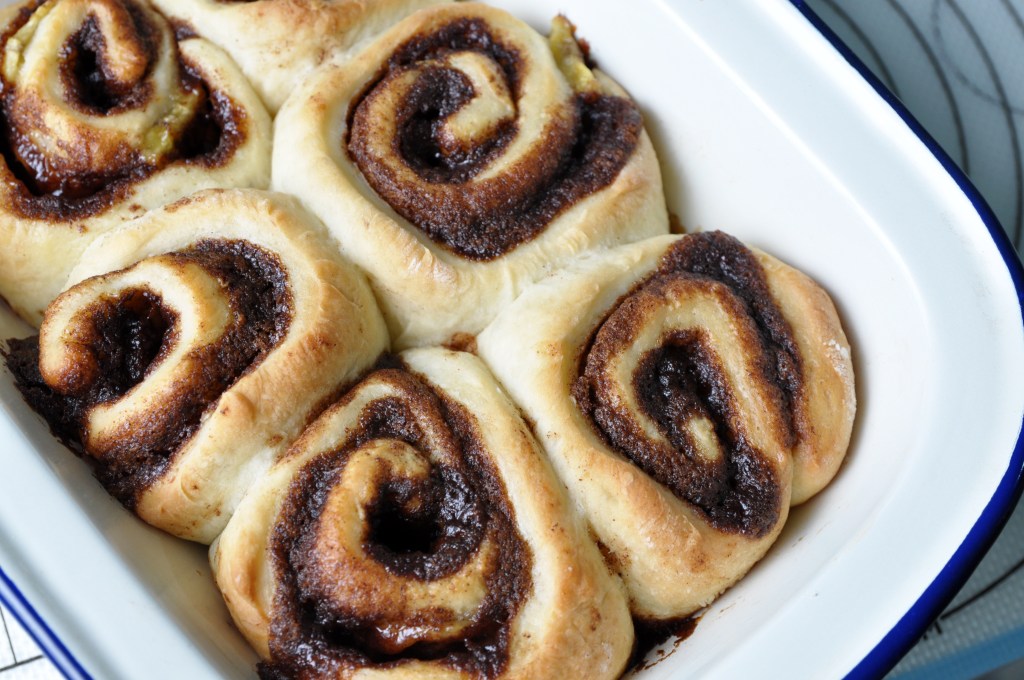
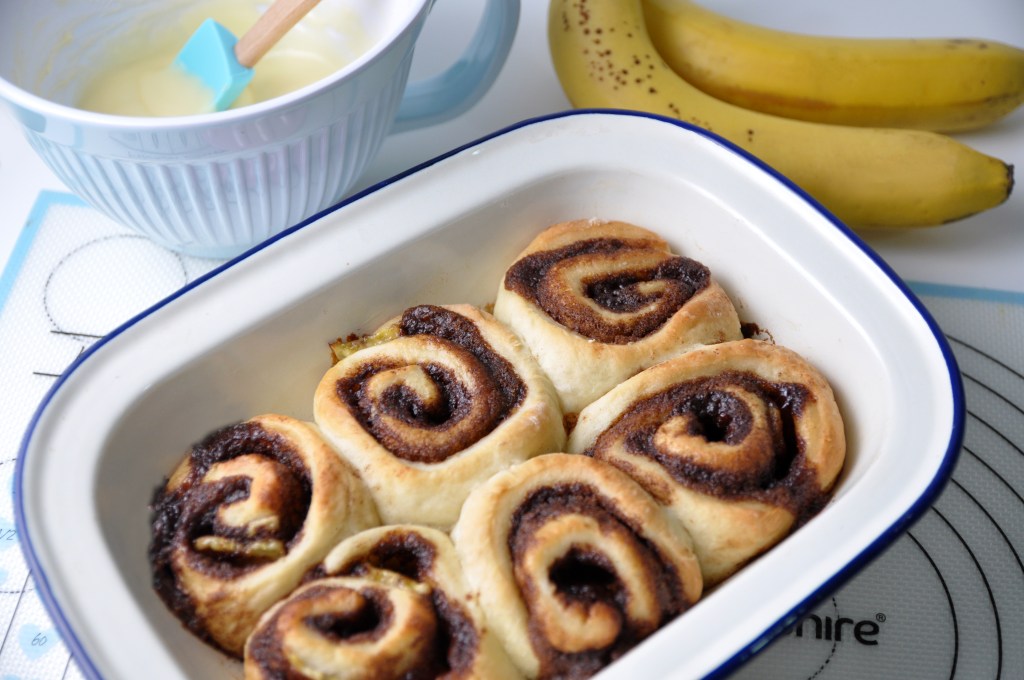
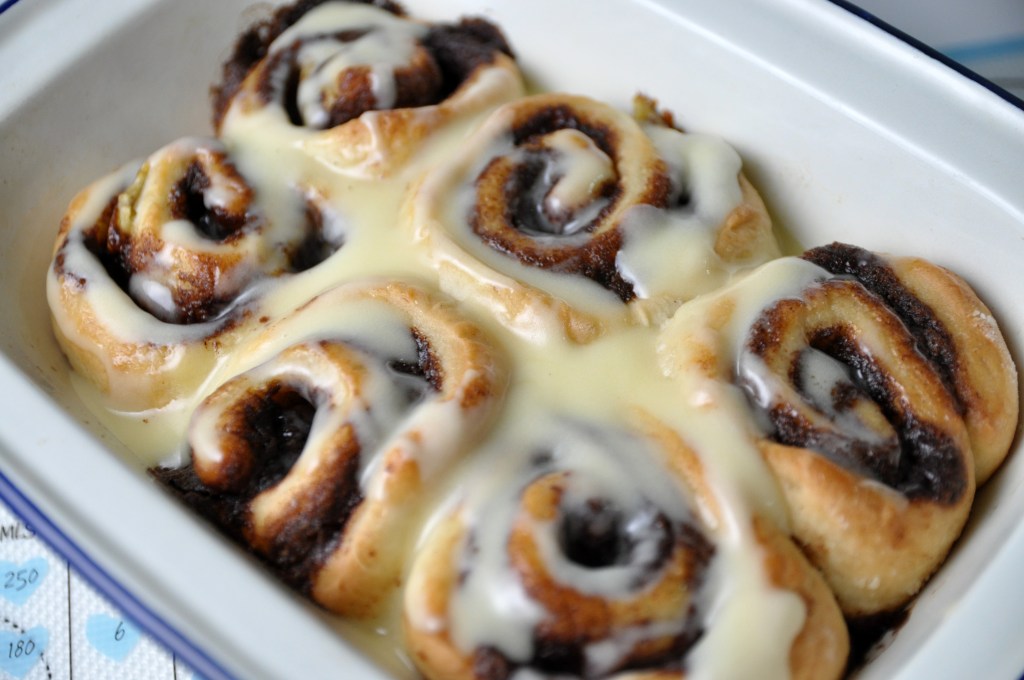
Hey Guys, today I’m gonna show you how to make my signature “Fluffy Banana Cinnamon Rolls”. These gorgeous cinnamon buns are filled with Buttery Brown Sugar Cinnamon and covered in gooey Cream Cheese Frosting.
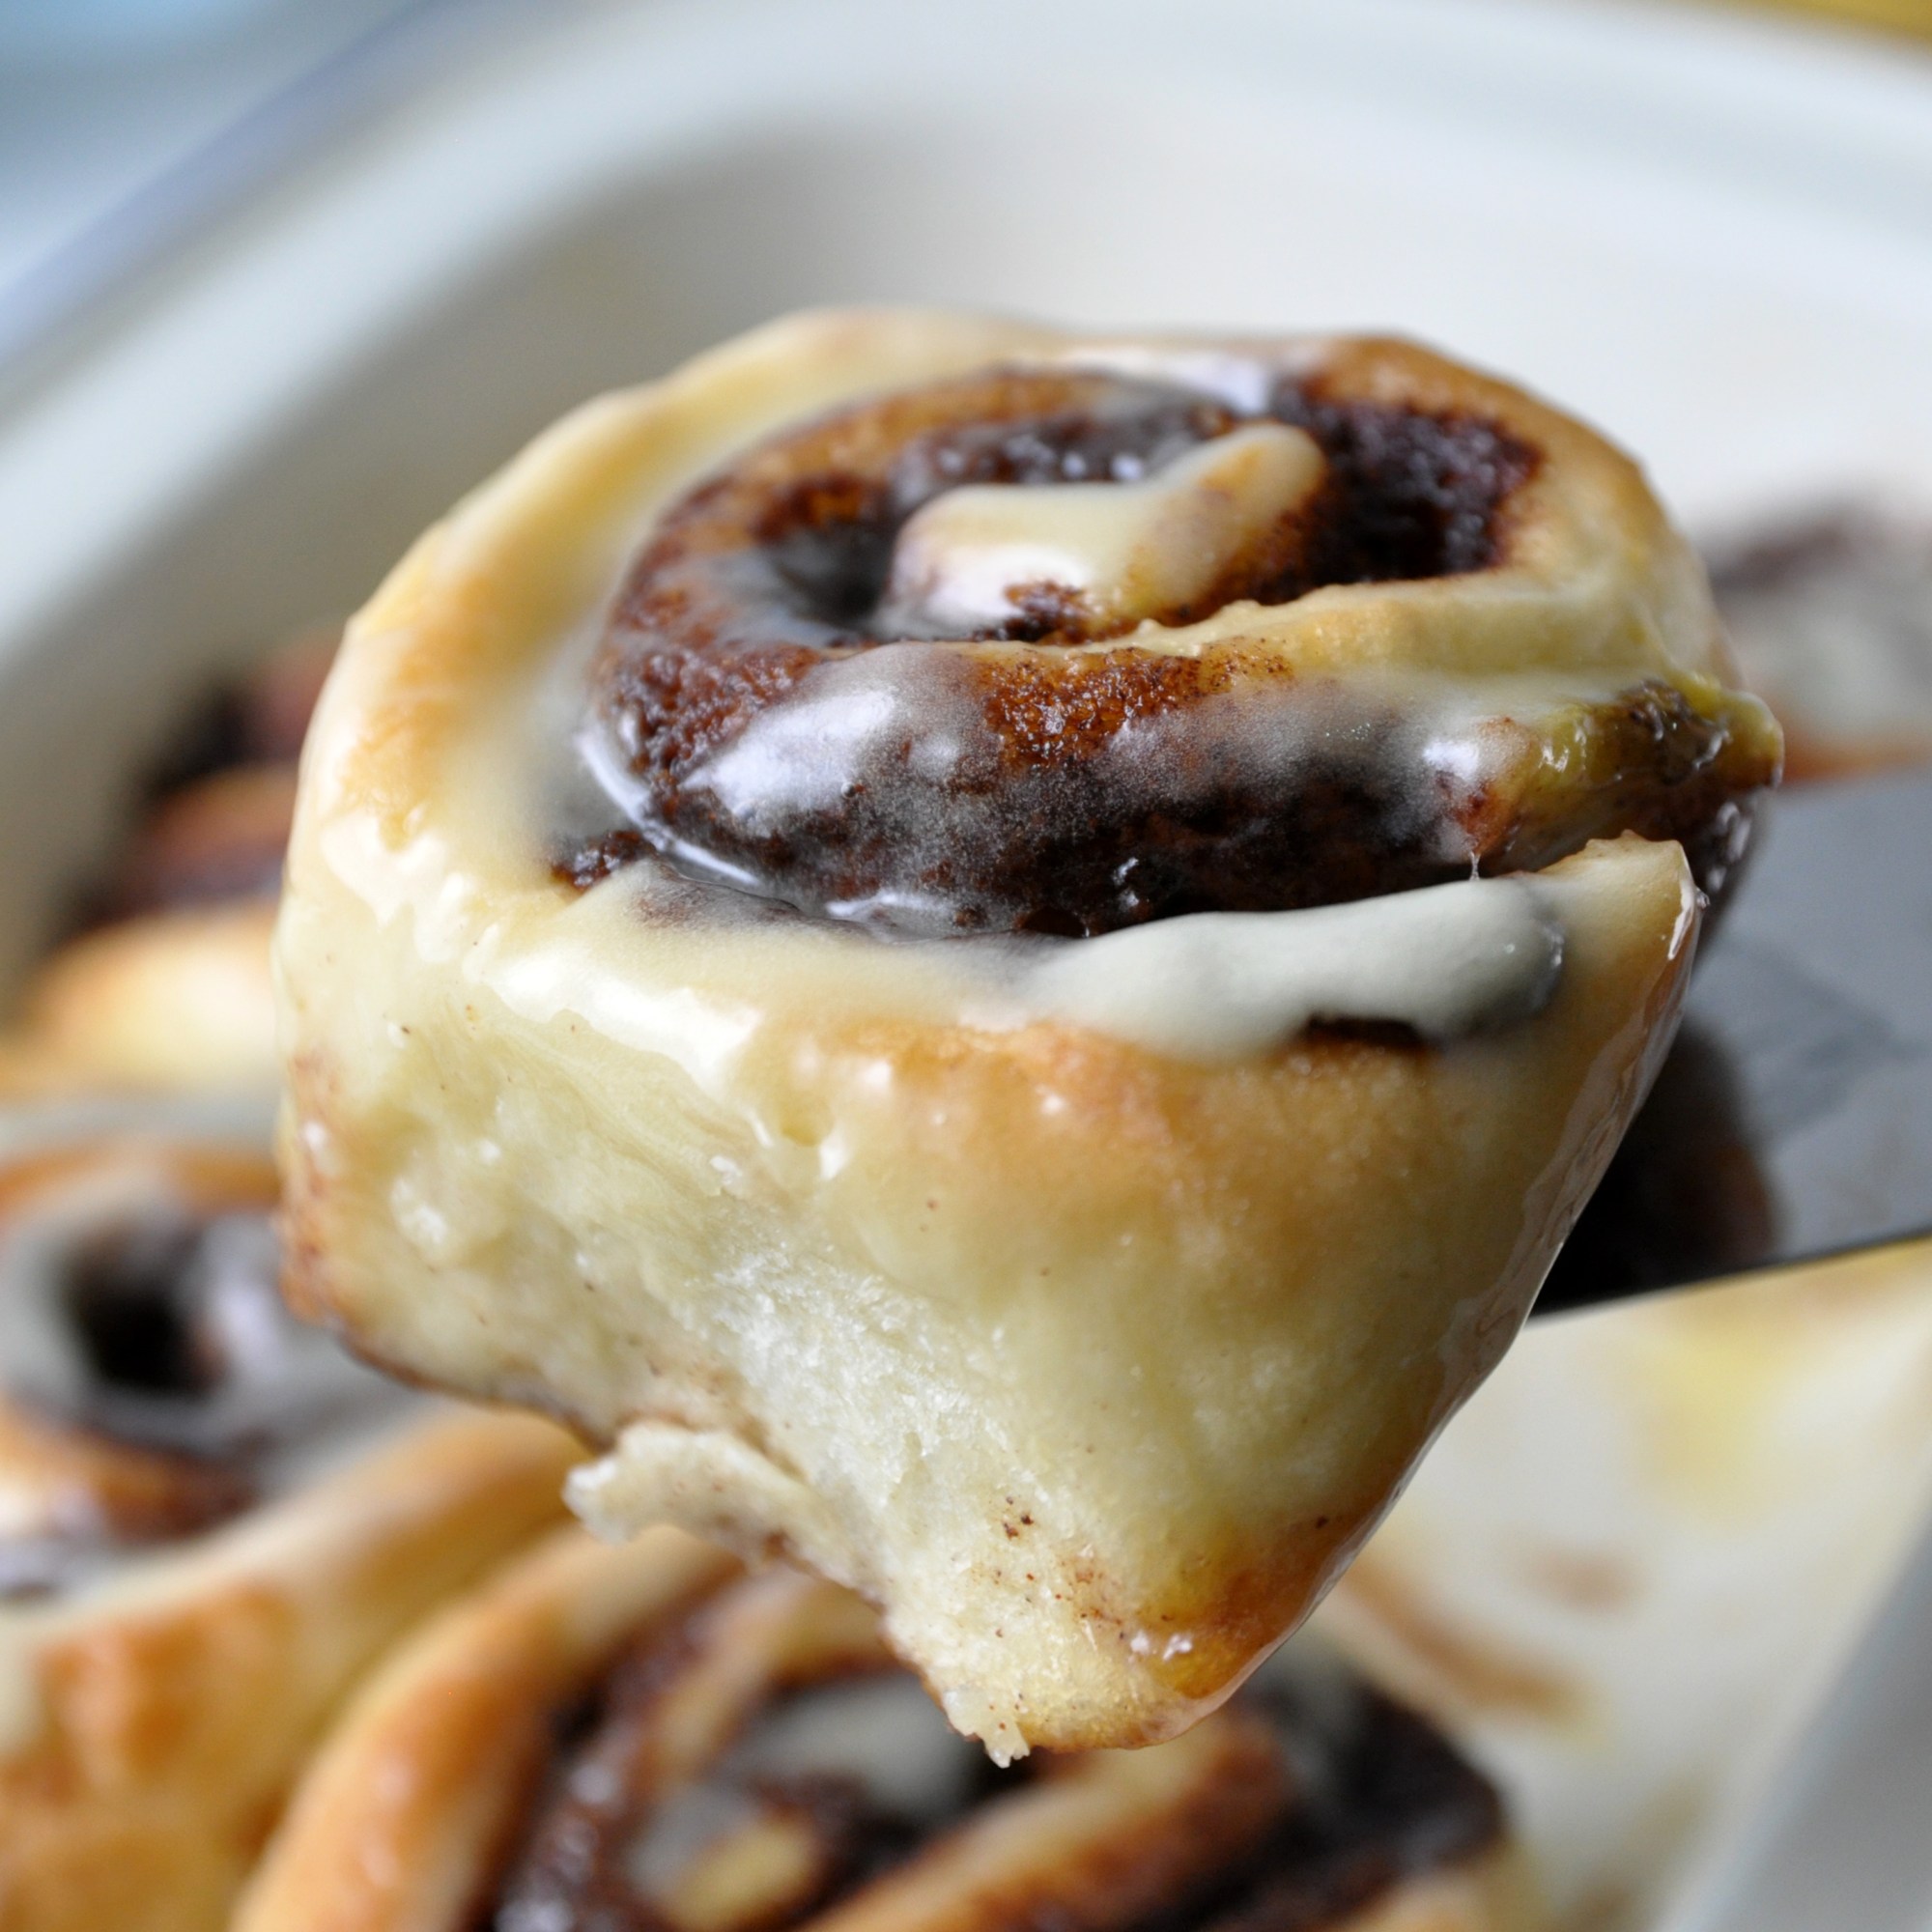
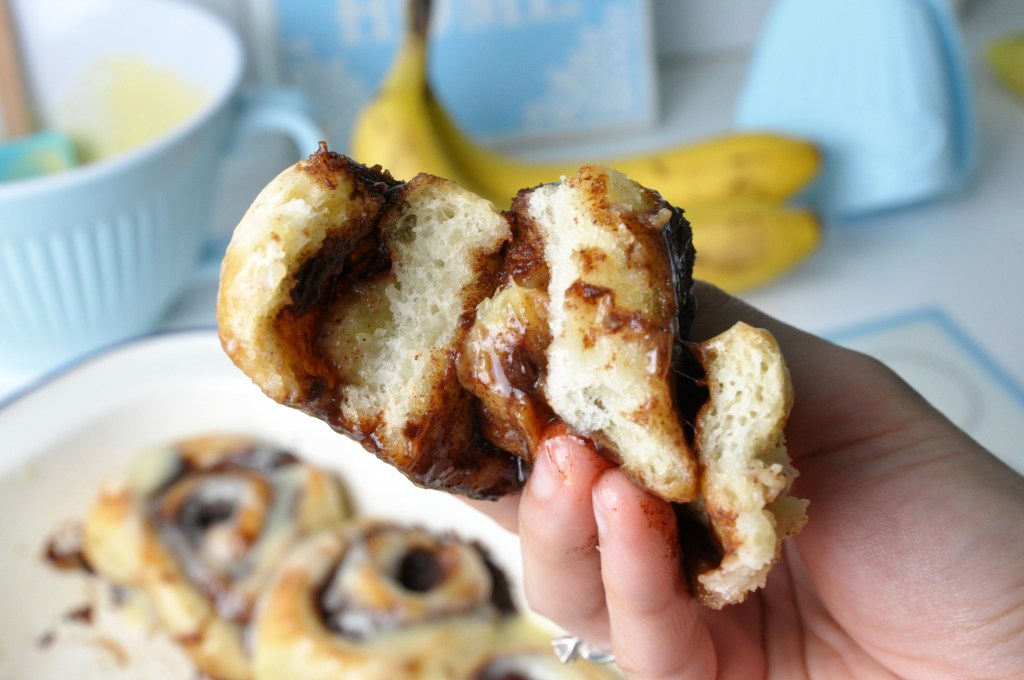
They’re incredibly  fluffy and soft, the smell of Cinnamon Rolls is heavenly, these fluffy buns are definitely perfect treat for any occasion.

Unbaked Buns

And as an egg-free recipe, we will be use banana puree as an eggs substitute. The result is amazingly moist and fluffy; and the banana slices in the centers, even makes this buns more delightful.

They are tender, warm, gooey, perfectly sweet, and so comforting… They are just gorgeous!

Look at that icing on those rolls. These wonderful icing is not too cream cheesy; it’s really creamy, buttery, a bit tangy but not overly sweet.
If you are the type of person that really loves icing, you could make double of this.

Besides our fluffy Banana Bread, this is another our original recipe that we are really love and have become a family favorite here at Bembum Kitchen.
You even can make this lovely buns in advance and freeze them. So you could still have them fresh whenever you are ready to bake them. Does it make everybody quite happy?

Is there anything better than a fresh Cinnamon Roll, dripping with frosting, hot from the oven? I just wish you Guys can smell this, they are really smell amazing!
I hope you enjoy them as much as we did, stay healthy and safe Guys! Love you all!!

BANANA CINNAMON ROLLS
Yield: One 8×6-inch rectangle pan (6 pieces)
Active time: 1/2 hour
Total time: 2 1/2 hour

INGREDIENTS
Buns Dough:

  • 60 grams Milk
  • 10 grams Unsalted Butter
  • 1 teaspoon Granulated Sugar
  • 1/2 + 1/8 teaspoon Instant Yeast
  • 40 grams Mashed Bananas
  • 125 grams All Purpose Flour
  • 1/8 teaspoon Salt

Filling:

  • 30 grams Unsalted Butter (softened)
  • 40 grams Brown Sugar
  • 1 tablespoon Cinnamon Powder
  • Thinly Banana Slices
  • 1/6 cup Chopped Walnuts (optional)

Icing:

  • 30 grams Cream Cheese (softenend)
  • 55 grams Unsalted Butter
  • 1 tablespoon Milk
  • 1/2 teaspoon Vanilla Extract
  • 40 grams Icing Sugar


INSTRUCTIONS

  1. Prepare the pan, grease it with butter, set aside.
  2. Bloom the yeast; In a small pan, mix the butter and milk. Place over a medium low heat until the butter melted, let it warm.
    Warm means if you put your finger into the milk, It shouldn’t feel like anything. It should feel like your body temperature (could be a little bit warmer than that, but not too hot, coz it will kill the yeast).
    Sprinkle on sugar and yeast, stir well. Let it sit for about 5-10 minutes until the yeast has activated.
  3. Once it has bloomed, add mashed bananas to the milk mixture, mix well.
    Pour in the flour and salt, mix until just combined (doesn’t need to be totally smooth at this point, it just needs to be brought together and homogenous).
    It’s gonna make a really wet, messy dough. No worries, that’s exactly what we are looking for.
  4. Transfer to a lightly floured surface and start kneading the dough. The dough will be sticky, knead the dough for at least 10 minutes until the dough just loses its stickiness and does not stick to the surface or your hands.
  5. Roll the dough into a big ball, grease mixing bowl with a bit of oil and then place the dough inside the bowl. Cover it with plastic wrap and set in a warm place to rise for about 1 hour, or until doubled in size.
  6. To make the filling; Combine very softened butter, brown sugar and cinnamon. Mix until smooth.
  7. To roll; After 1 hour, the dough will be rise (it almost double in size). Place it onto a clean surface (sprinkle a little bit of flour, we don’t want the dough sticking on the mat).
    Roll the dough out into a large rectangle, spread the filling evenly over the dough.
    Add thinly banana slices on top of the filling (remember, not too thick otherwise will be hard to roll later).
    Starting from one short end, roll up the dough into a log and pinch the seam closed.
    Using unflavored dental floss, cut the log into 6 evenly pieces, place them in the prepared pans.
  8. Preheat the oven to 180˚C. Cover the rolls with a plastic wrap and let rise in a warm place for about 20 minutes, until expanded by about half of their original volume.
  9. Bake the cinnamon rolls for 20 minutes, until golden brown. Let cool for about 10 minutes.
  10. To make the frosting; In a medium bowl, whisk together the Cream Cheese, softened butter, milk, and vanilla extract until smooth.
    Gradually add the powdered sugar and mix until smooth. Drizzle the frosting over the cinnamon rolls.

NOTE:

  1. After baking, leave them to cool at least 10 minutes, before you put the icing on, coz when it’s too warm the icing is just gonna completely melt and it’s not gonna be that really nice glaze on top.
  2. Best serve on the day it’s made or you can store left over baked Cinnamon Rolls (airtight container) in the fridge for 5 days and up to 2-3 months in the freezer.
  3. To reheat; remove the roll from the container, preheat the oven or toaster to 180˚C. Put the cinnamon buns on a baking sheet and cover with aluminium foil and let the rolls heat up for about 10-15 minutes.
    Another option is using the microwave for about 30 to 60 seconds. Check on them to ensure they don’t become soggy.
  4. How to freeze unbake Cinnamon Rolls; If you have plan to make the cinnamon rolls in advance and bake later, kindly follow instructions until number 7, and then cover the pan with plastic wrap and freeze for up to 3 months.
    And when you are ready for them, you can defrost them in the fridge overnight or you can leave them out for a few hours at room temperature and throw them in the oven. They might take a little bit longer to bake, just keep an eye of them.