Korean Mugwort Rice Cake “Ssuk-Injeolmi 쑥인절미

Love the look of it, it’s so weirdly green!

Thanks my subscriber for your inspiring comments ❤️🥰

Hellooo friends and welcome back!!
Today we are making some “Korean Mugwort Rice Cake” which is called 쑥인절미 (Ssuk-Injeolmi).
If you are not familiar with Mugwort, it’s an aromatic and medicinal herb from the Japanese plant.
Other names of Mugwort include Japanese Yomogi, Korean Mugwort, Korean Wormwood, Ssuk, and Kui Hao.

Mugwort Plant (Artemisia vulgaris)

The Japanese use this forest green leaves in various culinary applications and traditional medicine.
It is long used in traditional medicine to detox and beautify the skin.
Studies also show that Mugwort essential oils may have anti-inflammatory and anti-cancer properties.

These Korean Mugwort Rice Cake is almost similar to Japanese Kusa Mochi or Yomogi Mochi but has a chewier texture. There is also some red bean filling in the middle for some extra texture.

MUGWORT OR YOMOGI POWDER
In this recipe, I used dried Mugwort or Yomogi Powder to make it easier. You can buy online or find it at the baking supply store.
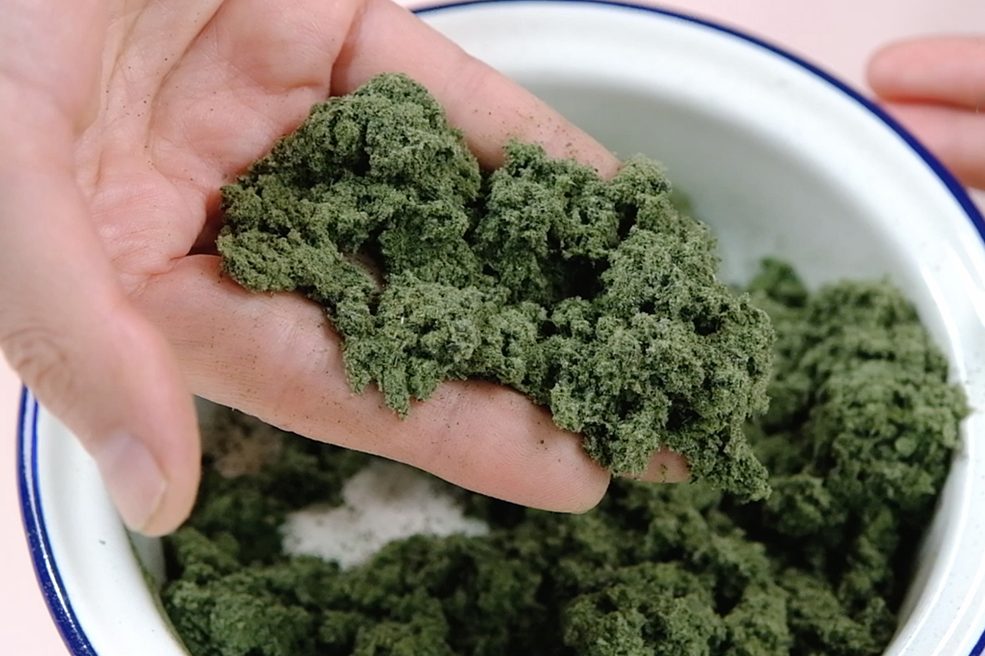
Beautiful Mugwort or Yomogi Powder 🥰

If you touch it, the texture actually feels more like soft cotton rather than powder.
It is important to soak the powder in hot boiling water before using it for about 15 minute; Strain it (safe the soaked Mugwort) and you can discard the soaking water.

WHEAT STARCH vs WHEAT FLOUR
Other important ingredient that we will be using is Wheat Starch.

Don’t be confused, it’s not the same as wheat flour for making bread

This Wheat Starch which is called as Tim Sum Flour is usually used for make prawn dumplings or HaKaw.

MOULD FOR SHAPING
Traditionally, this rice cake is known for its decorative patterns that are made using either wooden, ceramic, or bronze rice cake stamps (I found they are really hard to find).
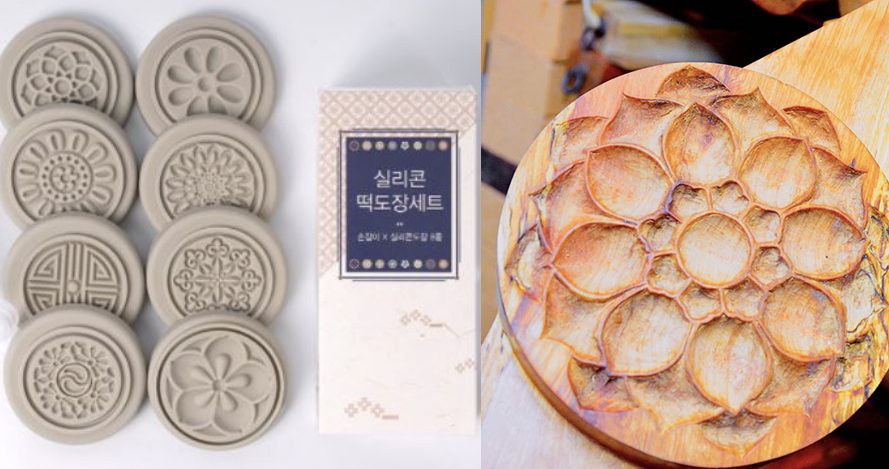
LEFT Ceramic Stamp ~ RIGHT Wooden Stamp

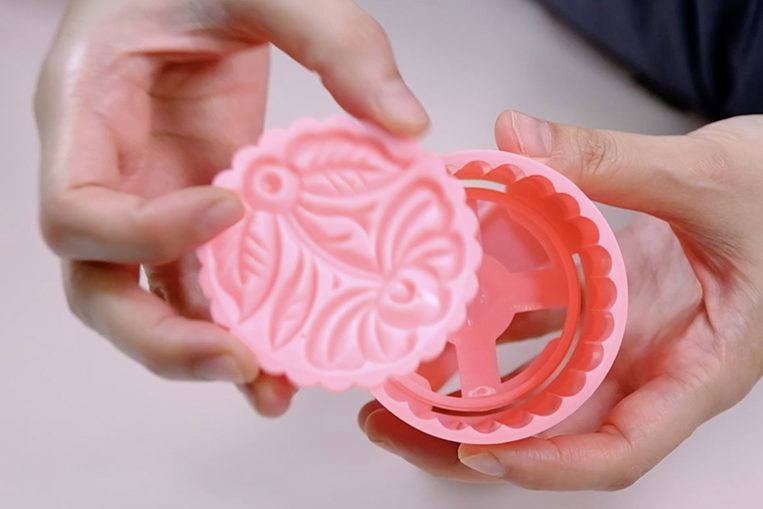
Alternatively, you can use these wooden mooncake mould or the plastic one

My precious vintage mould 😘
I found plastic mold works well and pretty too 😗


A VERY IMPORTANT NOTE
Make sure that you prepare some non-stick baking paper for the base of your rice cakes as it will be very sticky when finished steaming (don’t use ready made steamed buns paper as it NOT non-stick).

It can be frustrating when your rice cakes gets stuck in the steamer 😢 so…Don’t let that happened!


CHUNKY (Tsubuan (粒あん) OR SMOOTH (Koshian (こしあん) RED BEAN FILLING
In this recipe, I also will share a few tips to make the red bean filling; The method is not only faster but also produces a fragrant and flavourful filling.

I found that red bean filling that has a chunky texture (with bean shapes still intact) is perfectly match with the chewy rice cakes

If you prefer smooth texture filling, kindly blend the cooked red beans on high speed into a fine paste before cooking it with the sugar.

CONSISTENCY OF THE DOUGH
The dough should be wet enough that when you pinch off a piece, it doesn’t crack, but dry enough that it can hold its shape. 

Your goal is to be able to seal them tightly around the filling

If it’s too dry, add 1 teaspoon of water at a time until it’s softened; but If it’s too wet, add 1 tablespoon of glutinous rice flour at a time.
Remember always cover the dough to prevent it from drying out during making.

SHAPING STEPS

Both so beautiful… 🤔


STEAMING
I highly recommend to use Bamboo Steamer for best results.
If you use metal or plastic steamer, make sure that you cover the lid with a piece of clothes so the water condensation during steaming won’t ruin the look of your rice cakes.
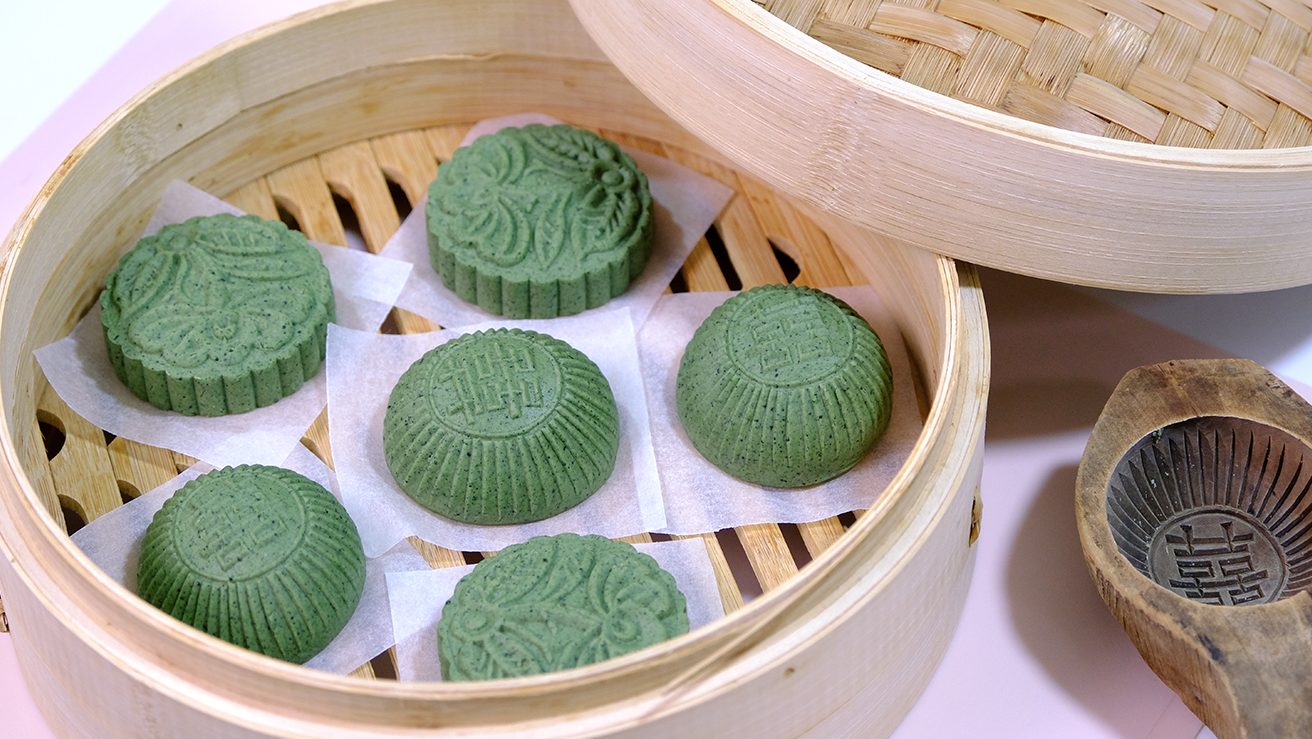
When it’s done, remove from the heat immediately; Don’t over steam them, as they will burst.


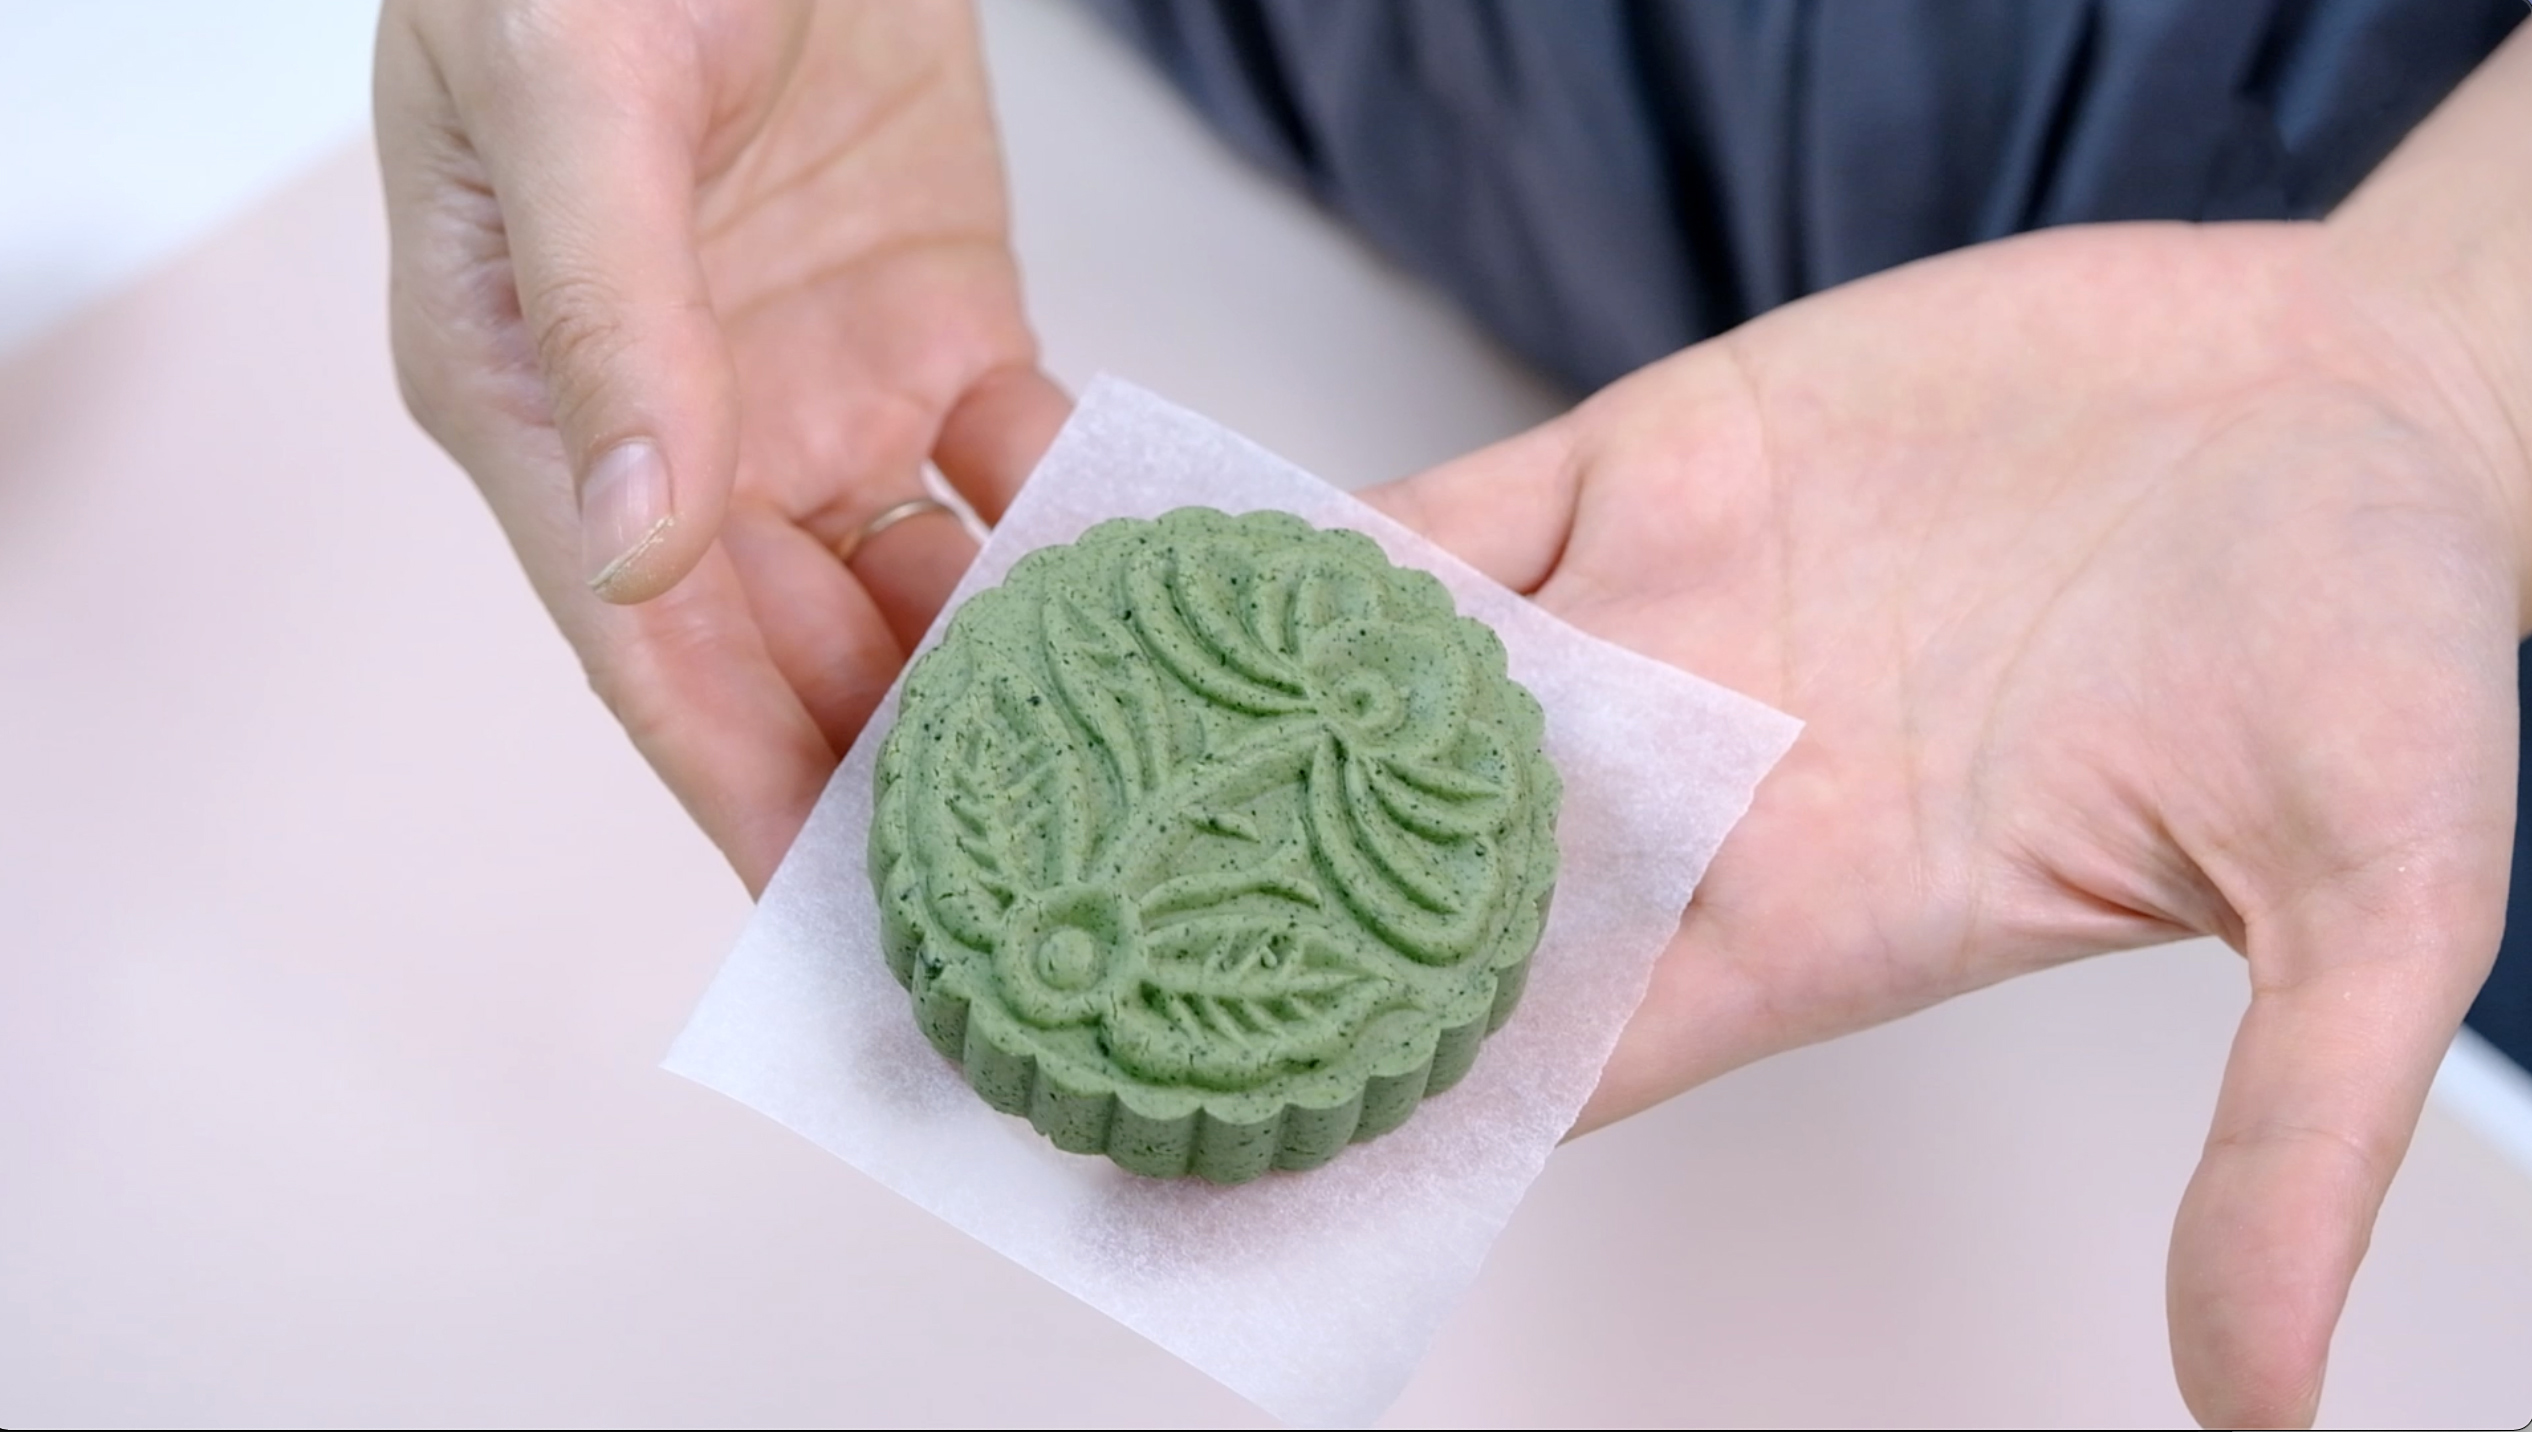
A vibrant emerald green jade colour….It’s so beautiful! 😳

To prevent the sticky rice from clinging to each other, brush each one with a very light coating of Sesame Oil;
This also will lock in the moisture and giving the rice cake a subtle nutty taste.

Chewy Rice Cake with a smooth, but stretchy consistency and the beautiful red bean filling inside 🙄❤️

These rice cakes make for a real sweet treat during special occasions.
My Dad loved this cake so much 😗; I grew up eating this rice cake and always loved the unique aroma of the green sticky rice dough 😇.

I hope this recipe gave you some insight into this treat, and gives you a new way to enjoy this useful plant!
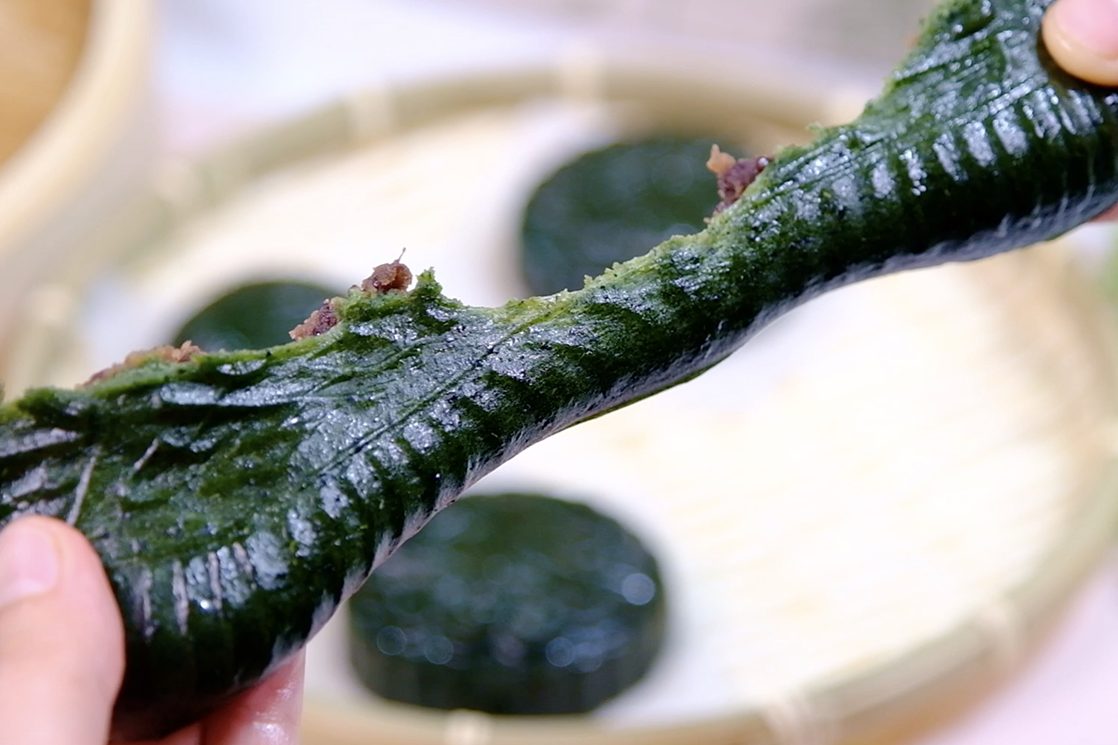
These fragrant green herbs produces a herbal and slightly minty taste, I love it so much…and I can’t stop eating it 😂😂…

watch how to make korean mugwort rice cake

recipe

KOREAN MUGWORT RICE CAKE
Yield: 6 Rice Cakes
Active Time: 1½ Hours
Total Time: 3 Hours

INGREDIENTS
♥︎ Red Bean Filling

  • 120 g Red Bean
  • 1/8 tsp Salt
  • 1000 ml Water
  • 60 g Granulated Sugar

♥︎ Rice Cake Dough

  • 20 g Wheat Starch
  • 60 g Water
  • 15 g Mugwort Powder
  • 200 g Hot Boiling Water
  • 130 g Glutinous Rice Flour
  • 40 g Icing Sugar
  • 1/2 tbs Unsalted Butter
  • 1/2 tsp Vanilla Extract
  • 40 g Water

INSTRUCTIONS
Red Bean Filling

  1. Rinse the beans and transfer it to a large pot. 120 g Red Bean
  2. Pour in the salt and water (adding salt at the beginning of cooking create more tender results).
    1/8 tsp Salt ; 1000 ml Water
  3. Then bring it to a boil
    After boiling take it off from the heat, cover it and let it rest for 1 hour.
    There’s no need to rinse or change the water, coz the beans cooked in the soaking liquid were much more flavourful, had a prettier, darker colour, and retained their texture better.
  4. After 1 hour, don’t forget to take the lid off, put it back to the stove and continue cooking on medium low heat until the beans are tender and creamy.
    The water will evaporate during cooking, adding more water as necessary to keep beans submerged.
  5. After for about 1 ½ hours, pick 1 bean and mash it with your fingers; if it’s mashed easily, it’s done.
  6. Transfer cooked beans to a non-stick pan, along with their cooking liquid.
  7. On medium-low heat add in the sugar, stirring constantly until the sugar melts; let the moisture evaporate. 60 g Granulated Sugar
  8. Once the mixture comes together and doesn’t stick to the pan, take it off from the heat 
    (Don’t worry if it’s still a bit loose, this filling will continue to thicken as it cools).
  9. Spread the filling onto a plate; cover it with a cling wrap to prevent from drying out, open a little gap so the steam can escape.
  10. After cool completely, divide it into 6 equal portions (about 20 grams each), cover it until you are ready to use it

Rice Cake Dough

  1. In a medium saucepan combine the Wheat Starch and water; Mix until no lumps visible.
    Cook over medium low heat until the mixture starts to thicken and looks translucent, set aside let it cool completely. 20 g Wheat Starch; 60 g Water
  2. In a medium bowl combine the Mugwort Powder and hot boiling water, let it steep up for 15 minutes. 15 g Mugwort Powder; 200 g Hot Boiling Water
    After 15 minutes strain it, squeeze it gently to release excess water (safe the soaked Mugwort and you can discard the soaking water).
    * Don’t let the soaked Mugwort sit too long before mixing the dough, or it will lose that beautiful green colour.
  3. In another large bowl combine the Glutinous Rice flour along with Icing Sugar, Unsalted Butter and Vanilla Extract, mix well. 130 g Glutinous Rice Flour; 40 g Icing Sugar; 1/2 tbs Unsalted Butter; 1/2 tsp Vanilla Extract
  4. Pour in the soaked Mugwort; Mix by hand until just combined.
  5. Then add in the Wheat Starch mixture, knead well (now you will see a pale green colour dry dough).
  6. Finally, add in the water in 3 batches, and knead again until the dough is smooth and an even bright green colour. 40 g Water
    * The dough should be wet enough that when you pinch off a piece, it doesn’t crack, but dry enough that it can hold its shape (your goal is to be able to seal them tightly around the filling).
    If it’s too dry, add 1 teaspoon of water at a time until it’s softened 
    If it’s too wet, add 1 tablespoon of glutinous rice flour at a time.
    (Remember always cover the dough to prevent it from drying out during making)
  7. Divide the dough into 6 pieces (about 55 grams each). 
  8. Kindly follow video instructions for shaping.

Steaming

  1. Pre-boil the water in the steamer for 10 minutes on high heat
    I highly recommend to use Bamboo Steamer for best results. If you use metal or plastic steamer, make sure that you cover the lid with a piece of clothes so the water condensation during steaming won’t ruin the look of your rice cakes
  2. Cover and steam over high heat for 10 minutes.
  3. When it’s done, remove from the heat immediately; Don’t over steam them, as they will burst.
  4. To prevent the sticky rice from clinging to each other, brush each one with a very light coating of Sesame Oil; This also will lock in the moisture and giving the rice cake a subtle nutty taste.


NOTES

  1. They will turn chewy when cooled, and hard when chilled.
  2. To Store; in the fridge for 3-4 days (in an airtight container).
  3. Simply reheat for 30 seconds in the microwave or 10 minutes in the steamer (no longer or they might burst).

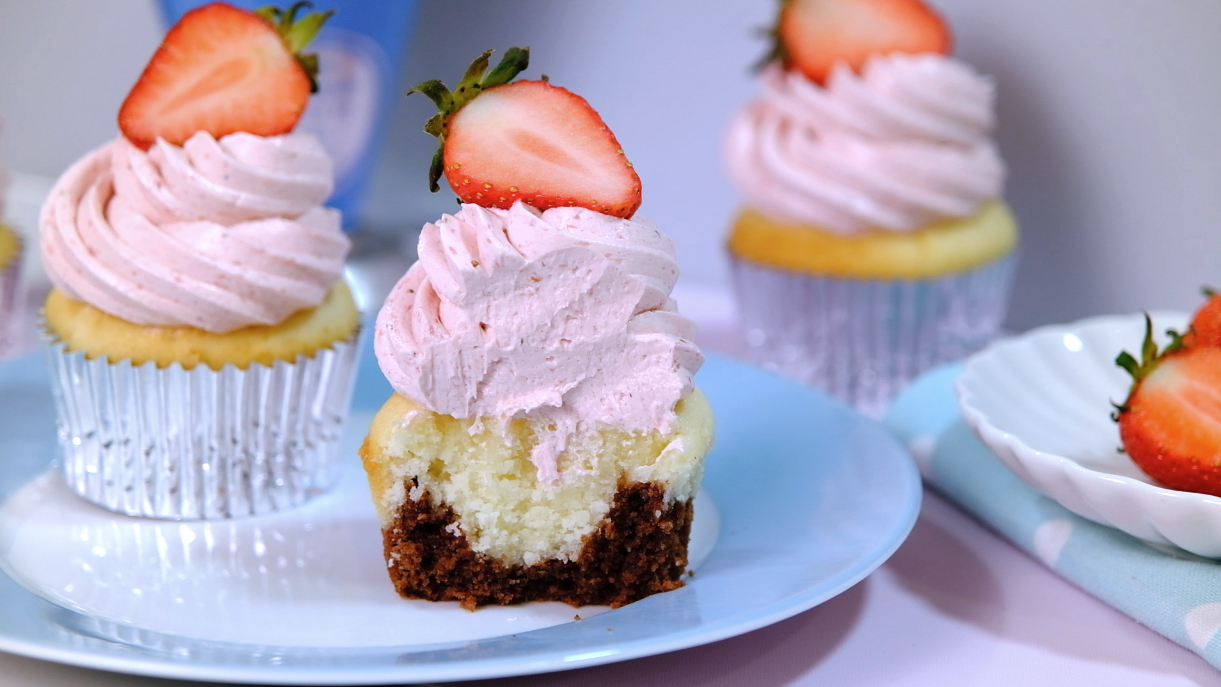
Classic Neapolitan Cupcakes (Moist, Less Sweet)


Neapolitan Ice Cream was my favourite since childhood… and I do love Ice Cream inspired cakes.

My big brothers and I never got tired of this ice cream until now 👨‍👨‍👧❤️ The eternal taste of our classic ice cream…
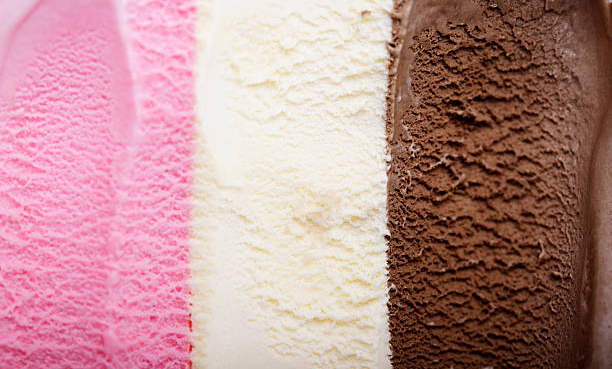
Vanilla-Chocolate-Strawberry these 3 flavours arranged side by side in the same container,  usually without any packaging in between.

Neapolitan Ice Cream~I am drooling by just looking at it 🙄

If you can’t decide which flavour, chocolate, vanilla, or strawberry is your favourite, then Neapolitan Ice cream is the perfect flavour for you! 😅
And if you like Neapolitan so much, I’m sure you will fall in love with this cupcake recipe 😘


This Neapolitan Cupcake is really moist and not too sweet.
The acid in Buttermilk helps tenderise the gluten in the flour resulting in a lovely rise and soft texture whereas the Sour Cream produces a super moist cake.


Some recipes make vanilla and chocolate batter separately, for me it’s very troublesome 🤔
So…I make it EASY for you
In this recipe, you just need to make 1 basic vanilla batter; and with a little addition then you will get another rich chocolate batter.


For the chocolate batter, I highly recommend to use Dutch-Processed Cocoa Powder; It provides an intense richness to cake
And… feel free to use your favourite 61% Dark Chocolate bar.


Some people ask me whether they can use 70% Dark Chocolate…
Well… I suggest DON’T because it will have slightly bitter taste, which I found not suitable for this cake.


As for the Strawberry Buttercream; make sure that you use Immersion Blender or Spices Grinding Machine to make the strawberry puree;
I don’t recommend to use food processor because you will need to add some water to help the spinning process; It will end up with runny buttercream (which is NOT good).


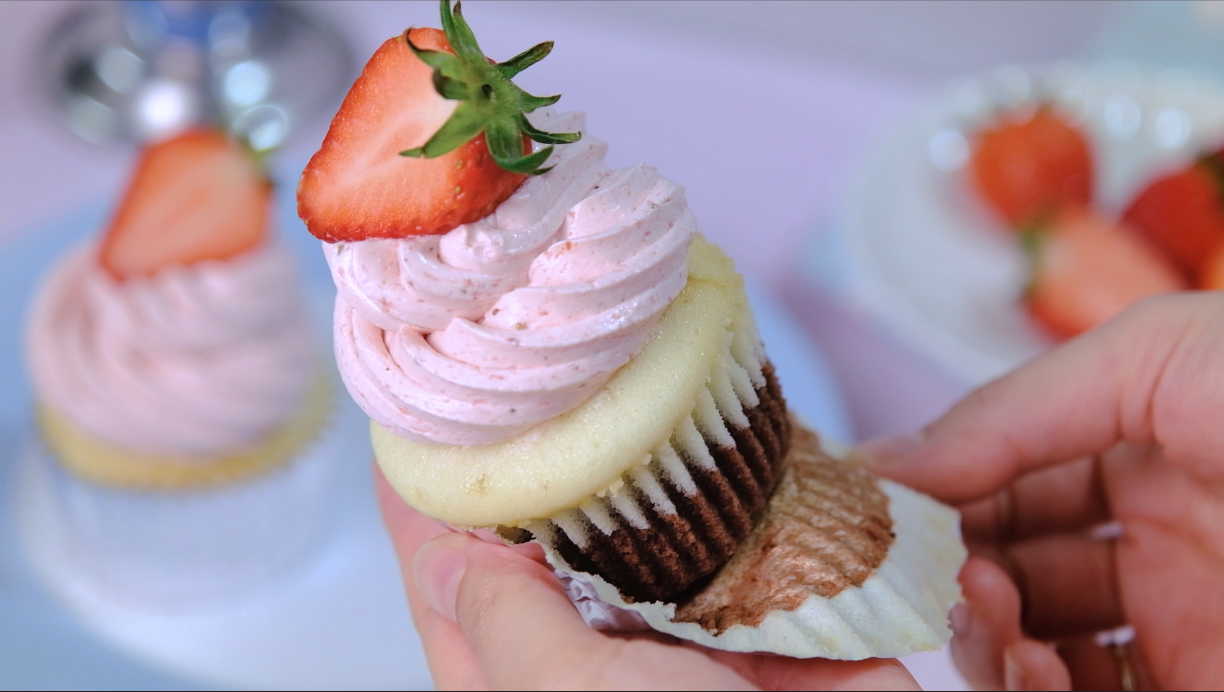
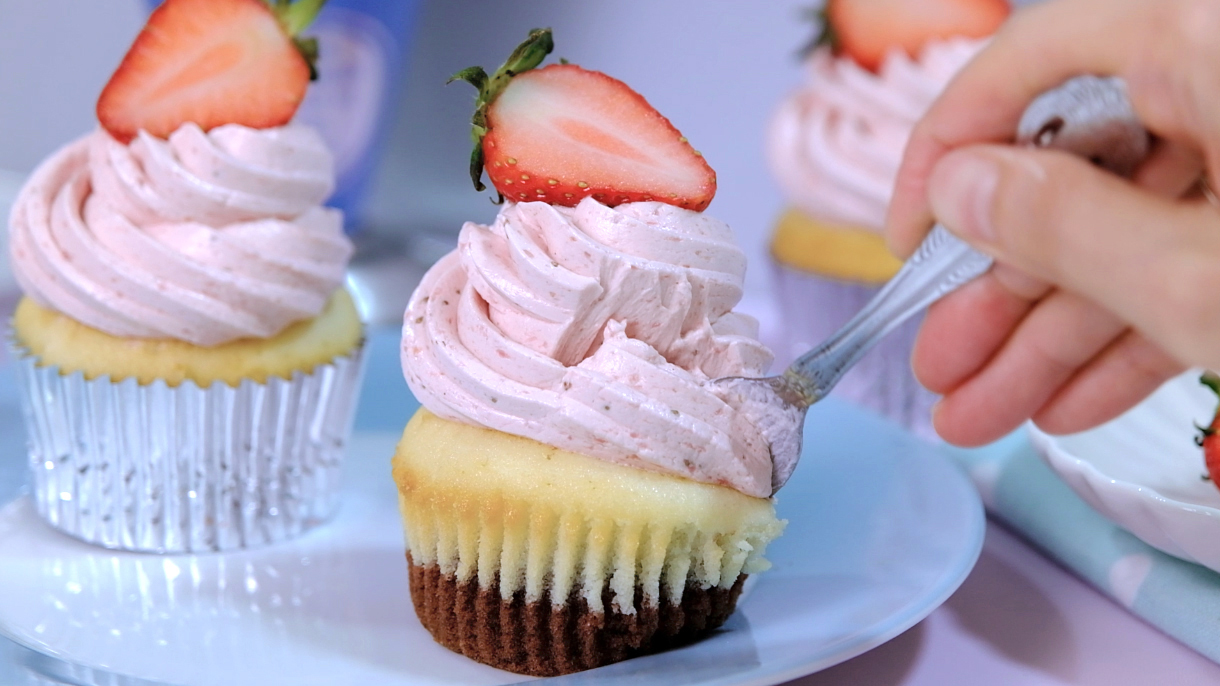
Beautiful tender white cake, moist chocolate cake …with a silky Strawberry Buttercream bursting with fresh strawberry flavour 🤤
What else can you ask for? It’s so satisfying… 😃


I hope you can share this beautiful cupcakes with someone you love…
Love You All and Happy Baking! 😘

CLASSIC NEAPOLITAN CUPCAKES
Yield: 6 cupcakes  (3,5 cm high; 5 cm bottom diameter; 7 cm top diameter)
Active Time: 1 Hours
Total Time: 2 ½ Hours

INGREDIENTS
♥︎ Cupcake Batter

  • 115 g Cake Flour
  • 1 tsp Baking Powder
  • 1/4 tsp Salt
  • 75 g Unsalted Butter (room temperature)
  • 116 g Granulated Sugar
  • 105 g Egg Whites (room temperature)
  • 2/3 tsp Clear Vanilla Extract
  • 80 g Buttermilk (room temperature)
  • 40 g Sour Cream (room temperature)
  • 6 g Cocoa Powder (Dutch-Processed)
  • 15 g Hot Water
  • 15 g Chopped Dark Chocolate (61%)


NOTE (Buttermilk Substitute)
Option 1: Replace Buttermilk with a mixture either 1 teaspoon of vinegar or Lemon Juice and 80 grams of milk; Let it sit for 5 minutes
Option 2: Replace Buttermilk with a mixture of 40 grams of Milk and 40 grams of Plain Greek Yogurt

♥︎ Strawberry Buttercream

  • 70 g Egg Whites (room temperature)
  • 125 g Granulated Sugar
  • 170 g Unsalted Butter (room temperature)
  • 150 g Fresh Strawberry Puree
  • 2 drops of Dusty Pink/ Rose food colouring

♥︎ Others
829 Nozzle

INSTRUCTIONS
Cupcake Batter

  1. Preheat the oven to 160°C at least 30 minutes prior to baking.
  2. Prepare the cupcake pan and liners (I am using 3,5 cm high with a 5 cm bottom diameter and a 7 cm top diameter).
  3. In a medium bowl, sift dry ingredients through a sifter, set aside. 115 grams Cake Flour; 1 teaspoon Baking Powder; ¼ teaspoon Salt
  4. For the cocoa mixture
    In a small bowl combine Cocoa Powder and hot water; Mix well until no lumps visible, set aside. 6 grams Cocoa Powder (Dutch-Processed); 15 grams Hot Water
  5. Remember; cake batter calls for room temperature butter, it’s soft to the touch, but not melted.
    In a large bowl beat Butter on low speed (Kitchen Aid speed 1) until smooth for about 1 minutes. 75 grams Unsalted Butter (room temp.)
  6. Gradually add in the sugar and beat on medium-high speed (speed 8) until light in colour and fluffy in texture 5 minutes. 116 grams Granulated Sugar
  7. Lower to medium speed (speed 4), add egg whites one at a time. Scraping down the bowl, make sure there’s no butter left at the bottom and continue beat on medium-high speed (speed 8) for 2 minutes until smooth. 105 grams Egg Whites (room temperature)
  8. Add vanilla, mix well. 2/3 teaspoon Clear Vanilla Extract
  9. Lower the speed (speed 1) add in intervals, blending after each addition (1/3 dry ingredients – ½ Buttermilk- 1/3 dry ingredients – ½ Buttermilk – 1/3 dry ingredients). 80 g Buttermilk (room temperature)
    Scraping the sides of the bowl to make sure the flour mixed evenly with the mixture and then mix again on medium-high speed (speed 8)  for another 20-30 seconds.
  10. Fold in Sour Cream and mix until just combined. 40 grams Sour Cream (room temp.)
  11. Transfer 1/3 of the batter (about 170 grams) to a medium bowl.
    Add cocoa mixture and chopped dark chocolate; stir until just combined. 15 g Chopped Dark Chocolate (61%)
  12. Divide Chocolate batter evenly among prepared cupcake pan liners; top with remaining Vanilla batter.
    Tap the pan a few times to remove air bubbles and bake in the preheated 160°C oven for 25 minutes or until toothpick inserted in the center of the cupcake comes out clean
  13. When it’s done, transfer pans onto wire rack to cool for 10 minutes before turn out cupcakes onto rack to cool completely.

Strawberry Buttercream

  1. Wipe the bowl and beater with some Vinegar or Lemon Juice to ensure that there’s not a speck of grease or fat on your utensils (fat can interfere with the beating of egg whites into a stable foam).
  2. Cut strawberries into small pieces. 150 grams Fresh Strawberries
    Puree in an Immersion Blender or Spices Grinding Machine until smooth (I don’t recommend to use food processor because you will need to add some water to help the spinning process; It will end up with runny buttercream), set aside.
  3. Then in a heatproof bowl combine egg whites and sugar. 70 grams Egg Whites; 125 grams Granulated Sugar
    Place the bowl over a pot of simmering water, whisk until sugar dissolved and then keep whisking until the mixture reach160°F on candy thermometer.
    Take it off from the heat, transfer the mixture to a stand mixer and beat on medium-high speed (speed 8) for 5 minutes until stiff glossy peaks form and the bottom of the bowl no longer feel warm to the touch.
    * You can use hand mixer, but it will take longer and your whipped buttercream may not be quite as fluffy.
  4. Lower to medium speed (speed 4) add butter one piece at a time; Whisking well after each addition. 170 g Unsalted Butter (room temperature)
  5. Reduce to low speed (speed 1), add in strawberry puree; And beat until smooth 3-5 minutes (scrapping down the bowl during the process).
    * Please note the motor under the mixing bowl creating heat when buttercream is mixed for several minutes; your buttercream may heat and even start to melt. In that case, I suggest decreasing the mixing time.
  6. The buttercream should be lighter in colour and fluffy in texture (I like to add some dusty pink food colouring to enhance the colour – optional). 2 drops of Dusty Pink/ Rose food colouring
    If you find your buttercream too soft, store them in the fridge for 30 minutes before you use it.


Assembly
Using 829 Nozzle, pipe Strawberry Buttercream on top of cupcakes; decorate with some fresh strawberries to make it prettier.

NOTES
Best served on the day it’s made; However, decorated cupcakes can be stored in the fridge for 3-4 days (in an airtight container). Make sure that you take it out of the fridge 30 minutes before serving it.