low-sugar Open face apple pie

I have been baking since I was little.
Baking to me is a wonderful way to be able to share food and joy with other people.
These beautiful Apple Pie recipe was taught by my cousin’s helper when I was in fourteen “Thanks to her!”
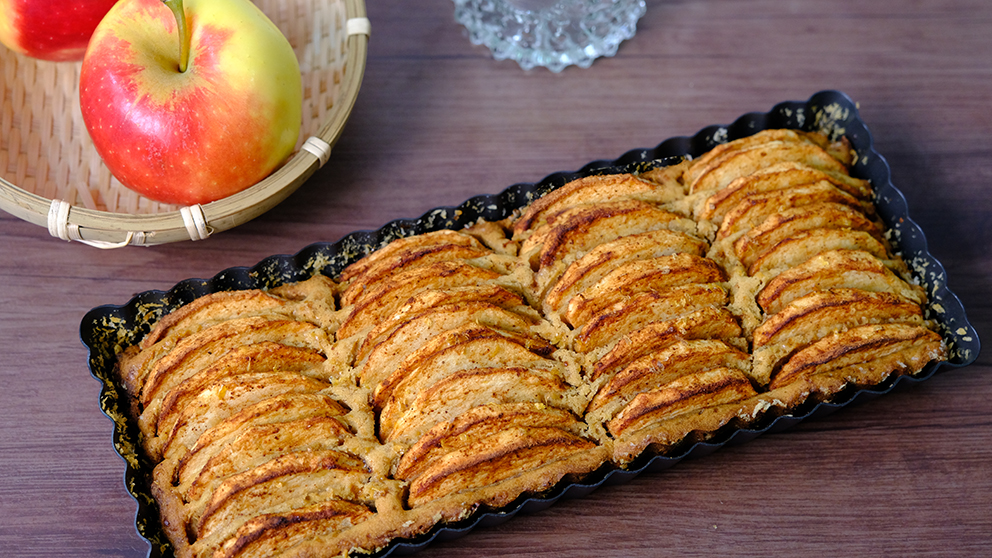
After reading a unique cookbook “Naturally Sweet” from America’s Test Kitchen, I was inspired to use Sucanat as a sweetener in this recipe.
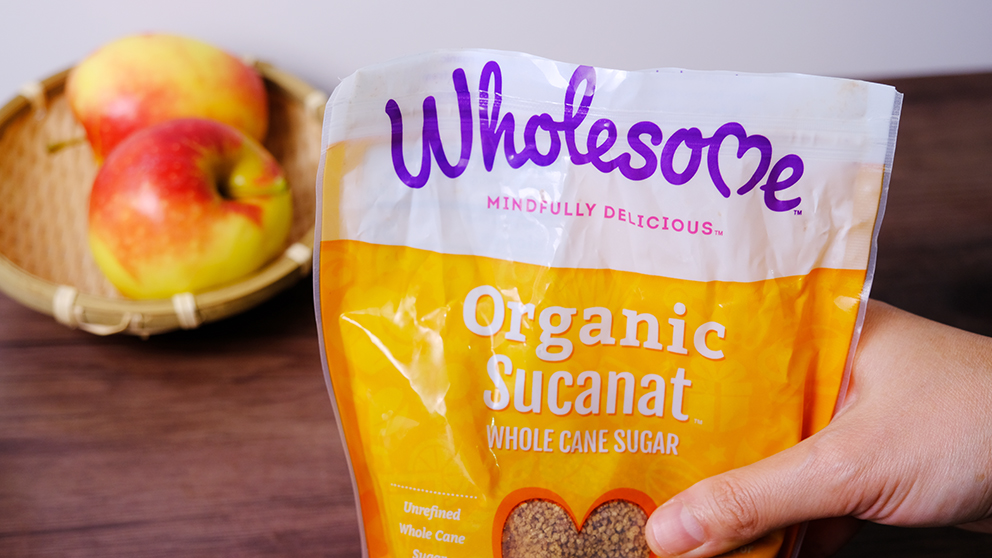
If you’ve never heard about Sucanat; it’s an unrefined sugar made from minimally processed sugar cane juice with no chemical.

Beautiful tan brown colour of Sucanat

Since it is less processed than granulated sugar, it retains additional vitamins and minerals from their natural molasses.
The granules are a tan-brown colour with a deep molasses-y flavour that far more flavourful than regular white sugar.

Sucanat sometimes never dissolved completely

And while granulated sugar dissolve quickly into batter, Sucanat took much longer to dissolve and sometimes never dissolved completely.
So don’t worry too much if at some point you still can see the sugar granules.

For the apple, Granny Smith apples are great for pies because their crisp texture holds well even after baking, they got soft but they are not break down into mush.

Peeled the apple, cored and cut it into thin slices

If you prefer to be sweeter, look for varieties such as Gala, Pink Lady or Honey crisp.

  Cut the apples into 1/4 inch thick

I like to squeeze some lemon juice on top of the apple slices.
This lemon juice not only prevent browning but also help balance the sweetness of the sugar and tartness of the Granny Smith apples.
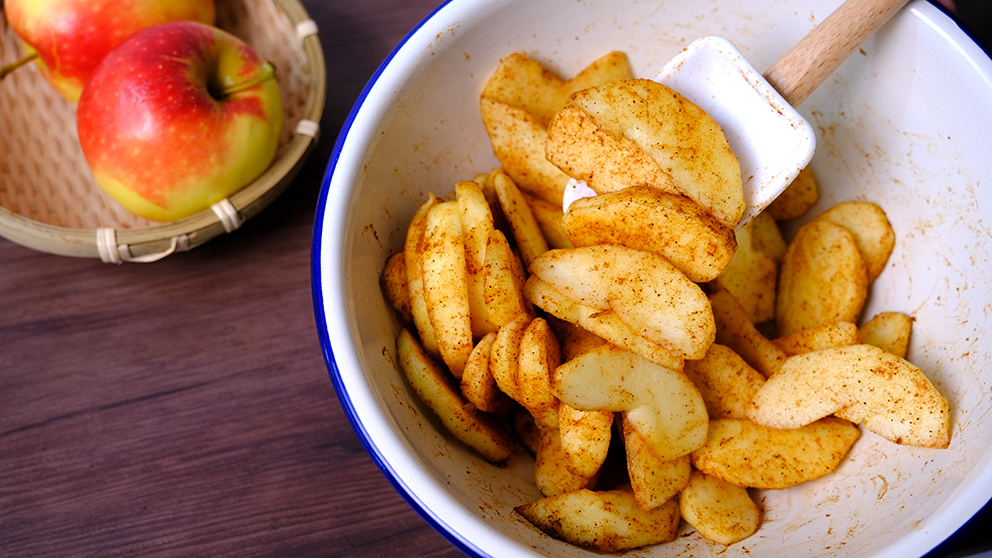
You could bake an Apple Pie without Cinnamon Powder of course, but it’s convention that apples and Cinnamon go together, much like Peanut Butter and chocolate.
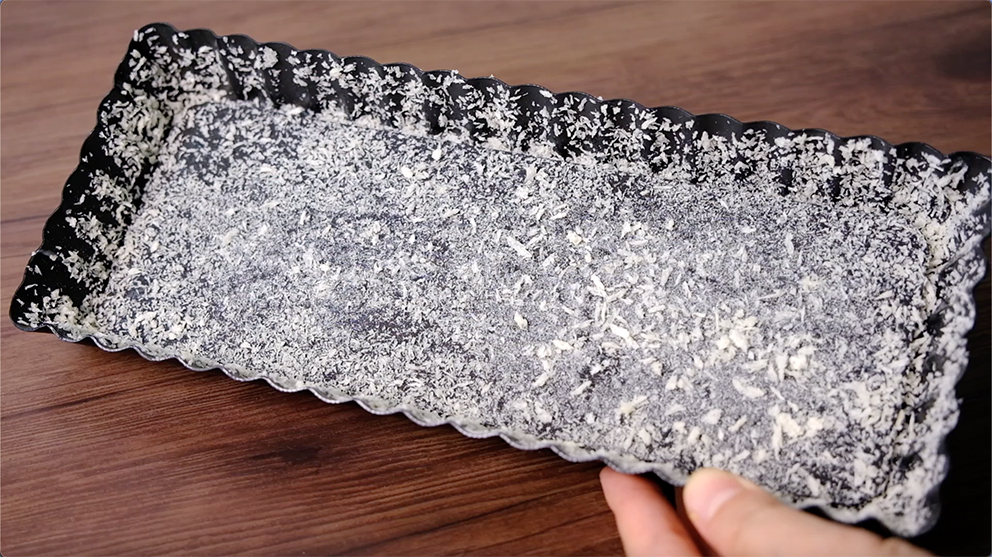
And to keep the cake from sticking to the pan, grease some butter to the pan and sprinkle with fine, dry breadcrumbs instead of flour. This breadcrumbs will add the beautiful crispness to the outer pie crust.
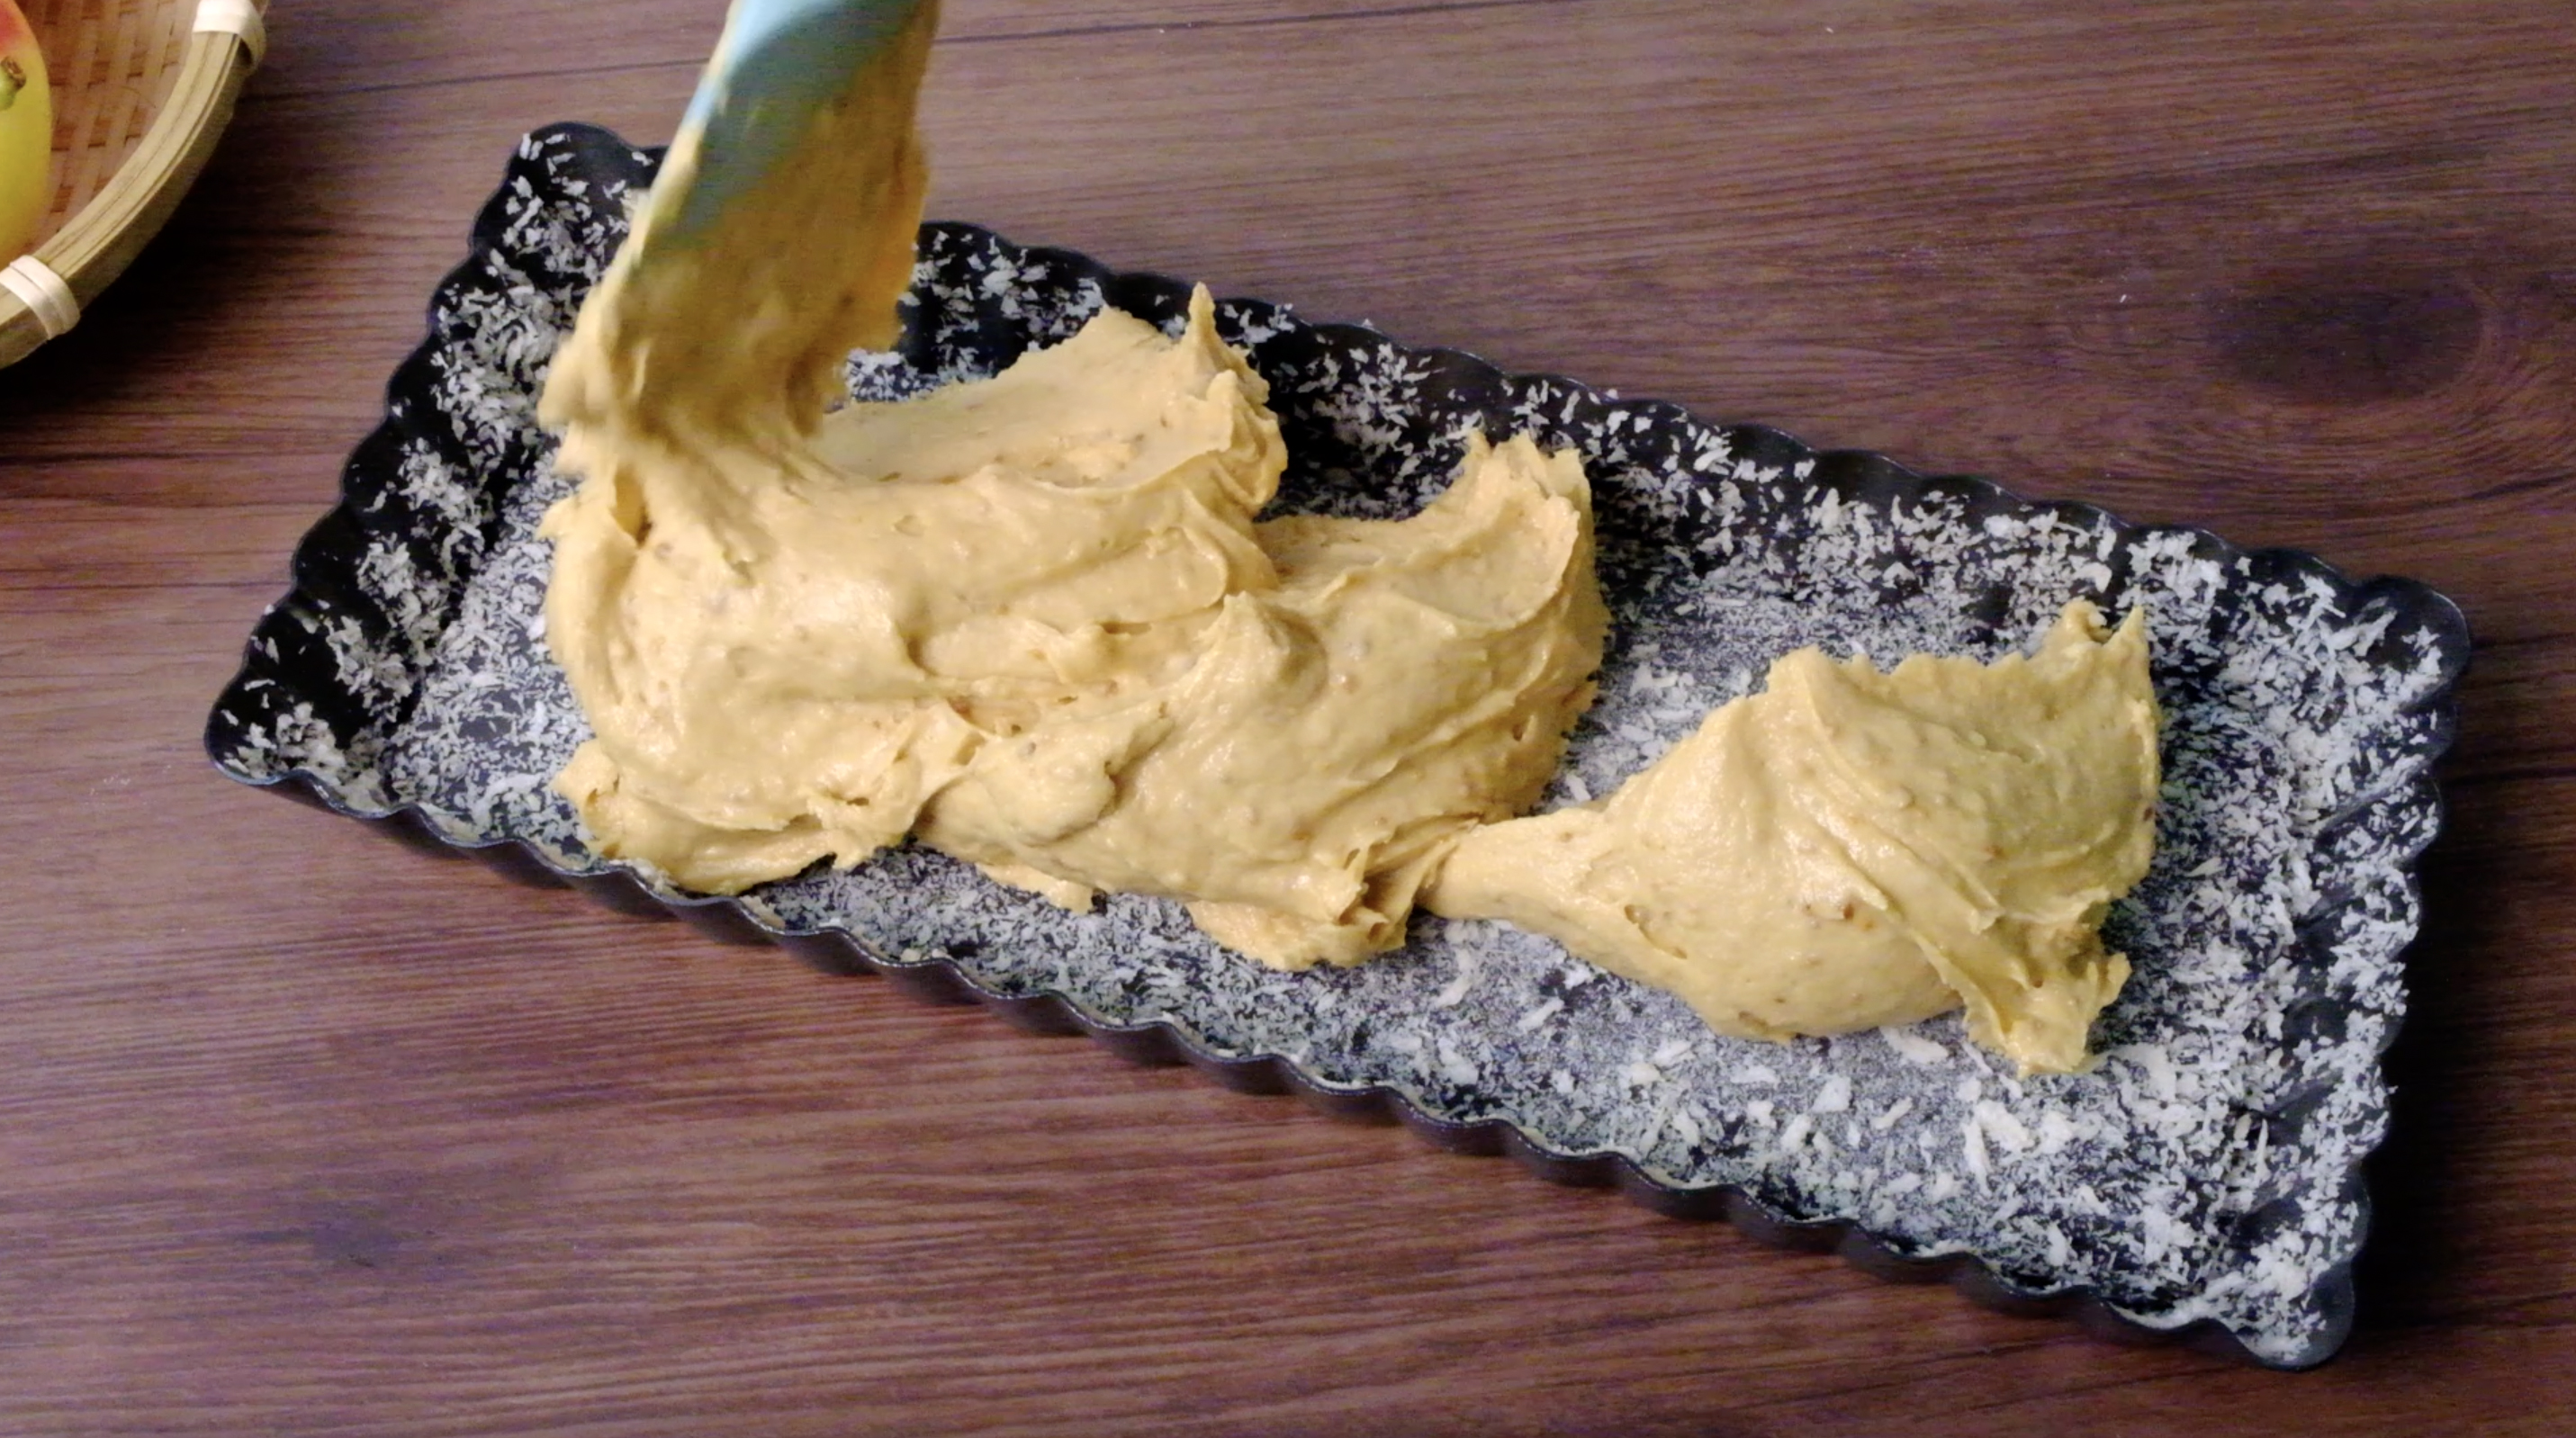
I suggest to distribute the batter in a few spots so it will be easier to spread evenly.

Arrange the apple slices on top of the batter in an overlapping pattern 45 degrees angle. 

I feel so relax when arranging these apples 😊

Make sure that you press the apples slice down so that half part of the slice is inside the batter.
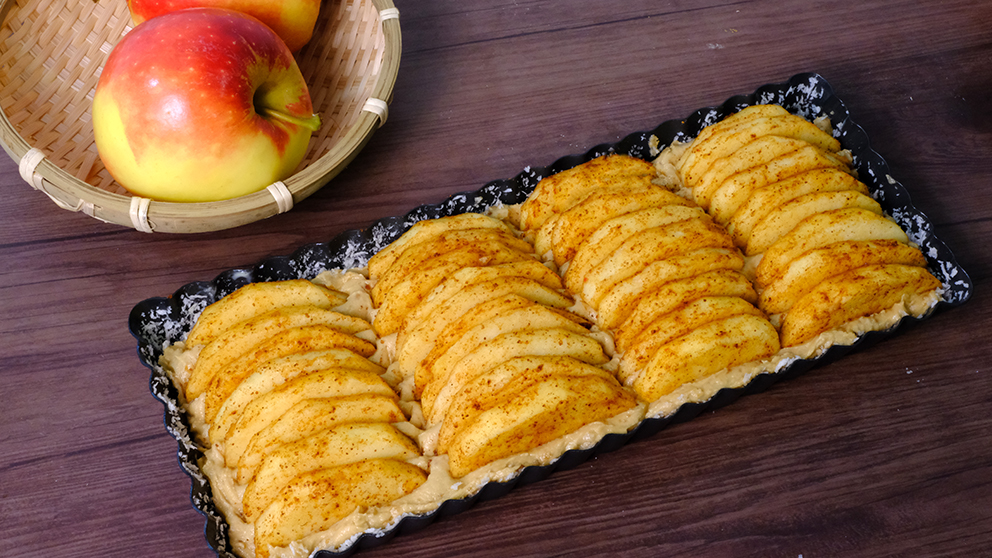
If you use bigger apple, you can arrange it horizontally. I’m prefer to do it vertically so it looks prettier when I cut it into portions.

Lemon is another unsung flavouring for Apple Pie. Adding a teaspoon of finely grated lemon zest to your Apple-Pie filling is always a good idea.
That hit of citrusy acid also helps set off the flavour of apples.

These Apple Pie bake in 2 different temperatures;
First in the preheated 200°C oven for 10 minutes to get that nice brown pie crust and then reduce the temperature to 170°C and continue baking for another 35 minutes until the apples are tender.

Apple pie needs some time to cool down before cutting into it, you will want to wait at least 30 minutes before actually steal your first slice.
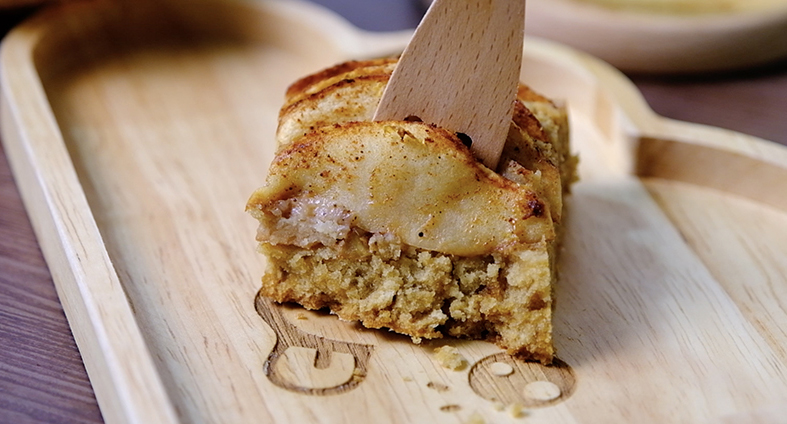
The outer crust is really crispy. Sucanat really gives the pies an earthy, molasses flavour and golden brown colour which is really tasty 😘.
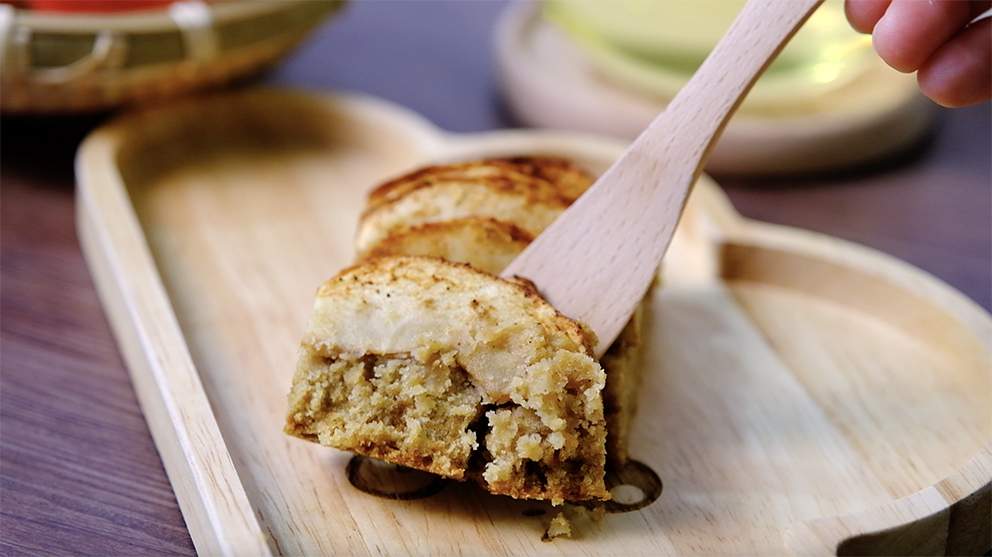
Hm..mm it’s really good! 🤪

Another secret of an Open Face Apple Pie is that every bite is made smoother and velvety with the absence of a top layer of crust like in usual pies.

Serve slices of warm with a cup of tea or coffee or maybe cooled pie with a scoop of your favourite ice cream or a spoonful of whipped cream.
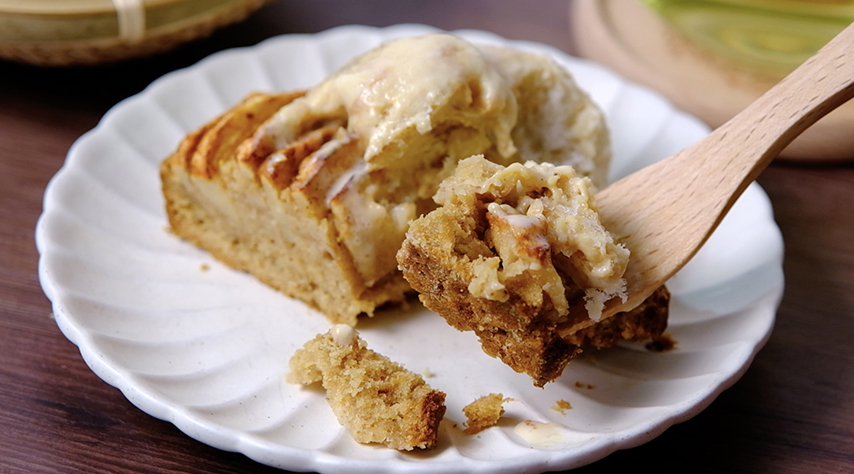
No matter what you choose to top your Apple Pie with, the all-time classic dessert will not disappoint.
I hope that you enjoy it as much as I do, I hope you learn something!
Love you All 🥰


LOW SUGAR OPEN FACE APPLE PIE
Yield: 1 Rect. Fluted Pie Pan (25 x 10 X 2.5 CM) or 7-inch Round Pie Pan
Active time: 30 minutes
Total time: 1 ½ hours

INGREDIENTS

  • 2-3 Medium Apples
  • 1 tbs Lemon Juice
  • 1 tsp Cinnamon Powder
  • 75 g Salted Butter
  • 60 g Sucanat (you can substitute it with 70 g Granulated Sugar)
  • 50 g Eggs
  • 100 g All-Purpose Flour
  • 1 tbs Sucanat (for sprinkle) or Granulated Sugar
  • 1 Grated Lemon Zest
  • Bread Crumb

INSTRUCTIONS

  1. Grease the bottom and sides of the pan with generous amount of butter, then sprinkle a small amount of bread crumbs. Tap the pan to spread the crumbs, twirled around all over the bottom and sides and excess thrown out.
  2. For the apple
    Peeled the apple, cored and cut it into thin slices (as shown in the video). Squeeze the lemon juice on top of the apple slices. Add the cinnamon powder, mix it really well.
  3. For the batter
    In a medium bowl, mix the butter and Sucanat for about 3 minutes until pale and fluffy (Sucanat took much longer to dissolve, don’t worry too much if at this stage you can still see the sugar granules).
    Add in the eggs and mix until all the eggs well incorporated with the butter mixture. Finally, pour in the flour and stir until just combined (do not over mix, stir until all the flour has disappeared).
  4. Place the batter in the prepared pan, spread it evenly (I suggest to distribute the batter in a few spots so it will be easier to spread).
  5. Arrange the apple slices on top of the batter vertically in an overlapping pattern, 45 degrees angle. Press the apples slice down so that half part of the slice is inside the batter.
    Sprinkle some Sucanat and grated lemon zest on top of the apple slices.
  6. Bake it in the preheated 200°C oven for 10 minutes. Reduce the temperature to 170°C and continue baking for another 35 minutes.
  7. Allow the pie to cool down in the pan for 30 minutes before cutting.

NOTES

  1. Best serve on the day it’s made.
  2. To store; 4 days in the fridge (in an airtight container).
  3. To reheat; Set the pie on a parchment lined baking sheet and put it in a preheated 180°C oven for about 15 minutes.

Banana Hand Pies

Hey Guys, today we are making these adorable “Banana Hand Pies”. These hand pies is decadent  and really easy to make.

Slices of fresh bananas, brown sugar and cinnamon, baked to perfection inside of an individual pie crust. The most perfect, amazing pie crust I’ve ever made.

The key to a really good pie crust is to have super cold butter, so, make sure you freeze them well in advance.
Instead of that classic ice water, we are gonna use sour cream to make the pie crust. Not only the dough extremely easy to work with, but the crust also buttery, light and flaky.

The pie crust dough can be prepared in advance and have it ready for whenever you are craving for some delicious snack.
You also can choose each time a different filling, there are so many options apple, pineapple, chocolate and various savory fillings.

The great thing about this dough is we don’t need store them in the fridge for a few hours before rolling. But even you can roll the dough immediately, I suggest to finish with all the pie details first to avoid the filling sit to long and becomes watery.

The uncooked pies

It’s really hard not to fall in love with them…

I like these best when they are still warm from the oven, when the filling is hot and the brown sugar is melted.

They will still be delicious the day after they were baked. You just need to reheating them a few minutes in the oven to crisp up the pastry.

And a scoop Vanilla ice cream served alongside makes a perfect combination with these adorable pie.

Hm..mm it’s really smells good. I hope that you will love these recipe and give them a try, enjoy the recipe!

BANANA HAND PIES
Yield: 5 Pieces
Active time: 1/2 hour
Total time: 1 hour

INGREDIENTS
Pie Dough:

  • 150 grams All-Purpose Flour
  • 1/4 teaspoon Salt
  • 1 1/2 teaspoons Granulated Sugar
  • 1/4 teaspoon Tumeric Powder
  • 105 grams Unsalted Butter (Frozen)
  • 90 grams Sour Cream (Not Lowfat or Light)


Filling:

  • 2 Bananas (Overripe)
  • 30 grams Brown Sugar
  • 1 teaspoon Cinnamon Powder

    Cocoa and Red Food Colouring
    Egg Whites (For Glue)


INSTRUCTIONS
Design Template
Tracing the outline template to some greaseproof paper and gently cut the outline.

Pie Filling
Cut the bananas into small pieces, mix it with the brown sugar and cinnamon, set aside.


Pie Dough

  1. Preheat the oven to 200°C
  2. In a medium bowl, lightly whisk together all the dry ingredients the flour, salt, granulated sugar and turmeric powder.
  3. Using the large holes of a box grater, grate the frozen butter into the dry ingredients.Using a fork, toss the butter and flour mixture.
    Do not break down the butter pieces in this step, just lightly toss until they are coated with flour or until you see a crumbly consistency.
  4. Add in the sour cream
    Using the same fork, mix the sour cream into the butter flour mixture. Pressing the fork down into the sour cream, in order to mash the large clumps of sour cream into the flour and butter.
    Try not to overwork the dough, if the butter pieces get too small and overprocessed, the crust will be tough.
    Then use hands to pull out the dough together (it will look a bit shaggy at first, but as you press it quickly and firmly together, it should start to form a cohesive ball).
    *If the dough seems overly wet, you can add a tablespoon of flour and if it’s too dry, add a teaspoon of sour cream at a time.
  5. Spare some pie dough for the details
    About 10 grams for the dark chocolate and 2 grams for the red.
    I am using cocoa powder and red food colouring powder for colouring, you can also use liquid food colouring if you want.
  6. Making pie details
    – Combine the oval shape of dark brown and red dough to create his mouth and tongue.
    – Using a dark brown dough to create his eyes, eyebrows and hands.
    – A bit of red dough for his cheeks.
  7. Roll the pie dough
    Divide the dough into 2 batches, for the bottom and top, so it’s easier to handle.
    Using a rolling pin, roll this out into about a half centimetre thick, then cut 5 pieces out of the each batch according to the design template (total 10 pieces of the cut dough).
  8. Fill the doughLay the bottom side of the cut dough on the tray with a parchment paper, place banana filling in the middle of the dough.
    Brush the egg whites as a glue on the underside rim and then place the top cut dough on top of the filling.
    Gently pasting the edges dough with fingers, and then using the prongs of a fork press the edges to seal the pies.
  9. Pie details
    Using egg whites as a glue to stick all the details to each position.
  10. Bake for about 20 minutes. Take off from the heat, let it cool on the pans for 5 minutes before transferring to a cooling rack to finish cooling. 


NOTES

  1. The key to a really good pie crust is to have super cold butter. So, make sure you freeze them well in advance.
  2. Best serve when they are still warm from the oven, when the filling is hot and the brown sugar is melted.
  3. A scoop Vanilla ice cream served alongside makes a perfect combination with these adorable pie.
  4. They will still be delicious the day after they were baked, just store them in the fridge and reheat them a few minutes in the oven to crisp up the pastry.
  5. The pie dough can also be pressed into a flat disc and wrapped in plastic to be refrigerated for 1-2 days or frozen for up to a month.
  6. The uncooked pie can be assembled a day ahead of time and stored in the fridge on the baking sheet until ready to bake.
  7. To freeze uncooked the pies, assemble the uncooked pies on a baking sheet, place the sheet in the freezer for one hour in order to harden and then transfer the frozen pies to a freezer bag.
    To prevent the pies from sticking to each other, place a sheet of parchment paper between them. Can be frozen for up to 3 months.
    And when you are ready to bake them, place desired amount of pies 2-3 inches apart on a rimmed parchment lined pan and bake them in preheated 200°C oven for about 20-25 minutes.

Teddy Bear Choco Pies

Hi Guys! I hope that you are doing well, and today we are making these gorgeous “Teddy Bear Choco Pies“.
Choco pie is a popular Korean snack, some call it National Snack. It consist of 2 cakes with marshmallow fillings in between, and the whole thing is covered in chocolate.

I’m the biggest fan of Choco Pie. 2 of the most popular Choco Pie brand are Oreon and Lotte. They got the original and also other flavor varieties.

And out of all the Choco Pies, my favorite will have to be Cacao Choco Pie. I love the the cacao version because it has chocolate cakes instead of Vanilla. The extra chocolate just adds a little richness to the Choco Pies and it taste really good.

So today I’m gonna show you how to make my homemade and healthier version of Cacao Choco Pie.

We need to make homemade chocolate cakes, homemade marshmallows, and then assembling it in the end to make Teddy Bear Choco Pies. It’s quite a long step, but of course it’s really worthed in the end.

The chocolate cake is soft and moist, the marshmallow fillings itself are so fluffy, kinda a spongy texture. And the melted chocolate… it’s just a chocolaty goodness. And yes, it was definitely fun to make.

I hope that you will enjoy this recipe. Have fun with it, create any design your want! Love you Guys!!

TEDDY BEAR CACAO CHOCO PIES
Yield: 16 pieces
Active time: 2 hour
Total time: 3 hours

INGREDIENTS
Cake Batter:

  • 145 grams Unsalted Butter
  • 105 grams Granulated Sugar
  • 150 grams Eggs
  • 190 grams All-Purpose Flour
  • 30 grams Cocoa Powder
  • 1 1/2 teaspoons Baking Powder

Marshmallow Fillings:

  • 10 grams Gelatine Powder
  • 80 grams Water
  • 220 grams Granulated Sugar
  • 60 grams Water
  • 1/2 teaspoon Vanilla Extract
  • Pink Food Colouring

Coating & Decorating:

  • 350 grams Dark Chocolate
  • 150 grams Milk Chocolate
  • 100 grams White Chocolate
  • 50 grams Strawberry Chocolate

INSTRUCTIONS
Prepare design template. Secure the template to the pan with some tape (so they stop slipping around). Over the top of the design, place a piece of baking parchment that fits exactly the bottom of the pan.

Chocolate Cake Batter:

  1. Preheat the oven to 170 C.
  2. Combine the soft butter and granulated sugar, continue mixing until light and fluffy. Add in the eggs, and mix that all through (don’t worry if the batter looks like curdling now, the mixture will comes back together when we add the dry ingredients later).
  3. Mix in all of the dry ingredients (flour, cocoa powder and baking powder), mix until the batter is really smooth and no lumps remains.
  4. Transfer the batter into a piping bag with a 1 cm round tip. Pipe according to the design template.
  5. Bake it for about 13-15 minutes. Let it sit on the pan for about 3 minutes then transfer them onto a cooling rack to cool completely (if you find that you have a little bit of uneven surface on your teddy bear cakes, it doesn’t really matter since we’re going to be dipping them in Chocolate anyways)

Details Decorations:

  1. Using the same Teddy Bear template as above, tape some wax paper right on top (just to make sure it doesn’t budge).
  2. Melt the chocolate in microwave of a double boiler, transfer it to a piping bag. Pipe each details with melted chocolate.
  3. Pop them in the freezer, let them set until ready to use them.

Prepare the Chocolate Cake:
Melt some dark chocolate. Dip each chocolate cake into some melted dark chocolate, shake off the excess (shake the teddy bear to get it nice and smooth). Let them dry on the cooling rack so it’s firm to touch.

Marshmallow Fillings:

  1. Pour the gelatine into a mixing bowl, add 80 grams of water and mix, let it stand for a while.
  2. In a sauce pot, mix the granulated sugar and 60 grams of water. Cook over medium heat until the sugar dissolves and the mixture comes to a boil. Cover the saucepan with a lid and let boil for about one to two minutes (to allow any sugar crystals to dissolve from the sides of the saucepan). Remove the lid and attach a candy thermometer to the side of the pan. Boil, without stirring, until the syrup reaches 240 degrees Fahrenheit or the softball stage (if you don’t have one, just bring it to a rolling boil and let it boil for 1 minute)
  3. Pour in hot sugar syrup over the soft gelatine. Whip this up on medium speed with a hand mixer. Add in your favorite extract and food colouring, continue whip for about 8-10 minutes, until it gets super thick and fluffy. Transfer the marshmallow into a piping bag.

ASSEMBLE
Take one of the chocolate cake. Squeze a generous amount of marshmallow to the center of the cake and then put another cake on top. Decorate with chocolate detail decorations (using melted chocolate as a glue to attach the details).

NOTE

  1. Let the marshmallow set a while before piping it, so it doesn’t melt around the edges of the cake.
  2. I don’t have milk chocolate on hand, so I’ve just mix the dark and white chocolate together to create a soft brown chocolate colour. And for the red mouth, I’ve just add a bit of red food colouring to the white chocolate.
  3. You can keep them quite well at room temperature in an airtight container for up to 1 weeks, 3 weeks in the fridge.