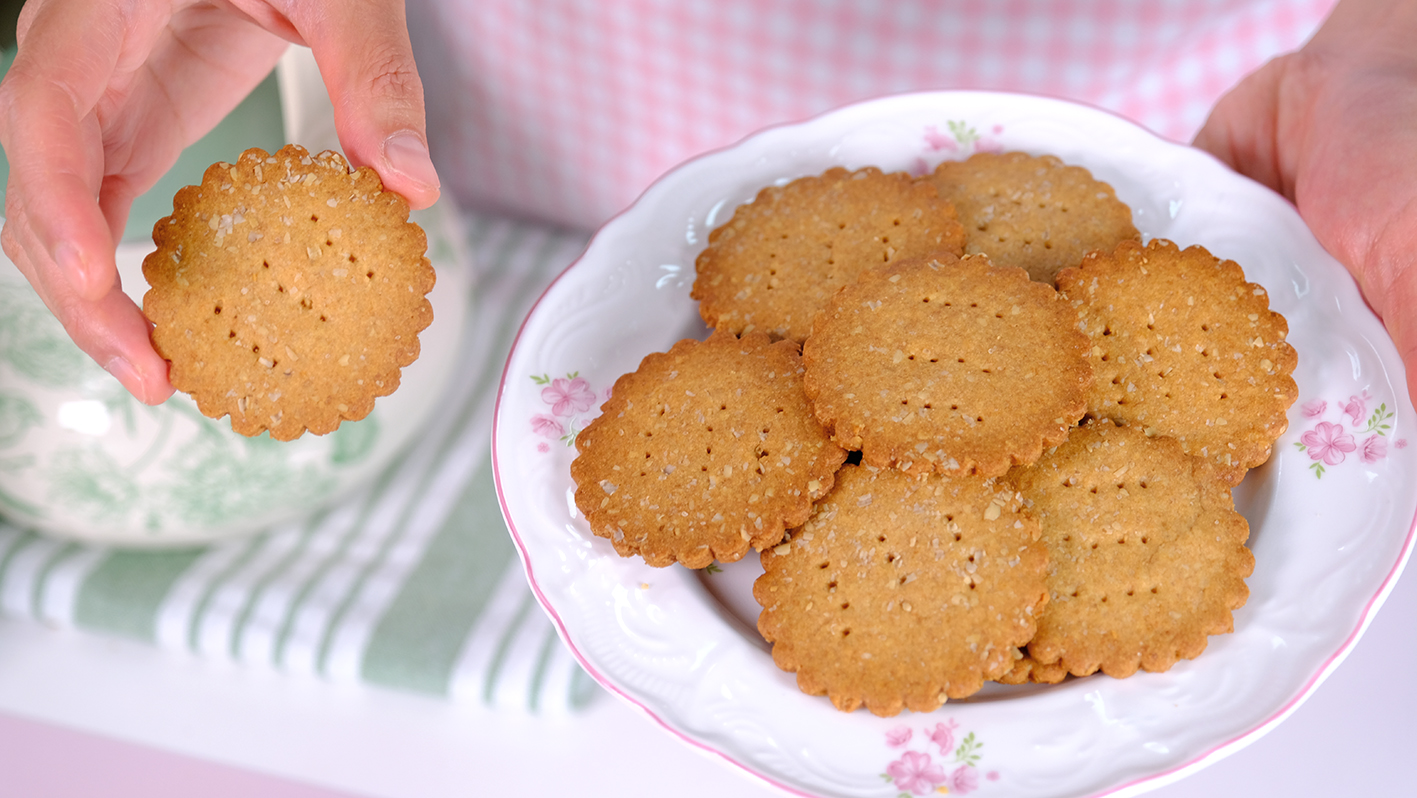
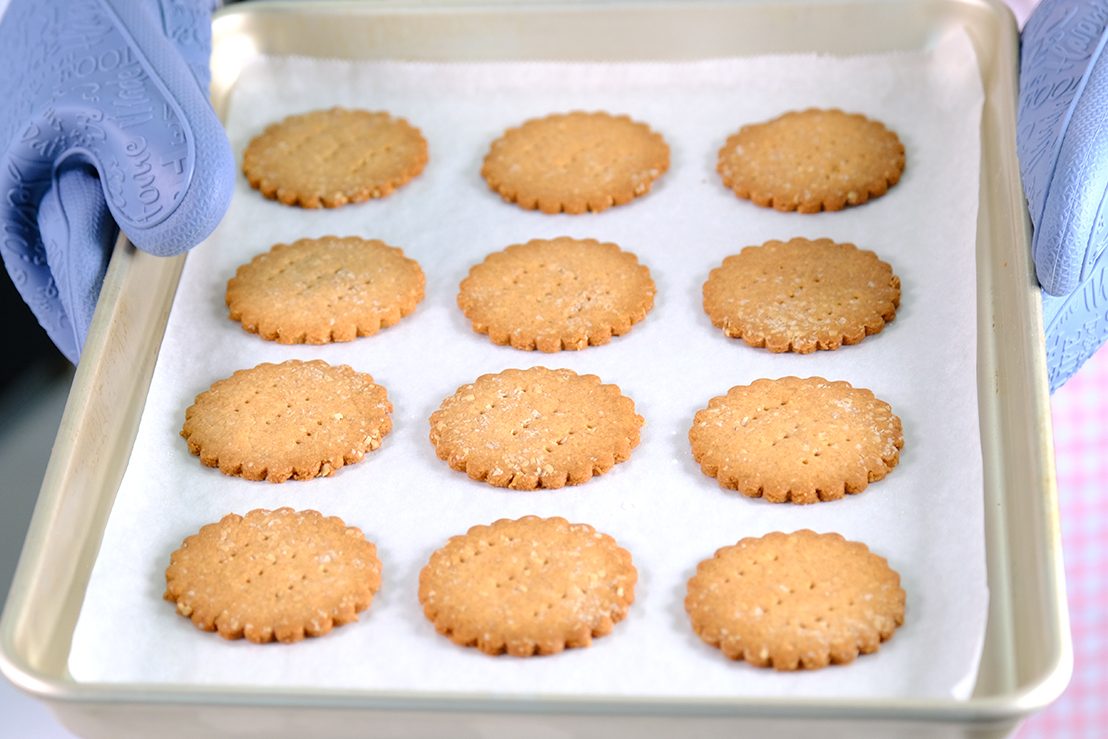
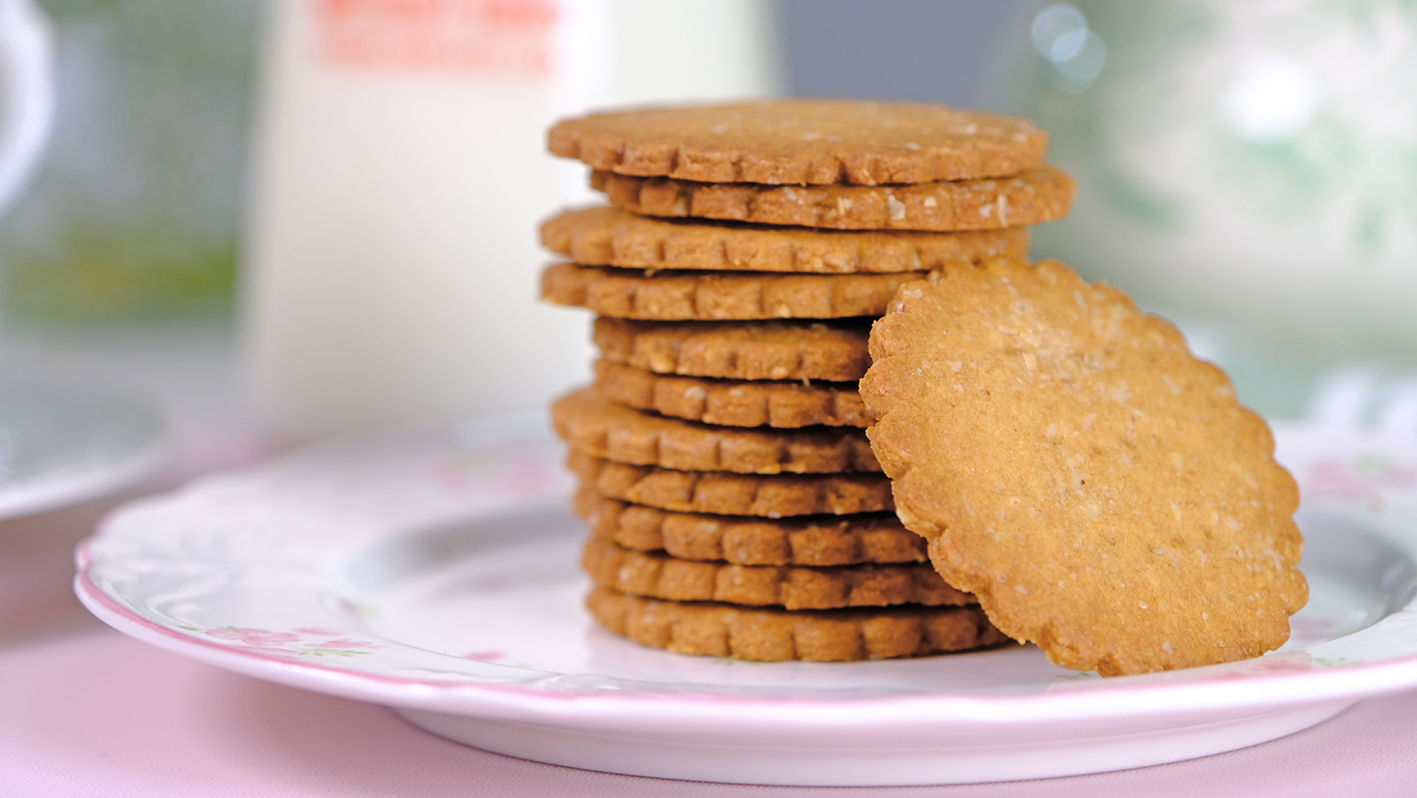
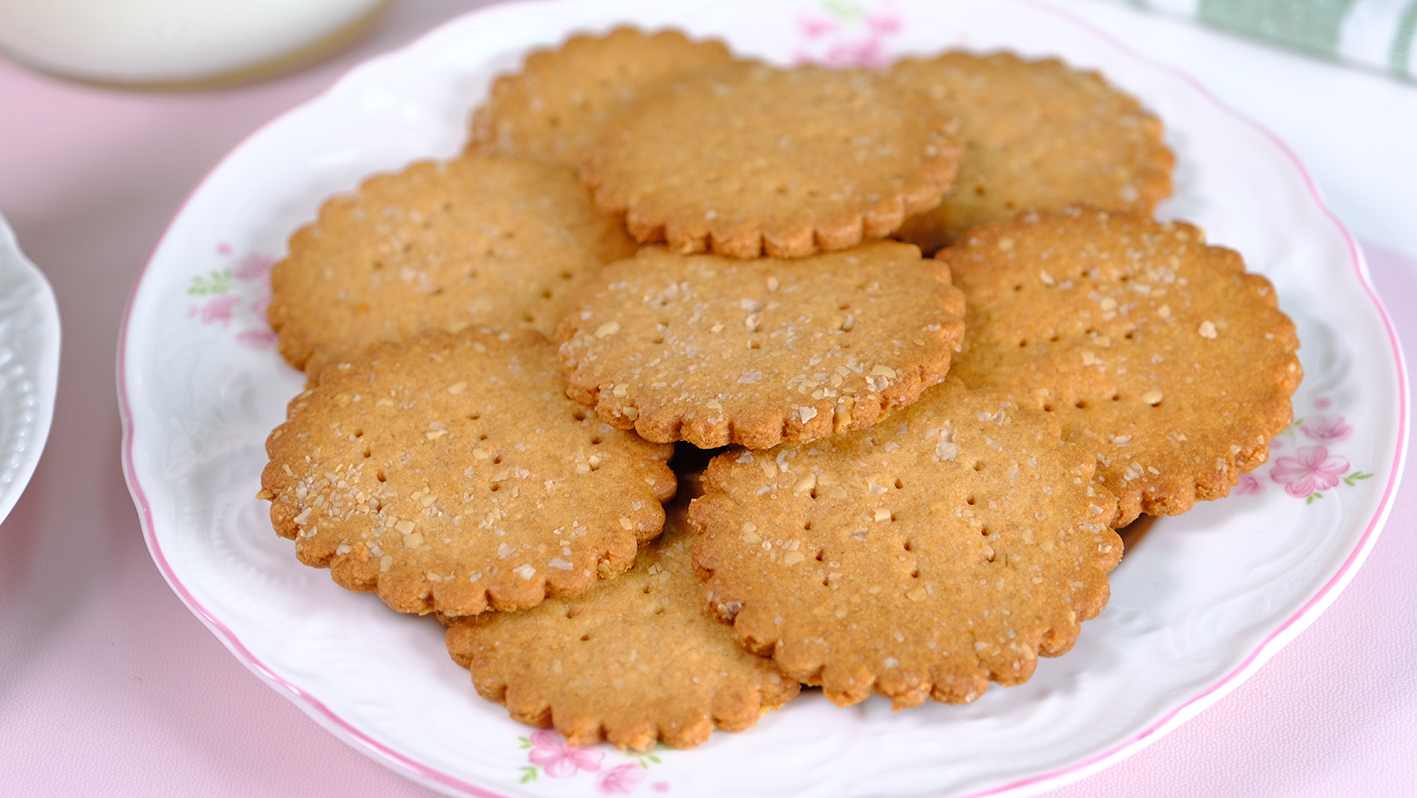
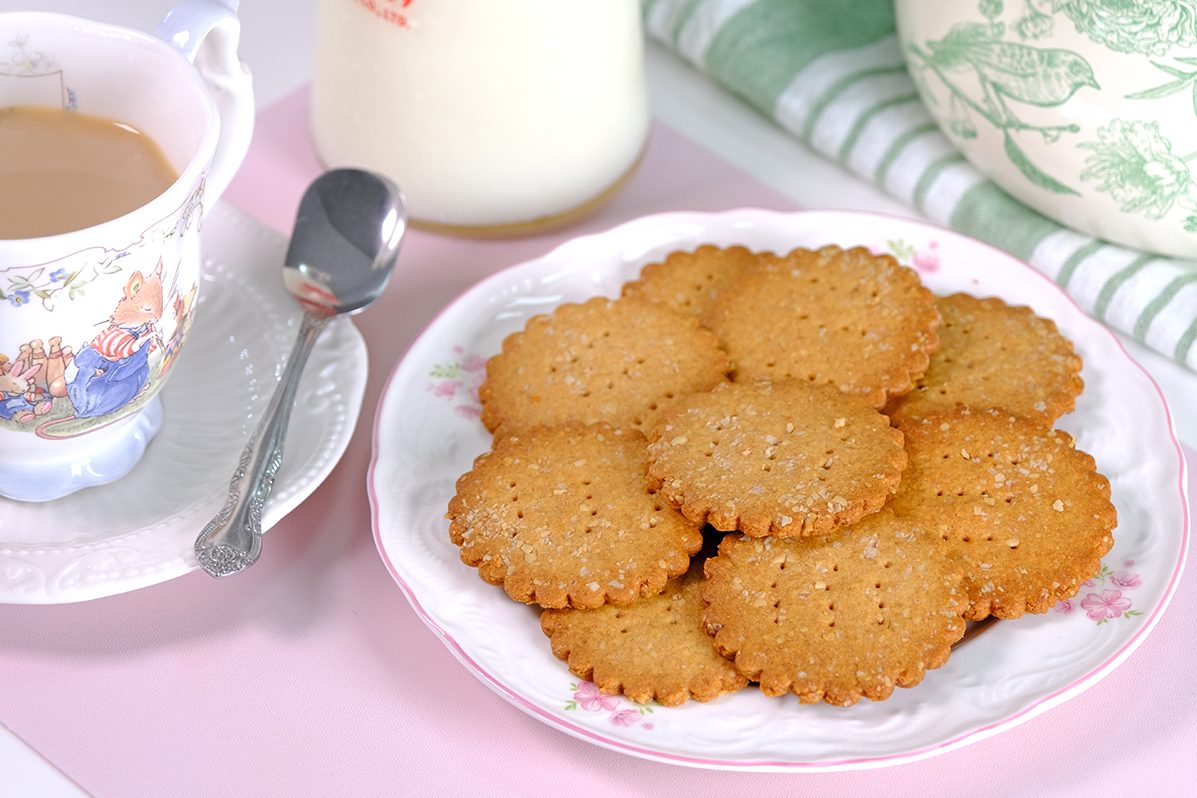
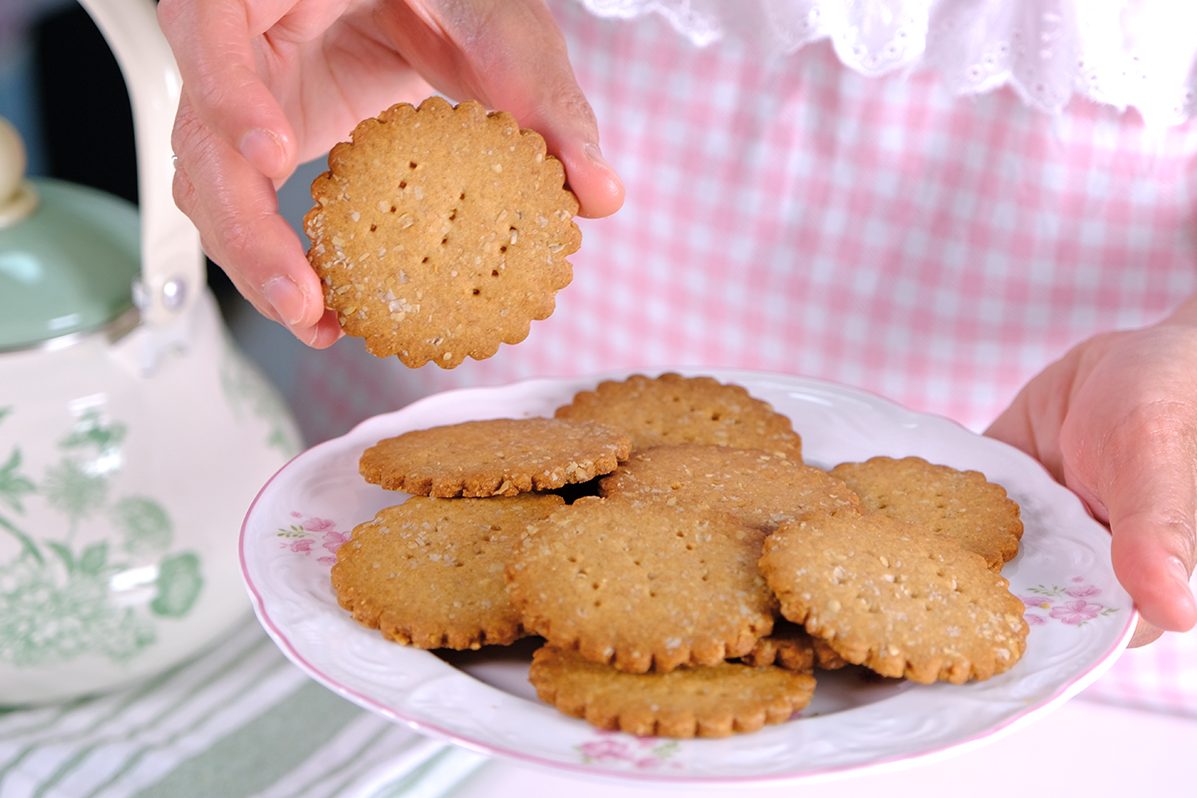
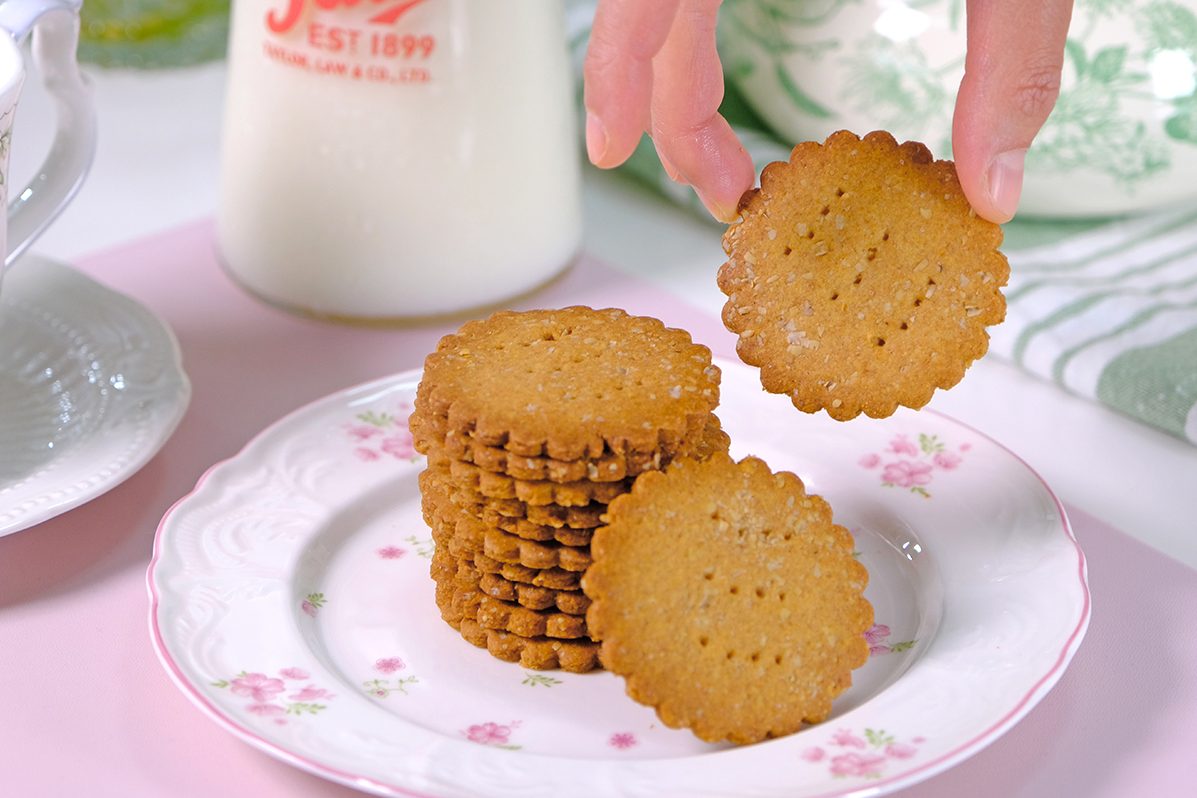
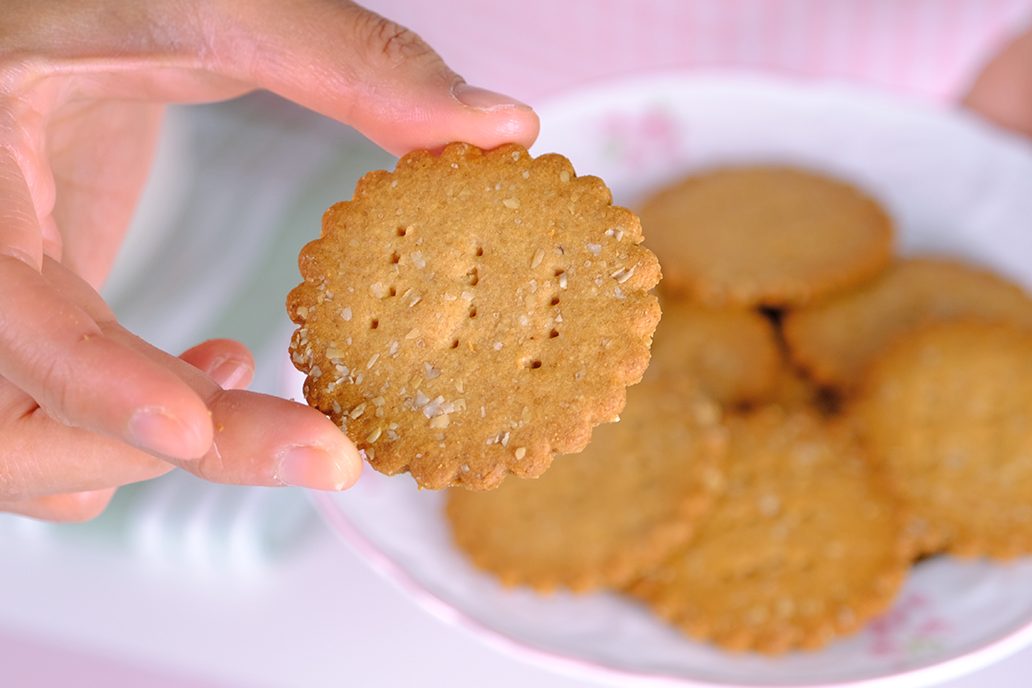
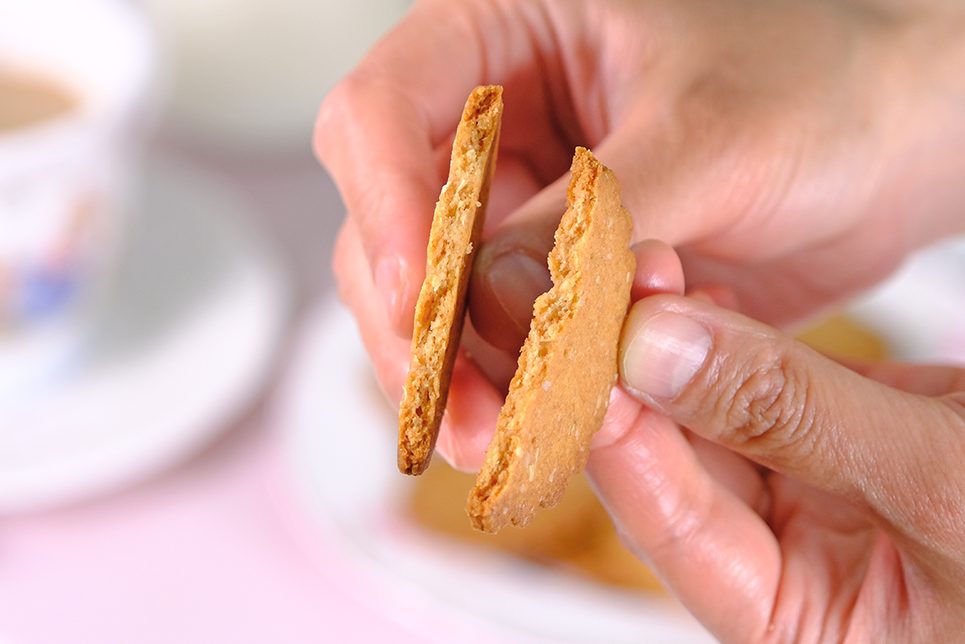
If you love snacking but want to keep things light, wholesome, and irresistibly crunchy; crispy thin Whole Wheat Biscuits might just become your new favorite treat.
Packed with the nutty flavor of whole grains and baked to delicate, golden perfection, these biscuits strike the ultimate balance between health and taste 🤩🤤 Whole wheat retains the bran and germ of the grain, making these biscuits naturally high in fiber, which supports digestion and keeps you feeling satisfied longerCompared to many commercial cookies, these crispy thin whole wheat biscuits are light on sugars and fatsPerfect for those watching their calorie intake without giving up flavor 😘You will need Whole Wheat Flour and Oat Bran for this recipe My go-to brand is Bob’s Red Mill 😚
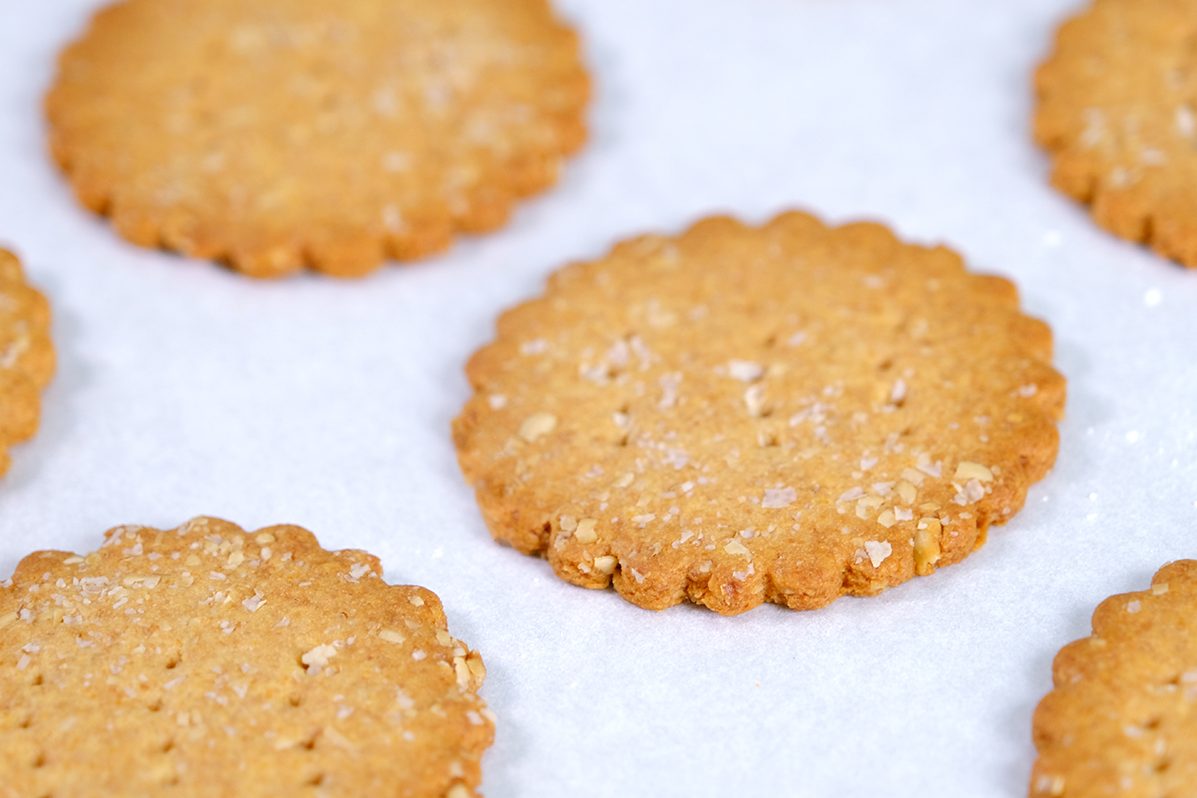
If you haven’t seen Oat Bran before, it’s the outer layer of the oat grain Adding oat bran to biscuits is an easy way to boost fiber, texture, and nutrition without changing the flavor too much. It gives your baked goods a slightly nuttier, hearty crunch that’s really tasty.
Whether you pair them with tea, enjoy them as a mid-day munch, or use them as a base for creative toppings.
These biscuits deliver a rich, nutty flavor and a hearty crunch; they’re so easy to bake 😉I’ve been making these for a while now, and I haven’t bought store-bought biscuits since 😇
Crispy, golden, and baked with love 💞
Perfect anytime, especially with coffee or milk 🤓😋A little healthy, a whole lot yummy! 😍😁Hope these biscuits bring a little comfort and joy to your day 🥳
Give them a try and let me know how yours turn out! 😉
WATCH HOW TO MAKE CRISPY THIN WHOLE WHEAT BISCUITS
Tips for Success (Please Read First):
Make sure the Butter and Eggs are at room temperature before you start. This helps the dough come together smoothly and makes your biscuits light and tender
Prepare the pan in advance, line a baking tray with Parchment Paper
Keep two additional pieces of parchment paper ready (you’ll use these to roll out the dough) Using parchment paper helps you to roll thinner, avoid sticking and transfer easily
If you can get 3 mm perfection strips, I highly recommend using it (those strips are very helpful for rolling evenly)
Don’t be tempted to add flour to the dough or sprinkle too much flour on the work surface, as this will make the biscuits tough
Try not to roll the biscuits too thick, or it will take longer to bake and won’t be as crispy
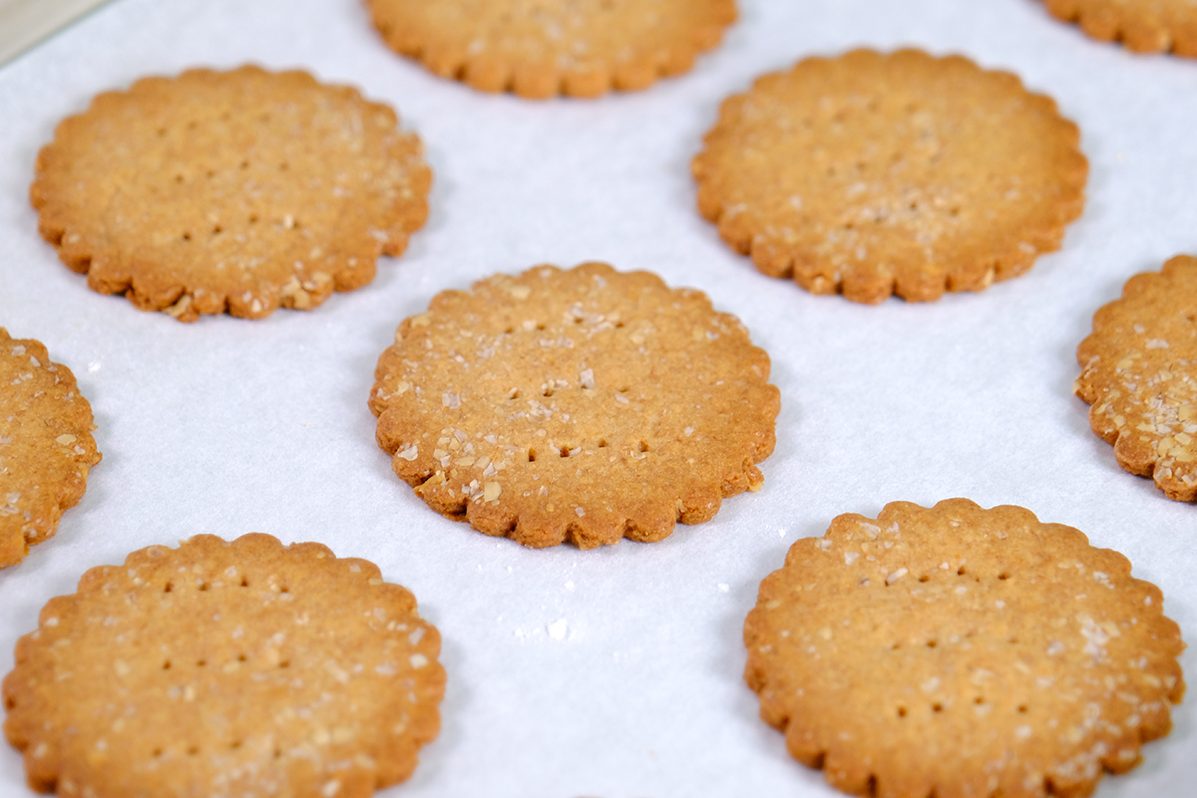
Don’t forget to lightly prick each biscuit with a fork before baking; this allows steam to escape and helps them bake evenly, staying flat and crisp
Bake in a preheated oven until they turn light golden brown (don’t bake it for too long or it will burn and taste bitter) Rotate the pan halfway through baking so the colour of the biscuits bakes evenly
Once they’re fully cooled, pop them into an airtight container to keep them nice and crisp
Never store warm biscuits, as they can become mushy and may develop mold
🪴 Ingredients 65 g Unsalted Butter 25 g Caster Sugar 1 tbs Honey 25 g Eggs 60 g All-Purpose Flour 60 g Whole Wheat Flour (100% Stone Ground) Less than 1/2 tsp Baking Powder (Double Acting) A pinch Salt 8 g Oat Bran * Extra Oat Bran (for sprinkle)
🪴 Instructions
Cream the Unsalted Butter and Caster Sugar for about 3 minutes, or until the mixture is pale, light, and fluffy
Add the Honey and mix thoroughly
Addthe Eggs and beat again until fully combined (this creamed mixture should be soft and smooth)
Add the sifted dry ingredients(All -Purpose Flour, Whole Wheat Flour, Baking Powder, Salt, Oat Bran) Don’t throw away the Bran left in the sifter, return it to the bowl and mix in gently Mix until just combined
Once the mixture comes together into a rough dough, use your hands to knead it lightly until it’s uniform (be gentle, over-kneading can make the biscuits tough)
Roll the dough Place the dough between two sheets of Parchment Paper and roll it out to about 3 mm thickness (use perfection strips if available); Sprinkle a little extra Oat Bran while rolling the dough Add a little flour (NOT too much) to the surface of the parchment paper, cutter or rolling pin as needed to prevent sticking (If you don’t have perfection strips, try not to roll it too thick, or the biscuits will take longer to bake and won’t be as crispy)
Then using a 6 cm fluted or plain cutter, cut the dough into rounds
Use the bottom parchment sheet to help lift the cut dough; this keeps the pieces from stretching or breaking; place them into prepared baking trays If you have any dough scraps, collect them, press them gently into a ball, and reroll to cut again
Lightly prick each biscuit with a fork 6 tiny holes before baking (this allows steam to escape and helps them bake evenly, staying flat and crisp)
Bake in a preheated oven at 180°C/ 160°C fan) / Gas Mark 4 for 13-15 minutes, until they turn light golden brown Rotate the pan halfway through baking so the colour of the biscuits bakes evenly
Once done, let the biscuits rest in the pan for a few minutes, then transfer them to a wire rack to cool completely
When they’re fully cooled, place the biscuits in an airtight container to keep them nice and crisp
NOTES
Never store warm biscuits, as they can become mushy and may develop mold
These Biscuits stay fresh for up to 2 weeks at room temperature or around 3 weeks in the fridge
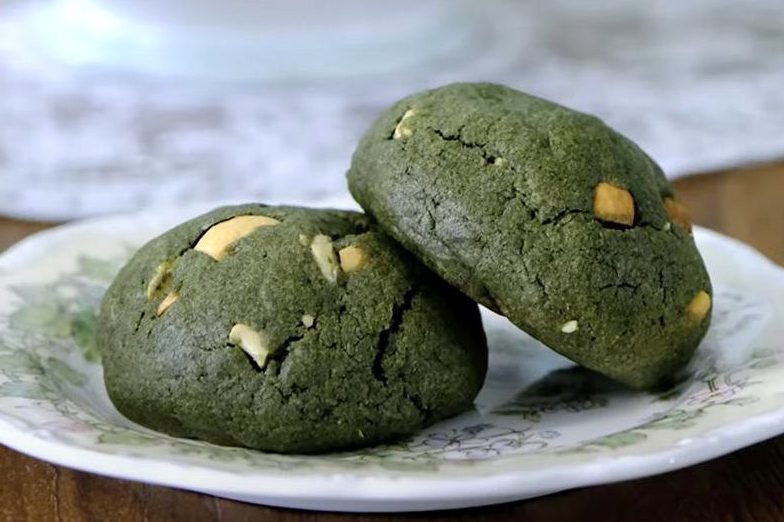
I have been craving Mugwort Cookies lately. I tried it for the first time when I was in Korea; It was SO GOOD !!
And I will make the cookies BIG and FAT 🤣 It will be chewy in the middle, so yummy …🤤 can’t wait to eat
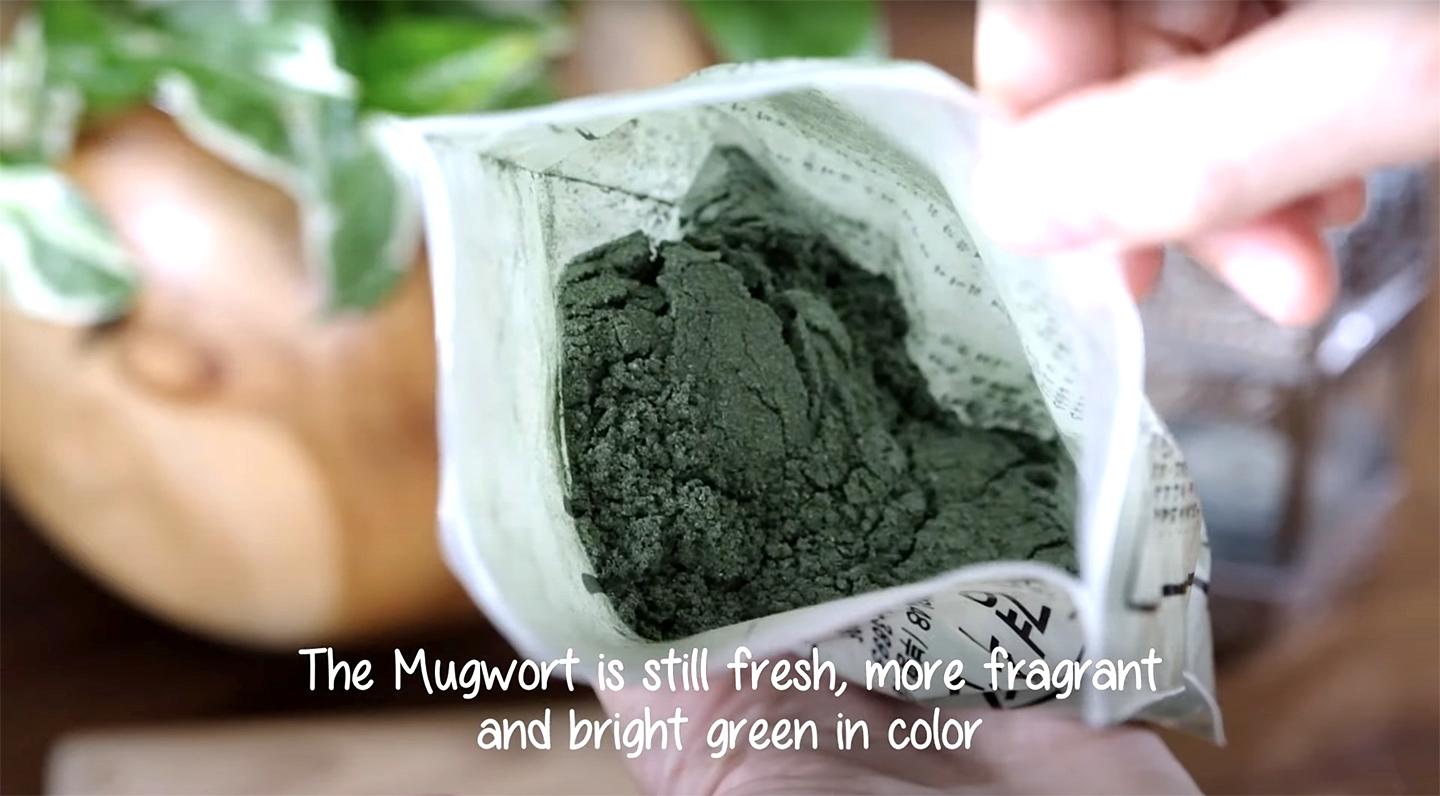
Mugwort Powder is much cheaper in Korea, the colour also more bright and fragrant. So if you are in Korea for holiday or visit some friends and keen to buy Mugwort Powder, I highly recommend it.
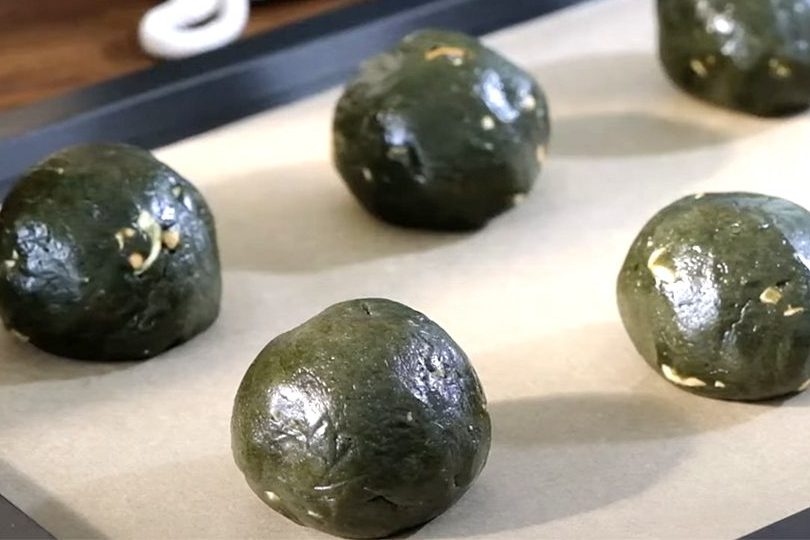
Beautiful Jade Colour Dough 😘
Some of you might wondering “why use 2 kinds of sugar and 2 kinds of leavening agent?”
Brown sugar helps the cookies become thicker when combined with the white sugar; And the addition of the Baking Powder along with the Baking Soda also helps in this process so the cookies rise taller.
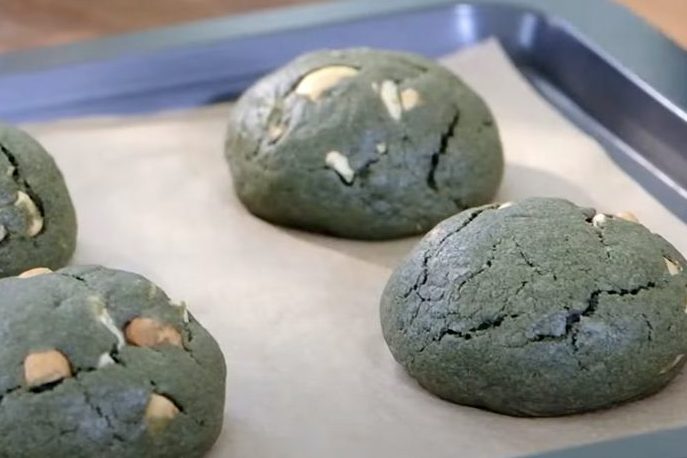
BIG… FAT… CHEWY COOKIE…. And an earthy fragrance of the Mugwort … I’m sure that you will fall in love with it!
I hope you try to make it … and once you try it, .. you will probably will addicted to it ! 😊
WATCH HOW TO MAKE “CHEWY KOREAN MUGWORT COOKIES”
RECIPE
CHEWY KOREAN MUGWORT COOKIES Yield: 6 Cookies
🌿 Ingredients 75 g Unsalted Butter (room temp.) 50 g Brown Sugar 35 g Caster Sugar 1/8 tsp Salt 35 g Eggs 90 g All-Purpose Flour 45 g Cake Flour 15 g Mugwort Powder 3 g Corn Starch 1/4 + 1/8 tsp Baking Powder 1/8 + 1/16 tsp Baking Soda 50 g Cashew Nuts (toasted) 20 g White Chocolate Button/ Chips
🌿 Instructions
Roast Cashew Nuts in 200°C/ 180°C fan/ gas 6 for 10 minutes. Let it rest until cool down a bit. Crush the nuts into small pieces, set aside.
In a medium bowl, combine Unsalted Butter, Brown Sugar, White Sugar and Salt.
Using a silicone spatula, cream the butter and sugar together (rubbing the sides of the bowl). This process will lends structure to the cookie so they won’t crumble apart.
As soon as you see the smooth creamy consistency, you can add in the Eggs. Mix it really well until completely mixed.
Then sift in all the dry ingredients (All-Purpose Flour, Cake Flour, Mugwort Powder, Corn Starch, Baking Powder and Baking Soda). Mix it really well.
Once the flour blended into the dough, pour in the toasted Cashew Nuts and White Chocolate Button/ Chips, mix until just combined.
Divide the dough into 6 equal portions, round it into a ball.
Place them on baking sheet lined with parchment paper (make sure that you give some space in between the cookies (it will spread a little bit) so it won’t stick one another.
Bake them in the preheated 190°C/ 170°C fan/ gas 5 for 15-18 Minutes.
Once it’s done, let it rest in the pan for about 5 minutes, then transfer it to a cooling rack to cool completely.
🌿 Notes Keep Mugwort Cookies (in an airtight container) at room temperature for 2- 3 days or 1 months in the refrigerator. Mugwort Cookies retain their quality when stored in the freezer for 3 months.
What kind of cookies do you usually make at Christmas time?
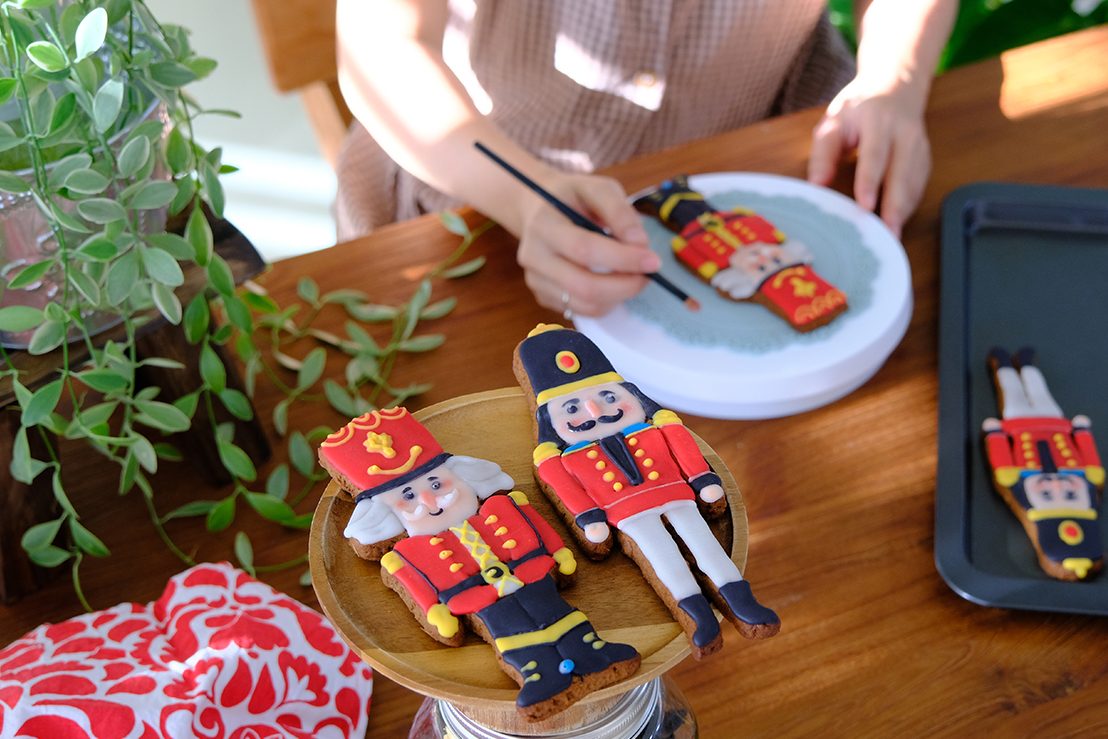
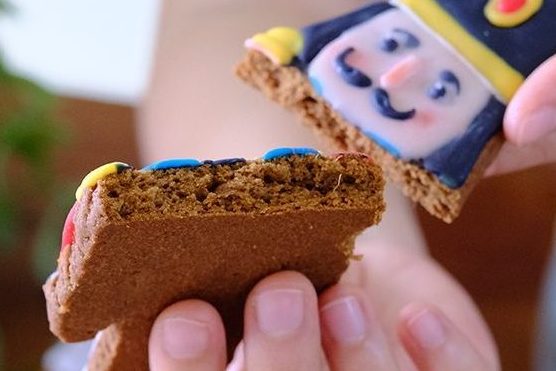
AClassic Gingerbread Cookies are soft and chewy in the centre but crisp on the edges, and warmly spiced; It’s been my go-to tried recipe for over a decade. It’s moist, chewy, ginger-ey and not too sweet; and the consistency of Royal Icing is just perfect and easy to make.
In my family, Gingerbread cookies are well loved for their taste and texture, especially with their intoxicating mix of spices and chewy textures.
WHY I LOVE NUTCRACKER ?
I have been dancing since I was 4 years old.
Every year after Thanksgiving, ballet companies and dance schools all over the world perform this holiday tradition. Many dancers have performed this ballet since they were as young as 3 years old.
The Nutcracker always a reminder that my childhood dreams of dancing and being happy have come true, and it will always have a special place in my heart.
The fresh ginger is really what makes these cookies so amazing. I would definitely recommend putting in grated fresh ginger instead of ginger powder for a spicy kick.
Soft chewy ginger cookies packed with ginger, molasses, and cinnamon spice is the most warm and cozy cookie ever.
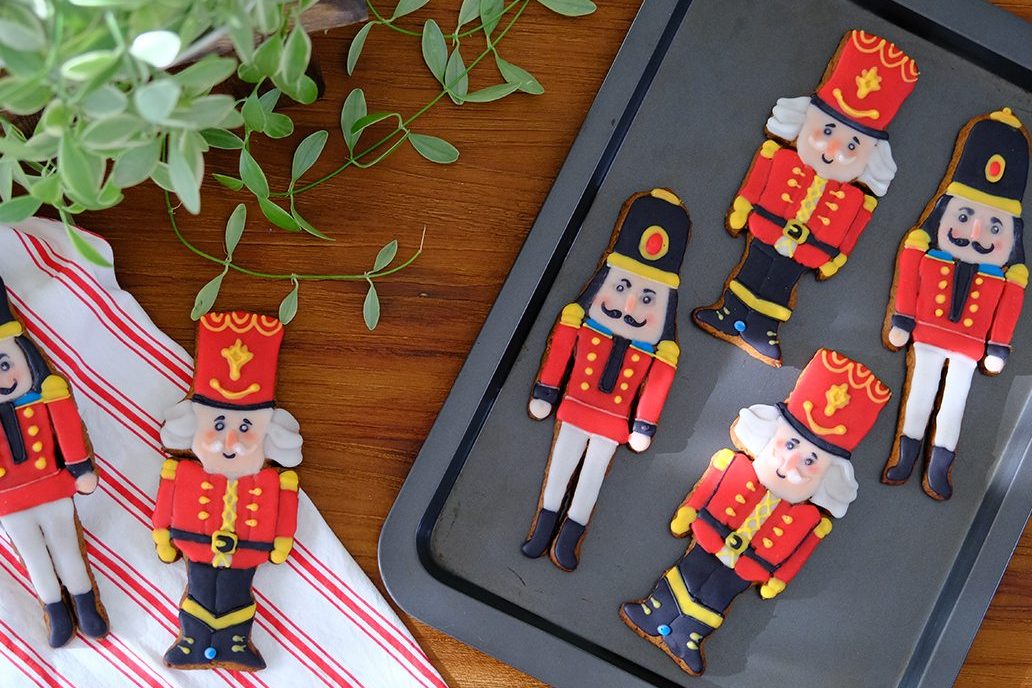
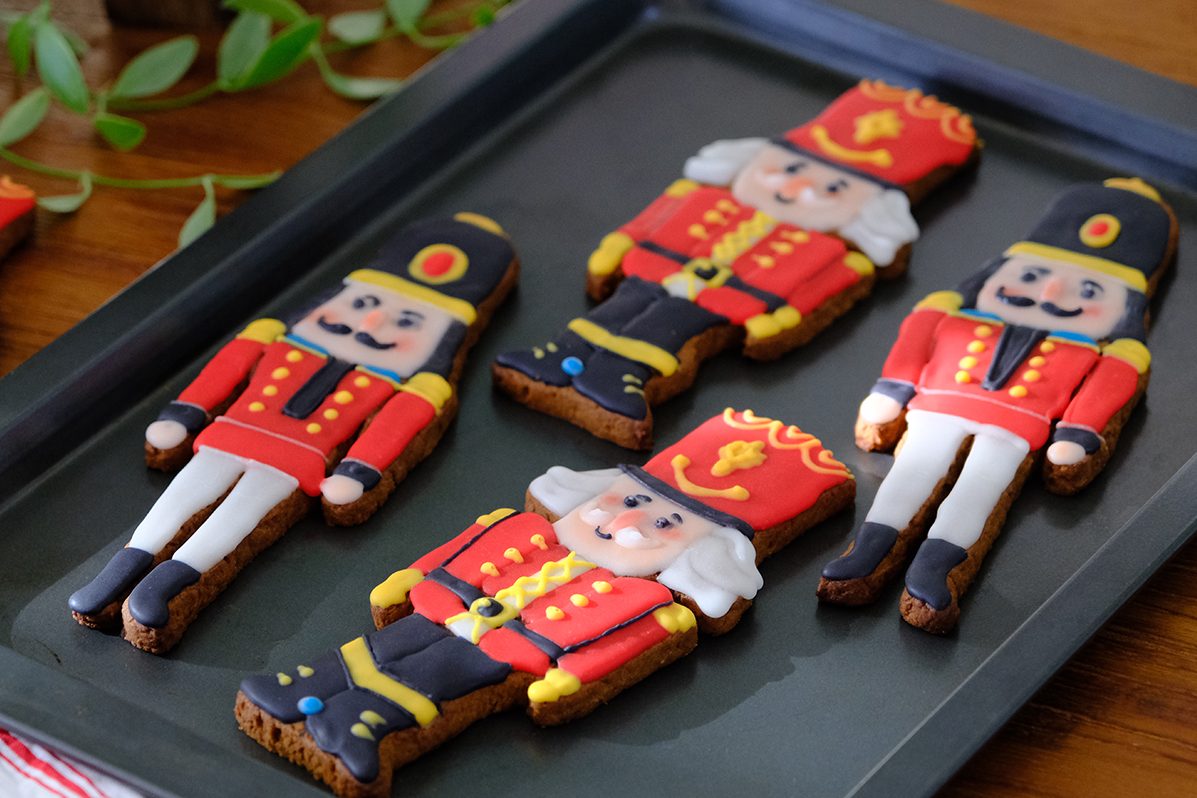
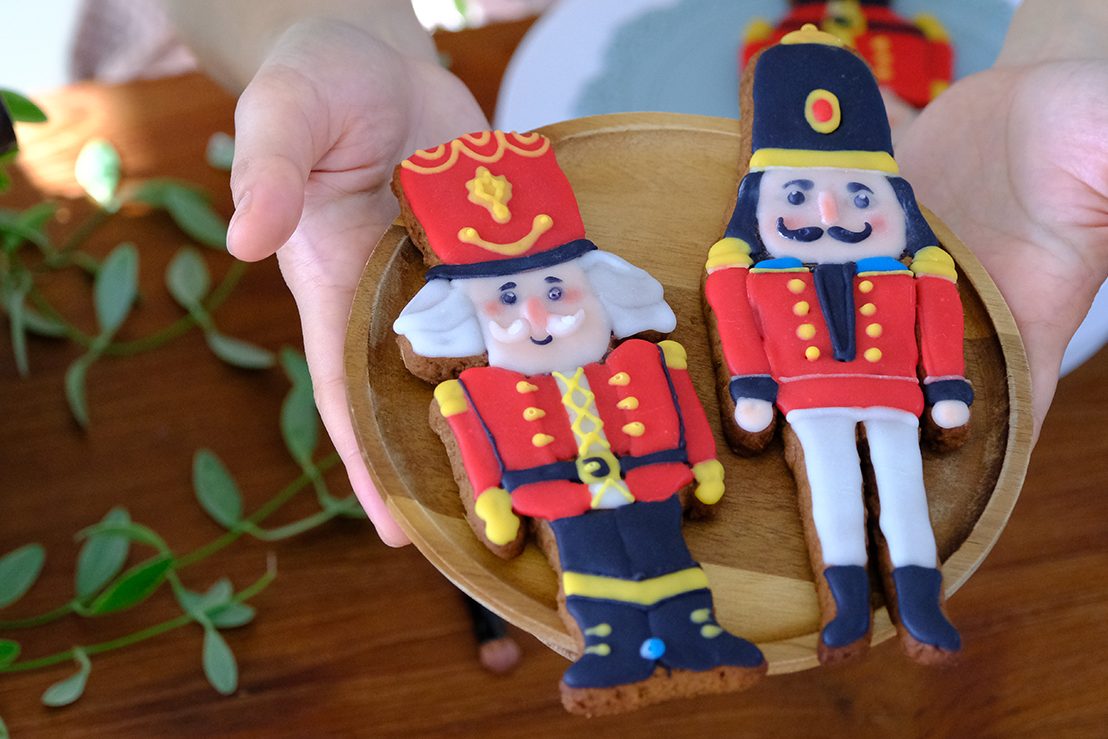
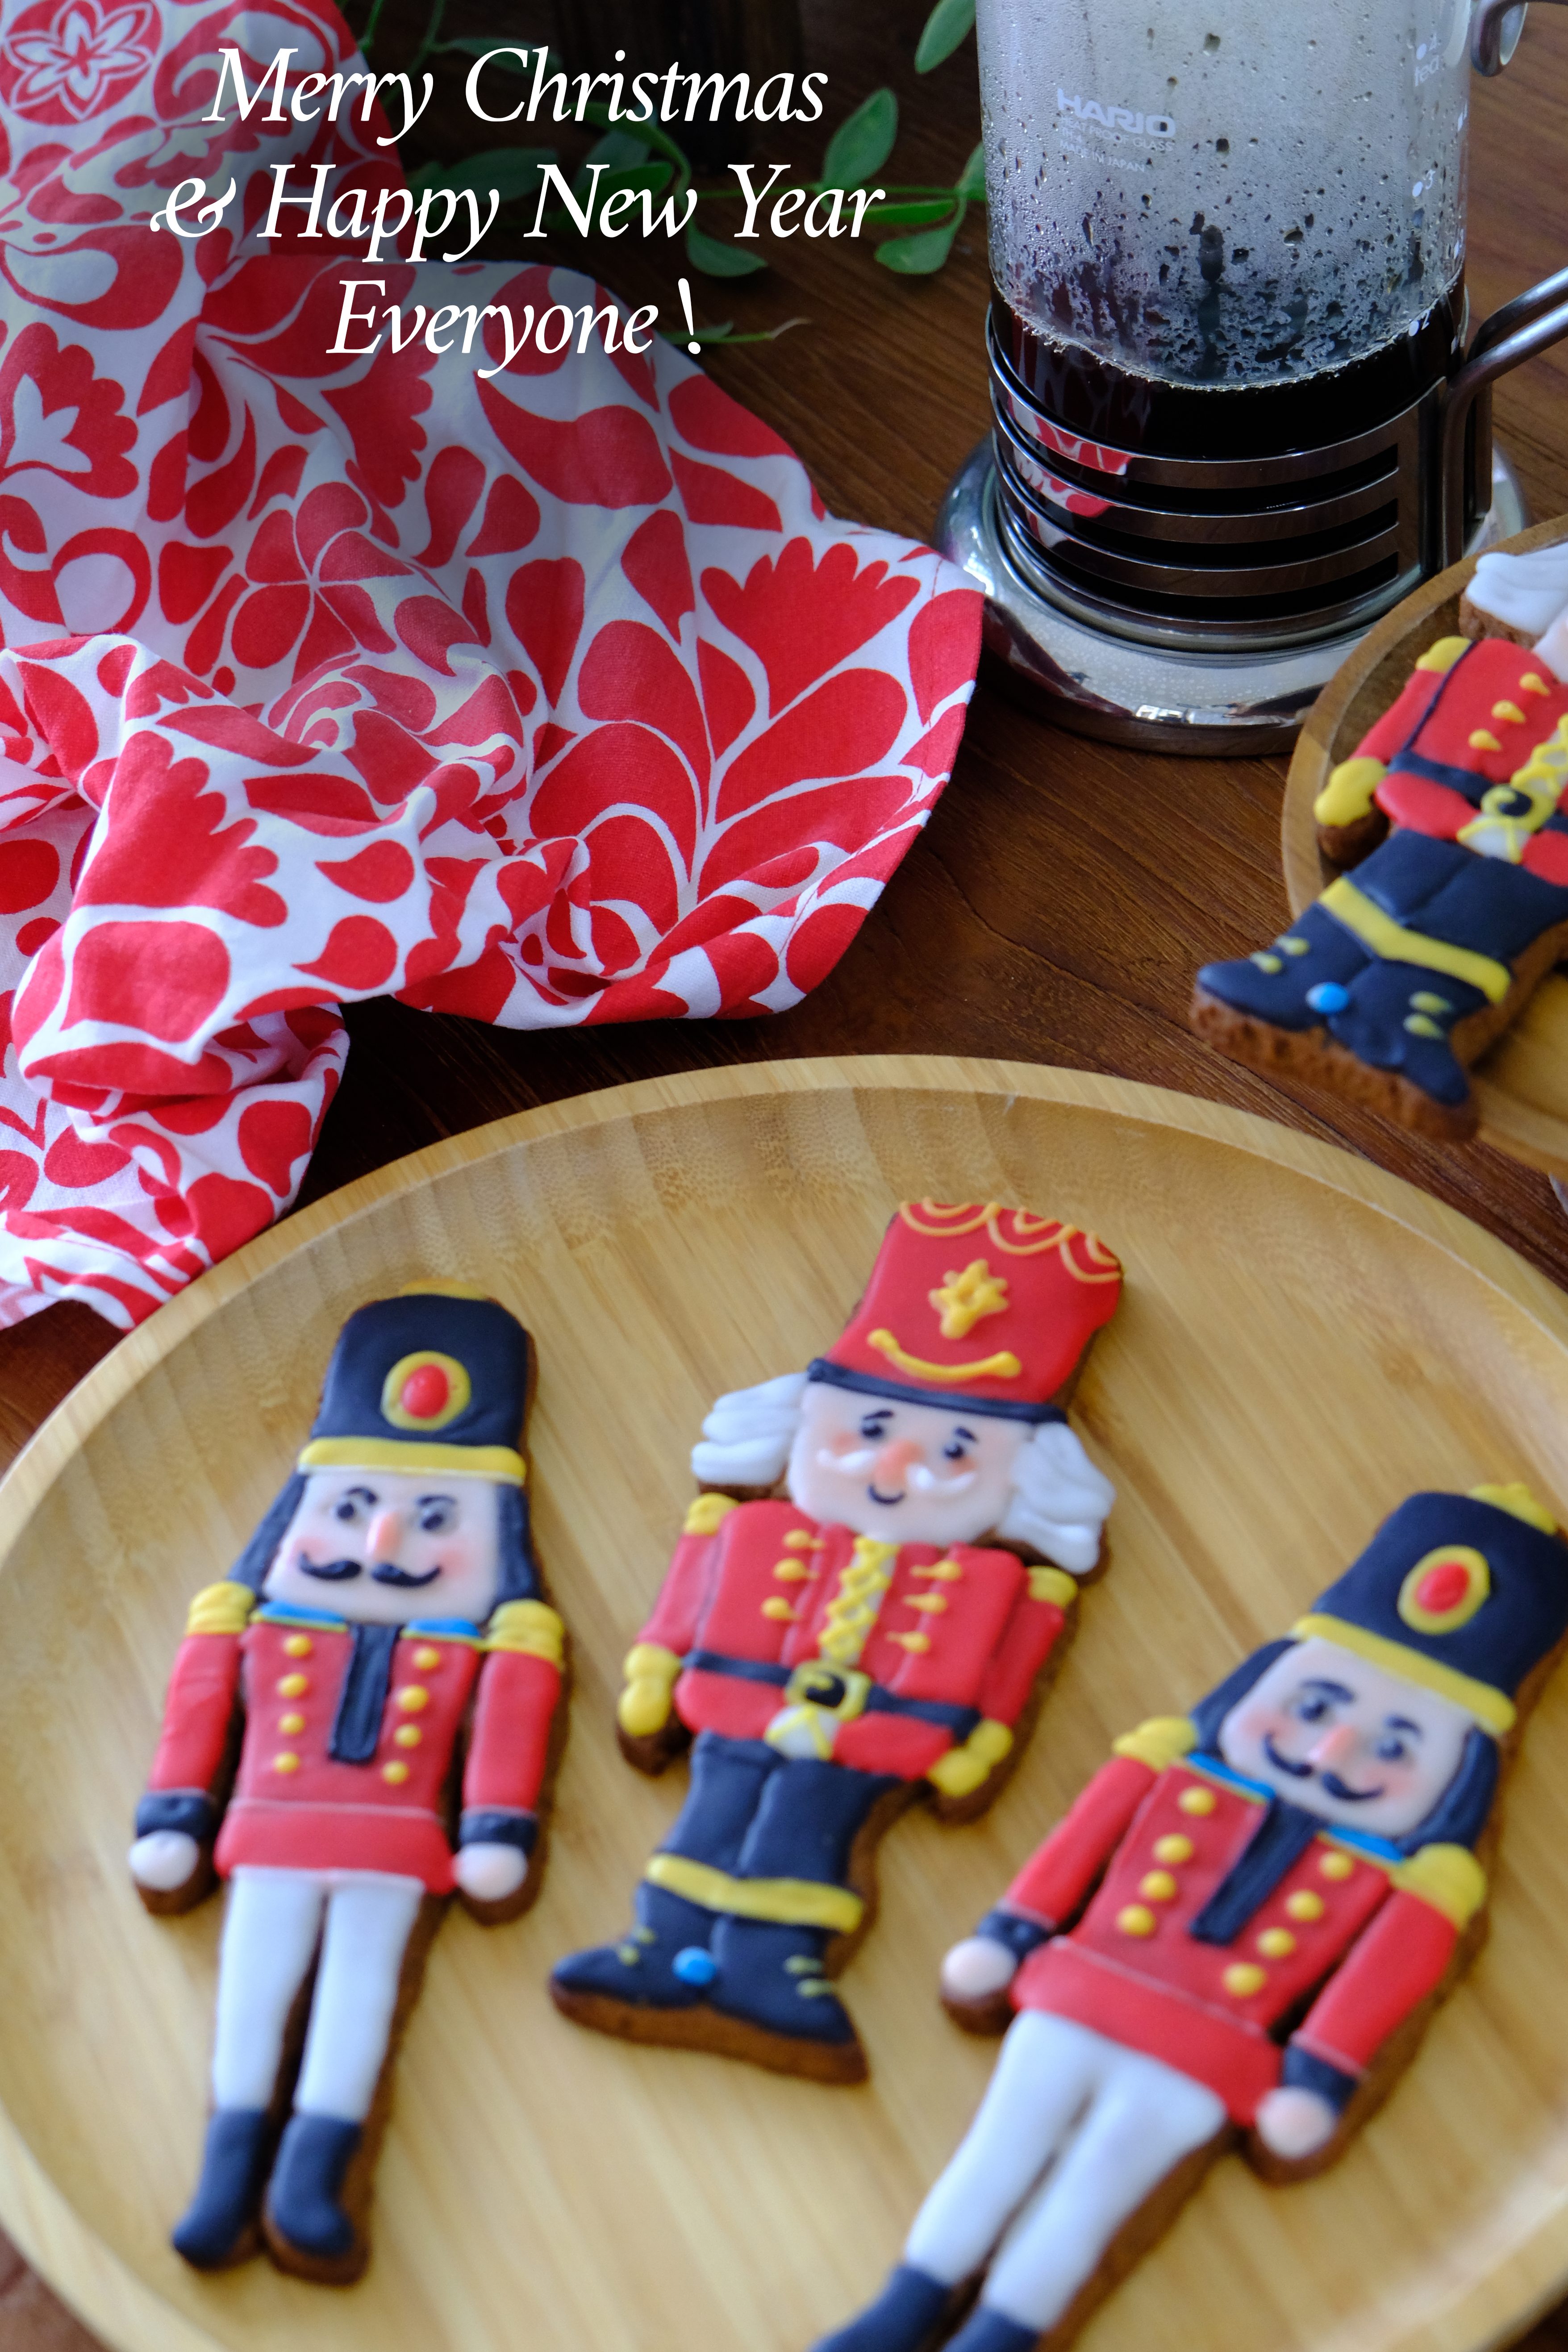
Decorate with royal icing to complete the look on these festive holiday cookies.
These cookies were pretty and “heavenly”
My cute “Dog dog” 🥰
“Dog dog” also LOVE it so much 🤣
But more important than all of that, these gingerbread cookies are delicious!
With Christmas just a few weeks away, I’m ready to turn up the holiday cheer around here, and making this gingerbread cookie recipe seems like a great place to start.
They’re soft, warmly spiced, and richly flavored with molasses and brown sugar
To me, they’re the perfect holiday treat, especially with a mug of hot coffee to drink I hope you love them too.
LOVE YOU ALL !! ❤️
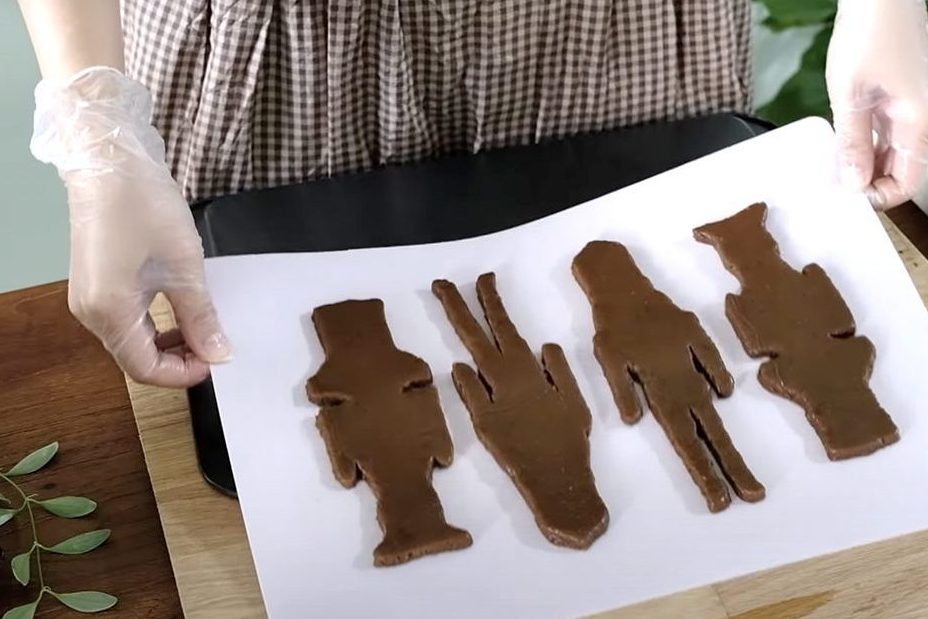
GINGERBREAD NUTCRACKER COOKIES Yield: 8 Cookies (17 cm x 7 cm)
🌿 Gingerbread Cookie Dough 40 g Water 105 g Brown Sugar 1½ tbs Molasses 1½ tbs Honey 1½ tbs Cinnamon Powder 1½ tbs Fresh Ginger (grated) 1/2 tsp Ground Cloves 130 g Salted Butter 1/2 tsp Baking Soda 280 g All-Purpose Flour
🌿 Royal Icing 300 g Icing Sugar 5 tsp Milk 5 tsp Corn Syrup
🌿 Decorating Food Gel Colouring (red, black, yellow, blue, beige) Black Edible Pen Food Colouring Powder (beige, pink)
INSTRUCTIONS 🌿 Gingerbread Cookie Dough
In a heavy saucepan mix the Water, Brown Sugar, Molasses, Honey, Cinnamon Powder, Fresh Ginger (grated) and Ground Cloves. Stir well and then bring it to the boil.
Once boiled, pour the mixture to the heat proof bowl, stir in the diced Salted Butter; stir until all the butter melted.
Add the Baking Soda, mix well; Allow to cool until just slightly warm.
Once the mixture has cooled, pour in the All-Purpose Flour and mix until it forms a wet and sticky dough.
Wrap the dough in cling-film and chill for a couple hours or overnight.
Knead the chilled dough briefly and then roll the dough on a piece of baking paper to an even thickness (5 mm). *Notes: I usually roll and cut the dough on parchment paper that’s fits exactly the bottom of the pan so I don’t have to move the cut cookies.
Lay the mould on top and cut out the cookies (tidy up the edges).
Chill the cut cookies in the refrigerator for at least 30 minutes before baking (chilled cookie dough will hold its shape better because it tends not to spread too much).
Bake the chilled cookies in the preheated oven 200°C/ 180°C fan/ Gas 6 for 12-15 Minutes (rotating the pan halfway through baking).
Once it’s done, let it cool slightly in the pan for 3 minutes; and then carefully transfer them onto a wire rack to cool completely.
🌿 Royal Icing Simply combine all the ingredient, mix well. Divide and colour it as needed.
🌿 Decorating Kindly follow video instructions
🌿 Notes
Cookie dough or uncooked cookies can be wrapped in cling-film and store in the freezer for up to 3 months.
Cookies baked from frozen hold better in shape as they don’t tend to spread as much as chilled ones.
Undecorated baked gingerbread cookies will keep for up to 2 month at room temperature, if kept in an airtight container or cookie jar.
This unique Taiwanese Pineapple Cakes no longer makes us bored with the standard rectangular shape; And I’m sure that your kids will love it too
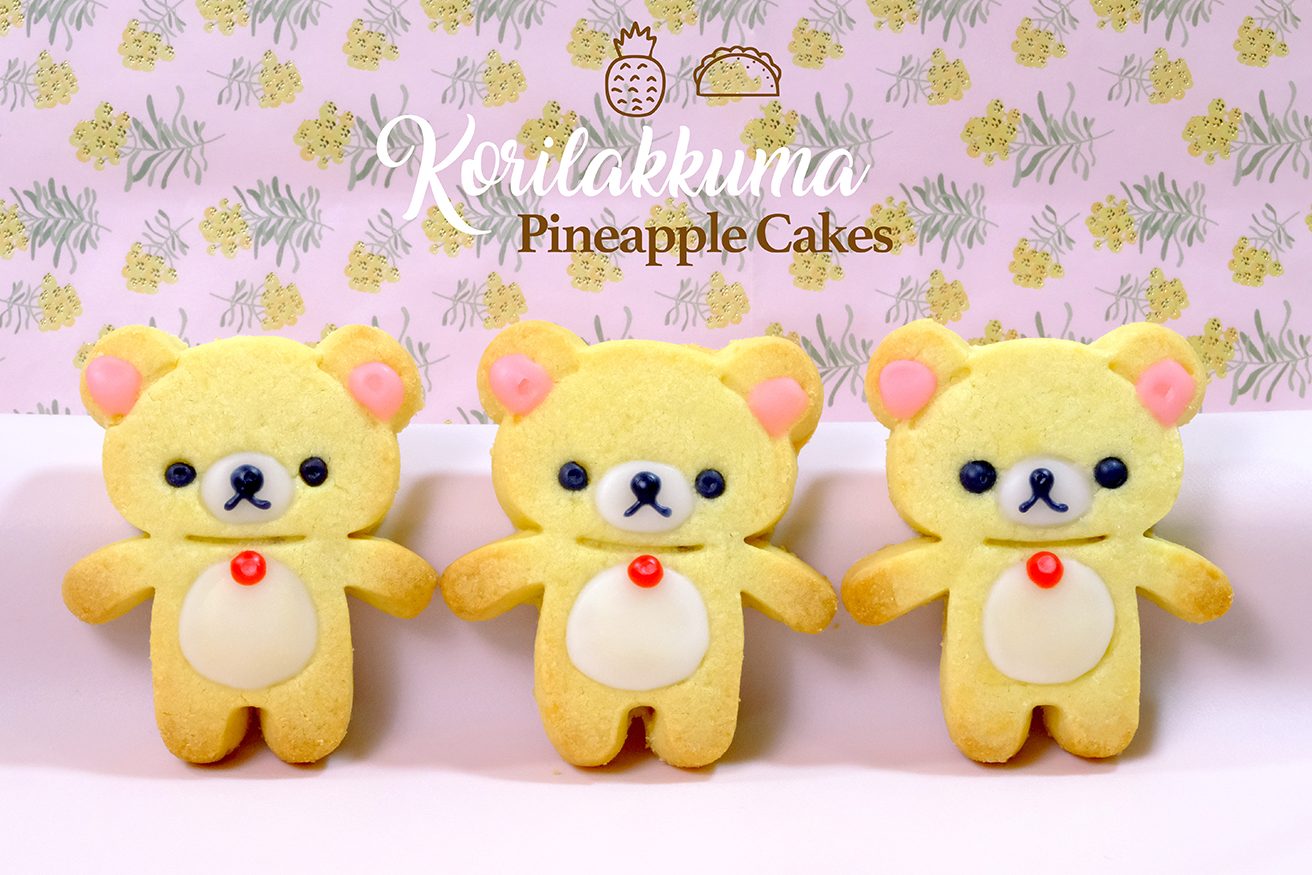
Hi Everyone, today I am making these cute “Korilakkuma Taiwanese Pineapple Cakes”. Taiwanese Pineapple Cakes actually almost similar to other Asian Pineapple Cakes; but typically larger than the Singaporean / Malaysian Pineapple Cakes.
They are made with butter pastry crust filled with thick pineapple jam. The cakes are baked in an individual mould, usually in square or rectangle mould.
Taiwanese style (left) ~ Singapore/ Malaysia style (right)
I was told by several Taiwanese-style bakeries that the traditional kind of Taiwanese pineapple cakes are made of pineapple jam that is made of winter melon and maltose syrup so that the jam is extra sweet, heavy and sticky.
Pineapple Jam
However, due to the change of time, most consumers are becoming more health conscious these days and prefer the less sweet and sticky version of pineapple cakes (I personally don’t like food that overly sweet). For this reason, in this recipe I would like to stick to my regular pineapple jam with NO winter melon and maltose syrup.
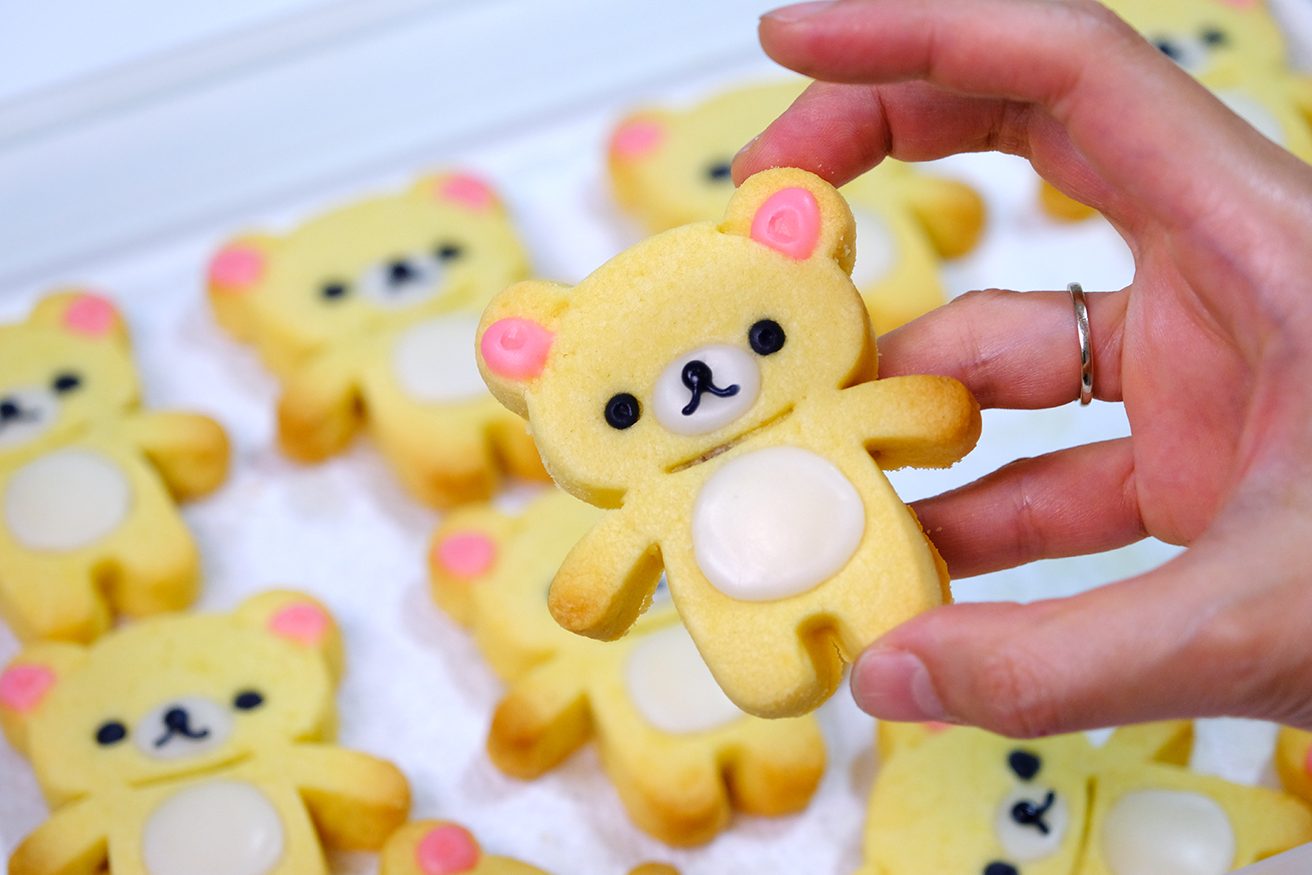
And I always think, how to make these Pineapple Cakes look more attractive? This cute Rilakkuma cookie cutter with facial stamp really make life easier; No longer makes us bored with the standard rectangular shape and I’m sure that your kids will love it too.
The crust to filling proportion is spot-on; thin crust with the right amount of filling.
And people often ask, what is the tips so that the crust is tender? As soon as the bottom and edges golden brown, take them out from the oven. Let it stay in the pan for about 5 minutes; Don’t wait it to cool, put in the sealed box while still hot (place kitchen paper on the bottom and the top to absorb the excess moisture).
This way, the cakes won’t be hardened and the crust will be tender. These Pineapple Cakes will keep well for up to 3 months in the fridge, in an airtight container.
Some people use chocolate for the details; I prefer royal icing because the chocolate that comes out of the fridge will “sweat”, melt easily, it definitely will ruin the look of your Korilakkuma.
Look how cute they are ☺️
Pineapple cakes make a great Chinese New Year gift for family and friends or a tasty birthday gift for loved ones!
The filling is just perfect not too sweet, they are such an addictive tea snack.
Tender buttery crust with a sweet and tang of homemade pineapple filling inside. The crust is crumbly and melt-in-the-mouth and the pineapple jam is just perfectly thick but not tough.
I hope this korilakkuma cake can make everyone smile 🙃❤️.
Love you All 🥰
KORILAKKUMA PINEAPPLE CAKES Yield: 40 pieces Active Time: 3 hours Total Time: 4 hours
🌿 Pineapple Filling 1000 g Pineapple (after peeled) 200 g Granulated Sugar 10 ml Lemon Juice 1/8 tsp Salt
🌿 Crust Dough 340 g Salted Butter (soft) 100 g Icing Sugar 85 g Egg Yolks 75 g Condensed Milk 530 g Cake Flour 1/2 tsp Salt
🌿 Royal Icing 130 g Icing Sugar (sifted) 4 tsp Lemon Juice 30 g Corn Syrup
Cut pineapple in half (the lower part of the core is a bit hard, so you need to remove it). 1000 g Pineapple (after peeled)
Shred pineapple into small pieces (about 1×1 cm), cut he core thinly.
Place the shredded pineapples along with the juice into a non-stick pan.
Pour in the sugar along with lemon juice and salt; and then bring it to a boil. 200 g Granulated Sugar; 10 ml Lemon Juice; 1/8 tsp Salt There’s no need to cover with a lid, what you need to do now is to evaporate all the liquid. Cook over high heat (as long as there is a water in a pot, it will not burn the bottom).
Once the pineapple juice almost completely dry, lower the heat to medium low; And continue cooking until it turn into dark brown caramel colour, take it off from the heat.
When the filling is cooled completely, it will become sticky and a bit hard; make it easier to wrap. Divide them into small portions; 10 grams each; Roll each portion into an oval shape, flatten it; And cover them with a cling wrap to prevent from drying out.
🌿 Crust Dough
In a large bowl, using whisk or mixer; beat the soft butter for a few seconds. 340 g Salted Butter (soft)
Add in the icing sugar and continue beat over high speed until the mixture is pale and fluffy (about 5 minutes). 100 g Icing Sugar
Mix in the egg yolks (this yolks is going to give extra flaky texture). 85 g Egg Yolks
Pour in the condensed milk, mix it really well. 75 g Condensed Milk
Sift in the flour along with the salt; mix until well combined. 530 g Cake Flour; 1/2 tsp Salt You don’t want to over-mix it, you can use whisk or mixer first (low speed) and then using spatula to make sure all is well combined and there’s no butter mixture left at the bottom of the bowl.
Cover the bowl with a cling wrap and let the dough rest for half hour.
After 30 minutes, the dough is ready. Divide it into small pieces; 30 grams each. Roll each piece into a smooth ball. Cover the balls with a cling wrap to prevent from drying out.
🌿 Moulding the Cake
Take 1 piece of the crust dough, roll into a cylinder shape;
Press down in the middle and place the filling in the centre; Wrap it up
Then over a piece of parchment paper, put the filled dough inside the cutter with the smooth side facing down.
Using your palm; press down while spreading the dough, filling in the blanks (this step will be time consuming especially hands part, so be patient).
Release the cake from the cutter with a smooth part facing up (baking sheet lined with a parchment paper); And carefully; press the facial stamp on top of each cake.
Store the cakes in the fridge for about 30 min before baking so it doesn’t spread too much
Bake them in the preheated 170°C oven for about 18-20 minutes (rotate the pan halfway through baking).
As soon as the bottom and edges golden brown, take them out. Let the cakes stay in the pan for 5 minutes; Don’t wait it to cool, put in the sealed box while still hot (place kitchen paper on the bottom and the top to absorb the excess moisture). This way, the Pineapple Cake won’t be hardened and the crust will be tender.
On the next day, you can continue with the details.
🌿 Royal Icing Simply combine the sifted icing sugar, lemon juice and Corn Syrup. 130 g Icing Sugar (sifted); 4 tsp Lemon Juice; 30 g Corn Syrup *If you feel the consistency is too thick, you can add a little bit of boiling water; on the other hand if it’s too thin; add more icing sugar.
🌿 Notes
These Pineapple Cakes will keep well for up to 3 months in the fridge, in an airtight container.
For the details Some people use chocolate, I prefer royal icing because the chocolate that comes out of the fridge will “sweat”, melt easily, it definitely will ruin the look of your Korilakkuma. Let the first layer of the icing sets hard before you add another details on top. If you are in humid conditions, you can turn on the air conditioner to speed up the drying process.
Hi Everyone, how is your Christmas preparation? I usually start making Christmas treats 3 days in advance … This year, I decided to make Gingerbread Cookies on the first day; Fruit Tea Bread, Triple Chocolate Peppermint Donuts and Ginger Milk Tea on the second day.
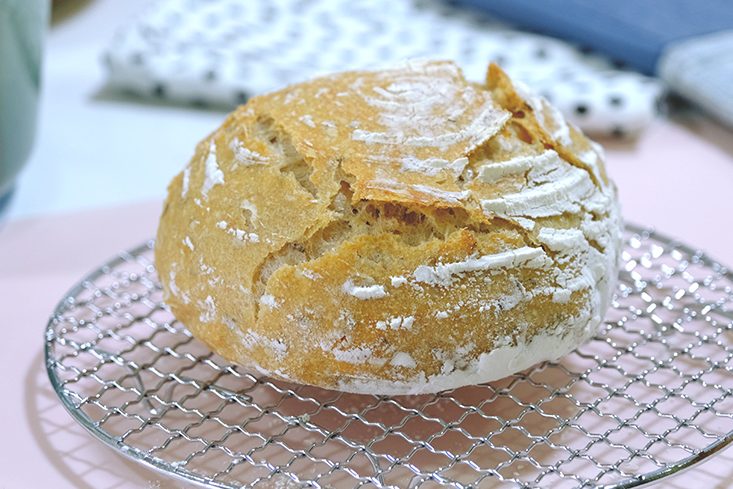
I also will share with you my favorite NO KNEAD Bread in the video
GINGER COOKIES WITH FRESH GINGER CAN'T BE BEAT FOR FLAVOUR
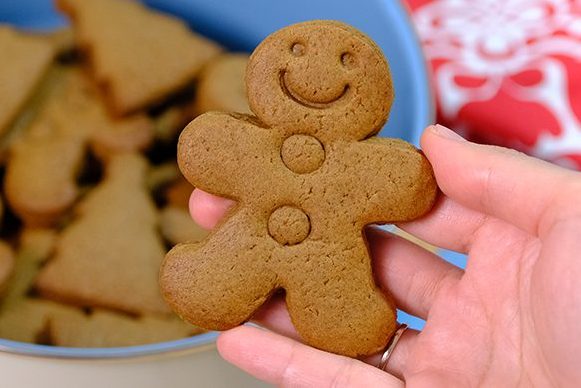
Nothing makes me feel more like Christmas is here than a batch of my favourite Gingerbread Cookies;
Hi Everyone! 😬
Soft in the centers, crisp on the edges, and perfectly spiced.
This is my trusty gingerbread recipe that I have used over the years and let me tell you it never disappoints.
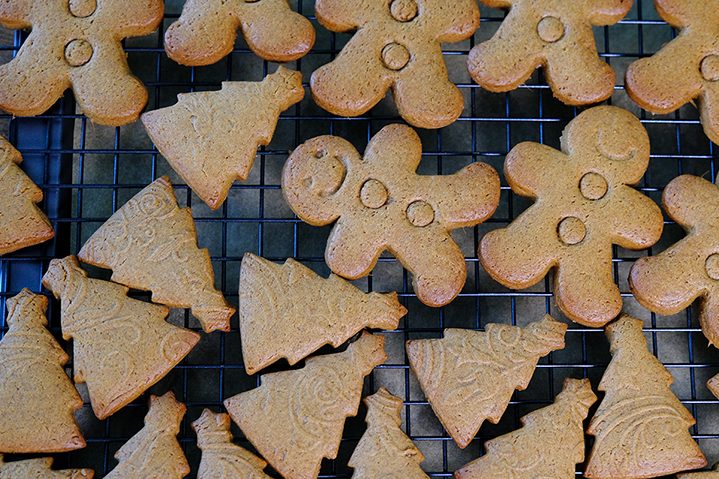
An embossed rolling pin makes even simple Christmas tree shape cookies look elegant
To use one, you’ll need to roll the dough out with a standard rolling pin first, then use the embossing rolling pin to leave pretty patterns. Do this before cutting the cookies into shapes.
The cookie dough or uncooked cookies can be wrapped in cling-film and stored in the freezer for up to 3 months
Always bake equally sized cookies together to make sure they cook in the same time If you mix different sizes, the smaller ones are already cooked when the larger ones are still raw in the middle.
Baked Gingerbread Cookies will keep for up to 3 months if kept in airtight container or cookie jar 😚
How you decorate your adorable Gingerbread Cookies is completely up to you! If you want to get extra creative you can pipe some coloured icing on top of your cookies and give them a bit of character!
AS WE ARE ENJOYING CLASSIC CHRISTMAS FRUITCAKE SINCE CHILDHOOD, I HAD TAKEN A MISSION TO BAKE DIFFERENT KIND OF FRUITCAKE ON THIS CHRISTMAS
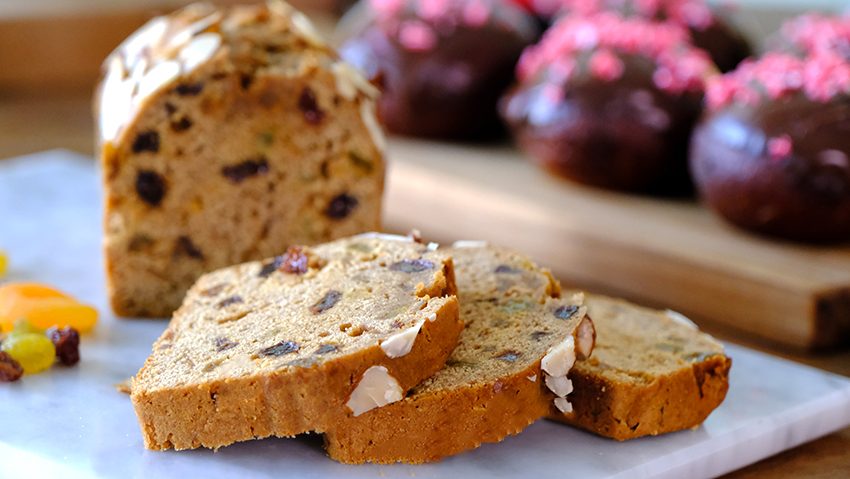
If you like fruit cake but don't have much of a sweet tooth, I highly suggest you try my Fruit Tea Bread recipe.
It’s a beautifully flavoured tea cake; a unique nut free non-alcoholic tea cake aka fruit cake loaded with fruits and raisins.
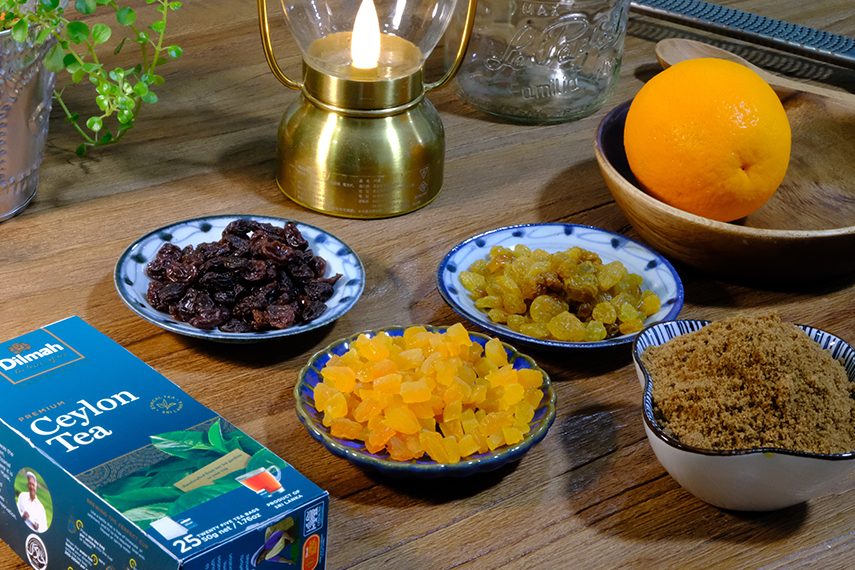
The raisins and dried fruits are soaked in strongly brewed tea overnight to plum them up and next day tea soaked fruits are added in the cake batter along with the tea and some additional spices.
Because the fruit is soaked before baking, it allows the fruit to impart moisture to the bread for days afterwards, keeping it from drying out;
You can use your favourite black tea 😇
And it will stay good for up to a week.
I’m prefer to use Ceylon Tea or Earl Grey, it really works beautifully 😘
CHRISTMAS DONUTS ARE A DELICIOUS AND FUN WAY TO ADD A LITTLE SWEETNESS TO YOUR CHRISTMAS BREAKFAST OF BRUNCH
Have I told you all how much I love chocolate? I mean, who doesn’t – right?
My family also loves donuts – chocolate ones, especially! I don’t make these too often, but they are a nice treat now and then.
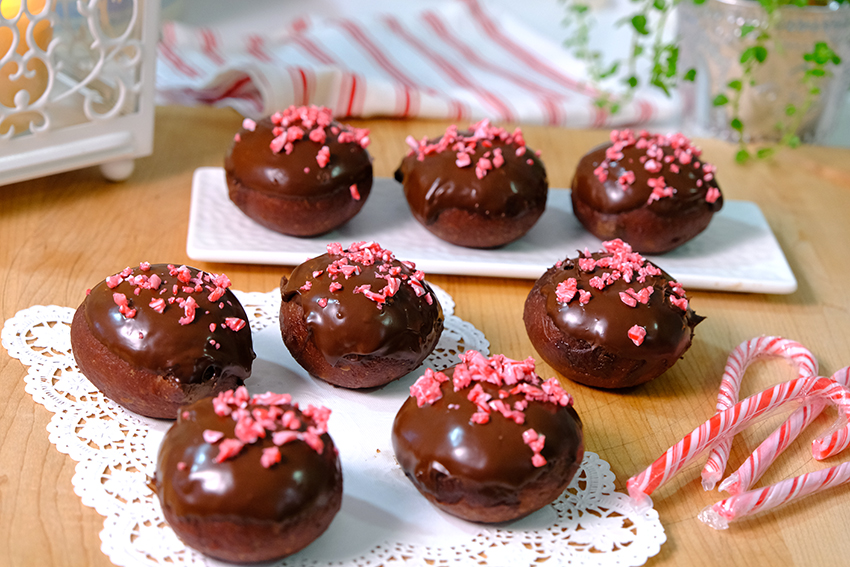
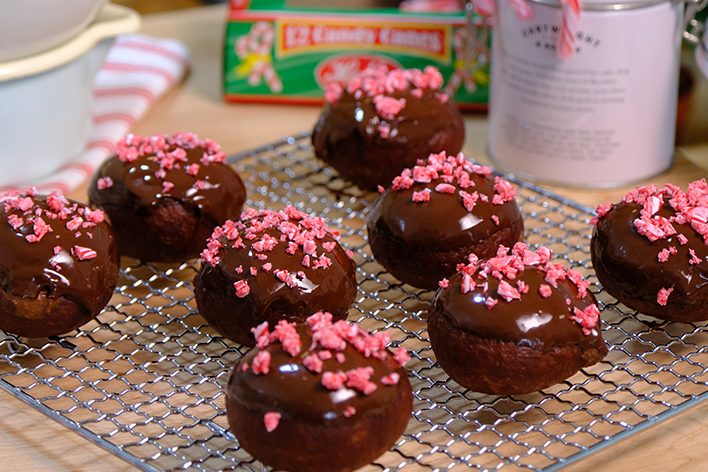
You probably want to try these TripleChocolate Peppermint Donuts; decadent and delicious, these yeast chocolate donuts are heaven in every bite.
Adorable puffy donuts 🙄 I can’t wait to take a bite
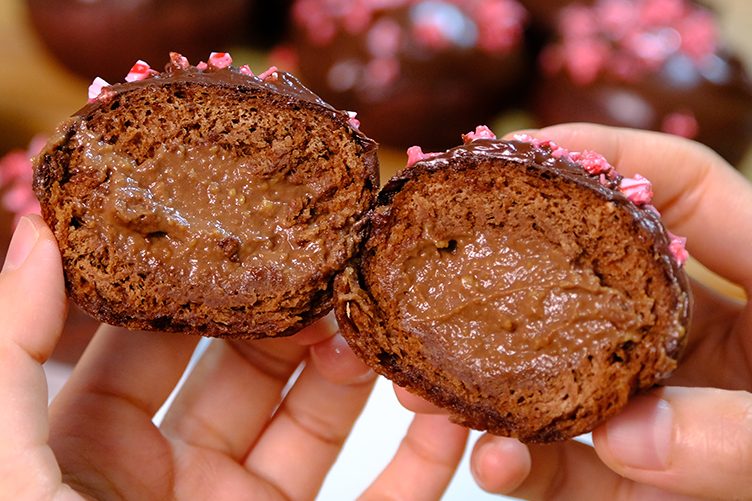
They’re loaded with creamy Chocolate Custard, topped with a silky Dark Chocolate and sprinkled with Peppermint Candy.
Frying Chocolate Donuts can be tricky coz you can’t see the browning colour.
Moist and fluffy, these Triple Chocolate Donuts are perfect for any chocoholic! 🍩🥰
No matter how you decorate and serve them, these Christmas donuts make for a fun and merry holiday treat. I know you’re going to love them These treat that’s sure to please any chocolate lover!
WHAT IS YOUR MOST POPULAR DRINK AT CHRISTMAS?
How about Ginger Milk Tea to warm up the holidays? ☃️☕
This Ginger Tea Latte is perfect for Christmas and winter. It's also a healthy alternative to coffee and tastes so good!
Ginger tea with some spices is a lovely, lightly spicy drink for warming up on cold days.
It’s a light, alcohol-free alternative to a nightcap. It soothes upset stomachs and eases indigestion if you over-indulge this holiday season (don’t we all?) 🤣
I wish you all the best that life can bring, May the true meaning of this season fill our hearts.
And that’s it, to appreciate the love given to us by not taking it for granted. Merry Christmas Everyone… ❤️ 💋
OVERNIGHT NO-KNEAD BREAD Yield: One 15 diameter loaf Active time: 1 Hour Total time: 11 Hours
🌿 Ingredients 200 g All-Purpose Flour (unbleached) 50 Whole Wheat Flour (100% Stone Ground) 1/3 tsp Instant Yeast 1/4 tsp Granulated Sugar 1 tsp Salt 1/2 tbsp Caraway Seeds (optional) 180 g Water (room temperature)
🌿 Instructions
In a large bowl; mix all dry and wet ingredient (make sure salt doesn’t have direct contact with the yeast); Cover the bowl with a plastic wrap and let it sit at room temperature for 8 to 18 hours or until doubled in size and the top of the dough has a lot of air bubbles (time will depend on your room temperature – the cooler the room the longer it will take).
On the next day, roll the dough into a smooth ball, place it in the proofing basket ( has been floured) and let it proof for 1 ½ – 2 hours or until almost double in size (if you lightly press into the dough, it will leave a slight indentation). In the meantime, place 16 cm diameter Cast Iron Pot in the oven, and preheat the oven to 210°C.
Turn the proofed bread upside down into HOT Cast Iron Pot, close the lid and bake in the preheated 210°C oven for 30 minutes.
After 30 minutes, remove the pot lid and continue bake for about 10-20 minutes or until golden brown.
Remove the bread from the pot and let it cool completely on the cooling rack.
🌿 Notes
What’s unique about this recipe is that the bread is baked in a covered pot. You can use either a Cast Iron (can be enameled) Dutch Oven or a Ceramic Pot. The pot needs to be placed in the oven as it preheats so it gets really hot. The idea is that when the bread bakes in the pot you are actually trying to simulate a small brick oven where the steam released from the wet bread dough is trapped inside the pot. This will produce a bread with a crisp golden brown crust and a soft and tender crumb.
If you are not keen to buy Cast Iron, you can also use a shallow pan as a base and a tall round baking pan as a lid. Don’t forget to put both pans inside the oven before you preheat the oven (so it gets really hot).
Store the bread in plastic wrap. Avoid storing bread in damp, airy locations, which can speed up moulding. If you’re not going to eat the loaf in 2-3 days, the best option is to freeze it for later (max. 2 month).
GINGERBREAD COOKIES Yield: 2 Dozen Medium Size Active time: 1 Hour Total time: 3 1/2 Hours
🌿 Ingredients 25 g Water 70 g Brown Sugar 1 tbsp Molasses 1 tbsp Maple Syrup/ Honey 1 tbsp Cinnamon Powder 1 tbsp Fresh Ginger (grated) 1/3 tsp Ground Cloves 85 g Salted Butter 1/3 tsp Baking Soda 185 g All-Purpose Flour
🌿 Instructions
In a medium saucepan, combine the Water, Brown Sugar, Molasses, Cinnamon Powder, Fresh Ginger and Ground Cloves. Bring the mixture to a boil. 25 g Water; 70 g Brown Sugar; 1 tbsp Molasses; 1 tbsp Maple Syrup/ Honey; 1 tbsp Cinnamon Powder; 1 tbsp Fresh Ginger (grated); 1/3 tsp Ground Cloves.
Once boiled, remove from the heat then stir in the Salted Butter, mix well. 85 g Salted Butter Add in Baking Soda and mix. 1/3 tsp Baking Soda
Allow to cool until just slightly warm; then pour in the All-Purpose Flour. Mix until it forms a wet and sticky dough. 185 g All-Purpose Flour
Wrap the dough in Cling-Film and chill for at least 2 hours.
After 2 hours, place the dough in between a pair of Marzipan Spacers and roll it out to an even thickness.
Using your favourite cutter, cut the dough. Place it on the pan (lined with a Parchment Paper).
Chill again for about 30 minutes before baking (chilled cookies hold better in shape as they don’t tend to spread too much).
Bake in the preheated 200°C oven for about 12 minutes (for large size); 8 minutes (for small size). Rotating your pans approximately halfway through the bake time.
Remove cookies from the pan and let it cool completely on the cooling rack.
🌿 Notes
Cookie dough or uncooked cookies can be wrapped in Cling-Film and stored in the freezer for up to 3 months.
Cookies baked from frozen hold better in shape as they don’t tend to spread as much as chilled ones.
Baked Gingerbread Cookies will keep for up to 3 months in an airtight container or cookie jar.
FRUIT TEA BREAD/ CAKE Yield: One 17x8x6 cm Loaf Pan Active time: 30 Minutes Total time: 10 Hours
🌿 Ingredients 2 Bags Black Tea (Ceylon) 125 g Hot Water 100 g Jaggery/ Muscovado Sugar 40 g Golden Raisins 40 g Black Raisins 25 g Dried Apricots (chopped) Zest of 1 Orange 175 g All-Purpose Flour 1/3 tsp Baking Powder 1/8 tsp Salt 1 tsp Mixed Spice Powder 30 g Whole Eggs 25 g Unsalted Butter (softened) Almond Slices (optional)
🌿 Instructions
In a heat proof jar, combine Black Tea Bags and Hot Water. Let it brew for 5 minutes. 2 Bags Black Tea (Ceylon); 125 g Hot Water Remove tea bags, then add in the Jaggery Sugar, Golden and Black Raisins, Dried Apricots and Orange Zest. Mix well, let it soak overnight. 100 g Jaggery/ Muscovado Sugar; 40 g Golden Raisins; 40 g Black Raisins; 25 g Dried Apricots (chopped); Zest of 1 Orange.
On the next day; In a large bowl, combine the All-Purpose Flour, Baking Powder, Salt and Mixed Spice Powder. 175 g All-Purpose Flour; 1/3 tsp Baking Powder; 1/8 tsp Salt; 1 tsp Mixed Spice Powder
Add in the Eggs and the Soaked Dried Fruit along with the tea liquid; Mix well. 30 g Whole Eggs
Add in the Unsalted Butter and mix all together until well combined. 25 g Unsalted Butter (softened)
Pour the batter onto prepared pan (loaf pan lined with Parchment Paper). Tap the pan a few times to remove air bubbles and the batter spread evenly.
Sprinkle with some Almond slices; then bake in the preheated 160°C oven for 45 minutes.
After 45 minutes, turn off the heat. Let the bread sit in the oven for about 10 minutes; Remove the bread from the oven, let it sit in the pan for another 10 minutes; Then remove the bread from the pan and let it cool completely on the cooling rack.
🌿 Notes
The cake/ bread best made two days ahead of time (if you have the time as this allows the flavours to absorb and develop). If you don’t have the time, it is also rather good straight from the oven.
The cake/ bread can be stored at room temperature for up to a week. Cover in plastic wrap or place in an airtight container to prevent it from drying out.
This cake/ bread freezes well for up to three months. Wrap it in plastic wrap and foil, then place it in an airtight plastic container or freezer storage bag.
TRIPLE CHOCOLATE PEPPERMINT DONUTS Yield: 8 Pieces (6 cm Diameter) Active time: 2 Hours Total time: 3 Hours
🌿 Chocolate Custard 35 g Egg Yolks 10 g All-Purpose Flour 1 tsp Corn Starch 170 g Milk 25 g Granulated Sugar 50 g Dark Chocolate (Couverture/ Compound) 1 tbsp Dark Rum/ Vanilla Extract
🌿 Chocolate Donuts Dough 80 g Water 40 g Milk 20 g Egg Yolks 30 g Granulated Sugar 1/3 tsp Salt 2/3 tsp Instant Yeast 140 g Bread Flour 40 g All-Purpose Flour 20 g Cocoa Powder 1/4 tsp Baking Powder 30 g Salted Butter
🌿 Top Coating 150 g Dark Chocolate (Compound)
INSTRUCTIONS 🌿 Chocolate Custard
In a medium bowl, combine the Egg Yolks, All-Purpose Flour, Corn Starch and 1/3 part of Milk. Mix until they are no lumps visible, set aside. 35 g Egg Yolks; 10 g All-Purpose Flour; 1 tsp Corn Starch; 1/3 part of 170 g Milk
In a medium saucepan mix the Granulated Sugar and the rest of the Milk; Cook over medium heat. 25 g Granulated Sugar; the rest Milk
Once it boiled, lower the heat, pour in the Egg Yolks mixture and continue stirring until the mixture thicken.
Add in the Dark Chocolate while continue stirring, mix until all the chocolate melted (be careful not to burn it). 50 g Dark Chocolate (Couverture/ Compound)
Take it off from the heat and strain the mixture (don’t skip this step, you don’t want any lumps in your Custard)
Add in the Rum (optional), mix well. 1 tbsp Dark Rum/ Vanilla Extract
Cover Custard with a Cling Film (make sure the plastic touches the custard surface to prevent forming a thin crust on top); store in the fridge for at least 1 hour to set.
🌿 Chocolate Donuts Dough
In a large bowl combine the Water, Milk, Egg Yolks, Granulated Sugar, Salt and Instant Yeast (NEVER add salt on top of yeast, it will indeed kill the yeast); Mix well. 80 g Water; 40 g Milk; 20 g Egg Yolks; 30 g Granulated Sugar; 1/3 tsp Salt; 2/3 tsp Instant Yeast
Add in the Bread Flour, All-Purpose Flour, Cocoa Butter and Baking Powder; knead briefly until it form a dough ball. Cover the dough with clean towel or a plastic wrap; let it rest for 15 minutes. 140 g Bread Flour; 40 g All-Purpose Flour; 20 g Cocoa Powder; 1/4 tsp Baking Powder
After 15 minutes, add in the Salted Butter, mix until well combined; then start kneading the dough for about 5 minutes. 30 g Salted Butter
After 5 minutes, the dough become less sticky and really smooth. From the dough into a smooth ball, place onto a grease bowl; cover and let it rest for another 15 minutes.
After 15 minutes, divide the dough into 8 equal portions. Roll each dough into a smooth ball (kindly follow video instructions). Place individually onto a Greaseproof Paper so it will be easier when you lift it. Cover with a clean towel, let it proof for about 30-45 minutes or until almost double in size (if you lightly press into the dough, it will leave a slight indentation).
Frying Donuts Preheat the oil (temperature should be about 160°-170°C); don’t fry donuts all at once, the oil temperature will decrease. After you reach the right temperature, turn down to medium low heat, place about 2-3 donuts and fry for about 10 seconds After 10 seconds the bottom is slightly cooked, turn it over (don’t flip it now, until the bottom is dry; about 1 minute) After 1 minute, flip it over and cook for another 1 minute; take it off from the heat, place onto a cooling rack and it’s done (So remember total frying time is about 2 minutes; otherwise, your donuts will definitely burn and taste bitter).
Once the donuts reach room temperature, gently shimmy the chopstick inside of the donut a little ways (gently rotating from the initial opening but not widening it too much). This will open up a little more space inside of your donut for the filling.
Spoon the filling into your piping bag, insert the tip of the piping bag into the donut, gently squeezing the filling inside. Squeeze slowly, so that the filling has a chance to reach into air pockets in the donut and generously fill it.
Once the doughnut has been filled, melt some Dark Chocolate (if it’s too thick, you can add 1-2 teaspoon of Shortening to thinning the chocolate); Ice one side of donut with melted chocolate and sprinkle it with some crushed Peppermint Candy for a pretty finish.
🌿 Notes
Custard filled donuts can be stored in the refrigerator for up to three days; cover doughnuts with foil or plastic wrap or place in plastic bag when refrigerating to prevent drying out.
Keep refrigerated; Because custard contains milk and eggs, it is quite perishable. The custard should be refrigerated at 40° or lower to stop the formation of bacteria.
To freeze (max. 2 weeks), wrap doughnuts tightly with Aluminum foil or plastic freezer wrap, or place in heavy-duty freezer bags.
GINGER MILK TEA Yield: 2 savings Active time: 15 Minutes Total Time: 45 Minutes
🌿 Ingredients 80 g Fresh Old Ginger 2 Stalks Lemongrass 1 Cinnamon Stick 4 Whole Cloves 30 g Palm Sugar 500 ml Water 200 ml Hot Milk (frothy) Cinnamon Powder (garnish)
🌿 Instructions
In a medium saucepan, combine all the ingredients (except milk). Bring to a boil, let it simmer for 15 minutes. 80 g Fresh Old Ginger; 2 Stalks Lemongrass; 1 Cinnamon Stick; 4 Whole Cloves; 30 g Palm Sugar; 500 ml Water
Take it off from the heat, strain the mixture (divide into 2 glass); Add some hot milk or frothy milk and sprinkle some Cinnamon Powder for garnish. 200 ml Hot Milk or Frothy
🌿 Notes
Ginger Tea can be served with or without milk.
Sugar can be added or reduced according to taste.
To store; 3 days in the fridge in an airtight container.
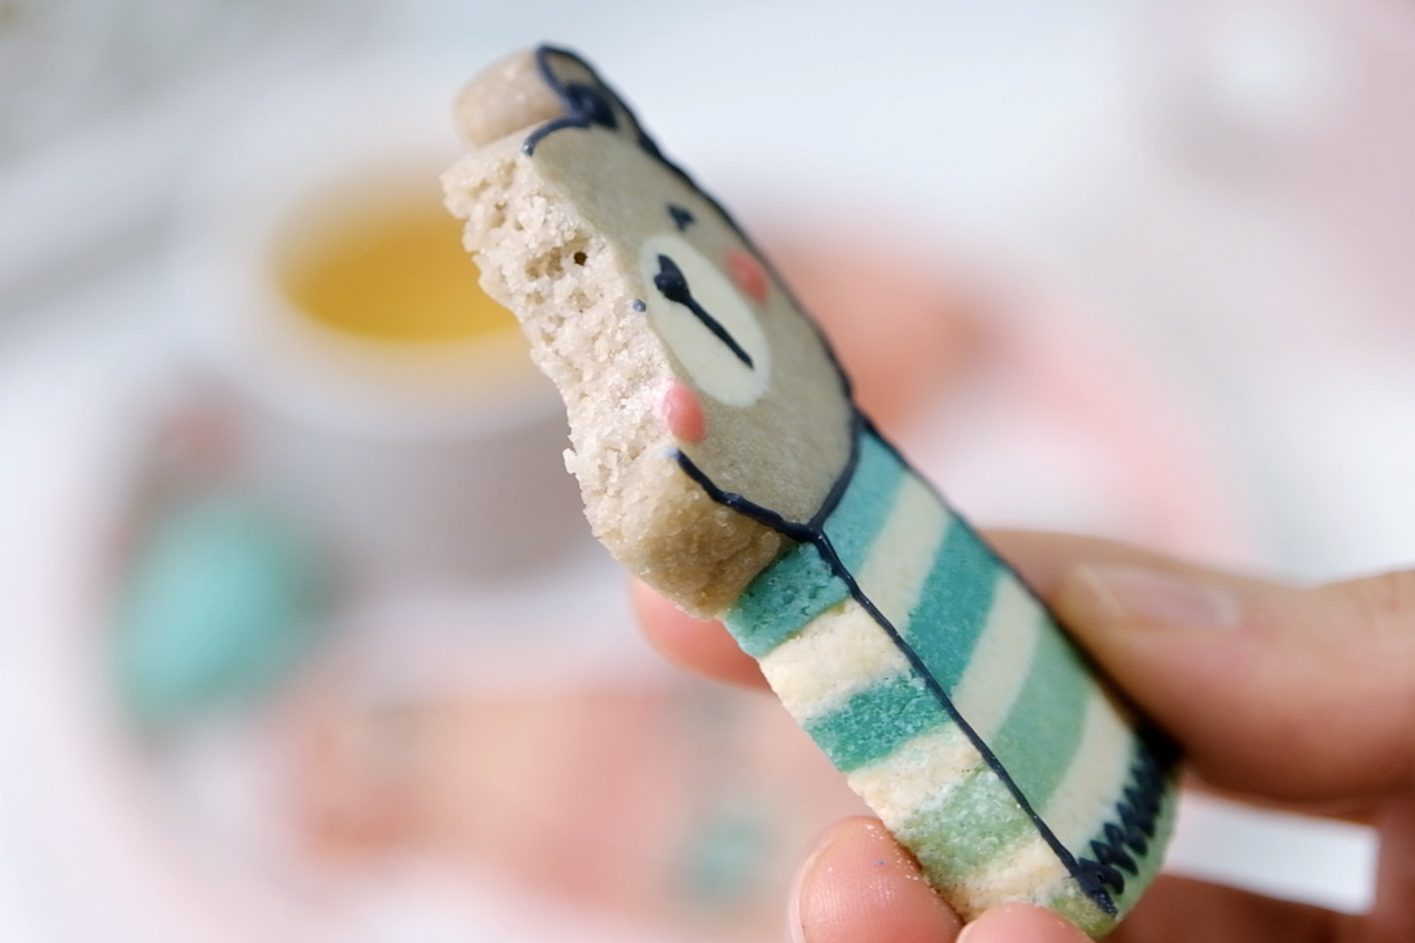
Hi Guys, have you ever tried making icebox cookies? The cookie dough is shaped into a specific design, freeze until firm, then sliced and baked.
Yes you need to plan well for these and it is a little complicated task, but it’s a lot of fun making these! They also not overly sweet, hold their shape and bake up perfect every single time.
This shortening based cookie recipe is easy to make, it doesn’t require any dough chilling, easy to work with (as it’s melting point is higher than butter), so it doesn’t soften as quickly while you handle it.
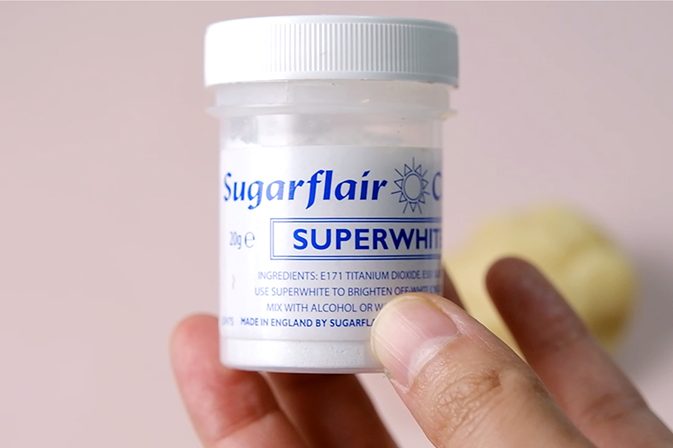
I use superwhite powder from Sugarflair for white bright colour
You will need some food colouring to dye your cookie dough. Try to use natural dyes as much as possible such as cocoa powder for brown, beetroot for pink or matcha powder for green colour.
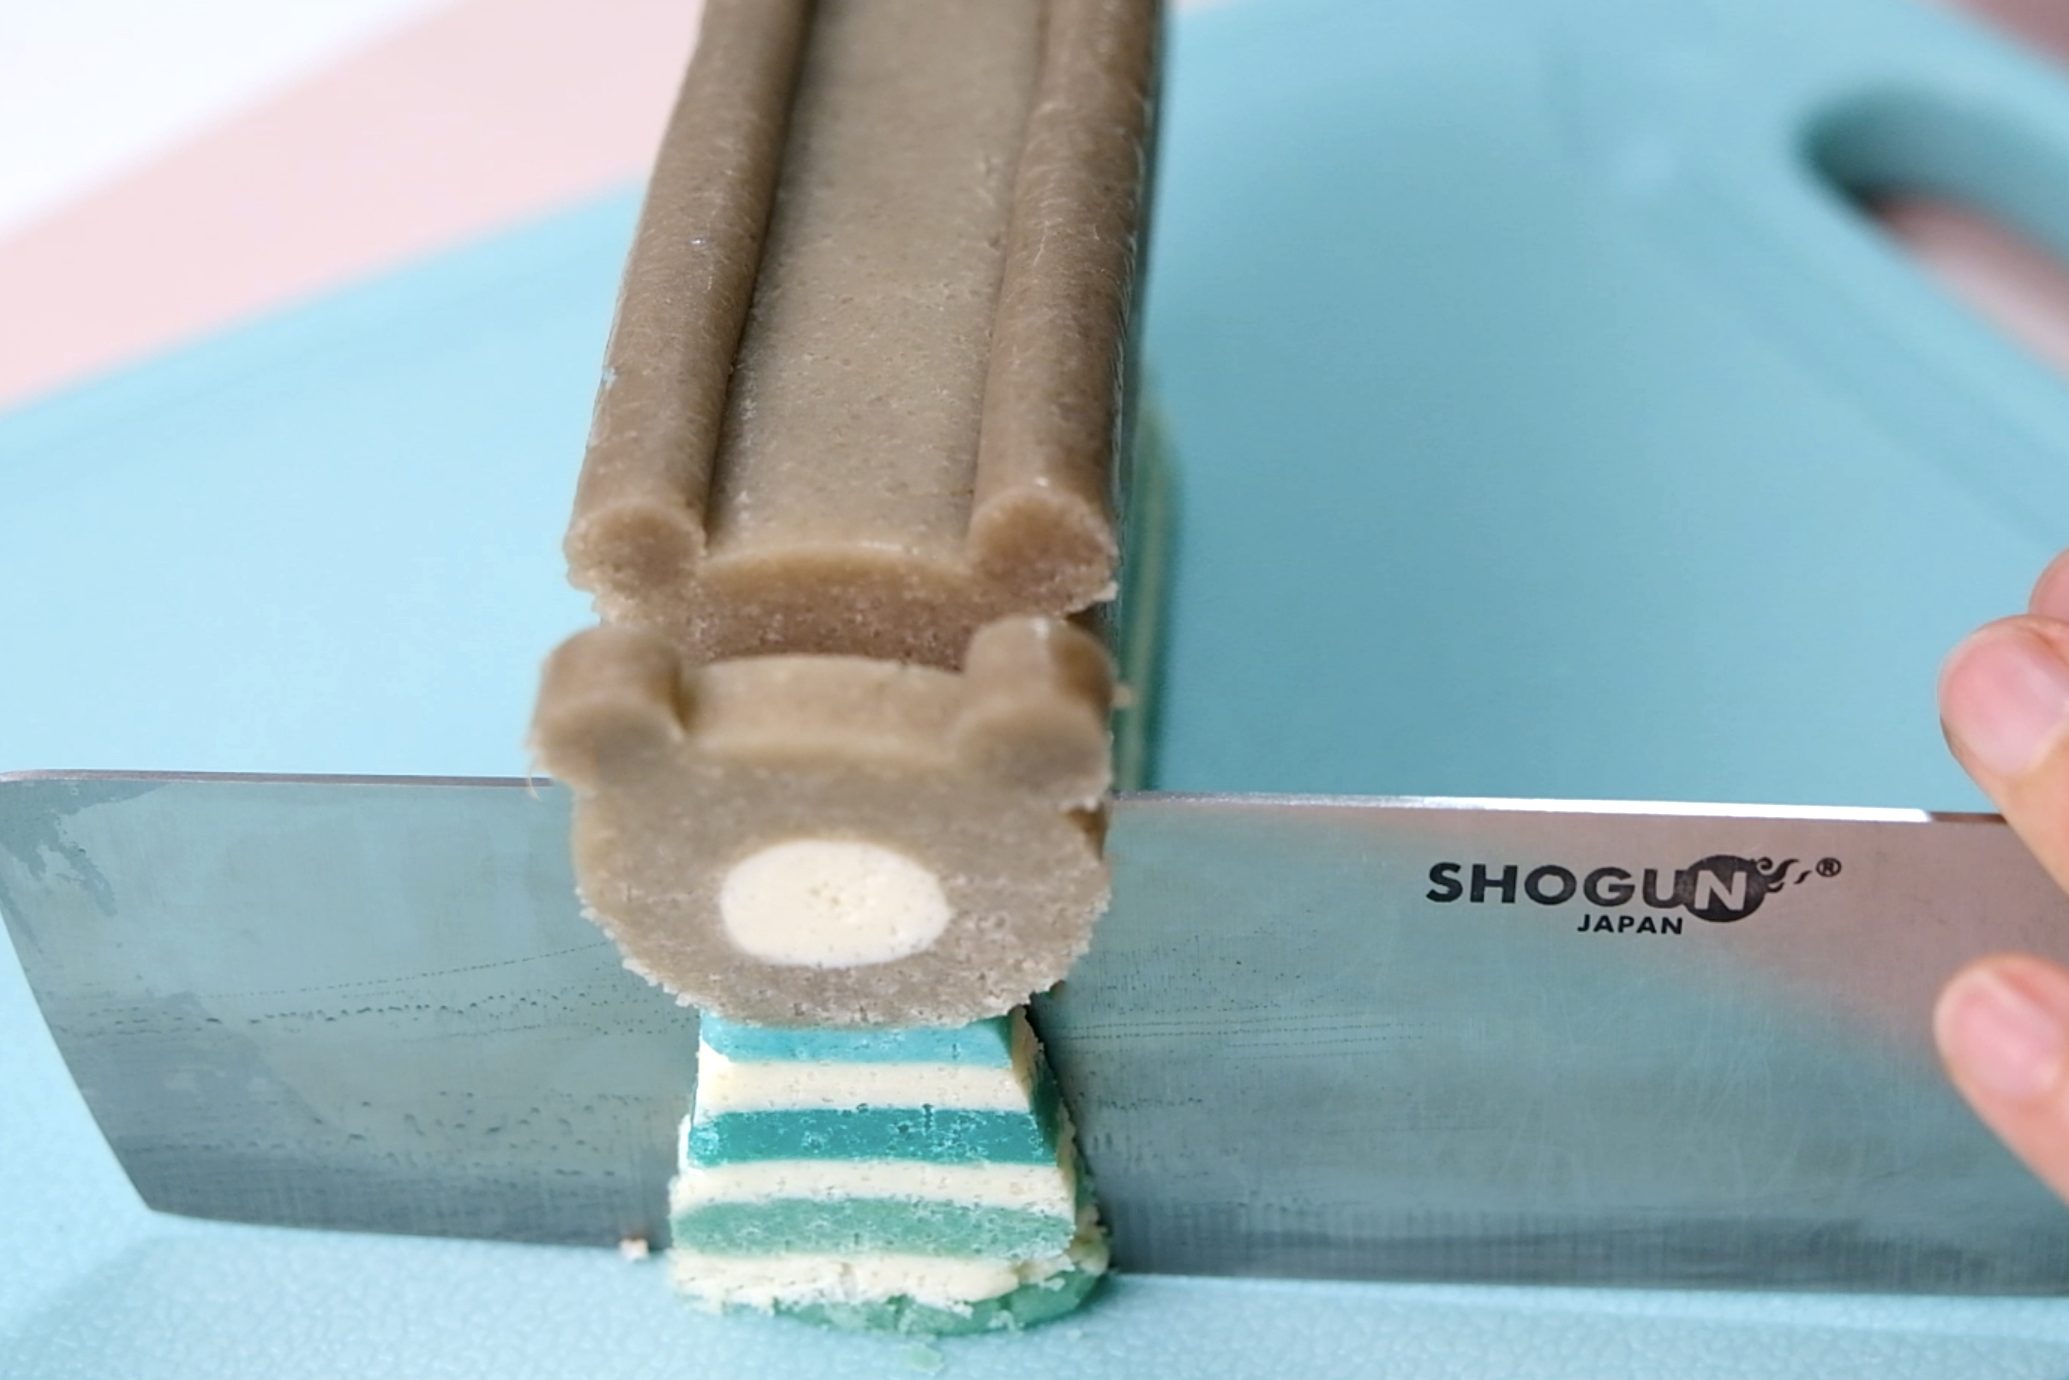
Make sure that you use a very sharp knife
And while this dough doesn’t technically have to be chilled, chilling it can make it easier to cut out more intricate shapes and transfer them to your baking sheet.
Slicing the first piece is always so exciting! I get a little nervous, too 😥. Look at that awwwwww!!! 🤣😱🤗
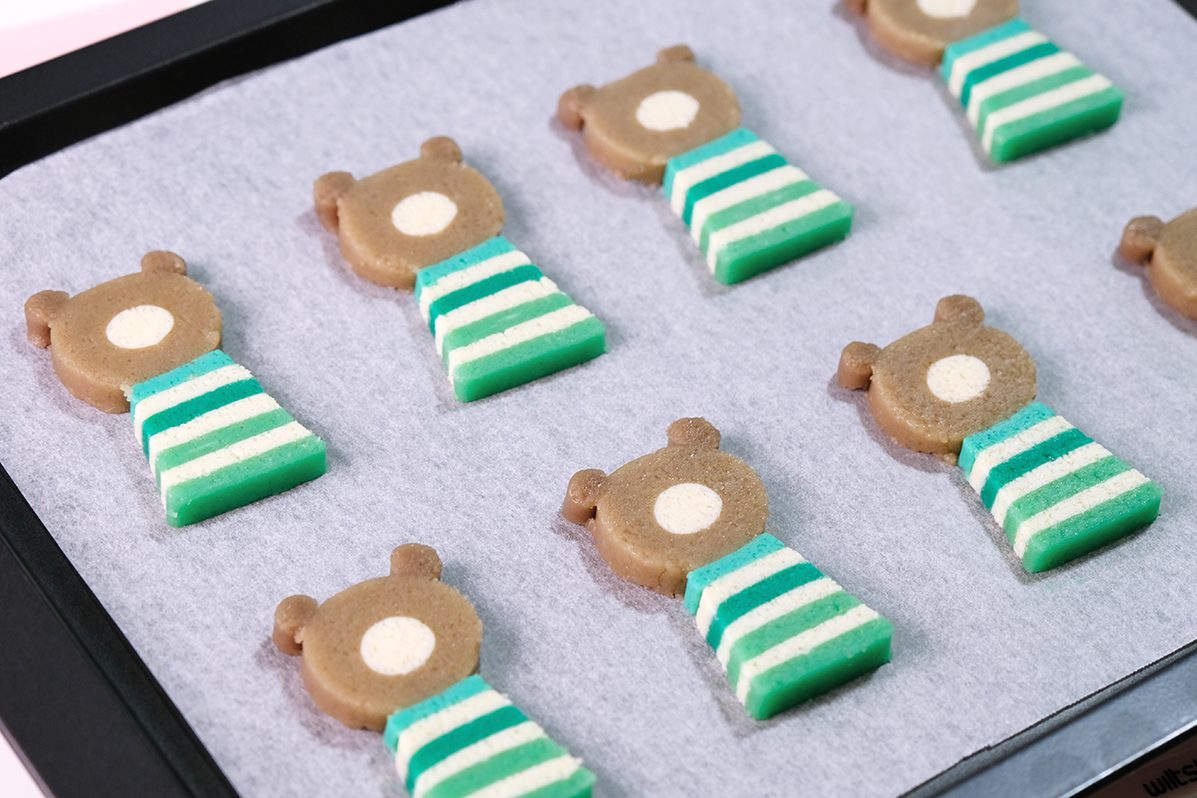
Don’t forget to chill the cookies in the fridge for about 30 minutes before baking to maintain the details, and don’t forget rotating your pans halfway through baking. When bake, leave at least 1-inch of spare in between the cookies, the dough won’t spread but will puff a bit.
Don’t throw the dough scraps, you can definitely reuse it. Roll and cut them with your favorite cookie cutter, I love to shape them with this tiny flower shape tart mould as a decoration.
The baking time will vary depending on the size, bake the cookies until the the bottom edges are just lightly browned. We don’t want overcooked the cookies as the colour detail is really crucial. When take out from the oven,cool them on the baking sheets for 5 to 10 minutes and then transfer to a wire rack to finish cooling.
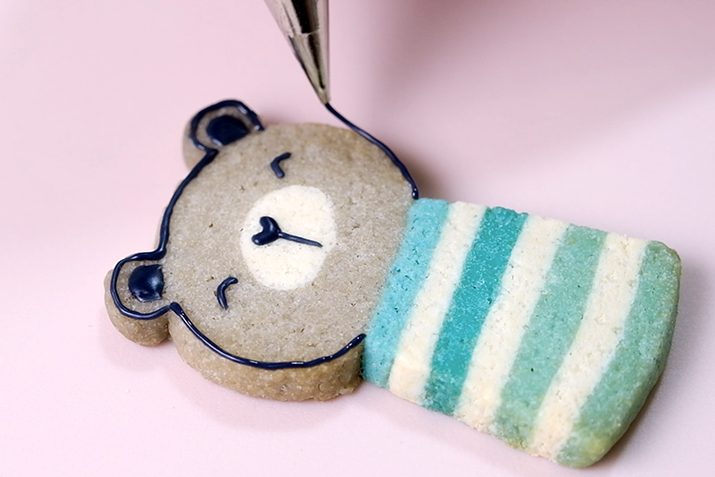
And for the details and outline, I choose royal icing coz it sets a little bit harder and it’s pretty simple. Royal icing is all about consistency, so depending on how you want to decorate yours, for example, this cookies I will go with the thicker consistency for more of lining things out.
No. 1 round noozle
I suggest to use no. 1 round noozle for this delicate details and you can use small damp brush to correct the details.
Look how cute they are! 🥰
Arh…SUPER cute!
Around these holiday season, is there anything more iconic than these cute doodle icebox cookies?
You can make many people smile with these cookies! They are perfect for casual gifts for your friends. Wrap them into a beautiful box or maybe in a homemade bag, like this.
The cookies are crispy on the outside, not overly sweet and not too hard in the inside. Hmm.mmm so yummy !!! These cookie may be stored in an airtight container at room temperature for up to one week.
I hope that you enjoy the recipe and have some beautiful moments with your family in this lovely season! 💗 LOVE YOU ALL💞
DOODLE ICEBOX COOKIE Yield: 24 pieces Active time: 3 1/2 hours Total time: 6 hours
🌿 Cookie Dough 170 g Shortening 200 g Granulated Sugar 50 g Whole Eggs 2 tbs Milk 1/2 tsp Almond Extract 380 g All-Purpose Flour 2 tsp Double Acting Baking Powder 1/2 tsp Salt Food Colouring (Pink, Turquoise, White, Brown)
🌿 Royal Icing 120 g Icing Sugar 3 tsp Milk 1 tsp Light Corn Syrup or Honey 1/4 tsp Almond Extract Food Colouring (Black, Pink, Turquoise)
INSTRUCTIONS 🌿 Cookie Dough
Cream the shortening and sugar together until well combined for about 3 minutes (there are gonna be much fluffier when you’re done).
Add in the eggs, along with milk and extract. Mix until all that liquid is well incorporated into the butter and sugar.
Add the sifted dry ingredients; the all-purpose flour, baking powder and salt. Mix well (the mixture will be a little bit crumbly at first, but keep mixing and it will come together just fine). Note: To get a flakey and snappy cookies, don’t overwork this mixture; you’re kind of just incorporating the flour.
This cookie dough is ready to use (it doesn’t require any dough chilling), colour your cookie dough and to shape it ~ kindly follow instructions according to the video.
Store the completed cookies in the freezer for at least 30 minutes.
Cut the frozen cookies for about 5 mm thick (make sure that you use a very sharp knife), place it on a baking try and then store them in the fridge for 30 minutes before baking (to maintain the details).
Bake them in the preheated 160°C oven (baking time will vary depending on the size); and don’t forget rotating your pans halfway through baking. * Bake the cookies until the the bottom edges are just lightly browned (don’t overcooked the cookies as the colour detail is really crucial).
When take out from the oven,cool them on the baking sheets for 5 to 10 minutes and then transfer to a wire rack to finish cooling.
🌿 Royal Icing
Simply combine all the ingredients together. You do wanna work a little bit quickly with royal icing coz it will sets hard or else cover it with clingwrap. *Note: If it’s too runny, add some icing sugar and if it’s too thick, add the amount of milk 1/4 teaspoon at a time until you reach the desire consistency.
Colour it, transfer to a piping bag and then draw the outline . Use a damp brush to correct the details.
🌿 Notes Baked cookies may be stored in an airtight container at room temperature for up to 1 week. Make sure to let the icing fully harden before stacking the cookies. It also freeze well for up to 3 months, thaw to room temperature before serving.
Hey Guys, today we are making these “Homemade Assorted Biscuits”.
As a 90s kid, Khong Guan was my favourite brand for snacks. A huge tins of assorted biscuits which contain at least 5 varieties of biscuits with plain and sugar icing swirl in the middle. I don’t know if children nowadays still take Khong Guan, but for my generation and before me, this is what our childhood was made of.
Classic Kong Guang Biscuits
My personal favourite are their cream sandwiches. These bit-sized little biscuits are addictive and are really tasty, specially the creamy chocolate flavour. I grew up with them and it’s still as tasty as before.
The cream biscuits are buttery, and slightly sweet, without being excessively oily like many of the other biscuits on the market.
As I grew up and learned baking, I still love them, but I try to avoid consuming any artificial food flavours as much as I can.
So I was thinking of making my own healthier version of assorted biscuits. With this recipe, you can make 6 flavours with 1 dough. The flavours are endless, feel free to make any flavour you like, just remember that you need to combine the flavour ingredient with hot milk first before you mix it into the dough.
Cookie Cutter Collection
You can create any shape you want, these are some cookie cutter collection that I had. The round and square brown colour vintage style cookie cutter with embossing words in the middle (I bought in Daiso) are my favourite, it’s really similar to the real Kong Guan biscuits.
Raw Dough
I am using 3 mm thickness ring for the rolling pin. Try not to roll more than 4 mm thick as the dough will be rise up while baking.
It’s not necesarry to spare a lot of space in between the biscuits, coz the dough doesn’t tends to spread while baking
Look how beautiful this vintage biscuits!
And please note that always bake equally sized biscuits together to make sure they are cook in the same time. If you mix different sizes, the small ones are already cooked when the larger ones are still raw in the middle.
Light and crispy texture
Some people like to have them just plain without any icing. I personally love to fill them with some creamy icing as a sandwich biscuits to bring back some memories of my childhood days.
Beautiful Vanilla Flavour
You can use small spatula to apply the filling, I found that using piping bag is easier for me, so I can reach the edge of the biscuit.
Perfecto!
No need to be so perfect, and if you have a huge sweet tooth, you can add a little bit more icing and vice versa.
Chocolate flavour is a must!
I like to apply huge filling for my chocolate sandwich biscuits because it’s so… yummy…
Matcha for green tea lovers
Some matcha flavours for green tea lovers? The bitterness from the green tea powder perfectly balance the sweetness of the icing sugar.
I love coffee so much, specialy with this adorable Rilakkuma cutter
And if you have a cute cookie cutter it will be even more perfect!
How about some fresh fruity rappberry?
Gets bored with sweet and bitter flavours? Add some fresh sour fruity flavour to compliment the biscuits.
Blue Pea Almond make the biscuits more interesting!
Last and the most important; create 1 flavour that makes people curious, your biscuit box will be so much fun!
Place them in individual cupcake case and store in an airtight jar or maybe a vintage box.
My favourite way to eat them was to bite off the biscuit before the icing sets hard so the icing melts in my mouth. It’s really light in texture, crunchy, not too sweet, heavenly assorted sandwich biscuits! I’m sure your kids are gonna love them so much!
Looking for special gift for someone? These homemade biscuit box works best!! I hope that you will enjoy the recipe, Love You Guys!
HOMEMADE ASSSORTED BISCUITS Yield: 18 pieces sandwich biscuits Active time: 1 hours Total time: 2 hours
INGREDIENTS Biscuit Dough:
260 grams All-Purpose Flour
A pinch of Salt Less than
1/2 teaspoon of Baking Soda
1/2 teaspoon Vanilla Extract
60 grams Unsalted Butter
150 grams Condensed Milk
4 tablespoon Milk (hot)
Food Colouring and Flavouring
Creamy Icing Filling:
100 grams Canned Butter
125 grams Icing Sugar
1 teaspoon Vanilla Extract
Food Colouring and Flavouring
INSTRUCTIONS Biscuit Dough
In a large bowl mix all the dry ingredients (flour, salt and baking soda).
Add in the unsalted butter, rub in with your fingers until the mixture looks like fine crumbs.
Pour in the condensed milk, stir a while with a spatula, then using your hand continue kneading, gather all the small crumbs until the dough comes together and form a smooth ball (do not over mixed or it will end up with a tough biscuits).
Divide the dough into 6 equal portions (78 gr each), always cover the dough with a plastic wrap so it doesn’t dry up.
To create flavour variations I suggest working on the dough one flavour at a time so the dough won’t sit to long and becomes greasy. – Vanilla: add 1 portion of the dough with 2 teaspoon of hot milk, mix well. – Chocolate: diluted 2 teaspoons of cocoa powder with hot milk, mix it with 1 portion of the dough. – Matcha: diluted 1/2 teaspoon of Matcha Powder with hot milk, mix it with 1 portion of the dough. – Coffee: diluted 1 teaspoon of instant coffee with hot milk, mix it with 1 portion of the dough. – Raspberry: diluted a bit of red food colouring with hot milk, mix it with 1 portion of the dough. – Almond: diluted 1/4 teaspoon of blue pea powder with hot milk, mix it with 1 portion of the dough.
To roll the dough To maintain each shapes make sure that every pieces cut on top on their own greaseproof paper that will be bake later. The dough is quite sticky, I suggest to place the dough in between greaseproof paper so in won’t stick to the rolling pin. Using 3 mm thickness ring for the rolling pin, roll the dough and cut it with cookie cutter. * Try not to roll more than 4 mm thick as the dough will be rise while baking. It’s not necesarry to spare a lot of space in between the biscuits, coz the dough doesn’t tends to spread while baking.
Bake them in the preheated 160 C oven for about 10-12 minutes, depending on size or until golden brown around the edges.
Take it off from the heat and transfer to a rack until cooled completely.
Creamy Icing Filling
Simply combine the canned butter, icing sugar and vanilla extract. Mix them until completely smooth.
Divide into 6 equal portions (40 gr each), add in the extracts or flavour powder: – Cocoa: add 2 tsp cocoa powder to 1 portions of icing – Matcha: add 1 tsp matcha powder to 1 portions of icing – Coffee: diluted 1/2 tsp of instant coffee, add in with 1 tsp of cocoa powder to 1 portion of icing. – Raspberry: add 1/2 tsp of raspberry powder to 1 portion of icing – Almond: add 1/4 tsp of blue pea powder and 1/2 tsp of almond extract to 1 portion of icing.
Assembly Sandwich the plain biscuits with the icing filling and vice versa, place it in an airtight jar, Let it sets hard for at least 2 hours before eating.
NOTES
Always bake equally sized biscuits together to make sure they are cook in the same time. If you mix different sizes, the small ones are already cooked when the larger ones are still raw in the middle.
Don’t re-roll dough more than 2 times or it will become tough.
Make sure that you store the biscuits in an airtight jar or container, so the crunchiness can last longer.
For the filling; you can substitute canned butter with either margarine, shortening or ghee if you like.
Stored properly, biscuits should last for up to 2 week at room temperature.
Many or all of the products featured here are from our partners who compensate us
Hi Guys, today we are making something very special “a Magical Carousel Cookies”. This was replicated from my previous cake project that I have designed for my client a few years ago.
Original Cake Design
Instead of using cake as a base structure of the design, I’m gonna use sugar cookies for the construction.
Cut off every pieces according to the templates
Special Cut Method for the Unicorns (with bamboo skewers underneath)
When you had this kind of project, it is very important to start by designing the construction drawing in 2 dimension.
Edges are golden brown means the cookies is done
The main purpose of construction drawings is to provide a graphic presentation of what is to be built. It showing the relationship between the components and how they fit together.
Stacking and Sticking to Develop the Structure
Carousel Design Construction
This dazzling Vintage Carousel Cookies featuring whimsical Unicorns would make a spectacular gift.
If you are looking for some cookies design that will have a hint of playful and look strikingly attractive just opt for these lovely Carousel Cookies and you are good to go.
Using Embossing Cutter for the Design
This also make a really cool birthday, upcoming christmas or even a wedding present.
Gorgeous Unicorns
You can simplify the design or even change the colour to suit the theme of your party. How about A Magical Carousel Cookies for a magical party?
Center Pole Design
Our Magical Carousel Cookies goes round and round it goes, it looks so beautiful and amazing!
If you keen to make these kind of project kindly find the completed design templates in the description below.
I hope that you will fall in love with this Magical and Dreamy Carousel Cookies as much as I do. Take care Guys, Love you all!
Print the attached files below in a standard A4 paper and simply cut the design out
Print in A4 Paper- Cut out the Design
Print in A4 Paper- Cut out the Design
Print in A4 Paper- Cut out the Design
Print in A4 Paper- Cut out the Design
Guide for Grouping, Sticking and Colouring Each Group
3D MAGICAL CAROUSEL COOKIES Yield: 1 Carousel (16 cm diameter, 24 cm height) Active time: 3 hour Total time: 5 hour
INGREDIENTS Sugar Cookies:
200 grams Unsalted Butter (soft)
200 grams Granulated Sugar
50 grams Whole Eggs
400 grams All-Purpose Flour
1 teaspoon Favorite Extract or Grated Zest (optional)
Marshmallow Fondant:
150 grams Marshmallow
2 tablespoons Water
350-450 grams Icing Sugar
35 grams Shortening
Food Colouring (Rose, Delphinium Blue, Turquoise)
Edible Pen (Black)
Royal Icing:
15 grams Egg Whites
100 grams Icing Sugar
1/6 teaspoon Cream of Tartar
1/3 teaspoon Vanilla Extract
1-2 teaspoons Water
Sugar Syrup: 50 grams Granulated Sugar, 50 grams Water
Assembly: Paper Straws, Bamboo Skewers, Small Brush, Gold Luster Dust, Embossing Cutter, Silver sugar pearls sprinkles
INSTRUCTIONS Design Structure and Templates Print Side View Design Structure and cookie templates on standard A4 paper, then simply cut all the design out
Sugar Cookies
In a large bowl mix the butter, sugar and favorite extract or zest until well combined and just becoming creamy in texture. Do not overwork, or the cookies will spread during baking.
Slowly beat in the eggs until well combined.
Add in the flour and mix until it creates a dough ball.
Gather it into a flat disk, wrap it in a plastic wrap and chill it in the fridge for at least 1 hour.
Trace and Cut Prepare marzipan spacers for an even thickness (you can use wooden chopstick if you don’t have it on hand), rolling pin, knife, cut off templates and some greaseproof paper for the base of the cookies.
Place the chilling dough on a floured surface and knead it briefly so it’s pliable. Place the dough on top of a greaseproof paper, using marzipan spacers on both sides and another greaseproof paper on top, roll it out into an even thickness.
Trace and cut out the shapes according to the templates (to maintain each shapes make sure that every pieces cut on top on their own greaseproof paper that will be bake later).
Lay cut out pieces on a baking tray. Please note, always bake equally sized cookies together to make sure they are cook in the same time. If you mix different sizes, the small ones are already cooked when the larger ones are still raw in the middle.
Chill the cut out cookies in the fridge for about 30 minutes before baking to maintain it’s shapes, and then bake them for about 8–15 minutes, depending on size, until golden brown around the edges.
Take it off from the heat, wait for 5 minutes then transfer them to a cooling rack to cool completely.
Marshmallow Fondant
Pour marshmallows into a microwave-safe bowl or in a double boiler (you might want to grease the bowl and spatula with a bit of shortening before mixing, to prevent stickiness). Add about 2 tablespoons of water and microwave it in 30 seconds intervals, stirring in between, until the marshmallows completely melted.
Add in ¾ of the icing sugar and mix (you can add any flavouring you want). After the fondant begins comes together, grease hands and table work generously with shortening, and then turn marshmallow mixture onto the table work.
Add some more left over icing sugar, and continue kneading until it’s form a firm nice and smooth elastic ball (you might need less or more icing sugar).
If it’s a bit dry, add 1 teaspoon of water at a time and if it’s too wet, add a bit more icing sugar. Knead until it feels soft and pliable.
Once it’s done, grease the outside of the fondant with shortening to prevent dryness and then store them in a ziplock bag to keep it moist.
Simple Syrup Over medium heat, bring equal amount of sugar and water to a boil, turn the heat to low, stir constantly until the sugar dissolves and the mixture is clear and thickened. Take it off from the heat, pour into a clean glass jar and let it cool completely.
Royal Icing In a medium bowl, combine egg whites, Cream of Tartar, icing sugar, and Vanilla Extract. Beat on high speed for 5 to 10 min or until very stiff (feel free to add 1 or 2 teaspoons of water as needed if you fill it’s to thick). Covering icing in bowl at all times with a plastic wrap to prevent from drying.
Assembly
Group, stick (use royal icing as a glue) and cover baked cookies with fondant (use simple syrup as a glue) according to the “Side View Design Structure” template.
Decorate the Unicorns.
Place paper straw as Carousel Center Pole (which has been inserted by 2 pieces of bamboo skewers to make it stronger), using royal icing as a glue to assemble and build the cookies group (except for the rooftop).
Decorate the Carousel Center Pole (feel free to use any embossing cutter).
Insert another 3 bamboo skewers around Carousel center pole for the Unicorns. Using paper straw (to cover the bamboo skewers) and thick round paper to support the Unicorns. Using royal icing to fill in the base of the pole. Place Unicorn on top of round paper, stick both sides together (use royal icing as a glue).
Place and decorate the Carousel rooftop.
Add finishing details.
NOTES
To Store Decorated Carousel Cookies; 1 week at room temperature in an airtight packaging.
To store baked cookies; 1 week at room temperature in an airtight container. For longer storage, pop in the freezer (in an airtight container) for up to 3 months.
To store Sugar Syrup; keeps for a while in the refrigerator. Eventually mold will begin to grow if stored too long. You can also stir in 1 tablespoon corn syrup to help ensure the syrup stays smooth.
To store Royal icing; 1 week in the fridge, always cover bowl in a plastic wrap.
Hi Everyone, today we are making these “Lovely Taiwanese Pineapple Cakes”. It is a crumbly and nearly melt-in-the-mouth pastry with the pineapple jam as the filling inside.
The difference with the Singaporean/ Malaysian pineapple tart is they are typically larger and made in square or rectangle shape.
I personally prefer the Taiwanese version coz the pastries have a rich distinctively crumbly milky taste and filled with a generous portion of sweet sticky chewy pineapple filling inside.
Pineapple cakes filling from commercial manufactures usually made of winter melon and Maltose Syrup so that the filling is extra sweet, heavy and sticky, which is not healthy.
They usually substitute all or part of the pineapple with winter melon, a vegetable in the squash family that is much cheaper than pineapple.
Since winter melon has little flavour, artificial flavours and colours are added to the pastries to make them attractive to consumer, and then Maltose syrup has been added to stiffen the fillling.
For this reason, I would like to show you how to make the healthier style of Taiwanese Pineapple Cakes which is hold up pretty well, so adorable and taste much fresher.
A lot of research went into perfecting these treats. But the end result was wonderful. The key is the exterior, that’s how it will remain even after it is baked so you want the dough to be as smooth as possible.
Pineapple Cakes before baking
So I actually found two versions of the crust that I liked, and there’s no need to put them in the fridge at all.
Thefirst one I called a “basic dough” for the character’s body. It’s buttery, soft, yet also malleable and sturdy enough to hold its form. And the second dough that I called the “colouring dough”. It’s soft and easy to work with, even for small details and also colour well with any kind of edible food colouring.
Is there anybody that wouldn’t want to box these as a present ? They are so cute, tasty, photogenic, everthing you could ever want!
They taste amazing when served slightly warm and paired with a cup of hot tea. The buttery crust is rich and crumbly, filled with fruity sweet sour, chewy and sticky pineapple filling, they are absolutely delicious.
I really hope you Guys give it a try, they are a lot of fun to put together and they are pretty simple too! Love you all!!
LOVELY TAIWANESE PINEAPPLE CAKES Yield: 10 pieces Active time: 1 hour Total time: 2 1/2 hours
INGREDIENTS Pineapple Filling
500 grams Pineapple (Chopped)
120 grams Granulated Sugar
20 grams Unsalted Butter
30 grams Glutinous Rice Flour
Basic Dough
100 grams Salted Butter (Cold)
12 grams Icing Sugar
22 grams Egg Yolks
152 grams All-Purpose Flour
24 grams Milk Powder
Colouring Dough
25 grams Salted Butter (Cold)
7 grams Condensed Milk
3 grams Egg Yolks
38 grams All-Purpose Flour
Food Colouring (Red, Soft Pink, Black, White)
INSTRUCTIONS Pineapple Filling
Cut off the pineapple skin, took off the core and coarsely cut them into chunks (if you use canned pineapple, make sure to adjust the sugar level. They will take longer to cook coz the heavy water content in the canned pineapple).
Transfer the chunks into a non-stick pan, add in the sugar (since the sweetness of each pineapple is different, feel free to adjust the amount of the sugar accordingly). Cook over medium high heat. Stirring constantly until most of the moisture has evaporated. Don’t forget to adjust the heat level based on the water content that was left in the pan. *I suggest using a non-stick pan as it is sticky after when it becomes concentrated.
When the pineapple is about to dry, looks translucent and a bit brownish, lower the heat, add in the butter. Stir continously until the butter melted and incorporated in the pineapple (the butter makes the pineapple fillings smoother and easier to handle during wrapping).
For the binder, sprinkle in some of the glutinous rice flour. Add it gradually, to make sure that the flour are distribute evenly. Mix until well combined.
Take it off from the heat, spread the fillings thinly on a large plate to cool completely.
Basic Dough
In a large bowl, cream the butter and icing sugar until light and smooth.
Add in the egg yolks, mix well
Pour in All-Purpose Flour and milk powder, mix until all the ingredients just combined and create a dough ball (do not overmix to avoid the formation of gluten, which will make the pastry less flaky).
Cover them with a plastic wrap to prevent the dough dry. Set aside
Colouring Dough
Combine the butter, condensed milk and egg yolks, mix well.
Pour in the all-purpose flour, mix until it’s form a smooth dough.
Colour it as needed (remember to always cover the dough with a plastic wrap to keep their moisture).
Wrapping, Decorating and Baking
Divide pineapple filling into portions of 20 grams each, and basic dough 25 grams each.
Roll each portion of pineapple filling into a ball.
Flatten a portion of basic dough (you can do this in your palm or with a small rolling pin).
And then place a portion of filling into the centre of the flattened dough.
Gently wrap the dough around the filling, pinching away and setting aside excess dough at the top and where the edges meet.
Gently roll the filled dough between your palms to form a smooth oval ball.
Using some basic dough and white colouring dough for the ears. Apply some white colouring dough for the face. Black dough for the nose, mouth and eyes. Soft pink for the cheeks and tounge. Using love shape plunger cutter to create the heart shape. And finally, use some basic dough to create her hands and legs. *Make sure the details sticks really well otherwise it will tilted or fall down while baking.
Bake in the preheat 160°C oven for 20 minutes. Remove from the oven, allow to cool slightly on the pan for about 20-25 minutes, and then transfer them onto a cooling rack to cool completely.
NOTES
The dough will expand a bit when baked in the oven.
You can use any food colouring for the “Colouring Dough” (powder, gel, liquid).
Store the cakes at room temperature in an airtight container, the crust will have become more tender.
Pineapple cakes turning mouldy even when stored in an airtight containers is due to the presence of too much moisture. Store pineapple cakes which are cooled to room temperature in an airtight container away from the sunlight for 3-4 days. Keep them refrigerated for up to 1 months.
Hi Guys! I hope that you are doing well, and today we are making these gorgeous “Teddy Bear Choco Pies“. Choco pie is a popular Korean snack, some call it National Snack. It consist of 2 cakes with marshmallow fillings in between, and the whole thing is covered in chocolate.
I’m the biggest fan of Choco Pie. 2 of the most popular Choco Pie brand are Oreon and Lotte. They got the original and also other flavor varieties.
And out of all the Choco Pies, my favorite will have to be Cacao Choco Pie. I love the the cacao version because it has chocolate cakes instead of Vanilla. The extra chocolate just adds a little richness to the Choco Pies and it taste really good.
So today I’m gonna show you how to make my homemade and healthier version of Cacao Choco Pie.
We need to make homemade chocolate cakes, homemade marshmallows, and then assembling it in the end to make Teddy Bear Choco Pies. It’s quite a long step, but of course it’s really worthed in the end.
The chocolate cake is soft and moist, the marshmallow fillings itself are so fluffy, kinda a spongy texture. And the melted chocolate… it’s just a chocolaty goodness. And yes, it was definitely fun to make.
I hope that you will enjoy this recipe. Have fun with it, create any design your want! Love you Guys!!
TEDDY BEAR CACAO CHOCO PIES Yield: 16 pieces Active time: 2 hour Total time: 3 hours
INGREDIENTS Cake Batter:
145 grams Unsalted Butter
105 grams Granulated Sugar
150 grams Eggs
190 grams All-Purpose Flour
30 grams Cocoa Powder
1 1/2 teaspoons Baking Powder
Marshmallow Fillings:
10 grams Gelatine Powder
80 grams Water
220 grams Granulated Sugar
60 grams Water
1/2 teaspoon Vanilla Extract
Pink Food Colouring
Coating & Decorating:
350 grams Dark Chocolate
150 grams Milk Chocolate
100 grams White Chocolate
50 grams Strawberry Chocolate
INSTRUCTIONS Prepare design template. Secure the template to the pan with some tape (so they stop slipping around). Over the top of the design, place a piece of baking parchment that fits exactly the bottom of the pan.
Chocolate Cake Batter:
Preheat the oven to 170 C.
Combine the soft butter and granulated sugar, continue mixing until light and fluffy. Add in the eggs, and mix that all through (don’t worry if the batter looks like curdling now, the mixture will comes back together when we add the dry ingredients later).
Mix in all of the dry ingredients (flour, cocoa powder and baking powder), mix until the batter is really smooth and no lumps remains.
Transfer the batter into a piping bag with a 1 cm round tip. Pipe according to the design template.
Bake it for about 13-15 minutes. Let it sit on the pan for about 3 minutes then transfer them onto a cooling rack to cool completely (if you find that you have a little bit of uneven surface on your teddy bear cakes, it doesn’t really matter since we’re going to be dipping them in Chocolate anyways)
Details Decorations:
Using the same Teddy Bear template as above, tape some wax paper right on top (just to make sure it doesn’t budge).
Melt the chocolate in microwave of a double boiler, transfer it to a piping bag. Pipe each details with melted chocolate.
Pop them in the freezer, let them set until ready to use them.
Prepare the Chocolate Cake: Melt some dark chocolate. Dip each chocolate cake into some melted dark chocolate, shake off the excess (shake the teddy bear to get it nice and smooth). Let them dry on the cooling rack so it’s firm to touch.
Marshmallow Fillings:
Pour the gelatine into a mixing bowl, add 80 grams of water and mix, let it stand for a while.
In a sauce pot, mix the granulated sugar and 60 grams of water. Cook over medium heat until the sugar dissolves and the mixture comes to a boil. Cover the saucepan with a lid and let boil for about one to two minutes (to allow any sugar crystals to dissolve from the sides of the saucepan). Remove the lid and attach a candy thermometer to the side of the pan. Boil, without stirring, until the syrup reaches 240 degrees Fahrenheit or the softball stage (if you don’t have one, just bring it to a rolling boil and let it boil for 1 minute)
Pour in hot sugar syrup over the soft gelatine. Whip this up on medium speed with a hand mixer. Add in your favorite extract and food colouring, continue whip for about 8-10 minutes, until it gets super thick and fluffy. Transfer the marshmallow into a piping bag.
ASSEMBLE Take one of the chocolate cake. Squeze a generous amount of marshmallow to the center of the cake and then put another cake on top. Decorate with chocolate detail decorations (using melted chocolate as a glue to attach the details).
NOTE
Let the marshmallow set a while before piping it, so it doesn’t melt around the edges of the cake.
I don’t have milk chocolate on hand, so I’ve just mix the dark and white chocolate together to create a soft brown chocolate colour. And for the red mouth, I’ve just add a bit of red food colouring to the white chocolate.
You can keep them quite well at room temperature in an airtight container for up to 1 weeks, 3 weeks in the fridge.