Mooncakes Symbolise Family Reunion. A full moon symbolises prosperity and reunion for the whole family.

In this recipe, I’m going to use Ghee instead of Lard to make a pastry mooncake with Durian filling. It creates more flaky, tastier pastry with beautiful crispy layers.

If you are not familiar with Ghee, Ghee is a type of clarified butter, originating from India. It is commonly used in India for cooking.
Ghee’s distinctive smell is often described as nutty, buttery, and aromatic, which adds depth and richness to dishes.

This type of mooncake is actually called Su-Style Mooncakes (苏式月饼 Su shi yuebing) which originally from Suzhou 苏州市.
As you can see, their uniqueness is in the crust, which is closer to flaky pastry with multi-layered.
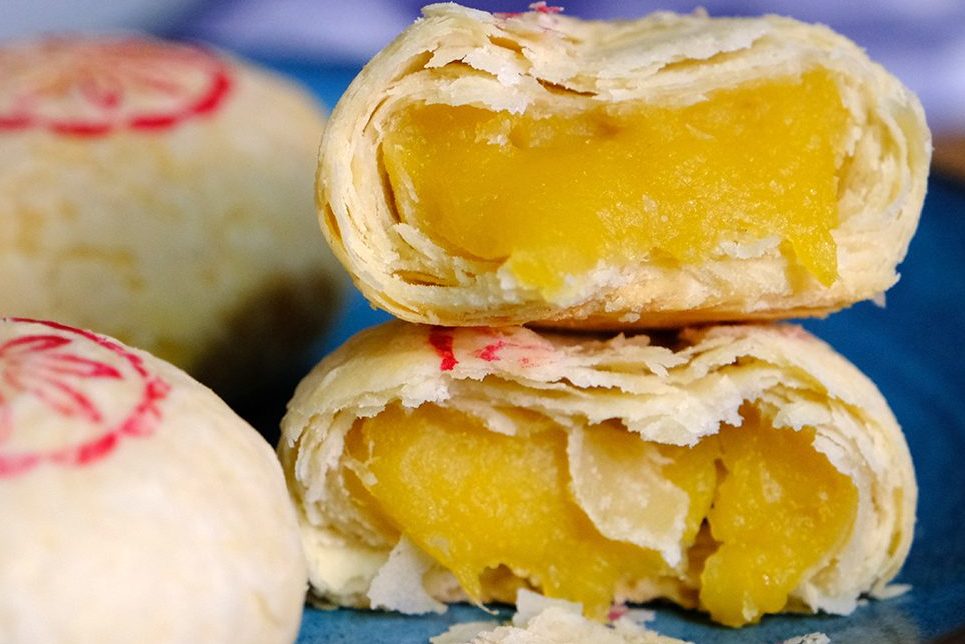
To make those beautiful multi-layered pastry shells we have to make 2 different types of dough; The first is Water Oil Dough and the second one is called Pastry Dough.

Unlike the common recipe that using Lard or Shortening as a fat; Ghee in pastry crusts deliver a tender, flaky crust with a richer, more buttery flavour.
It also have a more pleasant palate feel as compared to one made from Lard or Shortening.

And the key to make this delicious pastry filling is to use fresh durian fruit.
Frozen durians usually has almost no smell or the taste is milder than fresh durian, so it won’t be tasty.

Look how thin, crispy and flaky the crust is ! Ghee really gives a rich flavour to the pastry while the thick and sticky durian filling was so tasty 🥰.
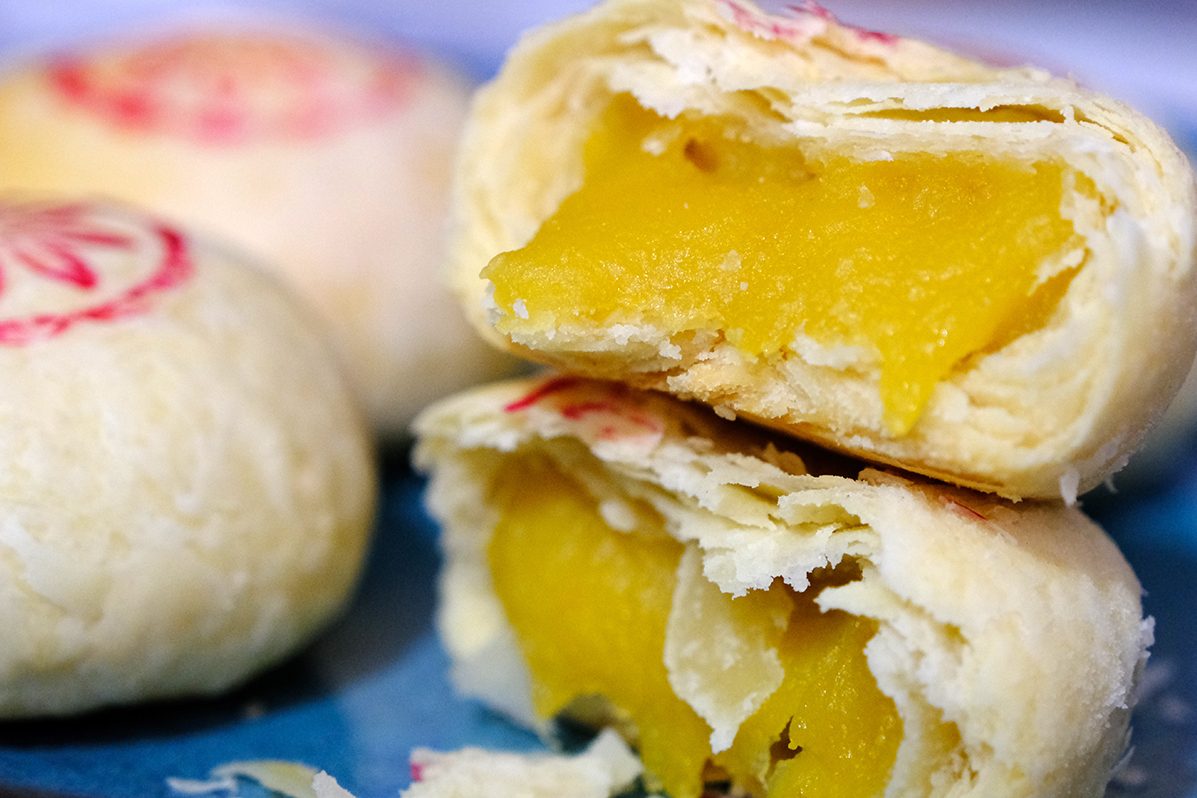
These pastry mooncakes are best served once it’s come out from the oven 👍🤤
The crust will be really crispy while the thick Durian filling inside are still warm and gooey .
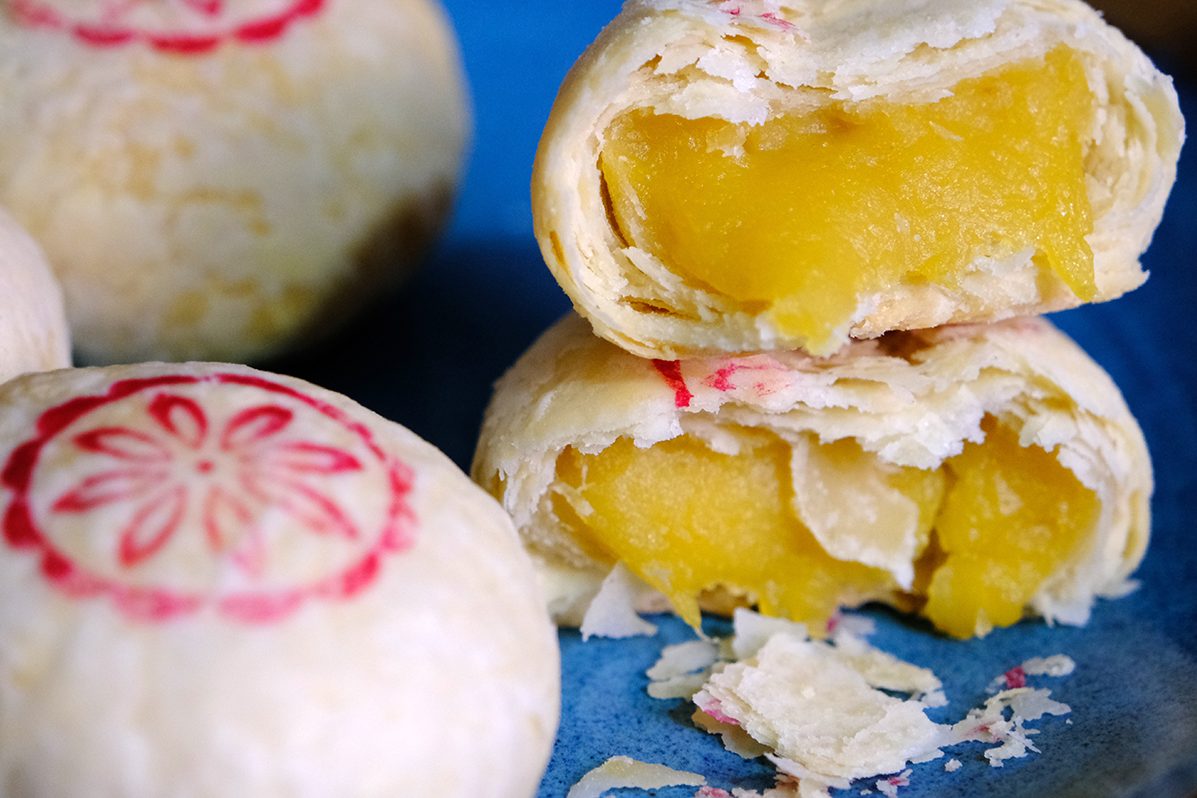
I hope you will enjoyed this recipe, especially with your loved ones or given as gifts to express love and good fortune.
Wishing you a Happy Mid-Autumn Festival !! ❤️💋 LOVE YOU ALL
WATCH HOW TO MAKE SUPER FLAKY DURIAN PASTRY MOONCAKE
RECIPE
SUPER FLAKY DURIAN PASTRY MOONCAKE WITH GHEE
Yield: 10 Pieces
Active Time: 2 Hours
Total Time: 4 Hours
INGREDIENTS
☘️ Durian Filling
75 g Mung Bean
600 g Water
130 g Fresh Durian Flesh
125 g Milk
35 g Caster Sugar
15 g Glutinous Rice Flour
1/8 tsp Salt
25 g Vegetable Oil
☘️ Water Oil Dough
130 g All-Purpose Flour
10 g Caster Sugar
1/8 tsp Salt
40 g Ghee
70 g Hot Water (40-60°C)
☘️ Pastry Dough
120 g All-Purpose Flour
50 g Ghee
☘️ Decoration
Wooden Stamp
Red Food Colouring
INSTRUCTIONS
Durian Filling
- Rinse Mung Beans until the water runs clear and pour it to a medium pan. 75 g Mung Bean
- Add in the Water, cook until they are very soft; set aside 600 g Water
- Scoop out the durian flesh. 130 g Fresh Durian Flesh
- Into the food processor- pour the cooked Mung Beans along with durian flesh and the rest ingredients (except the oil); Blend until smooth. 125 g Milk; 35 g Caster Sugar; 15 g Glutinous Rice Flour; 1/8 tsp Salt
* If the mixture is too thick, you can add a little bit of water to help the spinning process. - Pour the blended mixture into a non-stick pan; Add in the oil. 25 g Vegetable Oil
Cook over medium heat and keep stirring (please note never leave it out when cooking this mixture); This process will take for about 30 minutes (the water will slowly evaporate and the mixture star to thickened). - Once the mixture formed a thick paste, turn down the heat to medium low (be careful not to burned it) and continue cook until the paste comes together and no longer stick to the pan.
- Once it’s done, remove from heat.
Pour it to a plate, cover it with a cling wrap to prevent from drying out and store them in the fridge for at least 1 hour to firm up. - After 1 hour, the filling is firmer than before so it’s easier to handle.
Divide it into 10 equal portions (about 30 grams each) and roll each portion into a ball.
Cover with a cling wrap while waiting for the pastry dough.
Water Oil Dough
- In a large bowl, simply combine all the ingredients; Mix well (there’s no need to be so smooth).
Cover with a cling wrap and let the dough rest for 15 minutes. 130 g All-Purpose Flour; 10 g Caster Sugar; 1/8 tsp Salt; 40 g Ghee; 70 g Hot Water (40-60°C) - After 15 minutes, using your hands start kneading the dough (you can see that the dough become really smooth after kneading for a while).
- And then, continue kneading by slam the dough for about 5 minutes until you can pull the dough into a thin membrane (kindly follow video instructions).
- Wrap the dough in a plastic wrap and let it sit at room temperature for at least 30 minutes.
Pastry Dough
Simply combine All-Purpose Flour and Ghee. 120 g All-Purpose Flour; 50 g Ghee
Mix and knead the dough until you don’t see any flour left in the bowl; and then cover and let it rest at room temperature for at least 30 minutes.
Laminate the Dough
- Take the Water Oil Dough, press it into a thick round disc.
Place the Pastry Dough in the center and then wrap it up (gently fold and seal). - Turn it over so the seam facing down (sprinkle some flour to prevent from sticking).
And to prevent it from breaking, lightly press the dough with the palm of your hand first; And then you can use rolling pin gently roll into a long rectangular shape (about 15 cm x 20 cm). - Fold into thirds.
- And then, roll it into a bigger rectangle shape (about 25 cmx35 cm).
* I usually press the dough first and then roll it out slowly, it so much easier. - Once it’s done, spray or brush some water on the surface (not too much), this water acts as a glue; Then gently roll it up into a long log (make sure that you roll it tightly)
- Divide the log into 2 equal portion, cover and let it rest for 10 minutes.
- After 10 minutes, divide each log into 5 small equal portions (so total will be 10 small portions).
* Remember always cover the dough along the process to prevent it from drying - Once it’s done, we are ready to shape the mooncake.
Shape & Bake the Mooncake
- Take 1 dough; Turn it over so the smooth side facing down.
- Pinch both ends; Fold and stick the two ends together (pinch to seal).
- With the smooth side facing down, roll the dough into a 10 diameter round shape.
- Place the filling in the centre.
- Using your right hand, slowly squeeze and push the wrapper up while left thumb press the filling down; Pinch to seal.
* You can pull off the excess dough, I don’t like to waste any dough so I just press to flatten it. - Don’t worry if the skin of the dough is broken, you can always fix it.
Just apply a little bit of flour and rub gently, it will be smooth again. - Once the mooncake is done, place it on the pan lined with parchment paper.
- Use your palm or jar lid to flatten the mooncakes into a thick round disc.
- Spray some water on the top to prevent the surface from cracking.
- Apply some red food colouring to a kitchen paper; using wooden stamp create the pattern on the mooncake.
- Bake the mooncake in the preheated 190°C oven for 25 minutes.
- Once it’s done, transfer them onto a cooling rack and let them cool completely before storing.
NOTES
- These pastry mooncakes are best served once it’s come out from the oven; The crust will be really crispy while the thick Durian filling inside still warm and gooey .
- To Store
At room temperature (in an airtight container) for 2 days;
Fridge (in an airtight container) for 1 week;
Freezer (in an airtight container) for 1 month - The Durian filling is best consumed as soon as possible, but it will keep in an airtight container in the refrigerator (for up to a week) or in the freezer (for up to a month).