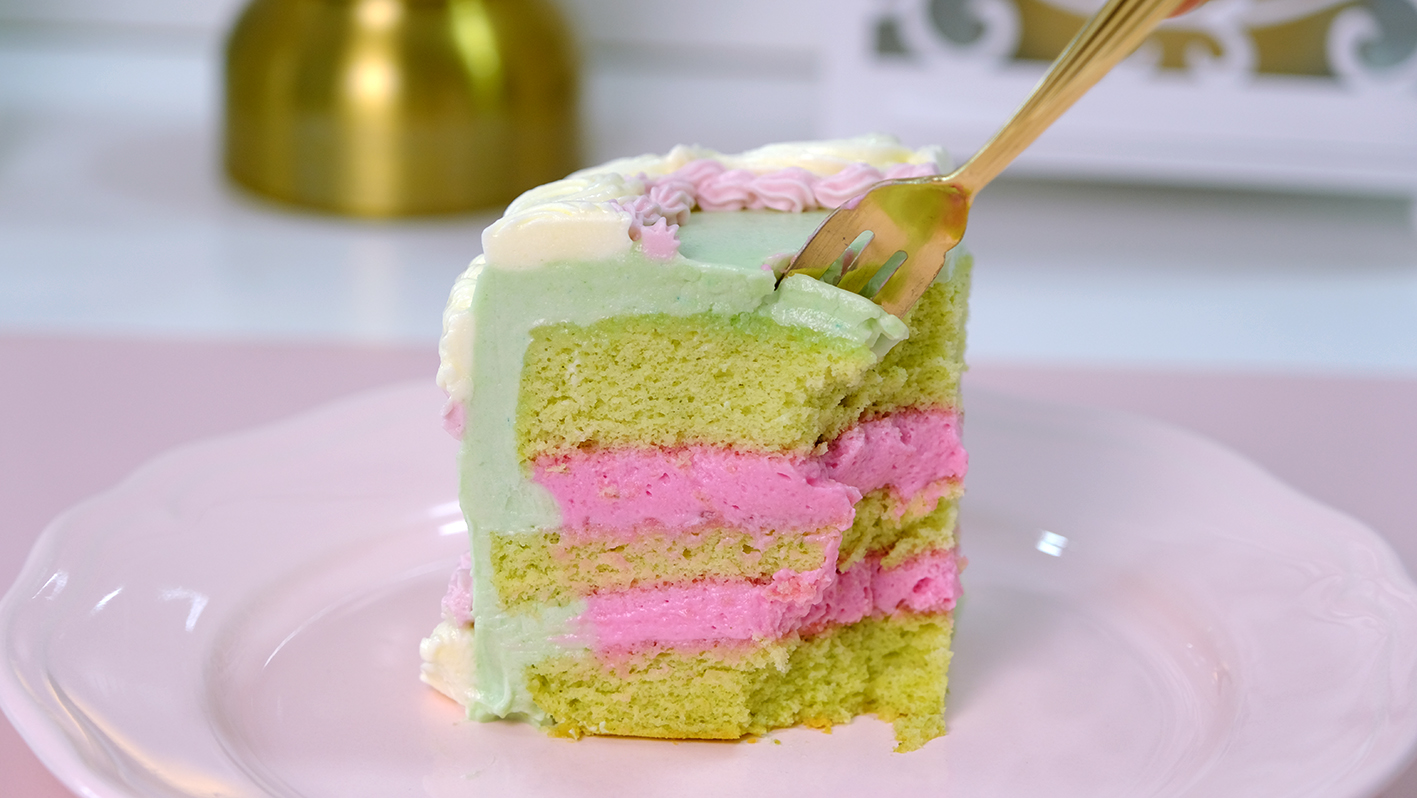
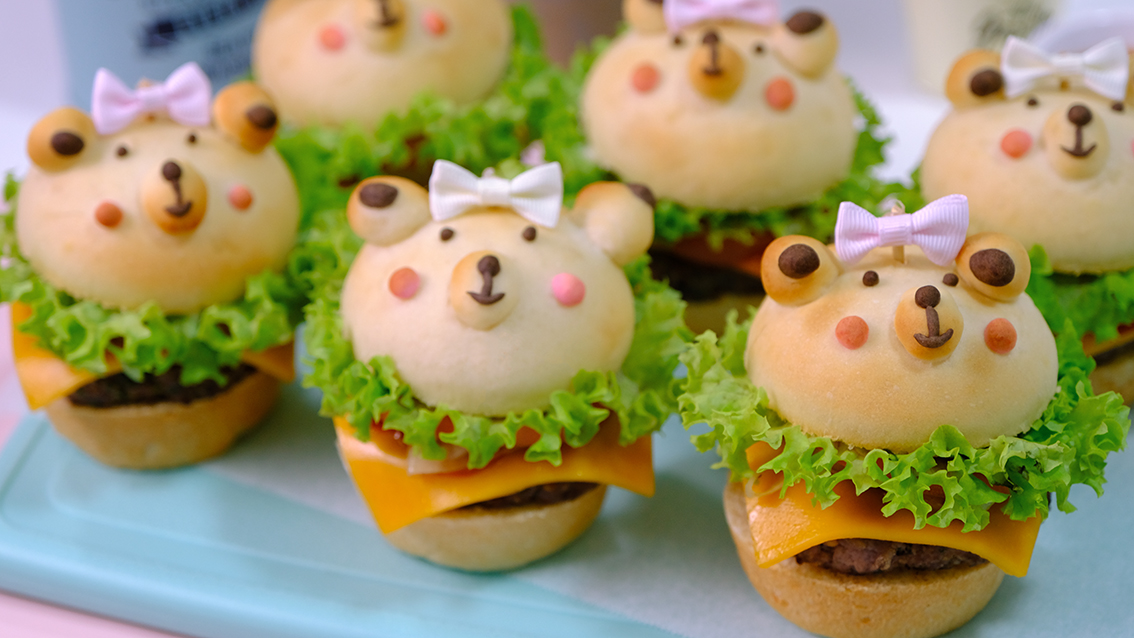
Today I’m gonna share with you my “Kawaii Mini Burger”.
These mini burgers will melt hearts and warm stomachs; they are so teeny-tiny, cute and absolutely delicious.
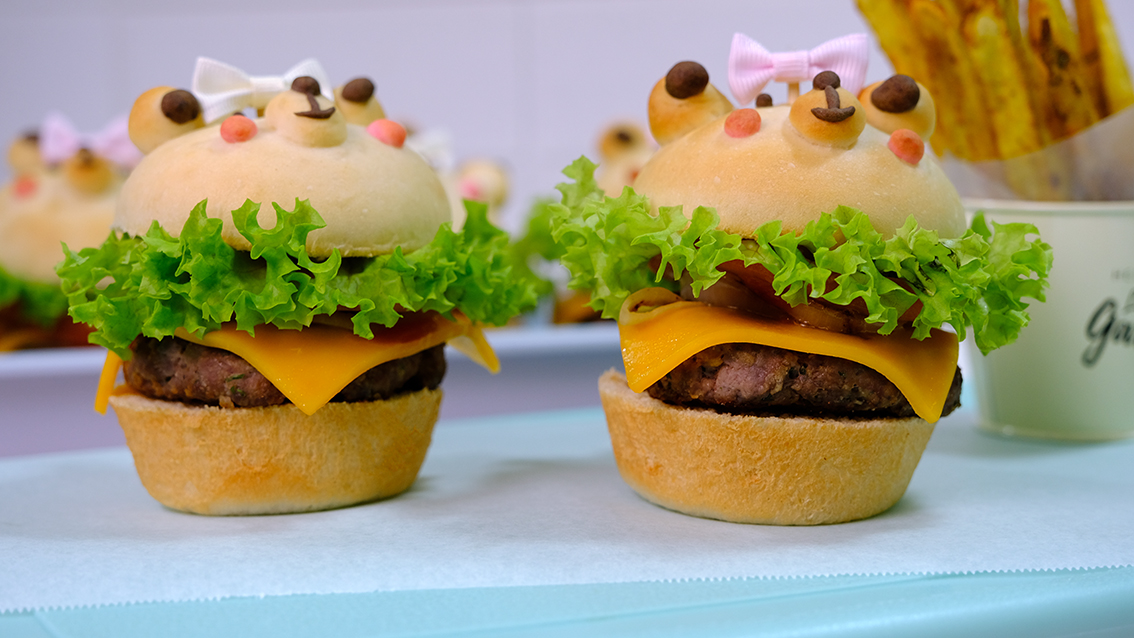
The bun is entirely homemade, soft and fluffy; with juicy patty inside and all the delicious toppings and sauce… so Yummy!!
They are perfect to serve up at a party or just a snack for your love ones.
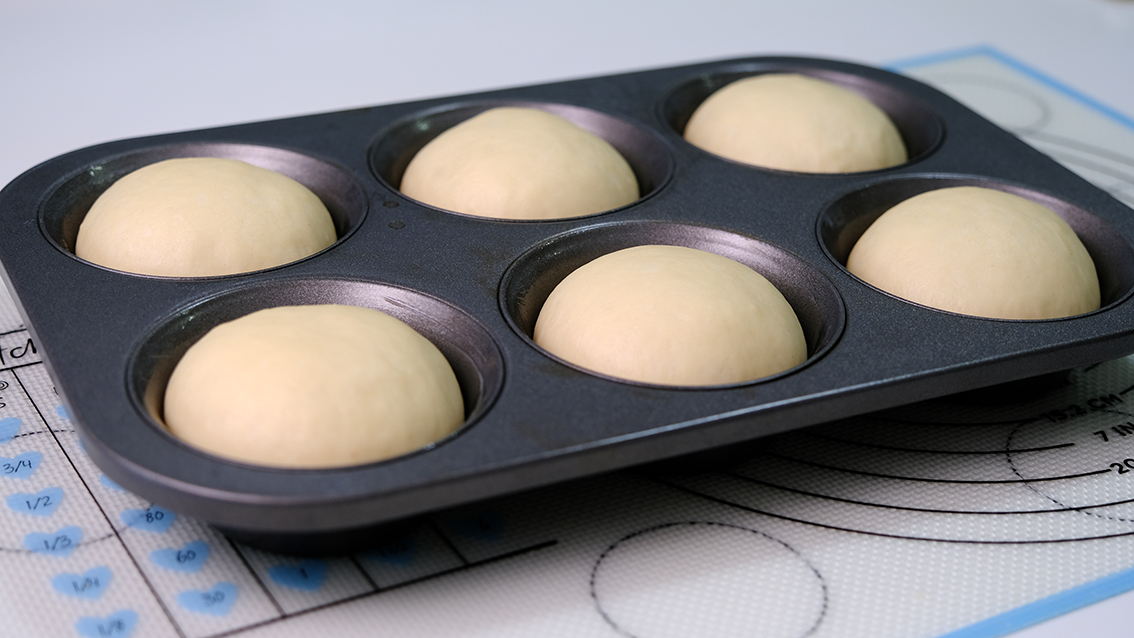
For the buns, you can make buns using ring moulds and they can be scaled to any size that you like, I found that this regular cupcake pan fits perfectly and easier to get.

To avoid over-proofing, I usually start adding the details when the buns has increase the volume 40-50 percent. If you see from the side, the top of the dough is more or less parallel with the top surface of the pan.

And while we adding the details the dough will continue to rise, so try to finish them as soon as possible.

You don’t want to over bake your lovely buns, if they are too dark they won’t look good on your burger.

And to keep everything from falling apart, I create my own DIY toothpick so it’s easier to “grab and eat”.
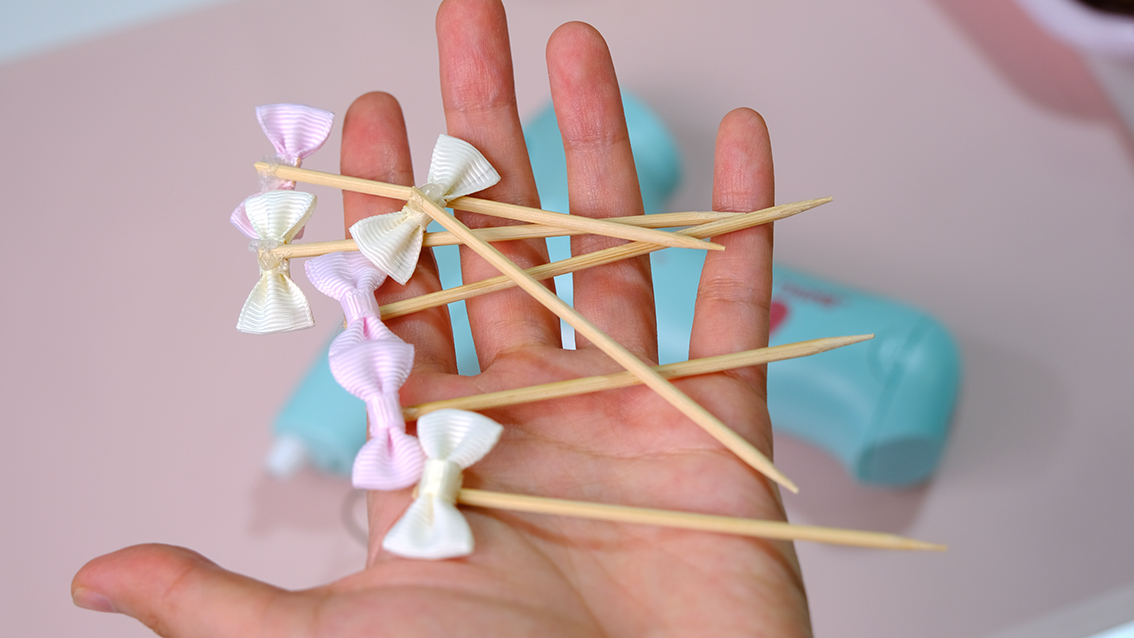
It’s not only make it even cuter, but also look more elegant and fancy
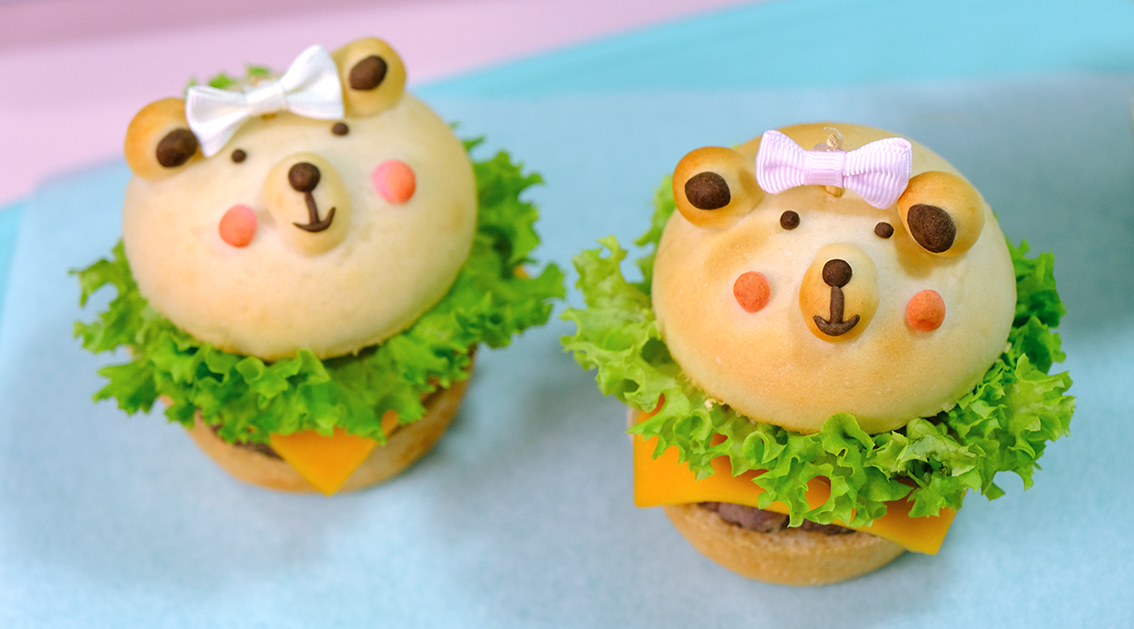
These custom toothpicks really take your food presentation to the next level.

You can shape the patty with your hands, I’m prefer to use ring mould, it really helps me to make my burgers look perfect like the ones you get in restaurants.
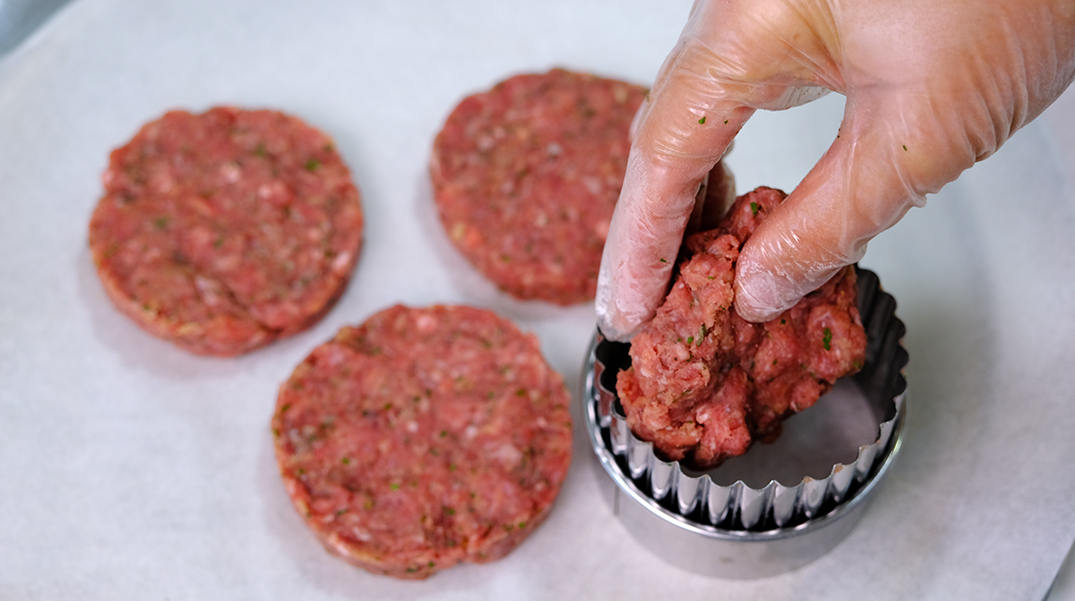
Some people use a lid from a jar as a mould. Just make sure that you find a lid that is slightly bigger than the size of your burger bun coz shrinkage happens throughout the cooking process.
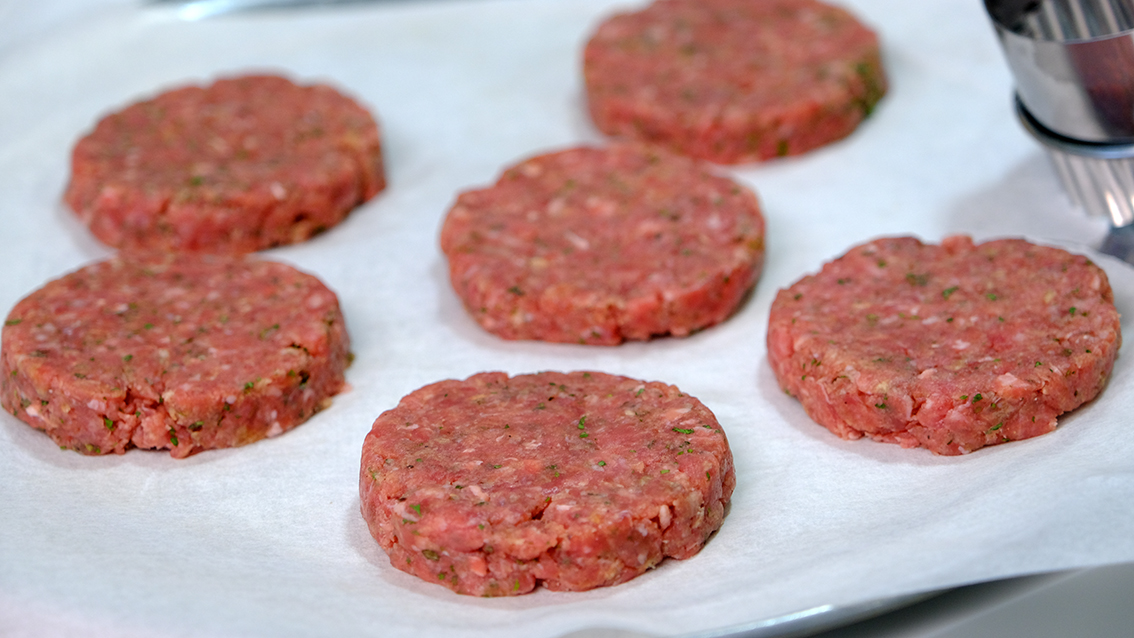
And before you cook it, give a thumbprint indentation to the center of each patty, this will helps the patty hold it’s shape—rather than swelling.
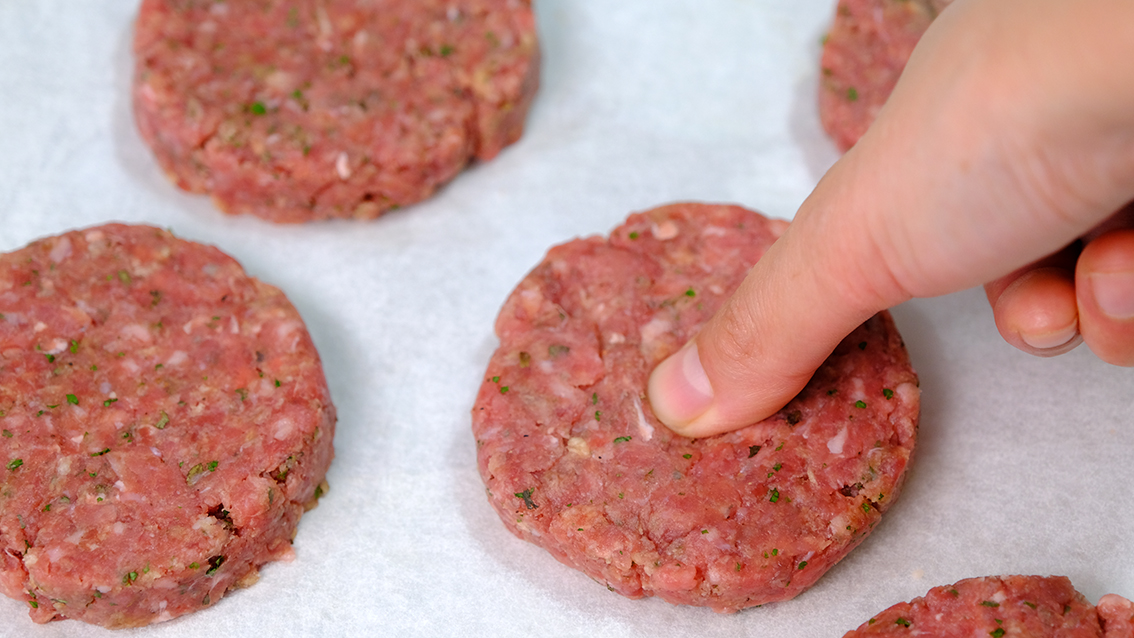
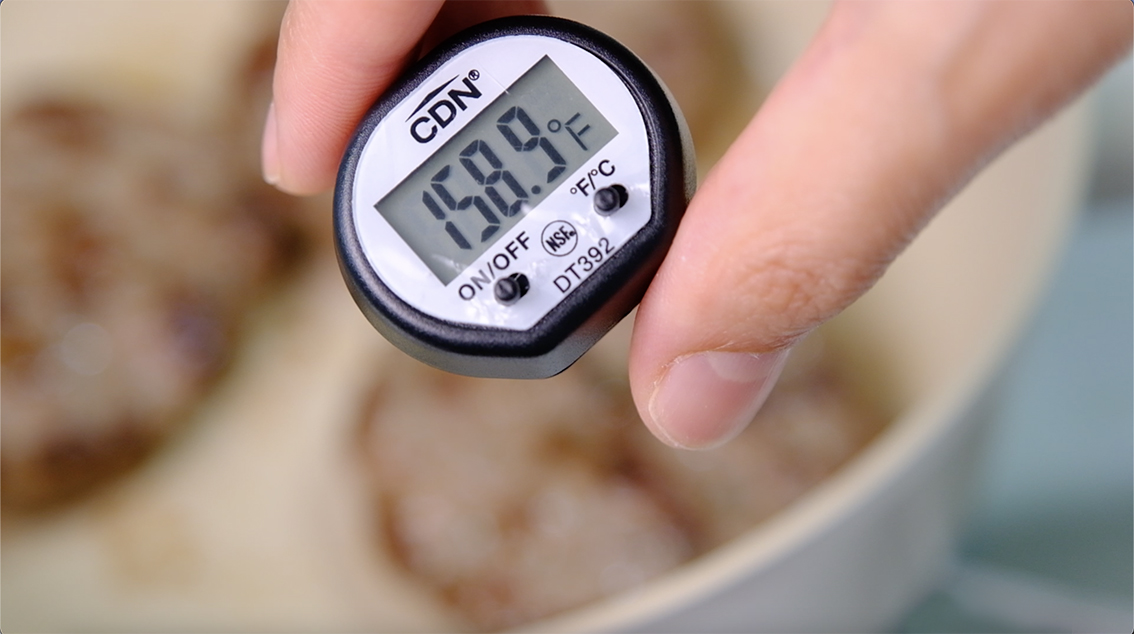
The best way to tell when it’s done is by using a thermometer without splitting the middle.
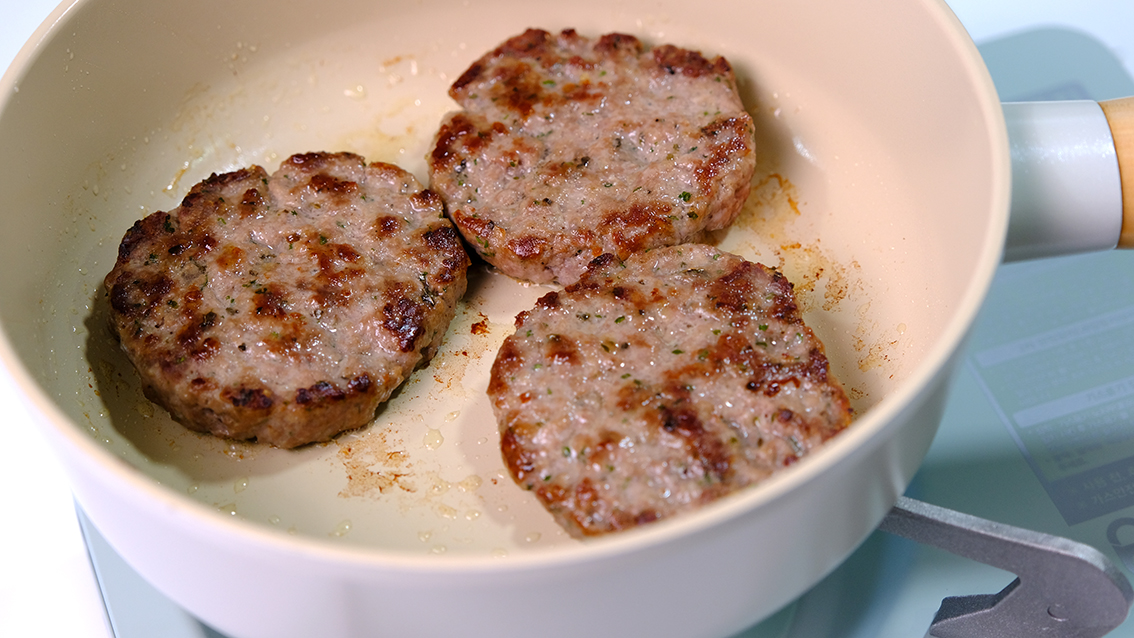
Cook until a thermometer reads 160°F.
Besides tomato ketchup, one of the best condiment that I always used when making burger is this wasabi mayo.
I remember having this sauce in a morning burger when I was in Japan and I really love it so much!
You can use either wasabi powder or paste, for me it does taste pretty similar.
If you are a wasabi lover, I promise it will taste really great!

All the ingredients is well prepared; the patties, sharp cheddar cheese, tomatoes, onions, some lettuce, the sauce…
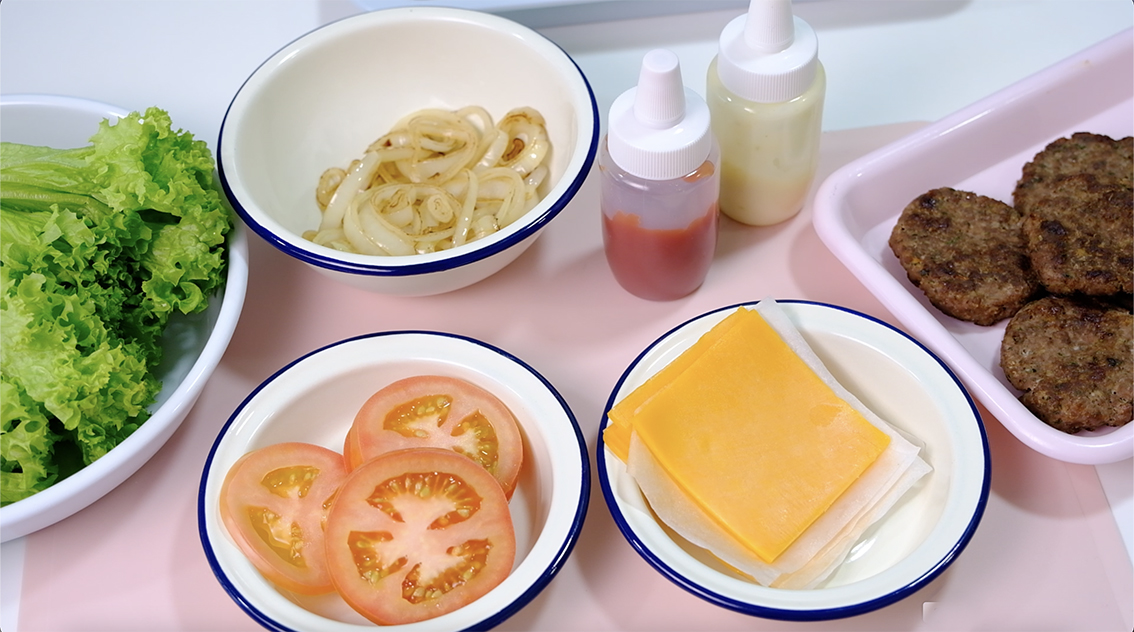
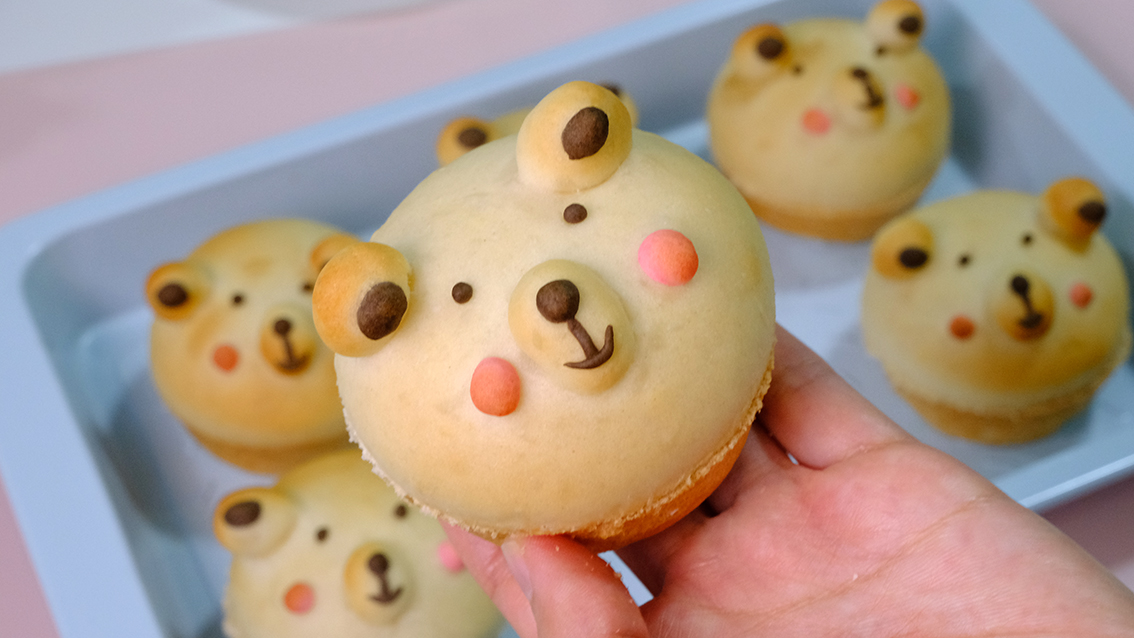
And of course our adorable burger buns !
And before we start to stack them, do you know that are many ways to stack the burgers??
If you pay attention to the emojis, each of them arrange the burger in a different order.

Initially I also thought is this thing important?
Then I was really surprised that 2 burger with identical ingredients but different stack orders can result in 2 different taste.
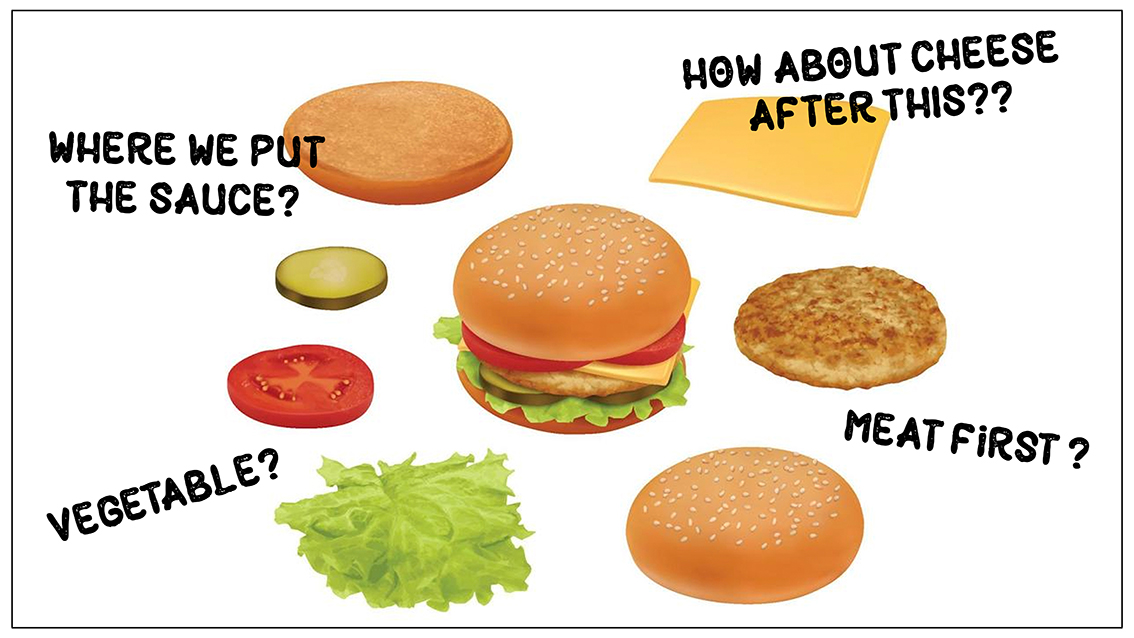
After a few experiment and testing, I decide to use the “Burger King Whopper” stack method as it produce more stable and flavourful burger.
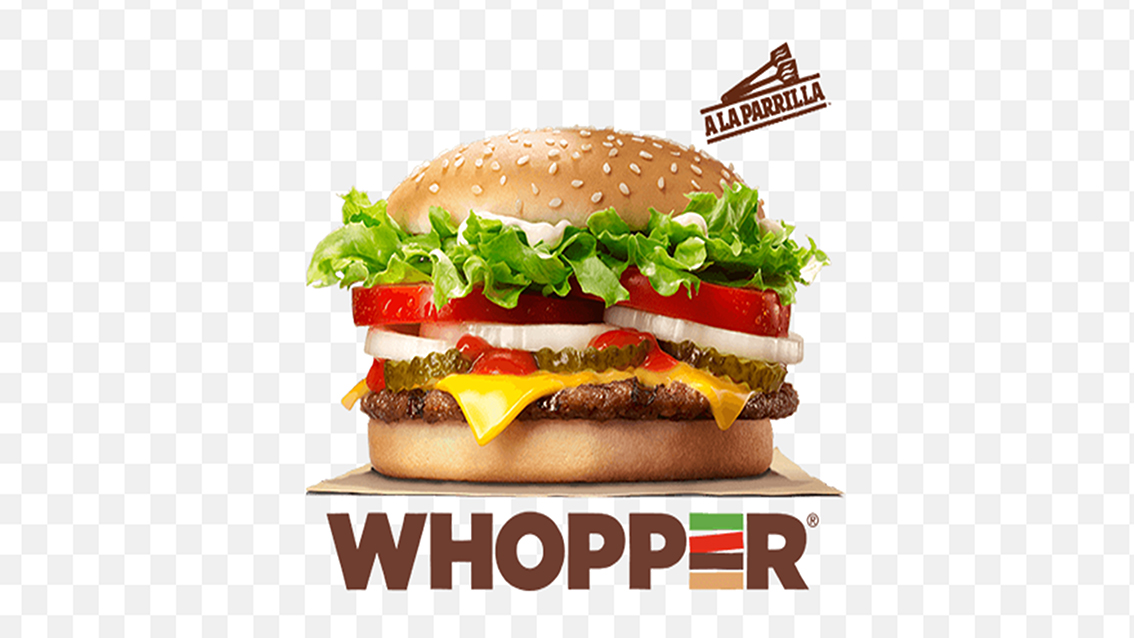
Ok back to our Whopper stack burger, so you will cut half of your tinny buns and stack all the toppings and sauce.

Look how beautiful this burger buns!

Please do remember the stack order (this will come out in the test! KIDDING 😅) :
1. The bottom of the bun
2. Juicy patty
3. A piece of sharp cheddar cheese
4. Tomato ketchup
5. Some grilled onion
6. A slice of tomato
7. A bunch of fresh lettuce
8. My beautiful wasabi sauce
9. The cute teddy bear head bun
10. And finally secure it with her pretty hair ribbon

And of course, no burger is truly complete without having a side of scrumptious fries!
These healthy baked sweet potatoes so tasty, they are caramelised on the outside and tender on the inside. I love it so much!
And as for the seasoning, you can keep it simple or even add more flavor with spices.
A pinch of curry powder, garlic, and cayenne pepper would be a nice touch. It was the perfect combination of heat and sweet.

They are look not only delicious but also so sweet, I’m sure that everyone and specially kids will love it so much.

The bun is entirely homemade, soft and fluffy, while the burger patty is juicy and tender.
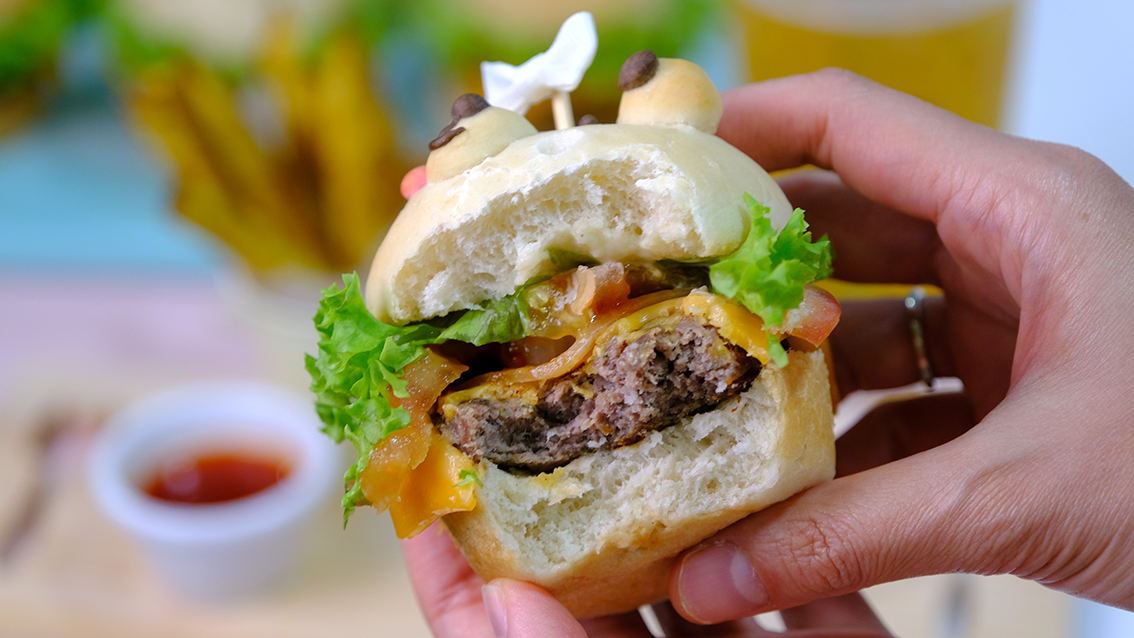
And how about some cold beer for adults?
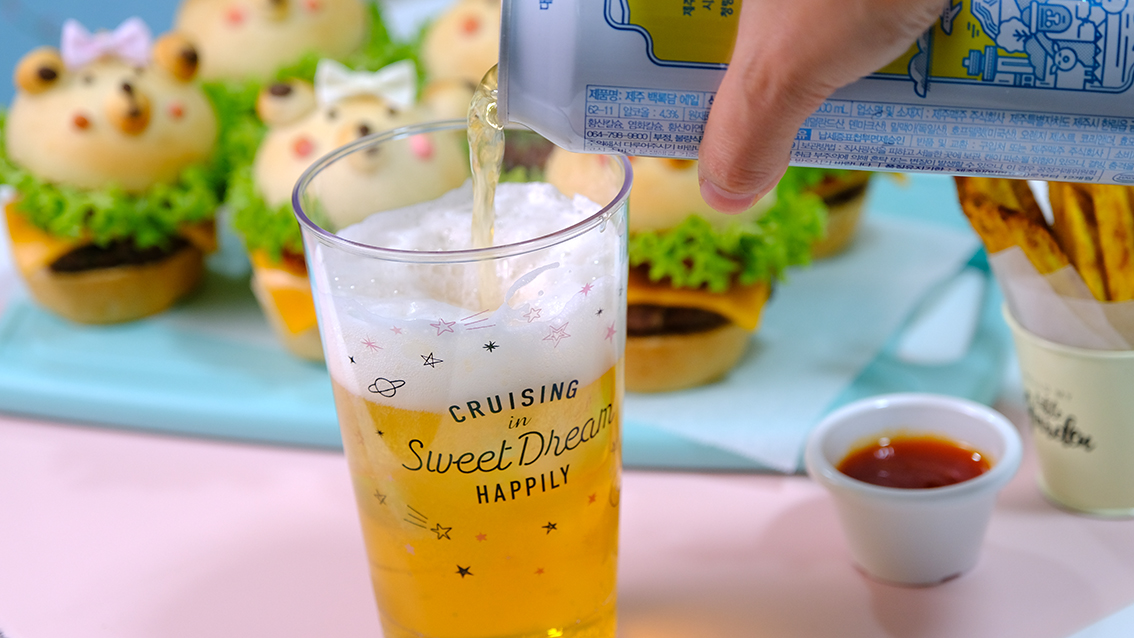
I hope that you give them a try, they are really a lot of fun to put together.

You can create your own design with a different flavour; replace the beef with juicy grilled chicken patty, change the sauce with sweet and savoury teriyaki sauce;
Whatever you like! THE SKY’S THE LIMIT
I hope that you enjoy the recipe!! LOVE YOU ALL!!
KAWAII MINI BURGER
Yield: 6 burgers
Cupcake pan dimensions: (18.5×26.5×3)cm
Active time: 2 hours
Total time: 2 1/2 hours
INGREDIENTS
BURGER BUNS ( 6 burgers, 55 grams each)
- 200 g Bread Flour
- 1 tsp Instant Yeast
- 25 g Granulated Sugar
- 8 Milk Powder
- 1/2 tsp Salt
- 120 Cold Water
- 15 Unsalted Butter
SWEET POTATO FRIES
- 750 g Sweet Potatoes
- 1 Egg White (30 g)
- 1 tsp Vegetable Oil
- 1 tsp Curry Powder (optional)
- 1/2 tsp Salt
- 1/4 tsp Ground Black Pepper
- 1/4 tsp Garlic Powder
- 1/8 tsp Cayenne Pepper (optional)
PATTIES (6 patties, about 55 grams each)
- 250 g Beef (Ground Chuck)
- 15 g Eggs
- 25 g Bread Crumbs
- 25 g Parmesan Cheese (grated)
- 1 tsp Dried Parsley
- 1/2 tsp Dried Basil
- 1/4 tsp Salt
- 1/4 tsp Garlic Powder
- 1/8 tsp Ground Black Pepper
TOPPINGS & ASSEMBLY
- Sharp Cheddar Cheese
- Tomato Ketchup
- 1 Onion (grilled)
- 1 Tomato (thin slice)
- Lettuce
- Wasabi Sauce (3 tbs Mayonaise + 3 tsp Wasabi Paste)
- DIY Toothpick
INSTRUCTIONS
BURGER BUNS
- Grease the pan with generous amount of butter; cupcake pan dimensions: (18.5×26.5×3)cm.
- In a large bowl combined the flour, instant yeast, sugar and milk powder; mix well.
Add the salt and mix (adding the salt last to make sure that it doesn’t come into direct contact with the yeast; salt can kill the yeast). - Pour ice water into the flour mixture (ice water slows down the fermentation so we have more time to decorate the buns).
Don’t knead the dough at this time, just mix water and flour mixture until it forms a cohesive ball - Cover and let the dough rest for about 10 minutes.
After 10 minutes you can feel that the dough become more stretchy and pliable. - Place the dough on the work surface, add in the butter and start kneading the dough.
The dough is really sticky at this point, that’s totally fine, don’t be tempted to add more flour to it; just continue kneading it until you get a smooth ball (it takes for about 10 minutes).
*You will know whether the dough is ready by doing the windowpane test; if you can stretch the dough into a thin translucent membrane without breaking it that means the gluten is well developed and your dough is done. - Weigh 6 portions of the dough, 55 grams each (there will be leftover dough for the details, some plain dough for the Bear’s ears, colour a bit with dark brown for the eyes, nose and mouth; and another pink for bear’s lovely cheek).
Cover all the dough in a plastic wrap to prevent from drying out and let them rest for about 5 minutes. - After 5 minutes, take 1 portion of the dough, flatten it with the palm of your hand to remove any air bubbles, pull all creases to the back; place it on a work surface and then roll and shape it into a smooth ball. Continue with the rest dough.
- Place the buns onto a greased cupcake pan, cover it with a kitchen towel and let them half proof for about 20-30 minutes.
- In the meantime; Preheat the oven to 170°C.
- After 30 minutes, you will see that the dough noticeably puffy and increase the volume 40-50 percent. If you see from the sides, the top of the dough is more or less parallel with the top surface of the pan.
Now you can start adding the detail (while we adding the details the dough will continue to rise, so try to finish them as soon as possible):
– Roll some plain dough for the Bear’s ears and then the center of her face
– Using some dark brown dough to create the inner part of the ears, her tiny nose, two little eyes and mouth.
– A bit of pink dough for her shy cheek - After finish with all the details, you can check whether the buns is fool proof; if you press the dough then the indentation slowly springs back half-way, that means the dough is well proved and ready to bake.
- Bake them in the preheated 170°C oven; turn on your alarm and check them out right after 10 minutes baking. Do not over bake, if they are too dark they won’t look good on your burger. Once it’s done, take it out from the pan and let it cool completely on a cooling rack.
SWEET POTATO FRIES
- Preheat the oven to 200°C.
- If you leave the skin on, make sure that you wash and scrub them well before you cutting or cooking it; pat them dry.
- Cut the fries; I recommend a width between 1/4- and 1/2-inch.
- In a large bowl whisk the egg whites until foamy, add a bit of vegetable oil and coat the fries (this egg whites mixture acts as a binding agent so all the spices will stick well to the fries).
- Toss the sweet potatoes with the rest ingredients (salt, pepper and spices).
- Place the fries on parchment lined baking sheets (try not to overlap the fries for even baking). Bake them for 20 minutes.
After 20 minutes, flip the fries; return to the oven and bake it for another 15-20 minutes. - Serve immediately.
*The browner they are, the crispier they will be, but if they get really dark, they will be a bit hard because of the natural sugars of the sweet potatoes caramelizing. Oven may vary, So watch carefully.
PATTIES
- Season ground beef with all the ingredients; mix really well and divide it into 6 patties.
- Place 1 portion of ground beef inside the 7 cm diameter ring; press the meat down, make sure it spread evenly.
*You can shape the patty with your hands, I’m prefer to use ring mould, it really helps me to make my burgers look perfect like the ones you get in restaurants (some people use a lid from a jar as a mould, just make sure that you find a lid that is slightly bigger than the size of your burger bun coz shrinkage happens throughout the cooking process). - Before you cook it, give a thumbprint indentation to the center of each patty (this will helps the patty hold its shape—rather than swelling).
- Over medium heat, cook for 2-3 minutes on each side. The best way to tell when it’s done is by using a thermometer without splitting the middle; cook until a thermometer reads 160°F.
*Don’t forget to fry your onion for toppings.
ASSEMBLY
Stack Orders :
1. The bottom of the bun
2. Juicy patty
3. A piece of sharp cheddar cheese
4. Tomato ketchup
5. Some grilled onion
6. A slice of tomato
7. A bunch of fresh lettuce
8. My beautiful wasabi sauce
9. The cute teddy bear head bun
10. And finally secure it with her pretty hair ribbon
NOTES
- To store buns; in an airtight container 4 days in the fridge, 2 week in the freezer.
- To defrost the buns; pull the bag out of the freezer and leave it on the counter at room temperature (a single bun may need 15 to 20 minutes to defrost).
Take out the buns from the bag and toast the buns in the preheated 180°C oven for 5-10 minutes, or just long enough to warm them through.