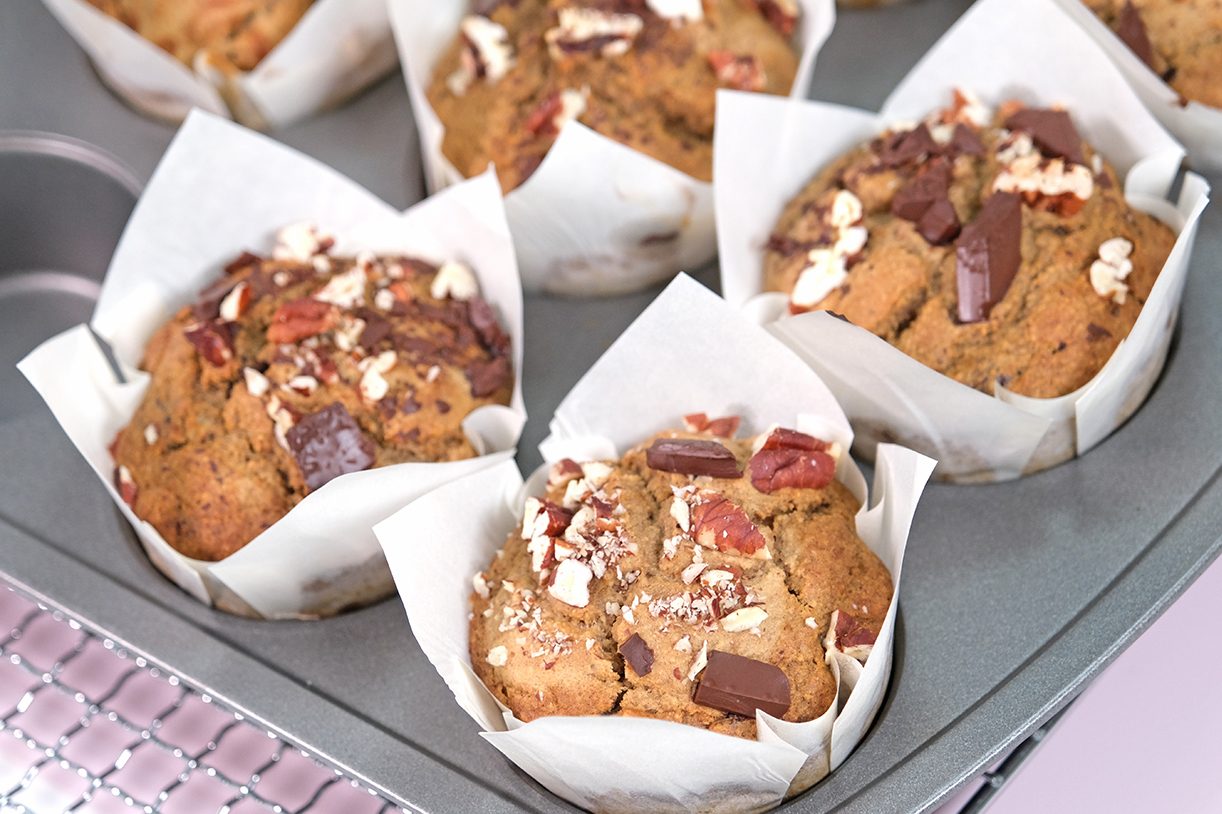
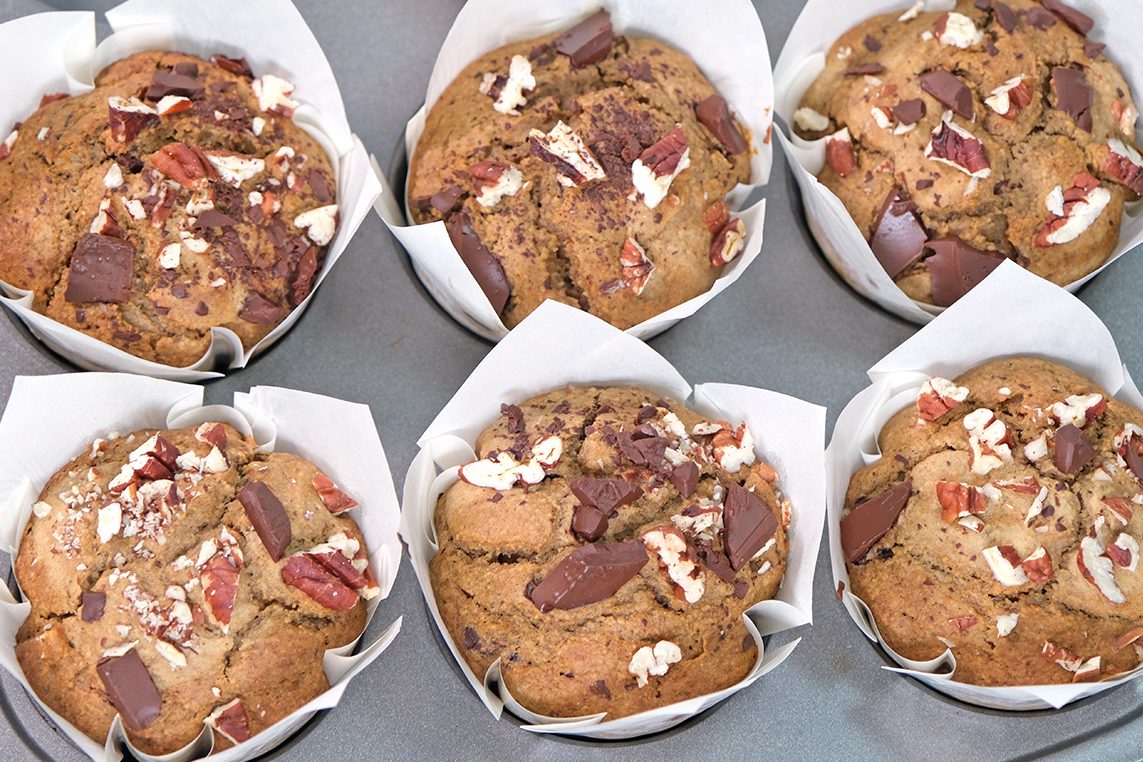
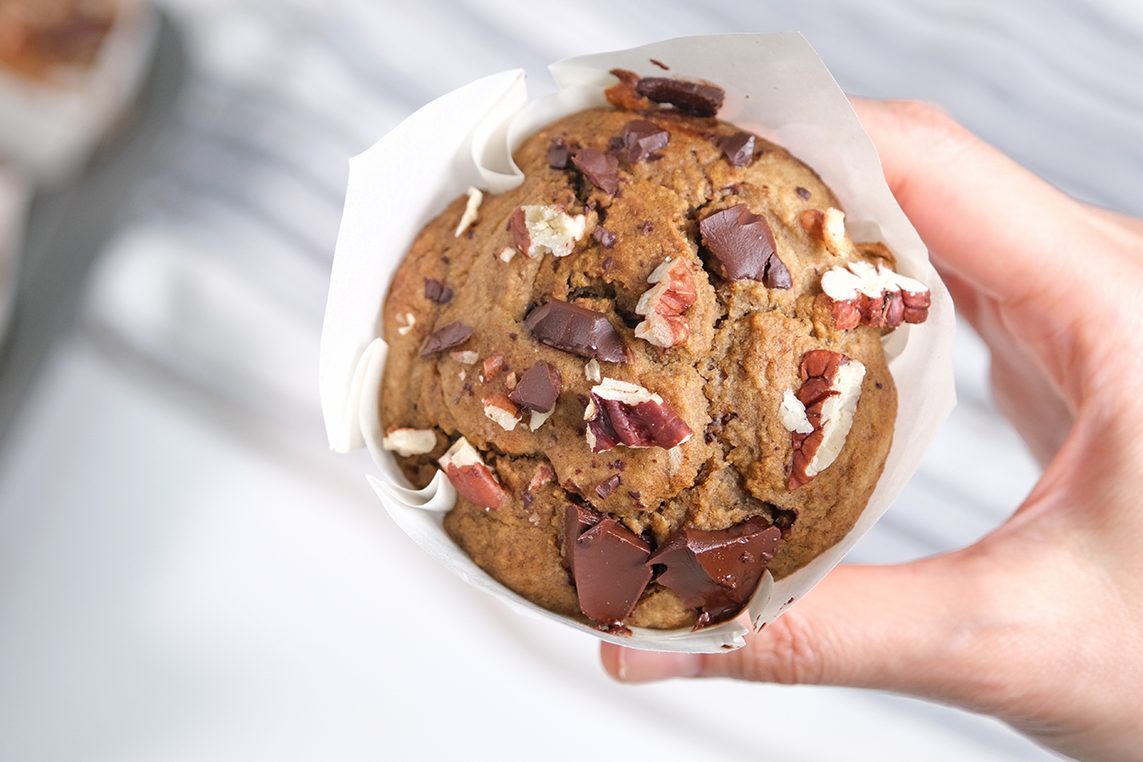
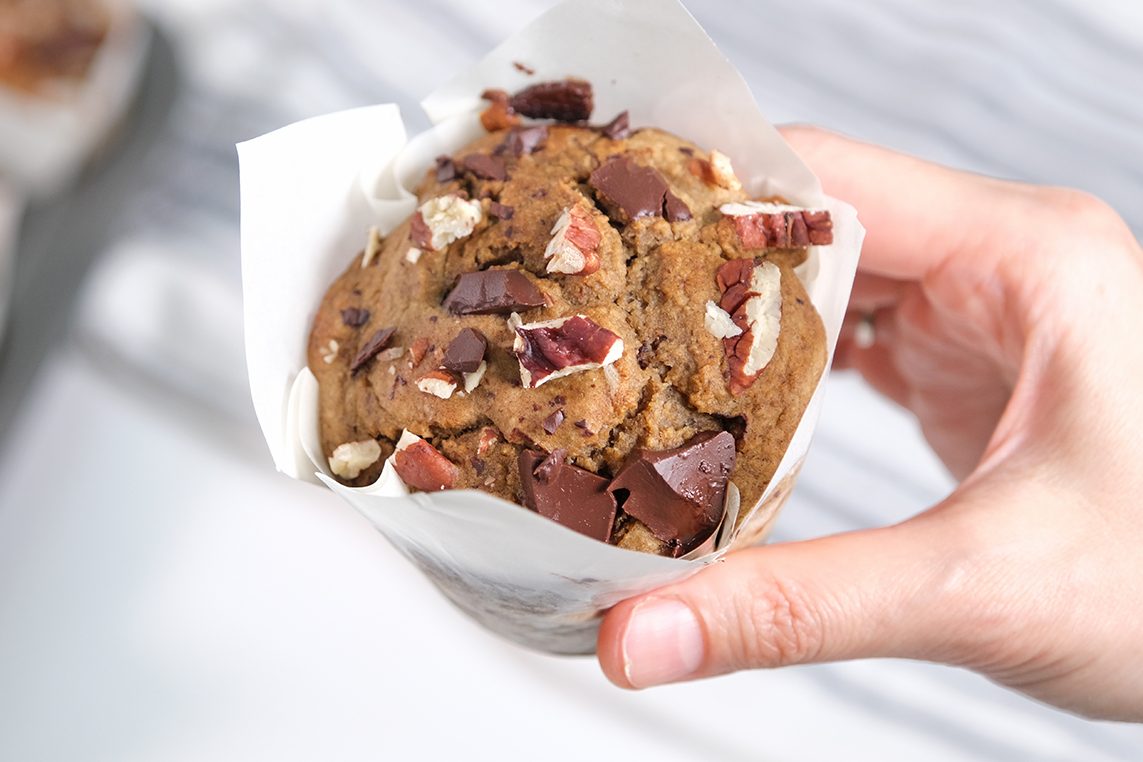
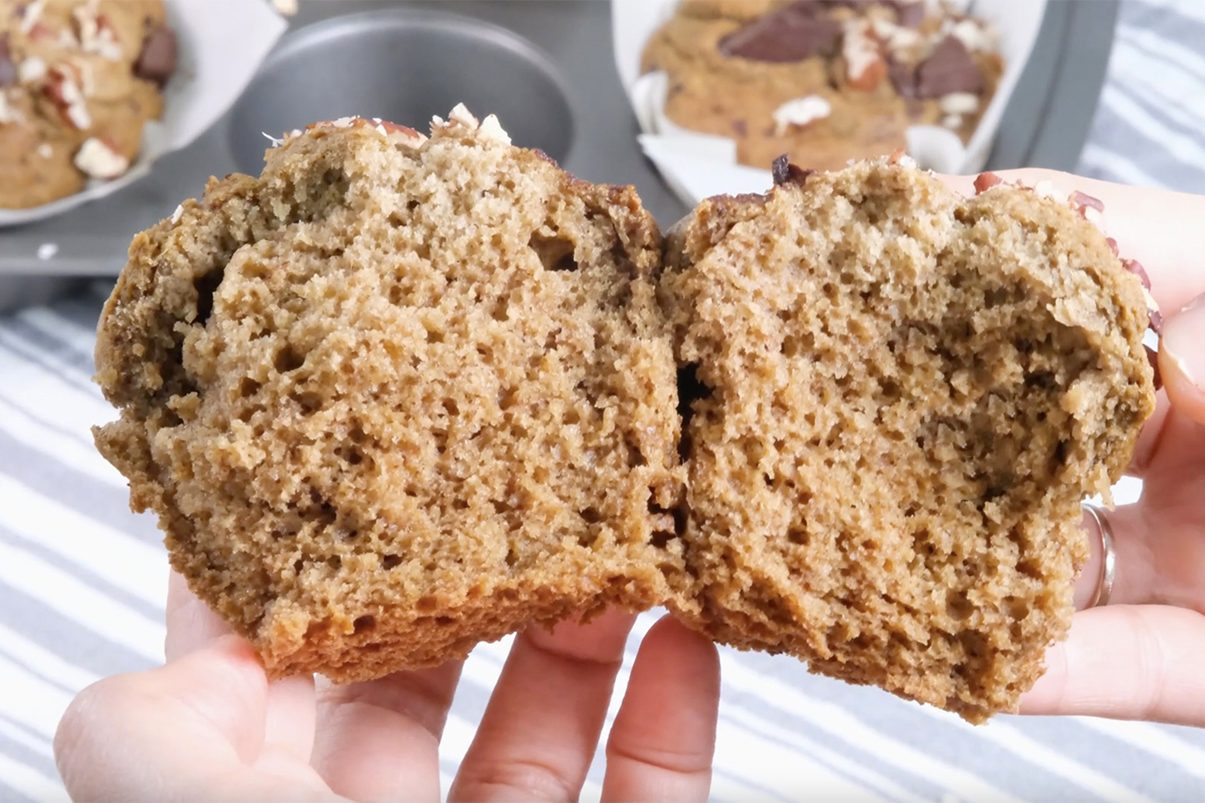
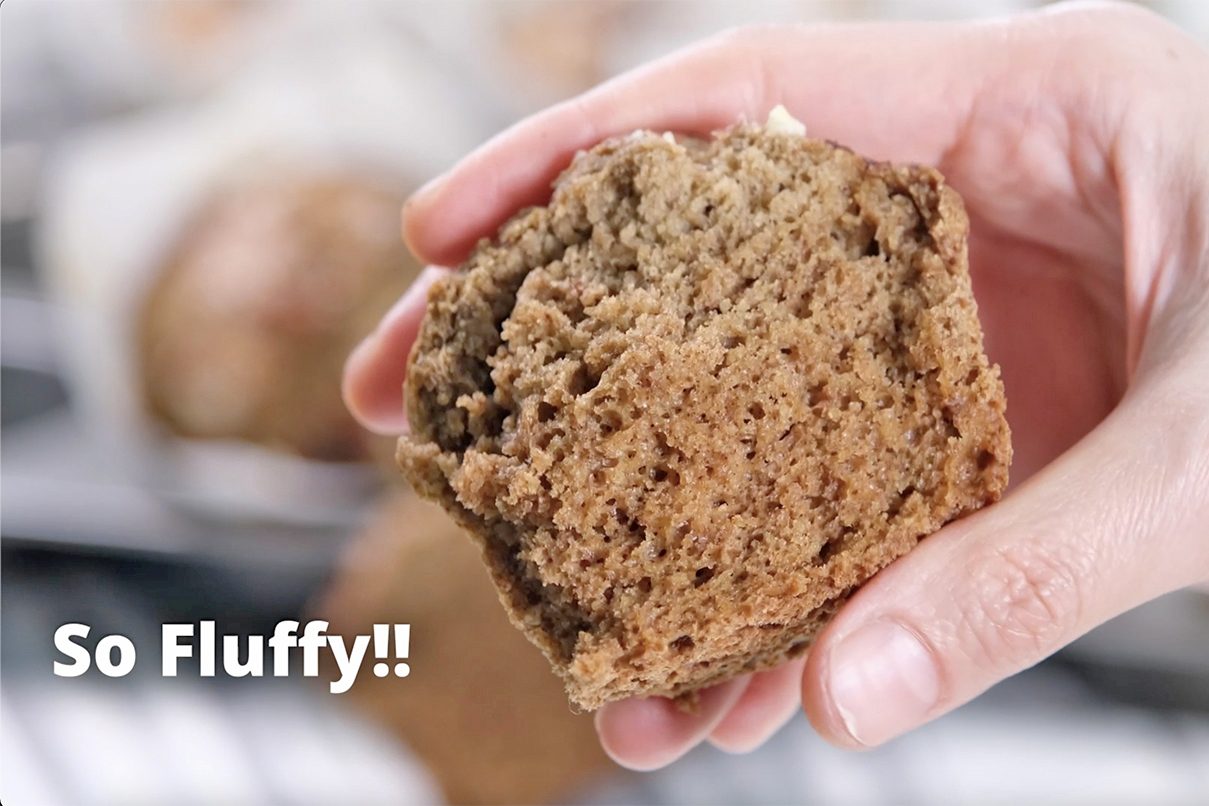
If you love Muffins but don’t love the sugar crash, these “Healthy Banana Oat Muffins” are about to become your new favorite bake.
They’re naturally sweet, incredibly moist, and made with simple, wholesome ingredients — without Oil, Refined Sugar, Flour, or Dairy.
😍 My favourite Muffin 🥰
Yes, really! These muffins are perfect for busy mornings, post-workout snacks, or even a light dessert. And the best part? Everything goes into one blender 😘
💋 WHY YOU WILL LOVE THESE MUFFINS
Naturally sweetened with ripe bananas & dates
No refined Sugar
No white Flour (just oats!)
No Oil or Butter
Dairy-free
Kid-friendly & freezer-friendly
Ready in 30 minutes
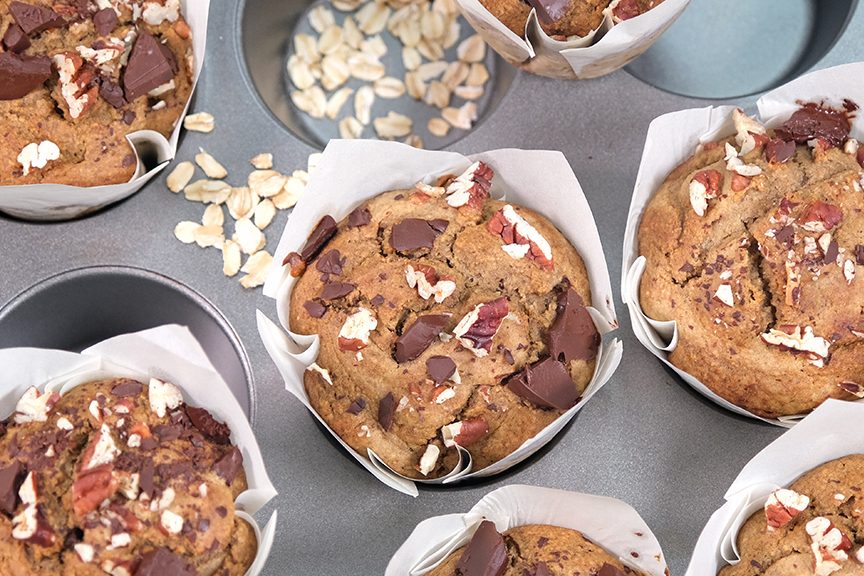
They’re soft, tender, and perfectly sweet, packed with fiber-rich Oats, and finished with Dark Chocolate and crunchy Pecans.
🍌 Why These Muffins Work
Bananas provide moisture and natural sweetness
Dates enhance sweetness without refined sugar
Oats replace flour entirely
Eggs give structure and lift
Dark Chocolate + Pecans add richness and crunch
They’re hearty, filling, and perfect for breakfast or a snack 🤓
It’s golden, fluffy, and totally healthy!! 🤤
These Banana Oat Muffins prove that healthy baking doesn’t mean sacrificing flavor. With just a handful of wholesome ingredients, you get a rich, satisfying muffin that feels indulgent — but fuels your body well.
Perfect for a guilt-free snack, breakfast or a cozy coffee break 😘 ☕
Give them a try, and let me know what you think! 😁
WATCH HOW TO MAKE HEALTHY BANANA OAT MUFFINS
RECIPE
HEALTHY BANANA OAT MUFFINS Yield: 7 Big Muffin
🍌🧁 INGREDIENTS 350 g Bananas (ripe to overripe with brown spots) 70 g Dates (pitted) 160 g Rolled Oats (blend into powder) 115 g Eggs (room temp.) 1 tsp Baking Soda 30 g Dark Chocolate 70% (chopped) 30 g Pecans (chopped)
🍌🧁 INSTRUCTIONS
Preheat the oven before you start 160°C fan/ 180°C/ Gas Mark 4 Once the batter is ready, bake it right away; letting it sit too long can cause the batter to lose its rise and collapse
Blend the Oats into a fine powder (don’t skip this step, you want a smooth, lump-free batter), set aside
In a large blender bowl, add the Eggs first, then the Bananas, Dates, and Oat Powder (make sure to follow this order; otherwise, the blender could get stuck!) Blend everything until it’s nice and smooth
Sift the Baking Soda into the batter to break up any lumps and ensure it’s evenly distributed; Mix well
Add half of the chopped Pecans and Dark Chocolate to the batter, then mix until everything is well combined
Scoop batter into muffin liners
Sprinkle the remaining Pecans and Dark Chocolate on top
Bake them in a preheated 160°C fan oven for about 25 minutes or until a toothpick inserted into the center comes out clean
Once the Muffins are done, you can serve them warm immediately, or carefully transfer them to a cooling rack and allow them to cool completely before storing
Storing instructions
Because these muffins contain fruit and no preservatives, proper storage is important:
Room Temperature: Store in an airtight container; Best consumed within 2 days; Keep in a cool, dry place
Refrigerator: Store in an airtight container; Lasts up to 5 days; Texture becomes slightly firmer when chilled
Freezer: Wrap individually or store in freezer-safe container; Freeze for up to 3 months; Thaw overnight in the fridge or microwave for 20–30 seconds
Reheating Tips
Microwave for 15–30 seconds to soften
Or warm in oven at 150°C for 5–8 minutes
Enjoy slightly warm for the best texture and melted chocolate pockets
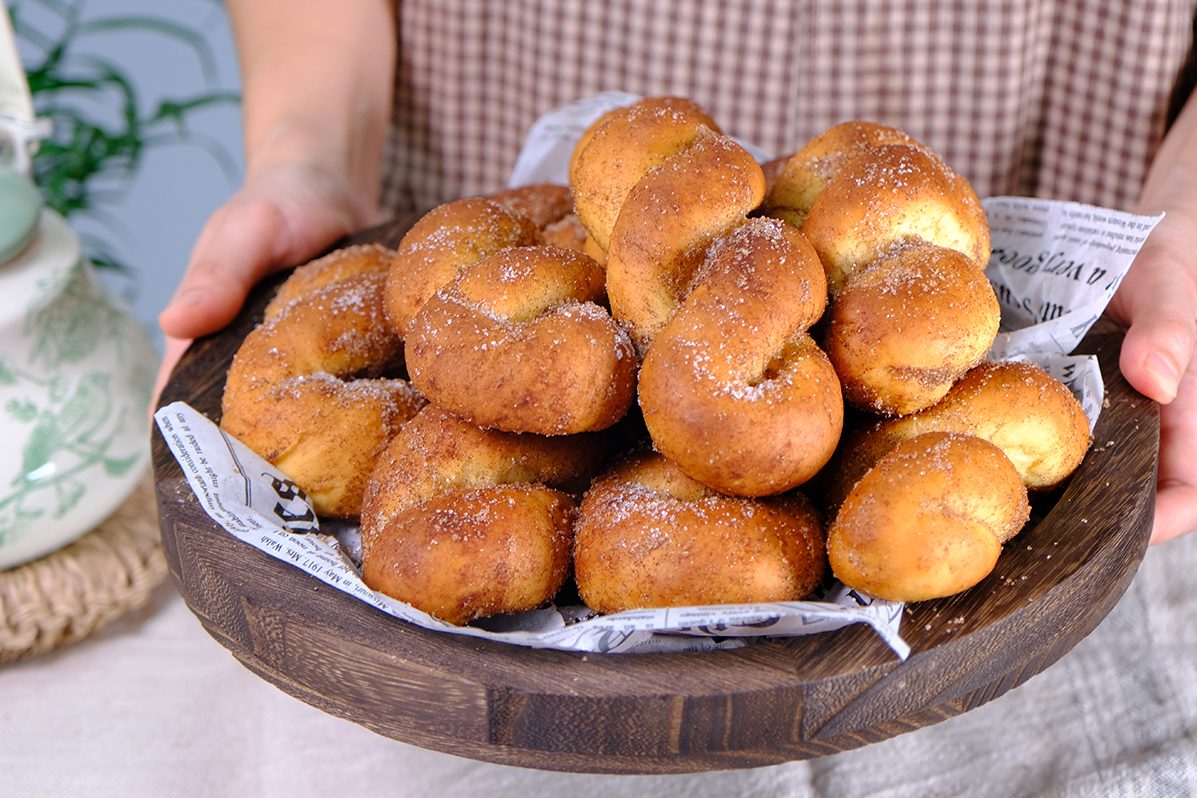
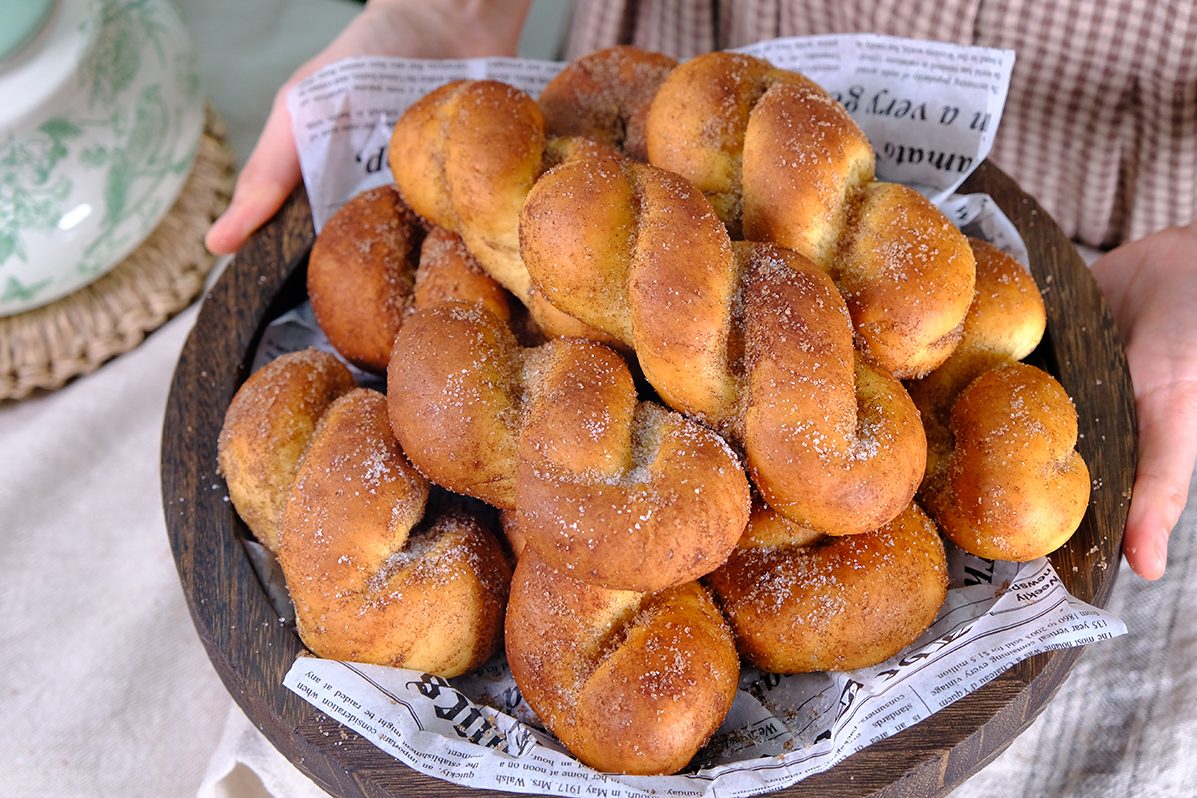
In Korea, Kkwabaegi is a popular after-school snack 🥰
“Kkwabaegi 꽈배기” or Korean Twisted Donuts;
I absolutely love them, but I don't like frying them; they're too greasy and troublesome.
This recipe doesn't require frying, you just bake them instead! A healthier version of Donuts 😋
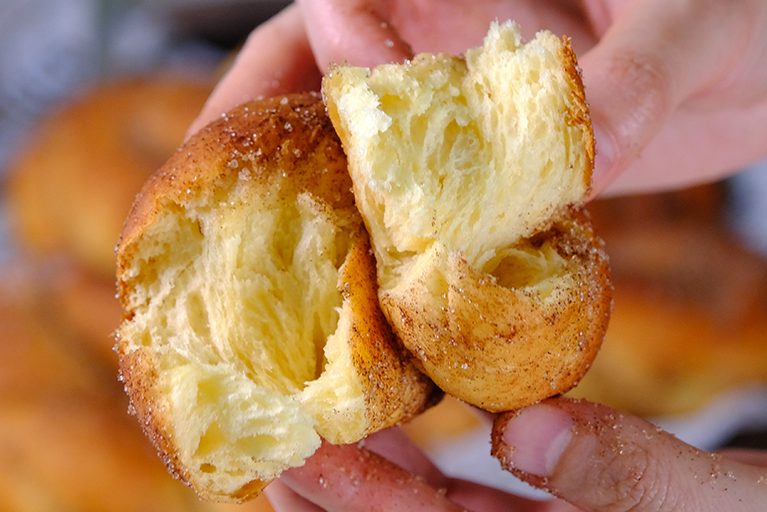
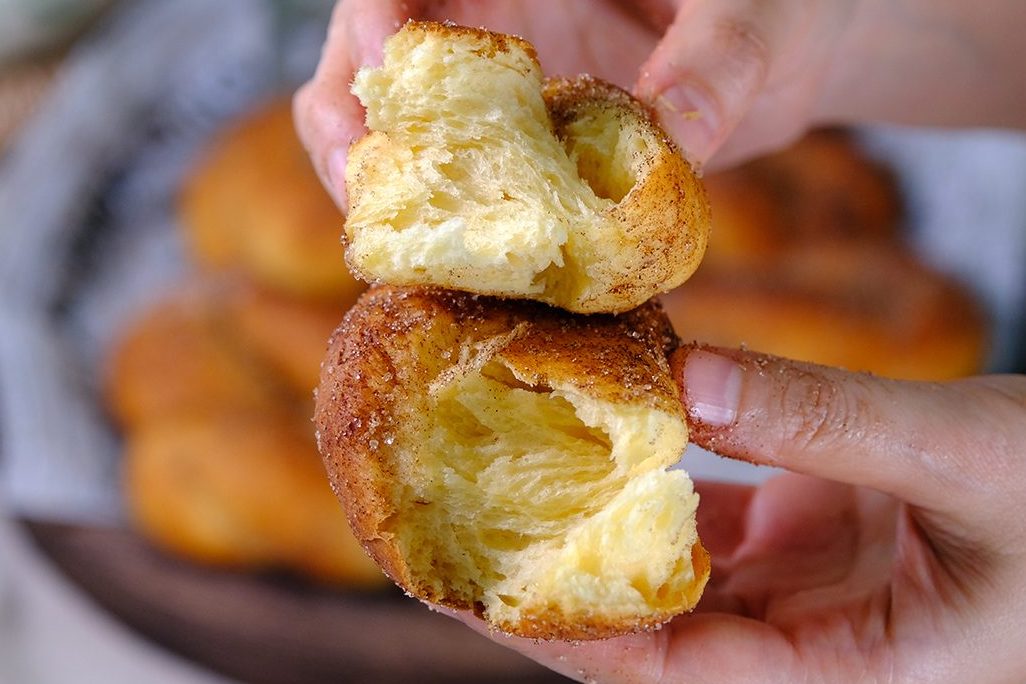
Mashed potatoes help keep the dough soft and moist, which is especially helpful in baked Donuts that can otherwise turn out dry. They give the Donuts a tender, slightly chewy, and fluffy texture; The starch in the Potatoes binds with the flour, creating a softer crumbThe key to making beautiful kkwabaegi is “Don’t roll the dough thinner in the middle and thicker at the ends, or vice versa” AND “Don’t twist it too much” That will cause the twist to break during the proofing or baking process Your twisted donut won’t look pretty ☹️These mildly sweet, fluffy, spongy, twisted doughnuts are simply irresistible 😳🤤🤤
Crispy sugar on the outside, soft and slightly chewy on the inside; And most importantly, it’s not greasy 😜
They pair really well with Coffee, Milk, Chai Tea or even Hot Chocolate. Make this for your loved ones, or your kids; They’ll love it !! 🤗
I hope you will enjoy it as much as I do 😍
WATCH HOW TO MAKE Baked Korean Twisted Donut (꽈배기) Kkwabaegi
RECIPE
BAKED KOREAN TWISTED DONUTS Yield: 10 pieces
INGREDIENTS 🍩 Donut Dough 315 g All-Purpose Flour 50 g Caster Sugar 1⅔ tsp Instant Yeast 1/3 tsp Salt 125 g Mashed Potatoes 50 g Egg Yolks 100 g Full Cream Milk (cold) 40 g Unsalted Butter
🍩 Coating 60 g Unsalted Butter (melted) 100 g Caster Sugar 1 tbs Cinnamon Powder
INSTRUCTIONS
Cook Potaoes until tender. Place potatoes in a saucepan, add enough water to submerge. Cook over hight heat until the water comes to a boil. Reduce the heat and let simmer until the Potatoes are tender. Once it’s done, drain the Potatoes and mash them smoothly, set aside.
Preheat the Oven to 400 F/ 200°C/ 180°C fan/ gas mark 6 and line baking tray with parchment paper.
Combine the dry ingredients. In a large bowl, place the Flour, Sugar, and Instant Yeast. Add the salt to the opposite side of the bowl (be careful not to let the Yeast and Salt come into direct contact, as this can kill or slow the yeast’s growth). Stir until thoroughly combined.
Add the wet ingredients to the dry mixture. Add the cooled Mashed Potatoes, Egg Yolks and Cold Milk to the dry mixture. Use a wooden spoon mix well until it forms a lump. And then, using your hands start kneading the dough. Gather all the small crumbs and dry flour to form a ball of dough.
Knead the dough until smooth and elastic. Once the dough forms a rough ball, add the Butter and knead for about 5 minutes until the dough is smooth and elastic. The dough will be slightly sticky, resist the urge to add more Flour as it can make your Donuts tough.
Portions the dough. Divide the dough into 10 equal portions (about 68 grams each). Shape each portion into a ball. Cover the dough with plastic wrap while shaping to prevent it from drying out. And let the dough rest for 10 minutes.
Shape the dough. 10 minutes later, Take one portion of the dough, roll it out. Starting from the center, roll out to both sides, until it is about 28 cm long. The dough should be evenly thick from end to end. I recommend using a ruler as a guide. Don’t sprinkle too much Flour on the surface, as it will be difficult to shape.
Twist the dough(Please watch the video for clear instructions) Roll the 28 cm long dough with your both hands in different directions; right hand up and left hand down; DON’T twist it too much. Once you feel tension between the two ends, stop twisting. Then, pick up both ends, they will automatically twist. Using your hands twist it a little more. Pinch the ends and fold them under. Place it on a baking sheet lined with Parchment Paper and cover with plastic wrap to prevent drying. Don’t roll the dough thinner in the middle and thicker at the ends, or vice versa; That will cause the twist to break during the proofing or baking process. Your twisted donut won’t look pretty.
Final proof. After shaping, let the dough proof for 20 minutes Meanwhile, we can prepare the Donuts coating
Prepare Coating. Melt the Butter in a double boiler, set aside. In a Ziploc bag, mix Caster Sugar and Cinnamon Powder, shake it.
Bake the Donuts. After 20 minutes, you can see that the dough puffy and bigger in size. If you press it lightly, the fingerprint returns slowly and does not bounce immediately. Bake in a preheated oven for 12 minutes. After 12 minutes, flip the donuts and bake for another 3 minutes.
Apply Coating. Once baked, brush with melted Butter while still hot. Place in a bag of Cinnamon Sugar (shake it), then place the donuts on a cooling rack or a plate. Twisted Donuts are best enjoyed while still warm, on the day it’s made.
NOTES * If you make a large batch and can not finished it in one day, after baked, don’t apply the coating. Place Donuts in an airtight container in the fridge (it will last for 3 days). When you need it, take them to room temperature for about 30 minutes; then reheat donuts in the preheated (400 F/ 200°C/ 180°C fan/ gas mark 6) for about 10 Minutes (the Donuts will be soft and fluffy again); Then coat with melted Butter and Cinnamon Sugarand serve. * Like all raised donuts, they can get a little bready as they age. It’s best to have them warm when they are first made, but if you have to store them, ensure they are completely cooled before packing them into a container.
Many people struggle making Steamed Meat Buns; A common mistake is that the Steamed Buns end up collapse or come out wrinkled.
Making steamed Pork buns is not complicated if you get the right tips and of course like they say practice makes perfect.
Homemade Pork Buns fresh out of the steamer are delicious to eat, and they taste even better if you make the dough yourself.
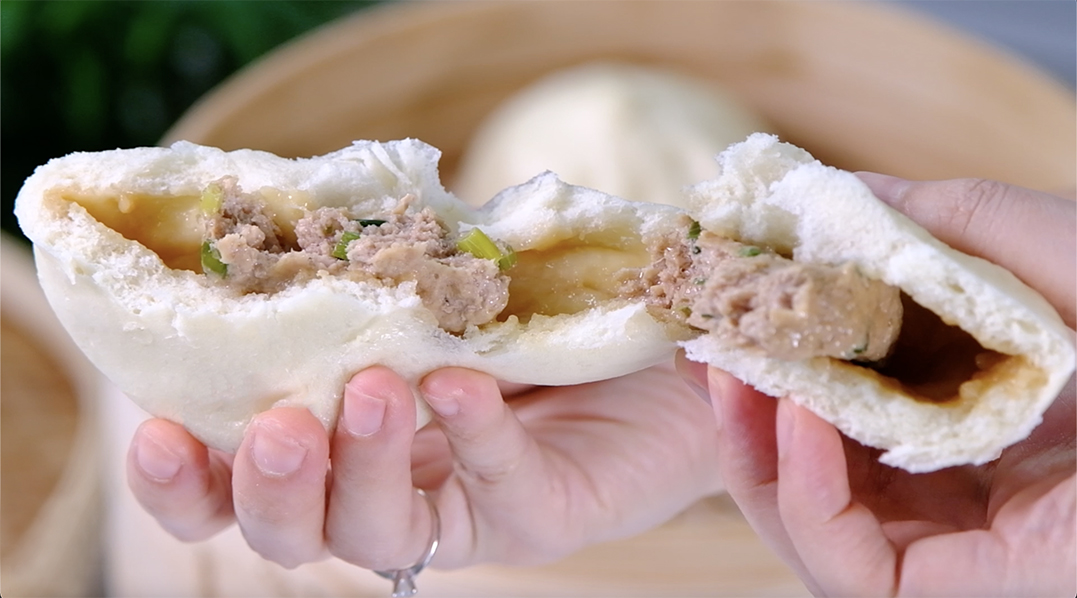
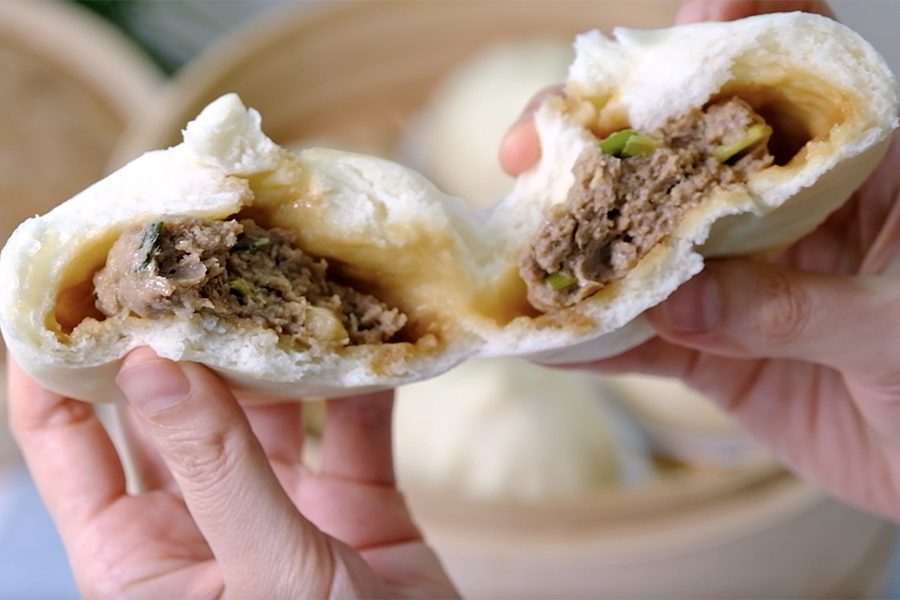
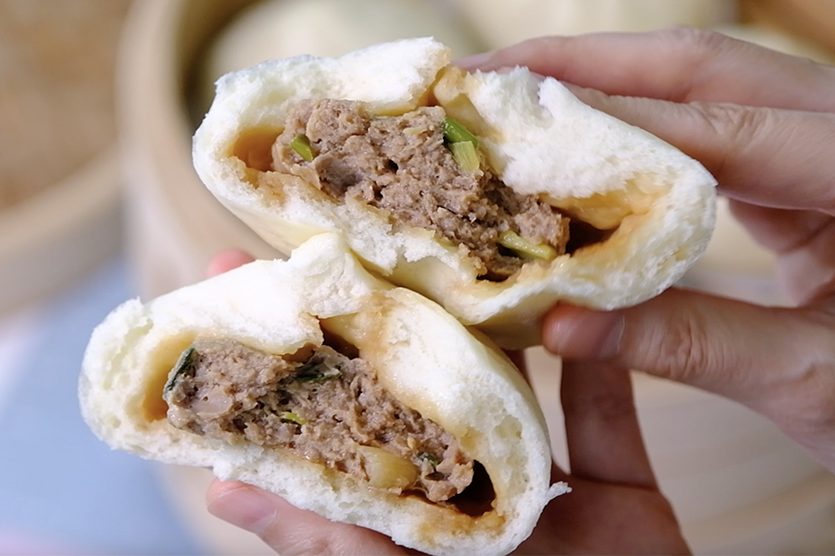
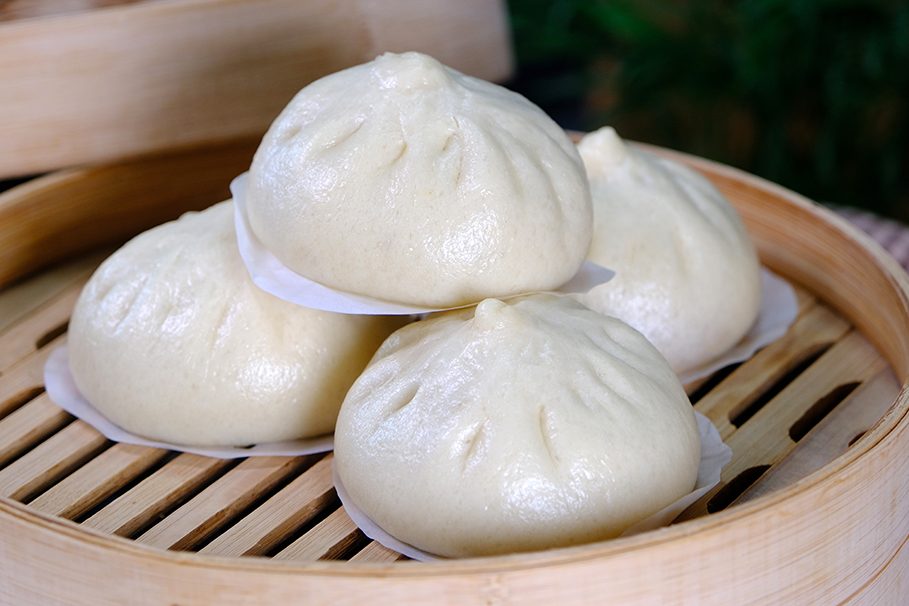
Soft and fluffy Steamed Buns filled with a juicy savory pork filling. The filling is juicy, and you can taste the savoury broth as soon as you bite into them 🥲 🤤 hungry…The texture is soft and fluffy with small, evenly distributed air bubbles It spring back when pressed lightly 🤗
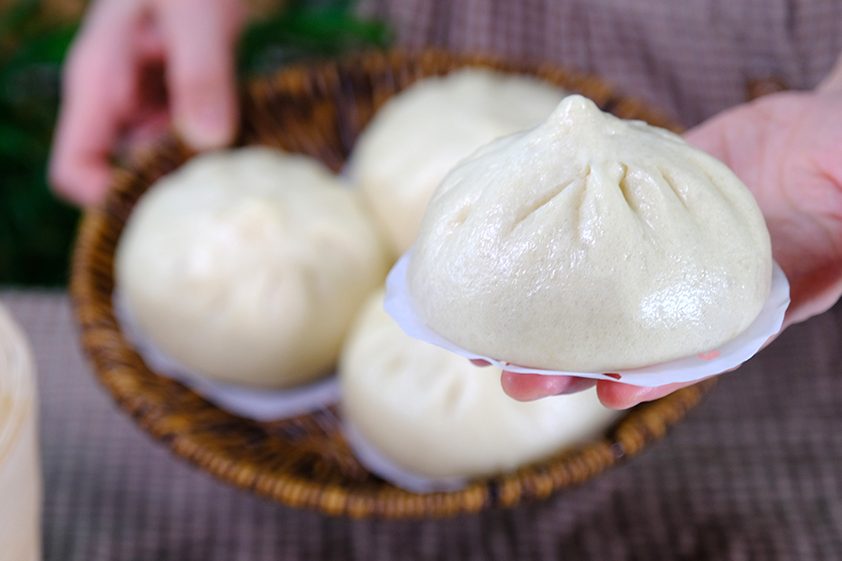
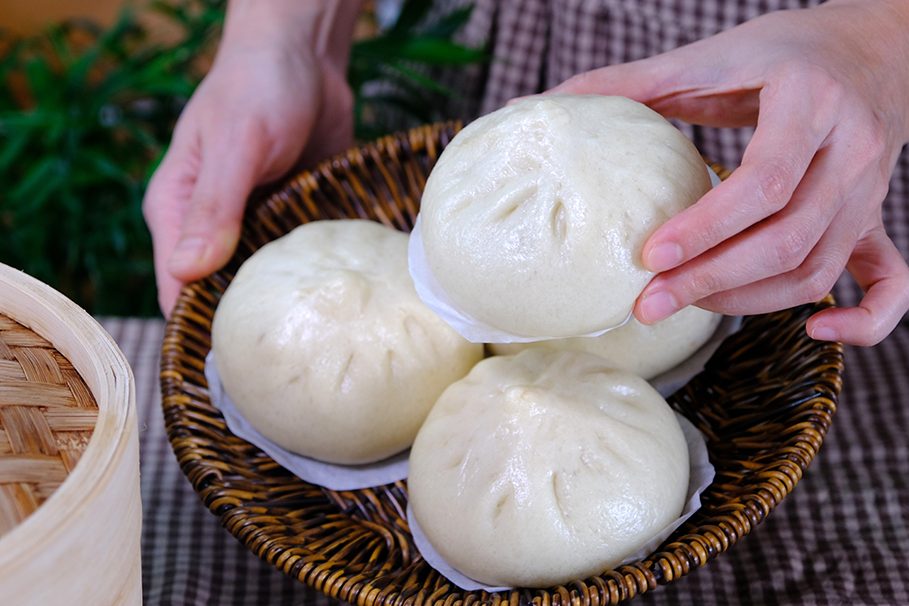
The buns are incredibly soft and won’t deflate or wrinkle after steaming
You can see that the bun does not collapse or wrinkle at all, they look so smooth and puffy
Hopefully, this recipe will give you more confidence in making your own Steamed Buns! 🍀 Love you All!
WATCH HOW TO MAKE FLUFFY STEAMED PORK BUN
TIPS FOR SUCCESS (PLEASE READ FIRST):
THE SECRET OF A DELICIOUS JUICY FILLING When mixing the filling, it’s important to stir it in one direction; usually clockwise or counterclockwise (This is a traditional technique in Chinese cooking) Stirring in one direction activates and aligns the meat proteins, which creates a stronger bind; this results in a firm, springy, and juicy filling that holds together well during steaming
The infused liquid Soak Star Anise and Sichuan Peppercorn in a boiling water. This infused liquid adds depth of flavor and helps maintain a juicy texture in the pork filling after steaming.
Minced Pork Using minced pork with some fat is definitely better than using lean meat alone (70/30 or 80/20 LEAN-to-FAT ratio is ideal) Fat adds essential moisture to the filling, it will taste richer and more savoury
Light Soy Sauce & Dark Soy Sauce Light Soy Sauce gives the dish a salty base. Dark Soy Sauce is generally thicker, less salty and slightly sweeter than Light Soy Sauce; it completes the salty template while giving the dish a richer color (you can add a little more if you like a slightly darker filling)
Caster Sugar Sugar balances the savory and salty elements in the filling
Ginger Ginger neutralizes Pork odor and brings a fresh, zesty heat that lifts the overall flavor of the filling
Oyster Sauceand White Pepper This will adds depth and complexity to the flavor profile
Sesame Oiland Vegetable Oil Sesame Oil adds a rich, nutty aroma and deep flavor that’s iconic in Chinese cooking; while Vegetable Oil keeps the filling moist and tender during steaming
Spring Onion Spring onion adds fresh flavor, balances richness, boosts aroma, and gives authentic character to the pork filling (making it more delicious and well-rounded)
WHAT IS IMPORTANT IN MAKING DOUGH SKIN ?
Yeast Instant Yeast is more stable than Active Dry Yeast This allows the dough to rise more consistently, which is important for achieving a fluffy bun texture
Water The water should be lukewarm around 35–38°C (95–100°F); Avoid water that is too hot, as it can kill the yeast
Flour I use Unbleached All-Purpose Flour, which has a protein content around 9.3–10.3%, making it suitable for soft Steamed Buns. I do not recommend using bleached wheat flour as it can leave a slightly chemical aftertaste and can weaken gluten development
Baking Powder Double Acting Baking Powder gives buns a reliable two-stage rise, perfect for steaming; It creates fluffiness, helps with shaping, and can boost yeast
Sugar Caster sugar dissolves quickly, sweetens evenly, boosts yeast, and improves dough texture (making it perfect for smooth, fluffy buns)
RECIPE
STEAMED PORK BUN Yield: 6 pieces INGREDIENTS 🍀 Filling 1/2 tsp Chinese Peppercorn 3 Star Anise 15 g Boiling Water 250 g Minced Pork (with fat 70/30 or 80/20 LEAN-to-FAT ratio is ideal ) 1 tbs Light Soy Sauce 2/3 tsp Dark Soy Sauce 2/3 tsp Caster Sugar 1⅓ tsp Ginger (grated) 1⅓ tsp Oyster Sauce 1/8 tsp White Pepper 1½ tsp Sesame Oil 1½ tsp Vegetable Oil 20 g Spring Onion (chopped)
🍀 Dough Skin 210 g All-Purpose Flour (Unbleached, 9.3–10.3% Protein) 1 tsp Instant Yeast 1½ tbs Caster Sugar 3/4 tsp Baking Powder (Double Act.) 125 g Lukewarm Water (35-38°C)
INSTRUCTIONS 🍀 Filling
Soak Star Anise and Sichuan Peppercorn in a boiling Water, let it sit for 10 minutes
In a medium bowl, combine Minced Pork, Light Soy Sauce, Dark Soy Sauce, Caster Sugar, Grated Ginger, Oyster Sauce and White Pepper Use chopsticks or a wooden spoon, stir evenly in one direction
Pour in the infused Water that we prepared earlier and stir until well combined
Add Sesame Oil and Vegetable Oil; stir vigorously in one direction until the mixture becomes sticky and cohesive
Add chopped Spring Onion and mix again
Cover and store the filling in the fridge for at least 30 minutes before using; it will firms up, making it even easier to wrap into buns
Slowly add lukewarn Water to the dry ingredients; and stir until it clump together
Then, knead the dough by hand for 10 minutes until smooth and elastic
Once it’s done, shape it into a ball; Place the dough in a lightly oiled mixing bowl, brush the dough lightly with oil Cover and let stand at room temperature until doubled in size Please note, proofing time varies depending on room temperature My dough took 30 minutes; a warmer room temperature means a faster proofing time, and vice versa
Once proofed; you’ll notice that a well-fermented dough should have doubled in size (poke the center with your finger, the dough should not deflate) Knead again for 3 minutes to knock back any air bubbles; then cover and leave to rest for another 10 minutes
After 10 minutes, sprinkle a little flour on your work surface to prevent sticking and transfer the dough onto it Shape the dough into a long sausage and knead until the dough becomes longer, then fold the dough into thirds Repeat this process six times By kneading and pressing the dough, the gas will be distributed evenly, the buns will have a smoother texture and also prevent the risk of the filling leaking due to large air bubbles
Then, divide the dough into 6 equal pieces (about 60 grams each) Round each piece into a ball Cover the dough with plastic wrap during the process to prevent it from drying out
To shape the bun(kindly watch the video for completed instructions) – Take the first dough; roll the dough into a thick disc 10 cm in diameter – Then grab the dough with your left hand and rolling pin on the other hand; use a rolling pin to flatten the edges of the dough while turning it little by little (the center part should be thicker so it gives more support to hold juicy meat fillings without collapsing or leaking during steaming) The wrapper should be 13 cm in diameter – Turn it over; sprinkle flour on your hands and place the wrapper in the palm of your hand – Add about 50 grams of the Pork filling to the centre of the dough (flatten the filling with a spatula, leaving about 1.5 cm of skin around the edges) – Place your right thumb on top of the wrapper and your index finger underneath it; And the thumb that holding the wrapper should hold the filling Start folding the dough around the filling in a circular motion while using your left thumb to lightly press the filling down (press each fold firmly) – Once all the edges are centered, twist the center of the bun to close it (pinch the top of the bun to make sure it is sealed tightly otherwise the filling will leak out)
Once it’s done, place the bun on a work surface; then rotate it between your palms to shape it
Then place the bun on a piece of Parchment Paper and lay on the base of a Bamboo or Metal Steamer; put the lid on while continuing with the remaining dough Meanwhile, you can start preheat your steamer Leave some space between the buns to allow them to expand during steaming
Once the buns have formed, immediately steam them over HIGH heat for 15 minutes; final proofing is not necessary, as it will overproofed the buns and cause the buns to collapse If you use a metal or plastic steamer, cover the lid with a cloth so condensation doesn’t drip onto the buns If you cook two layers at once, as I did; place the last batch on the bottom; It is closer to the water, which helps the dough rise faster
After 15 minutes, turn OFF the heat, remove the lid and let it sit for 5 minutes to let the excess steam to dissipate
You can serve the steamed buns immediately or let them cool completely on a cooling rack if you want to store them
NOTES
AVOID leaving buns at room temperature for more than 2 hours, especially if they contain meat — it’s unsafe
AVOID Refrigerating buns uncovered — they’ll dry out quickly.
Storage – Fridge: place in an airtight container or ziplock bag with the air squeezed out; store in the refrigerator for up to 2 days. – Freezer: wrap each bun individually in plastic wrap or Parchment Paper to prevent freezer burn; place wrapped buns in a freezer bag or airtight container (label with the date and freeze for up to 2 months)
Reheat – From the Fridge: Steam for 5–8 minutes over boiling water until hot and soft Or Microwave with a damp paper towel for 30–60 seconds (avoid overheating or they’ll dry out) – From the Freezer: DO NOT THAW— reheat directly from frozen Steam for 10–15 minutes until fully hot Or Microwave with a damp paper towel for 1–2 minutes in 30-second intervals
Baking bread is my favorite, the kneading process is very calming and meditative for me. But as my work gets busier, I find I don’t have time to make homemade bread.
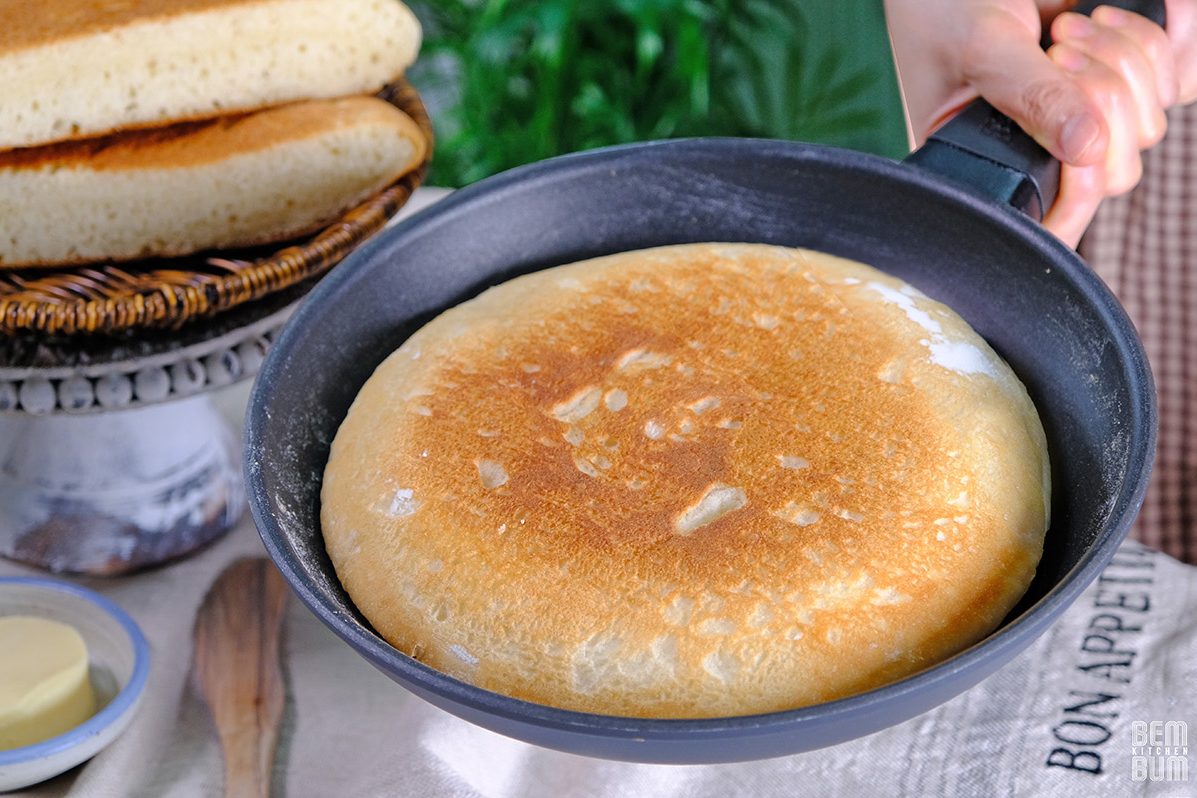
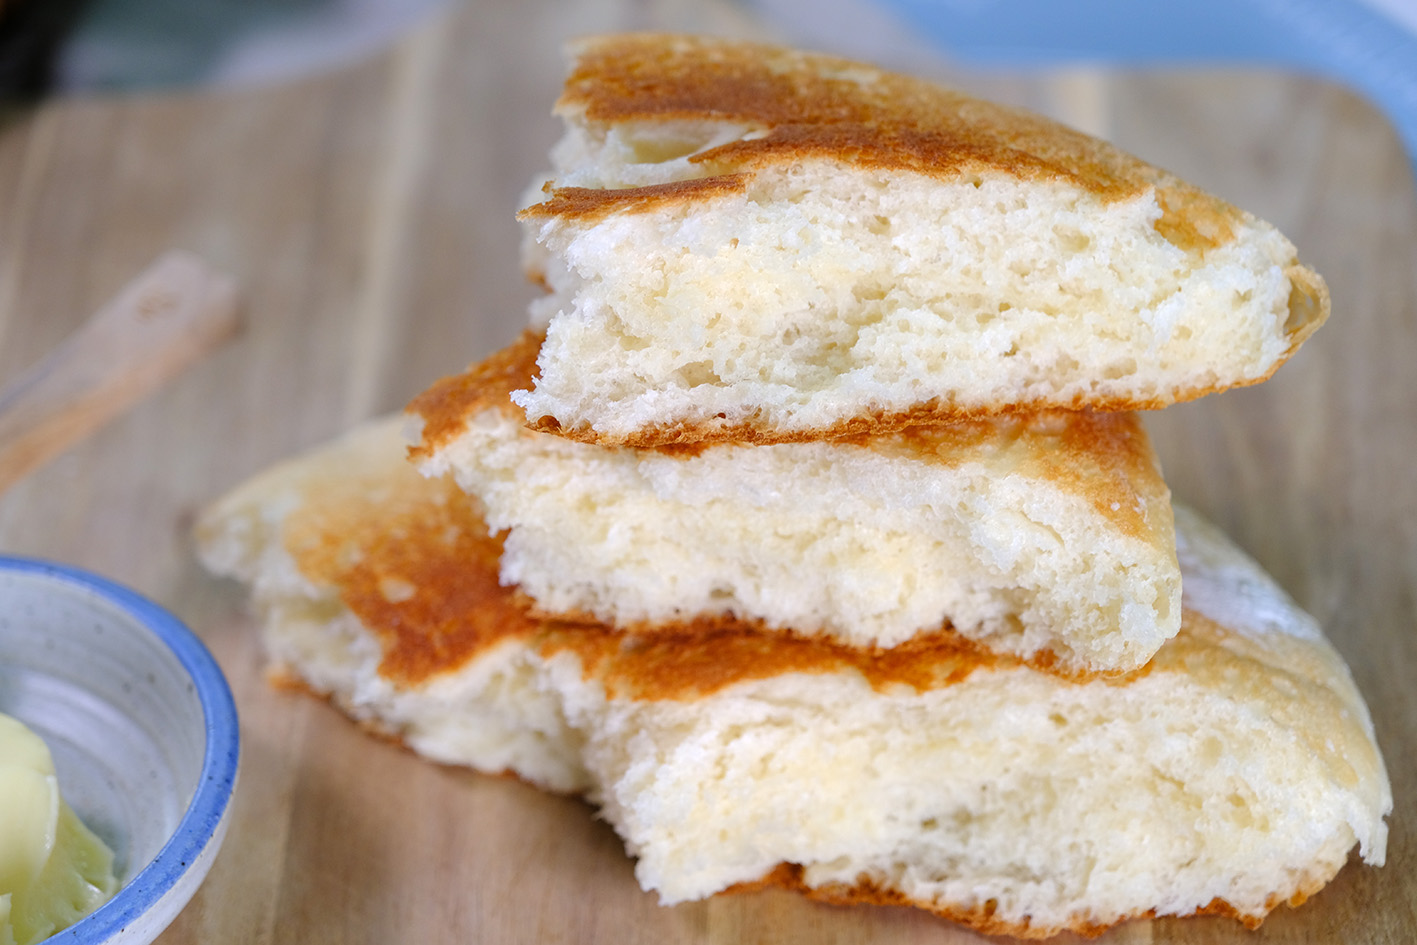
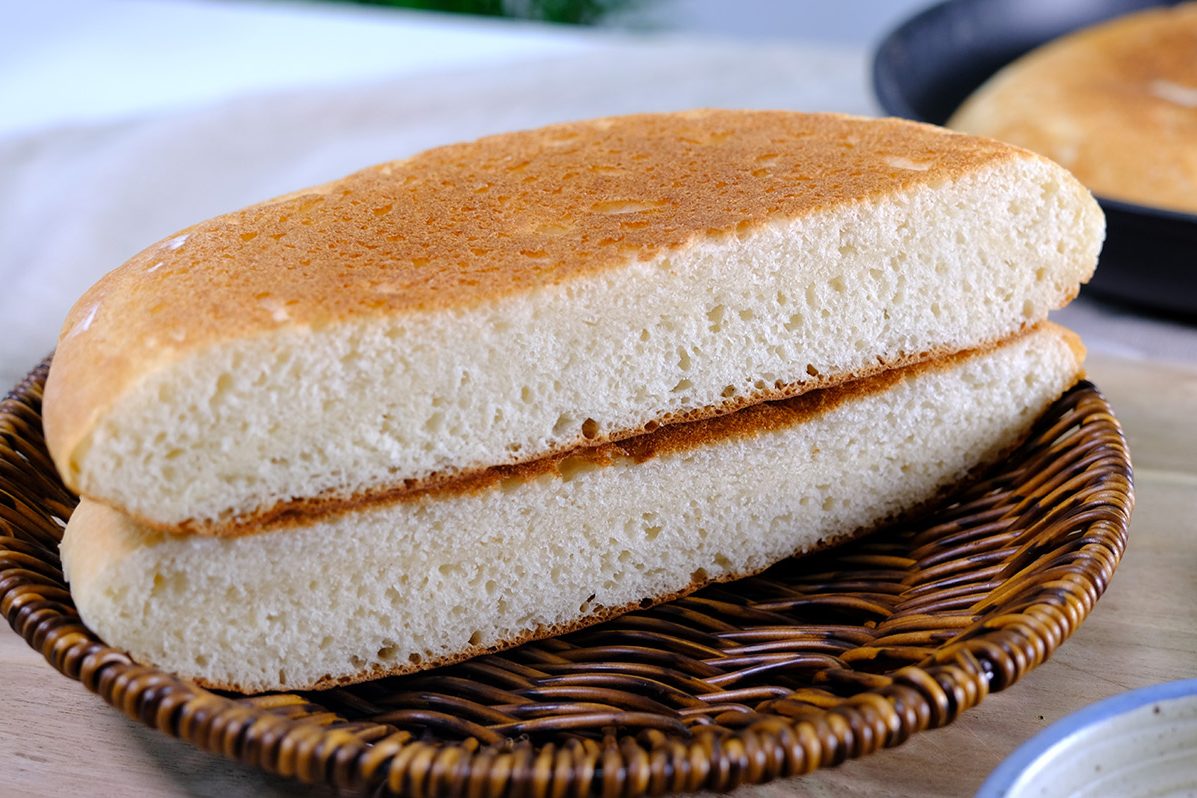
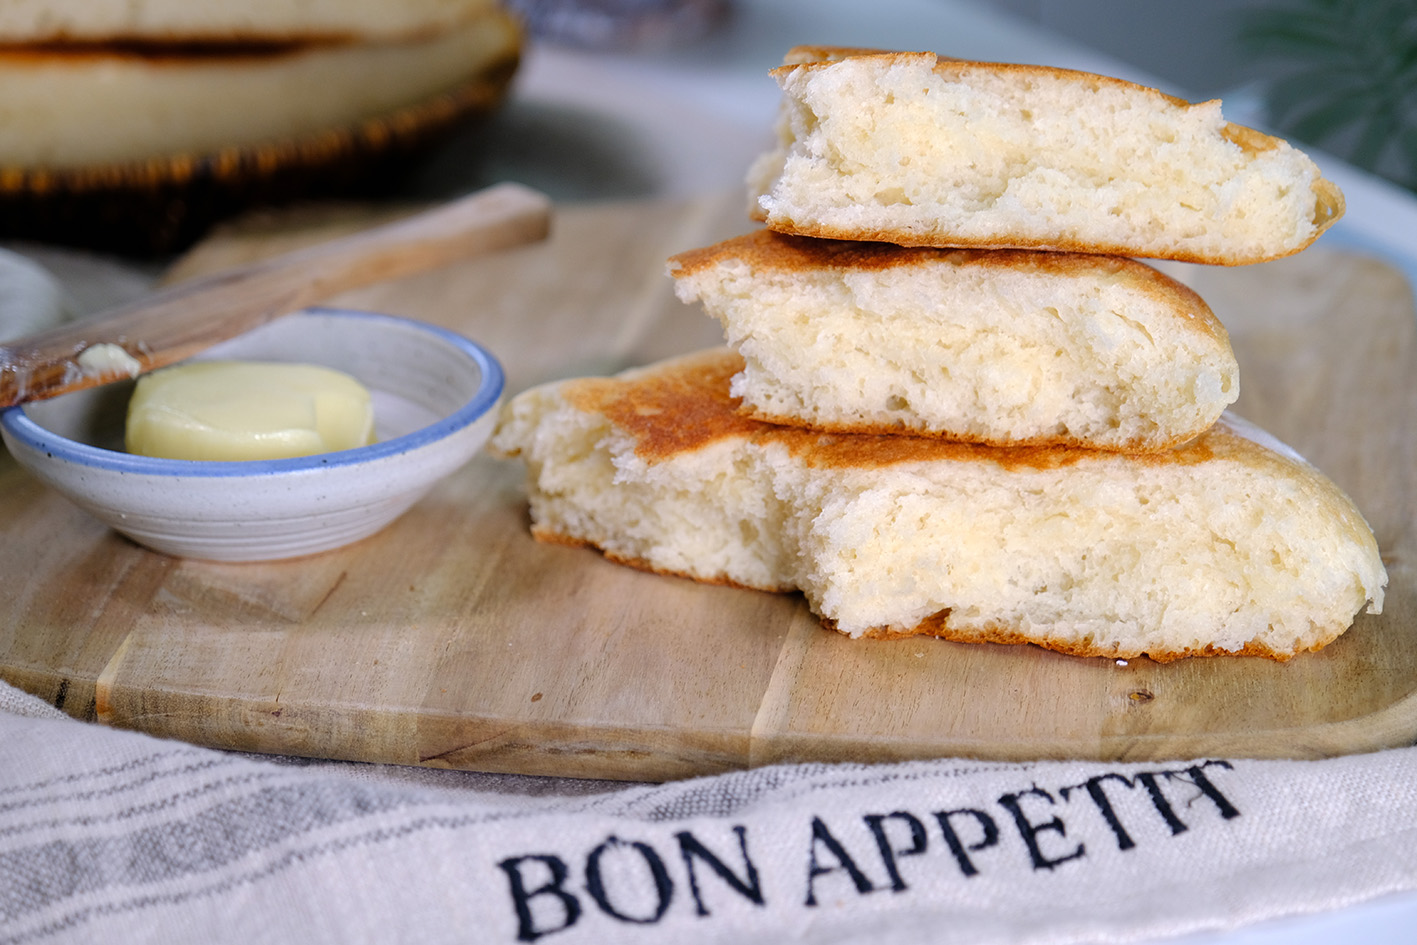
Through trial and error, this Frying Pan Bread was born! This recipe minimizes time and effort and can be made in just one frying pan.
A super quick and delicious way to make soft homemade bread.
When making this bread; It is important to use a non-stick pan with a thick base, otherwise the dough will stick to the bottom of the pan.
You can use either gas stove or an Induction cooktop to cook the bread If you are using an induction, please use a special frying pan
The pan lid is also essential; It use to prevent the bread from drying out during fermentation and cooking.
This powder proteins increase the strength of the dough, especially when mixed with Bread Flour
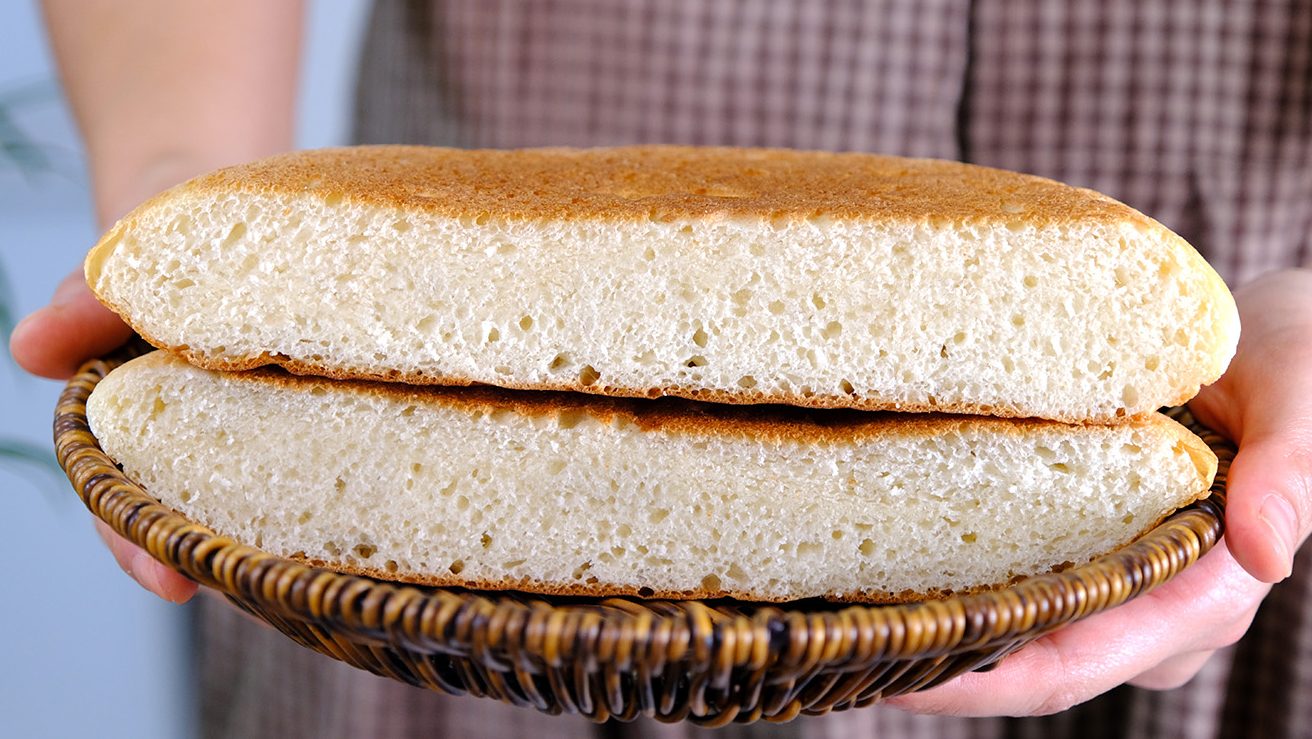
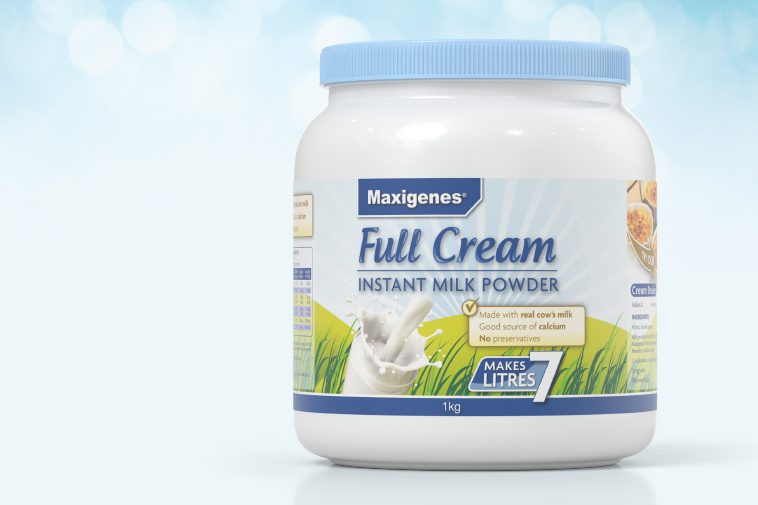
I use Full Cream Powdered Milk, not Liquid Milk in this recipe. The fat from Milk Powder adds rich flavor and tenderizes the dough, resulting in a softer, finer, more tender crumb. The bread will also have a longer shelf life.
🙄….. 🤤 SO SOFT…
The bread is so soft and fluffy; perfect served with Butter or jam, or as a delicious accompaniment to a bowl of warm soup.
I love making it into sandwiches 😁
I hope this recipe helps those of you who are busy; The simplest and most delicious homemade bread.
Make it for your loved ones; Give them freshly baked, healthy bread 🥰 LOVE YOU ALL!!
WATCH HOW TO MAKE FRYING PAN MILK BREAD
TIPS FOR SUCCESS (PLEASE READ FIRST):
Use a heavy bottom non-stick pan, otherwise the dough will stick to the bottom of the pan
The pan lid is also essential; It use to prevent the bread from drying out during fermentation and cooking
You can use either gas stove or an Induction cooktop to cook the bread (if you are using an Induction, please use a special frying pan)
The optimal size for the dough volume is 20 cm in diameter and 5 to 7 cm in depth (make sure your pan is large enough to accommodate the dough; I am using 10-Inch Frying Pan)
Choose “STRONG” Bread Flour for best result
Use Full Cream Powdered Milk instead of Liquid Milk
The water should be lukewarm; roughly matching body temperature, which is about 35°C to 37°C (this is the ideal range for activating yeast effectively) AVOID water that is too HOT, as this can kill the yeast
Follow the steps carefully, don’t skip any proofing time
While cooking bread DON’T use HIGH heat Please note: Stove temperatures vary, the correct temperature is determined by trial and error (you may need to experiment until you find the right temperature for your stove) If the temperature is too high, the surface of the bread will burn; Conversely, if it’s too low, the interior of the bread will be undercooked
Don’t forget to cover the pan when cooking Covering the pan and cooking slowly over medium-low heat, the water content in the dough will be locked in, resulting in soft, moist bread
Once done, place the bread on a cooling rack to cool completely before storing (by allowing excess moisture to escape and the structure to set, cooling helps the bread stay fresh longer)
recipe
FRYING PAN MILK BREAD Yield: One 20 cm diameter (5 cm thick)
🍞 INGREDIENTS 15 g Unsalted Butter (melted) 200 g Strong Bread Flour 30 g Caster Sugar 3 g Salt 150 g Water (lukewarm ~ 35-37°C) 15 g Full Cream Milk Powder 3 g Instant Yeast
INSTRUCTIONS
Melt the UnsaltedButter in a double boiler, set aside
For the dry ingredients, mix Bread Flour with Sugar and Salt; set aside
In another bowl, mix Water with Milk Powder, stir well Add the Instant Yeast and stir again; set aside
To make the dough Place the dry ingredients to the pan Pour in the Milk and melted Butter mixture Using a spatula stir thoroughly until comes together, then place the lid and let it sit for 10 minutes
After 10 Minutes Sprinkle a thin layer of flour and knead the dough with your fingertips for 1 Minute (you can feel the dough gradually becoming less sticky)
Then form the dough into a ball (you can add little flour to your palms to prevent sticking) Place the dough in the center of the pan with the smooth side facing up, cover and let it sit at room temperature for about 30 minutes
After 30 minutes (you will see the dough has risen to about 1.8 times its original size) Sprinkle the dough surface with a little flour; gently press the dough to release the gas and flatten it into a round disc shape (approximately 18 cm in diameter) Then, cover the pan again and leave at room temperature for about 30 minutes for the final rise
30 minutes later The dough looks puffed up and bigger in size (it’s time to cook the dough)
Over MEDIUM heat, cover and cook the dough for about 7 minutes (I use medium heat or level 5 on my induction stove) * Please note that stove temperatures vary, the correct temperature is determined by trial and error; You may need to experiment until you find the right temperature for your stove
After 7 minutes Once the bottom is brown and the spatula can be inserted easily, gently flip the bread then immediately reduce the heat to MEDIUM-LOW (I use level 4 on my Induction stove) Cover again and continue cooking for 7 minutes
7 minutes later Finally turn it over and cook again for 1 minute
Once it’s done, place the bread on a cooling rack to cool completely before storing or you can serve while still warm
notes
The bread will stay soft and can be stored at room temperature in an airtight container for up to 3 days
In the refrigerator, Milk Bread can last for up to a week (in an airtight container)
To Freeze Place the slices in freezer-safe bags, removing as much air as possible before sealing. Store the bread in the freezer, preferably in the coldest part, for up to 1 month
To reheat From the fridge: wrap the bread in foil and bake at 350°F (177°C) for 10-15 minutes From the freezer: thaw frozen bread on the counter for 1-2 hours or in the fridge overnight; then wrap the bread in foil and bake at 350°F (177°C) for 10-15 minutes
Lion Dance (traditional Chinese: 舞獅; simplified Chinese: 舞狮; pinyin: wǔshī) is a form of traditional dance in Chinese culture and other Asian countries in which performers mimic a lion‘s movements in a lion costume to bring good luck and fortune. These buns usually served during Chinese New Year as a symbol of good luck and prosperity.
When making this kind of steamed buns; the temperature of your surroundings and the amount of yeast used is important
When the weather is cold, the dough will not ferment so quickly, so it is more suitable for making styled buns.
Pretty Lion Dance before steaming 🙃
In summer, even if you use less yeast, the dough will still ferment quickly (especially when it’s HOT, they really hard to be made). So, using air conditioner in warm place is necessary and also keep the dough always be covered during the process so that it doesn’t dry out.
For the filling, I suggest to use store-bought roasted black sesame for best result.
Bored with ordinary bun fillings? 🥴 I will show you a few tips to make this flavourful Black Sesame Filling! 😉
Japanese brand Roasted Sesame is my favourite; the moment you open the package, you will be able to sense their exquisite aroma, as well as the slightly sweet and elegant taste.
CAN I USE OTHER FILLING?
Feel free to use other fillings according to your taste as long as the filling firm enough to hold their shape, that should be fine.
The buns is really soft and fluffy; You can see how spongy it is ! The thick sesame paste inside has a significant aroma and a toasty sesame flavour; Really tasty!
Contrast with the colour of the buns! So Mesmerize! 🥰
These vibrant Lion Dance Steamed Buns are truly a work of art, it is a symbol of good fortune and strength (this will be a really special gift for someone), Wishing You Wealth and Prosperity; May the dragon bring you success and energy in the upcoming year. HAPPY CHINESE NEW YEAR 2024 Everyone! 😇🥳
INGREDIENTS 🌿 Black Sesame Paste 50 g Mung Beans + 500 g Water 40 g Caster Sugar 5 g Wheat/ Potato Starch 1/8 tsp Salt 20 g Vegetable Oil 25 g Roasted Black Sesame Seeds (Crushed into powder)
🌿 Dough for Details 150 g All-Purpose Flour 1/6 tsp Instant Yeast 4 g Caster Sugar 70 g Cold Water 6 g Shortening Food Gel Colouring (Black, Green, Blue, Yellow, Red)
🌿 Buns Dough 110 g All-Purpose Flour 1/8 tsp Instant Yeast 3 g Caster Sugar 50 g Cold Water 4 g Shortening Red Food Colouring
INSTRUCTIONS Black Sesame Paste
Crush 25 g Sesame Seeds into a fine powder, set aside.
Rinse 50 g Mung Beans until the water runs clear and transfer it to a medium pan; add in 500 g Water. Cook over medium high heat until the beans are tender and then blend it until smooth.
Pour the blended cooked Mung Beans along with 40 g Caster Sugar, 5 g Wheat Starch, ⅛ tsp Salt, 20 g Vegetable Oil, crushed Black Sesame into a non-stick pan. Mix well until there are no lumps.
Cook over medium high heat and keep stirring (please note, never leave it out when cooking this mixture. This process will takes for about 10-15 minutes. The water will slowly evaporate and the mixture start to thickened.
Once the mixture formed a thick paste, turn down the heat to medium low; and continue cook until the paste comes together and no longer stick to the pan.
Once it’s done, pour it into a plate; cover it with a cling wrap to prevent from drying out and then store it in the fridge for at least 1 hour to firm up.
After 1 hour the fillings becomes denser. Take 2 portions of the paste, 60 grams each and roll it into a ball. * You can use the remaining filling to fill mochi or maybe spread it on your favourite bread.
Dough for Details
In a medium bowl, simply combine 150 g All-Purpose Flour, ⅙ tsp Instant Yeast and 4 g Caster Sugar.
Pour in 70 g Cold Water and 6 g Shortening and stir until just combined.
Then using your hand gather all the dough until it form a cohesive ball.
Transfer the dough on a work surface and start kneading the dough. Knead for about 4-5 minutes until it become really smooth.
After kneading for about 5 minutes, you can see that the dough become really smooth. Divide and colouring the dough as needed (30 g Red, 90 g White, 55 g Yellow, 20 g Blue, 15 g Green and 15 g Black). * If you like to use natural food colouring powder, you may need to dilute it with a little bit of water so it blends easily into the dough.
Cover each dough with a plastic wrap (to prevent from drying out) while waiting for the buns dough.
Buns Dough
In a medium bowl, simply combine 110 g All-Purpose Flour, 1/8 tsp Instant Yeast and 3 g Caster Sugar.
Pour in 50 g Cold Water along with 4 g Shortening and a few drops of Red Food Colouring; stir until just combined.
Then using your hand gather all the dough until it form a cohesive ball.
Transfer the dough on a work surface and start kneading the dough. Knead for about 4-5 minutes until it become really smooth.
After kneading for about 5 minutes, you can see that the dough become really smooth. Divide Buns Dough into 2 equal portions (about 80 grams each); cover the dough with a plastic wrap so it doesn’t dry out.
To Shape the Lion DanceHead and Details
Take 1 portion of the Buns Dough, roll it into a ball; Flatten it.
Using rolling pin, roll the dough into 10 cm diameter thick disk Place the filling in the centre of the dough
Then using your right hand, slowly squeeze and push the wrapper up while left thumb press the filling down. Pinch to seal; make sure that you seal it properly to prevent the filling from leaking. * DON’T FORGET ALWAYS COVER EACH DOUGH WITH A PLASTIC WRAP ALONG THE PROCESS TO PREVENT FROM DRYING OUT Continue with the rest Buns Dough…
Once it’s done put them in the steamer (make sure that you give some space in between the buns so they won’t stick one another after fermentation or steaming).
Cover and allow to rise until doubled in size for about 20-45 minutes. * Proofing time will depends on room temperature, it may take longer or may not take that long.
In the meantime preheat your steamer.
After fermentation the proofed buns should feel lighter and doubled in size; and if you gently press it with your finger, the dough will make indentation and be able to slowly bounce back into shape.
Steam over high heat for 18 minutes. * If you are using metal or plastic steamer; make sure that you cover the lid with a piece of cloth so the condensation during steaming won’t ruin the look of your buns.
After 18 minutes, take the steamer off from the heat; Do not open the lid and let it sit for another 3 minutes (this way; the buns will not sink or wrinkle due to the sudden change in temperature).
You can serve it immediately or transfer them to a cooling rack to cool completely before storing.
NOTES
The Black Sesame Paste filling is best consumed as soon as possible. If you are not using it right away, you can keep it in an airtight container in the refrigerator for up to 5 days or in the freezer for up to a month.
If you make this filling in large quantities; Before freezing, I suggest to divide the paste into small portions so that you can be flexible on how much to use each time. When you are ready to use, you can defrost in the fridge overnight.
The buns can be stored in the fridge (in an airtight container) for 5 days or frozen for a month.
I highly recommend to reheat the buns in the steamer To reheat: Place the frozen buns on a plate; put the plate on top of the trivet in the steamer and let them steam over high heat for 10 minutes or until heated through.
If you want to reheat it in the Microwave Place the frozen buns on a plate; wet some paper towel (wring out the excess water) and place the paper towel on top of the steamed buns (to prevent the buns from drying out). Microwave on high for 30 seconds (add the time as needed until heated through).
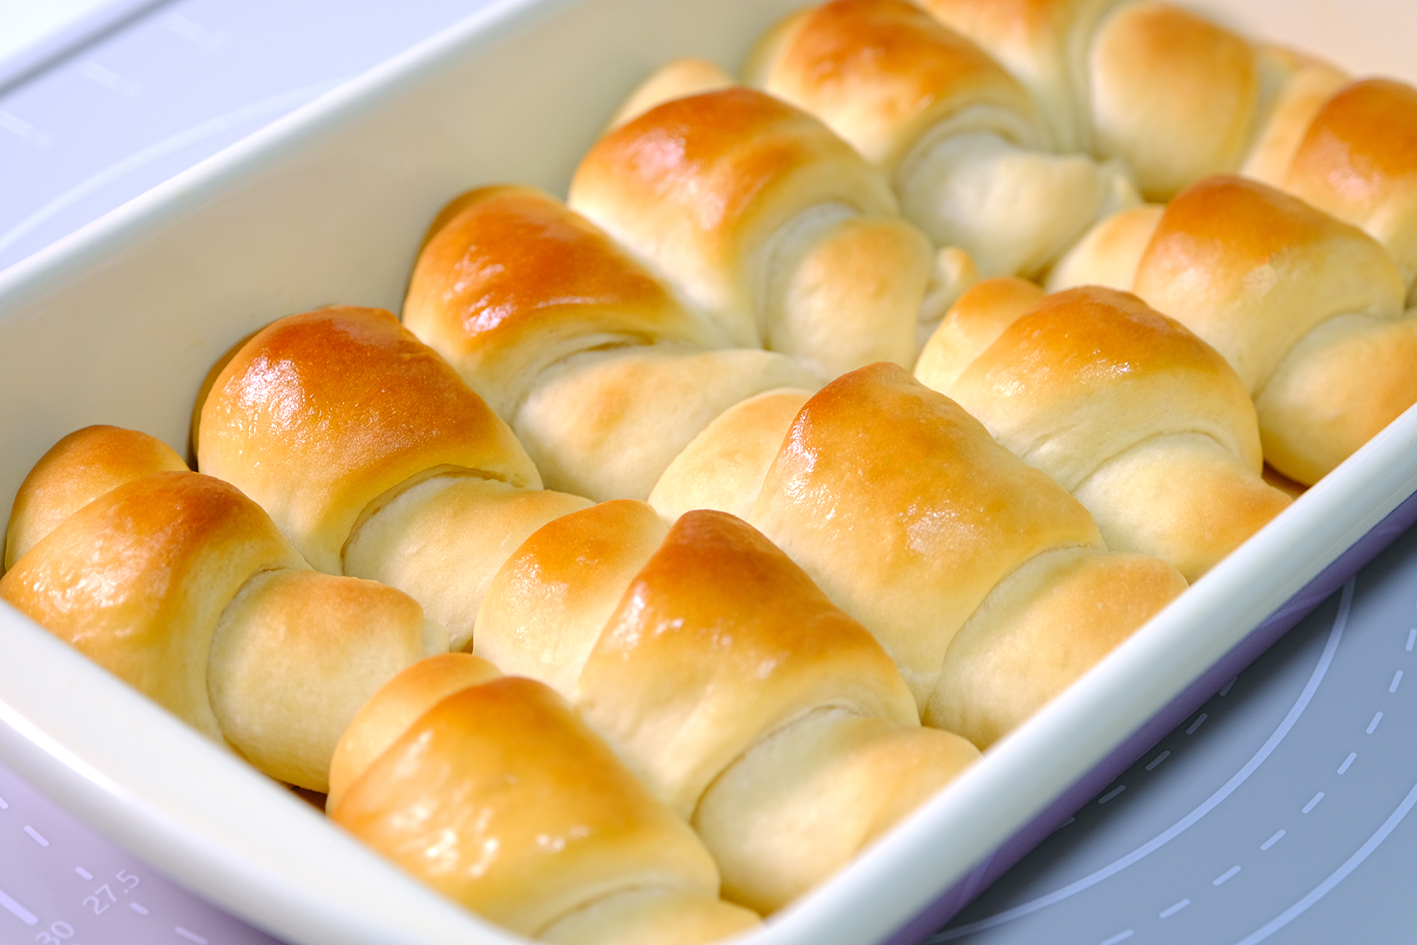
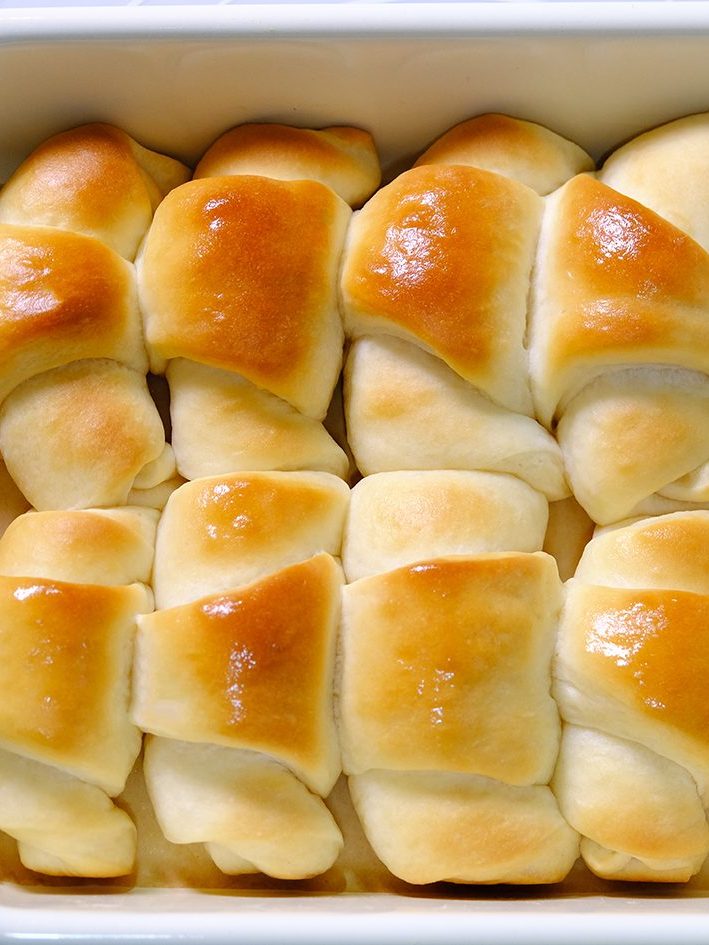
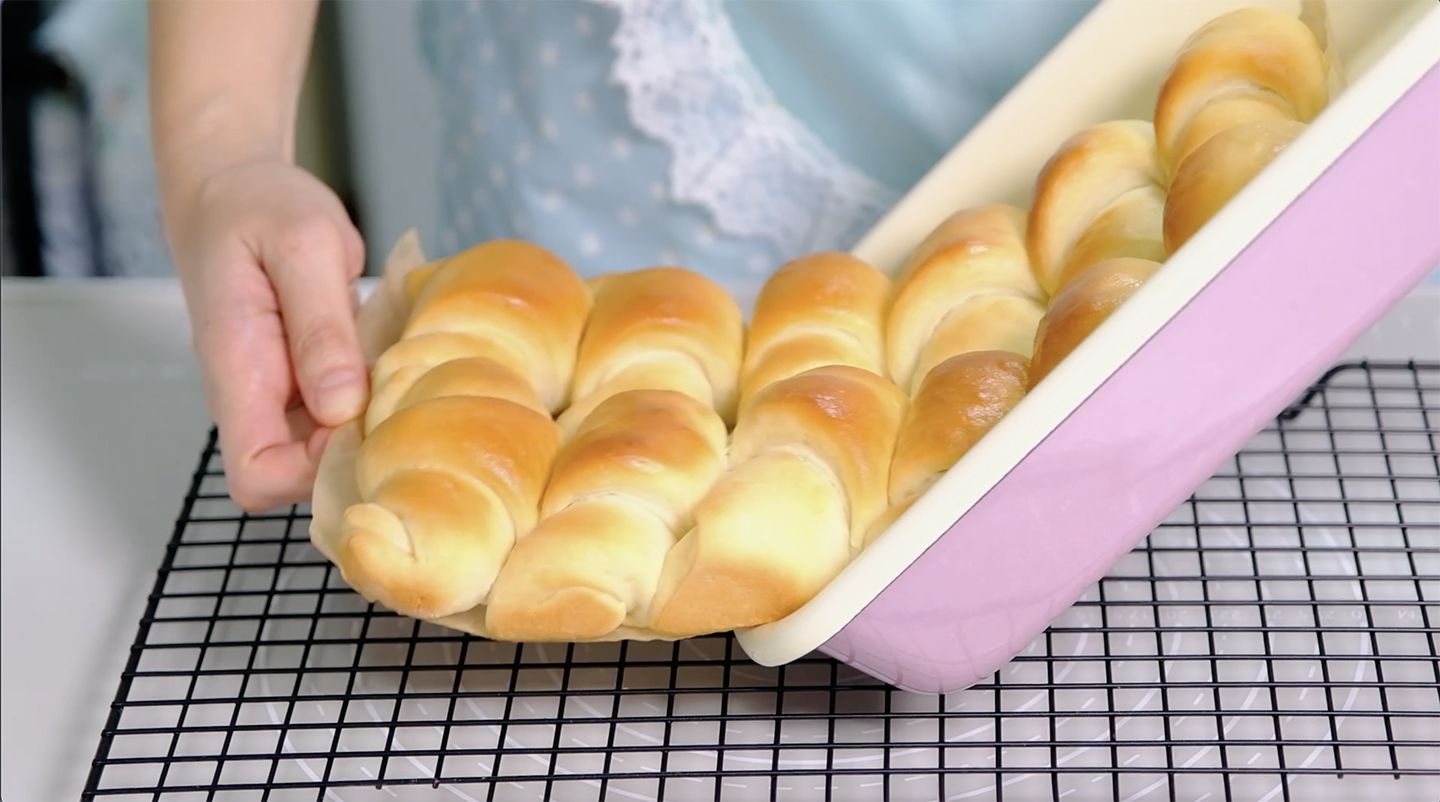
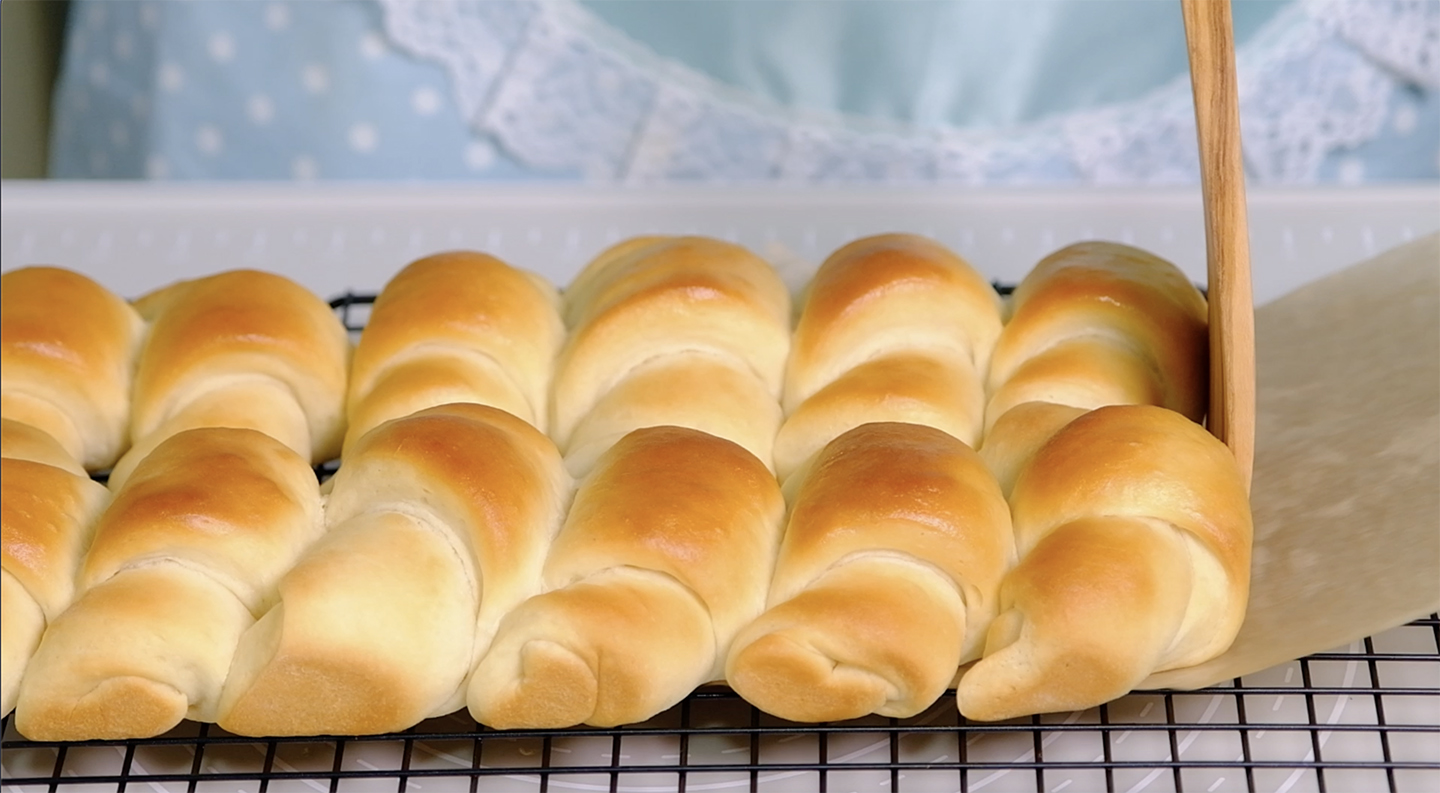
Soft… Pillowy… Squishy… Beautiful golden brown and delicious buttery; These are the best rolls you will ever eat ! 😉
🤤 HUNGRY …
I’ve been using this recipe for so long and you’ll quickly find they are the perfect side to just about any meal.
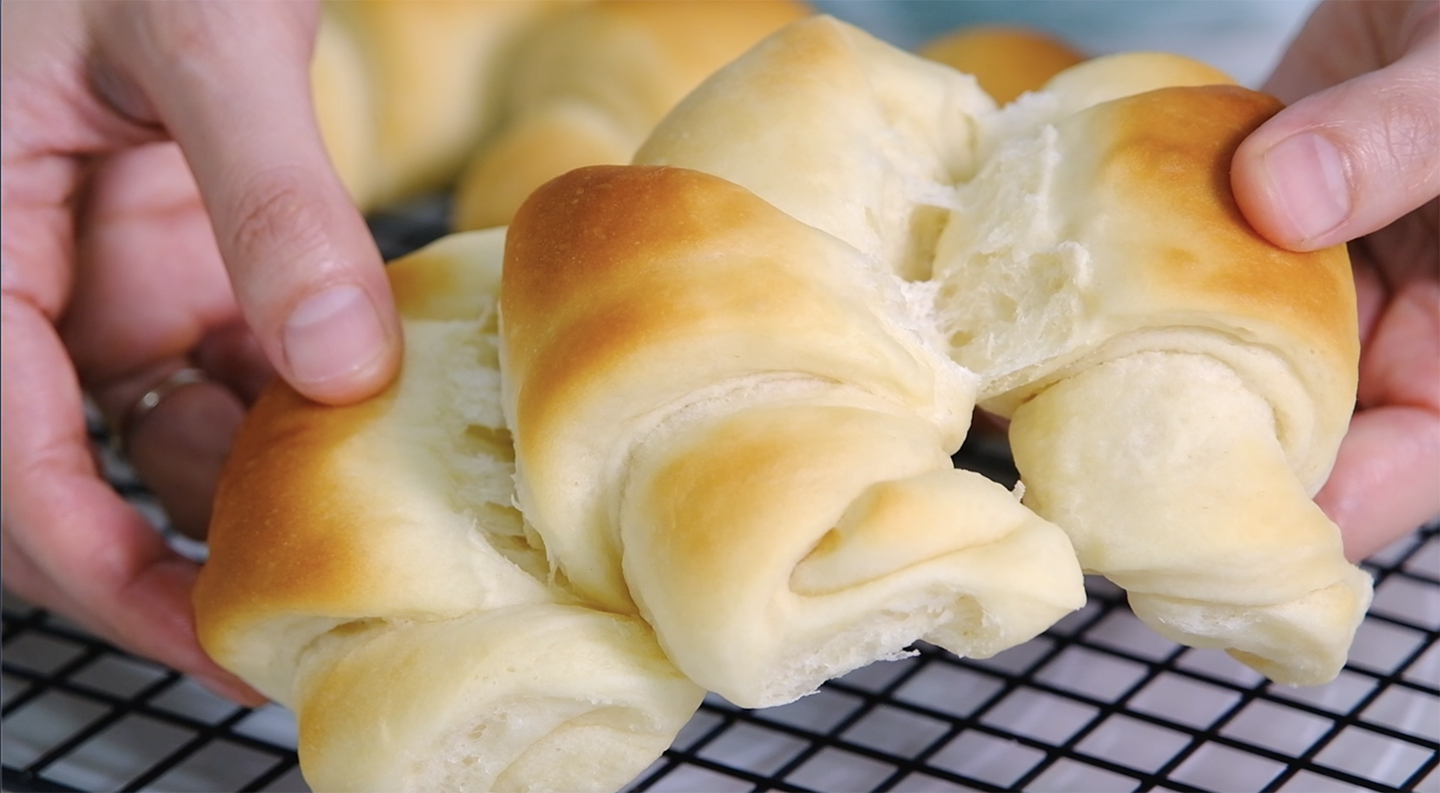
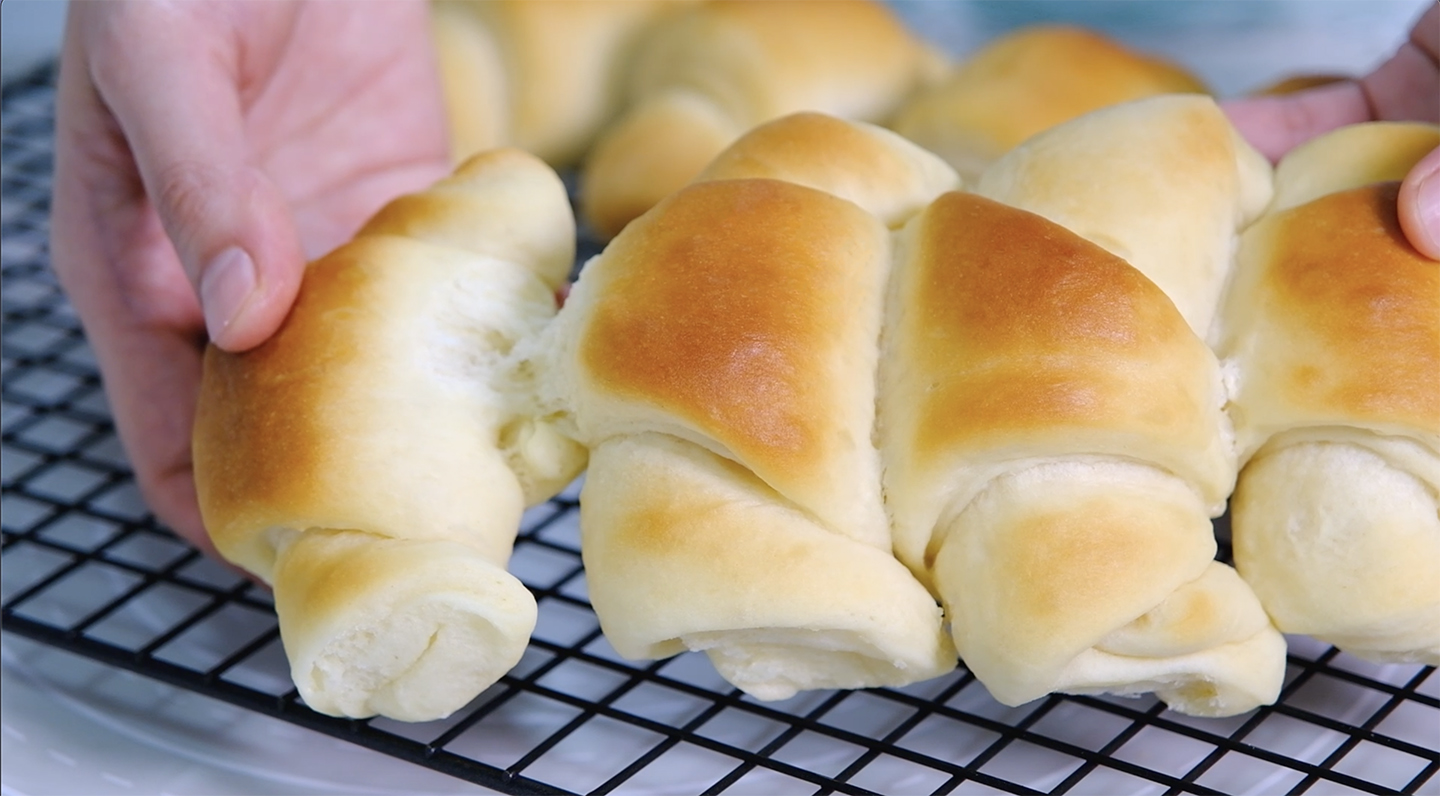
These buns are delightfully soft and squishy . . .
They can be frozen and are the perfect accompaniment to any meal; but they are also delicious in their own right
Lightly sweet, milky in flavour ….🥴😍
The texture is perfect balance of soft yet satisfyingly chewy 🥲
You can have this rolls either sweet or savoury, they are so versatile 🥰
I love to pair it with my favourite Strawberry Jam 🤗 I have a sweet tooth
Hm… so good!
The rolls are great while still warm but will also keep for days and I’m sure they’ll become a favourite in your home. I hope you will enjoy the recipe! 🤗
WATCH HOW TO MAKE “SUPER SOFT CHEWY DINNER ROLLS”
Recipe and Step
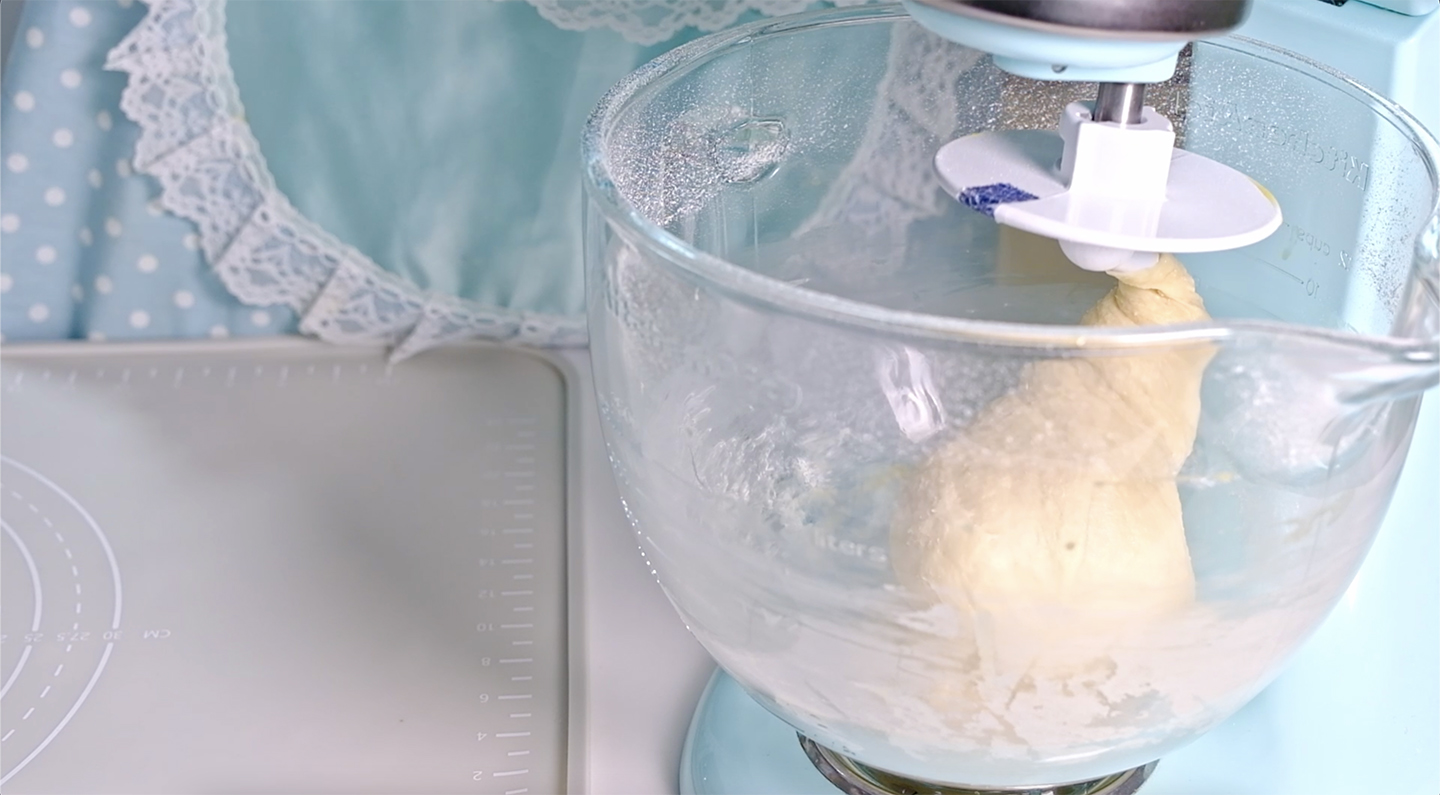
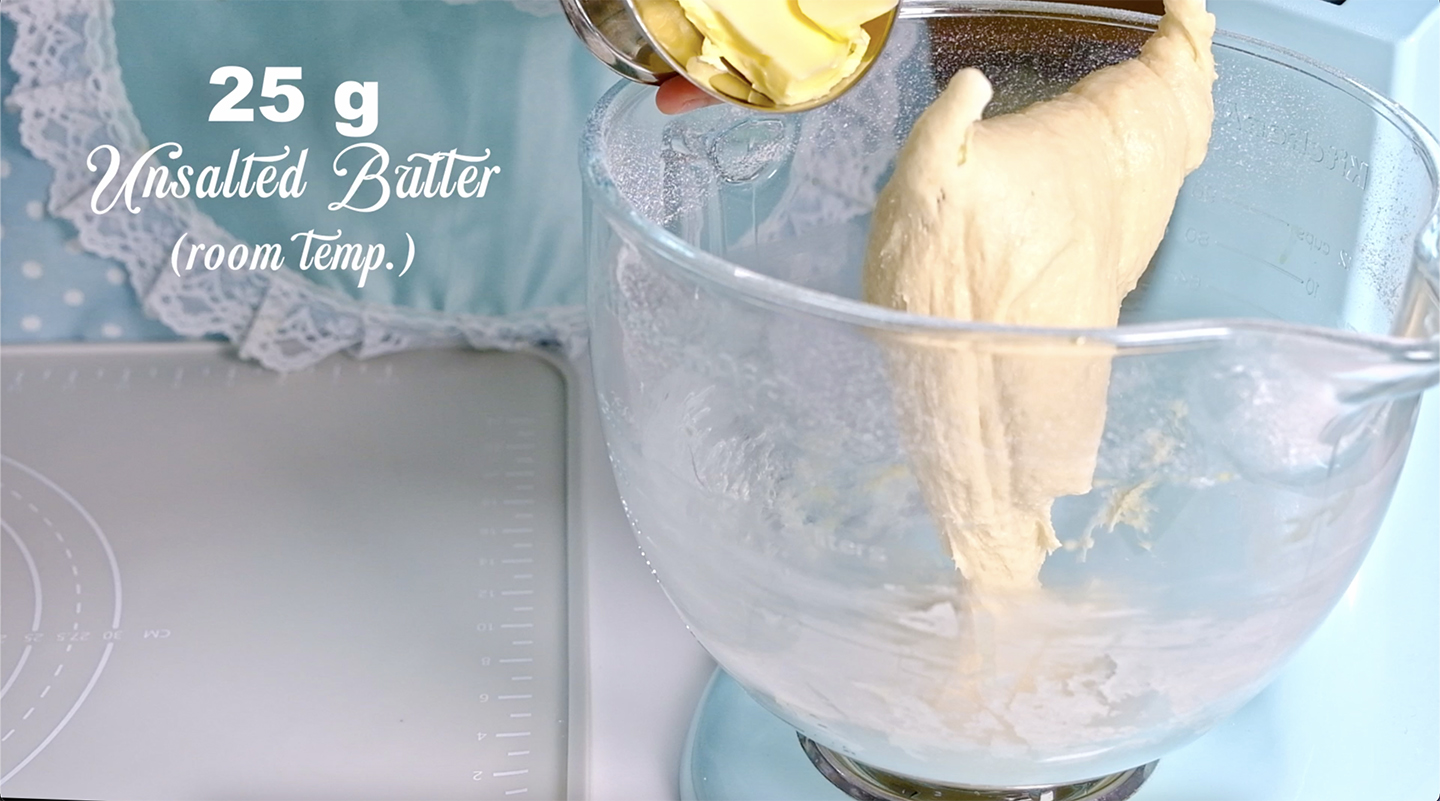
To a stand mixer bowl simply combine 280 g All-Purpose Flour, 45 g Caster Sugar, 1 tsp Instant Yeast and 1 ½ tbsp Milk Powder Mix until just combined NOTE: I usually add Salt after this; to avoid the salt coming into direct contact with the yeast (Salt can kill the yeast) Pour in 1/2 tsp Salt along with 140 g Milk (lukewarm) and 25 g Eggs (room temp.) On medium speed, mix until everything has come together into one mass, give a little scrape down the sides if anything sticks Add in 25 g Unsalted Butter (room temp.) and knead again on medium low speed until the dough is smooth and elastic for about 5-6 minutes * If you knead it by hand, it may take longer for about 10-15 minutes
Once it’s done; remove the dough from the bowl and shape it into a smooth ball
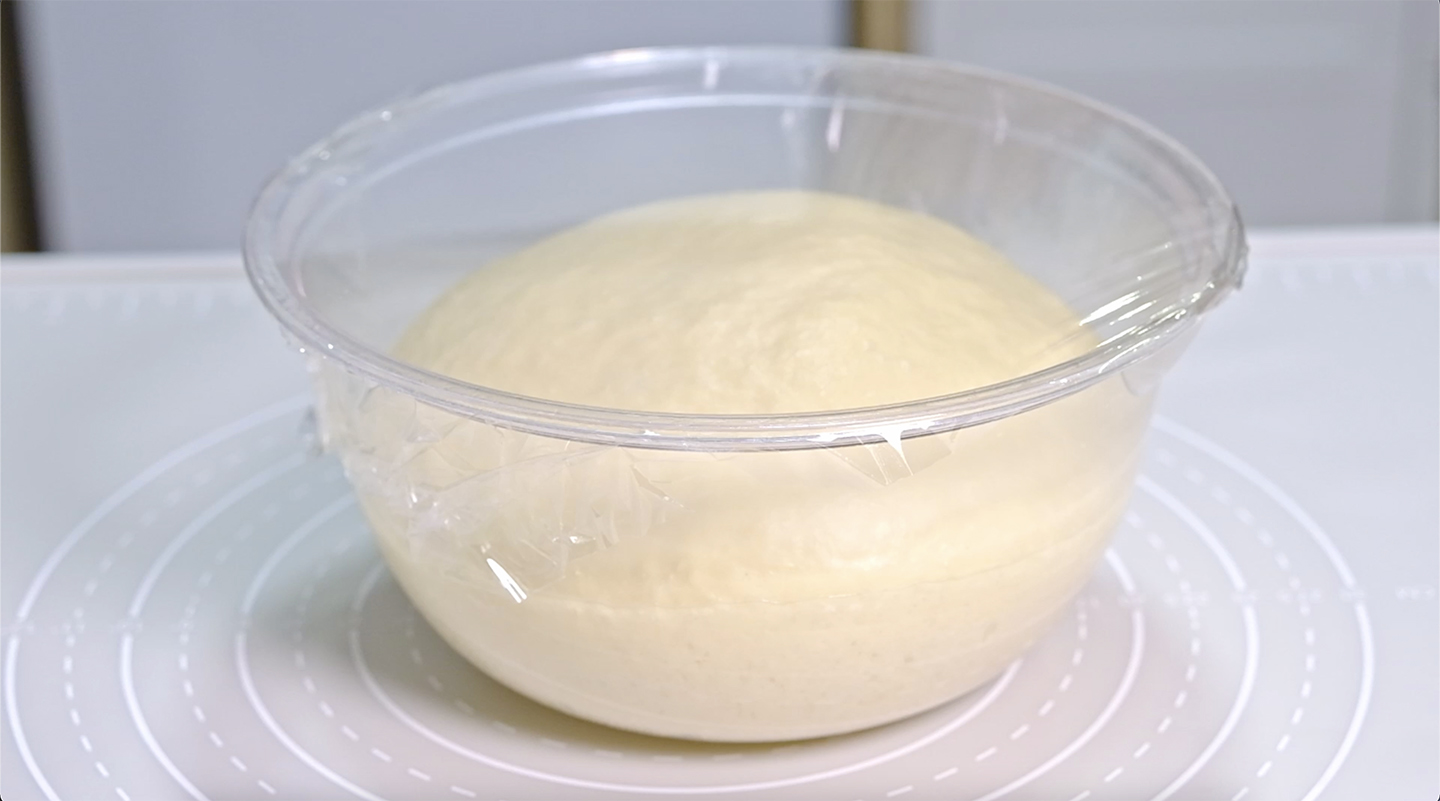
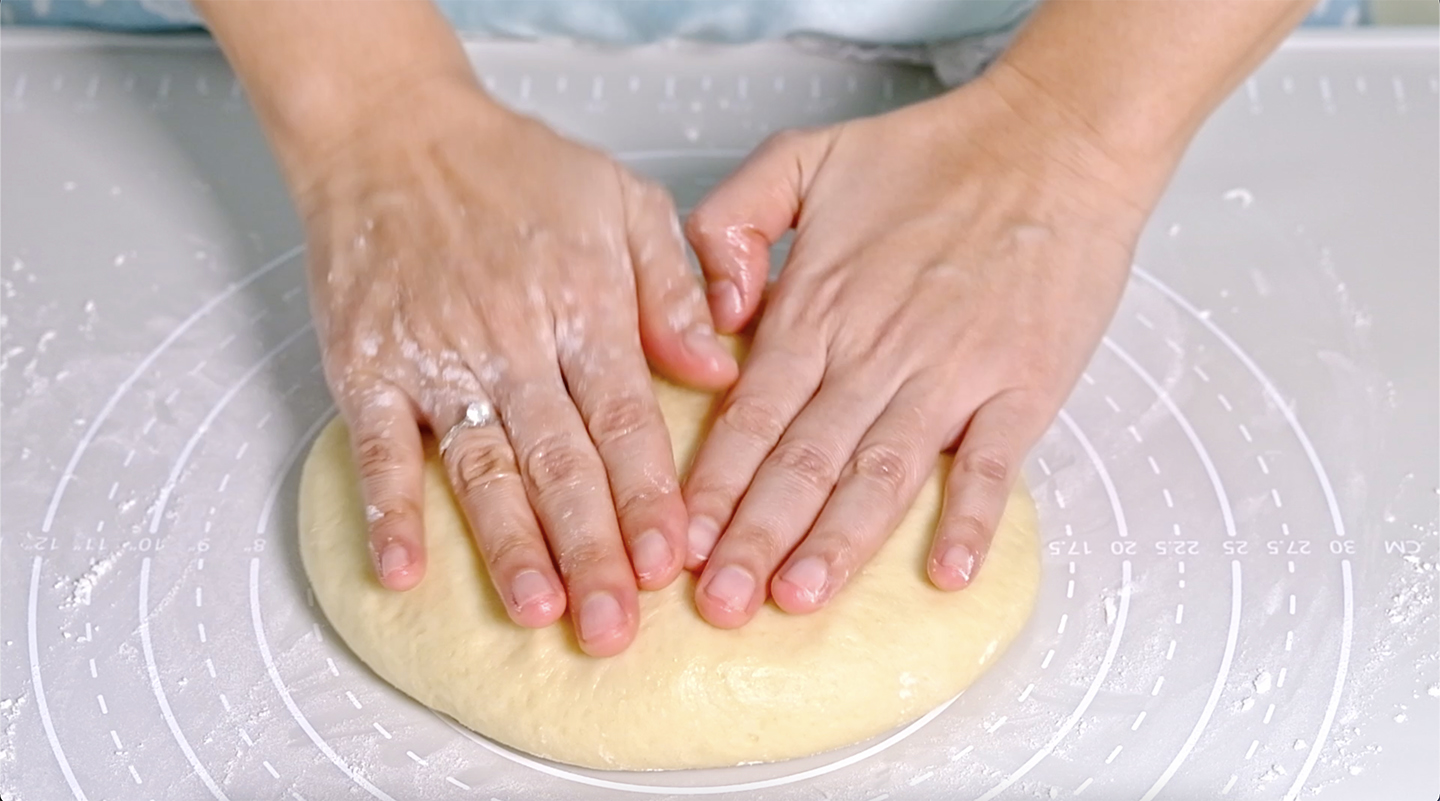
Add some oil to the clean bowl Place the dough in the bowl, smooth side up. Cover and let it rise until doubled in size for about 1 ½ hours (The time will depend on the temperature of your kitchen; if you are in cold environment, it will take longer and vice versa) After for about 1 ½ hours the dough has risen and become plump, airy and beautifully smooth Punch down and deflate the dough in the bowl Remove the gas inside Shape the dough into a ball, then thoroughly pat down the dough to evenly deflate it
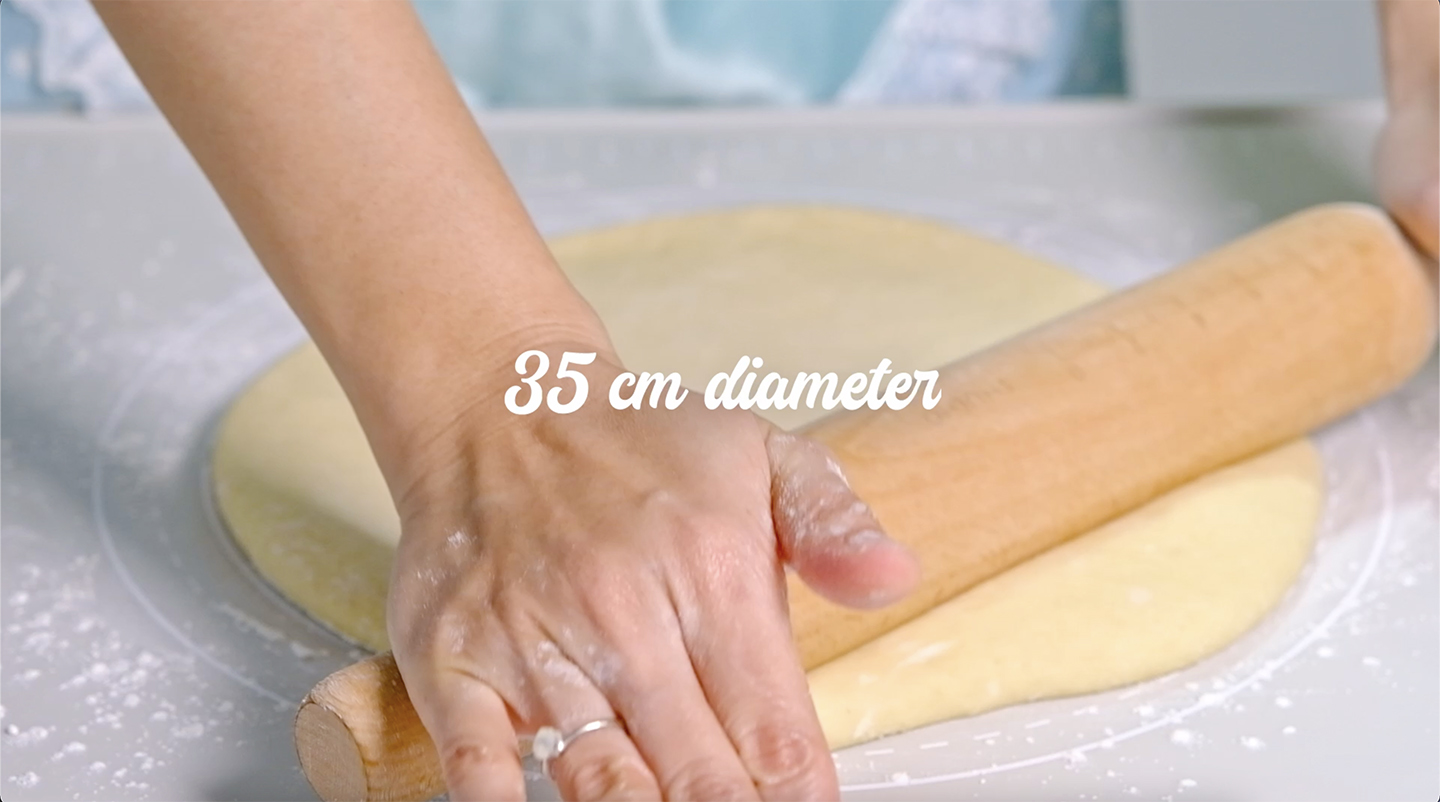
Then roll dough out on a lightly floured surface into a large circle about 35 cm diameter (Try to keep dough as much of an even thickness as possible)
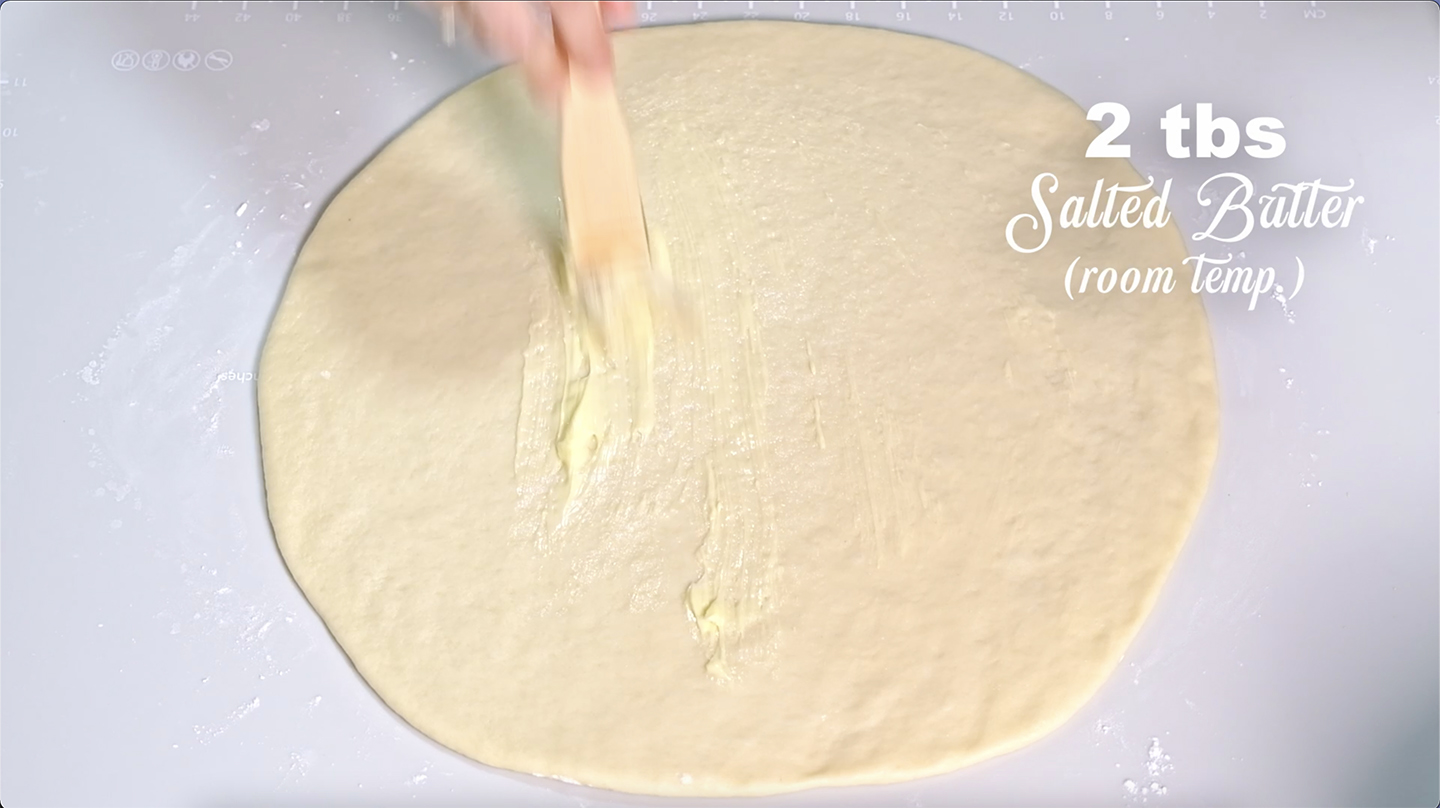
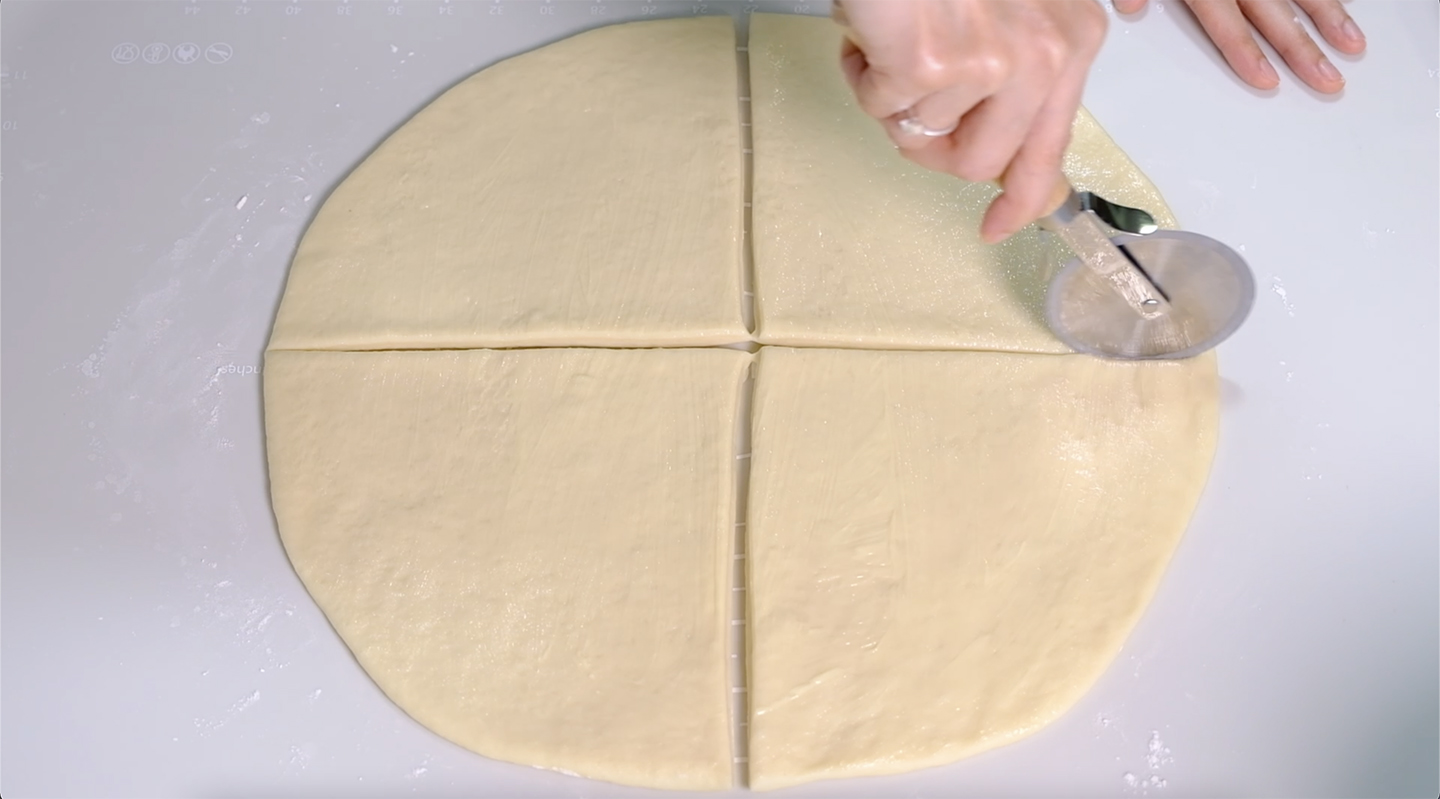
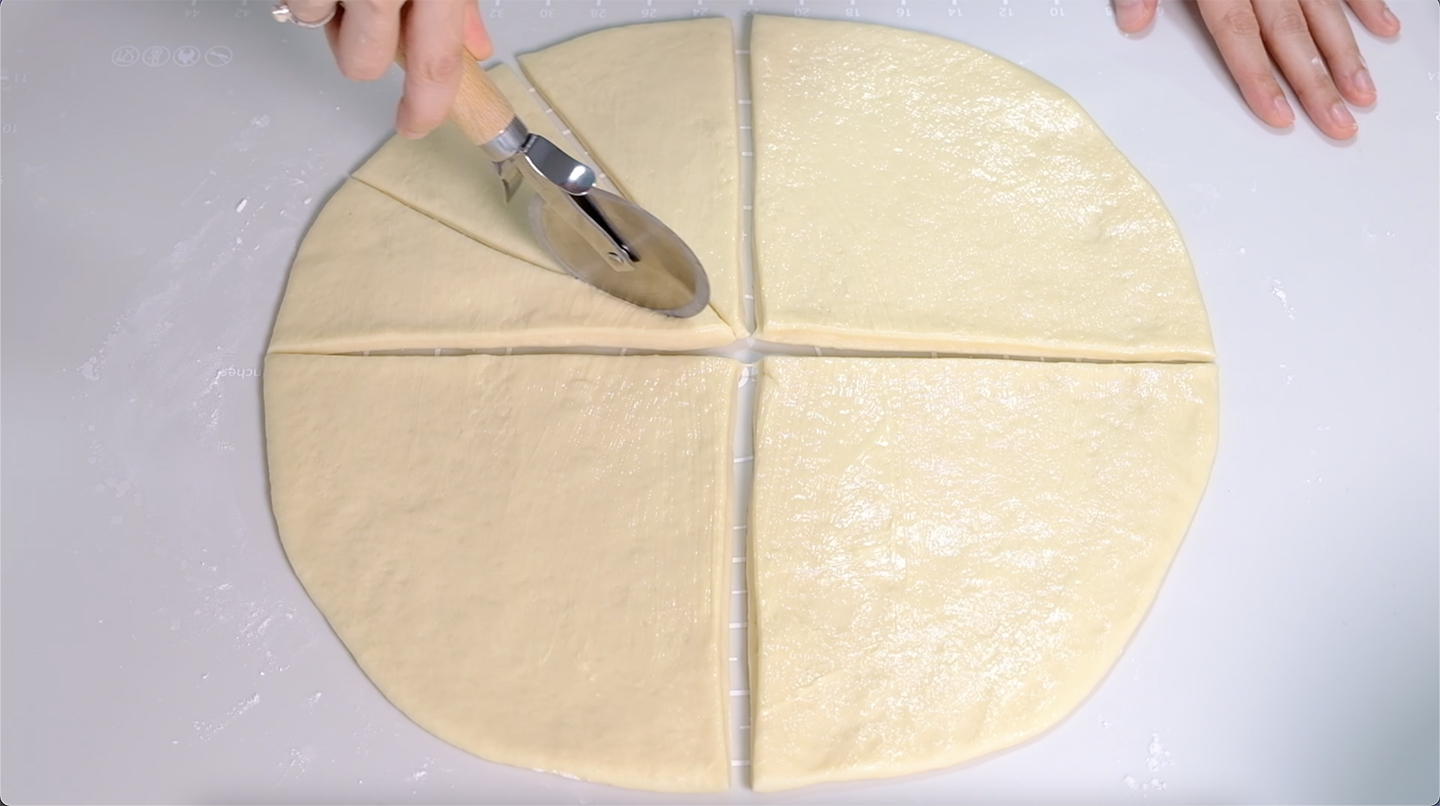
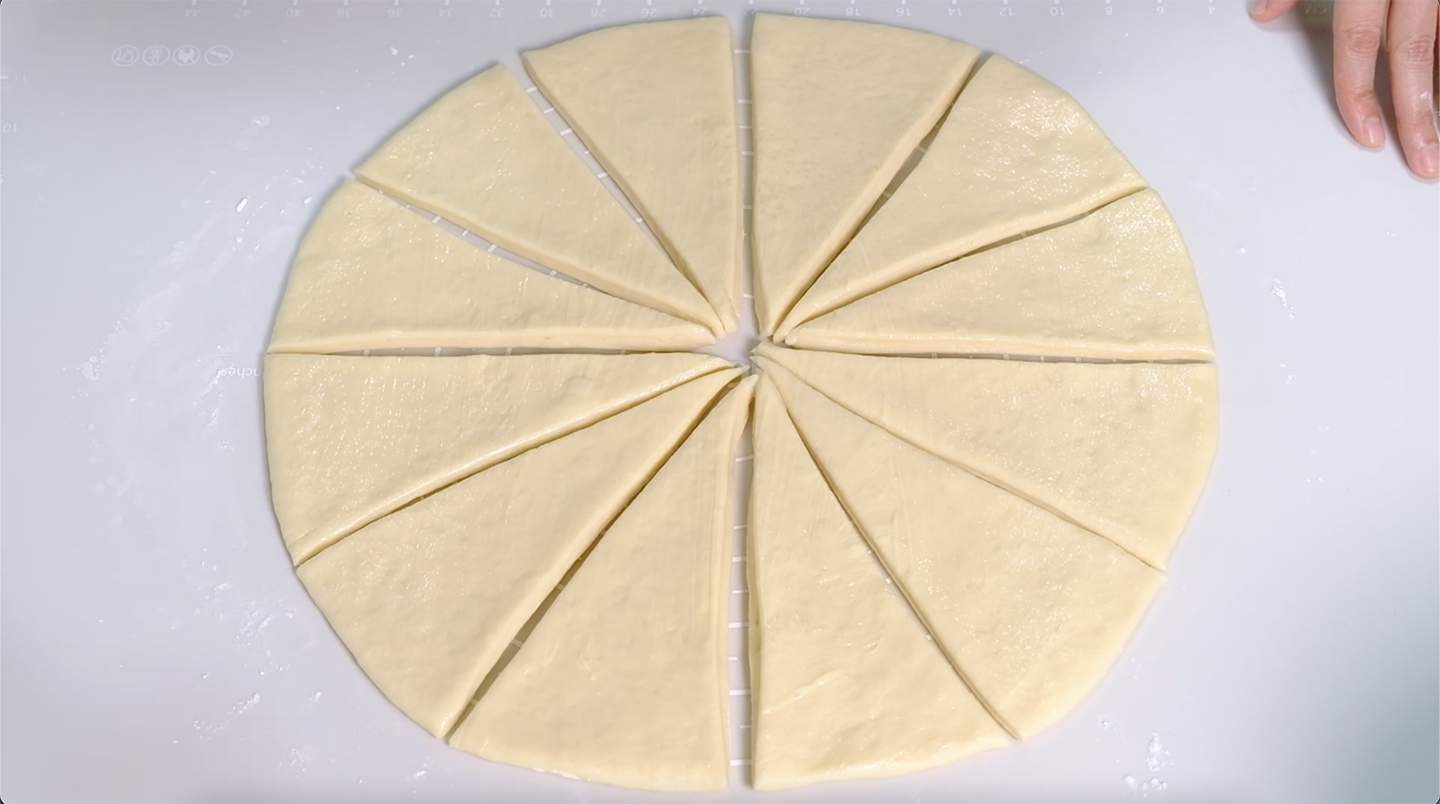
Spread circle of dough evenly with 2 tbsp Salted Butter(room temp.) Using pizza cutter or sharp knife divide circle into 12 equal portions Cut circle into 4 equal quarters first Then each quarter into 3 wedges
Just imagine cutting pizza slices or pie slices
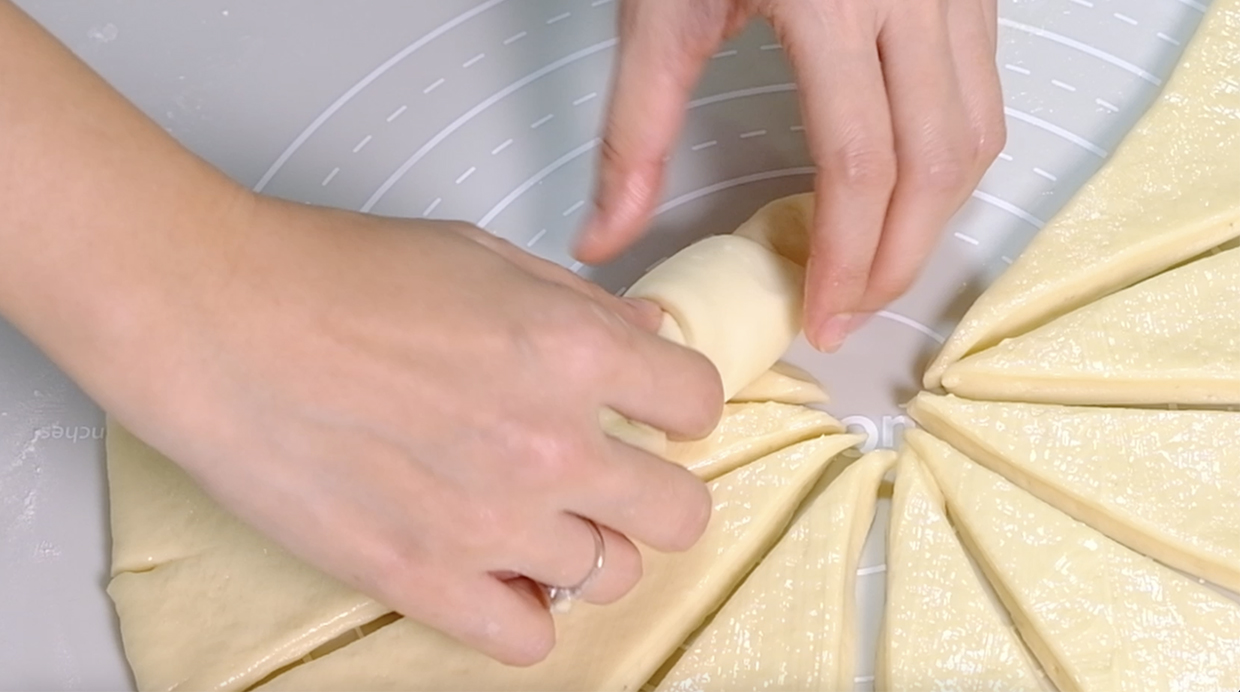
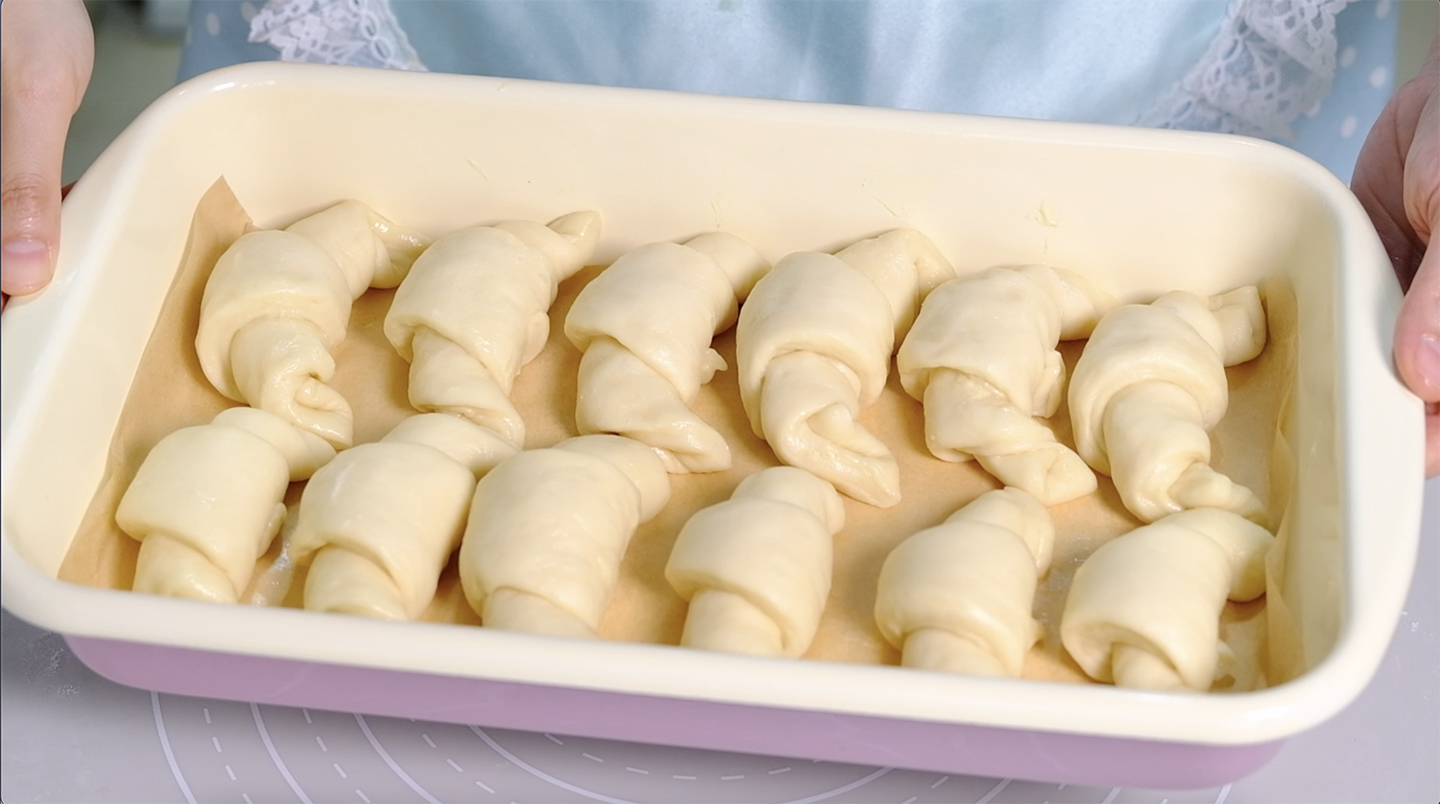
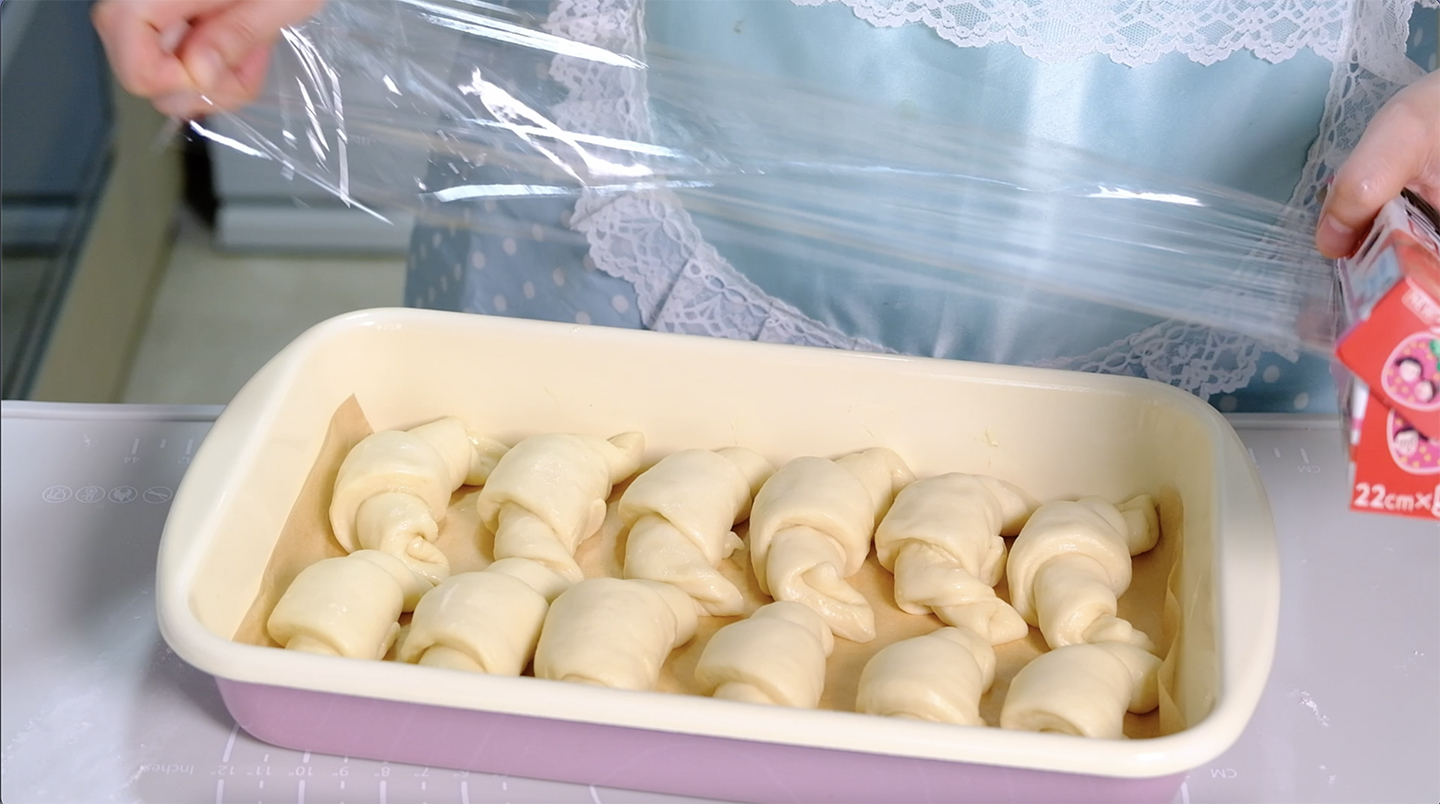
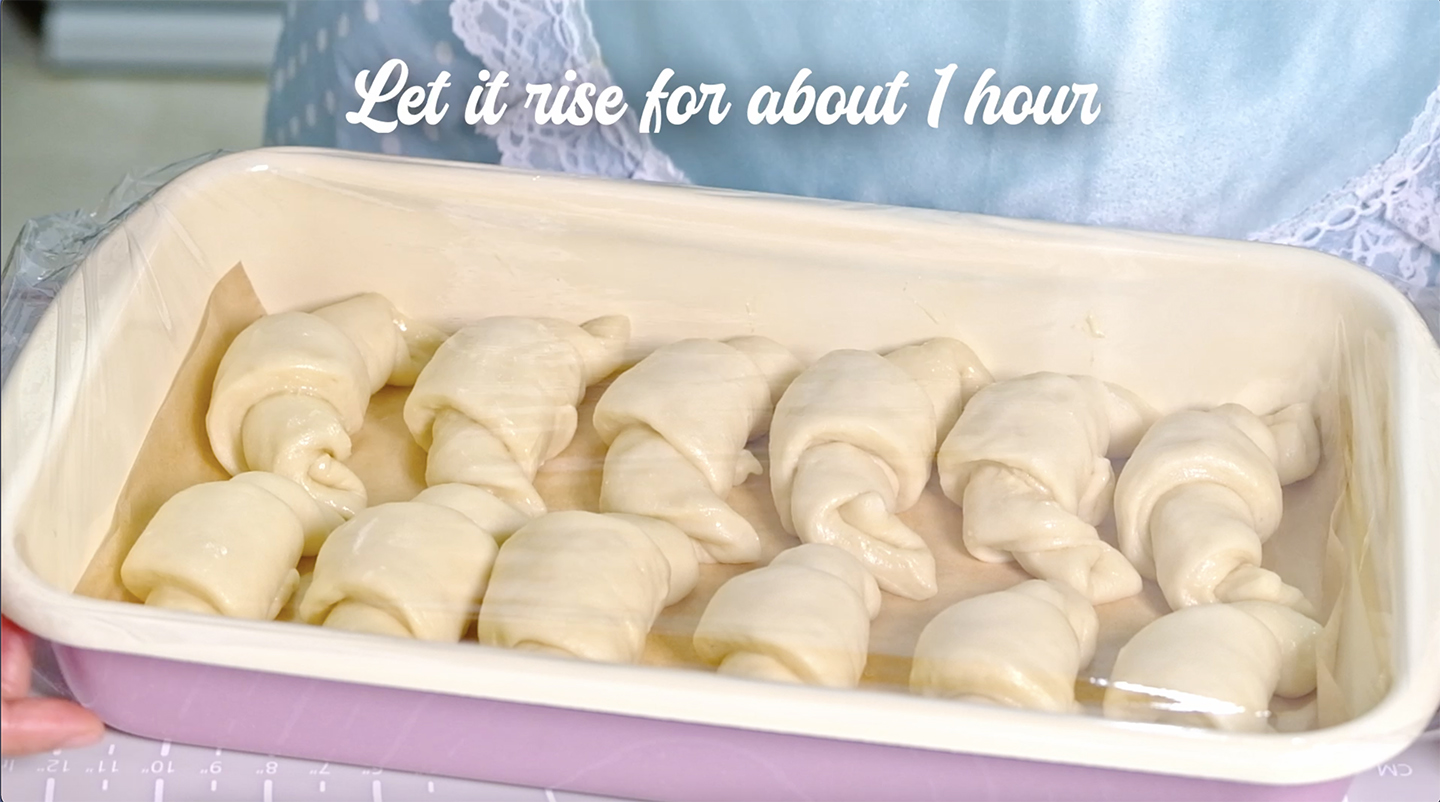
Cut a little bit in the middle of each wide edge Roll each wedge up, beginning on wide (outside) edge The shape is similar to a Croissant 😊 Transfer rolls to a greased 32 cm x 18 cm rectangular pan lined with parchment paper The tip of the rolled wedge should be tucked on the bottom You can fit 2 rows of 6 rolls Cover it with plastic wrap
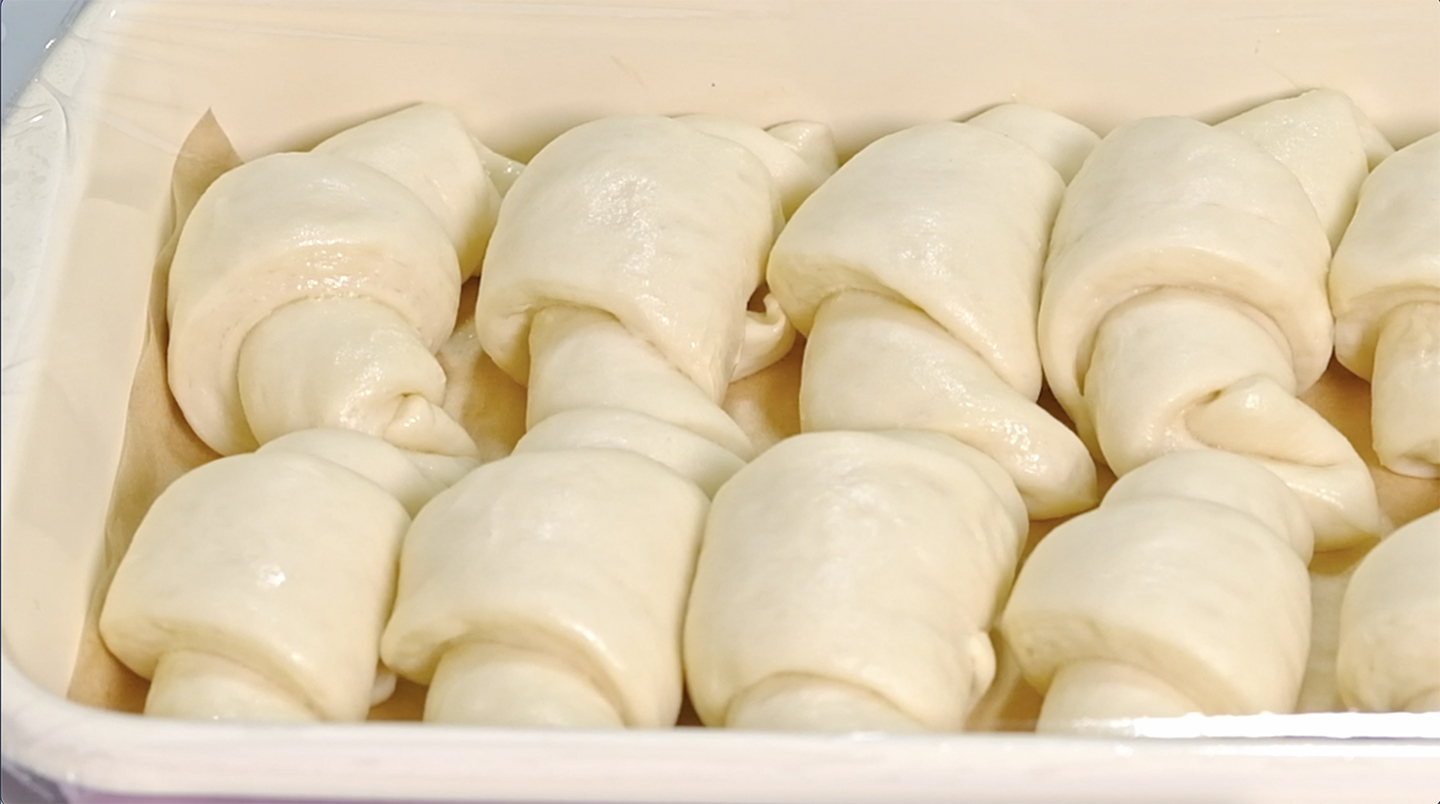
And let rise until plump and airy and about doubled in size, about 45 minutes to 1 hour
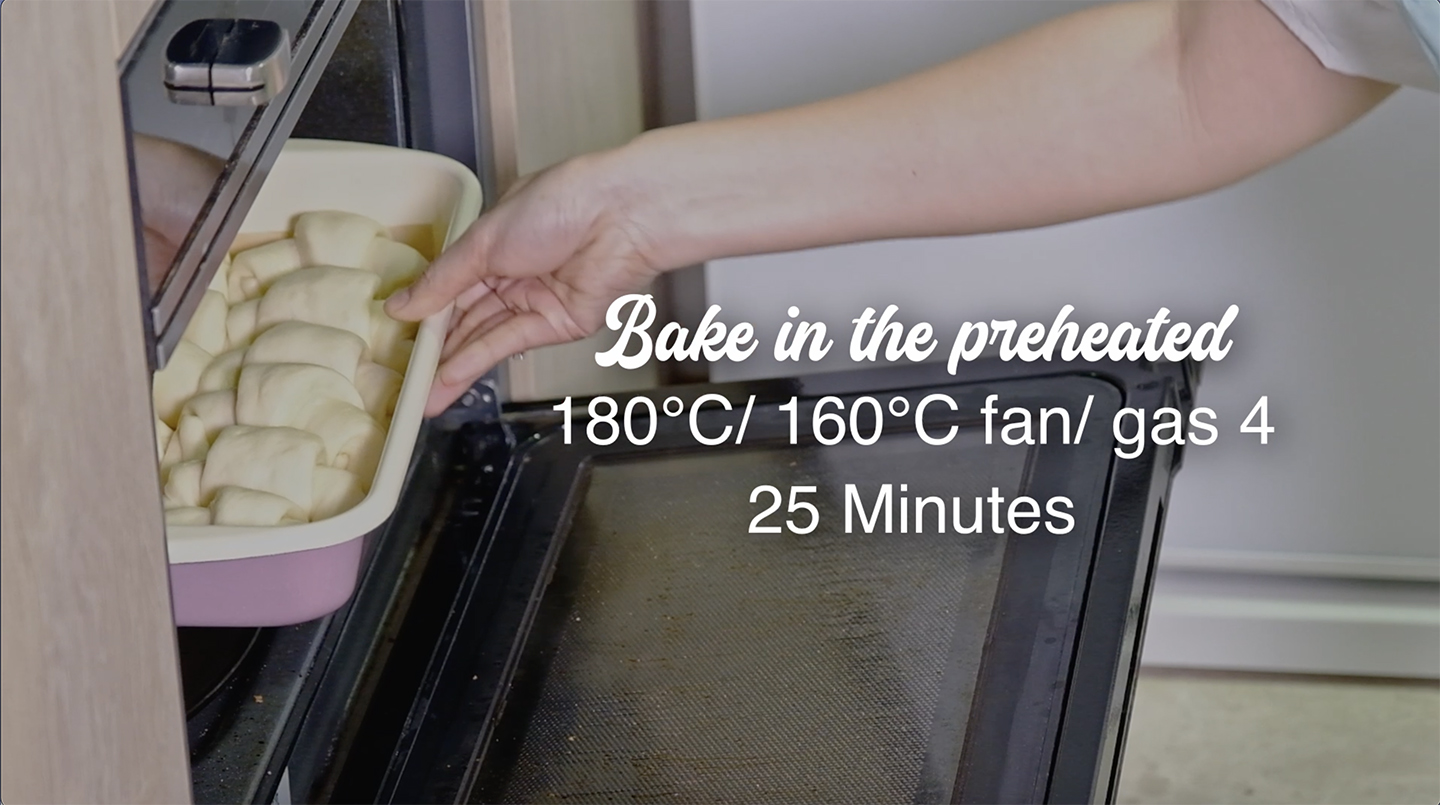
During the last 15 minutes of proofing time, preheat the oven to 350°F/ 180°C/ 160°C fan/ gas mark 4
After for about 1 hour, remove plastic wrap With the rack in the centre of the oven, bake rolls in the preheated oven for 25 Minutes Once it’s done; remove from oven NOTES: If your rolls aren’t browning at all, move the oven rack up closer to the top and bake again for another 2-3 Minutes Immediately while the buns are still hot from the oven brush all over with butter. (The melted butter will soak right in softening the crust, make it shinier and added richness to the rolls) Transfer it to a cooling rack Don’t forget to remove the parchment paper so it doesn’t get soggy And let it cool completely Be sure to store them in an airtight container so they don’t dry out. These dinner rolls should keep about 2 days at room temperature or about a week in the fridge; They also can be frozen for up to 2 months in an airtight container
SUPER SOFT CHEWY DINNER ROLLS
Yield: 12 Rolls
Total Time: 3 Hours

🌿 Ingredients
280 g All-Purpose Flour
45 g Caster Sugar
1 tsp Instant Yeast
1 ½ tbsp Milk Powder
1/2 tsp Salt
140 g Milk (lukewarm)
25 g Eggs (room temp.)
25 g Unsalted Butter (room temp.)
2 tbs Salted Butter (room temp.)

Baking temperature & time 180°C/ 160°C fan/ gas 4 ~ 25 Minutes

🌿 Notes
- These dinner rolls should keep about 3 days at room temperature or about a week in the fridge.
- Be sure to store them in an airtight container so they don’t dry out.
- Rolls can be frozen for up to 2 months in an airtight container.
- To reheat
 From the fridge ~ preheated 180°C oven for 3-5 minutes
 From the freezer ~ preheated 180°C oven for 5-10 minutes
Tangerine or Mandarin Oranges 橘子 and steamed buns 蒸包子 are two traditional Chinese New Year foods with meanings of wealth, thriving and good luck. During Chinese New Year, the oranges are given to family and friends to usher in prosperity.
SO..Beautiful 😚
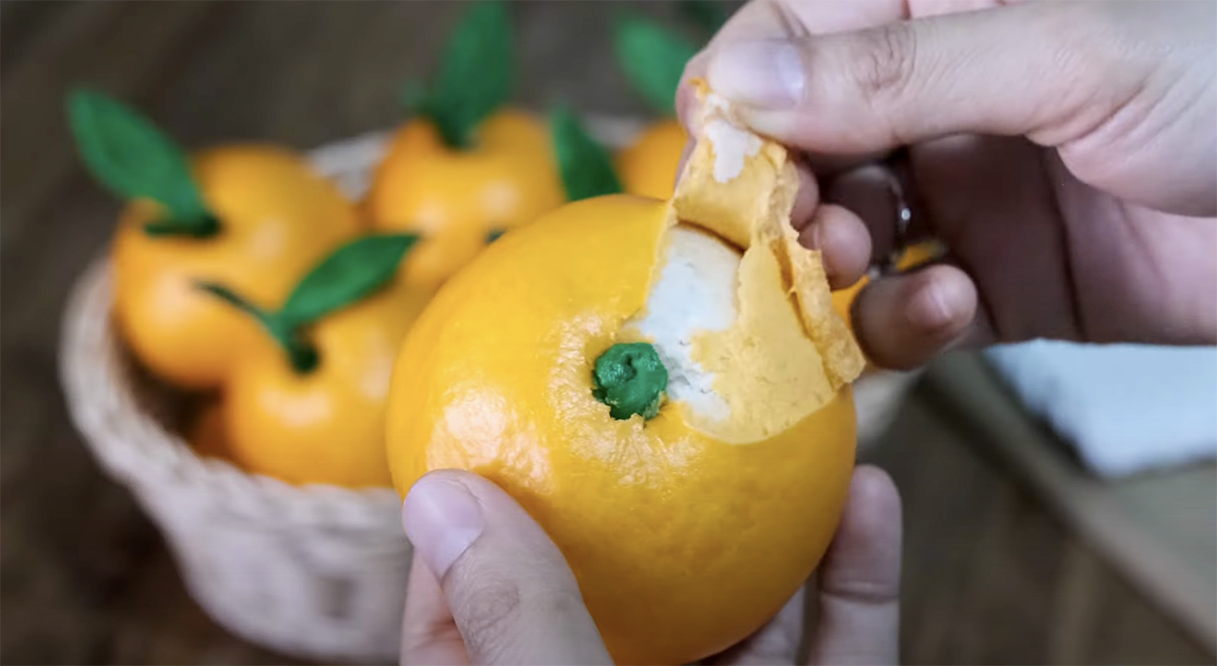
In this recipe, I will guide you step by step (also a few tips) to replicate Mandarin Orange into these beautiful Tangerine Buns. The most fun part, you can peel these sweet bun as if you peeling a citrus. And the Pandan Mung Bean Paste filling are not just so fragrant but easy to make as well, the stalks and leaves are edible too ☺️
Yummy fragrant and not too sweet… 🤤
I highly recommend to use fresh Pandan Leaves for best result. If you use Pandan Paste or Pandan Leaf Powder, they usually have a slightly bitter taste or a rough texture in your filling.
Get tired of Red Bean Paste Filling? TRY THIS! 😄
WHY IS THE BUN DOUGH A BIT HARD?
To maintain the characteristic shape of the Tangerine buns, a denser buns dough is needed.
The bun dough should not be too soft.
If it's too soft the bun will lose its shape (the shape of the steamed Tamarind Buns won't be round but rather flattened 😳).
CAN I USE OTHER FILLING?
Feel free to use other fillings according to your taste as long as the filling firm enough to hold their shape, that should be fine.
WHY MILK INSTEAD OF WATER?
We will be use cold milk in this bun dough recipe. Yeast is less active at cold temperature so it will give yourself more time for modelling the buns.
You can use cold water, but full cream milk adds flavour and nutrition to the buns and also a natural emulsifier that can make steamed buns whiter and help them stay softer for a longer period of time.
STIR THE SUGAR UNTIL COMPLETELY DISSOLVED
When making the dough, it is important to stir the sugar in the milk until completely dissolved; Because if there are still granules of sugar in the dough, you will knead the dough for too long to dissolve the sugar (your hands will warm the dough);
And the warmer the dough, the faster it will ferment and rise.
So I’m worried that you won't have enough time to shape the buns;  they will over-proofed and you will have a coarse texture on your final buns.
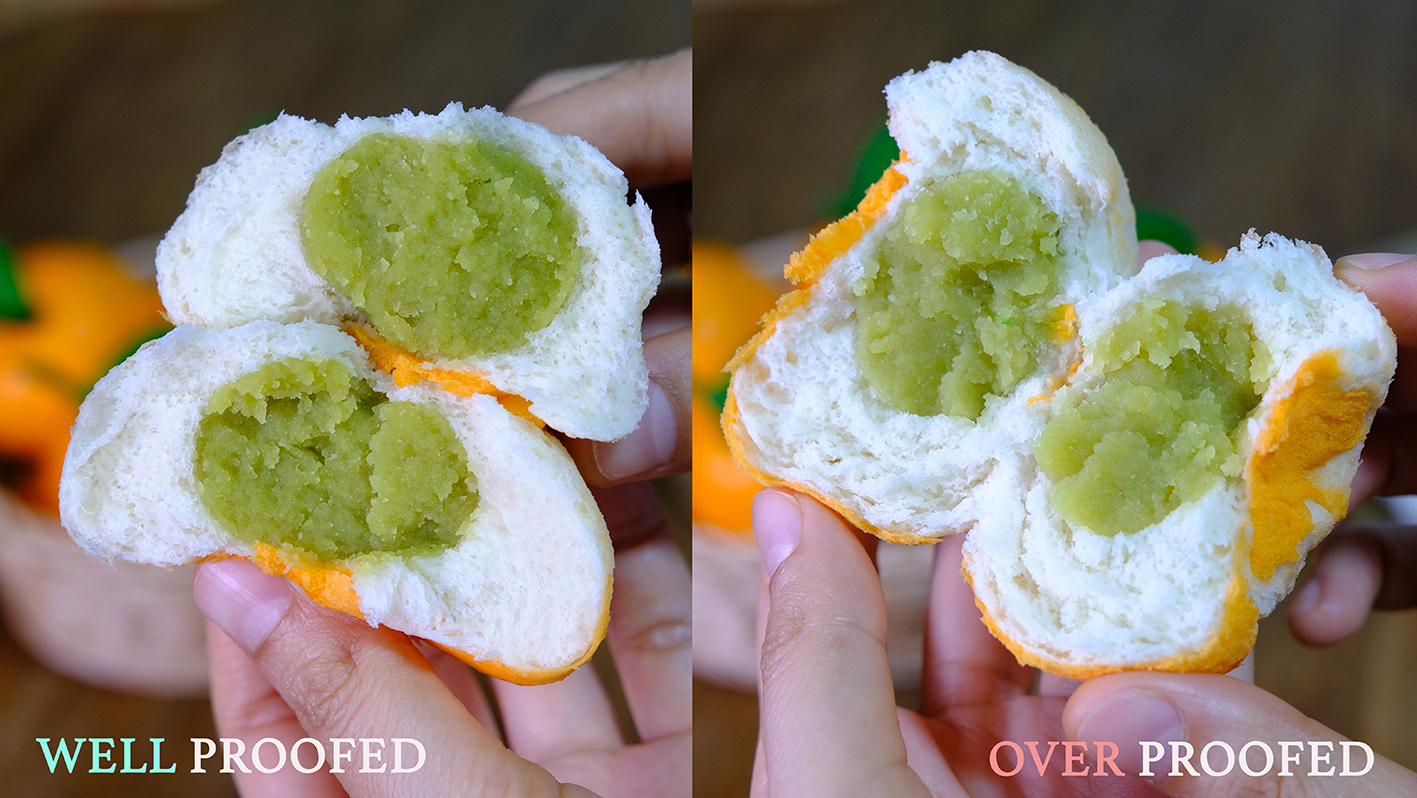
WHAT IS OVER-PROOFED BUN? Over-Proofedbun is likely to have a very open crumb structure. Due to the development of excess CO2 during the proofing stage, the gluten ends up being over-stretched and unable to hold up internal structure of the buns. You might just have a deflated buns with very coarse and crumbly texture.
CHOOSE THE RIGHT STEAMER
Bamboo steamer is the best choice in my opinion because their lids doesn't collect condensation.
If you are using metal or plastic steamer, make sure that you cover the lid with a piece of cloth
so the condensation during steaming won’t ruin the look of your buns.
HOW TO KNOW WHEN DOUGH IS DONE PROOFING
Proofing time depends on room temperature (so please pay attention); It may take longer or may not take that long (Cold temperatures make it harder for yeast to be active so you will need more time to proof; and vice versa).

After fermentation, the proofed buns should feel lighter and rise about 50% of their original size.
And if you gently press it with your finger, the dough will make indentation and be able to slowly bounce back into shape.
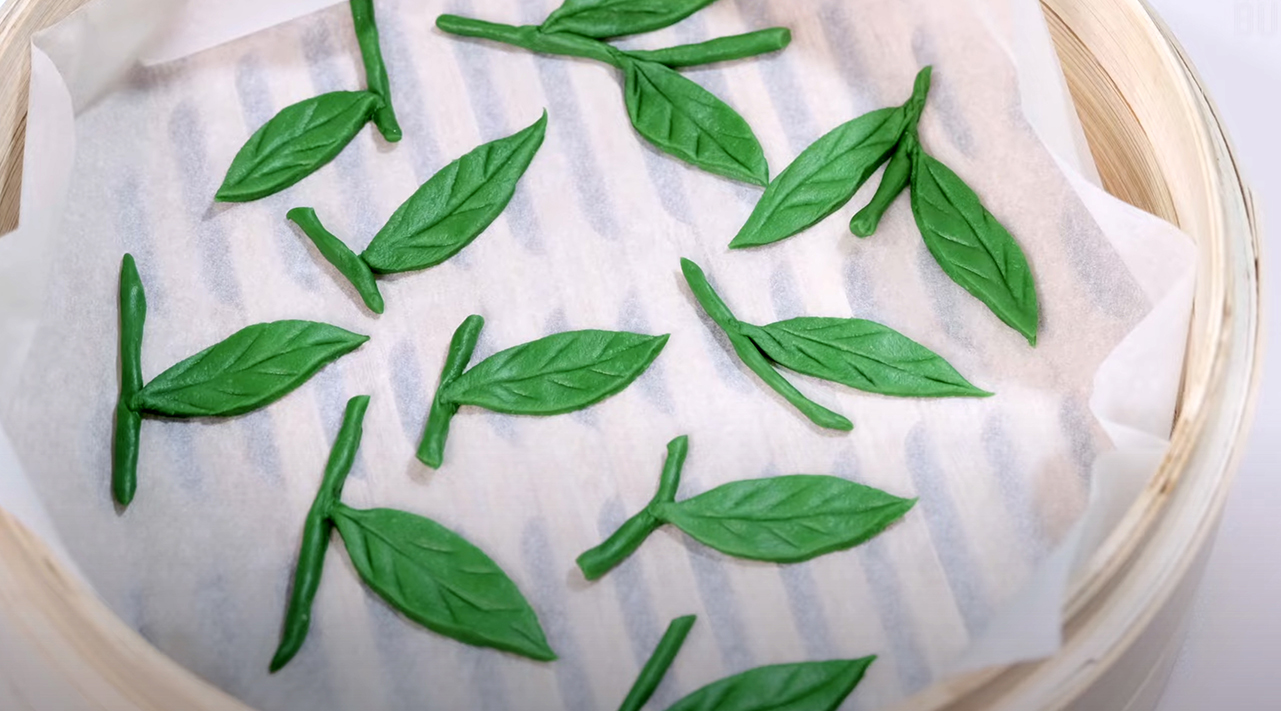
DON'T PROOF THE STALKS AND LEAVES It is important to roll the green dough into a very thin layer and don’t proof them (I've tried proofing it before and after steaming it looks like a FATLEAVES, it looks so weird) 😳
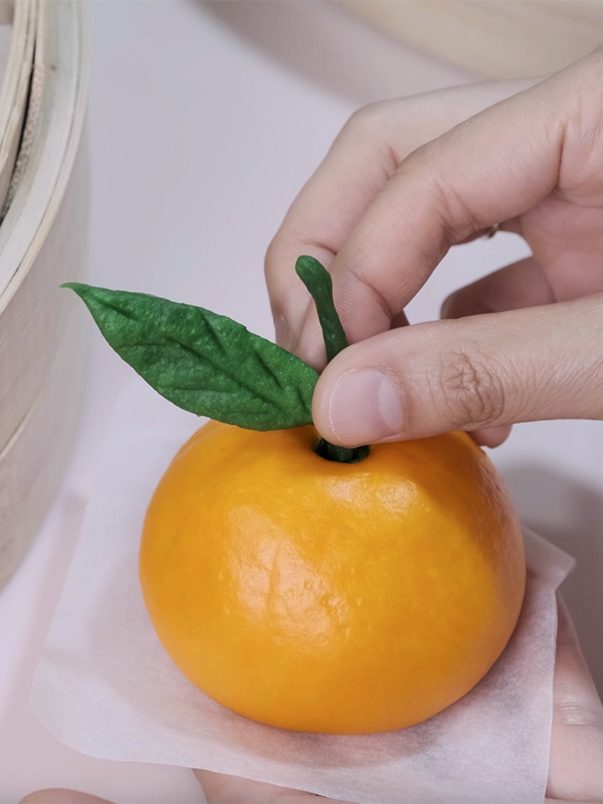
These beautiful Tangerine skin is bright and shiny 💥 🥰
Can you see? I am PEELING my bao! 😂🤣🤣 so funny….
🤭 ….
The small citrus looks like the sun, and because the sun 🌞 is aligned with the YANG 陽 / 阳 or positive principle, it is a symbol of abundance and happiness.
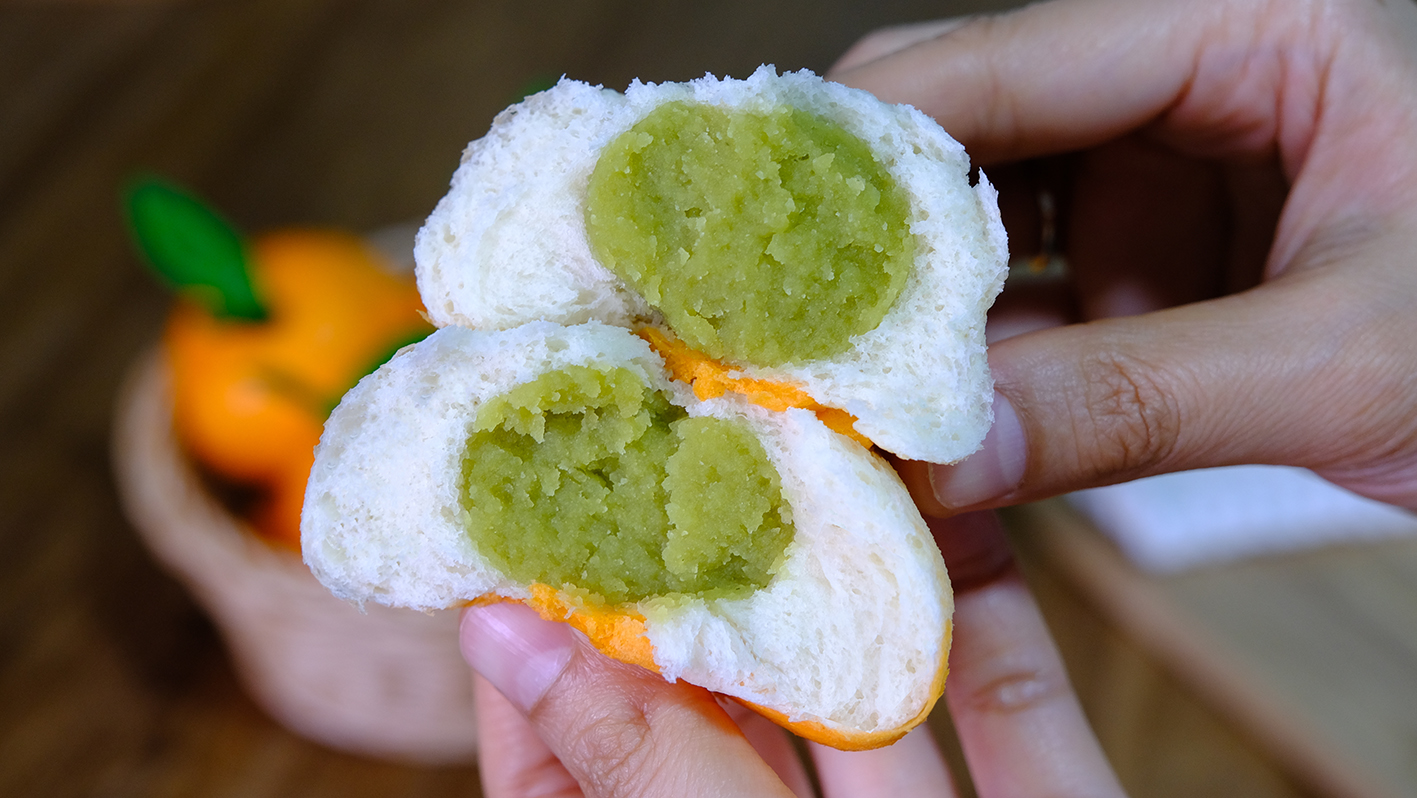
The buns is really soft and fluffy, with the fragrant Pandan Mung Bean Paste Filling inside, so tasty and not too sweet😉. With so much effort, these buns turned out so lovely and delicious. They are not only used as decorations, but given as gifts when visiting family and friends as a symbol of a good fortune.
I hope you can enjoy the beauty of this Tangerine Bao 😘❤️ Love you All…!
TANGERINE BUNS 橘子包子 Yield: 9 buns Active Time: 2 hours Total Time: 4 hours
INGREDIENTS 🌱Pandan Mung Bean Pastę 50 g Mung Beans + 500 g Water 15 g Pandan Leaves 150 g Water 40 g Caster Sugar 5 g Wheat Starch 1/8 tsp Salt 20 g Vegetable Oil
🌱Buns Dough 110 g Cold Milk 45 g Caster Sugar 3/4 tsp Instant Yeast 225 g All-Purpose Flour 1/4 + 1/8 tsp Baking Powder 10 g Unsalted Butter Orange and Green Food Colouring
INSTRUCTIONS Pandan Mung Bean Pastę
Rinse mung beans until the water runs clear and transfer it to a medium pan. Add in the water, cook over medium high heat until the beans are tender; Set aside. 50 g Mung Beans; 500 g Water
Cut the Pandan Leaves into small pieces Using a food processor, blend the leaves with some water (it doesn’t have to be so smooth). 15 g Pandan Leaves; 150 g Water
Strain Pandan mixture into a clean non-stick pan. Add in the sugar and Wheat Starch, mix well. 40 g Caster Sugar; 5 g Wheat Starch
Then add the blended cooked mug beans along with salt and vegetable oil. 1/8 tsp Salt; 20 g Vegetable Oil
Cook over medium high heat and keep stirring (please note, never leave it out when cooking this mixture). This process will takes for about 20 minutes. The water will slowly evaporate and the mixture start to thickened.
Once the mixture formed a thick paste, turn down the heat to medium low (be careful not to burned it); And continue cook until the paste comes together and no longer stick to the pan.
Once it’s done, pour it into a plate. Cover it with a cling wrap to prevent from drying out; And store it in the fridge for at least 1 hour to firm up.
After 1 hour in the fridge, the filling gets harder (knead it for a few seconds, the paste will become pliable again) And then, divide it into 9 equal portions (about 20 grams each), roll each portions into a ball; cover it with a cling wrap while waiting for the buns dough.
Buns Dough
Combine the milk and sugar, stir until the sugar completely dissolved (Don’t skip this important step). 110 g Cold Milk; 45 g Caster Sugar * If there are still granules of sugar in the dough, you will knead the dough for too long to dissolve the sugar; Your hands will warm the dough (the warmer the dough, the faster it will ferment and rise); So I’m worried that you won’t have enough time to shape the buns and you will have a coarse texture on your final buns.
Add in the yeast, mix well. 3/4 tsp Instant Yeast
For the dry ingredient, in a large bowl simply combine the All-Purpose Flour and Baking Powder. 225 g All-Purpose Flour; 1/4 + 1/8 tsp Baking Powder
Pour in the milk mixture to the dry ingredients and stir until just combined.
Add the butter, knead the dough for about 3 minutes until it form a cohesive ball and become really smooth. 10 g Unsalted Butter
Set aside 35 grams of the dough for the leaves; 120 grams for the orange skin (colour each portions). And leave the rest dough white (about 235 grams) for the inside part of the Tangerine.
Divide the white dough into 9 equal portions (about26 grams each); Roll each piece of the dough into a smooth ball. Do the same things for the orange dough (about 13 grams each). * Don’t forget always cover each dough with a plastic wrap along the process to prevent from drying out
Fill and Shape the Buns (Kindly follow video instructions for more details)
Take 1 portion of the white dough. With the smooth side facing down; press and roll into an 8 centimeters diameter disc.
And then, place 1 portion of the filling to the centre of the dough.
Using your right hand, slowly squeeze and push the wrapper up while left thumb press the filling down; Pinch to seal. * Make sure that you seal the buns well to prevent the filling from leaking out when steaming Continue with the rest white dough…
After all the white dough is done, we will wrap it with the orange colour dough to create it’s rind.
So for the Tangerine skin, take 1 portion of the orange dough. Press and roll into a 10 centimeters diameter thin disc
And then carefully lift and place the orange skin on top of the white dough; Turn it over Gently pull the orange skin a little by little until wrap the entire white dough (The orange skin dough is very elastic, so if you do it patiently, you will definitely be able to cover the entire surface).
Once it’s done use dough scraper or blunt wooden knife to create the segment
And then, make a hole on center of the top, insert some green dough to create the pedicel.
Place the bun onto a piece of parchment paper. Using some toothpicks puncture the surface of the skin (mimicking the pores texture of the Tangerine rind).
After all the buns is done, put them in the steamer (make sure that you give some space in between the buns so they won’t stick one another after fermentation or steaming). * In the meanwhile you can start preheat your steamer.
Cover and allow to rise for about 20-45 minutes (please pay attention, it depends on room temperature; It may take longer or may not take that long)
After fermentation the proofed buns should feel lighter and rise about 50% of their original size. And if you gently press it with your finger; the dough will make indentation and be able to slowly bounce back into shape.
Over medium heat, steam the buns for 15 minutes. *If you are using metal or plastic steamerMake sure that you cover the lid with a piece of cloth so the condensation during steaming won’t ruin the look of your buns.
After 15 minutes, take the steamer off from the heat (Do not open the lid) and let it sit for another 3 minutes; and then serve.
NOTES
The Pandan Mung Bean Pastę filling is best consumed as soon as possible. If you are not using it right away, you can keep it in an airtight container in the refrigerator for up to 5 days or in the freezer for up to a month.
If you make this filling in large quantities; Before freezing, I suggest to divide the paste into small portions so that you can be flexible on how much to use each time. When you are ready to use, you can defrost in the fridge overnight.
The buns can be stored in the fridge (in an airtight container) for 5 days or frozen for a month.
I highly recommend to reheat the buns in the steamer To reheat: Place the frozen buns on a plate; put the plate on top of the trivet in the steamer and let them steam over high heat for 10 minutes or until heated through.
If you want to reheat it in the Microwave Place the frozen buns on a plate; wet some paper towel (wring out the excess water) and place the paper towel on top of the steamed buns (to prevent the buns from drying out). Microwave on high for 30 seconds (add the time as needed until heated through).
Sophisticated bread these are not, but there is beauty in simplicity Soft and delicious, with just a touch of sweetness
Hi Everyone, today we are making these “NO Butter Sweet Bread” which is my Grandmother’s old school recipe. These breads are processed traditionally and has been passed down from generation to generation.
The main reason I like this old-fashioned bread is because the texture is very soft, they are healthier (there’s NO chemical such as bread improver or preservatives, etc.) The filling is also dense and sticky and tastes deliciously sweet.
Instead of using butter as a fat, we are going to use oil in this recipe. You will be surprise that the bread is really soft and fluffy, even if you store them in the fridge for a few days.
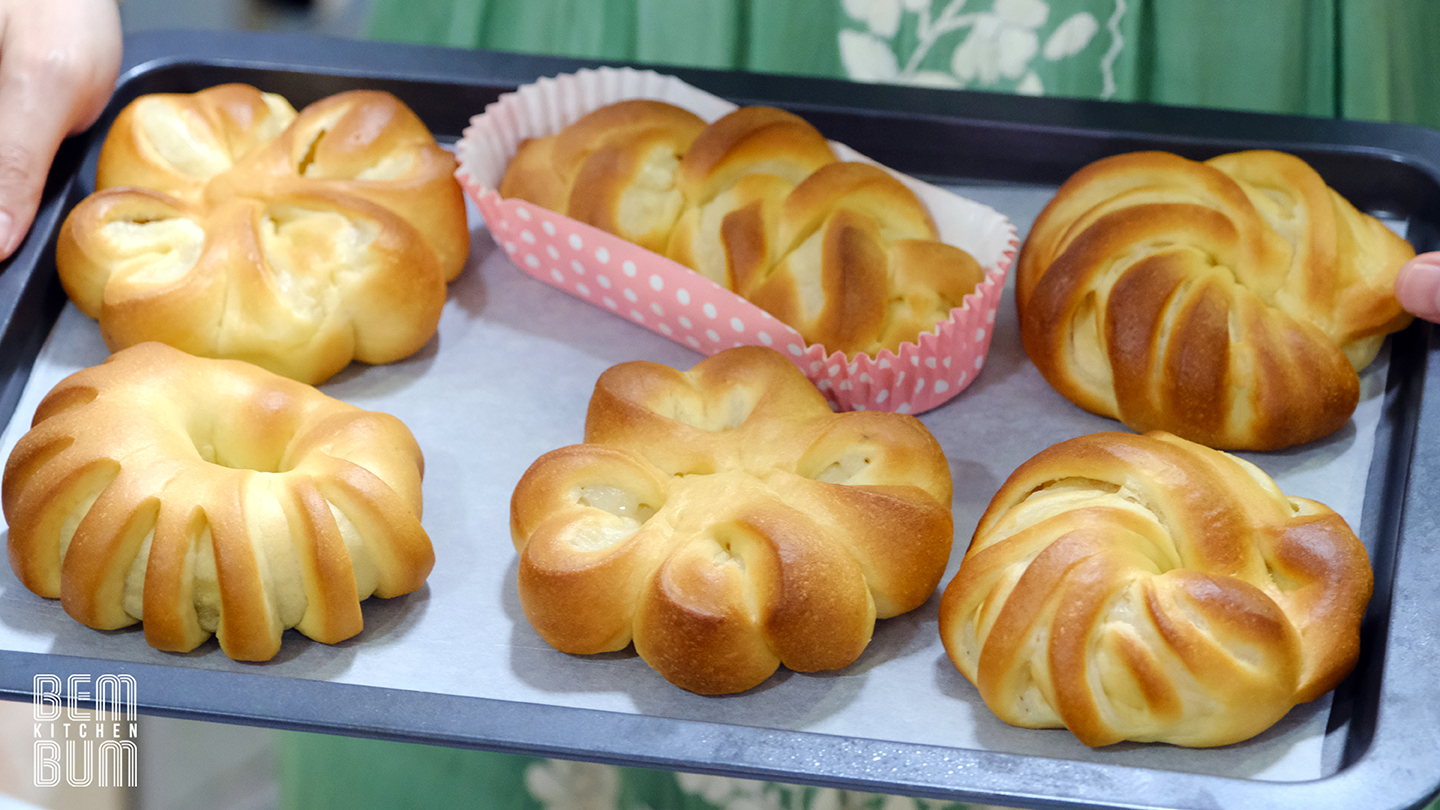
In this recipe, I will also share with you how to make 2 flavours of Old School Filling (Chocolate and Milk Butter Filling) along with 6 methods of shaping bread (kindly follow video instructions).
Considering that no preservatives are used, these bread can only last around 2 days at room temperature (in a dry; NOT in a humid conditions) and up to a week if stored in the refrigerator.
Nothing beats the unique taste and beautiful texture of the old school bread.
This recipe has been handed down from my Grandma, and now I am passing it along to you! I hope you like it can enjoy it as much as I do!
WATCH HOW TO MAKE OLD-FASHIONED SWEET BREAD
RECIPE
GRANDMA’S SUPER SOFT OLD-FASHIONED SWEET BREAD Yield: 9 Bread Active Time: 2 Hours Total Time: 4 Hours
Ingredients ☘️ Chocolate Filling 40 g Caster Sugar 1 tbs Milk Powder 15 g Cocoa Powder 50 g Eggs 1 tsp Vanilla Extract 15 g Unsalted Butter (room temp.)
☘️ Milk Butter Filling 125 g Full Cream Milk 35 g Caster Sugar 25 g All-Purpose Flour 1/8 tsp Salt (A pinch) 1 tsp Vanilla Extract 10 g Unsalted Butter (room temp.)
☘️ Bread Dough 200 g Bread Flour 50 g All-Purpose Flour 60 g Caster Sugar 10 g Milk Powder 6 g Instant Yeast 5 g Salt 45 g Vegetable Oil (Canola/ Palm/ Extra Light Olive Oil) 30 g Egg Yolks 100 g Water (room temp.)
Instructions Chocolate Filling
In a non-stick pan simply combine all the ingredients; Mix it really well until no lumps visible. 40 g Caster Sugar; 1 tbs Milk Powder; 15 g Cocoa Powder; 50 g Eggs; 1 tsp Vanilla Extract; 15 g Unsalted Butter (room temp.)
Cook over medium low heat until the mixture thickens, forms a paste and no longer sticks to the pan.
Once it’s done, take it off from the heat. Cover with a cling wrap so it doesn’t dry out (open a little gap so the steam can escape) and let it cool completely.
Milk Butter Filling
In a non-stick pan combine all the ingredients (except the butter); Mix it really well. 125 g Full Cream Milk; 35 g Caster Sugar; 25 g All-Purpose Flour; 1/8 tsp Salt (A pinch); 1 tsp Vanilla Extract
Strain the mixture to remove any lumps.
Add in the butter, cook over medium heat and keep stirring. 10 g Unsalted Butter (room temp.)
When the mixture starts to thickens, lower the heat (be careful not to burned it); The dough will looks like a glue.
Once you see the boiling bubbles appears on the surface, take it off from the heat. Pour the mixture into a heat proof plate, spread it evenly so it cool faster.
Cover with a cling wrap (open a little gap so the steam can escape); Let it cool completely.
Bread Dough
In a large bowl combine the two kinds of Flour along with Caster Sugar, Milk Powder and Instant Yeast; Mix well. 200 g Bread Flour; 50 g All-Purpose Flour; 60 g Caster Sugar; 10 g Milk Powder; 6 g Instant Yeast
Add in the rest ingredients. 5 g Salt; 45 g Vegetable Oil; 30 g Egg Yolks; 100 g Water (room temp.) * Please note never add salt directly on top of yeast because the salt will indeed kill the yeast
Knead the dough (with dough hook) on medium speed (kitchen aid speed 4) for 12-15 minutes * If you knead it by hand, it will take longer, for about 20-25 minutes; Knead until the dough no longer sticks to your hands (don’t be tempted to add more flour, it will make the bread tough).
Once it’s done, divide the dough into 9 equal portions (about 55 grams each). Roll each dough into a smooth ball; Cover with a greased plastic wrap so it doesn’t dry out and then let them rest for 30 minutes to relax the gluten.
After 30 minute, we can start shaping our bread (kindly follow video instructions). Please note: Don’t forget always cover the dough with a greased plastic wrap along the process to prevent it from drying out.
Once it’s done, place them on the pan lined with parchment paper (make sure that you give some space in between the bread so they won’t stick one another after fermentation or baking).
Cover and allow to rise for about 1 hour (please pay attention, it depends on room temperature, it may take longer or may not take that long).
After fermentation, the proofed bread will look puffier and rise about 50% of their original size. If you gently press it gently with your finger, the dough will make indentation and be able to slowly bounce back into shape.
Bake them in the preheated 180°C Oven for 13-15 minutes. Once it’s done, lightly brush the top of the bread with melted butter (this will give the bread a softer shiny beautiful crust and richer flavour)
Let them cool completely on a cooling rack.
Notes
To store – In a cool room temperature (in a dry-NOT in a humid conditions): in an airtight container for 2 days -Fridge (airtight container) for 4 days – Freezer (airtight container) for 3 weeks.
Reheat – From Fridge: preheated 160° C oven ~ 10 minutes (the bread actually will stay soft in the fridge) – From Freezer: preheated 160°C oven 15-20 minutes
With this recipe you don’t have to wait for so long to enjoy a piece of fluffy donut. They are soft, airy, bouncy, and chewy all at the same time!
I really like donuts, how about you? But sometimes I feel like it takes forever to make yeast donuts, would you agree with me?
These cute Mochi Donuts recipe will change our perception; the dough is really fast and easy to make and it doesn’t deflate after frying. They are soft, airy, bouncy, and chewy all at the same time.
If you haven’t heard of Mochi Donuts yet, these donuts were popularised in Japan from Mister Donut and known as “Pon De Ring,” whose donuts are famous for their bubble-ring shape. It’s also well-loved for its similar mochi-like texture on the inside and deep-fried donut crust.
Pon De Ring Poster Image from Mister Donut
Unlike the usual Mochi Donut recipes which is very sticky and difficult to shape (sometimes they need to use piping bag to shape it 🥺); this recipe is easy to handle.
There’s no need to be so perfect when you roll the dough, the surface of the donuts will spring up evenly while frying and become really smooth 😙 🍩
Now it doesn’t look pretty but it will be beautiful after frying it 😋
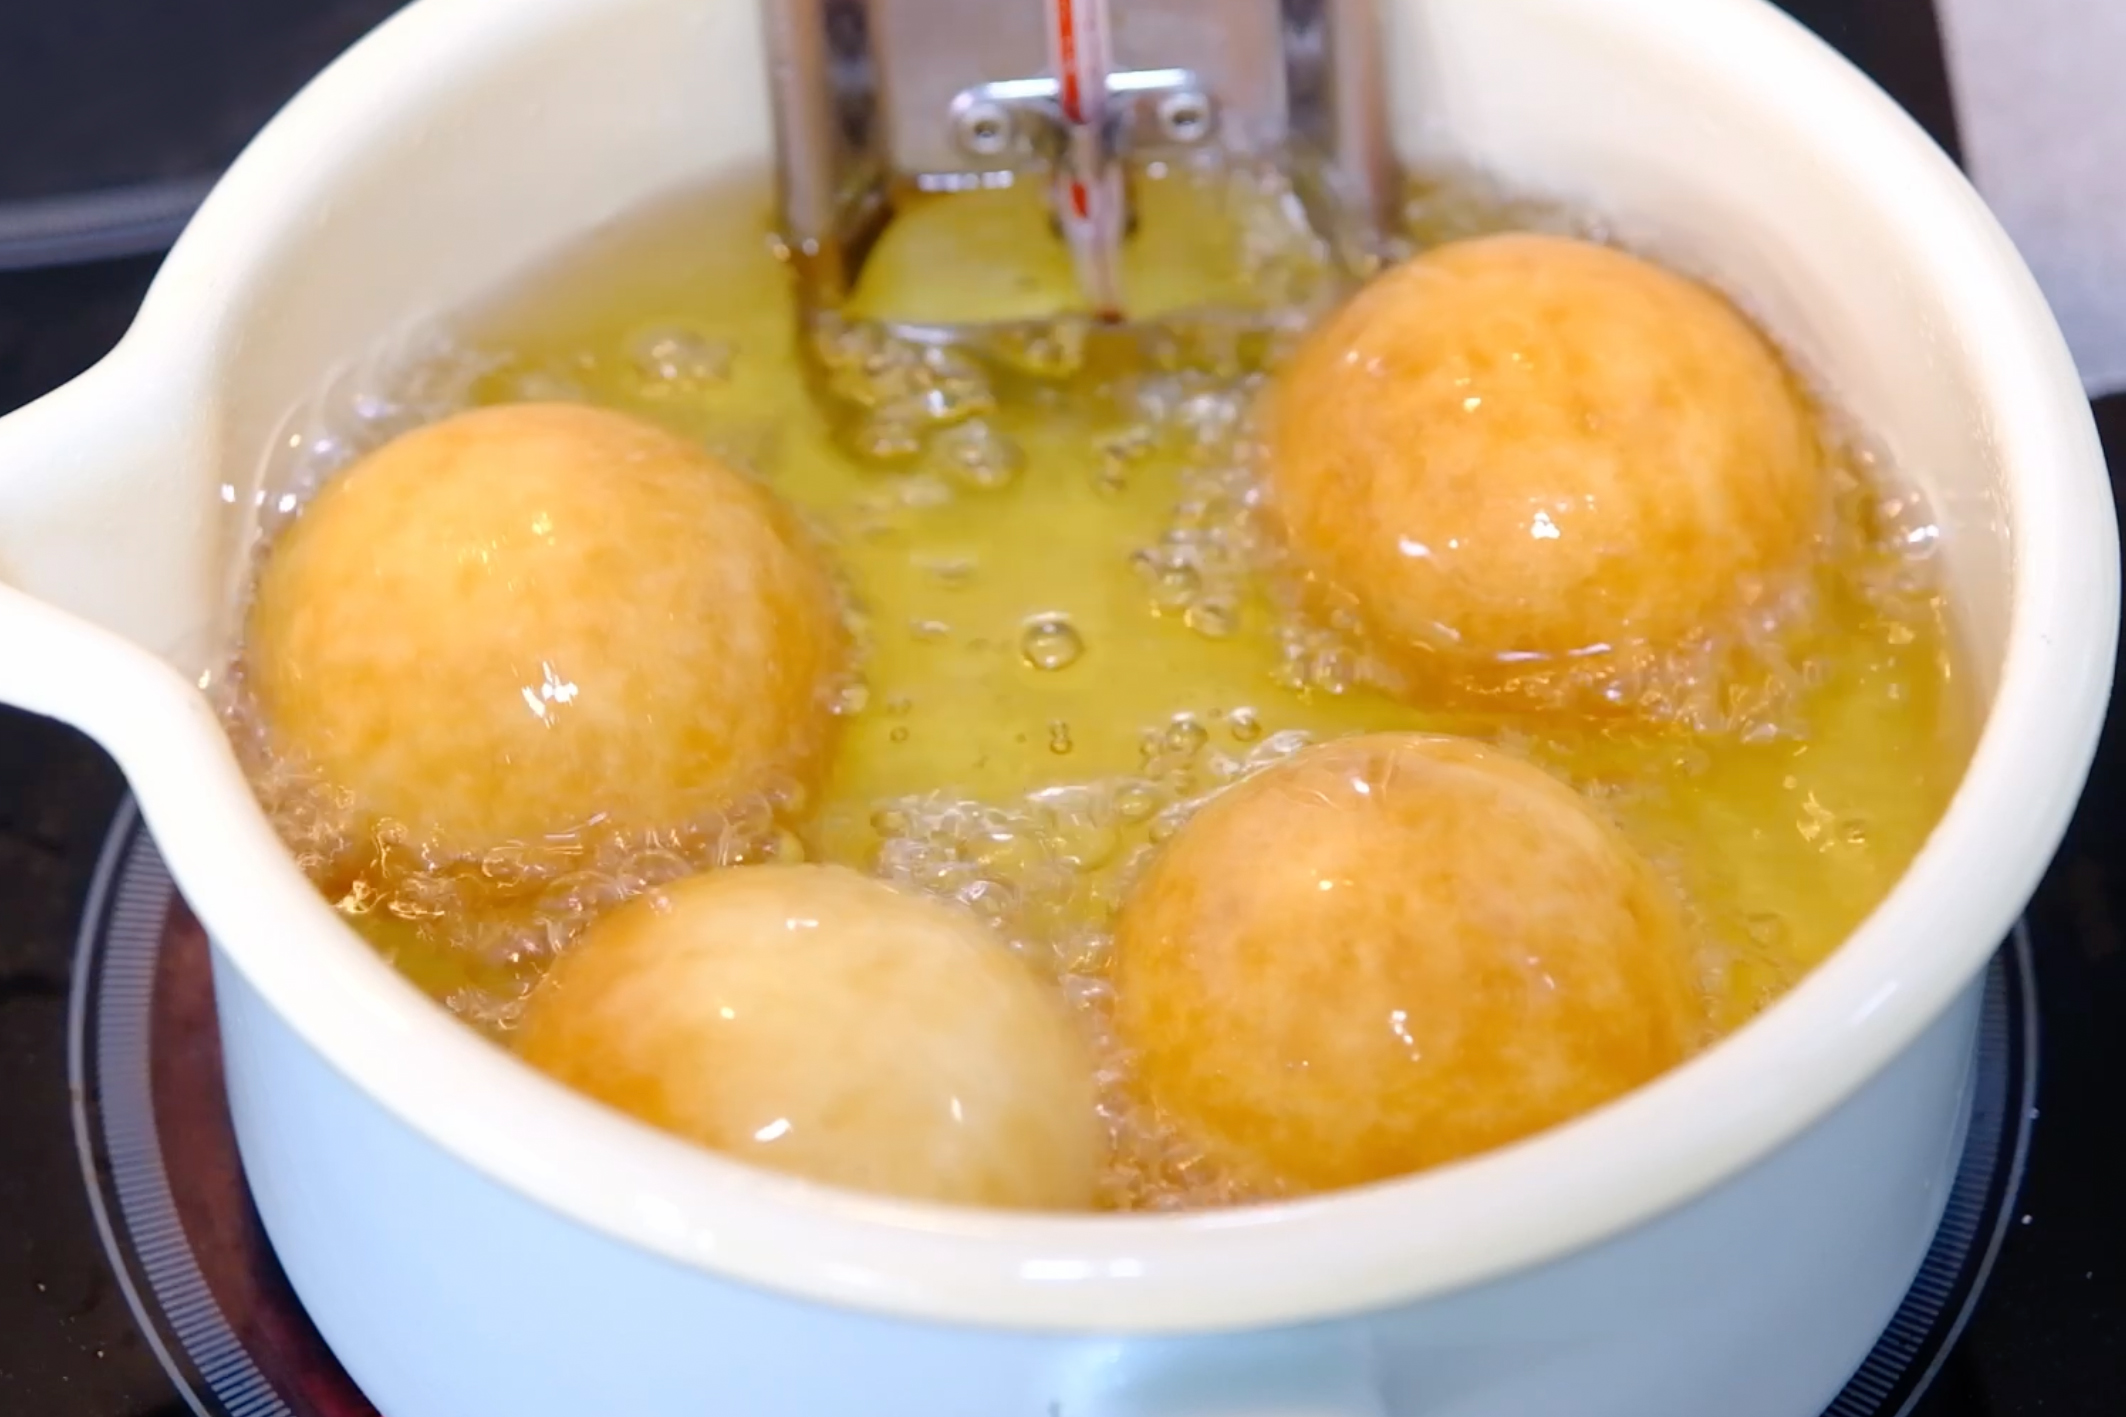
When you fry them, make sure that the temperature of the oil is about 160-170 degrees Celsius; you don’t want to burned them 🤯 And remember “Do not fry all at once”, give some space so that the oil temperature doesn’t drop drastically and make your donuts soggy 😞
You can see that each one has a beautiful ball shape 😍
It’s crispy on the outside, really soft and chewy on the inside Yummy… Mochi-mochi Donuts 🤤
🙄 So Hungry….
This donuts is delicious as it is without any topping. You can just enjoy it like this as a snack or dessert OR….
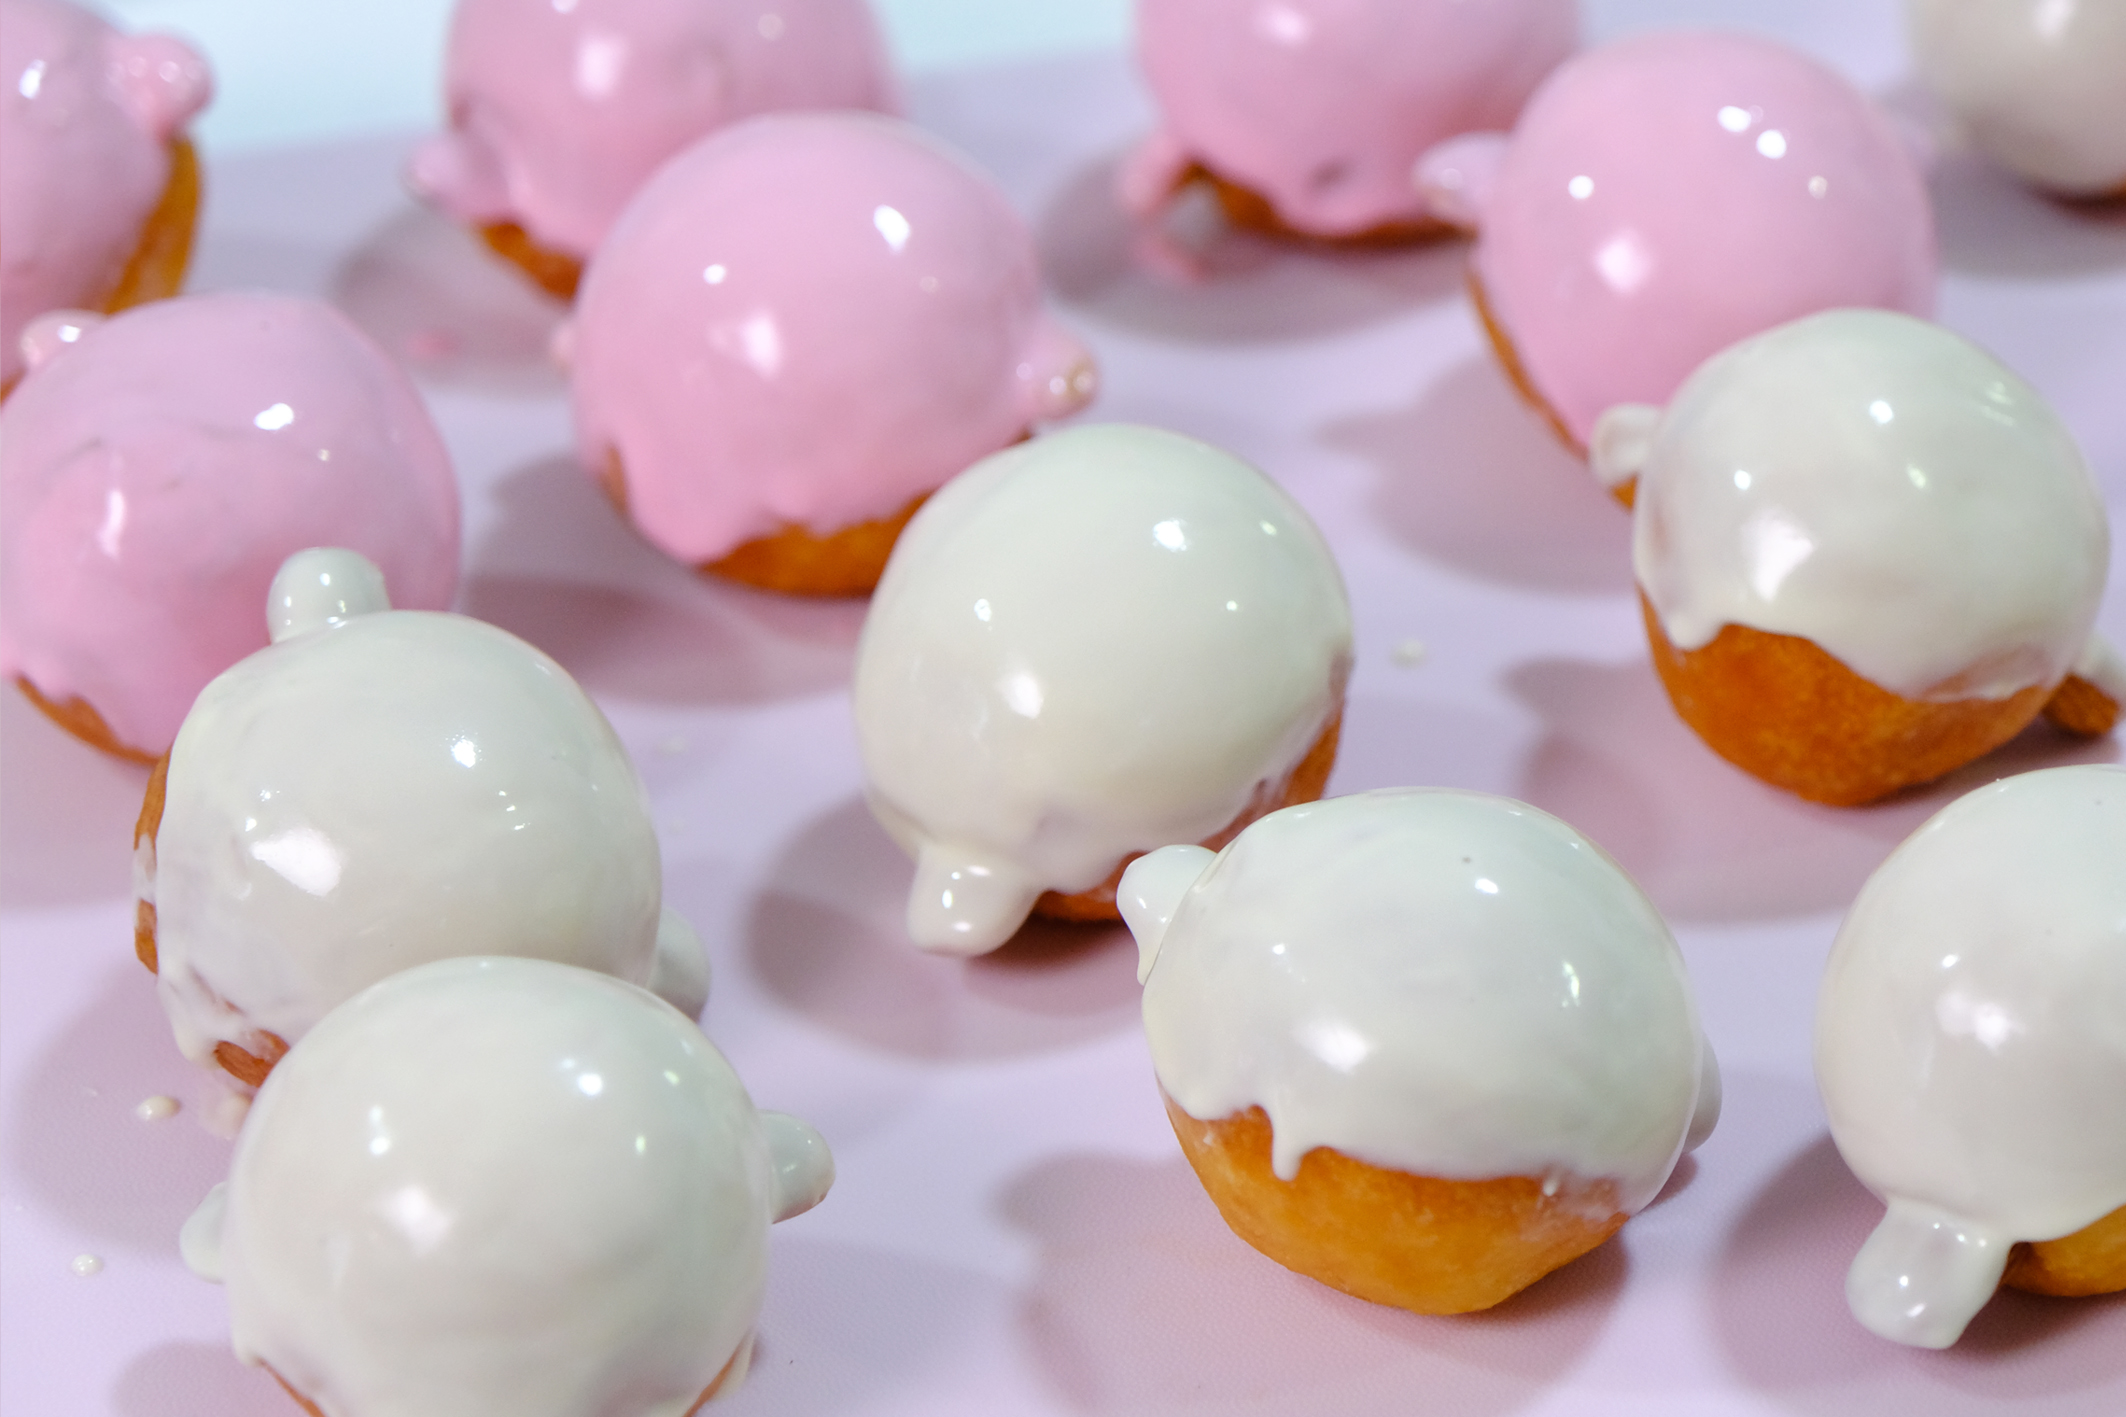
I use Whole Almond and Cashew Nuts to create the ears
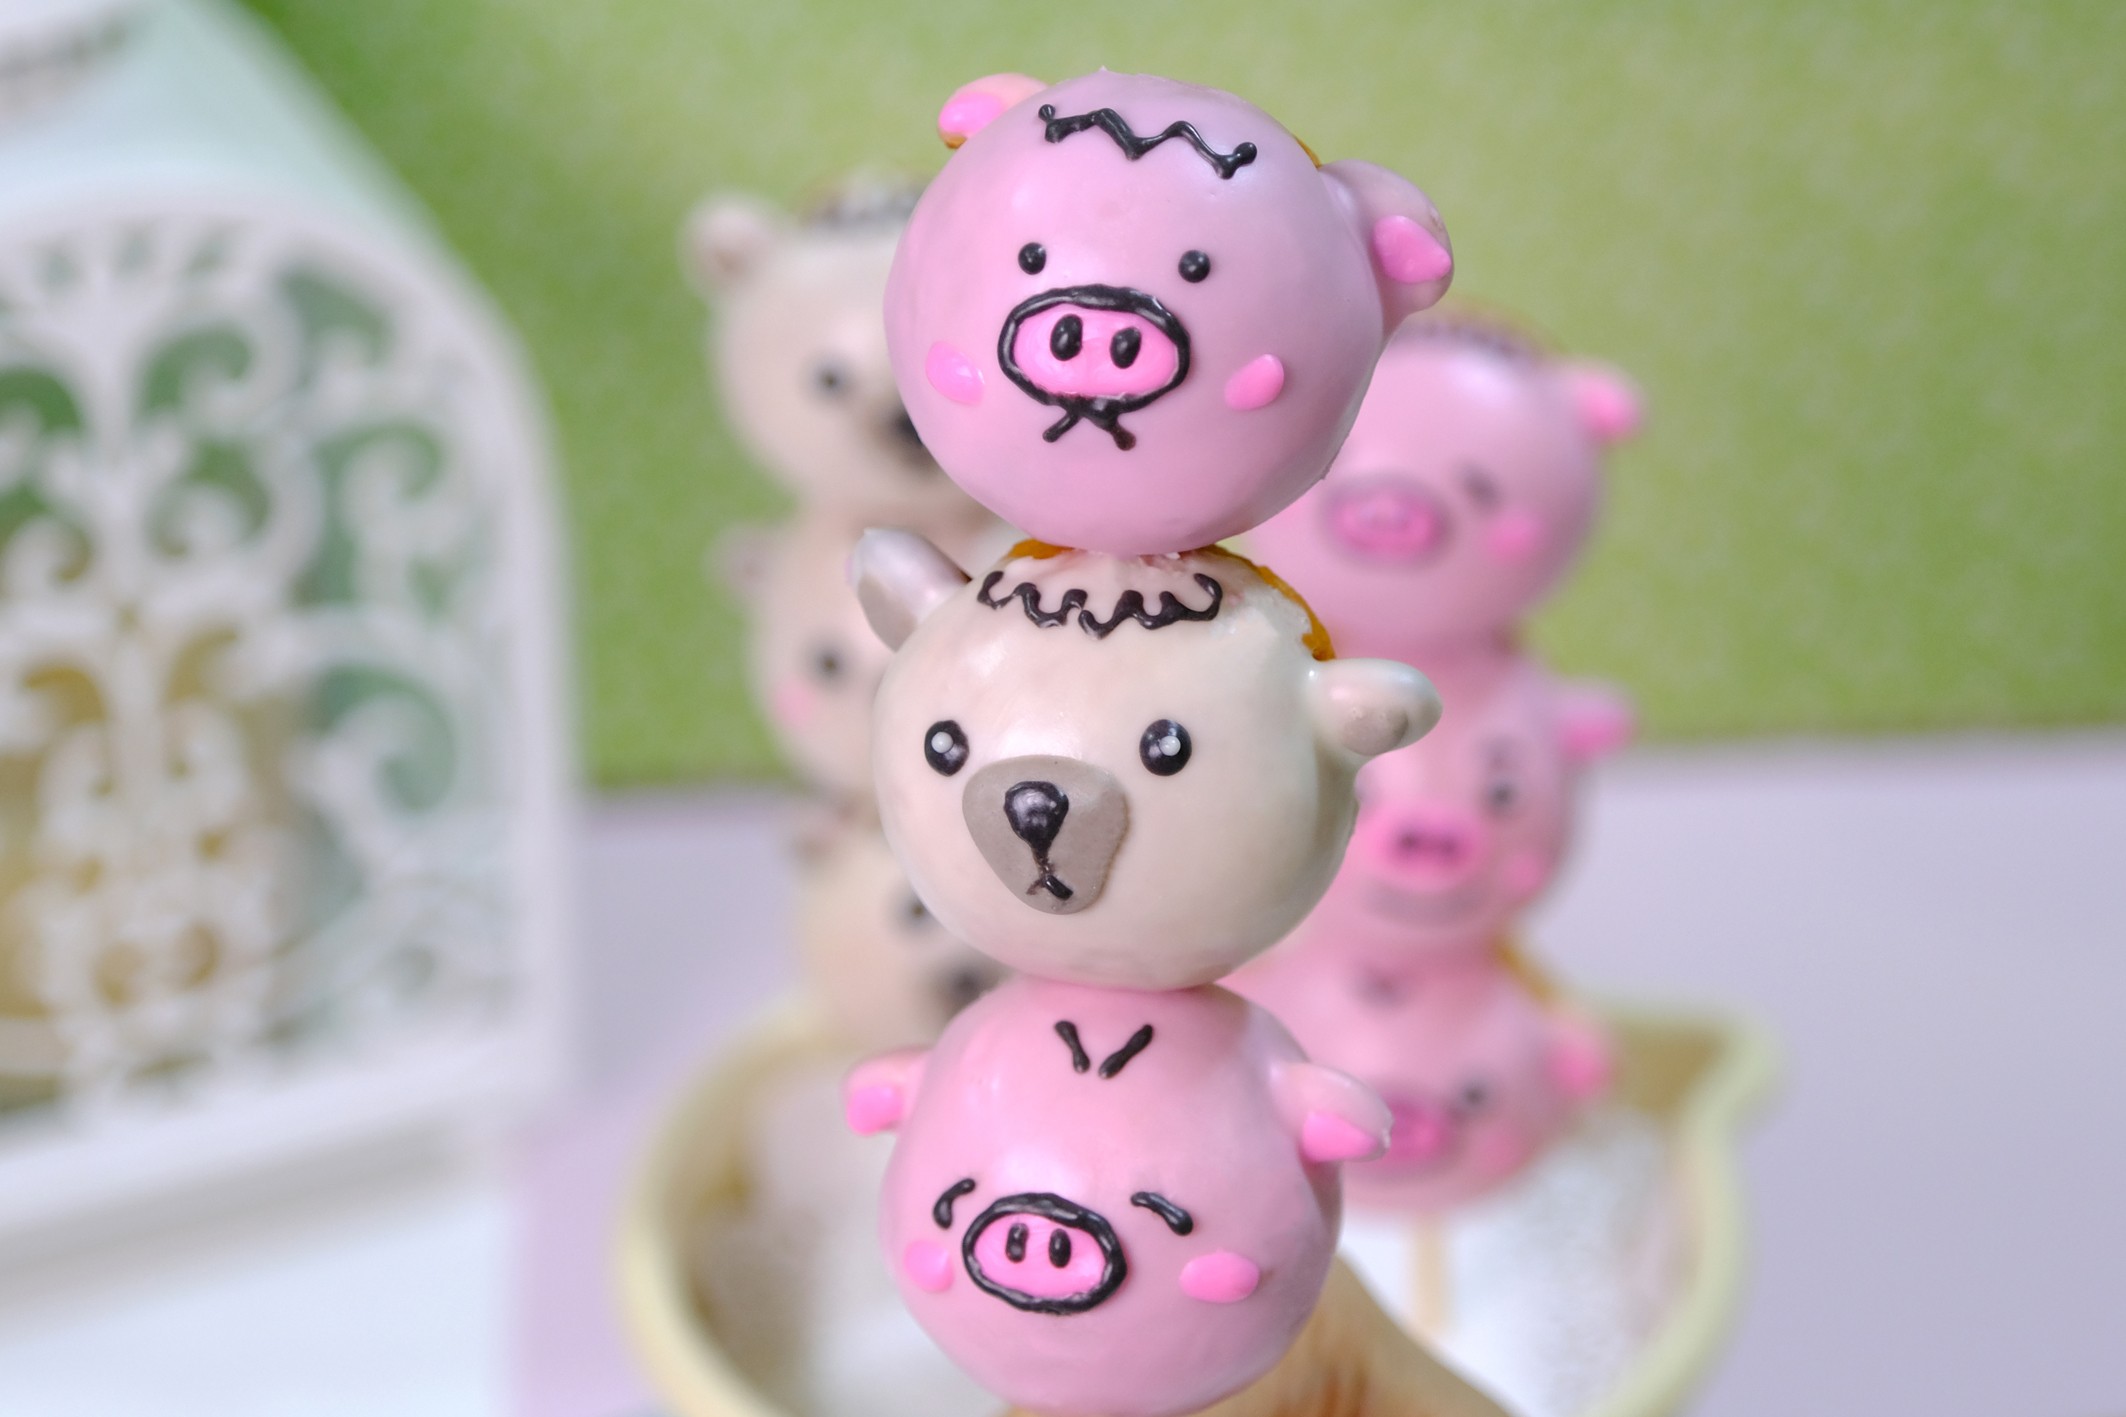
You can decorate them into a cute cartoon characters like what I did. Pig, Teddy Bear, Dog ,Cat… whatever you prefer or your kids like 😀
For the coating, I’m prefer to use White Chocolate Compound rather than icing sugar glaze because glaze in warm temperature will melts easily, which is NOT good 🤔 If you can find Candy Melts, that will be a better option. Candy Melts harden super fast and have a thick consistency, it’s really great for coating.
Rather than shaping it into a bubble-ring shape, I thought sticking this donut into a skewer like a SATAY will make this donut even more attractive.
This donut reminds me of the satay donut that I really liked when I was little 🤗 I MISS IT SO MUCH
They not only look adorable but very tasty too 🥰
The mochi-like texture is unique… And if you try it, I’m sure you will like this better than the traditional one.
I hope you would try to make it, and I’m sure that everyone will fall in love with it! LOVE YOU ALL…
KAWAII CHEWY Mochi Donut Yield: 20 Pieces Active time: 1½ hour Total time: 2 hours
INGREDIENTS ☘️Donut Dough
125g Glutinous Rice Flour
150g Cake Flour
90g Caster Sugar
10g Baking Powder
125g Greek/ Plain Yogurt
125g Silken Tofu
☘️Coating & Details
White Chocolate Compound (melted 80-90°F) * You can substitute Chocolate Compound with Candy Melts
Candy Colors
INSTRUCTIONS Donut Dough
In a large bowl, simply combine all the dry ingredients. 125g Glutinous Rice Flour; 150g Cake Flour; 90g Caster Sugar; 10g Baking Powder
Add Greek Yogurt along with Silken Tofu. 125g Greek/ Plain Yogurt; 125g Silken Tofu Mix it really well until it’s formed a dough ball (the dough will be soft and slightly sticky).
Divide the dough into 20 equal pieces (about 30 grams each).
Roll each dough into a ball (apply some all-purpose flour on your hand to prevent the dough from sticking). * There’s no need to be so perfect; he surface of the donuts will spring up evenly while frying and become really smooth.
Frying The temperature of the oil is about 160-170 degrees Celsius. Roll each dough one more time before frying (do not fry all at once; give some space so that the oil temperature doesn’t drop drastically and make your donuts soggy). Fry for about 4 minutes When the bottom is golden brown, turn it over to color the other side, keep rotating the donuts so that the color is even.
Once it’s done, take it out; let it cool completely on a cooling rack. Donuts are ready to serve or you can decorate it with some White Chocolate or Candy Melts.
Decorating, Coating & Details
After donuts cooled down completely; ut and insert Cashew or Whole Almond Nuts for the ears.
Melt some White Chocolate Compound, stir and let it cooled down to 80-90 degrees Fahrenheit (I found this temperature is the best for coating, in this consistency your coating won’t be too thin or too thick, just right). * For the Candy Melts once it melted, you can use it immediately
Dip each donuts and let the chocolate sets hard.
Decorate as desired or kindly follow video instructions.
NOTES
Enjoy the donuts on the same day you made them (best served).
You can keep both decorated and undecorated donuts at room temperature for a day in an airtight container (make sure to eat the left over on the next day).
You can reheat the undecorated donut in the preheated 200°C oven for 5-10 minutes before eating.
These donuts can only be stored for 2 days; because on the third day the texture will change and will no longer be chewy.
Have you ever went to a traditional bakery shop and enjoyed the aroma and freshness of the baking; And you could not resist treating yourself with the breads that are warm, soft and yummy?
This loaves of bread at vintage bakery shop in my hometown provide a slice of childhood memories that is hard to replace. One of the most legendary bread and my family love it so much.
Everything is done in the old and traditional way and I really loved the smell of the breads when they were freshly out from the oven.
In this recipe, I try to replicate it as closely as possible to describe the taste of the bread so you can enjoy it 😉 The recipe is simple and easy. I like to use my stand mixer but you can also knead the dough by hand.
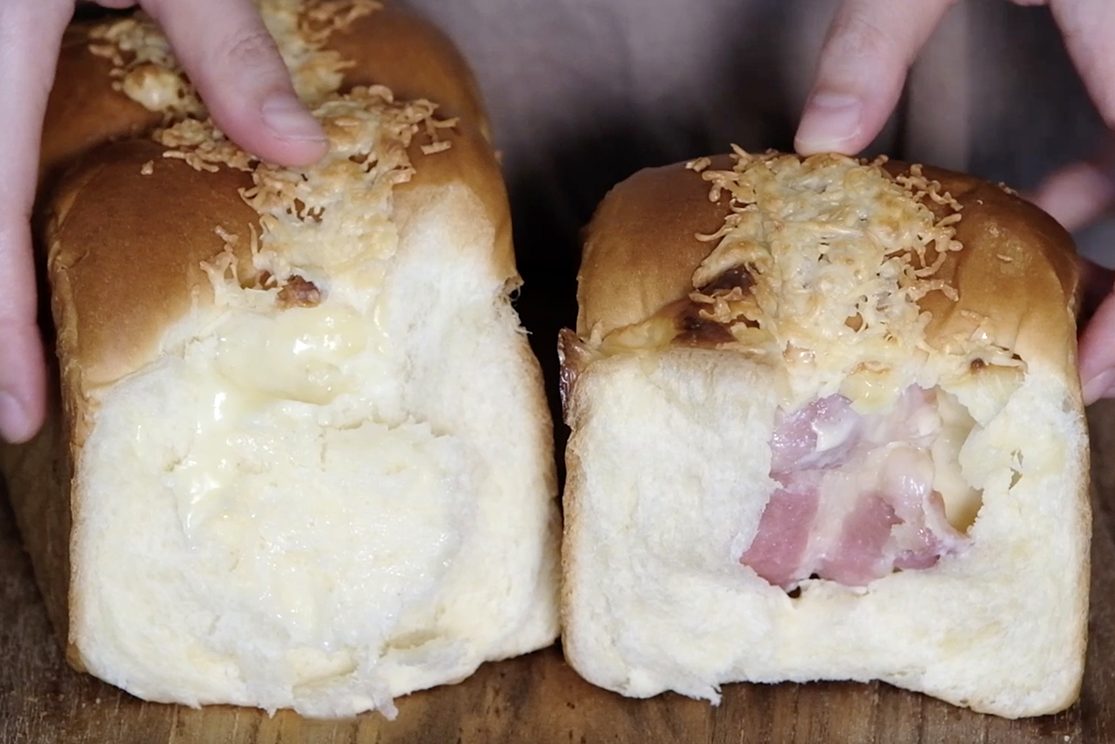
Not a very tall bread but with soft, springy and a slightly dense texture. The dough is enriched with butter and eggs so the baked bread has a good structure to stand up to its filling.
Yummy Edam Cheese 🤤
As for the filling, I found Edam cheese is perfect for this kind of bread. Edam cheese has a very mild flavour, slightly salty or nutty; it’s commonly eaten on crackers and bread. But if you can’t find it, you can replace it with Processed Cheese Slices; it taste good too.
Let’s take a look inside ! I just need to tear the bread slice into bite size, and munched. One slice was never enough for me 😋
🙄 So hungry….
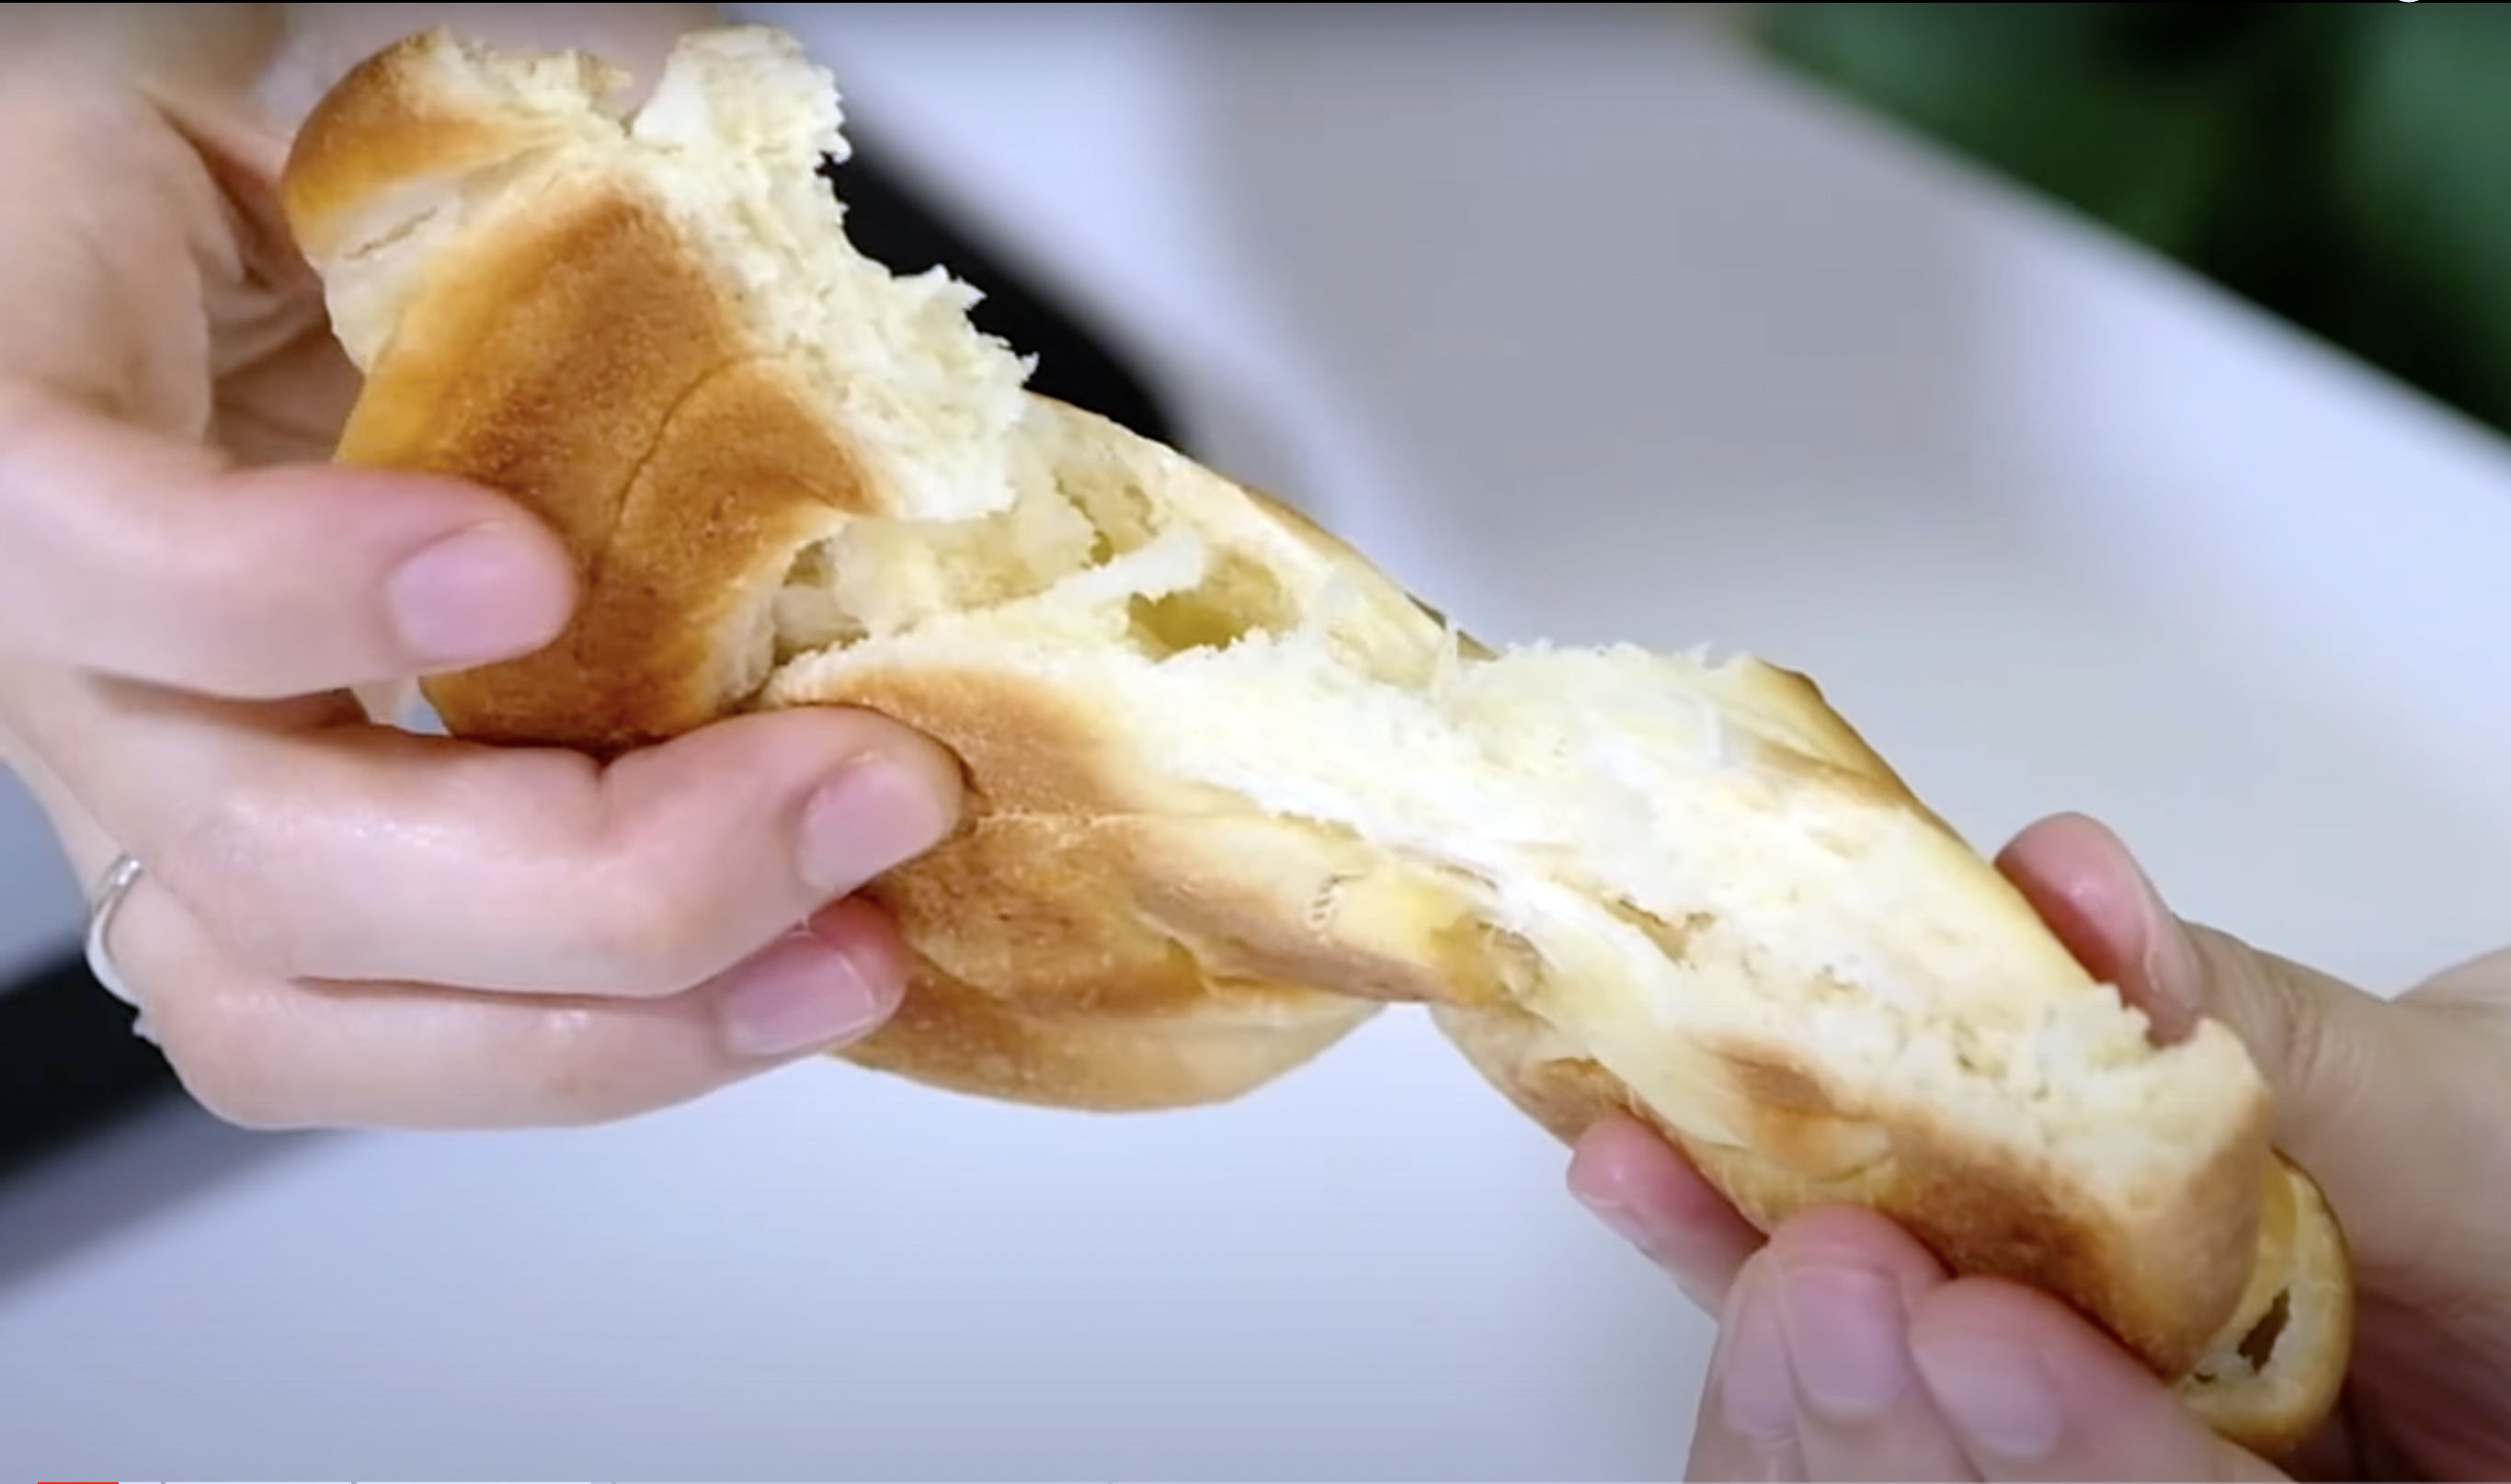
These cheese and bacon rolls are soft, fluffy, and filled with a gooey cheese and bacon filling; It’s quite easy to pull out the bread strands.
After cooling on the rack, store in the fridge in an airtight plastic bag. The loaf will still soft for the next few days.
You can reheat the bread in the 180°C oven for 10 minutes, it taste even better…. crispy on the outside, soft in the inside.
The soft, fluffy texture of the traditional bread is something that mass-production baking techniques can never achieve
I hope you can enjoy the beauty of this bread from the nostalgic old bakery 🤗
WATCH HOW TO MAKE TRADITIONAL BAKERY BACON AND CHEESE BREAD
RECIPE
BACON AND CHEESE BREAD Yield: One (450g Loaf Pan) Active time: 1 hour Total time: 4½ hours
Ingredients ☘️Bread Dough
120 g Bread Flour
120 g All-Purpose Flour
1 tsp Instant Yeast
25 g Caster Sugar
1/2 tsp Salt
15 g Milk Powder
65 g Milk
45 g Eggs
35 g Water
35 g Salted Butter
☘️Filling
150 g grated Edam cheese (OR you can use processed cheese slices)
3 slices Back Bacon
☘️Eggwash (1 tbs Eggs + 3 tbs Milk) ☘️Grated Cheddar Cheese on top for topping
Instructions
In a mixing bowl with dough hook, combine all the dry ingredients (Place the salt FAR AWAY from the yeast, you do not want to add salt on top of yeast because salt will indeed KILL the yeast). Mix for about 1 minute. 120 g Bread Flour; 120 g All-Purpose Flour; 1 tsp Instant Yeast; 25 g Caster Sugar; 1/2 tsp Salt; 15 g Milk Powder
Pour in the Milk, Eggs and Water; Mix on medium speed for about 5 minutes until the dough comes together. 65 g Milk; 45 g Eggs; 35 g Water
Add in the Salted Butter and continue knead the dough on medium speed for 12-15 minutes (You can also knead the dough by hand on a work surface for 15 to 20 minutes). 35 g Salted Butter
After 12-15 minutes, you can feel that the dough is very soft and has a shiny surface; And you can stretch it into a large thin membrane (it’s called a Windowpane Test). Shape the dough into a ball, cover and let it rest for 10 minutes.
Divide the dough into 3 equal pieces, round it into a ball; Cover and relax the dough for 10 minutes.
Prepare the pan and filling Grease 450g loaf pan with a little bit of oil. Pat bacon on a kitchen paper to absorb moisture and grated the cheese.
Take one dough, roll the dough into a rectangular shape (remove the gas inside); then fold both sides in so it become a rectangular shape ( do the same way with the rest dough). * Kindly watch the video for the full instructions
To shape Start with the first dough with the smooth side facing down, roll the dough into rectangular shape (25 cm long); Using your finger press to thinly the bottom and the sides; Spread a slices of Back Bacon and 50 grams of grated Edam Cheese in the middle and then roll the dough like a jelly roll tucking the sides well; place it into the prepared pan. Do the same way with the rest dough and then cover and let it ferment until it doubles in size. * At 32°C it usually takes for about 90 minutes.
After ferment for about 30 minutes brush the top lightly with egg wash mixture to give the final product a golden brown colour that is slightly shiny. 1 tbs Egg; 3 tbs Milk Cover again and continue with the fermentation process.
When the dough has doubled in size, bake in the preheated 180°C for 25 minutes. After 25 minutes, sprinkle some grated Cheddar Cheese on top and continue bake in the 180°C for 10 minutes.
Once it’s done, remove it from the pan immediately and let it cool completely on a cooling rack. * When baked, the internal temperature of the bread should be about 195°F – 210°F; the bread will have a hollow sound on the bottom when tapped.
NOTES
After cooling on the rack, store the bread in the fridge (in an airtight plastic bag). In the fridge, it will last for 1 week.
These loaves do freeze beautifully. Cool the baked loaves then place them in a freezer-safe storage bag, it can be frozen for up to a month.
To reheat – From the fridge: cut the bread into slices and then bake in the preheated 180°C oven for 10 minutes. – From the freezer: take out the bread to room temperature for at least 30 minutes (or defrost in the fridge overnight); cut the bread into slices and then bake in the preheated 180°C oven for 10 minutes.