Light Fluffy Vanilla Sponge Cupcakes

Everyone’s got their own idea of what the perfect Vanilla Cupcake should taste like; And this is my favourite Vanilla Cupcake recipe.
What makes this Cupcake special for me is because it’s light, not heavy, and just the right amount of sweet.

It’s the kind of Vanilla Sponge that pairs beautifully with whatever you like
Whether you’re adding frosting, berries or enjoying it plain.
They stay wonderfully moist for days and have a deep Vanilla flavour.
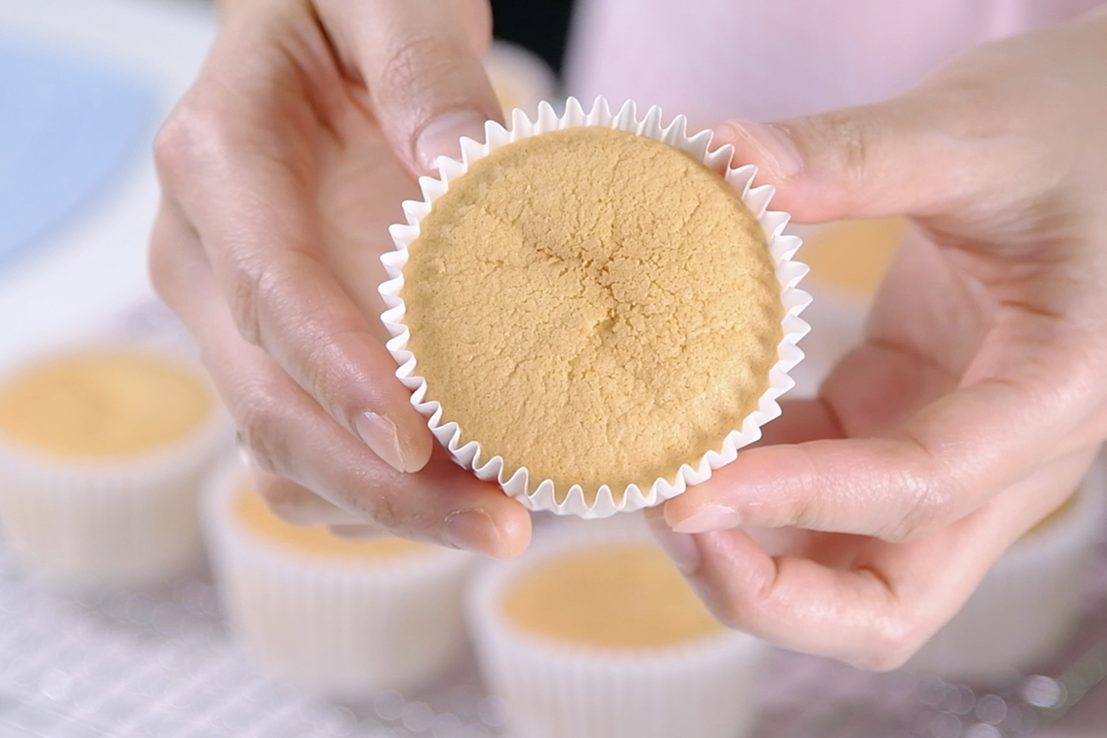
This Cupcakes are delicate but stable enough to hold the frosting
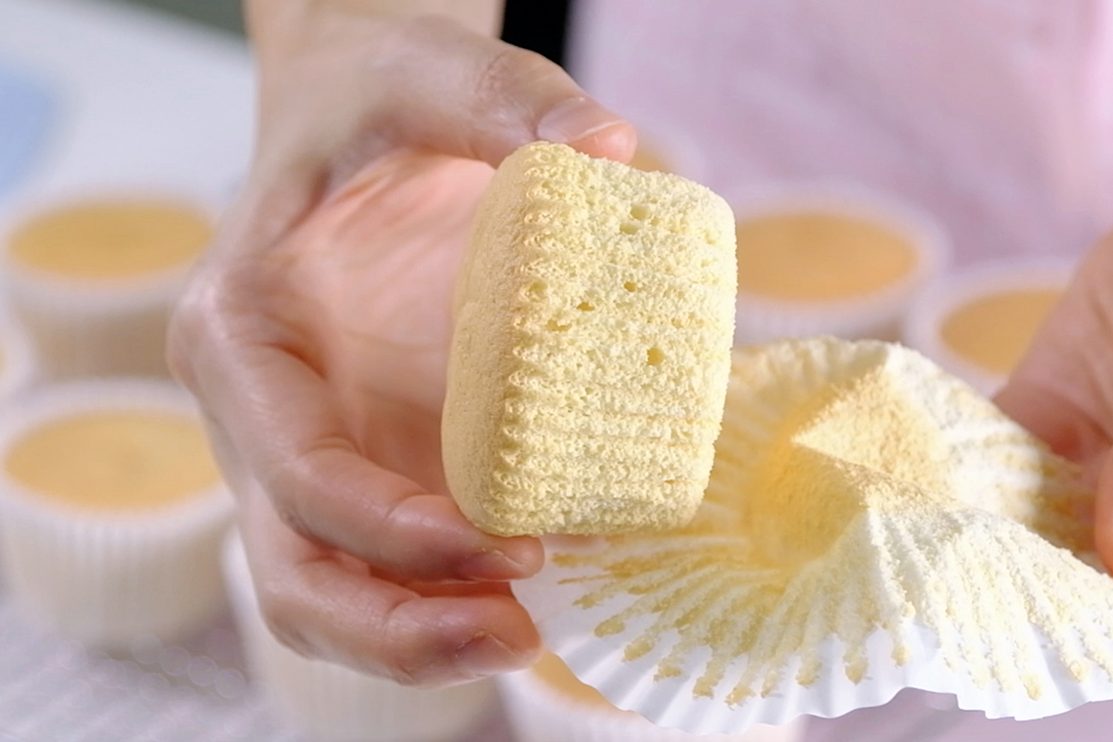
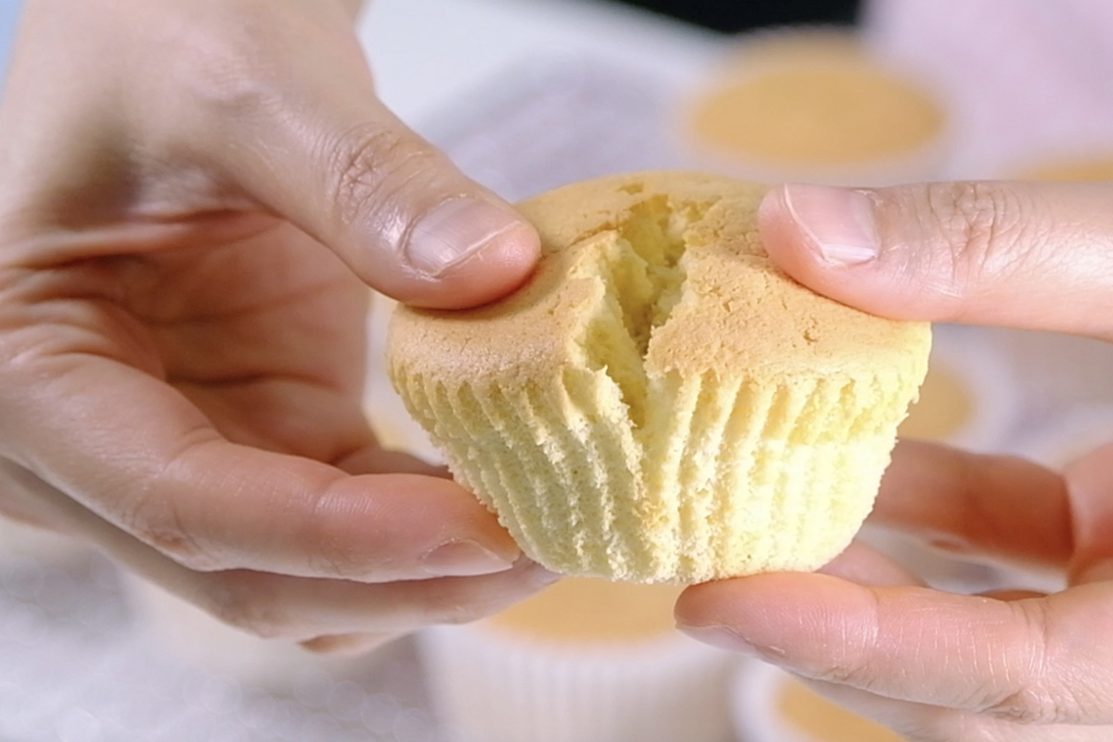
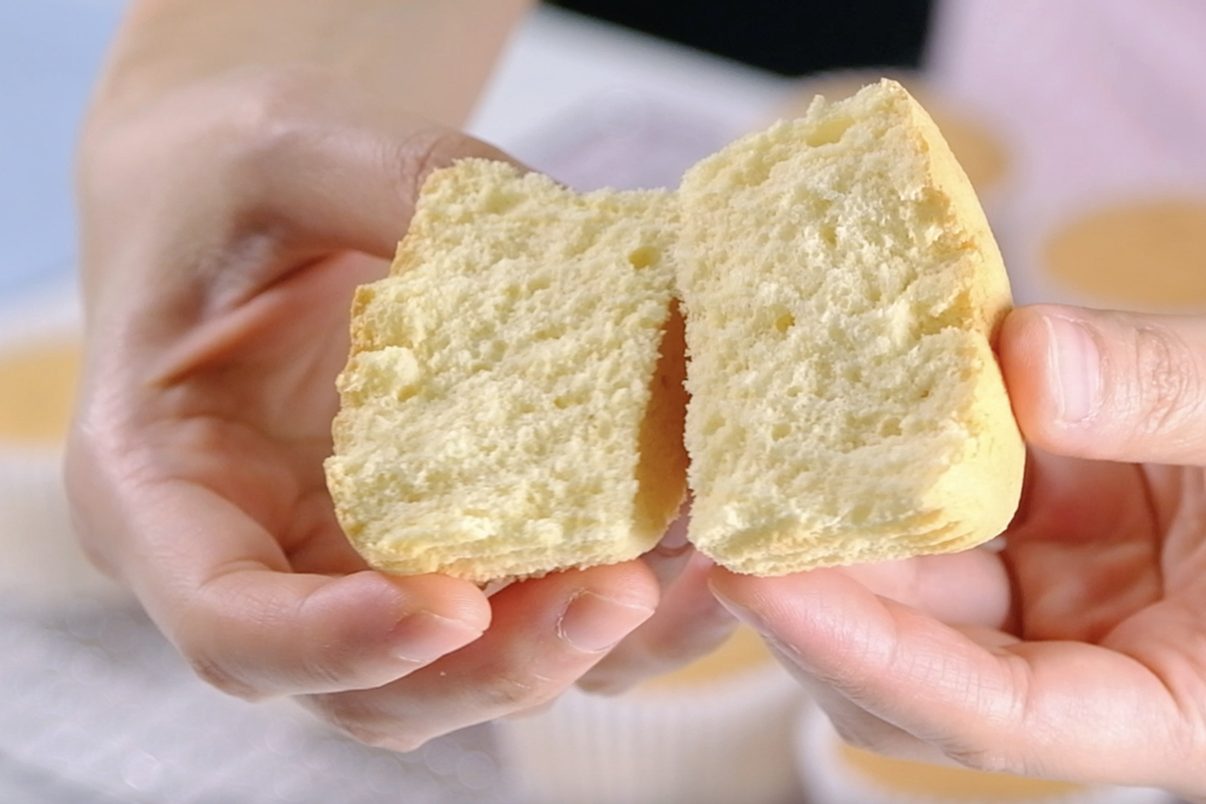
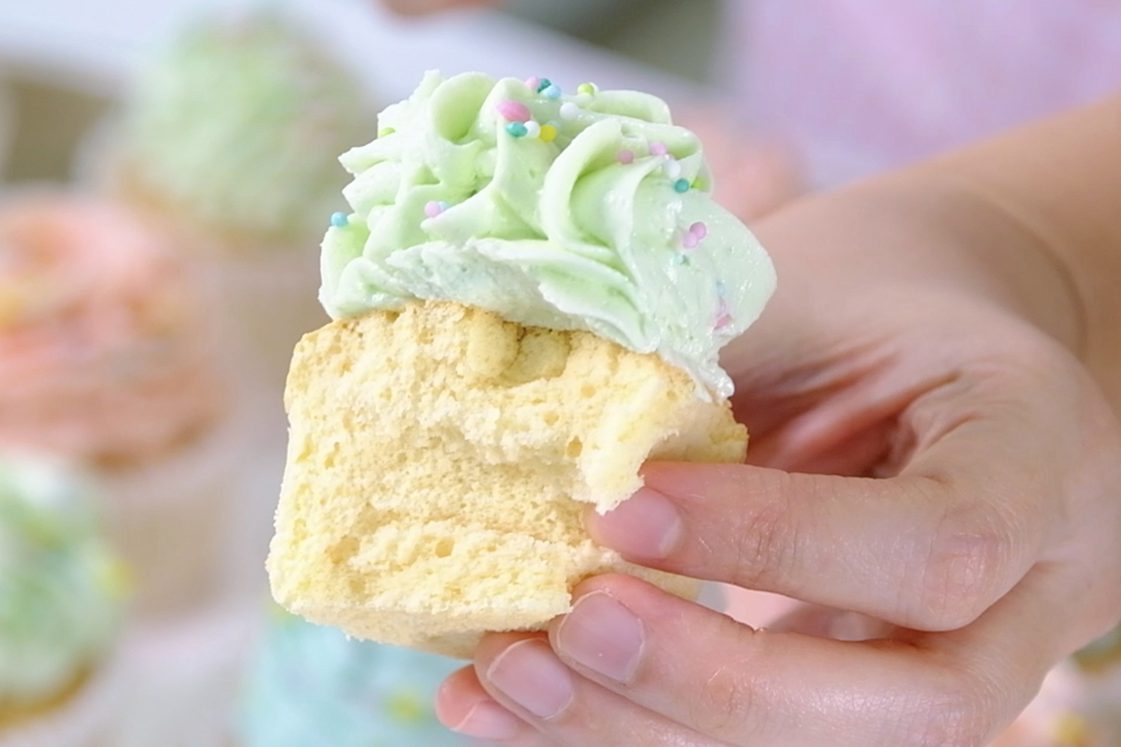
Let’s cut open and l00k inside
☺️
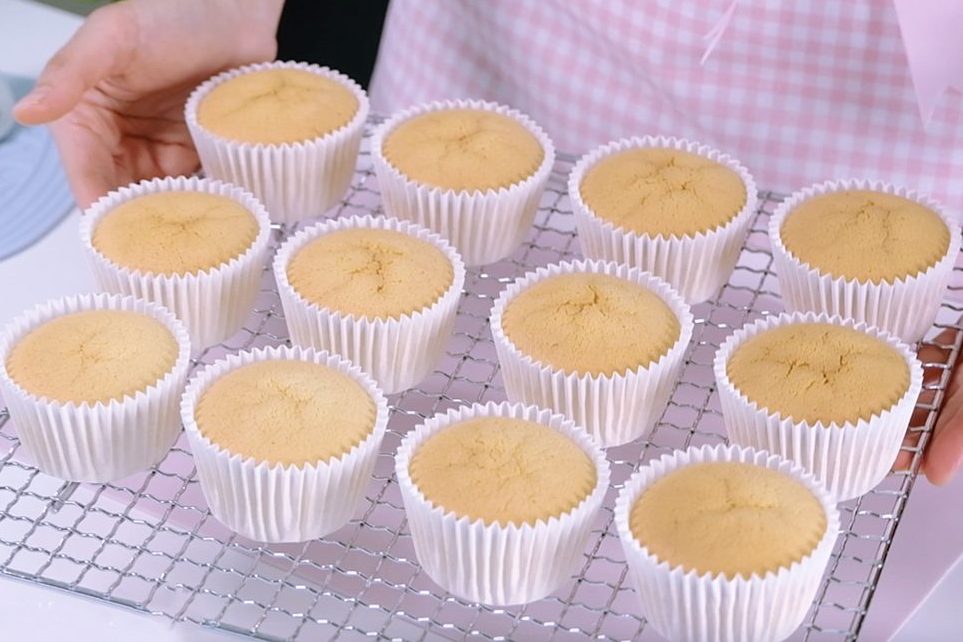
Soft and Moist but not too crumbly
Not too sweet and not heavy
🤗 So soft and fluffy
😍 And what’s the best frosting to pair it with?
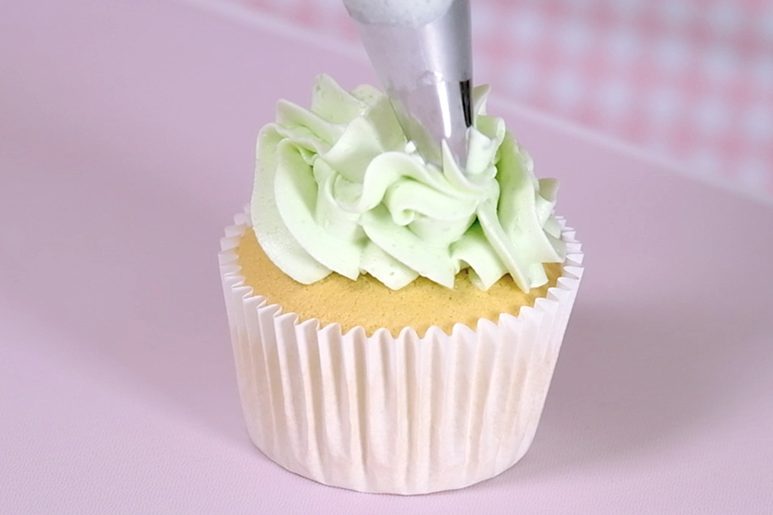
The clasic Boiled-Milk Frosting 😘

Boiled Milk Frosting is an old-school buttercream that is not too sweet, not too buttery, and not too heavy.

My version with Icing Sugar is more stable at room temperature.
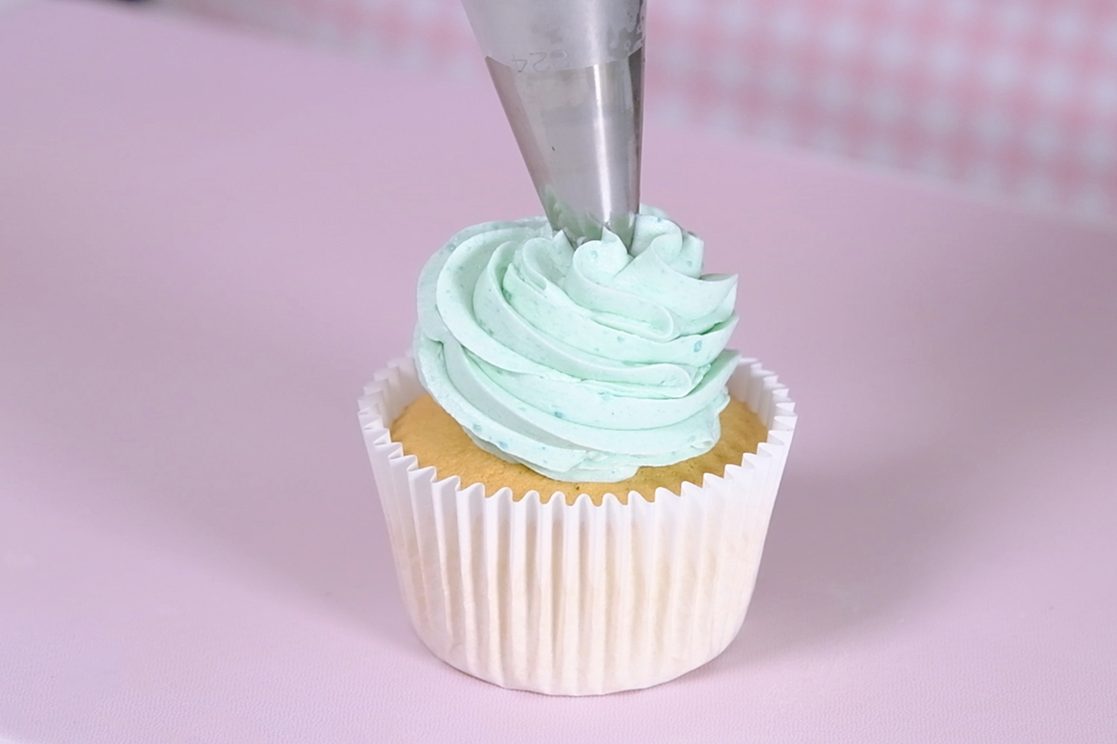
This beautiful frosting also easy to color and you can create any flavour you want; simply by adding some liquors, flavour oils or emulsions, extracts or even dried fruit powder.

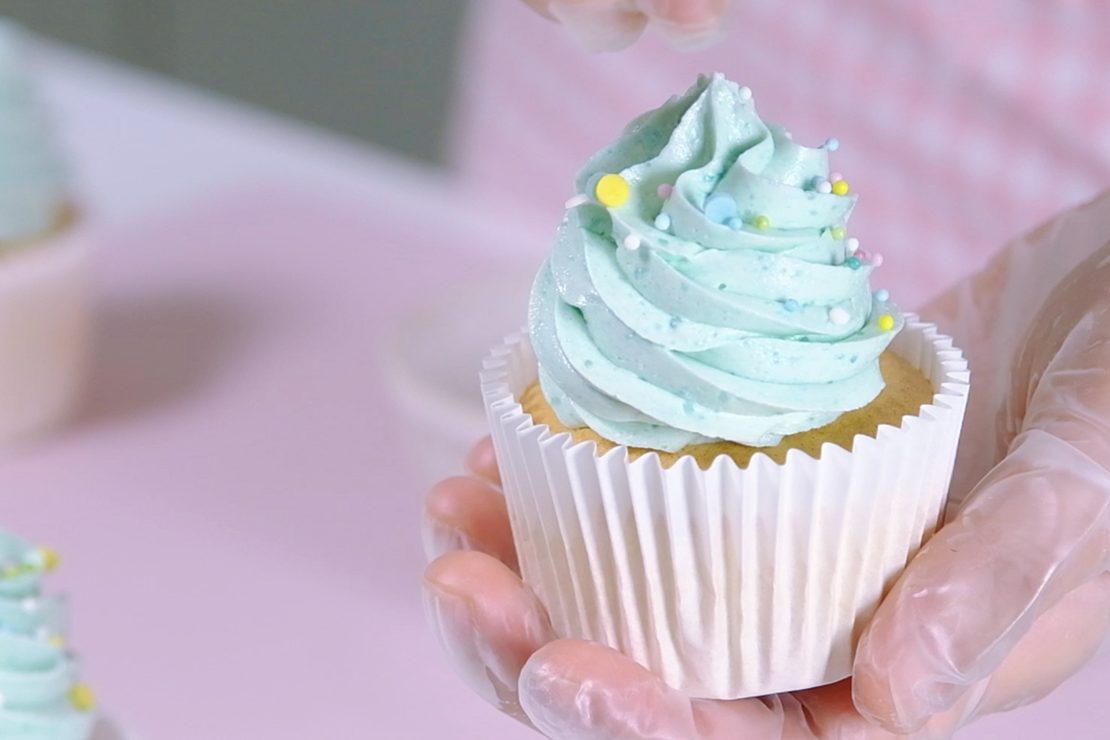
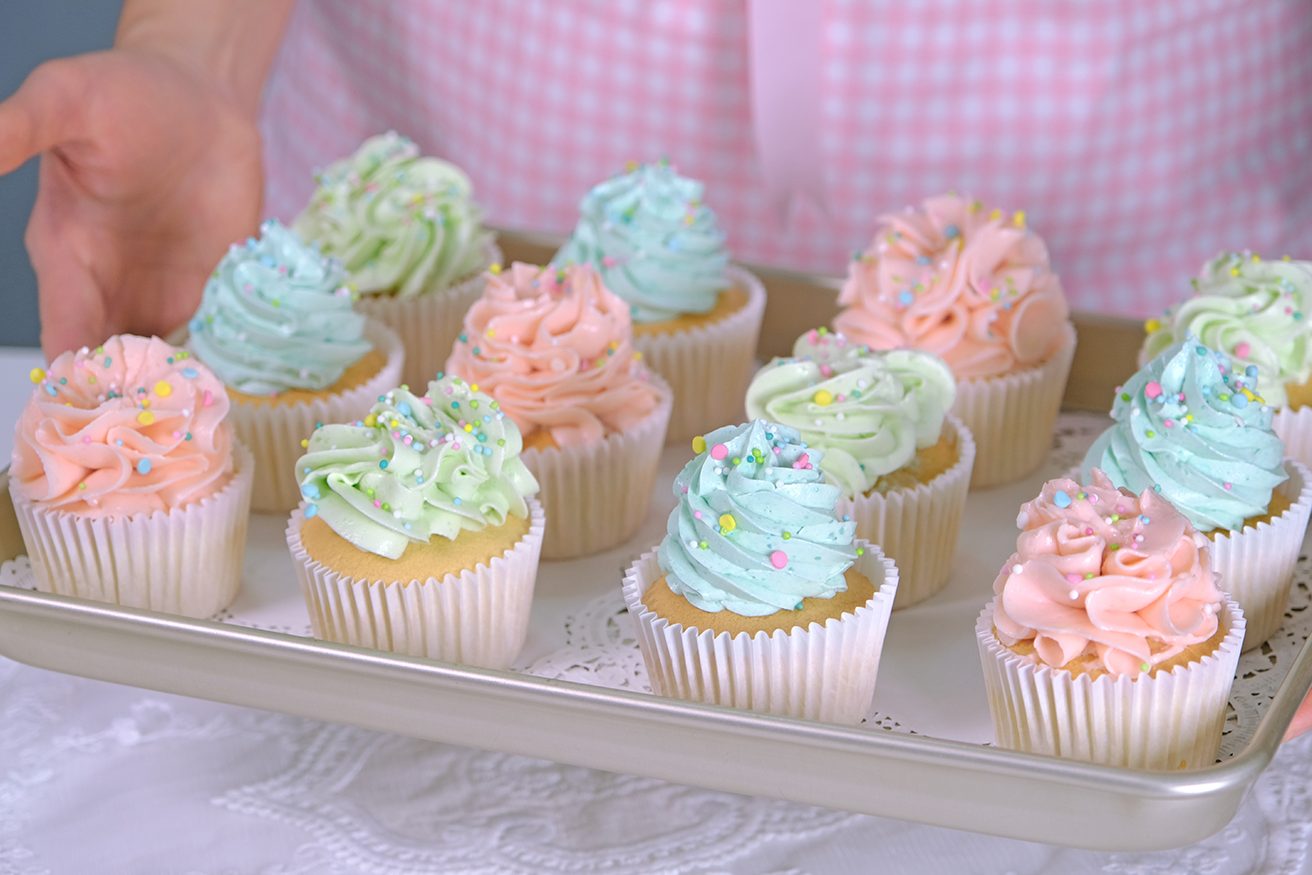
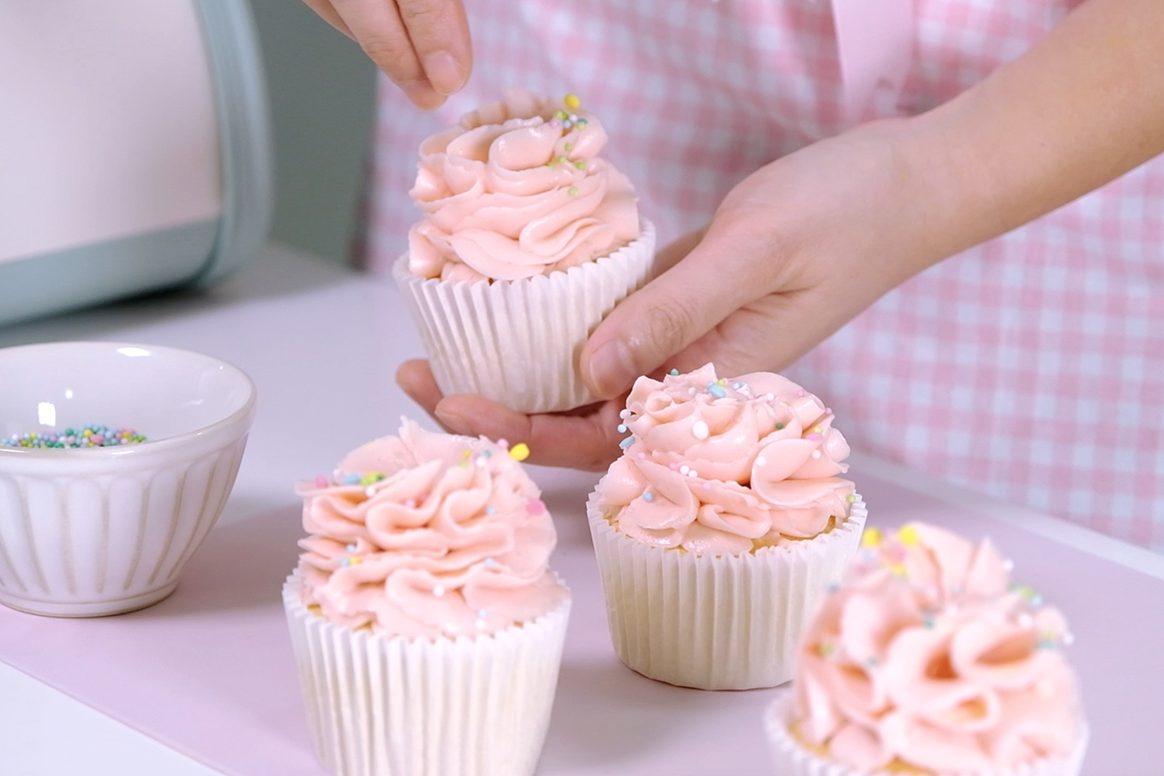
This Russian Ball tip creates beautiful ruffles 🥰
🥲 So beautiful !
Get creative with your own designs !!
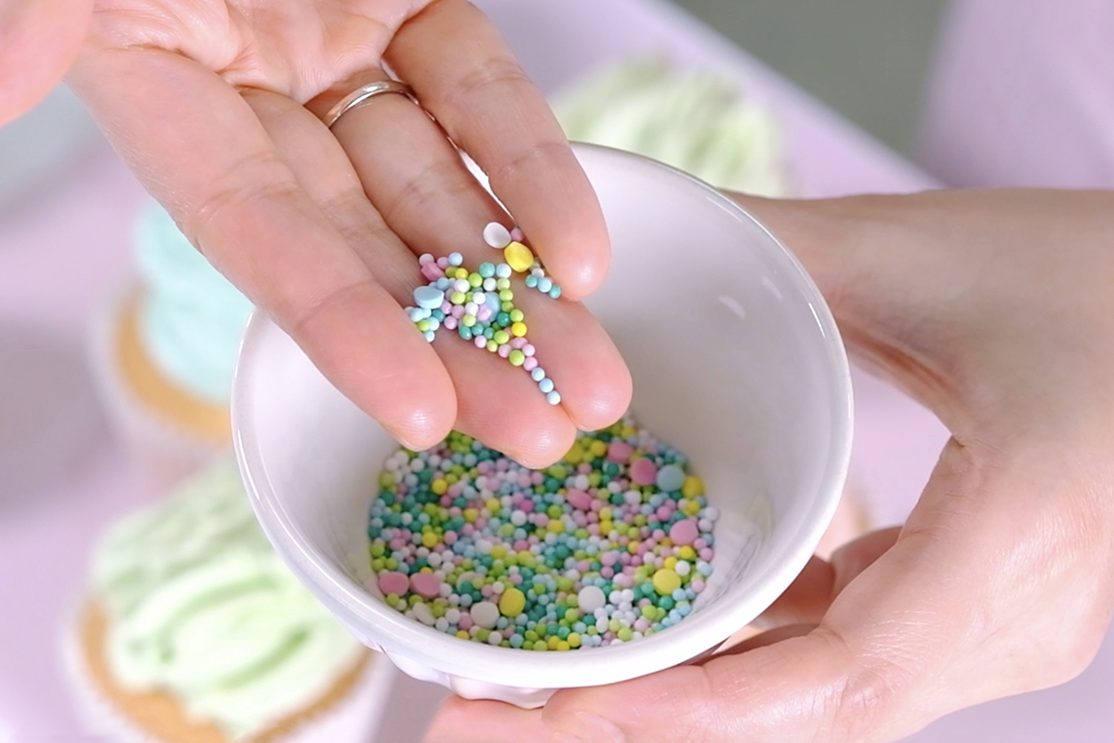
And finish with colourful confetti sprinkles   

So pretty! ☺️

I always flavor my frosting by adding a little at a time and tasting it as I go; Start with ½ teaspoon of extract or emulsion and taste.
Be careful with strong extracts like Almond and Mint,
I suggest starting with 1/8 teaspoon so the flavor doesn’t get too strong.
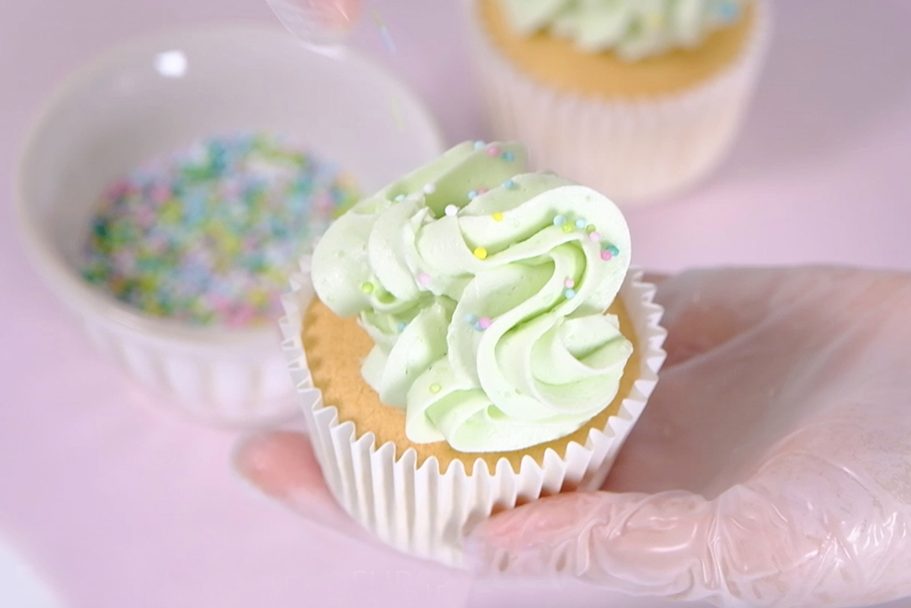
It’s time to enjoy the cupcakes 🥴

These cupcakes are perfect for any occasion and you can customize them to your taste by choosing your own frosting.
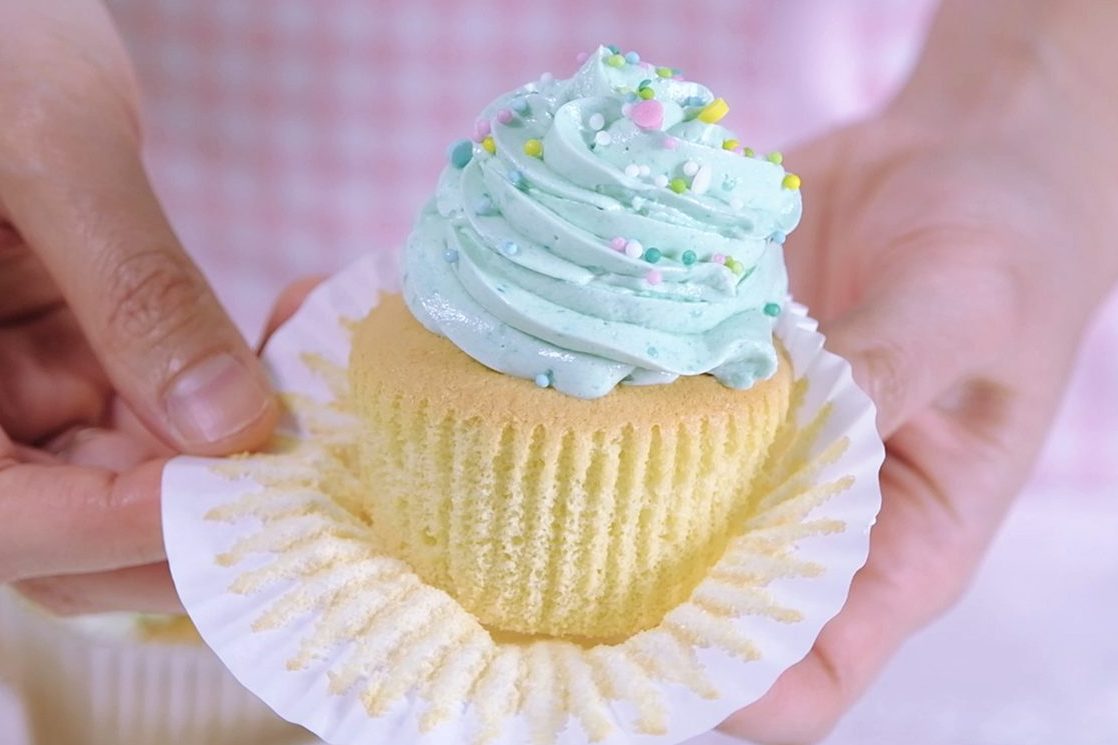
The frosting is a beautiful old-school classic.

It’s incredibly smooth and creamy, but not overly sweet.
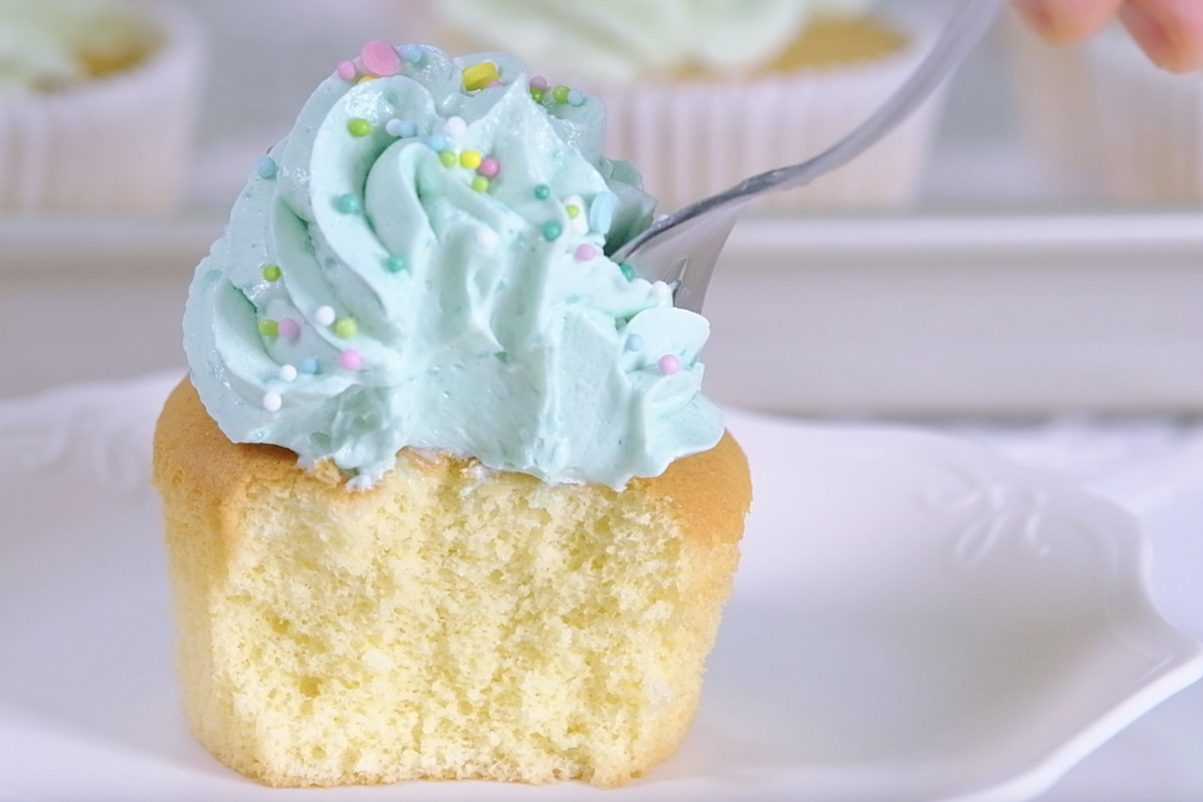
With a soft, airy texture that melts in your mouth

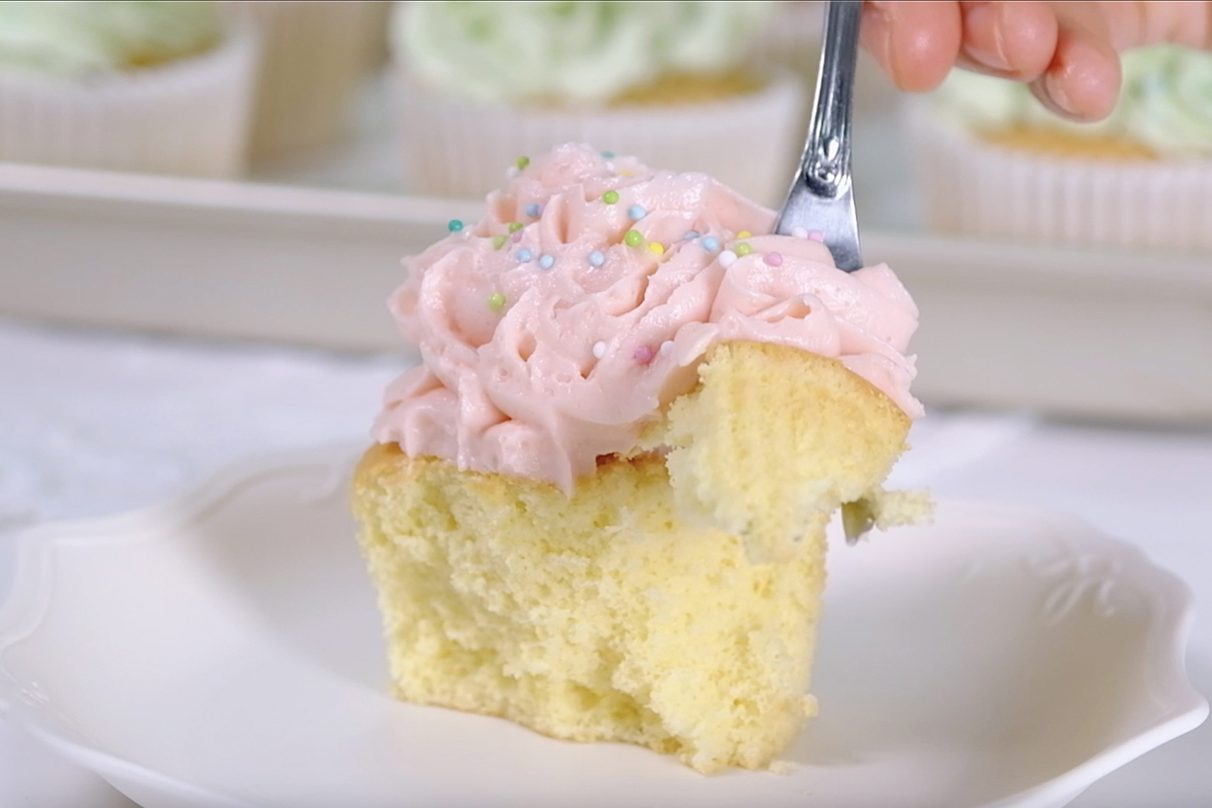
🥲
🤤

These cupcakes always make me smile

And I hope they bring a little joy to your kitchen too !!

Love you All and Happy Baking!!

WATCH HOW TO MAKE LIGHT FLUFFY VANILLA SPONGE CUPCAKES

TIPS FOR SUCCESS (PLEASE READ FIRST):

FOR THE BOILED-MILK FROSTING

  • Prepare the Roux in advanced, so it has time to cool completely at room temperature
  • It is important to strain the Roux mixture (before and after cooking), you don’t want any lumps in your frosting
  • Remember to stir the Roux mixture constantly during cooking, otherwise the bottom will burn
  • Once the Roux cooked, place a piece of plastic wrap directly on the surface to prevent a skin forming
  • Always use real Butter (100 percent High Quality Butter)
  • Take the Butter out of the fridge allow to sit on the counter for about 30 minutes before you start making the frosting.
    The Butter must be softened until it is pliable but still cold and holds its shape, rather than melting or becoming too soft.
  • Once you mix the Roux with Butter, it may look curdling at first;
    Keep mixing on medium-high speed for about 3 to 5 minutes, the frosting will become very smooth, light, and fluffy
  • If you find the frosting is too soft to pipe, you can place it in the fridge for about 30 minutes and it will firm up a bit to a nice consistency
     

FOR THE CUPCAKES BATTER

  • Make sure all utensils clean and grease free (wipe the bowl and utensil with lemon juice or vinegar to helps remove grease)
  • Preheat the oven 20 minutes or longer before you start (use an oven thermometer to ensure the temperature is correct)
    Set an oven rack in the middle of the oven
  • Use fresh eggs that are room temperature (other ingredients also must be at room temperature)
  • Beat egg whites until stiff peak
  • Sift the Flour
  • Mix each batches of the flour evenly until there are no lumps
  • Make sure the wet ingredients are combined well with the batter
  • Don’t mix the batter too hard, just make sure it is well blended (the consistency should be thick but flowing)
    If the batter looks runny, it means you’ve over-mixed it and the cupcakes won’t rise properly
  • Don’t let the batter sit too long before baking, bake it immediately (especially if the batter does not use any raising agents at all, there is a risk that the batter will deflate)
  • Resist the urge to open the oven door while baking; this can lead to the cake being too damp in the middle or even falling
  • Once baked, tap the pan on the counter 3 times, this will prevent the cupcakes from shrinking or deflating when they cool
    Then immediately transfer to a cooling rack to cool completely

RECIPE

VANILLA SPONGE CUPCAKES
Yield: 12 regular Cupcakes

Ingredients
🧁 CUPCAKE BATTER
4 Egg Whites (130 g) ~ room temperature
1 tsp Lemon Juice
80 g Caster Sugar
4 Egg Yolks (85 g) ~ room temperature
40 g Milk ~ room temperature
26 g Vegetable Oil
30 g Maple Syrup
1/2 tsp Vanilla Extract
120 g Cake Flour (sifted)
Notes: you can substitute Lemon Juice with 1 tsp White Vinegar or 1/2 tsp of Cream of Tartar

🧁 BOILED-MILK FROSTING
270 g Milk
36 g All-Purpose Flour
1/8 tsp Salt
270 g Unsalted Butter ~ softened at room temperature
135 g Icing Sugar
1/2 tsp Vanilla Extract
Food Colouring

Instructions
PREPARATION

  1. Line 12-cup Muffin Tins with paper liners
  2. Make sure all utensils clean and grease free (wipe the bowl and utensil with Lemon Juice or Vinegar to helps remove grease).
  3. Take the eggs and other cold ingredients out of the fridge
    Separate Egg Whites and Egg Yolks; then let them come to room temperature.
  4. Preheat the oven 180°C/ 160°C fan/ gas mark 4.
  5. Mix the wet ingredients (Milk, Oil, Maple Syrup and Vanilla Extract)


CUPCAKE BATTER

  1. Beat the Egg Whites over HIGH speed for about 30 seconds until foamy.
  2. Add Lemon Juice (or white Vinegar or Cream of Tartar) and continue beating for another 30 seconds.
    * Acid in Lemon Juice/ Vinegar/ Cream of Tartar will help stabilizing the egg whites
  3. Add Sugar in 3 batches every 30 seconds.
  4. Once all the Sugar is added, continue beating on high speed until stiff peak for about 3 to 5 minutes (the mixture will gradually thicken and look shiny).
  5. Pour in the Egg Yolks; Using a hand whisk, stir gently until evenly mixed.
  6. Add sifted Flour in 2 batches (don’t skip this process; by sifting the Flour, it will break up any lumps, create a light, delicate, and fluffy results).
    Stir gently; Make sure that you scrape the entire surface of the bowl so that there is no flour residue on the sides and bottom of the bowl (mix each batches evenly until there are no lumps).
  7. Then take about 1 cup of this egg-flour mixture into the wet ingredients; mix really well.
    * By using this pre-mix method, the milk-oil mixture will incorporated easily with the egg mixture.
    It prevents the oil and milk from falling directly to the bottom of the bowl, which would cause the cake didn’t rise properly
  8. Pour the pre-mix mixture back to the egg-flour mixture; using a hand whisk stir gently (don’t mix too hard, just make sure the mixture is well blended)
  9. Then using spatula, scrape all the bottom and sides of the bowl, make sure it is evenly mixed.
    The batter should be thick but flowing (if the batter looks runny, it means you’ve over-mixed it and the cupcakes won’t rise properly)
  10. Evenly scoop the batter into prepared muffin cups.
  11. Using a skewer make this circular motion to flatten the batter and break the large bubbles.
  12. Bake in the preheated oven at 180°C/ 160°C fan/ gas mark 4 for 23 Minutes (Middle rack).
    * Resist the urge to peek until your cake is done; this can lead to the cake being too damp in the middle or even falling
  13. Once baked, tap the pan on the counter 3 times, this will prevent the cupcakes from shrinking or deflating when they cool.
    And then immediately transfer to a cooling rack to cool completely.


BOILED-MILK FROSTING

  1. In a medium bowl, whisk the Flour and Salt into Milk until smooth
    Strain this mixture to the non-stick pan (you don’t want any lumps in your frosting)
  2. Cook over MEDIUM-HIGH heat, the mixture will gradually thicken.
    Stir constantly until very thick and bubbling, about 3 minutes.
    *It is important to stir the mixture constantly during cooking, otherwise the bottom will burn
  3. Once it’s done, strain the mixture through a fine sieve into a shallow heatproof dish
  4. Place a piece of plastic wrap directly on the surface to prevent a skin forming
  5. Let the Roux cool completely to room temperature (this will take about 2 hours)
  6. After the Roux has cooled,
    Start beating the Butter on medium speed for 1 minute until smooth and creamy
  7. Add the Icing Sugar and Vanilla Extract, continue beating for 1 minute
    * Scrapping down the sides and bottom of the bowl occasionally until all the Sugar has been incorporated
  8. Pour the room temperature Roux, continue mixing (It may look curdling at first) Using spatula, scrape down the sides and bottom of the bowl occasionally to make sure everything is mixed well
    Keep mixing on MEDIUM-HIGH speed for about 3 to 5 minutes, the frosting will become very smooth, light, and fluffy
    * If you find the frosting is too soft to pipe, you can place it in the fridge for about 30 minutes and it will firm up a bit to a nice consistency

NOTES

  1. Make sure the unfrosted Sponge Cupcakes to cool completely before storing
  2. Unfrosted Sponge Cupcakes can be stored at room temperatur for 2-3 days in an airtight container to prevent them from drying out
  3. For longer storage, they can be placed in the refrigerator for up to a week in an airtight container.
    If refrigerated, let the Cupcakes come to room temperature before serving to soften them up. This usually takes about 30 minutes to an hour
  4. Unfrosted Cupcakes can also be frozen for longer storage (up to 1 month). 
    Wrap each cupcake individually in plastic wrap and then place them in a freezer-safe container or bag. 
    To thaw, unwrap the Cupcakes, place in an airtight container and let them come to room temperature. 
  5. To store frosted Sponge Cupcakes; keep them in an airtight container for 1 day,
    If you can’t finish it, preferably refrigerated if the frosting contains dairy or perishable ingredients; they can last up to 5 days.

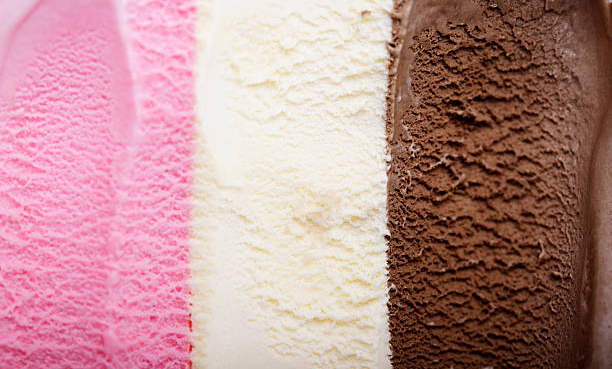
Classic Neapolitan Cupcakes (Moist, Less Sweet)


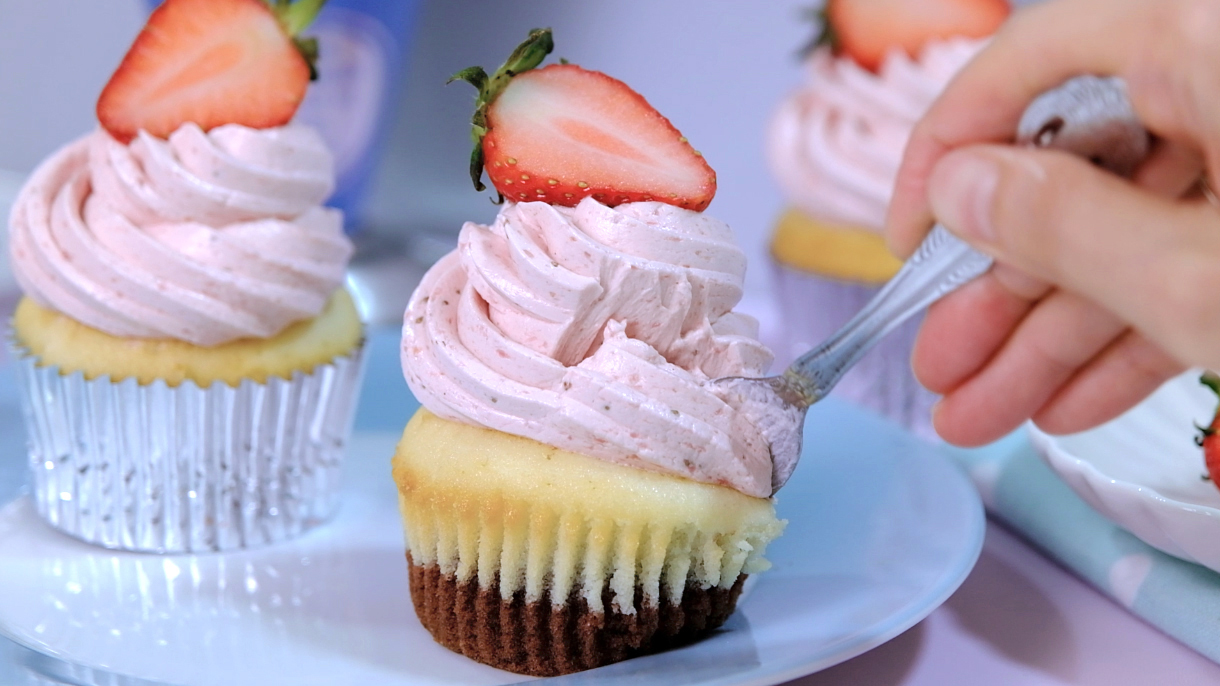
Neapolitan Ice Cream was my favourite since childhood… and I do love Ice Cream inspired cakes.

My big brothers and I never got tired of this ice cream until now 👨‍👨‍👧❤️ The eternal taste of our classic ice cream…
Vanilla-Chocolate-Strawberry these 3 flavours arranged side by side in the same container,  usually without any packaging in between.

Neapolitan Ice Cream~I am drooling by just looking at it 🙄

If you can’t decide which flavour, chocolate, vanilla, or strawberry is your favourite, then Neapolitan Ice cream is the perfect flavour for you! 😅
And if you like Neapolitan so much, I’m sure you will fall in love with this cupcake recipe 😘


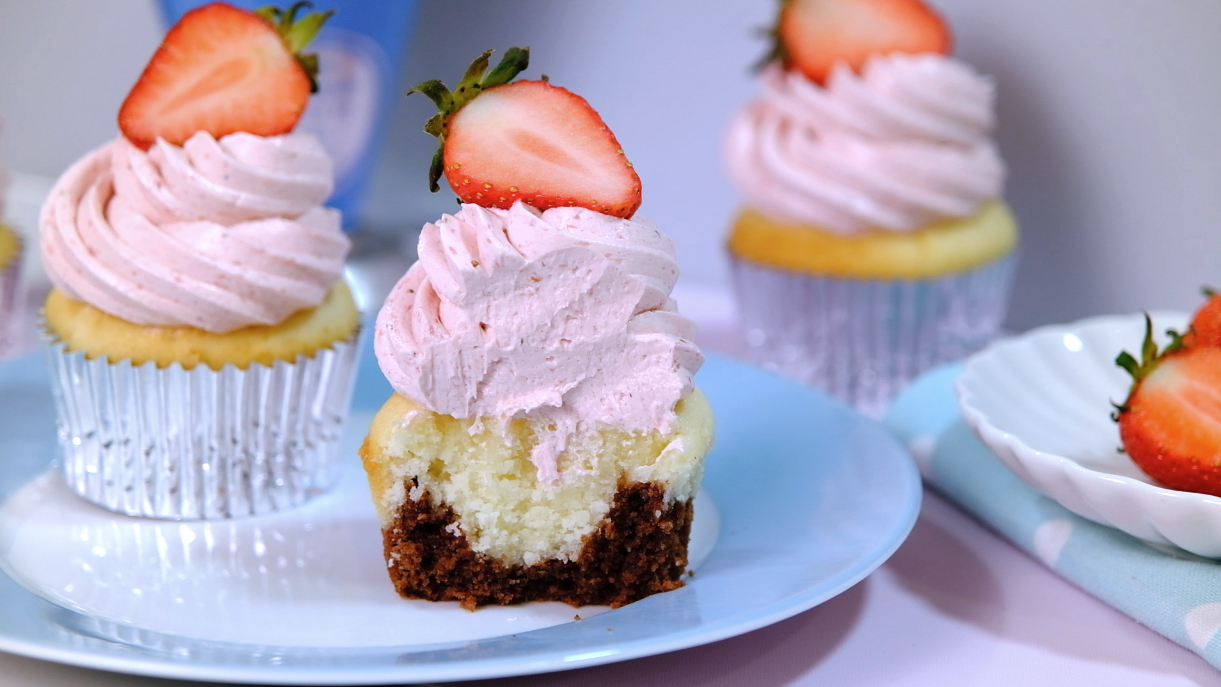
This Neapolitan Cupcake is really moist and not too sweet.
The acid in Buttermilk helps tenderise the gluten in the flour resulting in a lovely rise and soft texture whereas the Sour Cream produces a super moist cake.


Some recipes make vanilla and chocolate batter separately, for me it’s very troublesome 🤔
So…I make it EASY for you
In this recipe, you just need to make 1 basic vanilla batter; and with a little addition then you will get another rich chocolate batter.


For the chocolate batter, I highly recommend to use Dutch-Processed Cocoa Powder; It provides an intense richness to cake
And… feel free to use your favourite 61% Dark Chocolate bar.


Some people ask me whether they can use 70% Dark Chocolate…
Well… I suggest DON’T because it will have slightly bitter taste, which I found not suitable for this cake.


As for the Strawberry Buttercream; make sure that you use Immersion Blender or Spices Grinding Machine to make the strawberry puree;
I don’t recommend to use food processor because you will need to add some water to help the spinning process; It will end up with runny buttercream (which is NOT good).


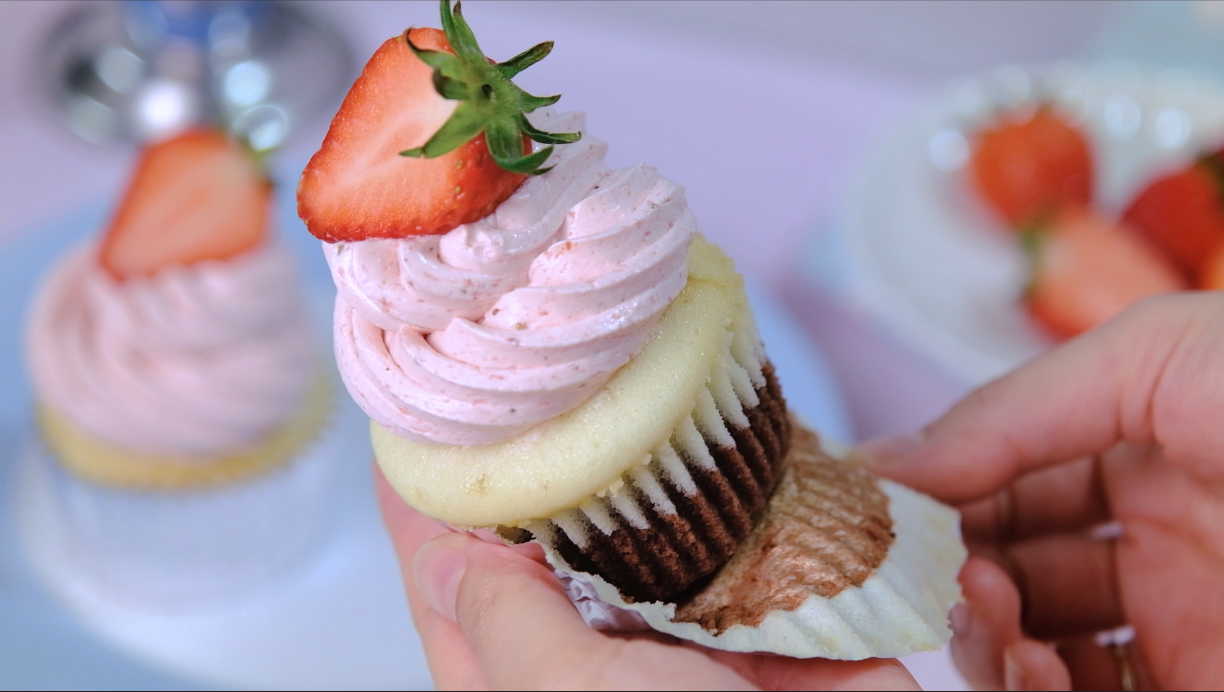
Beautiful tender white cake, moist chocolate cake …with a silky Strawberry Buttercream bursting with fresh strawberry flavour 🤤
What else can you ask for? It’s so satisfying… 😃


I hope you can share this beautiful cupcakes with someone you love…
Love You All and Happy Baking! 😘

CLASSIC NEAPOLITAN CUPCAKES
Yield: 6 cupcakes  (3,5 cm high; 5 cm bottom diameter; 7 cm top diameter)
Active Time: 1 Hours
Total Time: 2 ½ Hours

INGREDIENTS
♥︎ Cupcake Batter

  • 115 g Cake Flour
  • 1 tsp Baking Powder
  • 1/4 tsp Salt
  • 75 g Unsalted Butter (room temperature)
  • 116 g Granulated Sugar
  • 105 g Egg Whites (room temperature)
  • 2/3 tsp Clear Vanilla Extract
  • 80 g Buttermilk (room temperature)
  • 40 g Sour Cream (room temperature)
  • 6 g Cocoa Powder (Dutch-Processed)
  • 15 g Hot Water
  • 15 g Chopped Dark Chocolate (61%)


NOTE (Buttermilk Substitute)
Option 1: Replace Buttermilk with a mixture either 1 teaspoon of vinegar or Lemon Juice and 80 grams of milk; Let it sit for 5 minutes
Option 2: Replace Buttermilk with a mixture of 40 grams of Milk and 40 grams of Plain Greek Yogurt

♥︎ Strawberry Buttercream

  • 70 g Egg Whites (room temperature)
  • 125 g Granulated Sugar
  • 170 g Unsalted Butter (room temperature)
  • 150 g Fresh Strawberry Puree
  • 2 drops of Dusty Pink/ Rose food colouring

♥︎ Others
829 Nozzle

INSTRUCTIONS
Cupcake Batter

  1. Preheat the oven to 160°C at least 30 minutes prior to baking.
  2. Prepare the cupcake pan and liners (I am using 3,5 cm high with a 5 cm bottom diameter and a 7 cm top diameter).
  3. In a medium bowl, sift dry ingredients through a sifter, set aside. 115 grams Cake Flour; 1 teaspoon Baking Powder; ¼ teaspoon Salt
  4. For the cocoa mixture
    In a small bowl combine Cocoa Powder and hot water; Mix well until no lumps visible, set aside. 6 grams Cocoa Powder (Dutch-Processed); 15 grams Hot Water
  5. Remember; cake batter calls for room temperature butter, it’s soft to the touch, but not melted.
    In a large bowl beat Butter on low speed (Kitchen Aid speed 1) until smooth for about 1 minutes. 75 grams Unsalted Butter (room temp.)
  6. Gradually add in the sugar and beat on medium-high speed (speed 8) until light in colour and fluffy in texture 5 minutes. 116 grams Granulated Sugar
  7. Lower to medium speed (speed 4), add egg whites one at a time. Scraping down the bowl, make sure there’s no butter left at the bottom and continue beat on medium-high speed (speed 8) for 2 minutes until smooth. 105 grams Egg Whites (room temperature)
  8. Add vanilla, mix well. 2/3 teaspoon Clear Vanilla Extract
  9. Lower the speed (speed 1) add in intervals, blending after each addition (1/3 dry ingredients – ½ Buttermilk- 1/3 dry ingredients – ½ Buttermilk – 1/3 dry ingredients). 80 g Buttermilk (room temperature)
    Scraping the sides of the bowl to make sure the flour mixed evenly with the mixture and then mix again on medium-high speed (speed 8)  for another 20-30 seconds.
  10. Fold in Sour Cream and mix until just combined. 40 grams Sour Cream (room temp.)
  11. Transfer 1/3 of the batter (about 170 grams) to a medium bowl.
    Add cocoa mixture and chopped dark chocolate; stir until just combined. 15 g Chopped Dark Chocolate (61%)
  12. Divide Chocolate batter evenly among prepared cupcake pan liners; top with remaining Vanilla batter.
    Tap the pan a few times to remove air bubbles and bake in the preheated 160°C oven for 25 minutes or until toothpick inserted in the center of the cupcake comes out clean
  13. When it’s done, transfer pans onto wire rack to cool for 10 minutes before turn out cupcakes onto rack to cool completely.

Strawberry Buttercream

  1. Wipe the bowl and beater with some Vinegar or Lemon Juice to ensure that there’s not a speck of grease or fat on your utensils (fat can interfere with the beating of egg whites into a stable foam).
  2. Cut strawberries into small pieces. 150 grams Fresh Strawberries
    Puree in an Immersion Blender or Spices Grinding Machine until smooth (I don’t recommend to use food processor because you will need to add some water to help the spinning process; It will end up with runny buttercream), set aside.
  3. Then in a heatproof bowl combine egg whites and sugar. 70 grams Egg Whites; 125 grams Granulated Sugar
    Place the bowl over a pot of simmering water, whisk until sugar dissolved and then keep whisking until the mixture reach160°F on candy thermometer.
    Take it off from the heat, transfer the mixture to a stand mixer and beat on medium-high speed (speed 8) for 5 minutes until stiff glossy peaks form and the bottom of the bowl no longer feel warm to the touch.
    * You can use hand mixer, but it will take longer and your whipped buttercream may not be quite as fluffy.
  4. Lower to medium speed (speed 4) add butter one piece at a time; Whisking well after each addition. 170 g Unsalted Butter (room temperature)
  5. Reduce to low speed (speed 1), add in strawberry puree; And beat until smooth 3-5 minutes (scrapping down the bowl during the process).
    * Please note the motor under the mixing bowl creating heat when buttercream is mixed for several minutes; your buttercream may heat and even start to melt. In that case, I suggest decreasing the mixing time.
  6. The buttercream should be lighter in colour and fluffy in texture (I like to add some dusty pink food colouring to enhance the colour – optional). 2 drops of Dusty Pink/ Rose food colouring
    If you find your buttercream too soft, store them in the fridge for 30 minutes before you use it.


Assembly
Using 829 Nozzle, pipe Strawberry Buttercream on top of cupcakes; decorate with some fresh strawberries to make it prettier.

NOTES
Best served on the day it’s made; However, decorated cupcakes can be stored in the fridge for 3-4 days (in an airtight container). Make sure that you take it out of the fridge 30 minutes before serving it.

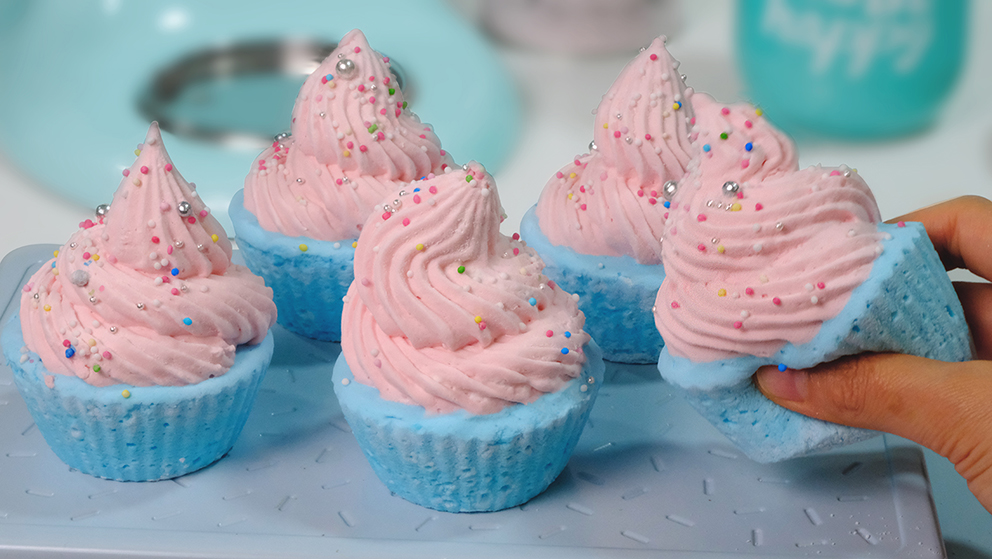
Marshmallow Cupcakes Candy

Soft, fluffy, pillowy and an entertainingly bouncy…
Homemade marshmallows may take a little time to prepare, but I’m sure once you spoil yourself with the homemade version, you may never go back to store-bought again. 

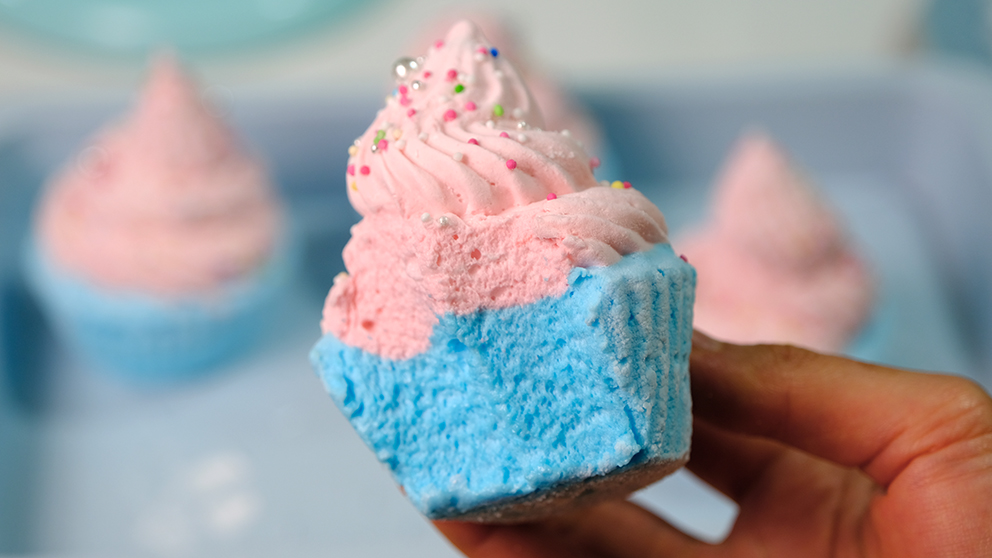
Can’t help bitting it!

These beautiful “Marshmallow Cupcakes Candy” are perfect for a birthday party, valentines day, baby shower, or even a wedding.

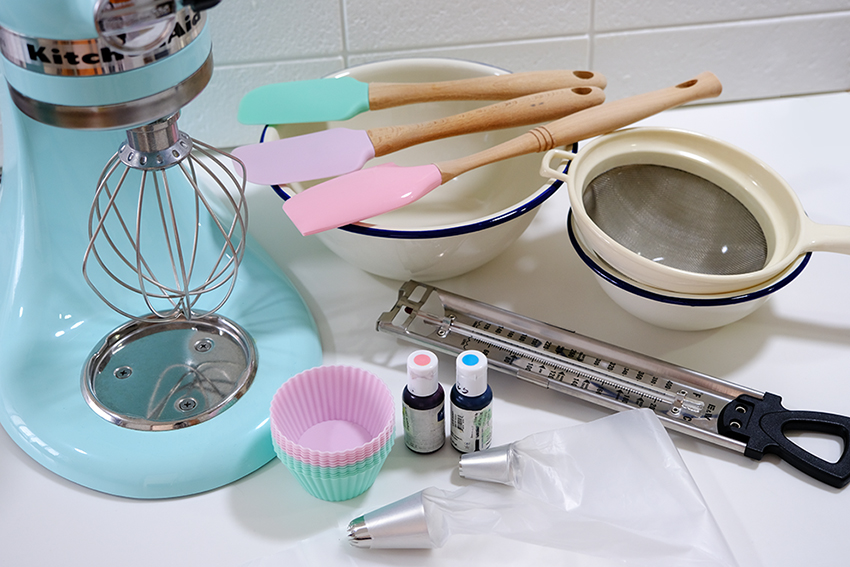
Thing that you will need to prepare in advance

And because marshmallow sets really quickly, it’s a good idea if we can prepare all things that we need in advance.
You can use hand mixer to make it, however stand mixer is the best choice in my opinion, it’s safer since we are working with a really hot sugar syrup.

Infrared Gun

Candy thermometer is important in making marshmallow candy, to check the correct temperature, or if you have infrared gun this also works well.

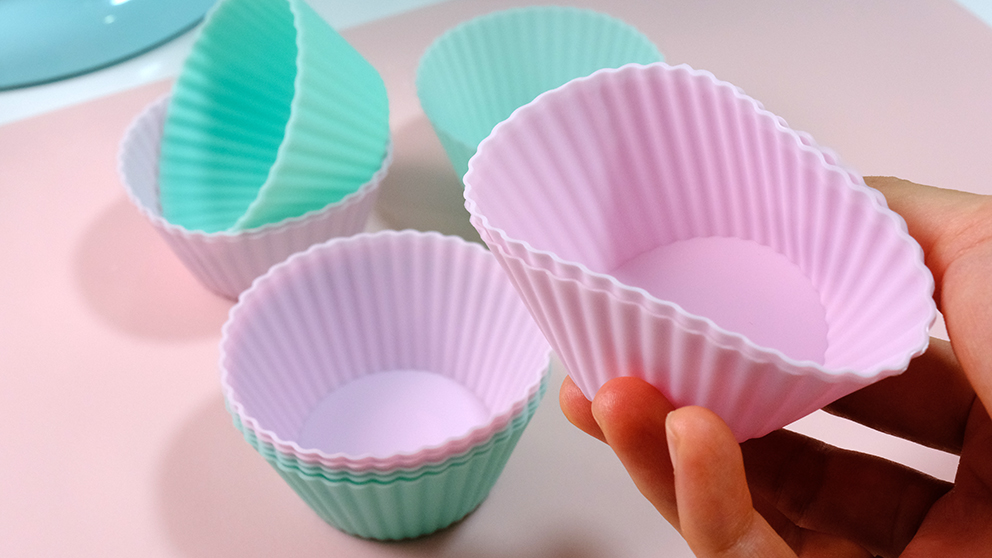
Why use silicone moulds?
Because it’s so much easier to remove your marshmallow from the moulds, any shape of silicone moulds works great.
Don’t forget to grease the silicone moulds with either baking spray, butter or oil for easy release.
I only dusted the moulds lightly with coating mixture, it just works great for me.

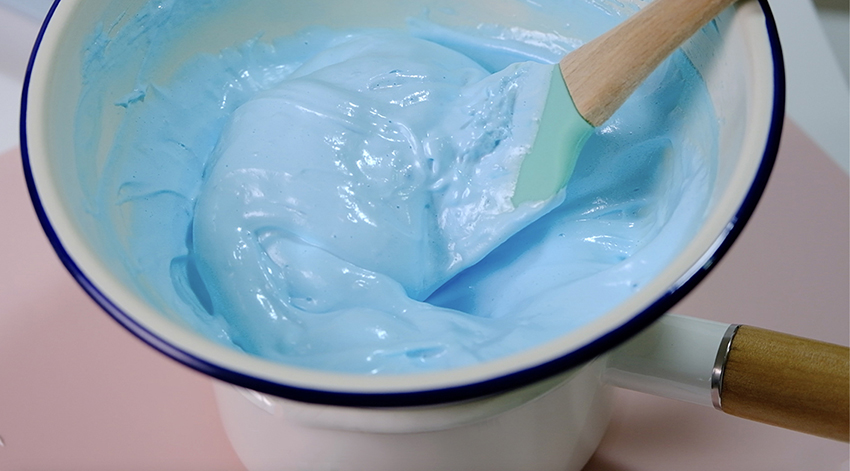
How to prevent the batter sets really quickly?
While you pour your marshmallow batter into the mould, we need to keep the batter stays liquid so it can fill up the entire space inside the mould.
I found that a double boiler method helps a lot.
So what I usually do is I place the bowl over the hot boiling water pot, by doing this, the steam stays trapped between the two pots will heats the marshmallow and liquefy the mixture.

The consistency of marshmallow when pouring into the mould need to be liquid

How to unmold?
Dust the work surface with generous amount of the coating mixture, then carefully peel the cupcake mould.

You might need to apply some coating mixure on your hands as well

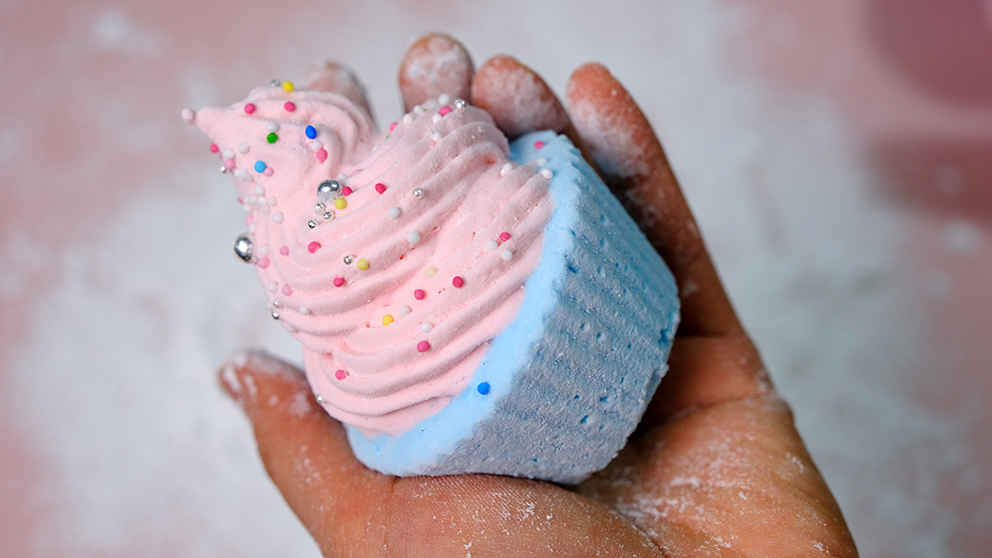
Pop the pretty marshmallow out of the molds and give them a good dusting of coating mixture to cover completely.

Then gently pick up the marshmallow, pat the surface to remove excess coating.
If you still feel a bit too much coating, you can just brush it away especially on the folding sections.

Oh.. it’s really feels good, it’s bouncy and the texture so soft and pillowy.
It’s much creamier in texture and you can customize this recipe to make any flavor marshmallow you would like .
I do hope that you have a chance to make this, coz there are really nothing more pleasurable than bitting into a homemade marshmallow.

MARSHMALLOW CUPCAKES CANDY
Yield: 5 medium cupcakes
Active time: 1 hours
Total time: 3 hours

INGREDIENTS
Coating:

  • 100 gr Icing Sugar
  • 70 gr Corn Flour

Marshmallow Batter:

  • 16 gr Gelatine Powder
  • 80 gr Cold Water
  • 100 gr Granulated Sugar
  • 60 gr Corn Syrup
  • 40 gr Cold Water
  • 60 gr Corn Syrup
  • Blue and Red Food Colouring

INSTRUCTIONS
Coating
Simply sift the icing sugar with some corn flour.

Prepare the Mould
Grease the cupcake silicone moulds with either baking spray, butter or oil for easy release (I just dusted the moulds lightly with coating mixture, it works great for me).

Marshmallow Batter

  1. To bloom gelatine
    Sprinkle the gelatine powder over 80 grams of cold water, give a little stir and let it sit for about 5 minutes.
  2. Microwave the bloomed gelatine for 30 seconds so it will be liquid, then pour it into the mixer along with the first batch of the corn syrup.
    Put your mixer on low speed (Kitchen Aid speed 2) just to keep it moving while waiting for the sugar syrup.
  3. In a medium sauce pan, combine the sugar, second batch of corn syrup and 40 grams of cold water (you don’t need to stir it, the corn syrup will helps the sugar from crystallising).
    Place your candy thermometer and then cook over medium heat until it reach 116°C.
  4. When the sugar syrup reach 116°C, take it off from the heat, slowly and carefully drizzle the sugar syrup down the sides of the mixing bowl. Make sure that it doesn’t touch the whisk.
  5. Once you add in all your sugar syrup, turn the mixer to medium speed (Kitchen Aid speed 6) and set your timer for 5 minutes.
  6. After 5 minutes, speed up the mixer to medium high (Kitchen Aid speed 8) for another 2 minutes.
  7. Divide the mixture into 2 equal portions, colour 1 batch with blue and another one with pink.
  8. Pop the pink mixture into a piping bag with a star nozzle.
  9. If the blue colour mixture start to sets hard before you piping it;
    Try to use double boiler method by placing the blue colour mixture bowl over the hot boiling water pot (the steam stays trapped between the two pots will heats the marshmallow and liquefy the mixture, keep stirring until you get the desired consistency.
  10. Pour the blue mixture into a piping bag, divide onto 5 cavities of the moulds evenly. Then working quickly, pipe the pink swirls mixture on top of the blue mixture.
  11. Sprinkle some sugar decoration or dragees before the marshmallow sets hard.
    Let the marshmallow sit uncovered at room temperature for at least 2 hours before coating.
  12. To Coat
    Using stainer, dust the work surface with generous amount of coating mixture (you might need to apply some on your hands as well).
    Carefully peel the cupcake mould, pop out the marshmallow onto the work surface, then give more coating mixture on top of the marshmallow.
    Gently pick up the marshmallow, pat the surface to remove excess coating.
    If you still feel a bit too much coating, you can use silicone brush just brush it away, especially on the folding sections.

NOTES

  1. You can substitute corn syrup with either glucose, golden syrup or even honey if you want.
  2. It’s really important not to boil the sugar syrup any further than 116°C, otherwise you will end up with chewing sugar syrup that’s really hard to work with.
  3. Weather does affect marshmallow making, the ideal weather is cooler, drier conditions.
    If you make this on a rainy day, they tend to take a little bit longer to set unless you can place them in an air conditioner room to speed up the process.
  4. If kept in a dry place at cool room temperature, they should keep for about a month in an airtight container.

Peppermint Hot Chocolate Drink Fruit Cake

Hey Guys, happy early holiday season to you all!
As the end of the year mean a lot of parties and food; and one of my favorite Christmas dessert is traditional fruit cake with loads of dark rum.
A festive, flavorful, and moist fruit cake to enjoy all holiday season. 

Bland and Boring Style Fruit Cake 🙁

Sometimes I have no time left to marinated the dried fruit and I felt the appearance of the fruit cake can get a little bland and boring, anyway… I still want to eat fruit cake.

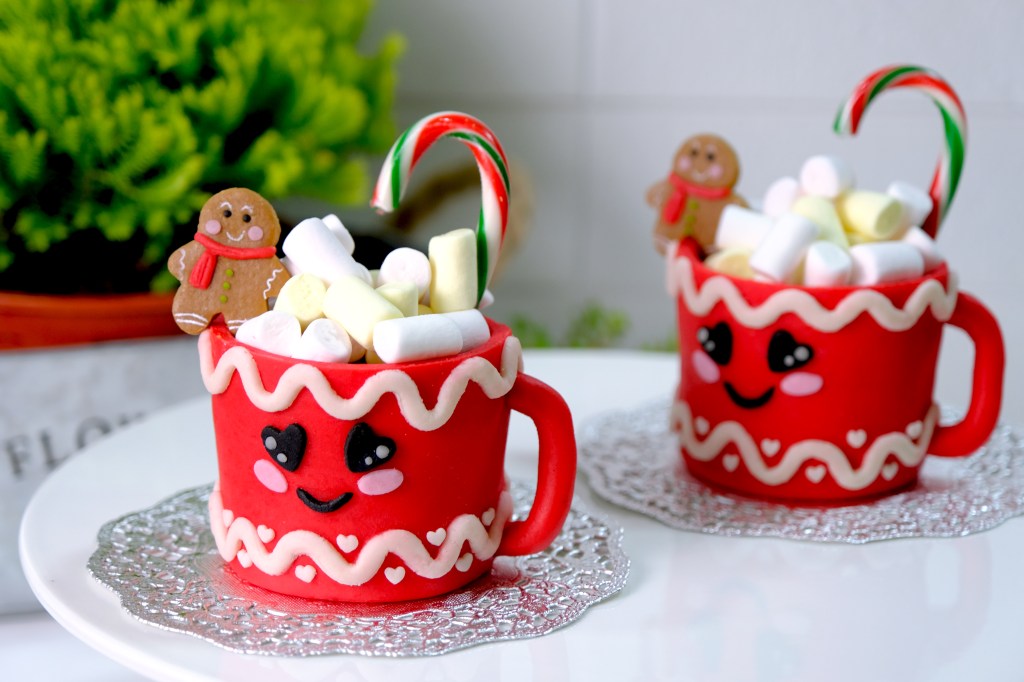
So I was thinking why not we try something that’s a little different? It’s gonna be a “Quick Fruit Rum Cake”, decorate as a Peppermint Hot Chocolate Drink! How cool is that?

No Cooked Homemade Egg-Free Marzipan

And to decorate the cake, of course marzipan is the best and traditionally has been used to cover fruit cakes with it.

You could use ready made marzipan, I personally love to make my own “No Cooked Homemade Egg-free Marzipan” which is very simple and easy. It only takes 10 mins and needs no special skills or equipment to make it.

Sifted Almond Flour and Icing Sugar

So… you will need to sift the almond flour and icing sugar.
It will be easier if you have food processor on hand, you can just pulse them until smooth, coz how smooth you grind the almond will determine the texture of your marzipan.

I don’t have one, so… I just do it manually by hand, try not to do it all at once, sift it gradually.
It will be a bit time consuming, just keep smiling and be patient.

My Sweet Little Gingerbread Man

And the most fun part, by using marzipan you can create customize decorations for your Hot Choco Mug.
I really fall in love with this cute little Gingerbread man cake topper, it’s perfect for my Christmas Cakes.

Look how cute he is!

The liquor will make the fruitcake more moist, and will help it last longer.
Well, traditionally one of the most important function of fruitcake is for storage. It could be stored for weeks, sometimes half year, if stored properly.
But in this recipe, it tastes the best when it’s fresh in my opinion.

Beautiful Golden Colour, Loads of Rum and Moist Cake

Unlike the other brownish fruitcake, this one has a beautiful golden color. The Marzipan is so soft not too sweet. A thin slice of this cake is a wonderful treatment with a cup of black coffee or tea.

I hope you Guys give this recipe a try and have a wonderful Christmas & Happy New Year!
Love you all…

PEPPERMINT HOT CHOCOLATE DRINK FRUIT CAKE
Yield: Five Pieces (Upper diameter: 6.8 cm, Bottom diameter: 6 cm, Height: 5 cm) cupcakes liners
Active time:  2 hour
Total time: 3 hour

INGREDIENTS
Marzipan:

  • 300 grams Almond Flour
  • 775 grams Icing Sugar
  • 2 1/2 tablespoons Corn Syrup
  • 1 teaspoon Almond/ Rose/ Vanilla Extract (or any favourite extract)
  • 2-5 tablespoons Water


Fruit Rum Cake:

  • 100-120 grams Dried Fruit (cut into small pieces)
  • 80 grams Dark Rum
  • 40 grams Orange Marmalade
  • 130 grams Cake Flour
  • 2/3 teaspoon Baking Powder
  • 100 grams Salted Butter
  • 50 grams Brown Sugar
  • 50 grams Granulated Sugar
  • 2 Eggs

Soaking:
30 grams Dark Rum, 1 tablespoon Orange Marmalade

Decorating:
Candy Canes, Mini Marshmallow, Food Colouring (red, black, green, pink)


INSTRUCTIONS

Marzipan

  1. In a large bowl, sift together the almond flour and the icing sugar.
    If you have food processor on hand, you can just pulse them until smooth, coz how smooth you grind the almond will determine the texture of your marzipan.
  2. Pour in the corn syrup and mix.
    Add in the water and almond extract, mix well (the mixture started grainy).
  3. Using hand, bring it all together into a ball (you can add one or two teaspoons of water if necessary if you feel the dough too dry). Lightly knead on a work surface until you have a smooth ball.
    Please note, try not to ever kneading, coz it will cause the almonds to give out oil and that can make the marzipan too oily.
  4. Place it in a plastic wrap and store them in the fridge for at least 1 hour before using. Colour as needed.

Soaking
Mix marmalade with dark rum, strained the mixture.

Fruit Rum Cake

  1. Mix dried fruit and dark rum, let it soak for at least 1 hour. Add in marmalade and fold to combine.
  2. In a medium bowl, whisk together the flour and baking powder, set aside.
  3. In another large bowl, combine the butter and both kinds of sugar, beat until fluffy. Pour in the eggs and mix until well combined.
    Add half of the flour mixture and mix. Pour the soaked dried fruit rum mixture that has been mixed with marmalade and fold to combine. Pour the rest of the flour mixture to the bowl and mix until well combined.
  4. Pour the batter into the prepared cupcake liners about ¾ full and bake them in the preheated 180°C for about 30-35 minutes of until toothpick inserted in the center comes out clean.
  5. Once they come out from the oven, brush the with generous amount of soaking mixture and let them cool completely on the cooling rack.


Decorating

  1. Trim the top of the cupcake so it have an even flat top.
    Sprinkle some icing sugar so the marzipan won’t stick to the work surface. Roll some red marzipan about 3 mm thick for the base of the mug cake, using some marmalade jam as a glue.
  2. For the sides; prepare a piece of greaseproof paper as a marzipan templates so we know how long and how much marzipan should we roll for the sides of the mug cake.
    Roll the marzipan about 5 mm thick according to the template, stick onto the cake with some marmalade jam. Cut off the excess.
  3. Using fondant smoother, press the marzipan onto the sides of the mug cake to make sure that it stick well to the cake surface
  4. Using knife tool, tuck the marzipan under a cake so it completely seal.
  5. For the decorations; add some ribbon and tiny hearts around the cake. Stick all mug details and handle with some marmalade. 
  6. Insert a stick of candy cane to the mug, add some mini marshmallow and tiny gingerbread man 


NOTES

  1. You can use your favorite dried fruits such as raisins, figs, prunes,cherries, apricots, or maybe peaches.
  2. If you don’t like dark rum, feel free to use other liquor.
  3. To colour the marzipan, you can use any food colouring, water based, gel, powder. 
  4. I highly recommend to use concentrated food colouring, specially for a deep colour (so you can add less and still get a deep colour).
    Food coloring can throw off the consistency of your marzipan, especially if you have to add a ton to achive the color you’re after.
  5. To store marzipan; wrapped well in an airtight container or it can dry out easily. I suggest to store your Marzipan in the fridge (1 month) or freezer (up to 6 months), when you are ready to use take it out from the fridge or freezer then lightly knead to make it pliable again.
  6. To store fruit cake; In an airtight container for about 3 days at room temperature, 1 month in the fridge and 3 month in the freezer.

Double Dark Chocolate Cupcakes

Hellloooo friends!!! Today we are making this “Double Dark Chocolate Cupcakes” This has been my go-to dark chocolate cupcake recipe for years now 😀 It makes the softest, PERFECTLY CHOCOLATY, moist and fluffy cupcake paired with whipped dark chocolate ganache frosting”.

The batter isn’t as thick as you would think. We don’t really want a super thick chocolate batter because that would yield a cupcake similar to brownies. Dense. We don’t want dense! We want spongey, cakey, and rich. So the batter is thin.

The chocolate cupcake just melts in your mouth, they are light and fluffy and stay moist for days. Seriously Guys, no other cupcake recipe can compare! I hope you make these Moist Chocolate Cupcakes and I know you Guys are going to love them!! Look forward to more videos coming soon 😊

DARK CHOCOLATE CUPCAKES
Yield: 6 pieces
Active times: 1 hour
Total time: 2 hours

INGREDIENTS
Cupcakes:

  • 30 grams Cocoa powder
  • 1/4 + 1/8 teaspoon Baking soda
  • 90 grams Boiling water
  • 45 grams Unsalted butter (melted)
  • 35 grams Vegetable oil
  • 150 grams Granulated sugar
  • 1/8 teaspoon Salt
  • 40 grams Eggs
  • 15 grams Egg yolks
  • 45 grams Heavy whipping cream
  • 95 grams All-purpose flour

Whipped Chocolate Ganache Frosting:

  • 80 grams Heavy whipping cream
  • 160 grams Dark Chocolate
  • 1 tablespoons Rhum (optional)

INSTRUCTIONS
Cupcakes:

  1. Preheat oven to 350 degrees Farenheit.
  2. In large heat proof mixing bowl, whisk together cocoa powder, baking soda and boiling water. Whisk until bubbling subsides and mixture is well blended, allow to cool for 5 minutes, set aside.
  3. Meanwhile, in a separate large mixing bowl, blend together melted butter, vegetable oil, granulated sugar and salt until well combined. Mix in egg and eggs yolk. Blend in lukewarm cocoa mixture. Then blend in heavy cream. Finally add flour and blend until well combined.
  4. Divide batter among 6 paper lined muffin cups filling each about 2/3 full. 
  5. Bake in preheated oven until toothpick inserted into center comes out clean, about 17 – 20 minutes. 
  6. Remove from oven and allow to cool in muffin pan several minutes before transferring to wire rack to cool.
  7. Cool completely then frost with whipped dark chocolate ganache frosting.

Whipped Dark Chocolate Ganache Frosting

  1. In a double boiler or in the microwave, melt dark chocolate and heavy cream together and stir until smooth.
  2. Let it cool in the fridge for about 1 hour or until you can spoon some out and keeps it’s form.
  3. Place in your hand mixer, add some rhum (as desired), whip until stiff. It should take for about 4-5 minutes.
  4. Pipe onto cooled cupcakes and top with sprinkles (optional).

NOTES

  • Store unfrosted cupcakes in an airtight container for up to seven days in the refrigerator or keep on the counter for two days.
  • Remove the cupcakes from the refrigerator an hour to two before you intend to eat them to allow them to come to room temperature.
  • The general rule is that classic ganache may stay at room temperature for up to 2 days then must be refrigerated. If you’d rather be safe (which I recommend), keep it refrigerated for all storage. 
  • Ganache can be frozen for up to 1 month. Thaw in the fridge then let come to room temperature before using.