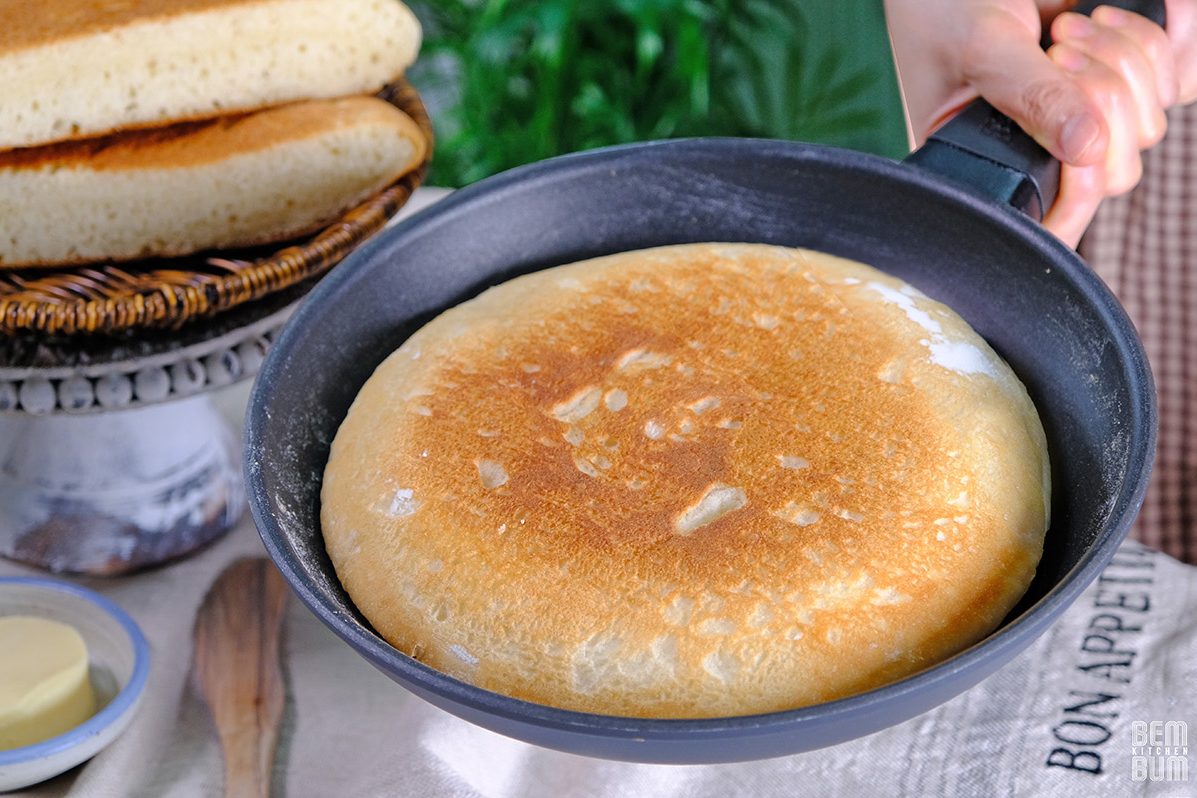
Frying Pan Milk Bread

Baking bread is my favorite,
the kneading process is very calming and meditative for me.
But as my work gets busier, I find I don’t have time to make homemade bread.
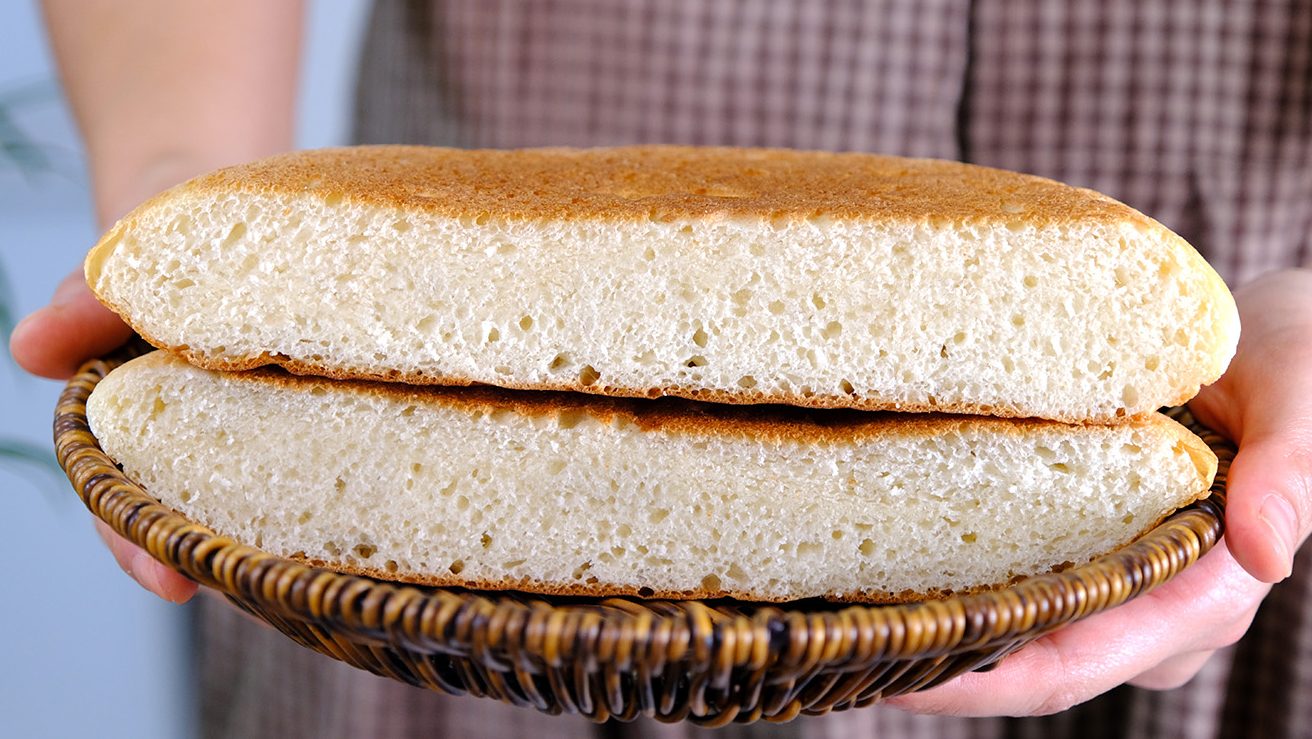
Through trial and error, this Frying Pan Bread was born!
This recipe minimizes time and effort and can be made in just one frying pan.

A super quick and delicious way to make soft homemade bread.

When making this bread; It is important to use a non-stick pan with a thick base, otherwise the dough will stick to the bottom of the pan.

You can use either gas stove or an Induction cooktop to cook the bread
If you are using an induction, please use a special frying pan

The pan lid is also essential; It use to prevent the bread from drying out during fermentation and cooking.
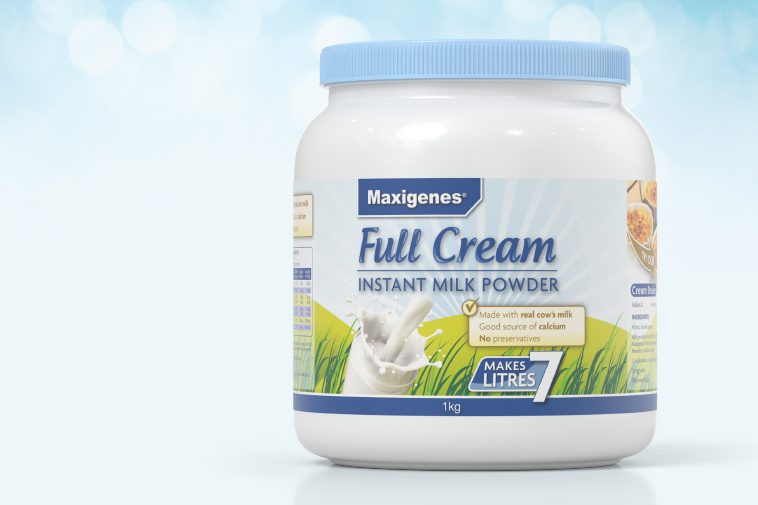
This powder proteins increase the strength of the dough, especially when mixed with Bread Flour

I use Full Cream Powdered Milk, not Liquid Milk in this recipe.
The fat from Milk Powder adds rich flavor and tenderizes the dough, resulting in a softer, finer, more tender crumb.
The bread will also have a longer shelf life.
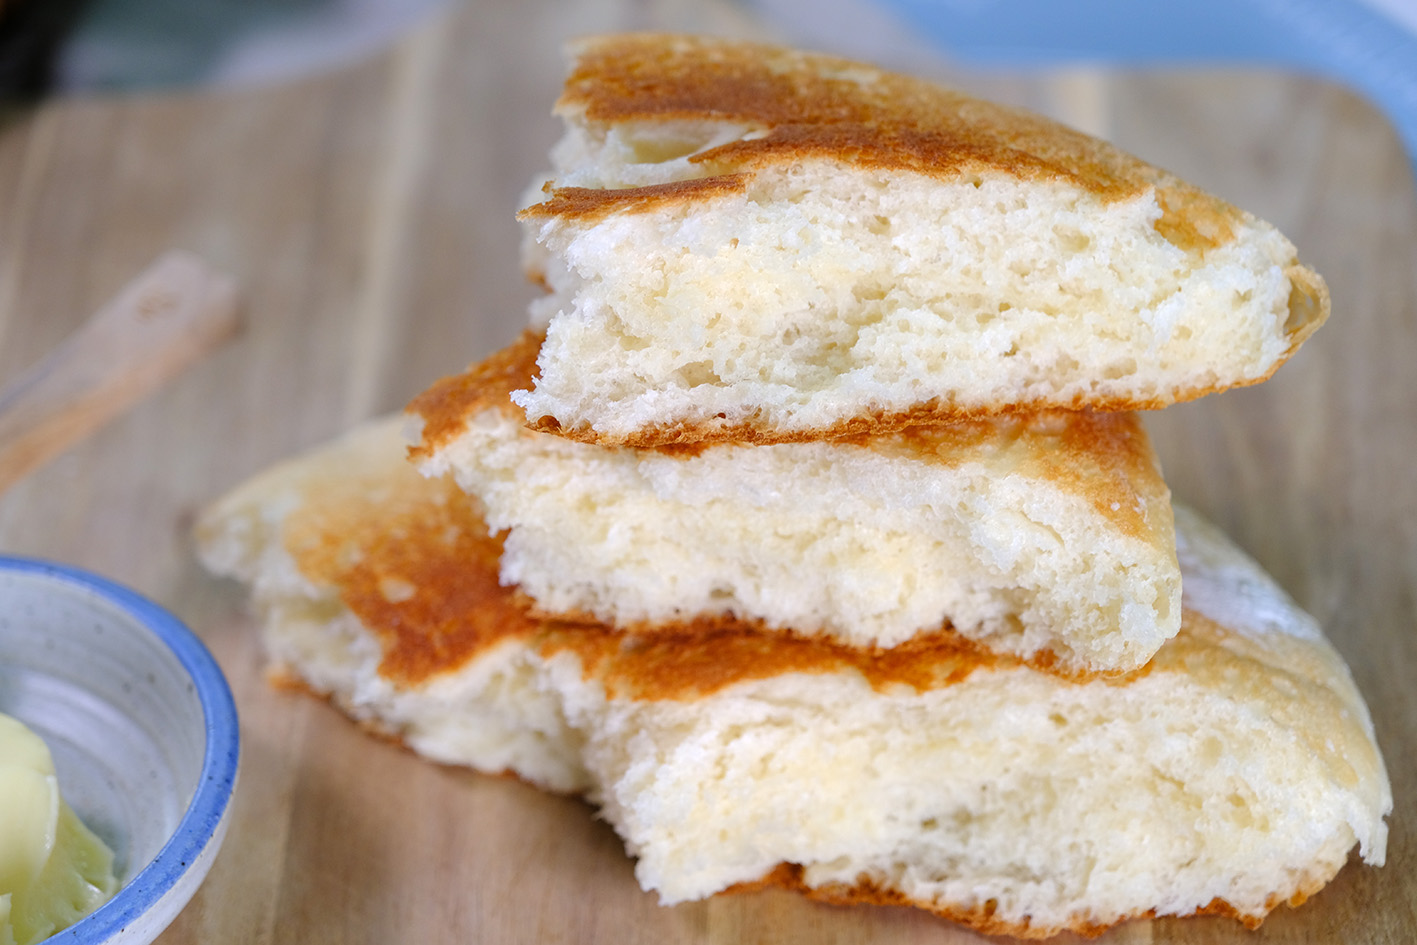
🙄….. 🤤 SO SOFT…

The bread is so soft and fluffy; perfect served with Butter or jam, or as a delicious accompaniment to a bowl of warm soup.

I love making it into sandwiches 😁
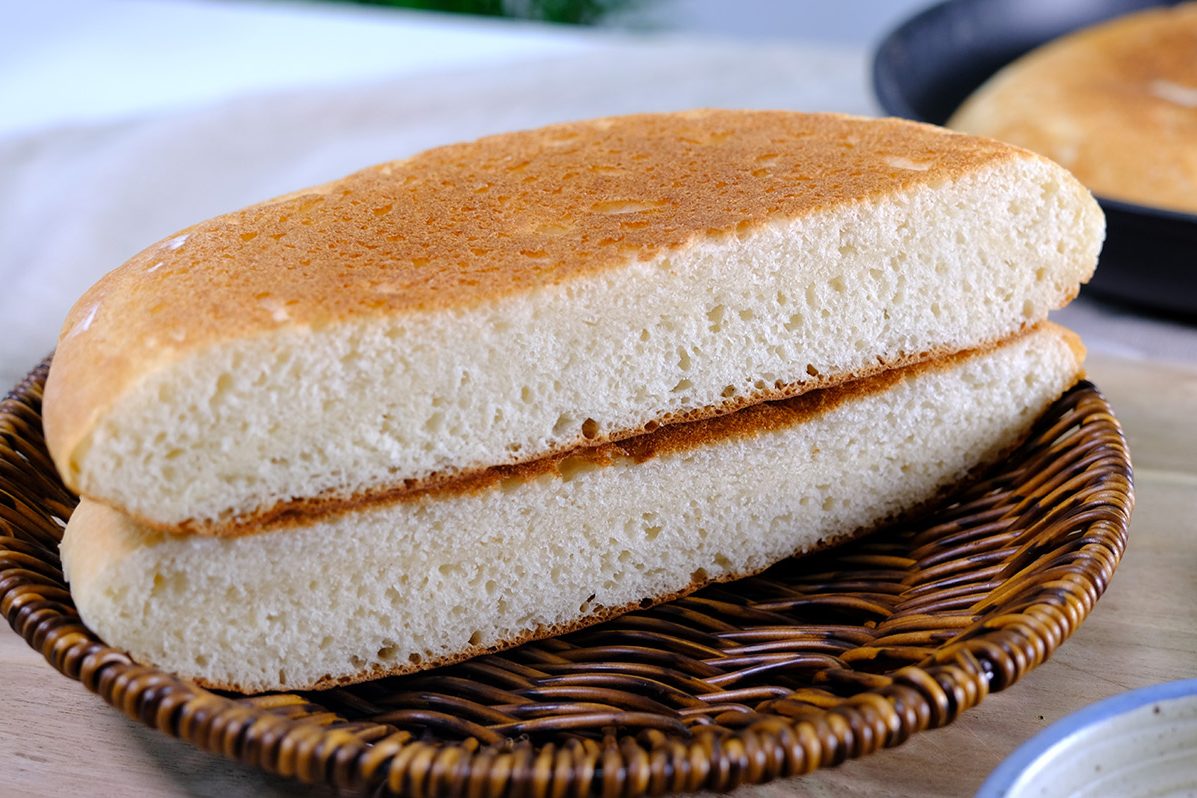
I hope this recipe helps those of you who are busy; The simplest and most delicious homemade bread.
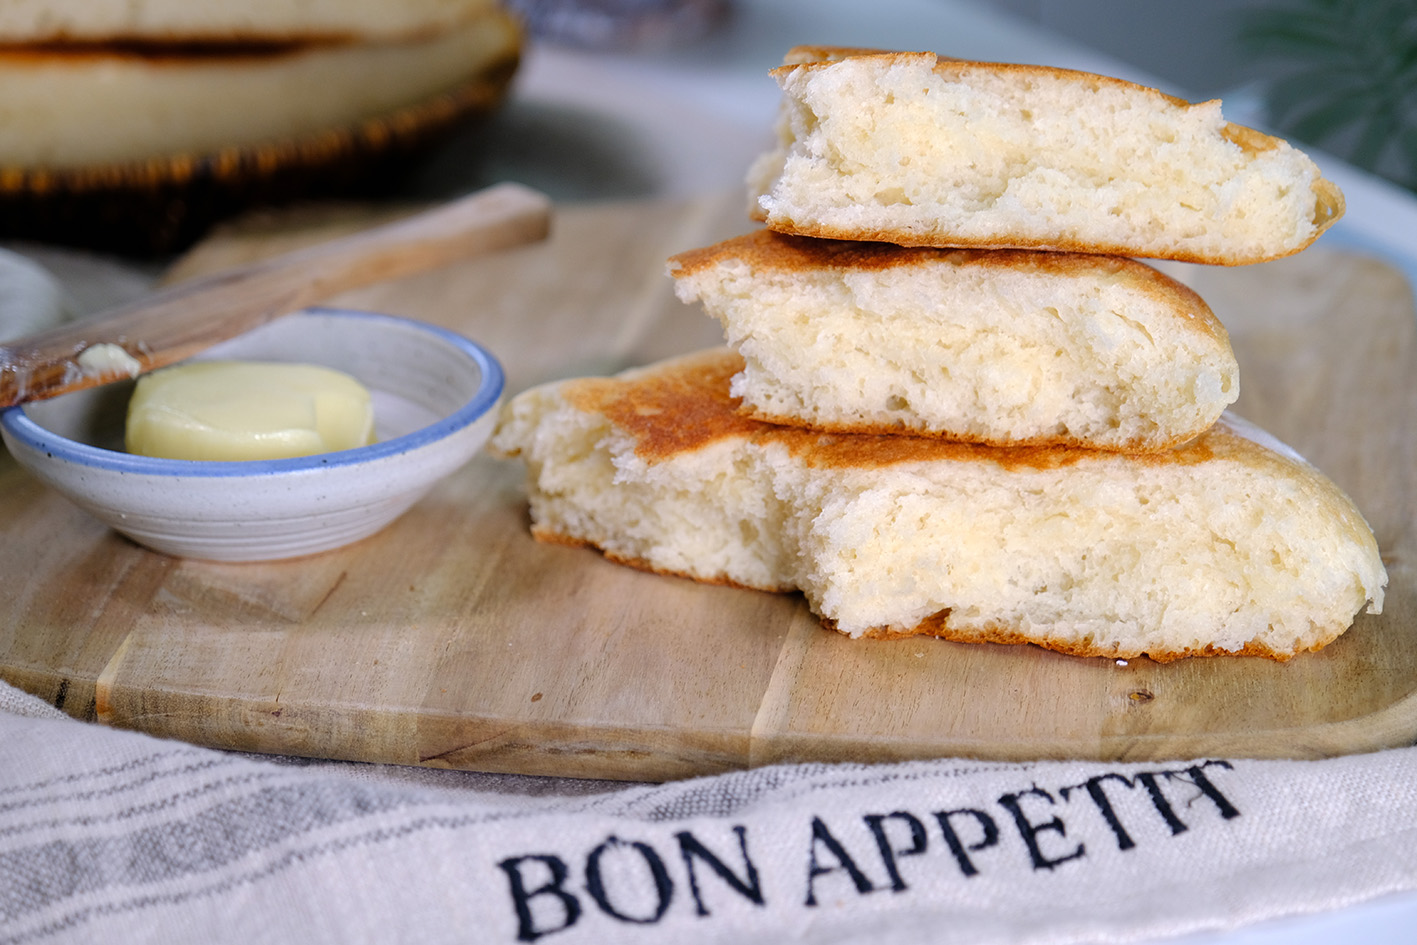
Make it for your loved ones; Give them freshly baked, healthy bread 🥰
LOVE YOU ALL!!

WATCH HOW TO MAKE FRYING PAN MILK BREAD

TIPS FOR SUCCESS (PLEASE READ FIRST):

  • Use a heavy bottom non-stick pan, otherwise the dough will stick to the bottom of the pan
  • The pan lid is also essential; It use to prevent the bread from drying out during fermentation and cooking
  • You can use either gas stove or an Induction cooktop to cook the bread (if you are using an Induction, please use a special frying pan)
  • The optimal size for the dough volume is 20 cm in diameter and 5 to 7 cm in depth (make sure your pan is large enough to accommodate the dough; I am using 10-Inch Frying Pan)
  • Choose “STRONG” Bread Flour for best result
  • Use Full Cream Powdered Milk instead of Liquid Milk
  • The water should be lukewarm; roughly matching body temperature, which is about 35°C to 37°C (this is the ideal range for activating yeast effectively)
    AVOID water that is too HOT, as this can kill the yeast
  • Follow the steps carefully, don’t skip any proofing time
  • While cooking bread DON’T use HIGH heat
    Please note: Stove temperatures vary, the correct temperature is determined by trial and error (you may need to experiment until you find the right temperature for your stove)
    If the temperature is too high, the surface of the bread will burn; Conversely, if it’s too low, the interior of the bread will be undercooked
  • Don’t forget to cover the pan when cooking
    Covering the pan and cooking slowly over medium-low heat, the water content in the dough will be locked in, resulting in soft, moist bread
  • Once done, place the bread on a cooling rack to cool completely before storing (by allowing excess moisture to escape and the structure to set, cooling helps the bread stay fresh longer)

recipe

FRYING PAN MILK BREAD
Yield: One 20 cm diameter (5 cm thick)

🍞 INGREDIENTS
15 g Unsalted Butter (melted)
200 g Strong Bread Flour
30 g Caster Sugar
3 g Salt
150 g Water (lukewarm ~ 35-37°C)
15 g Full Cream Milk Powder
3 g Instant Yeast


INSTRUCTIONS

  1. Melt the Unsalted Butter in a double boiler, set aside
  2. For the dry ingredients, mix Bread Flour with Sugar and Salt; set aside
  3. In another bowl, mix Water with Milk Powder, stir well
    Add the Instant Yeast and stir again; set aside
  4. To make the dough
    Place the dry ingredients to the pan
    Pour in the Milk and melted Butter mixture
    Using a spatula stir thoroughly until comes together, then place the lid and let it sit for 10 minutes
  5. After 10 Minutes
    Sprinkle a thin layer of flour and knead the dough with your fingertips for 1 Minute (you can feel the dough gradually becoming less sticky)
  6. Then form the dough into a ball (you can add little flour to your palms to prevent sticking)
    Place the dough in the center of the pan with the smooth side facing up, cover and let it sit at room temperature for about 30 minutes
  7. After 30 minutes (you will see the dough has risen to about 1.8 times its original size)
    Sprinkle the dough surface with a little flour; gently press the dough to release the gas and flatten it into a round disc shape (approximately 18 cm in diameter)
    Then, cover the pan again and leave at room temperature for about 30 minutes for the final rise
  8. 30 minutes later
    The dough looks puffed up and bigger in size (it’s time to cook the dough)
  9. Over MEDIUM heat, cover and cook the dough for about 7 minutes (I use medium heat or level 5 on my induction stove)
    * Please note that stove temperatures vary, the correct temperature is determined by trial and error; You may need to experiment until you find the right temperature for your stove
  10. After 7 minutes
    Once the bottom is brown and the spatula can be inserted easily, gently flip the bread then immediately reduce the heat to MEDIUM-LOW (I use level 4 on my Induction stove)
    Cover again and continue cooking for 7 minutes
  11. 7 minutes later
    Finally turn it over and cook again for 1 minute
  12. Once it’s done, place the bread on a cooling rack to cool completely before storing or you can serve while still warm

notes

  • The bread will stay soft and can be stored at room temperature in an airtight container for up to 3 days
  • In the refrigerator, Milk Bread can last for up to a week (in an airtight container)
  • To Freeze
    Place the slices in freezer-safe bags, removing as much air as possible before sealing. Store the bread in the freezer, preferably in the coldest part, for up to 1 month
  • To reheat
    From the fridge: wrap the bread in foil and bake at 350°F (177°C) for 10-15 minutes
    From the freezer: thaw frozen bread on the counter for 1-2 hours or in the fridge overnight; then wrap the bread in foil and bake at 350°F (177°C) for 10-15 minutes

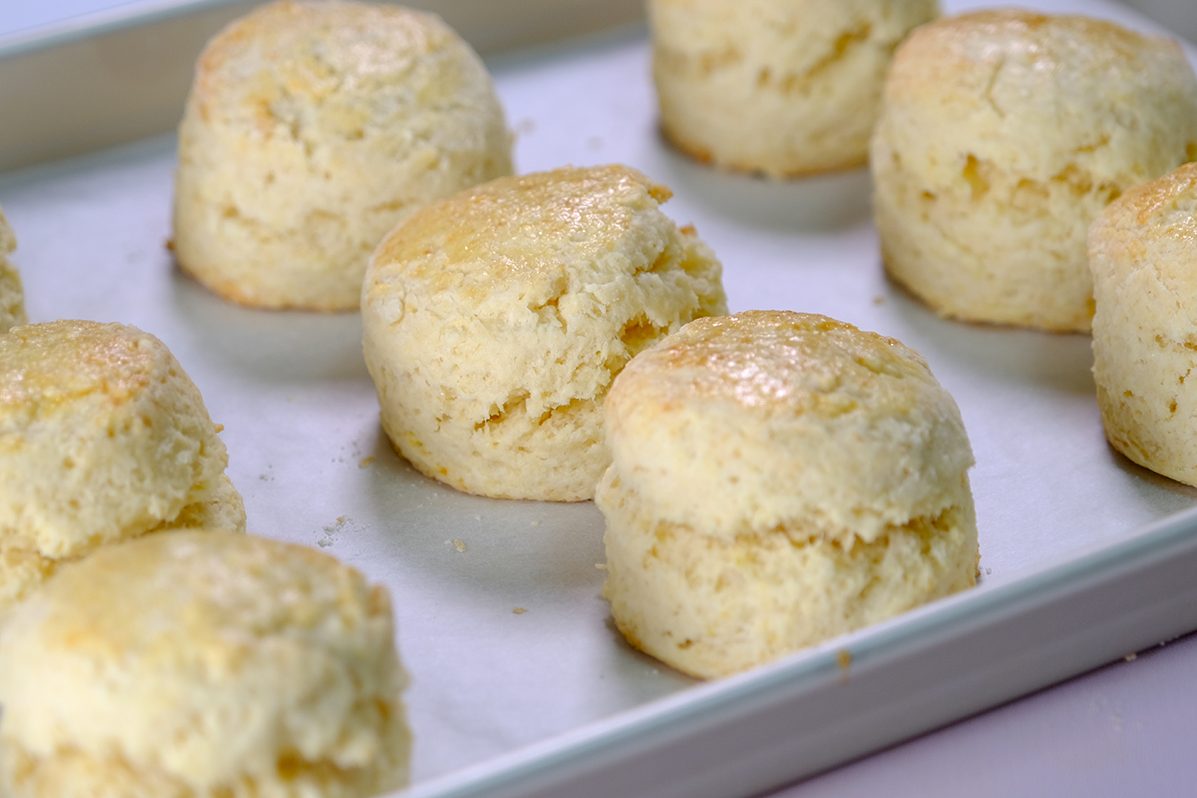
Fluffy Flaky British Scones Baked to Perfection (in 30 Minutes)

WHAT IS THE SECRET OF MAKING GOOD SCONES?
The recipe seems so simple, but the perfect Scone doesn’t come easy.

There are many little gritty things that can get in the way of achieving that all-buttery point of perfection.

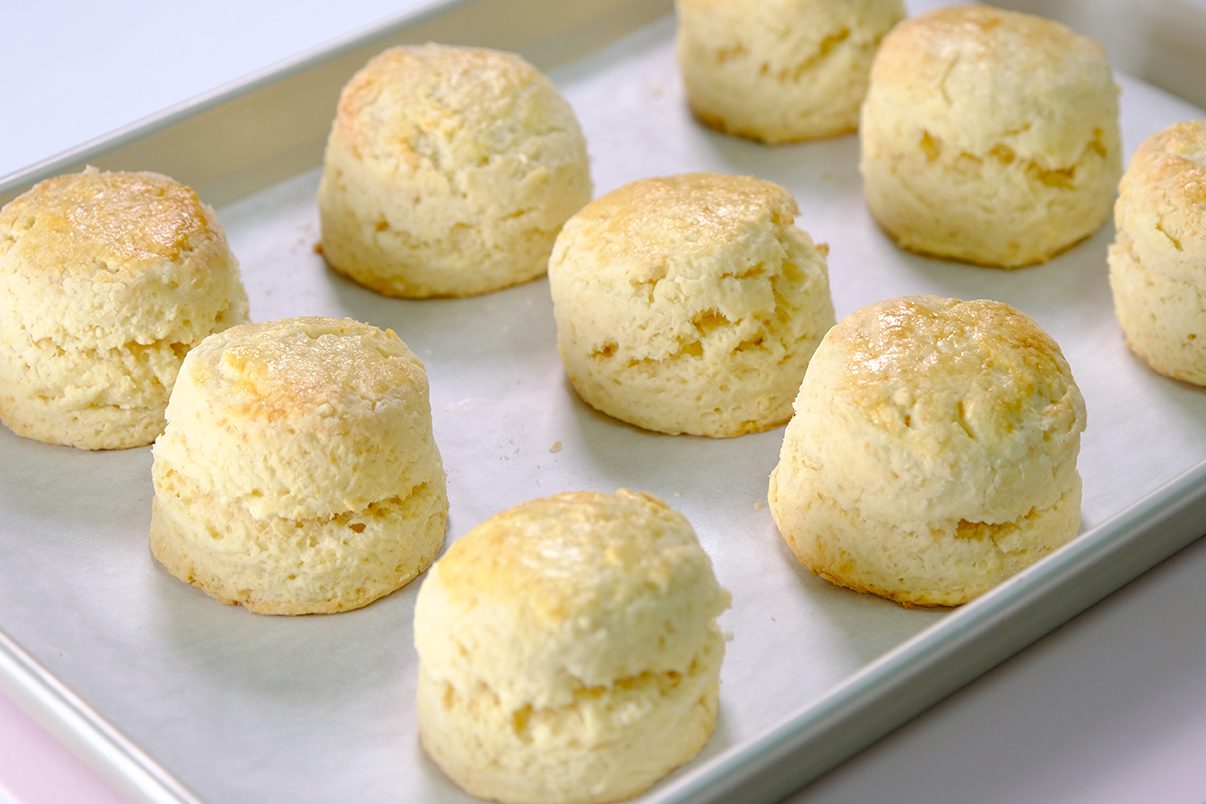
Scones are supposed to be light, fluffy and soft interior with a little crisp to the edges and top.

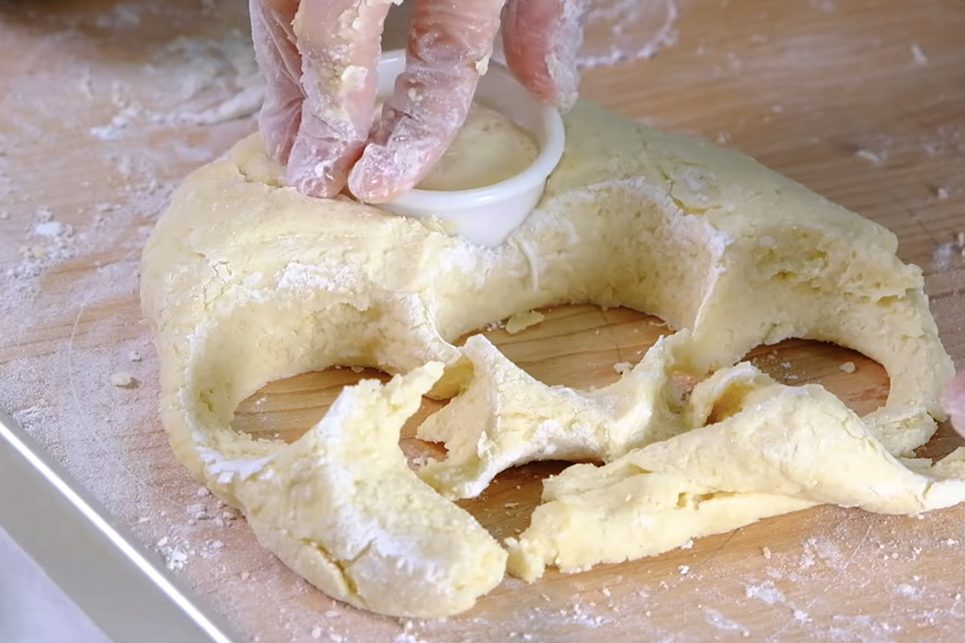
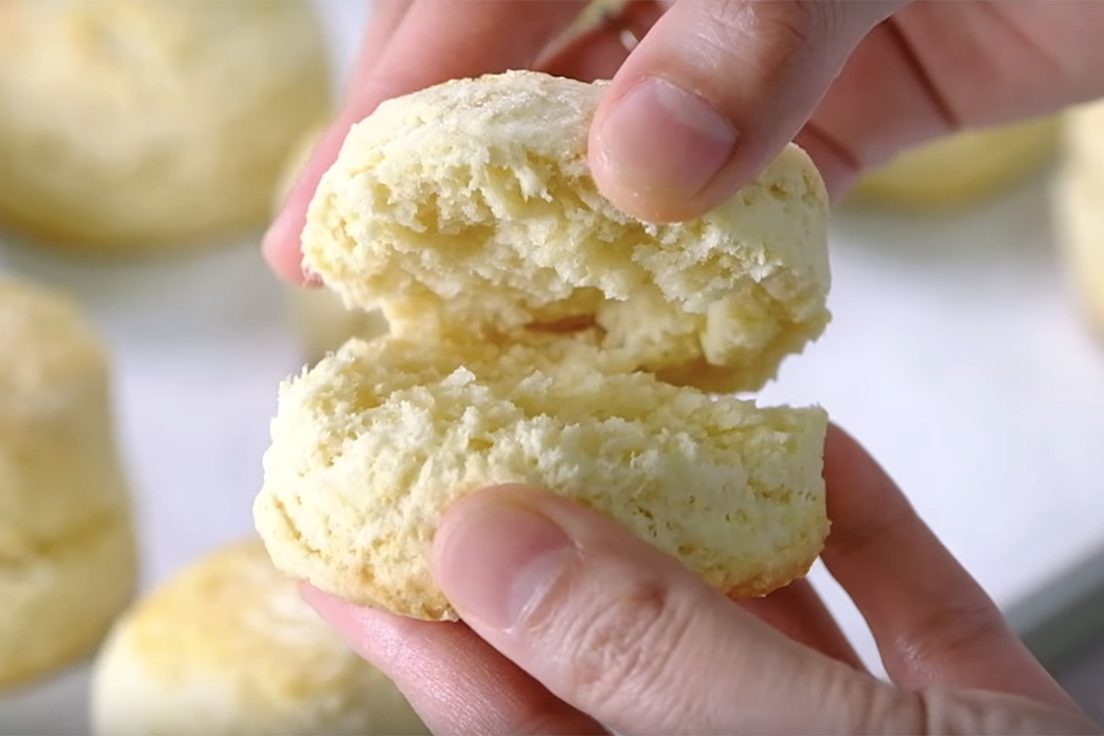
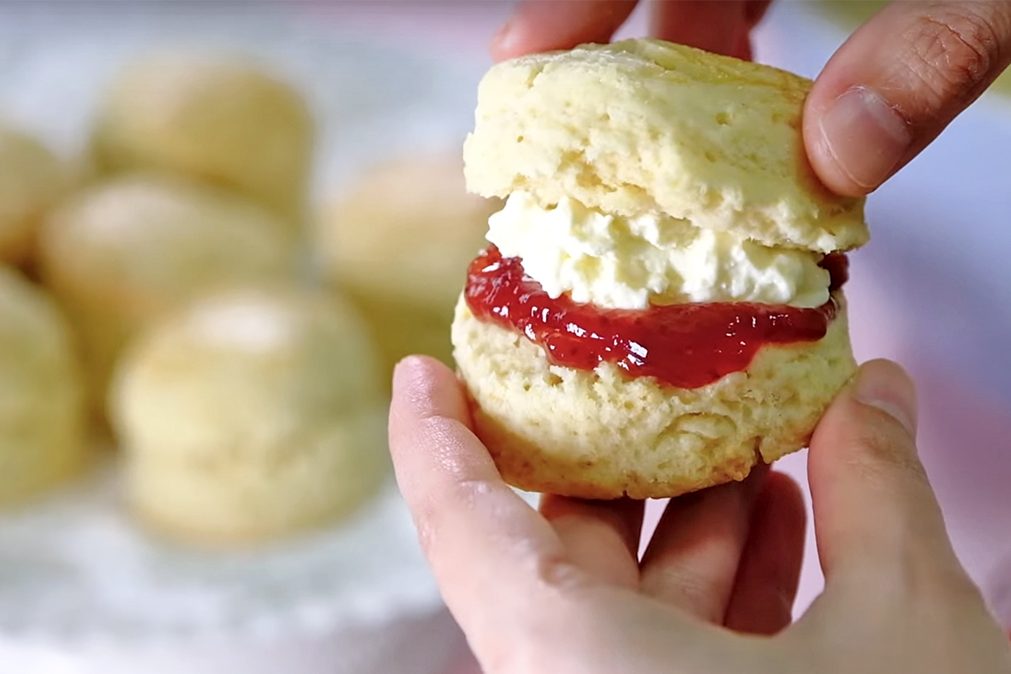
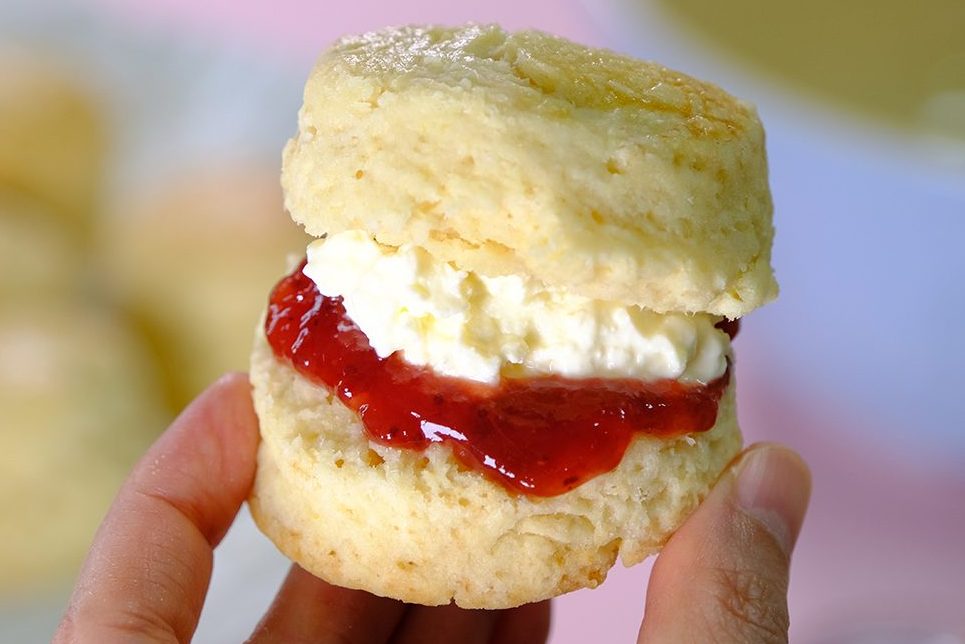
Can you see those layers?? 🧐
A little crisp to the edges and top 🥲🥲

Making Scones requires a VERY light touch.

Only use the tips of your fingers to rub in the butter into the flour, lightly lifting and dropping the mixture.

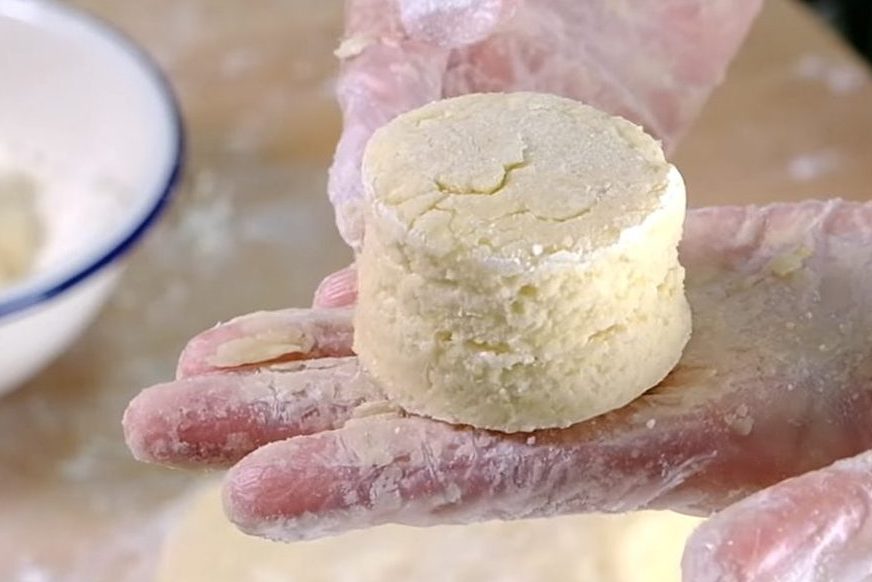
Scones Dough before baking

The trick is to use light pressure and only work the dough until it just comes together.

One common mistakes that causes Scones to be dry and tough is being too heavy-handed with the dough.

When you overwork the dough, your Scones can come out tough and chewy, rather than that desired light and crumbly texture.

If scones aren’t part of your baking repertoire, I suggest you give them a try.

Look at those flaky texture 🤗

They come together quicker than almost any other baked good and taste absolutely delicious 🤤

Messy and crumbly is a good thing! 🤩

Scones are best served warm, with Clotted Cream and Strawbery Jam of course; And not forgetting a pot of good Earl Grey Tea.

Choose your favourite Strawberry Jam 😍

If you cannot get Clotted Cream, you can try Crème Fraîche or Unsalted Butter; it goes quite well with Strawberry Jam.

And what is the proper way to eat a scone? Jam first or Cream first?
Lots of people are debating this 🤭

The Cornish tradition is to cut the scone in half, so you have two flat rounds;
On each side, Jam is spread first and then the cream on top.
The Jam being spread first is what makes it the ‘Cornish way‘

I personally prefer the Royal Way
I would put Jam on first, with cream on top and then sandwich them together so it’s not overly sweet 😚

😱😱😱 ……can’t wait to eat them!!!

But ultimately, You can do what you want! 🤣😂
The scones will still be tasty 😍

I will eat my Scones like The Queen… 👸🏻 …. shy…. 😌☺️

Take a small bite and enjoy the happiness brought by the Scones … 🥰

Look at those beautiful texture … 🤪

Kindly follow all the tips and instructions in this recipe, I’m sure you’ll end up with tender, flaky Scones that will literally melt in your mouth.

😊 😍 HAPPY BAKING !!!

WATCH HOW TO MAKE “FLUFFY FLAKY BRITISH SCONES”

The Key to Perfect Scones (Please Read First) :

PREPARE A LARGE MIXING BOWL
Prepare a large bowl for making scones. You will need some space for the mixing process; this provides plenty of room to spread the butter and mix the dough easily.

USE COLD BUTTER STRAIGHT FROM THE FRIDGE
Make sure that the butter is extremely cold.
Cold butter promotes the flakiness, high-rise and fluffy scones.
I usually take the butter out of the fridge and cut it into large cubes right before I’m ready to mix the dough.
Don’t cut it too small or even grate it. That will make the butter melt faster and you’ll have trouble with a sticky dough.
If you keep the butter in larger pieces, you get flakiness.
Once it hits the oven, the dough around the butter starts to set, the butter melts, and steam from the water content puffs the layers apart.

COLD BUTTERMILK FOR TENDER SCONES
For the liquid, most recipes calls for Whipped Cream or Milk.
However, when the Scones are served with Clotted Cream or Butter and Jam, I found this combination way too rich and not tasty.
I prefer to use homemade Buttermilk for the Scones which is the key to softness and lightness.
Buttermilk makes the scones very tender, has a better crumb and provides a slightly tangy taste
To make it: simply mix regular cold milk with some lemon juice or white vinegar, then let the mixture sit for 5 minutes to curdle and thicken slightly before using.

SIFTING ALL THE DRY INGREDIENTS
Don’t skip this step, it helps to build a light texture

INCLUDE BAKING SODA TO THE RECIPE
Since we are using Buttermilk, Baking Soda is added to this recipe.
The acid in the Buttermilk reacts with the Baking Soda and produces Carbon Dioxide which helps the Scones rise.

DON’T OVERWORKED THE BUTTER
When you mix the Butter with the Dry Ingredients, don’t pinch or overworked the butter into too tiny pieces or you will end up with Scones that are soft but not flaky.

USE A FORK TO WHEN ADDING THE LIQUID
By using a fork, the liquid (Buttermilk) will evenly distribute without overmixing the dough.

A ROUGH PASTRY-STYLE FOR EXTRA FLAKINESS
For extra flakiness, do a “Rough Puff Pastry-Style” flattening and folding the dough.
Fold three to four times, Building in those layers.
DO NOT kneading or stretching the dough, we don’t want to develop gluten and have a very tough Scones.

SHAPE THE DOUGH INTO A THICK DISC
The thickness of your Scone dough is all important.
Before you cut, Shape the dough into a thick disc about 3-4 cm thick

DO NOT TWIST THE CUTTER
Remember when you cut it, don’t twist the cutter or the Scones will be lopsided (it won’t look pretty 😒)

COLLECT AND PRESS THE SCRAPES
After you cut the dough, you will have those little scraps.
DO NOT knead it!
What you can do is collect and press it together; stand the dough up and press again.
Press until it is 3 cm thick and then you can cut again.

APPLY SOME EGGWASH
To give the top of the Scones a bit of shine, apply some egg wash.
Avoid the sides and bottom because they will affect the rise.
This will give your Scones a nice golden brown finished.

BAKE WITH IDEAL TEMPERATURE AND TIME
Use 15 minutes of a Scones in oven as a good rule, you can’t foget about it! 🤖

Recipe

FLUFFY FLAKY BRITISH SCONES
Yield: 9 Scones (Diameter 5 cm, 3 cm Tall)

🍰 Ingredients
115 g Cold Unsalted Butter
150 g Cold Milk + 2 tsp Vinegar (to make Homemade Buttermilk)
335 g All-Purpose Flour
50 g Caster Sugar
1 ⅓ tsp Double-Acting Baking Powder
1/3 tsp Baking Soda
1/3 tsp Salt
Zest from 1 Lemon
(1 Egg for egg wash~beat the eggs)

🍰 Instructions
Preparation

  1. Prepare a large bowl for making scones.
  2. Right before you are ready to mix the dough, take the butter out of the fridge and cut it into large cubes.
    Don’t cut it too small or even grate it; that will make the butter melt faster and you’ll have trouble with a sticky dough.
  3. Prepare Homemade Buttermilk
    Simply mix regular Cold Milk with Lemon Juice or White Vinegar; let the mixture sit for 5 minutes to curdle and thicken slightly before using.

To Make Scones Dough (Kindly watch the video for completed instructions)

  1. Sift All the dry ingredients (All Purpose Flour, Caster Sugar, Baking Powder, Baking Soda, Salt).
  2. Add grated Lemon Zest; mix well.
  3. Add Unsalted Butter in Cubes to the dry ingredients.
    Then, to incorporate the butter:
    – FIRST STEP
    Coat the butter with the flour,
    Using your fingers pinching and squishing the pieces of butter (broke down the butter into smaller pieces).
    Don’t pinch or overworked the butter into too tiny pieces or you will end up with scones that are soft but not flaky.
    – SECOND STEP
    Take a handful of the dough with the bits of butter and flatten it between your palms
    (this thin sheets of butter that’s once it enters the oven, it melts and releases steam, which leads to that magical texture) 
    When you feel between your hands all the butter pieces are flattened, you can start adding the liquid
  4. Slowly pour in the Buttermilk.
    Stir gently with a fork (by using a fork, the liquid will evenly distribute without overmixing the dough).
  5. Once you see the dough comes together, you can stop mixing it (if there are a few dry crumbs left, that’s okay).
  6. Dust your work surface with some flour (not too much) and transfer the dough over.
  7. Gather and press the dough together into a large ball, gather up any small crumbs (you can flour your hands lightly).
  8. Then using a large scraper; do a rough Puff Pastry-Style flattening and folding the dough.
    Fold three to four times, building in those layers (DO NOT kneading or stretching the dough; because we don’t want to develop gluten and have a very tough Scones).
    * If you like to add some dried fruit, nuts or maybe fresh fruit, you can add while you building this layers.
  9. Once it’s done, shape the dough into a thick disc about 3 cm thick
  10. Cut into rounds with a 5 cm diameter floured round cutter (remember when you cut it, don’t twist the cutter or the scones will be lopsided). Place them on a parchment-lined baking tray.
    * Feel free to vary the cutter size a little bit, as long as the thickness is the same, it will bake at the same speed
  11. After you cut the dough, now you have those little scraps. DO NOT knead these scraps.
    What you can do is collect and press it together; then stand the dough up and press again
    until it is 3 cm thick; And then you can cut again.
    * Do the same with the remaining dough (if there is only a little dough left, just shape it into a round with your hands.
  12. To give the top of the Scones a bit of shine; using small brush apply some Egg Wash.
    Avoid the sides and bottom because they will affect the rise (this will give your Scones a nice golden brown finished).
  13. Bake them in the preheated 200°C fan/ 220°C/ gas mark 7 for 15 minutes.
  14. Once it’s done, you can serve them immediately (Scones are best enjoyed when still warm) or let them cool completely on a cooling rack before storing.

Notes

  1. Scones are best enjoyed when fresh while still warm, but with proper storage they can extend their delight beyond the baking day while keeping safe to eat.
  2. Storage Method Room temperature 1-2 days in a covered container away from heat and sunlight
  3. Refrigerator Up to 3 days in an airtight container with a paper towel lining
  4. Freezer Up to 1 months in a freezer bag or tightly wrapped in an airtight container
  5. To preheat: In the preheated 180°C oven for 5-10 minutes or Microwave on high 10-20 seconds; They should be as good as freshly baked 😄.

Traditional Chinese Dumpling 饺子 (Gyoza) from Scratch

“We’ve eaten a lot of dumplings in restaurant but somehow, we always come back to these recipe“

These are little pockets of light, joy and deliciousness; My little nephew can literally devour them by the plateful. 🥲😄 Maybe… this is the dumpling recipe that you need.“

The original Chinese dumplings are called Jiaozi (饺子) (also known as Gyoza in Japanese Language).

These dumplings consist of ground meat and vegetable filling that are wrapped into a thinly rolled piece of dough, which is then sealed by pressing the edges together.

I remember sitting in my Mom’s kitchen, learning to fold these.
My fingers clumsily stumbling over everything, getting the wrappers way too wet, putting in too much filling 🤣
And after a couple times trial and error, I manage to learn it and never imagined that I could sold them quite well  😂

Chinese dumplings (Jiaozi) may be divided into various types depending on how they are cooked.

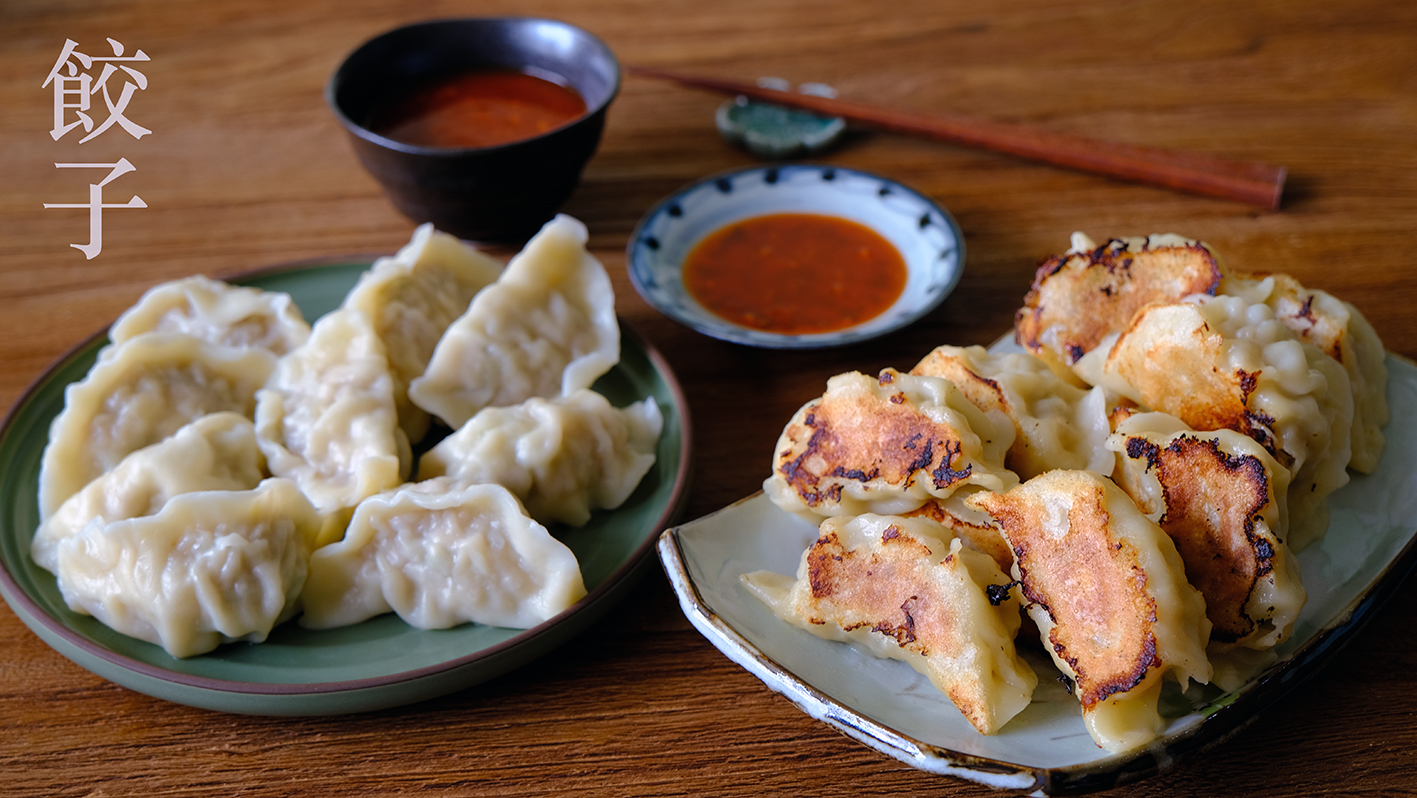
  • Boiled or Water dumplings called 水饺 (shuǐjiǎo)
  • Steamed dumplings called 蒸饺 (zhēngjiǎo)

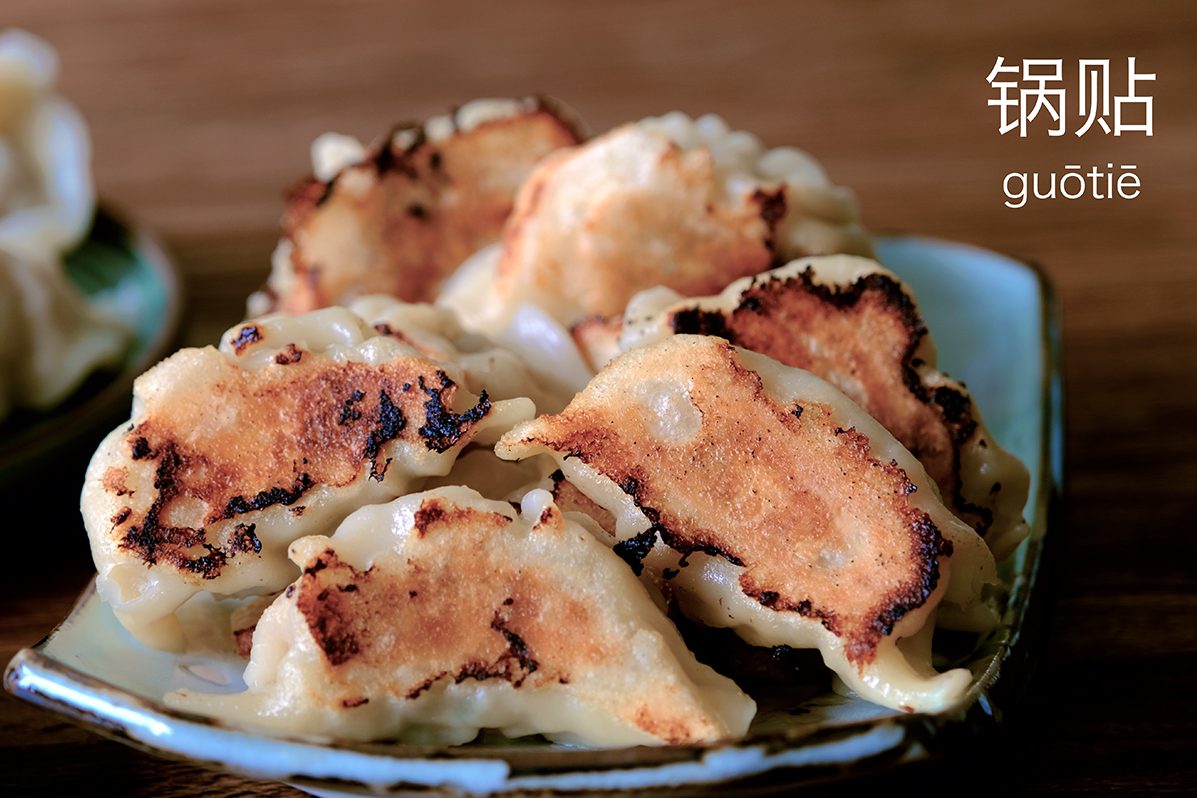
  • Pan-fried or Pan-Stick dumplings called 煎饺 (jiānjiǎo) or 锅贴 (guōtiē); also referred to as “Pot-Stickers”
  • Deep-fried dumplings called 炸饺 (zhà jiǎo)
  • Soup dumplings called 汤饺 (tāngjiǎo)

So what is the japanese version like?

The method of cooking Gyoza actually almost similar to Pan-Fried Method.
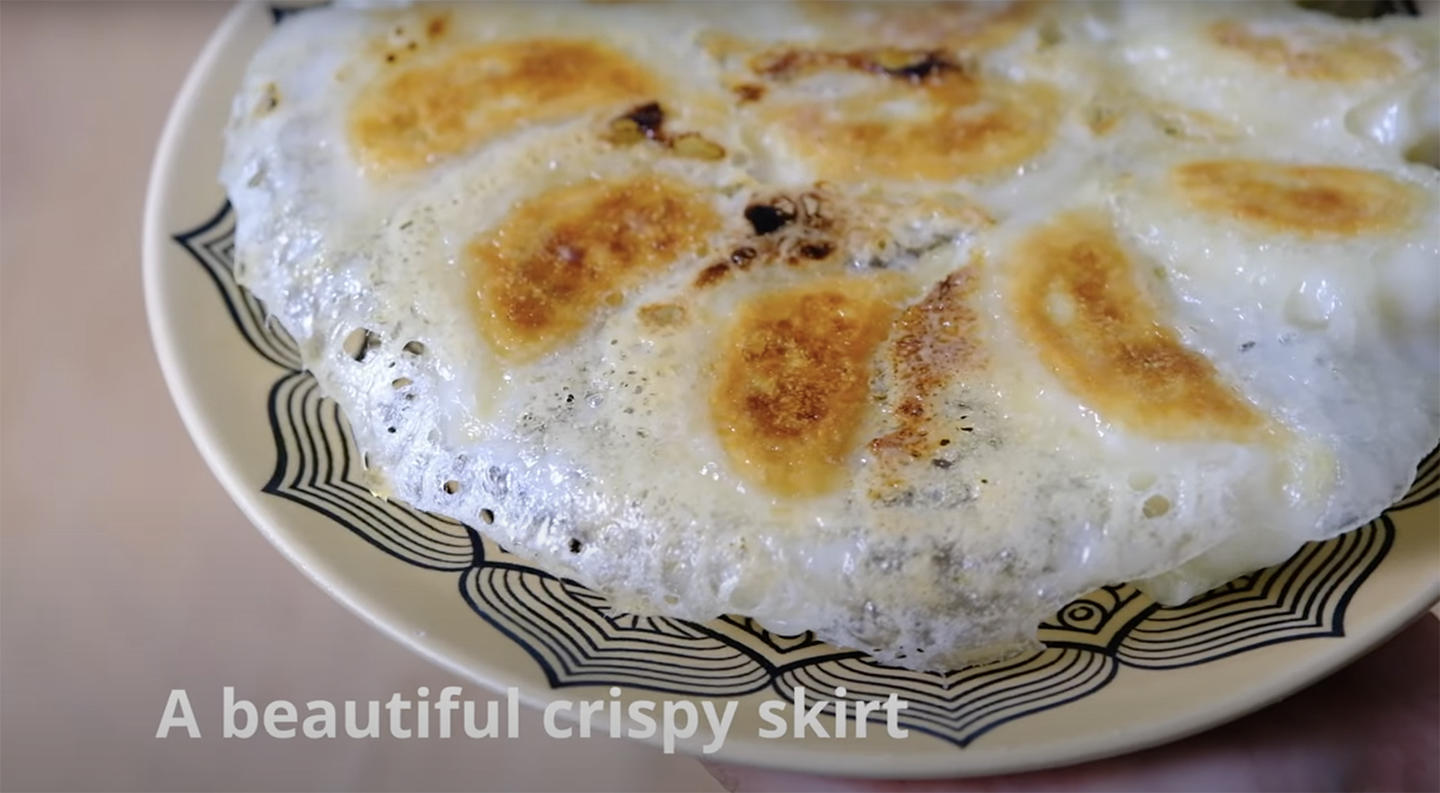
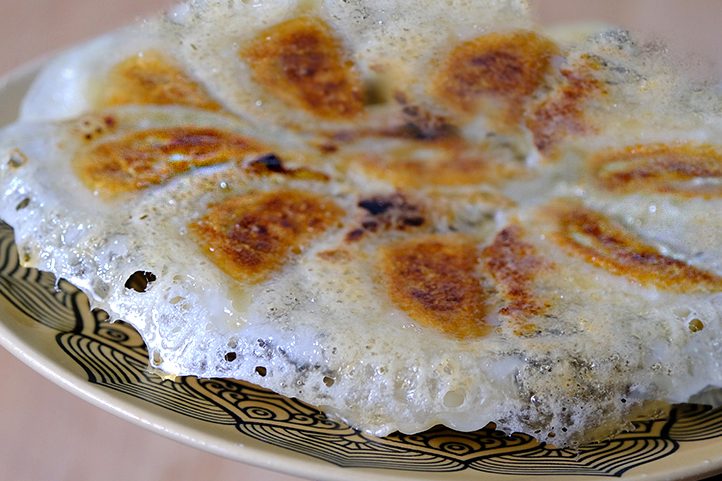
The difference is that Gyoza has a “golden skirt” surrounding the fried dumplings, gluing all the dumplings together.

Gyoza with “skirt”

They are first fried in a hot pan until crispy brown on the bottom sides, then starch mixture is added before the pan is covered to quickly steam the entire dumplings.

The skirt of Gyoza itself is made with flour or starch mixed with water

This technique gives Gyoza the best mix of textures, where you get crispy bottoms and tender soft tops that encase the juicy filling inside

This recipe produce 65-70 pieces.
I will guide you step by step on how to make it and also show you 3 methods for cooking the dumplings; Pan Fried, Boiled and Gyoza style.
Different method will produce slightly different texture but all of them are appetizing.


Dumplings are so handy to have, I really encourage you to make a big batch if time permits. 
I hope this recipe provides all the information you need for a successful outcome (CLICK this link and  follow instructions in the video for more details)
🥟 Love you All

Let’s Talk about Dumpling Fillings

  • Pork –While the original Chinese dumplings use ground beef, pork, lamb, chicken, fish, and shrimp for fillings; classic Gyoza usually consists of ground pork.
    I prefer mixing pork and shrimp to develop and add a deeper umami flavour to the overall filling.
  • Cabbage –Chinese dumpling use Napa cabbage, but regular cabbage is commonly used for Gyoza.
    As cabbage leaves are thick and hard, we use different ways to make the cabbage leaves wilted. I’m prefer to sprinkle salt to dehydrate the cabbage and squeeze the water out before mixing with meat.
  • Chinese Chives –Some people adds Chinese chives to their dumpling, but I usually skip the chives as my family don’t like its strong taste.
    Instead, I add more green onions to the filling.
  • Aromatics –Garlic is commonly used in dumpling.
    My mom always adds grated ginger and Coriander leaves too, so I do the same for my recipe.
  • Seasonings – The seasonings are simple, with just Fish Sauce, Light Soy Sauce, Sugar and a pinch of Salt and Pepper.
    This way you can just enjoy the flavour and freshness of the main ingredients.
  • Binder – A bit of Sago or Tapioca Starch will make the insides of your dumplings super tender. It’s the secret to juicy, tender dumplings!
    When you mix the water & starch and mix everything, it will come together into a homogenous paste, that’s what you want!
  • Vegetable and Sesame Oil – A little secret that can not only lock in the moisture of the vegetable fillings, but also enhance the aroma of the dumpling fillings.

Be Creative –  There is plenty of room for creativity when comes to making dumpling. Feel free to experiment with different ingredients or seasonal vegetables.
For example, you can add some shiitake mushrooms to the filling. I like the meaty texture and juicy umami flavour from shiitake mushrooms.


How to Make the Skin Dough

All-Purpose or Plain Flour works very well for dumpling skin or wrapper.
It’s possible to use bread flour, but you might find the cooked wrappers a little too chewy. 
You can also use a special dumpling bleached flour for a whiter results.
I personally don’t prefer to use it for a healthy reason.
You can make dumpling dough either by hand or in a stand mixer with a dough hook.

Simply combine 500 g All-Purpose Flour and 260 g Water
Once you don’t see any leftover dry flour you can stop mixing it (Don’t worry if the dough looks rough at this point)
Cover with a cling wrap and let it rest for 20 Minutes
(By letting the dough rest, gluten bonds will begin forming, the dough will start to smooth out and soften)
After 20 Minutes the dough become softer.
Knead it again for about 1-2 min until it’s form a smooth medium-firm dough
Then cover and leave to rest for a further 60 minutes (max. 2 hours) before shaping

How to Prepare the Filling

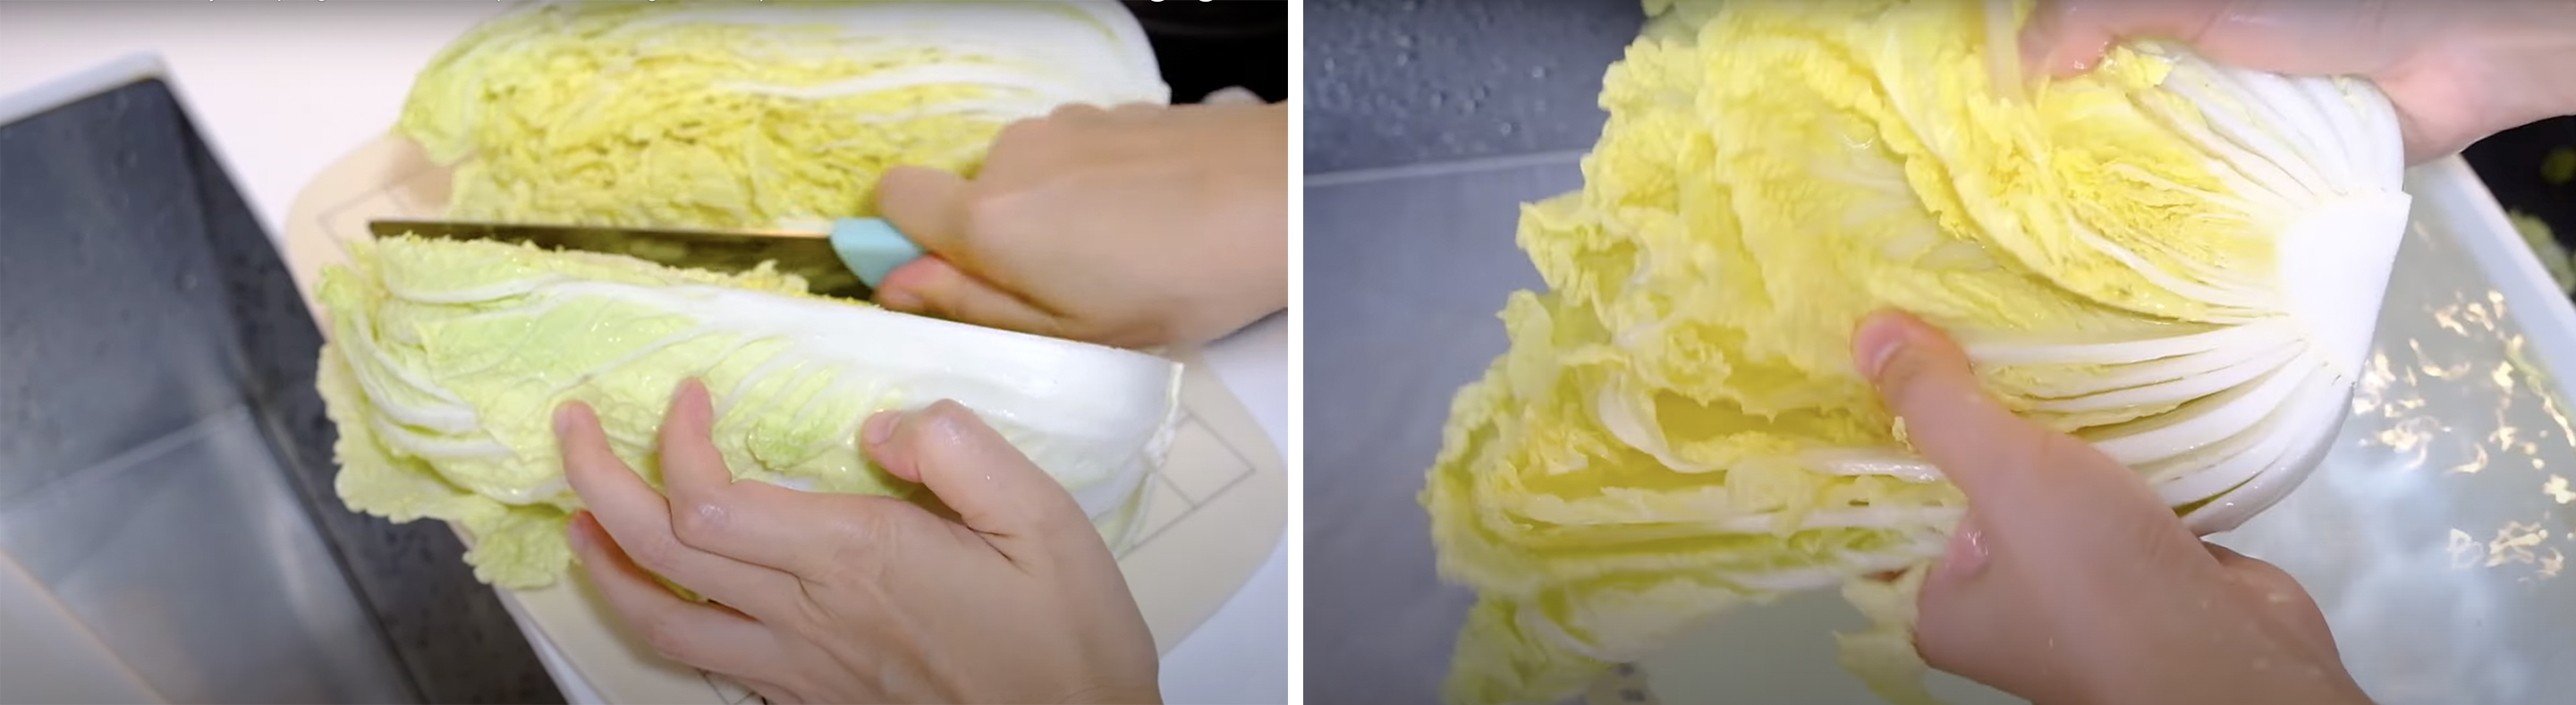
Cut 1 kg cabbage half lengthwise, rinse it under running water to remove any excess debris or dirt
Chop the cabbages lengthwise (1 cm wide);
Turn it over, and then chop as finely as possible (about 1 x 1 cm)
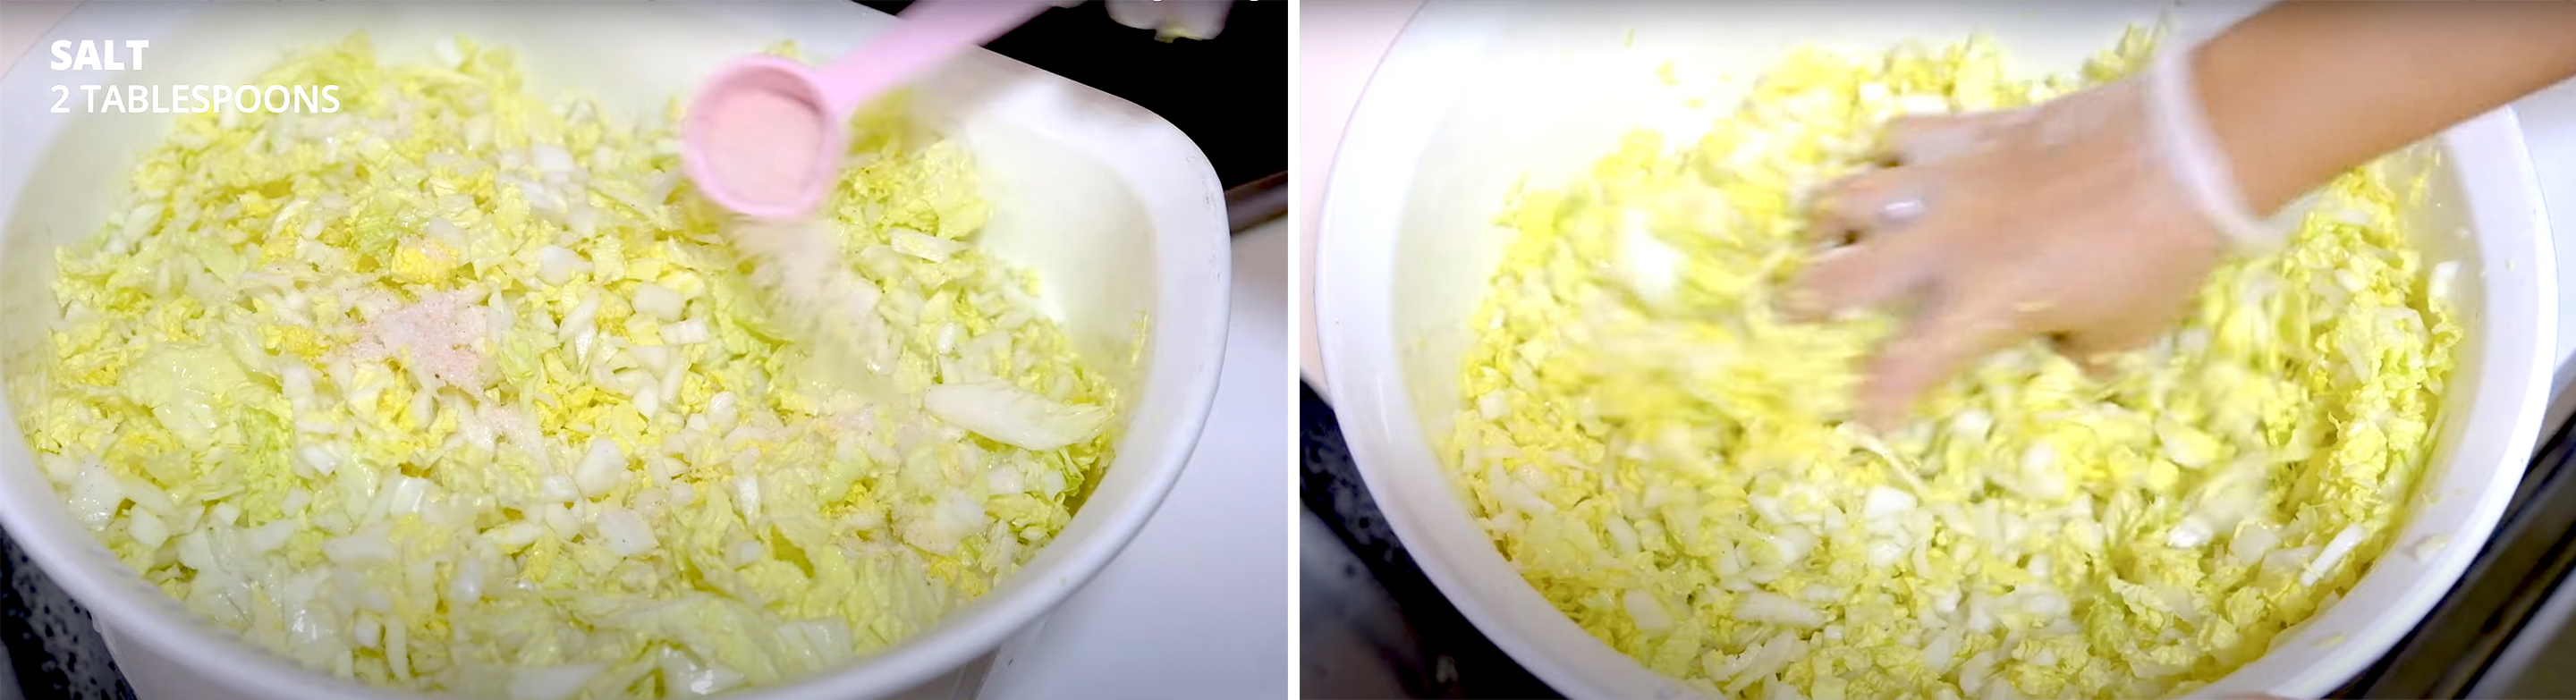
Place the chopped cabbages in a big bowl, scatter them with 2 tablespoons of salt; massage the salt through (the purpose of adding the salt is to draw the excess moisture out)
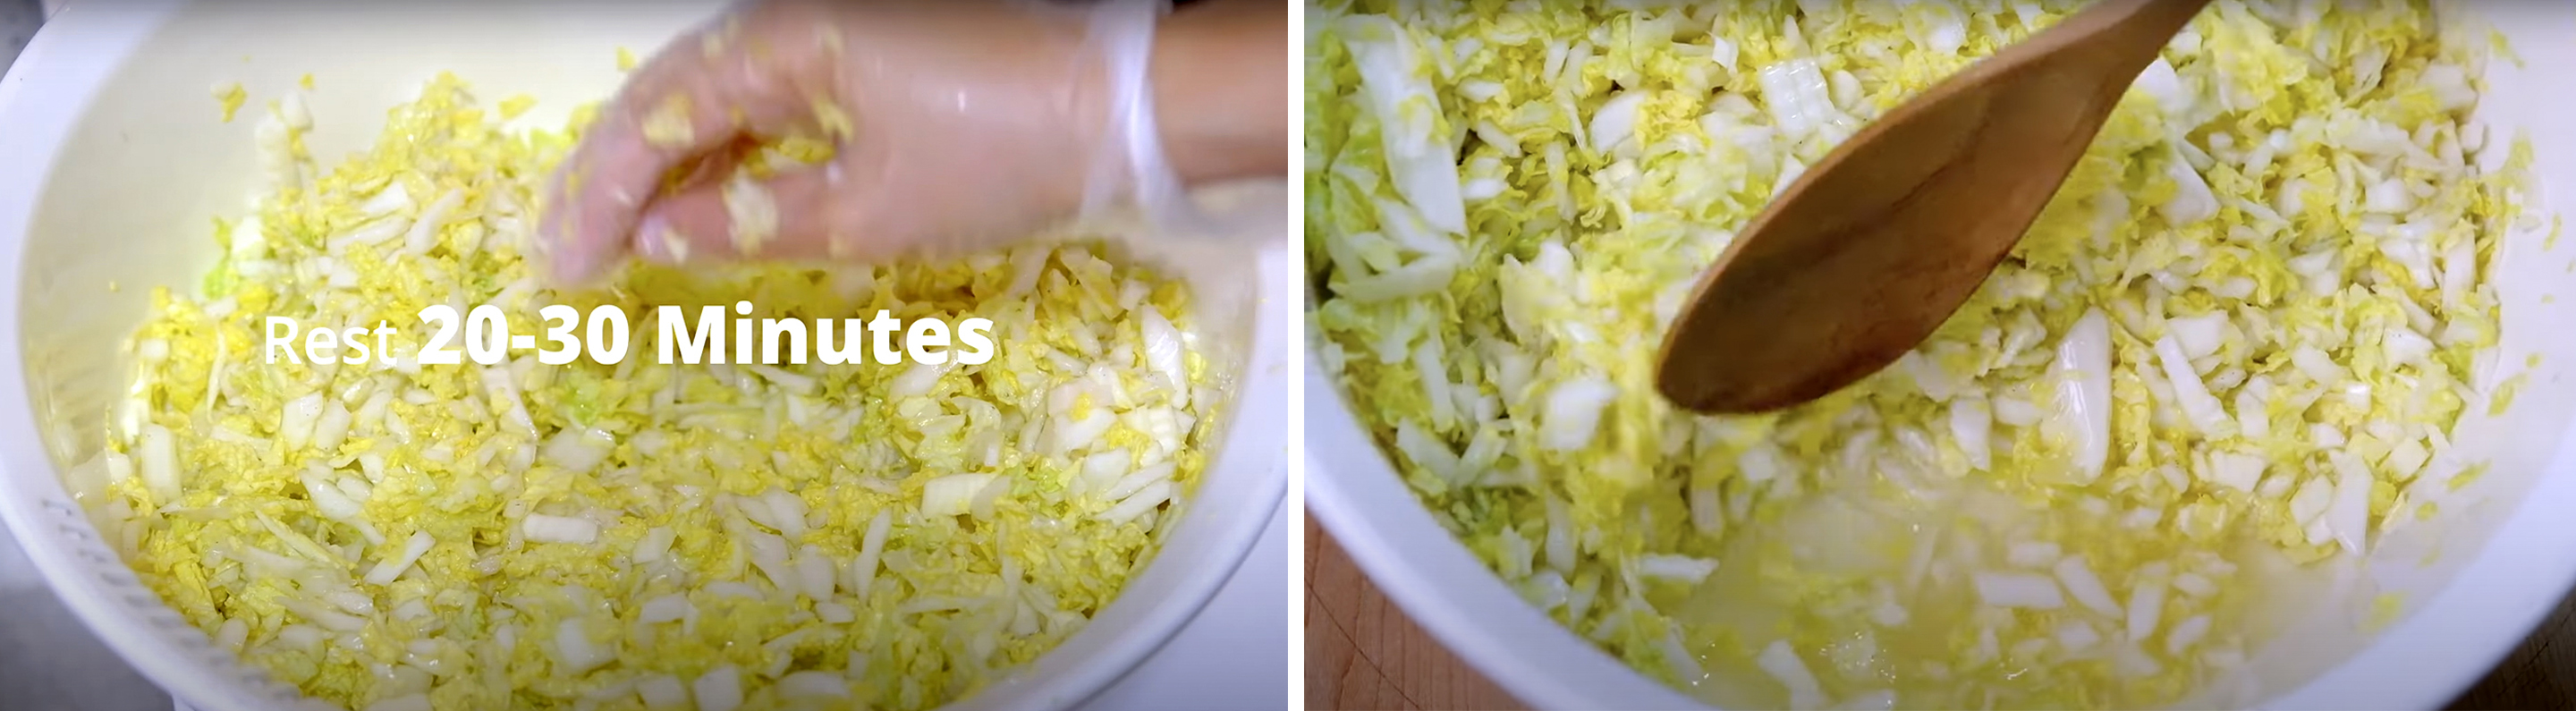
Once the salt is incorporated, let it sit for about 20-30 minutes
After 20 minutes, you can see a lot of liquid coming out of the cabbage
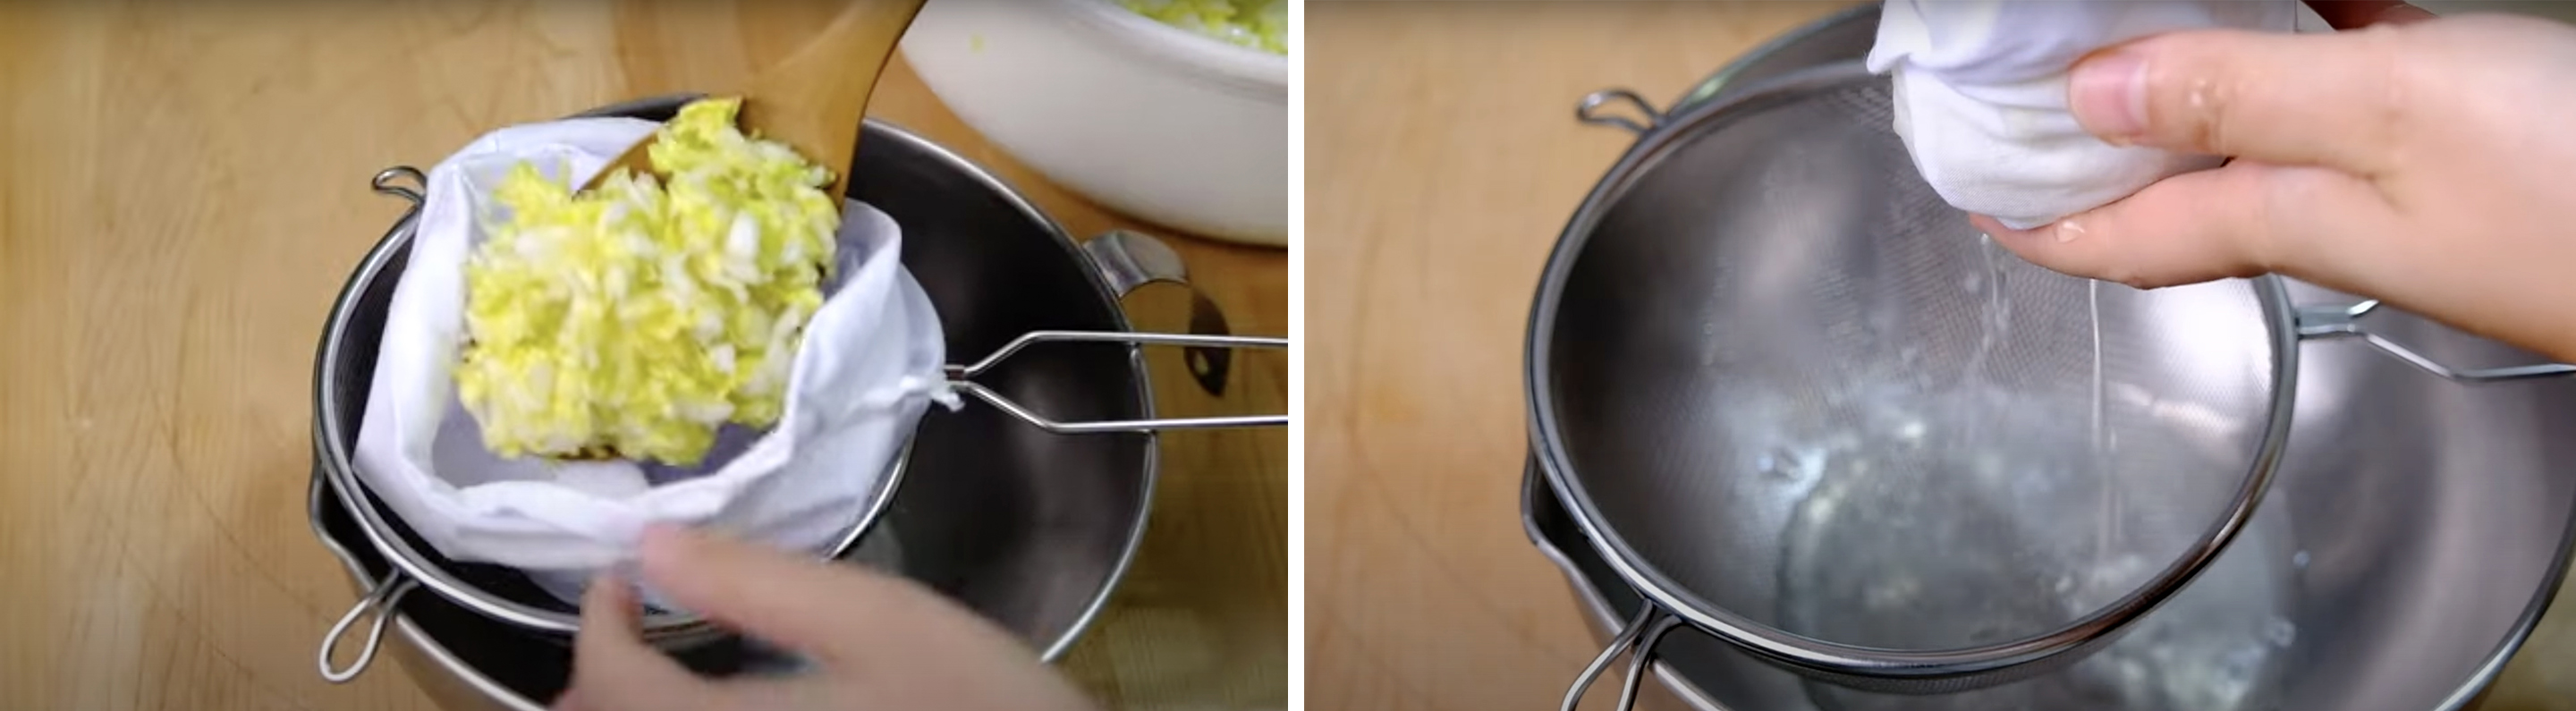
Use a muslin clothes of strainer, squeeze all the liquid ( I like to use muslin cloth because I can squeeze it all at once in large quantities)
Squeeze out all the liquid as much as you can (it’s a bit tiring, be patient 😚)
Set that aside…
Clean the 125 g Prawn (remove the head and the outer shell, legs and the tail). Using a kitchen scissor cut along the back of the prawn, discard the dark vein that runs under the surface.
For the Prawn Paste, blend 125 g Prawns, 1½ tbs Coriander Leaves, 1/2 tsp Ginger, 1½ tbs Green Onion, 1 tbs Garlic, 1 tbs Sesame Oil, 1/2 tbs Fish Sauce, 1/2 tbs Light Soy Sauce and 1/2 tbs Vegetable Oil in a food processor
Now, let’s combine all the filling ingredients
Mix 250 g Minced Pork (with fat), Blended Prawn Paste, 1/2 tbs Sago or Tapioca Starch, 1/2 tbs Salt, 2 tbs Sugar and 1/2 tsp White Pepper Powder
Mix it really well
Add in the Squeezed Cabbage, mix again until fully incorporated with the meat mixture
Your filling is ready! 😉

Roll and Shape the Dumpling Skin

Cut about 1/3 of the dough (make sure that you keep the rest wrapped up so it doesn’t dry out).
Roll the dough into a 2 cm diameter ropes; and then cut it into small equal pieces (about 1 cm wide). There’s no need to be perfect or exactly even.
Flatten each piece into a round disc with the palm of your hand (this basic shape will make it easier when you roll it).
And then roll them into thin wrappers with a rolling pin; I use a roll & turn technique which produces wrappers that are thinner on the edge but slightly thicker in the middles (perfect for dumpling folding). If the dough sticks to the work surface or the rolling pin, dust with a little flour.


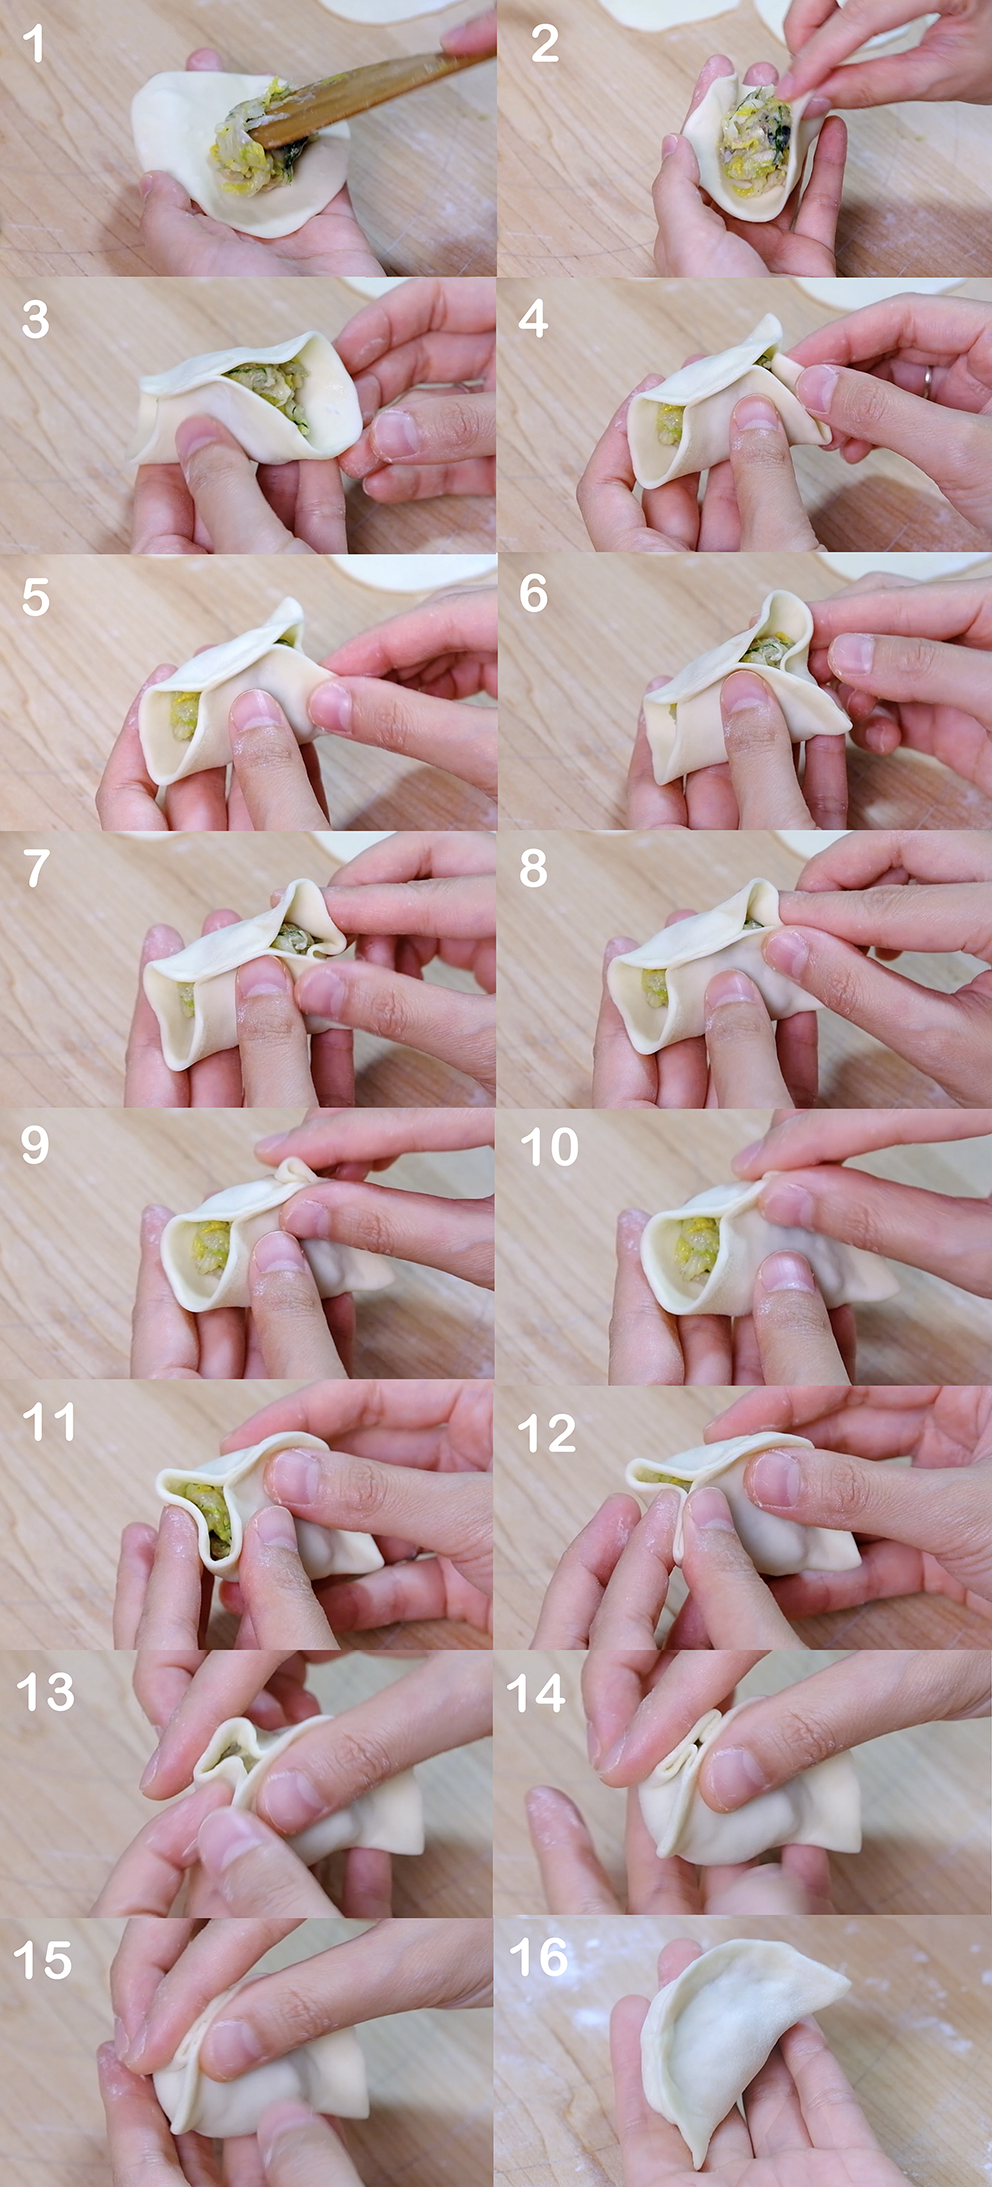
Dumpling Folding Techniques


If you planned to eat them fresh, just place the finished dumplings on a floured surface to keep them from sticking

But if you like to freeze the uncooked dumplings, place them on a container or baking sheet lined with Parchment Paper and a bit of flour (make sure non of the dumplings touch each other)
Wrap the container or baking sheet tightly, allow to freeze overnight
On the next day, they will be hard as rock.
Transfer them to Ziplog Bag and throw them back into freezer for use later (consume within 3 months)

Cooking Method

A thick heavy bottom NON-STICK pan with a lid is a perfect way to fry the dumplings.
This kind of pan is important to ensure the even distribution of the heat so that every dumpling can be cooked to a similar golden colour.
You can use regular pan, but you run the risk of the dumplings sticking to the bottom of the pan; you don’t want to ruin your hard work 😒

And for the Gyoza, whatever the size of your pan, make sure you’ve got a plate that fits on top of it;
Because you are going to turn out a Gyoza at the end, so if your plate is not the right size, you can end up with a bit of mess.
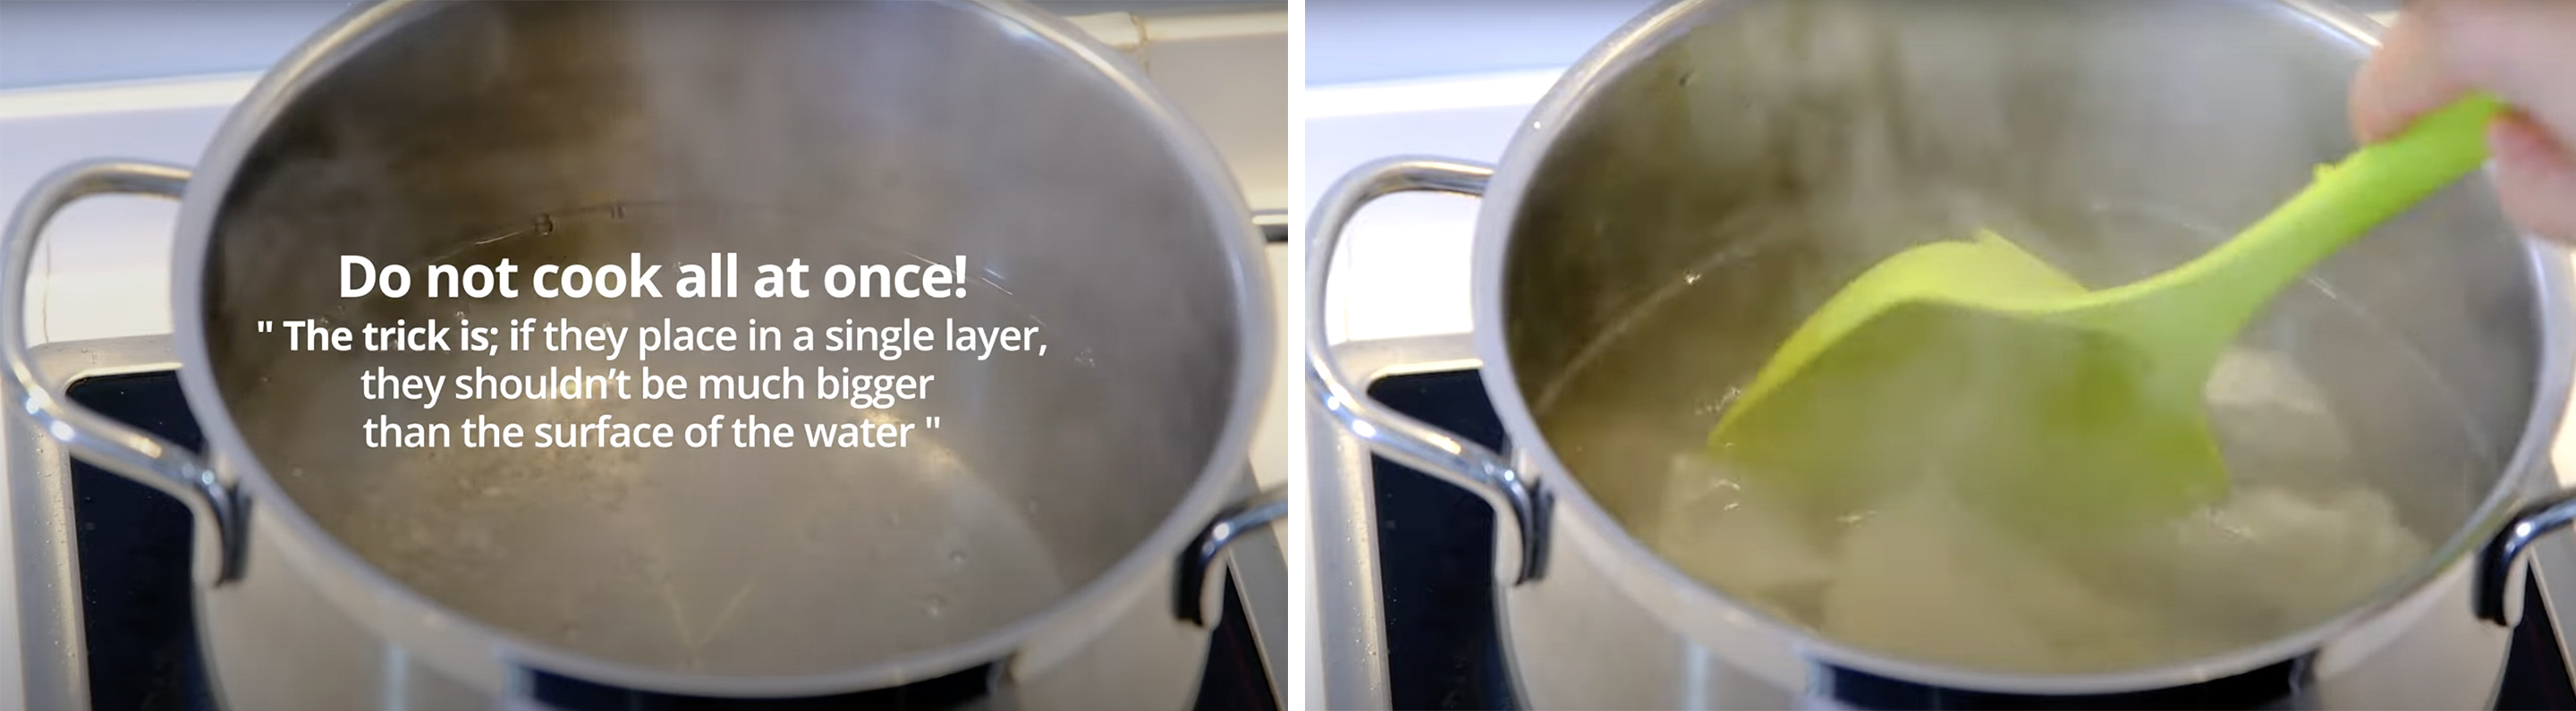
And make sure you use a deep pan and enough water to boil the dumplings 😉

No matter how you wish to cook them, frozen dumpling don’t need to be defrosted beforehand
Let’s start cooking!

PAN FRIED (Guo Tie) 锅贴

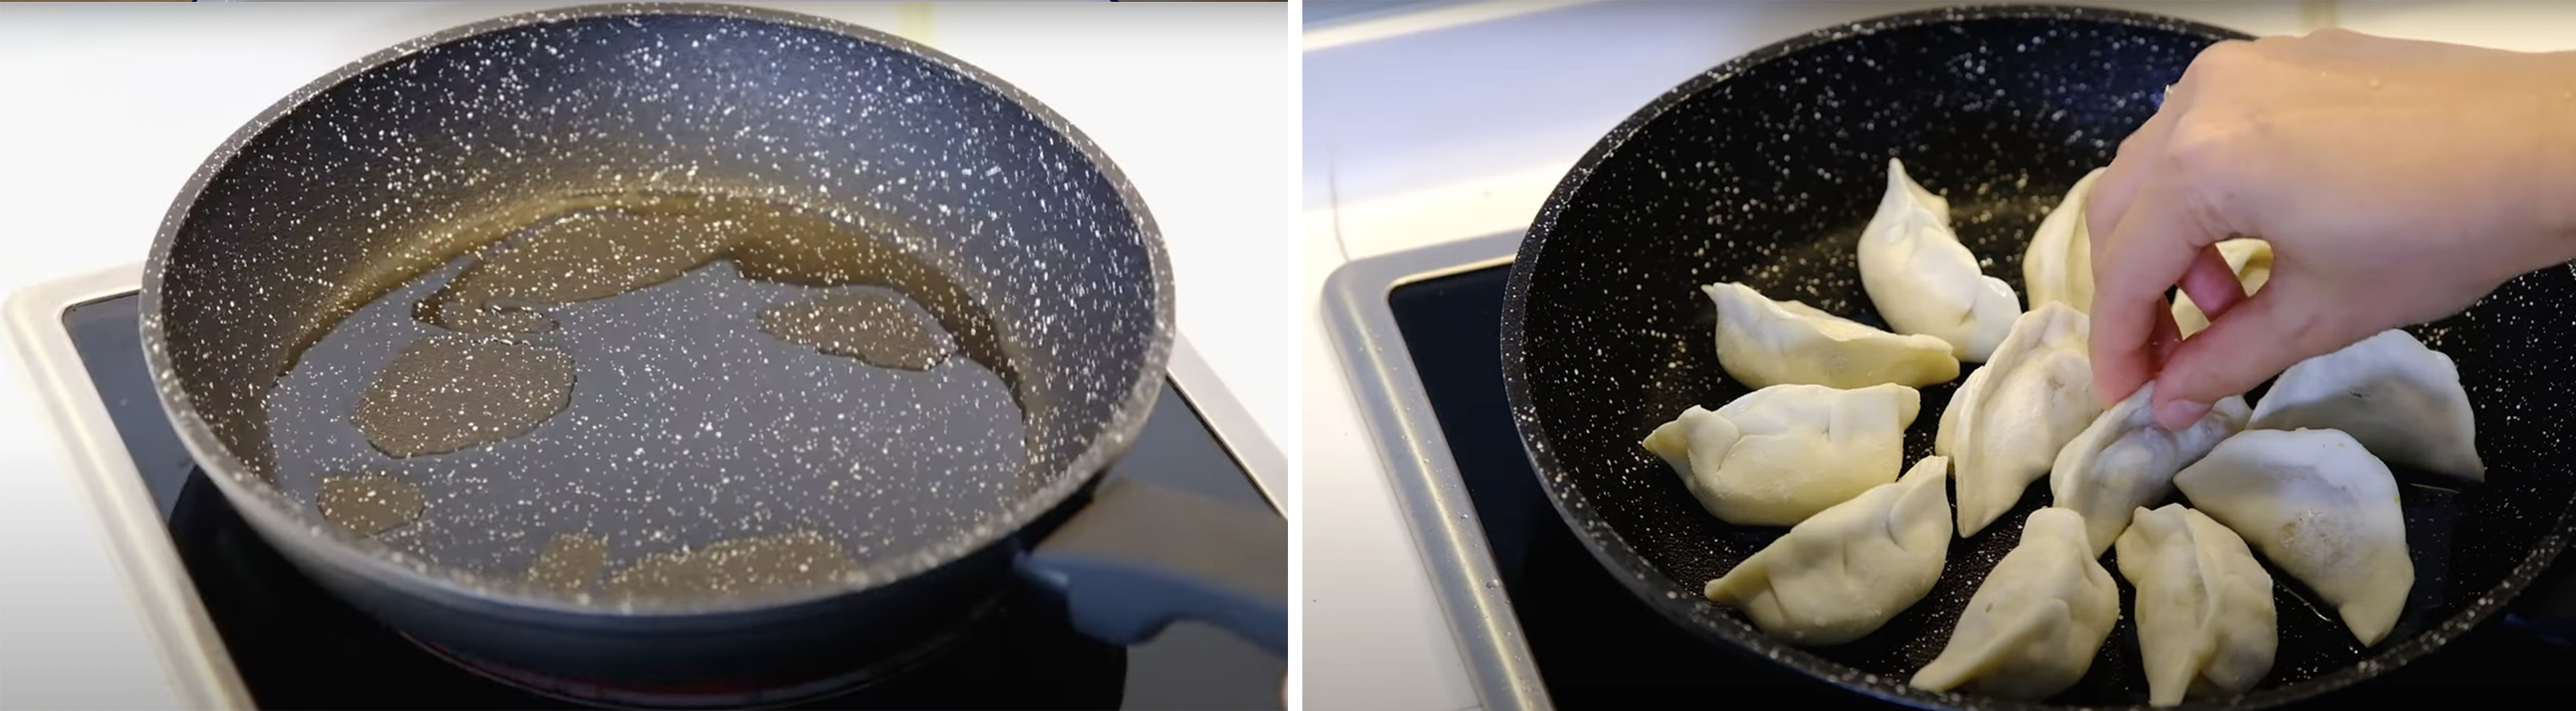
Heat the NON-STICK pan over MEDIUM HIGH heat, add about 2 tbs of Vegetable Oil
Place dumplings in a circular formation (make sure each bottom of the dumplings is in touch with the oil) leave a little bit of space between each one
Allow them to fry for a couple minutes
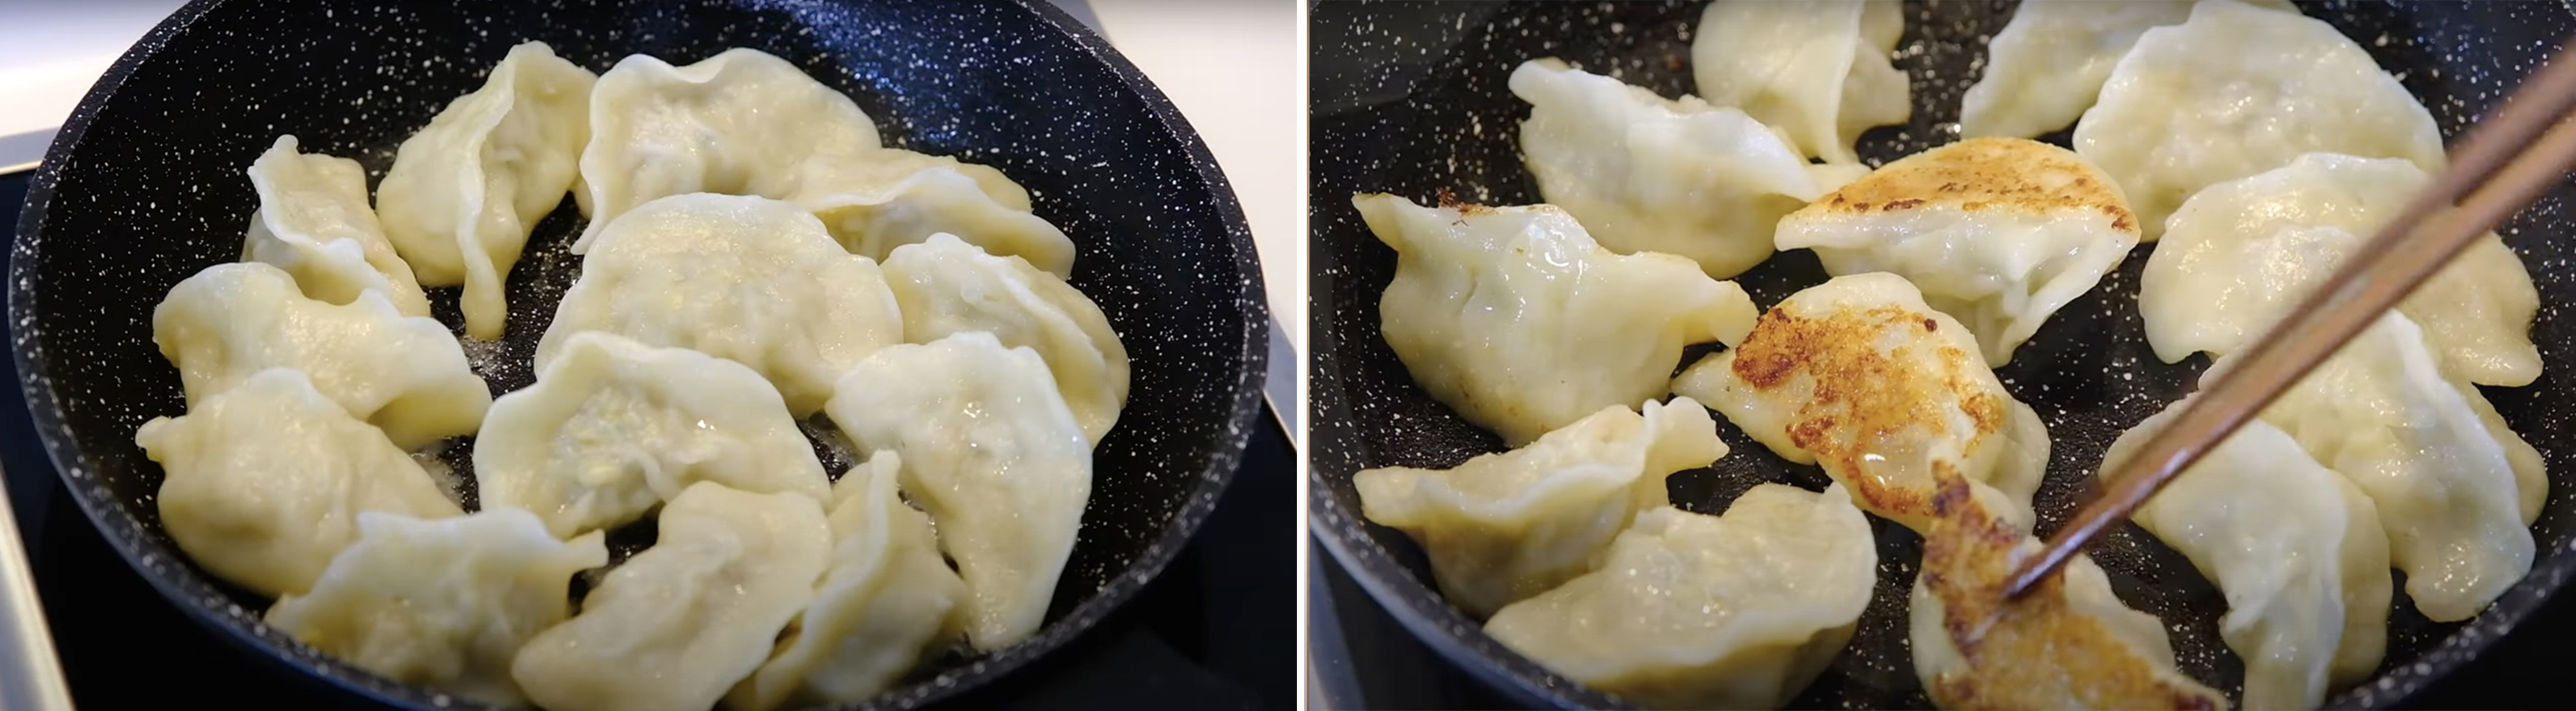
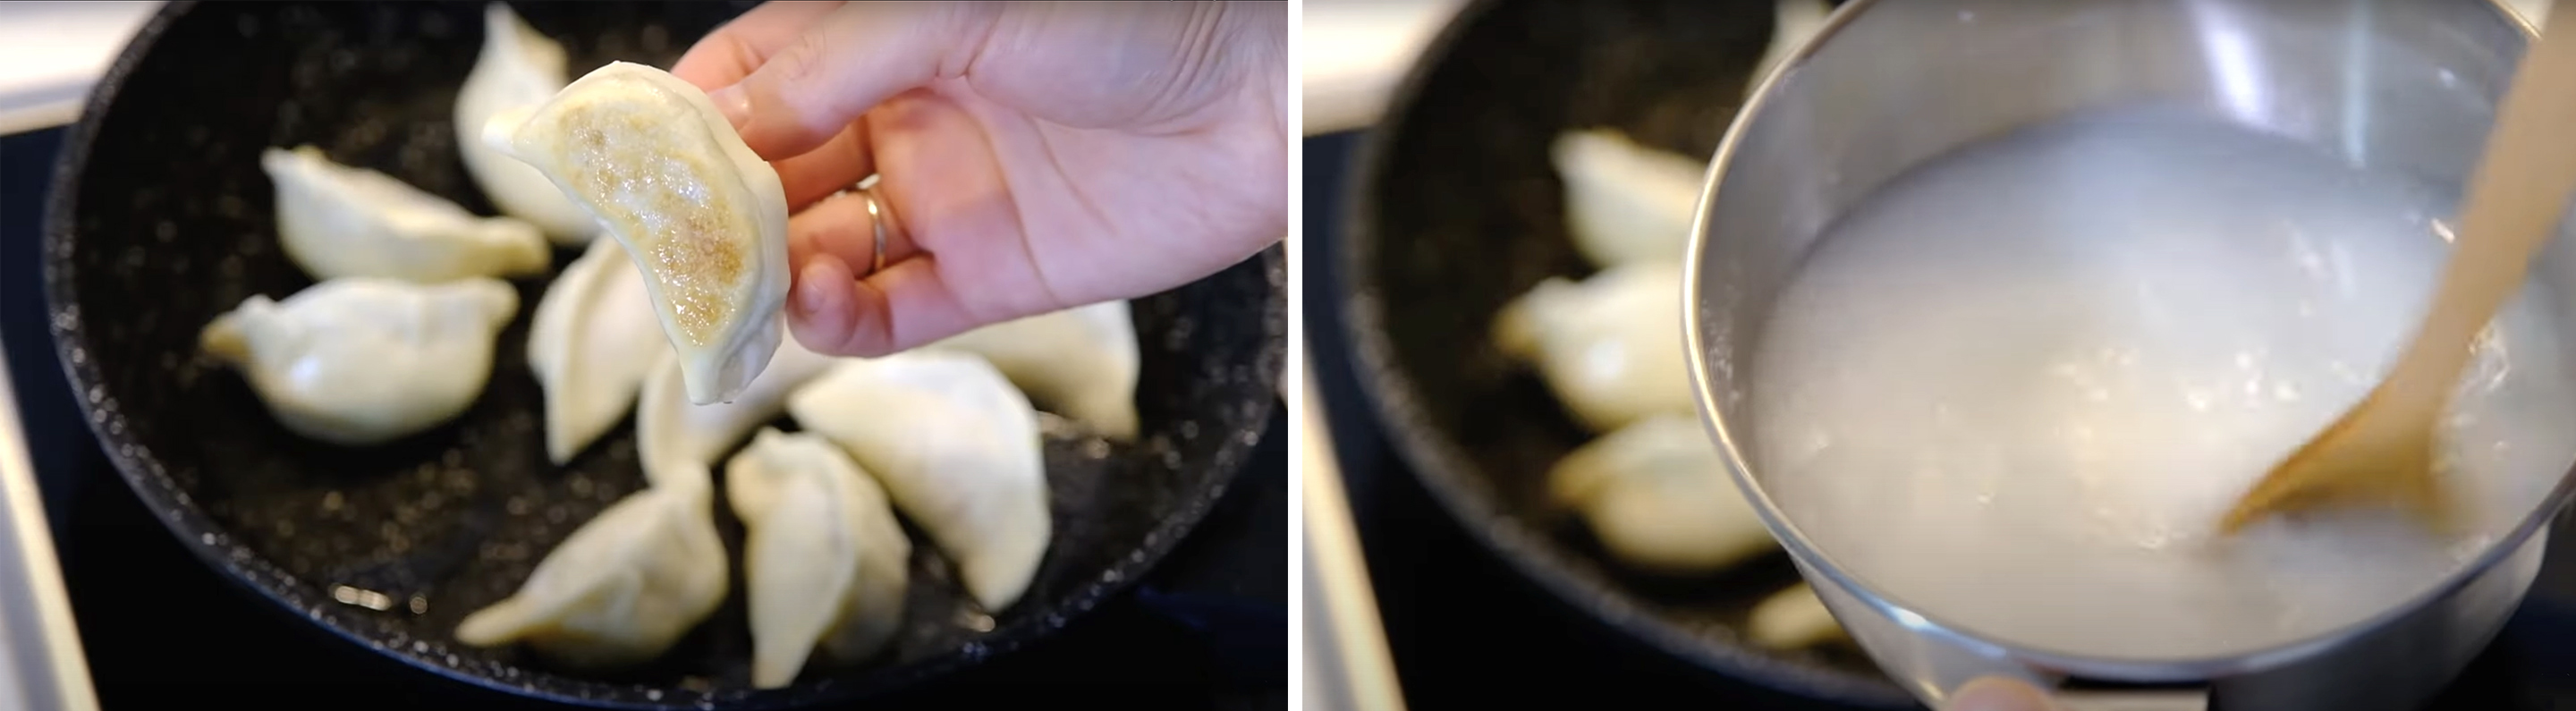
Check the bottom part of the dumplings
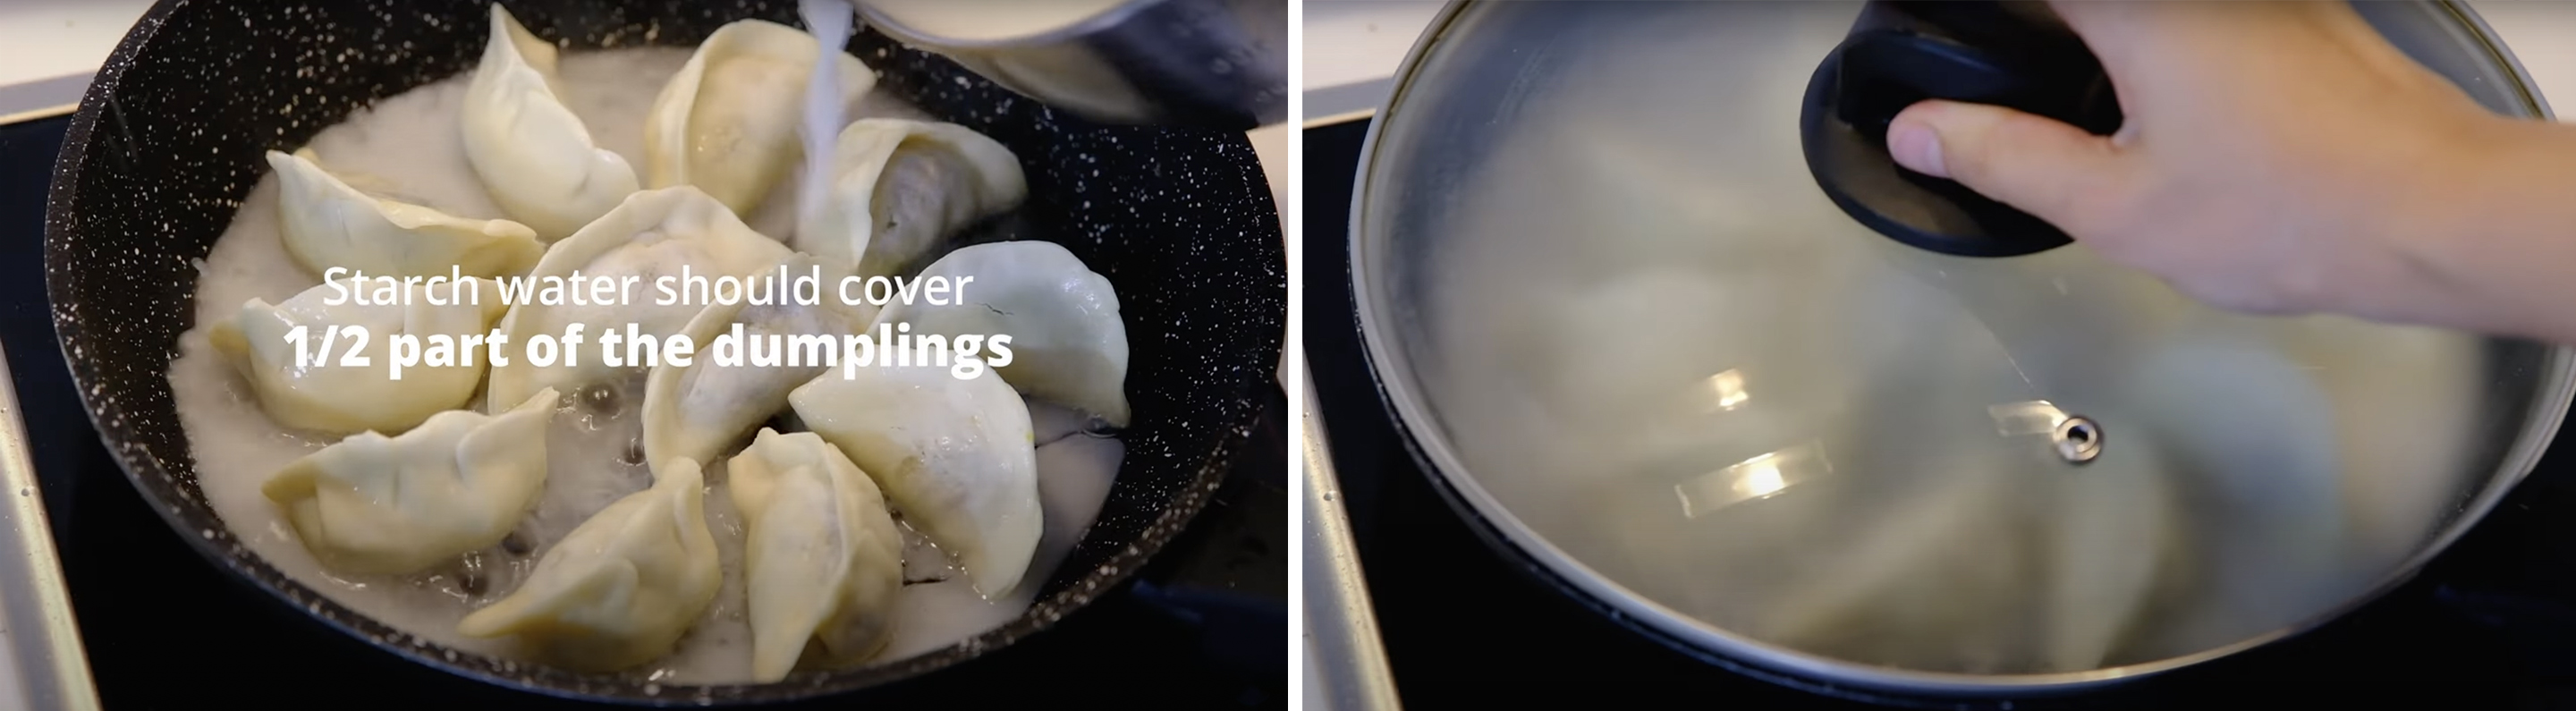
Once it turned light brown, pour in the Water (make sure it cover one half part of the dumplings)
Cover it with the lid and steam over HIGH heat for about 10 minutes
After 10 minutes, you can see that the water has reduce quite a lot (shake the pan to make sure there’s nothing sticking to the pan)
After 10 minutes open the lid, lower the heat to MEDIUM LOW and continue cook until the water is fully evaporated
Check the bottom part of the dumplings, when they are golden brown and crips, its done!
The filling is tender and juicy while the bottom are crispy 🥰


GYOZA 餃子

Prepare “Starch Mixture” in advance for the Gyoza “skirt”
Mix 300 g Water with 2 tbs Potato Strach (can be substitute it with Corn Starch/ Plain Flour/ Rice Flour)
Heat the NON-STICK pan over MEDIUM HIGH heat, add about 2 tbs of Vegetable Oil
Place dumplings in a circular formation (make sure each bottom of the dumplings is in touch with the oil) leave a little bit of space between each one
Allow them to fry for a couple minutes
Check the bottom part of the dumplings
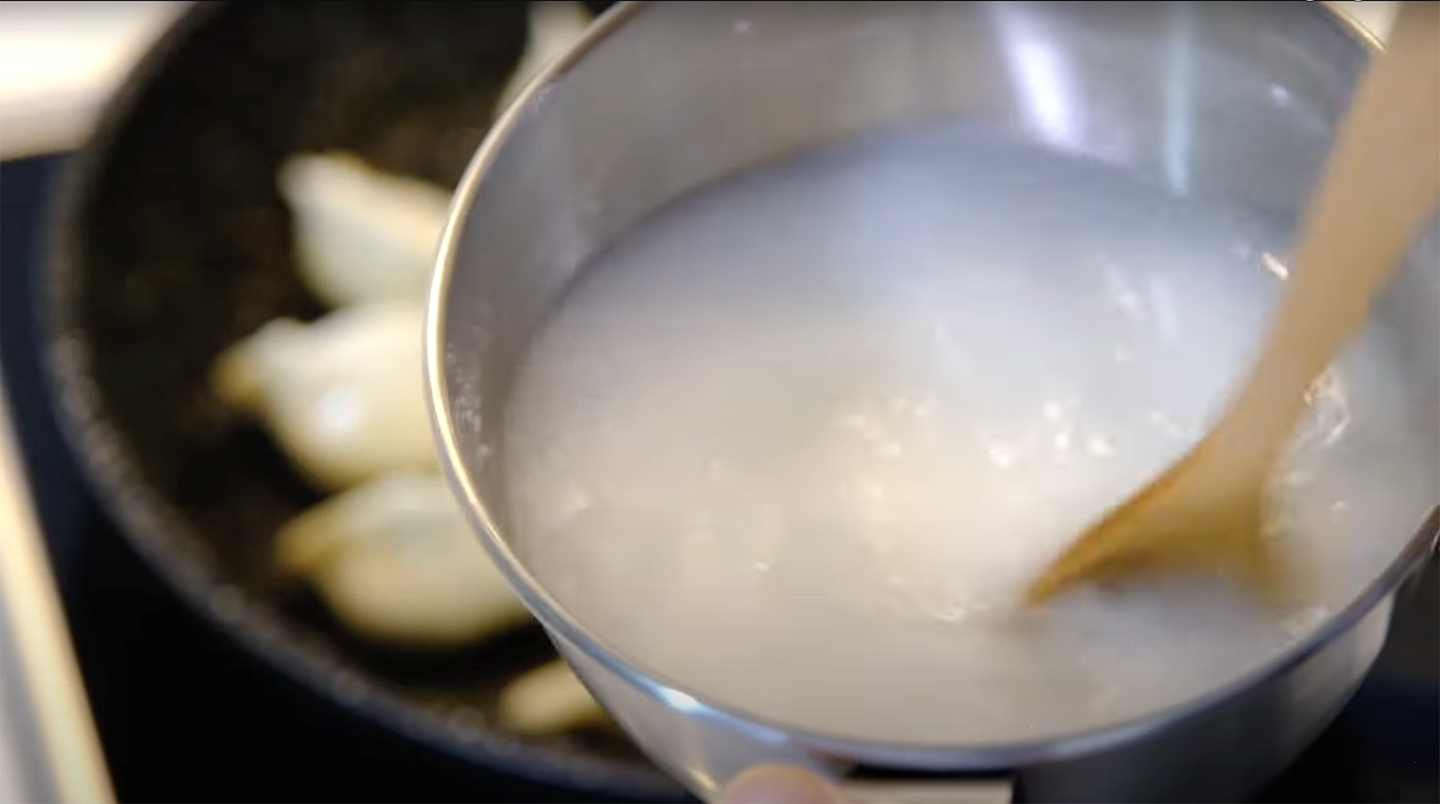
Once it turned light brown, pour in the Starch Mixture (don’t forget to stir the mixture before you pour it, to make sure that the starch is evenly distribute)
You don’t need to use all the starch mixture, just make sure it cover one half part of the dumplings (if you use bigger pan, you might need more starch mixture; kindly double the recipe as needed)
Cover it with the lid and steam over HIGH heat for about 10 minutes
After 10 minutes open the lid, lower the heat to MEDIUM LOW and continue cook until the water is fully evaporated
Watch carefully, when the skirts start to dry, drip some Sesame Oil around the dumplings (these Sesame Oil is going to help the skirt brown, make it crispier and also adds a beautiful flavour)
Cook for a further minutes, pay attention to the gaps around the Gyoza, so you can judge how brown you want it to be
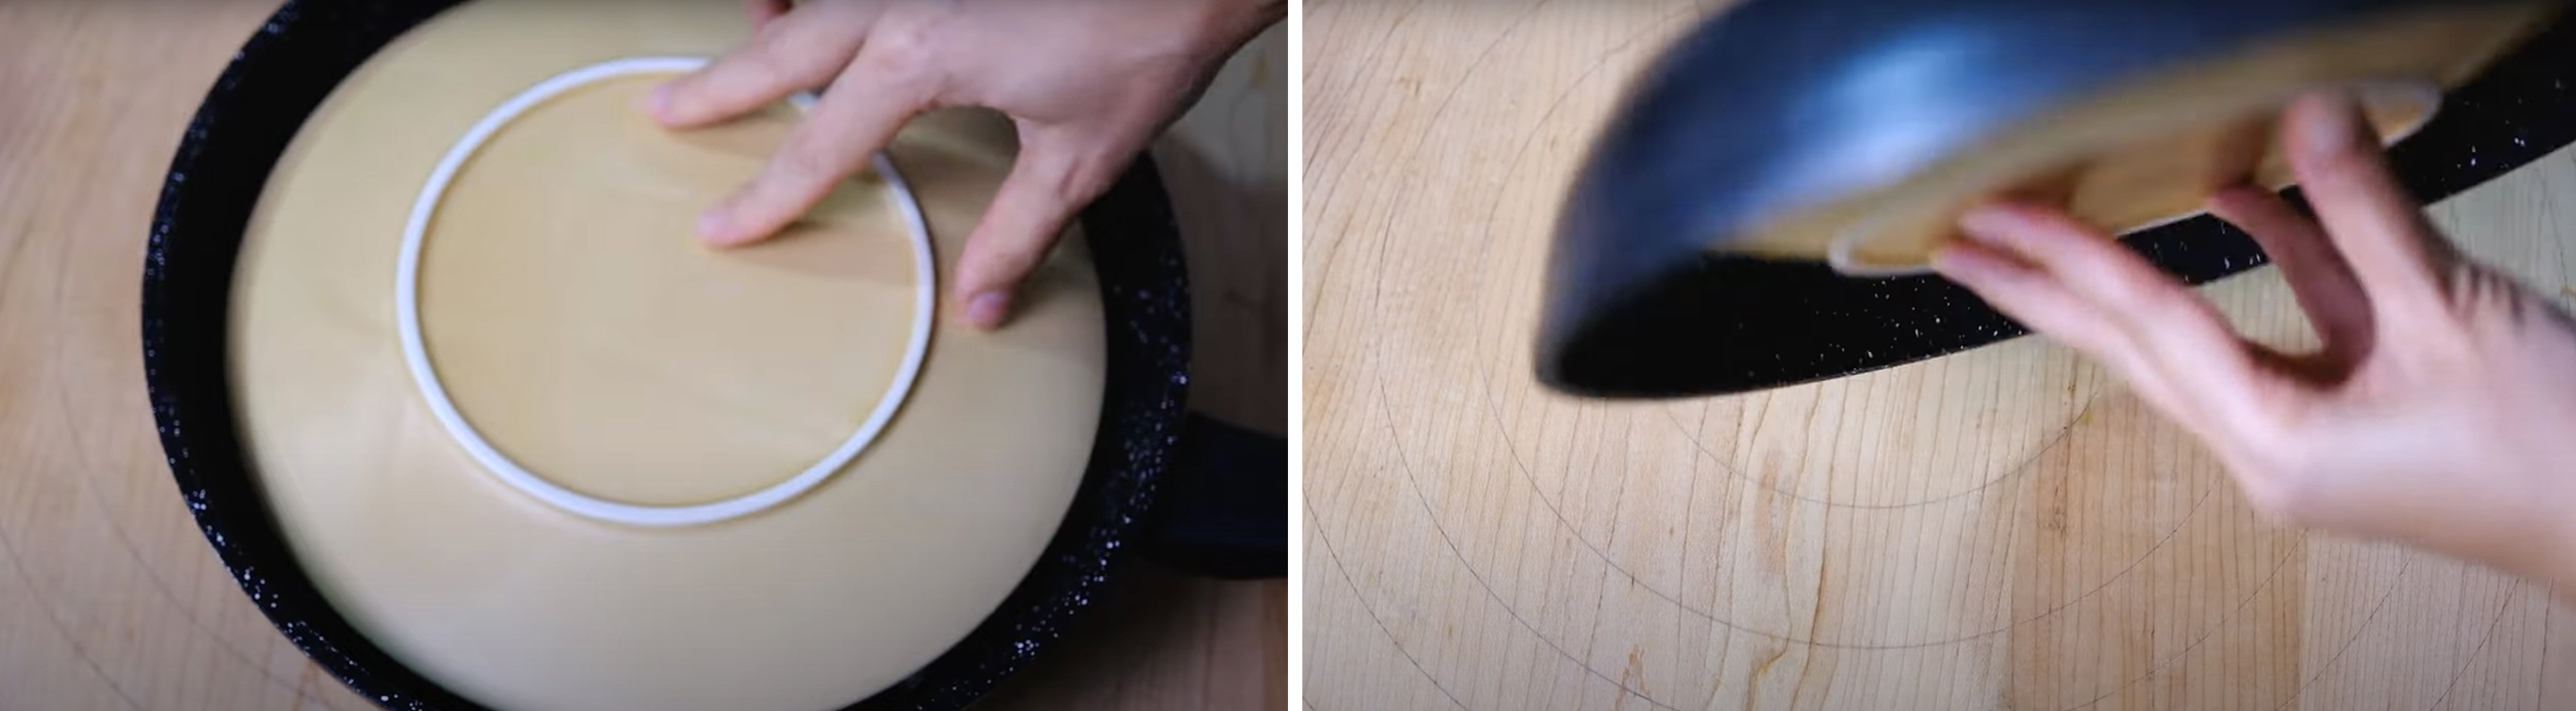
Once it’s done, give a little shake, make sure there’s nothing sticking; place a plate on top and carefuly flip the Gyoza
Enjoy the beautiful crispy skirt 😘
There’s a satisfaction in making a crisp sound when breaking the dumplings apart! 🤪

BOILED (Shui Jiao) 水饺

We will use the Chinese Traditional Method called Dian Shui (点水) to boil the dumplings

Over HIGH HEAT, bring a pot of water to a full boil and gently slide in the dumplings
Stir them gently, make sure there’s no dumplings stick at the bottom of the pan
Cover the lid
Once the water come back to a full boil, add 1 cup of Water, close the lid again and let it back to a full boil again.
Repeat the process of a boil and add water 2 more times
When they are fully cooked, the dumplings should be plump and floating on the surface
Drain it and you can serve it immediately
Although not very popular in restaurant, boiled dumpling is my favourite since childhood; as I love the soft yet slightly chewy texture and its non-greasy taste.
Don’t let them wait too long, boiled dumplings BEST SERVE when it still hot 🤩

Dipping Sauce

No dumpling is complete without a delicious dipping sauce ☺️
For my family, dipping sauce is very important for dumplings, especially if you like spicy; you might interest to try my “MOM’s Special Homemade Sauce”

To make it, simply mix all the ingredients
120 g Hot Garlic Chili Sauce, 30 g Water, 1 tbs Sugar, 1 tsp Sesame Oil, 1 tbs Light Soy Sauce, 1 tsp Chinese Black Vinegar and 1 tbs Garlic (minced)

Notes

  • To Freeze the Uncooked Dumplings
    If you’d like to freeze the uncooked dumplings, wrap the container tightly ,allow to freeze overnight (freeze them in a single layer, don’t stack).
    And then on the next day, transfer them to Ziploc bags and throw them back into the freezer for use later. Freeze up to 2 months for best flavour and texture (consume within 3 months).
  • To Store the Left-Over Cooked Dumplings and Reheating
    In the refrigerator, cooked dumplings will last about 3-5 days. Always put them in an airtight container to prevent the dumplings from drying out.
  • To reheat the left-over cooked dumplings
    Pan-Fried and Gyozain the preheated 180°C oven for about 10-15 minutes
    Boiled recook in the hot boiling water for about 5 minutes.

Watch How to Make “traditional chinese Dumpling 饺子 (Gyoza) from Scratch”

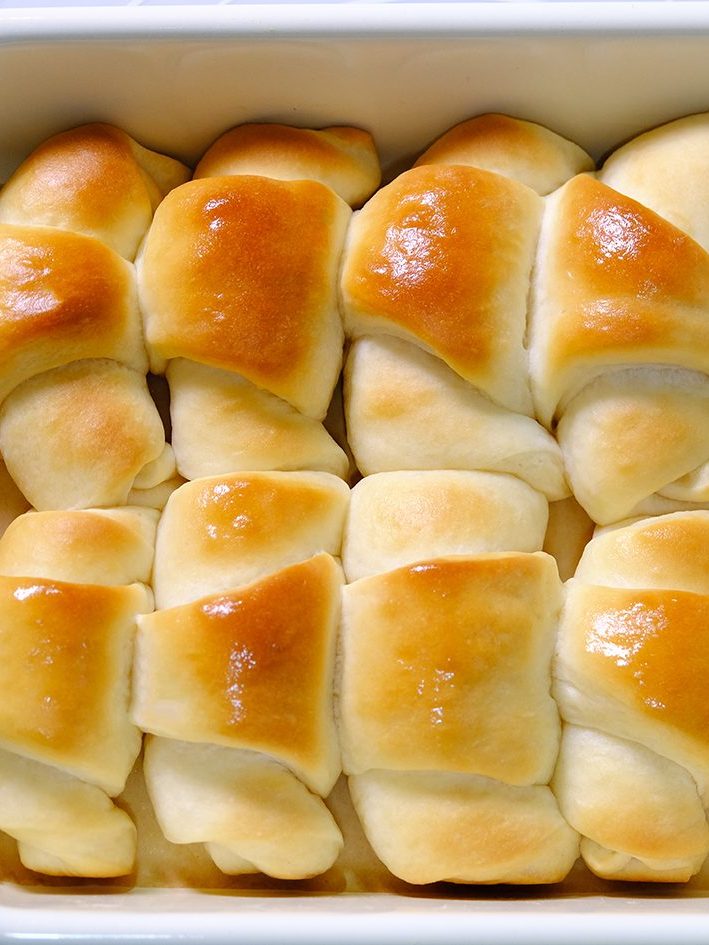
Super Soft Chewy Dinner Rolls

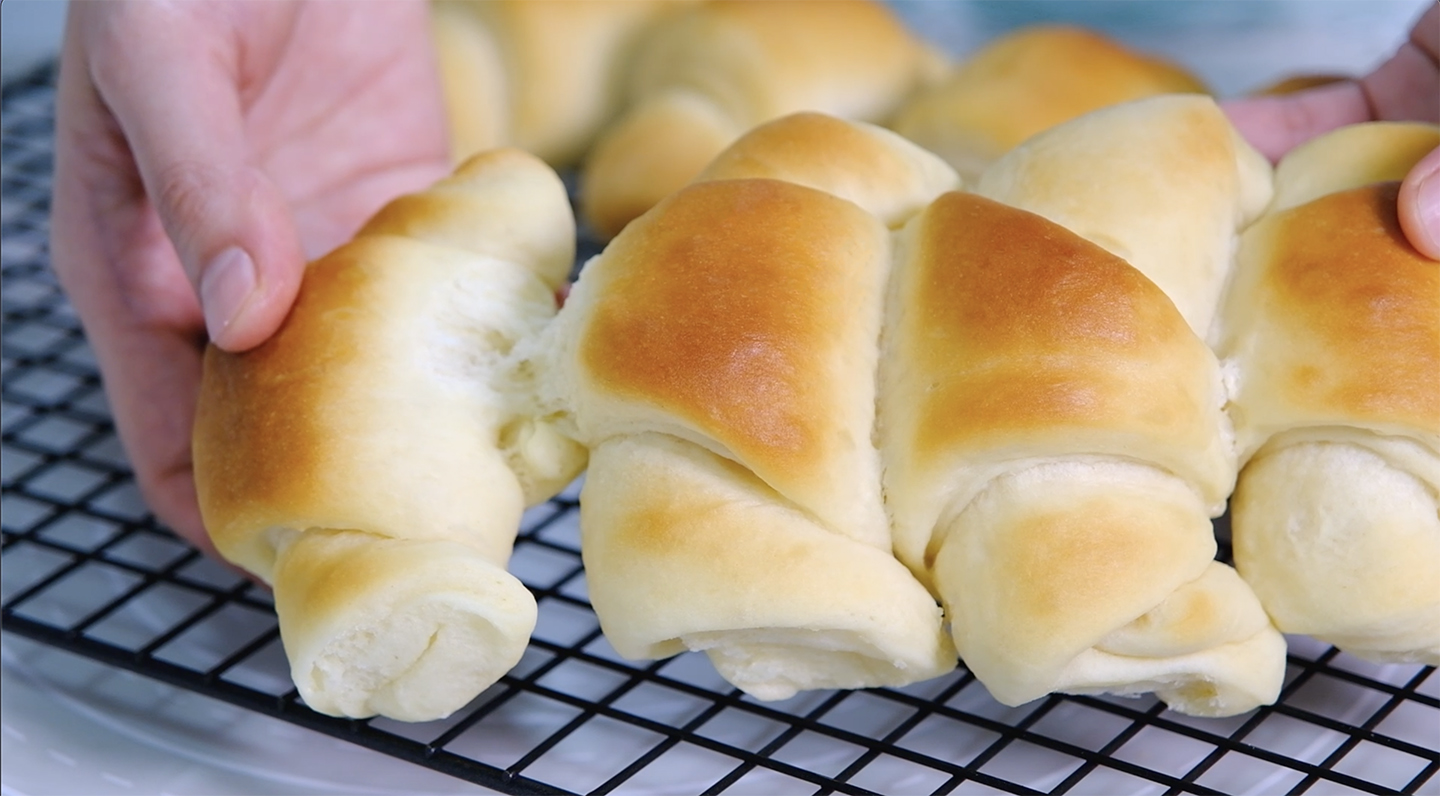
Soft… Pillowy…  Squishy…
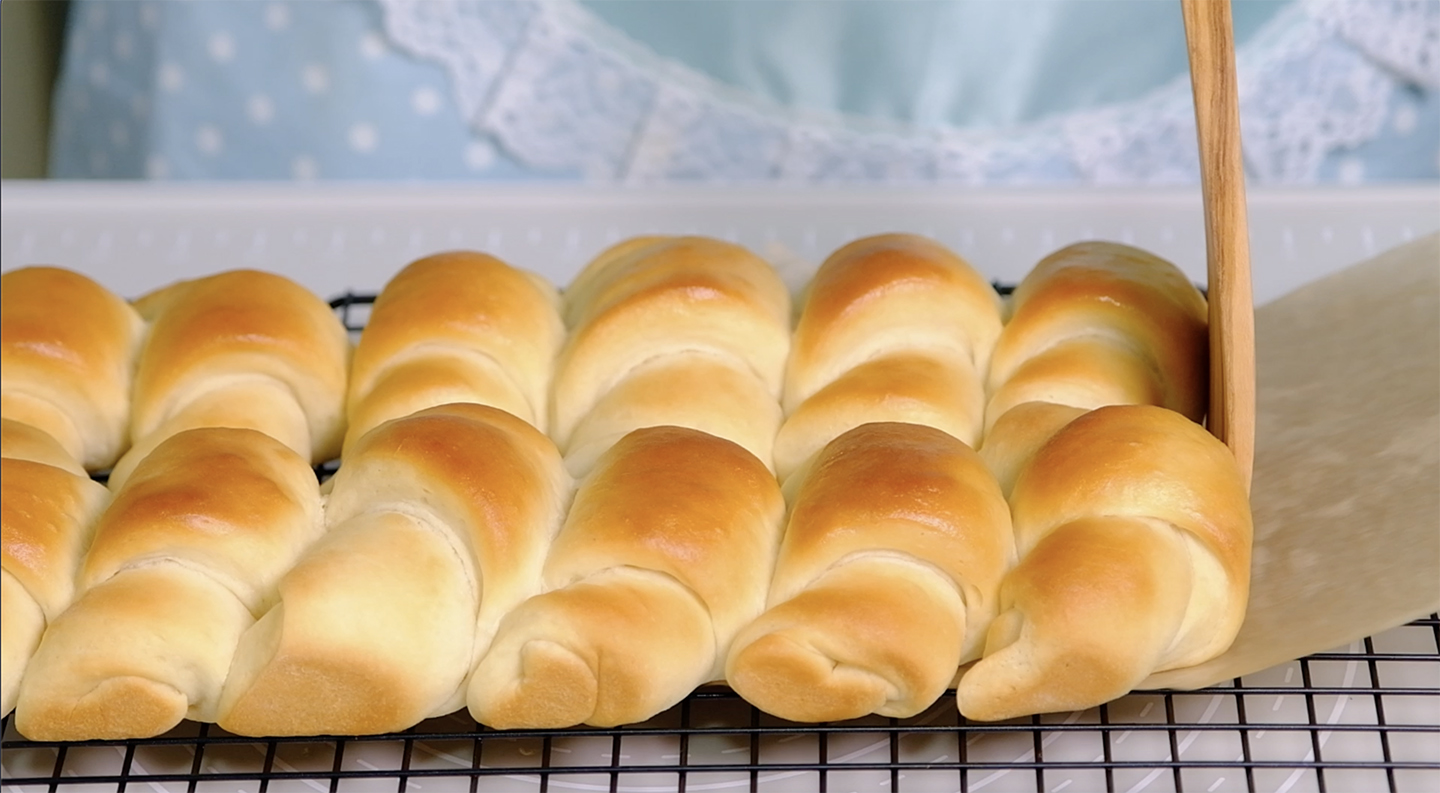
Beautiful golden brown and delicious buttery; These are the best rolls you will ever eat ! 😉

🤤 HUNGRY …

I’ve been using this recipe for so long and you’ll quickly find they are the perfect side to just about any meal.

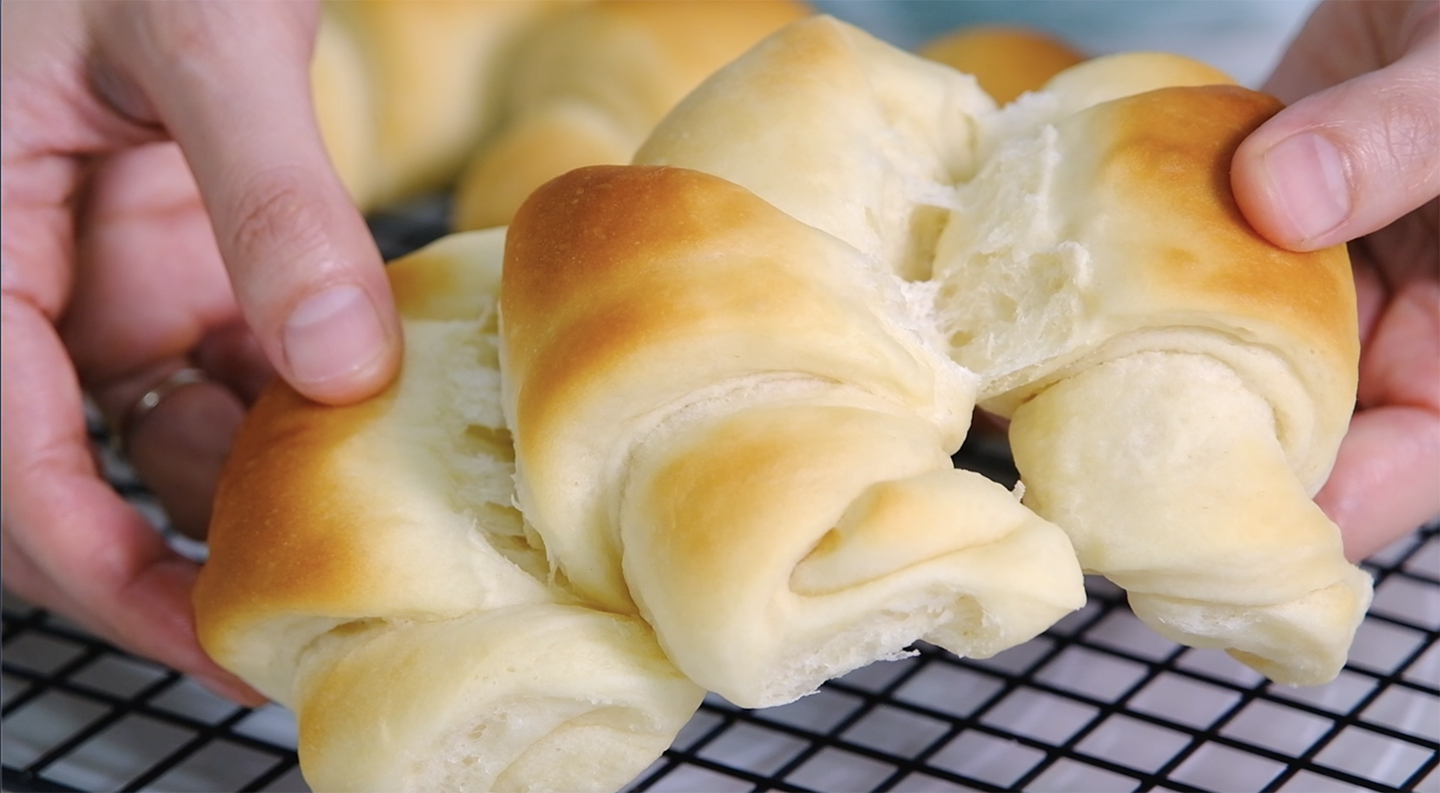
These buns are delightfully soft and squishy . . .

They can be frozen and are the perfect accompaniment to any meal; but they are also delicious in their own right

Lightly sweet, milky in flavour ….🥴😍

The texture is perfect balance of soft yet satisfyingly chewy 🥲

You can have this rolls either sweet or savoury, they are so versatile 🥰

I love to pair it with my favourite Strawberry Jam 🤗 I have a sweet tooth

Hm… so good!

The rolls are great while still warm but will also keep for days and I’m sure they’ll become a favourite in your home.
I hope you will enjoy the recipe! 🤗

WATCH HOW TO MAKE “SUPER SOFT CHEWY DINNER ROLLS”


Recipe and Step

To a stand mixer bowl simply combine 280 g All-Purpose Flour, 45 g Caster Sugar, 1 tsp Instant Yeast and 1 ½ tbsp Milk Powder
Mix until just combined
NOTE: I usually add Salt after this; to avoid the salt coming into direct contact with the yeast (Salt can kill the yeast) 
Pour in 1/2 tsp Salt along with 140 g Milk (lukewarm) and 25 g Eggs (room temp.)
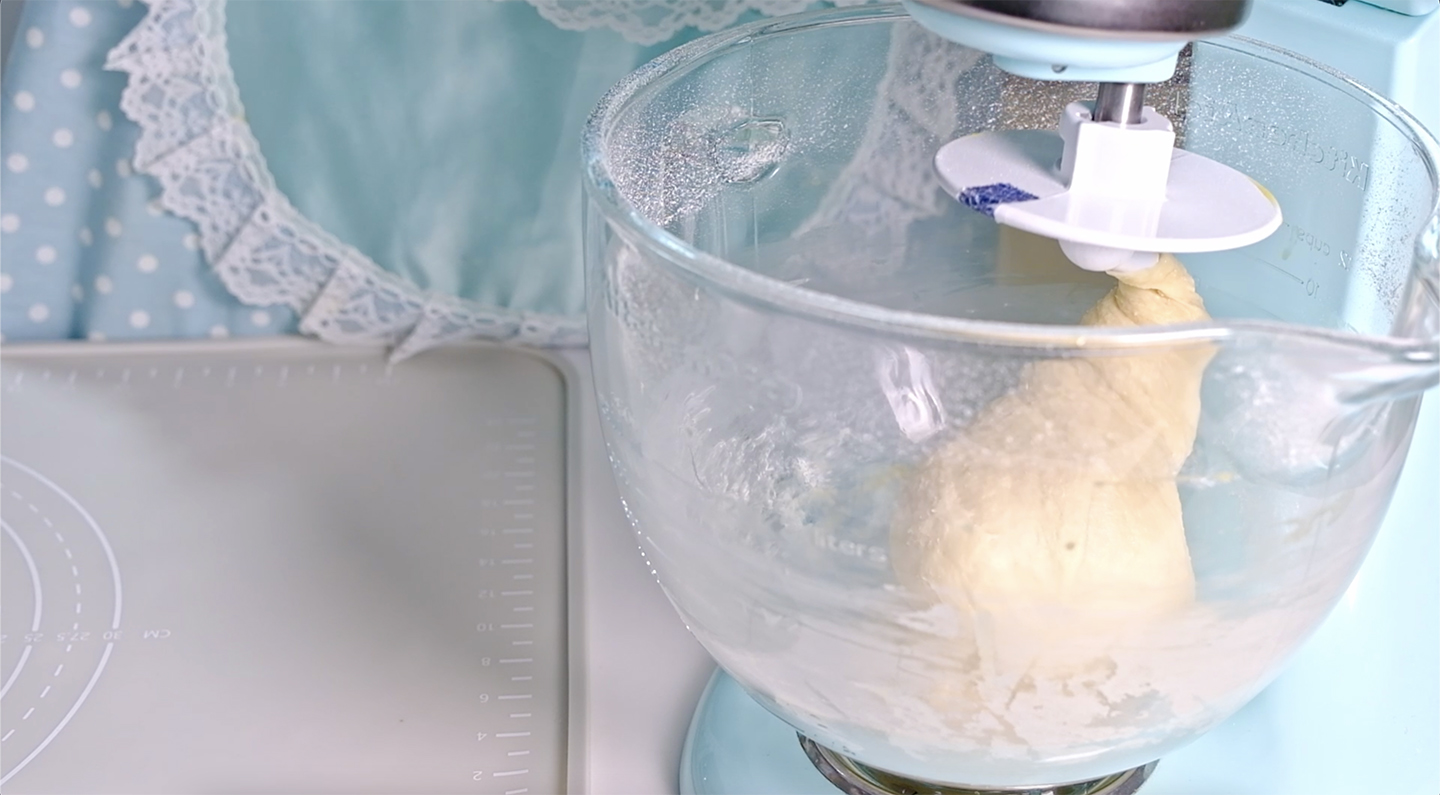
On medium speed, mix until everything has come together into one mass, give a little scrape down the sides if anything sticks
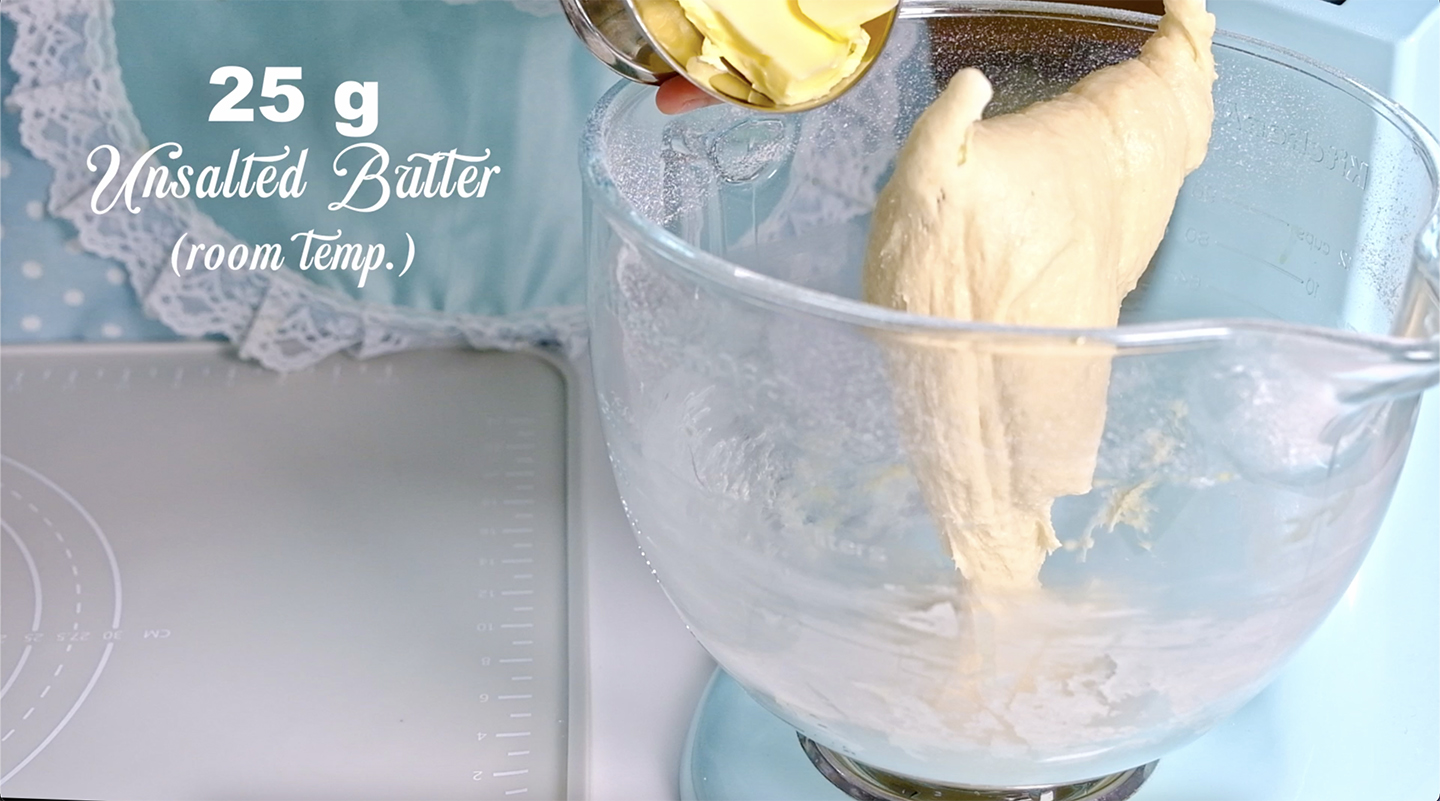
Add in 25 g Unsalted Butter (room temp.) and knead again on medium low speed until the dough is smooth and elastic for about 5-6 minutes
* If you knead it by hand, it may take longer for about 10-15 minutes
Once it’s done; remove the dough from the bowl and shape it into a smooth ball
Add some oil to the clean bowl
Place the dough in the bowl, smooth side up.
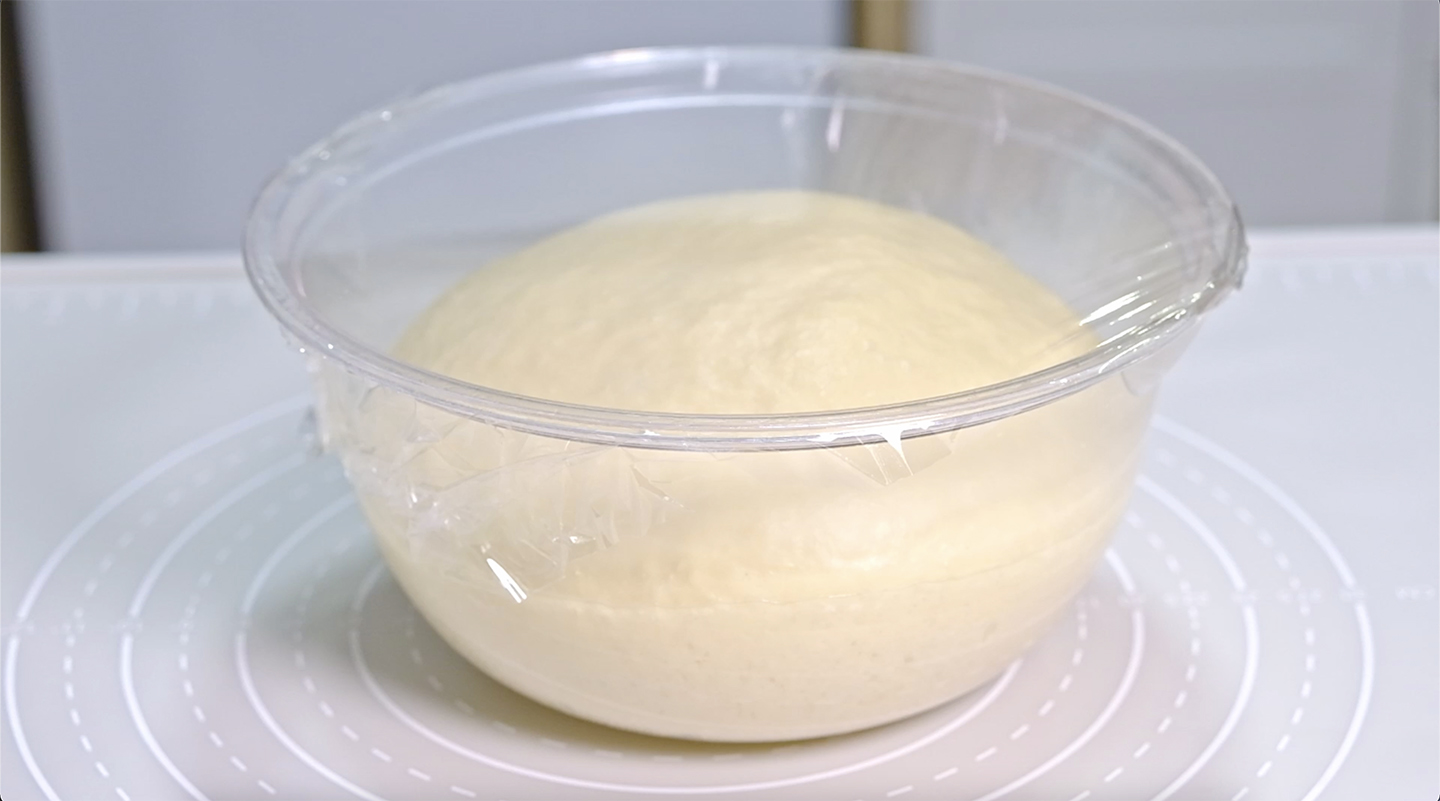
Cover and let it rise until doubled in size for about 1 ½ hours (The time will depend on the temperature of your kitchen; if you are in cold environment, it will take longer and vice versa)
After for about 1 ½ hours the dough has risen and become plump, airy and beautifully smooth
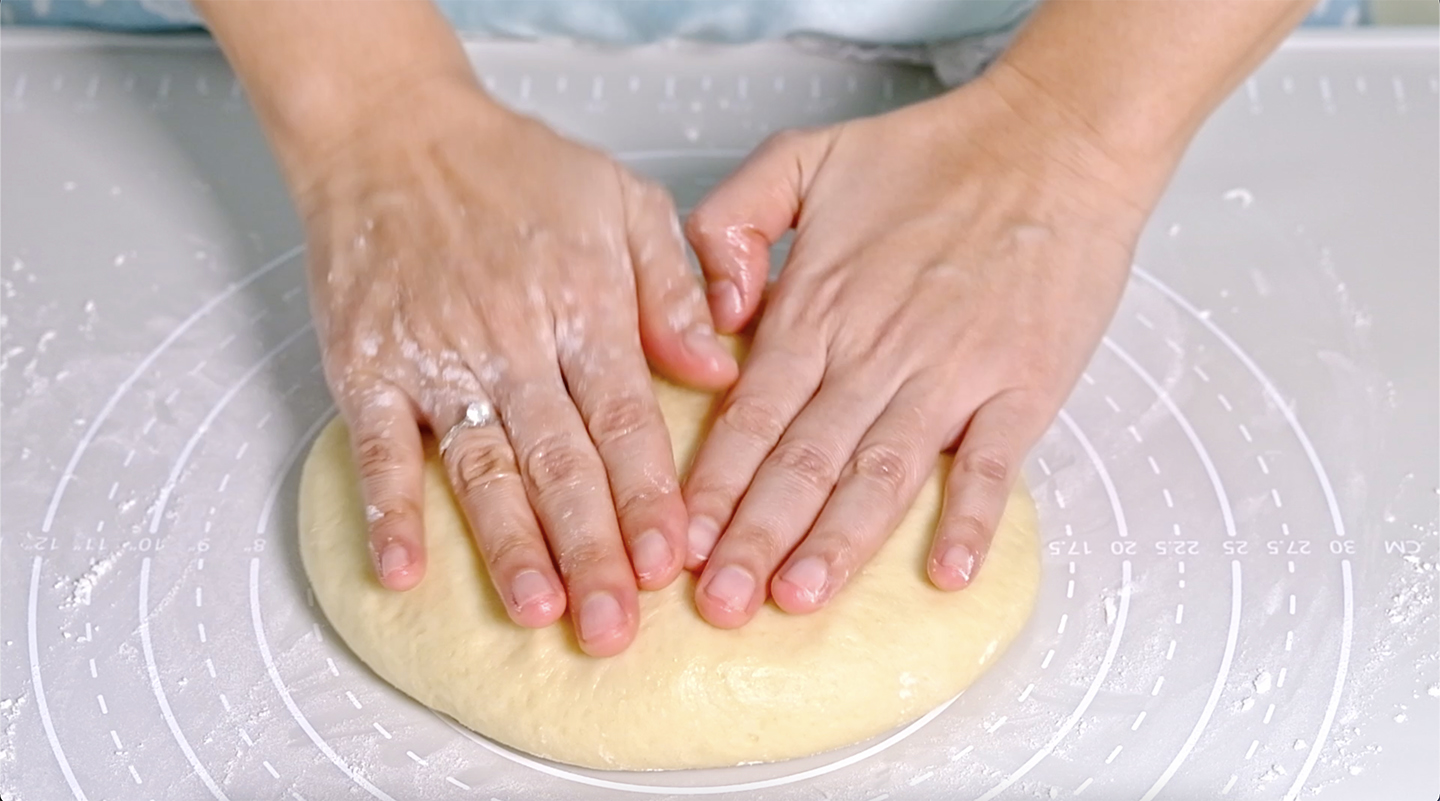
Punch down and deflate the dough in the bowl
Remove the gas inside
Shape the dough into a ball, then thoroughly pat down the dough to evenly deflate it
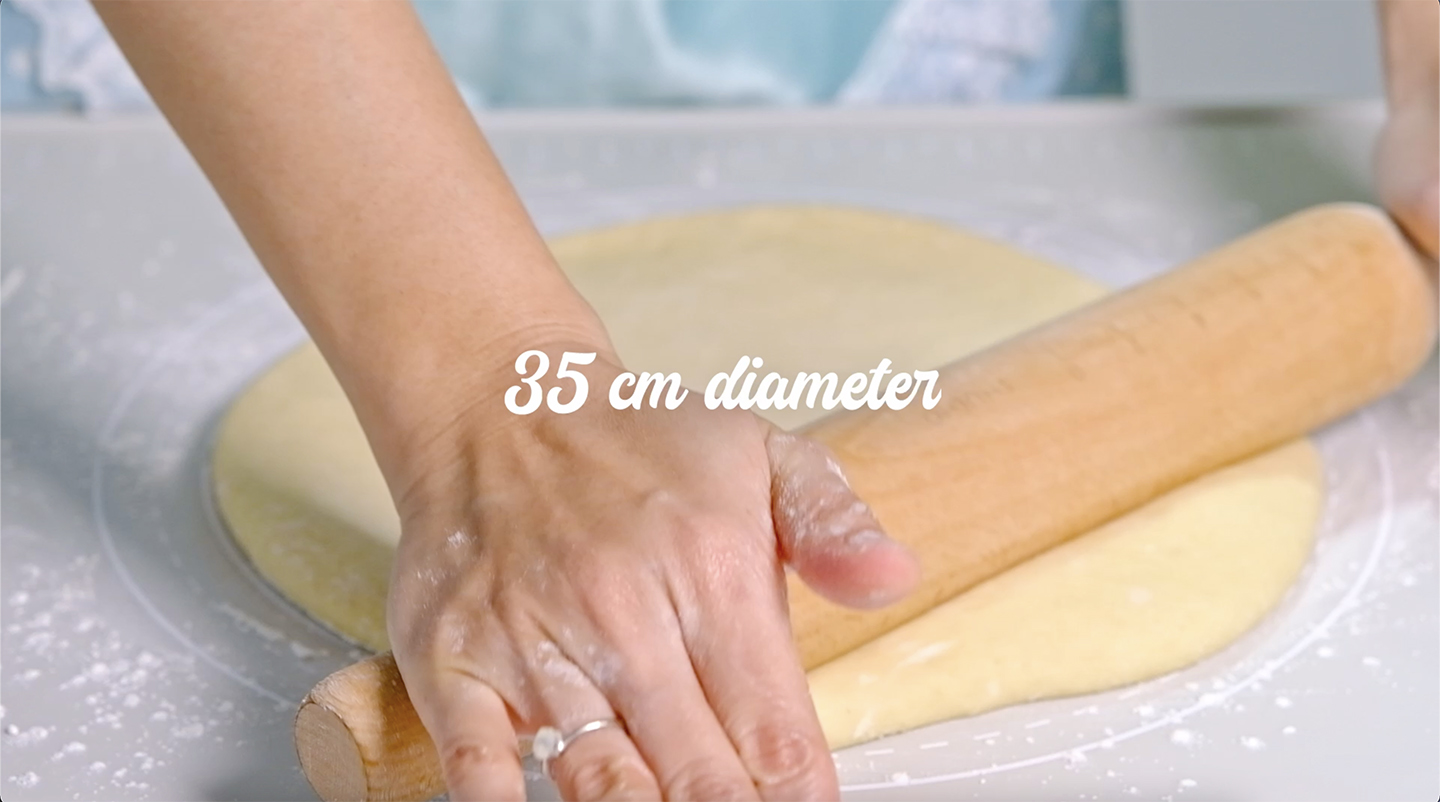
Then roll dough out on a lightly floured surface into a large circle about 35 cm diameter
(Try to keep dough as much of an even thickness as possible)
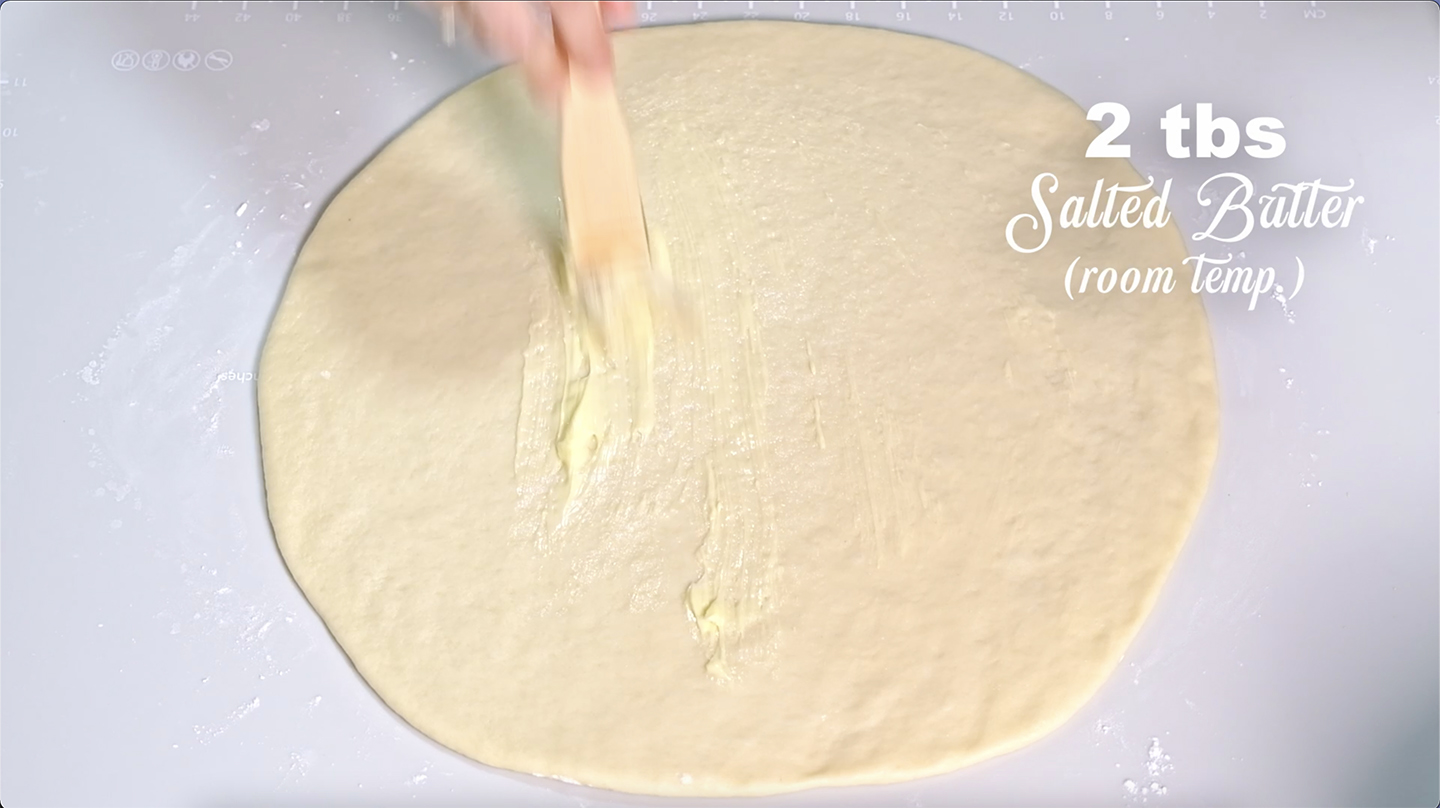
Spread circle of dough evenly with 2 tbsp Salted Butter (room temp.)
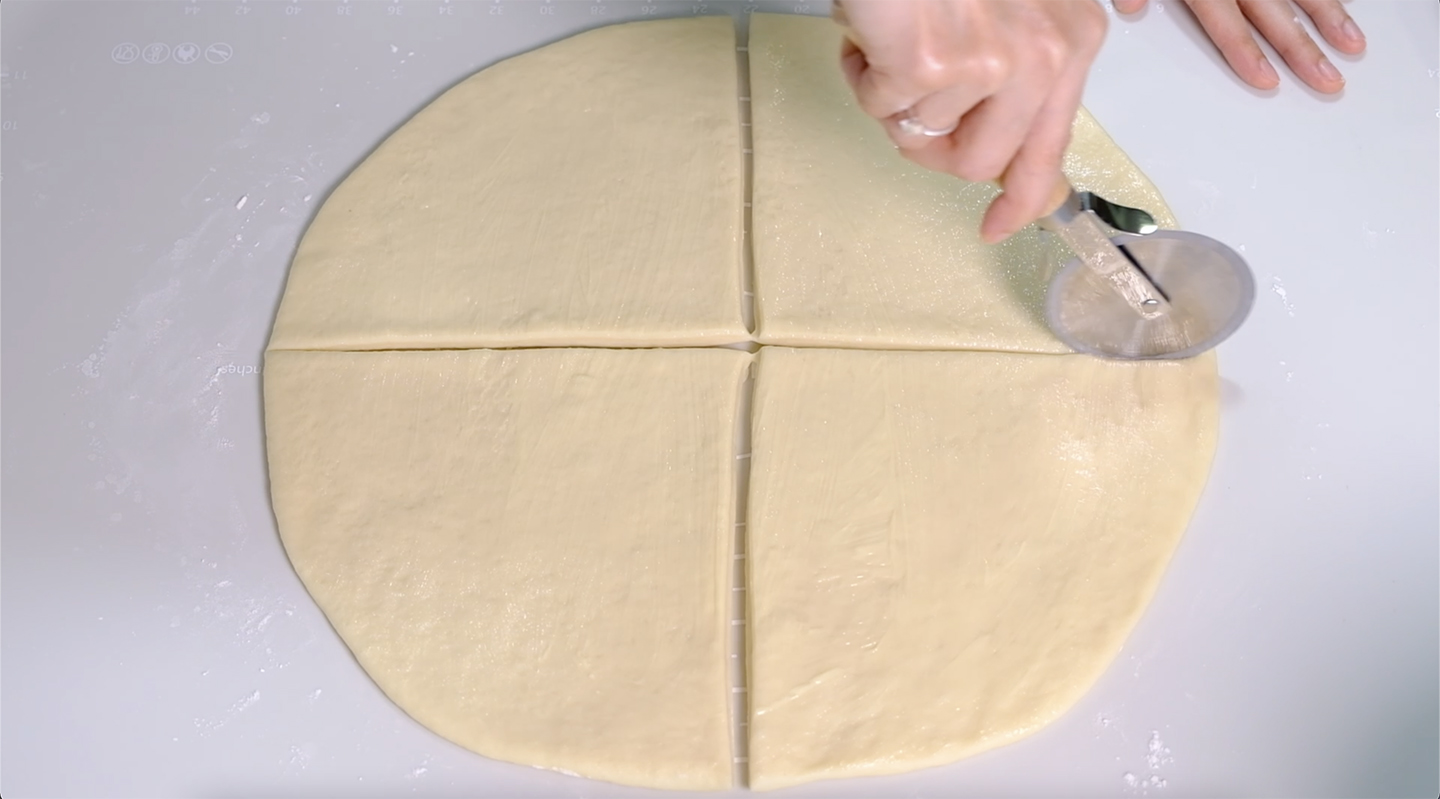
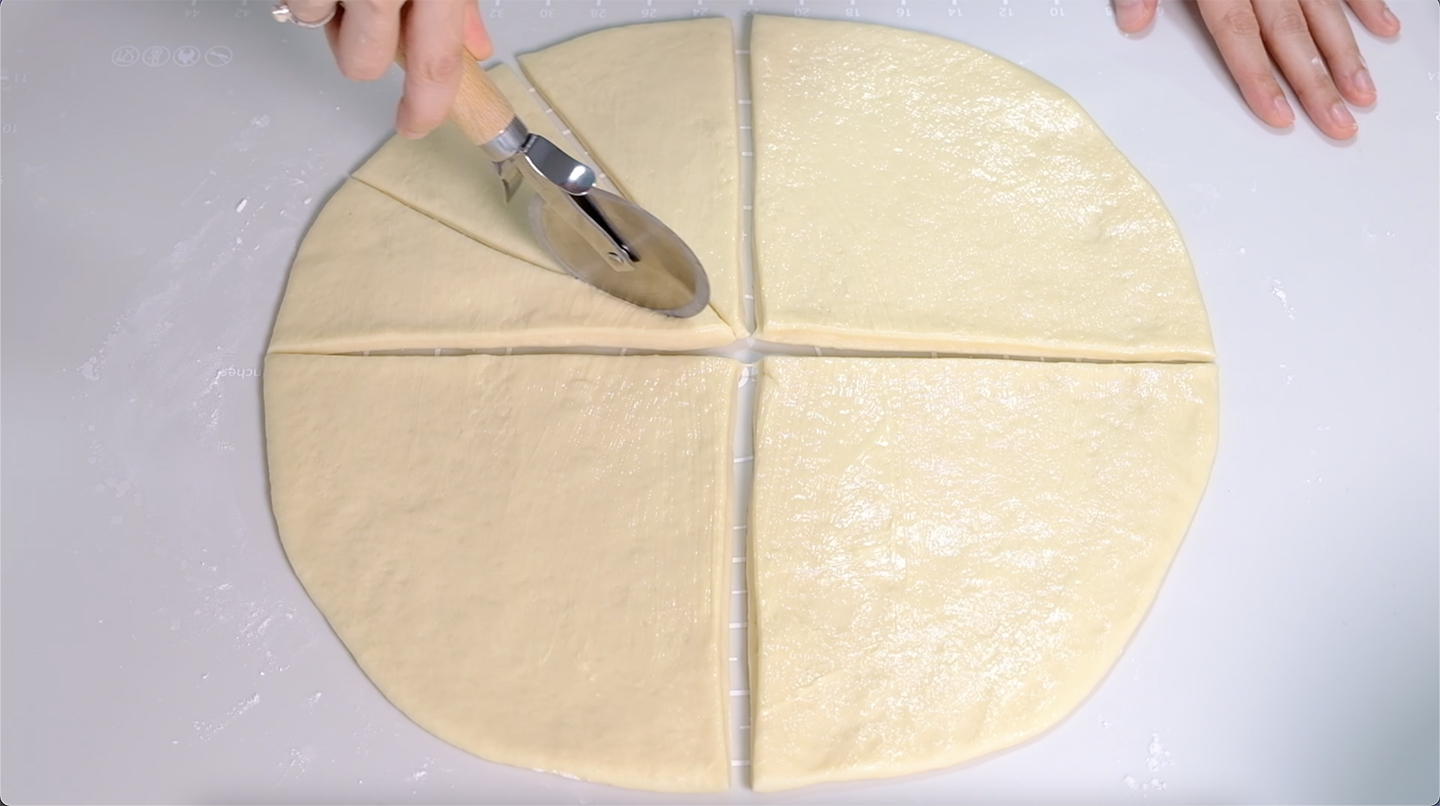
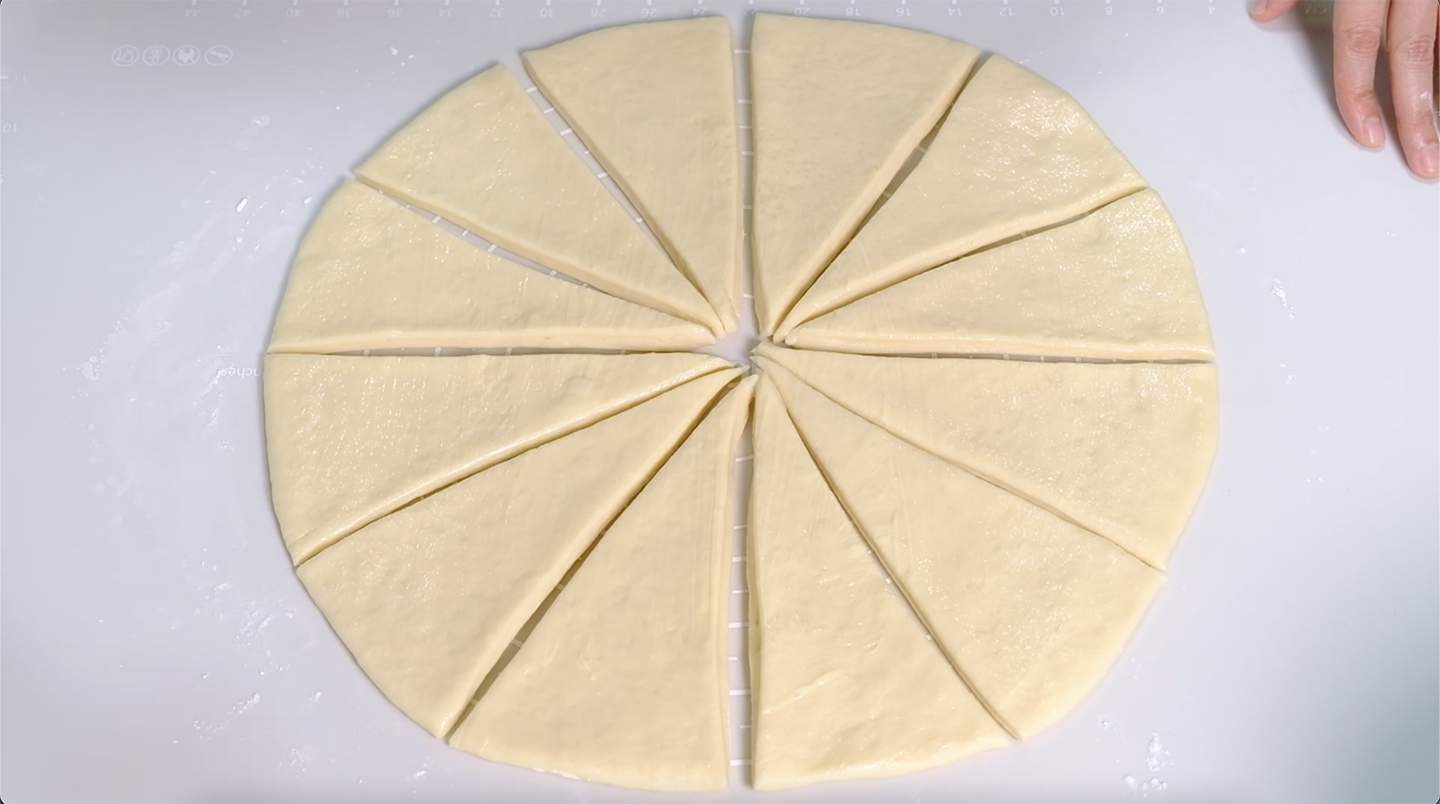
Using pizza cutter or sharp knife divide circle into 12 equal portions
Cut circle into 4 equal quarters first
Then each quarter into 3 wedges
Just imagine cutting pizza slices or pie slices
Cut a little bit in the middle of each wide edge
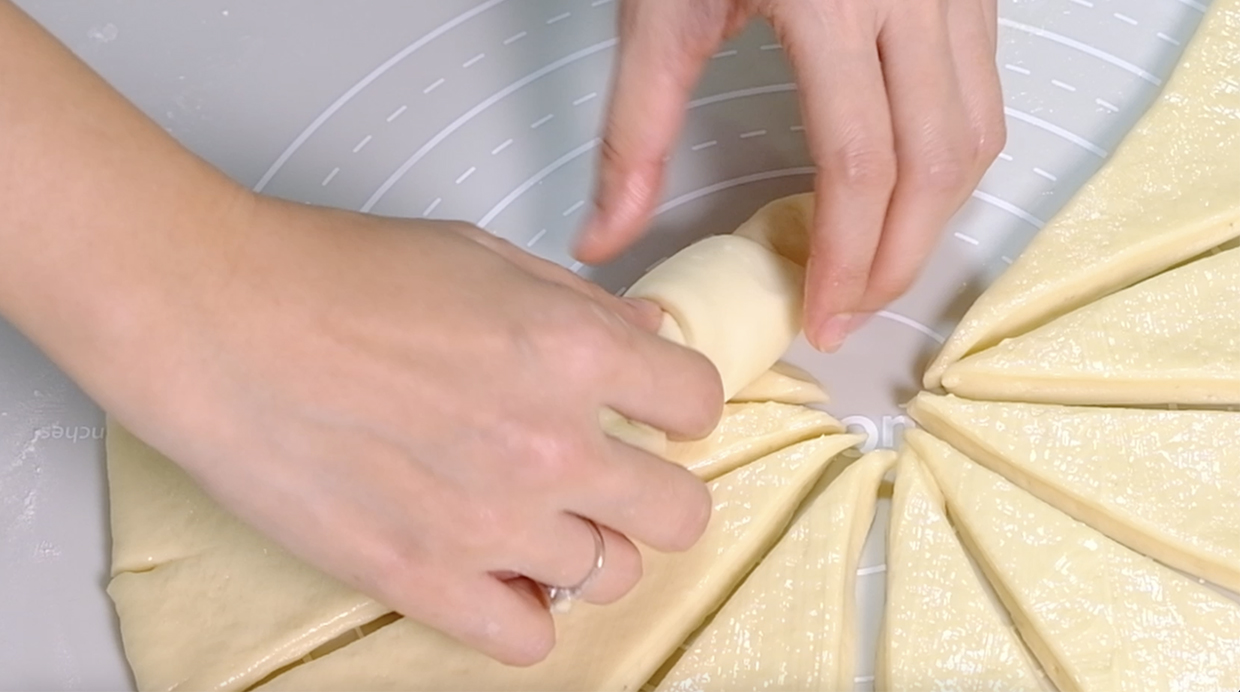
Roll each wedge up, beginning on wide (outside) edge
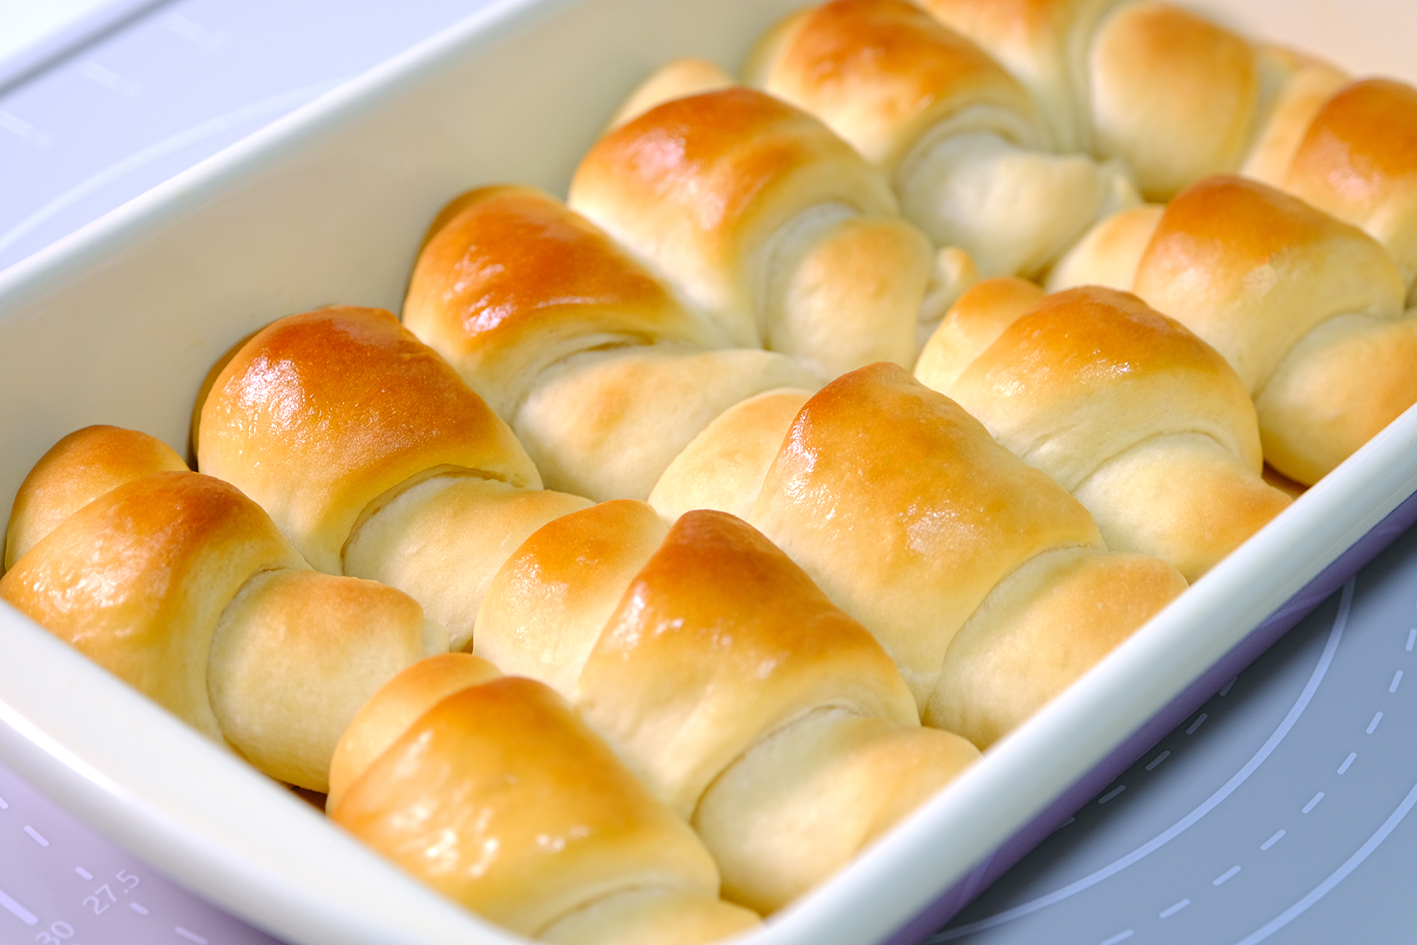
The shape is similar to a Croissant 😊
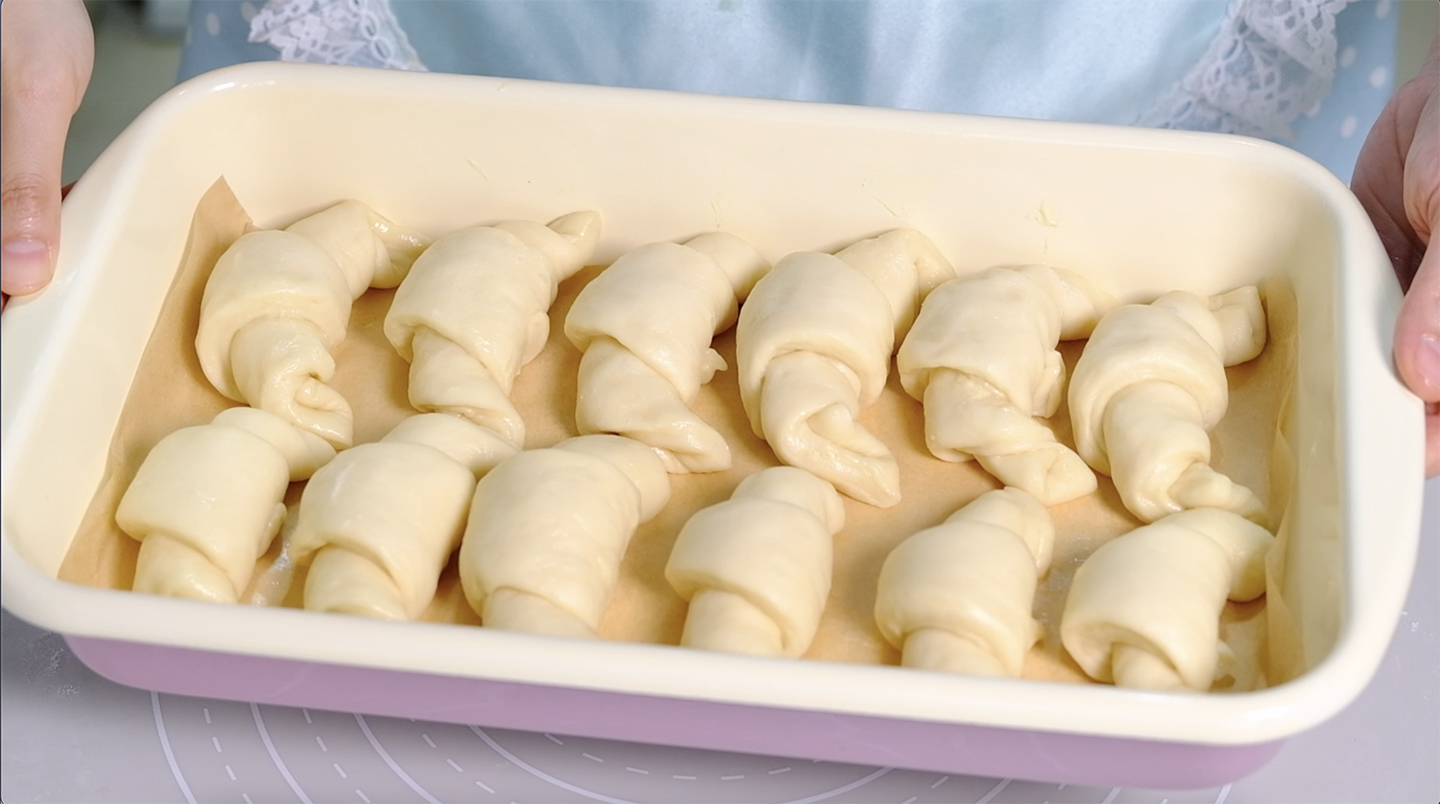
Transfer rolls to a greased 32 cm x 18 cm rectangular pan lined with parchment paper
The tip of the rolled wedge should be tucked on the bottom
You can fit 2 rows of 6 rolls
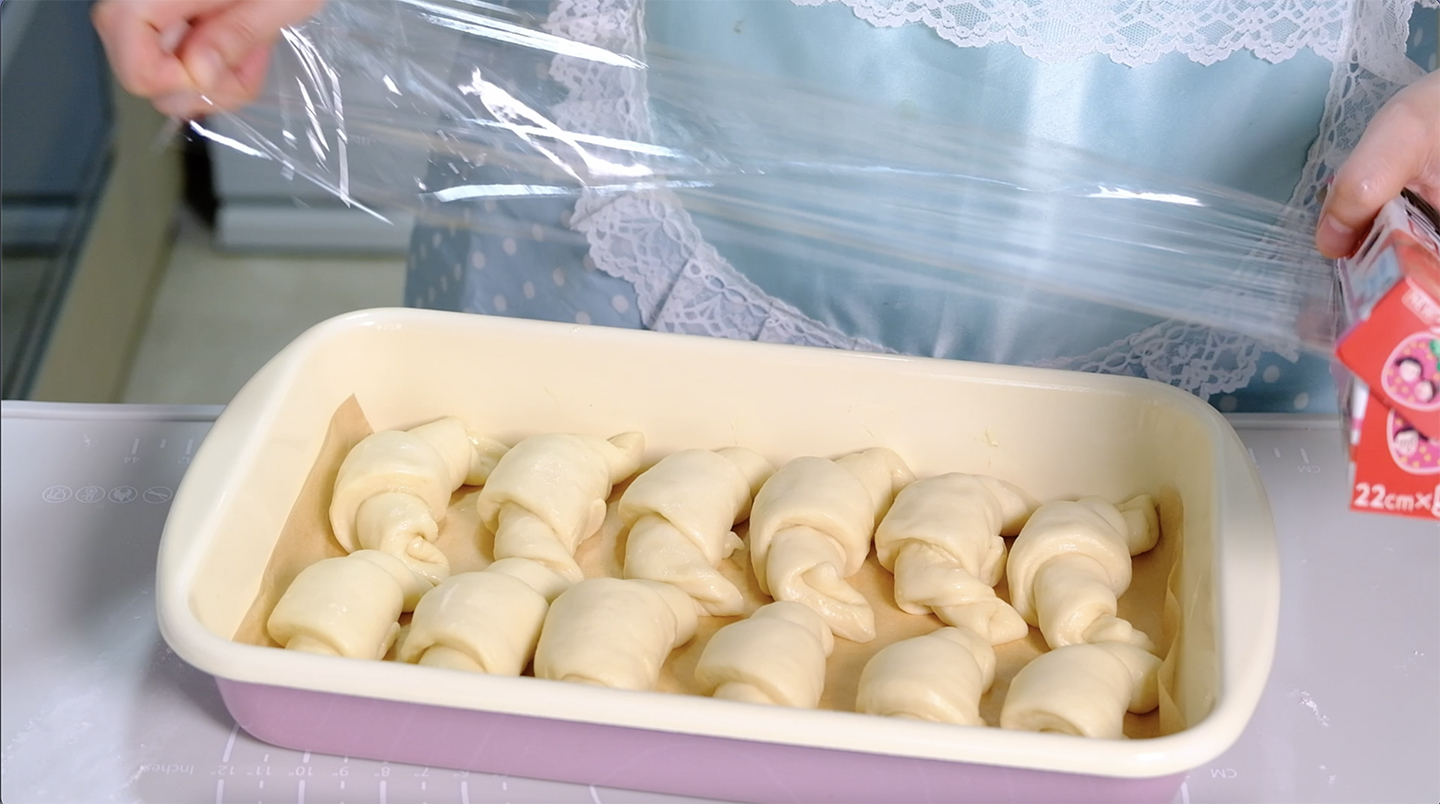
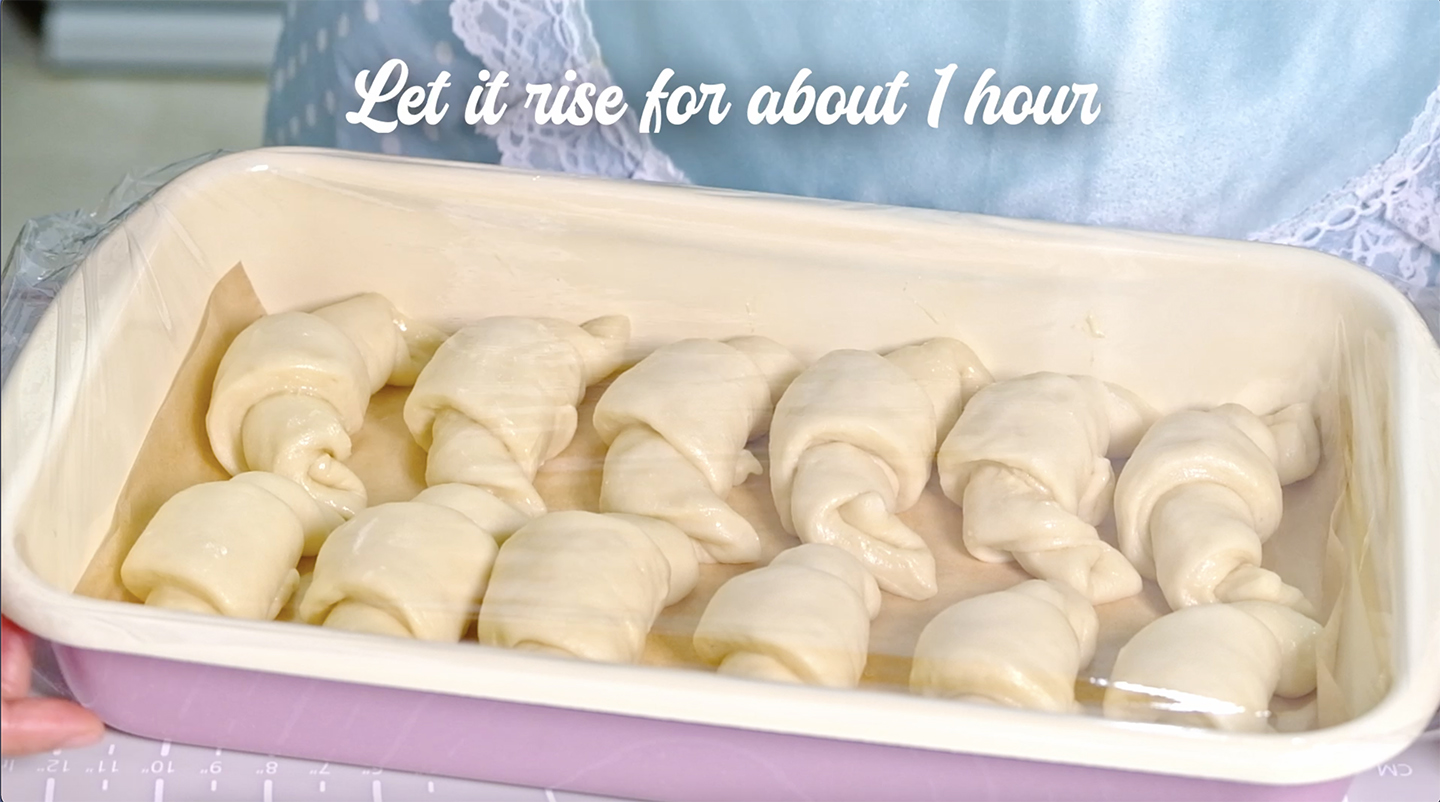
Cover it with plastic wrap
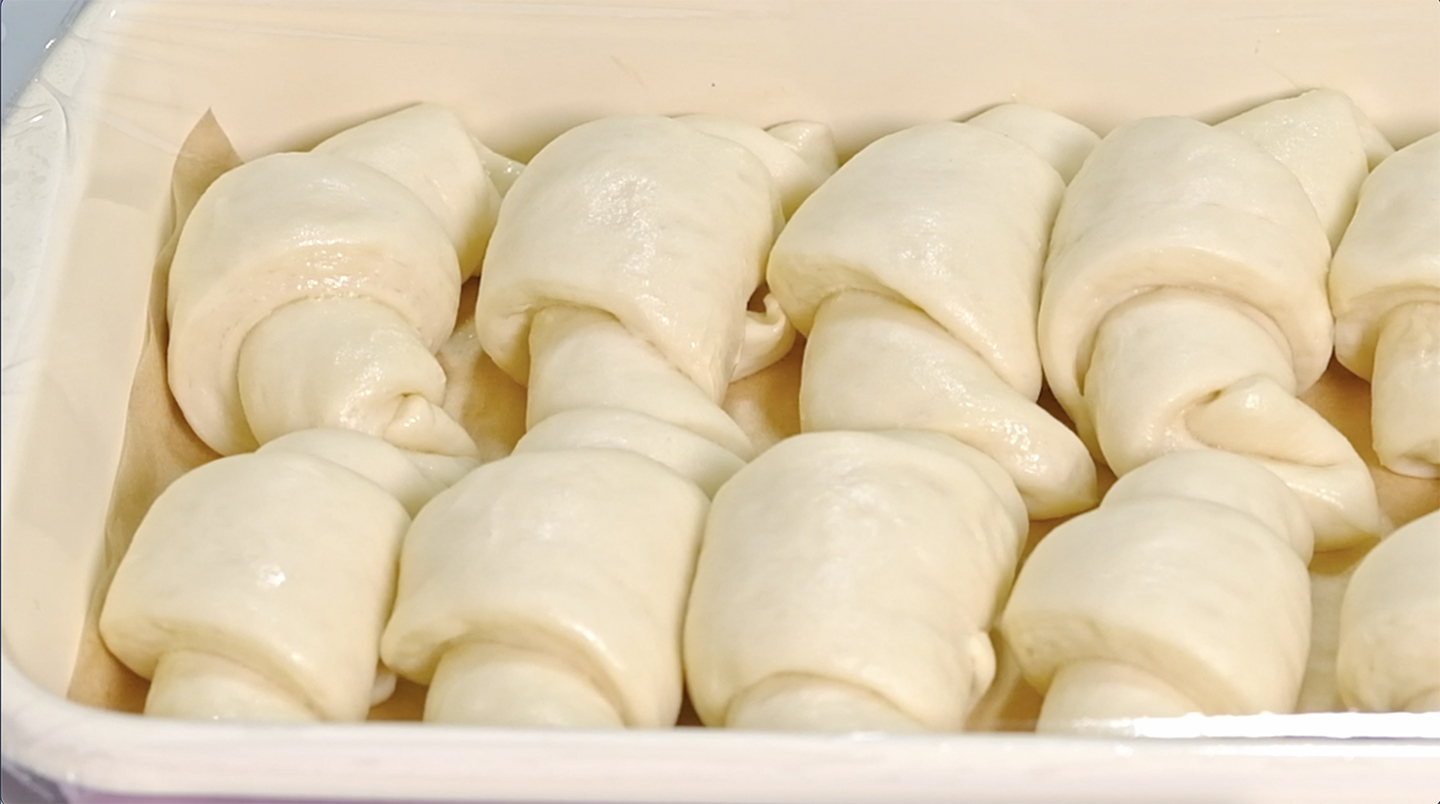
And let rise until plump and airy and about doubled in size, about 45 minutes to 1 hour
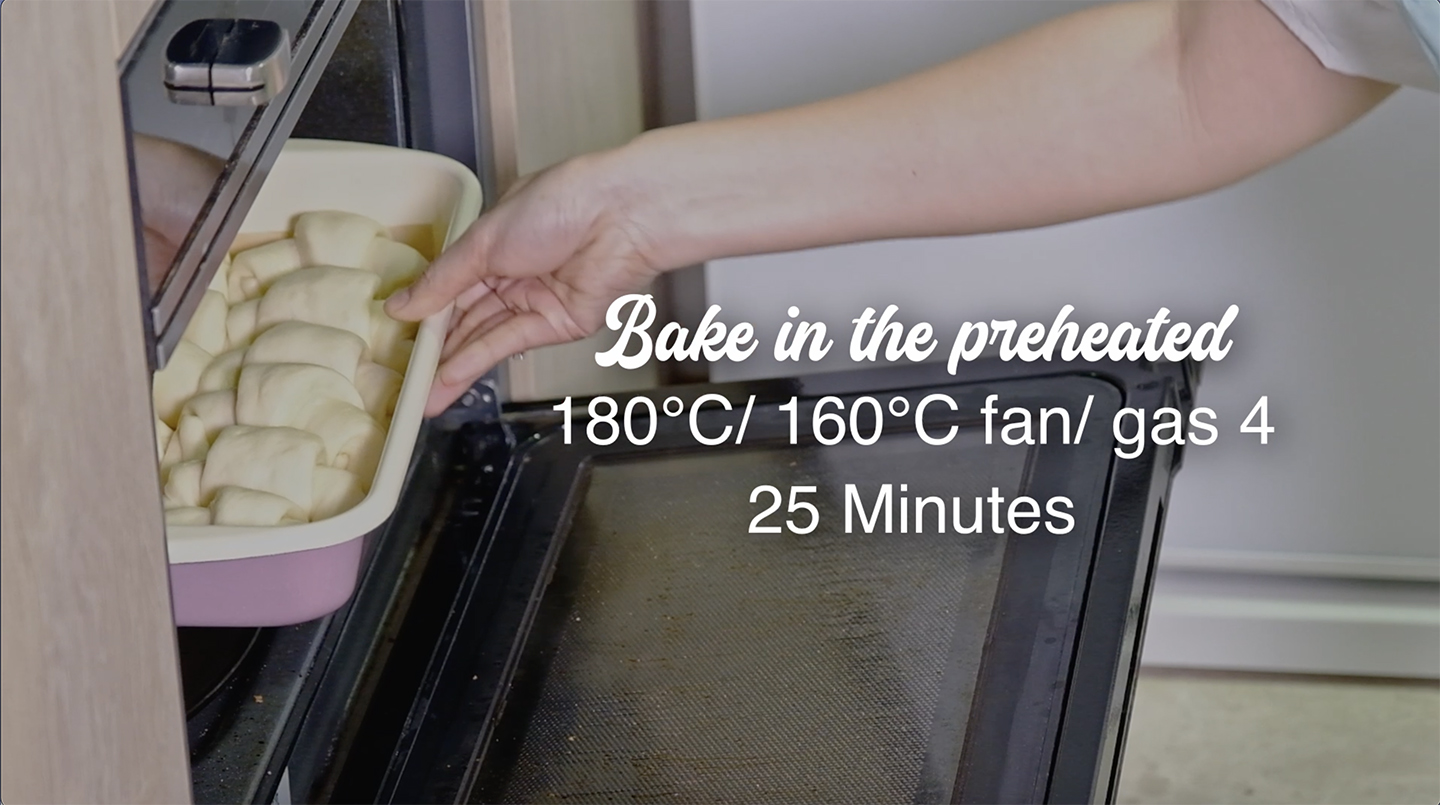
During the last 15 minutes of proofing time, preheat the oven to 350°F/ 180°C/ 160°C fan/ gas mark 4
After for about 1 hour, remove plastic wrap
With the rack in the centre of the oven, bake rolls in the preheated oven for 25 Minutes
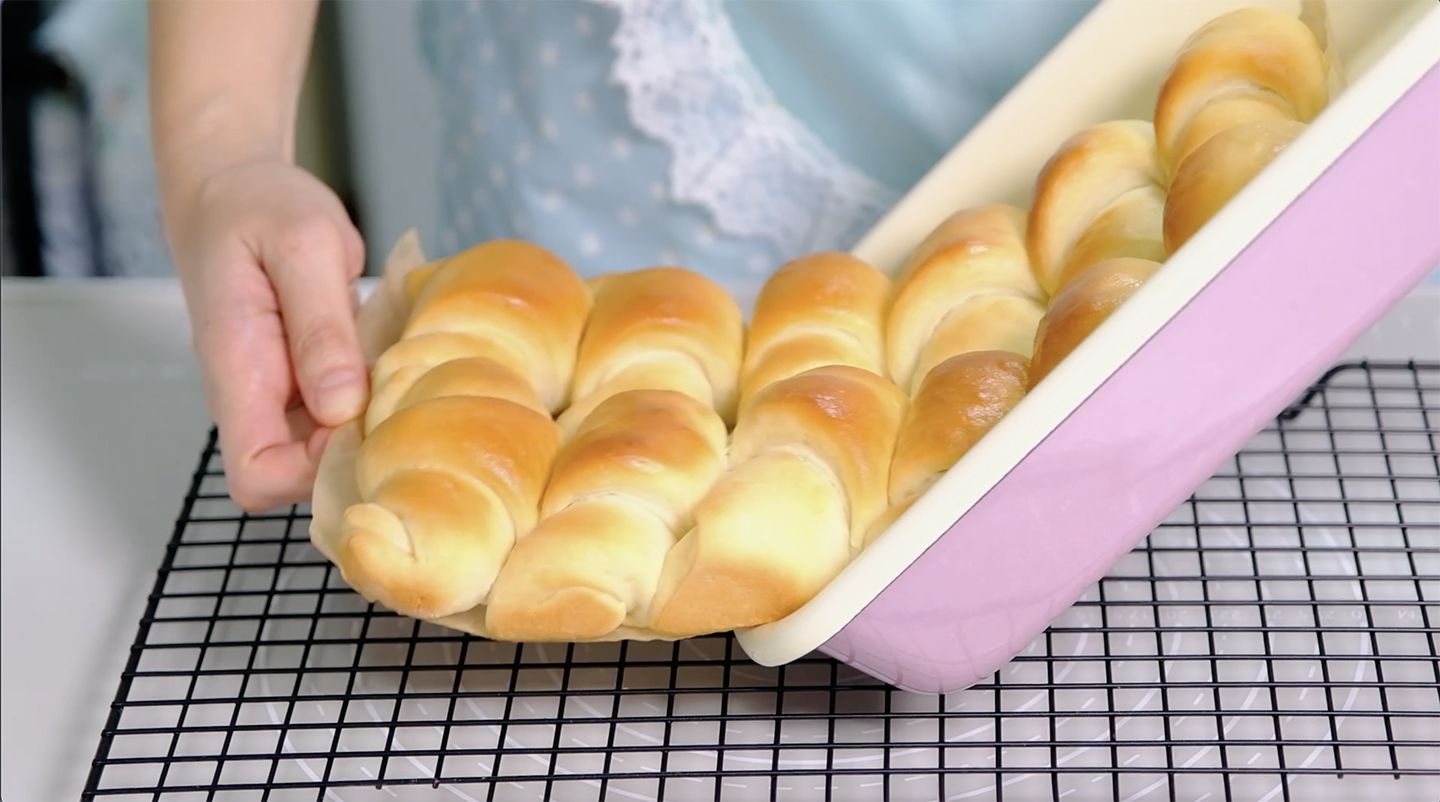
Once it’s done; remove from oven
NOTES: If your rolls aren’t browning at all, move the oven rack up closer to the top and bake again for another 2-3 Minutes
Immediately while the buns are still hot from the oven brush all over with butter.
(The melted butter will soak right in softening the crust, make it shinier and added richness to the rolls)
Transfer it to a cooling rack
Don’t forget to remove the parchment paper so it doesn’t get soggy
And let it cool completely
Be sure to store them in an airtight container so they don’t dry out.
These dinner rolls should keep about 2 days at room temperature or about a week in the fridge;
They also can be frozen for up to 2 months in an airtight container
SUPER SOFT CHEWY DINNER ROLLS
Yield: 12 Rolls
Total Time: 3 Hours

🌿 Ingredients
280 g All-Purpose Flour
45 g Caster Sugar
1 tsp Instant Yeast
1 ½ tbsp Milk Powder
1/2 tsp Salt
140 g Milk (lukewarm)
25 g Eggs (room temp.)
25 g Unsalted Butter (room temp.)
2 tbs Salted Butter (room temp.)

Baking temperature & time 180°C/ 160°C fan/ gas 4 ~ 25 Minutes

🌿 Notes
- These dinner rolls should keep about 3 days at room temperature or about a week in the fridge.
- Be sure to store them in an airtight container so they don’t dry out.
- Rolls can be frozen for up to 2 months in an airtight container.
- To reheat
 From the fridge ~ preheated 180°C oven for 3-5 minutes
 From the freezer ~ preheated 180°C oven for 5-10 minutes

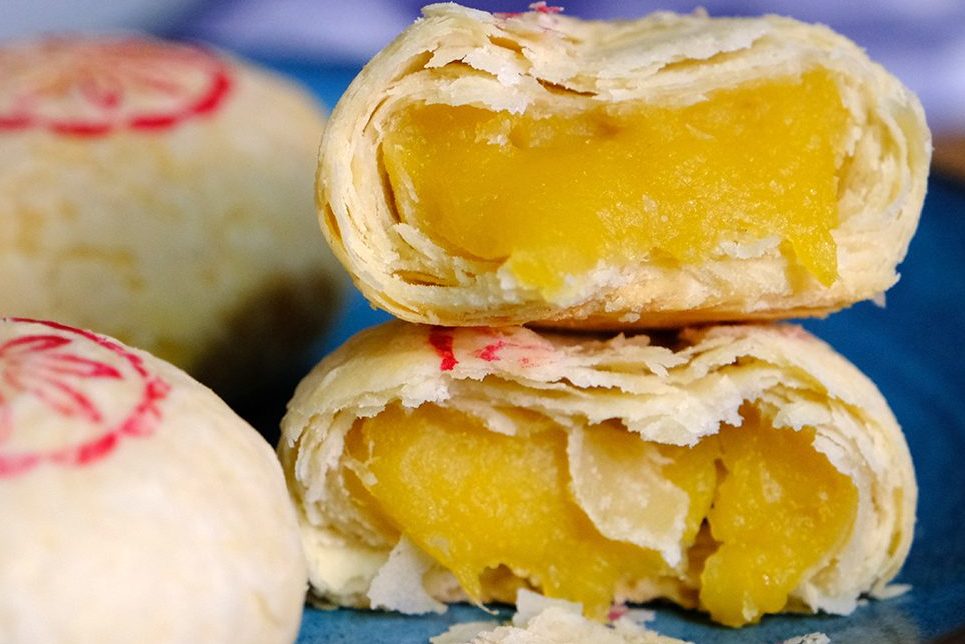
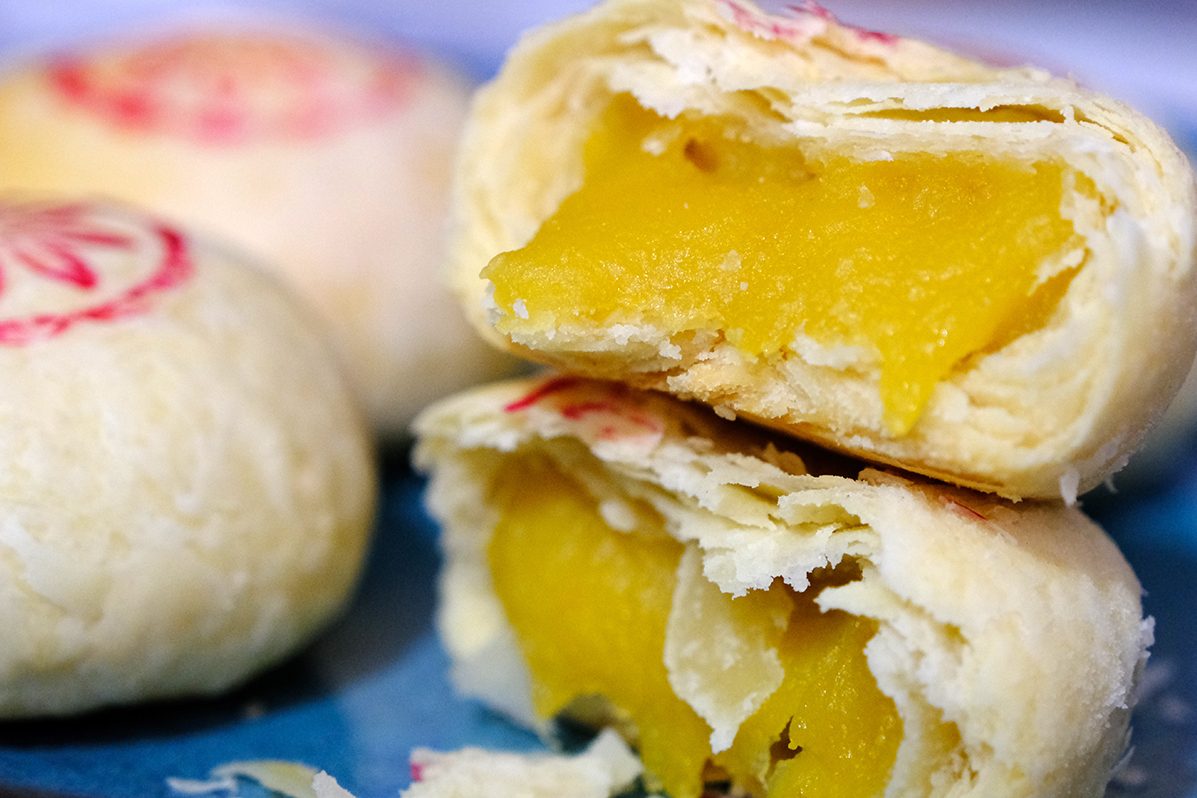
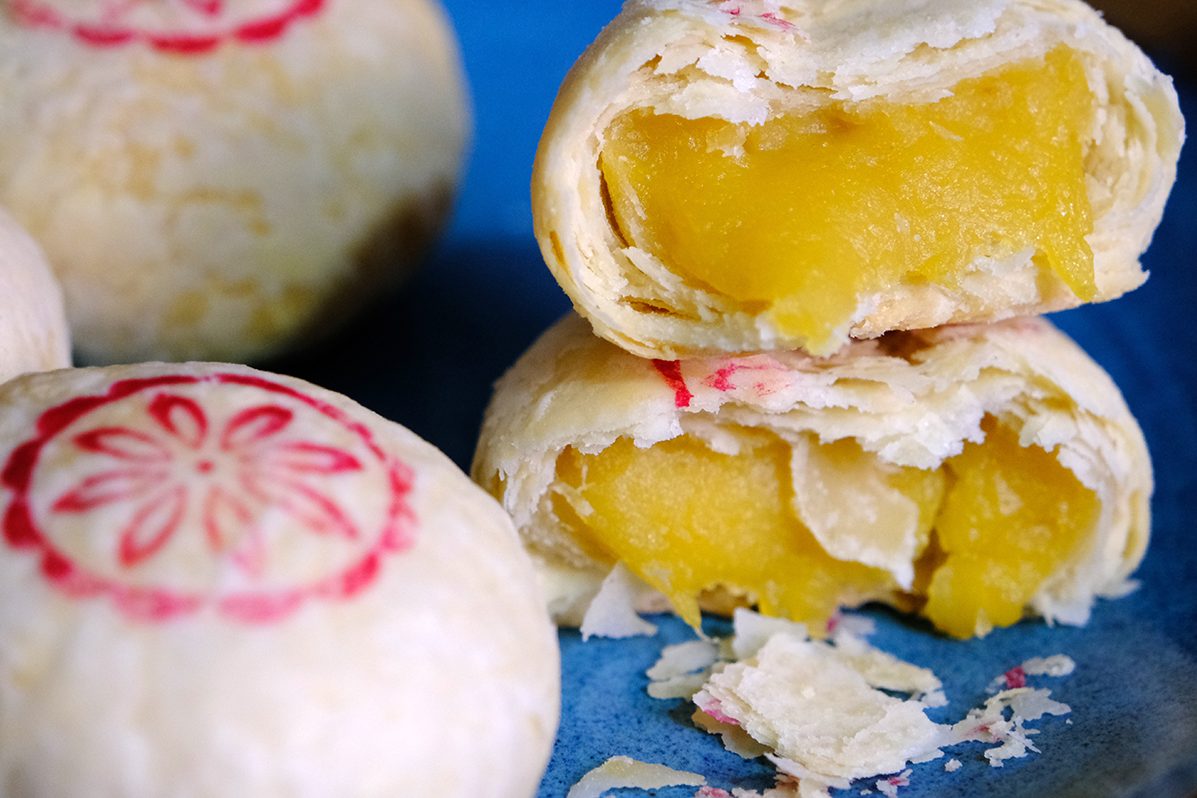
Super Flaky Durian Pastry Mooncake with Ghee

Mooncakes Symbolise Family Reunion. A full moon symbolises prosperity and reunion for the whole family.

In this recipe, I’m going to use Ghee instead of Lard to make a pastry mooncake with Durian filling. It creates more flaky, tastier pastry with beautiful crispy layers.

I like Ghee so much…. 🥰 It has a wonderful smell !! 😗

If you are not familiar with Ghee, Ghee is a type of clarified butter, originating from India. It is commonly used in India for cooking.
Ghee’s distinctive smell is often described as nutty, buttery, and aromatic, which adds depth and richness to dishes.


This type of mooncake is actually called Su-Style Mooncakes (苏式月饼 Su shi yuebing) which originally from Suzhou 苏州市.
As you can see, their uniqueness is in the crust, which is closer to flaky pastry with multi-layered.


To make those beautiful multi-layered pastry shells we have to make 2 different types of dough; The first is Water Oil Dough and the second one is called Pastry Dough.


Unlike the common recipe that using Lard or Shortening as a fat; Ghee in pastry crusts deliver a tender, flaky crust with a richer, more buttery flavour.
It also have a more pleasant palate feel as compared to one made from Lard or Shortening.

Who doesn’t like durian? For me… it smells so GOOD… 🤣😅

And the key to make this delicious pastry filling is to use fresh durian fruit.
Frozen durians usually has almost no smell or the taste is milder than fresh durian, so it won’t be tasty.

🙄 Can you count how many layers there are? 😳

Look how thin, crispy and flaky the crust is ! Ghee really gives a rich flavour to the pastry while the thick and sticky durian filling was so tasty 🥰.

🤤 So… hungry…

These pastry mooncakes are best served once it’s come out from the oven 👍🤤
The crust will be really crispy while the thick Durian filling inside are still warm and gooey .

I hope you will enjoyed this recipe, especially with your loved ones or given as gifts to express love and good fortune.
Wishing you a Happy Mid-Autumn Festival !! ❤️💋 LOVE YOU ALL

WATCH HOW TO MAKE SUPER FLAKY DURIAN PASTRY MOONCAKE

RECIPE

SUPER FLAKY DURIAN PASTRY MOONCAKE WITH GHEE
Yield: 10 Pieces
Active Time: 2 Hours
Total Time: 4 Hours

INGREDIENTS
☘️ Durian Filling
75 g Mung Bean
600 g Water
130 g Fresh Durian Flesh
125 g Milk
35 g Caster Sugar
15 g Glutinous Rice Flour
1/8 tsp Salt
25 g Vegetable Oil

☘️ Water Oil Dough
130 g All-Purpose Flour
10 g Caster Sugar
1/8 tsp Salt
40 g Ghee
70 g Hot Water (40-60°C)

☘️ Pastry Dough
120 g All-Purpose Flour
50 g Ghee

☘️ Decoration
Wooden Stamp
Red Food Colouring

INSTRUCTIONS
Durian Filling

  1. Rinse Mung Beans until the water runs clear and pour it to a medium pan. 75 g Mung Bean
  2. Add in the Water, cook until they are very soft; set aside 600 g Water
  3. Scoop out the durian flesh. 130 g Fresh Durian Flesh
  4. Into the food processor- pour the cooked Mung Beans along with durian flesh and the rest ingredients (except the oil); Blend until smooth. 125 g Milk; 35 g Caster Sugar; 15 g Glutinous Rice Flour; 1/8 tsp Salt
    * If the mixture is too thick, you can add a little bit of water to help the spinning process.
  5. Pour the blended mixture into a non-stick pan; Add in the oil. 25 g Vegetable Oil
    Cook over medium heat and keep stirring (please note never leave it out when cooking this mixture); This process will take for about 30 minutes (the water will slowly evaporate and the mixture star to thickened).
  6. Once the mixture formed a thick paste, turn down the heat to medium low (be careful not to burned it) and continue cook until the paste comes together and no longer stick to the pan.
  7. Once it’s done, remove from heat.
    Pour it to a plate, cover it with a cling wrap to prevent from drying out and store them in the fridge for at least 1 hour to firm up.
  8. After 1 hour, the filling is firmer than before so it’s easier to handle.
    Divide it into 10 equal portions (about 30 grams each) and roll each portion into a ball.
    Cover with a cling wrap while waiting for the pastry dough.


Water Oil Dough

  1. In a large bowl, simply combine all the ingredients; Mix well (there’s no need to be so smooth).
    Cover with a cling wrap and let the dough rest for 15 minutes. 130 g All-Purpose Flour; 10 g Caster Sugar; 1/8 tsp Salt; 40 g Ghee; 70 g Hot Water (40-60°C)
  2. After 15 minutes, using your hands start kneading the dough (you can see that the dough become really smooth after kneading for a while).
  3. And then, continue kneading by slam the dough for about 5 minutes until you can pull the dough into a thin membrane (kindly follow video instructions).
  4. Wrap the dough in a plastic wrap and let it sit at room temperature for at least 30 minutes.


Pastry Dough
Simply combine All-Purpose Flour and Ghee. 120 g All-Purpose Flour; 50 g Ghee
Mix and knead the dough until you don’t see any flour left in the bowl; and then cover and let it rest at room temperature for at least 30 minutes.

Laminate the Dough

  1. Take the Water Oil Dough, press it into a thick round disc.
    Place the Pastry Dough in the center and then wrap it up (gently fold and seal).
  2. Turn it over so the seam facing down (sprinkle some flour to prevent from sticking).
    And to prevent it from breaking, lightly press the dough with the palm of your hand first; And then you can use rolling pin gently roll into a long rectangular shape (about 15 cm x 20 cm).
  3. Fold into thirds.
  4. And then, roll it into a bigger rectangle shape (about 25 cmx35 cm).
    * I usually press the dough first and then roll it out slowly, it so much easier.
  5. Once it’s done, spray or brush some water on the surface (not too much), this water acts as a glue; Then gently roll it up into a long log (make sure that you roll it tightly)
  6. Divide the log into 2 equal portion, cover and let it rest for 10 minutes.
  7. After 10 minutes, divide each log into 5 small equal portions (so total will be 10 small portions).
    * Remember always cover the dough along the process to prevent it from drying
  8. Once it’s done, we are ready to shape the mooncake.


Shape & Bake the Mooncake

  1. Take 1 dough; Turn it over so the smooth side facing down.
  2. Pinch both ends; Fold and stick the two ends together (pinch to seal).
  3. With the smooth side facing down, roll the dough into a 10 diameter round shape.
  4. Place the filling in the centre.
  5. Using your right hand, slowly squeeze and push the wrapper up while left thumb press the filling down; Pinch to seal. 
    * You can pull off the excess dough, I don’t like to waste any dough so I just press to flatten it.
  6. Don’t worry if the skin of the dough is broken, you can always fix it.
    Just apply a little bit of flour and rub gently, it will be smooth again.
  7. Once the mooncake is done, place it on the pan lined with parchment paper.
  8. Use your palm or jar lid to flatten the mooncakes into a thick round disc.
  9. Spray some water on the top to prevent the surface from cracking.
  10. Apply some red food colouring to a kitchen paper; using wooden stamp create the pattern on the mooncake.
  11. Bake the mooncake in the preheated 190°C oven for 25 minutes.
  12. Once it’s done, transfer them onto a cooling rack and let them cool completely before storing.


NOTES

  1. These pastry mooncakes are best served once it’s come out from the oven; The crust will be really crispy while the thick Durian filling inside still warm and gooey .
  2. To Store
    At room temperature (in an airtight container) for 2 days;
    Fridge (in an airtight container) for 1 week;
    Freezer (in an airtight container) for 1 month
  3. The Durian filling is best consumed as soon as possible, but it will keep in an airtight container in the refrigerator (for up to a week) or in the freezer (for up to a month).

Traditional Bakery Bacon and Cheese Bread

Have you ever went to a traditional bakery shop and enjoyed the aroma and freshness of the baking;
And you could not resist treating yourself with the breads that are warm, soft and yummy?

This loaves of bread at vintage bakery shop in my hometown provide a slice of childhood memories that is hard to replace.
One of the most legendary bread and my family love it so much.

Everything is done in the old and traditional way and I really loved the smell of the breads when they were freshly out from the oven.

In this recipe, I try to replicate it as closely as possible to describe the taste of the bread so you can enjoy it 😉
The recipe is simple and easy. I like to use my stand mixer but you can also knead the dough by hand.

Not a very tall bread but with soft, springy and a slightly dense texture.
The dough is enriched with butter and eggs so the baked bread has a good structure to stand up to its filling.

Yummy Edam Cheese 🤤

As for the filling, I found Edam cheese is perfect for this kind of bread.
Edam cheese has a very mild flavour, slightly salty or nutty; it’s commonly eaten on crackers and bread.
But if you can’t find it, you can replace it with Processed Cheese Slices; it taste good too.

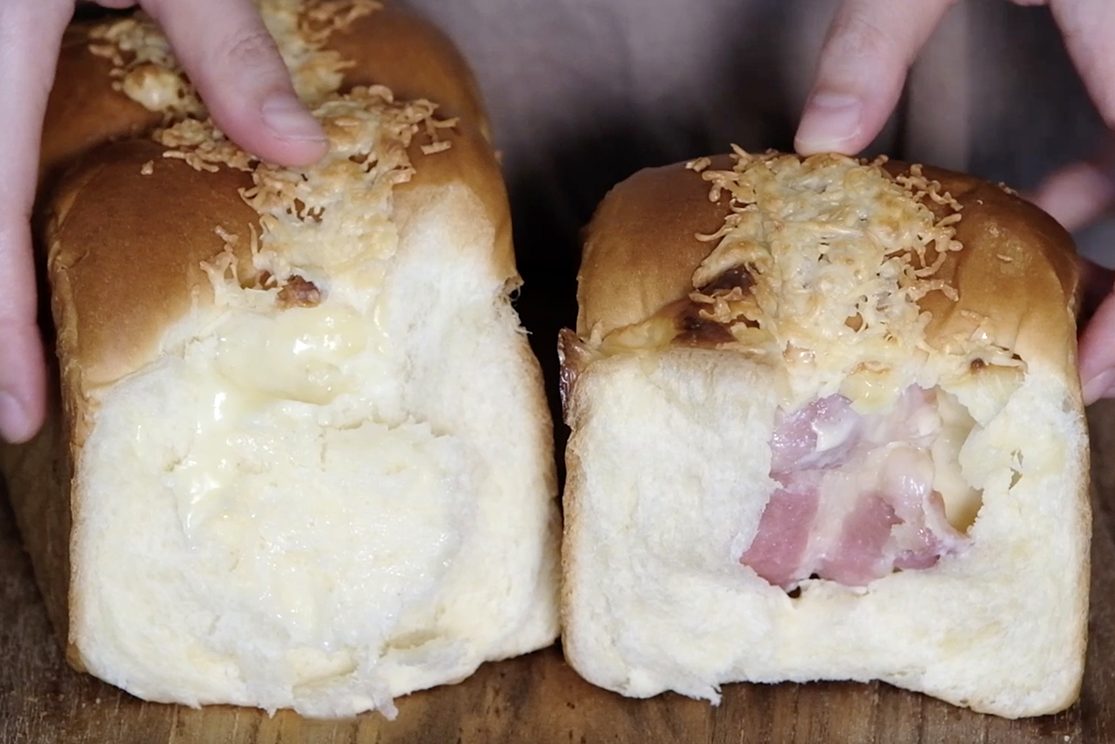
Let’s take a look inside !
I just need to tear the bread slice into bite size, and munched. One slice was never enough for me 😋

🙄 So hungry….

These cheese and bacon rolls are soft, fluffy, and filled with a gooey cheese and bacon filling;
It’s quite easy to pull out the bread strands.

After cooling on the rack, store in the fridge in an airtight plastic bag. The loaf will still soft for the next few days.

You can reheat the bread in the 180°C oven for 10 minutes, it taste even better…. crispy on the outside, soft in the inside.

The soft, fluffy texture of the traditional bread is something that mass-production baking techniques can never achieve

I hope you can enjoy the beauty of this bread from the nostalgic old bakery 🤗

WATCH HOW TO MAKE TRADITIONAL BAKERY BACON AND CHEESE BREAD

RECIPE

BACON AND CHEESE BREAD
Yield: One (450g Loaf Pan)
Active time: 1 hour
Total time: 4½ hours

Ingredients
☘️Bread Dough

  • 120 g Bread Flour
  • 120 g All-Purpose Flour
  • 1 tsp Instant Yeast
  • 25 g Caster Sugar
  • 1/2 tsp Salt
  • 15 g Milk Powder
  • 65 g Milk
  • 45 g Eggs
  • 35 g Water
  • 35 g Salted Butter

☘️Filling

  • 150 g grated Edam cheese (OR you can use processed cheese slices)
  • 3 slices Back Bacon

☘️Eggwash (1 tbs Eggs + 3 tbs Milk)
☘️Grated Cheddar Cheese on top for topping


Instructions

  1. In a mixing bowl with dough hook, combine all the dry ingredients (Place the salt FAR AWAY from the yeast, you do not want to add salt on top of yeast  because salt will indeed KILL the yeast). Mix for about 1 minute.
    120 g Bread Flour; 120 g All-Purpose Flour; 1 tsp Instant Yeast; 25 g Caster Sugar; 1/2 tsp Salt; 15 g Milk Powder
  2. Pour in the Milk, Eggs and Water; Mix on medium speed for about 5 minutes until the dough comes together. 65 g Milk; 45 g Eggs; 35 g Water
  3. Add in the Salted Butter and continue knead the dough on medium speed for 12-15 minutes (You can also knead the dough by hand on a work surface for 15 to 20 minutes). 35 g Salted Butter
  4. After 12-15 minutes, you can feel that the dough is very soft and has a shiny surface; And you can stretch it into a large thin membrane (it’s called a Windowpane Test).
    Shape the dough into a ball, cover and let it rest for 10 minutes.
  5. Divide the dough into 3 equal pieces, round it into a ball;
    Cover and relax the dough for 10 minutes.
  6. Prepare the pan and filling
    Grease 450g loaf pan with a little bit of oil.
    Pat bacon on a kitchen paper to absorb moisture and grated the cheese.
  7. Take one dough, roll the dough into a rectangular shape (remove the gas inside);
    then fold both sides in so it become a rectangular shape ( do the same way with the rest dough).
    * Kindly watch the video for the full instructions
  8. To shape
    Start with the first dough with the smooth side facing down, roll the dough into rectangular shape (25 cm long);
    Using your finger press to thinly the bottom and the sides;
    Spread a slices of Back Bacon and 50 grams of grated Edam Cheese in the middle and then roll the dough like a jelly roll tucking the sides well; place it into the prepared pan.
    Do the same way with the rest dough and then cover and let it ferment until it doubles in size.
    * At 32°C it usually takes for about 90 minutes.
  9. After ferment for about 30 minutes brush the top lightly with egg wash mixture to give the final product a golden brown colour that is slightly shiny. 1 tbs Egg; 3 tbs Milk
    Cover again and continue with the fermentation process.
  10. When the dough has doubled in size, bake in the preheated 180°C for 25 minutes.
    After 25 minutes, sprinkle some grated Cheddar Cheese on top and continue bake in the 180°C for 10 minutes.
  11. Once it’s done, remove it from the pan immediately and let it cool completely on a cooling rack.
    * When baked, the internal temperature of the bread should be about 195°F – 210°F; the bread will have a hollow sound on the bottom when tapped.


NOTES

  1. After cooling on the rack, store the bread in the fridge (in an airtight plastic bag).
    In the fridge, it will last for 1 week.
  2. These loaves do freeze beautifully.
    Cool the baked loaves then place them in a freezer-safe storage bag, it can be frozen for up to a month.
  3. To reheat
    – From the fridge: cut the bread into slices and then bake in the preheated 180°C oven for 10 minutes.
    – From the freezer: take out the bread to room temperature for at least 30 minutes (or defrost in the fridge overnight); cut the bread into slices and then bake in the preheated 180°C oven for 10 minutes.

Korilakkuma pineapple cakes

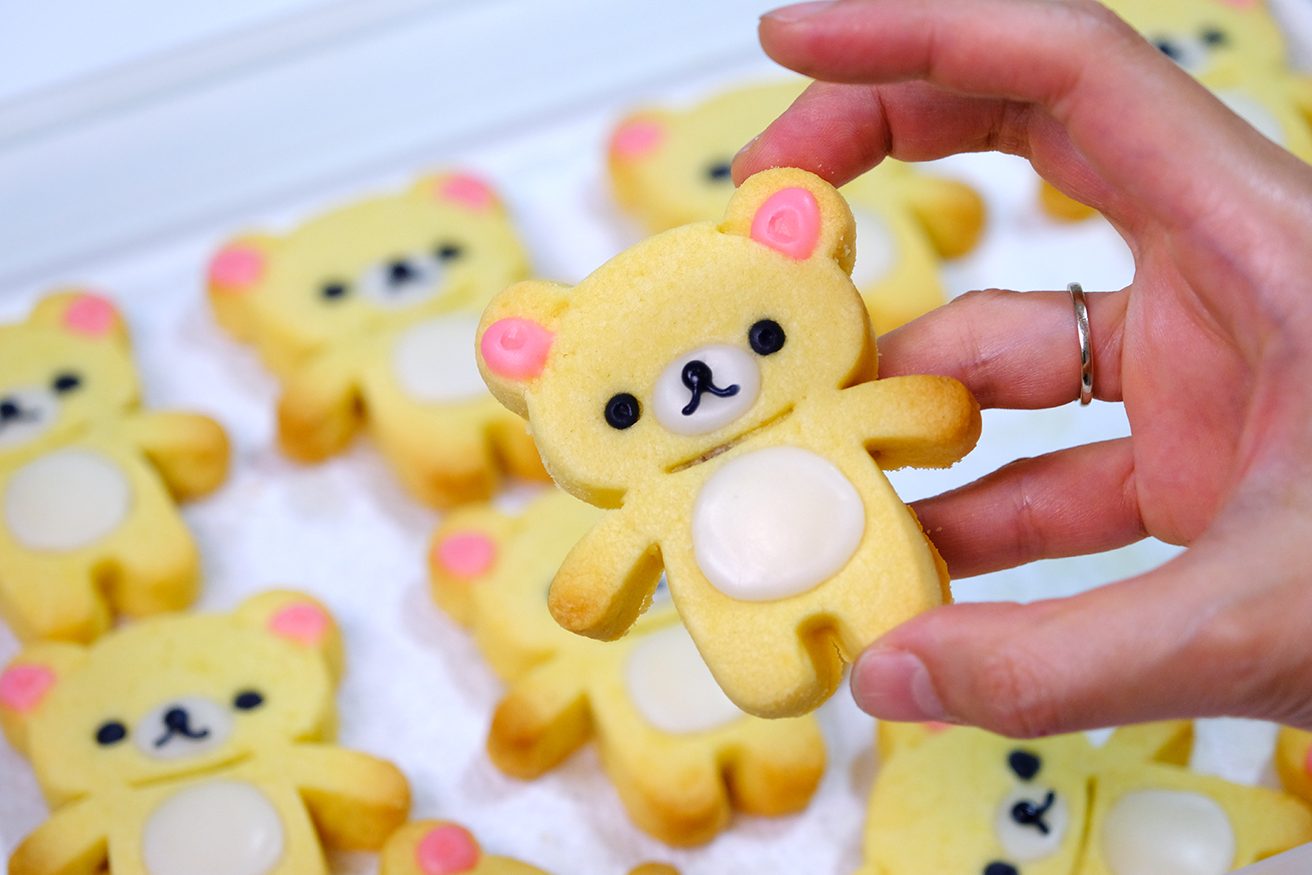
This unique Taiwanese Pineapple Cakes no longer makes us bored with the standard rectangular shape; And I’m sure that your kids will love it too

Hi Everyone, today I am making these cute “Korilakkuma Taiwanese Pineapple Cakes”.
Taiwanese Pineapple Cakes actually almost similar to other Asian Pineapple Cakes; but typically larger than the Singaporean / Malaysian Pineapple Cakes.

They are made with butter pastry crust filled with thick pineapple jam. The cakes are baked in an individual mould, usually in square or rectangle mould.

Taiwanese style (left) ~ Singapore/ Malaysia style (right)

I was told by several Taiwanese-style bakeries that the traditional kind of Taiwanese pineapple cakes are made of pineapple jam that is made of winter melon and maltose syrup so that the jam is extra sweet, heavy and sticky.

However, due to the change of time, most consumers are becoming more health conscious these days and prefer the less sweet and sticky version of pineapple cakes (I personally don’t like food that overly sweet). For this reason, in this recipe I would like to stick to my regular pineapple jam with NO winter melon and maltose syrup.

And I always think, how to make these Pineapple Cakes look more attractive?
This cute Rilakkuma cookie cutter with facial stamp really make life easier;
No longer makes us bored with the standard rectangular shape and I’m sure that your kids will love it too.

The crust to filling proportion is spot-on; thin crust with the right amount of filling.

And people often ask, what is the tips so that the crust is tender?
As soon as the bottom and edges golden brown, take them out from the oven.
Let it stay in the pan for about 5 minutes; Don’t wait it to cool, put in the sealed box while still hot (place kitchen paper on the bottom and the top to absorb the excess moisture).

This way, the cakes won’t be hardened and the crust will be tender.
These Pineapple Cakes will keep well for up to 3 months in the fridge, in an airtight container.

Some people use chocolate for the details;
I prefer royal icing because the chocolate that comes out of the fridge will “sweat”, melt easily, it definitely will ruin the look of your Korilakkuma.

Pineapple cakes make a great Chinese New Year gift for family and friends or a tasty birthday gift for loved ones!

The filling is just perfect not too sweet, they are such an addictive tea snack.

Tender buttery crust with a sweet and tang of homemade pineapple filling inside.
The crust is crumbly and melt-in-the-mouth and the pineapple jam is just perfectly thick but not tough.

I hope this korilakkuma cake can make everyone smile 🙃❤️.

Love you All 🥰


KORILAKKUMA PINEAPPLE CAKES
Yield: 40 pieces
Active Time: 3 hours
Total Time: 4 hours

🌿 Pineapple Filling
1000 g Pineapple (after peeled)
200 g Granulated Sugar
10 ml Lemon Juice
1/8 tsp Salt

🌿 Crust Dough
340 g Salted Butter (soft)
100 g Icing Sugar
85 g Egg Yolks
75 g Condensed Milk
530 g Cake Flour
1/2 tsp Salt

🌿 Royal Icing
130 g Icing Sugar (sifted)
4 tsp Lemon Juice
30 g Corn Syrup

Rilakkuma Cookie Cutter: https://amzn.to/3Y6iNvu

INSTRUCTIONS
🌿 Pineapple Filling

  1. Cut pineapple in half (the lower part of the core is a bit hard, so you need to remove it). 1000 g Pineapple (after peeled)
  2. Shred pineapple into small pieces (about 1×1 cm), cut he core thinly.
  3. Place the shredded pineapples along with the juice into a non-stick pan.
  4. Pour in the sugar along with lemon juice and salt; and then bring it to a boil. 200 g Granulated Sugar; 10 ml Lemon Juice; 1/8 tsp Salt
    There’s no need to cover with a lid, what you need to do now is to evaporate all the liquid.
    Cook over high heat (as long as there is a water in a pot, it will not burn the bottom).
  5. Once the pineapple juice almost completely dry, lower the heat to medium low;
    And continue cooking until it turn into dark brown caramel colour, take it off from the heat.
  6. When the filling is cooled completely, it will become sticky and a bit hard; make it easier to wrap.
    Divide them into small portions; 10 grams each;
    Roll each portion into an oval shape, flatten it; And cover them with a cling wrap to prevent from drying out.

🌿 Crust Dough

  1. In a large bowl, using whisk or mixer; beat the soft butter for a few seconds. 340 g Salted Butter (soft)
  2. Add in the icing sugar and continue beat over high speed until the mixture is pale and fluffy (about 5 minutes). 100 g Icing Sugar
  3. Mix in the egg yolks (this yolks is going to give extra flaky texture). 85 g Egg Yolks
  4. Pour in the condensed milk, mix it really well. 75 g Condensed Milk
  5. Sift in the flour along with the salt; mix until well combined. 530 g Cake Flour; 1/2 tsp Salt
    You don’t want to over-mix it, you can use whisk or mixer first (low speed) and then using spatula to make sure all is well combined and there’s no butter mixture left at the bottom of the bowl.
  6. Cover the bowl with a cling wrap and let the dough rest for half hour.
  7. After 30 minutes, the dough is ready.
    Divide it into small pieces; 30 grams each. Roll each piece into a smooth ball.
    Cover the balls with a cling wrap to prevent from drying out.

🌿 Moulding the Cake

  1. Take 1 piece of the crust dough, roll into a cylinder shape;
  2. Press down in the middle and place the filling in the centre; Wrap it up
  3. Then over a piece of parchment paper, put the filled dough inside the cutter with the smooth side facing down.
  4. Using your palm; press down while spreading the dough, filling in the blanks (this step will be time consuming especially hands part, so be patient).
  5. Release the cake from the cutter with a smooth part facing up (baking sheet lined with a parchment paper); And carefully; press the facial stamp on top of each cake.
  6. Store the cakes in the fridge for about 30 min before baking so it doesn’t spread too much
  7. Bake them in the preheated 170°C oven for about 18-20 minutes (rotate the pan halfway through baking).
  8. As soon as the bottom and edges golden brown, take them out.
    Let the cakes stay in the pan for 5 minutes; Don’t wait it to cool, put in the sealed box while still hot (place kitchen paper on the bottom and the top to absorb the excess moisture).
    This way, the Pineapple Cake won’t be hardened and the crust will be tender.
  9. On the next day, you can continue with the details.

🌿 Royal Icing
Simply combine the sifted icing sugar, lemon juice and Corn Syrup. 130 g Icing Sugar (sifted); 4 tsp Lemon Juice; 30 g Corn Syrup
*If you feel the consistency is too thick, you can add a little bit of boiling water; on the other hand if it’s too thin; add more icing sugar.


🌿 Notes

  1. These Pineapple Cakes will keep well for up to 3 months in the fridge, in an airtight container.
  2. For the details
    Some people use chocolate, I prefer royal icing because the chocolate that comes out of the fridge will “sweat”, melt easily, it definitely will ruin the look of your Korilakkuma.
    Let the first layer of the icing sets hard before you add another details on top.
    If you are in humid conditions, you can turn on the air conditioner to speed up the drying process.

Kawaii Mini Burger


Today I’m gonna share with you my “Kawaii Mini Burger”.
These mini burgers will melt hearts and warm stomachs; they are so teeny-tiny, cute and absolutely delicious. 


The bun is entirely homemade, soft and fluffy; with juicy patty inside and all the delicious toppings and sauce… so Yummy!!
They are perfect to serve up at a party or just a snack for your love ones.

(18.5×26.5×3)cm Cupcake Pan

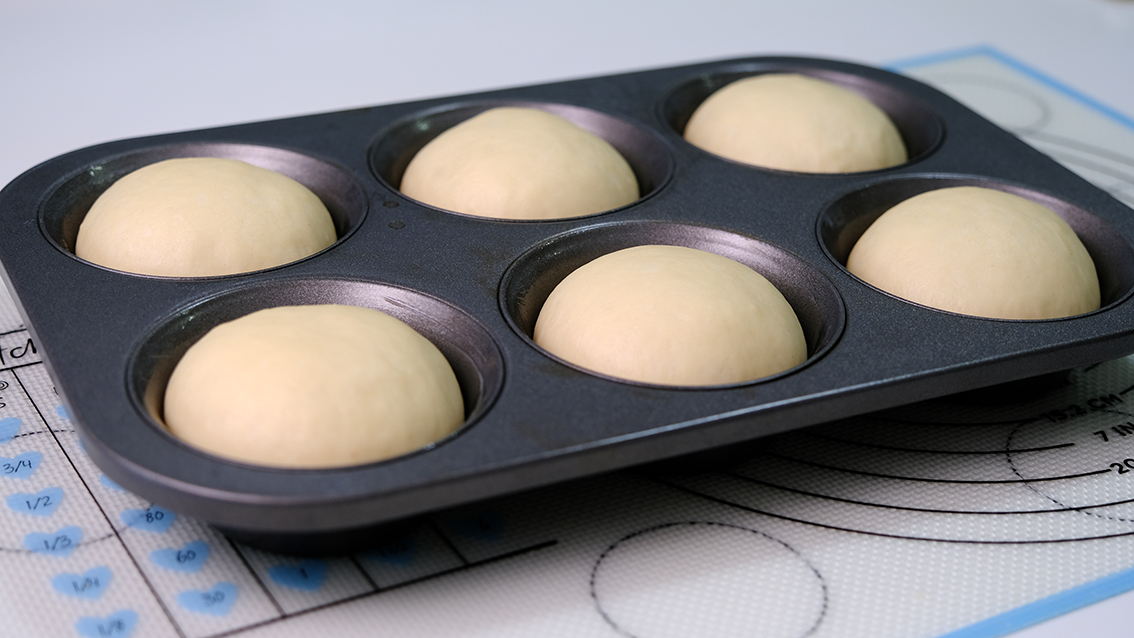
For the buns, you can make buns using ring moulds and they can be scaled to any size that you like, I found that this regular cupcake pan fits perfectly and easier to get.


To avoid over-proofing, I usually start adding the details when the buns has increase the volume 40-50 percent. If you see from the side, the top of the dough is more or less parallel with the top surface of the pan.


And while we adding the details the dough will continue to rise, so try to finish them as soon as possible.


You don’t want to over bake your lovely buns, if they are too dark they won’t look good on your burger.

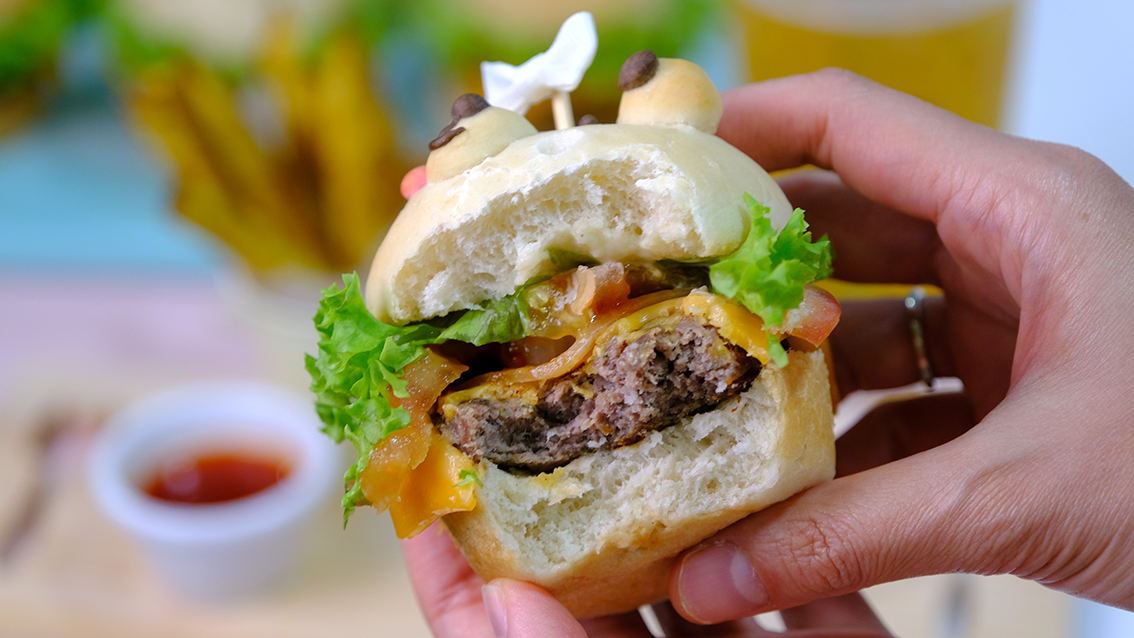
Oh… look how cute they are!

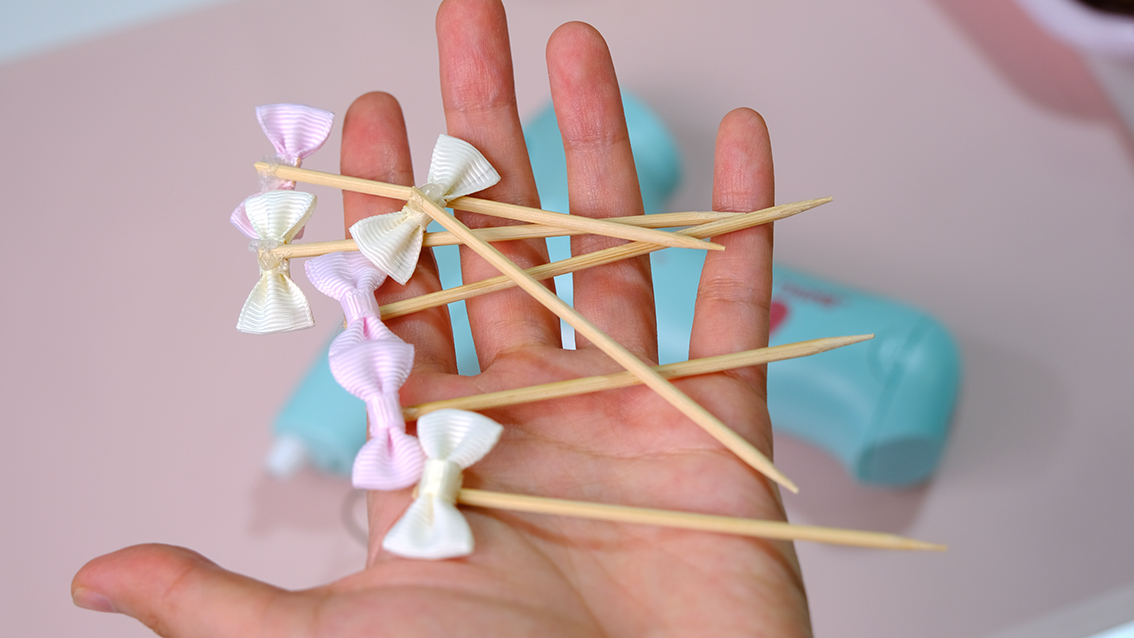
And to keep everything from falling apart, I create my own DIY toothpick so it’s easier to “grab and eat”.


It’s not only make it even cuter, but also look more elegant and fancy

These custom toothpicks really take your food presentation to the next level.


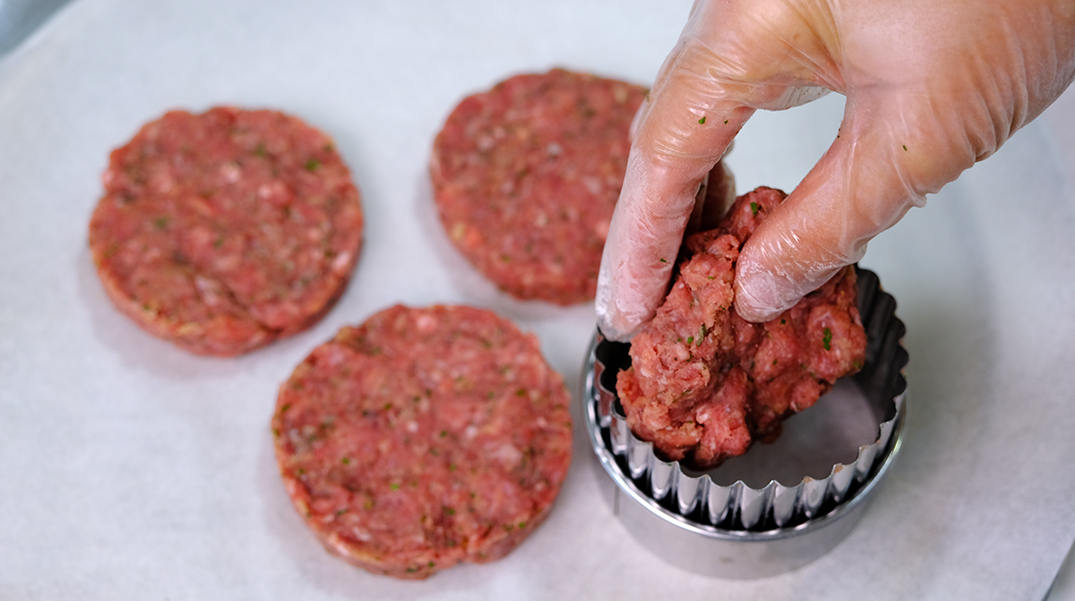
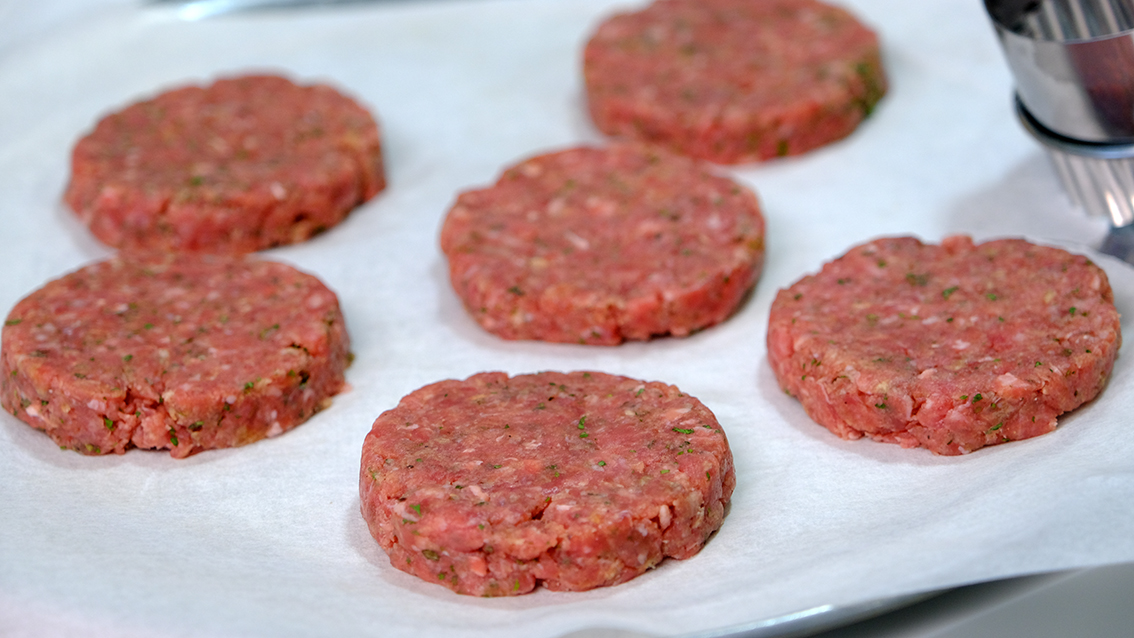
You can shape the patty with your hands, I’m prefer to use ring mould, it really helps me to make my burgers look perfect like the ones you get in restaurants.


Some people use a lid from a jar as a mould. Just make sure that you find a lid that is slightly bigger than the size of your burger bun coz shrinkage happens throughout the cooking process.


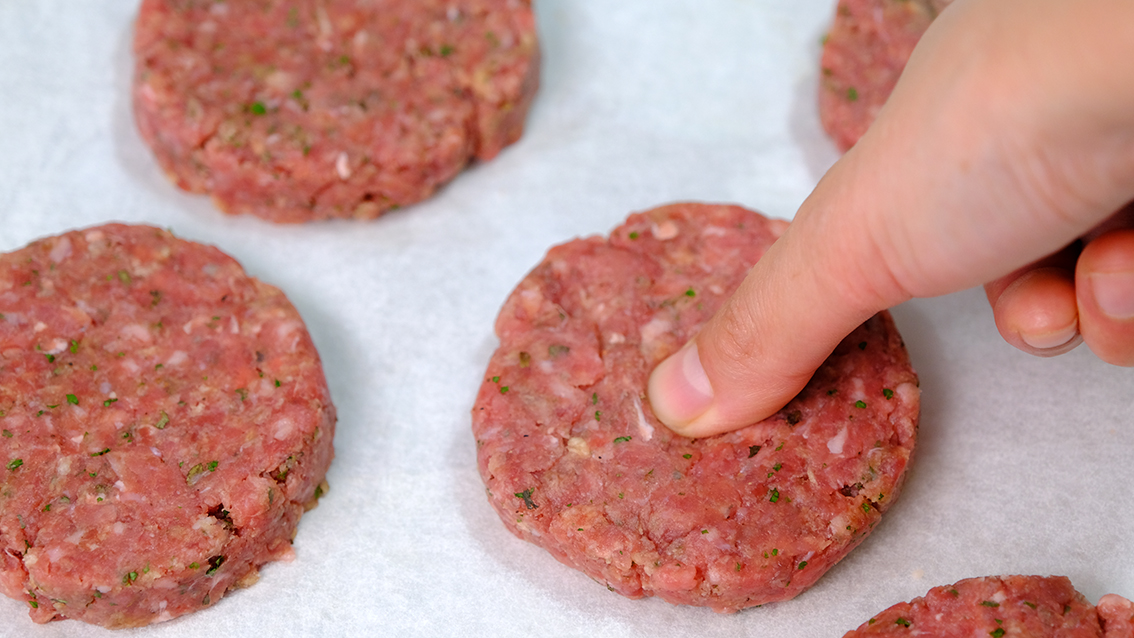
And before you cook it, give a thumbprint indentation to the center of each patty, this will helps the patty hold it’s shape—rather than swelling.


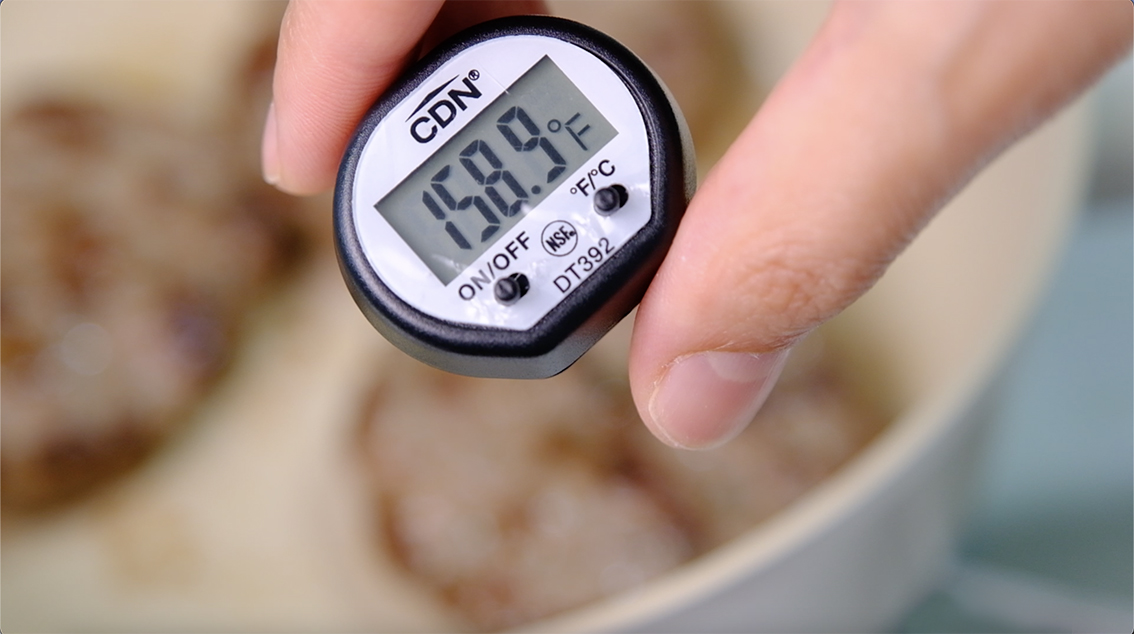
The best way to tell when it’s done is by using a thermometer without splitting the middle.


Cook until a thermometer reads 160°F.


Besides tomato ketchup, one of the best condiment that I always used when making burger is this wasabi mayo.

I remember having this sauce in a morning burger when I was in Japan and I really love it so much!
You can use either wasabi powder or paste, for me it does taste pretty similar.
If you are a wasabi lover, I promise it will taste really great!

Wasabi Paste

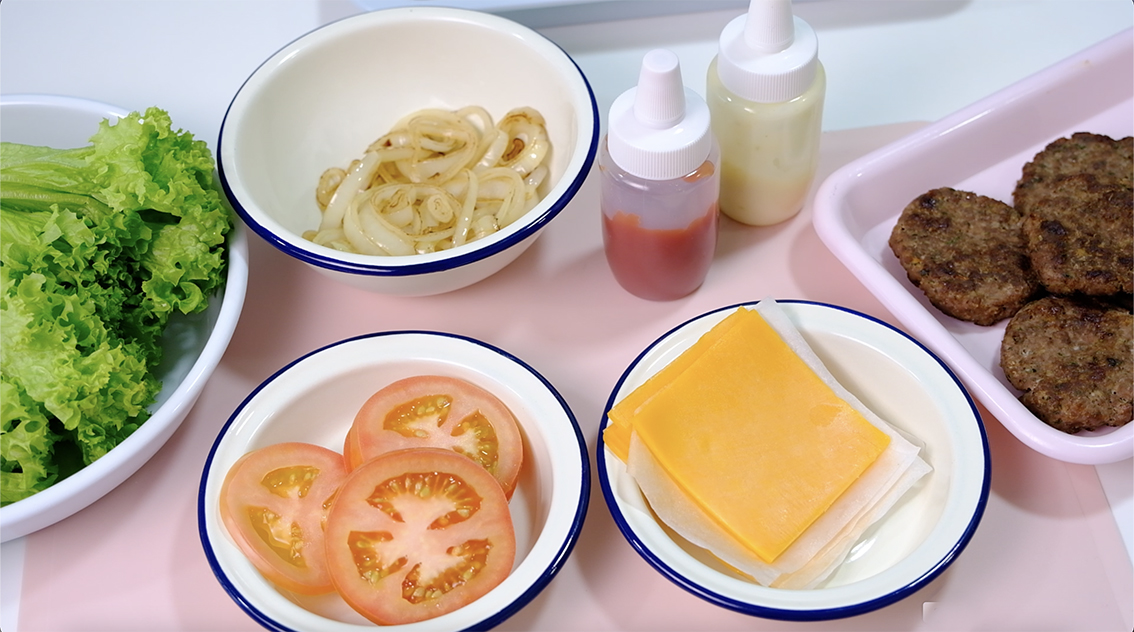
All the ingredients is well prepared; the patties, sharp cheddar cheese, tomatoes, onions, some lettuce, the sauce…

Toppings and Sauce

And of course our adorable burger buns !


And before we start to stack them, do you know that are many ways to stack the burgers??
If you pay attention to the emojis, each of them arrange the burger in a different order.


Initially I also thought is this thing important?
Then I was really surprised that 2 burger with identical ingredients but different stack orders can result in 2 different taste.


After a few experiment and testing, I decide to use the “Burger King Whopper” stack method as it produce more stable and flavourful burger.


Ok back to our Whopper stack burger, so you will cut half of your tinny buns and stack all the toppings and sauce.


Look how beautiful this burger buns!

Soft beautiful bun

Please do remember the stack order (this will come out in the test! KIDDING 😅) :
1. The bottom of the bun
2. Juicy patty
3. A piece of sharp cheddar cheese
4. Tomato ketchup
5. Some grilled onion
6. A slice of tomato
7. A bunch of fresh lettuce
8. My beautiful wasabi sauce
9. The cute teddy bear head bun
10. And finally secure it with her pretty hair ribbon 

The Scrumptious Sweet Potato Fries

And of course, no burger is truly complete without having a side of scrumptious fries! 
These healthy baked sweet potatoes so tasty, they are caramelised on the outside and tender on the inside. I love it so much!

And as for the seasoning, you can keep it simple or even add more flavor with spices. 
A pinch of curry powder, garlic, and cayenne pepper would be a nice touch. It was the perfect combination of heat and sweet.


They are look not only delicious but also so sweet, I’m sure that everyone and specially kids will love it so much.


The bun is entirely homemade, soft and fluffy, while the burger patty is juicy and tender.


And how about some cold beer for adults?


I hope that you give them a try, they are really a lot of fun to put together.


You can create your own design with a different flavour; replace the beef with juicy grilled chicken patty, change the sauce with sweet and savoury teriyaki sauce;
Whatever you like! THE SKY’S THE LIMIT


I hope that you enjoy the recipe!! LOVE YOU ALL!!


KAWAII MINI BURGER
Yield: 6 burgers
Cupcake pan dimensions: (18.5×26.5×3)cm
Active time: 2 hours
Total time: 2 1/2 hours

INGREDIENTS
BURGER BUNS ( 6 burgers, 55 grams each)

  • 200 g Bread Flour
  • 1 tsp Instant Yeast
  • 25 g Granulated Sugar
  • 8 Milk Powder
  • 1/2 tsp Salt
  • 120 Cold Water
  • 15 Unsalted Butter


SWEET POTATO FRIES

  • 750 g Sweet Potatoes
  • 1 Egg White (30 g)
  • 1 tsp Vegetable Oil
  • 1 tsp Curry Powder (optional)
  • 1/2 tsp Salt
  • 1/4 tsp Ground Black Pepper
  • 1/4 tsp Garlic Powder
  • 1/8 tsp Cayenne Pepper (optional)


PATTIES (6 patties, about 55 grams each)

  • 250 g Beef (Ground Chuck)
  • 15 g Eggs
  • 25 g Bread Crumbs
  • 25 g Parmesan Cheese (grated)
  • 1 tsp Dried Parsley
  • 1/2 tsp Dried Basil
  • 1/4 tsp Salt
  • 1/4 tsp Garlic Powder
  • 1/8 tsp Ground Black Pepper


TOPPINGS & ASSEMBLY

  • Sharp Cheddar Cheese
  • Tomato Ketchup
  • 1 Onion (grilled)
  • 1 Tomato (thin slice)
  • Lettuce
  • Wasabi Sauce (3 tbs Mayonaise + 3 tsp Wasabi Paste)
  • DIY Toothpick

INSTRUCTIONS
BURGER BUNS

  1. Grease the pan with generous amount of butter; cupcake pan dimensions: (18.5×26.5×3)cm.
  2. In a large bowl combined the flour, instant yeast, sugar and milk powder; mix well.
    Add the salt and mix (adding the salt last to make sure that it doesn’t come into direct contact with the yeast; salt can kill the yeast).
  3. Pour ice water into the flour mixture (ice water slows down the fermentation so we have more time to decorate the buns).
    Don’t knead the dough at this time, just mix water and flour mixture until it forms a cohesive ball
  4. Cover and let the dough rest for about 10 minutes.
    After 10 minutes you can feel that the dough become more stretchy and pliable.
  5. Place the dough on the work surface, add in the butter and start kneading the dough.
    The dough is really sticky at this point, that’s totally fine, don’t be tempted to add more flour to it; just continue kneading it until you get a smooth ball (it takes for about 10 minutes).
    *You will know whether the dough is ready by doing the windowpane test; if you can stretch the dough into a thin translucent membrane without breaking it that means the gluten is well developed and your dough is done.
  6. Weigh 6 portions of the dough, 55 grams each (there will be leftover dough for the details, some plain dough for the Bear’s ears, colour a bit with dark brown for the eyes, nose and mouth; and another pink for bear’s lovely cheek).
    Cover all the dough in a plastic wrap to prevent from drying out and let them rest for about 5 minutes.
  7. After 5 minutes, take 1 portion of the dough, flatten it with the palm of your hand to remove any air bubbles, pull all creases to the back; place it on a work surface and then roll and shape it into a smooth ball. Continue with the rest dough.
  8. Place the buns onto a greased cupcake pan, cover it with a kitchen towel and let them half proof for about 20-30 minutes. 
  9. In the meantime; Preheat the oven to 170°C.
  10. After 30 minutes, you will see that the dough noticeably puffy and increase the volume 40-50 percent. If you see from the sides, the top of the dough is more or less parallel with the top surface of the pan.
    Now you can start adding the detail (while we adding the details the dough will continue to rise, so try to finish them as soon as possible):
    – Roll some plain dough for the Bear’s ears and then the center of her face
    – Using some dark brown dough to create the inner part of the ears, her tiny nose, two little eyes and mouth.
    – A bit of pink dough for her shy cheek
  11. After finish with all the details, you can check whether the buns is fool proof; if you press the dough then the indentation slowly springs back half-way, that means the dough is well proved and ready to bake.
  12. Bake them in the preheated 170°C oven; turn on your alarm and check them out right after 10 minutes baking. Do not over bake, if they are too dark they won’t look good on your burger. Once it’s done, take it out from the pan and let it cool completely on a cooling rack.


SWEET POTATO FRIES

  1. Preheat the oven to 200°C.
  2. If you leave the skin on, make sure that you wash and scrub them well before you cutting or cooking it; pat them dry.
  3. Cut the fries; I recommend a width between 1/4- and 1/2-inch.
  4. In a large bowl whisk the egg whites until foamy, add a bit of vegetable oil and coat the fries (this egg whites mixture acts as a binding agent so all the spices will stick well to the fries).
  5. Toss the sweet potatoes with the rest ingredients (salt, pepper and spices).
  6. Place the fries on parchment lined baking sheets (try not to overlap the fries for even baking). Bake them for 20 minutes.
    After 20 minutes, flip the fries; return to the oven and bake it for another 15-20 minutes.
  7. Serve immediately.
    *The browner they are, the crispier they will be, but if they get really dark, they will be a bit hard because of the natural sugars of the sweet potatoes caramelizing. Oven may vary, So watch carefully.

PATTIES

  1. Season ground beef with all the ingredients; mix really well and divide it into 6 patties. 
  2. Place 1 portion of ground beef inside the 7 cm diameter ring; press the meat down, make sure it spread evenly.
    *You can shape the patty with your hands, I’m prefer to use ring mould, it really helps me to make my burgers look perfect like the ones you get in restaurants (some people use a lid from a jar as a mould, just make sure that you find a lid that is slightly bigger than the size of your burger bun coz shrinkage happens throughout the cooking process).
  3. Before you cook it, give a thumbprint indentation to the center of each patty (this will helps the patty hold its shape—rather than swelling).
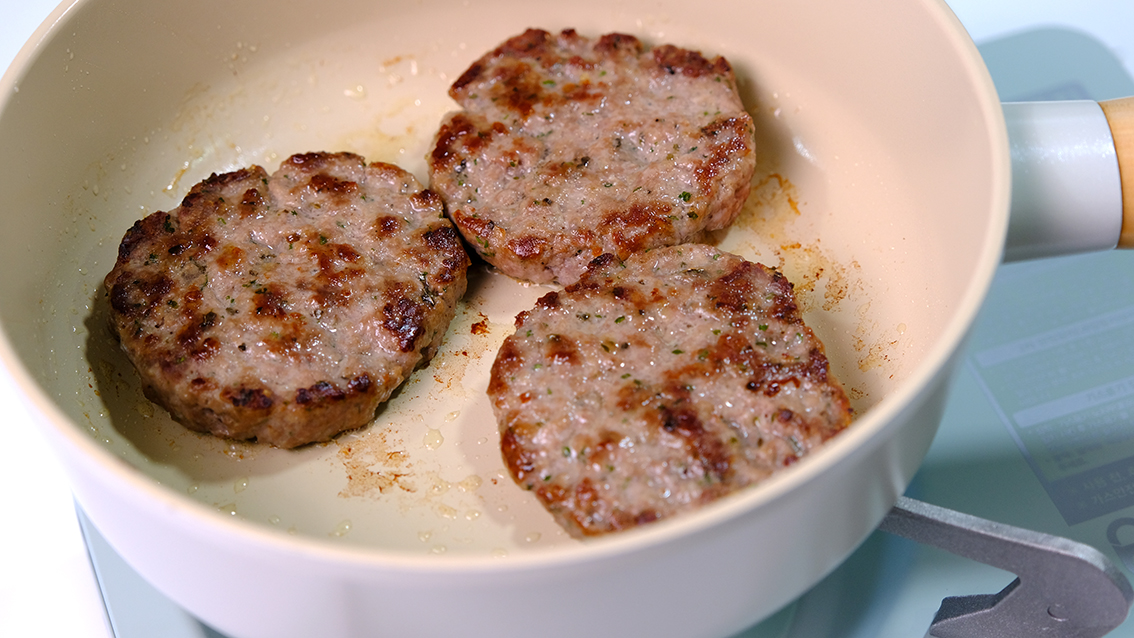
  4. Over medium heat, cook for 2-3 minutes on each side. The best way to tell when it’s done is by using a thermometer without splitting the middle; cook until a thermometer reads 160°F.
    *Don’t forget to fry your onion for toppings.

ASSEMBLY
Stack Orders :
1. The bottom of the bun
2. Juicy patty
3. A piece of sharp cheddar cheese
4. Tomato ketchup
5. Some grilled onion
6. A slice of tomato
7. A bunch of fresh lettuce
8. My beautiful wasabi sauce
9. The cute teddy bear head bun
10. And finally secure it with her pretty hair ribbon 

NOTES

  1. To store buns; in an airtight container 4 days in the fridge, 2 week in the freezer.
  2. To defrost the buns; pull the bag out of the freezer and leave it on the counter at room temperature (a single bun may need 15 to 20 minutes to defrost).
    Take out the buns from the bag and toast the buns in the preheated 180°C oven for 5-10 minutes, or just long enough to warm them through.

Char Siu Bao (BBQ Pork Filled Buns)


Char Siu Bao 叉烧包 considered as one of the “Four Heavenly Kings of Dim Sum” in China. Compared to regular Chinese buns, Char Siu Bao has distinctly different fragrance and texture and also sweeter taste.


This steamed buns is one of the essential Dim Sum that really brings my childhood memories.
The Soft, fluffy steamed buns filled with Chinese BBQ pork (Char Siu Pork) and the slurry sweet and savoury Char Siu Sauce.


Unlike the other common recipe that needs 2-3 days, this recipe only takes less than 24 hours to make it.
The following diagram is a guide so you can get the idea how’s the process and what we need to prepare to make these beautiful buns.

Diagram the Process of Char Siu Bao Making

It’s very important to choose the right flour and leavening agent, otherwise the buns won’t rise well and white bright in colour

This recipe has been through so many trial and error. After some testing and tweaking, 
I found that the key to a snowy white buns is this unbleached cake flour,

Unbleached Cake Flour that I used in the recipe

a good brand of double acting baking powder,

Make sure that you use “Double Acting Baking Powder”

and also special leavening agent called Ammonium Bicarbonate that helps the buns crack to the tops.

Be careful when adding this type of leavening, make sure that you measure it correctly; too much Ammonia will cause an extremely intense unpleasant ammonium smell in the dough

This chemical compound releases a large amount of carbon dioxide gas when heated
forcing the dough to crack open

Some recipes state that it’s crucial to use natural sourdough; but when testing, I found that instant yeast is easier with similar results.

Slurry Char Siu Sauce for the Filling

The filling of these buns consist of Char Siu Pork and slurry Char Siu Sauce.
Some people called it a slurry, some people call it a sauce, but whatever you called it, it’s the star of the show; and it’s what makes Char Siu Bao, “Char Siu Bao”.

Look how beautiful this Char Siu Pork!

One of the things that makes Char Siu Pork so tasty is a rich Marinade Sauce.
You can use store bought but I found creating your own marinade sauce makes the pork richer, smokier and more aromatic.

Some people use either shoulder, butt or neck part; it really depends on personal preference.
I’m prefer pork belly because it was the best part, they are more juicy and less likely to dry out.

I use baking pan and cooling rack on top for roasting
Line baking pan with some grease proof paper to prevent the sugar residue stick to the pan

There are also a few ways to roasting the pork. I found the simple and easy way to cook your pork is to roast it in the oven. Just get creative – the air should be able to circulate underneath the pork.


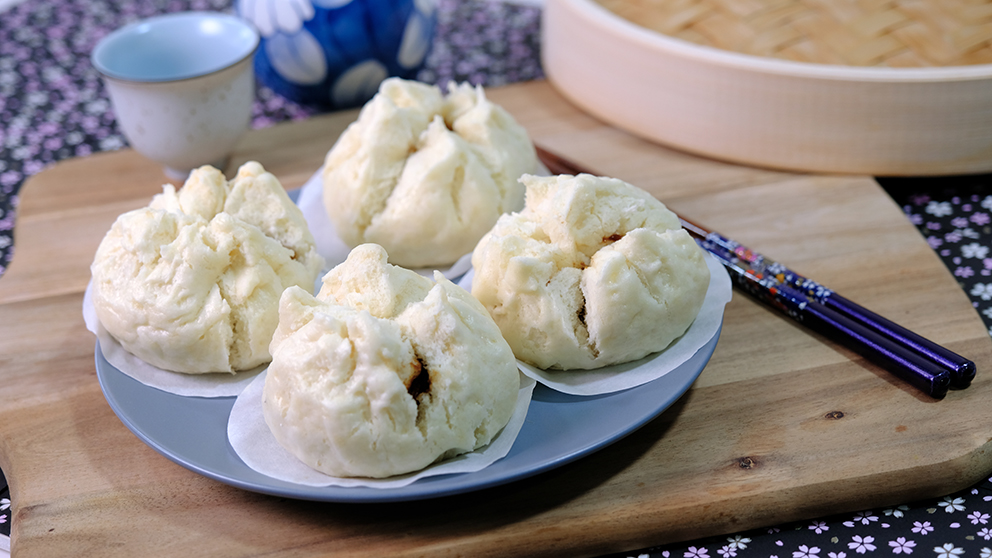
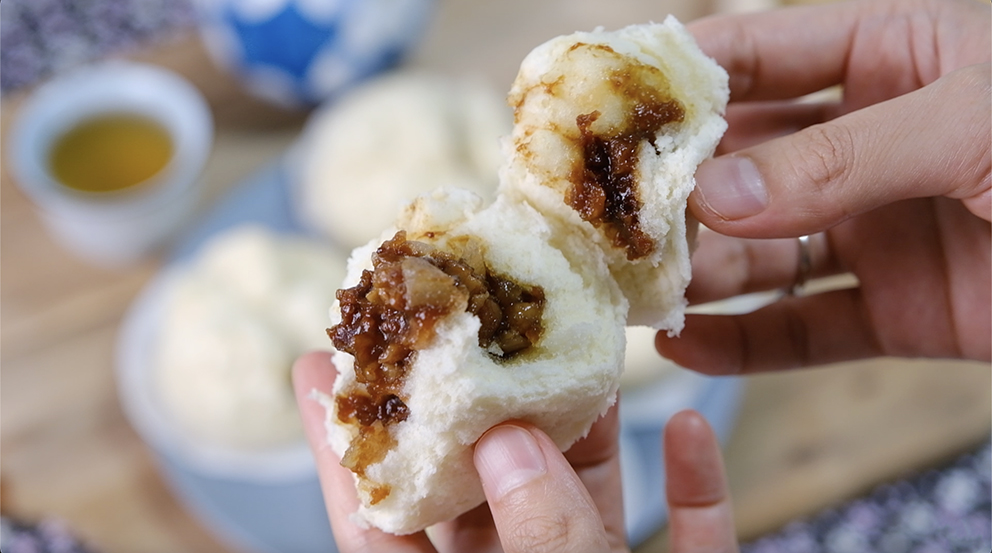
The steamed foreskin is just soft and smooth, and slightly cracks to reveal the barbecue stuffing, sending out the smell of barbecue.


The filling is luscious, sweet and delicious; juicy and sweet bbq pork is wrapped in soft and pillowy Chinese steamed buns.


These looks really addictive with such a flavourful filling nestled in the soft, pillowy bun. You won’t be able to forget this feeling and will crave it all the time.
I hope that you enjoy the recipe!

CHAR SIU BAO
Yield: 6 pieces
Active time: 4 hours
Total time: 19-20 hours

INGREDIENTS
Mother Dough

  • 25 g Unbleached Cake Flour
  • 1/6 tsp Instant Yeast
  • 20 g Water


Barberque Pork

  • 250-300 g Pork Belly
  • 2 tbs Vegetable Oil
  • 2 tbs Ginger (Minced)
  • 4 tbs Green Onion (Chopped)
  • 300 ml Water
  • 2 tbs Rice Wine
  • 1½ tbs Light Soy Sauce
  • 1 tsp Dark Soy Sauce

  • 5 Star Anise
  • 1 Cinnamon Stick
  • 2 Cardamom Pods
  • 6 Whole Cloves
  • 2 Liqorice Root
  • 1 Luo Han Guo (Monk Fruit)
  • 1/4 tsp Ginger Powder
  • 25 g Rock Sugar
  • 1/2 tbs Liquid from Red Bean Curd
  • 1½ tbs Red Miso Paste
  • 1/2 tsp Red Yeast Rice Powder or Paprika Powder
  • 1½ tbs Honey
  • Additional Light Soy Sauce for Marinate


Basting Sauce
Equal part honey and marinade sauce


Starter Dough

  • 24 g Mother Dough
  • 72 g Unbleached Cake Flour
  • 42 g Water


Slurry Sauce (for the filling)

  • 2 tbs Vegetable Oil
  • 1/4 Onion (Chopped)
  • 2 Scallion (Chopped)
  • 40 ml Water
  • 1/2 tbs Light Soy Sauce
  • 1/2 tsp Dark Soy Sauce
  • 1/4 tsp Red Miso Paste
  • 3/4 tbs Sweet Soy Sauce
  • 1 ½ tbs Caster Sugar
  • 1/8 tsp Salt
  • 1 tsp Sesame Oil
  • 1/2 tbs Corn Starch
  • 1/2 tbs Unbleached Cake Flour
  • 1/2 tbs Potato Starch
  • 30 ml Water


Final Dough

  • All Starter Dough (138 g)
  • 50 g Caster Sugar
  • 10 g Water
  • 1/5 tsp Ammonium Bicarbonate
  • 1/5 tsp Baking Soda
  • 80 g Unbleached Cake Flour
  • 1/2 tsp Cream of Tartar
  • 1⅔ tsp Double Acting Baking Powder
  • 6 g Shortening

INSTRUCTIONS
DAY 1 (7:00 p.m.)

Mother Dough

  1. Simply mix the Unbleached Cake Flour, instant yeast and water; stir until just combined.
  2. Cover the bowl with a plastic wrap, store it at warm place (68-72°F/ 20-22°C), and then let the dough ferment for 12 hours.


Marinade Sauce

  1. Fry the ginger and green onion with some vegetable oil for about one to two minutes until they’re fragrant but definitely not burnt.
  2. Pour in the water along with rice wine, light soy sauce, dark soy sauce and all the herbs and spices. Bring the mixture to boil, let it simmer until the mixture reduce to about half cup.
  3. Strain the mixture to remove all the herbs and spices; pour the liquid back into the saucepan.
  4. Add the rest ingredients into the liquid; ginger powder, rock sugar, liquid from red bean curd, red miso paste and red yeast rice powder.
    Cook over medium low heat until the sugar melted, once the sugar dissolved, turn off the heat, add in the honey, and stir until well combined.
  5. Pour the sauce into a jar or container and then store it in the fridge until you are ready to use it. 


Marinate the Pork

  1. Wash the pork, wipe off all the excess water with a paper towel, poke both sides of the pork with meat tenderizer (you can use either fork or a few skewers, that’s also works well). The holes will help the marinade sauce seep into the pork.
  2. Place the pork belly into a ziplog bag or a container, add 3 parts marinade sauce and 1 part light soy sauce.
    Seal the bag and do a little massage to make sure the marinade sauce is even and then store it in the fridge for at least 4 hours (max 12 hours).

DAY 2 (7:00 a.m.)
Starter Dough
After 12 hours, our mother dough is ready, you can see so many small bubbles and smell a bit sour.
Please note that for 1 batch of the recipe, we only use 24 g of the mother dough, you can throw the rest.

  1. Add the flour and water to the 24 g of the mother dough, mix until it forms a dough ball.
  2. Grease the bowl with a little bit of vegetable oil, place the dough inside the bowl, Cover with a cling wrap and then store it back to the warm place (68-72°F/ 20-22°C) for about 6-8 hours.


Roast the Pork

  1. Preheat the oven to 130°C .
  2. Line baking pan with some grease proof paper (to prevent the sugar residue stick to the pan), place a cooling rack on top of the baking pan.
    Just get creative – the air should be able to circulate underneath the pork.
  3. Place the pork on a roasting tray and then roast it for 1 hour
    Keep flipping and basting every in 15 minutes (the basting sauce was simply equal parts honey and Marinade Sauce).
  4. Once it’s done, brush the pork one more time with vegetable oil and let it rest for at least 30 minutes before cutting


Slurry Sauce (For the Filling)

  1. To begin, we have to make the scallion oil;
    In a pan combine vegetable oil, onion and scallion on medium heat; fry for about one to two minutes until fragrant and then take out the onion and scallion.
    Don’t throw the delicious scallion and onion, you can add later to your dishes.
  2. Pour in some water into the scallion oil along with light soy sauce, dark soy sauce, red miso paste, sweet soy sauce, sugar, salt and sesame oil (let it simmer for 1 minute).
  3. To thicken the sauce; in a small bowl combine corn starch, cake flour, potato flour and water (make sure that you mix it really well before you pour it to the mixture ).
    Pour thickening into the simmering mixture, continue stirring until the mixture is thicken and a bit translucent.
    Take it off from the heat, pour the mixture into a bowl, cover it with a cling wrap and then keep it in the fridge for at least 30 minutes to firm up (preferably 2 hours).


Combine the Filling
The ratio for the filling is equal part Char Siu Pork and slurry Char Siu Sauce.
After 2 hours in the fridge the consistency of slurry Char Siu Sauce turned similar to jelly.
Thinly slice the pork and remove the tough skin (you can keep some for your delicious Char Siu Rice). Coarsely chop the rest, combine it with slurry sauce and mix it really well.
Cover with a cling wrap and store this pork filling in the fridge while waiting for the final dough.


DAY 2 (1:00 P.M.)
Final Dough
After for about 6 hours you can see the starter dough has a lot of bubbles and it’s doubling in size.
This bubbly sponge texture is carbon dioxide produced by the yeast which makes the buns very soft.

  1. Add the sugar and water into the starter dough; mix well.
    After a couple minutes of mixing, the sugar will ‘melt’ into the dough and it should be more liquid-y.
  2. Add baking soda and Ammonium Bicarbonate (this chemical compound releases a large amount of carbon dioxide gas when heated forcing the dough to crack open).
    Please note: Be careful when adding this type of leavening, make sure that you measure it correctly. 1/5 tsp is about less than ¼ tsp (too much Ammonia will cause an extremely intense unpleasant ammonium smell in the dough).
    Mix for about 1-2 minutes (it’s really important that ammonium and baking soda is completely mixed with the dough); “Take your time, don’t rush this part”.
  3. Add the sifted Unbleached Cake Flour, Cream of Tartar and Baking Powder; mix well.
    Gather all small crumb, be careful not to over-knead the dough, you’re just looking for the dough to come together and stop sticking.
  4. Finally, add in the shortening and knead until just combined
  5. Cover the dough with a cling wrap for about 5 minutes to relax the gluten and don’t forget to preheat your steamer. 

Wrapping the Bao

  1. Divide the dough into 6 equal pieces (it’s about 50 g each).
  2. Take 1 portion of the dough, press into a thick disc.
    Grab the dough with your left hand and rolling pin on the other hand, using rolling pin roll up and back, flatten the edges of the dough while turn the dough a little by little (flatten the edges of the dough to a 10 cm circle); the center part should be slightly thick.
  3. Add about 30 gr of the pork filling to the center of the dough.
  4. Pinch one side of the dough and then pleat the dough around the filling in a circular motion while using your left hand thumb lightly pressing the filling downwards.
    Once you get to the end, press with force and pinch at the top of the bun to make sure everything is well sealed “kindly watch the video for more details“.
  5. Place each buns onto an individual greaseproof paper (always cover the buns with a plastic wrap to prevent the skin from dying out).


Steaming
Place the buns into the preheated steamer;
Over high heat, steam the buns immediately for about 10-12 minutes.
Take it off from the heat and serve immediately.

NOTES

  1. I highly recommend to use bamboo steamer because it doesn’t collect condensation, so you never have to worry about water dripping onto your buns.
    If you’re using metal or plastic steamers, I suggest to cover the lid with a piece of cloth, to absorb the condensation during steaming; otherwise the dropping water could affect the look of your buns.
  2. Char Siu Bao crave high heat, NEVER ever open the steamer lid during the steaming process else it won’t rise perfectly.
  3. Some people claims that add vinegar to the steaming water will make buns whiter,
    I personally didn’t find that method is useful.
  4. The best taste and texture of Char Siu Bao, serve them straight out of the baskets while they’re steaming hot.
    If there are any left, put them in an airtight container/bag and store in the fridge for up to 3 days or 1 month in the freezer.
  5. To reheat; Steam for 5-10 minutes or microwave for 1-2 minute.

My Melody Taiwanese Savory Mooncake

Hi Guys, today we are making these “My Melody Taiwanese Savory Mooncake”. It’s a flaky crust moon cake with the savoury sweet fillings inside which has a really unique texture.

Unlike the common traditional mooncake that are sweet, some spicy braised meat was added to the mung bean paste as a filling, they blends really well, the savoury perfectly complement the sweetness.

Crispy crust outside, Sweet spicy salty filling inside

You have some bits to bite in the smooth fillings, the savoury pairs the sweetness perfectly, the crunchiness of the layer crust even make it more special.

You can actually omit the meat portion if you wish too, but that’s what makes it special in my opinion. And if you are not preparing this for moon cake festivals, it’s definitely a good snack or a nice breakfast item.

Look how adorable they are!

The beautiful flaky crust itself created by combining 2 different type of dough which is called water and oil dough that has been layered by rolling and folding similar in making puff pastry dough.

Feel free to create any design you like but always remember that for the combined dough, you need to make the oil dough colour slightly lighter than the water dough so it doesn’t show on the surface of the water dough when you roll it.

So this is how we combine the dough;
Lightly press down to flatten the water dough and place the oil dough in the center of the water dough. Fold the combined dough like an envelope, seal all the seam and shape it round again.
Cover and let them rest for at least 10 minutes so the gluten can relax a bit.

Place oil dough in the center of the water dough

After resting, take one combined dough, using rolling pin, roll the dough into a long rectangular shape as evenly as possible, don’t press it too hard as you might tear the water dough membrane, about 3 mm thick is enough (pic. 1)
And then roll it up like you are preparing swiss roll (pic. 2)


Then turn the swiss roll direction with the shorter side pointing at you, using rolling pin roll it again into a long rectangular shape (pic. 3 & 4)

*One important tip when you roll the dough is always make sure that your rolling pin is clean from any dough flakes coz it will attracts the water dough surface which can cause a lot of cracks on the mooncake later.


And finally, roll it up again like a swiss roll (pic. 5 & 6)


Please note the colour will be much lighter when baked in the oven.
The minced meat is slightly on the salty side to compliment the sweet of the mung bean paste. If you prefer more spicy, feel free to add more chili or for a bigger kick, you can add a teaspoon of cayenne pepper, that will be great too!

And if the times permit, you even can prepared this meat the night before and store them in the fridge to let the flavor develops, it will taste even better.

Oh I love My Melody so much, they are my favorite Sanrio character since I was a child.

They taste amazing when served slightly warm and paired with a cup of hot tea or maybe your favorite coffee.
They are so adorable, tasty and also satisfying with their unique texture, it’s really hard to describe unless you have a chance to taste it

The recipe is rather long winded but it is rewarding coz they are so pretty and delicious.
I really hope you Guys give it a try coz this mooncake really suit my taste buds and I have to stop myself for further eating.

And if you want; you can share your creations with me with the “hastags bembumkitchen”, I really love to see all your creativity and I’ll make sure to give a like or thumbs up!

Enjoy the recipe, Love you All!!

MY MELODY TAIWANESE MOONCAKE
Yield: 10 pieces
Active time:  3 hours
Total time: 4 hours

INGREDIENTS
Mung Bean Paste:

  • 100 gr Split Yellow Mung Beans
  • 100 gr Hot Water
  • 75 gr Granulated Sugar

Braised Meat:

  • 100 grams Minced Pork
  • 1 tbs Corn Flour
  • 1 tsp Garlic (Minced)
  • 1 tsp Ginger (Minced)
  • 1/2 tbs Onion (Minced)
  • 1/2 tbs Rice Wine
  • 2 tbs Soy Sauce
  • 1 tsp Chopped Chilli Padi
  • 1/2 tsp Five Spice Powder
  • 1/4 tsp White Pepper
  • 1/4 tsp Salt
  • 2 tsp Sugar
  • 1/2 tbs White or Black Sesame Seeds

Water Dough:

  • 200 gr All-Purpose Flour
  • 50 gr Shortening
  • 20 gr Icing Sugar
  • 100 gr Cold Water
  • Food Colouring (Pink, Black, Blue, Yellow)

Oil Dough:

  • 75 gr Cake Flour
  • 35 gr Shortening
  • Pink Food Colouring


INSTRUCTIONS
Mung Bean Paste

  1. Wash mung beans in several rinses of water until the water runs clear, then soak them in a hot boiling water for 30 minutes (the water will be absorbed and the beans gets bigger). 
  2. Preheat the steamer, bring water to a boil and then steam the soaked beans for about 30 minutes or until it can be easily mashed.
  3. Pour the beans into a non-stick pan, add in the sugar, cook over medium low heat (it will be wet at first as the sugar melts,keep stirring until it gets drier).
    Using a spatula, press the beans until it resembles a thick paste (as the water evaporates, the beans will no longer be sticky).
    Feel free to use blender or immersion blender if you prefer a really fine paste.
  4. Take it off from the heat, cover it with a plastic wrap, store in the fridge to firm up.


Braise Meat

  1. Sprinkle corn flour to the meat before cooking (it will helps prevent overcooking and toughening of the outer layers so the result will be more tender and flavourful).
  2. In a medium pan, heat 2 tablespoons of vegetable oil, add in the minced garlic and onion, cook until golden brown.
    Add in minced pork, continue cooking until it change in colour.
    Pour in the rice wine and soy sauce, stir well.
    Add in the rest ingredients and mix until well combined.
    *Feel free to add more chili or cayenne pepper if you like more spicy.
  3. Cover and store them in the fridge to let the flavor develops.


Water Dough

  1. In a medium bowl, combine all the ingredients, stir until it forms a sticky dough.
  2. Lightly transfer to a work surface and knead until it forms a smooth dough. 
  3. Divide the dough for each details, color as needed
  4. Cover each colours with a cling wrap and let it rest for at least 20 minutes.


Oil Dough
Mix the flour and shortening, add in the pink food colouring (this oil dough colour must be slightly lighter than the water dough for the base of My Melody’s head).
Keep mixing until it forms a soft dough (it can be slightly sticky). Cover it with a plastic wrap to prevent the dough dry.


COMBINE, ROLL & BAKE

  1. Divide the bean paste into 10 equal portions (25 gr each), shape it into a ball.
    Using your thumb press the center of the bean ball to create a hole. Insert about 1-2 tsp of the braised meat filling in the center, and then wrap and seal. Perform the same for the remaining 9 portions.
  2. Combine 2 dough:
    Divide the “soft pink” water dough and oil dough into 10 equal pieces (19 grams water dough, 11 grams oil dough).
    Lightly press down the water dough to flatten and place the oil dough in the center of the water dough.
    Fold the combined dough like an envelope, seal all the seam and shape it round again. Continue with the rest dough.
    Cover and let them rest for at least 10 minutes so the gluten can relax a bit.
  3. Roll the combined dough:
    Take one combined dough, using rolling pin, roll the dough into a long rectangular shape as evenly as possible (don’t press it too hard as you might tear the water dough membrane), 3 mm thick is enough. 
    Roll it up like you are preparing swiss roll.
    Turn the swiss roll direction with the shorter side pointing at you, using rolling pin roll it again into a long rectangular shape. Then roll it up again like a swiss roll.
    Set aside, cover it up while continue with the rest dough.


FILL  & DECORATE

  1. Fill
    Take one of the swiss roll dough, using rolling pin, flatten it into a circle shape.
    Flip the dough, place one portion of a bean ball at the center of the dough, and start covering the bean ball from all sides, rotate while tighten your palm, make sure the skin and filling stick together evenly.
    Seal all the seam. Shape the mooncake a bit oval as My Melody’s head. Repeat this process for the rest of the Mooncake.
  2. Decorate
    Add details according to My Melody’s Head, add the spark of her eyes with some white food colouring

BAKE
Bake in the preheated 170°C oven for about 15-18 minutes.
Remove from the heat, allow to cool slightly on the pan for about 10-15 minutes then transfer to a cooling rack to cool completely.


NOTES

  1. Don’t let the water dough sit too long coz it will release the oil and cause a lot of crack on the mooncake surface later.
  2. Best serve 20 minutes freshly baked. 
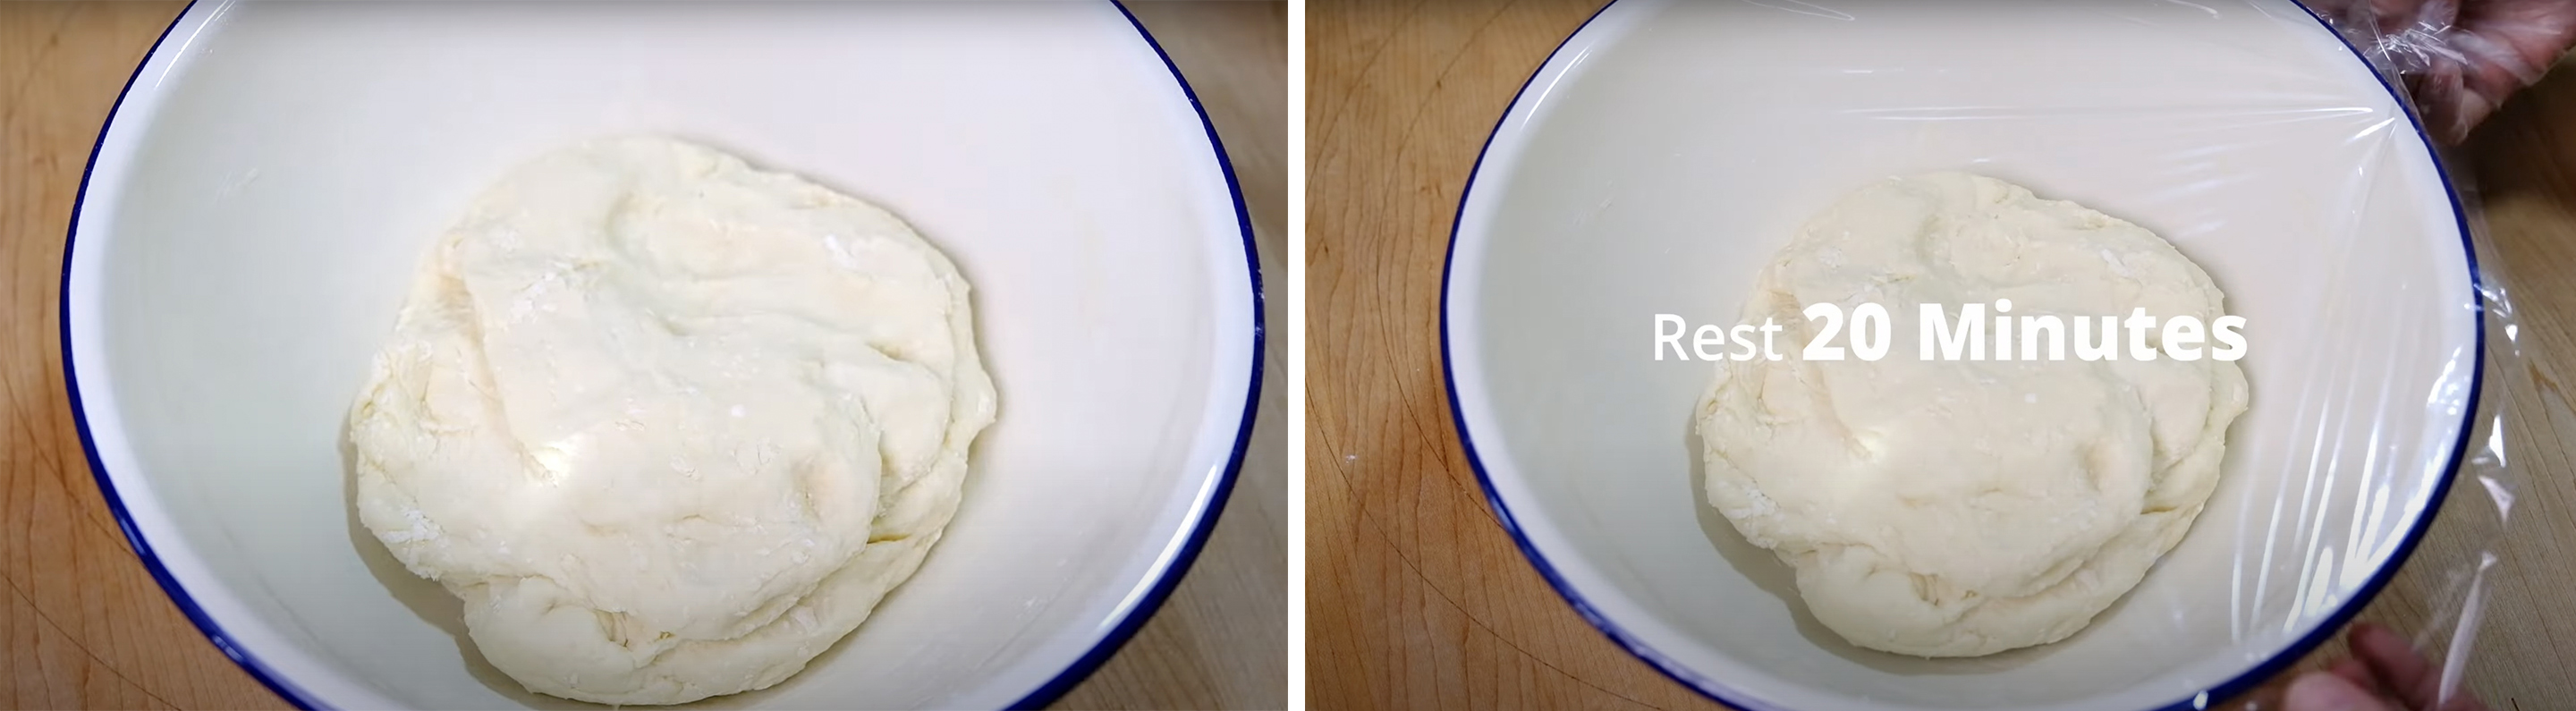
  3. To store in an airtight container; 1 day at room temperature, 1 week fridge, 1 months freezer.
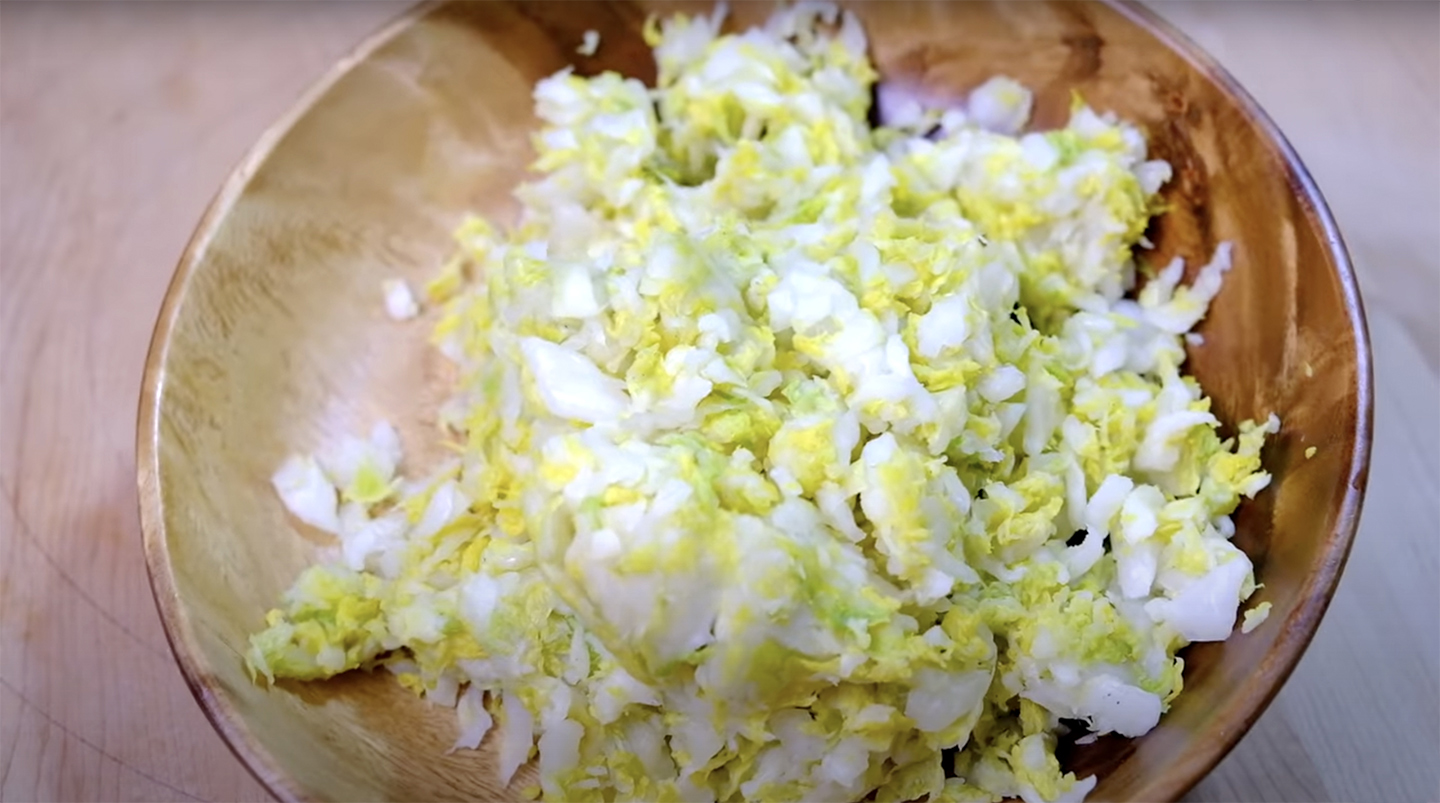
  4. To reheat; 180°C oven for about 5-10 minutes