15 Minutes Quick and Foolproof Pizza Dough

Hey Guys, today we are making these “15 Minutes Quick and Foolproof Pizza dough” that rises quickly and makes incredible homemade pizza! It comes together in just minutes, you really doesn’t need a long rising time to make a fabulous pizza.

This pizza dough is fantastic with part whole wheat flour or all white flour, it also doubles, triples and even quadruples beautifully.

The dough is easy to work with and it’s a great last minute family dinner that you can prepare within 30 minutes from start to finish.
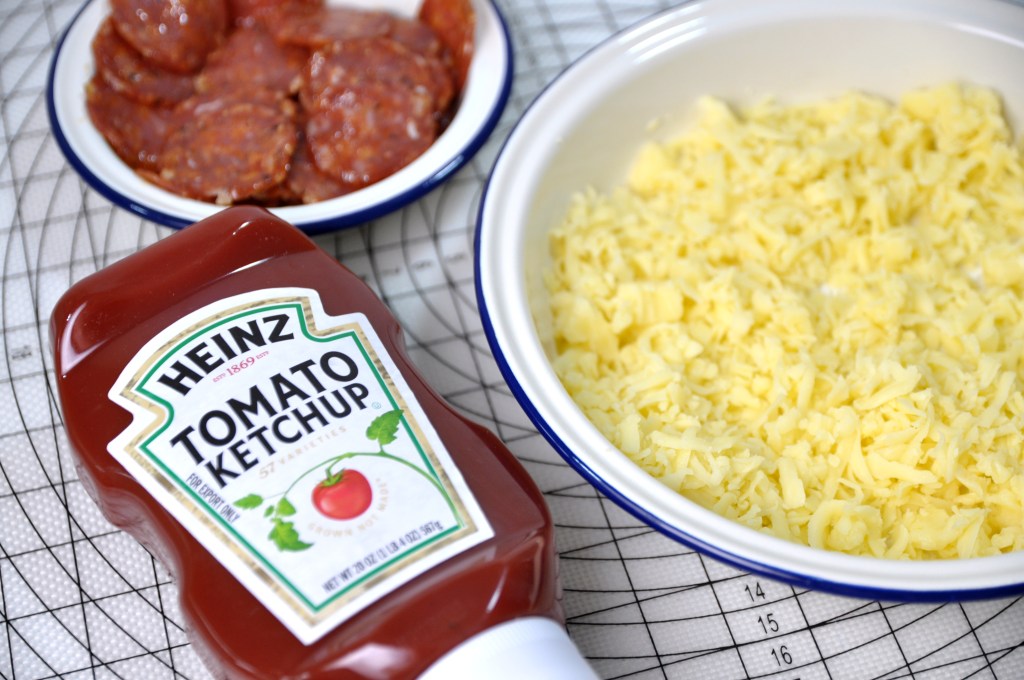
My favorite quick and easy toppings

There are also no rules about the kinds of toppings you put on your pizza. Choose ones you love. Don’t put yourself at risk of getting sick. When using toppings like sausage, chicken, steak, mushrooms or bacon, always cook them before preparing your pizza.
Keep in mind that more toppings generally mean more cook time.

It’s crispy around the edges, it’s soft and folds perfectly and of course the caramelized cheese and pepperoni even makes it more delicious!

Beautiful golden crust that’s super crispy around the edges and not soggy at the bottom, just nice!

Smells like heaven! It’s salty, spicy, crunchy…a bit sweet, It’s really good!!
I hope that you will enjoy the recipe!

15 MINUTES QUICK FOOLPROOF PIZZA DOUGH
Yield: 1 Regular Pizza
Active time: 15 Minutes
Total time: 30 Minutes

INGREDIENTS
Pizza Dough:

  • 120 grams Warm Water
  • 1/2 tablespoon Granulated Sugar
  • 1/2 tablespoon Vegetable Oil
  • 1/2 tablespoon Instant Yeast
  • 195 grams All-Purpose Flour
  • 1/2 teaspoon Salt

Sauce & Toppings:

  • Tomato Ketchup
  • Mozzarella Cheese
  • Salami(Pepperoni)
  • Parsley Flakes

Condiment: Cheddar Cheese and Chili Flakes Chili Sauce

INSTRUCTIONS
Prepare the Oven and Pan
Crank your oven up as high as it goes.
The closer you can get to 260°C, the better.
Flip a rimmed baking sheet upside down, place it in the oven and preheat it for about 30 minutes before baking.

Pizza Dough:

  1. Mix the water, sugar, oil and the yeast. Add the flour and mix until just combined, pour in salt and stir until a soft dough forms. The exact flour amount will vary, the dough should be soft and smooth, not leaving a residue on your fingers but not super stiff either. Not too sticky and definitely not overfloured.
  2. Pour the dough onto a work surface, knead it for about 5 minutes, then shape it into a ball. Place the dough in a greased bowl, cover it with a plastic wrap and let it rest for about 10 minutes to relax the gluten.
  3. Shape the dough into pizza Roll the dough onto a piece of parchment paper (you can stretch the dough with your hands, your fingers and kind of spread it or even use a rolling pin). If you want it a little bit thinner, feel free to roll it out more.
  4. Pizza toppings Spread 3-4 tablespoons of red sauce (no-cook blender sauce), Tomato Ketchup is the best option. Pesto or rich Ricotta are wonderful substitutes as well. Sprinkle generously amount of grated mozzarella all the way around, place pepperoni on top (make sure everyone gets one per bite), then sprinkle with some more mozzarella and parsley flakes.
  5. To Bake Place the pizza onto the middle of the hot baking sheet, bake for about 10-15 minutes until the cheese is a nice dark deep brown and the crust is like a golden brown as well.
  6. Take it off from the heat, serve immediately or transfer it to a cooling rack so the bottom not become soggy.

NOTES

  1. Do not add salt directly to the yeast because it will kill the yeast.
  2. I always use 1/2 or up to 3/4 whole wheat flour with good results (I let it knead for a few minutes longer).
  3. This recipe doubles, triples and quadruples really well. Keep an eye on the flour if increasing the recipe. You want a soft, smooth dough – not too sticky and definitely not overfloured.
  4. Don’t put yourself at risk of getting sick. When using toppings like sausage, mincemeat, chicken, steak, or bacon, mushrooms always cook them before preparing your pizza.
    Keep in mind that more toppings generally mean more cook time.
  5. To store; place the pizza in an airtight container, fridge for 3-5 days, freezer for up to 6 months.
  6. To reheat; in the preheated 180° C oven for 10 minutes, microwave for 30 seconds to 1 minutes.

Baby Eeyore Spiral Mantou

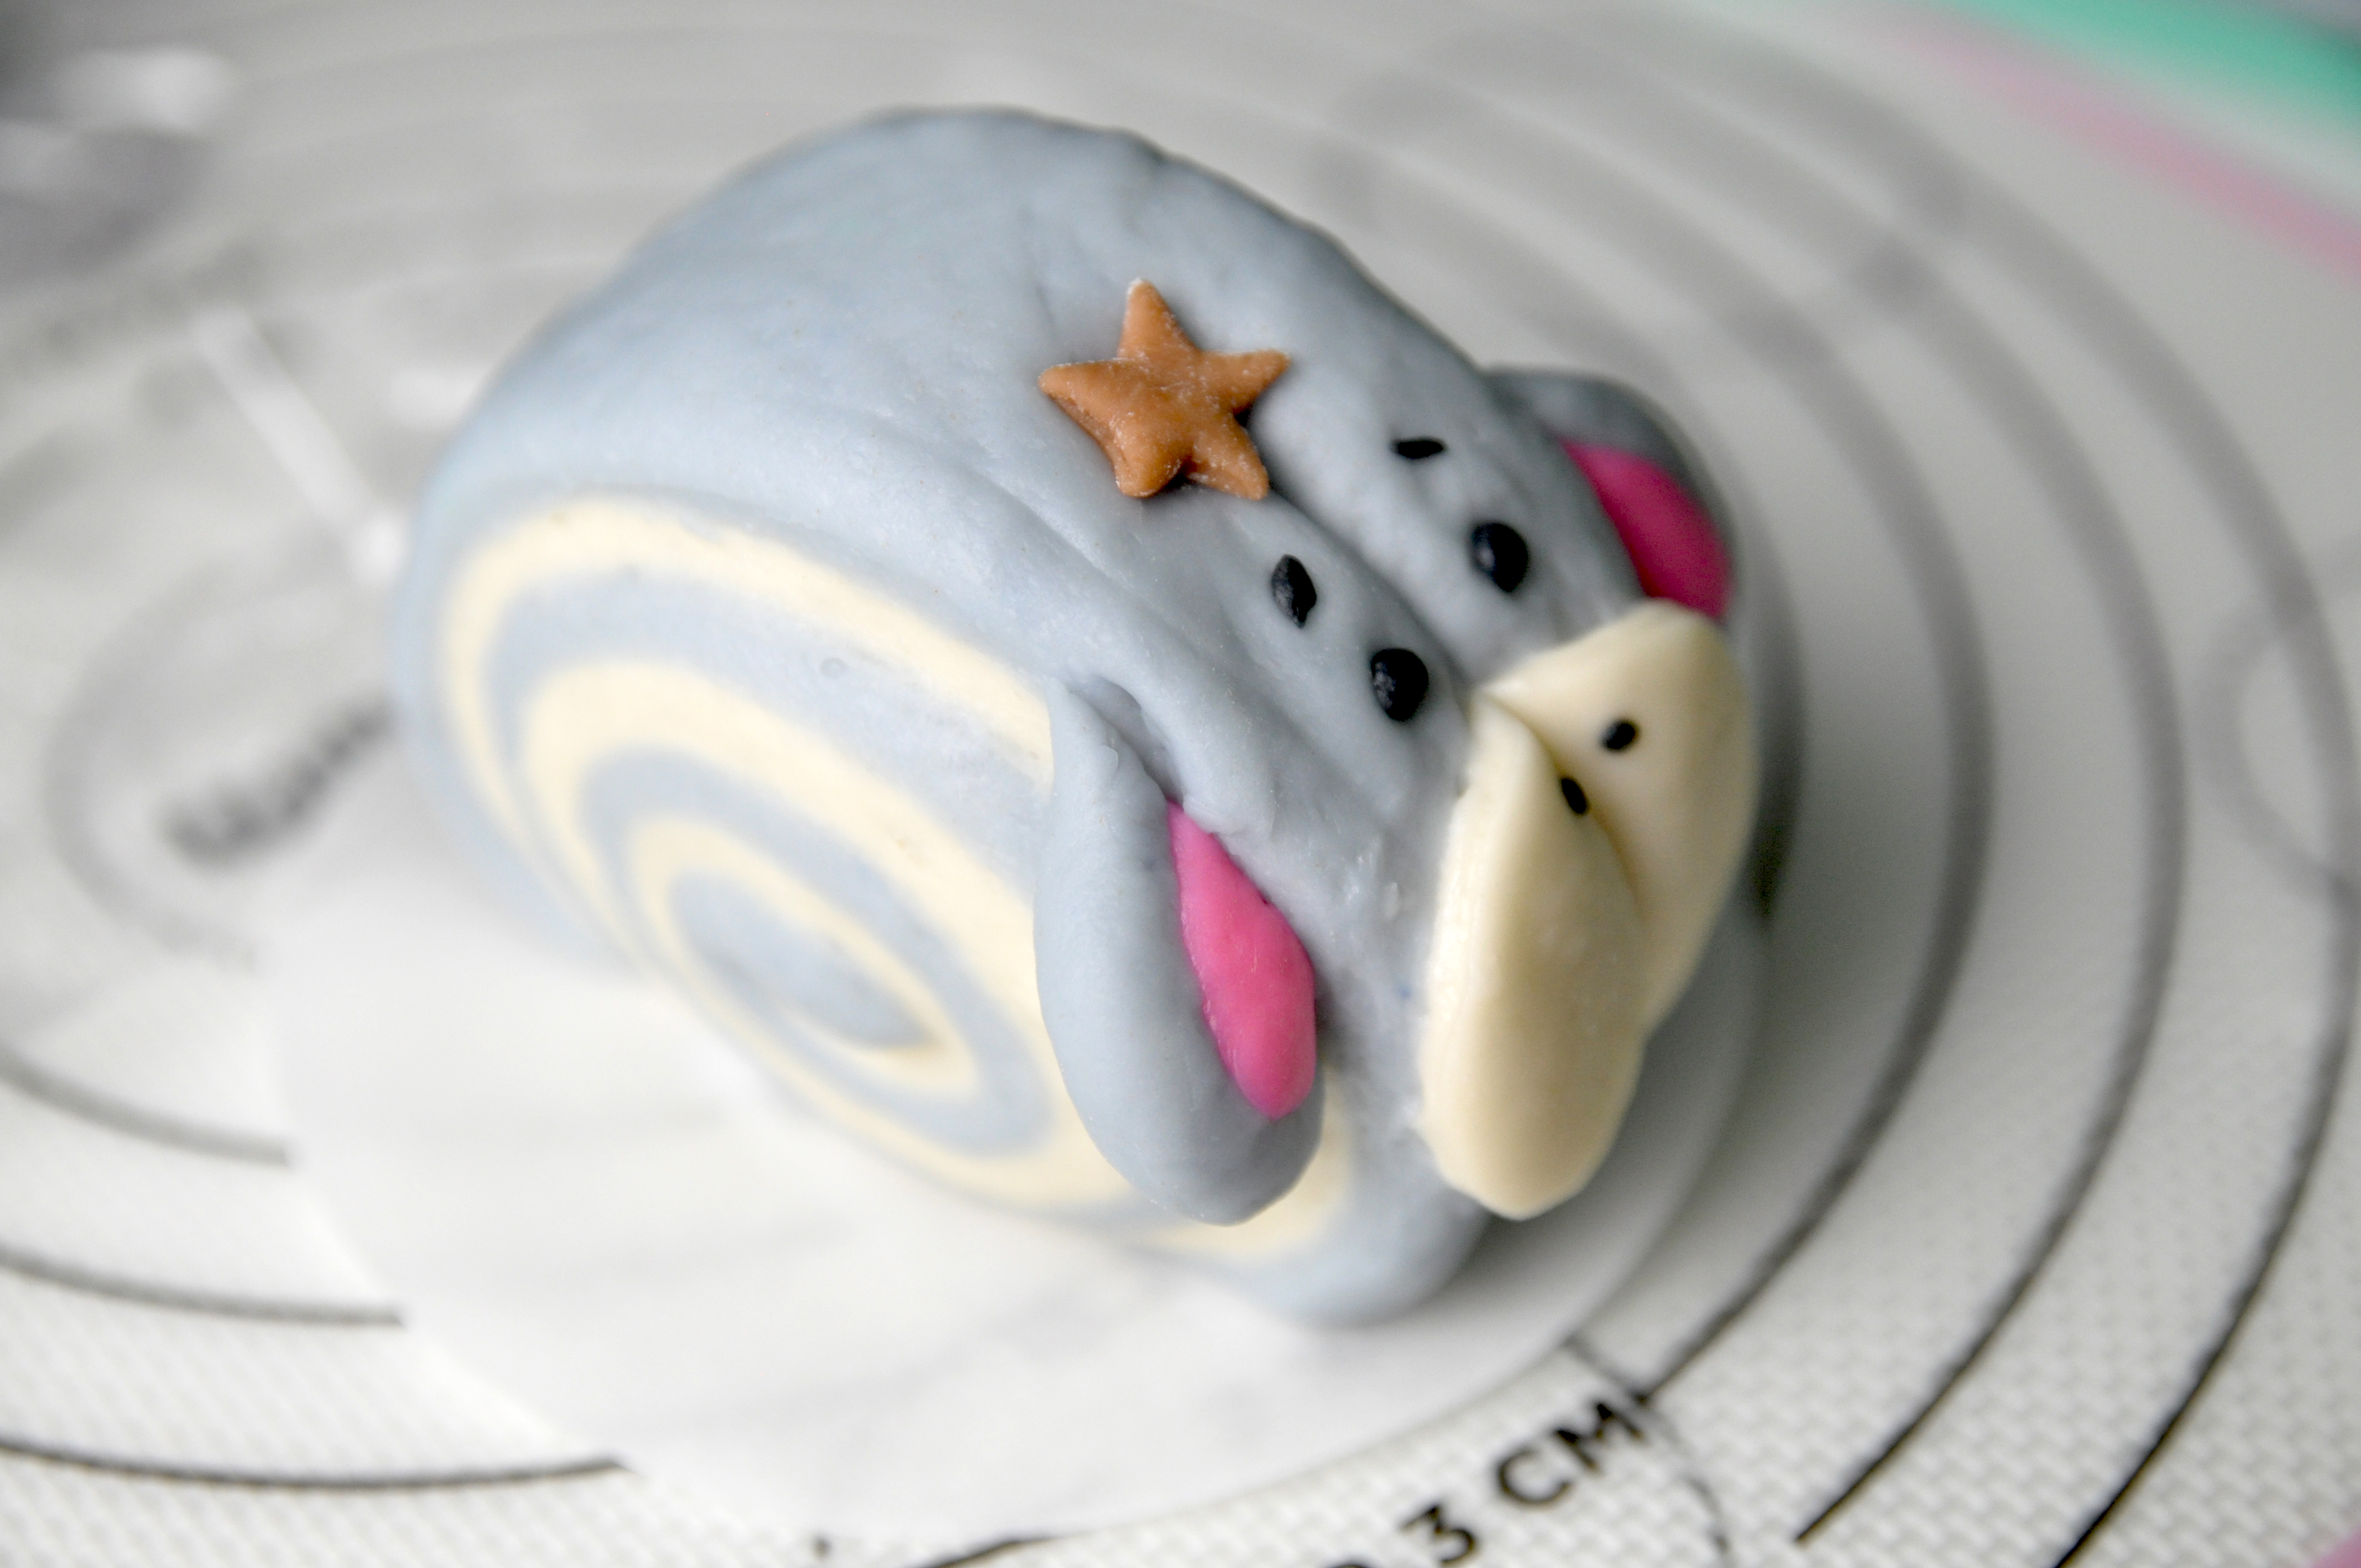
Hey Guys, today we are making these adorable “Baby Eeyore Spiral Mantou”.
They are fun to make with a super soft fluffy texture and pretty spiral patterns.

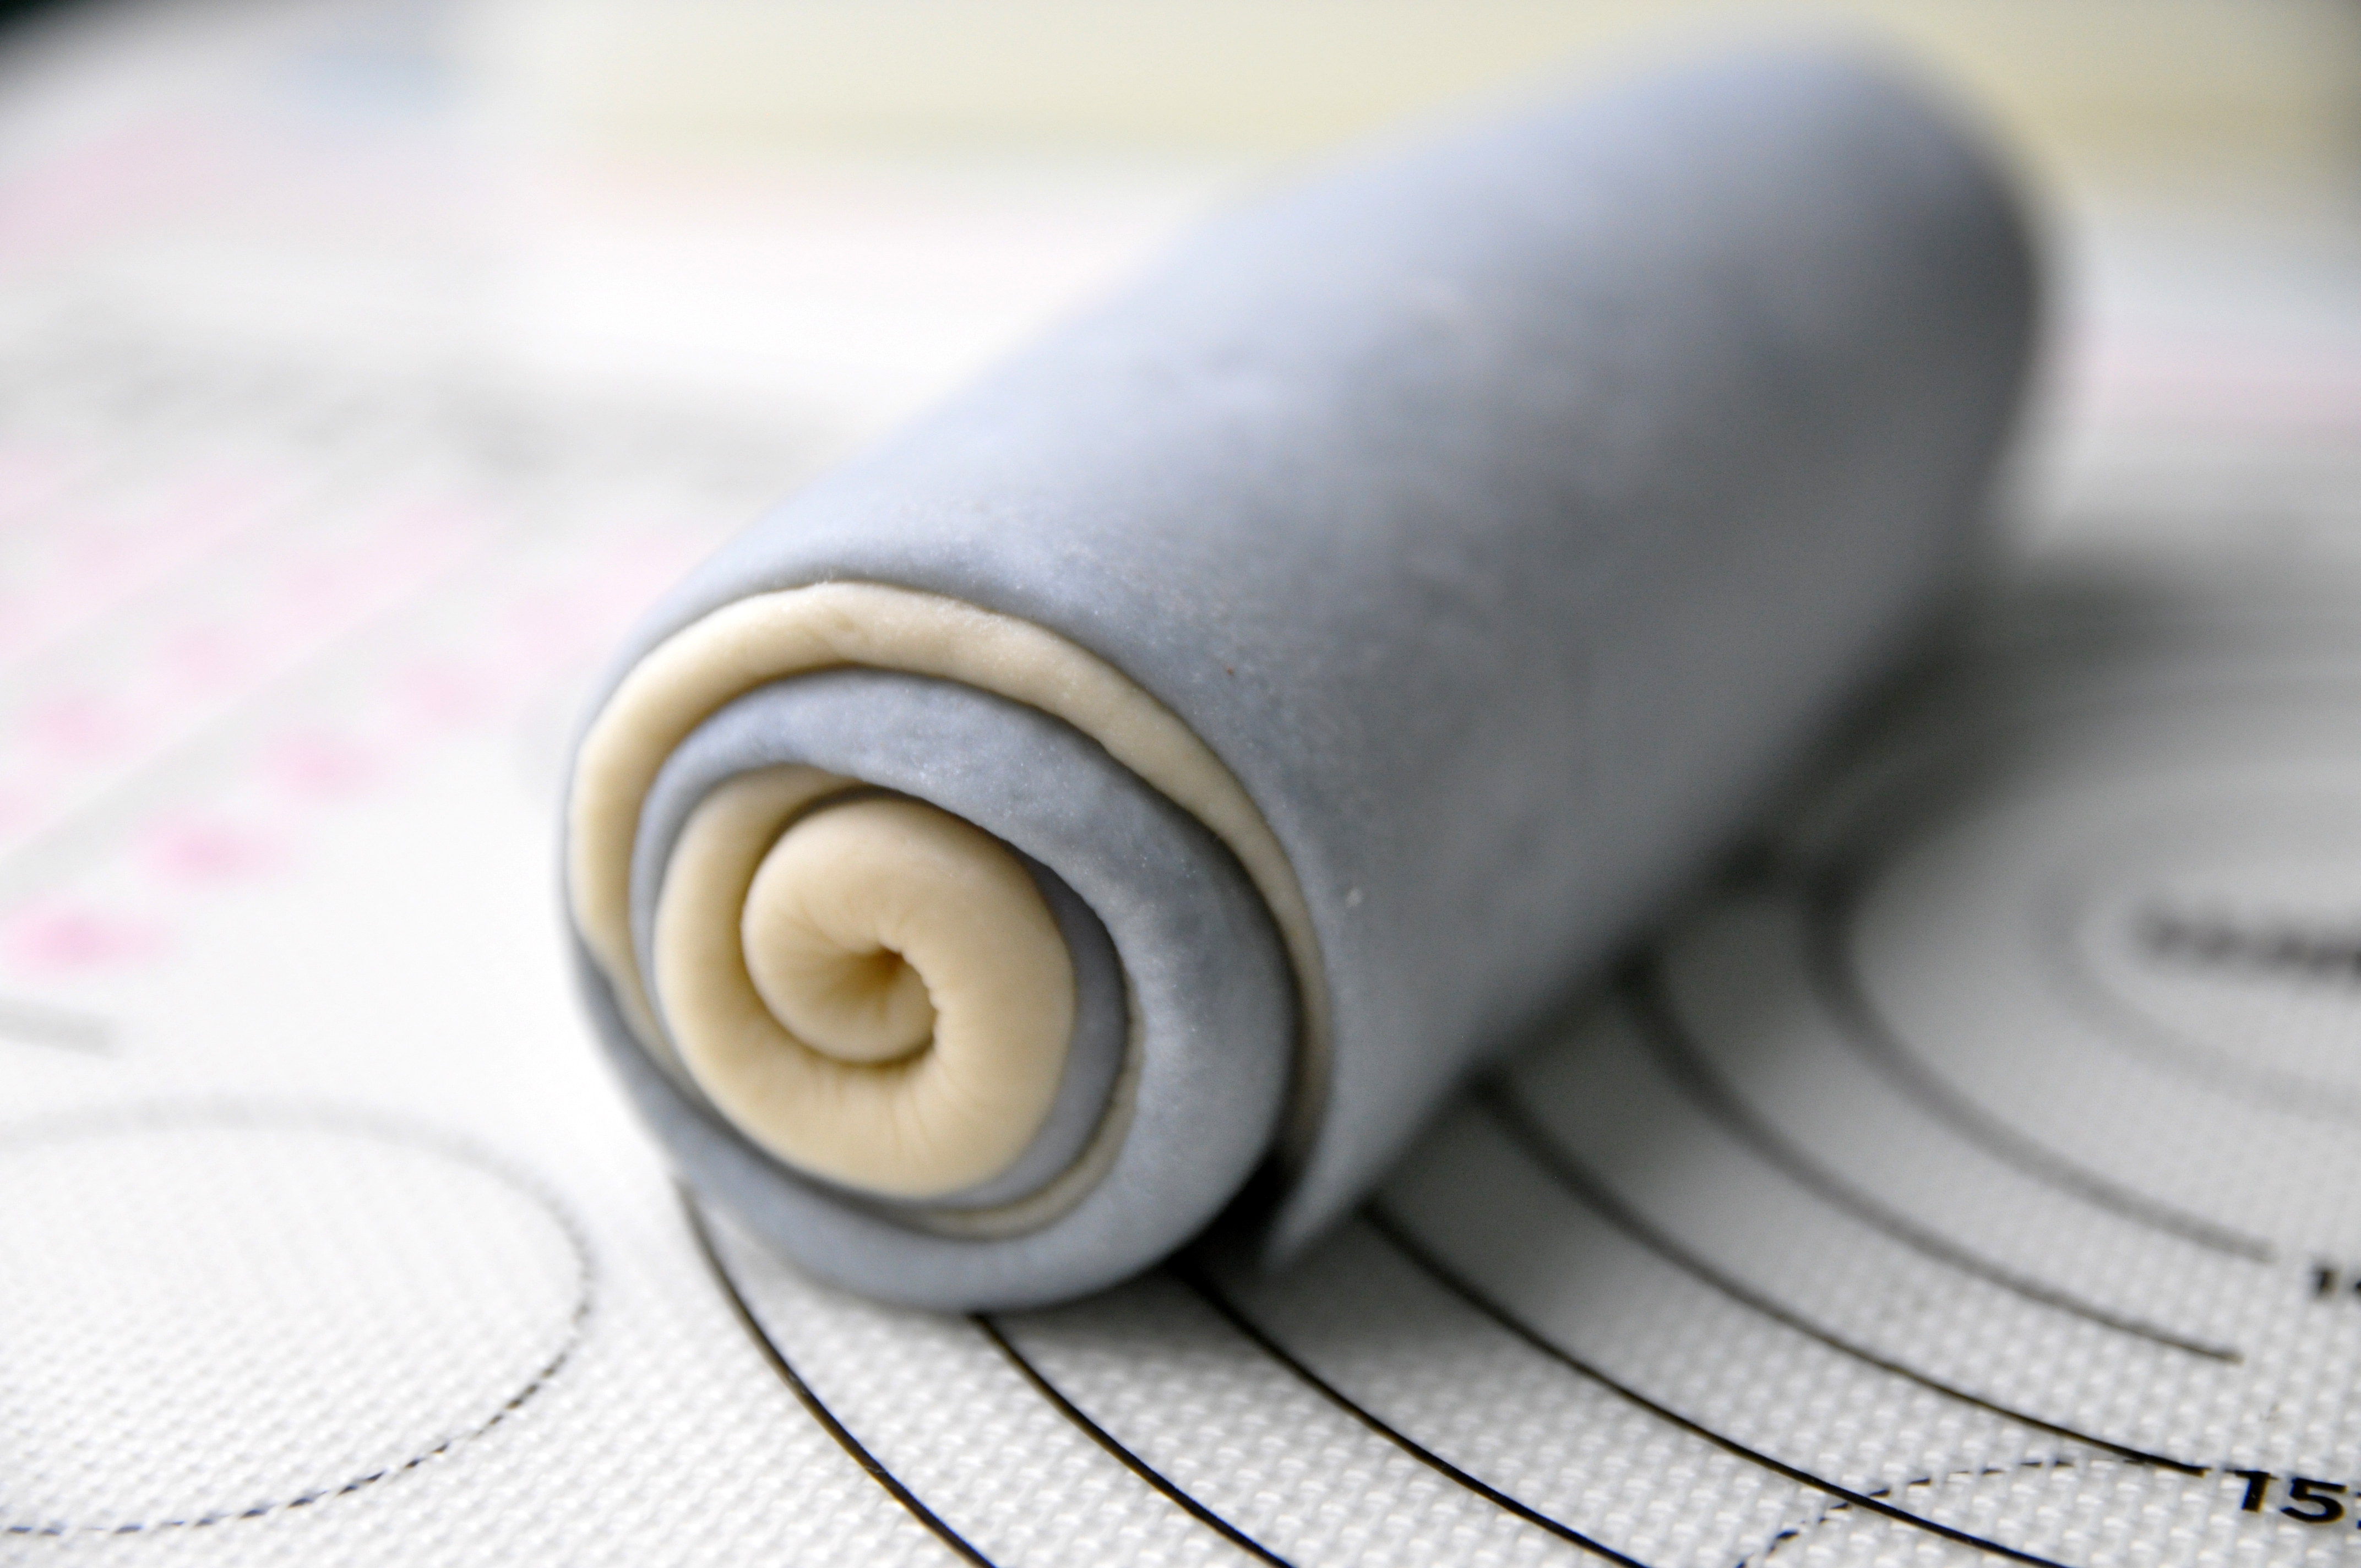
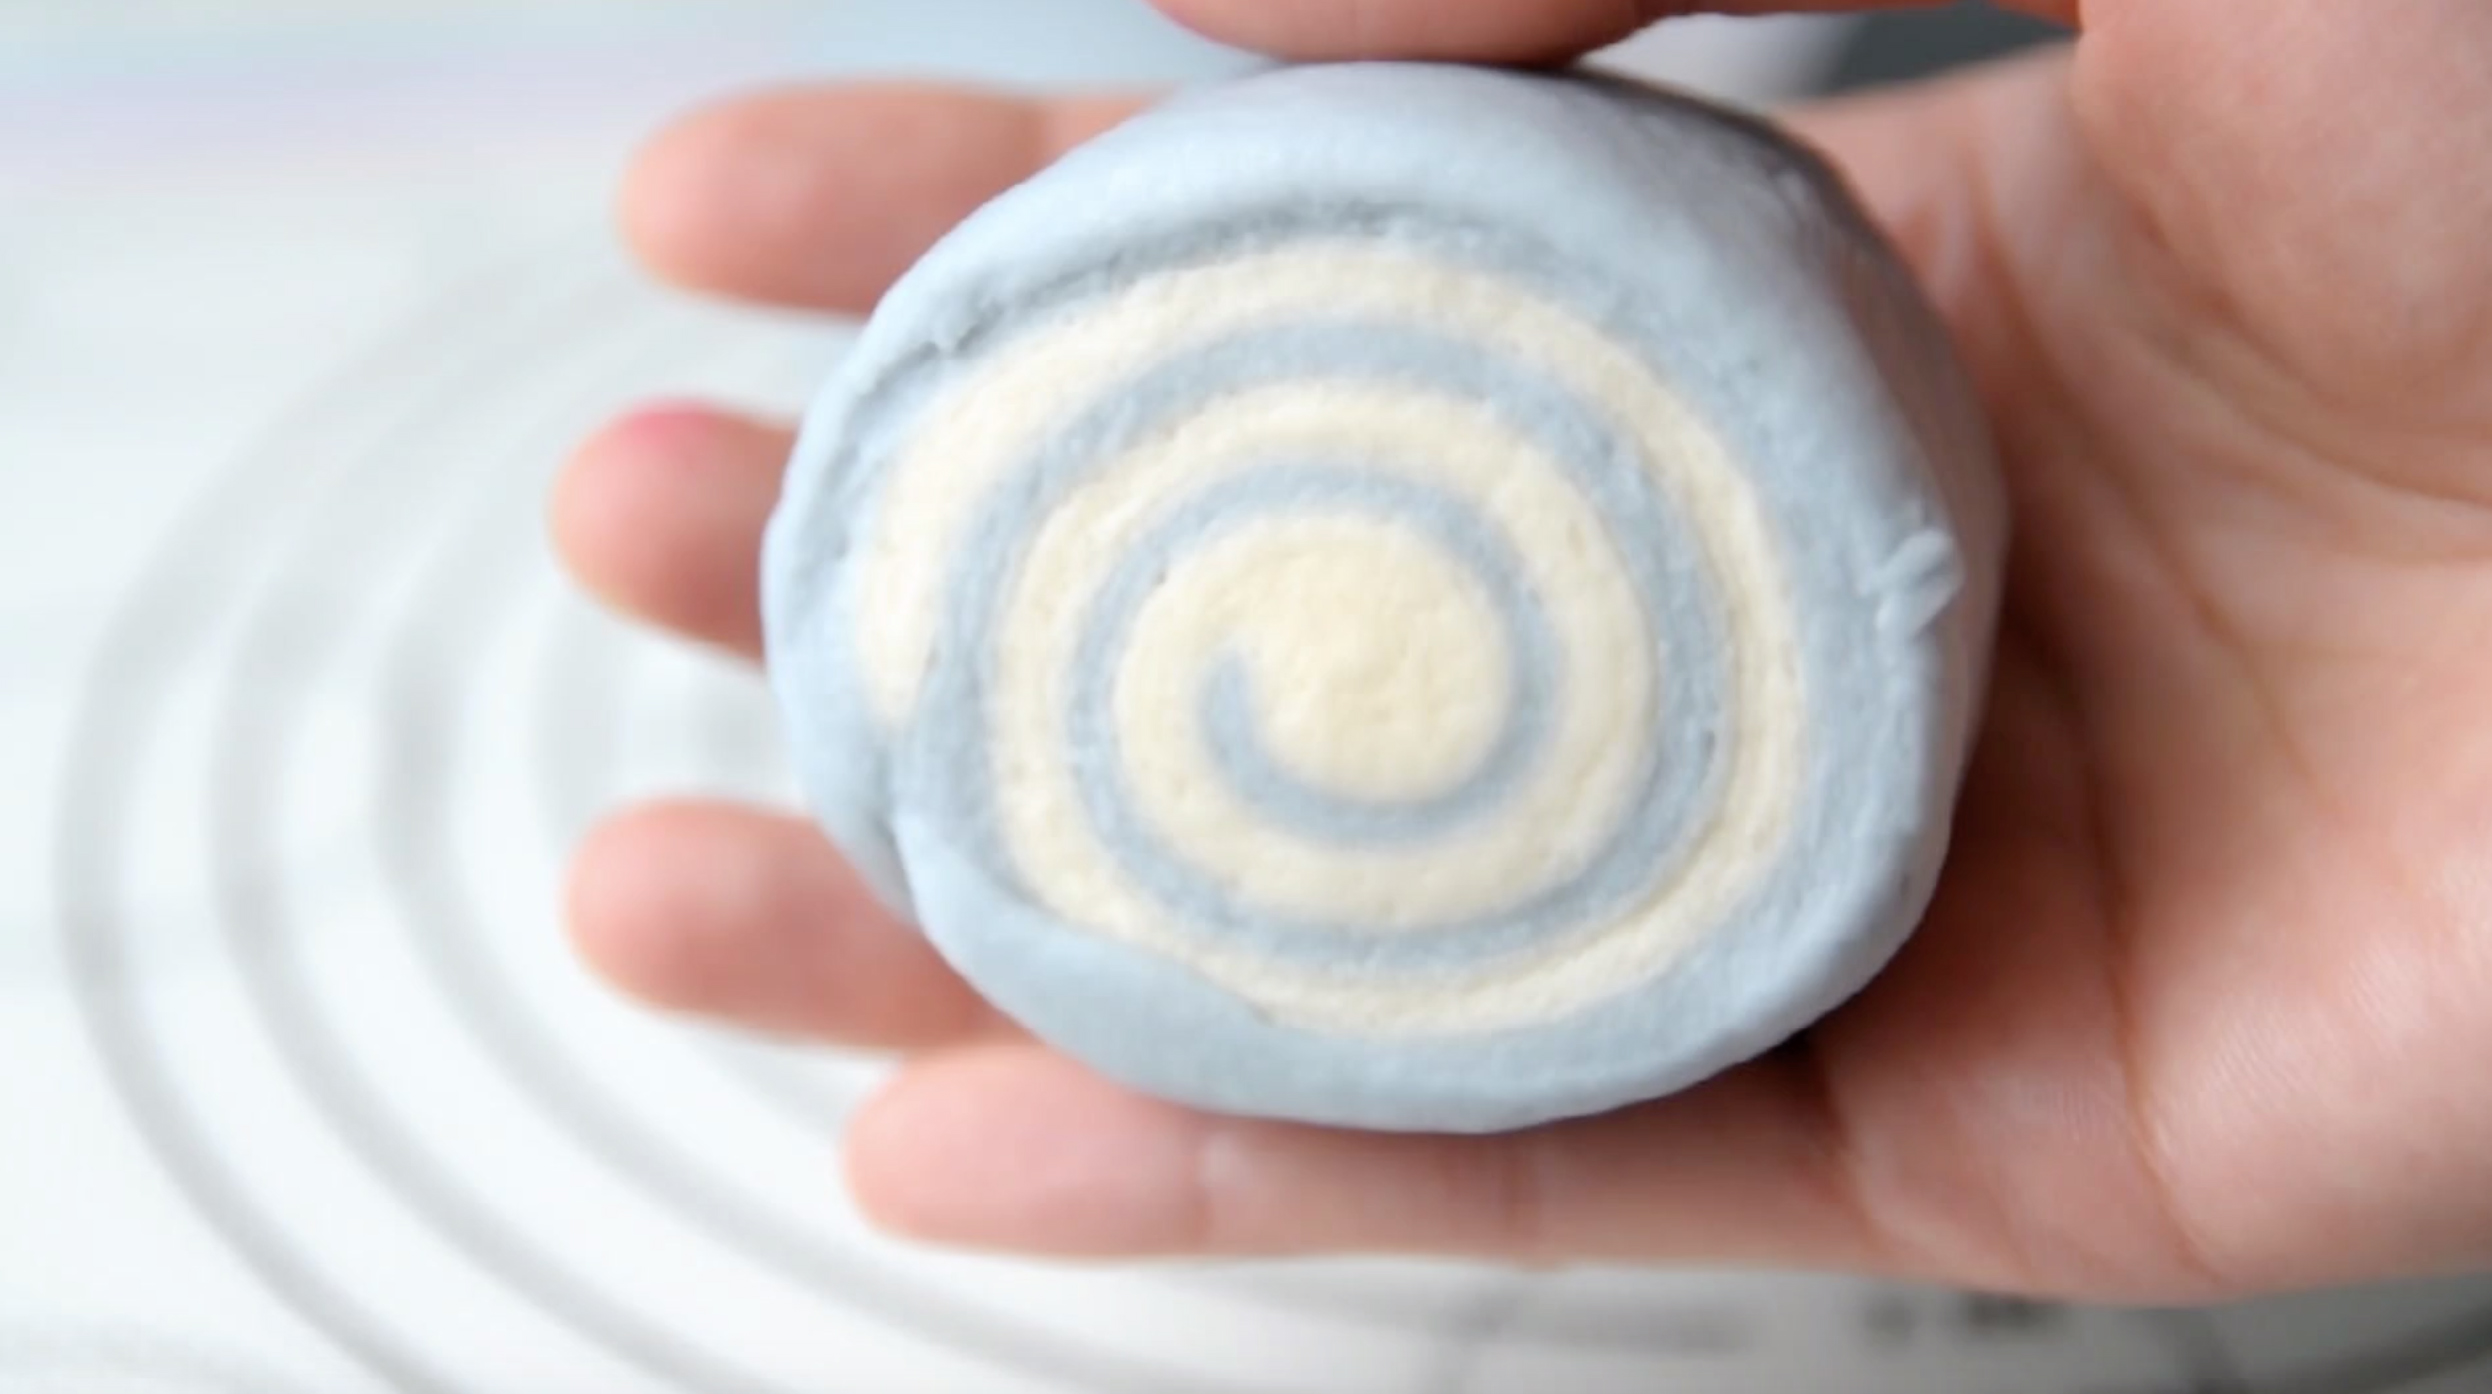
The pattern is created by using doughs with two different colors; one plain dough and the other soft blue has been coloured with this natural Blue Butterfly Pea Flower powder.

It’s more expensive but healthier and a great way to add more visual and to infuse flavors.
You will only need a small amount to achive the right colour tone, add the powder gradually until the desired colour is reached.

If you not keen to buy this kind of natural colour powder, kindly substitute it with standard food colouring.

And to cut the dough, you can use serrated knife if you want.
For me, the best way to do this is to use unflavoured dental floss, where as a knife kind of pushes from the top down and squished the slices.

When attaching small details, make sure to apply just a bit of water, coz the dough will not stick firmly if too much water is used.

Please do remember always cover them with a plastic wrap to prevent the dough dry while they are waiting working on the details.

These buns are favorites from kids to adults and it’s super easy to make at home. I grew up eating it a lot.
I remember having that for breakfast and great options for snack too.

Mantou was my childhood favorite and still is. I fell in love with this swirls since the first time I saw them, it looks beautiful and so tempting. And I know you’ve gonna love them too.

The texture so soft and fluffy, you won’t be able to resist them. If you keep them at room temperature in an airtight container, they even will stay soft moist on the next day.

These buns are great for whatever you’d like to fill them.
It can be eaten on its own or with some sweet spread like jams, condensed milk or to accompany savory dishes like your favorite floss.
I hope that you will enjoy making mantou as much as I do, and I really love to see what creations that you have been made from this recipe. Love you Guys!


BABY EEYORE SPIRAL MANTOU
Yield: 5 pieces
Active time: 1 hour
Total time: 1 1/2 hour

INGREDIENTS

  • 315 grams Cake Flour
  • 2 1/2 tablespoons Granulated Sugar
  • 1 1/4 teaspoons Instant Yeast
  • 1/2 + 1/8 teaspoon Baking Powder
  • 165 grams Cold Water
  • 16 grams Shortening
  • 1/2 + 1/8 teaspoon Salt
  • Food Colouring (Blue Pea Flower Powder for blue, Cocoa Powder for brown, standard food colouring for pink and black)


INSTRUCTIONS

  1. In a large bowl, mix in the flour, sugar, yeast and baking powder.
  2. Pour in the cold water and mix until just combined. By using cold water yeast becomes less active, so it give us more time to create the dough details.
  3. Add in the shortening and salt (you can use your hands to mix this or a stand mixer) keep on going until it’s create a dough ball.
    Place the dough onto a work surface, continue kneading it for 5-10 minutes until it create a smooth ball (sometimes different brand flour can have different moisture level, so if it’s too dry add a tablespoon of water, if it’s too wet add a bit of flour).
  4. After the dough is ready, spare some dough for the details; 30 gr for white; 10 gr each for brown, pink and black.
    And for the rest dough, divide it into 2 equal portions for the spiral dough.
    Cover all dough with a cling wrap to prevent it from drying out while waiting the rest of the dough to be coloured.
  5. Colouring
    – Take one portion of the spiral dough, add about 1/2 teaspoon Blue Pea powder, knead it to even the colour. You’ll only need a small amount to achive the right colour tone, add the powder gradually until the desired colour is reached.
    It will be much harder to color the dough evenly this way (be patient), should the dough become dry when kneading, spray it with some water and continue kneading it.
    * Please note that the colour will be darker after steaming so be mindful with the colour.
    If you not keen to buy this kind of natural colour powder, kindly substitute it with food colouring.
    Spare 30 gr of blue dough for the ears.
    – Add some cocoa powder for the brown colour
    – Using standard food colouring for pink and black.
    After finish with the colouring, let all the coloured dough covered and rest for about 10 minutes so the gluten can relax a bit.
  6. Rolling
    Using rolling pin roll both white and blue spiral dough into about a same size thin rectangle.
    Brush a thin layer of water as a glue on top of the blue dough, and then place the white dough on top of the blue dough.
    Using rolling pin, roll the stack dough one more time to make sure that they are stick well and the surface is even.
    Cut the edges of the dough to make it more tidy, brush a little water on top of the white dough.|
    Starting from the side near you, roll them up tightly into a log.
    Mark the dough into 5 equal pieces (you will have 2 extra ends).
  7. Cutting
    The best way to do this is to use unflavoured dental floss, where as a knife kind of pushes from the top down and squished the slices. You can also use serrated knife to do this.
  8. Detailing
    Place each cut spiral mantou on each parchment paper.
    Always cover all the dough with a plastic wrap to prevent the dough dry while they are waiting working on the details.
    When attaching small details, make sure to apply just a bit of water, coz the dough will not stick firmly if too much water is used.
    – Face: roll some white dough thinly, cut with oval shape cutter ,apply a thin layer of water as a glue, stick it to the front side of the mantou.
    – Ears: roll some blue and small pink dough into a teardrop shaped, stick and press the pink dough on top of the blue dough. Cut the sides of the dough and stick them each side of the head.
    – Eyes, nose and eyebrows: roll some black dough, place and stick it according to position.
    – For the Hair: cut some brown dough with star shape cutter and stick it on top of the head.
    – Mark his face line verticaly from hair down to face with blade tool.
  9. Final Proof
    After finish with all the details, cover mantou with a clear container or cling wrap and set it aside to proof.
  10. Prepare steamer
    Preheat the steamer (the water level should be no more than 3 cm deep as excessive steam will ruin the look of the buns).
    Wrap the lid with kitchen towel to prevent the water drops to the buns.
  11. To check if the dough has been optimally proofed
    The dough should look larger in size. rounded and airy, they also feel soft and spring back slowly when the surface is touched.
  12. Steaming
    Arrange the buns in the steamer and place the lid. Place a chopstick under the lid to create a small gap to allow the steam to escape. Steam over a medium heat for about 10-12 minutes.
  13. Turn off the heat, let the buns rest in the steamer for 3 minutes and then remove the buns, serve them immediately or place on a wire rack to cool completely before you store them (this will prevent the bottom of the steamed buns from getting soggy).


NOTE

  1. If you keep them at room temperature in an airtight container, they will stay soft moist on the next day.
  2. You may keep them in the fridge for up to 4 days or in the freezer for up to 2 months.
  3. You may make lots of these mantou ahead of time and freeze it. To serve fridge or freeze mantou; steam for 10 minutes or wrap mantou with cling film and microwave on high for 1 minute.

Fluffy Banana Cinnamon Rolls|No Egg

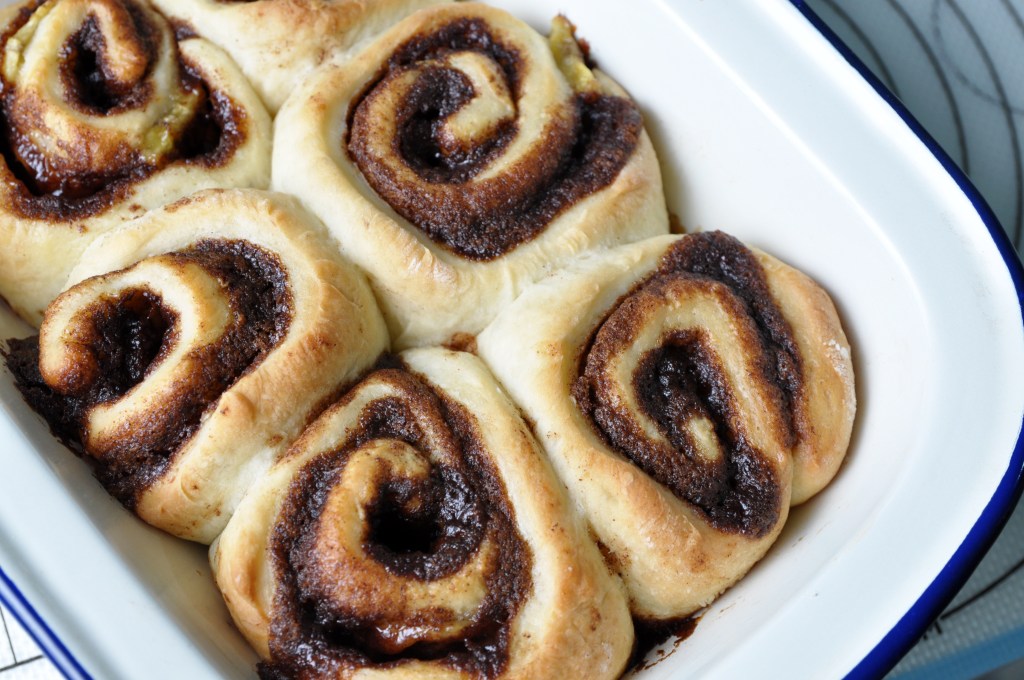
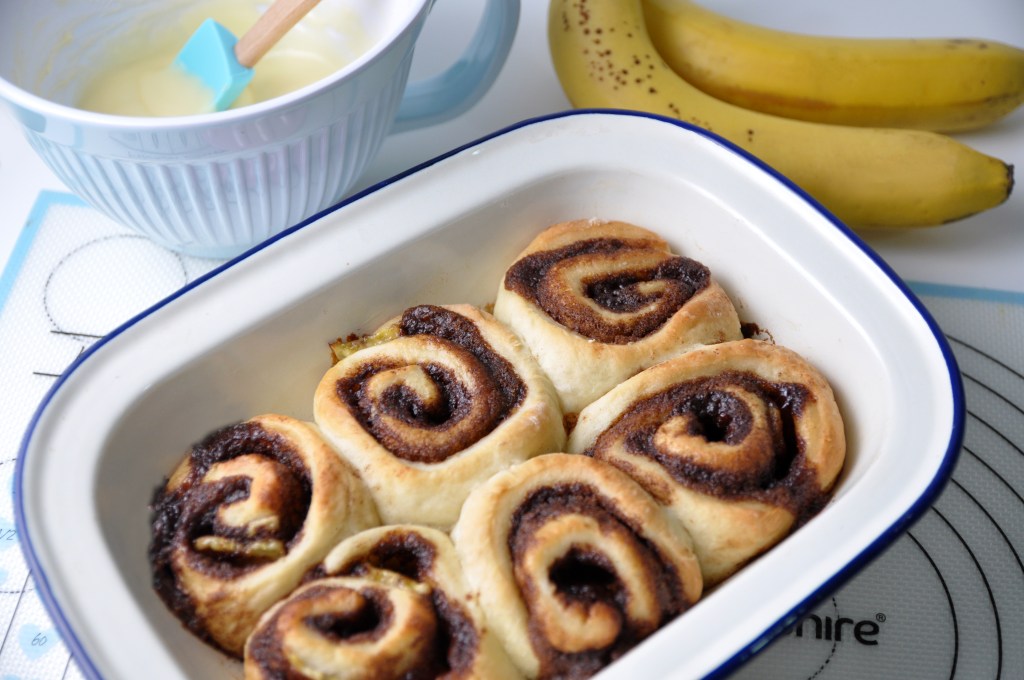
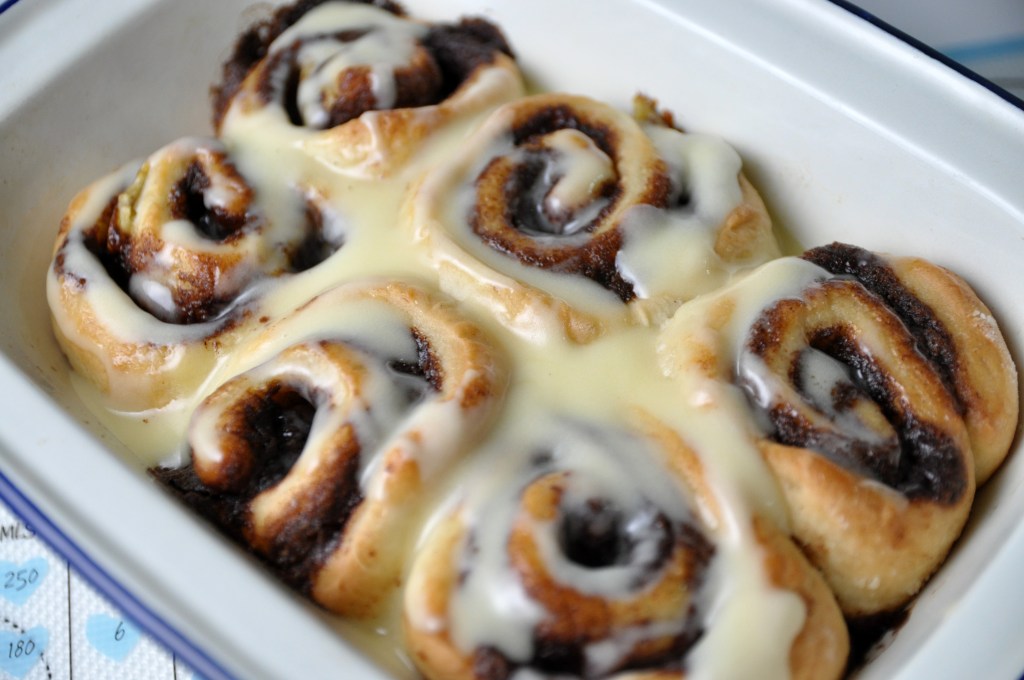
Hey Guys, today I’m gonna show you how to make my signature “Fluffy Banana Cinnamon Rolls”. These gorgeous cinnamon buns are filled with Buttery Brown Sugar Cinnamon and covered in gooey Cream Cheese Frosting.
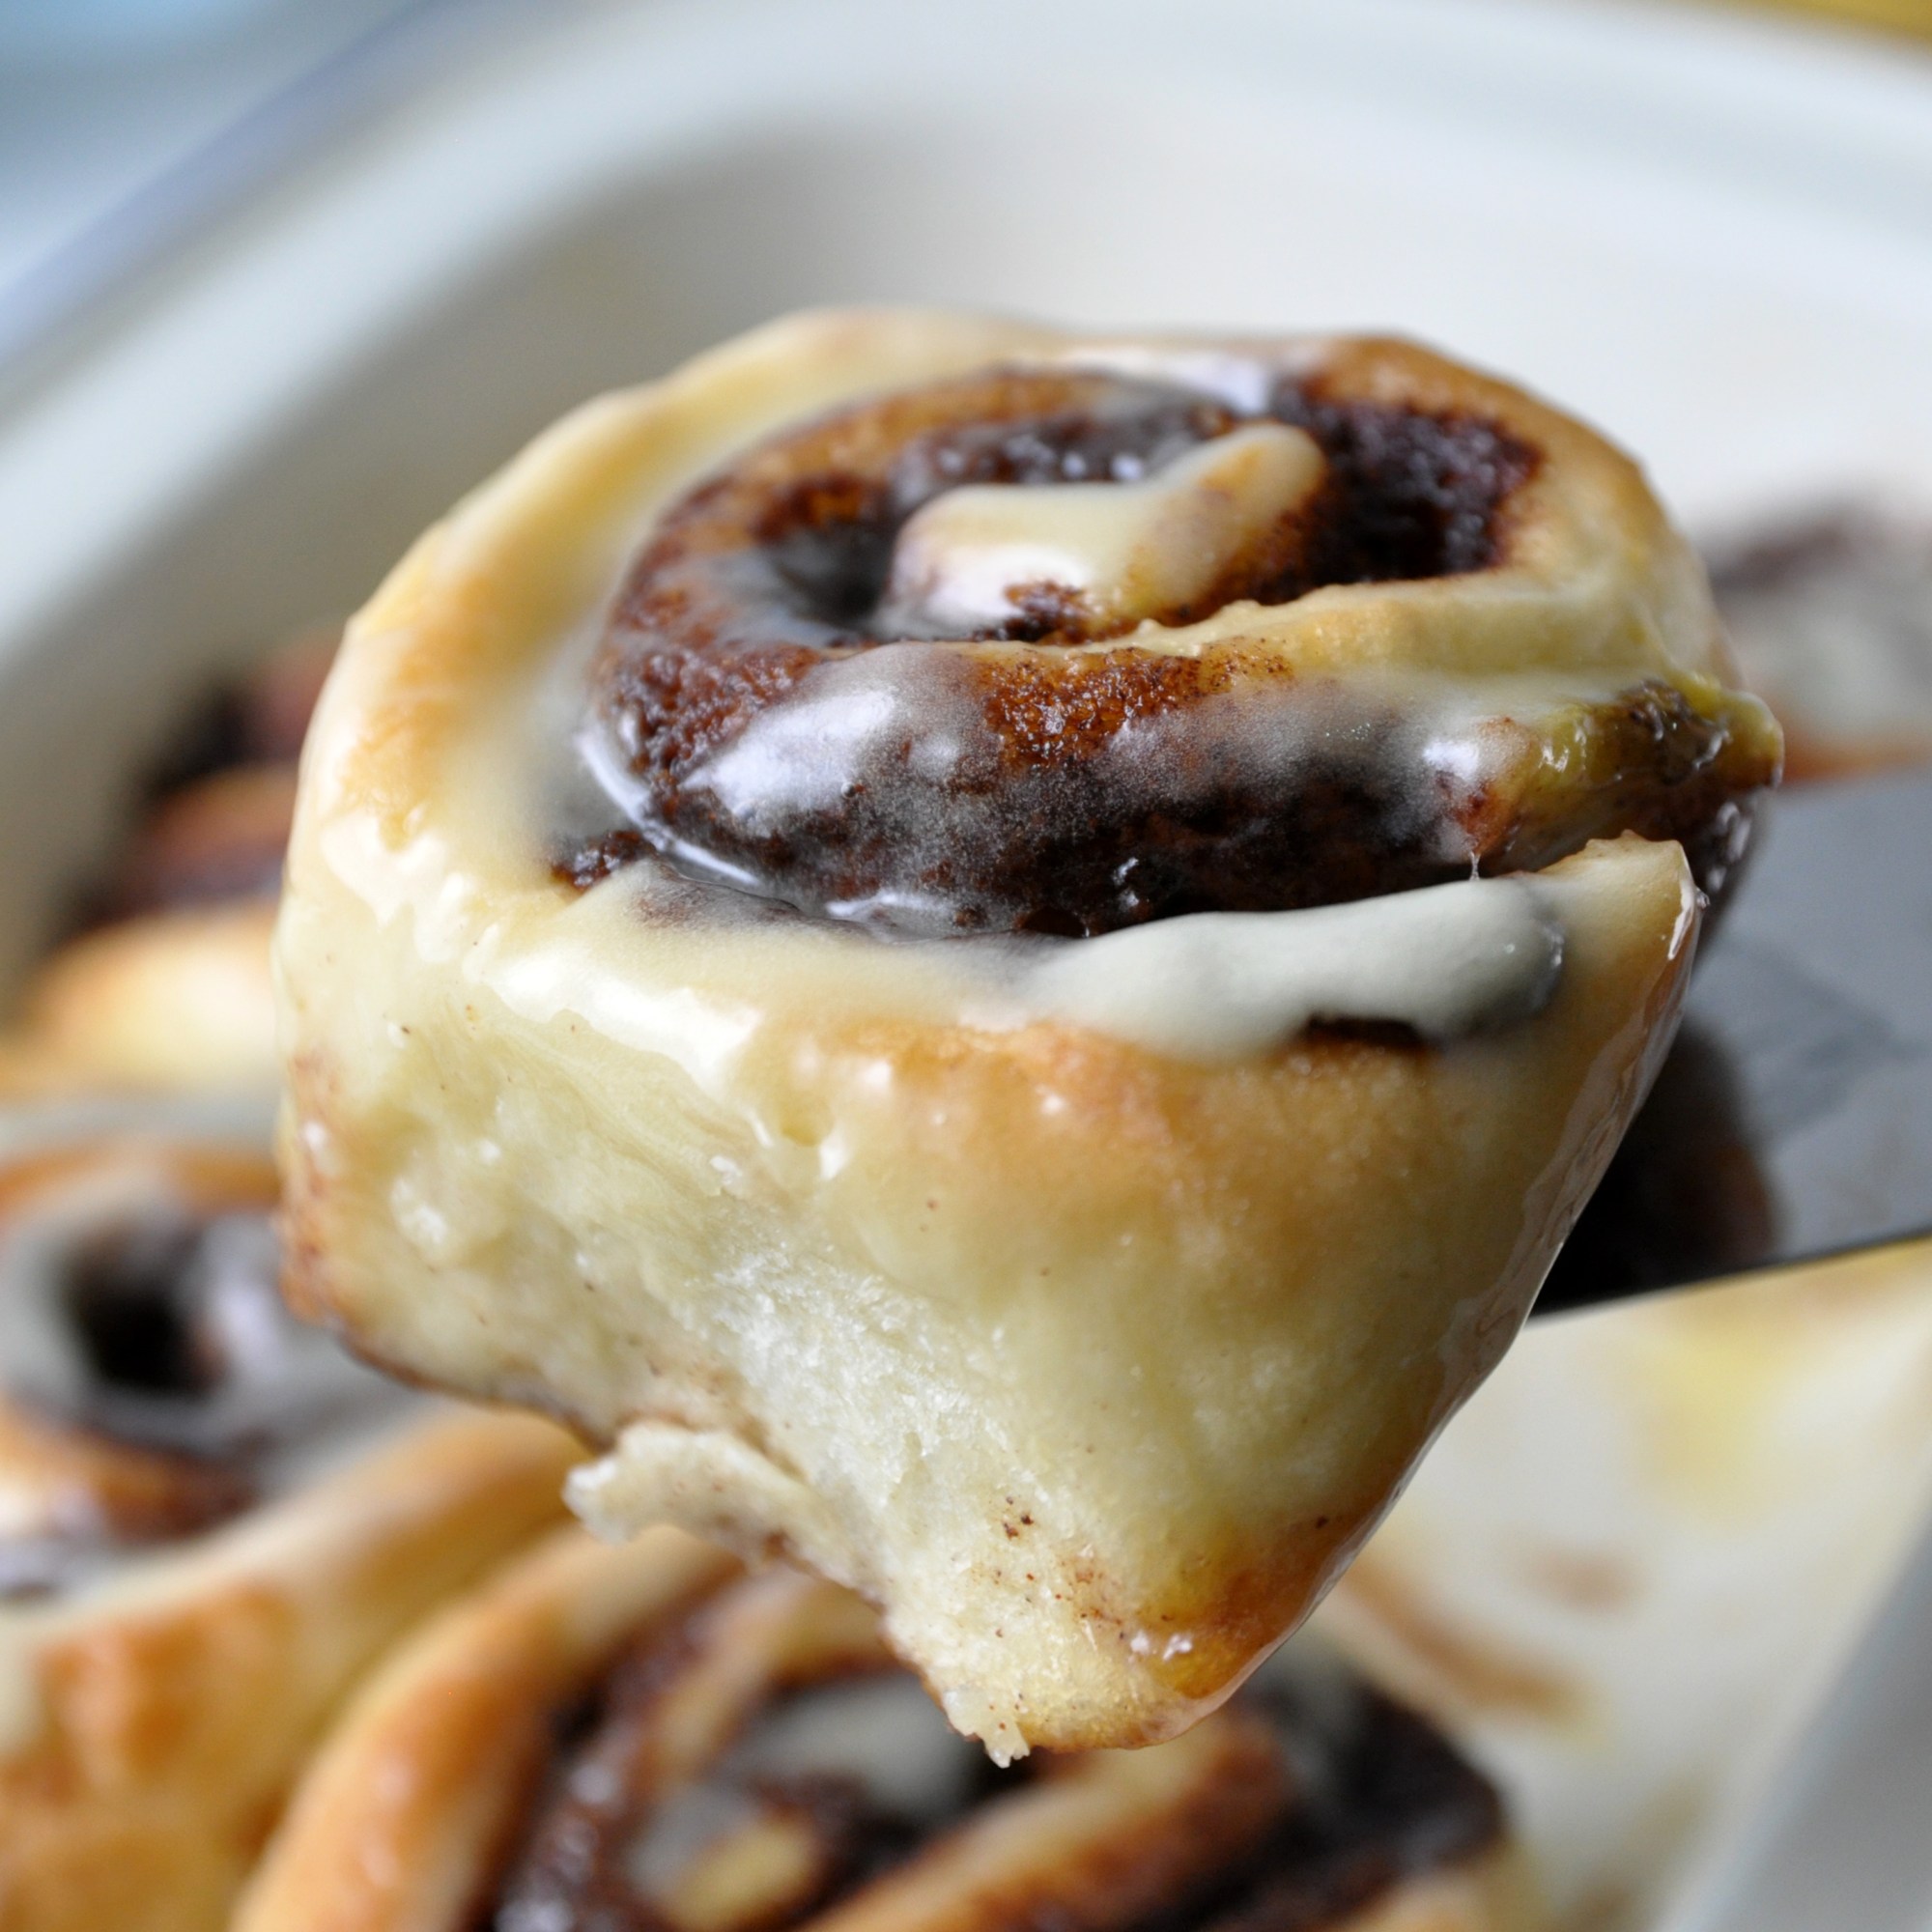
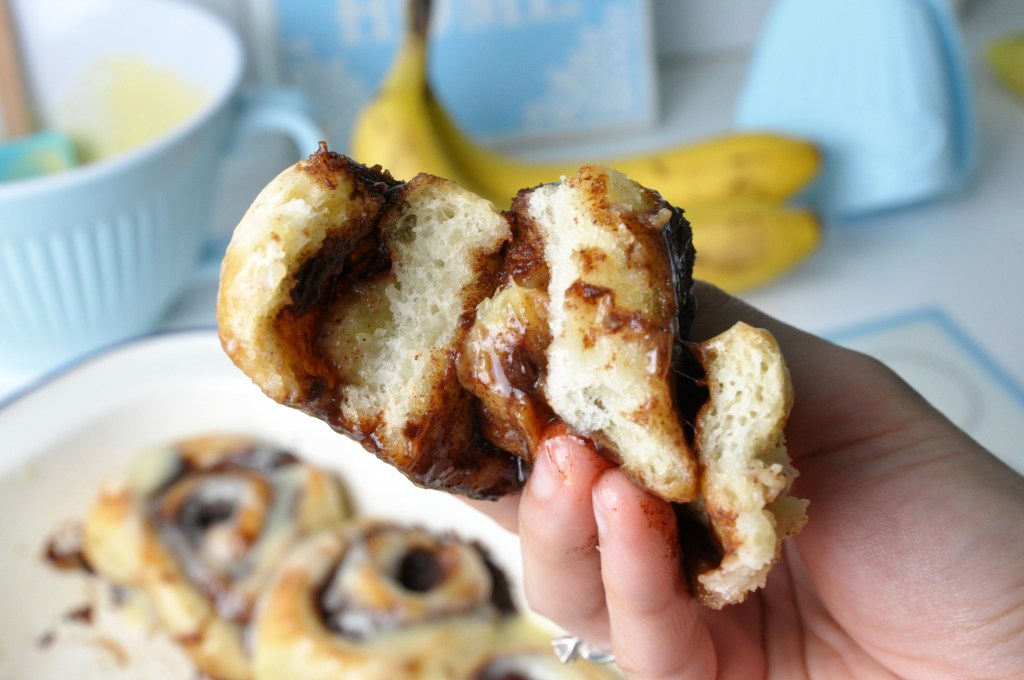
They’re incredibly  fluffy and soft, the smell of Cinnamon Rolls is heavenly, these fluffy buns are definitely perfect treat for any occasion.

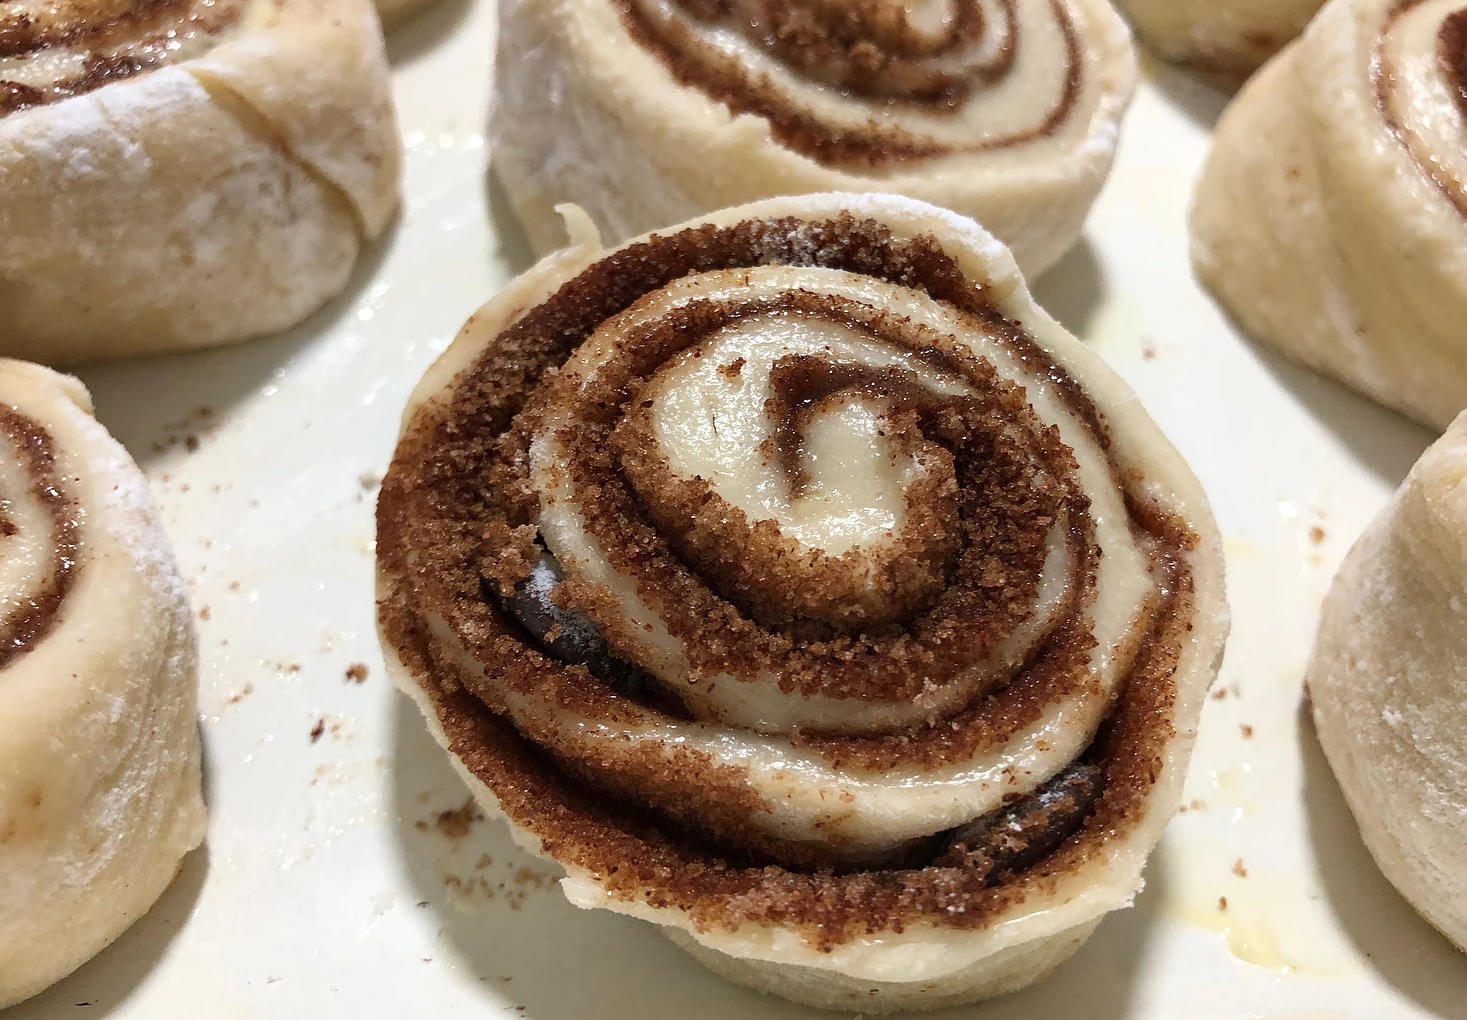
Unbaked Buns

And as an egg-free recipe, we will be use banana puree as an eggs substitute. The result is amazingly moist and fluffy; and the banana slices in the centers, even makes this buns more delightful.

They are tender, warm, gooey, perfectly sweet, and so comforting… They are just gorgeous!

Look at that icing on those rolls. These wonderful icing is not too cream cheesy; it’s really creamy, buttery, a bit tangy but not overly sweet.
If you are the type of person that really loves icing, you could make double of this.

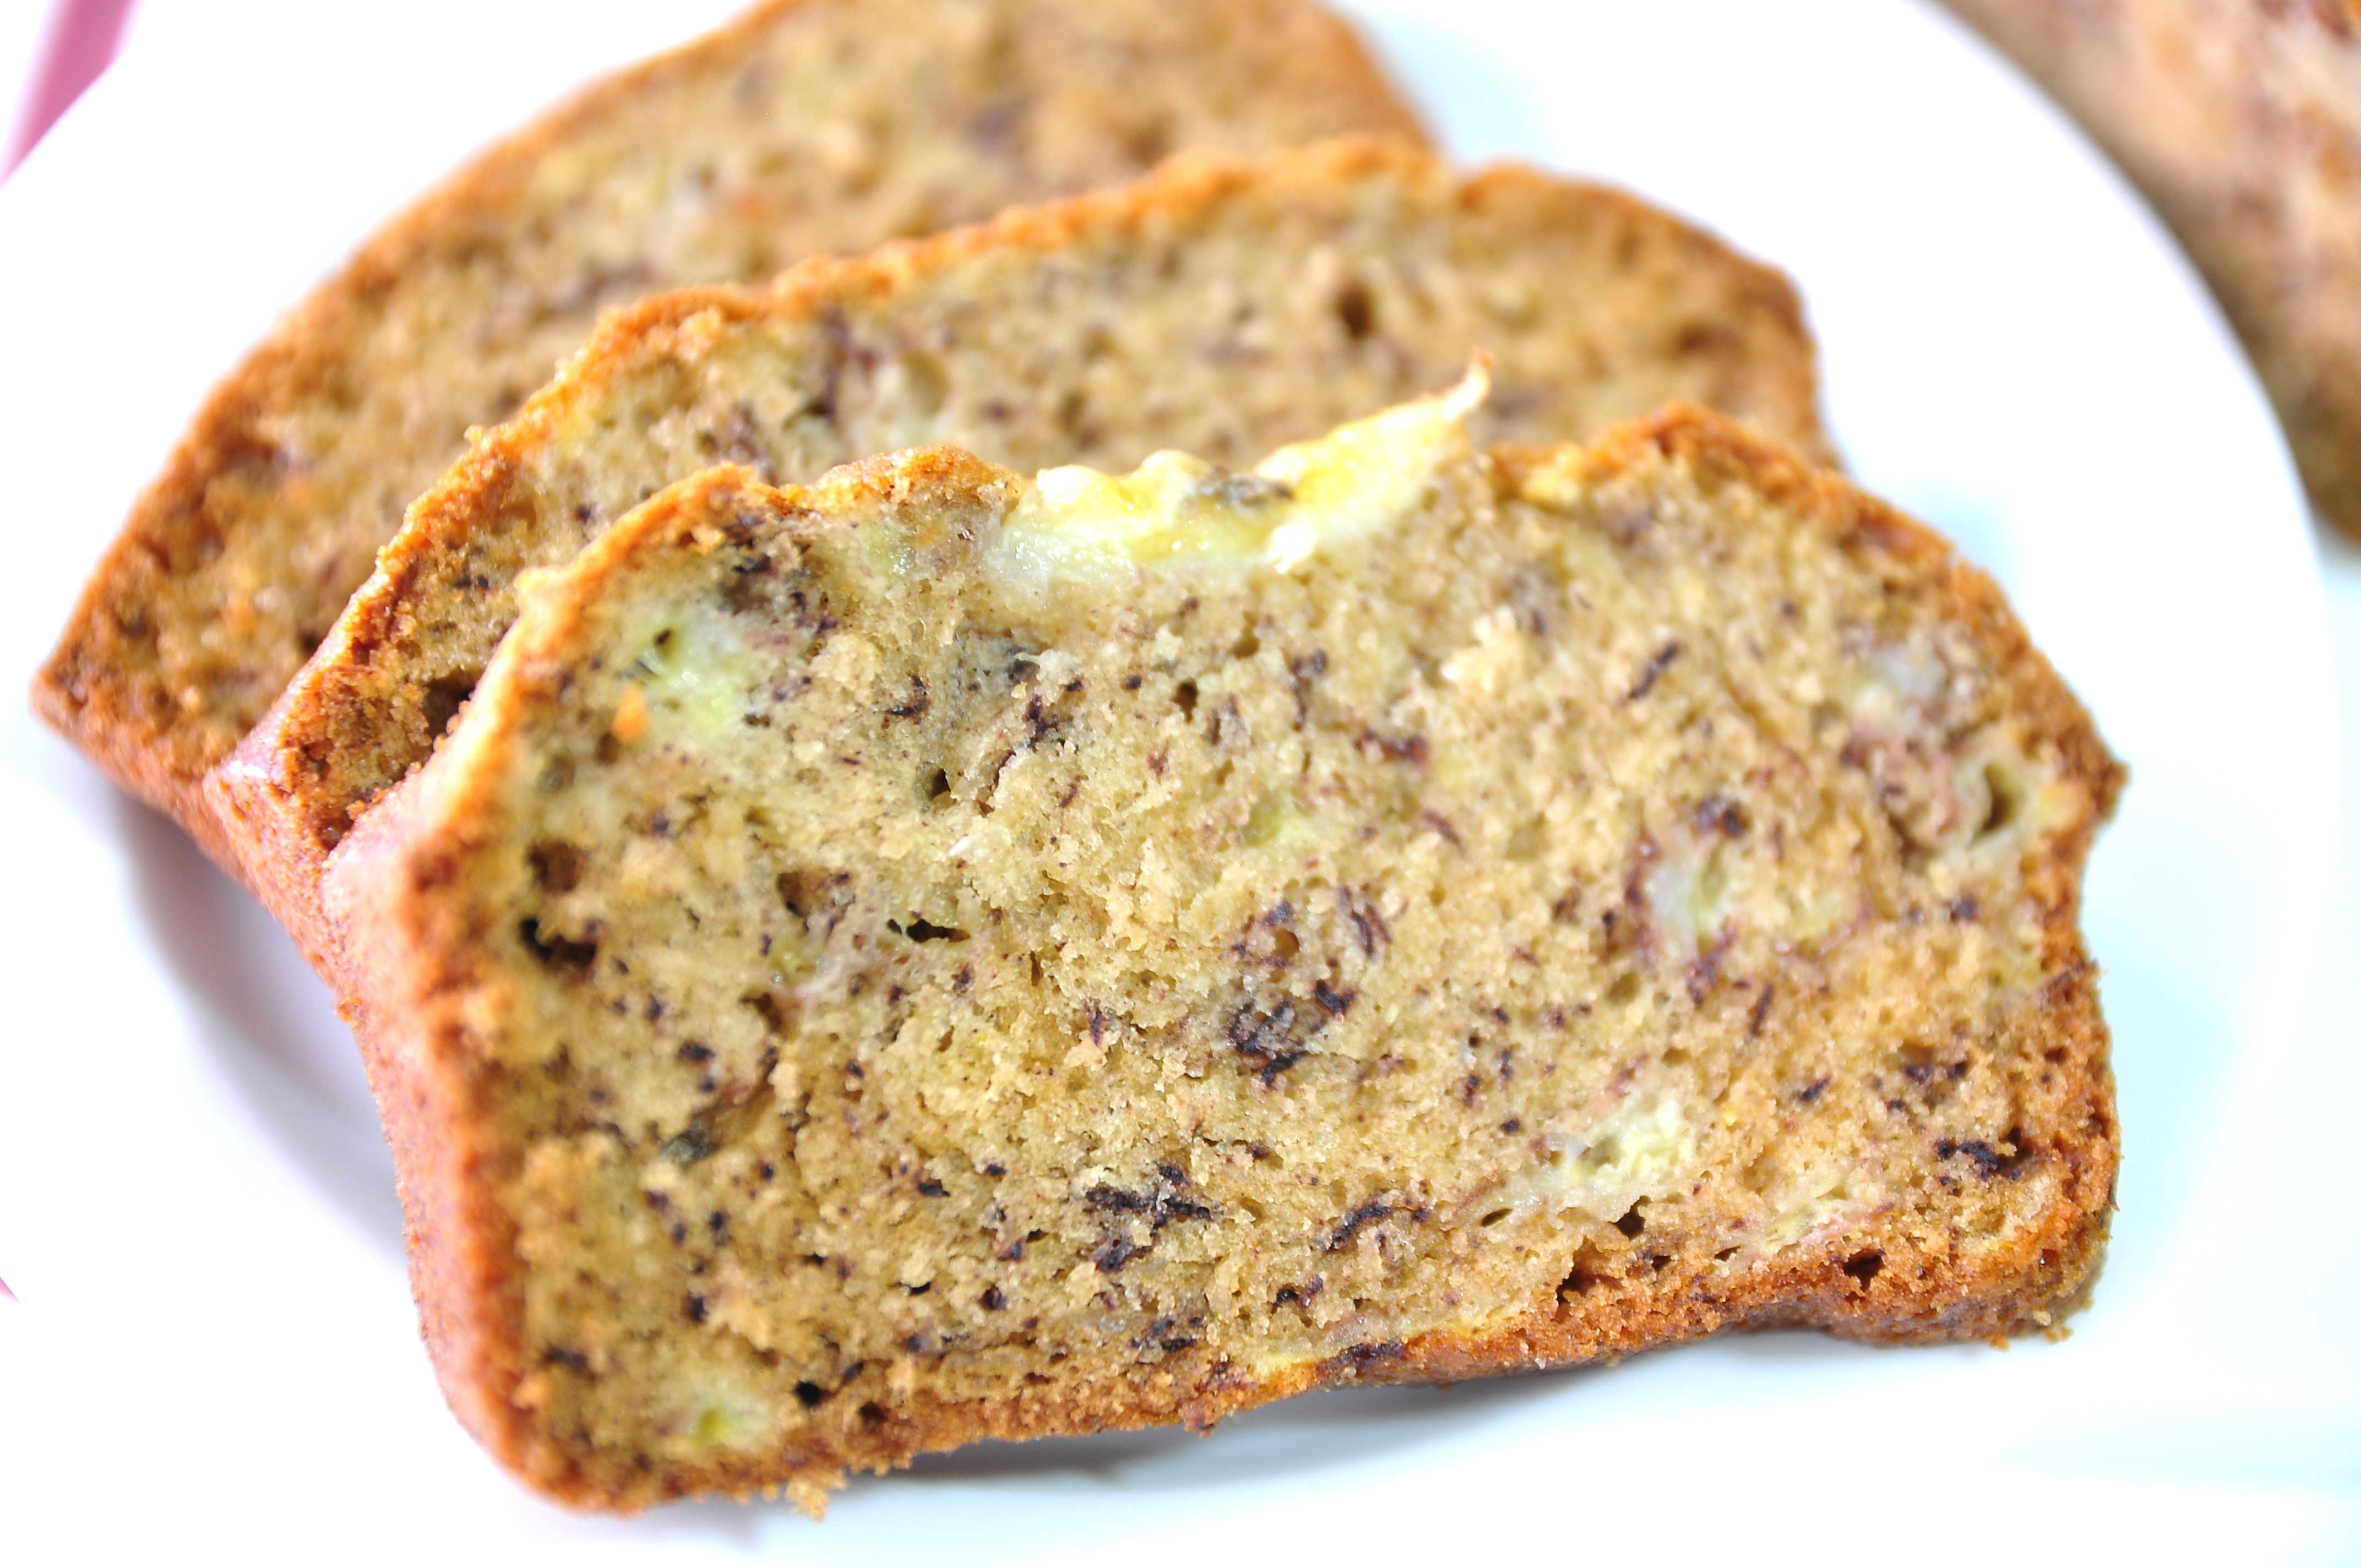
Besides our fluffy Banana Bread, this is another our original recipe that we are really love and have become a family favorite here at Bembum Kitchen.
You even can make this lovely buns in advance and freeze them. So you could still have them fresh whenever you are ready to bake them. Does it make everybody quite happy?

Is there anything better than a fresh Cinnamon Roll, dripping with frosting, hot from the oven? I just wish you Guys can smell this, they are really smell amazing!
I hope you enjoy them as much as we did, stay healthy and safe Guys! Love you all!!

BANANA CINNAMON ROLLS
Yield: One 8×6-inch rectangle pan (6 pieces)
Active time: 1/2 hour
Total time: 2 1/2 hour

INGREDIENTS
Buns Dough:

  • 60 grams Milk
  • 10 grams Unsalted Butter
  • 1 teaspoon Granulated Sugar
  • 1/2 + 1/8 teaspoon Instant Yeast
  • 40 grams Mashed Bananas
  • 125 grams All Purpose Flour
  • 1/8 teaspoon Salt

Filling:

  • 30 grams Unsalted Butter (softened)
  • 40 grams Brown Sugar
  • 1 tablespoon Cinnamon Powder
  • Thinly Banana Slices
  • 1/6 cup Chopped Walnuts (optional)

Icing:

  • 30 grams Cream Cheese (softenend)
  • 55 grams Unsalted Butter
  • 1 tablespoon Milk
  • 1/2 teaspoon Vanilla Extract
  • 40 grams Icing Sugar


INSTRUCTIONS

  1. Prepare the pan, grease it with butter, set aside.
  2. Bloom the yeast; In a small pan, mix the butter and milk. Place over a medium low heat until the butter melted, let it warm.
    Warm means if you put your finger into the milk, It shouldn’t feel like anything. It should feel like your body temperature (could be a little bit warmer than that, but not too hot, coz it will kill the yeast).
    Sprinkle on sugar and yeast, stir well. Let it sit for about 5-10 minutes until the yeast has activated.
  3. Once it has bloomed, add mashed bananas to the milk mixture, mix well.
    Pour in the flour and salt, mix until just combined (doesn’t need to be totally smooth at this point, it just needs to be brought together and homogenous).
    It’s gonna make a really wet, messy dough. No worries, that’s exactly what we are looking for.
  4. Transfer to a lightly floured surface and start kneading the dough. The dough will be sticky, knead the dough for at least 10 minutes until the dough just loses its stickiness and does not stick to the surface or your hands.
  5. Roll the dough into a big ball, grease mixing bowl with a bit of oil and then place the dough inside the bowl. Cover it with plastic wrap and set in a warm place to rise for about 1 hour, or until doubled in size.
  6. To make the filling; Combine very softened butter, brown sugar and cinnamon. Mix until smooth.
  7. To roll; After 1 hour, the dough will be rise (it almost double in size). Place it onto a clean surface (sprinkle a little bit of flour, we don’t want the dough sticking on the mat).
    Roll the dough out into a large rectangle, spread the filling evenly over the dough.
    Add thinly banana slices on top of the filling (remember, not too thick otherwise will be hard to roll later).
    Starting from one short end, roll up the dough into a log and pinch the seam closed.
    Using unflavored dental floss, cut the log into 6 evenly pieces, place them in the prepared pans.
  8. Preheat the oven to 180˚C. Cover the rolls with a plastic wrap and let rise in a warm place for about 20 minutes, until expanded by about half of their original volume.
  9. Bake the cinnamon rolls for 20 minutes, until golden brown. Let cool for about 10 minutes.
  10. To make the frosting; In a medium bowl, whisk together the Cream Cheese, softened butter, milk, and vanilla extract until smooth.
    Gradually add the powdered sugar and mix until smooth. Drizzle the frosting over the cinnamon rolls.

NOTE:

  1. After baking, leave them to cool at least 10 minutes, before you put the icing on, coz when it’s too warm the icing is just gonna completely melt and it’s not gonna be that really nice glaze on top.
  2. Best serve on the day it’s made or you can store left over baked Cinnamon Rolls (airtight container) in the fridge for 5 days and up to 2-3 months in the freezer.
  3. To reheat; remove the roll from the container, preheat the oven or toaster to 180˚C. Put the cinnamon buns on a baking sheet and cover with aluminium foil and let the rolls heat up for about 10-15 minutes.
    Another option is using the microwave for about 30 to 60 seconds. Check on them to ensure they don’t become soggy.
  4. How to freeze unbake Cinnamon Rolls; If you have plan to make the cinnamon rolls in advance and bake later, kindly follow instructions until number 7, and then cover the pan with plastic wrap and freeze for up to 3 months.
    And when you are ready for them, you can defrost them in the fridge overnight or you can leave them out for a few hours at room temperature and throw them in the oven. They might take a little bit longer to bake, just keep an eye of them.

One Hour Bomboloni (Vanilla Rum Custard Cream Donuts)

Hi Everyone, today we are making these “One Hour Bomboloni” irresistibly light and delicious Italian donuts that are fried, coated in sugar, and traditionally stuffed with a pastry cream.

Usually you will find these either stuffed with Nutella, fruit jam or with cream like custard.
I’m gonna do Vanilla Rum Custard today and they are so good! The donuts itself so soft and fluffy.
These are completely homemade and easier than you’d imagine!

And the great thing about this recipe is you even don’t need to rise the dough twice!

If you never made bread before you have to try it sometime. It really so much fun and fresh homemade bread taste amazing.

And while they are still warm, pour some granulated sugar in a container.
I like to mix them with some Cinnamon Powder here to add more delightful taste. Roll them around until completely coated in the Cinnamon Sugar.

Look how soft and fluffy those are! These look and smell amazing!

They are absolutely incredible, and you’ll fall in love with them! Make Bomboloni at home and bring a little taste of Italy to you! 🙂

BOMBOLONI (VANILLA RUM CUSTARD CREAM DONUTS)
Yield: 6 pieces
Active time: 1 hour
Total time: 2 hours

INGREDIENTS
Custard

  • 66 grams Granulated Sugar
  • 36 grams Egg Yolks
  • 30 grams Corn Starch
  • 320 grams Milk
  • 2/3 teaspoon Vanilla Extact/ Paste
  • 2 tablespoons Rum Liquor (optional)


Donuts Dough

  • 150 grams Bread Flour
  • 38 grams Cake Flour
  • 1/2 + 1/4 teaspoon Instant Yeast
  • 1/4 teaspoon Baking Powder
  • 23 grams Granulated Sugar
  • 1/3 teaspoon Salt
  • 77 grams Water
  • 25 grams Milk
  • 18 grams Egg Yolks
  • 12 grams Margarine
  • 10 grams Pure Creamy Butter/ Salted Butter


Coating:

  • 3 tablespoons Granulated Sugar
  • 1 tablespoons Cinnamon Powder


INSTRUCTIONS
Custard

  1. In a bowl combine sugar, egg yolks and corn starch. Whisk until the color lightens and the texture thickens, set aside.
  2. In a medium saucepan pour in milk and Vanilla Extract. Place over medium heat until boil, take it off from the heat.
  3. Whisk in 1/4 cup of the hot milk mixture into the eggyolks mixture until it’s incorporated then slowly drizzle in the remaining hot milk mixture while whisking.
    Strain the mixture back into the saucepan, and then place over medium-high heat and cook while whisking continuously until the mixture thickened and slowly boiling.
  4. Remove from the heat, strain the mixture to remove tiny lumps, add in rum. Mix well.
  5. Let the custard cool slightly and then pour it into the piping bag fitted with a medium size round tip. Set aside.


Donuts Dough

  1. Combine all the dry ingredients; bread flour, cake flour, instant yeast, baking powder and granulated sugar, mix well.
  2. Add in salt, mix well.
    Please note that never let the yeast and salt touch one another without mixing fist, coz it will kill the yeast.
  3. Pour in water, milk and egg yolks. Mix until just combined.
  4. Add in margarine and creamy butter. Spread and fold the butter into the dough until just combined.
  5. Pour the mixture onto a work surface and start kneading the dough.
    You will know the dough is done mixing if you touch the dough, it doesn’t leave a lot if residue on your fingers.
    And you can also do the windowpane test by taking a piece of dough gently spread your fingers and thumbs apart, stretching the dough into a thin translucent membrane.
    If you can stretch the dough without it breaking, that means the gluten is well-developed and your dough is ready.
    But if it tears when you stretching it out, that’s mean it’s not ready and you need to knead it a little bit longer.
  6. After the dough is ready, roll them into a big smooth ball.
    Let it sit on the counter for about 10 minutes so the gluten can relax a little bit.
  7. While our gluten is chilling out, preheat the oven to 90 degress C to create warm environment for proofing the dough later.
  8. Cut some greaseproof paper and grease them with a little bit of oil for the donuts base. This paper will make us easier to handle the proofed dough, which is very soft after rising.
  9. To Form
    Divide the dough into 6 equal protions, it’s about 58 grams each.
    Roll each pieces into a smooth ball. Hold and roll the dough
    with our hands in C shape, give a little pressure to it, keep rolling until it create a smooth ball.
    After finished with all the dough, cover and let the dough rest for about 15 minutes.
  10. Place each dough ball onto a greaseproof paper. Using round flat surface, press the ball gently into a thick flat disk, about 3 inches diameter each. 
  11. To Proof
    Place them in the preheated 90° C oven that has been turned off for about 20 minutes.
    If you do not keen to use this method, you also can proof them at room temperature. Just make sure to covered them with a plastic wrap to prevent the dough dry and they might need more time to rise (depends on the room condition).
  12. Let all the donuts rise until noticeably puffy, they should look pretty darn fat and happy. If you simply touch them lightly with your fingertip and the indentation remains, that’s means they are ready to fried. Do not overfproof.
  13. To Fried
    Heat about 2-3 inches of vegetable oil in a heavy pot on the stove, wait until it reaches between 350-360° F (175-180° C).
    Feel free to use electric deep fryer according to manufacturer directions.
  14. Gently pick Proofed donuts up off the baking sheets and carefully place the top sides facing down into the hot oil.
    Cook for about 60-90 seconds per side until they’ve got beautiful golden colour on both sides.
    Drain off the excess oil, and transfer them to a lined baking sheet 
  15. To Coat
    While they are still warm, mix granulated sugar and cinnamon powder in a container. Roll donuts around until completely coated in the cinnamon sugar.
  16. To Fill
    Poke a hole on the side, create empty space inside the donuts. You can use chopstick or small knife.
    Push the custard fillings piping bag tip into the small hole and squeeze to fill. Allow a little bit of the filling to spill out and show through the hole.


NOTES

  1. The best oils for frying is a neutral flavour oil; like peanut oil and canola oil because of their high smoke points. Although sunflower and corn oil work well too. 
  2. It is always best to eat the Bomboloni immediately. You could keep them unfilled in an airtight container at room temperature for 1-2 days at most. If filled they should be kept in the refrigerator for a couple of days. Freezing is not a good idea.
  3. To Reheat
    Place the cold Bomboloni in a pan (uncovered), reheat in preheated 300°F/ 150°C oven until warm for about 4 to 5 minutes.

Pink Totoro Chigiri Pan

Hi Guys, today we are making Pink Totoro Chigiri Pan or commonly known as tear off or pull-apart bread. This kind of bread has become extremely popular in Japan.

The name of chigiri comes from the Japan word chigiru, meaning “tear off”, it’s the fact that you can tear off the bread as much as you want from the original square and eat it as you like.

These bread using 5 degress celcious cold storage liquid method. A small percentage of the flour, water and yeast, that have been stored for at least 18 hours in the fridge.

By using this method, it pre-gelatinizes the starches in the flour, meaning they can absorb more water. The bread may rise higher, they will be moister, and will stay soft and fresh longer, and best of all, the method is very natural, no chemical needed.

You can see how puffy it looks, see the inner fluffy structure of this bread. It’s still super fluffy and light as you can see it just melts in your mouth, you will just enjoy it like eating a cloud!

I hope you guys enjoy this video and give it a try as well. If you’re a soft bread lover, I think you’ll enjoy the results. Happy baking All!!

PINK TOTORO CHIGIRI PAN (PULL-APART BREAD)
Yield: 9 pieces (7 inch Square Pan)
Preparation time: 18 hours
Active time: 1 1/2 hour
Total time: 2 1/2 hours

INGREDIENTS
5°C Cold Storage Liquid :

  • 300 grams Bread Flour
  • 300 grams Cold Water
  • 1 gram Instant Yeast
    ** This Cold Storage recipe produce more than we need. You can keep the rest for the next batch.

Bread Dough:

  • 250 grams Bread Flour
  • 15 grams Milk Powder
  • 45 grams Granulated Sugar
  • 3 grams Instant Yeast
  • 150 grams Cold Storage Liquid
  • 38 grams Whole Eggs
  • 90 grams Cold Milk
  • 30 grams Unsalted Butter (softened)

Facial Features Details:
Melted White and Dark Chocolate


INSTRUCTIONS
5°C Cold Storage Liquid

  1. In a bowl or a container, mix in together the flour, water yeast. Mix well (make sure that you are using the instant yeast).
  2. Cover and let them sit at room temperature for outdoor fermentation for about 1 hour and then put them in the fridge for at least 18 hours until ready to use them.

Template For Totoro’s Tummy
Using A4 paper, divide 3 equal sections at the bottom of the paper (it’s about 7 cm each), using round cutter to make the curve shape. Cut it out the curve.

Prepare The Pan
Fold the non-stick baking paper that fits to the bottom of the 7 inch Square Pan, Cut out the sides, then place it into the pan.

Bread Dough

  1. In a large bowl mix in the flour, milk powder, sugar, and instant yeast. Mix well. Add in the wet ingredients (cold storage liquid, eggs and the milk), mix it all through.
  2. Add in the softened butter and mix, pour them on our work surface and start kneading the dough (you can use a dough hook of your stand mixer). If you’re gonna do this by hand it will take for about 15 minutes or so, and with a stand mixer for about 5-10 minutes.

  3. Knead the dough until you can stretch the dough into a thin translucent membrane (this is called windowpane test) without breaking it, that means the gluten is well developed and your dough is ready to rise.
  4. Add on some red food colouring and then start kneading to incorporate it.
  5. Let the dough rest for about 10 minutes (please remember always cover the dough with a plastic wrap or a damp clothes to keep the moisture in and prevent the skin from drying out).
  6. After the dough got enough rest, divide the dough into 9 equal parts (it’s about 45 grams each) and also don’t forget to spare some dough about 30 grams for the ears (cover it with plastic wrap).
  7. Rounding the divided dough one by one and let it rest again for about 10 minutes.
  8. After resting, take one of the dough, flatten it by hand, fold the dough twice, roll it into a smooth ball and then place it in the pan (don’t flour it too much to prevent the dry result). Continue with the rest dough, and they are ready for the fermentation process.
  9. Cover the shaped dough in a pan with a plastic wrap and let them rise for about 50-60 minutes until they are double in size.
  10. Preheat the oven to 170 degress Celcious.
  11. 10 minutes before fermentation is completed, the ear dough is ready to shape. Flaten the dough, cut into small pieces, then shape it into a cone.
  12. Spray the proofed dough surface with some water, and stick the ear to each position.
  13. To complete Totoro’s tummy, place the curve template on the dough, and using a mesh strainer sprinkle some cake flour on the uncovered dough.
    Please note that you need to start from the top row and the rest row should be covered with another piece of paper to avoid the flour.
  14. Cover the dough with a piece of aluminium foil, bake it for about 20-25 minutes (you don’t want to over bake, like have a brown Totoro, so turn on your alarm and check them out right after 20 minutes baking and quickly safe your cutie Totoro).
  15. After baking, take it out from the pan and let it sit on the cooling rack, and don’t forget to remove the baking paper as well (this way will prevent the bread to gets soggy which can cause a wrinkle on their surface later).
  16. After cool completely, add the details with regular melted white and dark chocolate.


NOTE

  1. I usually make the 5°C Cold Storage Liquid one day in advance, so I can immediately use it on the next day.
  2. You can store them for 3 days in the refrigerator and 1 month in the freezer. Store them in the sealed bag or a plastic container to prevent the bread dry.
  3. To reheat the bread: Microwave (30 seconds) or 180° C oven (10 minutes).

Category

Howto & Style

Pao De Queijo (Chessy Dip Chewy Cheese Balls)

Hellooo friends and welcome back!! Today we are making some delicious “Chessy Dip Chewy Cheese Balls”  a.k.a “Pao de Queijo“.

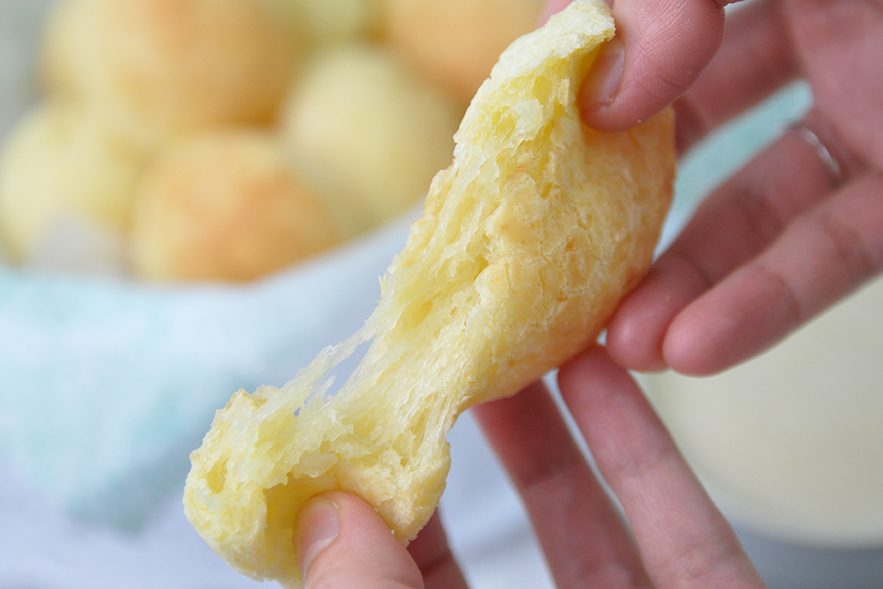
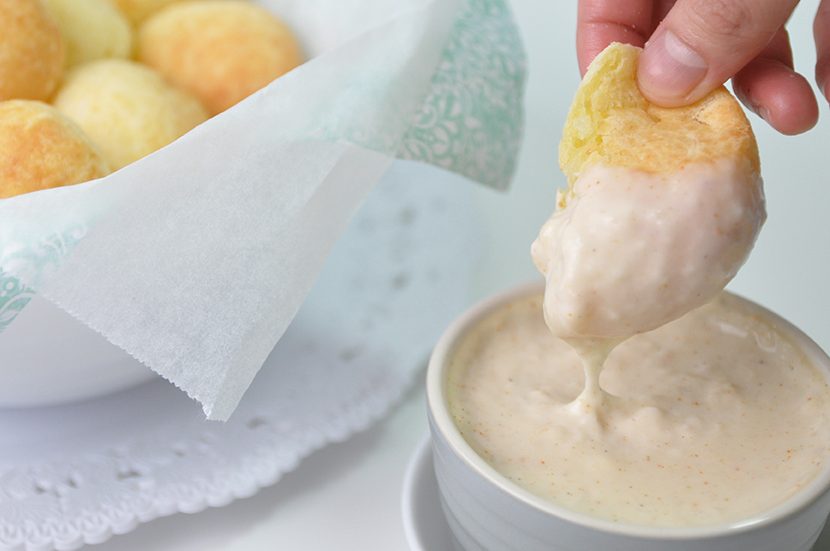
It was crunchy outside but amazingly soft and chewy inside, these little cheese balls with their addictive cheesiness, they are super easy to make at home.

These Brazilian Cheese Bread is tasty as it gets, since they are so flavorful due to the Cheese and the Tapioca Flour.

It’s really the most comforting and satisfying snack for a Cheese Lover .
These flavor was so haunting and I still dream about it. 🤤

However, it’s even better if you serve them with  these mild creamy and velvety chessy dip sauce.

🥲 I want !!

The recipe is super easy, fail proof and absolutely mouthwatering. Try to make these at home and go enjoy your ooey gooey “Pao de Queijo” !

WATCH HOW TO MAKE Pao De Queijo (Chessy Dip Chewy Cheese Balls)


CHESSY DIP CHEWY CHEESE BALLS (PAO DE QUEIJO)
Yield: 16 pieces
Active time: 20 minutes
Total time: 1 hours

INGREDIENTS
🧀 Cheese Balls
120 grams Milk
80 grams Water
3 tablespoons Vegetable Oil
200 grams Tapioca Starch
50 grams Eggs (beaten)
80 grams Parmesan Cheese (Grated)

🧀 Cheesy Dip
160 grams Milk
2 ⅔ teaspoons All-Purpose Flour
1/4 teaspoon Salt
1/4 teaspoon Ground Black Peper
1/4 teaspoon Ceyenne Pepper
40 grams Cheedar Cheese (Grated)

INSTRUCTIONS
🧀 Cheese Balls

  1. Preheat the oven to 180 C/ 350 F.
  2. In a medium saucepan, combine the Milk, Water and Vegetable Oil.
    Heat the mixture until just before it begins to boil, then take it OFF from the heat.
  3. Place the Tapioca Starch in a large bowl,
    Pour the Milk Mixture into a bowl of Tapioca Starch, then quickly combine the mixture (BE CAREFUL the mixture is quite hot, you can use a fork or wodden spoon to mix this).
  4. Add the beaten Eggs and continue mixing
  5. When the dough is cool enough to touch, you can knead it by hand
  6. Add the grated Parmesan Cheese; continue kneading the dough until the Cheese is mixed evenly.
  7. Take about 1 tablespoonful of the dough (about 35 grams each) and shape it into a ball.
    Place Cheese Balls onto a baking sheet lined with a parchment paper (Don’t worry if the balls are uneven, they will become round while baking).
  8. Bake it for about 20 minutes. Place the balls onto a cooling rack to cool down a bit.

🧀 Cheesy Dip

  1. In a medium saucepan combine Milk, Flour, Salt, Black Pepper and Cayenne Pepper (If you don’t like spicy, you can omit the Cayenne Pepper).
  2. Bring to a boil over MEDIUM heat, stirring constantly until slightly thickened. Remove from heat, add the grated Cheedar Cheese, stir until well combined.


NOTES

  1. Some people use All-Purpose Flour to make this; I personally don’t recommend it because you won’t get the chewy texture that you are you are looking for.
    So, better stick with the Tapioca Starch.
  2. You can adjust and add the amount of Cheese if you want.
  3. It’s best to serve it hot, coz it will be a bit tough when it’s gets cold.
  4. To reheat, either Microwave them on a paper towel for about 20 seconds (they won’t be crispy at all),
    OR if you want that crispy-chewy texture, pop them in a 350 F oven for about 8-12 minutes. Keep an eye on them so you don’t end up burning them.

Kanahei Usagi Steamed Buns

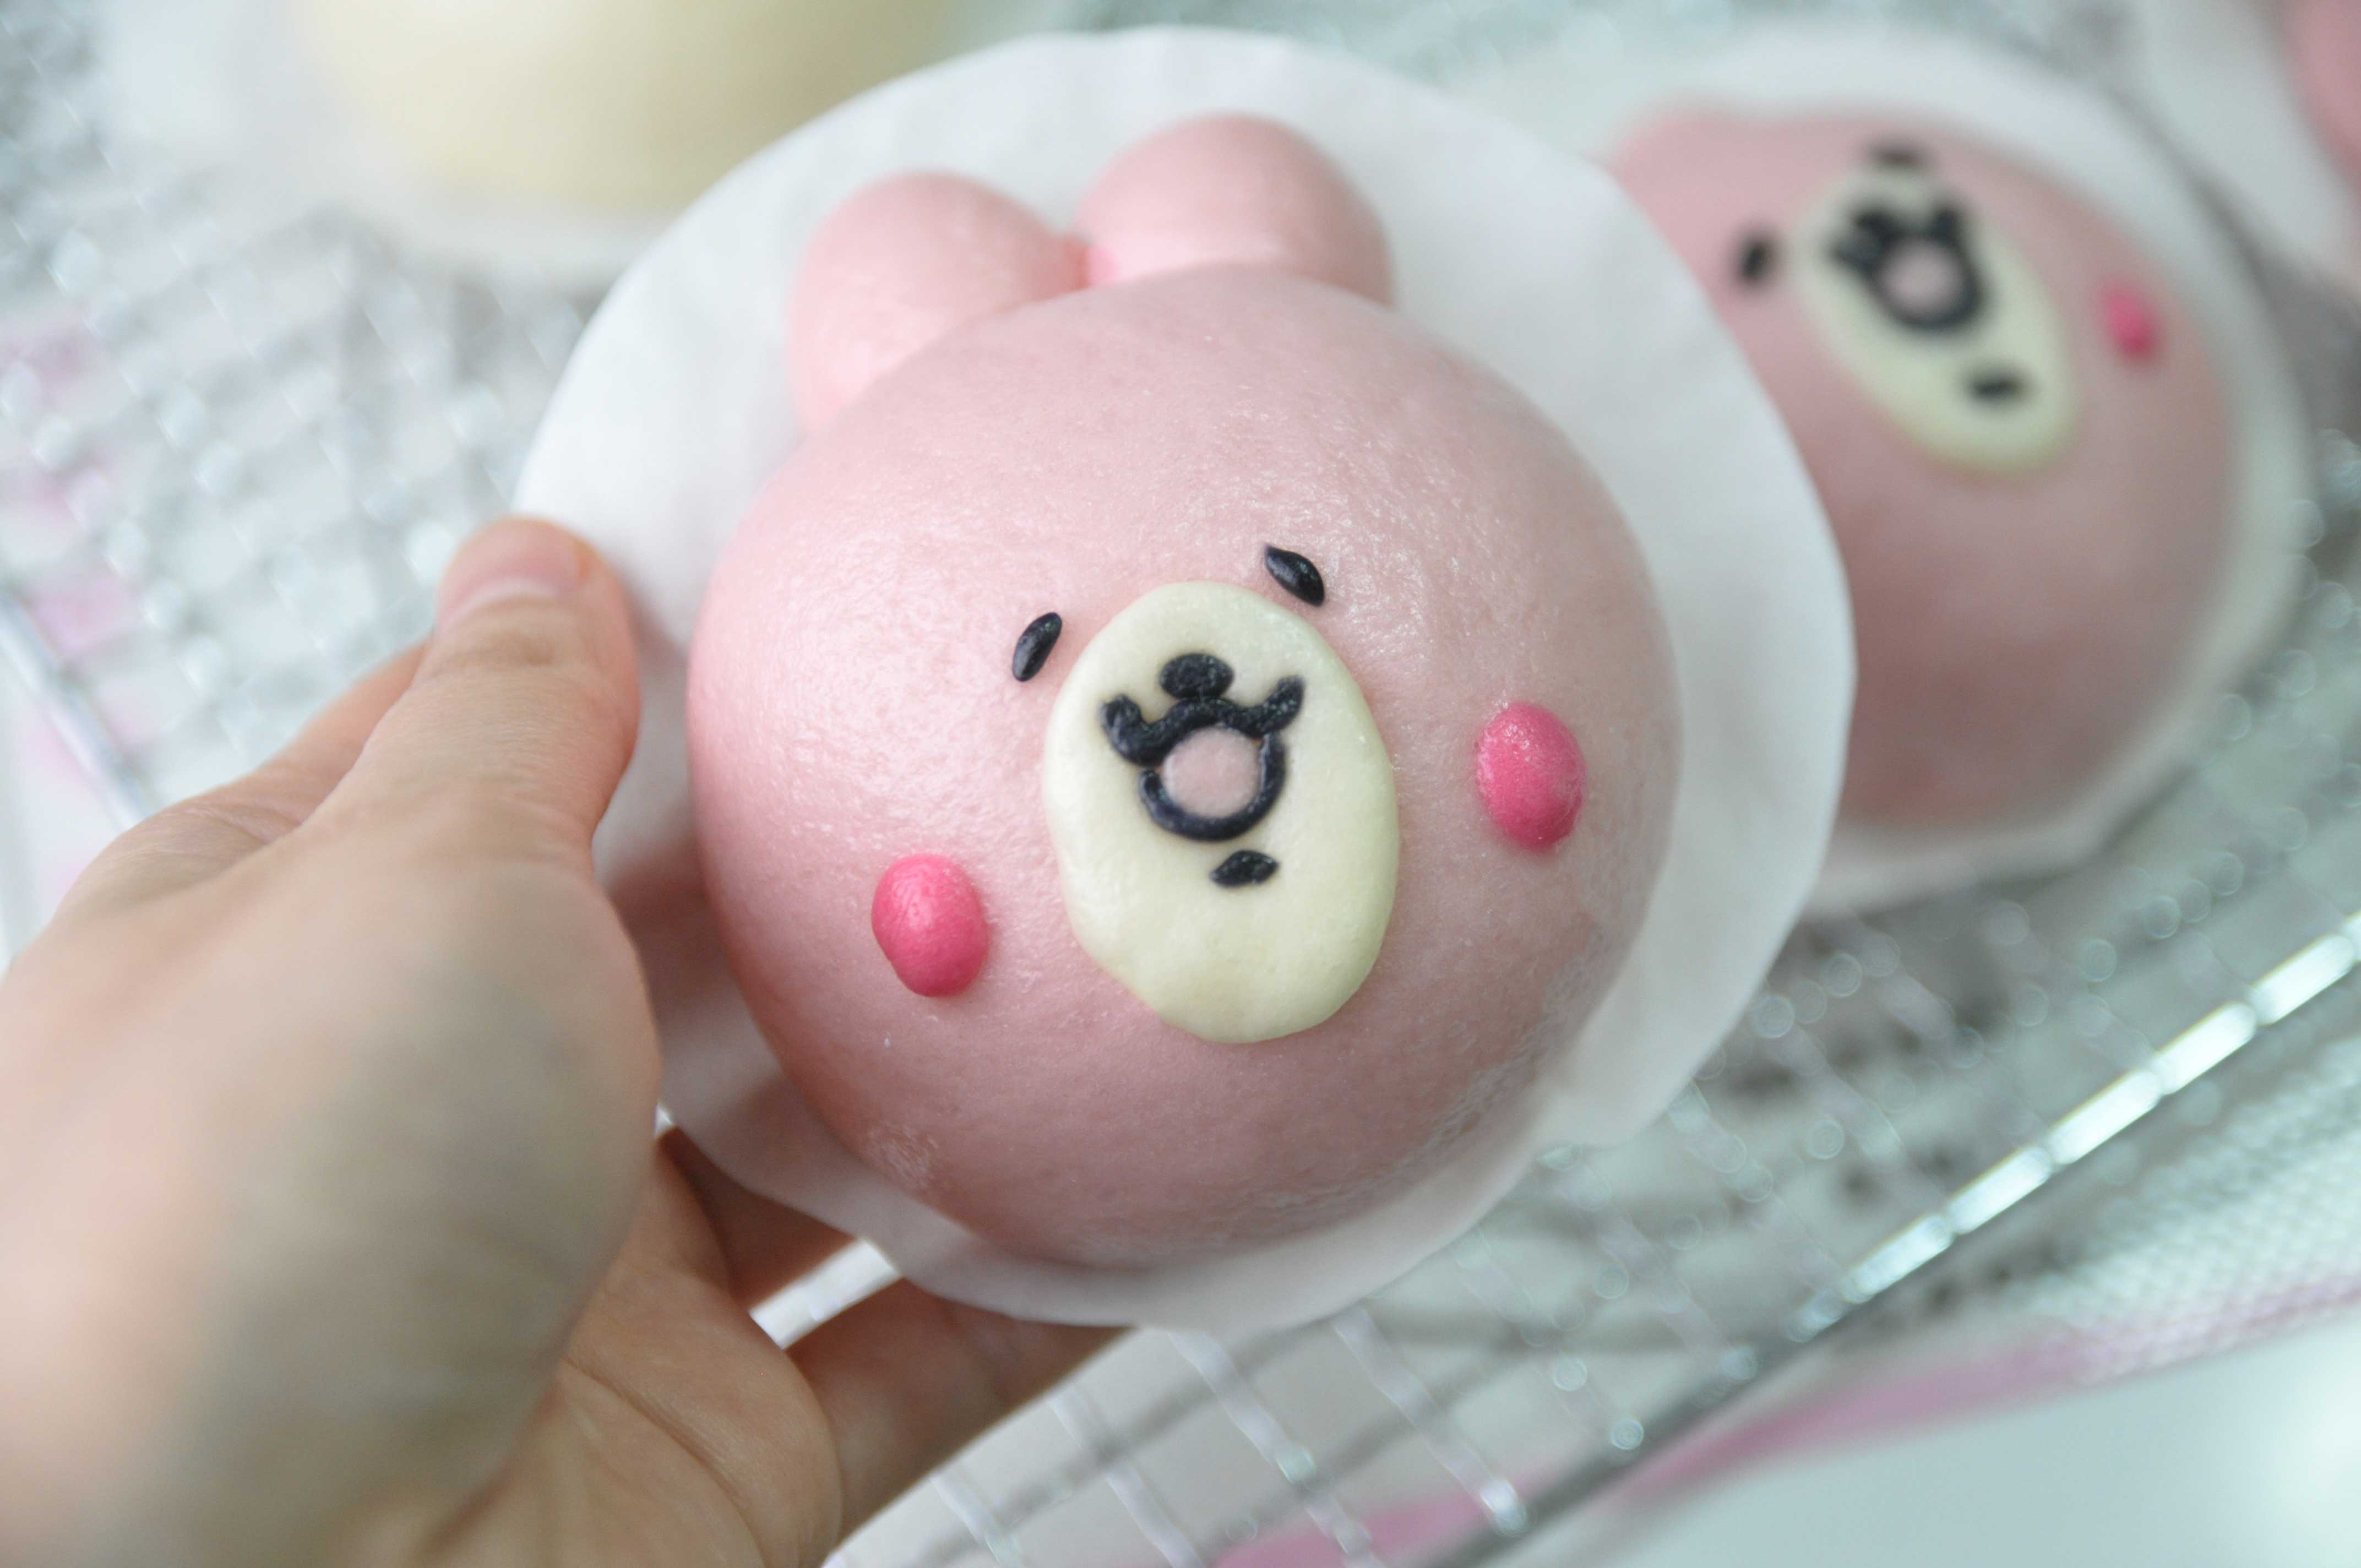
Hi Everyone, today we are making these cute “Homemade Kanahei Usagi Steamed Bun”. 
Too cute to eat? But again there’s no such things as too cute to eat at Our Kitchen 😛

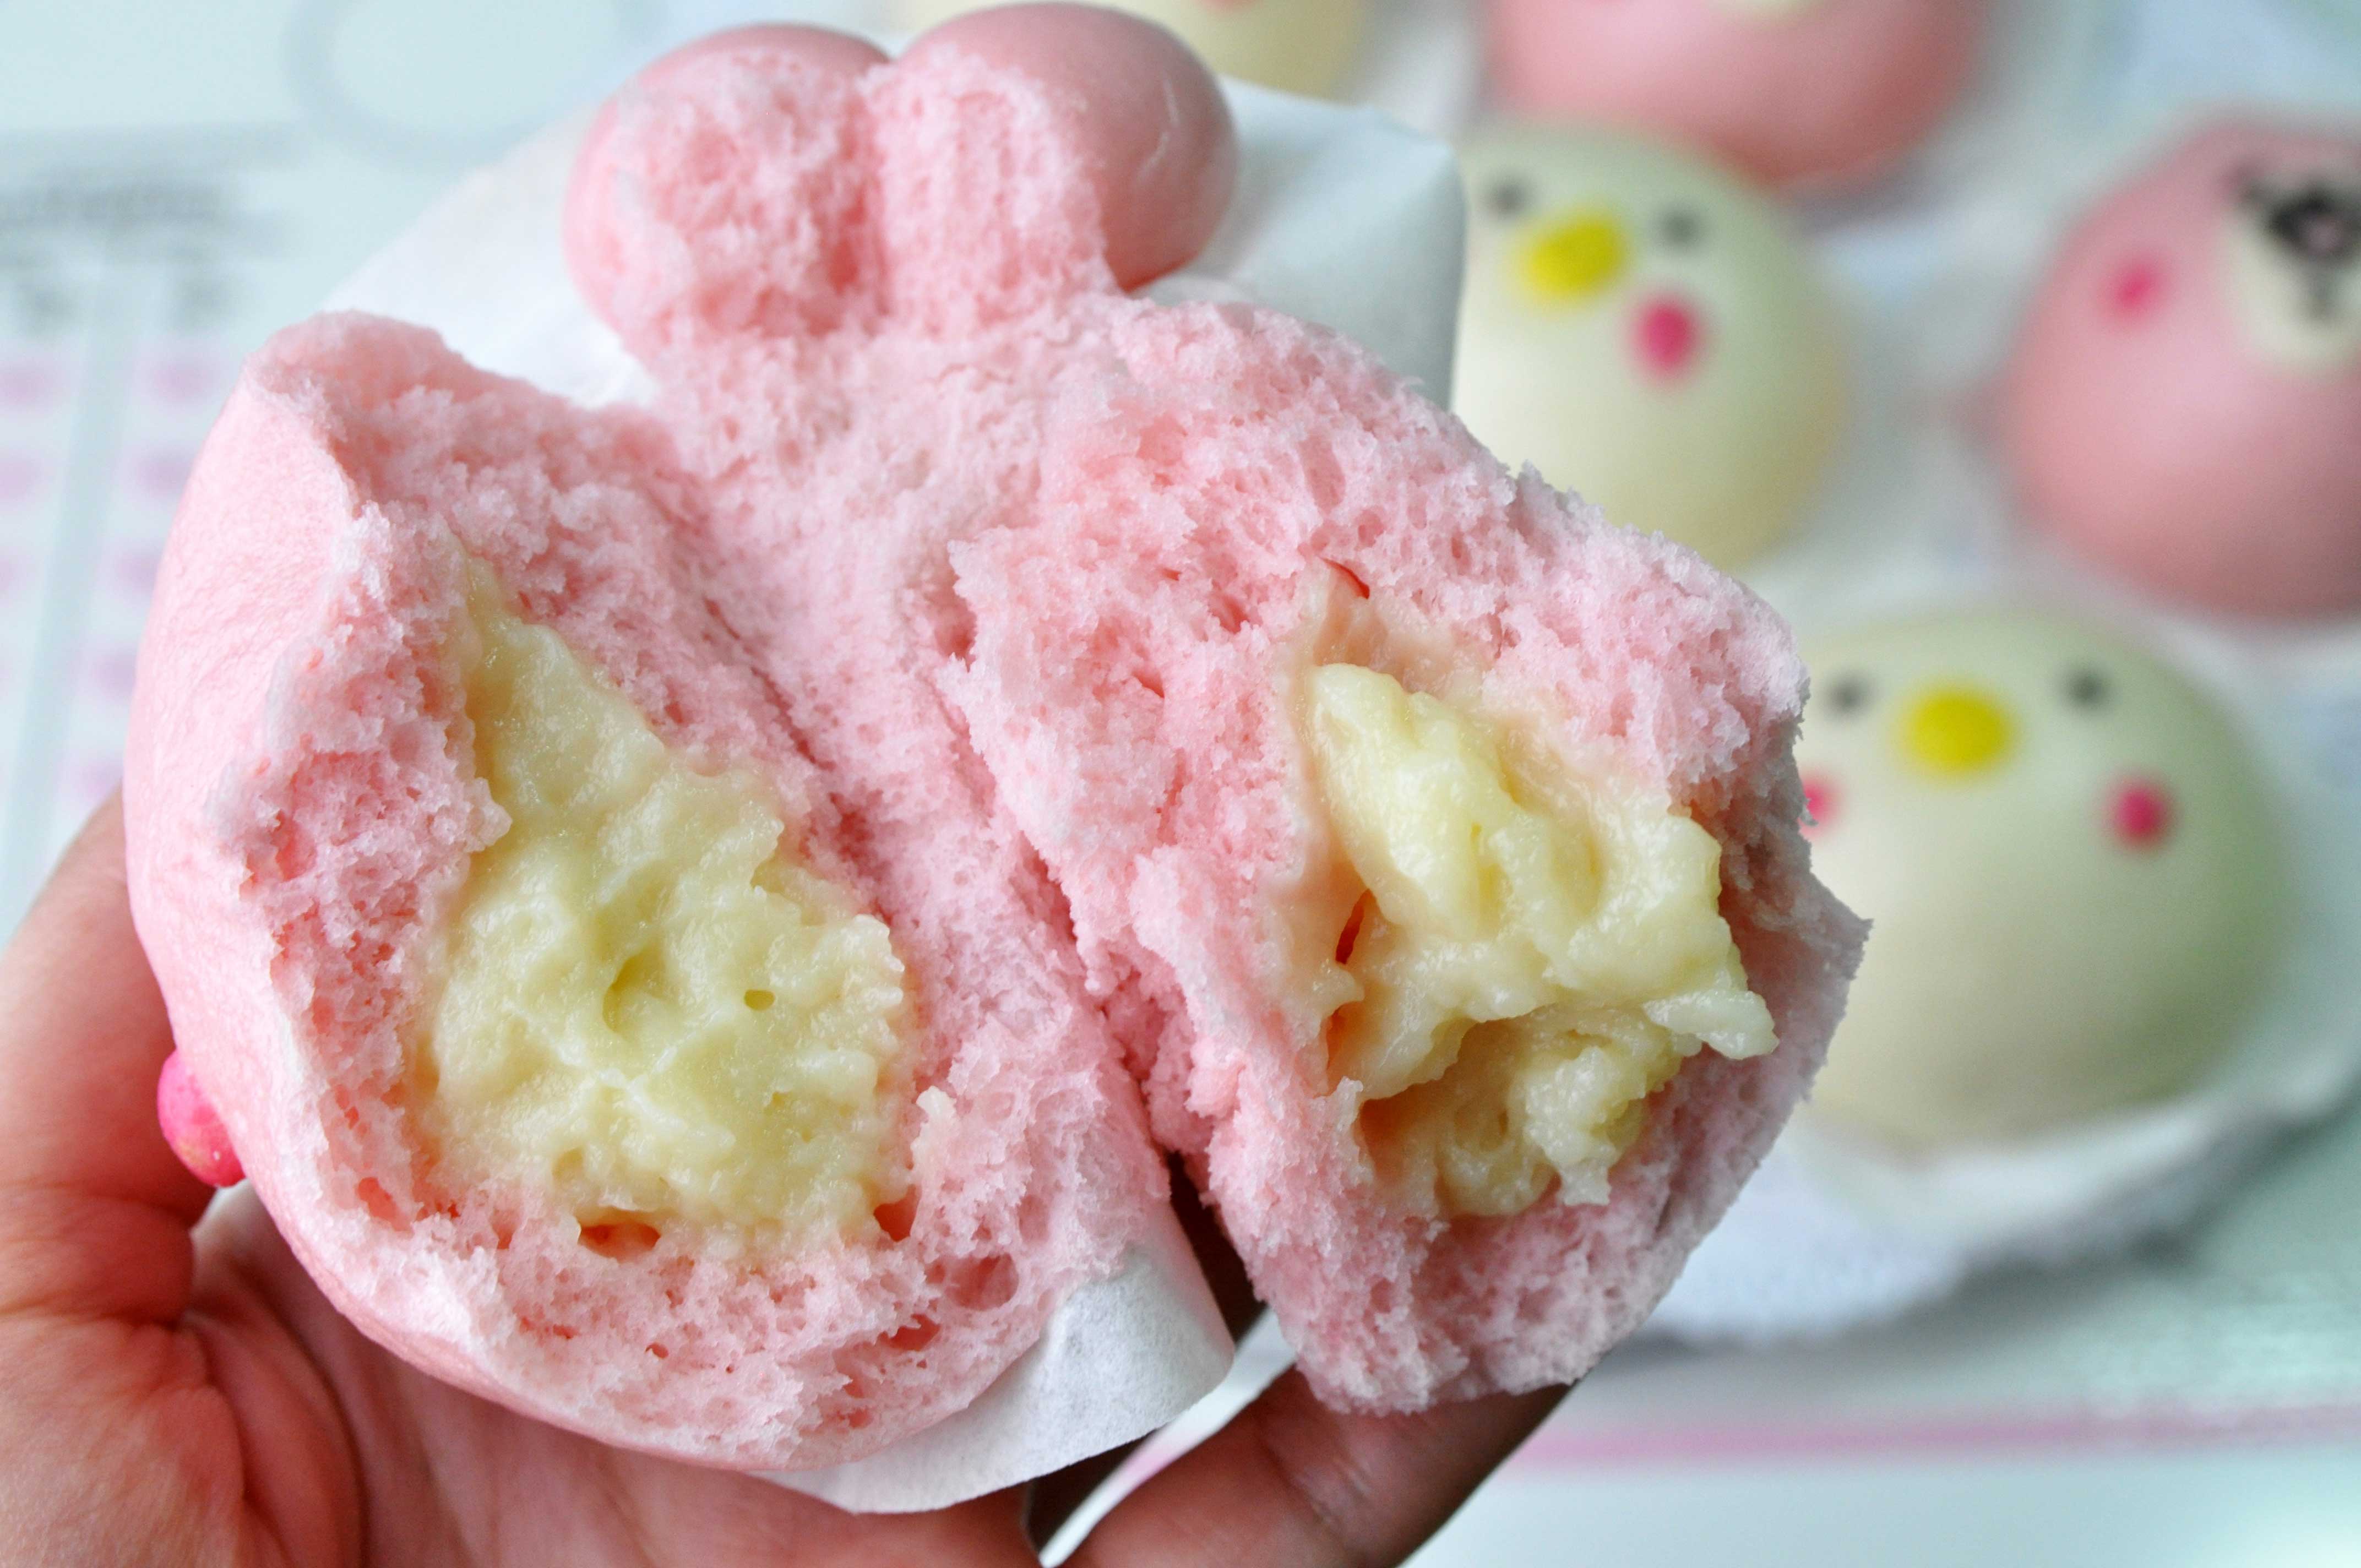
These soft fluffy steamed buns are just basic lightly steamed buns with a yummy milky filling. They are so fun to make though. 
Making them is as fun as eating them. Opening the lid of the steamer to reveal all these cute rabbits and chicks inside just melts my heart 🙂

These cute character buns aren’t super hard to make, especially if you have already made steamed Chinese buns before.

I made them with these soft and creamy milky filling, but you can certainly stuff them with other sweet fillings such as red bean paste or lotus seed paste or custard or even any savory stuffing.

Feel free to get creative with the character. I went with Kanahei Usagi as my favorite character but I’d love to see what other character you guys can come up with :). Enjoy Guys!

KANAHEI USAGI STEAMED BUN
Yield: 10 pieces
Active time: 2 1/2 hours
Total time: 3 hours

INGREDIENTS
Milky Filling:

  • 38 grams All-purpose flour
  • 30 grams Milk powder
  • 90 grams Granulated sugar
  • 190 grams Milk
  • 15 grams Condensed milk
  • 15 grams Unsalted butter
  • 1/2 teaspoon Vanilla extract (optional)

Bun Dough:

  • 1 tablespoon Warm water
  • 1/2 + 1/4 teaspoon Active dry yeast
  • 250 grams All-purpose flour
  • 75 grams Glutinous rice flour
  • 50 grams Granulated sugar (spare 1 tablespoon to activate the yeast)
  • 1 teaspoon Baking powder
  • 150 grams Milk
  • 1 tablespoon Heavy cream
  • 1 Egg white
  • Food Colouring (Red, Black, Yellow)

INSTRUCTIONS
Milky Filling:

  1. In a large heavy saucepan combine all purpose flour, milk powder, granulated sugar, milk and condensed milk. Mix well.
  2. Then add in the unsalted butter, cook over medium-low heat, stirring constantly until the mixture thickens and comes to a boil.
  3. Add in vanilla extract, mix well. Set aside and let it cool completey.

Buns Dough:

  1. To activate the dried yeast; Pour warm water into a small bowl, add a tablespoon of sugar then add in the yeast. Stir until the yeast completely dissolved, let the mixture stand for a while until yeast begins to foam vigorously  for about 5 – 10 minutes.
  2. In a large mixing bowl, mix the all purpose flour, glutinous flour, the rest sugar and baking powder. Mix until well combined.
  3. Stir in milk, heavy cream, egg white and the activated yeast mixture to the dry ingredients. Stir until the dry and wet ingredients incorporated and then start to knead it.
  4. Knead the dough manually by hand until it’s form a smooth dough ball for about 20 minutes. You can use your bread maker or stand mixer to make this (if using machine, this process will takes for about 10 minutes).
    Note: Sometimes different brand flour can have different moisture level. So if it’s to dry, you can just add a tablespoon of milk or heavy cream and if it’s too wet, just add a bit of flour.
  5. Divide the dough by 2 equal part. Colour the one part dough soft pink. Spare a bit of white dough. Colour it dark pink, black and yellow for the details.
  6. Cover and Let the dough rest for about 10-15 minutes (to relax the gluten).
  7. After the dough has been rested, divide the white and soft pink dough for about 45 grams each (this recipe can produce 5 steamed buns for each characters, so total will be 10 pieces).
    *** Please remember always cover the rest dough with plastic wrap, because the dough tend to gets dry if you leave them uncovered.
  8. Roll each pieces dough round. Hold and roll the dough with our hands in “C” shape give a little pressure on it until create a smooth ball, set aside.
  9. Create the Head: Take a dough ball, press it out from edge to center, rotate, and repeat until it forms a 3-inches circle. The center should be slightly thicker than the edges. 
  10. Add about 25 grams of filling to the center, and then fold and twist the bun repeatedly until the top is closed.
    After closing, if you want the buns round and plump using your palms press inward, then raise it up a bit (that will make it stay up after fermentation and they will become more round after steaming).
  11. After rolling put the dough onto a piece of steam paper. Don’t forget to cover them with a plastic wrap to prevent them getting dry after shaping.
  12. Add the buns details: eyes, nose, mouth and blush (as shown in the video).
  13. For the fermentation: After all the details is done, let the buns sit in a warm place (covered with plastic wrap) for about 1 hour.
    Note: This step is very important, because if the ferment is not enough, the buns texture will be hard after steaming and when the ferment is overtime, the skin will be not smooth or bright.
  14. If the volume is double in size and if pressing hard on the sides it’s sink, that’s means the fermentation is completed and we can get ready to steam them.
  15. Preheat the steamer on medium high heat (about 3 cm of water level is enough). Wrap the lid with some cloth to prevent the water condensation from steam drops to the buns.
  16. Put the buns in the steamer, steam for about 8 minutes. Remember to keep a distance from each other, don’t make the steam paper overlap too much or they will stick together after fermentation and steaming.
    Note: if your steamer is not big enough, you can steam half of them first and then continue with the other batch.
  17. Don’t take off the lip immediately after turning off the heat. Let it sit for about 3 minutes, then open the lid (don’t make the buns stay in the steamer too long, they will get sticky and wet)
  18. Cool the bun completely on the cooling rack.

NOTES

  1. Fermentation time is depends on room temperature, if the weather is hot it can ferment more quickly than when it’s cold.
  2. There are two ways to decide whether it’s finished or not by hand touching and volume. If the volume is double in size and if pressing hard on the sides it’s sink, that’s means the fermentation is completed and we can get ready to steam them.
  3. If you cant finish them all, you can store them for 3 days in the refrigerator and 1 month in the freezer. Store them in the sealed bag or a plastic container to prevent the buns dry.
  4. To reheat the buns: Place them in your microwave safe plate (30 seconds) or in the steamer (20 minutes) and heat them.

Soft Moist Fluffy Banana Bread | Banana Muffins

Am I a little old–fashioned? Maybe! Not because it just seemed a little too boring 😀 but honestly I didn’t think anyone needs another banana bread recipe and I just adore it :oops:.

I know everyone has their own go-to banana bread recipe but seriously, this recipe is everything you want in banana bread. It’s moist, fluffy, full of flavor and it’s also freeze well.
What I love about this recipe is that you can just whip it up in minutes. There is no mixer required just mix the wet and dry ingredients separately, then combine and bake – easy peasy.

Whether you enjoy this healthy banana bread for a breakfast treat or with a cup of coffee as an afternoon snack – I think you’ll find that it’s tasty and comforting ;). Enjoy!!!

SOFT MOIST FLUFFY BANANA BREAD | BANANA MUFFINS
Yield: One 8×4 -inch loaf pan/ 6 standard muffins
Active time: 15 minutes
Total times: 1 hour

INGREDIENTS

  • 200 grams Bananas (mashed)
  • 123 grams All-purpose flour
  • 2/3 teaspoon Baking soda
  • 1/6 teaspoon Salt
  • 1/3 teaspoon Cinnamon powder
  • 90 grams Granulated sugar (you can reduce to 60 grams if you prefer less sweet)
  • 67 grams Eggs
  • 67 grams Vegetable oil
  • 2/3 teaspoons Vanilla extract (optional)

INSTRUCTIONS

  1. Preheat the oven to 350 degrees F.
  2. Grease and flour a 8X4-inch loaf pan.
  3. Combine flour, baking soda, salt and cinnamon powder, set aside.
  4. In a large bowl, whisk together the sugar, eggs and oil.
  5. Pour dry ingredients to wet ingredients; stir just until dry ingredients are moistened. Then add the mashed bananas, mix well. Do not over mix, because that would result in tough dry bread.
  6. Spread the batter evenly in the prepared pan. Place some banana and almond slices on top of the batter (optional).
  7. Bake for 40-45 minutes until toothpick inserted in the center of the loaf comes out clean.
  8. Cool for five minutes in the pan. Gently turn out onto a cooling rack and cool completely.
  9. Store covered at room temperature (the bread also freezes great).

NOTES

  • This recipe can produce 6 standard Banana Muffins.
    Place cupcakes paper inside the pan. When filling your cupcake cases, only pour the batter until it is two thirds full. Overfilling leads to overflowing, so always leave some rising room for your muffins. Place banana and almond slices on top of the batter (optional), then bake for 30-35 minutes of until toothpick inserted in the center comes out clean.
    Cool for five minutes in the pan. Gently turn out onto a cooling rack and cool completely.
  • It will keep well (in an airtight container) for about 1 days in room temperature, 1 week in the fridge and 2-4 months in the freezer
  • To defrost the loaf from the freezer, unwrap it and put it on a wire rack at room temperature for 3-4 hours, then store in an airtight container.
  • You also can use microwave to defrost it. Arrange the bread slices on a microwave-safe plate, then microwave the bread on high power for 10 seconds at a time until it is soft and warm.
  • Or you can instead defrost your bread by placing it into a toaster oven. Take the bread out of the plastic and let it thaw in the fridge until it is no longer frozen (overnight for a loaf, and 2 to 3 hours for individual slices). Heat your oven to 380 degrees F and ‘refresh’ the bread for 3 to 5 minutes

One Hour Fluffy Cinnamon Rolls

Helloooo and welcome back!! Today we are making my favorite bread “Cinnamon Rolls”!
One is never enough, that’s how I love cinnamon rolls 😉 My entire family also is OBSESSED with these rolls, especially when they require only 60 MINUTES to make! .
They are super soft and result in a quick, mouth-watering cinnamon treat. The rolls were tasted just as good as regular version, BUT – they were made in an hour! How awesome is that?!


I have to say, these ONE HOUR cinnamon rolls are not only quick and easy, but they taste just as amazing.
The dough is perfectly buttery and flaky, and every bit of that brown-sugar-butter-cinnamon-toast-crunch topping is crunchy and sweet and unbelievably good.


The smell of fresh yeasty dough in the air, followed shortly after by sizzling butter and warming sugar and cinnamon, there’s nothing better than a warm, gooey cinnamon roll covered in a sweet layer of cream cheese icing.


These recipe are everything you want in a cinnamon roll;
I am hooked on them and believe you will love this cinnamon rolls recipe too!!! Look forward to more videos coming soon 😛


ONE HOUR FLUFFY CINNAMON ROLLS
Yield: 6 pieces
Active times: 1 hour
Total time: 1 1/2 hours

INGREDIENTS
Dough

  • 192 grams all-purpose flour
  • 1 1/8 teaspoons instant yeast (NOT the active dry)
  • 1/2 teaspoon salt
  • 60 grams water
  • 14 grams unsalted butter
  • 30 grams milk
  • 25 grams granulated sugar
  • 25 grams eggs


Cinnamon Filling

  • 28 grams unsalted butter (melted)
  • 67 grams brown sugar
  • 1/2 tablespoon cinnamon powder

Cream Cheese Frosting

  • 45 grams cream cheese
  • 95 grams icing sugar
  • 1 tablespoon milk


INSTRUCTIONS
Dough

  1. Grease 10″ x 8″ baking dish with butter.
  2. In a microwave safe container, combine water, butter, milk, and sugar. Heat in the microwave or on the stove until the butter and sugar melted, set aside.
  3. In a large bowl combine flour and yeast, mix well. Then and salt, and mix again. Please remember, don’t bring the yeast and salt into direct contact. Because salt can kill the yeast, there will be no chance that your dough will rise.
    Add in eggs, mix. The slowly drizzle the warm butter-milk mixture, knead with by hand for 4 about minutes. You know your dough is the right texture if it’s doesn’t really sticks to your fingers with a light touch.
  4. Cover the bowl with plastic wrap, let the dough rest for about 10 minutes.
  5. Preheat oven to 200 F/ 100 C, then turn it off when it reaches 200 F /100 C. This is where you’ll allow the rolls to rise.
  6. Roll out cinnamon roll dough into a 12″ x 9″ rectangle, then spread cinnamon roll filling on top. Leave a 1″ border on the bottom long edge of the dough.
    Roll dough with your fingertips, starting from the long end without a border, pinch the seam to seal, then cut roll into 6 equal pieces. Arrange pieces in a 10″ x 8″ baking dish greased with butter.
  7. Place pan in warmed oven and let rise for 20-25 minutes or until doubled in size .
  8. Remove rolls from the oven, then turn oven to 375F/ 180 C. Once oven is preheated, bake the rolls for 15-18 minutes.
  9. Remove from the oven, drizzle the cream cheese icing on top.

Cinnamon Filling
Melt butter in the microwave, then stir in sugar, cinnamon, and vanilla; mix well.

Cream Cheese Icing
Mix cream cheese, powdered sugar and milk together until smooth

NOTES

  • Rolls in an airtight container will keep at room temperature for up to 3 days, 5 days in the refrigerator, and up to 2-3 months in the freezer.
  • To reheat; remove the roll from the container, preheat the oven or toaster until the temperature reaches 350 degrees F. Put the cinnamon buns on a baking sheet and cover with aluminum foil and place them in the oven or toaster. Let the rolls heat up for about 10-15 minutes.
    Another option is using the microwave; place the cinnamon rolls in the microwave for about 15 to 30 seconds. Check on them to ensure they don’t become soggy.