Mocha Mousse Cake

Not only this cake is so tasty, but it also has two of my favourite things that I need every day; coffee and dark chocolate. This one is for all the chocolate and coffee lovers.
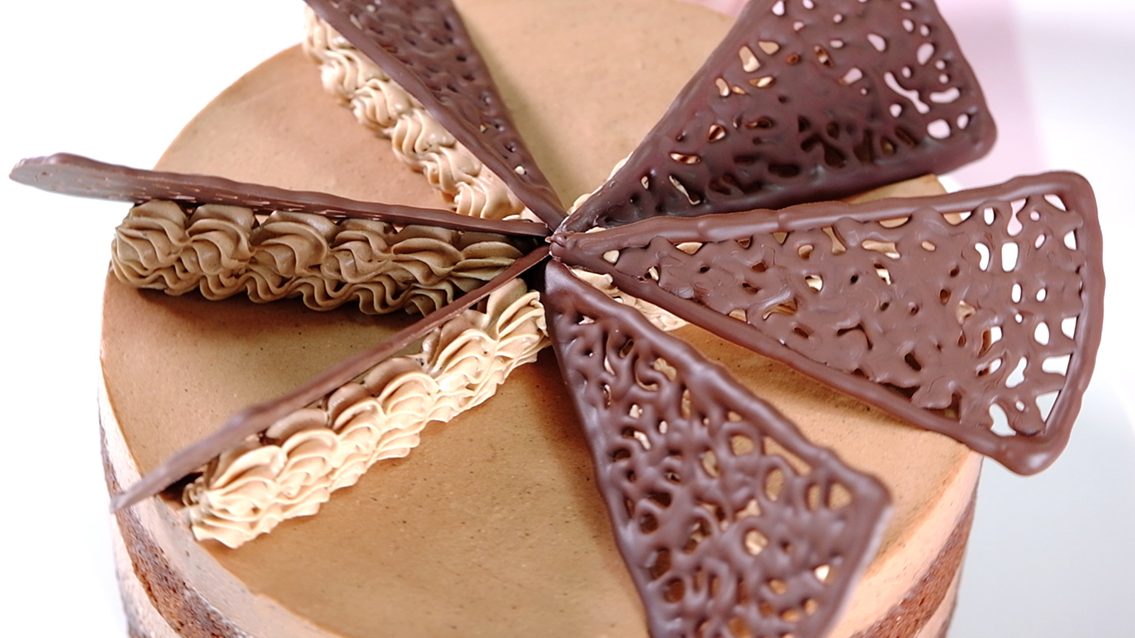
This is definitely not a quick recipe as it has a few different elements However, it is also not highly technical or complicated (this cake requires a little patience 😉).

One important tip when making it, make sure that you bake the Chocolate Sponge Cake in advanced so it has time to cool because Mousse is very susceptible to heat.
Don’t rush the chilling times. If anything is too warm when assembled, it will melt and you won’t get that light and fluffy mousse texture.

Chocolate cake is incomplete without decoration, don’t you agree? 😉

And if you like to decorate the cake, I will show you the simplest way to make an attractive chocolate decorations.
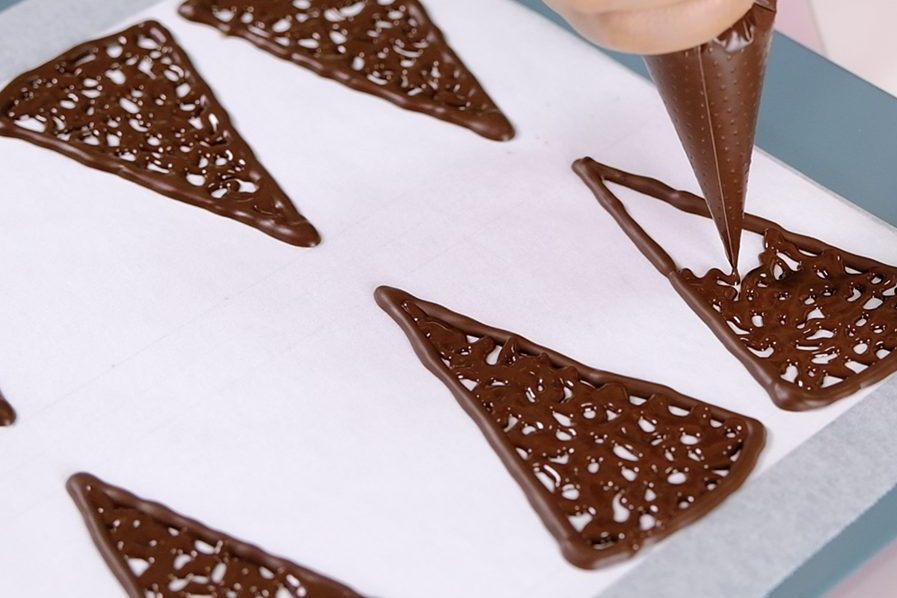
This chocolate decorations is best frozen at 17 to 21 degrees Celsius.
Once it’s done, let it harden at room temperature for best results. It will take longer, but this way the chocolate can maintain its shape and shine.
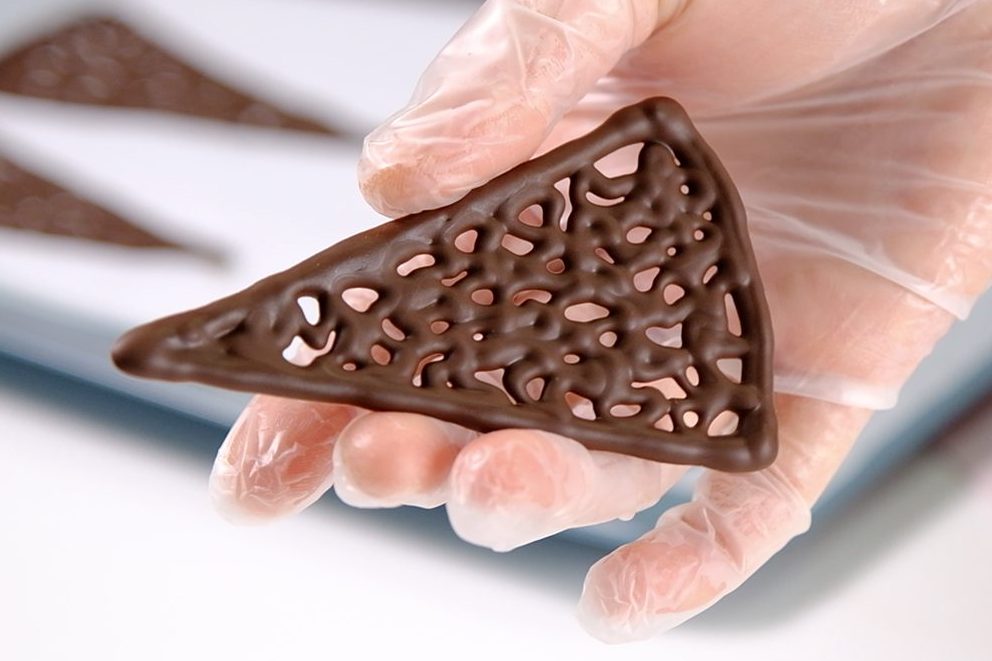
So pretty!! 🥰

If the room temperature is too warm, the only way is to put it in the fridge, however the chocolate will sweat and lose its shine.

This cake is delicious and creamy … 😍

Chocolate and coffee have always made such a great pair and it is heavenly

🤤

This rich chocolate cake is light, fluffy, and decadent…

The mocha mousse is creamy and airy, brings some softness to this cake.

I hope you can share this beautiful cake with someone you love 😘

WATCH HOW TO MAKE “MOCHA MOUSSE CAKE”

RECIPE

MOCHA MOUSSE CAKE
Yield: One 16 cm Diameter (7,5 cm tall) Cake

INGREDIENTS
🍫 Cake
7-Inch Fluffy Moist Chocolate Sponge Cake 

🍫 Sugar Syrup
25 g Caster Sugar
25 g Coffee Liquid
1 tsp Dark Rum 


🍫 Mocha Mousse
30 g Coffee Liquid (cold)
5 g Gelatine Powder
70 g Dark Chocolate 60% (chopped)
100 g Coffee Liquid
40 g Milk
200 g Heavy Whipping Cream
1 tsp Finely Ground Coffee 


🍫 Decorations
150 g Dark Chocolate Compound
Chocolate Buttercream

INSTRUCTIONS
Cake

  1. Bake the Chocolate Sponge Cake in advance so that it has time to cool as Mousse is very susceptible to heat.
  2. Once the sponge is baked, transfer it to a cooling rack and leave to cool completely.
  3. Wrap the cooled sponge cake in a cling film and Ziplog Bag then let it rest overnight in the fridge.
    This will ensure that all the moisture is sealed and the sponge is perfect firm texture for trimming and layering.

    NOTES: If you are in a hurry or have to make the cake on same day, let the cake cool for at least 30 minutes before wrapping and place in the fridge to chill.
    Don’t rush the chilling times.
    If anything is too warm when assembled, it will melt and you won’t get that light and fluffy mousse texture.


Sugar Syrup & Mocha Mousse

  1. Start by brewing your favourite coffee
    1 tablespoon of ground coffee with 155 grams hot water (we will need 155 grams of coffee liquid)
    Let it cool completely.
    * If you want a stronger coffee taste, you can use 2 tablespoons of ground coffee
  2. Finely chop the Dark Chocolate
    Place the chopped dark chocolate in a medium sized heatproof bowl (I recommend using 60% dark chocolate for a divine taste or you can use Dark Chocolate Compound)
  3. Once the coffee liquid has cooled, divide it into 3 portions
    – First for the Sugar Syrup
    Mix 25 grams Coffee Liquid with Caster Sugar; stir until all the sugar dissolved
    Add Dark Rum for extra kick (if you don’t want alcohol in your cake, you can just omit it)
    – Second to bloom the Gelatine
    Mix 30 grams of Coffee Liquid with Gelatine, set aside
    – Third
    Place the remaining 100 grams of Coffee Liquid with milk in a medium sauce pan
    Cook over medium heat;
    Once it starts to bubble, pour this mixture over the chopped Chocolate;
    Stir until the chocolate has fully melted into the liquid;
    Immediately add the bloomed Gelatine and mix again until everything is dissolved;
    Then let it cool completely (please note, this mixture needs to be fully cooled but not stiff
    before you fold into the Whipped Cream; It will take for about 30 minutes to 1 hour)
  4. In the meantime, we can prepare the cake layers and moulds to assemble them

    Cake Layers
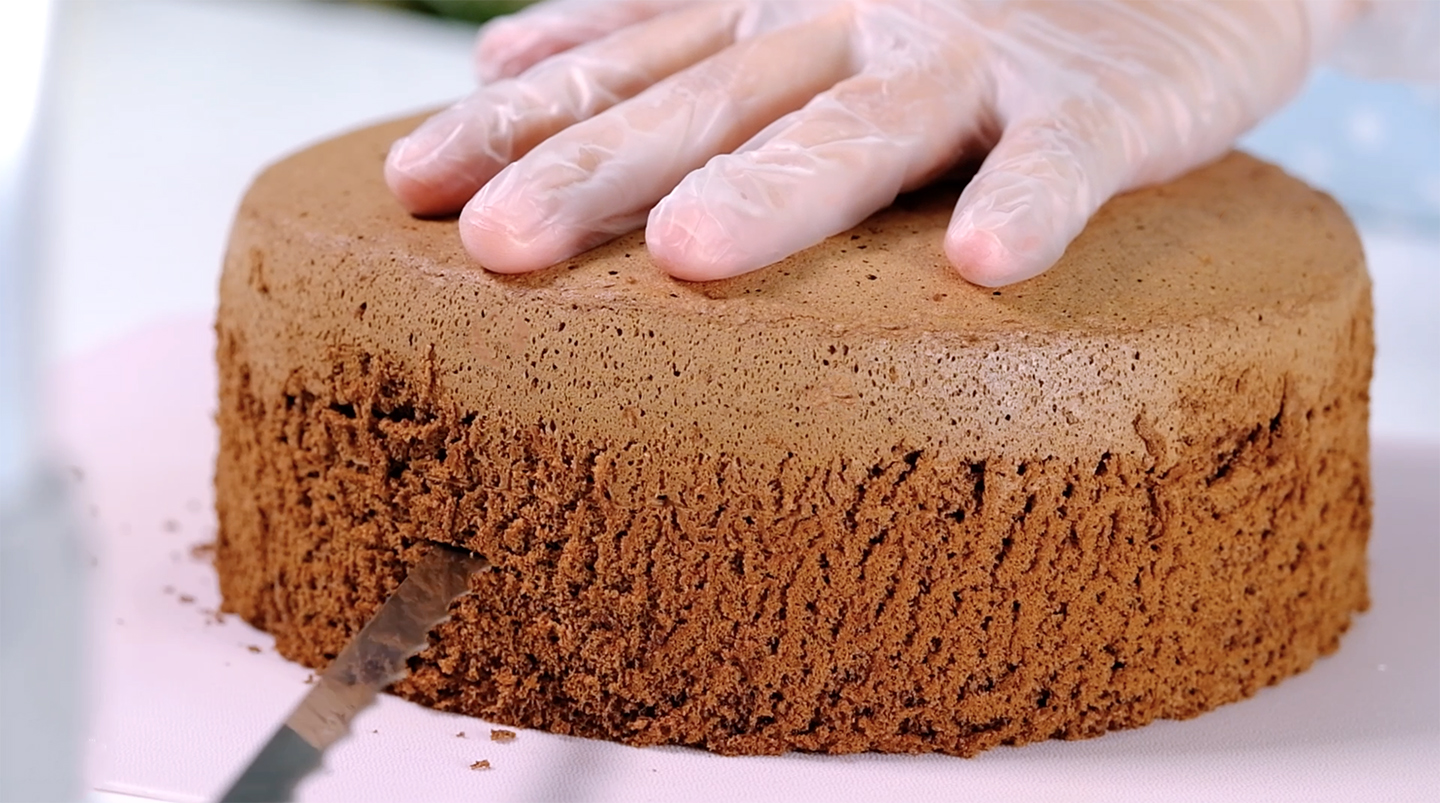
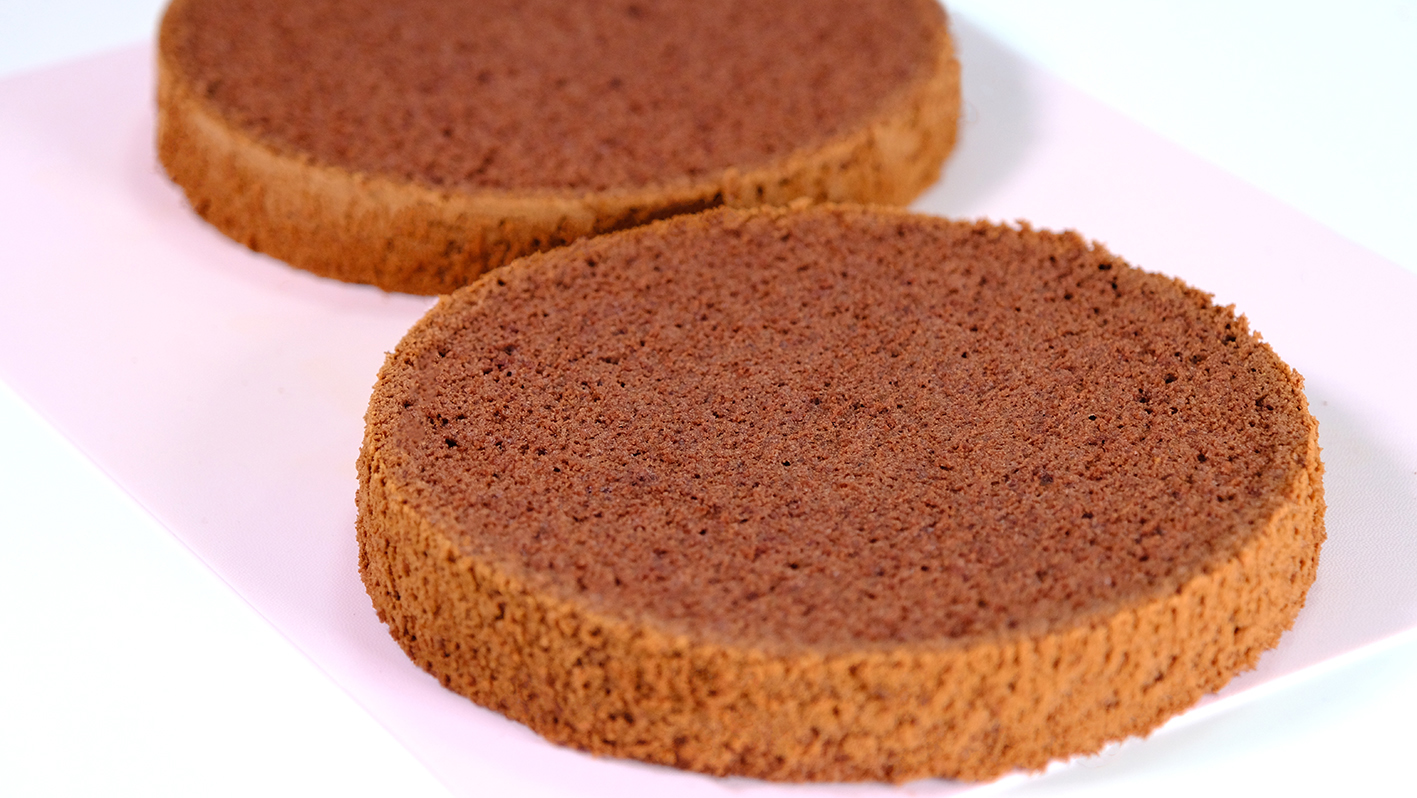
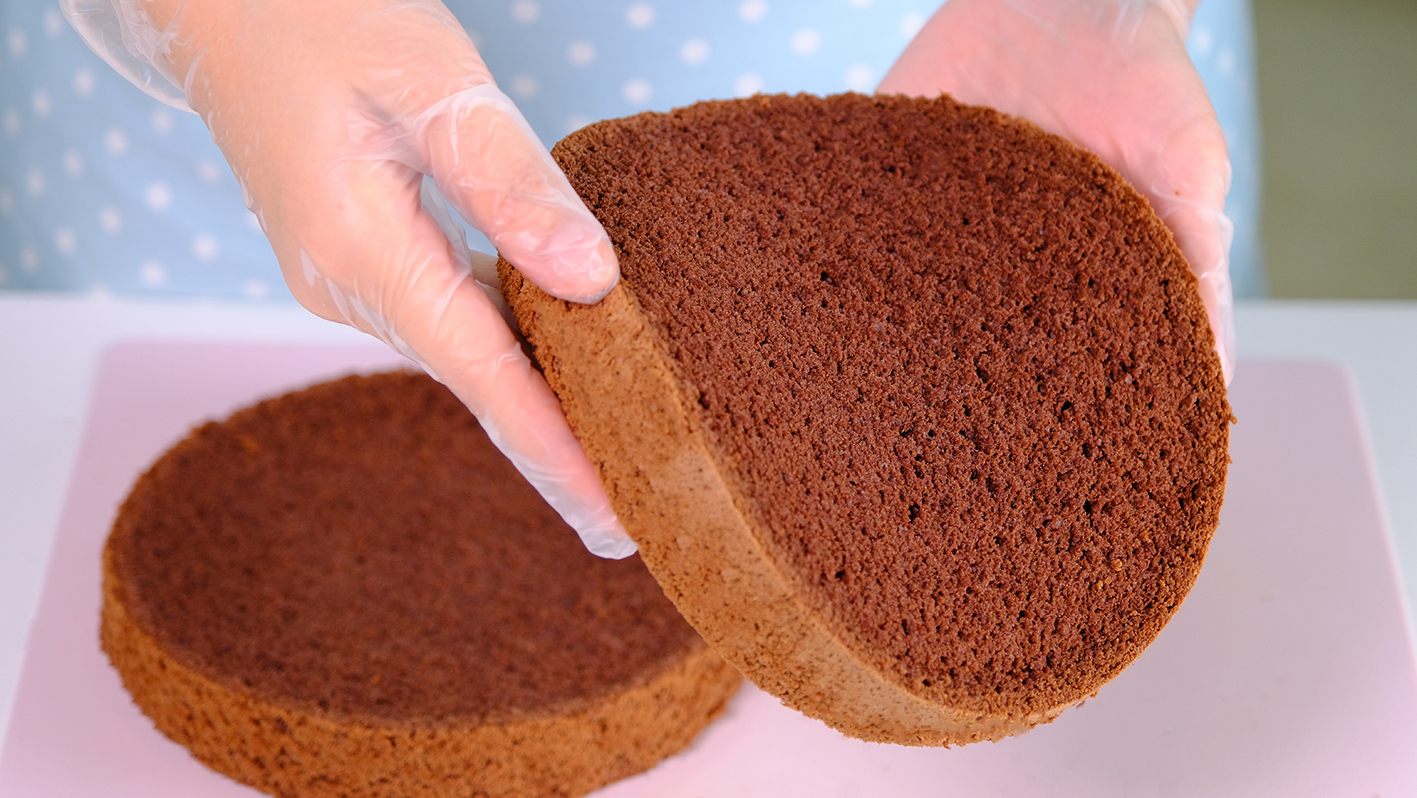
    Cut the chilled Chocolate Sponge Cake into two equal layers, about 1-inch thick (you can use the top of the cake for other purposes)
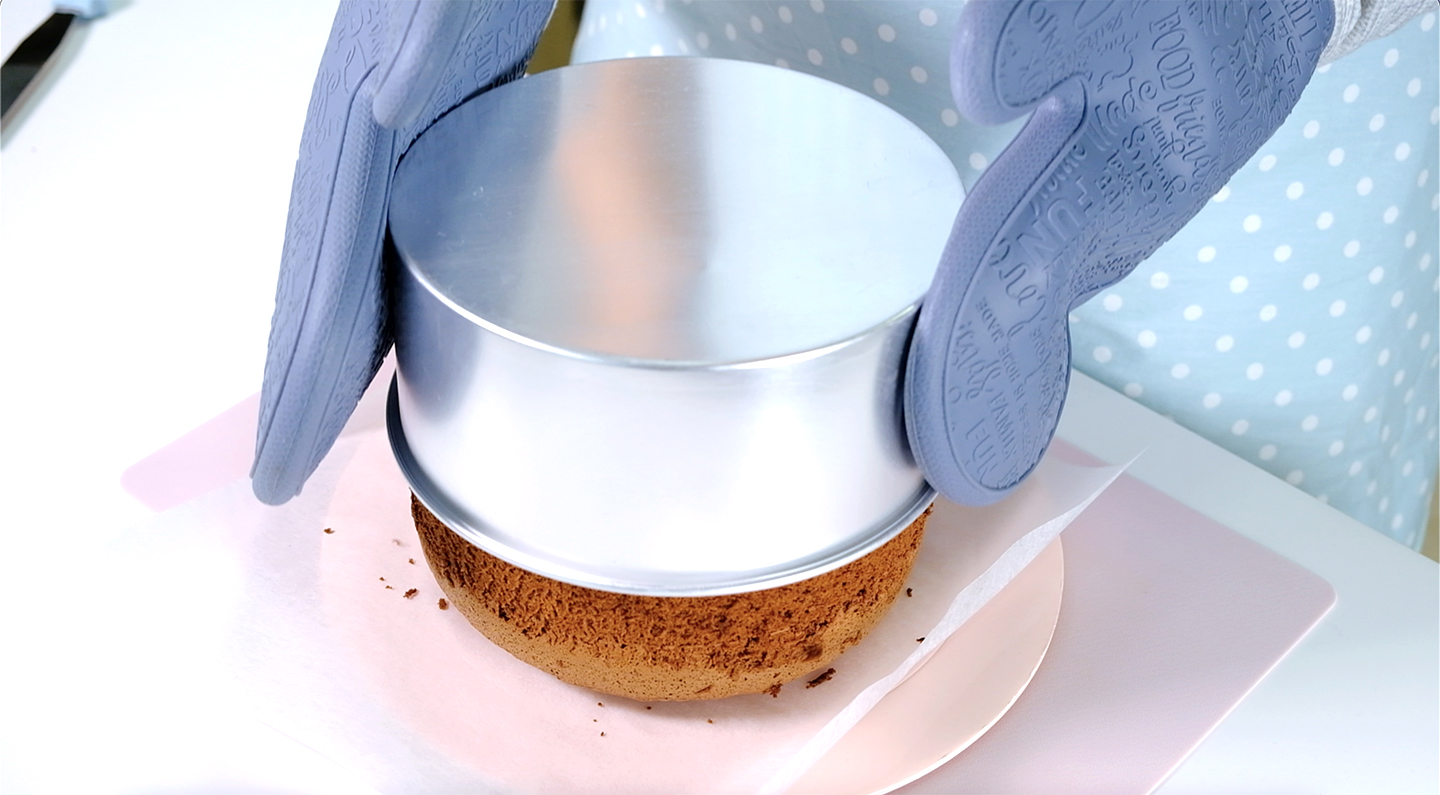
    Place the ring mould on top of the cake;
    Using the outside edge of the ring mould as a guide, trim the sides of the cake (use a sharp knife)
    * This trimming method ensures there are no gaps between the cake and the ring so the mousse doesn’t leak over the sides
    Once it’s done, wrap cake layers in a cling wrap to prevent from drying out

Mould for assembly
Cover one side of the ring mould with a cling wrap (the side with the cling wrap is the bottom of
the cake). Place this ring on a sturdy cake board.
Then place a sheet of Reusable Non-Stick Baking Paper on the bottom for easy removal.
* Remember to prepare this first; Don’t let by the time the mousse starts to sets, the ring isn’t
ready yet; That would be a disaster!

5. Once the coffee-chocolate mixture cooled to room temperature, we can start beating the
Whipped Cream. On medium-high speed, whip the cream until stiff peaks form.
* I highly suggest to whip the cream over an ice bath, this will helps stabilized the cream longer;
Especially when the weather is hot and you’re whipping by hand

6. Using a wide rubber spatula, gently fold the cooled coffee-chocolate liquid into the Whipped
Cream in two additions
* Don’t stir the mixture or you will deflate the cream and make a dense filling

7. Add finely ground Coffee, mix well; Then immediately remove the bowl, don’t let the mousse sit
too long and harden in the ice bath; then we are ready to assembly the cake


ASSEMBLY THE CAKE

  1. Place the first cake layer to the lined plate ring mould
  2. Brush with some Coffee Sugar Syrup (this will keep the cake moist and add extra flavour to the cake)
  3. Pour half of the Mocha Cream over the first layer (use the back of the spoon to smooth out and bring it all the way to the edges)
  4. Place the second layer of cake over it (press down on the top layer of cake so that it lies level and firmly on the mousse)
  5. Repeat the same process for remaining syrup and mousse
  6. Once it’s done, place the cake back in the fridge for at least 8 hours or preferably overnight


MAKING CHOCOLATE DECORATIONS
(kindly watch the video for completed instructions)

  1. Place a piece of non-stick baking paper on top of the template, secure them with some tape
    Feel free to use any design according to your taste
  2. Place the bowl of chopped dark chocolate over a pan of hot water, make sure that the bowl doesn’t touch the water
  3. Stir the chocolate until it’s completely melted without any lumps (don’t let the water drip on the chocolate, it will cause it to seize, becoming stiff and grainy instead of smooth and silky)
  4. Pour the melted chocolate into a piping bag
    Trace the shapes according to the template
    When tracing it, make sure the outer frame is thicker so they don’t break when lifted
  5. Chocolate is best frozen at 17 to 21 degrees Celsius
    Once it’s done, let it harden at room temperature for best results. It will take longer, but this way the chocolate can maintain its shape and shine
    * If the room temperature is too warm, the only way is to put it in the fridge, however the chocolate will sweat and lose its shine


UMOULD AND FINISHING
(kindly watch the video for completed instructions)

  1. After 8 hours in the fridge, the mousse has hardened
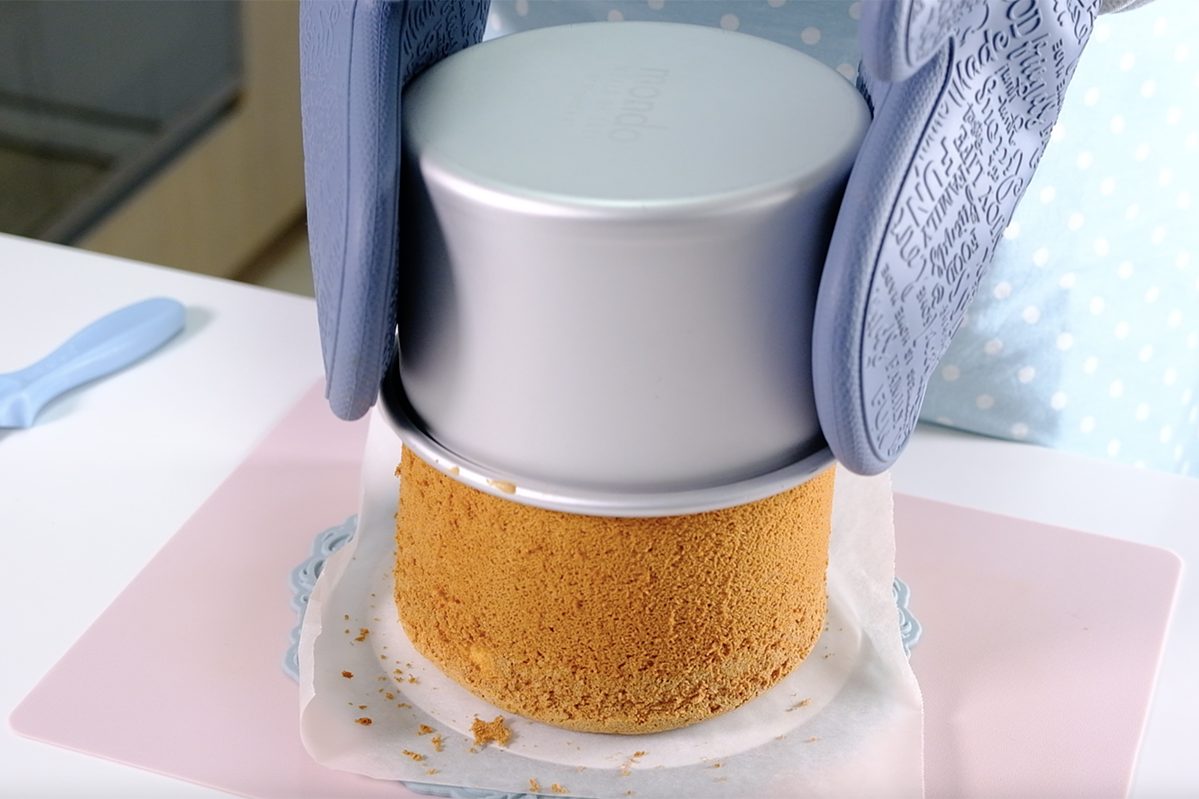
    To unmould, place the ring mould on an inverted 6-inch round baking pan
  2. Peel away the cling film
  3. Then using hot towel, wrap around the outside of the ring for a few seconds to loosen it
    Gently push the ring down
  4. Then carefully transfer the cake to a display plate
  5. Beautify with some buttercream and chocolate decorations

NOTES

  1. Always store the cake in the fridge
  2. This cake can be made a day or two in advance, but I recommend eating it within 4 or 5 days

Fluffy Moist Chocolate Sponge Cake

Craving chocolate cake, who doesn’t?
This fluffy, moist chocolate cake with a deep chocolate flavour is perfect for chocolate lovers.
I recently uploaded my “Fluffy Moist Vanilla Sponge Cake” and it was so loved by all of you that I thought you would love a chocolate version as well! 

🙃 So soft… and chocolatey 🤤

This chocolate cake is so spongy and quite flexible.
It’s an incredibly soft and light cake which can be used with any frosting and filling, a perfect base for any celebration cakes you want to make.

I usually use this basic chocolate cake to build my Black Forest or Chocolate Fudge Cake 😋.

When you make this cake, please note that it is important to use fresh eggs that are room temperature.
Egg whites are most effective when beaten at room temperature to stiff peaks. When eggs are cold, they will be difficult to expand.

Always remember DO NOT grease or use a non-stick pan. Essentially your sponge cake batter is using the sides of the pan to help it climb up so it doesn’t collapse.

Make sure all utensils clean and grease free, any residue of fat will prevent egg whites from beating up properly.

😱

Once it’s baked, remove the cake immediately from the pan so that the moisture can escape and not damage the structure of the cake.
Scrape the sides of the pan, turn it over and let it cool completely on a cooling rack.

Sponge cake is a type of cake that dries easily. Once it’s cool, this cake can be use immediately to build your cake of choice or wrap it tightly in a cling wrap and freeze until ready to use it

To keep it moist, I brush it with simple syrup before using it as a cake base.
This cake is not too sweet, light and stays moist even if stored in the fridge for several days.

While this cake might look simple, it’s the small steps and details that can trip you up; so please follow the steps for the perfect cake!
Kindly watch my video on how to make it 😉
🍰 Love you All !

Watch How To Make “Fluffy Moist CHOCOLATE Sponge Cake”

Tips for Success (Please Read First):

  • Line the bottom of the pan with parchment paper (don’t grease of use a non-stick pan)
  • Make sure all utensils clean and grease free (wipe the bowl and utensil with lemon juice or vinegar to helps remove grease)
  • Preheat your oven before you start
  • Use fresh eggs that are room temperature (other ingredients also must be at room temperature)
  • Beat egg whites until stiff peak
  • Sift the dry ingredients
  • Mix each batches of the dry ingredients evenly until there are no lumps
  • Make sure the wet ingredients are combined well with the batter
  • Make sure the batter is stirred well (pay attention to the flow and consistency)
  • Don’t let the batter sit too long before baking, bake it immediately
  • Resist the urge to open the oven door while baking
  • Once it’s baked, remove the cake immediately from the pan
  • Let the cake cool completely on a cooling rack before wrapping
  • Wrap the cooled cake tightly in a cling wrap so it doesn’t dry up

Recipe

CHOCOLATE SPONGE CAKE
Yield: One 7-Inch (8 or 9 cm tall) Round Pan
* You can use 6-Inch (10 cm tall) Round Pan for taller cake

❄️ Ingredients
5 Egg Whites (165-175 g) ~ room temperature
1 tsp Lemon Juice
200 g Caster Sugar
5 Egg Yolks (85-95 g) ~ room temperature
120 g Cake Flour
19 g Cocoa Powder
1/4 teaspoon Baking Soda
40 g Milk ~ room temperature
25 g Vegetable Oil
1/2 tsp Vanilla Extract
Notes: you can substitute Lemon Juice with 1 tsp White Vinegar or 1/2 tsp of Cream of Tartar

❄️ Instructions
Preparation

  1. Place a piece of parchment paper on the bottom of the pan (don’t grease or use a non-stick pan)
  2. Make sure all utensils clean and grease free (wipe the bowl and utensil with lemon juice or vinegar to helps remove grease).
  3. Take the eggs out of the fridge, separate egg whites and egg yolks; then let them come to room temperature.
  4. Preheat the oven 150°C fan/ 170°C/ gas mark 3.
  5. Combine the dry ingredients (Cake Flour, Cocoa Powder and Baking Soda)
  6. Mix the wet ingredients (Milk, Oil and Vanilla Extract)


To make Vanilla Sponge Cake

  1. Beat the Egg Whites over high speed for about 30 seconds until foamy.
  2. Add Lemon Juice (or white Vinegar or Cream of Tartar) and continue beating for another 30 seconds.
    * Acid in Lemon Juice/ Vinegar/ Cream of Tartar will help stabilizing the egg whites
  3. Add sugar in 3 batches every 1 minutes.
  4. Once all the sugar is added, continue beating on high speed until stiff peak for about 3 minutes (the mixture will gradually thicken and look shiny).
  5. Pour in the Egg Yolks; Using a hand whisk, stir gently until evenly mixed.
  6. Add sifted dry ingredients in 3 batches (don’t skip this process; by sifting the flour, it will break up any lumps, create a light, delicate, and fluffy results).
    Stir gently; Make sure that you scrape the entire surface of the bowl so that there is no flour residue on the sides and bottom of the bowl (mix each batches evenly until there are no lumps).
  7. Then take about 2 cup of this egg-flour mixture into the wet ingredients; mix really well.
    * By using this pre-mix method, the milk-oil mixture will incorporated easily with the egg mixture.
    It prevents the oil and milk from falling directly to the bottom of the bowl, which would cause the cake didn’t rise properly
  8. Pour the pre-mix mixture back to the egg-flour mixture; using a hand whisk stir gently.
    Then using spatula, scrape all the bottom and sides of the bowl, make sure it is evenly mixed.
    How much you mix is very important
    When you drop the mixture and it doesn’t flow; that’s means you haven’t mix enough and the batter won’t rise properly.
    Drop it with a spatula and check, pay attention to the flow and thickness; When it flows smoothly, that’s means it’s ready.
  9. Slowly pour the batter from a position of about 15 cm from the pan so that the excess bubbles can burst.
  10. Using a skewer make this circular motion to flatten the batter and break the large bubbles.
  11. Tap the pan to remove excess bubbles.
  12. Then immediately bake in the preheated 150°C fan/ 170°C/ gas mark 3 oven on the bottom rack for 55 minutes.
    After 55 minutes, increase the temperature to 170°C fan/ 190°C/ gas mark 5 and continue bake for another 10 minutes.
    * Resist the urge to peek until your cake is done; Opening the oven door while you bake will release some of the heat, this can lead to the cake being too damp in the middle or even falling
  13. Once it’s done, remove the cake immediately from the pan (so that the moisture can escape and not damage the structure of the cake).
    Using spatula, scrape the sides of the pan; turn it over and let it cool completely on a cooling rack.
  14. Once it’s cool, this cake can be use immediately to build your cake of choice or wrap it tightly in a cling wrap and freeze until ready to use it.

Notes

  1. Cool the cake completely before wrapping (wrap in a cling wrap then put in a ziplog bag) for freezer storage up to 1 months or use immediately.
  2. Cake without filling can be store in the fridge for up to a week (the filling and icing will determinte storage time).

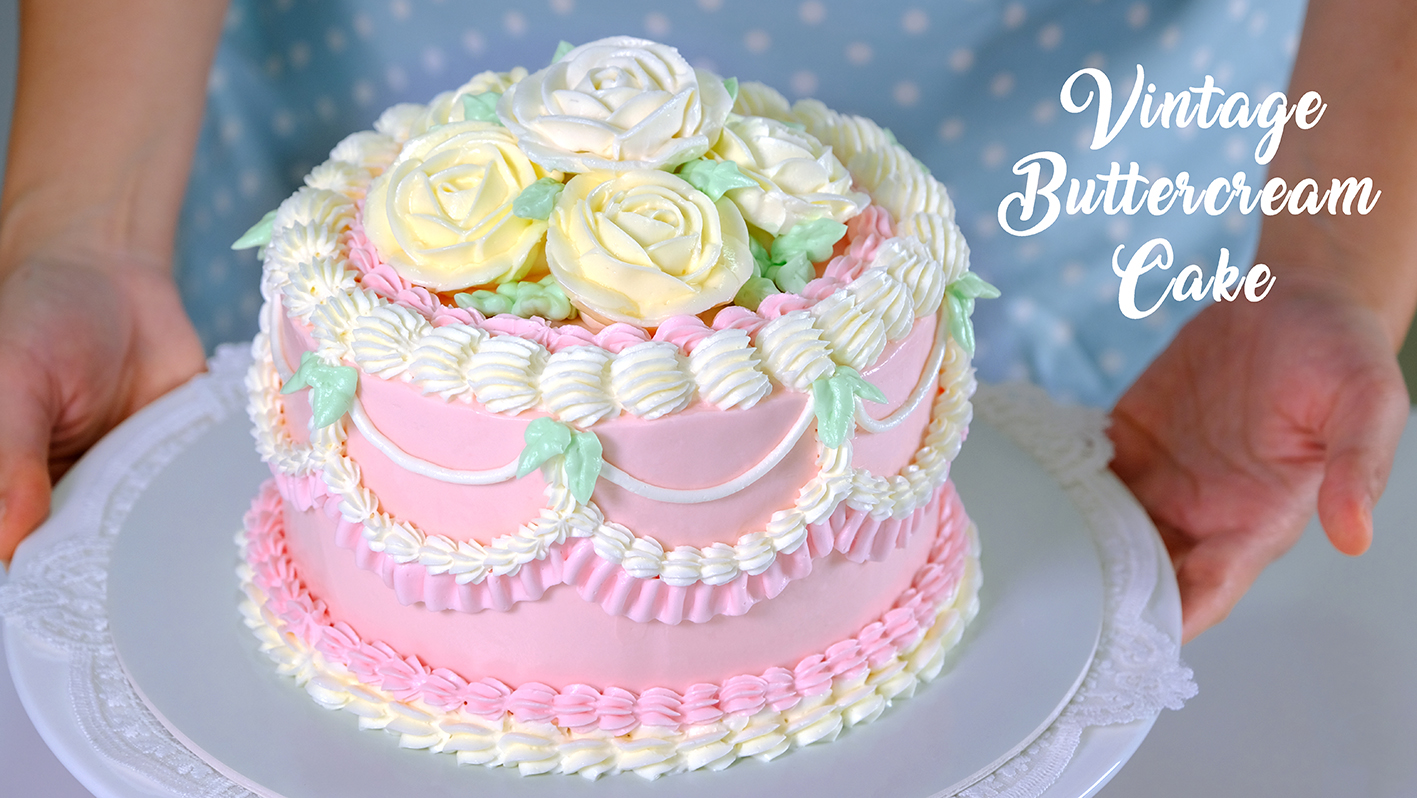
Vintage Buttercream Cake (with Piping Roses Technique)

My love for buttercream cakes goes back to my very early childhood.
I still remember my fifth birthday when my Mum presented me with a lovely Vanilla Buttercream Cake with frills, buttercream flowers and farm animal theme decorations on top.

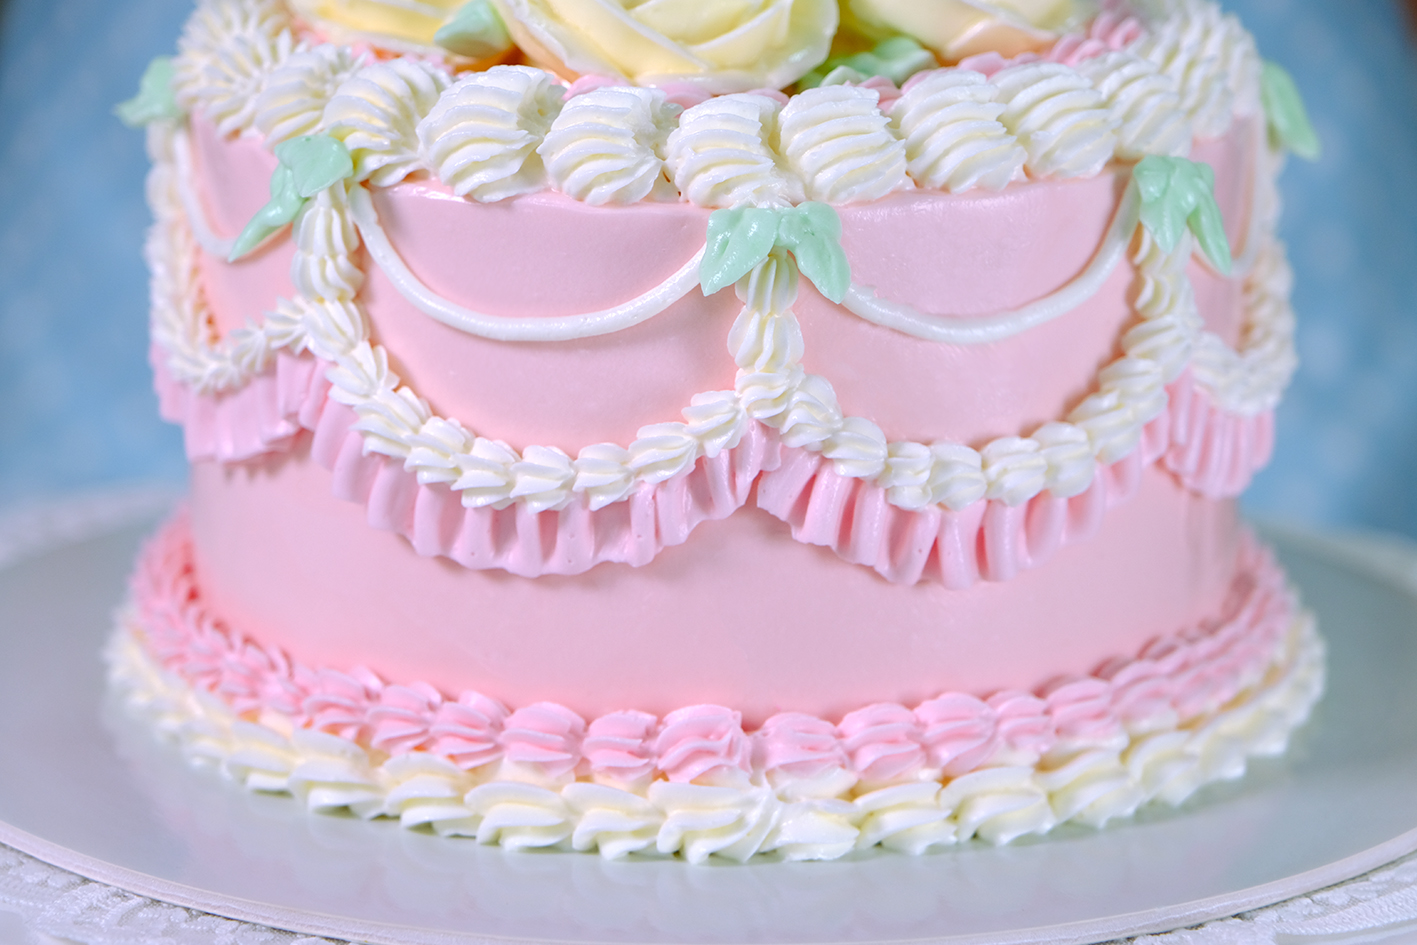
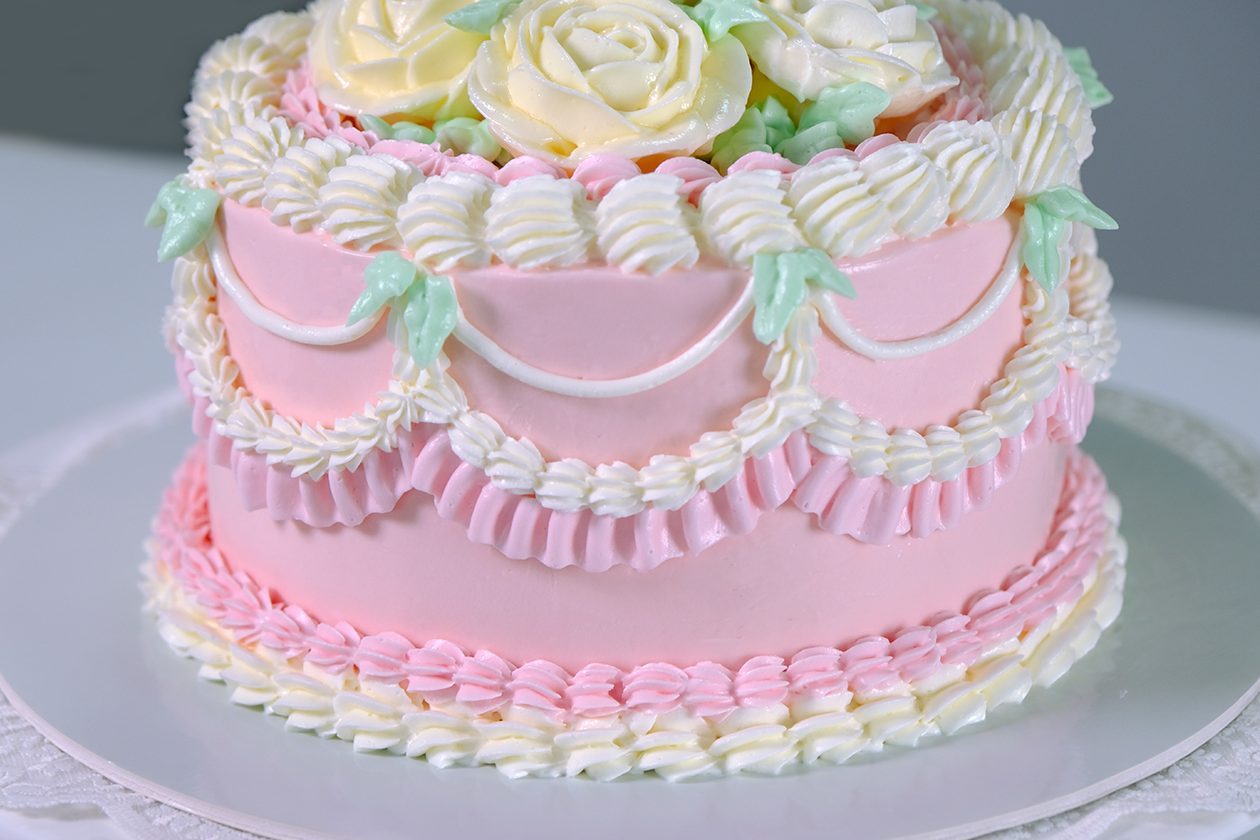
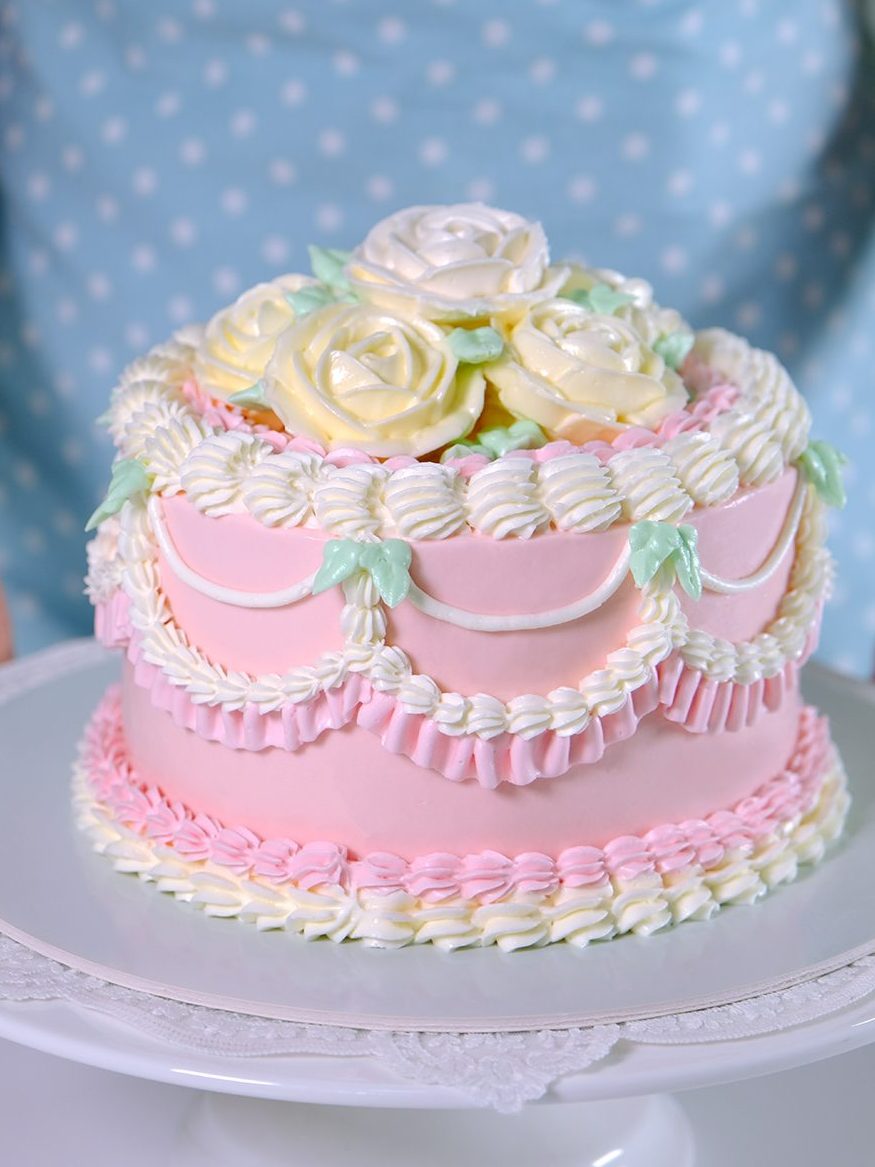
Kitschy, gaudy, and ornate; layers of buttercream frosting, pastel colours, lace and swirls 🥰

From that point, Vintage Buttercream Cake has become of the cake style that I truly love; my birthday cake was the highlight of my year 😅.
I love looking at them, smelling them, eating them and most importantly now I can make it 😊

I have always cared about how cake looks just as much as how it tastes 🥲

Before you start making any of this recipes, I recommended that you carefully read through my top tips (or watch my videos) for baking the perfect sponge cake and making the buttercream.

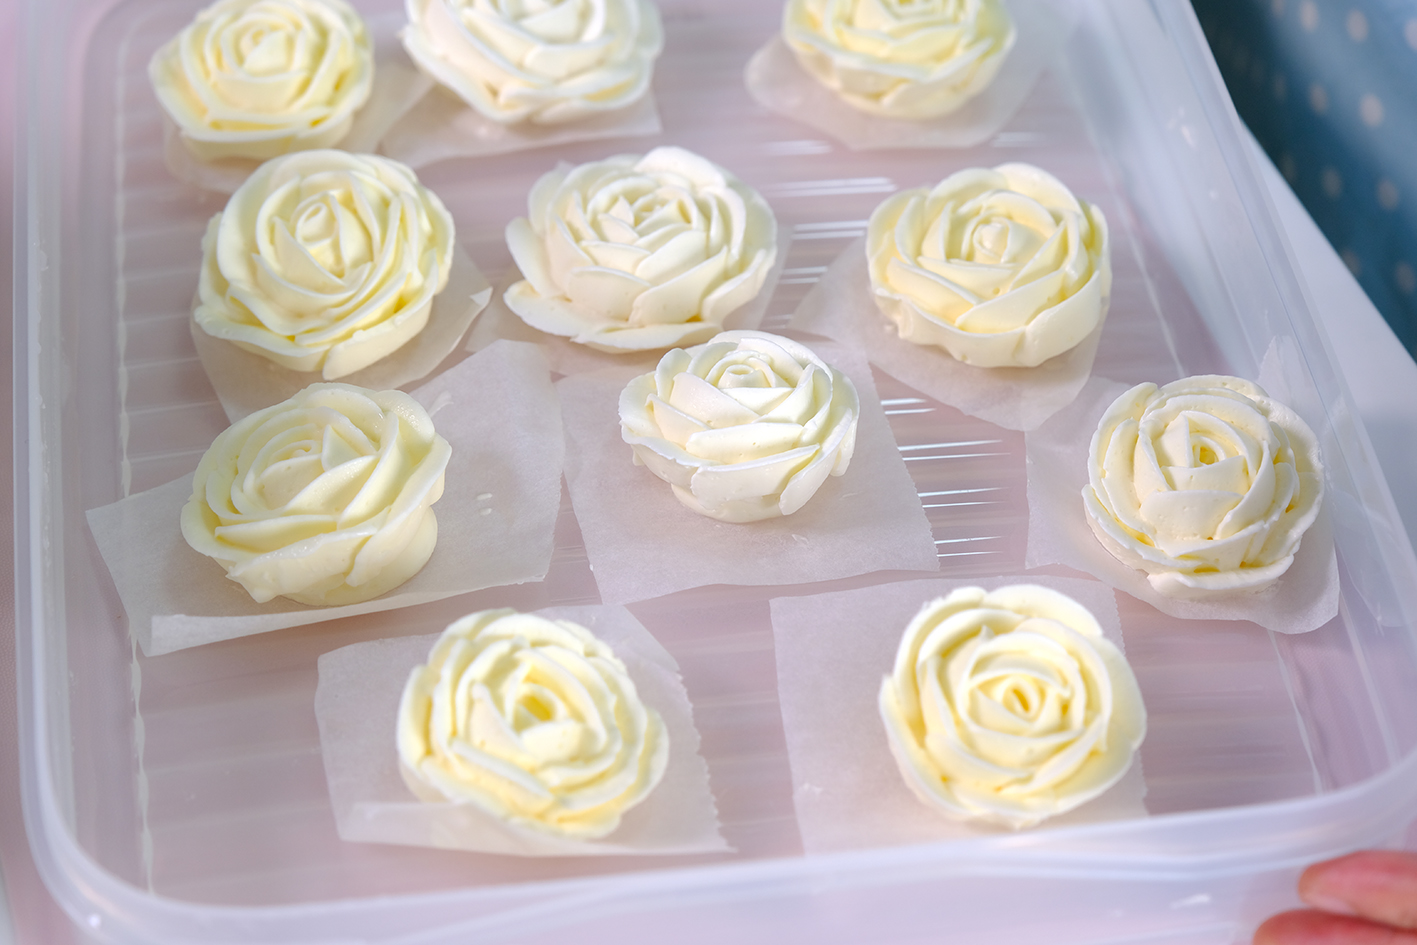
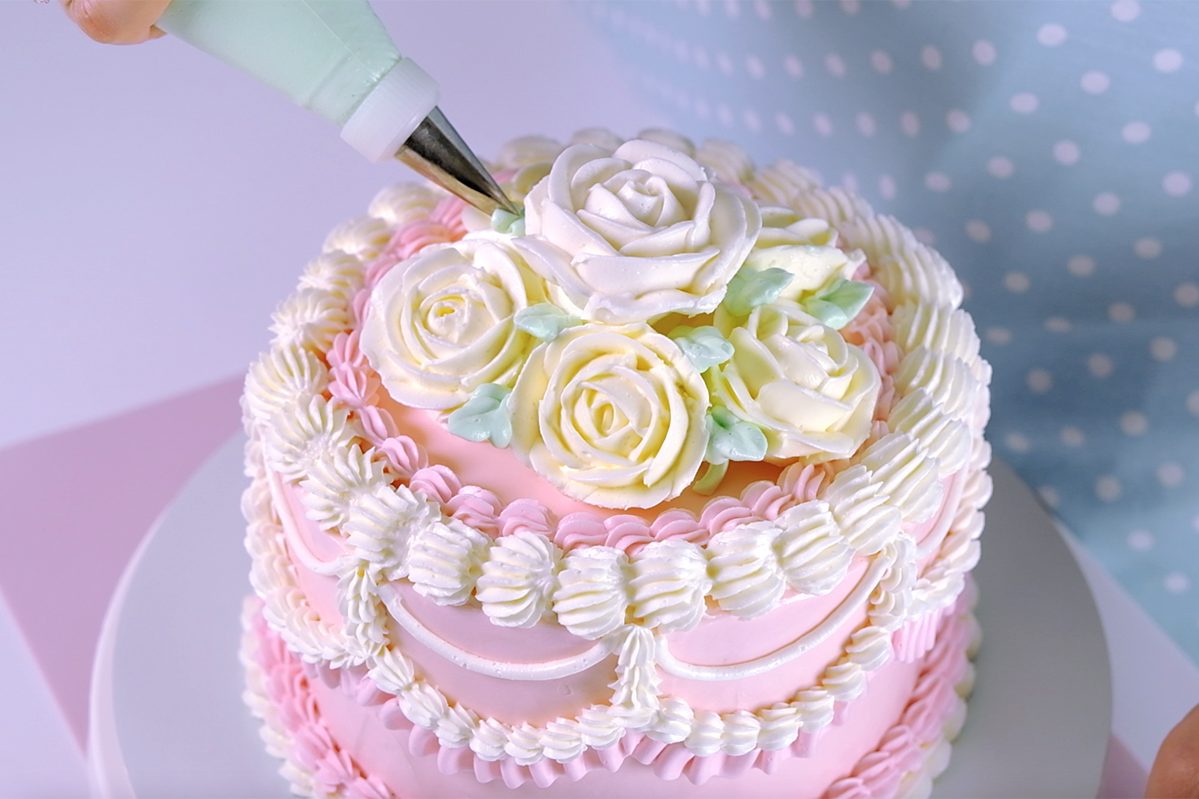
As for the decorations, buttercream flowers elevate any dessert and making them is much easier than you think

If you follow the simple advice given in the recipe, you should avoid the dissapointment when making this cake.

The most important things to have are the right piping tips, buttercream that’s the correct consistency and a little patience

If you’ve never piped with buttercream before, doing some practicing can help!
You can pipe right onto a cake board for practice and then scrape it off and reuse the buttercream.

Everything might seem difficult at first, but once you perfect an action, it will seem like you can do it easily (kindly find the completed instructions in the video).

Here I’m using my “Fluffy Vanilla Sponge Cake” and “Grit Free, Less Sweet American Buttercream”

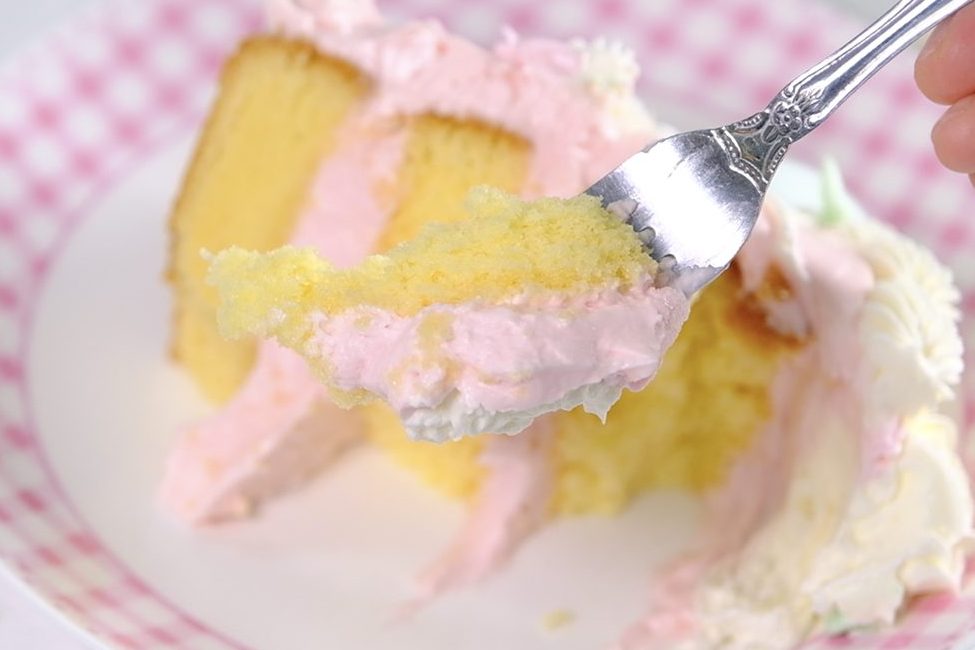
This fluffy sponge cake is not too sweet, light and stays moist even if stored in the refrigerator for several days. It also goes well with a variety of fillings.

The buttercream is super smooth that pipes like a dream, doesn’t crust over.
You can find the complete recipes in the link below.

If you’re looking for a slice of cream cake with old-school buttercream, this is a recipe you must try! 😍

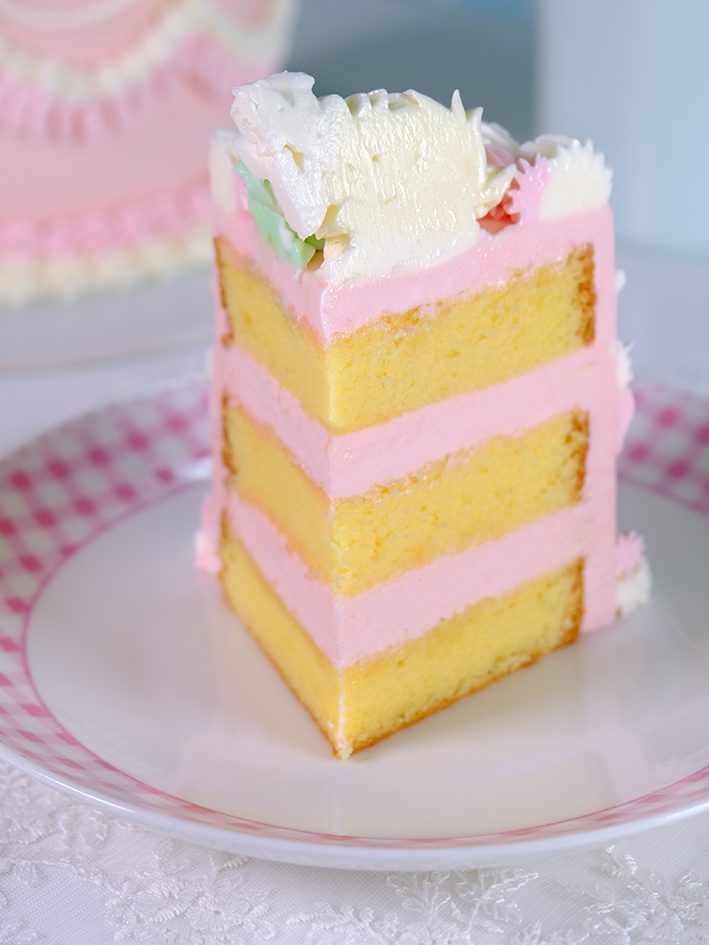
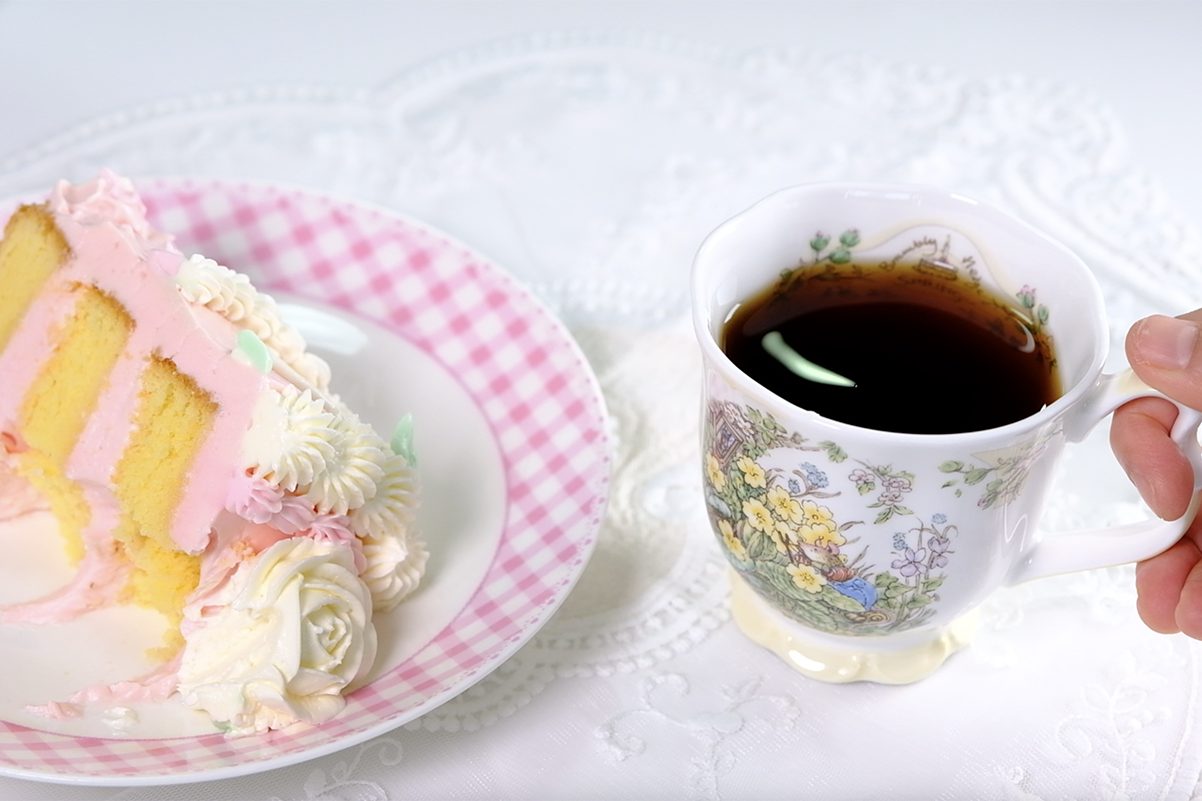
Perfect with a cup of coffee 😉

Even though trends come and go in this day and age, there’s always something timeless about the joy that comes from childhood memories.

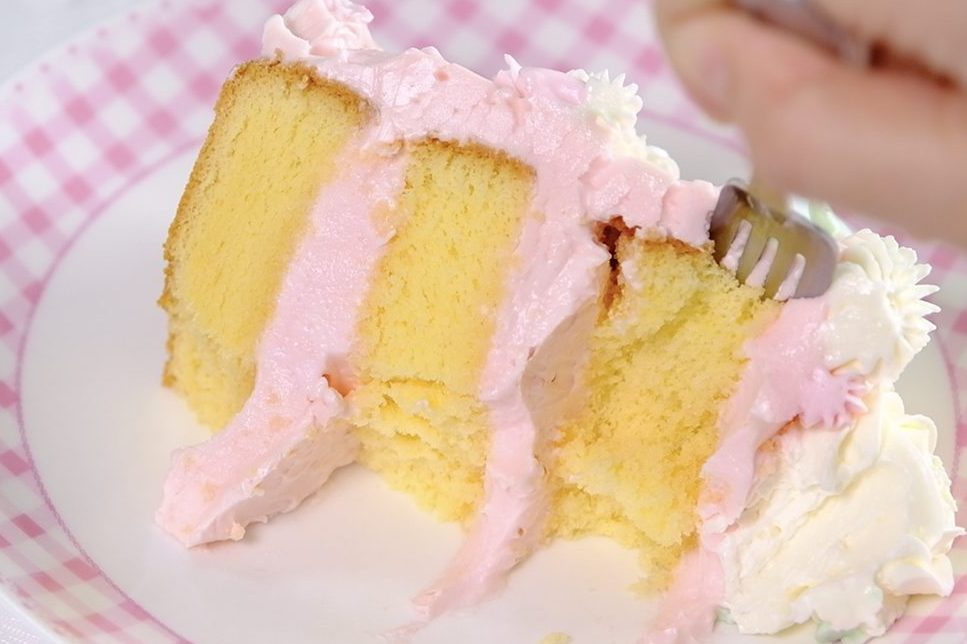
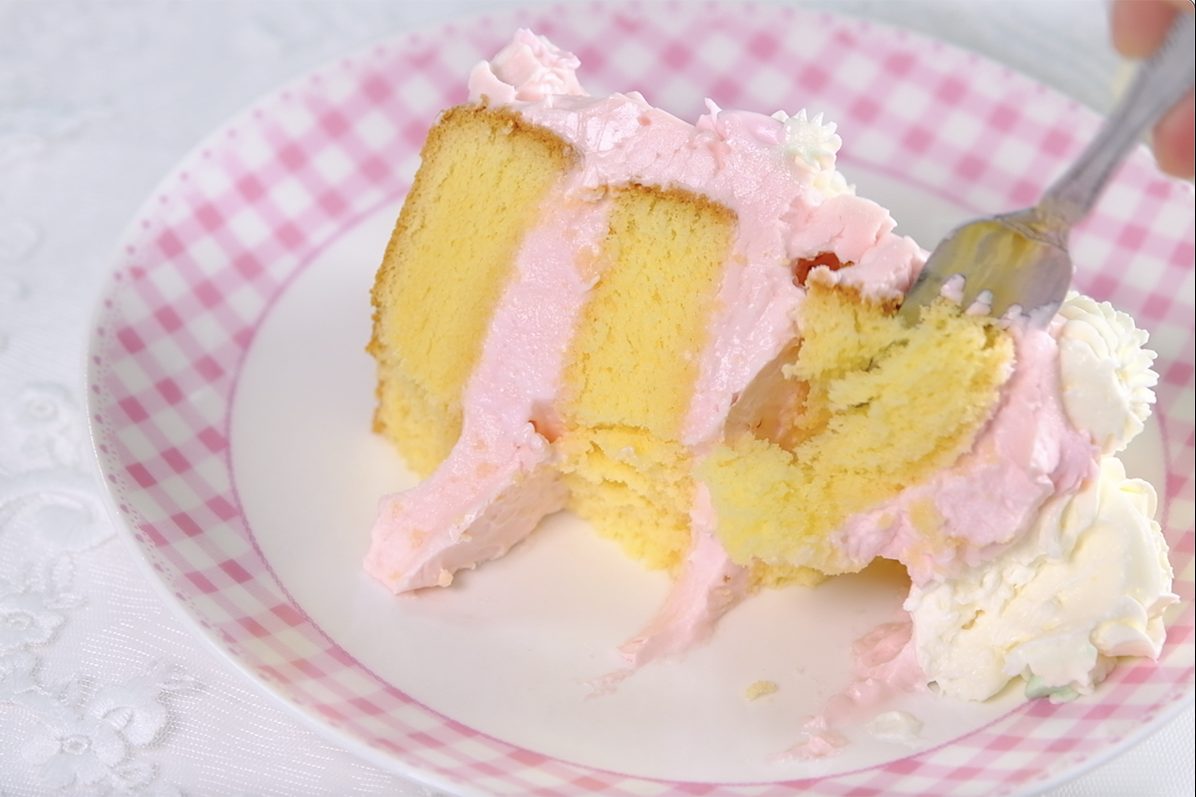
Super moist …😘

And while we’re at it, why not enjoy a fun trip down memory lane with this retro cake.

Creamy …🤤
It always makes me happy … ☺️😚

I hope you will love and appreciate the beauty of this Vintage Buttercream Cakes as much as I do 🤗

Love you All and Happy Decorating 🤗

WATCH HOW TO MAKE “Vintage Buttercream Cake (with Piping Roses Technique)”

RECIPE

VINTAGE BUTTERCREAM CAKE
Yield: One 7-Inch, 12 cm high Cake (3 layers)

❄️ Ingredients

One 7-Inch Fluffy Vanilla Sponge Cake http://bembumkitchen.home.blog/2024/05/08/fluffy-moist-vanilla-sponge-cake/

5 Cups Grit Free-Less Sweet American Buttercream http://bembumkitchen.home.blog/2024/05/17/grit-free-less-sweet-american-buttercream/

Food Gel Colouring (Yellow, Soft Pink, Green)
Sugar Syrup (mix 100g hot boiling water and 100g Caster Sugar)

❄️ Instructions
Kindly watch the video for completed instructions

NOTES

  • Store the cake in the fridge if not serving on the same day; Always serve at room temperature; Keep away from heat or direct sunlight.
  • The cake tastes best within the first 3 days of baking, but will last for up to one week if stored in the fridge.
Fluffy Moist Vanilla Sponge Cake

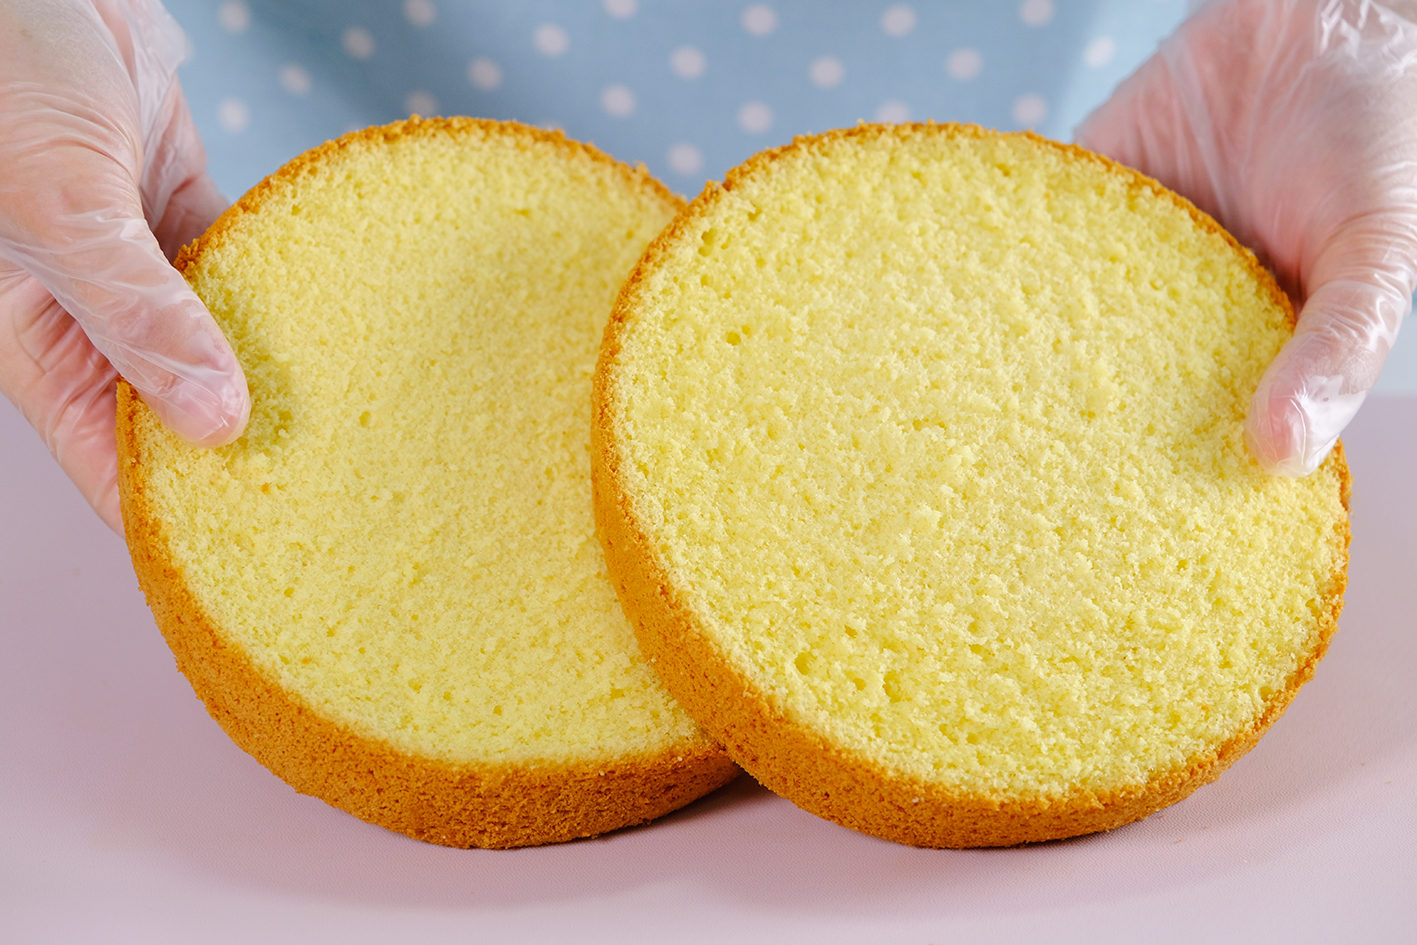
Fluffy, moist and packed with vanilla goodness, this is what my birthday cake dreams are made of.

The texture is so soft and quite flexible 😘

It’s an incredibly soft and light cake which can be used with any frosting and filling, a perfect base for any celebration cakes you want to make.


When you make this cake, please note that it is important to use fresh eggs that are room temperature.
Egg whites are most effective when beaten at room temperature to stiff peaks. When eggs are cold, they will be difficult to expand.
And make sure all utensils clean and grease free, any residue of fat will prevent egg whites from beating up properly.

Remember DO NOT grease or use a non-stick pan. Essentially your sponge cake batter is using the sides of the pan to help it climb up so it doesn’t collapse.

Once it’s baked, remove the cake immediately from the pan so that the moisture can escape and not damage the structure of the cake.
Scrape the sides of the pan, turn it over and let it cool completely on a cooling rack.

Sponge cake is a type of cake that dries easily. Once it’s cool, this cake can be use immediately to build your cake of choice or wrap it tightly in a cling wrap and freeze until ready to use it.

To keep it moist, I brush it with simple syrup before using it as a cake base.
This cake is not too sweet, light and stays moist even if stored in the fridge for several days.

For the complete guide, please watch my video on how to make it.
Hopefully this recipe can be useful for you!
🍰 Love you All !

Watch How To Make “Fluffy Moist Vanilla Sponge Cake”

Tips for Success (Please Read First):

  • Line the bottom of the pan with parchment paper (don’t grease of use a non-stick pan)
  • Make sure all utensils clean and grease free (wipe the bowl and utensil with lemon juice or vinegar to helps remove grease)
  • Preheat your oven before you start
  • Use fresh eggs that are room temperature (other ingredients also must be at room temperature)
  • Beat egg whites until stiff peak
  • Sift the dry ingredients
  • Mix each batches of the dry ingredients evenly until there are no lumps
  • Make sure the wet ingredients are combined well with the batter
  • Make sure the batter is stirred well (pay attention to the flow and consistency)
  • Don’t let the batter sit too long before baking, bake it immediately
  • Resist the urge to open the oven door while baking
  • Once it’s baked, remove the cake immediately from the pan
  • Let the cake cool completely on a cooling rack before wrapping
  • Wrap the cooled cake tightly in a cling wrap so it doesn’t dry up

Recipe

VANILLA SPONGE CAKE
Yield: One 7-Inch (8 or 9 cm tall) Round Pan
* I used 6-Inch (10 cm tall) Round Pan in the video for taller cake

❄️ Ingredients
5 Egg Whites (165-175 g) ~ room temperature
1 tsp Lemon Juice
200 g Caster Sugar
5 Egg Yolks (85-95 g) ~ room temperature
140 g Cake Flour
3/4 teaspoon Baking Powder (Double Acting)
40 g Milk ~ room temperature
25 g Vegetable Oil
1/2 tsp Vanilla Extract
Notes: you can substitute Lemon Juice with 1 tsp White Vinegar or 1/2 tsp of Cream of Tartar

❄️ Instructions
Preparation

  1. Place a piece of parchment paper on the bottom of the pan (don’t grease or use a non-stick pan)
  2. Make sure all utensils clean and grease free (wipe the bowl and utensil with lemon juice or vinegar to helps remove grease).
  3. Take the eggs and other cold ingredients out of the fridge
    Separate egg whites and egg yolks; then let them come to room temperature.
  4. Preheat the oven 150°C fan/ 170°C/ gas mark 3.
  5. Combine the dry ingredients (Cake Flour and Baking Powder)
  6. Mix the wet ingredients (Milk, Oil and Vanilla Extract)

To make Vanilla Sponge Cake

  1. Beat the Egg Whites over HIGH speed for about 30 seconds until foamy.
  2. Add Lemon Juice (or white Vinegar or Cream of Tartar) and continue beating for another 30 seconds.
    * Acid in Lemon Juice/ Vinegar/ Cream of Tartar will help stabilizing the egg whites
  3. Add sugar in 3 batches every 1 minute.
  4. Once all the sugar is added, continue beating on high speed until stiff peak for about 3 minutes (the mixture will gradually thicken and look shiny).
  5. Pour in the Egg Yolks; Using a hand whisk, stir gently until evenly mixed.
  6. Add sifted dry ingredients in 3 batches (don’t skip this process; by sifting the flour, it will break up any lumps, create a light, delicate, and fluffy results).
    Stir gently; Make sure that you scrape the entire surface of the bowl so that there is no flour residue on the sides and bottom of the bowl (mix each batches evenly until there are no lumps).
  7. Then take about 2 cups of this egg-flour mixture into the wet ingredients; mix really well.
    * By using this pre-mix method, the milk-oil mixture will incorporated easily with the egg mixture.
    It prevents the oil and milk from falling directly to the bottom of the bowl, which would cause the cake didn’t rise properly
  8. Pour the pre-mix mixture back to the egg-flour mixture; using a hand whisk stir gently.
    Then using spatula, scrape all the bottom and sides of the bowl, make sure it is evenly mixed.
    How much you mix is very important
    When you drop the mixture and it doesn’t flow; that’s means you haven’t mix enough and the batter won’t rise properly.
    Drop it with a spatula and check, pay attention to the flow and thickness; When it flows smoothly, that’s means it’s ready.
  9. Slowly pour the batter from a position of about 15 cm from the pan so that the excess bubbles can burst.
  10. Using a skewer make this circular motion to flatten the batter and break the large bubbles.
  11. Tap the pan to remove excess bubbles.
  12. Then immediately bake in the preheated 150°C fan/ 170°C/ gas mark 3 oven on the bottom rack for 55 minutes.
    After 55 minutes, increase the temperature to 170°C fan/ 190°C/ gas mark 5 and continue bake for another 10 minutes.
    * Resist the urge to peek until your cake is done; Opening the oven door while you bake will release some of the heat, this can lead to the cake being too damp in the middle or even falling
  13. Once it’s done, remove the cake immediately from the pan (so that the moisture can escape and not damage the structure of the cake).
    Using spatula, scrape the sides of the pan; turn it over and let it cool completely on a cooling rack.
  14. Once it’s cool, this cake can be use immediately to build your cake of choice or wrap it tightly in a cling wrap and freeze until ready to use it.

Notes

  1. Cool the cake completely before wrapping (wrap in a cling wrap then put in a ziplog bag) for freezer storage up to 1 months or use immediately.
  2. Cake without filling can be store in the fridge for up to a week (the filling and icing will determinte storage time).

Korean Traditional Rainbow Rice Cake MUJIGAE-TTEOK 무지개떡

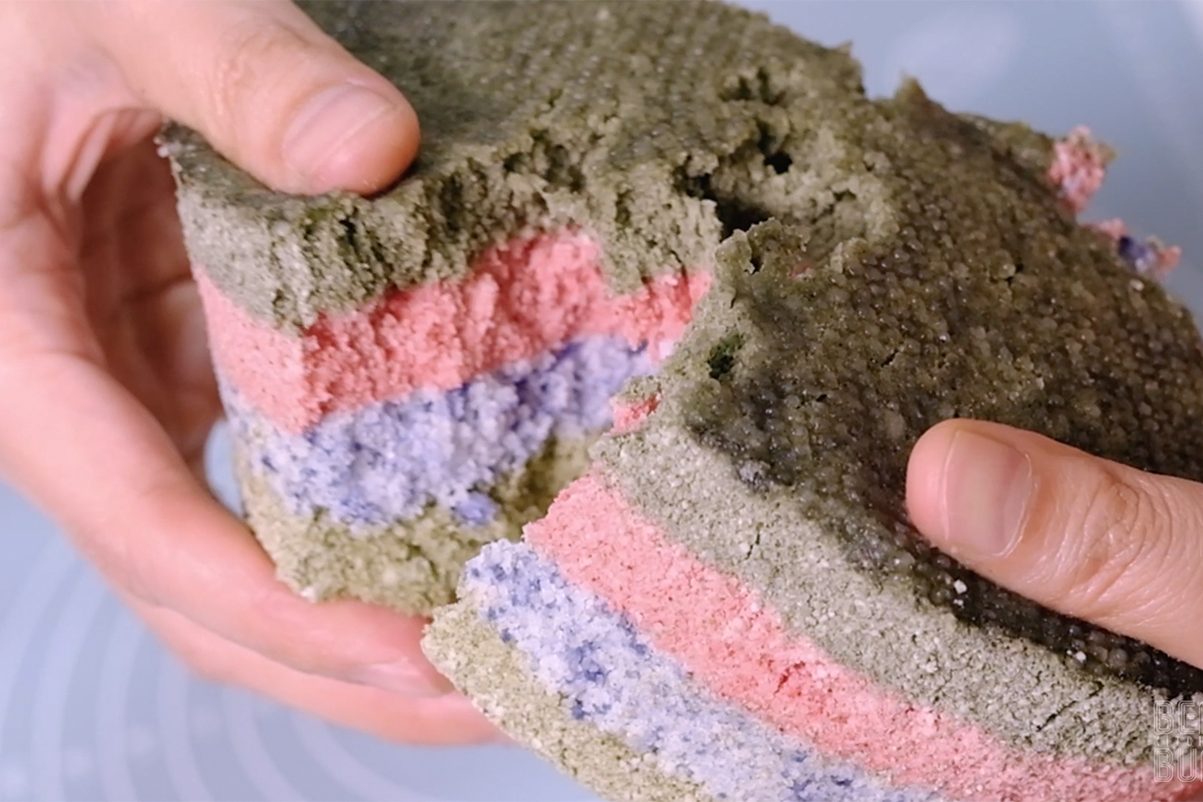
Mujigae-tteok (Korean: 무지개떡) or Rainbow Rice Cake is a layered tteok (rice cake) of different colours resembling a rainbow.
It is used for special occasions such as a banquet, party, or feast like doljanchi (baby’s first birthday), hwangapjanchi (60th birthday).

Alternative names for Mujigae-tteok include Saektteok (색떡) and Saekpyeon (색편), both of which means “coloured rice cakes”

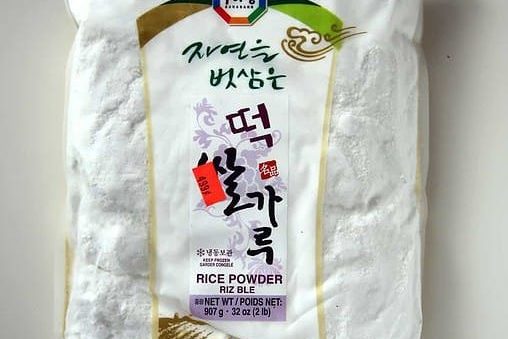
The main ingredient for making this cake is “wet milled Short Grain Rice Flour” Mepssalgaru (Korean: 멥쌀가루) which in many places is very difficult to find.

Wet milled Short Grain Rice Flour (Mepssalgaru)

In this recipe, I will show you how to mimic the texture of this rainbow cake by combining 3 kinds of basic flour (so you will be able to enjoy this beautiful rice cake wherever you are).

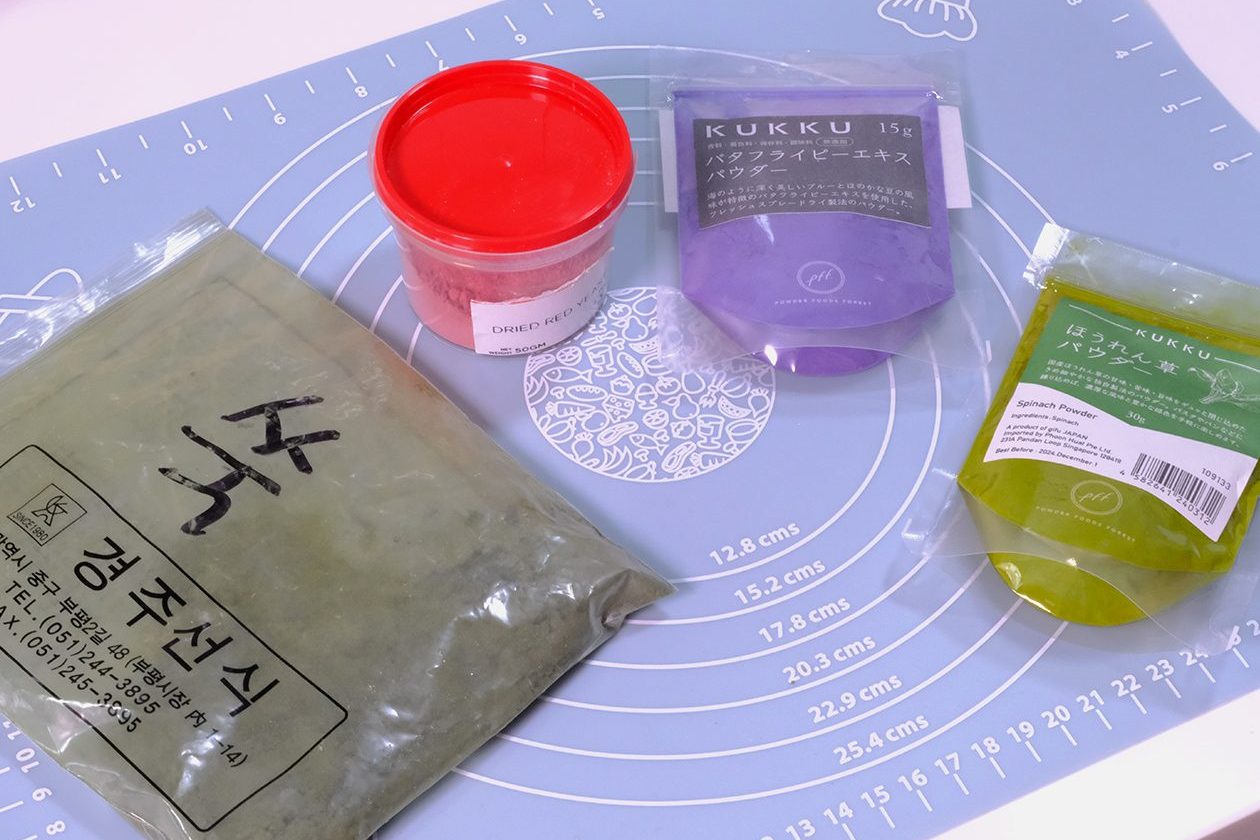
I use Mugwort Powder (dark green), Red Yeast Powder (pink), Butterfly Pea Powder (purple) and Spinach Powder (light green)

For the colouring, natural food colouring powder is commonly use for making this cake. The price is far more expensive compared to artificial food colouring powder but of course it is safer.

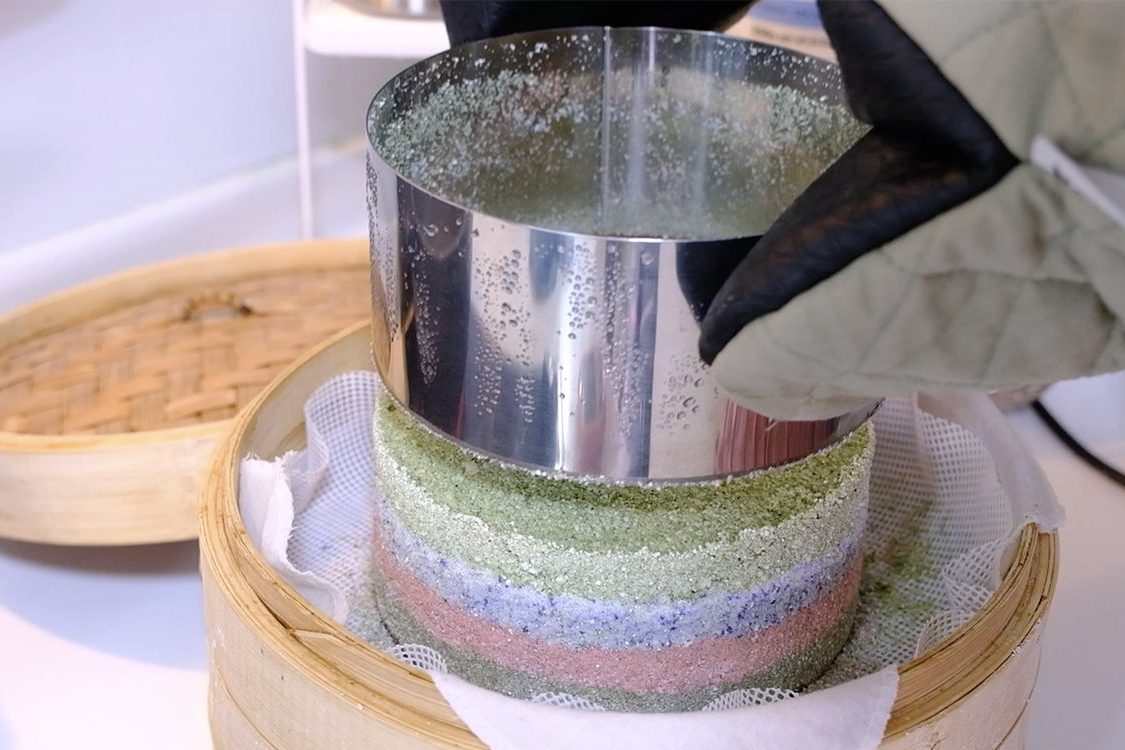
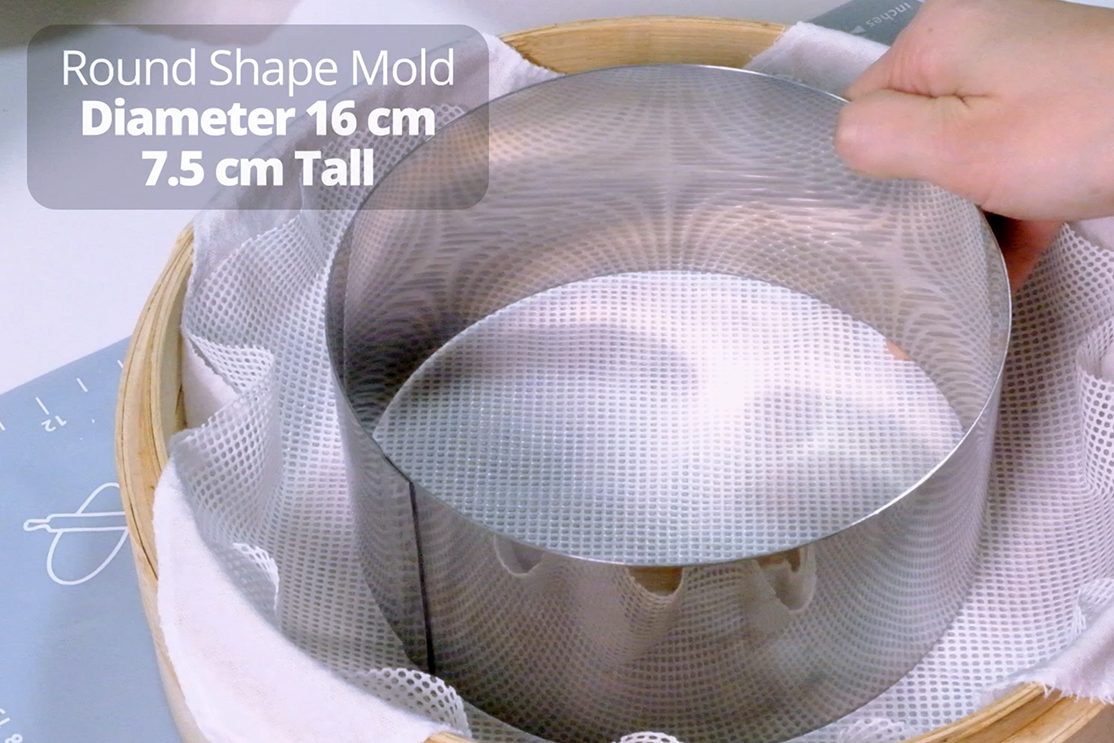
For steaming, it is important to line the steamer with a damp cotton cloth along with this reusable silicone sheet 😚
This sheet will prevent your rice cake from sticking to the bottom

I highly recommend to use bamboo steamer for best result, it absorbs condensation and prevent the cakes from getting soggy (if you are using metal or plastic steamer, make sure that you cover the lid with a piece of cloth so the water condensation doesn’t drip onto your cake).

Place the ring moulds on top (feel free to use any shape of mould according to your taste)
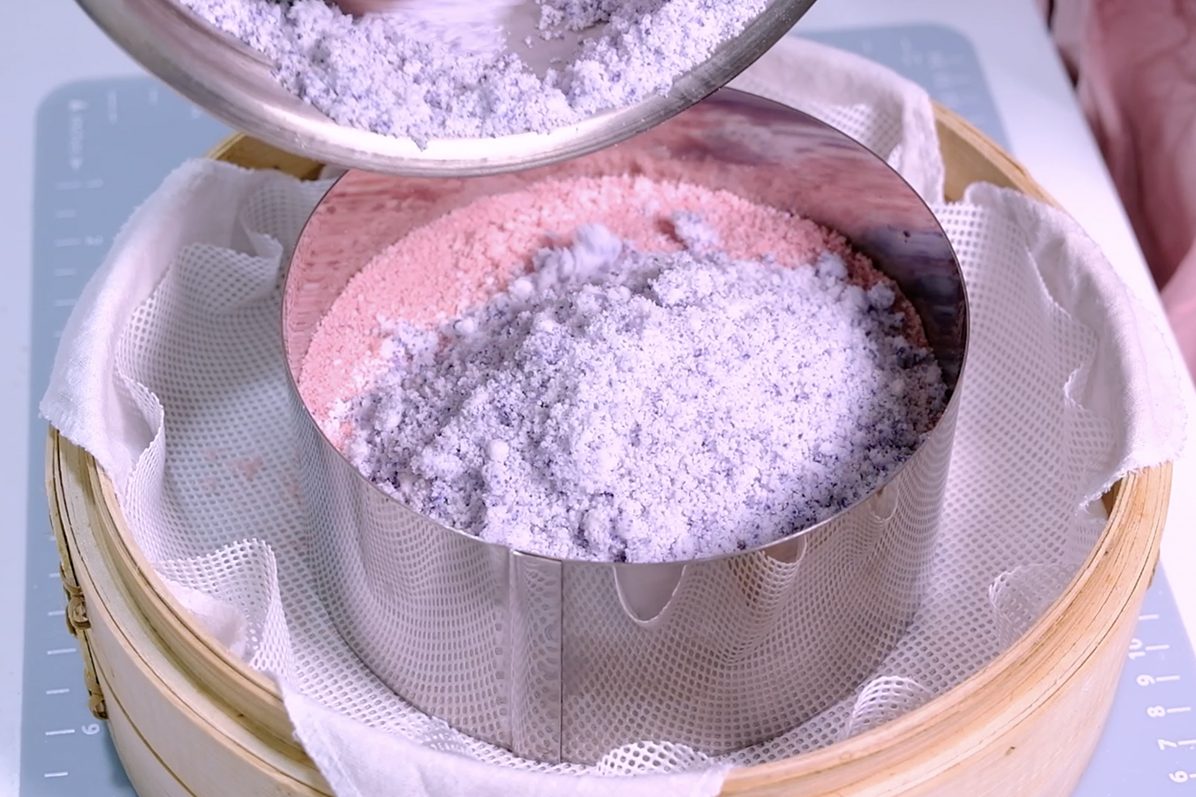
Coloured rice flour are then laid on a cloth-lined steamer, layer by layer

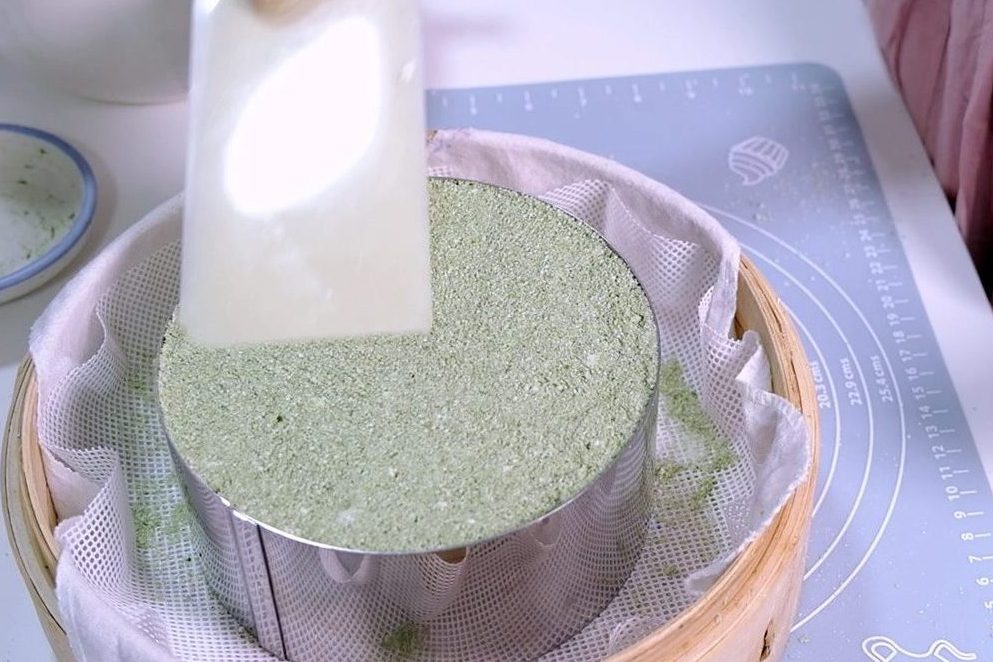
Using a scraper, spread each layer of the mixture evenly.
Please remember scrape the mixture lightly, DO NOT press or tamp the mixture (it will make the cake dense and not fluffy).

DO NOT PRESS the mixture 😉

After 8 minutes of steaming time; don’t forget carefully remove the ring mould so that the sides can cook well.

Please pay attention, you may need to add some water halfway through the steaming process (don’t let your steamer burn) 😣

🤗 These delicate and subtly sweet rice cake not only beautiful and colourful, it is also tender with a light chewy consistency, it’s not very sweet.

The perfect birthday cake for those who don’t have a sweet tooth.

🤤 I’m already DROOLING

Look at the colour 🥰 How pretty it is!
You can create your own colours according to your preferences !!

The colours makes me happy 🤣

This cake is one of my favourite…. I really can finish it by myself 😳🤫 I hope you will give it a try and I’m sure you will like it! 😀

Watch How To Make “Korean Traditional Rainbow Rice Cake MUJIGAE-TTEOK 무지개떡”

recipe

RAINBOW RICE CAKE (MUJIGAE-TTEOK) 무지개떡
Yield: One 10 cm Heart Mould (3.5 cm tall) & One 16 cm Round Mould (7.5 cm tall)

INGREDIENTS
🌿 Basic Mixture  
2/3 tsp Salt  
275 g Water  
220 g Rice Flour
220 g Glutinous Rice Flour
110 g Potato Starch
195 g Caster Sugar
Natural Food Colouring Powder (Mugwort, Red Yeast, Butterfly Pea, Spinach)

🌿 Filling
10 g Brown/ Palm Sugar
1 tsp Cinnamon Powder

INSTRUCTIONS
Basic Mixture

  1. Prepare the steamer
    Line bamboo steamer with a damp cotton cloth along reusable silicone sheet.
    Place the ring moulds on top (feel free to use any shape of mould according to your taste).
    Notes: If you are using metal or plastic steamer; make sure that you cover the lid with a piece of cloth so the water condensation doesn’t drip onto your cake.
  2. Mix 2/3 tsp Salt with 275 g Water until the salt completely dissolved, set aside.
    * This step is important, otherwise you will taste grains of salt in your cake, which is NOT GOOD.
  3. Then, in a large bowl combine 220 g Rice Flour with 220 g Glutinous Rice Flour and 110 g Potato Starch, mix well.
  4. Add salted water that we made earlier to the flour mixture; mix roughly (you will see now that the dough has a lot of lumps).
  5. Using your hands, press out any wet lumps by rubbing it gently between your palms for uniform mixing (by doing this, the moisture will be distributed evenly).
  6. Then using the coarse mesh strainer sift the mixture (I don’t recommend using fine mesh because it will complicate the sifting process).
  7. Every flours have different water needs, weather is another factor.
    After sifting this mixture once, you can test whether the water content in the dough is sufficient.
    Take a handful of dough and squeeze it; If it doesn’t break right away when you throw it, that’s means it’s good to go.
    * On the other hand if it breaks, that’s means you need to add more water (add 1 teaspoon at a time until the dough clumps up well).
    And then, you can sift the mixture again at least 2 times.
  8. Once it’s done, pour in 195 g Caster Sugar, mix it really well and this basic white mixture is ready.
  9. For the heart shape mould 10 cm (3.5 cm tall)
    Fill half of the mould with the basic white mixture.
    Using spatula, spread the mixture evenly
    Scrape the mixture lightly (DO NOT PRESS or TAMP the mixture, it will make the cake dense and not fluffy).
    Add some Cinnamon Brown Sugar filling in the center (10 g Brown/ Palm Sugar, 1 tsp Cinnamon Powder), then fill the rest with the mixture up to the top of the mould; Using a scraper level it.
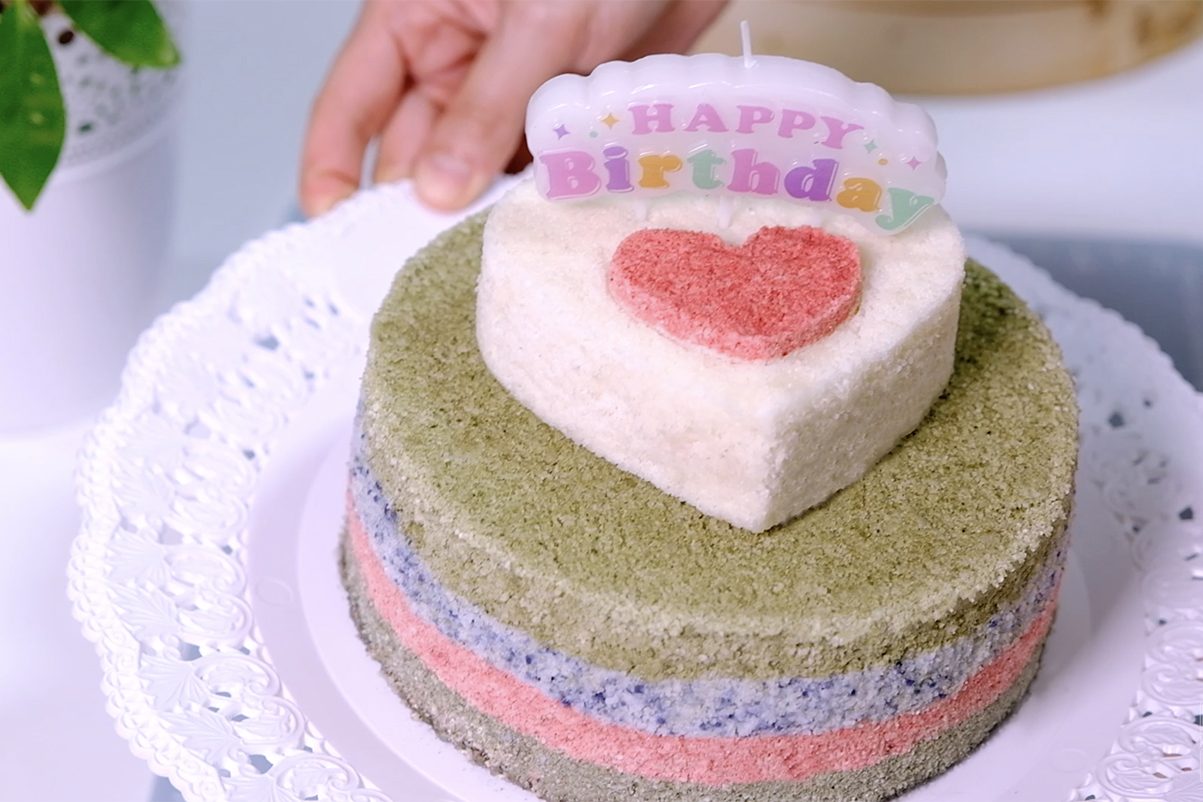
    Place a small heart mould on top for the decorations; fill with a little bit of pink mixture and spread evenly.
  10. For the big round mould 16 cm Round Mould (7.5 cm tall)
    Divide the remaining basic mixture into 4 equal portions.
    For the first layer; add Mugwort Powder to the first batch, mix it really well
    Put this dark green mixture into the ring mould and spread it evenly (remember do not press the mixture, scrape it lightly).
    * Continue with another layers; and in the meantime you can start preheat the water for steamer (it is better to fill the water a little over half; if you fill it up too much, the bottom of the rice cake will become stiff).
  11. After all the colours is done; slide each ring (heart and round) up and down, left and right to give clearance so that the mould can be easily removed later.
    For more details please follow video instructions
  12. When the water boils, place the steamer
    STEAMING METHOD & TIME
    (Please pay attention, you may need to add some water halfway through the steaming process; Don’t let your steamer burn)
    – First: Over HIGH HEAT for 8-10 Minutes; then carefully remove the ring moulds.
    – Second: After remove the ring moulds, back to the pot and continue steaming over HIGH HEAT for 25 Minutes.
    – Third: After 25 Minutes, turn OFF the heat and let it sit in the hot pot for another 5 Minutes.
  13. After 5 minutes the rice cake is ready, carefully lift and flip the cake onto the plate. Place the pretty love shape rice cake on top and serve.
    * You can wrap this cake in a plastic packaging or an airtight cake box so it doesn’t dry out


NOTES

  1. It taste best on the day they are made (they cannot be kept for long).
  2. Freeze any leftover rice cake
    If you are unable to finish the cake, you can cut it into slices (wrap them individually with an airtight plastic wrap) and store the rice cakes in the freezer for 1-2 days.
  3. To reheat
    By placing them in a steamer (over HIGH HEAT) for 5-10 minutes.
    * I don’t recommend to use microwave to reheat it because the texture of the cake will tend to become dry.

Super Flaky Durian Pastry Mooncake with Ghee

Mooncakes Symbolise Family Reunion. A full moon symbolises prosperity and reunion for the whole family.

In this recipe, I’m going to use Ghee instead of Lard to make a pastry mooncake with Durian filling. It creates more flaky, tastier pastry with beautiful crispy layers.

I like Ghee so much…. 🥰 It has a wonderful smell !! 😗

If you are not familiar with Ghee, Ghee is a type of clarified butter, originating from India. It is commonly used in India for cooking.
Ghee’s distinctive smell is often described as nutty, buttery, and aromatic, which adds depth and richness to dishes.


This type of mooncake is actually called Su-Style Mooncakes (苏式月饼 Su shi yuebing) which originally from Suzhou 苏州市.
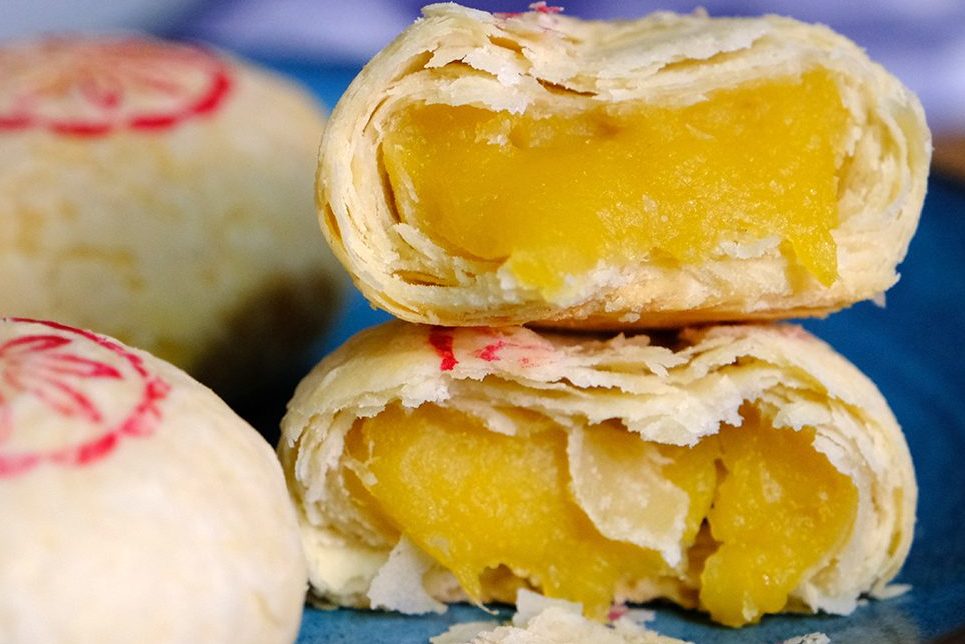
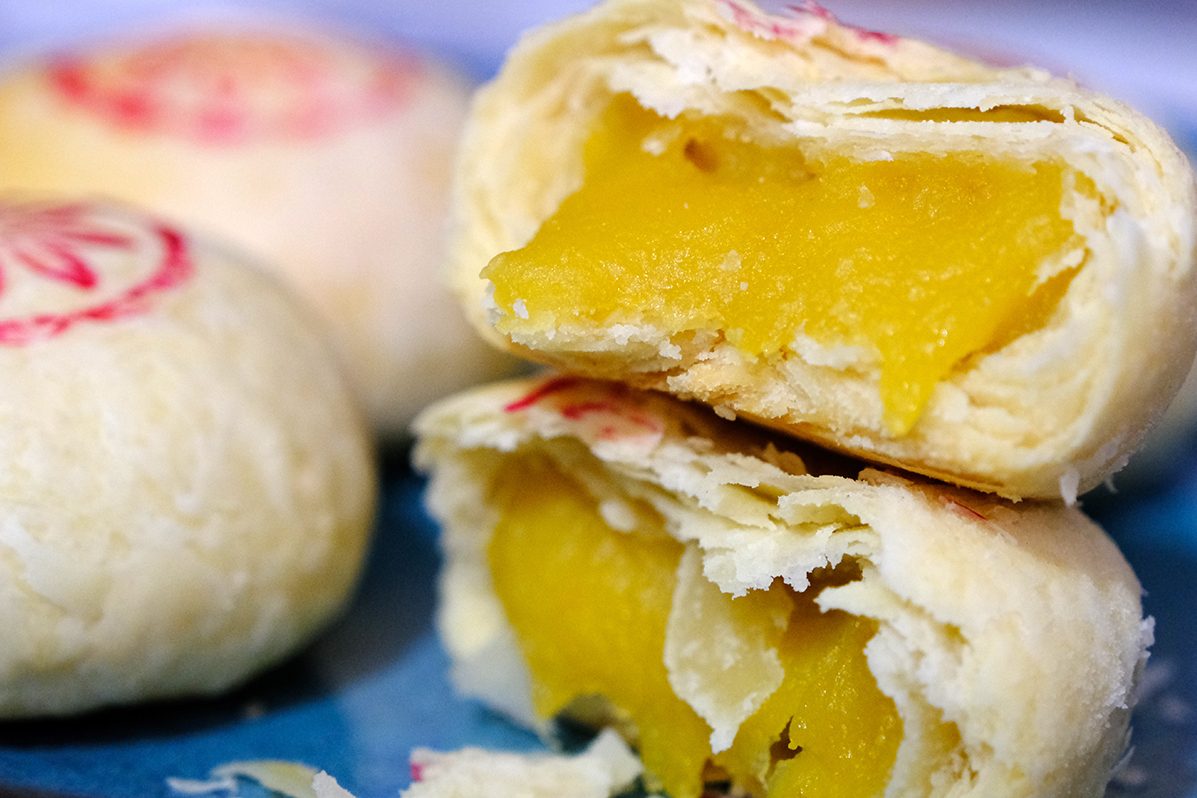
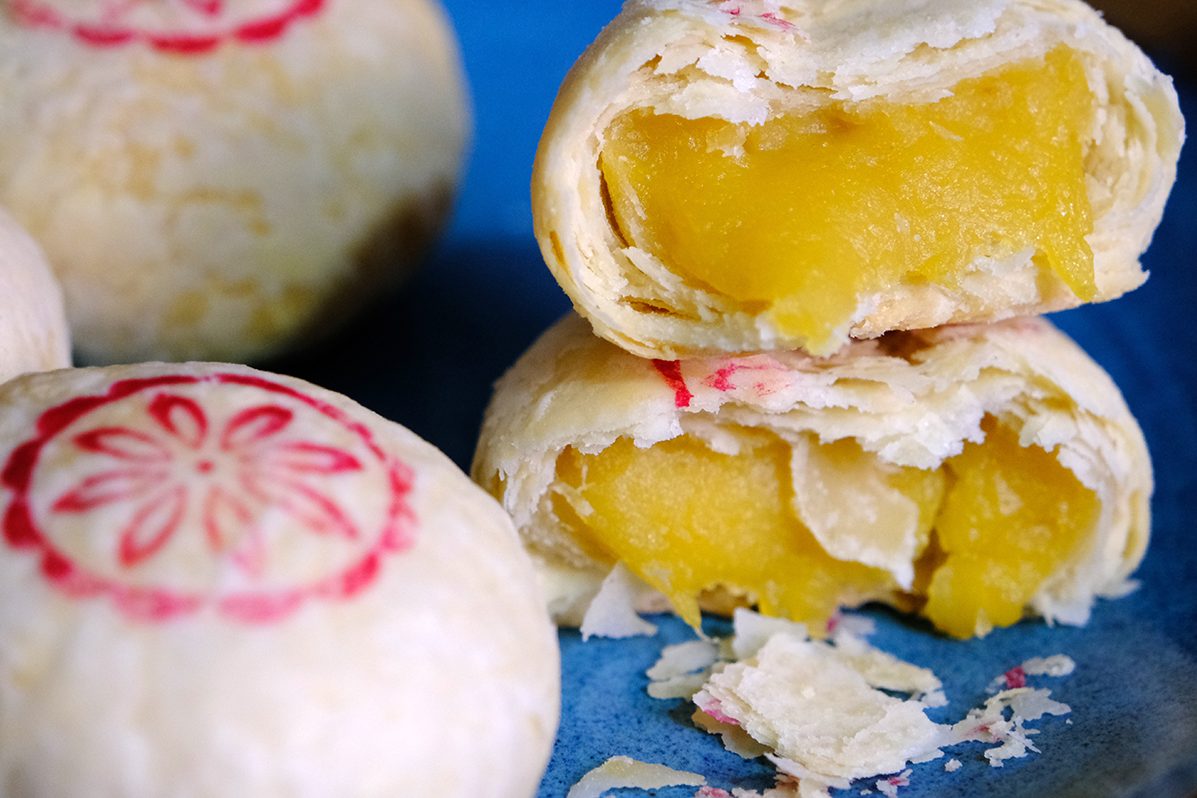
As you can see, their uniqueness is in the crust, which is closer to flaky pastry with multi-layered.


To make those beautiful multi-layered pastry shells we have to make 2 different types of dough; The first is Water Oil Dough and the second one is called Pastry Dough.


Unlike the common recipe that using Lard or Shortening as a fat; Ghee in pastry crusts deliver a tender, flaky crust with a richer, more buttery flavour.
It also have a more pleasant palate feel as compared to one made from Lard or Shortening.

Who doesn’t like durian? For me… it smells so GOOD… 🤣😅

And the key to make this delicious pastry filling is to use fresh durian fruit.
Frozen durians usually has almost no smell or the taste is milder than fresh durian, so it won’t be tasty.

🙄 Can you count how many layers there are? 😳

Look how thin, crispy and flaky the crust is ! Ghee really gives a rich flavour to the pastry while the thick and sticky durian filling was so tasty 🥰.

🤤 So… hungry…

These pastry mooncakes are best served once it’s come out from the oven 👍🤤
The crust will be really crispy while the thick Durian filling inside are still warm and gooey .

I hope you will enjoyed this recipe, especially with your loved ones or given as gifts to express love and good fortune.
Wishing you a Happy Mid-Autumn Festival !! ❤️💋 LOVE YOU ALL

WATCH HOW TO MAKE SUPER FLAKY DURIAN PASTRY MOONCAKE

RECIPE

SUPER FLAKY DURIAN PASTRY MOONCAKE WITH GHEE
Yield: 10 Pieces
Active Time: 2 Hours
Total Time: 4 Hours

INGREDIENTS
☘️ Durian Filling
75 g Mung Bean
600 g Water
130 g Fresh Durian Flesh
125 g Milk
35 g Caster Sugar
15 g Glutinous Rice Flour
1/8 tsp Salt
25 g Vegetable Oil

☘️ Water Oil Dough
130 g All-Purpose Flour
10 g Caster Sugar
1/8 tsp Salt
40 g Ghee
70 g Hot Water (40-60°C)

☘️ Pastry Dough
120 g All-Purpose Flour
50 g Ghee

☘️ Decoration
Wooden Stamp
Red Food Colouring

INSTRUCTIONS
Durian Filling

  1. Rinse Mung Beans until the water runs clear and pour it to a medium pan. 75 g Mung Bean
  2. Add in the Water, cook until they are very soft; set aside 600 g Water
  3. Scoop out the durian flesh. 130 g Fresh Durian Flesh
  4. Into the food processor- pour the cooked Mung Beans along with durian flesh and the rest ingredients (except the oil); Blend until smooth. 125 g Milk; 35 g Caster Sugar; 15 g Glutinous Rice Flour; 1/8 tsp Salt
    * If the mixture is too thick, you can add a little bit of water to help the spinning process.
  5. Pour the blended mixture into a non-stick pan; Add in the oil. 25 g Vegetable Oil
    Cook over medium heat and keep stirring (please note never leave it out when cooking this mixture); This process will take for about 30 minutes (the water will slowly evaporate and the mixture star to thickened).
  6. Once the mixture formed a thick paste, turn down the heat to medium low (be careful not to burned it) and continue cook until the paste comes together and no longer stick to the pan.
  7. Once it’s done, remove from heat.
    Pour it to a plate, cover it with a cling wrap to prevent from drying out and store them in the fridge for at least 1 hour to firm up.
  8. After 1 hour, the filling is firmer than before so it’s easier to handle.
    Divide it into 10 equal portions (about 30 grams each) and roll each portion into a ball.
    Cover with a cling wrap while waiting for the pastry dough.


Water Oil Dough

  1. In a large bowl, simply combine all the ingredients; Mix well (there’s no need to be so smooth).
    Cover with a cling wrap and let the dough rest for 15 minutes. 130 g All-Purpose Flour; 10 g Caster Sugar; 1/8 tsp Salt; 40 g Ghee; 70 g Hot Water (40-60°C)
  2. After 15 minutes, using your hands start kneading the dough (you can see that the dough become really smooth after kneading for a while).
  3. And then, continue kneading by slam the dough for about 5 minutes until you can pull the dough into a thin membrane (kindly follow video instructions).
  4. Wrap the dough in a plastic wrap and let it sit at room temperature for at least 30 minutes.


Pastry Dough
Simply combine All-Purpose Flour and Ghee. 120 g All-Purpose Flour; 50 g Ghee
Mix and knead the dough until you don’t see any flour left in the bowl; and then cover and let it rest at room temperature for at least 30 minutes.

Laminate the Dough

  1. Take the Water Oil Dough, press it into a thick round disc.
    Place the Pastry Dough in the center and then wrap it up (gently fold and seal).
  2. Turn it over so the seam facing down (sprinkle some flour to prevent from sticking).
    And to prevent it from breaking, lightly press the dough with the palm of your hand first; And then you can use rolling pin gently roll into a long rectangular shape (about 15 cm x 20 cm).
  3. Fold into thirds.
  4. And then, roll it into a bigger rectangle shape (about 25 cmx35 cm).
    * I usually press the dough first and then roll it out slowly, it so much easier.
  5. Once it’s done, spray or brush some water on the surface (not too much), this water acts as a glue; Then gently roll it up into a long log (make sure that you roll it tightly)
  6. Divide the log into 2 equal portion, cover and let it rest for 10 minutes.
  7. After 10 minutes, divide each log into 5 small equal portions (so total will be 10 small portions).
    * Remember always cover the dough along the process to prevent it from drying
  8. Once it’s done, we are ready to shape the mooncake.


Shape & Bake the Mooncake

  1. Take 1 dough; Turn it over so the smooth side facing down.
  2. Pinch both ends; Fold and stick the two ends together (pinch to seal).
  3. With the smooth side facing down, roll the dough into a 10 diameter round shape.
  4. Place the filling in the centre.
  5. Using your right hand, slowly squeeze and push the wrapper up while left thumb press the filling down; Pinch to seal. 
    * You can pull off the excess dough, I don’t like to waste any dough so I just press to flatten it.
  6. Don’t worry if the skin of the dough is broken, you can always fix it.
    Just apply a little bit of flour and rub gently, it will be smooth again.
  7. Once the mooncake is done, place it on the pan lined with parchment paper.
  8. Use your palm or jar lid to flatten the mooncakes into a thick round disc.
  9. Spray some water on the top to prevent the surface from cracking.
  10. Apply some red food colouring to a kitchen paper; using wooden stamp create the pattern on the mooncake.
  11. Bake the mooncake in the preheated 190°C oven for 25 minutes.
  12. Once it’s done, transfer them onto a cooling rack and let them cool completely before storing.


NOTES

  1. These pastry mooncakes are best served once it’s come out from the oven; The crust will be really crispy while the thick Durian filling inside still warm and gooey .
  2. To Store
    At room temperature (in an airtight container) for 2 days;
    Fridge (in an airtight container) for 1 week;
    Freezer (in an airtight container) for 1 month
  3. The Durian filling is best consumed as soon as possible, but it will keep in an airtight container in the refrigerator (for up to a week) or in the freezer (for up to a month).

Sumikko Gurashi Deco Mousse Cake


I’m obsessed with Sumikko Gurashi, I even sleep with them every day 😂 and I was thinking that they would be very interesting if I draw them on a Sponge Cake 🤔.

So here it comes ” Sumikko Gurashi Deco Mousse Cake“
I love this cake so much 😍, I think they are really cute and so tasty.
Sponge cake painted with cute Sumikko and filled with delicious and cloud-like Strawberry Mousse.
It is super light, moist and really fluffy.

Some of my Sumikko collection 😬 and there are many more… 😳 SHY…

Some people might think that they won’t be able to make this kind of cake, because they are not really good in painting.

As you can see (in my video), this cake is actually not difficult to make. 
You just need to print and trace according to the template, it’s a really fun activity!
So don’t be discouraged, if I can do it, you can do it too! 🥳


In this recipe, I will show you in details how it’s done!
Here with some tips and tricks you can bake it as a gift and I’m sure everyone will love it so much Because it was so SPECIAL 😆

1. Pan – Templates – Baking Paper
It is important to prepare the pan and templates first (as your drawing guide) before you start making the cake.

Penguin? accompany me 😷
Kindly find the ready print A4 templates below

This “Reusable Non-Stick Baking Paper” is perfect for deco rolls. 
You can use Parchment Paper if you want.
I found that if you apply too much drawing paste on Parchment Paper, it will wrinkle easily.

Reusable Non-Stick Baking Paper

Compared to parchment paper, this makes tracing from the template easy and it peels off the cake smoothly to yield neat and pretty results, even for the finest patterns.
So.. if you keen to buy this kind of baking paper, I totally recommend it.

Make sure that you secure the paper with some double tape, so they stop slipping around

2. Tie the Colour Bags Tightly
Another important thing is the drawing paste.
You should be able to control the colour, so make sure you tie each of the piping bags tightly so you feel comfortable holding it, they will be your drawing pen.


3. Let the Drawing Paste Set
And since our Sumikko is quite complex, it’s a good ideas to break down the process into several steps.
The goal is to let it harden so it doesn’t bleed to the next colour.

STEP 1 ~ Outline and Small Details

Start by drawing the outline and any small details that can interfere with the color next to it
Don’t worry if you make some mistake, you can always fix it, you can use small dry brush to fix or even remove the paste.

Kitchen paper is your best friend. Sometimes you will find that your piping bag is clogged and you need to clean the tip, that’s what your best friend for 😬

After finished with all the outlines, pop them in the fridge to harden or until it doesn’t stick to your finger when you touch it.

STEP 2 ~ The Rest Details (Except the Grass)

Next, you can continue with the rest of the details, except the grass; just leave it for the last step.
Make sure that you apply the color thick enough, because if it’s too thin it will peel off easily.

STEP 3 ~ The Grass

And lastly, add some pale green color to the grass.
Sometime you will see some air bubbles on the paste, you can use toothpick to release it.

Once it’s done, it is important to let our cutie Sumikko chill for at least 30 minutes in the fridge to set before you pour the cake batter on top.
Remember… you don’t want to ruin your hard work.

Toothpick to prick a naughty bubbles 😤

4. Don’t Pour the Cake Batter ALL at Once
You don’t want the stream of the batter damaging your beautiful drawing.
Pour some batter into a piping bag, pipe around the drawing patterns to make sure the gaps between the images are covered in cake batter; and then spoon the rest of the batter gradually.

Spoon the batter gradually PLEASE 😇 BE CAREFUL don’t disturb my beautiful friends 😱

5. Release Heat & Prevent Drying
Once it’s baked, cover the cake with parchment paper as soon as it’s out from the oven
invert onto a cooling rack and immediately peel off the paper from pattern to release heat (you don’t want to keep the moisture inside and the cake will get soggy); and then cover our lovely Sumikko with a new piece of parchment paper so it doesn’t dry out.

So pretty!!! 😳🥲

6. Assemble the Cake First
Because Gelatin in the mousse can thicken, it’s really important to assemble the cake first before you start making the Strawberry Mousse.


Don’t peel off the bottom parchment paper, it will be very helpful when you lift the cake into the pan.


Fit both strips of cake around side of the pan.
You might need to trim the second strip a bit to fit perfectly; And then cut the remaining cake to fit the bottom of the pan.


7. Let the Mousse Harden
I know you can’t wait to meet your cutie Sumikko, but you will need to let them chill in the fridge for at least 5 hours or preferably overnight until the mousse is firm.
So… be patient 🙃

Is that a cake? 😧

Actually without any decoration our cake is cute already 😜


I always like to add some sweet touch to the cake…


And don’t forget my lovely Ebifurai No Shippo on top 🤗 so cute!

My favourite Sweet Sugar Cube (left hand side) 😚 SATOU TENCHO is always excited in baking 🤗

This cake is so adorable…
Will you make it for someone you love?


This cake is so light and moist with a jiggly cloud-like strawberry mousse filling inside…
Your kids will fall in love with it … 😄

Feel free to do as many different pictures and colour variations as you would like to…

And if you do please tag share it with me… I would be happy and love to see your beautiful creations 🙂

So.. hungry.. 🙄😓

For the Sumikko lovers, I hope you all enjoyed 😆
Take care Guys AND happy baking !!!
LOVE YOU ALL…

A4 TEMPLATE
Kindly print the the templates in A4
with the scale setting 100%

SUMIKKO GURASHI DECO MOUSSE CAKE
Yield: One 5-Inch Round Pan x 3-Inch Tall
Active Time: 3 Hours
Total Time: 10 Hours

INGREDIENTS
✨DRAWING PASTE

  • 70 g Unsalted Butter
  • 70 g Egg Whites
  • 70 g Icing Sugar
  • 70 g Cake Flour
  • Food Colouring

✨CAKE BATTER

  • 115 g Milk
  • 35 g Caster Sugar
  • 35 g Vegetable Oil
  • 90 g Cake Flour (sifted)
  • Blue Food Colouring
  • 115 g Egg Whites
  • 35 g Caster Sugar


✨STRAWBERRY MOUSSE

  • 2 ½ tbs Cold Water
  • 8 g Gelatine Powder
  • 190 g Fresh Strawberris
  • 70 g Caster Sugar
  • 3/4 tbs Lemon Juice
  • 190 g Whipping Cream

✨BUTTERCREAM

  • 90 g Shortening
  • 15 g Unsalted Butter
  • 60 g Icing Sugar
  • 1 tsp Vanilla Exract
  • 30 g Whipping Cream


INSTRUCTIONS
Prepare the template and Pan

  1. Print some design templates (kindly find the templates above)
  2. Cut each template and merge the two images with some double tape.
  3. Place the template on the baking pan. Rectangular 28 cm x 24 cm
    Overlay template with a piece of “reusable non-stick baking paper” that’s fit exactly the bottom of the pan.
    Make sure that you secure them each other with some double tape, so they stop slipping around.
  4. Lightly grease the surface with some vegetable oil to enable paper to be peeled off easily after baking.

Drawing Paste

  1. In a medium bowl, simply combine all the ingredients. 70 g Unsalted Butter; 70 g Egg Whites; 70 g Icing Sugar; 70 g Cake Flour
  2. Divide the paste and colour it according to your own design.
  3. Pour each colour paste into a piping bag, make sure you tie them tightly so you feel comfortable holding it (they will be your drawing pen).

Drawing Process
(I will divide the process in 3 steps, kindly watch video for detail instructions)

  1. Step 1 Outline and Small details
    Start by drawing the outline and any small details that can interfere with the color next to it.
    Don’t worry if you make some mistake, you can always fix it.
    You can use small dry brush to fix this or even remove the paste.
    Kitchen paper is your best friend, sometimes you will find that your piping bag is clogged and you need to clean the tip, that’s what your best friend for.
    Once it’s done, pop them in the fridge for about 10 minutes, let it harden so it doesn’t bleed into the next colour.
  2. Step 2 The Rest Details (Except the Grass)
    After 10 minutes the outline is set, it doesn’t stick to your finger when you touch it.
    Continue with the rest of the details (except the grass, just leave it for the last step).
    Make sure that you apply the color thick enough, because if it’s too thin it will peel off easily. 
    You can use toothpick to release some air bubbles.
    After finished with all the details, pop them again in the fridge for about 10-15 minutes or until it doesn’t stick to your finger
  3. Step 3 The Grass
    Lastly, add some pale green color to the grass.
    Once it’s done, tap the pan a few times to remove air bubbles and let our cutie Sumikko chill for at least 30 minutes in the fridge to set while waiting for the cake batter.

Cake Batter

  1. In a medium bowl, pour in the Milk along with Caster Sugar and Vegetable Oil; mix them lightly. 115 g Milk; 35 g Caster Sugar; 35 g Vegetable Oil
  2. Sift in the Cake Flour and beat again until the batter is sticky for about 5 minutes. 90 g Cake Flour (sifted)
    * Mixing the batter well at this stage will ensure a soft and elastic cake that will not crumble easily when assembly it.
  3. Add Blue Food Coloring, mix well. Set that aside
  4. For the meringue
    In a clean bowl beat the Egg Whites until soft peaks form. 115 g Egg Whites
    Make sure that your bowl is grease free, otherwise you won’t be able to beat the whites properly (wipe the bowl and beater with some vinegar to remove any left-over fat or grease).
    Add Caster Sugar in 3 batches and continue beat until it reach a stiff peak form. 35 g Caster Sugar
  5. Add the meringue to the flour batter in 3 batches; Mix gently after each addition until the batter is smooth.
  6. Pour 1/3 of the batter into a piping bag.
    Pipe around the drawing patterns to make sure the gaps between the images are covered in cake batter
  7. Spoon the rest of the batter gradually (don’t pour it all at once, you don’t want the stream of the batter damaging your beautiful drawing).
  8. Using a scrapper spread it evenly, be careful don’t disturb our Sumikko underneath.
  9. Tap the pan a few times to remove air bubbles and then bake them in the preheated 170°C oven for 12 minutes
  10. Once it’s done, cover the cake with parchment paper as soon as it’s out from the oven; invert onto a cooling rack and immediately peel off the paper from pattern to release heat.
    Cover our Sumikko Drawing with a new piece of parchment paper so it doesn’t dry out.
    Turn it over, change the bottom paper again one more time so it doesn’t get soggy;
    Turn it back and let it cool completely.


Assembly the Cake into the Pan
Because Gelatin in the mousse can thicken, it’s really important to assemble the cake first before you start making the Strawberry Mousse.

  1. Place a piece of parchment paper at the bottom of the pan (5-Inch Round Pan) so it will be easier when you unmould it.
  2. Trim the sides of the cake to make it prettier;
    And then cut 2 strips from the cake according to the template.
    * Don’t peel off the bottom parchment paper, it will be very helpful when you lift the cake into the pan.
  3. Place a piece of parchment paper on top of the long strip and carefully lift it up;
    Fit both strips of cake around side of the pan (you might need to trim the second strip a bit to fit perfectly).
  4. And then cut the remaining cake to fit the bottom of the pan.


Strawberry Mousse

  1. In a small bowl, sprinkle Gelatin over cold water; Mix well. 2 ½ tbs Cold Water; 8 g Gelatine Powder
  2. Place the bowl into a hot water bath to dissolve Gelatin and set aside.
  3. For the strawberries
    Wash, hull and puree them in a food processor; then Strain to remove the seeds. 190 g Fresh Strawberries
  4. Add in the Caster Sugar and Lemon Juice to the strawberry puree, mix well. 70 g Caster Sugar; 3/4 tbs Lemon Juice
  5. Pour in the dissolved gelatin and stir until well combined.
  6. Place the bowl in an ice water bath, stir constantly until gelatin thickens; set that aside.
  7. Then over an ice water bath, beat the whipped cream until stiff peaks form. 190 g Whipping Cream
  8. Add beaten Whipped Cream to the gelatin mixture, mix lightly until well combined
  9. Pour the Strawberry Mousse into prepared pan
    Tap a few times to remove air bubbles, cover it with a cling wrap (the prevent the sponge cake from drying out) and pop them in the fridge for at least 5 hours or preferably overnight until the mousse is firm.


Simply Fluffy Buttercream

  1. Simply combine the Shortening and Unsalted Butter until soft. 90 g Shortening; 15 g Unsalted Butter
  2. Add in the Icing Sugar and Vanilla Extract, mix until light and fluffy. 60 g Icing Sugar; 1 tsp Vanilla Extract
  3. And finally, pour in the Whipping Cream and mix until well combined. 30 g Whipping Cream

Finishing
Once the mousse is set, carefully remove it from the pan. Pipe some fluffy buttercream on top,
add a few strawberries slices; And don’t forget our lovely Ebifurai No Shippo on top.
And it’s done!

NOTES

  1. The great thing about Drawing Paste is that you can also color it a few times. 
    For example, if I need white and pink color, I will make white color first;
    After I’m done with the white pattern, then I will add a little bit of red food coloring to that white paste and I get a pink color.
  2. To Store; In the fridge (in an airtight container) for 3-4 days.


Korean Mugwort Rice Cake “Ssuk-Injeolmi 쑥인절미

Love the look of it, it’s so weirdly green!

Thanks my subscriber for your inspiring comments ❤️🥰

Hellooo friends and welcome back!!
Today we are making some “Korean Mugwort Rice Cake” which is called 쑥인절미 (Ssuk-Injeolmi).
If you are not familiar with Mugwort, it’s an aromatic and medicinal herb from the Japanese plant.
Other names of Mugwort include Japanese Yomogi, Korean Mugwort, Korean Wormwood, Ssuk, and Kui Hao.

Mugwort Plant (Artemisia vulgaris)

The Japanese use this forest green leaves in various culinary applications and traditional medicine.
It is long used in traditional medicine to detox and beautify the skin.
Studies also show that Mugwort essential oils may have anti-inflammatory and anti-cancer properties.

These Korean Mugwort Rice Cake is almost similar to Japanese Kusa Mochi or Yomogi Mochi but has a chewier texture. There is also some red bean filling in the middle for some extra texture.

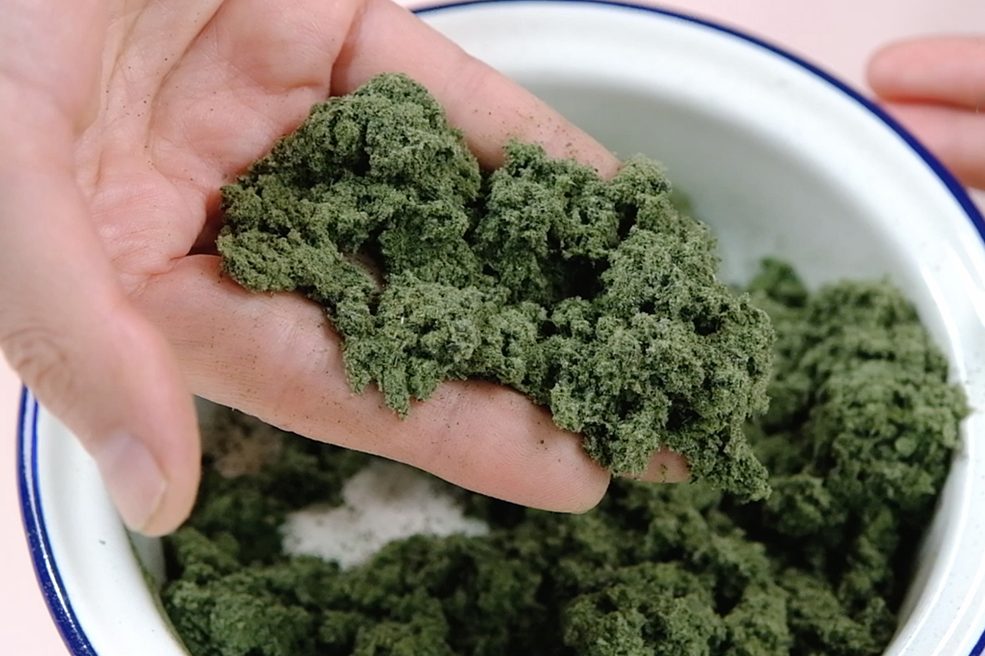
MUGWORT OR YOMOGI POWDER
In this recipe, I used dried Mugwort or Yomogi Powder to make it easier. You can buy online or find it at the baking supply store.

Beautiful Mugwort or Yomogi Powder 🥰

If you touch it, the texture actually feels more like soft cotton rather than powder.
It is important to soak the powder in hot boiling water before using it for about 15 minute; Strain it (safe the soaked Mugwort) and you can discard the soaking water.

WHEAT STARCH vs WHEAT FLOUR
Other important ingredient that we will be using is Wheat Starch.

Don’t be confused, it’s not the same as wheat flour for making bread

This Wheat Starch which is called as Tim Sum Flour is usually used for make prawn dumplings or HaKaw.

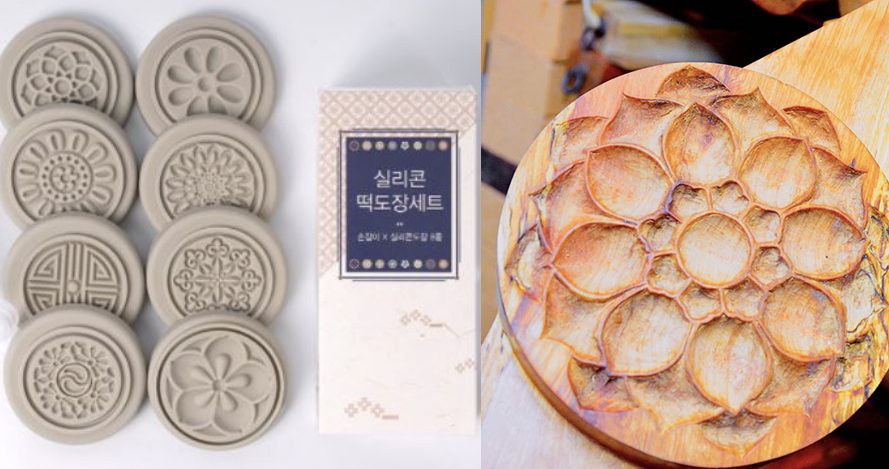
MOULD FOR SHAPING
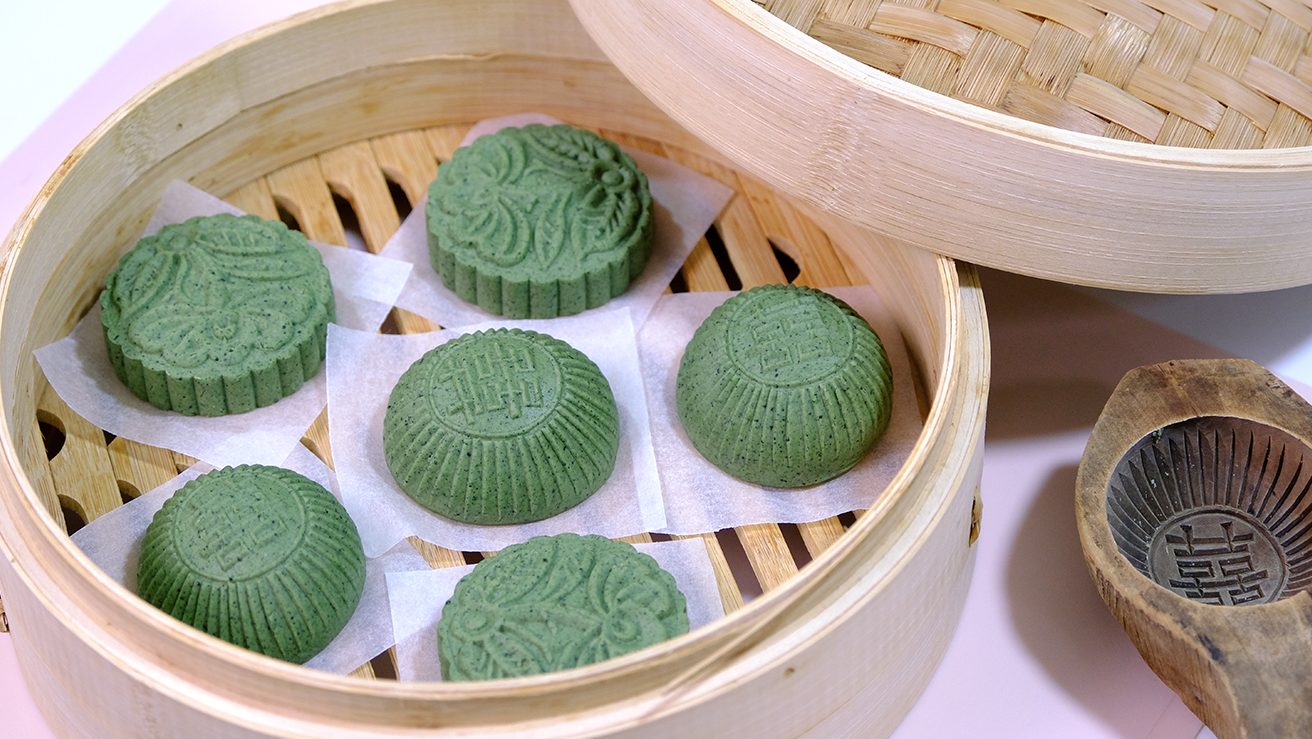
Traditionally, this rice cake is known for its decorative patterns that are made using either wooden, ceramic, or bronze rice cake stamps (I found they are really hard to find).

LEFT Ceramic Stamp ~ RIGHT Wooden Stamp

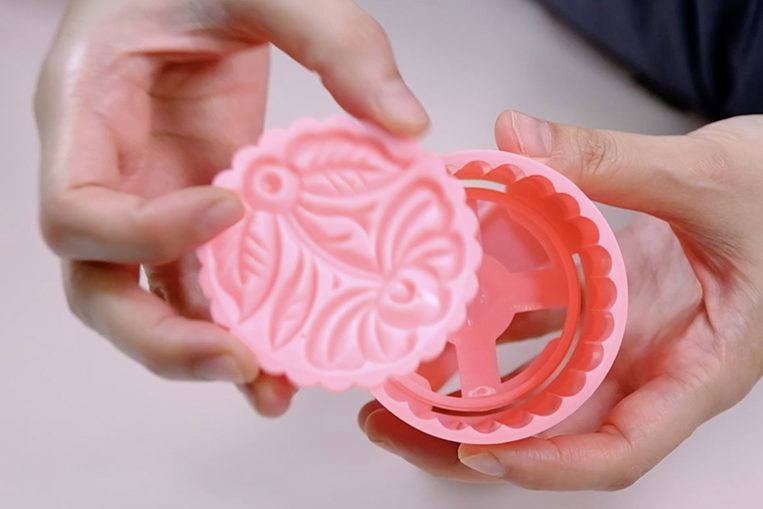
Alternatively, you can use these wooden mooncake mould or the plastic one

My precious vintage mould 😘
I found plastic mold works well and pretty too 😗


A VERY IMPORTANT NOTE
Make sure that you prepare some non-stick baking paper for the base of your rice cakes as it will be very sticky when finished steaming (don’t use ready made steamed buns paper as it NOT non-stick).

It can be frustrating when your rice cakes gets stuck in the steamer 😢 so…Don’t let that happened!


CHUNKY (Tsubuan (粒あん) OR SMOOTH (Koshian (こしあん) RED BEAN FILLING
In this recipe, I also will share a few tips to make the red bean filling; The method is not only faster but also produces a fragrant and flavourful filling.

I found that red bean filling that has a chunky texture (with bean shapes still intact) is perfectly match with the chewy rice cakes

If you prefer smooth texture filling, kindly blend the cooked red beans on high speed into a fine paste before cooking it with the sugar.

CONSISTENCY OF THE DOUGH
The dough should be wet enough that when you pinch off a piece, it doesn’t crack, but dry enough that it can hold its shape. 

Your goal is to be able to seal them tightly around the filling

If it’s too dry, add 1 teaspoon of water at a time until it’s softened; but If it’s too wet, add 1 tablespoon of glutinous rice flour at a time.
Remember always cover the dough to prevent it from drying out during making.

SHAPING STEPS

Both so beautiful… 🤔


STEAMING
I highly recommend to use Bamboo Steamer for best results.
If you use metal or plastic steamer, make sure that you cover the lid with a piece of clothes so the water condensation during steaming won’t ruin the look of your rice cakes.

When it’s done, remove from the heat immediately; Don’t over steam them, as they will burst.


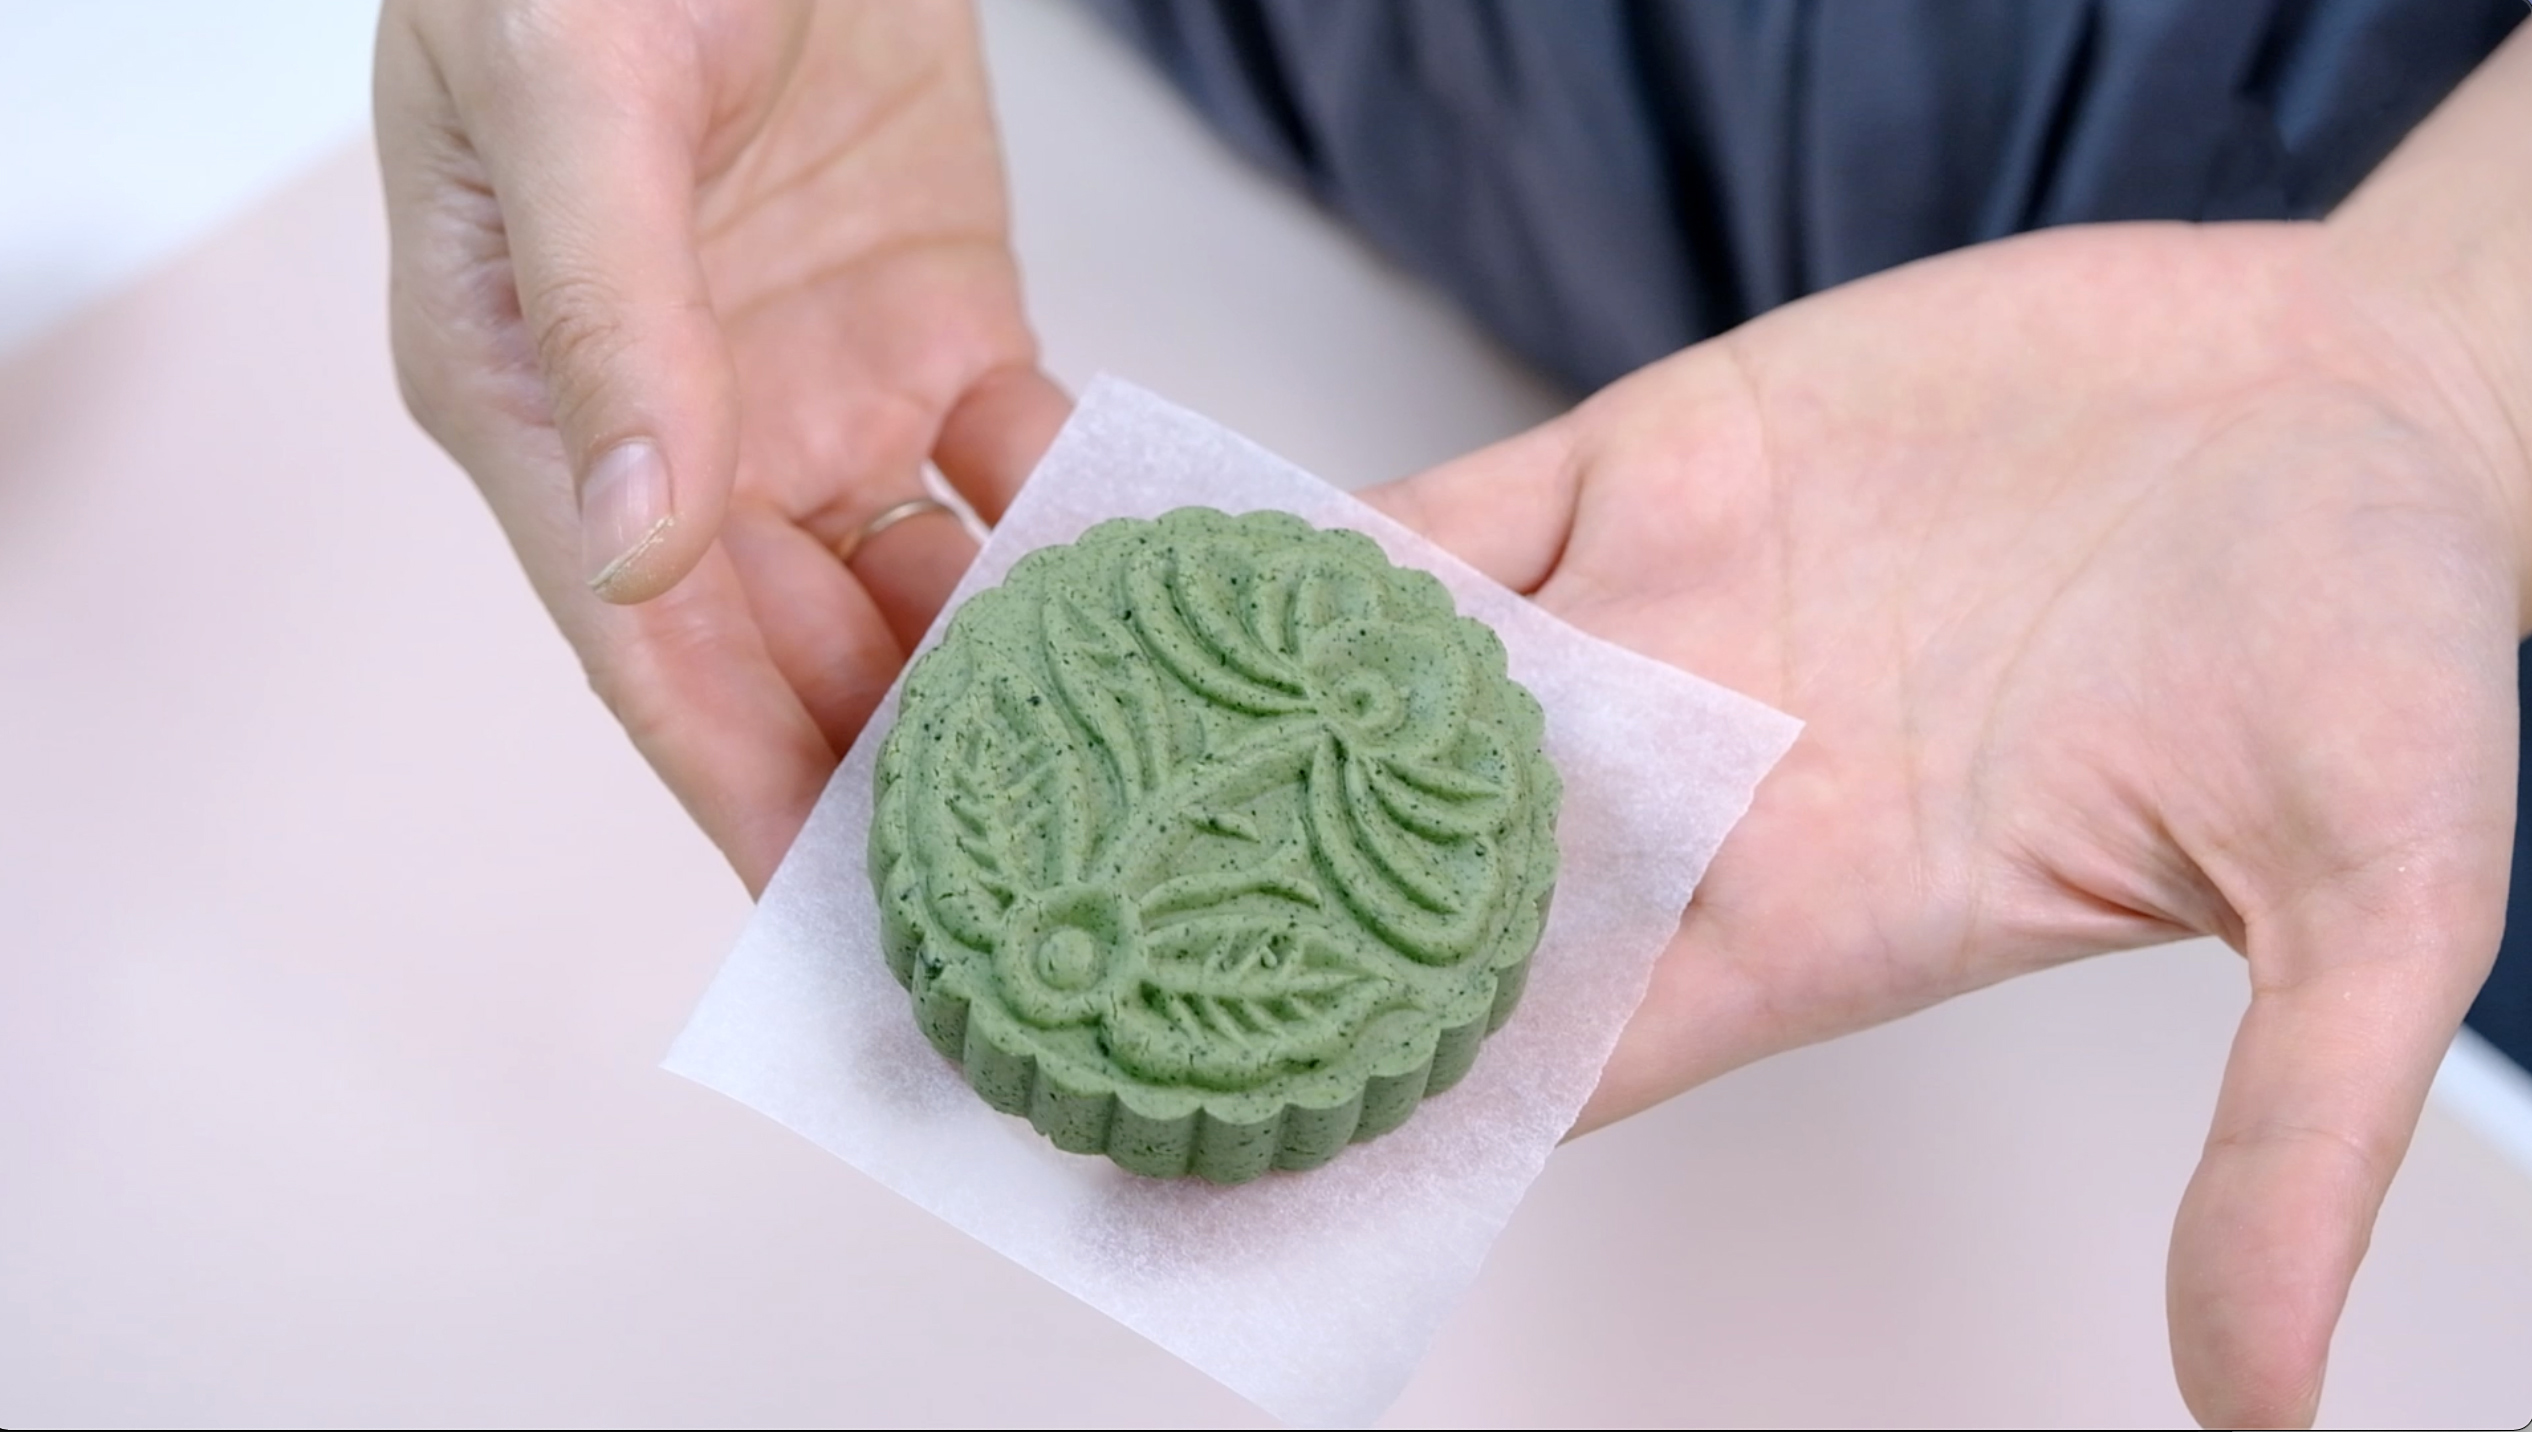
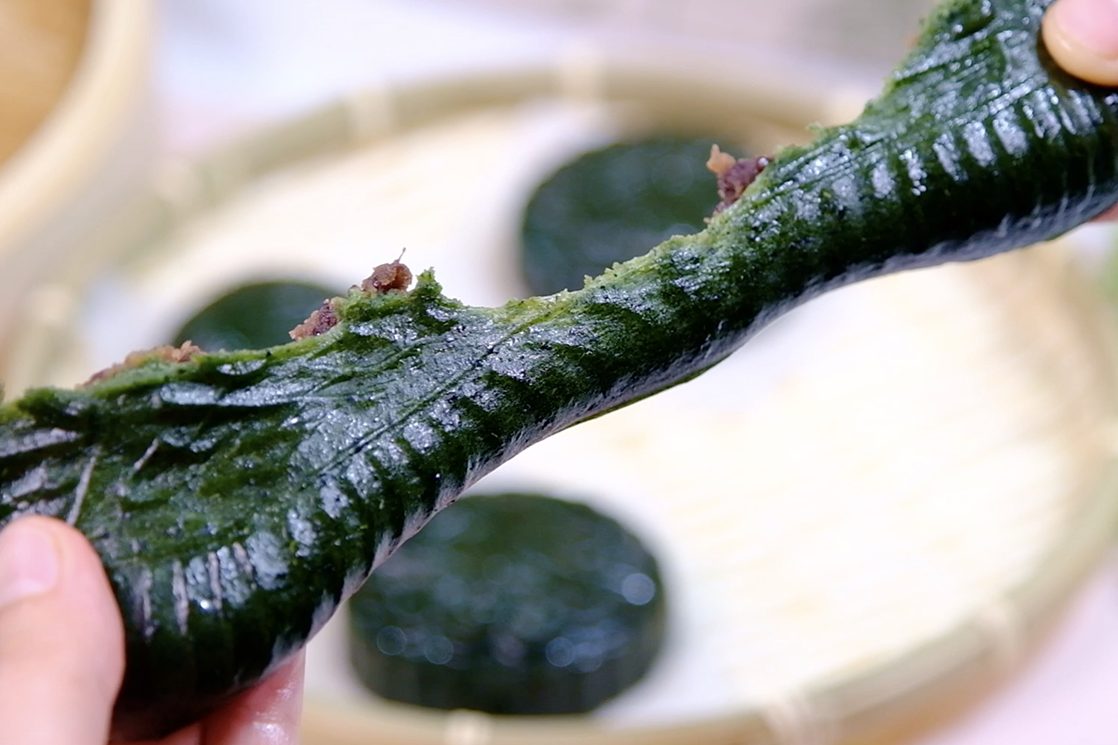
A vibrant emerald green jade colour….It’s so beautiful! 😳

To prevent the sticky rice from clinging to each other, brush each one with a very light coating of Sesame Oil;
This also will lock in the moisture and giving the rice cake a subtle nutty taste.

Chewy Rice Cake with a smooth, but stretchy consistency and the beautiful red bean filling inside 🙄❤️

These rice cakes make for a real sweet treat during special occasions.
My Dad loved this cake so much 😗; I grew up eating this rice cake and always loved the unique aroma of the green sticky rice dough 😇.

I hope this recipe gave you some insight into this treat, and gives you a new way to enjoy this useful plant!

These fragrant green herbs produces a herbal and slightly minty taste, I love it so much…and I can’t stop eating it 😂😂…

watch how to make korean mugwort rice cake

recipe

KOREAN MUGWORT RICE CAKE
Yield: 6 Rice Cakes
Active Time: 1½ Hours
Total Time: 3 Hours

INGREDIENTS
♥︎ Red Bean Filling

  • 120 g Red Bean
  • 1/8 tsp Salt
  • 1000 ml Water
  • 60 g Granulated Sugar

♥︎ Rice Cake Dough

  • 20 g Wheat Starch
  • 60 g Water
  • 15 g Mugwort Powder
  • 200 g Hot Boiling Water
  • 130 g Glutinous Rice Flour
  • 40 g Icing Sugar
  • 1/2 tbs Unsalted Butter
  • 1/2 tsp Vanilla Extract
  • 40 g Water

INSTRUCTIONS
Red Bean Filling

  1. Rinse the beans and transfer it to a large pot. 120 g Red Bean
  2. Pour in the salt and water (adding salt at the beginning of cooking create more tender results).
    1/8 tsp Salt ; 1000 ml Water
  3. Then bring it to a boil
    After boiling take it off from the heat, cover it and let it rest for 1 hour.
    There’s no need to rinse or change the water, coz the beans cooked in the soaking liquid were much more flavourful, had a prettier, darker colour, and retained their texture better.
  4. After 1 hour, don’t forget to take the lid off, put it back to the stove and continue cooking on medium low heat until the beans are tender and creamy.
    The water will evaporate during cooking, adding more water as necessary to keep beans submerged.
  5. After for about 1 ½ hours, pick 1 bean and mash it with your fingers; if it’s mashed easily, it’s done.
  6. Transfer cooked beans to a non-stick pan, along with their cooking liquid.
  7. On medium-low heat add in the sugar, stirring constantly until the sugar melts; let the moisture evaporate. 60 g Granulated Sugar
  8. Once the mixture comes together and doesn’t stick to the pan, take it off from the heat 
    (Don’t worry if it’s still a bit loose, this filling will continue to thicken as it cools).
  9. Spread the filling onto a plate; cover it with a cling wrap to prevent from drying out, open a little gap so the steam can escape.
  10. After cool completely, divide it into 6 equal portions (about 20 grams each), cover it until you are ready to use it

Rice Cake Dough

  1. In a medium saucepan combine the Wheat Starch and water; Mix until no lumps visible.
    Cook over medium low heat until the mixture starts to thicken and looks translucent, set aside let it cool completely. 20 g Wheat Starch; 60 g Water
  2. In a medium bowl combine the Mugwort Powder and hot boiling water, let it steep up for 15 minutes. 15 g Mugwort Powder; 200 g Hot Boiling Water
    After 15 minutes strain it, squeeze it gently to release excess water (safe the soaked Mugwort and you can discard the soaking water).
    * Don’t let the soaked Mugwort sit too long before mixing the dough, or it will lose that beautiful green colour.
  3. In another large bowl combine the Glutinous Rice flour along with Icing Sugar, Unsalted Butter and Vanilla Extract, mix well. 130 g Glutinous Rice Flour; 40 g Icing Sugar; 1/2 tbs Unsalted Butter; 1/2 tsp Vanilla Extract
  4. Pour in the soaked Mugwort; Mix by hand until just combined.
  5. Then add in the Wheat Starch mixture, knead well (now you will see a pale green colour dry dough).
  6. Finally, add in the water in 3 batches, and knead again until the dough is smooth and an even bright green colour. 40 g Water
    * The dough should be wet enough that when you pinch off a piece, it doesn’t crack, but dry enough that it can hold its shape (your goal is to be able to seal them tightly around the filling).
    If it’s too dry, add 1 teaspoon of water at a time until it’s softened 
    If it’s too wet, add 1 tablespoon of glutinous rice flour at a time.
    (Remember always cover the dough to prevent it from drying out during making)
  7. Divide the dough into 6 pieces (about 55 grams each). 
  8. Kindly follow video instructions for shaping.

Steaming

  1. Pre-boil the water in the steamer for 10 minutes on high heat
    I highly recommend to use Bamboo Steamer for best results. If you use metal or plastic steamer, make sure that you cover the lid with a piece of clothes so the water condensation during steaming won’t ruin the look of your rice cakes
  2. Cover and steam over high heat for 10 minutes.
  3. When it’s done, remove from the heat immediately; Don’t over steam them, as they will burst.
  4. To prevent the sticky rice from clinging to each other, brush each one with a very light coating of Sesame Oil; This also will lock in the moisture and giving the rice cake a subtle nutty taste.


NOTES

  1. They will turn chewy when cooled, and hard when chilled.
  2. To Store; in the fridge for 3-4 days (in an airtight container).
  3. Simply reheat for 30 seconds in the microwave or 10 minutes in the steamer (no longer or they might burst).

Korilakkuma pineapple cakes

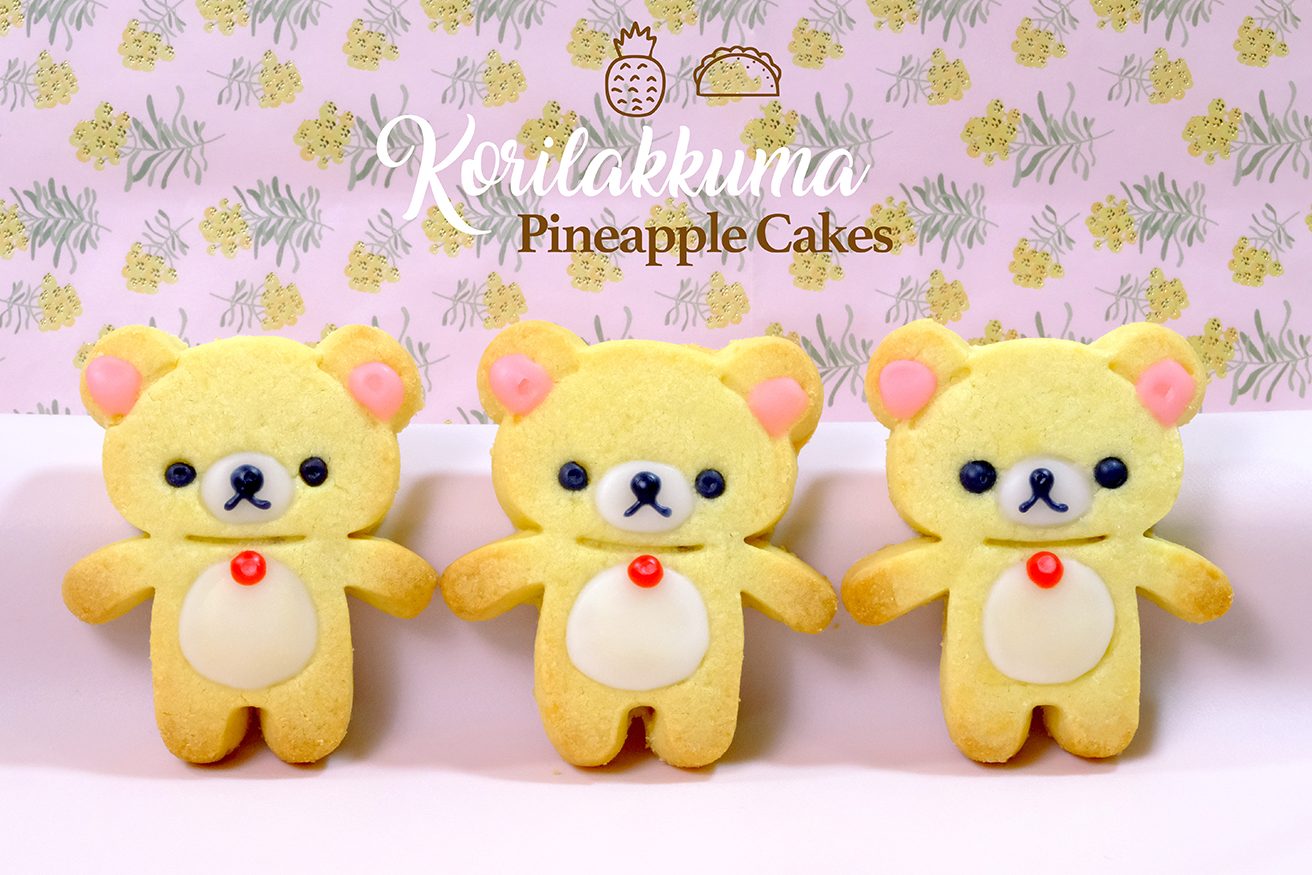
This unique Taiwanese Pineapple Cakes no longer makes us bored with the standard rectangular shape; And I’m sure that your kids will love it too

Hi Everyone, today I am making these cute “Korilakkuma Taiwanese Pineapple Cakes”.
Taiwanese Pineapple Cakes actually almost similar to other Asian Pineapple Cakes; but typically larger than the Singaporean / Malaysian Pineapple Cakes.

They are made with butter pastry crust filled with thick pineapple jam. The cakes are baked in an individual mould, usually in square or rectangle mould.

Taiwanese style (left) ~ Singapore/ Malaysia style (right)

I was told by several Taiwanese-style bakeries that the traditional kind of Taiwanese pineapple cakes are made of pineapple jam that is made of winter melon and maltose syrup so that the jam is extra sweet, heavy and sticky.

However, due to the change of time, most consumers are becoming more health conscious these days and prefer the less sweet and sticky version of pineapple cakes (I personally don’t like food that overly sweet). For this reason, in this recipe I would like to stick to my regular pineapple jam with NO winter melon and maltose syrup.
And I always think, how to make these Pineapple Cakes look more attractive?
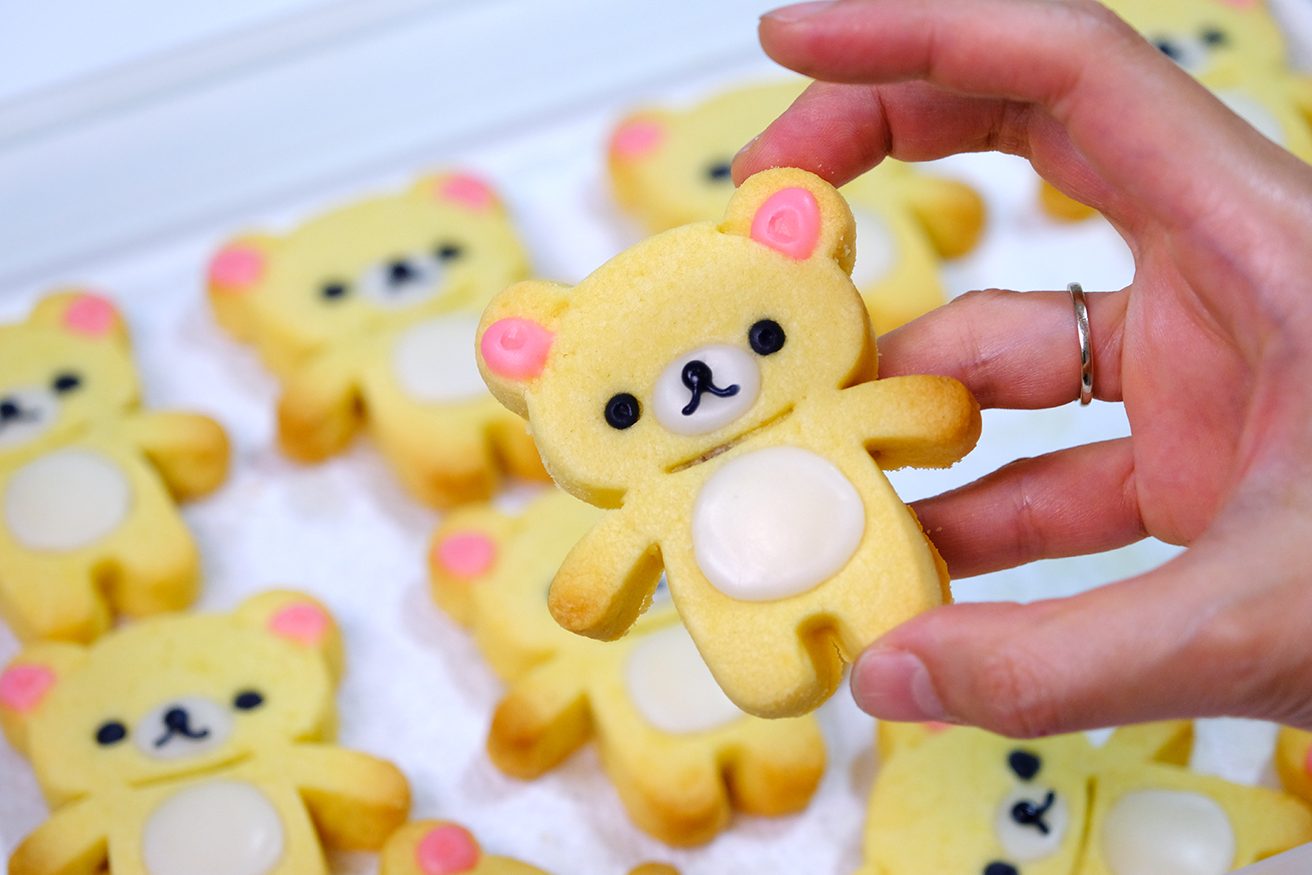
This cute Rilakkuma cookie cutter with facial stamp really make life easier;
No longer makes us bored with the standard rectangular shape and I’m sure that your kids will love it too.

The crust to filling proportion is spot-on; thin crust with the right amount of filling.

And people often ask, what is the tips so that the crust is tender?
As soon as the bottom and edges golden brown, take them out from the oven.
Let it stay in the pan for about 5 minutes; Don’t wait it to cool, put in the sealed box while still hot (place kitchen paper on the bottom and the top to absorb the excess moisture).

This way, the cakes won’t be hardened and the crust will be tender.
These Pineapple Cakes will keep well for up to 3 months in the fridge, in an airtight container.

Some people use chocolate for the details;
I prefer royal icing because the chocolate that comes out of the fridge will “sweat”, melt easily, it definitely will ruin the look of your Korilakkuma.

Pineapple cakes make a great Chinese New Year gift for family and friends or a tasty birthday gift for loved ones!

The filling is just perfect not too sweet, they are such an addictive tea snack.

Tender buttery crust with a sweet and tang of homemade pineapple filling inside.
The crust is crumbly and melt-in-the-mouth and the pineapple jam is just perfectly thick but not tough.

I hope this korilakkuma cake can make everyone smile 🙃❤️.

Love you All 🥰


KORILAKKUMA PINEAPPLE CAKES
Yield: 40 pieces
Active Time: 3 hours
Total Time: 4 hours

🌿 Pineapple Filling
1000 g Pineapple (after peeled)
200 g Granulated Sugar
10 ml Lemon Juice
1/8 tsp Salt

🌿 Crust Dough
340 g Salted Butter (soft)
100 g Icing Sugar
85 g Egg Yolks
75 g Condensed Milk
530 g Cake Flour
1/2 tsp Salt

🌿 Royal Icing
130 g Icing Sugar (sifted)
4 tsp Lemon Juice
30 g Corn Syrup

Rilakkuma Cookie Cutter: https://amzn.to/3Y6iNvu

INSTRUCTIONS
🌿 Pineapple Filling

  1. Cut pineapple in half (the lower part of the core is a bit hard, so you need to remove it). 1000 g Pineapple (after peeled)
  2. Shred pineapple into small pieces (about 1×1 cm), cut he core thinly.
  3. Place the shredded pineapples along with the juice into a non-stick pan.
  4. Pour in the sugar along with lemon juice and salt; and then bring it to a boil. 200 g Granulated Sugar; 10 ml Lemon Juice; 1/8 tsp Salt
    There’s no need to cover with a lid, what you need to do now is to evaporate all the liquid.
    Cook over high heat (as long as there is a water in a pot, it will not burn the bottom).
  5. Once the pineapple juice almost completely dry, lower the heat to medium low;
    And continue cooking until it turn into dark brown caramel colour, take it off from the heat.
  6. When the filling is cooled completely, it will become sticky and a bit hard; make it easier to wrap.
    Divide them into small portions; 10 grams each;
    Roll each portion into an oval shape, flatten it; And cover them with a cling wrap to prevent from drying out.

🌿 Crust Dough

  1. In a large bowl, using whisk or mixer; beat the soft butter for a few seconds. 340 g Salted Butter (soft)
  2. Add in the icing sugar and continue beat over high speed until the mixture is pale and fluffy (about 5 minutes). 100 g Icing Sugar
  3. Mix in the egg yolks (this yolks is going to give extra flaky texture). 85 g Egg Yolks
  4. Pour in the condensed milk, mix it really well. 75 g Condensed Milk
  5. Sift in the flour along with the salt; mix until well combined. 530 g Cake Flour; 1/2 tsp Salt
    You don’t want to over-mix it, you can use whisk or mixer first (low speed) and then using spatula to make sure all is well combined and there’s no butter mixture left at the bottom of the bowl.
  6. Cover the bowl with a cling wrap and let the dough rest for half hour.
  7. After 30 minutes, the dough is ready.
    Divide it into small pieces; 30 grams each. Roll each piece into a smooth ball.
    Cover the balls with a cling wrap to prevent from drying out.

🌿 Moulding the Cake

  1. Take 1 piece of the crust dough, roll into a cylinder shape;
  2. Press down in the middle and place the filling in the centre; Wrap it up
  3. Then over a piece of parchment paper, put the filled dough inside the cutter with the smooth side facing down.
  4. Using your palm; press down while spreading the dough, filling in the blanks (this step will be time consuming especially hands part, so be patient).
  5. Release the cake from the cutter with a smooth part facing up (baking sheet lined with a parchment paper); And carefully; press the facial stamp on top of each cake.
  6. Store the cakes in the fridge for about 30 min before baking so it doesn’t spread too much
  7. Bake them in the preheated 170°C oven for about 18-20 minutes (rotate the pan halfway through baking).
  8. As soon as the bottom and edges golden brown, take them out.
    Let the cakes stay in the pan for 5 minutes; Don’t wait it to cool, put in the sealed box while still hot (place kitchen paper on the bottom and the top to absorb the excess moisture).
    This way, the Pineapple Cake won’t be hardened and the crust will be tender.
  9. On the next day, you can continue with the details.

🌿 Royal Icing
Simply combine the sifted icing sugar, lemon juice and Corn Syrup. 130 g Icing Sugar (sifted); 4 tsp Lemon Juice; 30 g Corn Syrup
*If you feel the consistency is too thick, you can add a little bit of boiling water; on the other hand if it’s too thin; add more icing sugar.


🌿 Notes

  1. These Pineapple Cakes will keep well for up to 3 months in the fridge, in an airtight container.
  2. For the details
    Some people use chocolate, I prefer royal icing because the chocolate that comes out of the fridge will “sweat”, melt easily, it definitely will ruin the look of your Korilakkuma.
    Let the first layer of the icing sets hard before you add another details on top.
    If you are in humid conditions, you can turn on the air conditioner to speed up the drying process.

Red bean jujube Nian Gao

Some people felt that making Nian Gao is troublesome; This simple and easy recipe might change your perception.


Making traditional steamed Nian Gao can sound intimidating to some people. Some just can’t be bothered to prepare banana leaves or steaming for hours.;
This simple and easy recipe might change your perception.


In this recipe, there’s no need to use banana leaves to make it and it only takes a short time for steaming.

I’ve had share my other traditional Nian Gao recipe, but the version I’m sharing today is one of the best I have ever tasted; It’s not too sweet and really tasty.

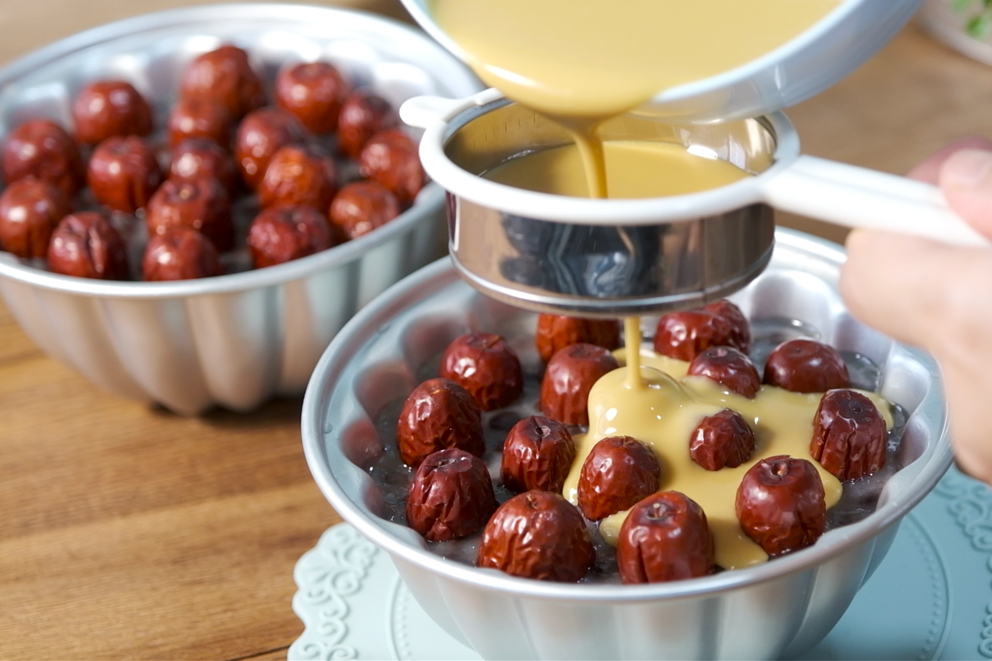
Strain the mixture, you don’t want any lumps in your Nian Gao 🤓

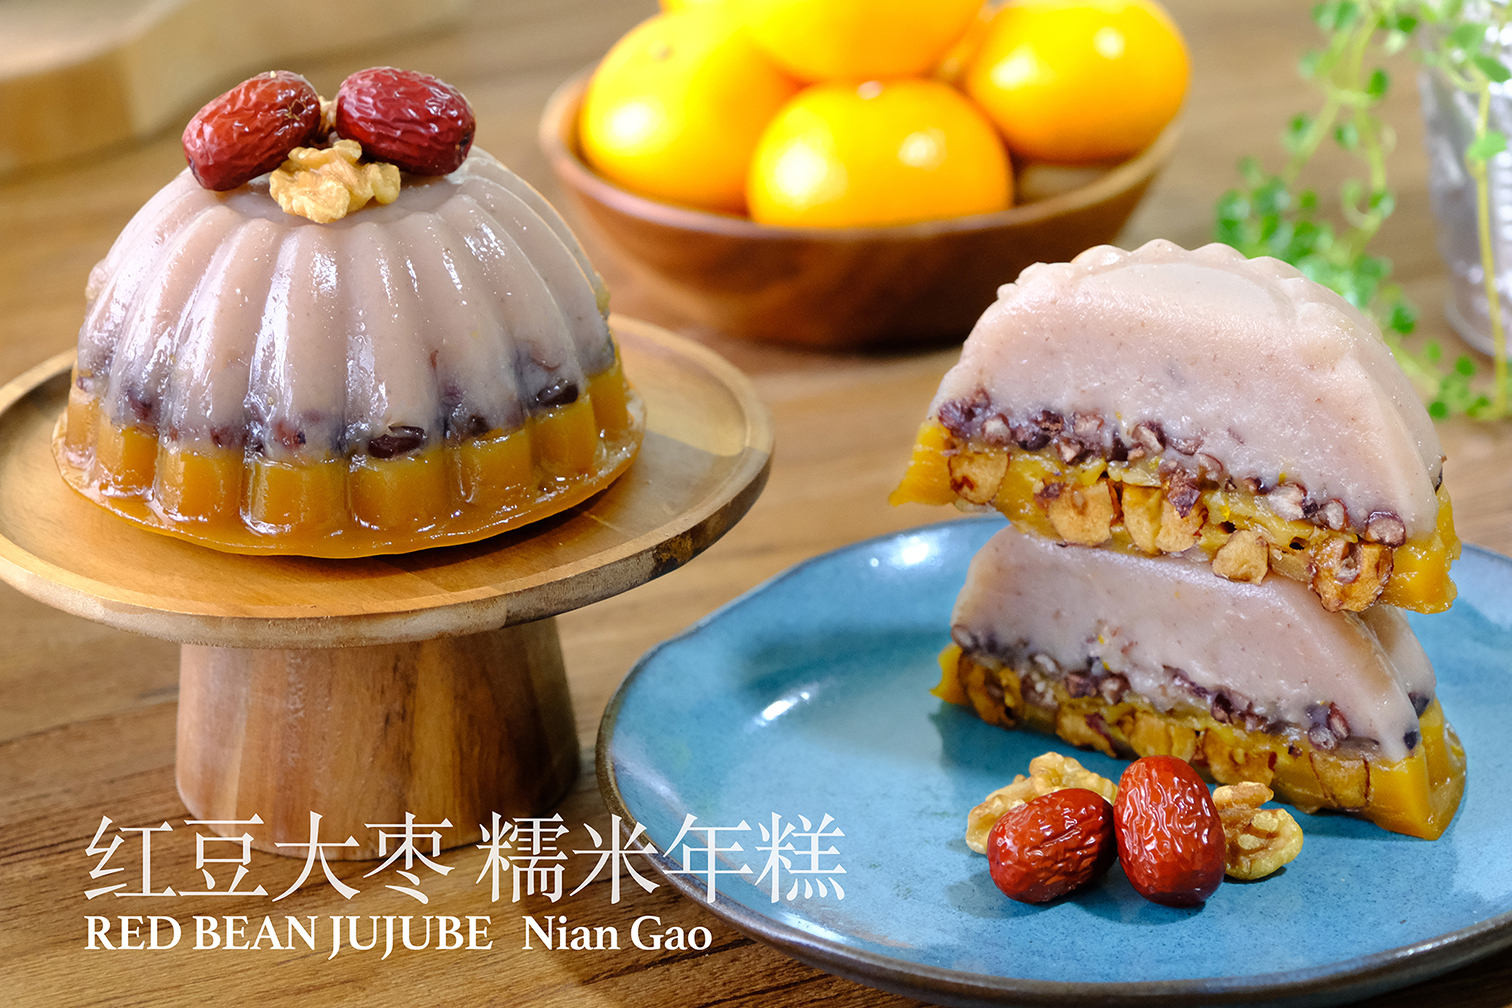
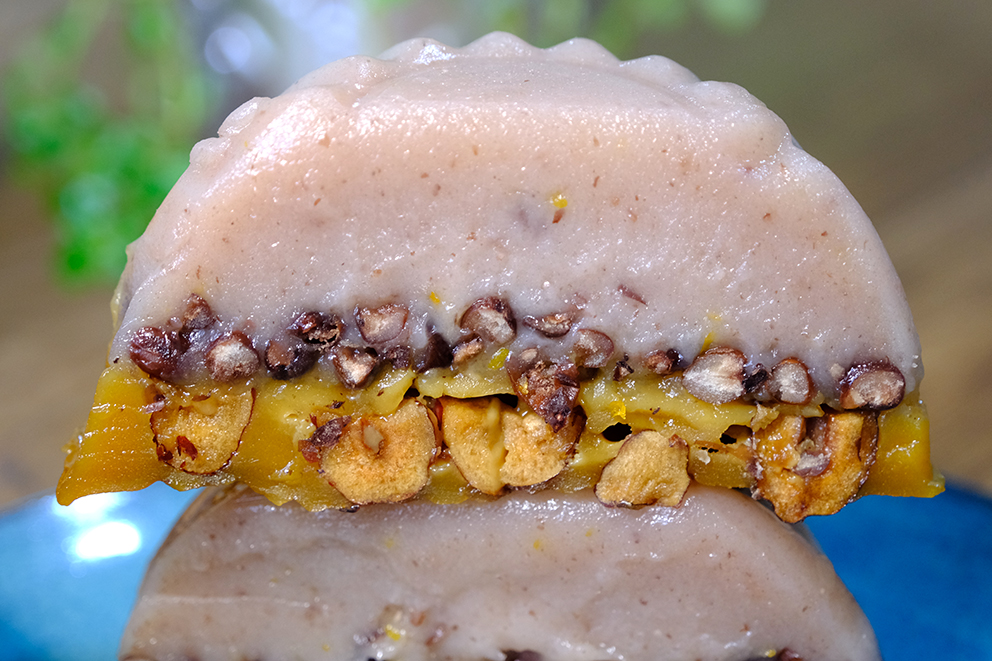
Aside from the base ingredients, this recipe includes Red Bean and Jujube (aka Chinese Dates or Red Dates). The dates add a sweet caramelise flavour, while the Red Bean add pops of nuttiness in each bite.

You can omit the orange zest in the white batter, but it make so much difference; It really adds a lovely fragrance.


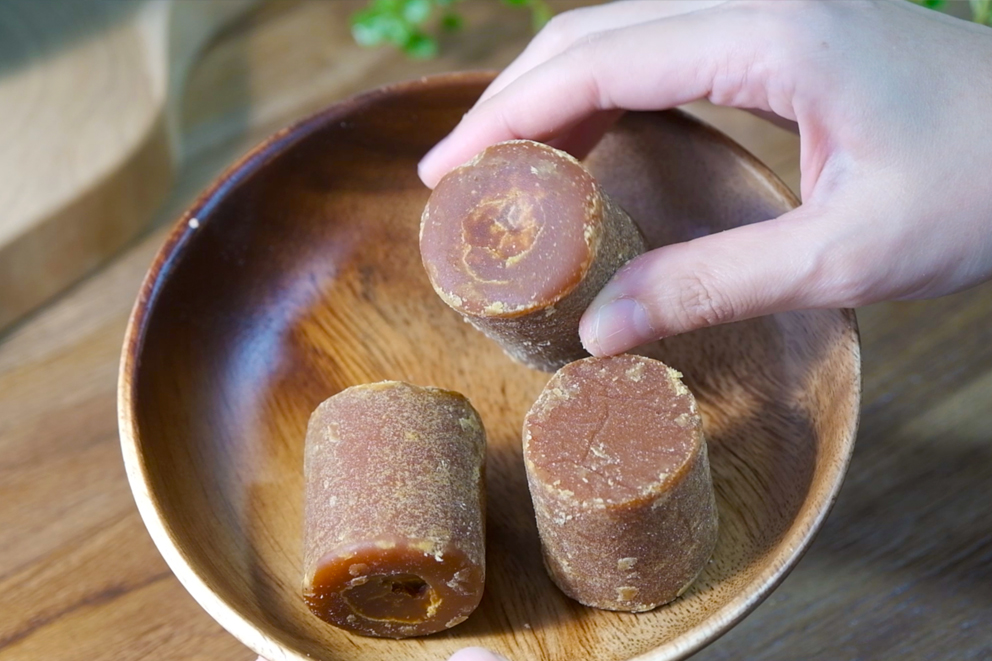
As for the yellow batter; It is necessary to use a good quality of Palm Sugar for a better flavour. The original Palm Sugar rather soft or crumbly; Whereas the rock hard ones shows that is has added sugar.

PANS

You can use any shape of pans; Aluminium, Silicone or even Stainless Steel all works well. Just make sure that you grease them with generous amount of oil to prevent stickiness.
If you grease your pan with enough oil, you won’t get any trouble when unmould it.

STEAMING
I highly recommend to use Bamboo Steamer for steaming, if you use Stainless or plastic steamer, makes sure that you cover each pan with Aluminium Foil so the water condensation doesn’t ruin the taste of your Nian Gao.

My favourite snack for Chinese New Year 🥰

After steaming, the Jujubes have been cooked and completely soft, fully blended with the taste of the sweet red beans, orange zest and Glutinous Rice.
I used to cover and store my cooked Nian Gao in the fridge overnight so it will be less sticky when I cut it

Make sure that you use non-stick pan 😗

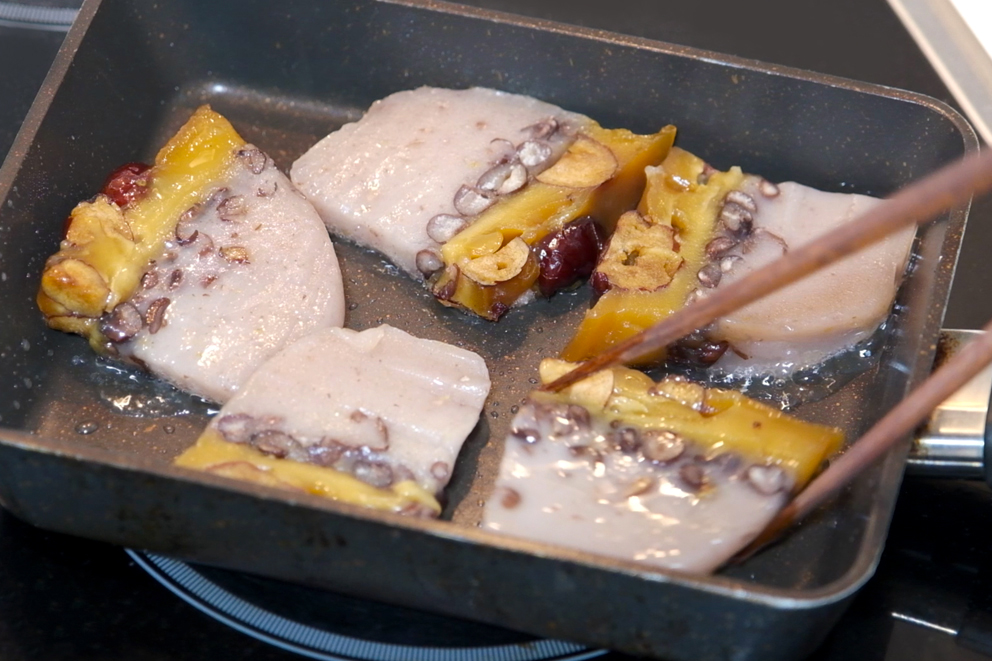
You can slice and fry them with a bit of oil for a smoky caramelised coating! ; I am sure you will be addicted to it 😅


Warm, chewy and sweet glutinous rice cakes… It was the best thing to have on Chinese New Year!


Happy Chinese New Year Everyone….Wishing you a prosperous year of the Rabbit! 🐰❤️


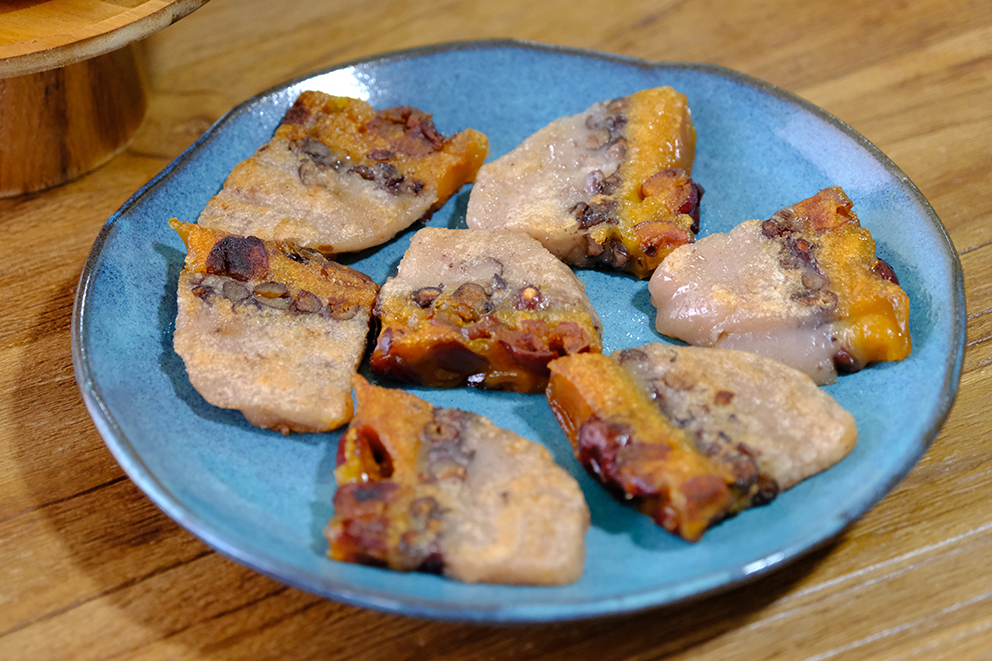
RED BEAN JUJUBE Nian Gao
Yield: Two Pudding Pan (450 ml each)
Active Time: 2½ Hours
Total Time: 5 Hours

INGREDIENTS
Sweet Red Bean:
60 g Red Bean
1000 ml Water
1/8 tsp Salt
30 g Granulated Sugar

White Batter:
100 g Granulated Sugar
100 g Hot Boiling Water
1/4 tsp Salt
100 g Water (Room Temp.)
100 g Glutinous Rice Flour
50 g Rice Flour
50 g Tapioca Starch
Zest from 1 Orange

Yellow Batter:
100 g Palm Sugar (Grated)
50 g Hot Boiling Water
1/8 tsp Salt
50 g Water (Room Temp.)
50 Glutinous Rice Flour
25 Rice Flour
25 Tapioca Starch
55 g Pitted Jujubes


INSTRUCTIONS
Sweet Red Bean

  1. Rinse the beans under running water and transfer it into large pot. 60 g Red Bean
  2. Add clean water and salt (adding salt at the beginning of cooking create more tender results); Bring it to a boil. 1000 ml Water; 1/8 tsp Salt
    When the water starts to boil; take it off from the heat, cover and let it rest for 1 hour.
  3. After 1 hour take the lid off, put it back to the stove and continue cooking over medium heat for about 1 ½ hours.
  4. After 1 ½ hours you can see that the beans are tender and creamy.
    Turn down to low heat, add in the sugar while keep stirring (allow some of the water to evaporate while the sugar flavour the beans). 30 g Granulated Sugar
  5. When the bottom of the pan is almost dry, sweet beans are ready.
    Take it off from the heat and let it cool down to room temperature before you use it.

White Batter

  1. Grease the pans with generous amount of oil to prevent stickiness and prepare the Bamboo Steamer.
  2. In a medium bowl combine Granulated Sugar, hot boiling water and Salt. Mix until all the sugar dissolved. 100 g Granulated Sugar; 100 g Hot Boiling Water; 1/4 tsp Salt
  3. Pour in the room temperature water. 100 g Water (Room Temp.)
    *Never add the flour while the mixture still hot; hot water helps the sugar dissolve faster while the room temperature water cooling it down.
  4. Add in the Glutinous Flour, Rice Flour and Tapioca Starch; Mix it really well. 100 g Glutinous Rice Flour; 50 g Rice Flour; 50 g Tapioca Starch
  5. Strain the mixture (don’t skip this step)
  6. Add the orange zest and cooked sweet red beans (you can omit the orange zest but it make so much difference, it really adds a lovely fragrance); Mix well. Zest from 1 Orange; Cooked Sweet Red Bean
  7. Divide the batter into 2 equal portions, pour it into each pans and steam into Bamboo Steamer over high heat for 25 minutes (if you use Stainless or plastic steamer, makes sure that you cover each pan with Aluminium Foil so the water condensation doesn’t ruin the taste of your Nian Gao);
  8. In the meantime, you can start prepare the Yellow Batter.

Yellow Batter

  1. Wash the Jujubes and pat dry; Cut the middle to remove the cores (kindly follow video instructions).
  2. In a medium bowl, combine Palm Sugar, hot boiling water and Salt. 100 g Palm Sugar (Grated); 50 g Hot Boiling Water; 1/8 tsp Salt
  3. After all the sugar dissolved, pour in the room temperature water. 50 g Water (Room Temp.)
  4. Strain the mixture; as sometimes there are some impurities in the sugar.
  5. Add in the Glutinous Flour, Rice Flour and Tapioca Starch; Mix it really well. 50 g Glutinous Rice Flour; 25 g Rice Flour; 25 g Tapioca Starch
  6. Once the white batter is done, lay a layer of Jujubes on top. 55 g Pitted Jujubes
  7. Divide the yellow batter into 2 equal portions; pour the strained yellow batter on top of the Jujubes.
  8. Steam over high heat for 45 minutes (in the middle of cooking, you must remember to add water to the steaming pot, don’t let it burn)
  9. Once it’s done, let it cool to room temperature first, then you can enjoy soft chewy rice cake immediately.
    * I used to cover and store them in the fridge overnight so it will be less sticky when I cut it.
  10. You can slice and fry them with a bit of oil for a smoky caramelized coating (make sure that you use non-stick pan).

NOTES

  1. The cake should be stored in the fridge (in an airtight container).
  2. It can be stored for 1 week (in the fridge) OR 1 month (in the freezer).