Salted Caramel Mexican Coffee Buns (Tangzhong Method)

Hey Guys, today we are making these “Salted Caramel Mexican Coffee Buns”. A sweet buns which is basically made with coffee topping and butter filling.

It’s actually originated in Malaysia and quite popular around Asia. Papparoti and Rotiboy are the most famous brands for these delicious coffee-coated buns, while in Singapore was popular with Roti Mum.
They even customized the buns with other flavours combination such as chocolate, cheese, kaya and peanut

The familiar and alluring smell of the coffee buns will always be the first scent that greets the nose and they go perfectly well with coffee, hot coffee preferably.

The aroma of this Mexican coffee bun is really tantalizing and makes you just want to eat it piping hot.

Tanzhong Starter

In this recipe, I’m gonna show you how to use Tangzhong Method in bread making. One of the most reliable method to produce soft and fluffy breads. This method contributes to the ultra airy, pillowy texture of this bread.

Tangzhong starter or called roux starter is basically a liquid (milk or water) and flour that is being cooked into a paste and then incorporated into the dough.

Windowpane test

Some people (I used to) scared of making bread and the FAQ is “How to tell if your bread dough is fully kneaded?”

Actually, we can check to see if your dough is well-formed by doing the windowpane test by stretch it out into a thin membrane without breaking it. That’s an indication that the gluten is
well-formed.

Magical Coffee Topping

For the Coffee Topping, YES! you can substitute it with espresso powder if you don’t have instant coffee on hand, but I really don’t recommend it coz it will make your buns taste a lot less flavorful

So.. try stick to instant coffee!
Use the best instant coffee you can get coz this is the thing that will spell the difference for your coffee buns.
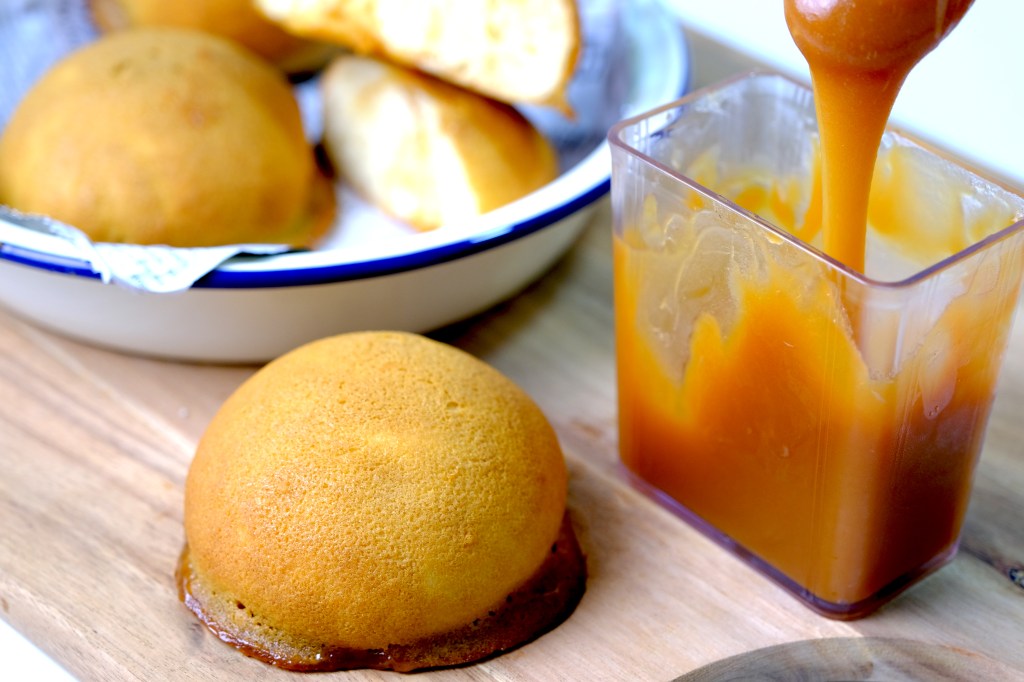
Perfect Homemade Caramel for the Bread Filling

And instead of butter, I will use my homemade salted caramel sauce for the bread filling, which is so tasty. It’s melty and slightly savory against the sweet cookie crust and buns!

The combination of the soft bread with the sweet, salty, velvety smooth caramel sauce is completely divine!

This caramel sauce is so good! Left over can be refrigerated for up to 1 month and taste great on everything, especially for your favorite ice cream sundaes.

The Sweet Aromatic Coffee Shell for the Buns

Please note, you don’t want to pipe down this beautiful aromatic mixture all the way because that will be WAY too much topping, coz once you put these into the oven they will melt downwards and form a coffee shell over the buns.

If you pipe until the bottom, the topping will just ooze down all over the place.
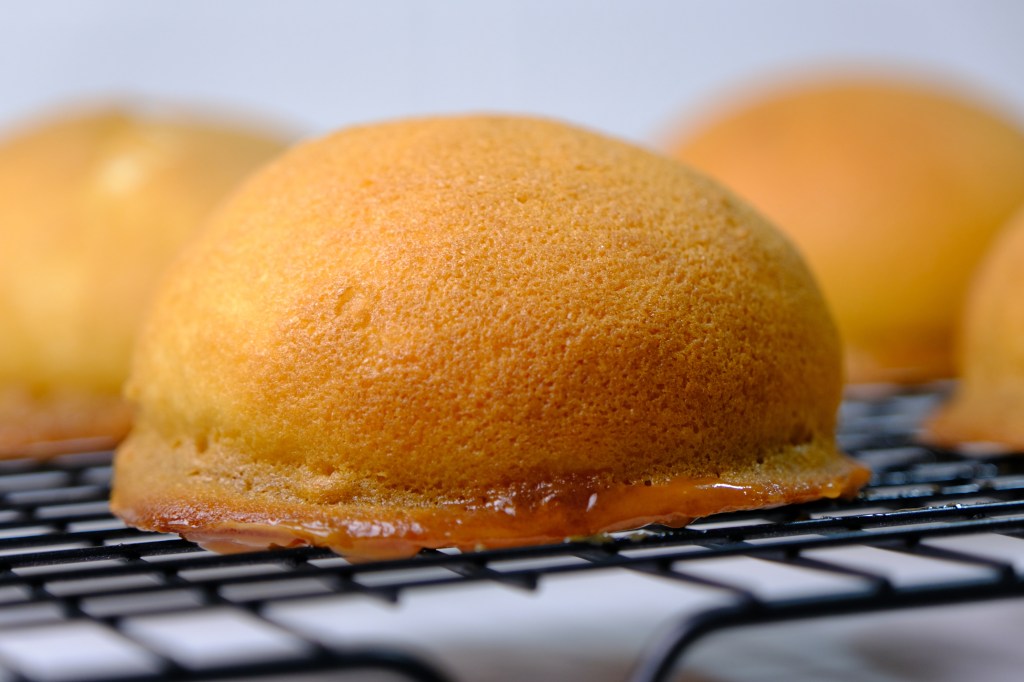
The Caramel Inside is Melty, It’s Leaked out as they Baked

Look how amazing these buns are! It not too oily and It doesn’t flattens at all.

The caramel inside is melty, it’s leaked out as they baked, the gooey crusty texture on the bottom of the buns intensely flavorful and so aromatic. Just one whiff of these is enough to make my mouth watery! They are so difficult to resist.

I don’t think making these buns are difficult, although they do require some time and a number of steps.

If you keen to sell these, this a good choice to start baking business ideas in my opinion coz the ingredients quite cheap and it’s easy to produce. This bread also addicting for some people, that’s a good thing!
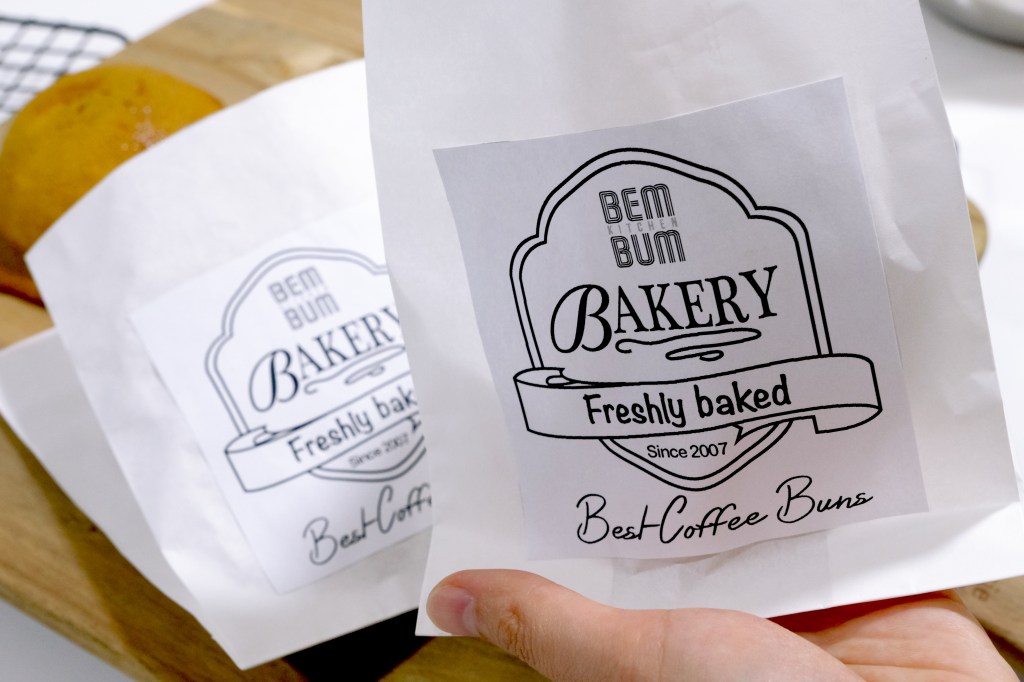
Simple DIY Packaging

And Yes, packaging is really important for selling point, but the main key of success still on the taste of our baking goods.

As home bakers, we don’t need to produce such a mass packaging for starter which can cost a lot of money. Yet, we can simply use ready made paper bag or even make DIY packaging with our own design, like what I did here.
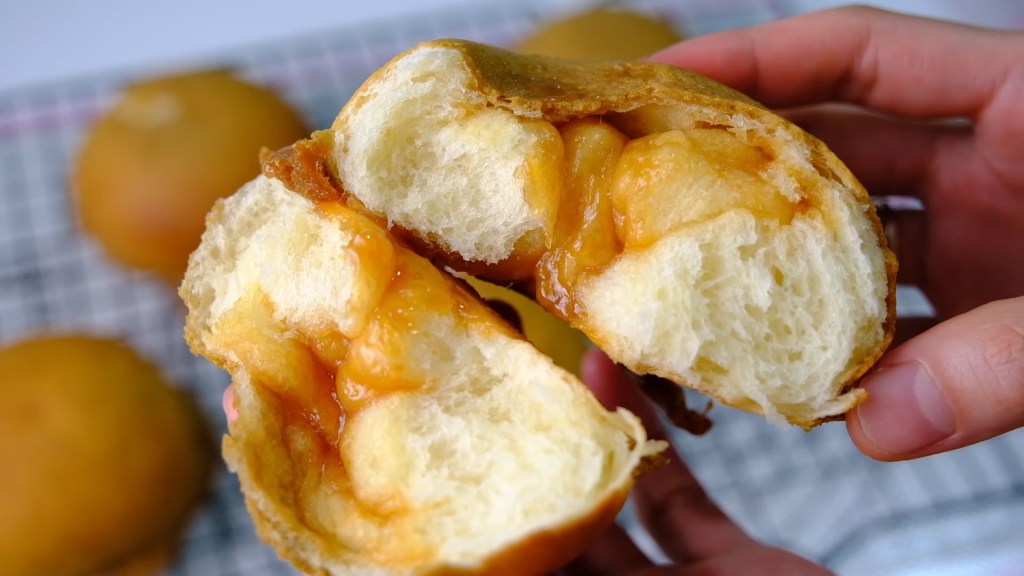
Pillowy Soft, Moist and Creamy Interior

These bread has a perfectly moist, creamy interior with a crisp outer crust. Crispy on the outside, soft bread in the inside, with an additional salted caramel in the center of the soft bun.
Oh I Love Caramel so much! It’s really addictive and they really gone too fast.

I hope you will enjoy the recipe of these memorable taste of the caramel coffee-coated buns and let’s spread the love for coffee buns!

SALTED CARAMEL MEXICAN COFFEE BUNS
Yield: 5 Pieces 
Active time:  1 1/2 hour
Total time: 5 hour

INGREDIENTS
Caramel Filling:

  • 100 grams Granulated Sugar
  • 40 grams Unsalted Butter
  • 60 grams Heavy Cream
  • 1/2 teaspoon Salt


Coffee Topping:

  • 3/4 teaspoon Instant
  • 1/4 teaspoon Hot Water
  • 1/4 teaspoon Vanilla Extract
  • 25 grams Unsalted Butter
  • 25 grams Granulated Sugar
  • 25 grams Eggs
  • 25 grams Cake Flour


Tangzhong Starter:

  • 10 grams Bread Flour
  • 60 grams Water


Bread Dough:

  • 120 grams Bread Flour
  • 30 grams Cake Flour
  • 10 grams Milk Powder
  • 20 grams Granulated Sugar
  • 3 grams Instant Yeast
  • 15 grams Eggs
  • 45 grams Water
  • 40 grams Tangzhong Starter
  • 1/4 teaspoon Salt
  • 10 grams Unsalted Butter


INSTRUCTIONS
Caramel Filling

  1. In a medium heavy pan, heat the sugar over medium heat until melted, swirl the pan occasionally. Continue cooking until the sugar has reached a deep amber color (almost a reddish-brown colored and have a slight toasted aroma).
    * Be careful, at this point the caramel can go from perfect to burnt in a matter of seconds, so keep a close eye.
  2. When the caramel reaches its sweet spot, turn off the heat, add in the butter (watch out, it will bubble up). Stir until the butter is completely melted. 
  3. Remove it from the heat, slowly pour in the cream (be careful, it will bubble up ferociously). Whisk until all of the cream has been incorporated and smooth.
  4. Add in salt, stir well. Set aside to cool for about 10-15 minutes, pour into your favorite glass jar, let it cool completely, close the lid and store in the fridge to harden it.

Coffee Topping

  1. Dissolve instant coffee with a small amount of hot water, add in vanilla extract, set aside.
  2. In a medium bowl, beat the butter and sugar until fluffy and pale in color. Gradually add in the eggs, mix well.
  3. Add in the coffee mixture and mix, fold in the flour and mix until smooth.Transfer the mixture into a piping bag and chill in the fridge to firm up.

Tangzhong Starter

  1. In a medium pan, mix the bread flour and water until no lumps remain.
  2. Cook over medium low heat, keep stirring until the mixture turn into a sticky paste (be careful not to burned the paste).
  3. Take it off from the heat, cover it with plastic wrap, pressing the wrap onto the surface of the mixture to prevent the skin form on the surface, let it cool completely.

Bread Dough

  1. In a large bowl, mix the bread flour, cake flour, milk powder, sugar and yeast. Add in the eggs, water, Tangzhong Starter and salt. Mix for a minute until a sticky dough forms.|
    Add in the softened butter and fold it into the dough with your hands until well combined.
    *It will be sticky at first, it’s not necessary to add additional flour and then end up with a tough bread.
  2. Transfer the dough onto a work surface and continue kneading (10-15 minutes), feel free to use electric mixer. As you knead the dough, it will be less and less sticky, knead until the dough becomes smooth and elastic.
    * Check if your dough is well-formed by doing the Windowpane Test; Take a little bit of dough, stretch it out into a thin membrane without breaking it. That’s an indication that the gluten is well-formed.
  3. Round and place the dough into a clean grease bowl. Cover with a plastic wrap and let it rise until it almost doubles in size.
  4. Punch down the risen dough, divide dough into 5 equal pieces (55 grams each)
    Roll each dough into round, pull around the edges, tuck underside into itself.
    Hold and roll the dough with our hands in “C” shape, give a little pressure on it, smoothing top and sides at same time as turning.
    Cover each roll with plastic wrap and let it rest for about 10-15 minutes (to relax the gluten).
  5. After being rested,  flatten each ball into a disc, place a half tablespoon caramel filling in center, enclose it by pulling the seams of the dough over and around it.
    Hold and roll the dough with our hands in “C” shape into a ball and place it on baking sheet lined with parchment paper (spare at least 3-inches space around each buns as they will expand during final proof and while baking).
  6. Cover the shaped buns with plastic wrap or kitchen towel, let them rise for 30 to 40 minutes or until almost double in size.
    In the meantime take out your coffee toppings from the fridge and preheat the oven to 180°C.
  7. Once the buns has risen, pipe the coffee topping in a tight circular pattern. Starting from the top of the buns down to about the middle part of the sides of your coffee buns.
    *Don’t pipe down all the way because that will be WAY too much topping which will just ooze down all over the place.
  8. Bake the buns for about 12-15 minutes. Take it off from the heat, transfer and let them cool completely on the cooling rack.

NOTES

  1. I don’t recommend to use espresso powder for the coffee toping coz it will make your buns taste a lot less flavourfull.
  2. To proof the dough in cold days; place them in the preheated 60°C oven that has been turned off.
  3. Buns best eaten freshly baked while still warm. You can store them in the fridge for 2 days.
  4. Reheat; in the preheated 180°C oven or toaster for obout 5-7 minutes, take it out.
    The top will soft at first, let them sit for about 5-10 minutes, it will become crispy.

15 Minutes Quick and Foolproof Pizza Dough

Hey Guys, today we are making these “15 Minutes Quick and Foolproof Pizza dough” that rises quickly and makes incredible homemade pizza! It comes together in just minutes, you really doesn’t need a long rising time to make a fabulous pizza.

This pizza dough is fantastic with part whole wheat flour or all white flour, it also doubles, triples and even quadruples beautifully.

The dough is easy to work with and it’s a great last minute family dinner that you can prepare within 30 minutes from start to finish.

My favorite quick and easy toppings

There are also no rules about the kinds of toppings you put on your pizza. Choose ones you love. Don’t put yourself at risk of getting sick. When using toppings like sausage, chicken, steak, mushrooms or bacon, always cook them before preparing your pizza.
Keep in mind that more toppings generally mean more cook time.

It’s crispy around the edges, it’s soft and folds perfectly and of course the caramelized cheese and pepperoni even makes it more delicious!

Beautiful golden crust that’s super crispy around the edges and not soggy at the bottom, just nice!

Smells like heaven! It’s salty, spicy, crunchy…a bit sweet, It’s really good!!
I hope that you will enjoy the recipe!

15 MINUTES QUICK FOOLPROOF PIZZA DOUGH
Yield: 1 Regular Pizza
Active time: 15 Minutes
Total time: 30 Minutes

INGREDIENTS
Pizza Dough:

  • 120 grams Warm Water
  • 1/2 tablespoon Granulated Sugar
  • 1/2 tablespoon Vegetable Oil
  • 1/2 tablespoon Instant Yeast
  • 195 grams All-Purpose Flour
  • 1/2 teaspoon Salt

Sauce & Toppings:

  • Tomato Ketchup
  • Mozzarella Cheese
  • Salami(Pepperoni)
  • Parsley Flakes

Condiment: Cheddar Cheese and Chili Flakes Chili Sauce

INSTRUCTIONS
Prepare the Oven and Pan
Crank your oven up as high as it goes.
The closer you can get to 260°C, the better.
Flip a rimmed baking sheet upside down, place it in the oven and preheat it for about 30 minutes before baking.

Pizza Dough:

  1. Mix the water, sugar, oil and the yeast. Add the flour and mix until just combined, pour in salt and stir until a soft dough forms. The exact flour amount will vary, the dough should be soft and smooth, not leaving a residue on your fingers but not super stiff either. Not too sticky and definitely not overfloured.
  2. Pour the dough onto a work surface, knead it for about 5 minutes, then shape it into a ball. Place the dough in a greased bowl, cover it with a plastic wrap and let it rest for about 10 minutes to relax the gluten.
  3. Shape the dough into pizza Roll the dough onto a piece of parchment paper (you can stretch the dough with your hands, your fingers and kind of spread it or even use a rolling pin). If you want it a little bit thinner, feel free to roll it out more.
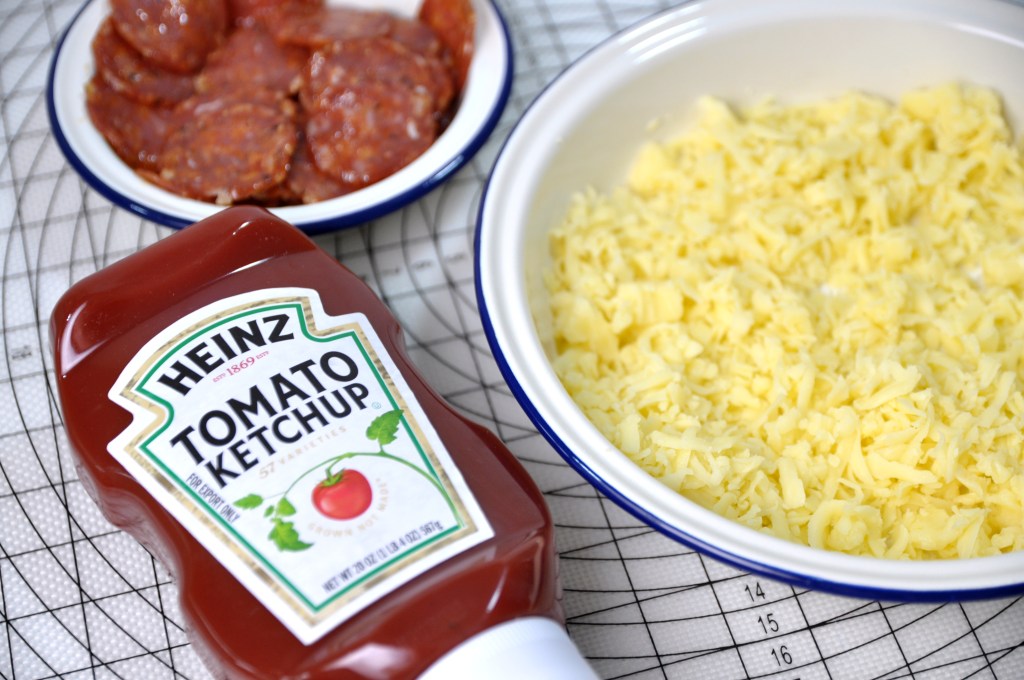
  4. Pizza toppings Spread 3-4 tablespoons of red sauce (no-cook blender sauce), Tomato Ketchup is the best option. Pesto or rich Ricotta are wonderful substitutes as well. Sprinkle generously amount of grated mozzarella all the way around, place pepperoni on top (make sure everyone gets one per bite), then sprinkle with some more mozzarella and parsley flakes.
  5. To Bake Place the pizza onto the middle of the hot baking sheet, bake for about 10-15 minutes until the cheese is a nice dark deep brown and the crust is like a golden brown as well.
  6. Take it off from the heat, serve immediately or transfer it to a cooling rack so the bottom not become soggy.

NOTES

  1. Do not add salt directly to the yeast because it will kill the yeast.
  2. I always use 1/2 or up to 3/4 whole wheat flour with good results (I let it knead for a few minutes longer).
  3. This recipe doubles, triples and quadruples really well. Keep an eye on the flour if increasing the recipe. You want a soft, smooth dough – not too sticky and definitely not overfloured.
  4. Don’t put yourself at risk of getting sick. When using toppings like sausage, mincemeat, chicken, steak, or bacon, mushrooms always cook them before preparing your pizza.
    Keep in mind that more toppings generally mean more cook time.
  5. To store; place the pizza in an airtight container, fridge for 3-5 days, freezer for up to 6 months.
  6. To reheat; in the preheated 180° C oven for 10 minutes, microwave for 30 seconds to 1 minutes.

Rabokki 라볶이 (Ramen+Tteokbokki 떡볶이) | Homemade Rice Cakes & Gochujang Sauce

Hi Guys, today I’m going to show you how to make Rabokki. It’s actually the same thing as Tteokbokki. But besides using rice cake which is called Tteok, we will add some Ramen noodles for Rabokki. So there’s where the “Ra” words in Rabokki coming from.

Rabokki (라볶이) is consists of Tteok, a cylinder-shaped white rice cake and Ramyeon (Ramen) as the main ingredients; with other ingredients such as vegetables, fish cake, boiled egg, seafood, and even melted cheese.

I will use my homemade rice cakes and also my homemade Gochujang Sauce in this recipe.
I really recommend to use the freshly made rice cakes because the frozen one tends to be dry, easy to crack, and not chewy.

Look how chewy and flexible this homemade Rice Cakes are, they even don’t gets hard when they are cold.

The ingredients are coated with sweet and spicy homemade Gochujang Sauce and the chewy rice cakes and soft noodles soak up a lot of the flavor. 
You can simply use water to make Rabokki or you can use broth if you want to make it tastier.

Add ramen noodle at the last minute of cooking Rabokki, when you add them at the beginning, the noodles will soak too much water and become to soft and soggy.
Some people also add the instant Ramen seasoning to make the flavor more savoury.

You can use ready made Gochujang Sauce, I’m prefer homemade version coz it’s healthier. The rice cakes and ramen noodle will thicken the Gochujang Sauce. 
If you do not like the sauce to be too spicy, omit the cayenne pepper or chili powder. If you like it super spicy, adding Cayenne Powder or chilli powder is the way to increase the heat level without altering the flavor.

Best serve the same day you cook it as Rabokki leftover does not reheat well. If you want to store them in the fridge, make sure there is no Ramen left before you put your Rabokki, considering leaving Ramen in liquid will make it soggy and disintegrate into porridge texture.
Enjoy the recipe!

RABOKKI (RAMEN+TTEOKBOKKI)
Yield: 4 Servings
Active time: 1 hour
Total time: 1 1/2 hour

INGREDIENTS
Tteok (Korean Rice Cakes):

  • 120 grams Glutinous Rice Flour
  • 75 grams Tapioca Starch
  • 1/4 teaspoon Salt
  • 150 grams Boiling Water
  • Sesame Oil (for grease)

Side Dishes:

  • 1 large Onion
  • 1 large Carrot Cabbage (optional)
  • Fish Cake
  • Ramen Noodle


Gochujang Sauce:

  • 800 Boiling Water
  • 6 tablespoons Miso Paste
  • 4 1/2 tablespoons Granulated Sugar
  • 4 1/2 tablespoons Chili Sauce (preferable with garlic)
  • 1 teaspoon Ceyenne Pepper or Chilli Powder (optional)
  • 1 1/2 teaspoons Garlic Powder
  • 1 teapoon Salt
  • 1 tablespoon Sesame Oil
  • 1 tablespoon White Vinegar


Garnish: Spring Onion, Roasted Sesame


INSTRUCTIONS
Tteok (Korean Rice Cakes)

  1. In a large bowl combine glutinous rice flour, tapioca starch and salt. Pour in the hot boiling water and mix until just combine.
    Then using my hand I will continue to knead them (it will look a bit dry and floury at first, continue kneading it until it create a smooth ball).
  2. Divide the dough into 8 equal pieces. Roll each dough into 1 cm thick, and then bend and cut them into 2 equal pieces. Set aside to the tray, continue with the rest dough.
  3. To cook the rice cakes
    Bring a medium pan of water to a boil and carefully place the rice cakes into the simmering water.
    In the meanwhile, grease a tray with a bit of sesame oil to prevent stickiness.
    When the rice cakes start to float that means they are ready to be picked up, scoop them out and place them into the tray.
  4. The rice cakes is ready to use, if you want to keep your rice cakes for a long time, make sure they are grease well with sesame oil, place them in an airtight container and store them in the fridge or freezer.

To Cook Rabokki

  1. Slice onions, carrots, spring onions, fish cake and rice cakes into small pieces.
  2. Pour some hot water into a wok, add all the Gochujang ingredients (Miso paste, sugar, chilli sauce, cayenne pepper or chilli powder, garlic powder, salt, sesame oil and vinegar).
    Stir until well combined and bring it to a boil.
  3. After boiling, pour the red onions and carrots. Cook for about 5 minutes so they’re soften a bit. Add in fish cakes and rice cakes, stir well.
    Add your favorite ramen noodle and cook until they soft enough.
    *Be careful not to cook the noodles too long, as they become mushy very quickly.
  4. Sprinkle with spring onions and roasted sesame as a garnish.

NOTES

  1. To store the Rice cakes; place them in an airtight container and store them in fridge (1-2 days) or freezer (3 months).
  2. Please note; add ramen noodle at the last minute of cooking Rabokki, when you add them at the beginning, the noodles will soak too much water and become to soft and soggy.
    Some people also add the instant Ramen seasoning to make the flavor more savoury.
  3. The rice cakes and ramen noodle will thicken the Gochujang Sauce.
  4. You can find Tteok (Korean Rice Cakes) sold freshly made, refrigerated, or frozen at Korean grocery stores.
    I really recommend to use the freshly made rice cakes because the frozen one tends to be dry, easy to crack, and not chewy.
  5. You can use ready made Gochujang Sauce, I’m prefer homemade version coz it’s healthier.
  6. If you do not like the sauce to be too spicy, omit the cayenne pepper or chili powder. 
    If you like it super spicy, adding cayenne powder or chilli powder is the way to increase the heat level without altering the flavor.
  7. You can simply use water to make Rabokki or you can use broth if you want to make it tastier.
  8. Best serve the same day you cook it as Rabokki leftover does not reheat well.
    If you want to store them in the fridge, make sure there is no Ramen left before you put your Rabokki, considering leaving Ramen in liquid will make it soggy and disintegrate into porridge texture.
    You can reheat any leftover along with a little bit of water in a small pan over low heat.

Fluffy Snow Cheese Cake

Hi Guys, today we are making these classic “Fluffy Snow Cheese Cake”. Ultimately soft, moist and cheesy sponge cake that you cheese lover will surely love!

This cake bakes up so nice and beautifuly even on the top, making it perfect for layering.

Fluffy Vanilla Buttercream

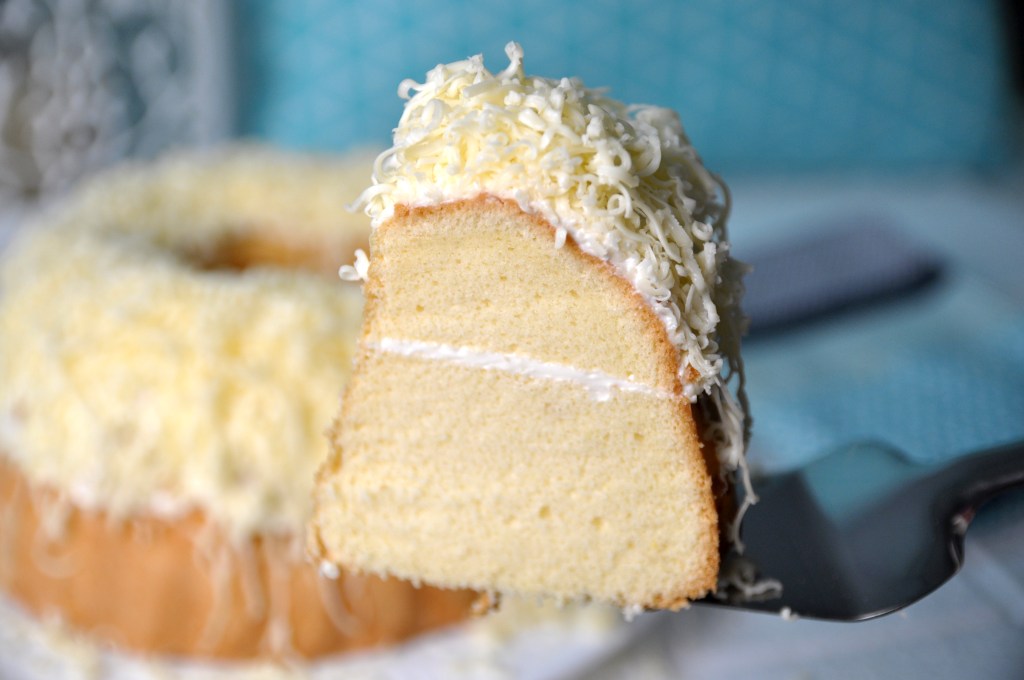
A light, moist and fluffy vanilla sponge cake, lightly filled and frosted with fluffy vanilla buttercream on top.

Finished with a generous topping of shredded cheddar cheese.
The combination of soft cake, sweet vanilla buttercream and salty cheddar cheese are perfect match in every bite.

And if you are a true cheese lover, feel free to add shredded cheedar cheese in the middle of the filling if you want.

Pillowy Soft Crumb

Look how soft and pillowy the crumb is. They are amazingly fluffy and stay moist even if you keep them in the fridge for a few days.

This cake is perfect little snack to go with your afternoon tea or after dinner time with coffee or tea. You will literally could not stop eating it!

There’s something about milky and creamy cheese that really gives depth of flavor of the cake.
If you not exactly a sweet tooth, these Snow Cheese Cake might be just right for you!

SNOW CHEESE CAKE
Yield: One 8-inch bundt pan 
Active time: 1/2 hour
Total time: 1 1/2 hour

INGREDIENTS
Sponge Cake :

  • 150 grams Egg Whites
  • 1 1/2 teaspoons Lemon Juice
  • 150 grams Granulated Sugar
  • 90 grams Egg Yolks
  • 135 grams Cake Flour
  • 20 grams Corn Flour
  • 1/4 teaspoon Salt
  • 40 grams Milk
  • 25 grams Vegetable Oil
  • 1 teaspoon Vanilla Extract


Vanilla Buttercream:

  • 140 grams Shortening
  • 35 grams Salted Butter
  • 35 grams Condensed Milk
  • 1 teaspoon Vanilla Extract

Grated Cheedar Cheese


INSTRUCTIONS
Sponge Cake

  1. Preheat the oven to 150° C, grease the pan (I am using my bakery pan grease https://www.youtube.com/watch?v=ilWe6_4ZDuI or  you can brush it with some butter and sprinkle flour to grease them).
    One important tips, if you are using bundt pan, just make sure that you coat all of it’s nooks and crannies or else the cake will stuck inside the pan.
  2. For the wet ingredients;
    In a medium bowl  combine the milk, vegetable oil and vanilla extract. Mix that all through, set aside.
  3. For the batter;
    – In a large bowl, pour in the egg whites, whip at low speed until foamy, then add the lemon juice and continue mixing it (by adding small amounts of lemon juice helps to stabilize the egg whites, help prevent overbeating and allows the beaten whites to reach their full volume and stiffness).
    – When the mixture start become white, add the sugar gradually, continue beating until it reach a stiff peak (they will look shiny and the tips can stand straight up).
    – Add in the egg yolks, mix slowly until just combine.
    – Sift all the dry ingredients into a bowl in 3 batches. Mix after each addition, stirring just top part of egg mixture
  4. Take about 3 tablespoon of the eggs mixture and mix them to the wet ingredients.
    Then gently pour it back to the egg mixture.
    Scrape down and fold with spatula until well combined (this technique is used to make sure that the batter is well combined and there’s no liquid left at the bottom of the batter).
  5. Pour the batter slowly to the pan. Pour it from above 15 cm height to help get rid of air bubbles and then shake and tap the pan against worktop for 2-3 times. 
  6. Bake this off at 150° C for 40 minutes, then increase the heat to 170° C and continue baking for another 5-10 minutes.
  7. Take it off from the heat.
    Tap the pan immediately about 2-3 times against worktop so the cake won’t shrink too much.
    Put the greaseproof paper and cooling rack on top, flip the pan and let it sit for about 10-15 minutes.
  8. After 15 minutes, remove the pan and let it cool completely.

    Vanilla Buttercream
    In a large bowl, combine the shortening, salted butter, condensed milk and vanilla extract.
    Mix it all through until it becomes pale white, light and fluffy.

ASSEMBLY

  1. Using serrated knife, divide the cake horizontally into half (make sure the cake is perfectly flat all the way around).
  2. Apply about half of the vanilla buttercream as a filling, spread evenly.
  3. Place the other layer of the cake on top
  4. Spread the rest buttercream over the cake
  5. Coat the cake with a generous amount of shredded cheddar cheese.

*If you are a true cheese lover, feel free to add shredded cheedar cheese in the middle of the filling if you want. 

NOTES

  1. This basic sponge cake recipe is perfect for many other delicious treats.
  2. After the cake cooled completely, if you are not gonna assembly the cake immediately, wrap it with a cling wrap to prevent the cake dry.
  3. They are amazingly fluffy and stay moist even if you keep them in the fridge (in an airtight container) for a few days.
  4. To serve the cake from the fridge; let it the cake sit at the counter (in an airtight container) for about 20 minutes and enjoy.
  5. You can keep them in the refrigerator (in an airtight container for 3-4 days.

Martabak (Indonesian Thick Pancake)

Hey Guys, today we are making these “Indonesian Thick Pancake”. These thick sweet pancakes are known as Martabak, it was one of the most famous street food in Indonesia.
They are usually lining up on the street at night to get this Martabak as a midnight snack.

These thick yummy pancake characterized by its honeycomb textures and the sweet decadent stuff like chocolates, condensed milk, butter, cheese, peanuts, Nutella, etc.
It really doesn’t require any fancy ingredients to make it.

There are many recipes to make Martabak, some of them used Baking Soda as a leavening agent.
I personally not prefer to use Baking Soda in the recipe, coz it’s a base or alkaline ingredient, which naturally has a bitter taste.

A popular and indulgent choice of toppings for Martabak in Indonesia includes butter, condensed milk, chocolate rice and shredded cheese -which is my favorite!

I love this martabak so much because they are so soft, spongy, the rich of the butter and sweet mild savory combination was truly amazing!!!

The sides and bottom of the pancake should be nicely brown and the middle of the pancake is lightly springy when you touch it.

Crispy and golden brown on the out side, but moist in the inside. It’s really easy and comforting, especially for us who stay at home 24/7.

Making Martabak is about patience and many many trial and errors. Never give up, keep practice Guys! And once get the hang of it, you will always want to make and crave it! Enjoy the recipe!!

MARTABAK (INDONESIAN THICK PANCAKE)
Yield: One 8-inch round pan
Active time: 1/2 hour
Total time: 1 hour

INGREDIENTS
Batter:

  • 1 teaspoon Instant Yeast
  • 1 teaspoon Granulated Sugar
  • 25 grams Slightly Warm Milk (too hot will kill the yeast)
  • 100 grams Cake Flour
  • 1 tablespoon Granulated Sugar
  • 1/4 teaspoon Vanilla Extract (optional)
  • 25 grams Eggs
  • 100 grams Water
  • 45 grams Salted Butter (melted)
  • 1/4 teaspoon Baking Powder

Filling:

  • Pure Creamy Butter (butter in a can)
  • Condensed Milk
  • 100 grams Cheddar Processed Cheese Block
  • Chocolate Rice Sprinkles

INSTRUCTIONS

  1. To activate the yeast; In a medium bowl, combine warm milk, 1 teaspoon of sugar and the yeast. Allow to stand for about 5-10 minutes until the mixture begins to foam.
  2. In a large bowl combine the flour, sugar, eggs, water. Mix until just combined. Stir in the activated yeast, mix well. Pour in the melted butter, mix until smooth and no lumps remains (you will have a thin, shiny batter.
    Cover the bowl and set aside for about 30 minutes (the volume of batter will increase and have air bubbles all over the surface).
    In the meanwhile, you can prepare your favorite fillings.
  3. Prepare 8 inch non-stick pan, make sure the pan has a glass lid so that you can check the pancake while cooking it.
    Heat the pan over medium high heat (it’s really important to preheat the skillet fully before you add the batter, or it won’t rise and get those honeycomb textures).
    To test whether the pan is hot enough; a drop of water thrown into the pan should sizzle right away.
  4. Once the pan is hot and ready, add baking powder into the batter. Mix it well and pour the batter immediately into the pan, don’t let the batter sit around for too long after the baking powder is in.
    Very gently slightly turn the pan around in circular motion so the batter thinly coat the side of the pan (this will form a nice crust later and that’s one of the best part of martabak).
  5. Let it cook on medium high heat until the bubbles came out into the entire surface and then reduce the heat immediately to the lowest setting.
    Please note, never use high heat because it could burn the bottom of pancake while cooking.
  6. When the edges of the pancake begin to look dry, sprinkle the top with 1 tablespoon of sugar and then cover the pan with the lid. Let it cook for about 5 minutes or until the center of pancake surface is fully dry and cooked.
  7. Remove pancake from the pan and place it on a cutting board. Spread a generous amount of pure creamy butter on top of the pancake. Cut them into half before you start adding the filling.
  8. Add your favourite fillings (grated cheese, chocolate rice, etc).
  9. Drizzle with some condensed milk.
  10. Gently fold half of the pancake to the other half to form a sandwich.
  11. Spread with some more pure creamy butter on top (you don’t have to do this if you feel it’s too oily, but actually it’s the main thing that makes the martabak more appealing and delicious)
  12. Cut them into pieces according to your preference’s size, traditionally, they will cut them into these square shapes. Don’t forget to wipe your knife with a clean damp kitchen towel between each cut, so the filling doesn’t stick everywhere.

    NOTES
  1. Making Martabak is about patience and many many trial and errors. Pay more attention to the heat, it’s very critical.
    Never use high heat to cook Martabak, because it could burn the bottom of the pancake before it’s completely cooked. Once the entire top surface of the pancake has bubbles, reduce the heat to the lowest setting to continue cooking.
  2. I will recommend to use heavy thick high quality non-stick skillets if possible.
    If you use non-stick regular pans, apply a thin layer of oil might be needed and you will need to peek the bottom part occasionally as they generally burn more easily.
  3. After mixing the batter with baking powder, immediately pour the batter to the heated pan for optimum results. So make sure by this time, the heated pan is ready. 
  4. Instead of using Pure Creamy Butter, you can substitute it with regular salted butter.
  5. Best serve immediately while still warm. You can store left over in the fridge for 3-4 days.
  6. To reheat; 200° C oven for 10-15 minutes or 1000 W microwave for 1 minute (most of the fillings will be melt).

Pao De Queijo (Chessy Dip Chewy Cheese Balls)

Hellooo friends and welcome back!! Today we are making some delicious “Chessy Dip Chewy Cheese Balls”  a.k.a “Pao de Queijo“.

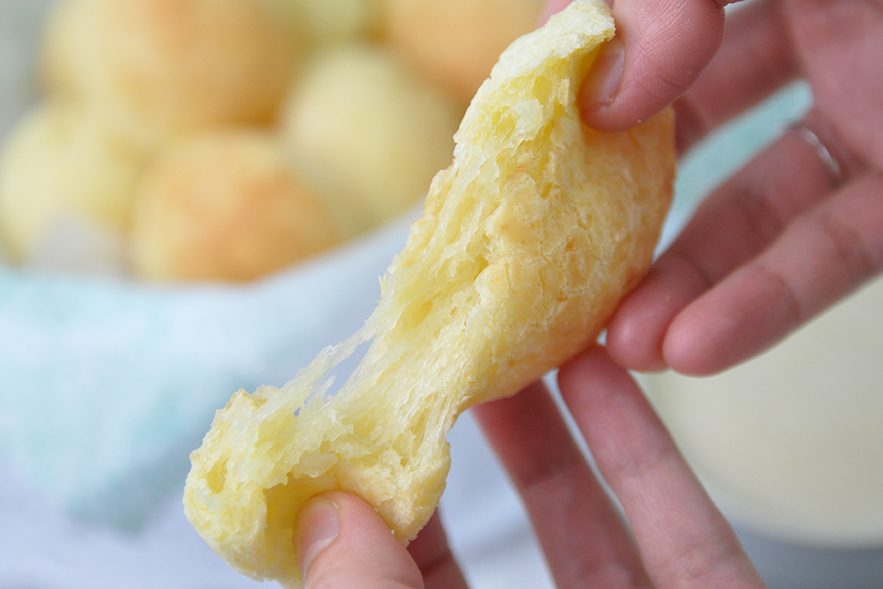
It was crunchy outside but amazingly soft and chewy inside, these little cheese balls with their addictive cheesiness, they are super easy to make at home.

These Brazilian Cheese Bread is tasty as it gets, since they are so flavorful due to the Cheese and the Tapioca Flour.

It’s really the most comforting and satisfying snack for a Cheese Lover .
These flavor was so haunting and I still dream about it. 🤤

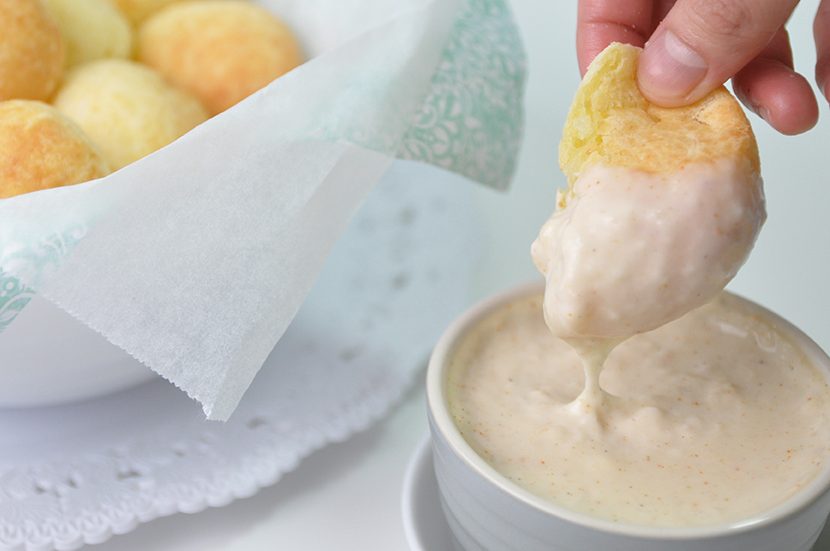
However, it’s even better if you serve them with  these mild creamy and velvety chessy dip sauce.

🥲 I want !!

The recipe is super easy, fail proof and absolutely mouthwatering. Try to make these at home and go enjoy your ooey gooey “Pao de Queijo” !

WATCH HOW TO MAKE Pao De Queijo (Chessy Dip Chewy Cheese Balls)


CHESSY DIP CHEWY CHEESE BALLS (PAO DE QUEIJO)
Yield: 16 pieces
Active time: 20 minutes
Total time: 1 hours

INGREDIENTS
🧀 Cheese Balls
120 grams Milk
80 grams Water
3 tablespoons Vegetable Oil
200 grams Tapioca Starch
50 grams Eggs (beaten)
80 grams Parmesan Cheese (Grated)

🧀 Cheesy Dip
160 grams Milk
2 ⅔ teaspoons All-Purpose Flour
1/4 teaspoon Salt
1/4 teaspoon Ground Black Peper
1/4 teaspoon Ceyenne Pepper
40 grams Cheedar Cheese (Grated)

INSTRUCTIONS
🧀 Cheese Balls

  1. Preheat the oven to 180 C/ 350 F.
  2. In a medium saucepan, combine the Milk, Water and Vegetable Oil.
    Heat the mixture until just before it begins to boil, then take it OFF from the heat.
  3. Place the Tapioca Starch in a large bowl,
    Pour the Milk Mixture into a bowl of Tapioca Starch, then quickly combine the mixture (BE CAREFUL the mixture is quite hot, you can use a fork or wodden spoon to mix this).
  4. Add the beaten Eggs and continue mixing
  5. When the dough is cool enough to touch, you can knead it by hand
  6. Add the grated Parmesan Cheese; continue kneading the dough until the Cheese is mixed evenly.
  7. Take about 1 tablespoonful of the dough (about 35 grams each) and shape it into a ball.
    Place Cheese Balls onto a baking sheet lined with a parchment paper (Don’t worry if the balls are uneven, they will become round while baking).
  8. Bake it for about 20 minutes. Place the balls onto a cooling rack to cool down a bit.

🧀 Cheesy Dip

  1. In a medium saucepan combine Milk, Flour, Salt, Black Pepper and Cayenne Pepper (If you don’t like spicy, you can omit the Cayenne Pepper).
  2. Bring to a boil over MEDIUM heat, stirring constantly until slightly thickened. Remove from heat, add the grated Cheedar Cheese, stir until well combined.


NOTES

  1. Some people use All-Purpose Flour to make this; I personally don’t recommend it because you won’t get the chewy texture that you are you are looking for.
    So, better stick with the Tapioca Starch.
  2. You can adjust and add the amount of Cheese if you want.
  3. It’s best to serve it hot, coz it will be a bit tough when it’s gets cold.
  4. To reheat, either Microwave them on a paper towel for about 20 seconds (they won’t be crispy at all),
    OR if you want that crispy-chewy texture, pop them in a 350 F oven for about 8-12 minutes. Keep an eye on them so you don’t end up burning them.