Black Forest Cake

Hi Guys, there’s something about Christmas that makes everything a bit more magical, even the dessert. I grew up making treats to share with the entire family and I love baking so much.

And for this special day, I’m gonna share with you my signature “Christmas Blackforest Cake”. The perfect dessert for Christmas dinner that my whole family will love.

This is the first cake that I’ve learned to made when I was 13 years old. I was so happy and proud of myself at that time because everyone (specially my Mom) said that the cake was delicious.
Sometimes I think they gave me compliment just to make me feel good, they don’t want me to be disappointed.

But as I got older, I just realized that what they said was true.

Dark Sweet Cherry Filling

This Blackforest Cake combines a very soft chocolately chocolate sponge cake, layered with a rich dark cherry fillings, covered with fluffy frostings and sprinkle with a generous amount of dark chocolate shavings.

What make it special from other Blackforest Cake is the rich dark sweet cherry filling, which people usually use only whipped ceam.

And because it has always been very difficult to get Kirsch in my country (Kirsch is a traditional cherry liquor for Blackforest Cake), I always substitute it with my favourite Dark Rum for the wonderful aroma.

You can use Vodka, wine or Brandy if you want or just leave this out if you’d like to keep it kid-friendly.

Look how soft and chocolately this chocolate sponge cake!

The cake so soft, melts in your mouth, full of that rum flavour cherries filling, and the fluffy light frosting and dark chocolate shaves, really create a decadent, rich!

Light, fluffy, not too sweet frosting

Black Forest Cake was a staple when I was growing up. It’s a light and perfectly sweet German dessert that is easy to make and a chocolate-lover’s dream!

I created this special frosting recipe, coz I don’t like to use whipped cream for covering the cake which is melts easily.

And of course it’s not complete without some fresh cherries, sift some icing sugar for the snow effect, and I would like to add silver sugar pearls for a sweet touch.
Feel free to add other decoration as desire.

The frosting won’t melt , so you we don’t need to worry too much 🙂

Isn’t this cake look tempting? It’s ready to serve or you can pop it into the fridge to hang out for a while.

Look at the inside, that delicious chocolately sponge cake!
And the thick rich dark sweet cherry filling in between

I’m so ready for a Christmas celebration, they are also perfect with your favorite tea or coffee.

I now you can’t resist it!

No one thought we would be celebrating Christmas in the midst of a pandemic, yet here we are. But we are still grateful for everything we have and always hope for the best.
May your Christmas be a merry one! Stay safe!! Love you All…


BLACKFOREST CAKE
Yield: One 8-inch Round Pan
Active time: 1 hour
Total time: 3 hour

INGREDIENTS
Chocolate Sponge Cake:

  • 100 grams Cake Flour
  • 25 grams Cocoa Powder
  • 65 grams Granulated Sugar
  • 50 grams Vegetable Oil
  • 65 grams Milk
  • 1 teaspoon Vanilla Extract
  • A Pinch of Salt
  • 85 grams Egg Yolks
  • 165 grams Egg Whites
  • 1 teaspoon Lemon Juice/ Vinegar
  • 65 grams Granulated Sugar

Cherry Filling:

  • 1 can (16 Ounces) Dark Sweet Cherries
  • 80 grams Granulated Sugar
  • 30 grams Corn Flour
  • 3 tablespoons Dark Rum/ Kirsch

Frosting:

  • 225 grams Shortening
  • 40 grams Unsalted Butter
  • 190 grams Icing Sugar
  • 2 tablespoons Dark Rum/ Kirsch
  • A Pinch of Salt
  • 60 grams Whipped Cream


INSTRUCTIONS
Prepare the panFor the water bath; Line the inside bottom part of 8-inch round pan with parchment paper and wrap the outside bottom part of the pan with aluminium foil.
Place the wrapped pan on bigger baking pan, set aside.


Chocolate Sponge Cake

  1. Preheat the oven to 150°C.
  2. In a large bowl, sift the flour and cocoa powder, set aside.
    In a medium bowl, combine the sugar, vegetable oil, milk, vanilla, salt and egg yolks, mix well. Pour the egg yolks mixture into the flour mixture and mix until no lumps remain.
  3. In another large bowl, whip egg whites and lemon juice until a bit foamy. Add the sugar gradually, continue mixing until reach a stiff peak.
  4. Very gently fold the egg whites into the egg yolks batter in three batches (don’t mix it together all at once, to prevent the egg foam deflate).
    Using spatula, mix gently just until all incorporated, make sure there’s no egg yolks batter left on the bottom of the bowl.
  5. Pour the mixture into the baking pan, tap the pan a few times to get rid off air bubbles.
    And for the water bath; pour about ½-inch hot water onto the bigger pan.
    Place both pans on the bottom rack of the oven and bake it for about 85 minutes.
  6. Once it come out from the oven, take it out immediately from the water bath. Tap the pan a few times so it won’t shrink too much, remove the cake from the pan and let it cool on a cooling rack.


Cherry Filling

  1. Strain the cherries and place the syrup to a medium sauce pan.
  2. Soak the cherries with generous amount of dark rum for about 1 hour (you can leave this out if you’d like to keep it kid-friendly).
  3. To make the cherry filling; Combine the reserve cherry syrup with sugar and corn flour (strain to make sure there’s no any lumps) pour it back to the pan.
    Cook over medium low heat, keep stirring until it boil becomes transparant and thickened. Remove it from the heat, add in rum, mix well
  4. Drain the soaked cherries and combine with the cherry filling.


Frosting

  1. In a large bowl combine the shortening and unsalted butter mix until soft and well combined.
  2. Add in the icing sugar, rum and salt, continue mixing until becomes light and fluffy.
  3. Pour in the whipped cream and mix until just combined.


Assembly

  1. Using a large serrated knife, divide the cake into 3 equal layers.
  2. Place the first cake layer on a cake plate, brush it with rum. Pipe a rim of frosting around the cake layer before adding the filling (this creates a nice barrier so the filling stays in place), spread half of the cherry filling within the frosting barrier.
    Place the second layer on top, repeat the step. Place your final cake layer bottom side up on top of the cake.
  3. Crumb coat your cake with a light coat of frosting (freezer for about 10 or 30 minutes in the fridge to set the crumb coat). Continue frost the cake with remaining frosting.
  4. Press generous amount of the chocolate shaves onto the cake, sprinkle some for the top
    (Tip: grate the chocolate 1 hour in advance and store them in the fridge so it’s easier to handle).
  5. Pipe frosting to make it pretty, place some fresh cherries. Sift some icing sugar on top of the cake. Add another decoration if desire.


NOTES

  1. Best serve on the day it’s made.
  2. Cover in an airtight container and store leftover cake in the refrigerator for up to 5 days.
  3. I suggest to use 16 Oz S&W Dark Sweet Cherries brand for the best result coz it serve fresh cherries inside and better taste than any other brand.

Molang & Piu Piu Jiggly Pudding

Hey Guys, today we are making these Molang and Piu Piu Jiggly Pudding. A light, smooth, firm-yet-soft milky pudding pairs with chocolately creamy chocolate custard.

Unmould Pudding

This type of puddings are quite soft.
So I suggest to prepare them 1 day in advance to make sure that they are firm enough before we unmold them.

Creamy Chocolate Custard

This supersilky and chocolately chocolate custard quick and easy to make, it’s creamy and delicious and is kid friendly.

Edible Chocolate Cup

And to make it more special, we will serve them in individual edible chocolate cup. I am using these 4 oz half-sphere silicone mould for the the cups and donut silicone mould for the cup saucers.

If you not keen to buy this kind of mould, kindly substitute them with silicone cupcakes liner or maybe other shape and you can simply pipe circle chocolate decorations on parchment paper to create the saucer.

To kind of fancy the cup up, I dip the rim of the chocolate cup into the melted chocolate and then dip that into the nonpareils. Isn’t that beautiful?

Chinese Tea Cup

And for the pudding moulds, I found that my pretty chinese tea cup and this super tiny measuring cup suits perfectly for this kind of project.

Super Tiny Measuring Cups

Look how small and adorable they are!! They are perfect coz they have a round bottom shape, quite similar to our lovely character’s head.

What I love about this pudding is that it’s not too sweet and it’s pretty light. There’s something so satisfying about spooning out that first bite.
It should keep it’s shape on your tongue and until you sink into it, it will dissolve into a velvety smooth melty bite.

It’s really an easy, simple, yet stunning dessert. You can make them ahead of time and serve on a dinner party.
I hope you give the a try and I’m sure that everybody will love them!

MOLANG & PIU PIU JIGGLY PUDDING
Yield: 2 portions
Active time:  1 hour
Total time: 8 hour

INGREDIENTS
Pudding:

  • 20 grams Cold Water
  • 4 grams Gelatine Powder
  • 20 grams Granulated Sugar
  • 115 grams Milk
  • 1/2 teaspoon Vanilla Extract (optional)

Chocolate Custard:

  • 20 grams Granulated Sugar
  • 2 teaspoons Cocoa Powder
  • 2 teaspoons Cornstarch
  • A pinch of salt
  • 12 grams Egg Yolks
  • 160 grams Milk
  • 1 teaspoon Unsalted Butter
  • 2/3 teaspoon Vanilla Extract/ Rhum


Decoration:

  • White Chocolate Compound
  • Dark Chocolate Compound
  • Food Colouring (Pink Rose, Yellow)


INSTRUCTIONS
Prepare the templates and moulds

  1. For Templates
    Print some templates for Molang and Piu Piu details. Stick some greaseproof paper on top of the templates, then apply some shortening to the greaseproof paper to prevent the chocolate stick to the paper surface.
  2. Pudding Mould
    Prepare pudding mould for Molang and Piu Piu that have a round bottom shape (quite similar to our lovely character’s head, for example chinese tea cup).
  3. Edible Cups and Saucers Mould
    You can use 4 oz half-sphere silicone mould or silicone cupcakes liner and maybe other shape for the the cups and donut silicone mould for the cup saucer (or manually make simple circle chocolate decorations on parchment paper for these saucer).


Pudding

  1. Bloom the gelatine with cold water and let it stand for about 3-5 minutes.
  2. In a medium sauce pan, mix the milk and sugar. Cook until the mixture simmering or reach about 60°C. 
  3. Mix in the bloomed gelatine into the milk, stir until well combine.
  4. Pour the white pudding mixture into Molang mould, colouring the rest with a bit of yellow food colouring for the Piu Piu, and then pour the yellow mixture into Piu Piu’s mould.
  5. Store them in the fridge for at least 6 hours (preferably over night).


Custard

  1. In a medium saucepan, mix the sugar, cocoa powder, corn flour and salt. Add in the egg yolks and mix until just combined.
  2. Gradually pour in the milk and whisk until no lumps remain.
  3. Cook the mixture over medium heat, keep stirring until it starts to boil and the mixture thickens. Take it off from the heat, add in the unsalted butter and rum or vanilla extract, mix well.
  4. Strain the custard to get rid of any lumps. 
  5. Let it cool about 5-10 minutes. Cover the surface with plastic wrap, pushing it directly on top of the mixture (make sure there are no air pockets, to prevent skin formation on top of custards). 
  6. Let it chill in the fridge for about 2 hours.


Character Details
Melt some white and dark chocolate compound, colouring as needed, pour each colour into a piping bag then trace characters details onto a parchment paper. Let them set hards in the fridge for about half hour.


Edible Chocolate Cups and Saucers
Cups; Pour melted rose pink colour chocolate compound fill up our moulds here, fill it right up to the top.  Flip it right over to make sure all the excess drips out, scrape the edge of any of that excess (we don’t want it to be a real jagged looking cup).
Repeated this 2 times, make sure you let these set in between each layer.
Saucer; Fill about half of the donut mould
*Store both cups and saucer for about 10 minutes in the fridge so they are completely solid and sets.


ASSEMBLY

  1. Unmould the Cups and Saucers
    Pull that silicone away from the chocolate, being very careful not to crack the chocolate.
    To fancy the cup; dipped the rim of the chocolate cup into the melted chocolate and then dip that into the nonpareils.Stick the cup onto the saucers with some melted chocolate.
  2. Crush some marie biscuit for layering in between the custard to add crunchiness and strengthen the base of the pudding so it won’t sink too much (can substitute with digestive or oreo).
  3. Pour about 2 tablespoons of chocolate custard into the edible cup, sprinkle about 1 tablespoon of crushed marie biscuits, spread another layer of custard evenly over the biscuits. 
  4. Slowly and carefully unmould Molang and Piu Piu pudding then place the pudding on top of the custard.
  5. Stick all the details.


NOTES

  1. Prepare the pudding 1 day in advance to make sure that they are firm enough before we unmold them.
  2. You can make the pudding and custard ahead of time (store them in the fridge for 2-3 days).
  3. You can use Candy Melts for Chocolate Compound.
  4. If you made edibles cups and saucers in advance, I suggest to store them at room temperature in an airtight container, so there is no moisture when served.
  5. For the presentation purpose; I recommend to assembly these dessert directly before serving to make sure that the biscuits don’t get mushy so the pudding doesn’t sink into the custard.

15 Minutes Quick and Foolproof Pizza Dough

Hey Guys, today we are making these “15 Minutes Quick and Foolproof Pizza dough” that rises quickly and makes incredible homemade pizza! It comes together in just minutes, you really doesn’t need a long rising time to make a fabulous pizza.

This pizza dough is fantastic with part whole wheat flour or all white flour, it also doubles, triples and even quadruples beautifully.

The dough is easy to work with and it’s a great last minute family dinner that you can prepare within 30 minutes from start to finish.

My favorite quick and easy toppings

There are also no rules about the kinds of toppings you put on your pizza. Choose ones you love. Don’t put yourself at risk of getting sick. When using toppings like sausage, chicken, steak, mushrooms or bacon, always cook them before preparing your pizza.
Keep in mind that more toppings generally mean more cook time.

It’s crispy around the edges, it’s soft and folds perfectly and of course the caramelized cheese and pepperoni even makes it more delicious!

Beautiful golden crust that’s super crispy around the edges and not soggy at the bottom, just nice!

Smells like heaven! It’s salty, spicy, crunchy…a bit sweet, It’s really good!!
I hope that you will enjoy the recipe!

15 MINUTES QUICK FOOLPROOF PIZZA DOUGH
Yield: 1 Regular Pizza
Active time: 15 Minutes
Total time: 30 Minutes

INGREDIENTS
Pizza Dough:

  • 120 grams Warm Water
  • 1/2 tablespoon Granulated Sugar
  • 1/2 tablespoon Vegetable Oil
  • 1/2 tablespoon Instant Yeast
  • 195 grams All-Purpose Flour
  • 1/2 teaspoon Salt

Sauce & Toppings:

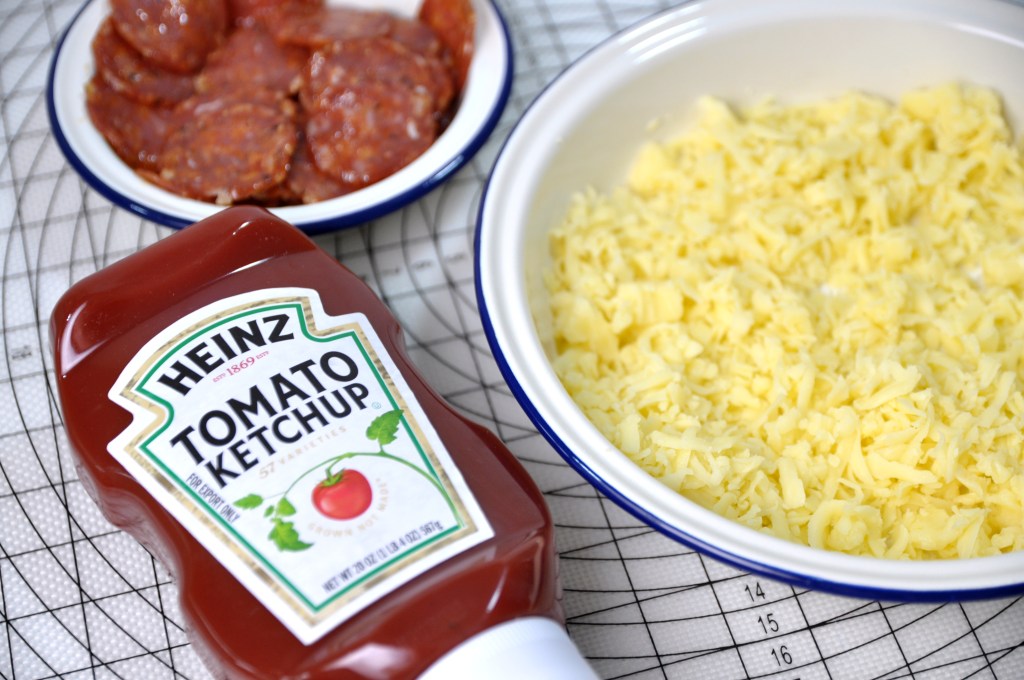
  • Tomato Ketchup
  • Mozzarella Cheese
  • Salami(Pepperoni)
  • Parsley Flakes

Condiment: Cheddar Cheese and Chili Flakes Chili Sauce

INSTRUCTIONS
Prepare the Oven and Pan
Crank your oven up as high as it goes.
The closer you can get to 260°C, the better.
Flip a rimmed baking sheet upside down, place it in the oven and preheat it for about 30 minutes before baking.

Pizza Dough:

  1. Mix the water, sugar, oil and the yeast. Add the flour and mix until just combined, pour in salt and stir until a soft dough forms. The exact flour amount will vary, the dough should be soft and smooth, not leaving a residue on your fingers but not super stiff either. Not too sticky and definitely not overfloured.
  2. Pour the dough onto a work surface, knead it for about 5 minutes, then shape it into a ball. Place the dough in a greased bowl, cover it with a plastic wrap and let it rest for about 10 minutes to relax the gluten.
  3. Shape the dough into pizza Roll the dough onto a piece of parchment paper (you can stretch the dough with your hands, your fingers and kind of spread it or even use a rolling pin). If you want it a little bit thinner, feel free to roll it out more.
  4. Pizza toppings Spread 3-4 tablespoons of red sauce (no-cook blender sauce), Tomato Ketchup is the best option. Pesto or rich Ricotta are wonderful substitutes as well. Sprinkle generously amount of grated mozzarella all the way around, place pepperoni on top (make sure everyone gets one per bite), then sprinkle with some more mozzarella and parsley flakes.
  5. To Bake Place the pizza onto the middle of the hot baking sheet, bake for about 10-15 minutes until the cheese is a nice dark deep brown and the crust is like a golden brown as well.
  6. Take it off from the heat, serve immediately or transfer it to a cooling rack so the bottom not become soggy.

NOTES

  1. Do not add salt directly to the yeast because it will kill the yeast.
  2. I always use 1/2 or up to 3/4 whole wheat flour with good results (I let it knead for a few minutes longer).
  3. This recipe doubles, triples and quadruples really well. Keep an eye on the flour if increasing the recipe. You want a soft, smooth dough – not too sticky and definitely not overfloured.
  4. Don’t put yourself at risk of getting sick. When using toppings like sausage, mincemeat, chicken, steak, or bacon, mushrooms always cook them before preparing your pizza.
    Keep in mind that more toppings generally mean more cook time.
  5. To store; place the pizza in an airtight container, fridge for 3-5 days, freezer for up to 6 months.
  6. To reheat; in the preheated 180° C oven for 10 minutes, microwave for 30 seconds to 1 minutes.

Perfect Fluffy Pancakes | With Homemade Maple Syrup

SIMPLE. EASY. QUICK. FLUFFY. The Perfect Fluffy Pancakes recipe you will fall in love with!
I’ve tried so many recipes using milk or buttermilk but none of it as fluffy as this recipe. These homemade Greek Yogurt Pancake so delicious and incredibly quick to whip up.

Do not overmix the batter, a few small lumps is perfect!

It all starts with the batter! The key to light and fluffy pancakes is mixing just until combined, it’s important not to over mix.

Don’t use electric beaters or a mixer, just whisk it by hand until it’s generally smooth, but you still can see a few small lumps. That way you know you’ll have tender fluffy light pancakes.

Cook until small bubbles appear on the surface and the edges lose it’s shine

You can add some toppings to the batter directly before flipping; such as Blueberries, Chocolate chips, slices bananas, nuts anything you like . Just drop them on the top of the pancake, distribute them evenly.

When you can see small bubbles appear on the surface and the edges lose it’s shine, that way you know it’s cooking from underneath and they are ready to flip (it will takes for about 1-2 minutes).

Homemade Maple Syrup can be store 2 months in the fridge

I love to pair them with my Homemade Maple Syrup. This Maple Syrup is low budget, simple, easy to make and it taste like pure Maple Syrup, how cool is that?

If you don’t like to use my Canadian style Maple Syrup, feel free to serve them with your favorite Nutella, fruit jams, chocolate sauce, caramel syrup or maybe a bit savory like cheese if you want.

Look how fluffy those are!

I love everything about these pancakes, they turns out perfect every single time! An amazing fluffy and light texture, they make me hungry as soon as I see them.

They are so tender and warm.
If you are making these on the weekend and you have a few extra left, just keep them in the fridge.
When it comes to Monday morning when you are in a hurry, just take them out from the fridge, pop  in the microwave or toaster for a few seconds, and you have got a quick breakfast on the go!

Start your mornings with these perfect pancakes, I’m sure that you will love them!

PERFECT FLUFFY PANCAKES (WITH HOMEMADE MAPLE SYRUP)
Yield: 10-12 pieces
Active time: 1/2 hour
Total time: 1 hour

INGREDIENTS
Maple Syrup:

  • 160 grams Granulated Sugar
  • 20 grams Granulated Palm Sugar
  • 2 teaspoons Honey
  • 140 grams Water
  • 2 teaspoons Vanilla Extract
  • 1 teaspoons Maple Extract (optional)


Pancakes Batter:

  • 195 grams All-Purpose Flour
  • 1 tablespoon Granulated Sugar
  • 1/2 + 1/4 teaspoon Baking Powder
  • 1/4 + 1/8 teaspoon Baking Soda
  • 1/4 teaspoon Salt
  • 180 grams Plain Greek Yogurt
  • 180 grams Milk
  • 75 grams Whole Eggs
  • 3 tablespoons Vegetable Oil


INSTRUCTIONS
Maple Syrup

  1. In a medium saucepan, combine the granulated sugar, granulated palm sugar, honey and water.
  2. Bring the mixture to boil, then reduce the heat to low. Cover the pan and allow it to simmer for about 15 minutes.
  3. Take it off from the heat and let it cool for 20 minutes.
  4. Stir in the extracts, mix well.
  5. Let the syrup cool completely before pour them in a jar or containers. You can store them for up to 2 months in the fridge.


Pancakes Batter

  1. In a medium bowl whisk together all the wet ingredients; Greek Yogurt, milk, eggs and vegetable oil, set aside.
  2. In another large bowl combine all the dry ingredients; the flour, sugar, baking powder, baking soda and salt.
  3. Pour the wet ingredients to the dry .
    The key to light and fluffy pancakes is mixing just until combined (don’t use electric beater or mixer, just whisk it by hand).
    Do not over mix, whisk until it’s generally smooth but you still can see a few small lumps.
  4. To cook
    On a medium heat, preheat a nonstick pan until a drop of water sizzles. Pour batter into rounds (about 3-4 tablespoons).
    Cook until small bubbles appear on the surface and the edges lose it’s shine (it will takes for about 1-2 minutes).
    *At this point you can add some toppings to the batter directly (blueberries, chocolate chips, slices bananas, nuts anything you like). Just drop them on the top of the pancake, distribute them evenly.
  5. Flip the pancakes and then cook for another minute or so until golden and cooked through. Repeat with remaining batter.

NOTES

  1. For the Pancake Batter;You can substitute the vegetable oil with melted unsalted butter, it will gives the pancakes a bit more flavor.
    Sour cream subs great for the greek yogurt, or you can use regular plain yogurt.
  2. Store leftover pancakes in an airtight container. They’ll be good in the refrigerator for 2-3 days, or you can freeze for up to 3 months.
  3. To reheat Pancakes
    Microwave: 20 seconds to 1 minute
    Oven: 10 minutes in the preheated 180°C
  4. Maple syrup can be store in the fridge for up to 2 months.

3D Magical Carousel Cookies

Many or all of the products featured here are from our partners who compensate us


Hi Guys, today we are making something very special “a Magical Carousel Cookies”. This was replicated from my previous cake project that I have designed for my client a few years ago.

Original Cake Design

Instead of using cake as a base structure of the design, I’m gonna use sugar cookies for the construction.

Cut off every pieces according to the templates

Special Cut Method for the Unicorns (with bamboo skewers underneath)

When you had this kind of project, it is very important to start by designing the construction drawing in 2 dimension.

Edges are golden brown means the cookies is done

The main purpose of construction drawings is to provide a graphic presentation of what is to be built. It showing the relationship between the components and how they fit together.

Stacking and Sticking to Develop the Structure

Carousel Design Construction

This dazzling Vintage Carousel Cookies featuring whimsical Unicorns would make a spectacular gift.


If you are looking for some cookies design that will have a hint of playful and look strikingly attractive just opt for these lovely Carousel Cookies and you are good to go.

Using Embossing Cutter for the Design

This also make a really cool birthday, upcoming christmas or even a wedding present.

Gorgeous Unicorns

You can simplify the design or even change the colour to suit the theme of your party.
How about A Magical Carousel Cookies for a magical party?

Center Pole Design

Our Magical Carousel Cookies goes round and round it goes, it looks so beautiful and amazing!


If you keen to make these kind of project kindly find the completed design templates in the description below.


I hope that you will fall in love with this Magical  and Dreamy Carousel Cookies as much as I do. Take care Guys, Love you all!

Print the attached files below in a standard A4 paper and simply cut the design out

Print in A4 Paper- Cut out the Design

Print in A4 Paper- Cut out the Design

Print in A4 Paper- Cut out the Design

Print in A4 Paper- Cut out the Design

Guide for Grouping, Sticking and Colouring Each Group

List of Tools That I Used in Creating This Project
Scissors https://amzn.to/3CEmqk5
Rolling Pin & Cutting Tools https://amzn.to/3V8yH7g
Marzipan Spacers https://amzn.to/3eaqoaB
Round Plunger Cutter https://amzn.to/3e8fYsa
X-ACTO Knife https://amzn.to/3ehZVrw
Dual Sided Cookie Cutter Rectangle https://amzn.to/3V1N9yd
Scriber Needle https://amzn.to/3rBtQyc
Straight Frill Cutter https://amzn.to/3EirQSY
Strip Cutter https://amzn.to/3CCeyPV
Textured Lace Set https://amzn.to/3CcJapQ
Mini Heart Plunger https://amzn.to/3CaYjrO


3D MAGICAL CAROUSEL COOKIES
Yield: 1 Carousel (16 cm diameter, 24 cm height)
Active time: 3 hour
Total time: 5 hour

INGREDIENTS
Sugar Cookies:

  • 200 grams Unsalted Butter (soft)
  • 200 grams Granulated Sugar
  • 50 grams Whole Eggs
  • 400 grams All-Purpose Flour
  • 1 teaspoon Favorite Extract or Grated Zest (optional)


Marshmallow Fondant:

  • 150 grams Marshmallow
  • 2 tablespoons Water
  • 350-450 grams Icing Sugar
  • 35 grams Shortening
  • Food Colouring (Rose, Delphinium Blue, Turquoise)
  • Edible Pen (Black)


Royal Icing:

  • 15 grams Egg Whites
  • 100 grams Icing Sugar
  • 1/6 teaspoon Cream of Tartar 
  • 1/3 teaspoon Vanilla Extract
  • 1-2 teaspoons Water

Sugar Syrup: 50 grams Granulated Sugar, 50 grams Water

Assembly: Paper Straws, Bamboo Skewers, Small Brush, Gold Luster Dust, Embossing Cutter, Silver sugar pearls sprinkles

INSTRUCTIONS
Design Structure and Templates
Print Side View Design Structure and cookie templates on standard A4 paper, then simply cut all the design out

Sugar Cookies

  1. In a large bowl mix the butter, sugar and favorite extract or zest until well combined and just becoming creamy in texture.
    Do not overwork, or the cookies will spread during baking.
  2. Slowly beat in the eggs until well combined.
  3. Add in the flour and mix until it creates a dough ball.
  4. Gather it into a flat disk, wrap it in a plastic wrap and chill it in the fridge for at least 1 hour.
  5. Trace and Cut
    Prepare marzipan spacers for an even thickness (you can use wooden chopstick if you don’t have it on hand), rolling pin, knife, cut off templates and some greaseproof paper for the base of the cookies.

    Place the chilling dough on a floured surface and knead it briefly so it’s pliable.
    Place the dough on top of a greaseproof paper, using marzipan spacers on both sides and another greaseproof paper on top, roll it out into an even thickness.

    Trace and cut out the shapes according to the templates (to maintain each shapes make sure that every pieces cut on top on their own greaseproof paper that will be bake later).
  6. Lay cut out pieces on a baking tray. Please note, always bake equally sized cookies together to make sure they are cook in the same time.
    If you mix different sizes, the small ones are already cooked when the larger ones are still raw in the middle.
  7. Chill the cut out cookies in the fridge for about 30 minutes before baking to maintain it’s shapes, and then bake them for about 8–15 minutes, depending on size, until golden brown around the edges. 
  8. Take it off from the heat, wait for 5 minutes then transfer them to a cooling rack to cool completely.

Marshmallow Fondant

  1. Pour marshmallows into a microwave-safe bowl or in a double boiler (you might want to grease the bowl and spatula with a bit of shortening before mixing, to prevent stickiness).
    Add about 2 tablespoons of water and microwave it in 30 seconds intervals, stirring in between, until the marshmallows completely melted.
  2. Add in ¾ of the icing sugar and mix (you can add any flavouring you want).
    After the fondant begins comes together, grease hands and table work generously with shortening, and then turn marshmallow mixture onto the table work.

    Add some more left over icing sugar, and continue kneading until it’s form a firm nice and smooth elastic ball (you might need less or more icing sugar).

    If it’s a bit dry, add 1 teaspoon of water at a time and if it’s too wet, add a bit more icing sugar. Knead until it feels soft and pliable.
  3. Once it’s done, grease the outside of the fondant with shortening to prevent dryness and then store them in a ziplock bag to keep it moist.

Simple Syrup
Over medium heat, bring equal amount of sugar and water to a boil, turn the heat to low, stir constantly until the sugar dissolves and the mixture is clear and thickened.
Take it off from the heat, pour into a clean glass jar and let it cool completely.

Royal Icing
In a medium bowl, combine egg whites, Cream of Tartar, icing sugar, and Vanilla Extract.
Beat on high speed for 5 to 10 min or until very stiff (feel free to add 1 or 2 teaspoons of water as needed if you fill it’s to thick).
Covering icing in bowl at all times with a plastic wrap to prevent from drying.


Assembly

  1. Group, stick (use royal icing as a glue) and cover baked cookies with fondant (use simple syrup as a glue) according to the “Side View Design Structure” template.
  2. Decorate the Unicorns.
  3. Place paper straw as Carousel Center Pole (which has been inserted by 2 pieces of bamboo skewers to make it stronger), using royal icing as a glue to assemble and build the cookies group (except for the rooftop).
  4. Decorate the Carousel Center Pole (feel free to use any embossing cutter).
  5. Insert another 3 bamboo skewers around Carousel center pole for the Unicorns. Using paper straw (to cover the bamboo skewers) and thick round paper to support the Unicorns.
    Using royal icing to fill in the base of the pole.
    Place Unicorn on top of round paper, stick both sides together (use royal icing as a glue).
  6. Place and decorate the Carousel rooftop. 
  7. Add finishing details.    


NOTES

  1. To Store Decorated Carousel Cookies; 1 week at room temperature in an airtight packaging.
  2. To store baked cookies; 1 week at room temperature in an airtight container. For longer storage, pop in the freezer (in an airtight container) for up to 3 months.
  3. To store Sugar Syrup; keeps for a while in the refrigerator. Eventually mold will begin to grow if stored too long.  You can also stir in 1 tablespoon corn syrup to help ensure the syrup stays smooth.
  4. To store Royal icing; 1 week in the fridge, always cover bowl in a plastic wrap.

Traditional Mooncake (Inspired by Sin Hap Hoat Brand)

Hi Guys, today we are making my favorite childhood Traditional Mooncake inspired by the famous brand “Sin Hap Hoat”.
And until now, I still fall in love with this moon cake.
Mid-Autumn Festival takes place when the full moon is said to be the largest and brightest of the whole year. It was traditionally a time to give thanks to the Gods.

This is the type of moon cake that capture my heart, it brings fond memories for me and my family.
The round moon cakes are symbols of the great family reunion just like the round, as usual we sit together under the bright light of the moon, sip tea, nibble on mooncakes.

It’s completely different with alkaline water or snow skin kind moon cake, no need any fancy ingredients such as golden syrup or alkaline water.
They original Brand “Sin Hap Hoat” have flavour varieties such as Chocolate, Milk, Durian, Jackfruit, cheese and many more. My favorite flavour will always be these lovely chocolate.

Yummy Thick Chocolate Paste

The chocolate paste mixed nut filling is not too sweet, it’s pretty thick and so flavourful.

“Tjoklat” Old Stamp Spelling

And originally it still use the old stamp spelling of the flavour on the top of the Mooncake, like Tjoklat means Chocolate.

DIY Stencil

As I don’t have customized stamp for the cake design so I decided to make my own DIY cake stencil.

These mooncake has an equal proportions of skin and filling. That helps the mooncake to balance out the sweetness and make it taste so good.
They are best enjoyed with a strong, palate-cleansing cup of Chinese tea.

The cake skin will be sturdy and a bit crunchy after baking, but as you store them, it will absorb the oil from the filling and become softer, which is a good thing! Make them even tastier.

I hope that you will enjoy these recipe, maybe turned them into gifts for friends or relatives and have a happy Mid-Autumn Festival.
Love you Guys!


TRADITIONAL MOONCAKE (INSPIRED BY SIN HAP HOAT BRAND)
Yield: 4 pieces
Active time: 1 hour
Total time: 1 1/2 hour

INGREDIENTS
Chocolate Nut Filling:

  • 15 grams Unsalted Butter
  • 45 grams Dark Baking Chocolate (Compound or Couverture)
  • 65 grams Granulated/ Raw Sugar
  • 40 grams Water
  • 1/2 tablespoon Vanilla Extract
  • 80 grams All-Purpose Flour
  • 20 grams Cocoa Powder
  • 60 grams Baked Cashew Nut

*For those of you who prefer savoury flavour, you can substitute the chocolate filling with this delicious Cheese Filling:

  • 120 grams Grated Cheddar Cheese
  • 95 grams Icing Sugar
  • 80 grams All-Purpose Flour
  • 40 grams Salted Butter

Skin Dough:

  • 125 grams Condensed Milk
  • 44 grams Eggs
  • 1/2 teaspoon Vanilla Extract
  • 165 grams All-Purpose Flour
  • 1 1/2 tablespoons Milk Powder
  • 1/3 teaspoon Baking Powder

Cake Stencil:

  • Printed design on A4 paper
  • Greaseproof Paper
  • Double Tape
  • Red Food Colouring Powder
  • White Vinegar
  • Small Brush


INSTRUCTIONS
Cake Stencil
Print the design on a piece of standar A4 paper. Laminate back side of the A4 printed design with a greaseproof paper using double tape. Then using sharp Xacto knife carefully cut out the design out.


Chocolate Nut Filling

  1. In a medium pan, combine the unsalted butter, dark sweet chocolate, granulated or raw sugar, water and Vanilla Extract. Cook over medium low heat until start to boil and the chocolate melted. Take it off from the heat.
  2. Sift the flour and cocoa powder immediately into the pan, mix until well combined until it create a smooth shiny chocolate dough.
  3. Add the crushed cashew nuts into the chocolate filling, mix well.
  4. Divide the fillings into 4 equal pieces (about 80 grams each), shape the chocolate filling into a disk about 1-inch thick, set aside.

Cheese Filling
Simply combine all the ingredients. The mixture will be gritty at first, keep kneading until it creates a dough ball.

Divide into 4 equal pieces (about 80 grams each) shape into a disk.

Skin Dough
In a large bowl combine the condensed milk, eggs, and vanilla extract, mix well. Then pour in the all-purpose flour, milk powder and baking powder Mix until well combined.
The dough should be sticky at first, cover and let it rest for about 5 minutes to let the flour absorbed the water so it’s will be less sticky.
Divide the skin dough into 4 equal pieces (about 80 grams each).


Wrapping, Decorating and Baking

  1. Wrapping;
    Using rolling pin, gently flatten and roll the skin dough into 7 cm in diameter disk, put some flour on your palm, then pick up the skin and put it on your palm.
    Place one portion of the chocolate nuts filling ball at the center of the skin, gently wrap the dough upwards and around the filling, tighten your palm, pinching edges at the top to seal.
    Make sure the skin and the filling stick together evenly.
  2. Place a piece of greaseproof paper on top of the mooncake. Using flat surface, press the mooncake gently into a thick flat disk (make sure the top is flat and it should be about the same diameter size as the template).
    *If you see a shadow of the chocolate filling on the skin surface, don’t worry it won’t be visible after the skin dough risen in the oven.
  3. Decorating;
    Dilute about 1/2 teaspoon red food colouring powder with a bit of white vinegar. Place your stencil on top of the mooncake, using round brush tap the coloured gently over holes in the stencil (make sure it doesn’t move around while you stenciling).
    Gently peel away the stencil, using tiny brush paint the rest of the missing details.
  4. Baking;
    Bake the mooncake in the preheated 160°C oven for about 25 minutes.
    After baking, remove it from the heat and let it cool completely on the cooling rack.
  5. Store them in an air-tight container.

NOTES

  1. The cake skin will be sturdy and a bit crunchy after baking, but as you store them, It will absorb the oil from the filling and become softer, which is a good thing, Make them even tastier.
  2. The mooncake has an equal proportions of skin and filling. That helps the mooncake to balance out the sweetness and make it taste so good
  3. You can substitute cashew nut with any other baked nut you like (macademia, almond, walnut or peanut).
  4. Best serve after you keep them 1-2 days at room temperature (in an airtight container), when the skin soften a bit.
  5. You can store them 4 days at room temperature or 3 months in the fridge.

Lovely Taiwanese Pineapple Cakes/ Tarts

Hi Everyone, today we are making these “Lovely Taiwanese Pineapple Cakes”.
It is a crumbly and nearly melt-in-the-mouth pastry with the pineapple jam as the filling inside.

The difference with the Singaporean/ Malaysian pineapple tart is they are typically larger and made in square or rectangle shape.

I personally prefer the Taiwanese version coz the pastries have a rich distinctively crumbly milky taste and filled with a generous portion of sweet sticky chewy pineapple filling inside.

Pineapple cakes filling from commercial manufactures usually made of winter melon and Maltose Syrup so that the filling is extra sweet, heavy and sticky, which is not healthy.

They usually substitute all or part of the pineapple with winter melon, a vegetable in the squash family that is much cheaper than pineapple.

Since winter melon has little flavour, artificial flavours and colours are added to the pastries to make them attractive to consumer, and then Maltose syrup has been added to stiffen the fillling.

For this reason, I would like to show you how to make the healthier style of Taiwanese Pineapple Cakes which is hold up pretty well, so adorable and taste much fresher.

A lot of research went into perfecting these treats. But the end result was wonderful.
The key is the exterior, that’s how it will remain even after it is baked so you want the dough to be as smooth as possible. 

Pineapple Cakes before baking

So I actually found two versions of the crust that I liked, and there’s no need to put them in the fridge at all.

The first one I called a “basic dough” for the character’s body. It’s buttery, soft, yet also malleable and sturdy enough to hold its form.
And the second dough that I called the “colouring dough”. It’s soft and easy to work with, even for small details and also colour well with any kind of edible food colouring.

Is there anybody that wouldn’t want to box these as a present ? They are so cute, tasty, photogenic, everthing you could ever want!

They taste amazing when served slightly warm and paired with a cup of hot tea.
The buttery crust is rich and crumbly, filled with fruity sweet sour, chewy and sticky pineapple filling, they are absolutely delicious.

I really hope you Guys give it a try, they are a lot of fun to put together and they are pretty simple too! Love you all!!

LOVELY TAIWANESE PINEAPPLE CAKES
Yield: 10 pieces
Active time: 1 hour
Total time: 2 1/2 hours

INGREDIENTS
Pineapple Filling

  • 500 grams Pineapple (Chopped)
  • 120 grams Granulated Sugar
  • 20 grams Unsalted Butter
  • 30 grams Glutinous Rice Flour

Basic Dough

  • 100 grams Salted Butter (Cold)
  • 12 grams Icing Sugar
  • 22 grams Egg Yolks
  • 152 grams All-Purpose Flour
  • 24 grams Milk Powder

Colouring Dough

  • 25 grams Salted Butter (Cold)
  • 7 grams Condensed Milk
  • 3 grams Egg Yolks
  • 38 grams All-Purpose Flour
  • Food Colouring (Red, Soft Pink, Black, White)

INSTRUCTIONS
Pineapple Filling

  1. Cut off the pineapple skin, took off the core and coarsely cut them into chunks (if you use canned pineapple, make sure to adjust the sugar level. They will take longer to cook coz the heavy water content in the canned pineapple).
  2. Transfer the chunks into a non-stick pan, add in the sugar (since the sweetness of each pineapple is different, feel free to adjust the amount of the sugar accordingly). Cook over medium high heat. Stirring constantly until most of the moisture has evaporated. Don’t forget to adjust the heat level based on the water content that was left in the pan.
    *I suggest using a non-stick pan as it is sticky after when it becomes concentrated.
  3. When the pineapple is about to dry, looks translucent and a bit brownish, lower the heat, add in the butter. Stir continously until the butter melted and incorporated in the pineapple (the butter makes the pineapple fillings smoother and easier to handle during wrapping).
  4. For the binder, sprinkle in some of the glutinous rice flour. Add it gradually, to make sure that the flour are distribute evenly. Mix until well combined.
  5. Take it off from the heat, spread the fillings thinly on a large plate to cool completely.


Basic Dough

  1. In a large bowl, cream the butter and icing sugar until light and smooth.
  2. Add in the egg yolks, mix well 
  3. Pour in All-Purpose Flour and milk powder, mix until all the ingredients just combined and create a dough ball (do not overmix to avoid the formation of gluten, which will make the pastry less flaky).
  4. Cover them with a plastic wrap to prevent the dough dry. Set aside


Colouring Dough

  1. Combine the butter, condensed milk and egg yolks, mix well.
  2. Pour in the all-purpose flour, mix until it’s form a smooth dough.
  3. Colour it as needed (remember to always cover the dough with a plastic wrap to keep their moisture).


Wrapping, Decorating and Baking

  1. Divide pineapple filling into portions of 20 grams each, and basic dough 25 grams each.
  2. Roll each portion of pineapple filling into a ball.
  3. Flatten a portion of basic dough (you can do this in your palm or with a small rolling pin).
  4. And then place a portion of filling into the centre of the flattened dough. 
  5. Gently wrap the dough around the filling, pinching away and setting aside excess dough at the top and where the edges meet. 
  6. Gently roll the filled dough between your palms to form a smooth oval ball. 
  7. Using some basic dough and white colouring dough for the ears.
    Apply some white colouring dough for the face.
    Black dough for the nose, mouth and eyes.
    Soft pink for the cheeks and tounge.
    Using love shape plunger cutter to create the heart shape.
    And finally, use some basic dough to create her hands and legs.
    *Make sure the details sticks really well otherwise it will tilted or fall down while baking.
  8. Bake in the preheat 160°C oven for 20 minutes.
    Remove from the oven, allow  to cool slightly on the pan for about 20-25 minutes, and then transfer them onto a cooling rack to cool completely.


NOTES

  1. The dough will expand a bit when baked in the oven.
  2. You can use any food colouring for the “Colouring Dough” (powder, gel, liquid).
  3. Store the cakes at room temperature in an airtight container, the crust will have become more tender.
  4. Pineapple cakes turning mouldy even when stored in an airtight containers is due to the presence of too much moisture.
    Store pineapple cakes which are cooled to room temperature in an airtight container away from the sunlight for 3-4 days.
    Keep them refrigerated for up to 1 months.


Chocolate Tiramisu in A Cup

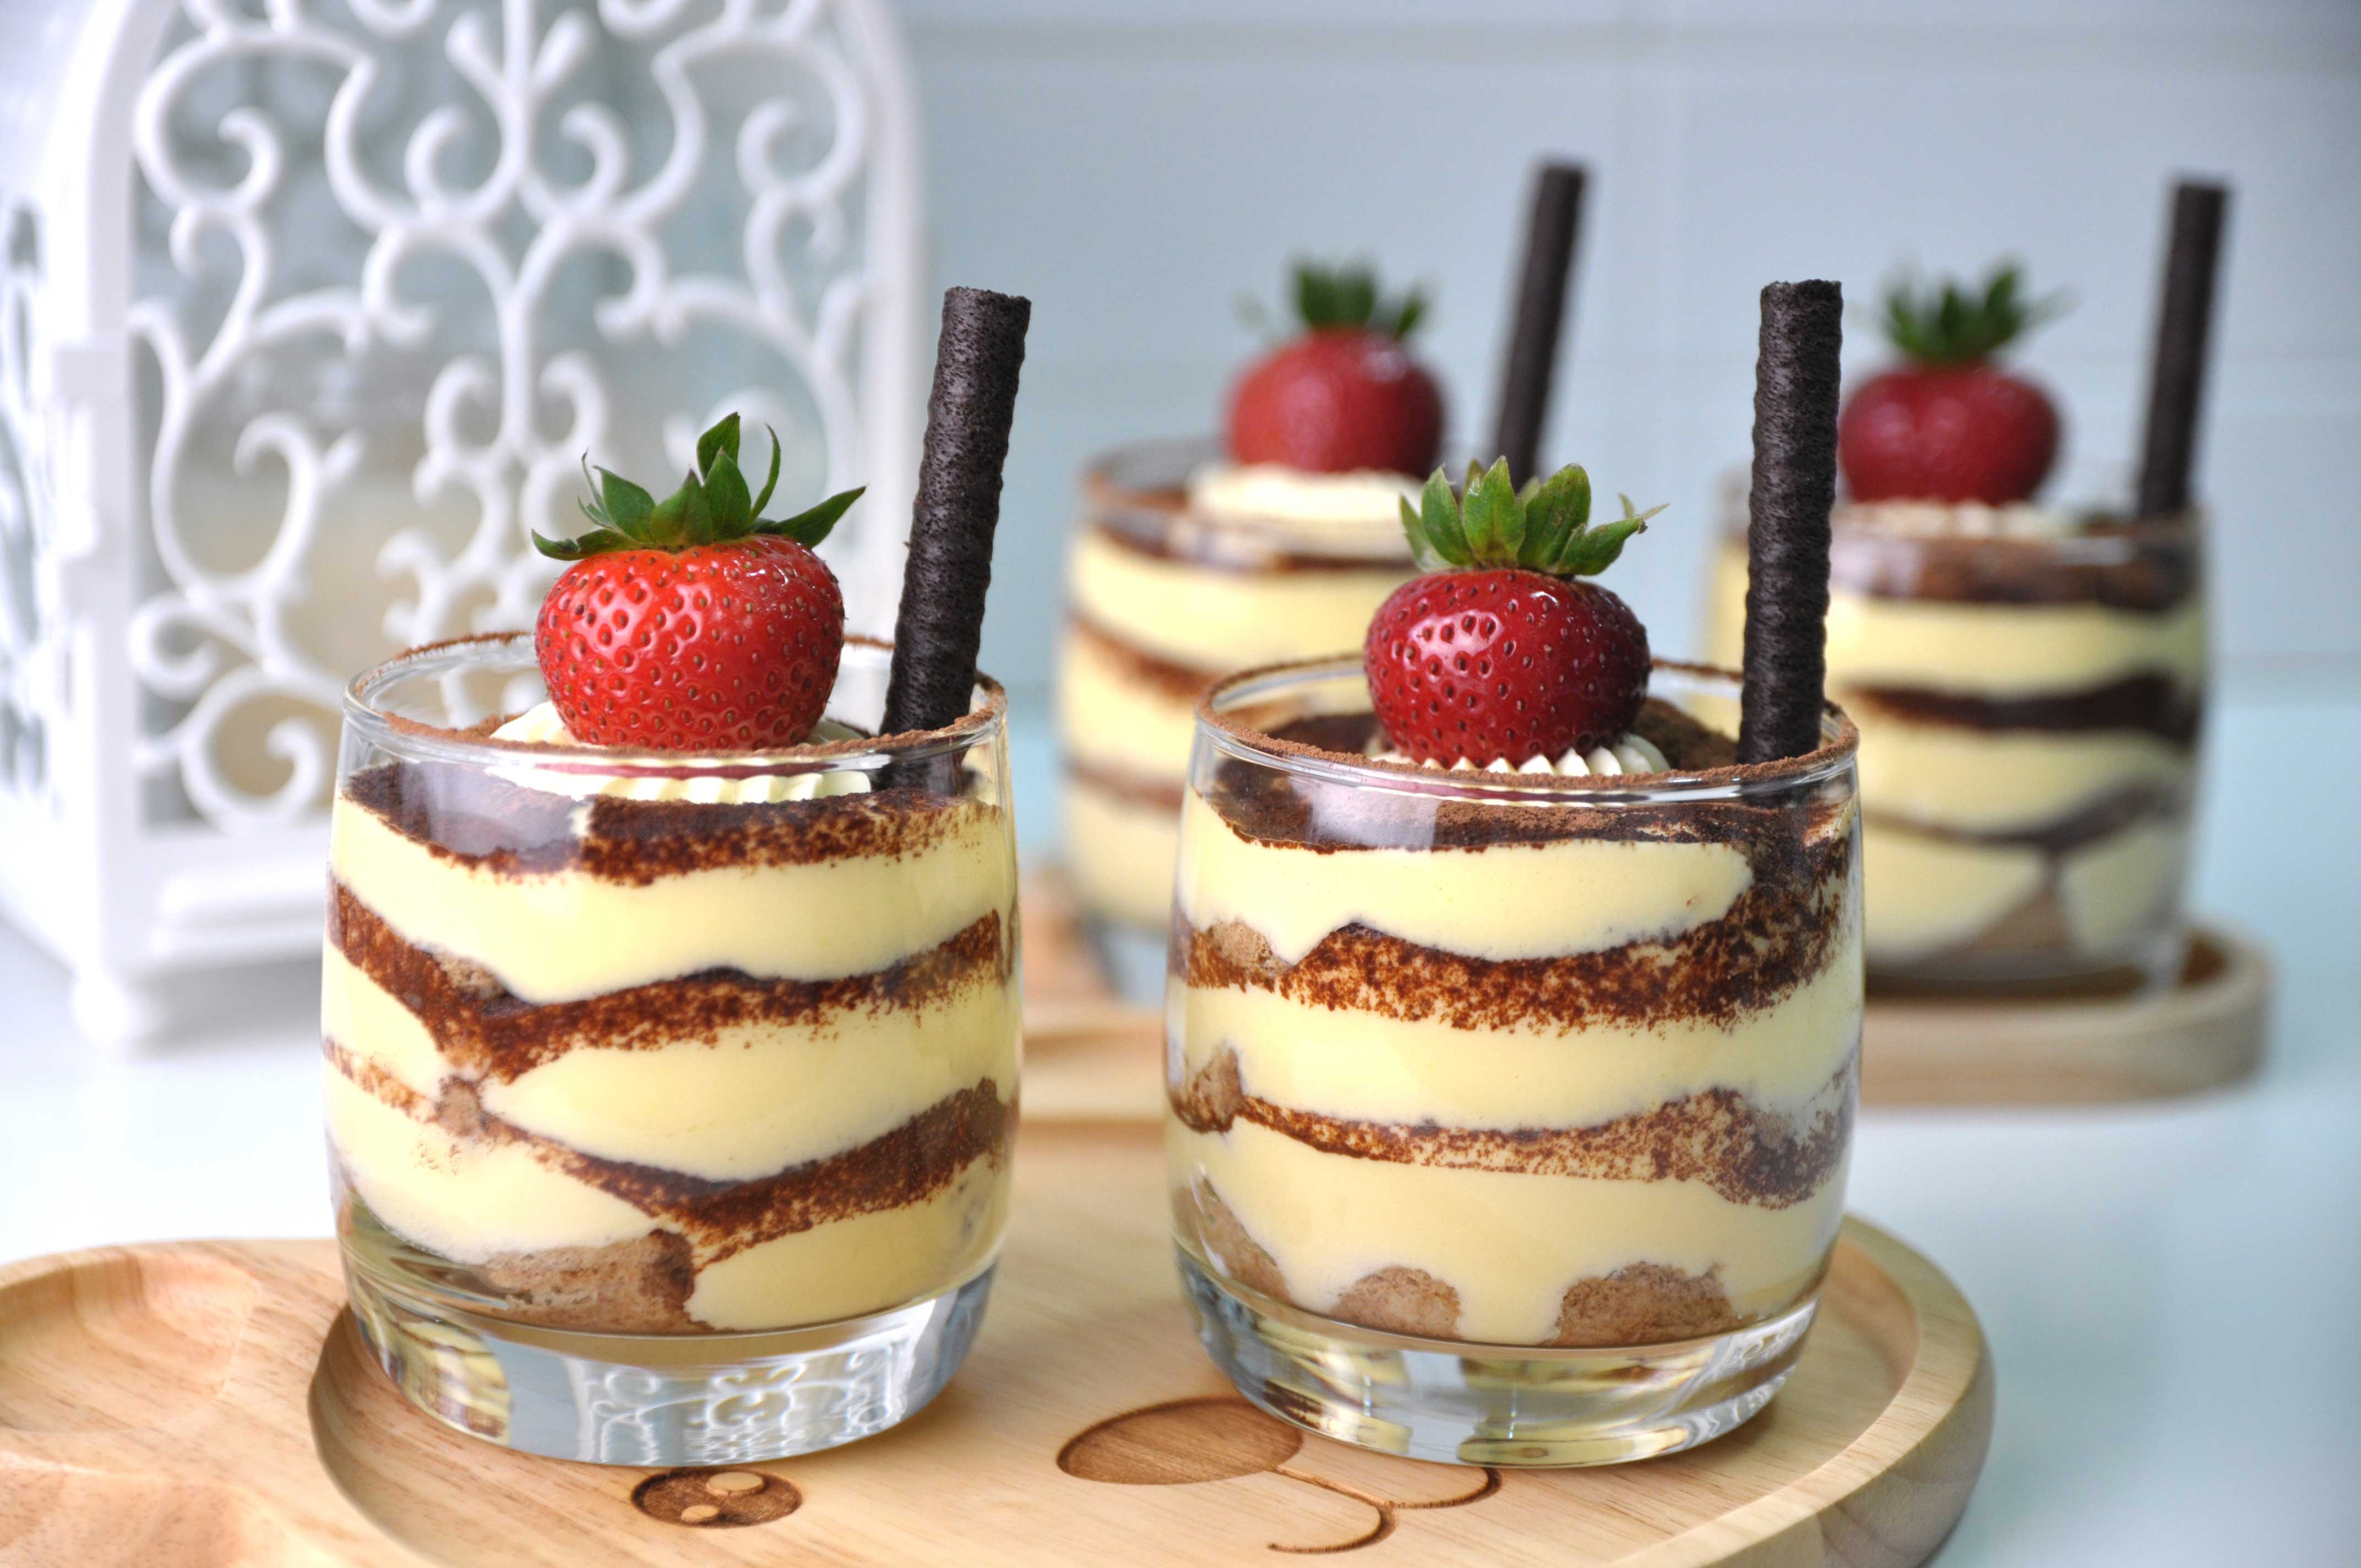
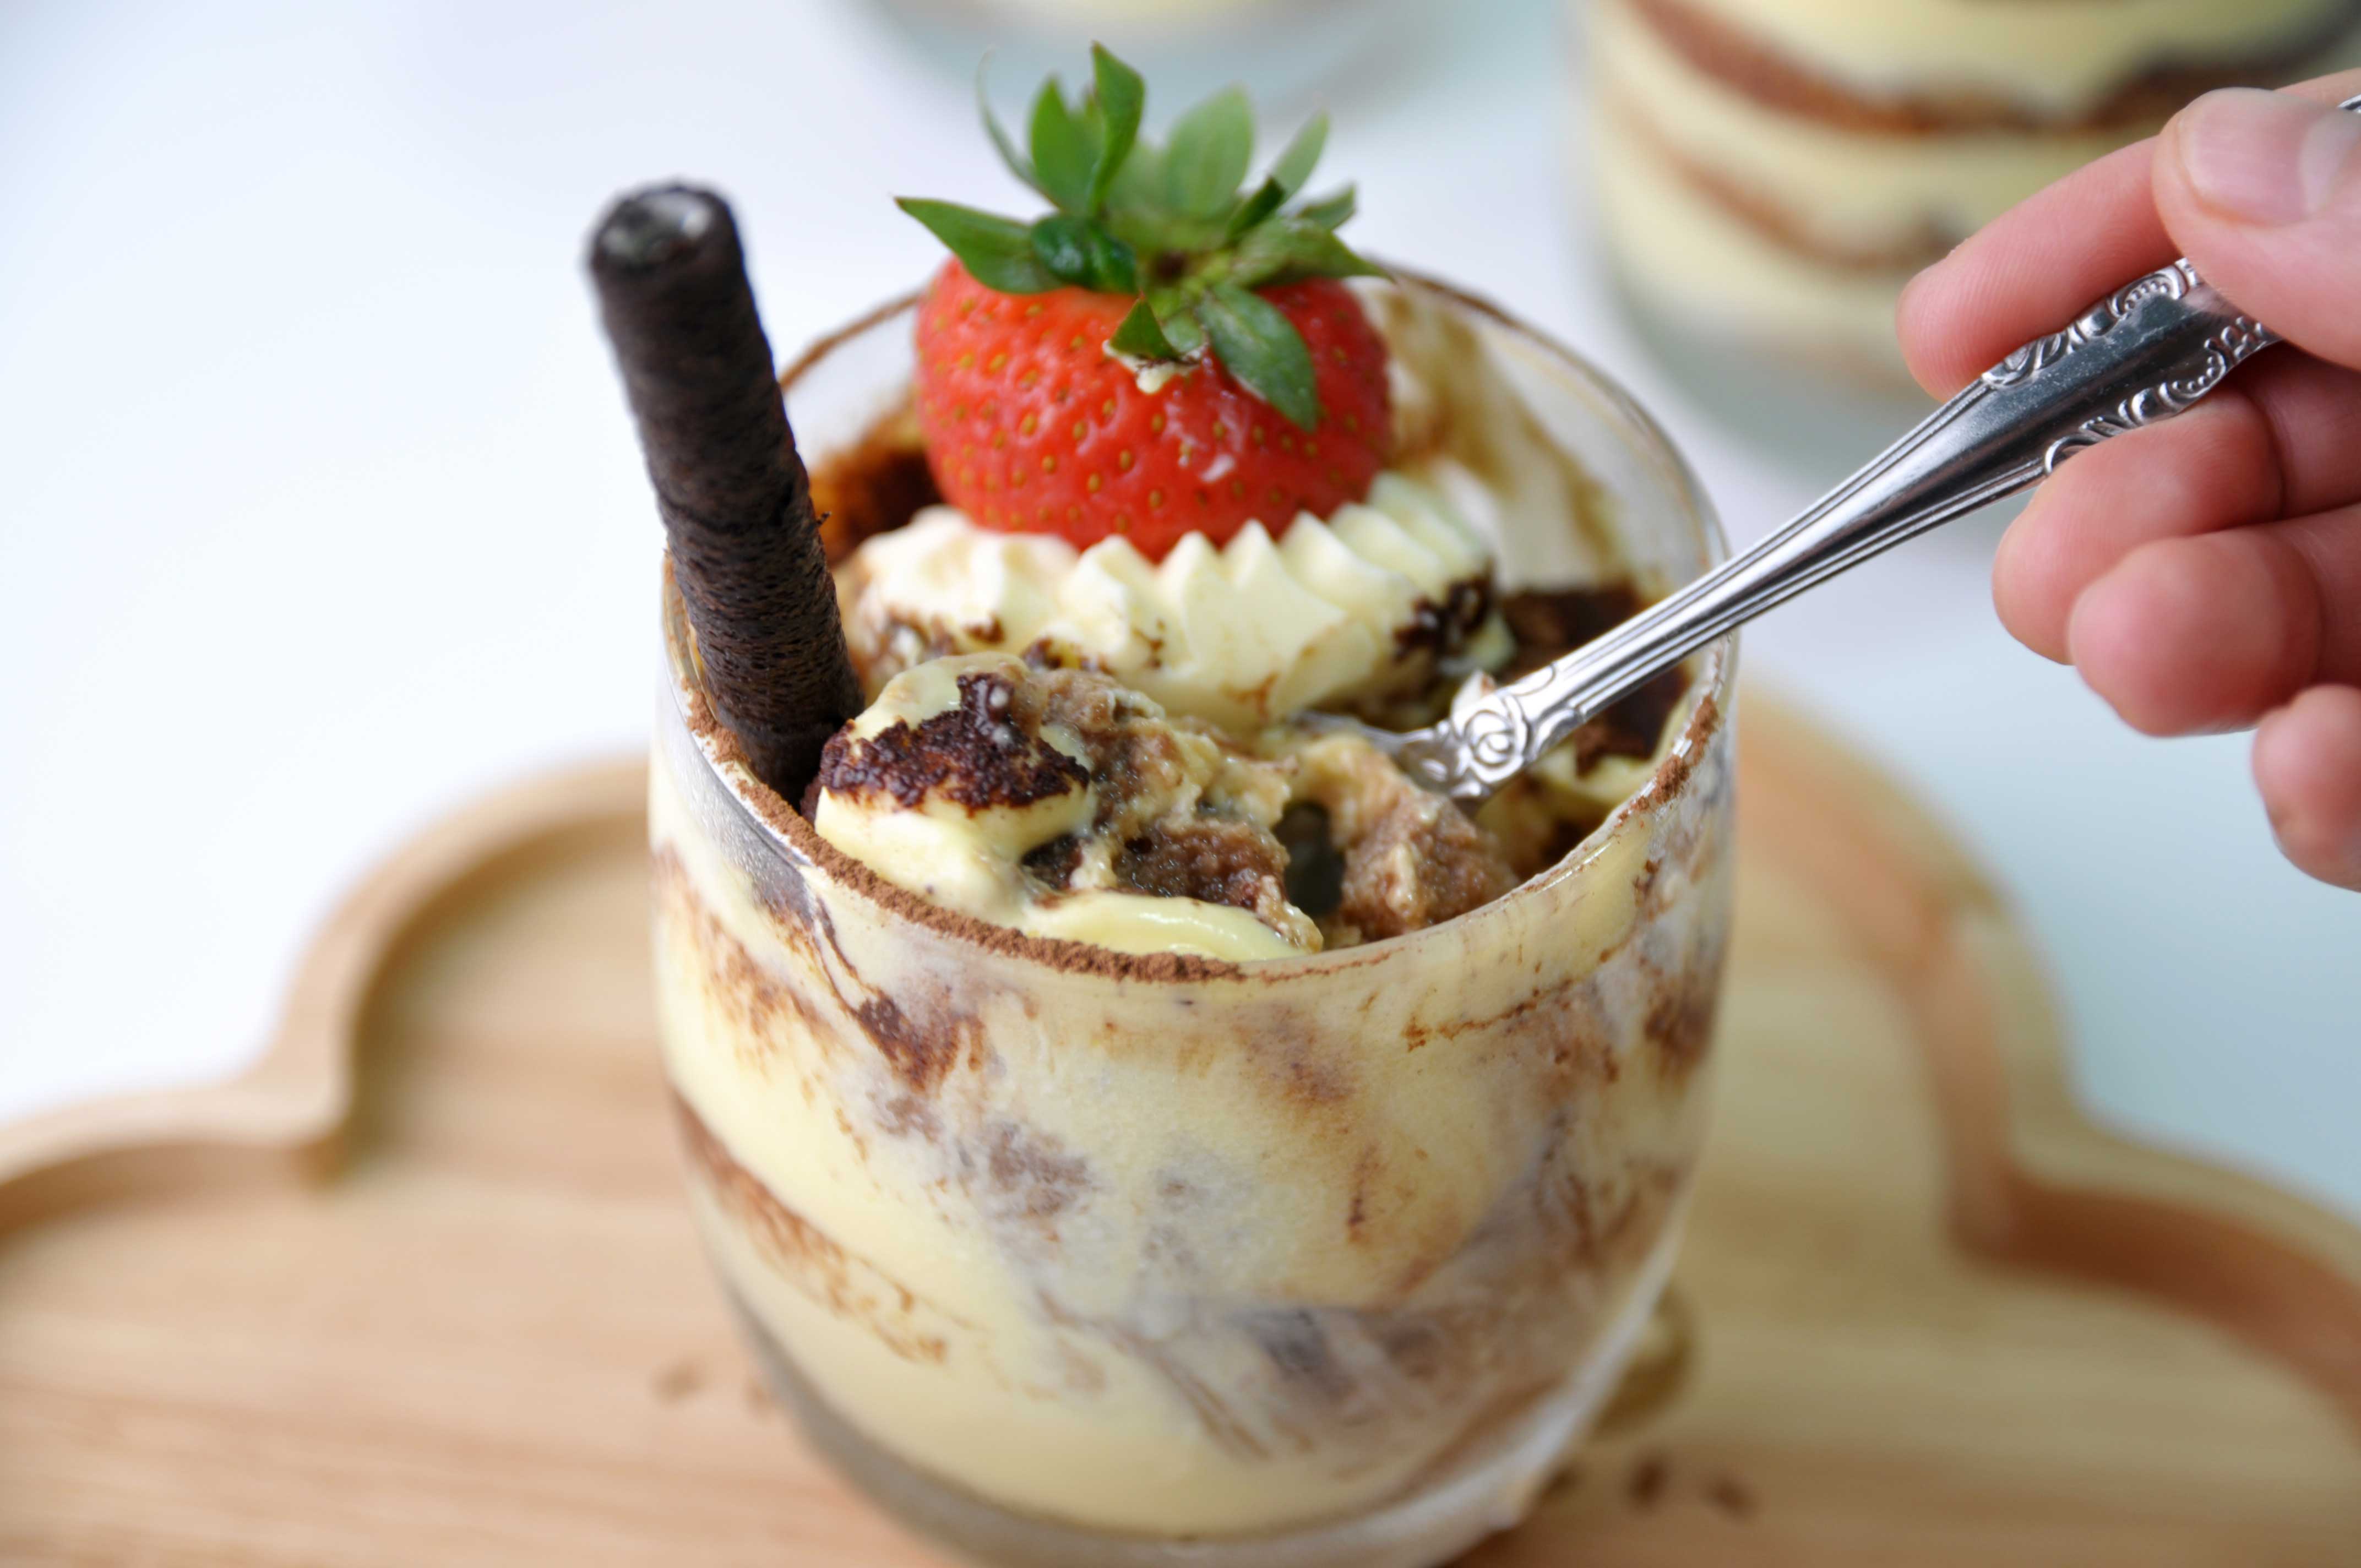
Hi Everyone, today we are making these yummy “Chocolate Tiramisu in A Cup”.  Tiramisu is one of my absolute favorite desserts 😛  It is even simple to make, you just need a little time.

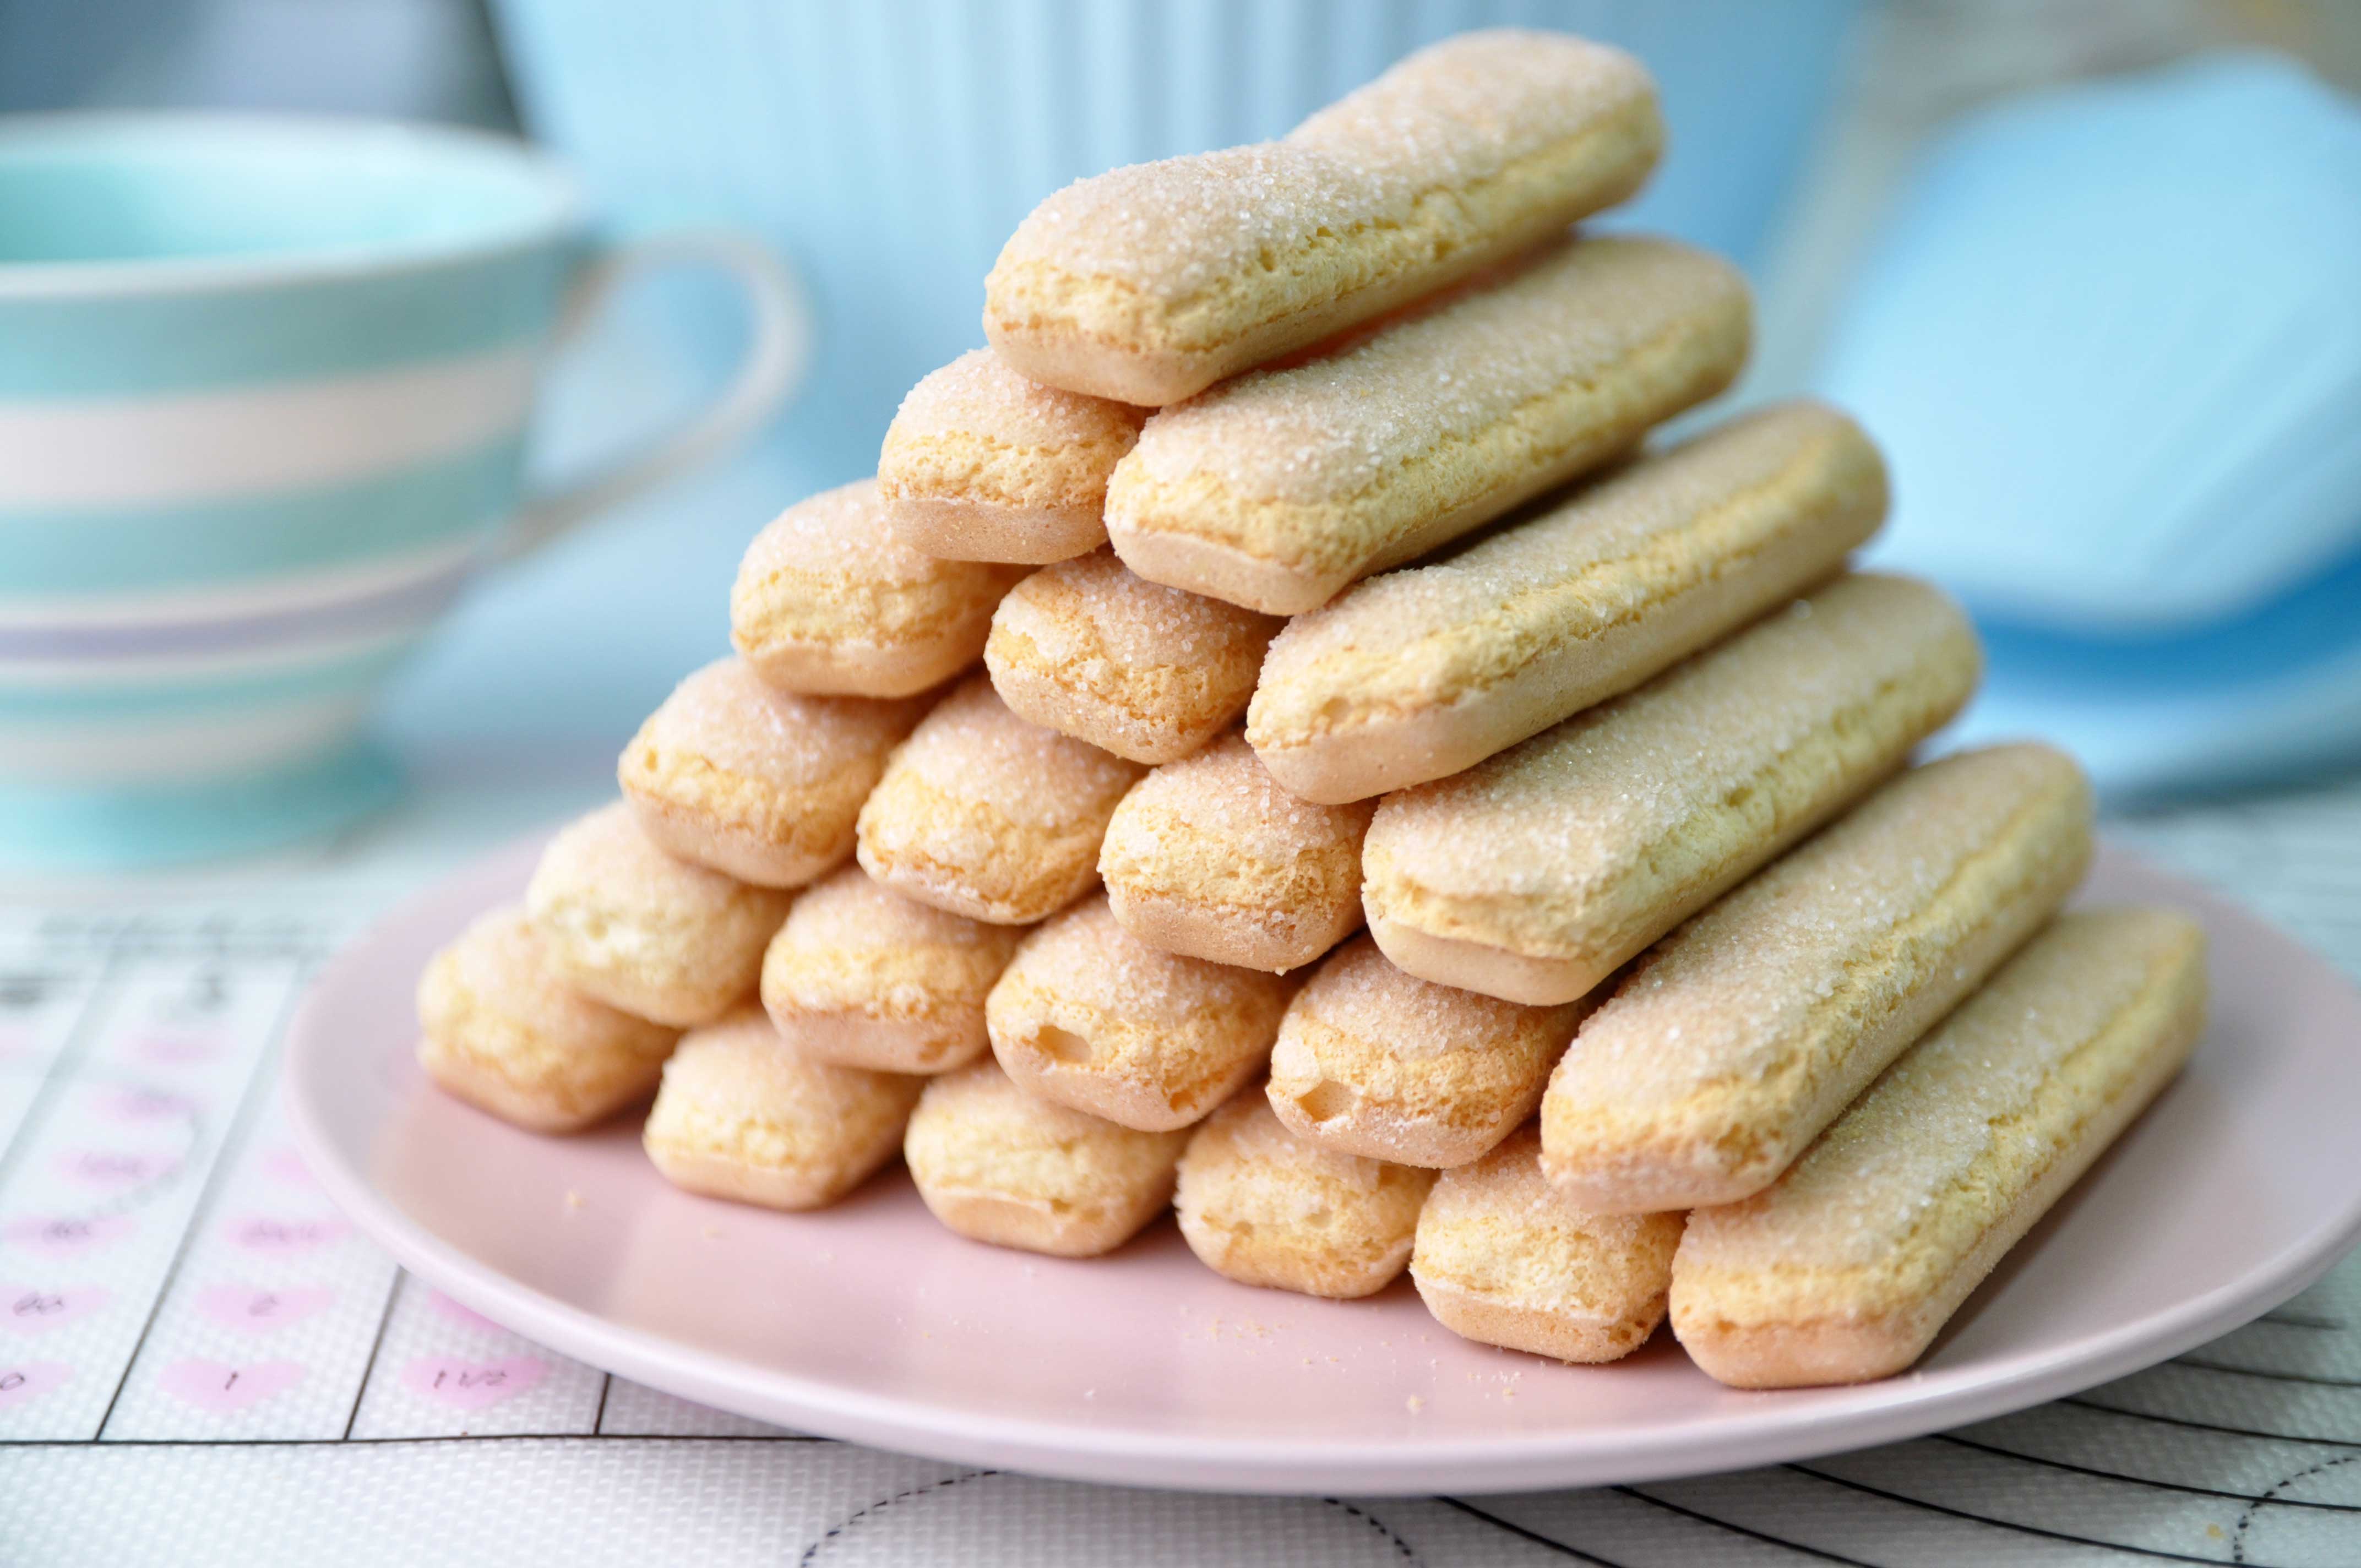
Ladyfinger Cookies

Traditional Tiramisu is made with Espresso and Rum soaked Ladyfingers. The version below has subbed in hot Cocoa and Rum for the Espresso and Rum.

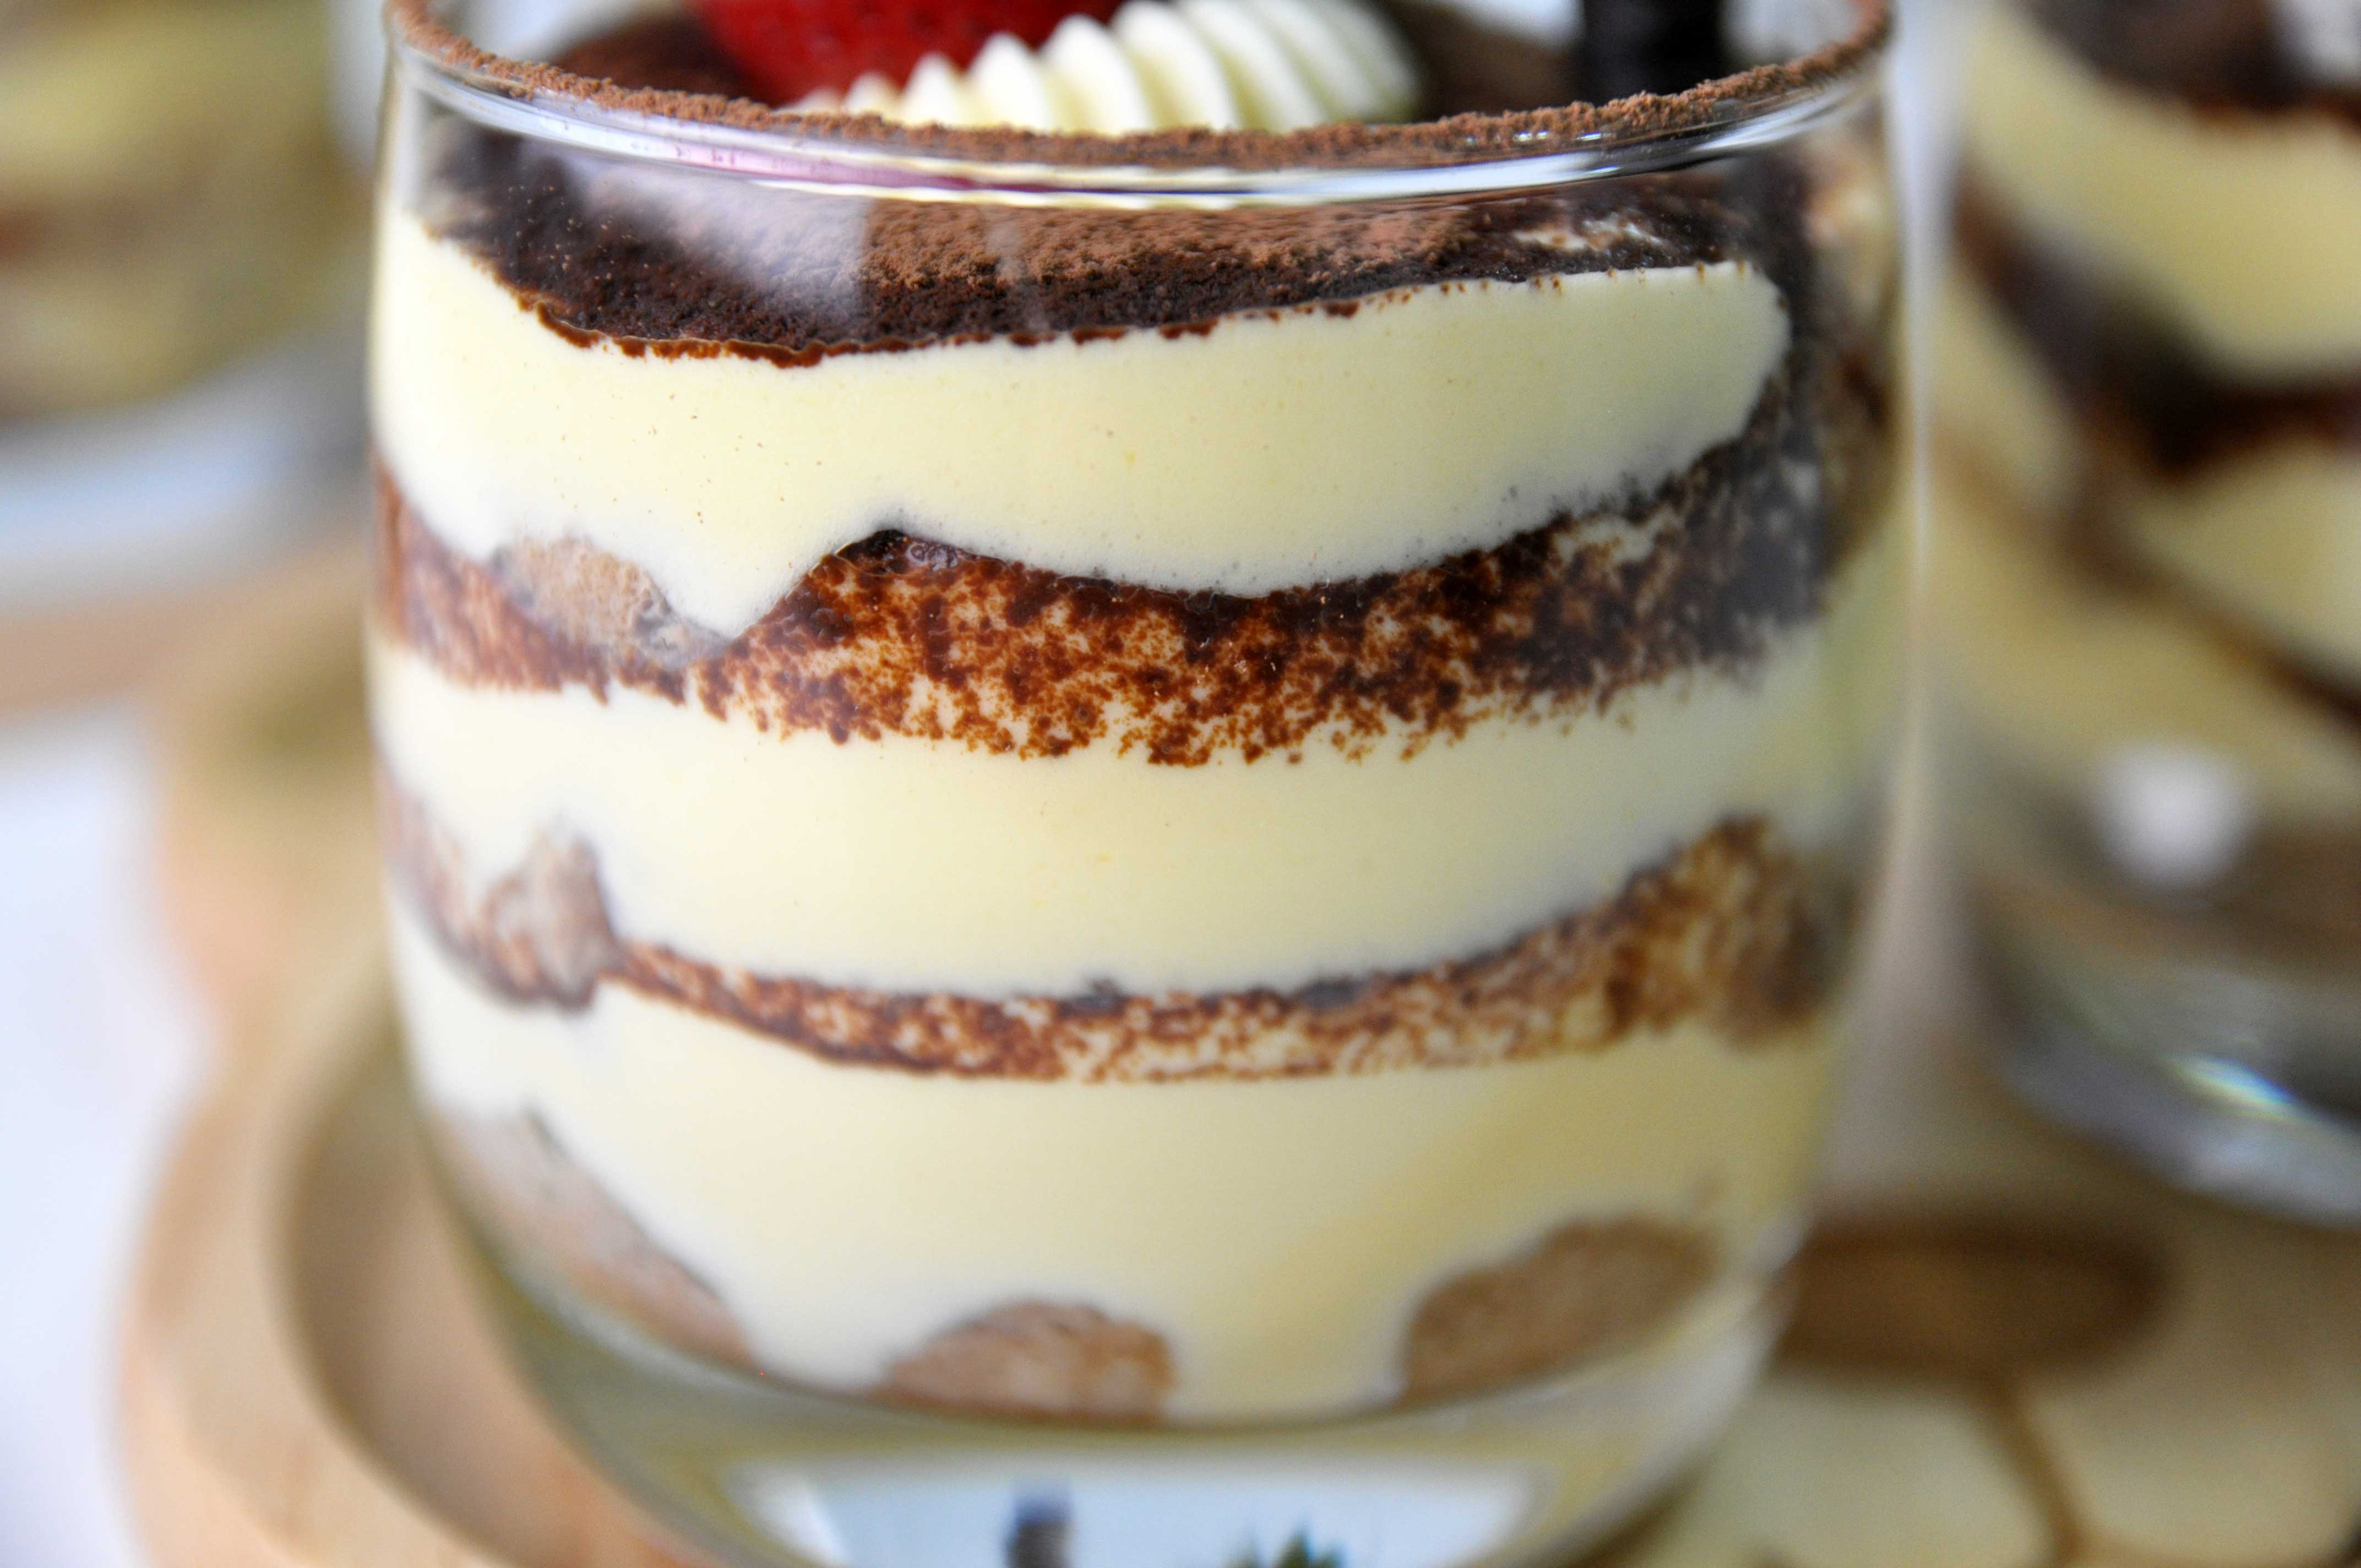
Creamy Custard Layers

And since I know many people are nervous about eating raw eggs, I went with the cooking-the-eggs method. This makes a bit more dense than authentic Tiramisu since the creamy layers is like a custard.

I can honestly say this is the perfect tiramisu that I’ve ever tasted! And I hope you can love it as much as I do! Enjoy Guys! 😉

CHOCOLATE TIRAMISU IN A CUP
Yield: 5 cups (8 Oz)
Active time: 1 hour
Total time: 5 hours

INGREDIENTS

  • 360 grams Hot water
  • 3 tablespoons Cocoa powder
  • 2 tablespoons Rum liqueur
  • 1 teaspoon Vanilla extract
  • 4 Egg yolks
  • 100 grams Granulated sugar
  • 1/8 teaspoon Salt
  • 60 grams Whipping cream
  • 230 grams Cream Cheese
  • 120 grams Whipping cream
  • 20-30 pieces Lady fingers
  • Cocoa Powder (for sprinkle)

INSTRUCTIONS
Cocoa Mixture:
In a large bowl, mix cocoa powder and the hot water, mix well. Allow the hot cocoa to cool until lukewarm, then add the Rhum and Vanilla extract. Set aside. Note: Due to the high cocoa to water ratio, whisk the cocoa mixture frequently to keep the cocoa suspended.

Cream Cheese Custard Mixture:

  1. In a medium heat proof bowl beat the egg yolks until just combined. Add in the sugar and salt, beat at medium speed until pale yellow for about 2 minutes. Pour in the 60 grams of whipped cream, mix well. After well combined, set the bowl over saucepan of water that has come to a simmer. Cook these mixture, stirring constantly and scraping along the bottom and sides of the bowl until the eggyolk mixture coats the back of the spoon (it will take for about 4-7 minutes). Take it off from the heat, set aside to cool completely.
  2. As soon as it cool completely, gently pour in the cream cheese and beat at medium speed until no lumps remain. Set aside.
  3. In a medium bowl beat the 120 grams heavy whipping cream at medium-high speed until stiff peaks form.
  4. Using a rubber spatula, fold 1/3 of the stiff whipped cream into the cream cheese mixture. Then gently fold in the remaining whipped cream until no white streaks remain. Set the mixture aside.

ASSEMBLY

  1. Give the hot cocoa mixture a good whisk to combine. Dip 1 ladyfinger into the cocoa mixture at a time, allowing it to soak up the hot cocoa for about 1-2 seconds per side. Transfer each ladyfinger immediately to a cup. Lay the cookies side-by-side to create one even layer (you may have to trim/break the soaked cookies to fit the dish).
    After finishing the first layer of the cookies, spread about 3 tablespoons of the cream cheese mixture evenly over the ladyfingers.
    Then using a small fine-mesh strainer, sprinkle a generous amount of cocoa powder over the cream cheese layer.
  2. Repeat these process, creating 2 more layer of ladyfinger over the cream cheese cocoa layer. After finished with all the layers, spread evenly with the remaining cream cheese mixture. And finally dust the top with more cocoa powder.

NOTES

  1. These Tiramisu need to refrigerate it for at least 4 hours to chill and set, they taste even better if you can made it 1 day in advance.
  2. Store the Tiramsu in an airtight container, it will keep for up to 4 days in the refrigerator.
  3. It also will stay fresh frozen for 3 months.
    To freeze the Tiramisu; you can wrap it with two layers of cling wrap (make sure that it is an airtight), either by individual slices (if you are not planning to eat everything right away) or as a whole if you are sure that you can consume everything once thawed, cover the wrapped Tiramisu with an alumunium foil, then freeze.
  4. To thaw the frozen Tiramisu; simply put it in the refrigerator overnight and it’s ready to enjoy.

Sumikko Gurashi Meringue Cookies

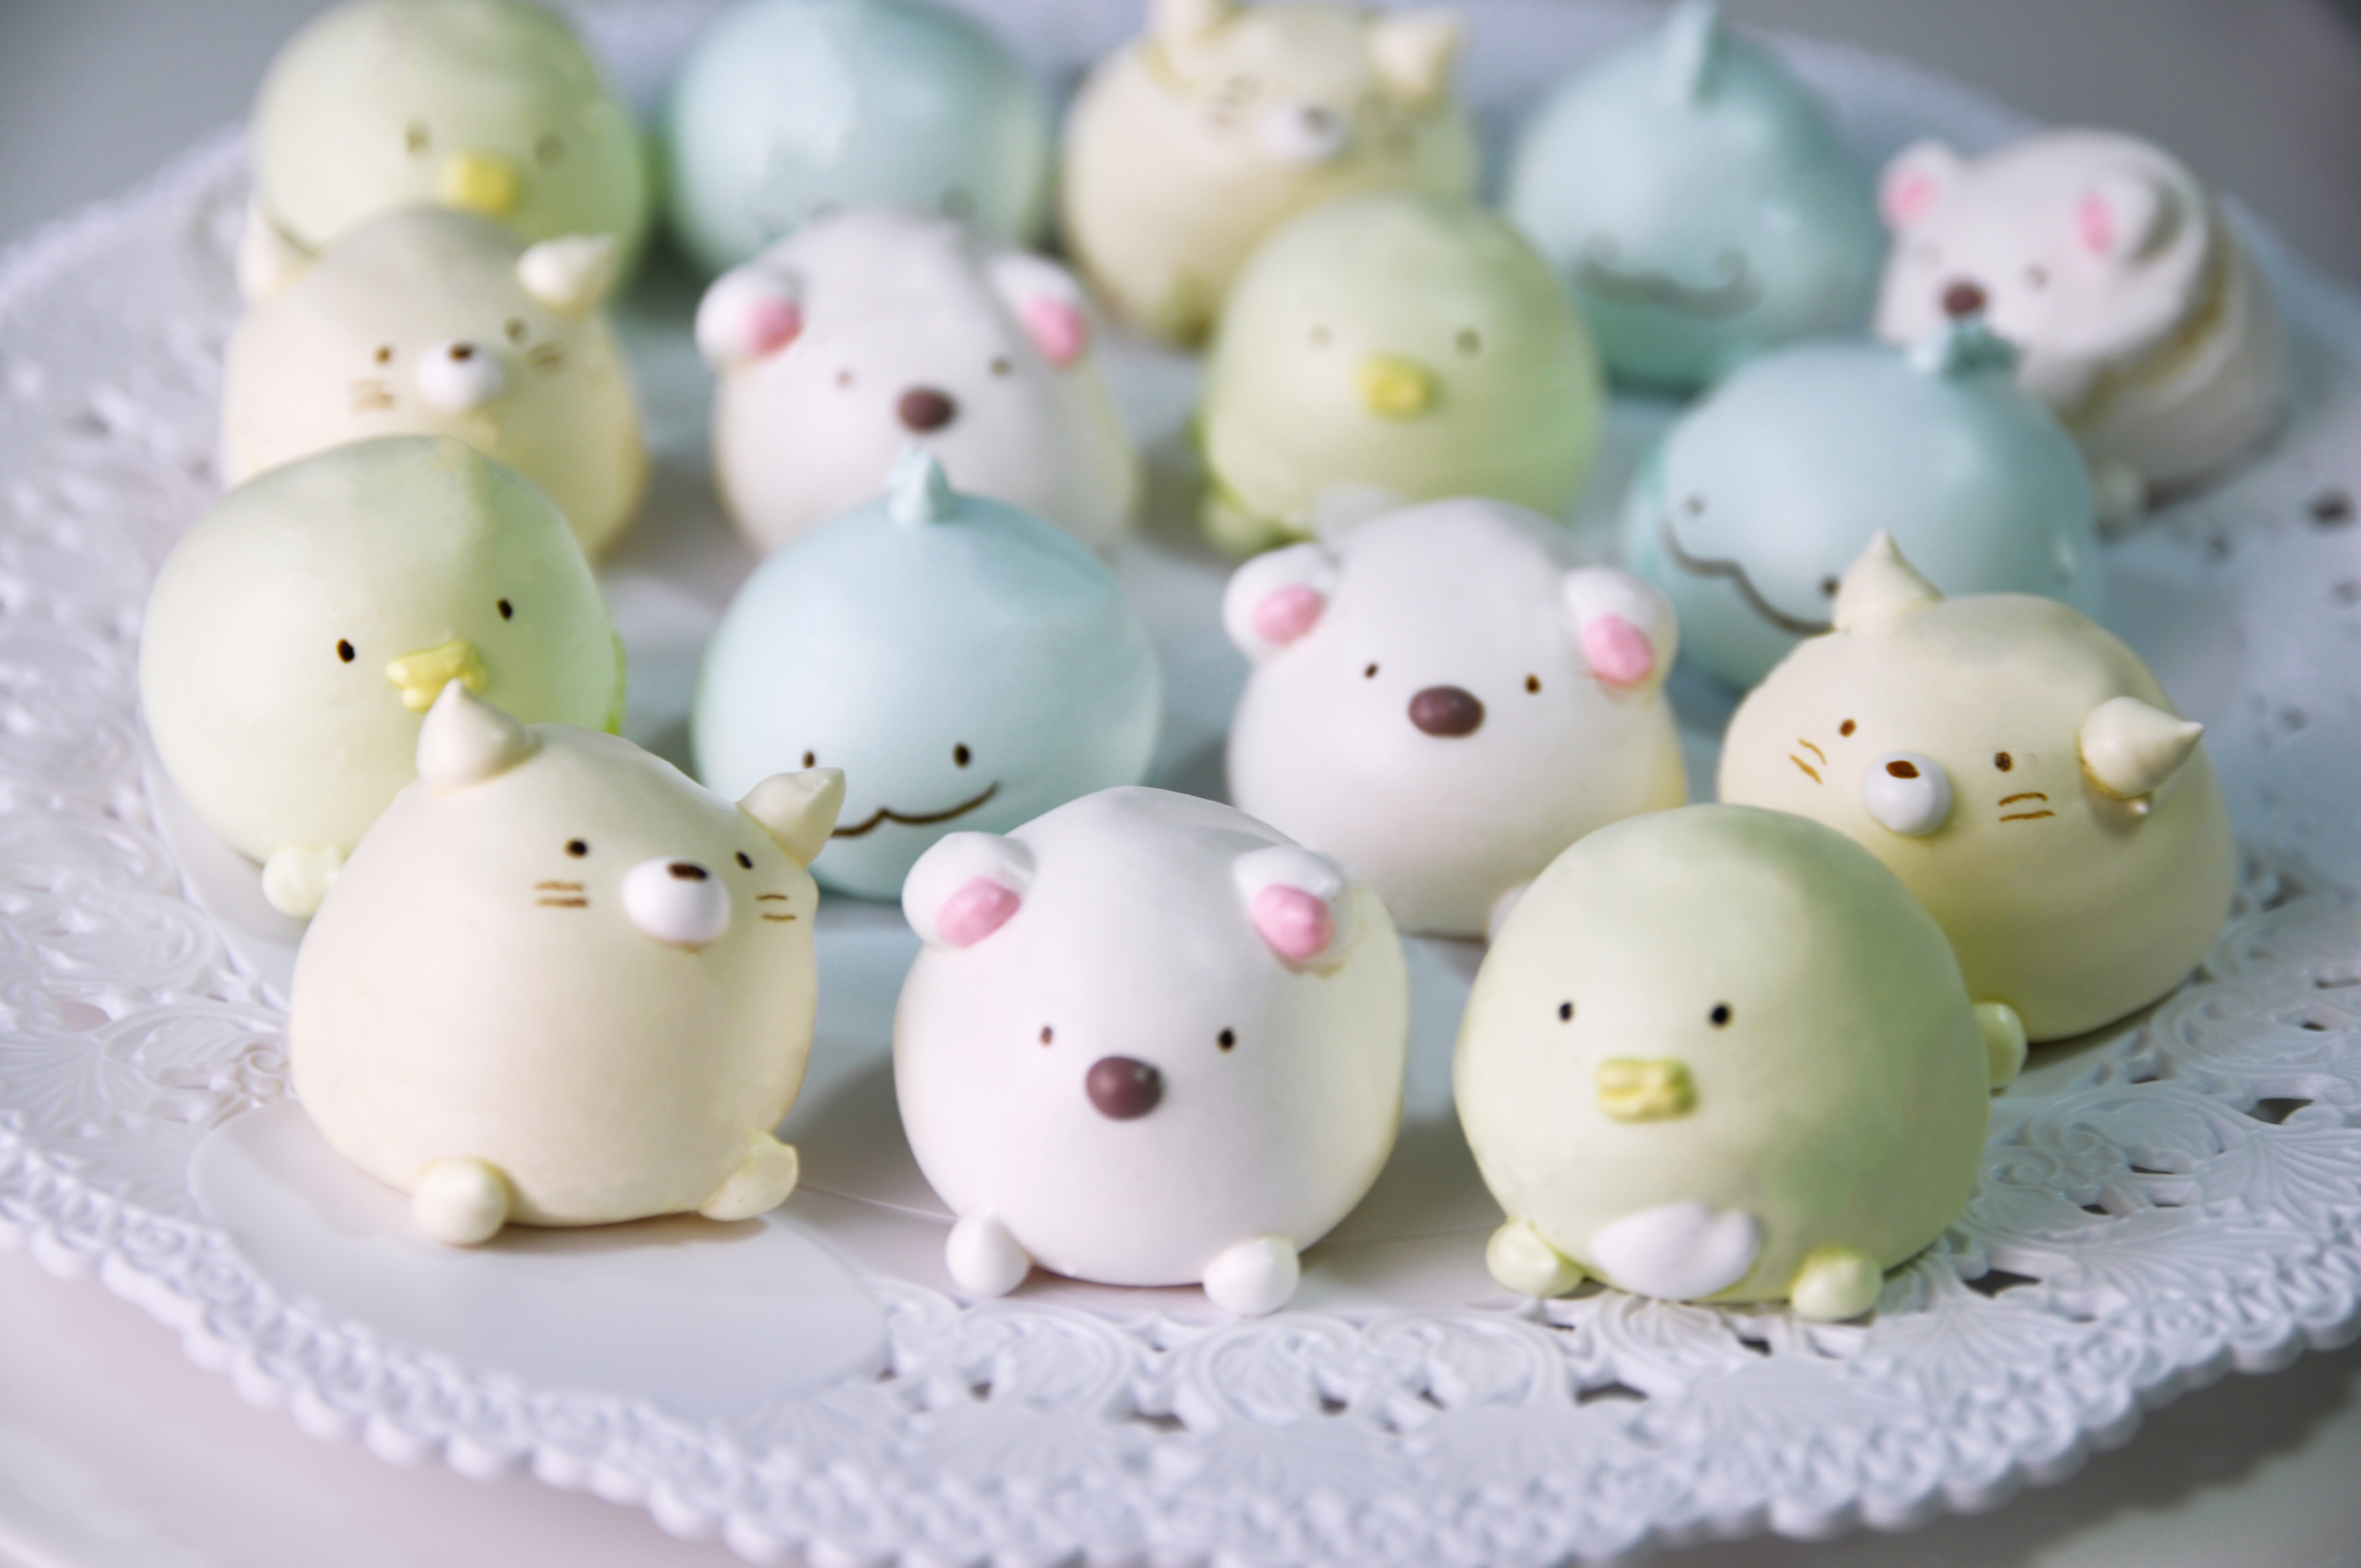
Hellooo friends and welcome back!! Today we are making some adorable “Sumikko Gurashi Meringue Cookies” perfect for anyone who’s a fan of this Japan cute animal characters 🙂

The main Sumikko characters are Shirokuma – a polar bear who dislikes the cold; Penguin – who is unsure of being a penguin; Tonkatsu – a piece of leftover pork cutlet; Neko – a timid and anxious cat; and Tokage – a dinosaur who pretends to be a lizard.

Anyway, we are gonna make 4 of them today ; Shirokuma, Penguin, Neko and Tokage.

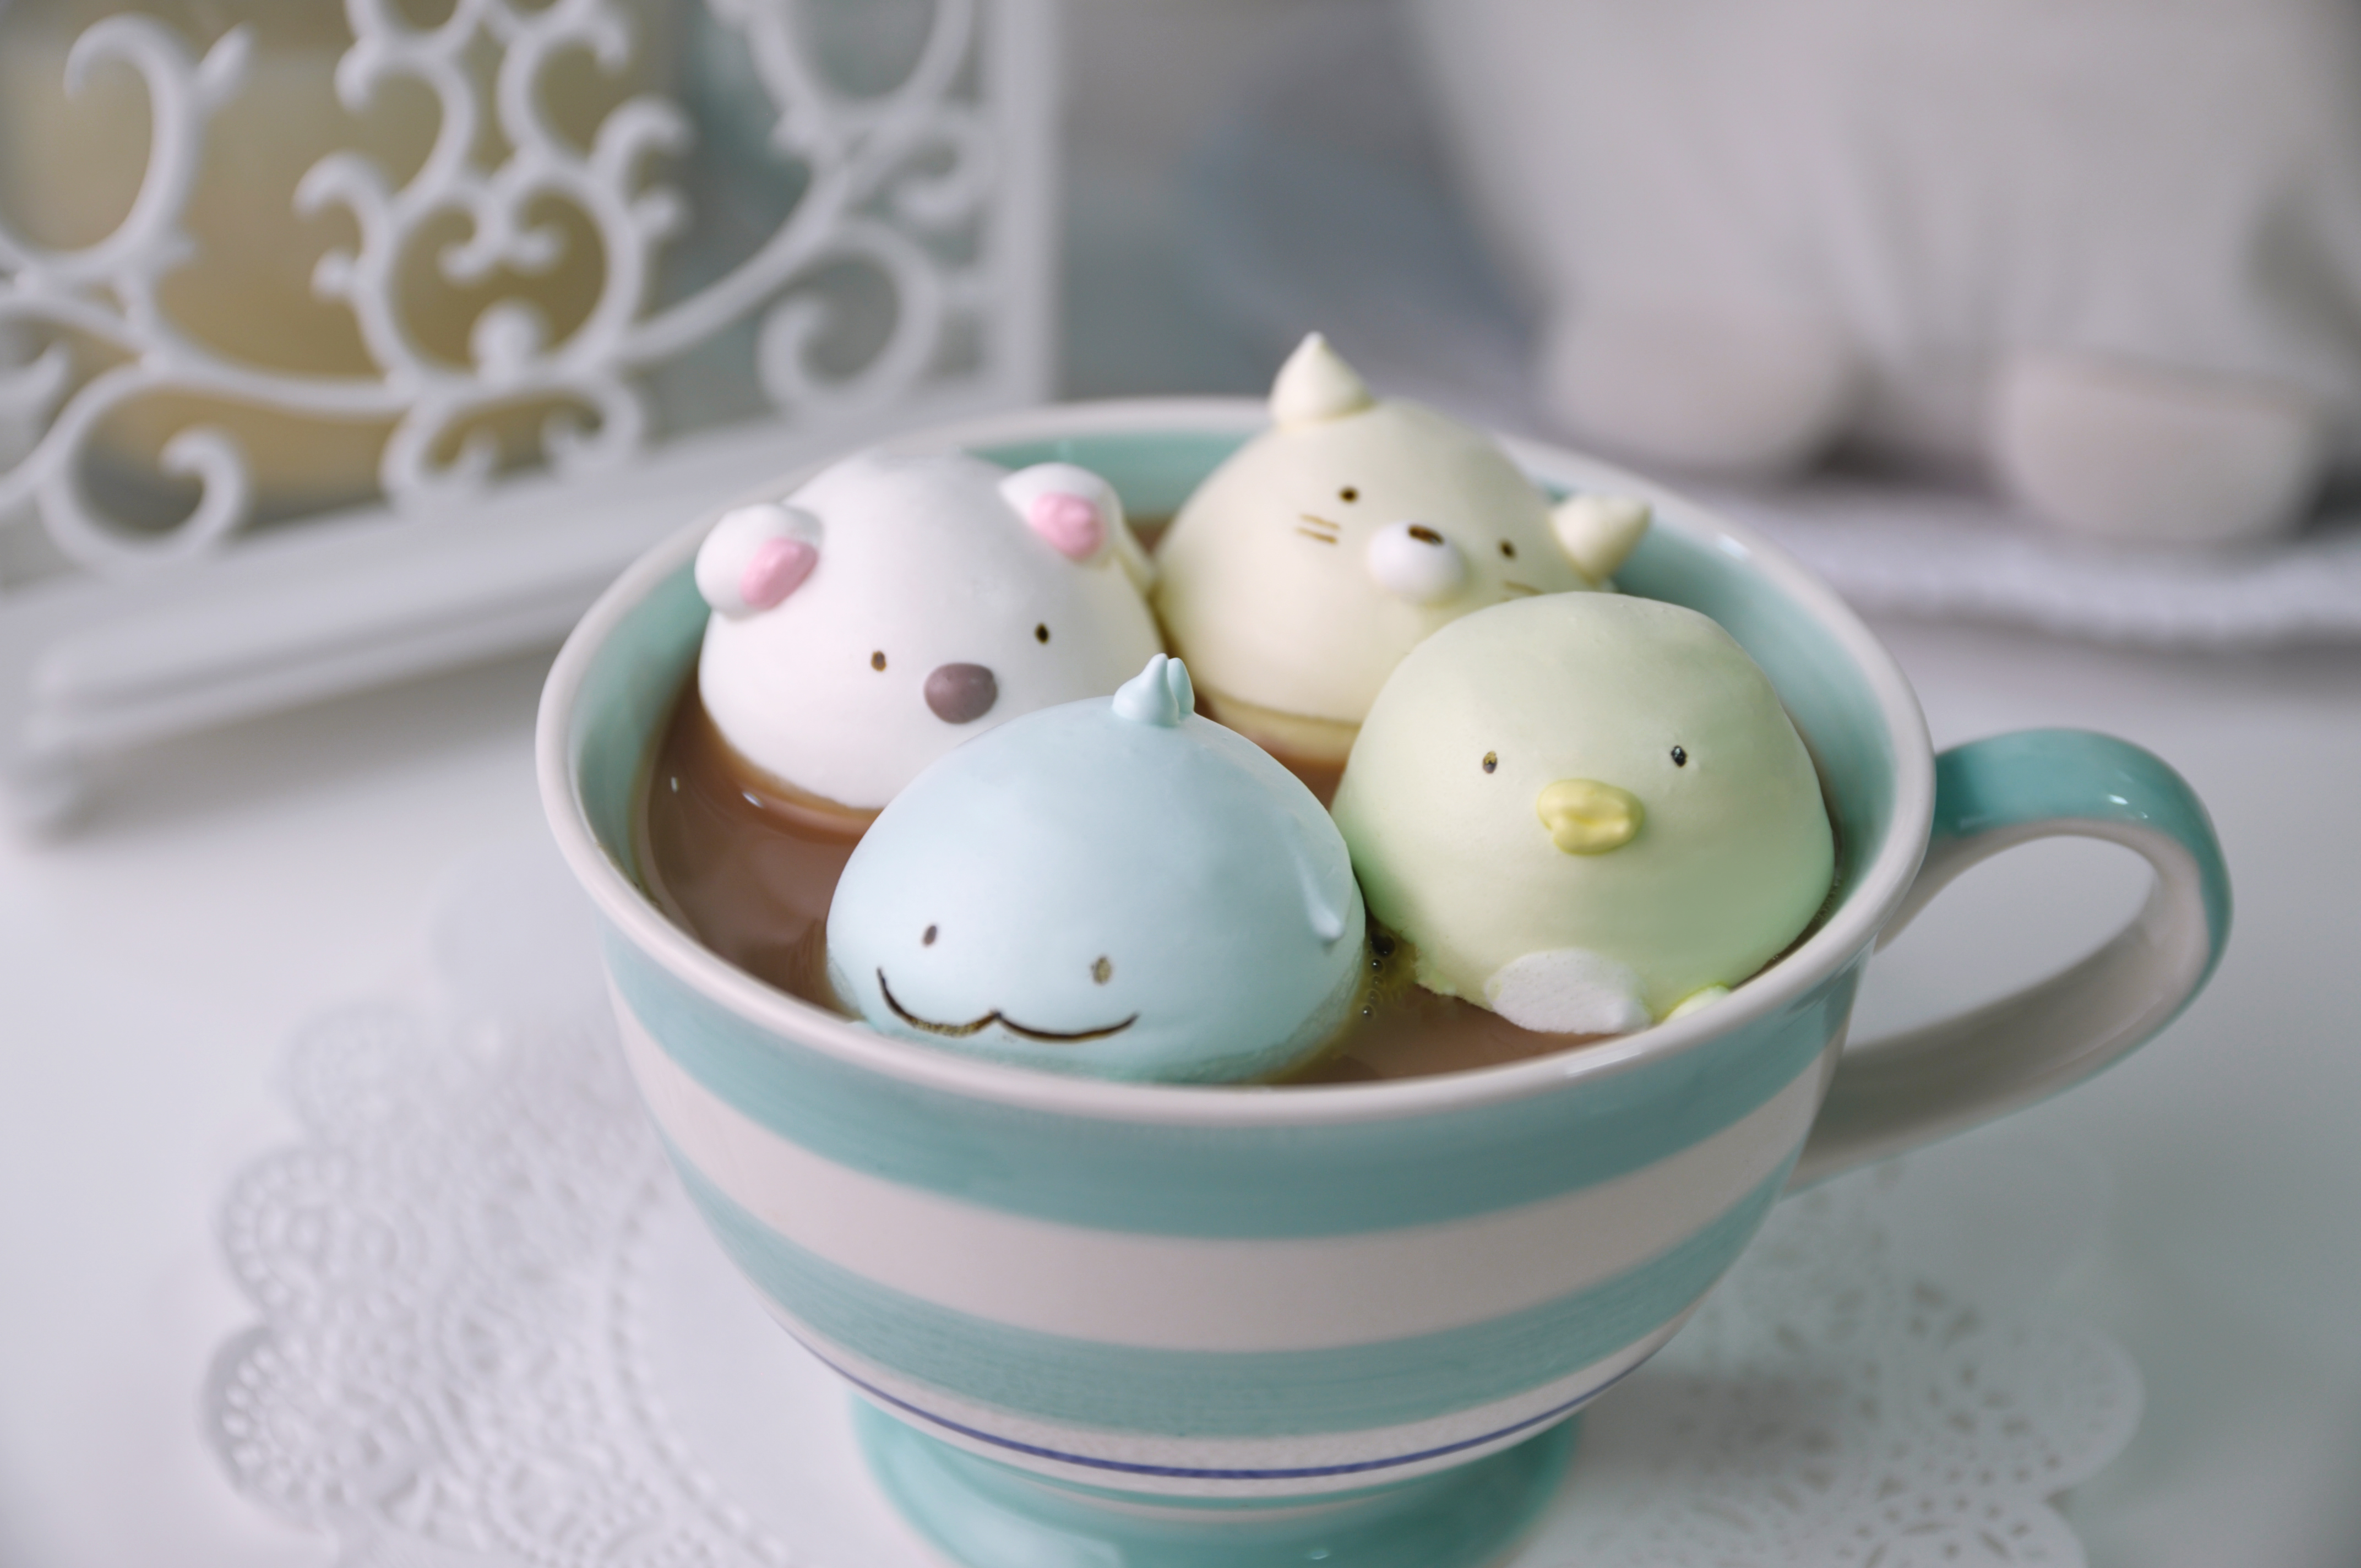
These cookies are almost too pretty to eat. If you’ve never had one, meringues are light, airy cookies with crisp and chewy interiors. They are not only so adorable, but can floating in your coffee too 😛 .

I’m sharing a classic vanilla meringue recipe today (with notes on how to add your own different flavors!), and the taste always reminds me of marshmallow 😍.

The technique takes a little bit of practice, and a long time in the oven, but I’ll walk you through the steps in the recipe so that you can make your own perfect meringues! Enjoy!!!

SUMIKKO GURASHI MERINGUE COOKIES
Yield: 16 pieces
Active time: 1 hours
Total time: 3 hours

INGREDIENTS

  • 130 grams Egg whites
  • 260 grams Icing sugar
  • 1 teaspoon vanilla extract
  • Food colouring pink, blue, green, yellow, brown, black
  • Vodka (for painting the final details)


INSTRUCTIONS

  1. In a large bowl, place the egg whites and the icing sugar. Mix until well combined.
  2. Once that is all combined, place the bowl over boiling water on the stove. Whisk vigorously until sugar dissolved and there are no more sugar granules visible. Remove from heat.
  3. Using hand or stand mixer, beat on medium high until egg whites become bright white but still runny.
  4. Add in vanilla extract, Then beat on medium high to stiff peaks. This process will take for about 8-10 minutes.
    *You may substitute it with any extracts. If I’m adding a different flavor, I usually still keep the vanilla but cut it down to 1/2 teaspoon, then add 1/4-1/2 teaspoon of the other extract.
    Be careful as some extracts (like Peppermint) are very strong, make sure that you don’t add in too much!
  5. Separate the batter in a few small bowl, Add in food coloring to the color for each character.

    These information is for your guidance of what colour you will need for all the characters and details.

    FOR BODY (big round tip):
    White (Shirokuma head), Soft blue (Tokage head), Soft Yellow (Neko head), Soft Green (Penguin head).

    FOR DETAILS (small round tip):
    White (ears, hands for Shirokuma and nose for Neko), Soft blue (hands and fins for Tokage), Soft yellow (ears and hands for Neko), Soft green (hands for Penguin), Soft pink (ears for Shirokuma, Brown (nose for Shirokuma), Yellow (mouth for Penguin) .
  6. Load the meringue batter into a pastry bag fitted with a round tip and a ziplock bag works too.
  7. Line the baking tray with a parchment paper.
  8. Then to pipe the meringue, start out by creating a round shape for each character (4 pieces for each character). And then adding other details.
  9. Bake these off in the preheated 180° F (80° C) oven for about 2 hours.
  10. Once the meringue have come out from the oven, let it cool completely on the cooling rack.
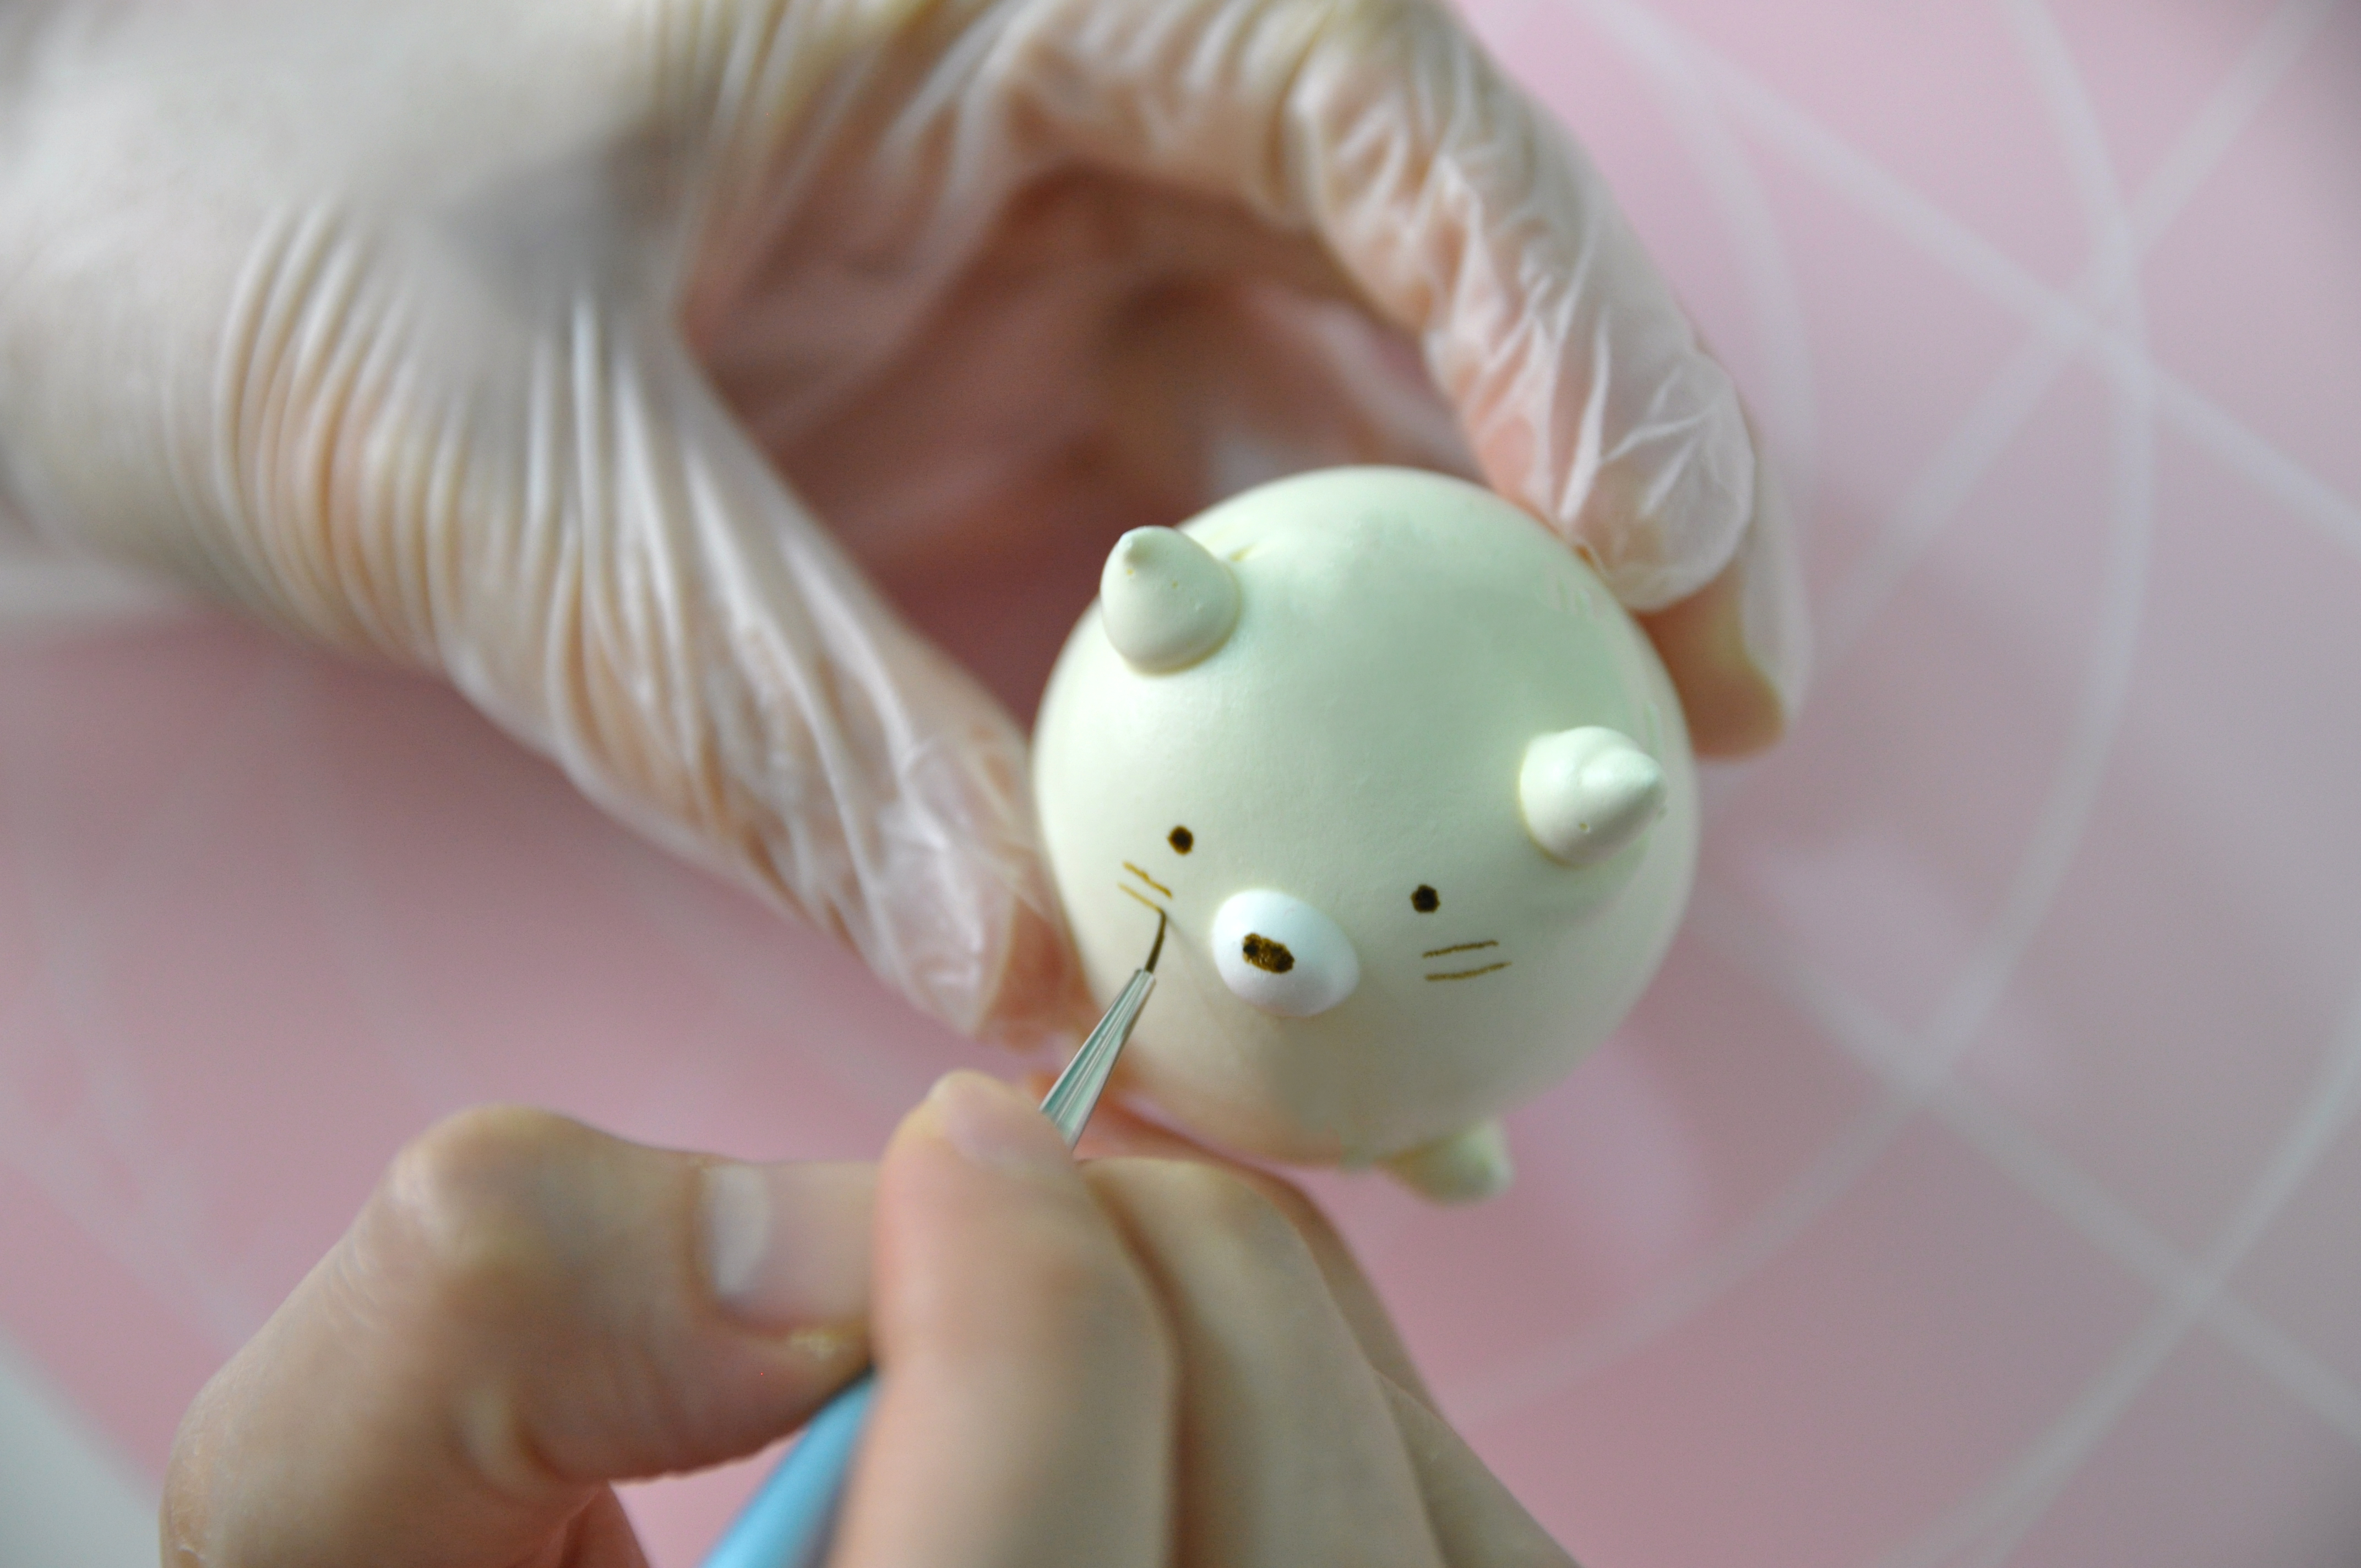
  11. Create the final details. I used Americolor food gel colouring mixed with vodka (rhum or lemon or vanilla extract will works too), or you can use food decorating pen or edible pen.
    * The purpose of adding vodka in the food colouring actually is to thinning and lighten the colour. I am using alcohol like vodka because it evaporates and dry quickly.


NOTES:

  1. This recipe is so easy to remember. If you want to double or triple the recipe, just remember that the amount of the icing sugar is always twice as the egg whites.
  2. Make sure that the bowl and beater that you are using to beat your meringue is completely grease and moisture free. Any moisture can ruin your meringues.
  3. Crack your eggs in a separate bowl when separating the whites. Even a tiny bit of yolk can also ruin your meringues, so crack each egg in a small bowl before adding it to the bowl that you will be mixing the meringue batter in.
  4. Do not whisk the meringue on high speed with an electric mixer. This will form an airy foam with lots of large air bubbles. When baked, these large masses of air have a greater ability to expand than smaller air bubbles, causing the mixture to rise, spread and crack unevenly.
  5. Don’t stop until you get stiff peaks.  The batter will take several minutes, at least, of beating to achieve stiff peaks, but keep going.  It will increase in volume and be very thick and glossy — that’s what you’re looking for!
  6. Don’t over-beat your batter, either! Once you hit stiff peaks, stop!  You can stir in your extract and any food coloring at this point, but don’t push it because over-beating the batter is just as bad as not beating it enough.
  7. Do not bake it at too high temperature. The intense heat will cause the air bubbles to expand more efficiently, causing the mixture to rise, spread and crack.
  8. You can store the meringues at room temperature in an airtight container for up to 3 weeks. Line parchment paper between each layer of meringues.

Double Dark Chocolate Cupcakes

Hellloooo friends!!! Today we are making this “Double Dark Chocolate Cupcakes” This has been my go-to dark chocolate cupcake recipe for years now 😀 It makes the softest, PERFECTLY CHOCOLATY, moist and fluffy cupcake paired with whipped dark chocolate ganache frosting”.

The batter isn’t as thick as you would think. We don’t really want a super thick chocolate batter because that would yield a cupcake similar to brownies. Dense. We don’t want dense! We want spongey, cakey, and rich. So the batter is thin.

The chocolate cupcake just melts in your mouth, they are light and fluffy and stay moist for days. Seriously Guys, no other cupcake recipe can compare! I hope you make these Moist Chocolate Cupcakes and I know you Guys are going to love them!! Look forward to more videos coming soon 😊

DARK CHOCOLATE CUPCAKES
Yield: 6 pieces
Active times: 1 hour
Total time: 2 hours

INGREDIENTS
Cupcakes:

  • 30 grams Cocoa powder
  • 1/4 + 1/8 teaspoon Baking soda
  • 90 grams Boiling water
  • 45 grams Unsalted butter (melted)
  • 35 grams Vegetable oil
  • 150 grams Granulated sugar
  • 1/8 teaspoon Salt
  • 40 grams Eggs
  • 15 grams Egg yolks
  • 45 grams Heavy whipping cream
  • 95 grams All-purpose flour

Whipped Chocolate Ganache Frosting:

  • 80 grams Heavy whipping cream
  • 160 grams Dark Chocolate
  • 1 tablespoons Rhum (optional)

INSTRUCTIONS
Cupcakes:

  1. Preheat oven to 350 degrees Farenheit.
  2. In large heat proof mixing bowl, whisk together cocoa powder, baking soda and boiling water. Whisk until bubbling subsides and mixture is well blended, allow to cool for 5 minutes, set aside.
  3. Meanwhile, in a separate large mixing bowl, blend together melted butter, vegetable oil, granulated sugar and salt until well combined. Mix in egg and eggs yolk. Blend in lukewarm cocoa mixture. Then blend in heavy cream. Finally add flour and blend until well combined.
  4. Divide batter among 6 paper lined muffin cups filling each about 2/3 full. 
  5. Bake in preheated oven until toothpick inserted into center comes out clean, about 17 – 20 minutes. 
  6. Remove from oven and allow to cool in muffin pan several minutes before transferring to wire rack to cool.
  7. Cool completely then frost with whipped dark chocolate ganache frosting.

Whipped Dark Chocolate Ganache Frosting

  1. In a double boiler or in the microwave, melt dark chocolate and heavy cream together and stir until smooth.
  2. Let it cool in the fridge for about 1 hour or until you can spoon some out and keeps it’s form.
  3. Place in your hand mixer, add some rhum (as desired), whip until stiff. It should take for about 4-5 minutes.
  4. Pipe onto cooled cupcakes and top with sprinkles (optional).

NOTES

  • Store unfrosted cupcakes in an airtight container for up to seven days in the refrigerator or keep on the counter for two days.
  • Remove the cupcakes from the refrigerator an hour to two before you intend to eat them to allow them to come to room temperature.
  • The general rule is that classic ganache may stay at room temperature for up to 2 days then must be refrigerated. If you’d rather be safe (which I recommend), keep it refrigerated for all storage. 
  • Ganache can be frozen for up to 1 month. Thaw in the fridge then let come to room temperature before using.