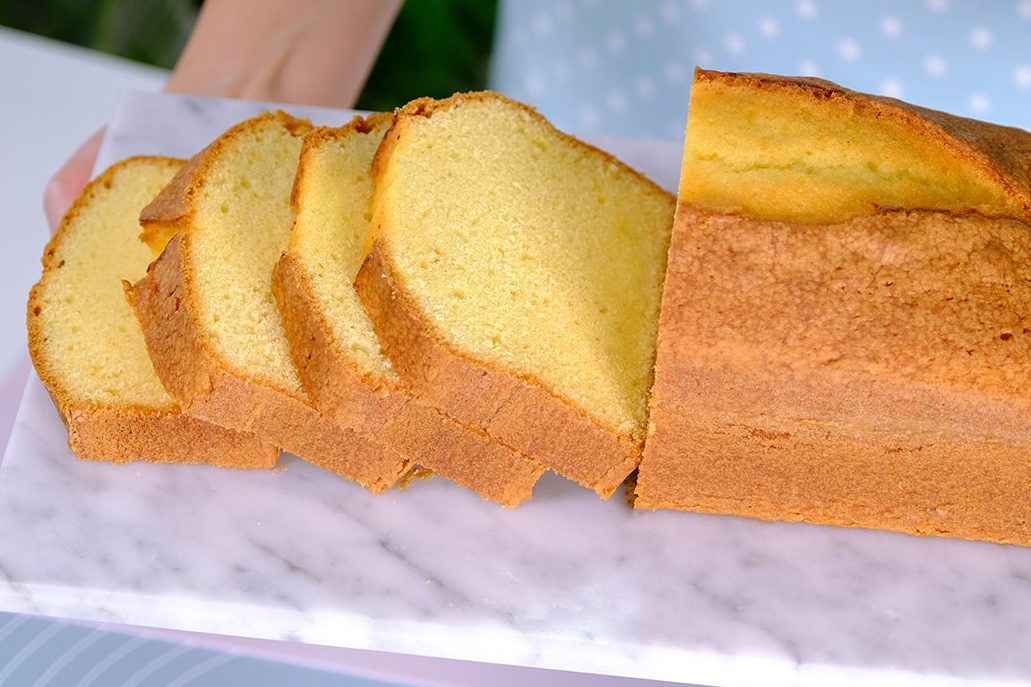
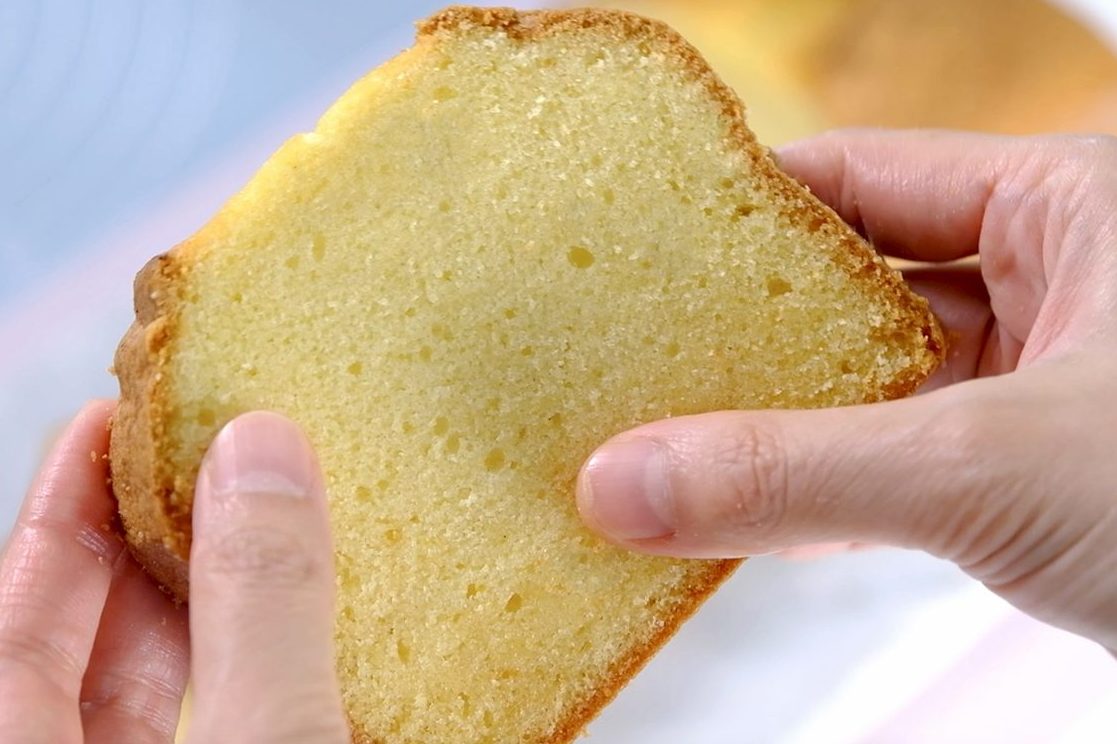
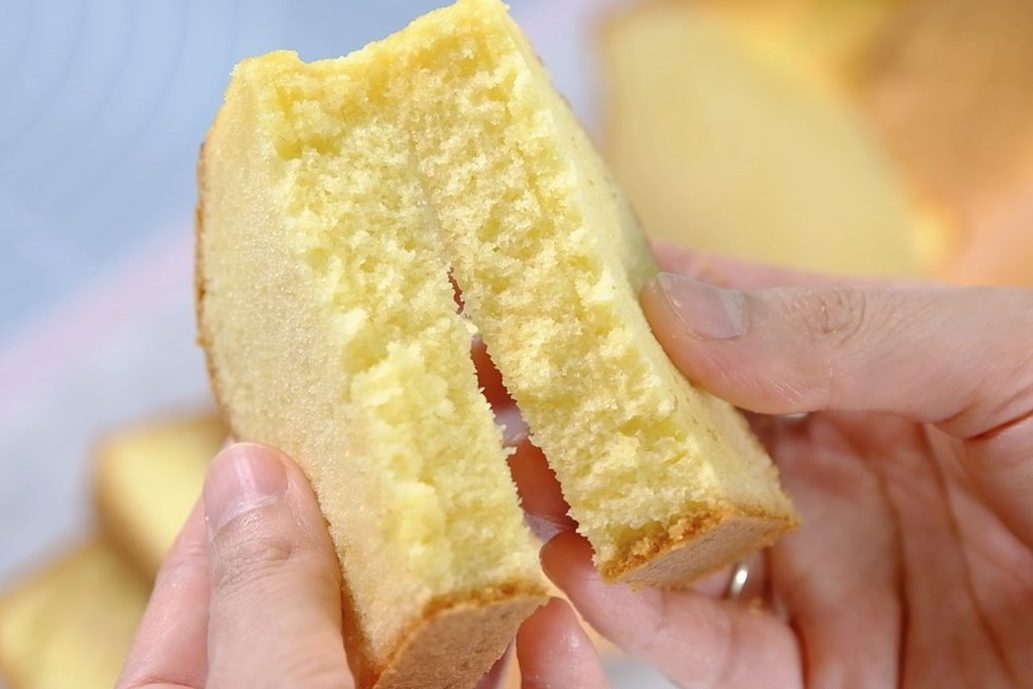
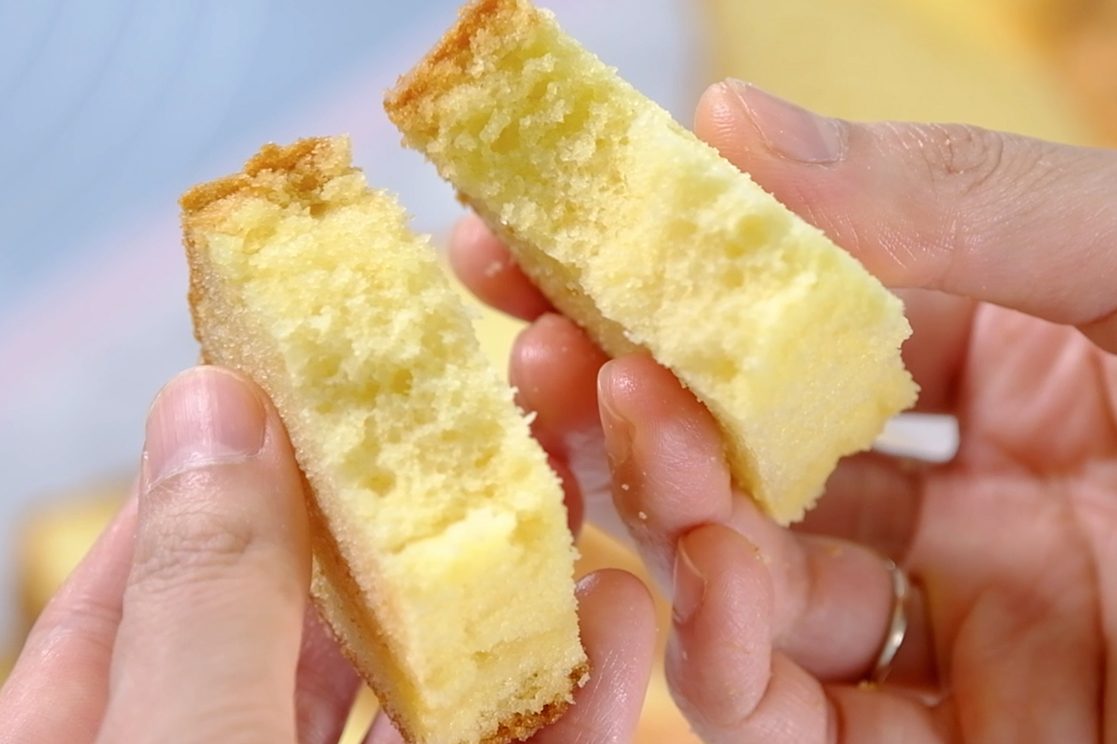
Light Fluffy Vanilla Sponge Cupcakes

Everyone’s got their own idea of what the perfect Vanilla Cupcake should taste like; And this is my favourite Vanilla Cupcake recipe.
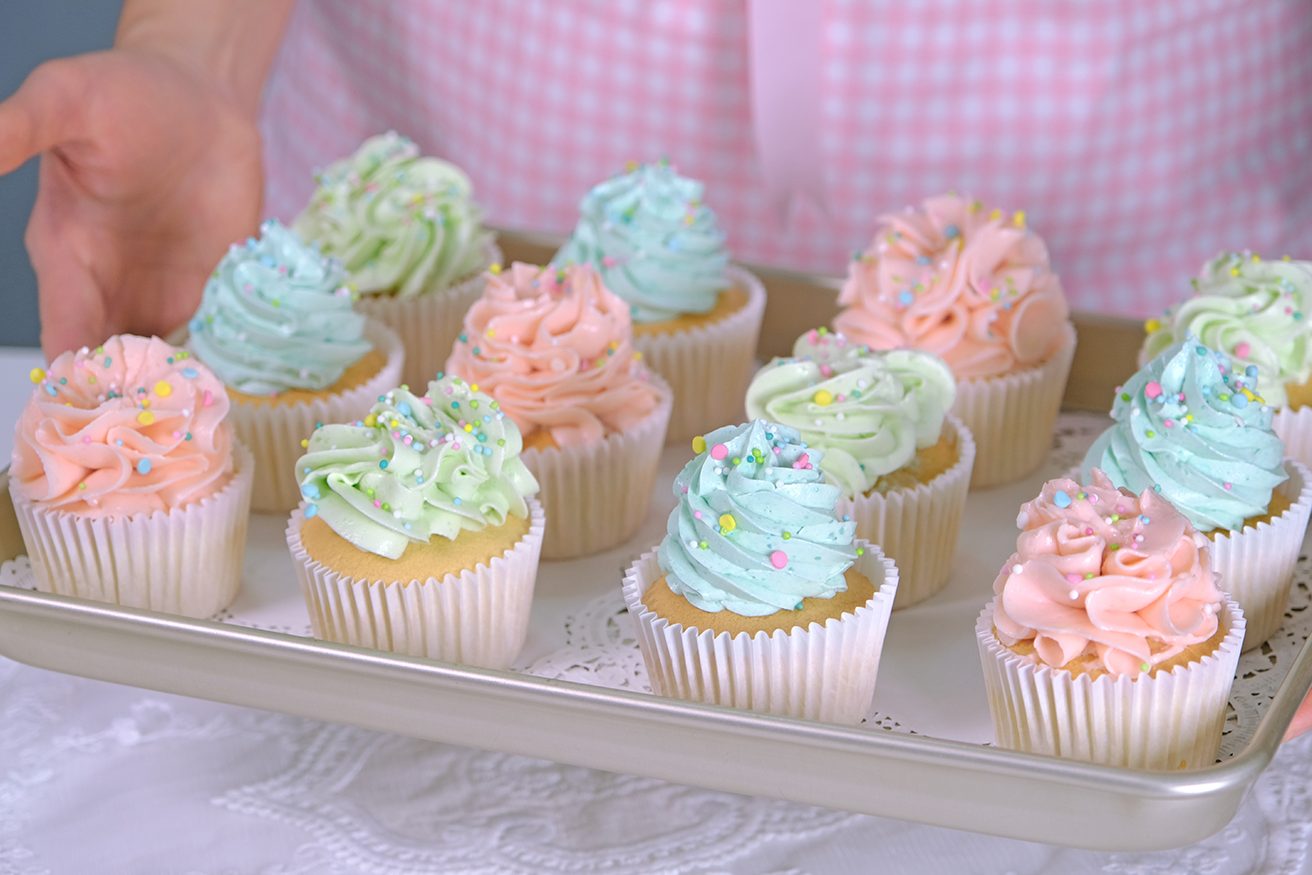
What makes this Cupcake special for me is because it’s light, not heavy, and just the right amount of sweet.

It’s the kind of Vanilla Sponge that pairs beautifully with whatever you like
Whether you’re adding frosting, berries or enjoying it plain.
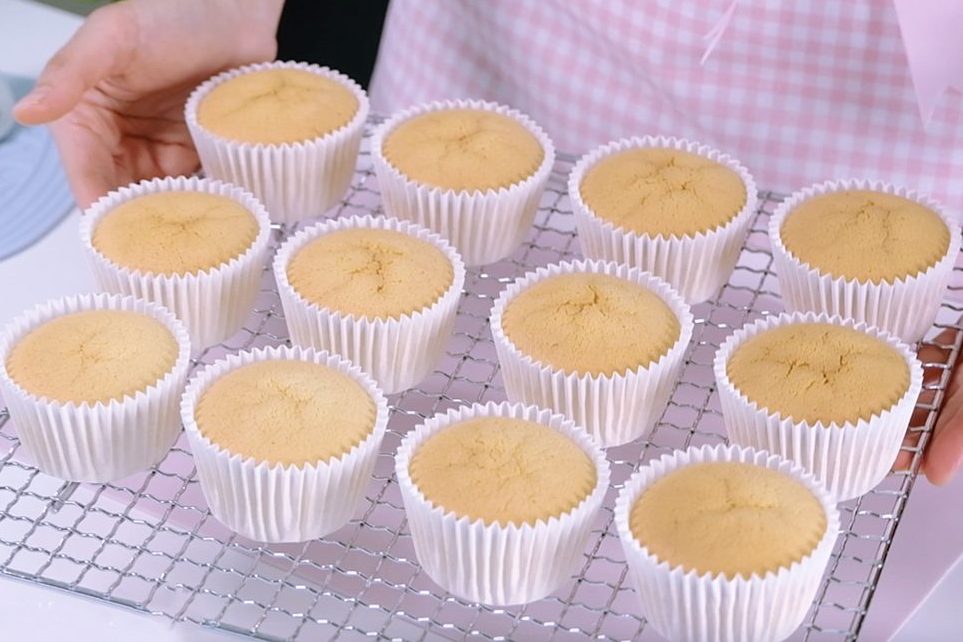
They stay wonderfully moist for days and have a deep Vanilla flavour.
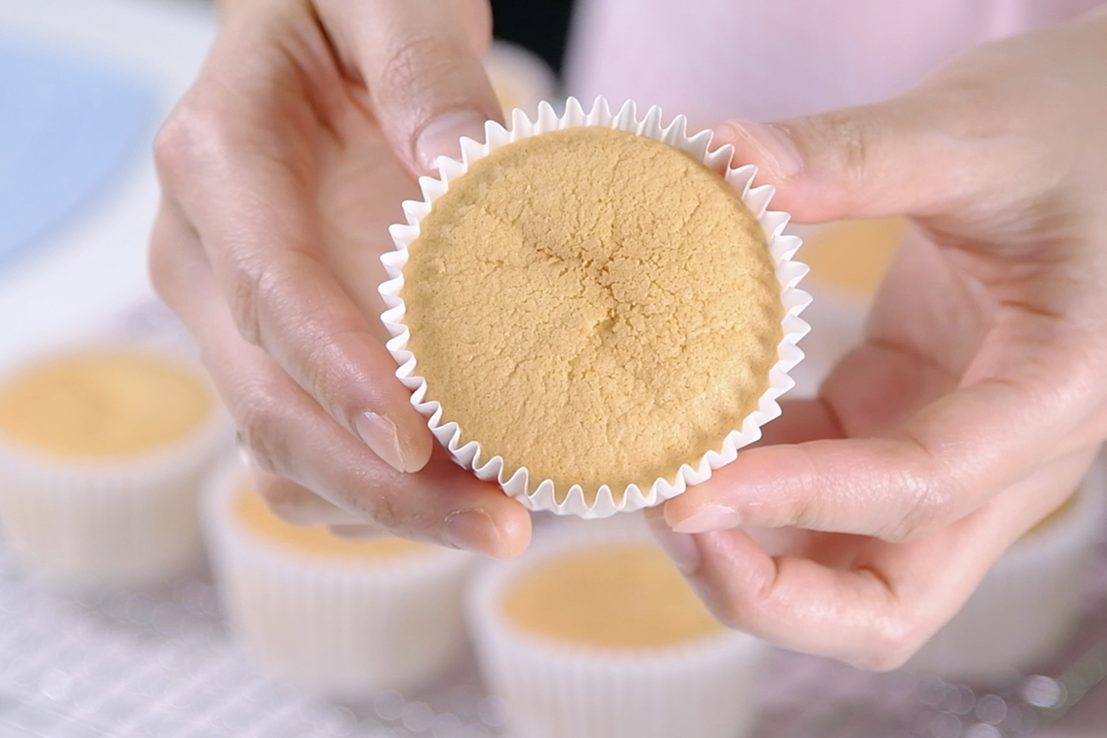
This Cupcakes are delicate but stable enough to hold the frosting
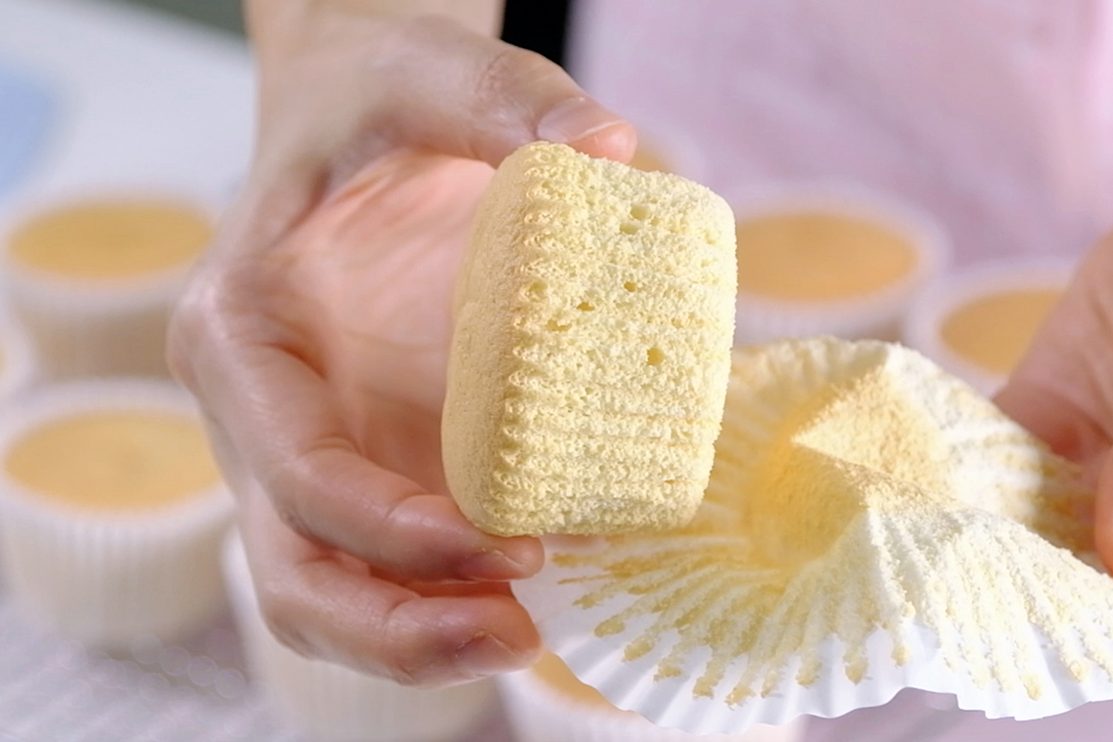
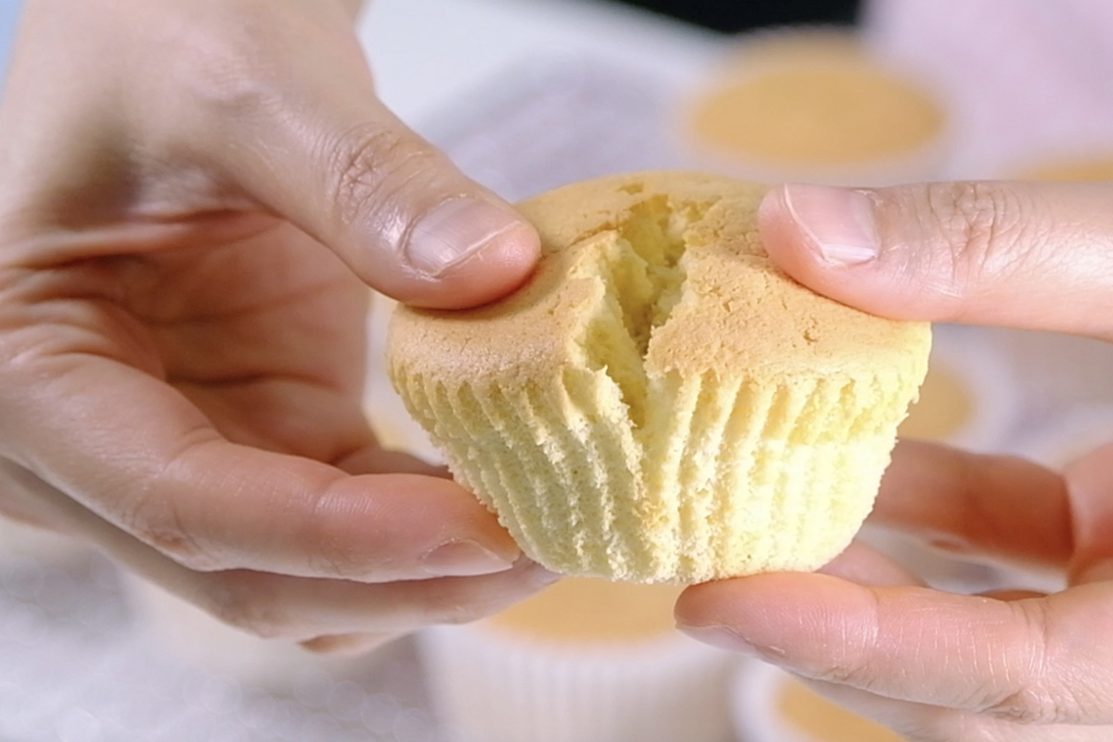
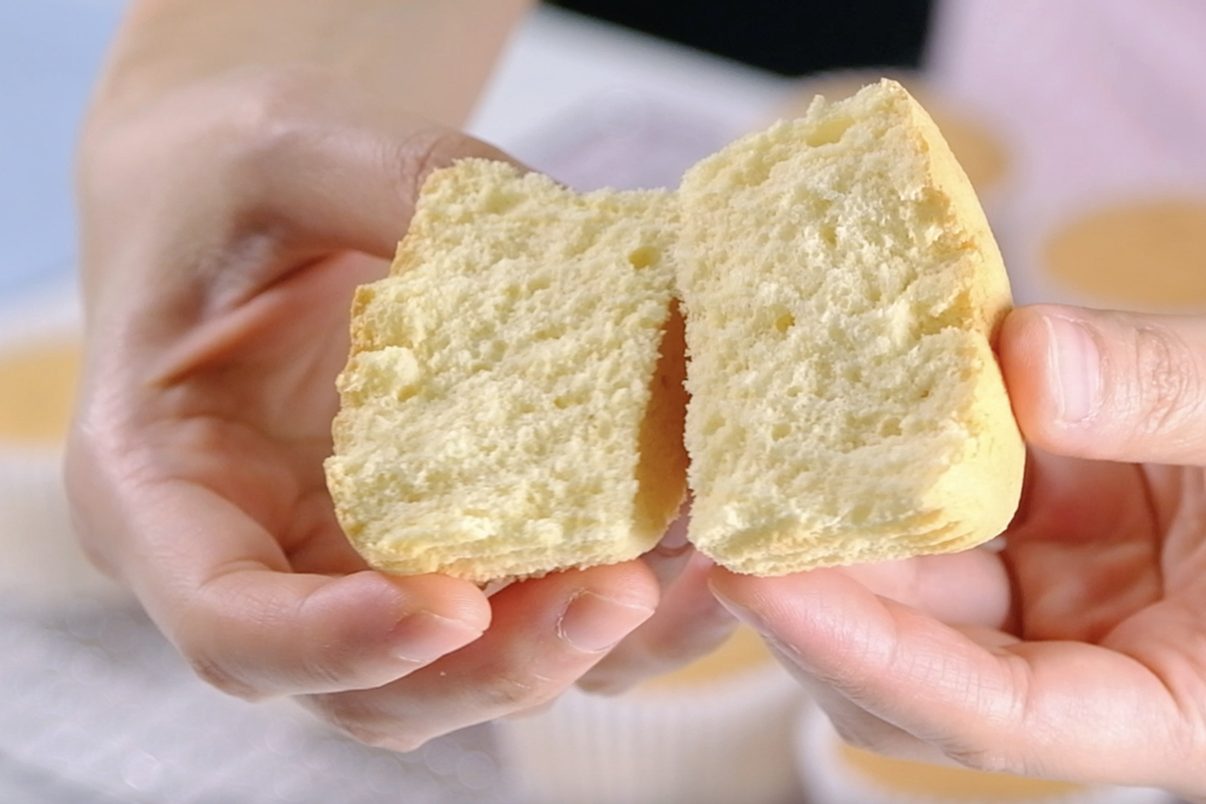
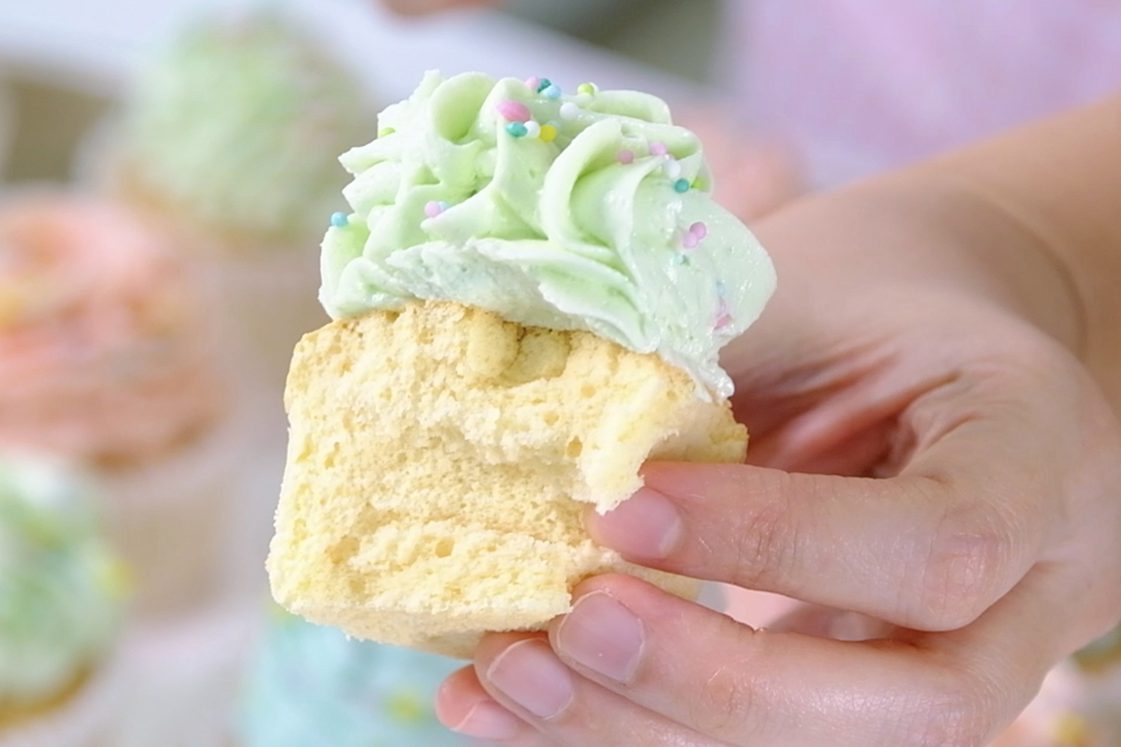
Let’s cut open and l00k inside
☺️
Soft and Moist but not too crumbly
Not too sweet and not heavy
🤗 So soft and fluffy
😍 And what’s the best frosting to pair it with?
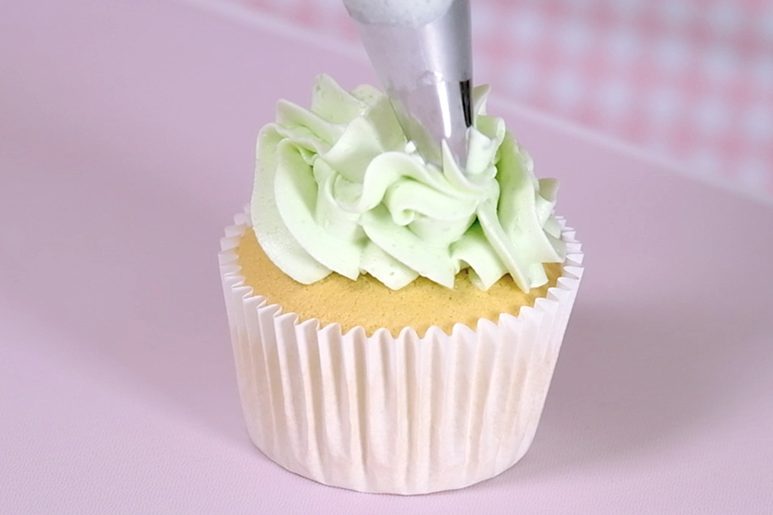
The clasic Boiled-Milk Frosting 😘

Boiled Milk Frosting is an old-school buttercream that is not too sweet, not too buttery, and not too heavy.

My version with Icing Sugar is more stable at room temperature.
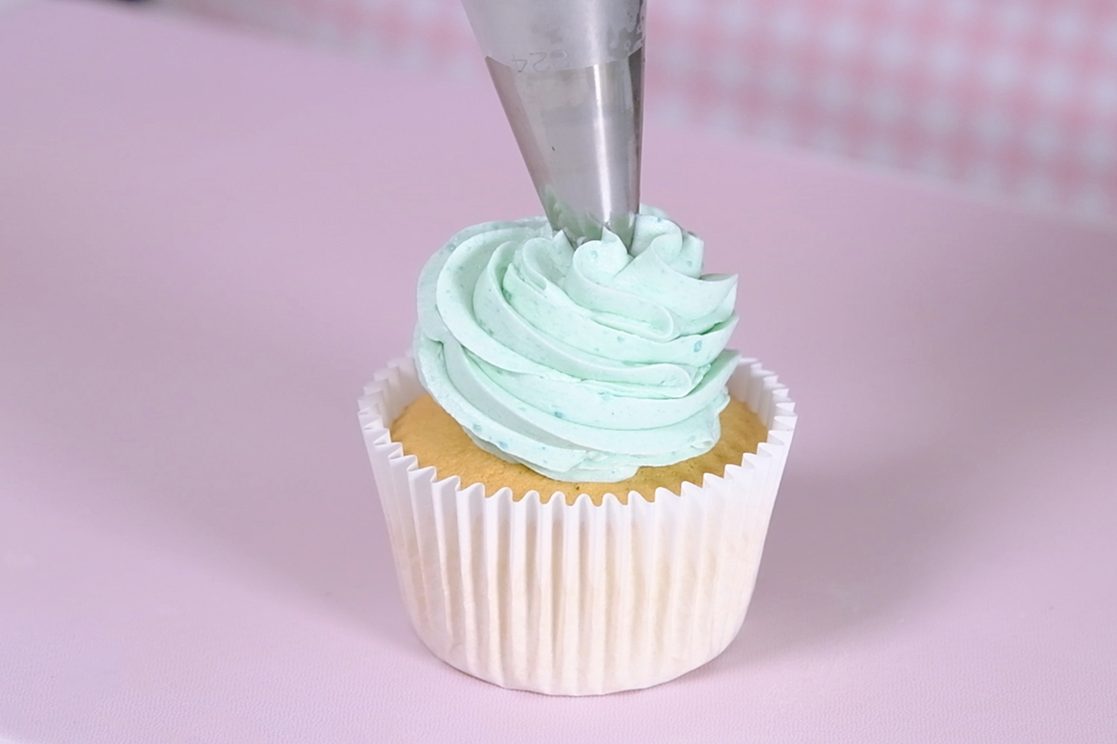
This beautiful frosting also easy to color and you can create any flavour you want; simply by adding some liquors, flavour oils or emulsions, extracts or even dried fruit powder.

This Russian Ball tip creates beautiful ruffles 🥰
🥲 So beautiful !
Get creative with your own designs !!
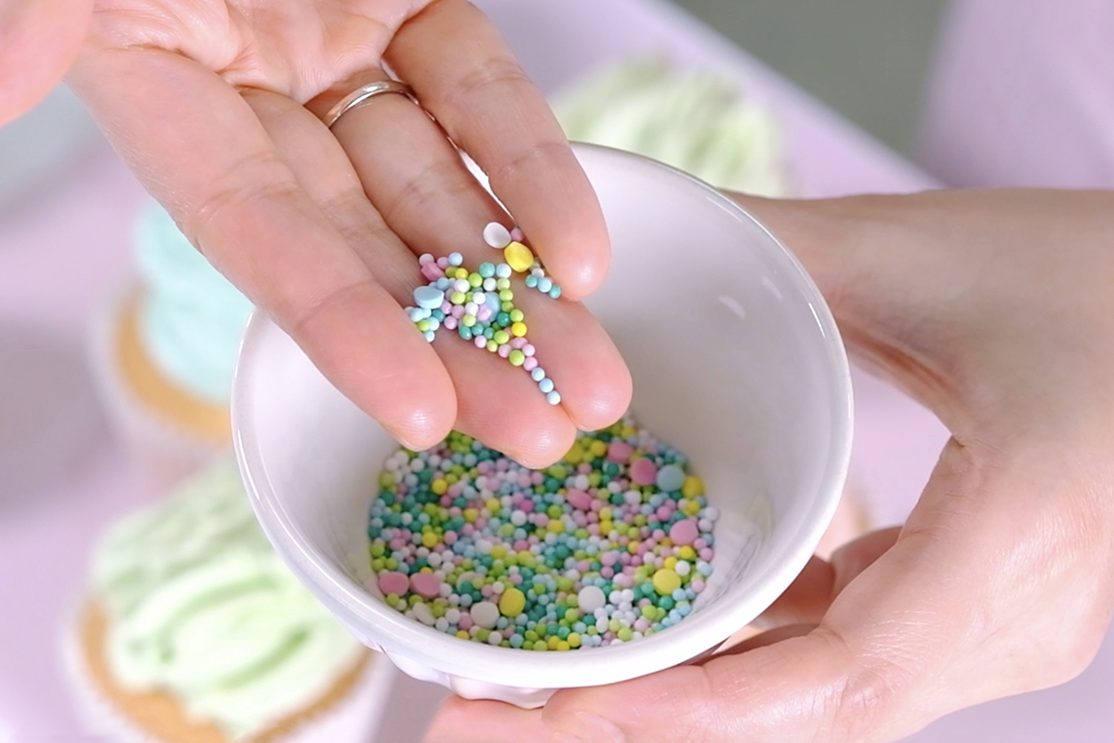
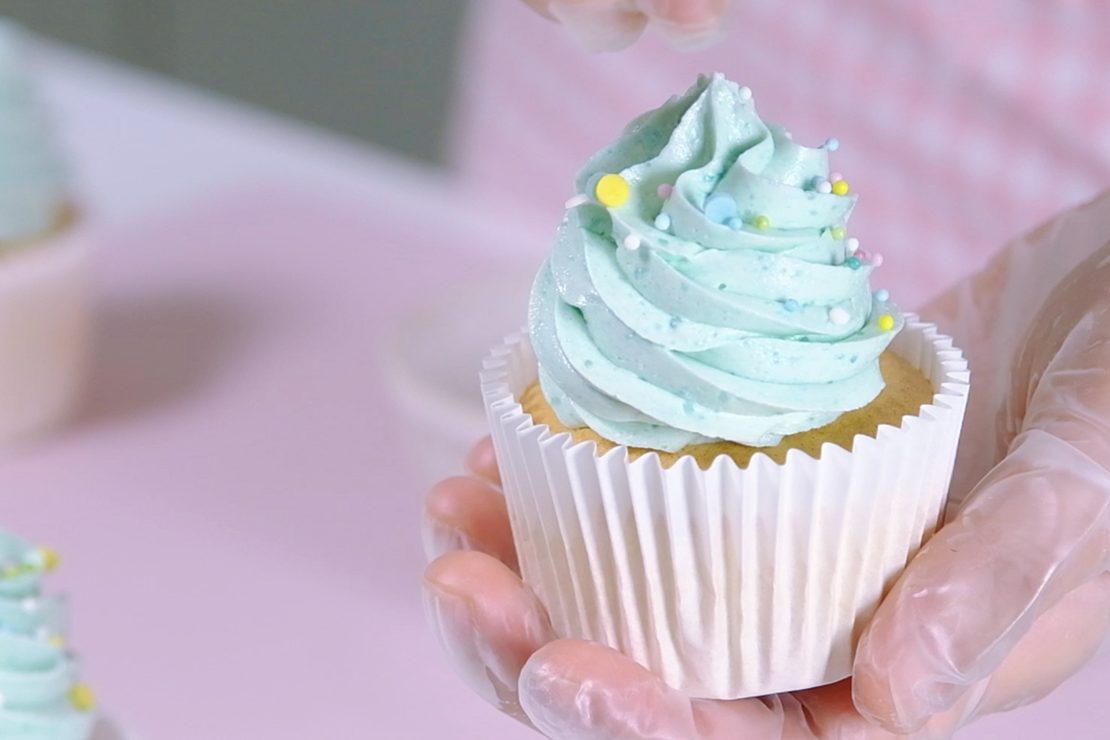
And finish with colourful confetti sprinkles   

So pretty! ☺️

I always flavor my frosting by adding a little at a time and tasting it as I go; Start with ½ teaspoon of extract or emulsion and taste.
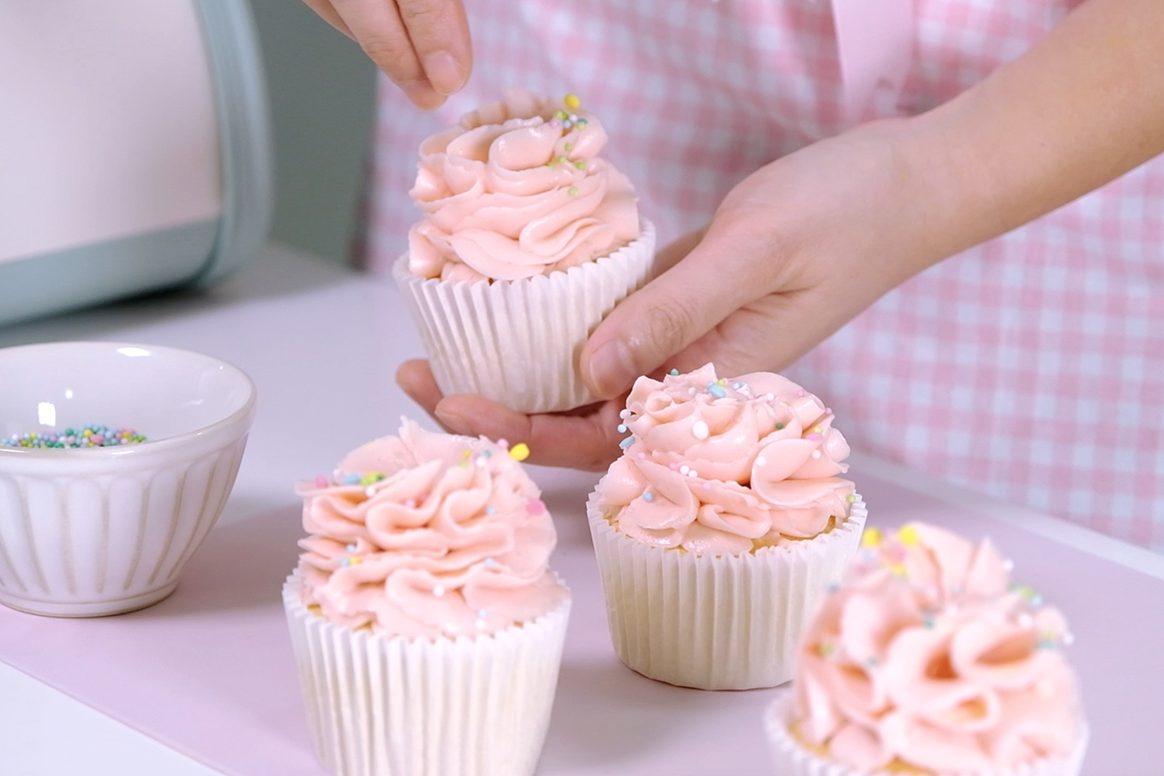
Be careful with strong extracts like Almond and Mint,
I suggest starting with 1/8 teaspoon so the flavor doesn’t get too strong.
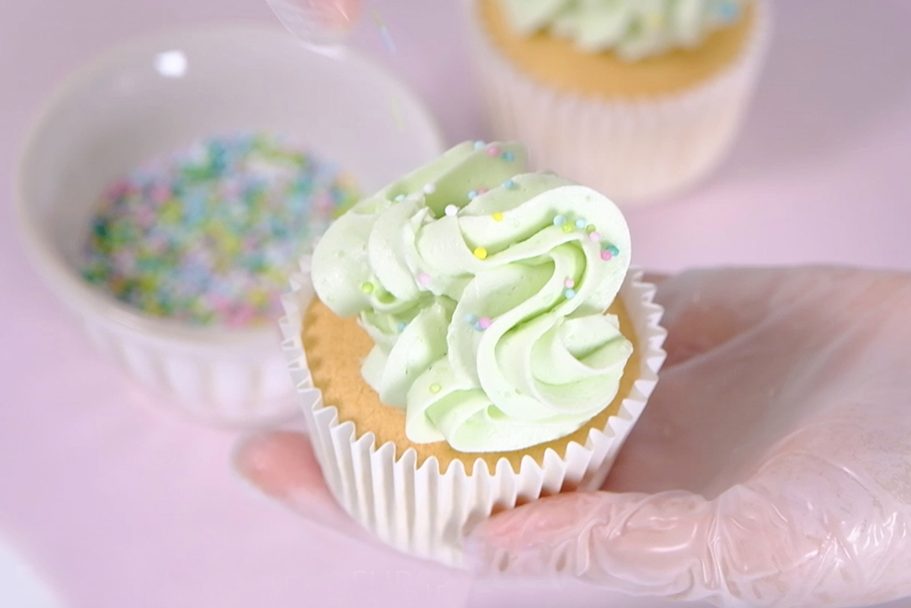
It’s time to enjoy the cupcakes 🥴

These cupcakes are perfect for any occasion and you can customize them to your taste by choosing your own frosting.
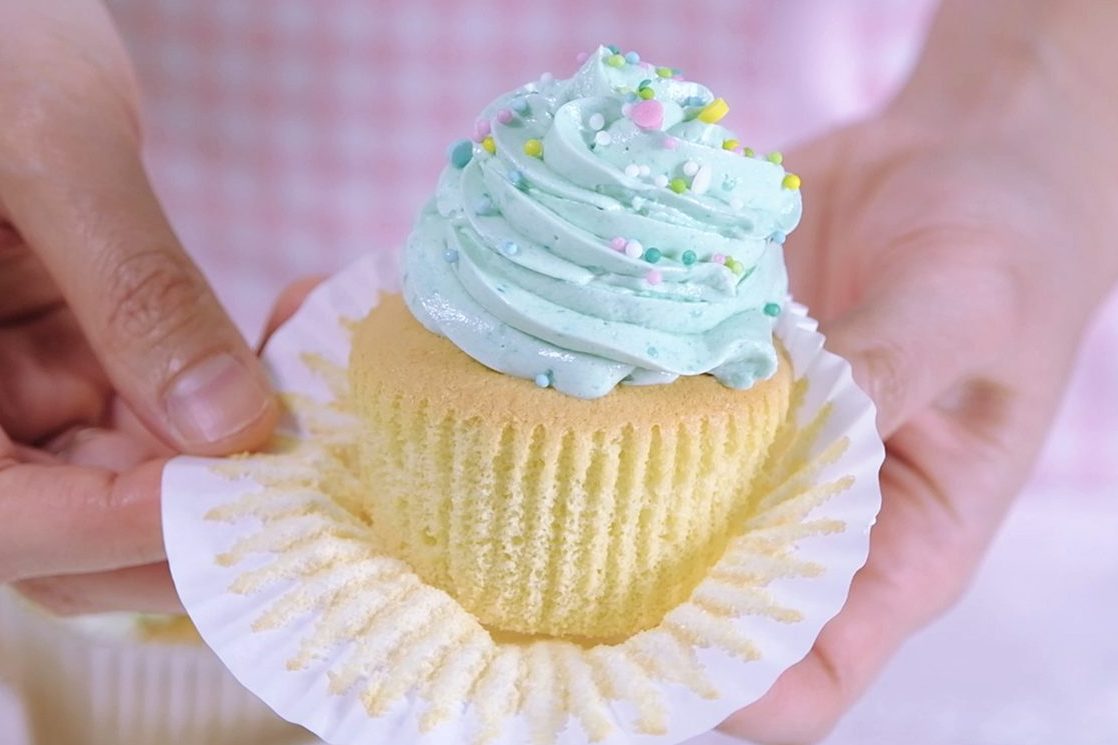
The frosting is a beautiful old-school classic.

It’s incredibly smooth and creamy, but not overly sweet.
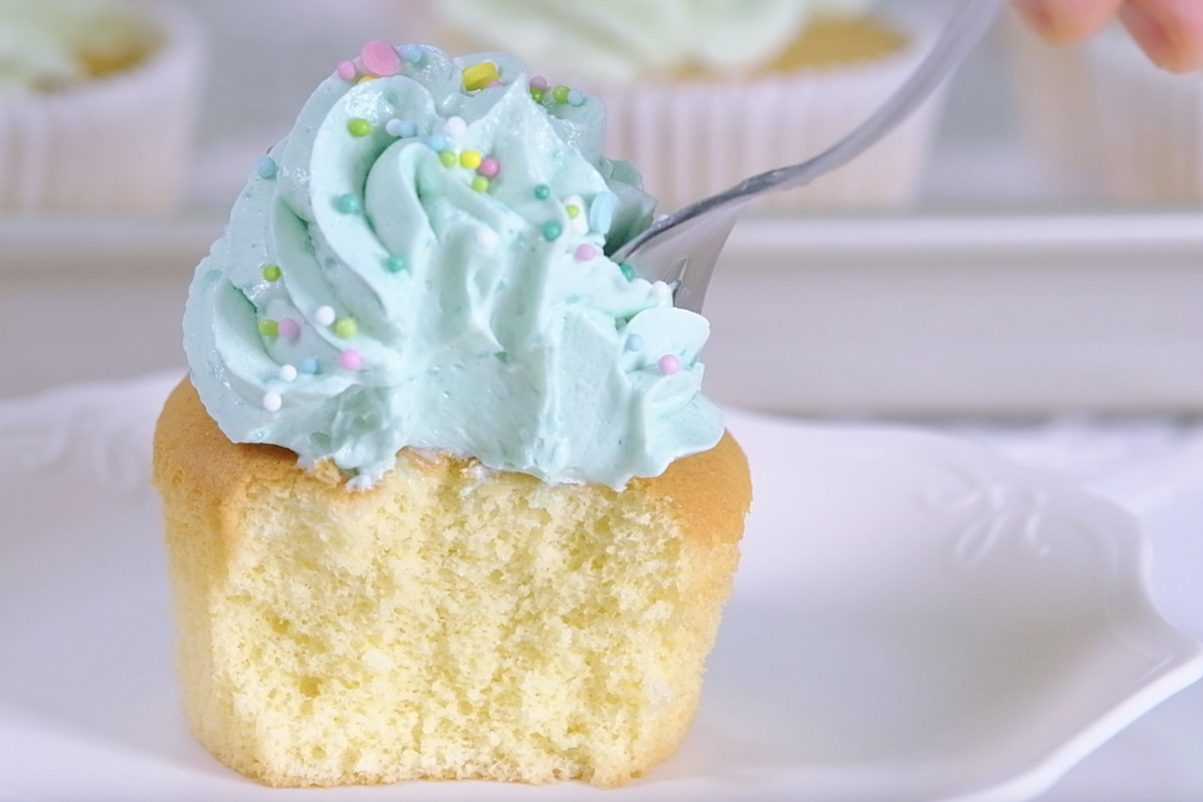
With a soft, airy texture that melts in your mouth

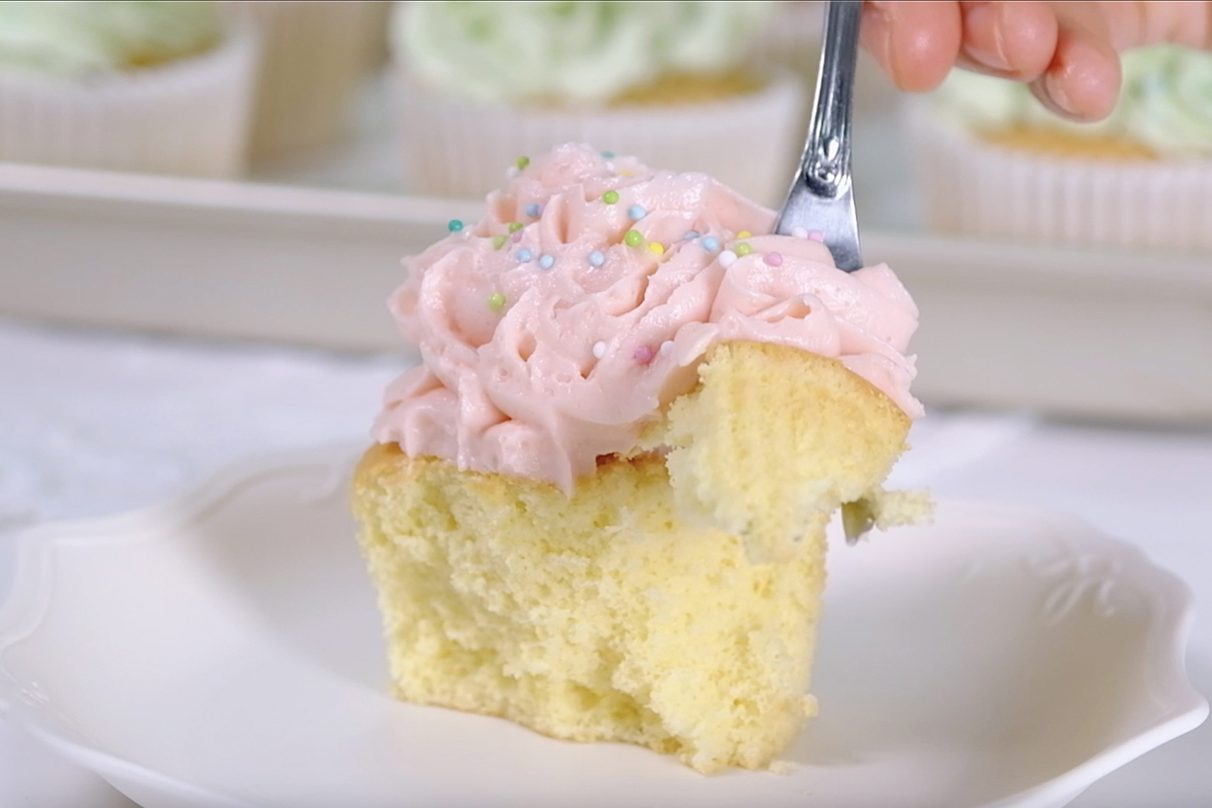
🥲
🤤

These cupcakes always make me smile

And I hope they bring a little joy to your kitchen too !!

Love you All and Happy Baking!!

WATCH HOW TO MAKE LIGHT FLUFFY VANILLA SPONGE CUPCAKES

TIPS FOR SUCCESS (PLEASE READ FIRST):

FOR THE BOILED-MILK FROSTING

  • Prepare the Roux in advanced, so it has time to cool completely at room temperature
  • It is important to strain the Roux mixture (before and after cooking), you don’t want any lumps in your frosting
  • Remember to stir the Roux mixture constantly during cooking, otherwise the bottom will burn
  • Once the Roux cooked, place a piece of plastic wrap directly on the surface to prevent a skin forming
  • Always use real Butter (100 percent High Quality Butter)
  • Take the Butter out of the fridge allow to sit on the counter for about 30 minutes before you start making the frosting.
    The Butter must be softened until it is pliable but still cold and holds its shape, rather than melting or becoming too soft.
  • Once you mix the Roux with Butter, it may look curdling at first;
    Keep mixing on medium-high speed for about 3 to 5 minutes, the frosting will become very smooth, light, and fluffy
  • If you find the frosting is too soft to pipe, you can place it in the fridge for about 30 minutes and it will firm up a bit to a nice consistency
     

FOR THE CUPCAKES BATTER

  • Make sure all utensils clean and grease free (wipe the bowl and utensil with lemon juice or vinegar to helps remove grease)
  • Preheat the oven 20 minutes or longer before you start (use an oven thermometer to ensure the temperature is correct)
    Set an oven rack in the middle of the oven
  • Use fresh eggs that are room temperature (other ingredients also must be at room temperature)
  • Beat egg whites until stiff peak
  • Sift the Flour
  • Mix each batches of the flour evenly until there are no lumps
  • Make sure the wet ingredients are combined well with the batter
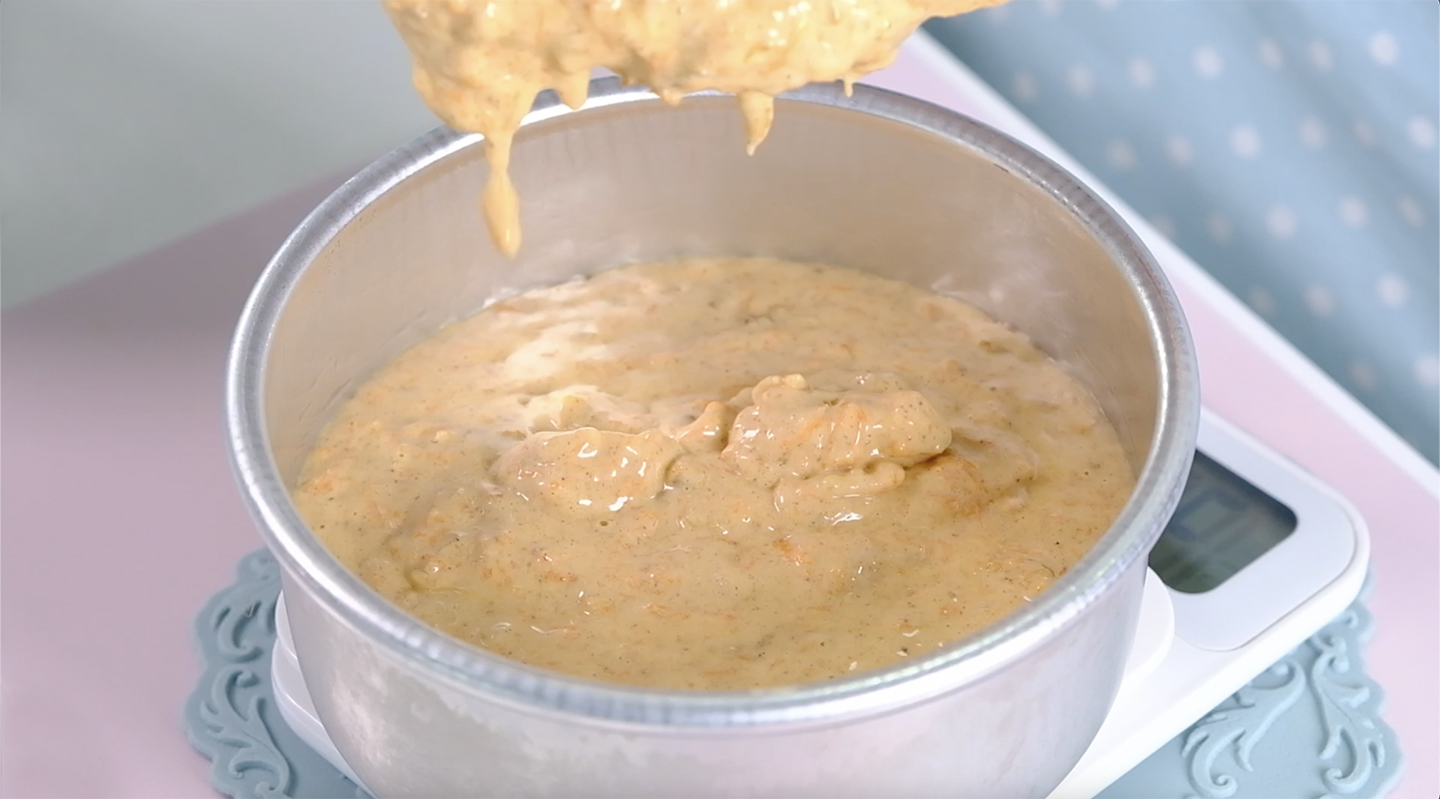
  • Don’t mix the batter too hard, just make sure it is well blended (the consistency should be thick but flowing)
    If the batter looks runny, it means you’ve over-mixed it and the cupcakes won’t rise properly
  • Don’t let the batter sit too long before baking, bake it immediately (especially if the batter does not use any raising agents at all, there is a risk that the batter will deflate)
  • Resist the urge to open the oven door while baking; this can lead to the cake being too damp in the middle or even falling
  • Once baked, tap the pan on the counter 3 times, this will prevent the cupcakes from shrinking or deflating when they cool
    Then immediately transfer to a cooling rack to cool completely

RECIPE

VANILLA SPONGE CUPCAKES
Yield: 12 regular Cupcakes

Ingredients
🧁 CUPCAKE BATTER
4 Egg Whites (130 g) ~ room temperature
1 tsp Lemon Juice
80 g Caster Sugar
4 Egg Yolks (85 g) ~ room temperature
40 g Milk ~ room temperature
26 g Vegetable Oil
30 g Maple Syrup
1/2 tsp Vanilla Extract
120 g Cake Flour (sifted)
Notes: you can substitute Lemon Juice with 1 tsp White Vinegar or 1/2 tsp of Cream of Tartar

🧁 BOILED-MILK FROSTING
270 g Milk
36 g All-Purpose Flour
1/8 tsp Salt
270 g Unsalted Butter ~ softened at room temperature
135 g Icing Sugar
1/2 tsp Vanilla Extract
Food Colouring

Instructions
PREPARATION

  1. Line 12-cup Muffin Tins with paper liners
  2. Make sure all utensils clean and grease free (wipe the bowl and utensil with Lemon Juice or Vinegar to helps remove grease).
  3. Take the eggs and other cold ingredients out of the fridge
    Separate Egg Whites and Egg Yolks; then let them come to room temperature.
  4. Preheat the oven 180°C/ 160°C fan/ gas mark 4.
  5. Mix the wet ingredients (Milk, Oil, Maple Syrup and Vanilla Extract)


CUPCAKE BATTER

  1. Beat the Egg Whites over HIGH speed for about 30 seconds until foamy.
  2. Add Lemon Juice (or white Vinegar or Cream of Tartar) and continue beating for another 30 seconds.
    * Acid in Lemon Juice/ Vinegar/ Cream of Tartar will help stabilizing the egg whites
  3. Add Sugar in 3 batches every 30 seconds.
  4. Once all the Sugar is added, continue beating on high speed until stiff peak for about 3 to 5 minutes (the mixture will gradually thicken and look shiny).
  5. Pour in the Egg Yolks; Using a hand whisk, stir gently until evenly mixed.
  6. Add sifted Flour in 2 batches (don’t skip this process; by sifting the Flour, it will break up any lumps, create a light, delicate, and fluffy results).
    Stir gently; Make sure that you scrape the entire surface of the bowl so that there is no flour residue on the sides and bottom of the bowl (mix each batches evenly until there are no lumps).
  7. Then take about 1 cup of this egg-flour mixture into the wet ingredients; mix really well.
    * By using this pre-mix method, the milk-oil mixture will incorporated easily with the egg mixture.
    It prevents the oil and milk from falling directly to the bottom of the bowl, which would cause the cake didn’t rise properly
  8. Pour the pre-mix mixture back to the egg-flour mixture; using a hand whisk stir gently (don’t mix too hard, just make sure the mixture is well blended)
  9. Then using spatula, scrape all the bottom and sides of the bowl, make sure it is evenly mixed.
    The batter should be thick but flowing (if the batter looks runny, it means you’ve over-mixed it and the cupcakes won’t rise properly)
  10. Evenly scoop the batter into prepared muffin cups.
  11. Using a skewer make this circular motion to flatten the batter and break the large bubbles.
  12. Bake in the preheated oven at 180°C/ 160°C fan/ gas mark 4 for 23 Minutes (Middle rack).
    * Resist the urge to peek until your cake is done; this can lead to the cake being too damp in the middle or even falling
  13. Once baked, tap the pan on the counter 3 times, this will prevent the cupcakes from shrinking or deflating when they cool.
    And then immediately transfer to a cooling rack to cool completely.


BOILED-MILK FROSTING

  1. In a medium bowl, whisk the Flour and Salt into Milk until smooth
    Strain this mixture to the non-stick pan (you don’t want any lumps in your frosting)
  2. Cook over MEDIUM-HIGH heat, the mixture will gradually thicken.
    Stir constantly until very thick and bubbling, about 3 minutes.
    *It is important to stir the mixture constantly during cooking, otherwise the bottom will burn
  3. Once it’s done, strain the mixture through a fine sieve into a shallow heatproof dish
  4. Place a piece of plastic wrap directly on the surface to prevent a skin forming
  5. Let the Roux cool completely to room temperature (this will take about 2 hours)
  6. After the Roux has cooled,
    Start beating the Butter on medium speed for 1 minute until smooth and creamy
  7. Add the Icing Sugar and Vanilla Extract, continue beating for 1 minute
    * Scrapping down the sides and bottom of the bowl occasionally until all the Sugar has been incorporated
  8. Pour the room temperature Roux, continue mixing (It may look curdling at first) Using spatula, scrape down the sides and bottom of the bowl occasionally to make sure everything is mixed well
    Keep mixing on MEDIUM-HIGH speed for about 3 to 5 minutes, the frosting will become very smooth, light, and fluffy
    * If you find the frosting is too soft to pipe, you can place it in the fridge for about 30 minutes and it will firm up a bit to a nice consistency

NOTES

  1. Make sure the unfrosted Sponge Cupcakes to cool completely before storing
  2. Unfrosted Sponge Cupcakes can be stored at room temperatur for 2-3 days in an airtight container to prevent them from drying out
  3. For longer storage, they can be placed in the refrigerator for up to a week in an airtight container.
    If refrigerated, let the Cupcakes come to room temperature before serving to soften them up. This usually takes about 30 minutes to an hour
  4. Unfrosted Cupcakes can also be frozen for longer storage (up to 1 month). 
    Wrap each cupcake individually in plastic wrap and then place them in a freezer-safe container or bag. 
    To thaw, unwrap the Cupcakes, place in an airtight container and let them come to room temperature. 
  5. To store frosted Sponge Cupcakes; keep them in an airtight container for 1 day,
    If you can’t finish it, preferably refrigerated if the frosting contains dairy or perishable ingredients; they can last up to 5 days.

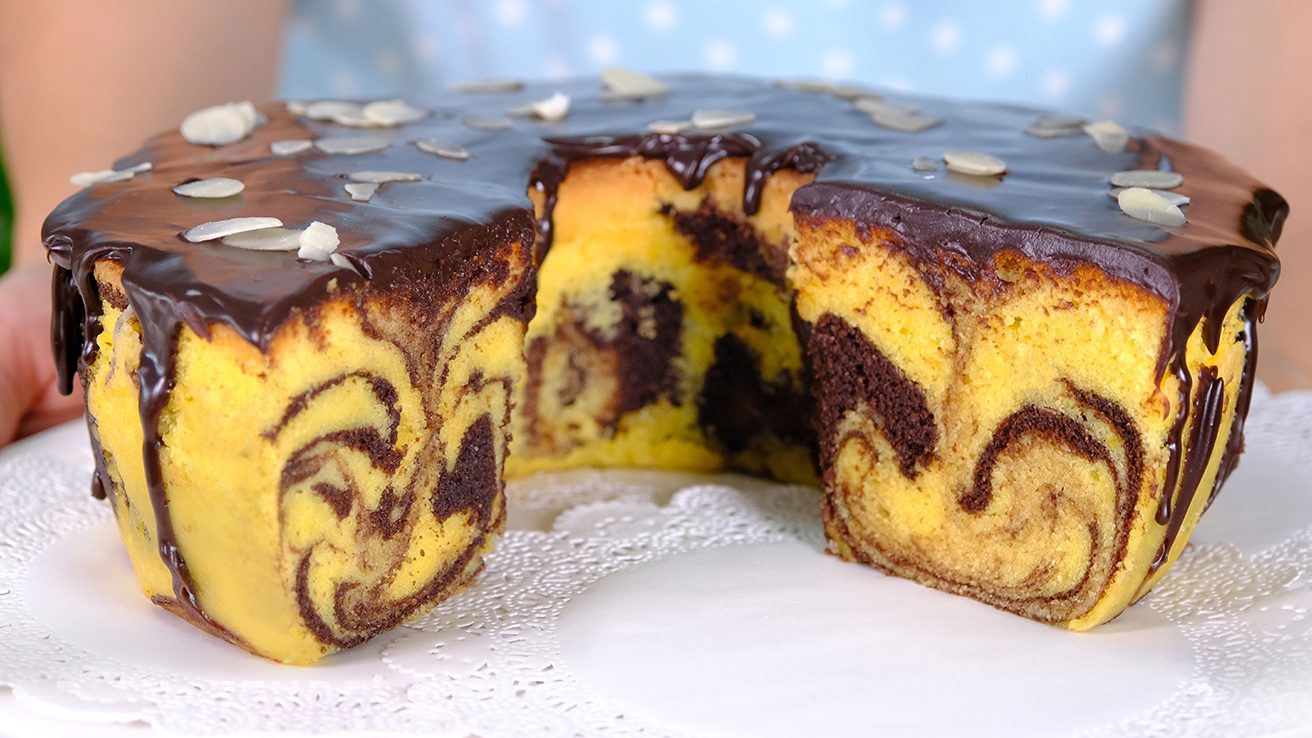
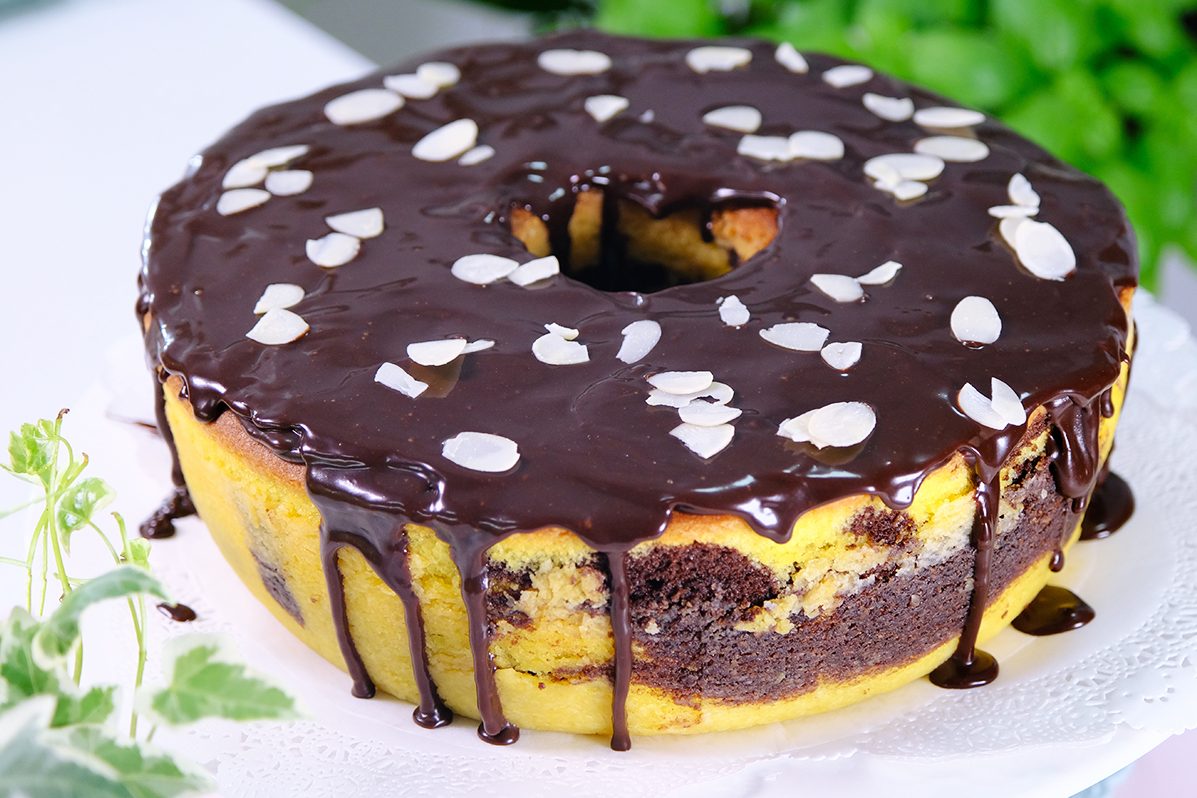
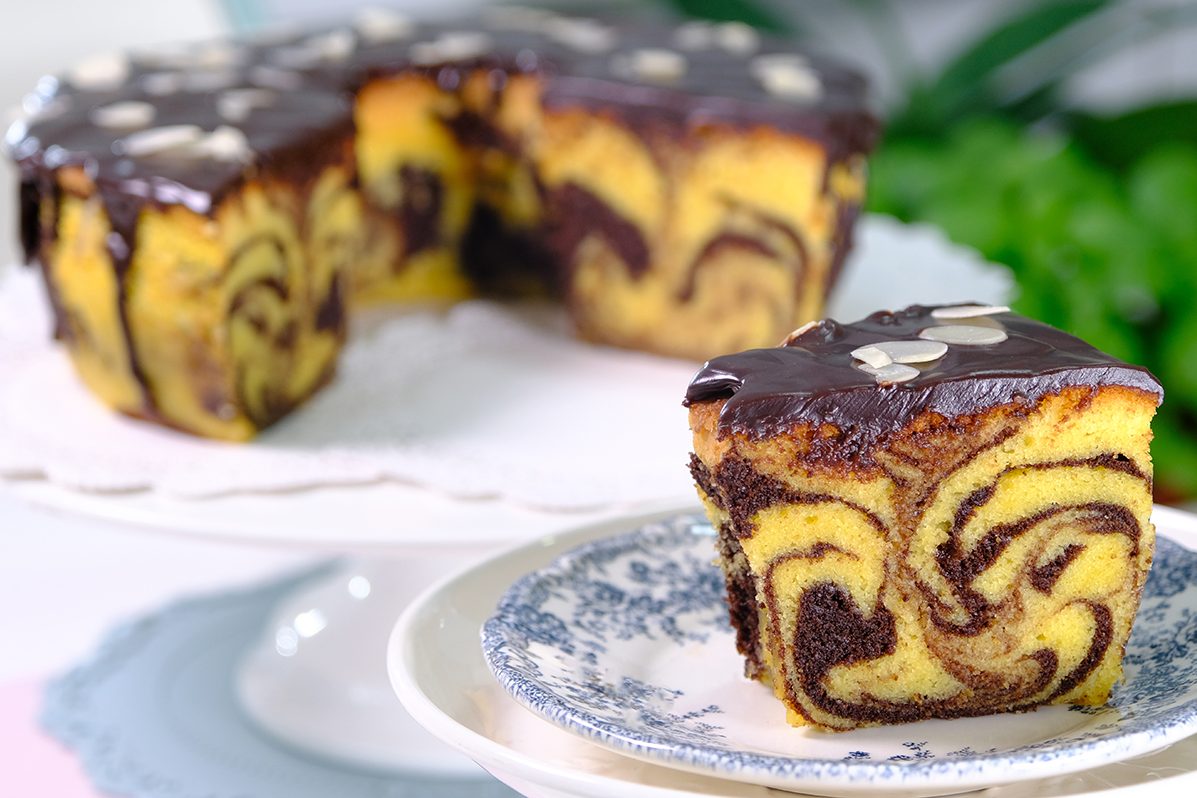
Rich Fluffy Moist Classic Marble Cake

Marble Cake is my classic childhood baking memory 🥰
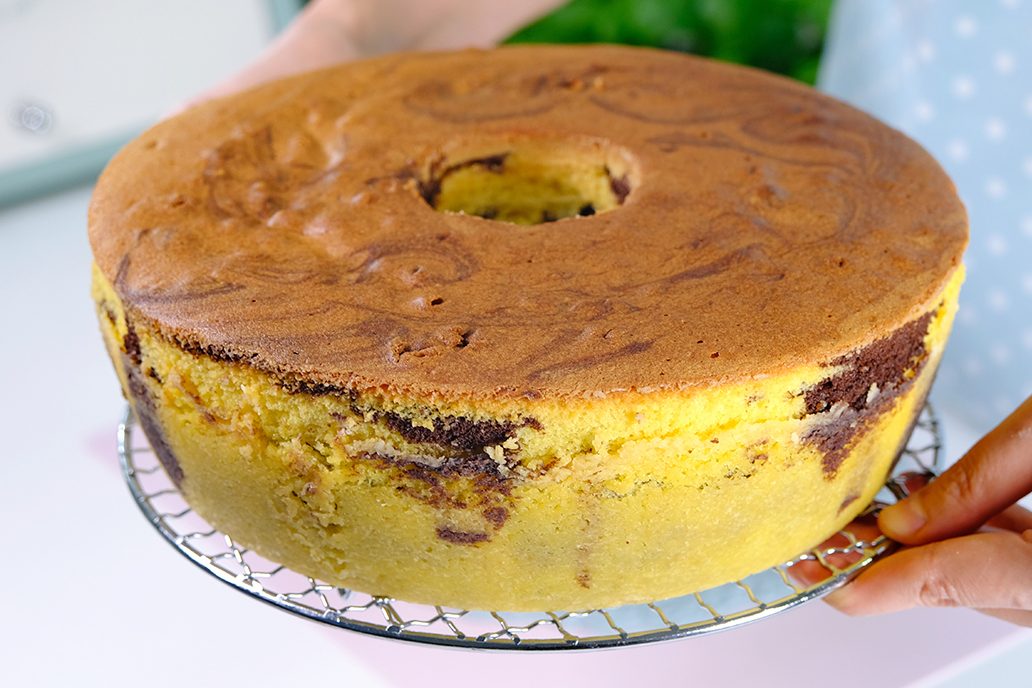
Swirls of tender Vanilla and rich Chocolate Cake baked together in one beautiful Tube Pan.
This cake was a childhood favorite, but it seems a bit dated now; which is a shame, because it’s worth the energy it takes to bake.

😱

Many Marble Cake recipes will simply use a basic Pound Cake recipe, and introduce a couple of tablespoons of Cocoa Powder to half of the batter.
A pound cake recipe is an extremely useful one to have up your sleeve; but for me, it isn’t the perfect Marble Cake recipe.

I love making this marble cake using my old tube pan 😙

So this recipe is based on a Vanilla Sour Cream Cake that I’ve been making for years: as well as the tang of the Sour Cream softening the sugar content,  
Adding Sour Cream will result in a richer, super moist and soft cake.

The cake is ridiculously moist and keeps extremely well (Unglazed Marble Cake should last 4 days at room temperature in an airtight container, without becoming dry or stale).
Likewise, the mixture of Cocoa Powder and melted Butter in the darker batter creates richness and depth of flavor; no dry or bland cake here.

I used the Flour Batter Mixing Method to make this cake.
This method produces a more tender cake because the Butter coats some of the gluten-forming proteins in the flour at the beginning of the mixing process, preventing excessive gluten formation.

Flour Batter Method works only if the Butter is softened or 65° to 75°F/ 19° to 23°C.
At this temperature, the Butter when whipped will hold the maximum amount of air; And make sure that all other ingredients are room temperature as well, this includes Eggs and Sour Cream.

I love to serve this cake with Chocolate Glaze, but you can serve it just plain or dust the top with Icing Sugar.

Once the glaze is poured, I highly recommend storing it in the refrigerator, since the glaze contains Butter as a perishable ingredient.

🤤 I want to bite it !

The cake smells amazing 🤪 🙃 😘 …
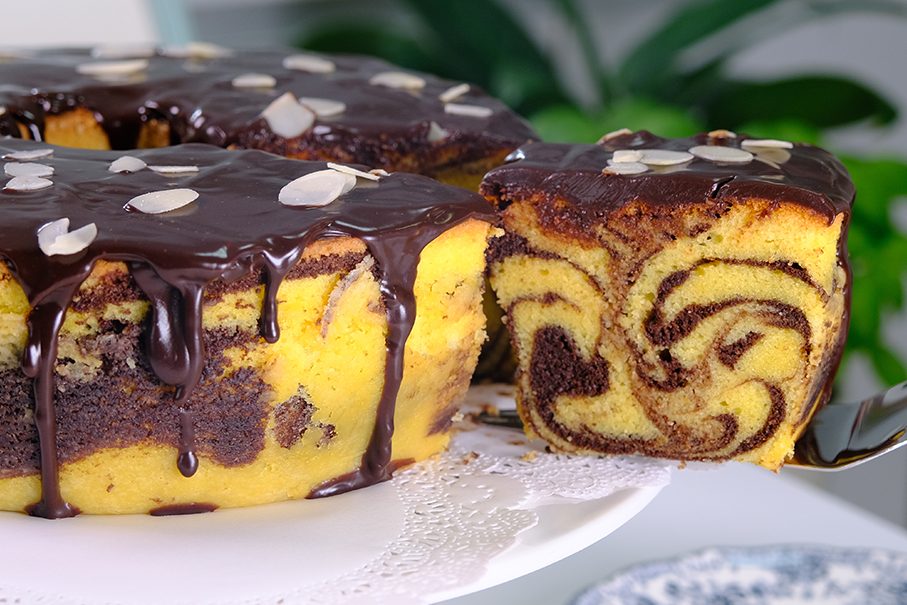
There is something special about a classic marble cake, it catches the eye but also makes you excited to bite into it because it has two different flavors.

You can use a Bundt Pan to make this simple homemade treat much more sophisticated.
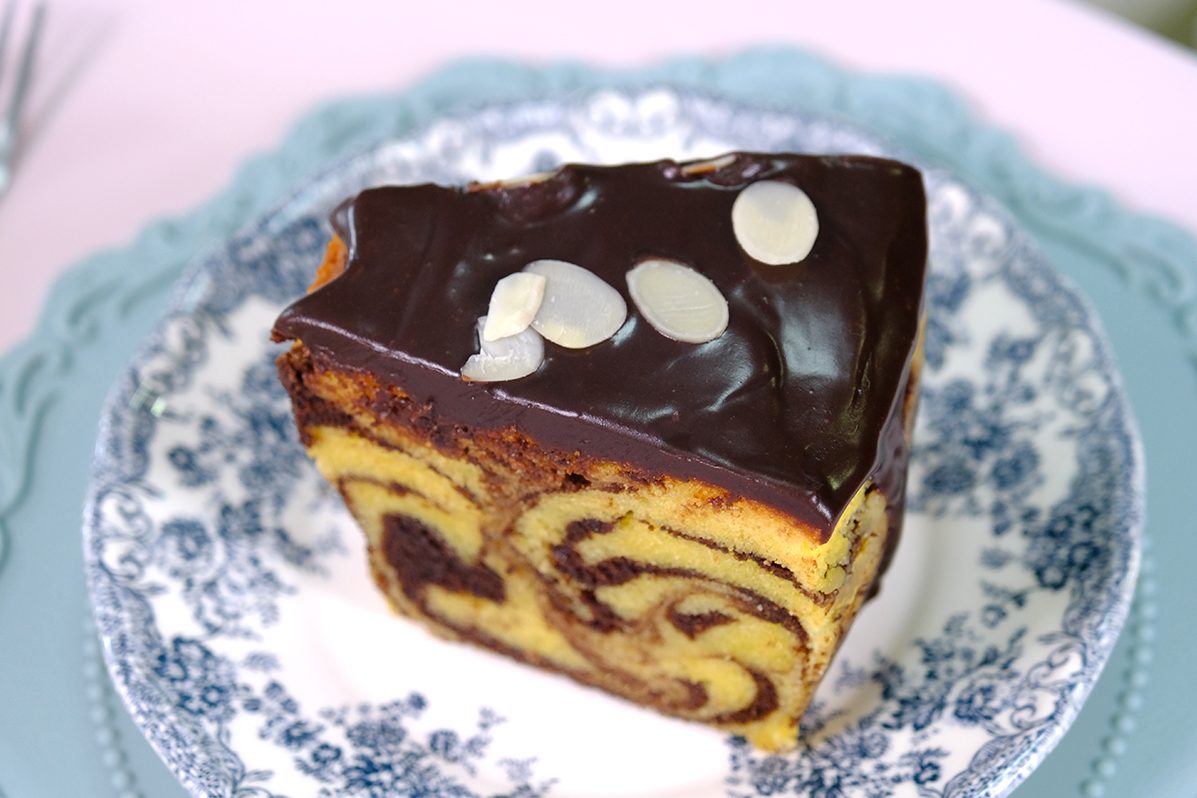
It is wonderfully rich and buttery with a moist and tender crumb.

If you love soft, velvet Marble Cake then please give this cake a try.
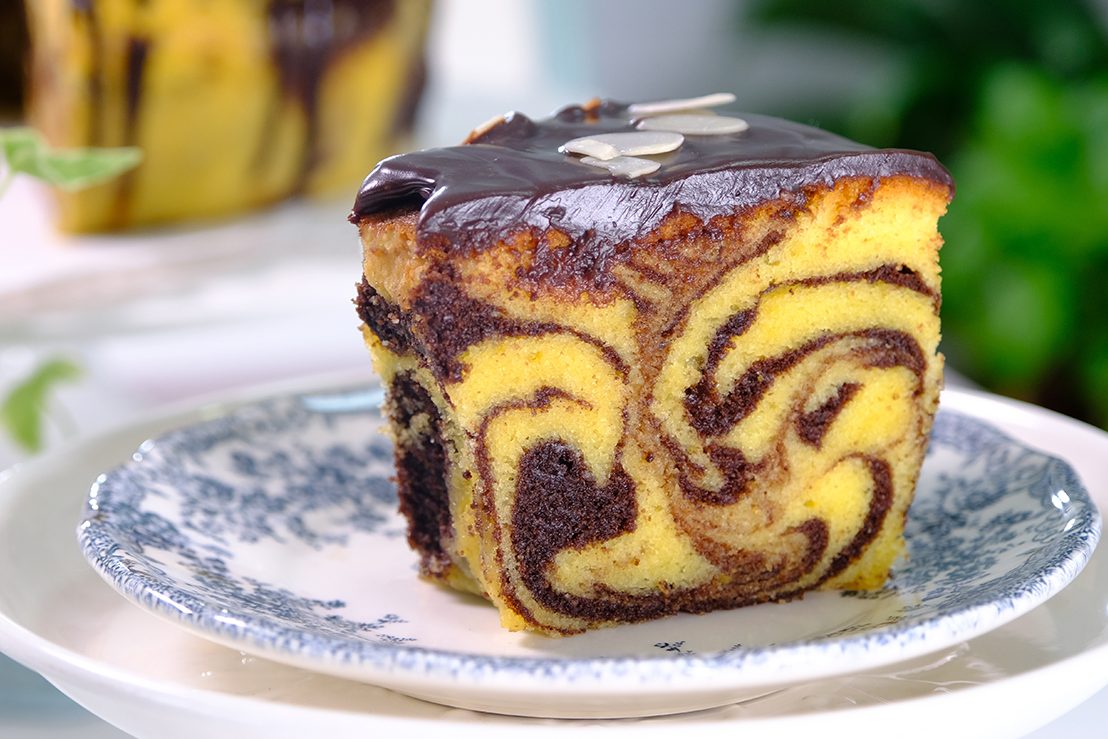
I will also show you how to get the perfect Marble swirl (kindly watch the video)
This beautiful moist cake perfect for serving with a cup of tea or coffee.

Marble cake is a simple concept, but the baked result is very satisfying, with a delightful look when you cut into the cake and reveal the hidden pattern.
I hope you will enjoy it as much as I do 😃

WATCH HOW TO MAKE RICH FLUFFY MOIST CLASSIC MARBLE CAKE

TIPS FOR SUCCESS (PLEASE READ FIRST):

  • Choose the right pan
    Use a cake pan made of a highly conductive metal such as Aluminium
    If you prefer to use a Bundt Pan, make sure that you choose a thick, non-stick metal pan that is not too dark, since they are sturdy and conduct heat consistently
  • Make sure every crack and crevice of your pan has been greased with solid Shortening and flour to ensure a perfect crust
  • Preheat the oven 20 minutes or longer before you start (use an oven thermometer to ensure the temperature is correct)
    Set an oven rack in the lower third of the oven
  • Start with room temperature ingredients (the Butter must be softened or 65° to 75°F/ 19° to 23°C).
    I usually take the ingredients out of the fridge (including Eggs and Sour Cream), allow to sit on the counter for about 30 minutes before I start making the cake. The amount of time depends on the weather and how cool you keep your kitchen (the temperature where I live is 29.5°C)
    DON’T heat the butter in the Microwave, melted Butter won’t cream properly
  • Always use real Butter (100 percent High Quality Butter)
  • Sift the Flour Mixture (160 grams of Flour, Baking Powder and Salt)
  • When adding Flour mixture and Sour Cream, DON’T overmix
  • When making the marbling effect, DO NOT overdo it (2 rounds max) as you want the Vanilla and Chocolate swirls to be clearly visible
  • NEVER try to speed up the baking process and DO NOT open the oven door until your cake has baked at least three-quarters of the recommended baking time
  • Once it’s baked, let Marble Cake rest for at least 15 minutes in the pan; then remove the pan and let it cool completely on a cooling rack
  • Marble cake is best eaten the day after baking
    Once cool, store Marble Cake at room temperature (in an airtight plastic bag) overnight
    And the next day; you can pour the glaze on top and serve.

RECIPE

MARBLE CAKE
Yield: One 10-Inch (7 cm tall) TUBE PAN

❄️ Ingredients
CAKE BATTER
🪴Cocoa Mixture:
40 g Unsalted Butter (melted)
20 g Cocoa Powder (Dutch-Processed)

🪴 Creamed Butter Mixture:
255 g Unsalted Butter ~ softened at room temperature
180 g All-Purpose Flour

🪴Flour Mixture:
160 g All-Purpose Flour
2 ¼ tsp Baking Powder (Double Acting)
3/4 tsp Salt

240 g Sour Cream (room temp.)
1/2 tbs Vanilla Extract
225 Whole Eggs (room temp.)
90 g Egg Yolks (room temp.)
375 g Caster Sugar

CHOCOLATE GLAZE
170 g Dark Chocolate Compound (Semi-Sweet)
120 g Heavy Cream
20 g Unsalted Butter
1 tbs Dark Rum


❄️ Instructions
Preparation

  1. Coat the entire inside of the pan with solid Shortening
    After greasing the pan, sprinkle some All-Purpose Flour, tilt the pan and rotate it (tapping the sides to spread the flour evenly)
    Invert the pan and tap it lightly to get rid of any excess flour (make sure every nook and cranny of the pan is greased and floured to ensure a perfect crust)
  2. Preheat the oven 20 minutes or longer before you start 160°C fan/ 180°C/ Gas Mark 4 (use an oven thermometer to ensure the temperature is correct)
    Set an oven rack in the lower third of the oven
  3. Make sure all utensils clean and grease free (wipe the bowl and utensil with lemon juice or vinegar to helps remove grease).
  4. Make sure all ingredients are at room temperature
    Take the Butter, Eggs and Sour Cream out of the fridge, allow to sit on the counter for about 30 minutes before you start making the cake (the amount of time depends on the weather and how cool you keep your kitchen. The temperature where I live is 29.5°C)
    The Butter must be softened or 65° to 75°F/ 19° to 23°C; To test poke it with your finger; your finger should make an indent without sinking into the Butter (it should not be shiny or greasy and cool to touch, not warm)
    DON’T take a shortcut and Microwave the Butter because it will not heat evenly
  5. Melt 40 grams of Unsalted Butter in the double boiler, then mix with Cocoa Powder until smooth; set aside
  6. Using a baloon whisk, combine the Flour Mixture (160 grams of All-Purpose Flour, Baking Powder and Salt), set aside
  7. Mix Sour Cream and Vanilla Extract, set aside


To Make Marble Cake

  1. In the first bowl
    Beat the softened 255 grams Unsalted Butter for 30 seconds until soft
    Add 180 grams of All-Purpose Flour, mix on LOW SPEED first until the dry ingredients are moistened; then raise the speed to MEDIUM-HIGH and continue beat for about 3 minutes until light, fluffy and pale in color (scrape the sides and bottom of the bowl occasionally to make sure everything is evenly mixed)
    This method produces a more tender cake because the Butter coats some of the gluten-forming proteins in the flour at the beginning of the mixing process, preventing excessive gluten formation
    Set aside
  2. In a second bowl
    Beat the Eggs and Caster Sugar at MEDIUM-HIGH speed for about 3 Minutes to form a semi-firm foam
    The egg whipping is not as thorough as that needed for a Sponge Cake
  3. Using a hand whisk, gently combine the Beaten Eggs to the Creamed Butter Mixture in 3 batches (mixing well after each addition)
  4. Then gradually add sifted Flour Mixture alternately with Sour Cream that we prepared earlier in 3 batches (beginning and ending with Flour Mixture).
    Please note that the flour mixture must be sifted
    Mix gently with a hand whisk until just combined after each addition
    Make sure that you scrape the entire surface of the bowl so there is no flour residue on the sides and bottom of the bowl (avoid over-mixing the batter or your Marble Cake will be tough)
  5. Using a spatula, scrape down the sides of the bowl, making sure everything is mixed well (the consistency should be thick)
  6. For the Chocolate batter, pour 360 ​​grams of the batter into another bowl
    Add the Cocoa mixture that we have prepared earlier and stir until well combined
  7. Scoop the batter into the prepared pan
    Place 1/3 of the Vanilla batter first
    Then 1/2 of the Chocolate batter
    Repeat the process
    Finished with the Vanilla batter
  8. For marbling effect
    Using a wide spoon, fold through bit by bit
    Then use a spatula, lightly swirling the batter in a spiral motion (make sure the spatula doesn’t touch the bottom of the pan)
    Don’t overdo it here, 2 rounds max, as you want the Vanilla and Chocolate swirls to be clearly visible (this process will also help to flatten the batter and break the large bubbles)
  9. Tap the pan to remove excess bubbles
  10. Bake in the preheated 160°C fan/ 180°C/ Gas Mark 4 (the lower third rack) for 1 hour or until a skewer inserted into the center comes out clean
    Never try to speed up the baking process and Do not open the oven door until your cake has baked at least three-quarters of the recommended baking time
    The rush of cold air that hits the cake when the door is opened could cause the cake to collapse
    ** If you feel your cake is a little too brown, what you can do is after 45 minutes of baking, cover the pan loosely with Aluminium Foil to prevent overbrowning and continue bake for another 15 minutes until the cake is done
  11. Once it’s baked, let the cake cool in the pan for about 15 minutes
  12. 15 minutes later, remove the pan and let it cool completely on a cooling rack
  13. Marble cake is best eaten the day after baking
    Once it’s cools completely, wrap tightly with airtight plastic and let it sit at room temperature overnight. This storage method can maximize the moisture of the Marble Cake

To Make Chocolate Glaze

  1. Heat the Heavy Cream in a medium saucepan until start to simmer
  2. Remove from heat, add in the chopped Chocolate, let it sit for 30 seconds then whisk until smooth
  3. Add the Butter while the mixture still hot (Butter fat adds a creamier, shinier, and more stable Ganache)
  4. Pour in Dark Rum, this is optional and mix until well combined
    Now you can see, the consistency of the glaze is runny
    Let the glaze cool to lukewarm and thickened for about 20 minutes
  5. After 20 Minutes the glaze will be thicken
    Drizzle over the cake and sprinkle with some toasted Almonds

NOTES

  1. DON’T use Butter to grease the pan
    Shortening is preferable to Butter because it is solid at room temperature; It will stick the pan and provides a better barrier
    Butter unless it is clarified will leave gaps where the flour will not adhere but the cake unfailingly will
  2. Ensure the cake is completely cooled before wrapping or storing
    If you are wrapping a warm Marble Cake, condensation may occur, which can make the cake soggy and sticky
    That moisture buildup can affect the crumb—making it feel overly dense or gummy
    Condensation = Mold Risk; If it’s wrapped warm and stored for a while, that trapped moisture can speed up spoilage
  3. The unglazed Marble Cake can simply be stored at room temperature (wrap the cake tightly in plastic wrap or place it in an airtight container); store in a cool, dry place away from direct sunlight, it can last for 3-4 days at room temperature
  4. Once the glaze is poured, I highly recommend storing it in the refrigerator, since the glaze contains Butter as a perishable ingredient
  5. If storing in the refrigerator, wrap the cake well to prevent it from drying out and absorbing odors; Marble Cake can be kept in the refrigerator for up to a week
  6. For longer storage, it can be frozen for up to 3 months
    Wrap the cake or individual slices tightly in plastic wrap and then foil; Store in an airtight container or freezer bag
    To thaw, remove from the freezer and let it sit at room temperature for a few hours

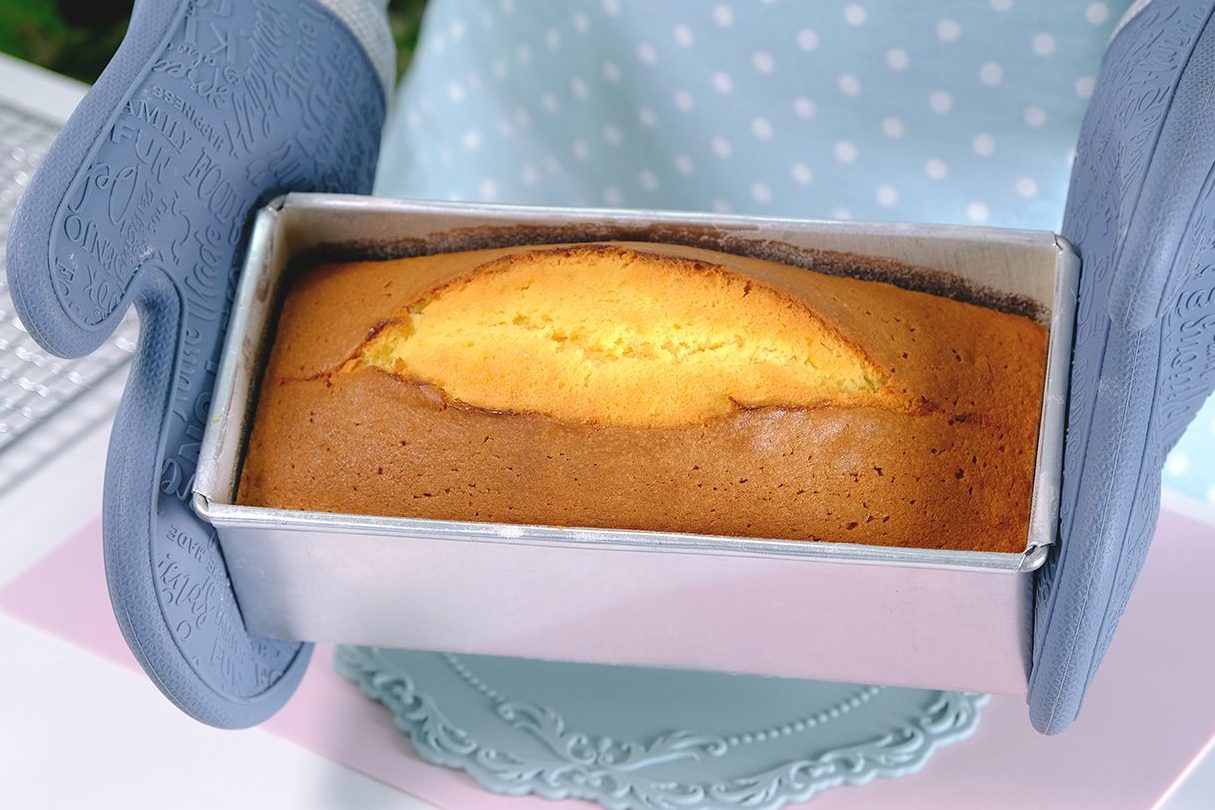
Soft Fluffy Moist Vanilla Pound Cake

“Plain Old Vanilla Pound Cake”
This simple yet classic and elegant cake has become recognized as a basic foundation for many of our modern confections.
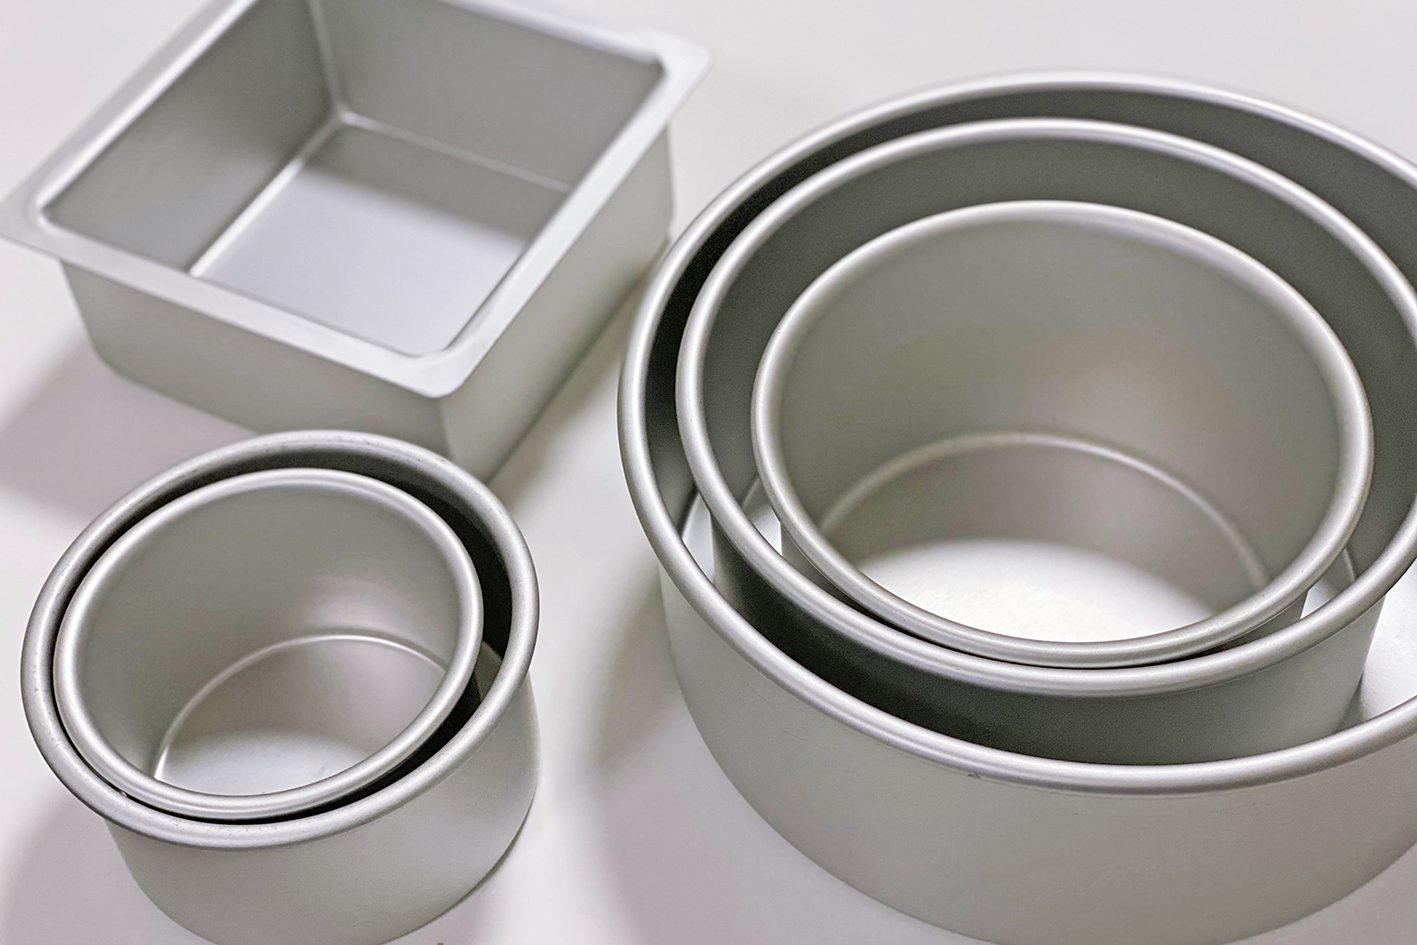

Pound cake gets its name from its traditional recipe: it used a pound each of four main ingredients — Flour, Butter, Sugar, and Eggs. That’s it!

A pound of this, a pound of that, super straight forward and easy to remember which would yield a cake large enough to feed several families.

Rich and buttery, heavy and dense are the original characteristics of Pound Cake.
It’s not light and fluffy like a Sponge Cake—it’s got weight to it.

Nowadays, many people don’t like Pound Cake because it’s too heavy and dense.
The dense crumb comes from all that butter and eggs, with NO leavening agents like Baking Powder or Baking Soda in the original recipe.

However, methods and ingredients have changed over time to suit evolving tastes.

Along with new ingredients, proportions of the basic ingredients I adjusted to make less dense cake.

In this recipe, I will use the Flour Batter Mixing Method and share some tips for making a Mile High yet moist Vanilla Pound Cake.


FLOUR BATTER MIXING METHOD produces a more tender cake because the Butter coats some of the gluten-forming proteins in the flour at the beginning of the mixing process, preventing excessive gluten formation.

This method works only if the Butter is softened or 65° to 75°F/ 19° to 23°C and all other ingredients are ROOM TEMPERATURE as well (this includes Eggs and Milk).
At this temperature, the Butter when whipped will hold the maximum amount of air.

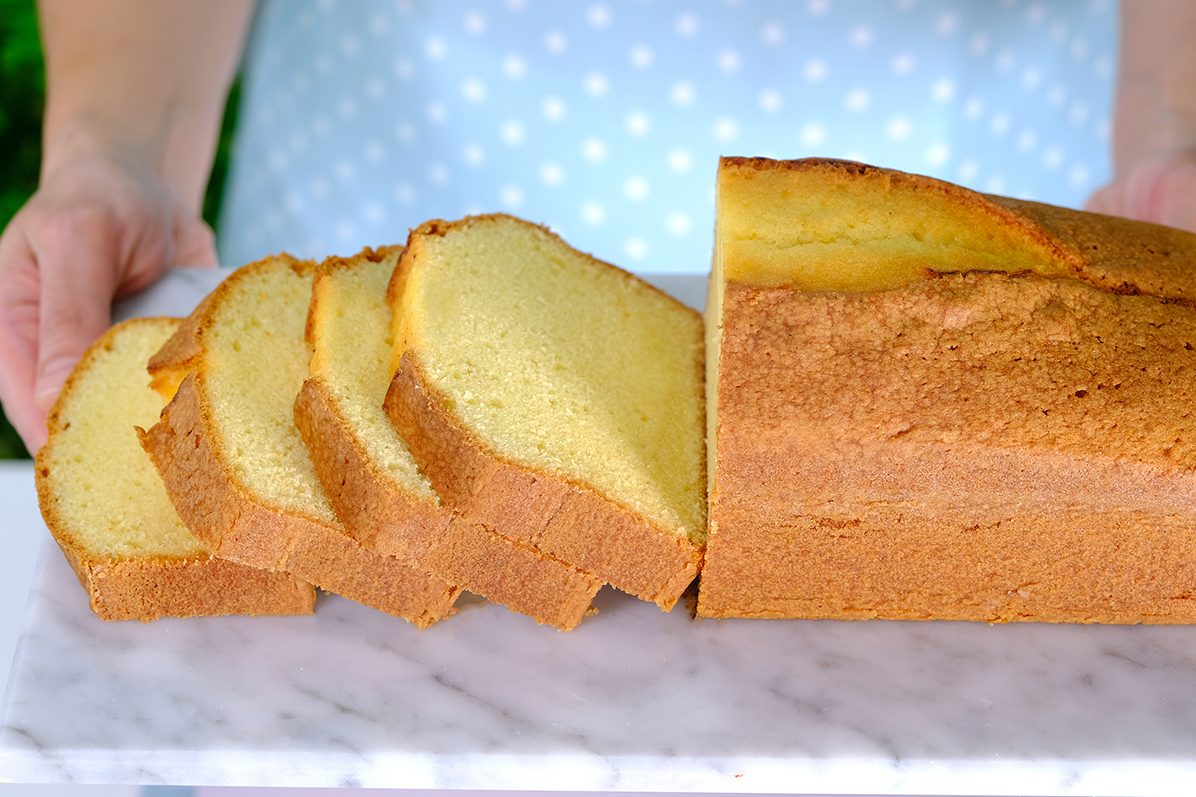
Soft fluffy Vanilla Pound Cake 😇

ALWAYS USE REAL BUTTER when making Pound Cake. Using 100 percent high quality Butter at the correct temperature yields perfect texture in addition to superior flavor.

CHOOSING THE RIGHT PAN IS VERY IMPORTANT IN MAKING POUND CAKE
Pound Cake can be baked in a Loaf, Tube or Bundt Pan.
Rapid heat penetration gives the cake a superior texture, so it is best to use a cake pan made of a highly conductive metal that has a dull, heat-absorbing finish such as Aluminium.

If you prefer to use a Bundt Pan, make sure that you choose a thick, non-stick metal pan that is not too dark, since they are sturdy and conduct heat consistently (Nordic Ware Cast Aluminium Bundt Pan does a great job).

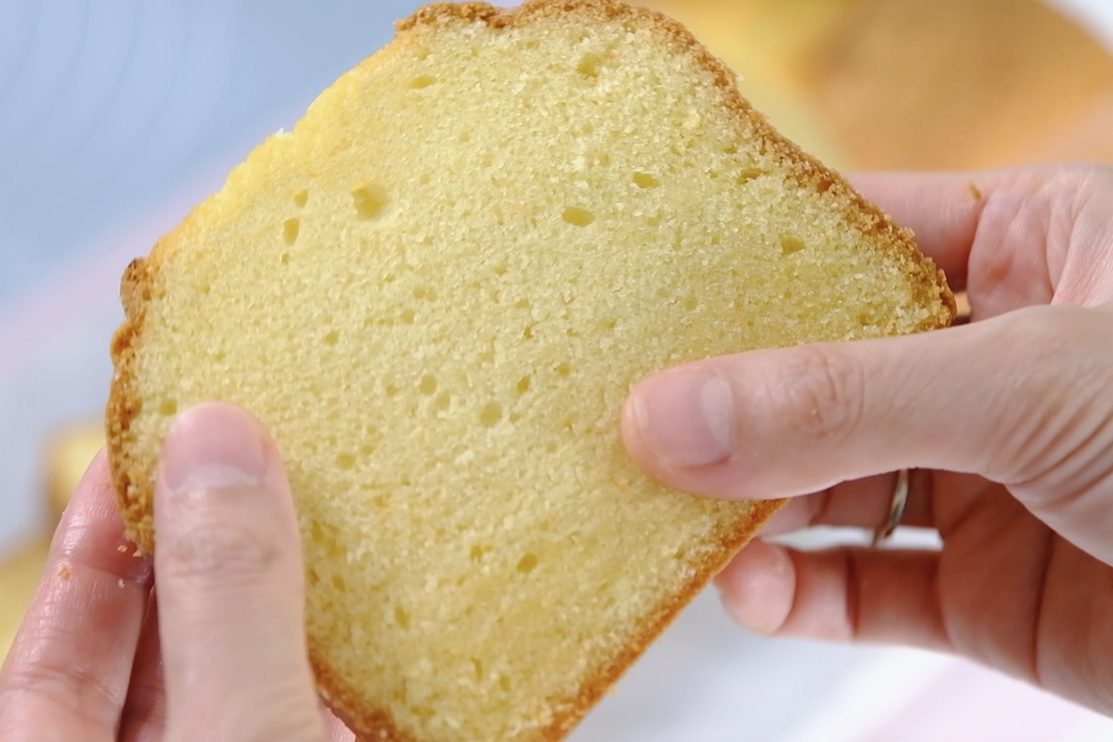
This classic Butter Cake will be so fluffy, light, buttery and very tasty 😘

So.. soft, light and fluffy 🥲
😱 !!
😚 🤤
I used to not like sponge cake either 😏
But now, I started to fall in ❤️ with it 😳
I never imagined a simple cake could be so tasty 😬
Eat it plain …
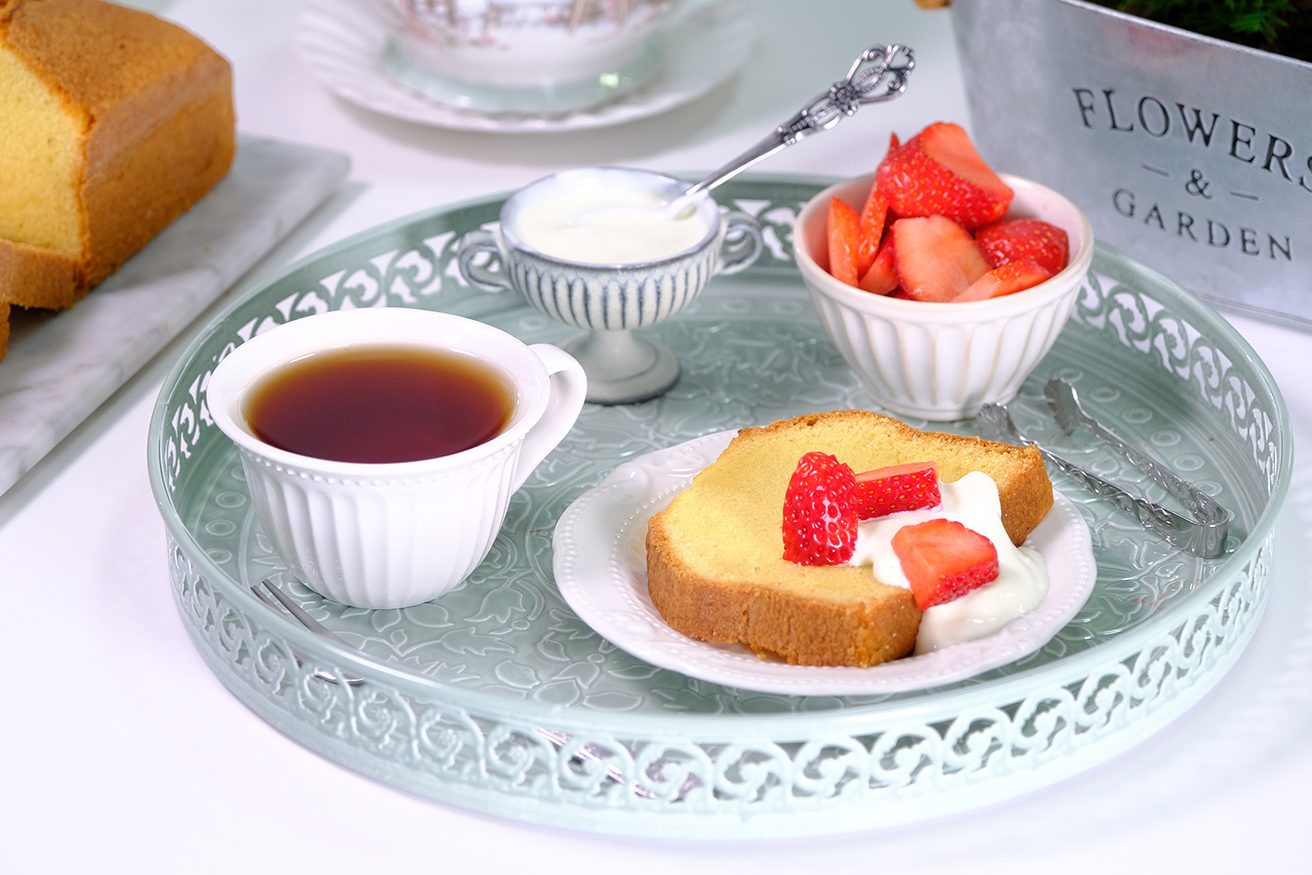
Frosted or lightly toasted with Strawberries 🍓 and fresh Whipped Cream
The cake will still be delicious 🥰
Pound Cake is classic for afternoon tea
It’s rich, buttery, and not too fussy, which makes it perfect alongside a cup of tea
The dense texture balances really well with lighter tea, sandwiches or more delicate pastries on the table

I hope this beautiful cake will add to your baking repertoire 😉

🍰 Love you All !

WATCH HOW TO MAKE “SOFT FLUFFY MOIST VANILLA POUND CAKE”

TIPS FOR SUCCESS (PLEASE READ FIRST):

  • Choose the right pan
    Use a cake pan made of a highly conductive metal such as Aluminium
    If you prefer to use a Bundt Pan, make sure that you choose a thick, non-stick metal pan that is not too dark, since they are sturdy and conduct heat consistently
  • Make sure every crack and crevice of your pan has been greased with solid Shortening and flour to ensure a perfect crust
  • Preheat the oven 20 minutes or longer before you start (use an oven thermometer to ensure the temperature is correct)
    Set an oven rack in the lower third of the oven
  • Start with room temperature ingredients (the Butter must be softened or 65° to 75°F/ 19° to 23°C).
    I usually take the ingredients out of the fridge (including Eggs and Milk), allow to sit on the counter for about 30 minutes before I start making the cake. The amount of time depends on the weather and how cool you keep your kitchen (the temperature where I live is 29.5°C)
    DON’T heat the butter in the Microwave, melted Butter won’t cream properly
  • Always use real Butter (100 percent High Quality Butter)
  • Sift the Flour Mixture (120 grams of Flour, Baking Powder, Baking Soda and Salt)
  • When adding Flour mixture and Buttermilk, Don’t overmix
  • Always fold fruit (if using) by hand (blueberries, etc)
  • NEVER try to speed up the baking process and DO NOT open the oven door until your cake has baked at least three-quarters of the recommended baking time
  • Once it’s baked, let Pound Cake rest for at least 10 minutes in the pan; then remove the pan and let it cool completely on a cooling rack
  • Refrigerating the cake will distort the fresh texture and flavor
    Once cool, store Pound Cake at room temperature (in an airtight plastic bag) for 4-5 days

RECIPE

VANILLA POUND CAKE
Yield: One (9” X 4” X 3”) or (23 x 10 x 7.5) cm Loaf Pan

❄️ Ingredients
FOR THE CREAMED BUTTER MIXTURE:
135 g Unsalted Butter ~ softened at room temperature
115 g All-Purpose Flour

160 g Eggs ~ room temperature
240 g Caster Sugar
120 g All-Purpose Flour
1/3 tsp Double Acting Baking Powder
1/3 tsp Baking Soda
1/3 tsp Salt
120 g Milk ~ room temperature
1/2 tbs Lemon Juice/ Vinegar
2/3 tsp Vanilla Extract

❄️ Instructions
Preparation

  1. Coat the entire inside of the pan with solid Shortening
    After greasing the pan, sprinkle some All-Purpose Flour, tilt the pan and rotate it (tapping the sides to spread the flour evenly)
    Invert the pan and tap it lightly to get rid of any excess flour (make sure every nook and cranny of the pan is greased and floured to ensure a perfect crust)
  2. Preheat the oven 20 minutes or longer before you start 160°C fan/ 180°C/ Gas Mark 4 (use an oven thermometer to ensure the temperature is correct)
    Set an oven rack in the lower third of the oven
  3. Make sure all utensils clean and grease free (wipe the bowl and utensil with lemon juice or vinegar to helps remove grease).
  4. Make sure all ingredients are at room temperature
    Take the Butter, Eggs and Milk out of the fridge, allow to sit on the counter for about 30 minutes before you start making the cake (the amount of time depends on the weather and how cool you keep your kitchen. The temperature where I live is 29.5°C)
    The Butter must be softened or 65° to 75°F/ 19° to 23°C; To test poke it with your finger; your finger should make an indent without sinking into the Butter (it should not be shiny or greasy and cool to touch, not warm)
    DON’T take a shortcut and Microwave the Butter because it will not heat evenly
  5. Using a baloon whisk, combine the Flour Mixture (120 grams of All-Purpose Flour, Baking Powder, Baking Soda and Salt), set aside
  6. Prepare the Buttermilk Mixture (combine Milk, Lemon Juice or Vinegar and Vanilla Extract), set aside


To Make Vaniila Pound Cake

  1. In the first bowl
    Beat the softened Unsalted Butter for 30 seconds until soft
    Add 115 grams of All-Purpose Flour, mix on LOW SPEED first until the dry ingredients are moistened; then raise the speed to MEDIUM-HIGH and continue beat for about 3 minutes until light, fluffy and pale in color (scrape the sides and bottom of the bowl occasionally to make sure everything is evenly mixed)
    This method produces a more tender cake because the Butter coats some of the gluten-forming proteins in the flour at the beginning of the mixing process, preventing excessive gluten formation
    Set aside
  2. In a second bowl
    Beat the Eggs and Caster Sugar at MEDIUM-HIGH speed for about 3 Minutes to form a semi-firm foam
    The egg whipping is not as thorough as that needed for a Sponge Cake
  3. Using a hand whisk, gently combine the Beaten Eggs to the Creamed Butter Mixture in 3 batches (mixing well after each addition)
  4. Then gradually add sifted Flour Mixture alternately with Buttermilk Mixture that we prepared earlier in 3 batches (beginning and ending with Flour Mixture).
    Please note that the flour mixture must be sifted
    Mix gently with a hand whisk until just combined after each addition
    Make sure that you scrape the entire surface of the bowl so there is no flour residue on the sides and bottom of the bowl (avoid over-mixing the batter or your Pound Cake will be tough)
  5. Using a spatula, scrape down the sides of the bowl, making sure everything is mixed well (the consistency should be thick)
  6. Spoon batter into prepared pan (the batter will fill the loaf pan 1-inch from the top)
  7. Using a knife, lightly swirling the batter in spiral motion to flatten the batter and break the large bubbles (make sure the knife doesn’t touch the bottom of the pan)
  8. Smooth the surface of the batter
  9. Tap the pan to remove excess bubbles
  10. Place a line of cold butter in the center of the batter (long side)
    By doing this, perfect cracks will appear after baking, resulting in a very neat appearance
    If you don’t put Butter on top, cracks will still form, but they will be irregular in shape
  11. Bake in the preheated 160°C fan/ 180°C/ Gas Mark 4 (the lower third rack) for 1 hour or until a skewer inserted into the center comes out clean
    Never try to speed up the baking process and Do not open the oven door until your cake has baked at least three-quarters of the recommended baking time
    The rush of cold air that hits the cake when the door is opened could cause the cake to collapse
    ** If you feel your cake is a little too brown, what you can do is after 50 minutes of baking, cover the pan loosely with Aluminium Foil to prevent overbrowning and continue bake for another 10 minutes until the cake is done
  12. Once it’s baked, let the cake cool in the pan for about 10 minutes
    The cake should start to shrink from the sides of the pan only after removal from the oven
  13. 10 minutes later, remove the pan and let it cool completely on a cooling rack
  14. Pound cake is best eaten the day after baking
    Once it’s cools completely, wrap tightly with airtight plastic and let it sit at room temperature overnight. This storage method can maximize the moisture of the Pound Cake

NOTES

  1. DON’T use Butter to grease the pan
    Shortening is preferable to Butter because it is solid at room temperature; It will stick the pan and provides a better barrier
    Butter unless it is clarified will leave gaps where the flour will not adhere but the cake unfailingly will
  2. If you want to add Fruit to Pound Cake Batter (fresh or frozen), pat them dry after washing to remove excess moisture, then lightly coat the fruit in a tablespoon or two of flour (taken from the flour in your recipe); this helps keep it from sinking to the bottom during baking
    Once your batter is fully mixed and smooth, gently fold the floured fruit in using a spatula. Don’t overmix—just fold enough so the fruit is evenly distributed
  3. Ensure the cake is completely cooled before wrapping or storing
    If you are wrapping a warm Pound Cake, condensation may occur, which can make the cake soggy and sticky
    That moisture buildup can affect the crumb—making it feel overly dense or gummy
    Condensation = Mold Risk; If it’s wrapped warm and stored for a while, that trapped moisture can speed up spoilage
  4. The cake can simply be stored at room temperature (wrap the cake tightly in plastic wrap or place it in an airtight container); store in a cool, dry place away from direct sunlight, it can last for 3-5 days at room temperature
  5. Refrigerating the cake is NOT recommended as it will distort the fresh texture and flavor
    If storing in the refrigerator, wrap the cake well to prevent it from drying out and absorbing odors; Pound Cake can be kept in the refrigerator for up to a week
  6. For longer storage, it can be frozen for up to 3 months
    Wrap the cake or individual slices tightly in plastic wrap and then foil; Store in an airtight container or freezer bag
    To thaw, remove from the freezer and let it sit at room temperature for a few hours

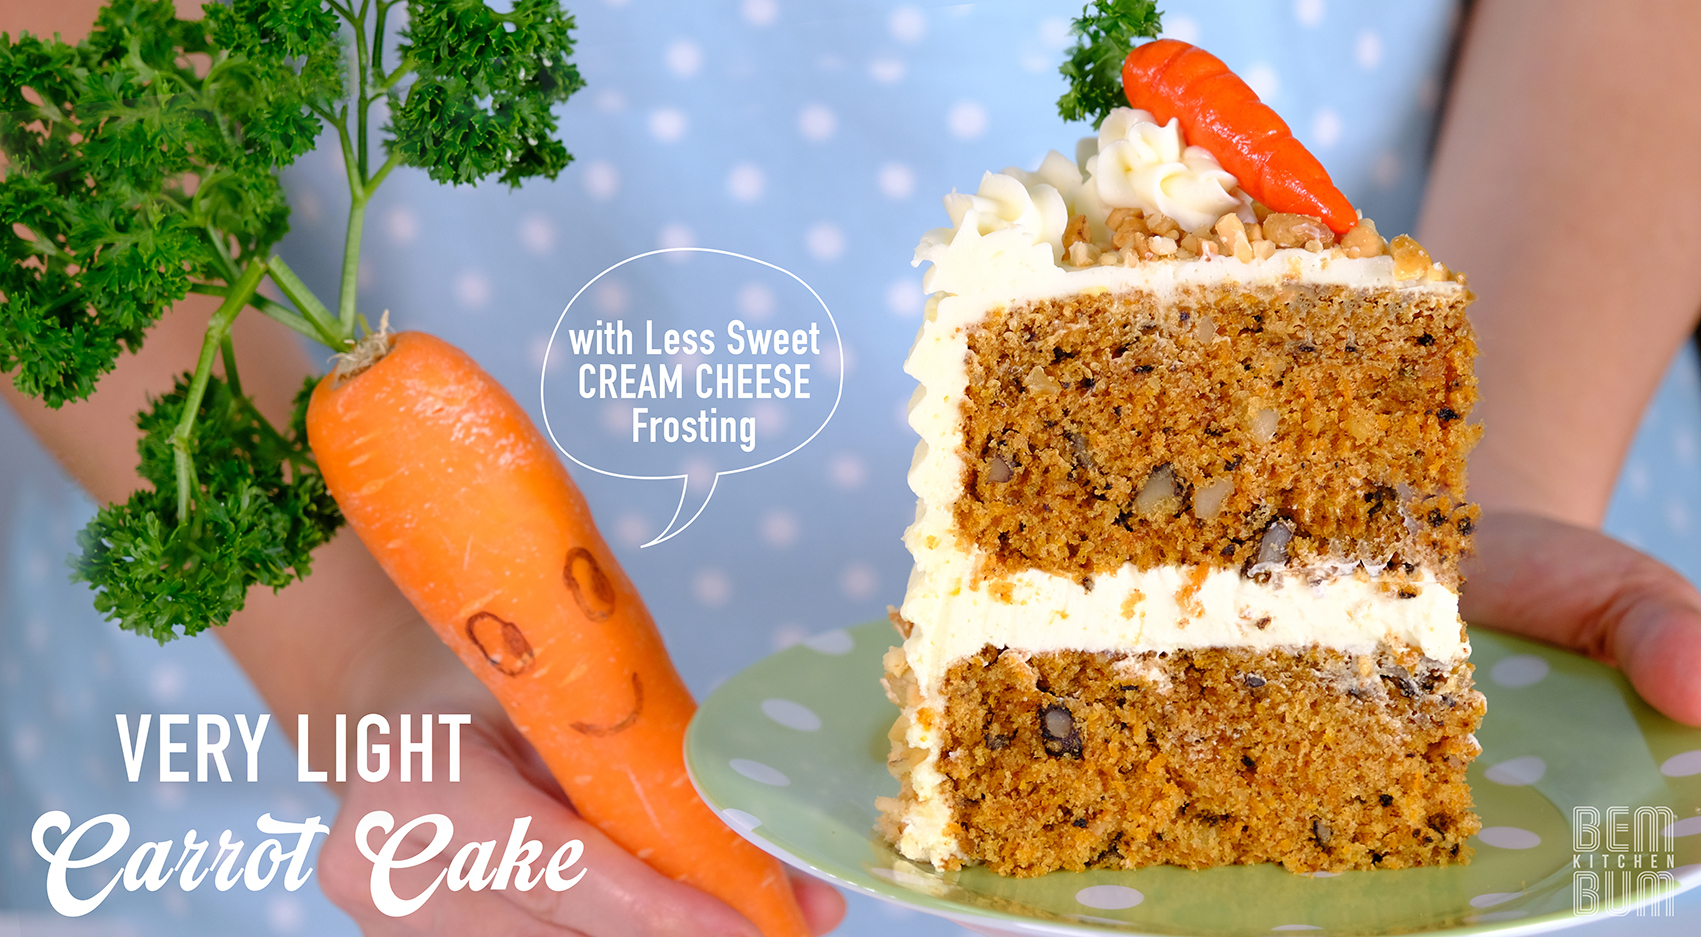
A Very Light Carrot Cake with Less Sweet yet Stable Cream Cheese Frosting

Carrot Cake tends to be a bit dense or heavy and the Frosting is usually too sweet.
In this recipe, I will share a few tips to make a very light Carrot Cake.

My second Brother is a Carrot Cake lover.
He likes light and fluffy cakes, that’s why I was motivated to make this recipe for Him.
Especially for you BRO! 😘

The texture of the cake is very soft and fluffy like a Sponge Cake; and the Frosting is not too sweet but stable enough to fill and decorate your cake.

Eggs must be whip until thick, fluffy and pale yellow in colour 😉
Or reach a ribbon stage
Unlike most Carrot Cake recipes, the eggs do not need to be beaten first; 
This recipe starts by beating the eggs and sugar first until thick and fluffy.

Therefore the use of fresh eggs is very important. Fresh eggs will achieve more volume and have greater stability when beaten than older eggs.

The Eggs must be at room temperature. If your eggs are cold, it may take longer to whip.

Fluffy Light Carrot Cake 🥲
Then the Eggs and Sugar will be warmed in a double boiler.
Warming the ingredients simply helps dissolve the sugar better and improves the emulsifying properties of the egg.
As a result, it helps them achieve maximum volume when beaten.

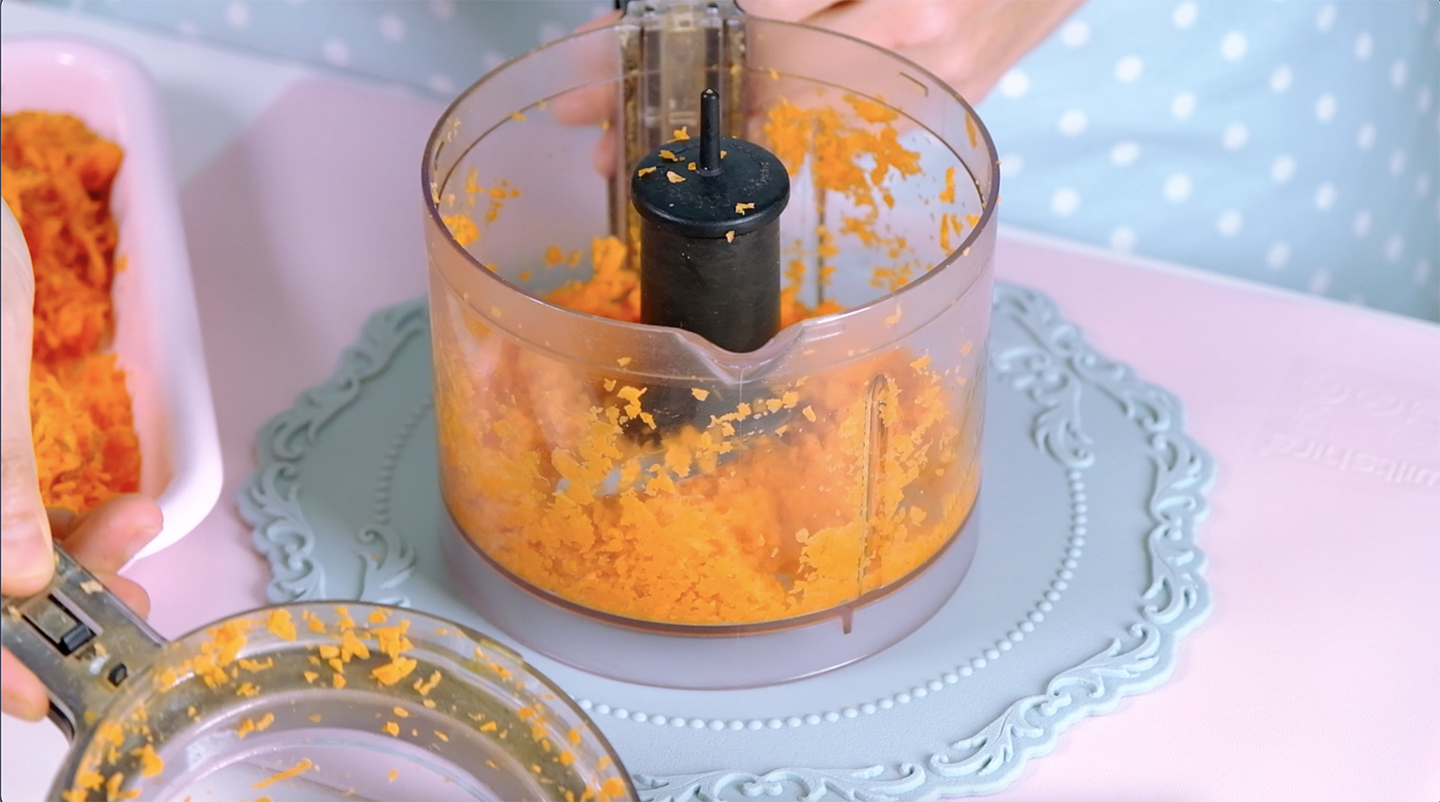
The Carrrots can be grated on a metal grater or in a food processor.
I have used all these methods and found using a fine grater or a food processor was better than use a coarse grater.

NOT GOOD 🙁

Grate the carrots more finely so you don’t get weird, chewy carrot pieces.

You will LOVE this Frosting 😁

For the Frosting, I use less Icing Sugar than most Cream Cheese Frosting recipes.

Less Icing Sugar means less stability, This is where the magic ingredient Milk Powder plays a role in stabilizing the frosting.

NOT overly SWEET yet STABLE Cream Cheese Frosting!!! 🥲
Really SMOOTH and CREAMY 🙄

This frosting recipe relies on good quality ingredients at the right temperature.
A good quality Butter is important otherwise your frosting might split.

I prefer to use a French Brand for best results and take the butter out of the fridge 20 minutes before I start making the frosting

The butter must be softened, that means when you press it with your finger there is an indentation, it’s not sticky and it doesn’t lose its shape.

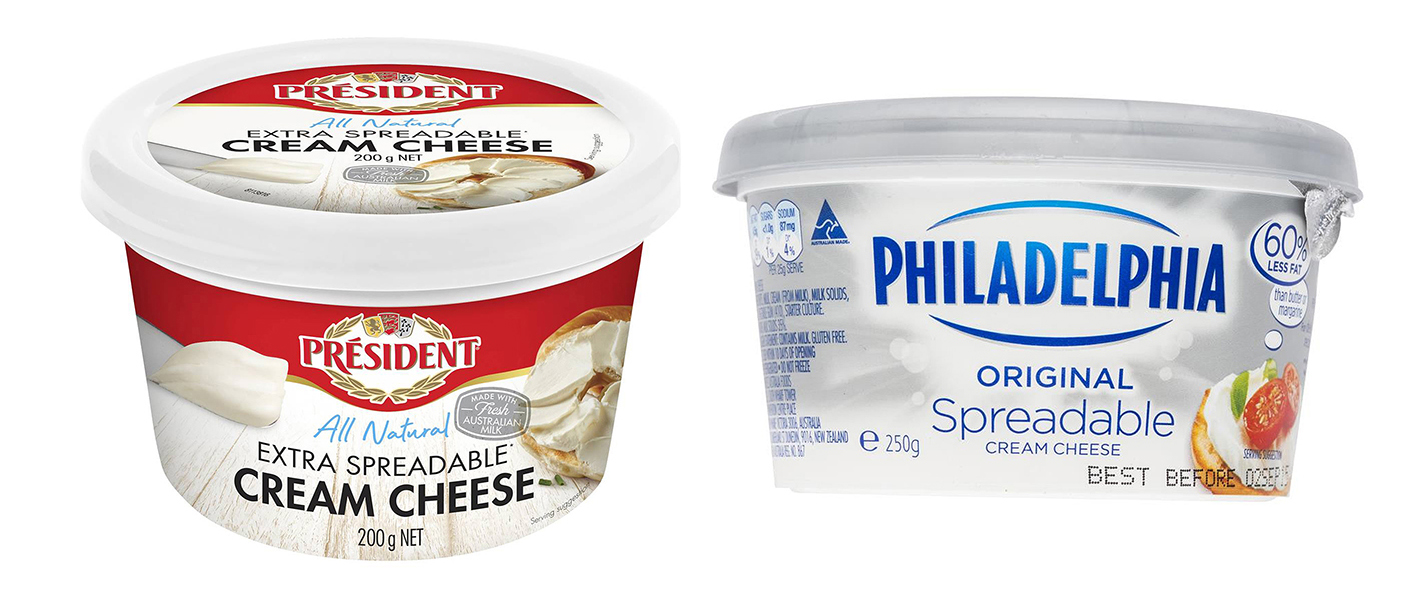
I highly recommend the Philadelphia Brand

And please use “block style” Cream Cheese. The Cream Cheese must be cold, straight out of the fridge.
Do not use the Cream Cheese spread that comes in the container as it will not provide structure to the frosting

DO NOT USE this kind of Cream Cheese 😓

This frosting must be mix on high speed to ensure it comes out fluffy!

Perfectly pipeable 😍

For decorations, I am completely obsessed with Marzipan Carrot. They look so realistic and perfect, and they are so easy to make!  

Screenshot
You can use homemade Marzipan, I prefer store bought.
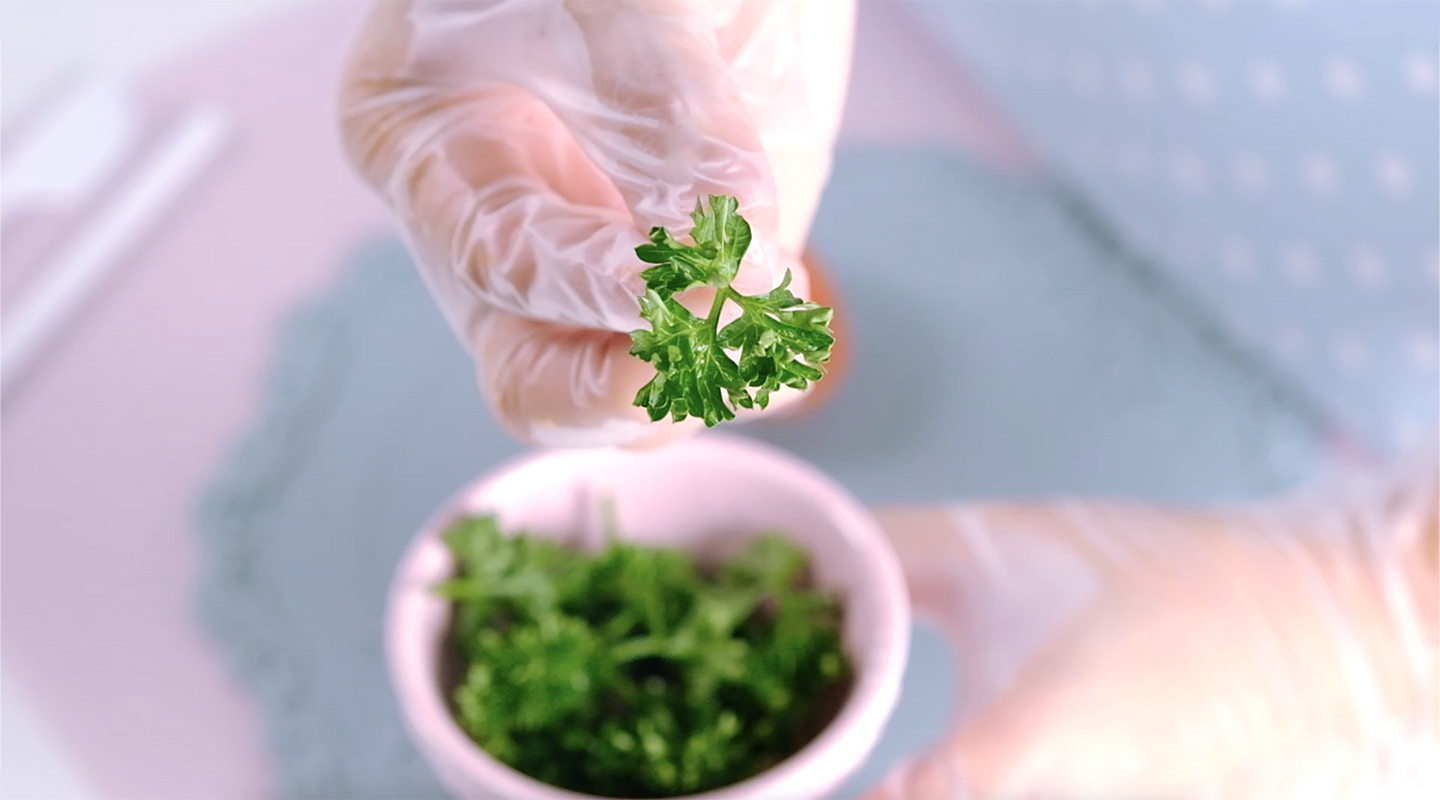
Don’t forget to prepare some parsley for the carrot greens ☺️

Look how adorable and CUTE they were turning out!

The carrots are also completely edible
This is absolutely delicious! 😍

If you desired, you can save some of the frosting to pipe decorations onto the cake.

Or press chopped toasted pecans into the frosting 🤗🤭
Be creative with the decorations 😃
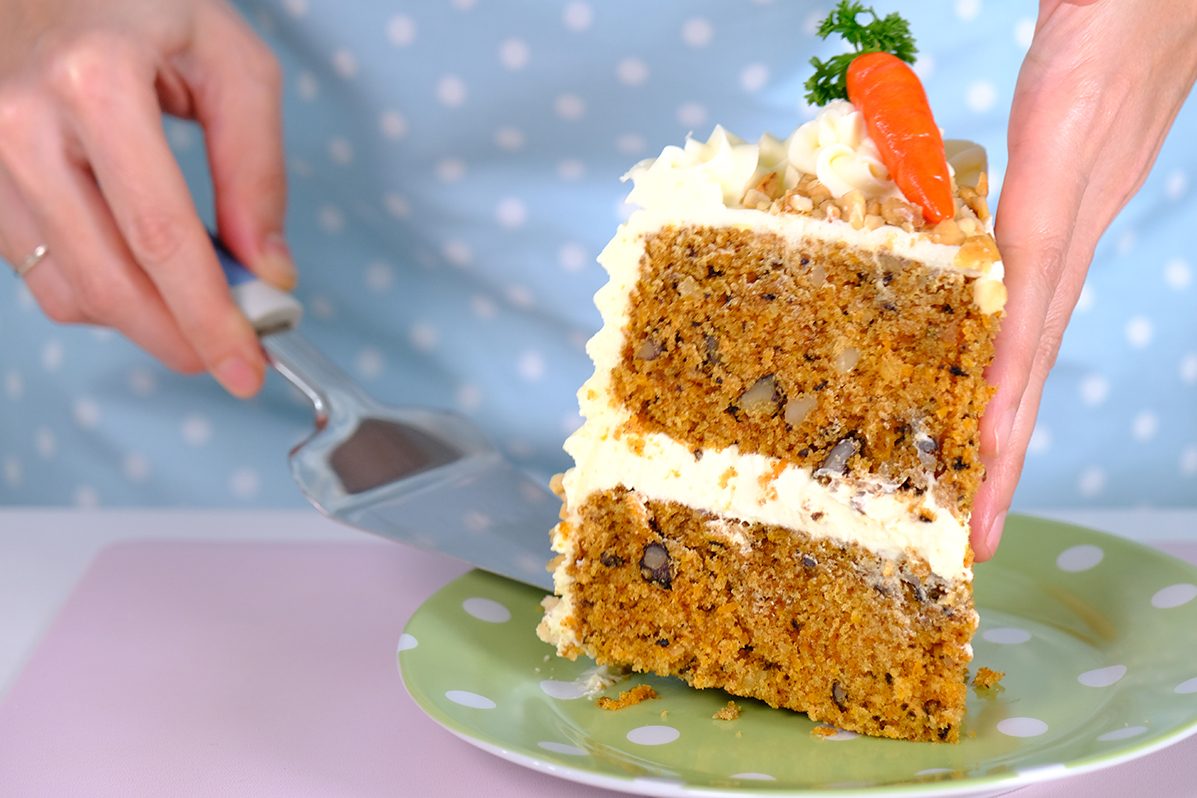
I was so excited to cut this beautiful cake 😜 !!!

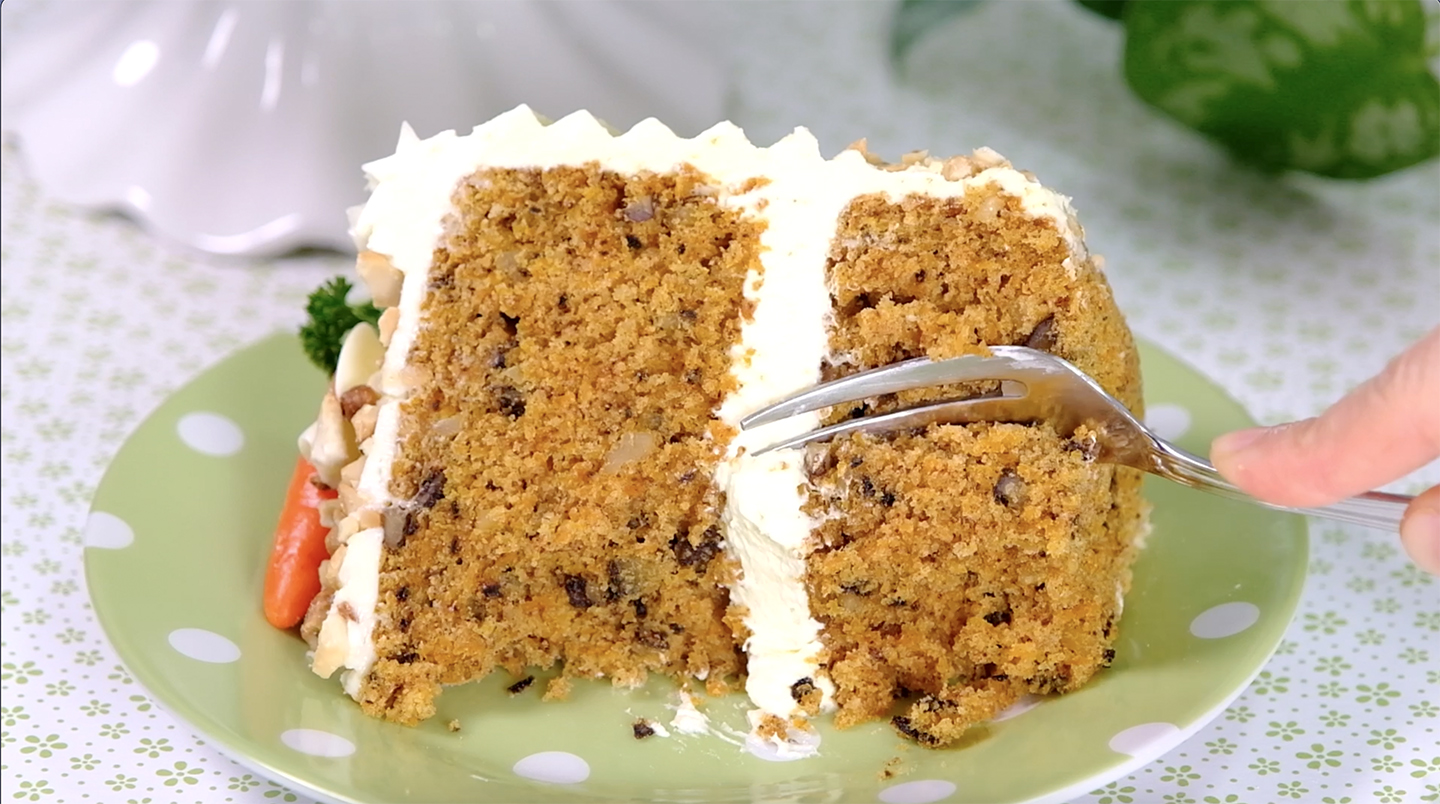
Addictive tender crumb, warm spices, crunchy pecans, and not-too-sweet Cream Cheese Frosting 😍😘

No more dense, heavy carrot cake 🤩

I hope this cake will change your perception ☺️

One slice is never enough 🤗

You will always miss this cake 😉

My second Brother will fall in love with this cake! 😍 🥰 😘

Love You All …
Enjoy the recipe and Happy Baking !

WATCH HOW TO MAKE A VERY LIGHT CARROT CAKE

TIPS FOR SUCCESS (PLEASE READ FIRST):

  • Grease the pans with Oil or Butter and place a piece of Parchment Paper on the bottom of each pan
  • Make sure all utensils clean and grease free (wipe the bowl and utensil with lemon juice or vinegar to helps remove grease)
  • Preheat your oven before you start
  • Use fresh eggs that are room temperature
  • Prepare grated carrots in advance (grate the carrots more finely so you don’t get weird, chewy carrot pieces)
  • Grind the nuts into small pieces
  • Beat the Eggs and Sugar until reach a ribbon stage (thick, fluffy and pale yellow in colour)
  • Sift the dry ingredients
  • Mix the dry ingredients evenly until there are no lumps
  • Make sure the oil are combined well with the batter
  • Don’t let the batter sit too long before baking, bake it immediately
  • Resist the urge to open the oven door while baking
  • Once it’s baked, let it sit rest in the pan for 5 minutes then remove the cake immediately from the pan
  • Let the cake cool completely on a cooling rack before add frosting to the cake
  • Wrap the cooled cake tightly in a cling wrap so it doesn’t dry up
  • Store the cake in the fridge in an airtight container

RECIPE

A VERY LIGHT CARROT CAKE WITH LESS SWEET YET STABLE CREAM CHEESE FROSTING
Yield: One 6-Inch Round Cake (2 or 4 Layers)

INGREDIENTS
🥕 Carrot Cake
170 g Eggs (room temp.)

200 g Caster Sugar
175 g All-Purpose Flour
1/2 tsp Baking Soda
1 tsp Baking Powder (Double Act.)
1/4 tsp Salt
1½ tsp Cinnamon Powder
1/4 tsp Ground Cloves
1/4 tsp Ground Nutmeg
100 g Vegetable Oil
200 g Grated Carrots (finely)
100 g Chopped Walnuts/ Pecans/ Cashews (optional)

🥕 Cream Cheese Frosting
240 g Unsalted Butter (softened)
240 g Cream Cheese (cold, straight out of the fridge)
120 g Icing Sugar
145 g Milk Powder
1½ tsp Vanilla Extract

🥕 Decorations
Store Bought White Marzipan
Orange Food Colouring
Parsley

INSTRUCTIONS
🥕 Carrot Cake

  1. Grease Two 6-Inch Round pans with Oil or Butter and place a piece of Parchment Paper on the bottom of each pan
  2. Preheat the oven 160°C Fan/ 180°C/ Gas Mark 4
  3. Prepare grated carrots in advance; no need to peel, just cut off the ends, wash them well and dry them.
    They can be grated on a fine metal grater or in a food processor (grate the carrots more finely so you don’t get weird, chewy carrot pieces)
  4. If you use nuts, grind the nuts into small pieces
  5. Perpare a double boiler
    Heating a pot of water until it’s almost boiling; take it off from the heat
  6. Then, in a large heatproof bowl combine the Eggs and Caster Sugar
    And immediately place the bowl over the pan of hot water (double boiler) and start whisking vigorously (make sure that the bottom of the bowl doesn’t touch the water)
    Keep mixing until the Sugar has completely dissolved
    Check by rubbing a small amount of the mixture between your fingers, it should not be gritty
  7. Once the sugar completely dissolved; using a hand mixer or stand mixer fitted with a whisk, continue beat the mixture on high speed until the mixture reach a ribbon stage (thick, fluffy and pale yellow in colour) this process will take for about 8 to 10 minutes
    The ribbon stage means when you lift the whisk from the mixture, the batter should fall back in thick trails. The ribbon lines will stay suspended on top of the batter, remaining clearly visible on the surface for a few moments before slowly disappearing
  8. Sift the dry ingredients into Eggs mixture (All-Purpose Flour, Baking Soda, Baking Powder, Salt, Cinnamon Powder, Ground Cloves, Ground Nutmeg), Gently fold with a hand whisk, mix until there are no lumps (don’t overworked the batter)
  9. Then, in another bowl mix about a third of the eggs-flour mixture with the Vegetable Oil; mix until well combined
    By using this pre-mix method, it prevents the oil from falling directly to the bottom of the bowl which would cause the cake didn’t rise properly
  10. Pour the pre-mix mixture back to the rest eggs mixture, stir well
  11. Add grated Carrots and chopped Nuts
    Using spatula, scrape the bottom and sides of the bowl, make sure it is evenly mixed
  12. Divide the batter into prepared pans, tap the pan to remove excess bubbles
  13. Then immediately bake in the preheated 160°C Fan/ 180°C/ Gas Mark 4 on the middle rack for 40 minutes
    Resist the urge to peek until your cake is done; Opening the oven door while you bake will release some of the heat, this can lead to the cake being to damp in the middle or even falling
  14. Once it’s done, let the cake rest in the pan for about 5 minutes
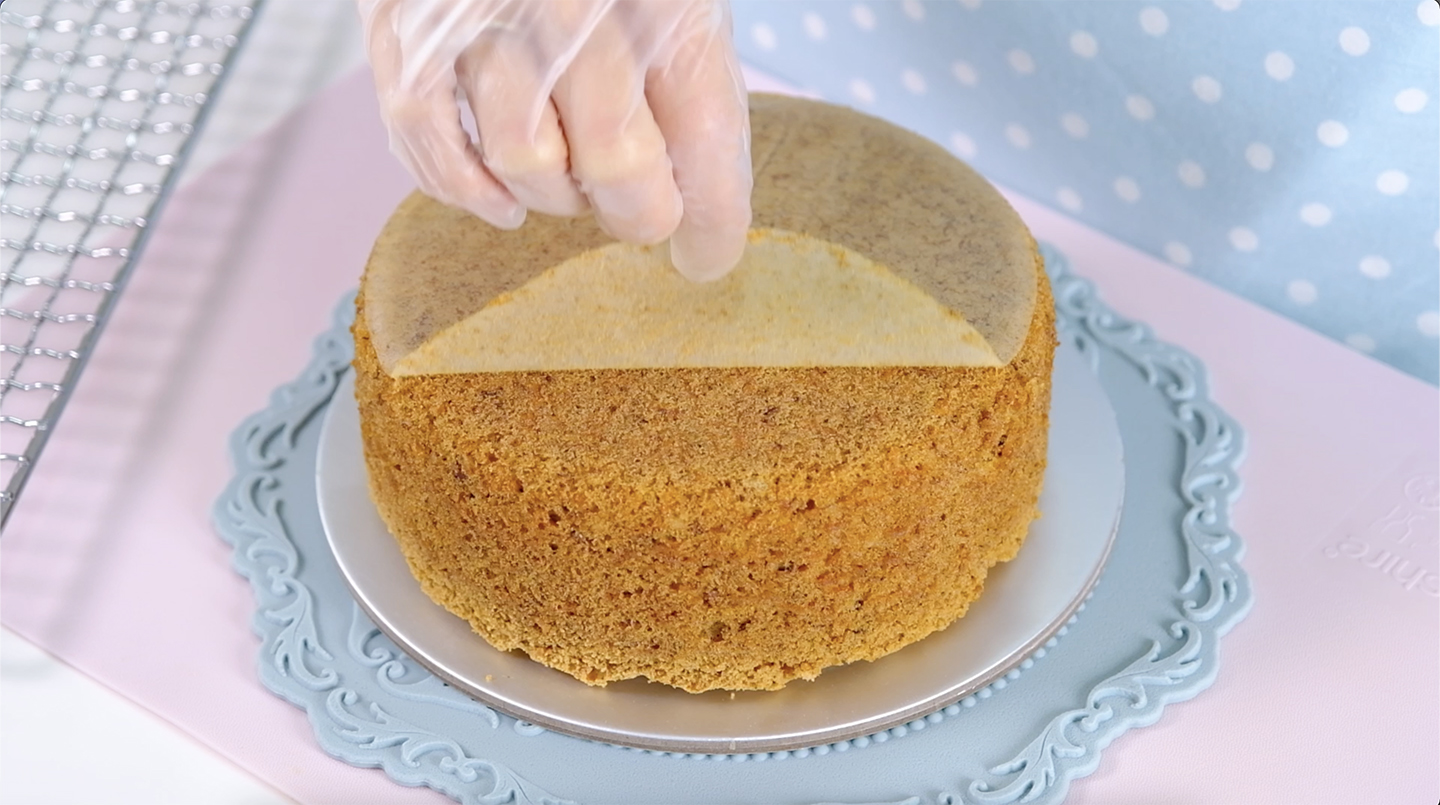
    Then scrape the sides of the pan, turn it over and let it cool completely on a cooling rack

🥕 Cream Cheese Frosting

  1. Beat the softened Unsalted Butter for a few second until soft
  2. Add cold Cream Cheese and beat again until this two ingredients are well combined
  3. Add the Icing Sugar and Milk Powder
    Mix on low speed first until the dry ingredients are mixed in (scrape the bowl occasionally to make sure everything is mixed well)
  4. Add Vanilla Extract and continue beat on high speed for 5 minutes
    Please note, this frosting must be mix on high speed to ensure it comes out fluffy
  5. Cover the bowl with plastic wrap and store frosting in the fridge for 1 hour until semi stiff

🥕 Decorations

  1. Add a little orange food colouring to the Marzipan, knead well.
  2. Cut the Marzipan into roughly equal pieces for each Carrot (about 8 grams each)
  3. Using your hands, shape it to resemble the appearance of a Carrot
  4. Use a toothpick or fondant tools to make the Carrot ridges and then a hole in the top to insert a Parsley

🥕 Assemble the Cake

  1. If you like more frosting between the cakes, you can cut each cake into 2 layers
  2. Place the first cake layer into a cake board, then spread some of the frosting evenly over the top.
    Repeat the same process until the final cake layer
  3. Before cover the cake with frosting, chill the cake in the fridge for at least 30 minutes. This will make easier to apply the final coat without shifting the layers
  4. After 30 minutes, spread the remaining frosting over the top and sides of the cake
    If you desired, you can save some of the frosting to pipe decorations onto the cake or press chopped toasted pecans into the frosting (be creative with the decorations)
  5. Decorate the top with Marzipan Carrots and Chopped Nuts


NOTES

  1. Store unfrosted or frosted Carrot Cake in the fridge (in an airtight container) if not serving immediately, and serve at room temperature
  2. Keep away frosted cake from heat or direct sunlight
  3. Unfrosted or frosted Carrot Cake can be kept in the fridge for up to 5 days (in an airtight container)
  4. Unfrosted Carrot Cake can be kept in the freezer for up to 3 months.
    Frosted Carrot Cake is not recommended for freezing because the frosting doesn’t thaw well
  5. If you want freeze the unfrosted Carrot Cake, you can wrap it in individual slices or the whole cake tightly in plastic wrap and aluminum foil before placing it in a freezer bag
  6. To defrost unforsted Carrot Cake from the freezer
    The best method is to transfer it directly from the freezer to the fridge (still wrap in plastic wrap) and let it thaw overnight (around 8 hours) before serving
    This slow refrigerated thawing process helps preserve the cake’s texture and moisture

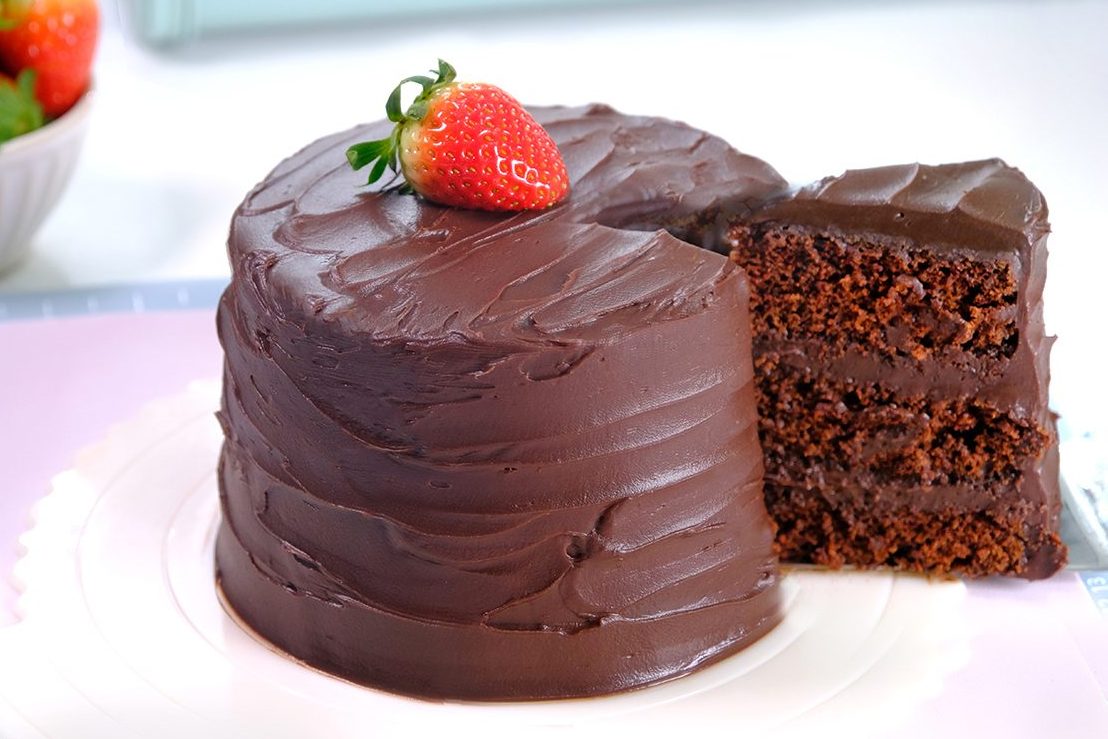
Rich Moist Old-Fashioned Chocolate Fudge Cake

Chocolate Cake is a staple of every self-respecting tea table in England.
On a busy day, this Old-Fashioned Chocolate Fudge Cake is my go-to recipe to satisfy my cravings.

Frosted with a rich chocolate frosting! Get a large class of milk ready for this one 😇

This homemade chocolate cake recipe is super easy to prepare in one bowl for a deliciously moist and fluffy chocolate cake.
Classic Chocolate Fudge Cake that is rich in flavor and not too sweet.

What I love most about this cake is how EASY it is to make, you don’t even need a mixer!
All you need is a big bowl and a whisk and it tastes heavenly too 😇

Try it the next time you feel like baking a Chocolate Cake, I´m sure you will love it!

Raw Cacao Powder is my favorite when making Chocolate Cake, it tastes fruity, sweet with a hint of citrus. But if you prefer a more bitter dark chocolate taste, you can also use Dutch Processed Cocoa Powder.

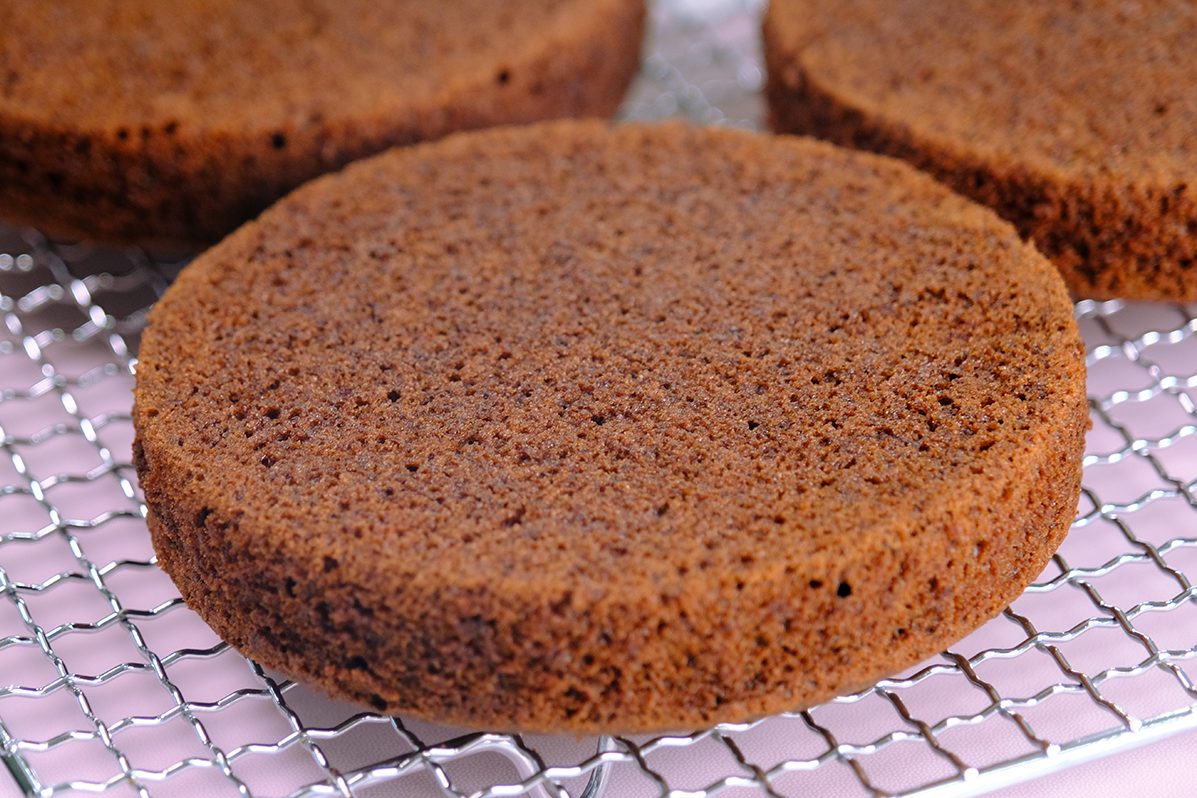
The cake has a very soft and moist crumb 😍

The rich and silky chocolate frosting is also easy to make, but does need one hour to set up.

Smooth, rich, and deeply chocolatey… 🥲

LOOK! how luscious this chocolate frosting is 🤤

If you’re making this frosting for a lover of bittersweet, darker chocolate, go ahead and use 70% Dark Couverture or Baking Chocolate.

😱 !!!
😋
🤪 can wait to eat !!!
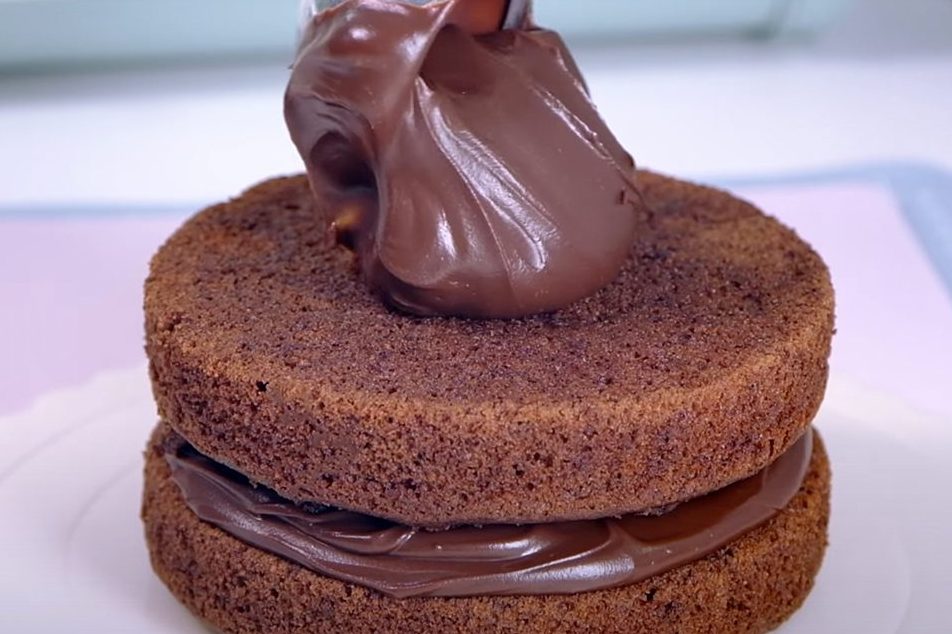
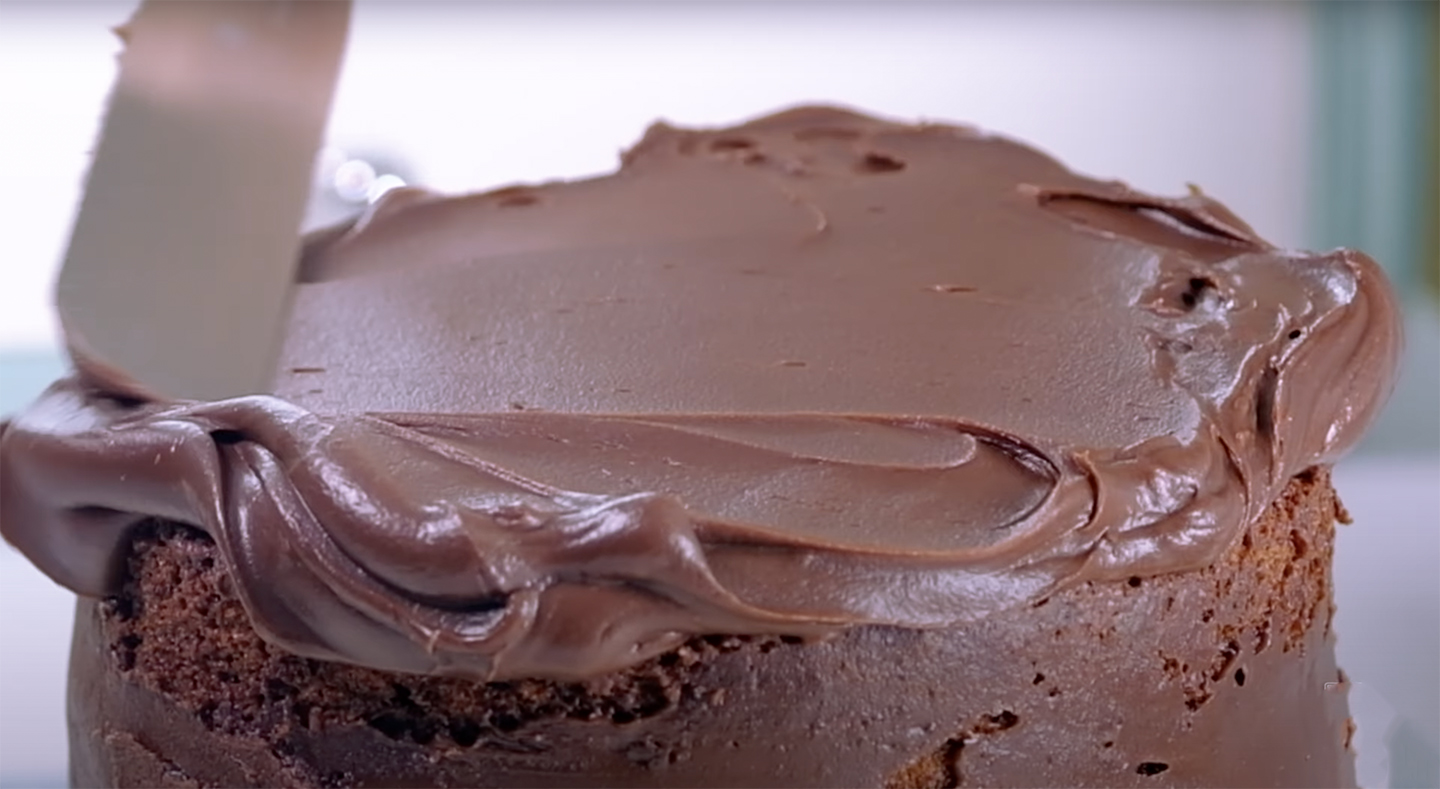
This is the easiest technique to ice a beautiful classic Chocolate Cake

The cake is very light and moist.

And the silky smooth Chocolate Frosting is so creamy 🤗

And after 1 day in the fridge, the cake tasted even better ...
The cake after 1 DAY IN THE FRIDGE 🧐

The frosting become super fudgy and the texture of the cake becomes nice and thick

🙃 One slice is never enough …

It has a perfectly soft and tender crumb, an incredibly luscious chocolate flavor, and melt-in-your-mouth moisture.

It’s easy to make and sure to impress all chocolate lovers!

Kids will definitely fall in love with it! 😍 🥰 😘

I hope you will give it a try and I can’t wait to hear what you guys think.
🍫 Love you All and Happy Baking!

WATCH HOW TO MAKE “RICH Moist Old-Fashioned Chocolate Fudge Cake”

RECIPE

OLD-FASHIONED CHOCOLATE FUDGE CAKE
Yield: One 14 cm diameter Round Cake (3 layers)

INGREDIENTS
🎂 Fudge Frosting
322 g Dark Chocolate Compound/Semisweet Baking Chocolate (chopped)
255 g Whipping Cream
45 g Greek Yogurt/ Sour Cream

*If you’re making this frosting for a lover of bittersweet, darker chocolate, go ahead and use 70% Dark Couverture or Baking Chocolate.

🎂 Chocolate Cake
113 g Whole Milk (room temperature)
1 ½ tsp White or Apple Cider Vinegar/ Lemon Juice
115 g All-Purpose Flour
1/2 tsp Baking Soda
25 g Raw Cacao Powder/ Dutch Processed Cocoa
65 g Unsalted Butter (room temperature)
125 g Caster Sugar
75 g Eggs (room temperature)

*Raw Cacao Powder is my favorite when making chocolate cake, it tastes fruity, sweet with a hint of citrus; but if you prefer a more bitter dark chocolate taste, you can also use Dutch-Processed Cocoa Powder


INSTRUCTIONS
🎂 Fudge Frosting

  1. Combine chopped Chocolate with Whipped Cream in a heatproof bowl
  2. Fill a medium saucepan with 1 inch of water and let it boil to create a water bath
  3. Place the bowl of chopped Chocolate and Whipped Cream over the water bath
    Make sure that the bottom of the bowl doesn’t touch the boiling water (the steam will slowly melt the chocolate)
  4. Once it’s completely melted, remove from heat; add Greek Yogurt; Stir well (Yogurt will lighten the sweetness of the chocolate)
  5. Cover the bowl with a cling wrap and let it cool in the fridge for 1 hour to set

🎂 Chocolate Cake

  1. Preheat the oven 160°C fan/ 180°C/ gas mark 4
  2. Grease three 14 centimetre diameter round pans (4 cm tall), adding a circle of parchment paper to the bottom of each pan
  3. For the Buttermilk
    Simply combine the Milk and Vinegar; Stir well, let it sit for 5 minutes; set aside *The acids in Buttermilk will react with the leavening agent, producing a light, fluffy cake texture and tender crumb
  4. In another bowl, sift all the dry ingredients (All-Purpose Flour, Baking Soda and Raw Cacao Powder); set aside
    * Sifting the dry ingredients will help remove any lumps in the Cocoa Powder and Baking Soda
  5. In a large mixing bowl, using a baloon whisk creaming the Unsalted Butter and Caster Sugar until pale and fluffy This process will take for about 5 minutes
  6. Then add in Eggs, mix well
  7. Add the dry ingredients alternating with the Buttermilk (3 additions of dry ingredients and 2 additions of Buttermilk; begin and end with dry ingredients) Mix until just combined DO NOT OVER MIXED
  8. Scrape the bottom of the bowl to make sure the batter is mixed well
  9. Divide the batter evenly between the 3 pans (About 170 grams each)
  10. Tap the pan a few times to remove air bubbles; then bake in the preheated 160°C fan oven on the middle rack for 15 minutes
  11. Once it’s done, let it cool in the pan for about 5 minutes; then turn it over and leave it cool completely on a cooling rack (make sure it’s completely cool before adding the frosting)

NOTES

  1. Store the cake in an airtight container in the fridge if not serving immediately
  2. The cake taste best if consumed within 3 days of baking, but will last for up to 1 week if stored in the fridge
  3. Serve at room themperature; keep away from heat and direct sunlight
  4. You can freeze the cake and it can be stored in the freezer for up to 2 months.
  5. To freeze: wrap the cake well in plastic wrap and then in foil to prevent freezer burn. 
    To thaw: move the cake to the refrigerator overnight to slowly defrost. 

How to Convert Cake Recipes for Any Cake Tin or Pan

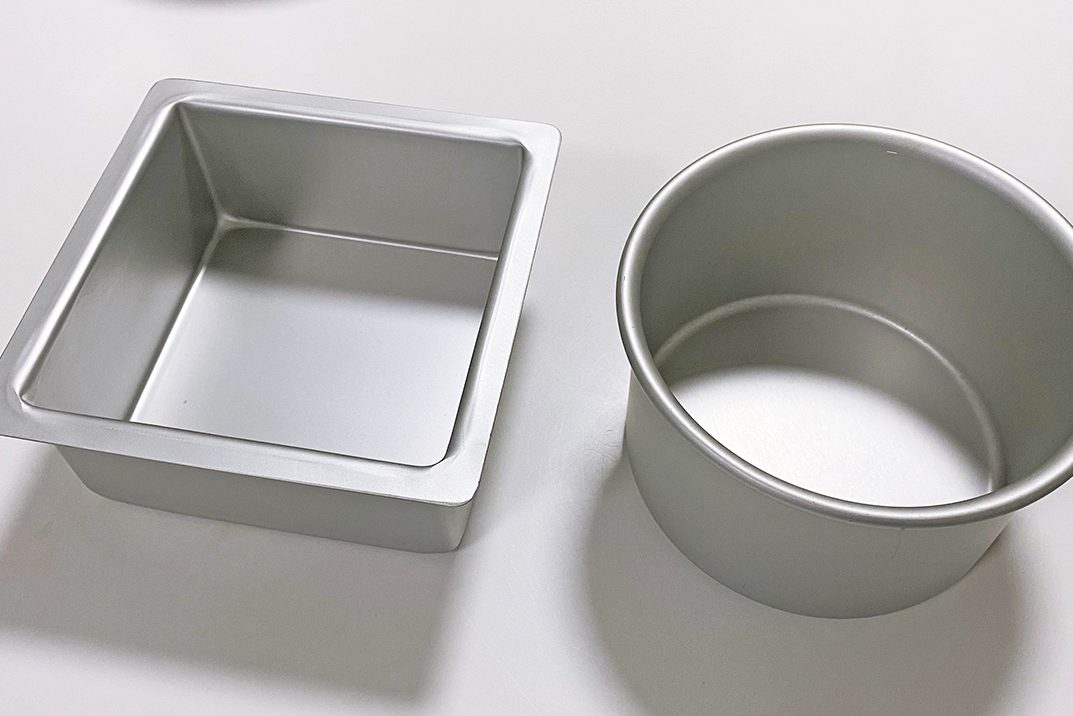
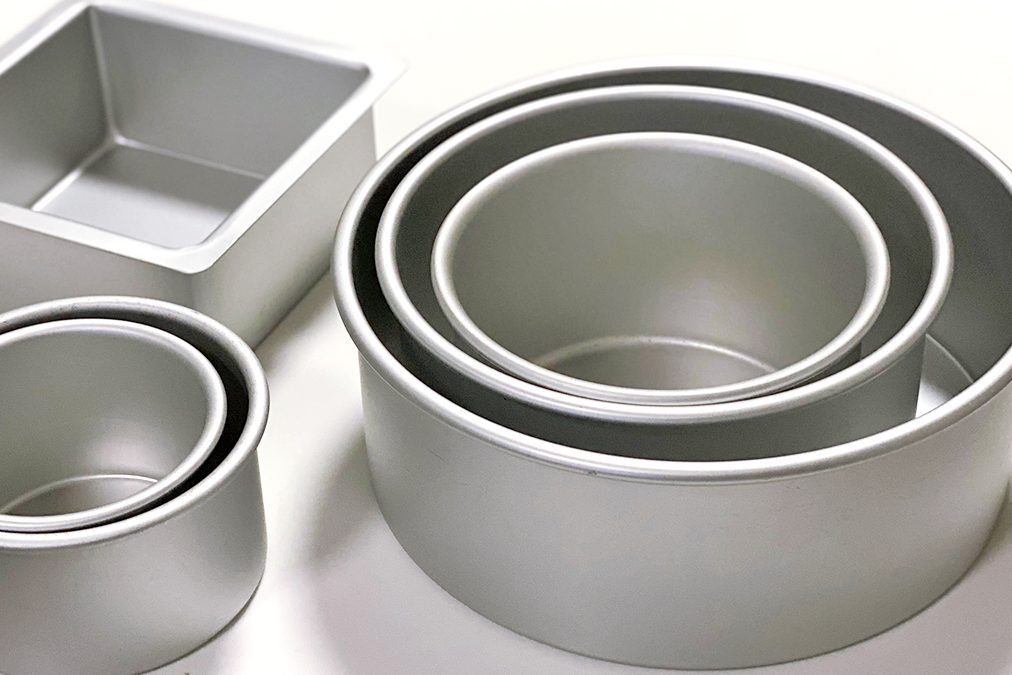
One of the most popular questions I get asked is “How to convert cake recipes for different size pans with the same height?”.
Maybe you have a recipe that tells you to use a 6-inch pan, but all you have at home is an 8-inch pan or what do you do when you don’t have the right cake pan?

When converting cake recipes, first thing that you need to know is “How much the surface area of each of the pans?” (the pan you want to use and the pan the original recipe calls for).

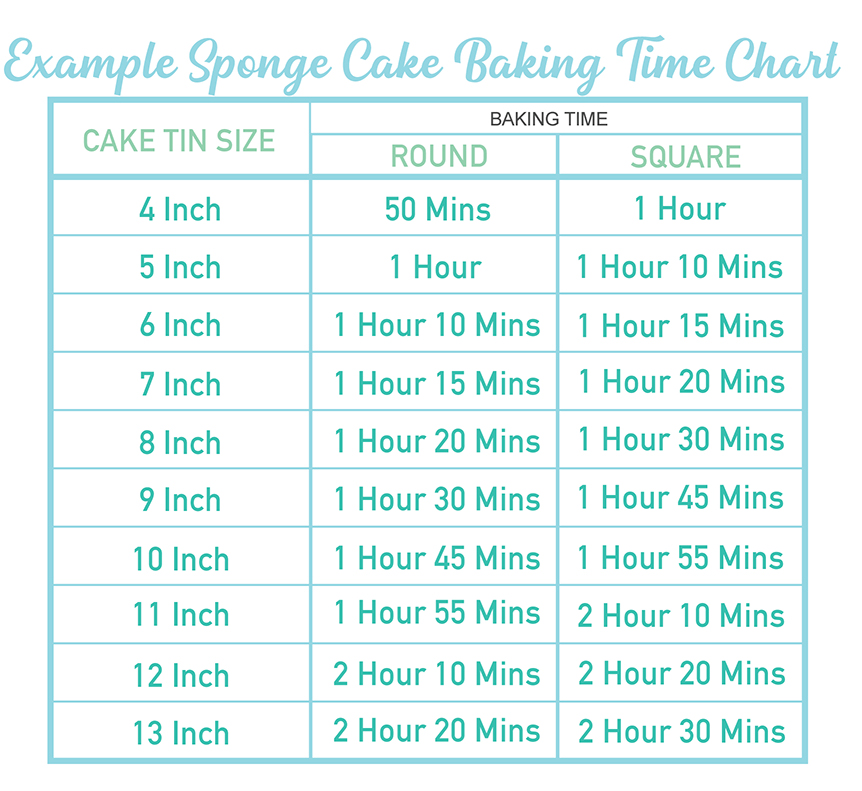
There is a little maths involved in working this out, but to make it a little easier I have done this for you by using the simple chart below:

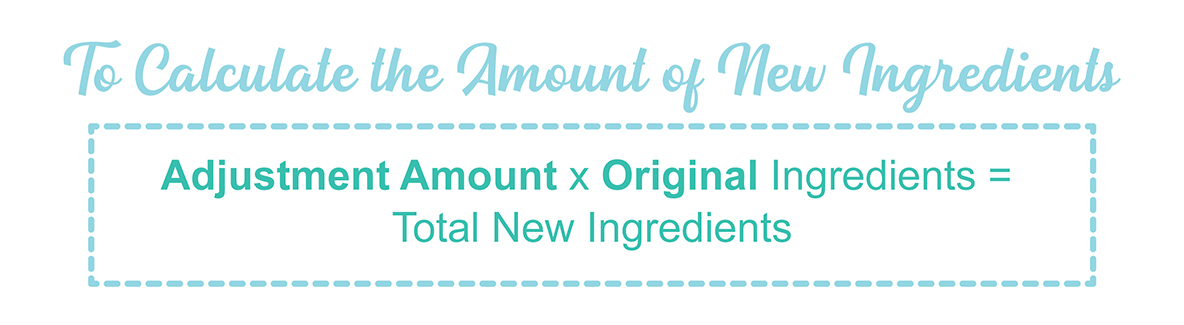
Once you have your 2 surface areas you can work out your Adjustment Amount

Then you can use the adjustment amount to convert the original recipe; by multiplying the value of the adjustment amount by the amount of each original ingredient

EXAMPLE OF ADJUSTING RECIPE

Here’s an example of how I converted one of my cake recipes;
My Vanilla Cake Recipe was for a 6-Inch Round cake and I wanted to use my 8-Inch Round Pan

The surface area of 6-Inch Round Pan (according to chart) is 29; and 8-Inch Round Pan is 50
To get the Adjustment Amount, I will divide 50 by 29 = 1,72

After multiplying all ingredients by 1,72 (as shown by the math above), I was able to bake the cake in my 8″ cake pans which produced the same height, texture and consistency as my 6″ cake pans.

WHAT ABOUT EGGS, BAKING POWDER/ Soda, SALT AND EXTRACT?!

For eggs – work off of a standard egg weighing 50g (out of the shell).
If you only need 25 grams of an egg, crack an egg into a cup whisk and measure out 25g using scales (save the leftovers for other purposes).

For ingredients like Baking Powder/ Soda or Lemon Juice
I round up or down e.g. if 1 tsp Lemon Juice is needed for 6″ , I round 1,72 up to 1, 75 (which is 1 ¾ tsp)

Another helpful trick is to follow the rule; the standard ratio is 1 teaspoon Baking Powder per cup of Flour and 1/4 teaspoon Baking Soda per cup of Flour.

Salt and vanilla are little more easier to play around with seeing as they are flavour enhancers only and don’t affect the structure of the cake. 

DO I NEED TO ADJUST THE BAKING TIME?

Please note that changing pan sizes may change your baking time, so DON’T forget to adjust the baking time.
It is hard to tell how much you will need to adjust the time by as this will depend on the size difference; generally, a bigger pan has more liquid and needs more time baking.

An 8″ square pan will have a larger volume than an 8″ round pan

For a SMALLER pan start checking 5-10 minutes prior to the stated time, and for a LARGER pan add time in 5-minute increments until it is baked
(Below is an example of how I increased and decreased the baking time)

DO I HAVE TO DO THE MATH?

If this all seems like too much hard work, I get it!
If you are using a smaller cake pan than what the recipe states, you could just make the recipe as usual and follow the general rule of thumb which is to fill the cake tin 2/3’s full.
Any left over cake mixture can be used for mini cupcakes to be frozen and used for another time.

In the opposite scenario (the cake pan you have is larger than the required in the recipe), then you could multiply the recipe by 1.5 or 2 depending on how much larger the cake tin is; But in fairness, if you’re going to do some math anyway you may as well do it precisely and get it right with the method above.

I hope this was helpful for you.
Happy baking! 🥰

Fluffy Moist Wedding White Cake

This is like my dream cake for the perfect Wedding Cake;
A beautiful white velvet cake that is soft, moist and not too sweet.

White cakes were also once known as Silver Cakes, they became widely available in the later part of the 19th century, and became associated with weddings and christenings
If you’re in search of the “Perfect Homemade White Cake recipe”, you must try this recipe!

What’s so great about this White Cake?
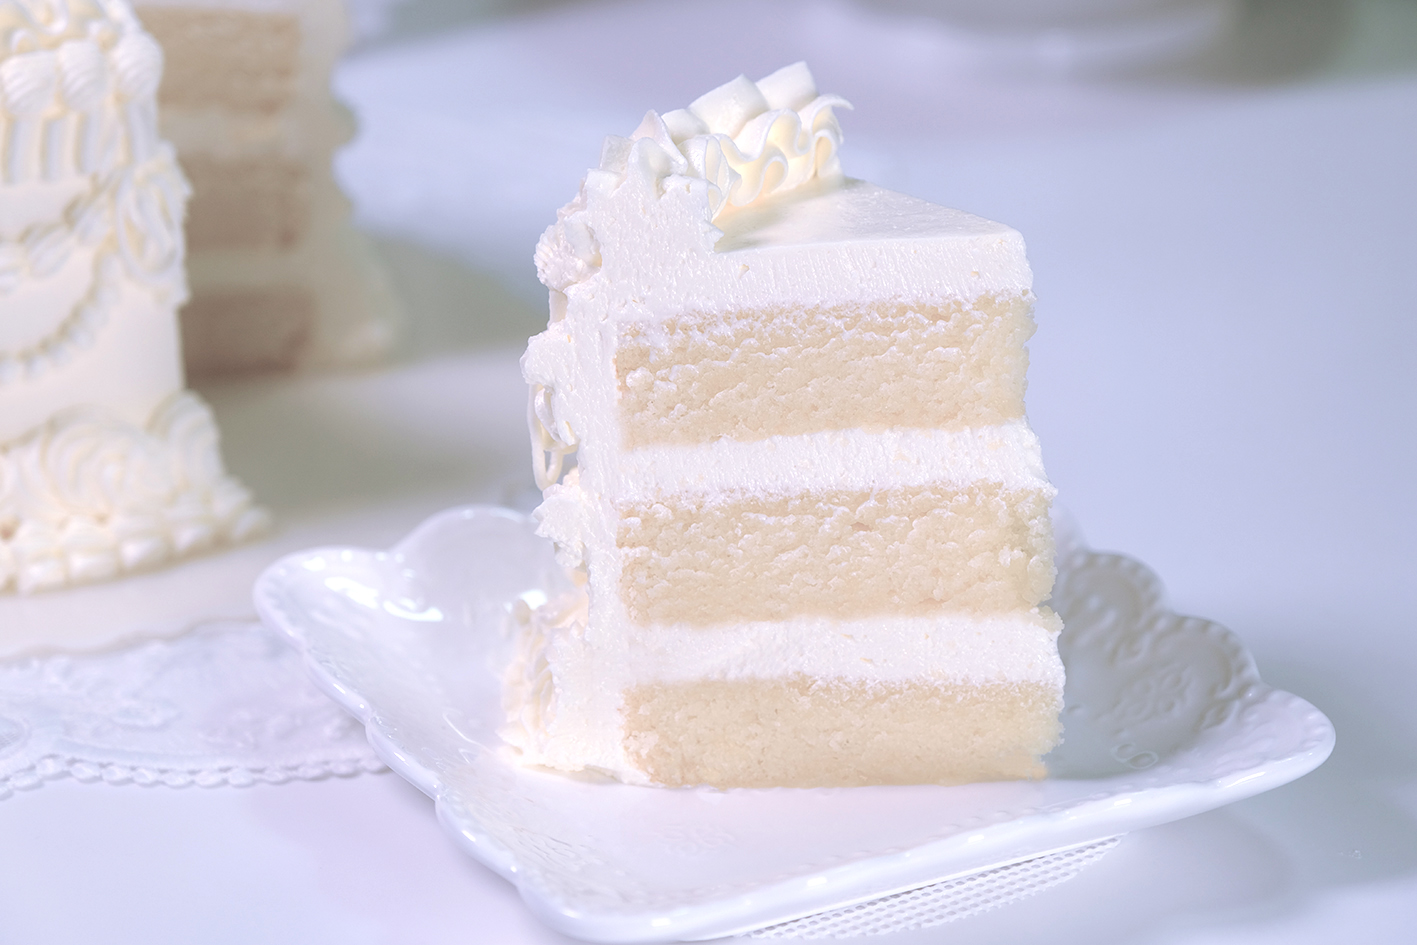
One of the BEST things about this recipe, is the texture. The crumb is so light, soft and pillowy.

What frosting goes with this White Velvet Cake?
This Meringue Buttercream recipe is creamy, silky smooth, holds its shape beautifully;
And the best part and why everyone loves it, is that it’s not overly sweet.

There are several important ingredients that must be considered so that the texture and white color remains nice and bright

FULL FAT CREAM CHEESE
This ingredient is the star of the show. It produces a cake that is softer and richer in taste but still maintains a soft texture.

BUTTERMILK
The extra acidity from the Buttermilk softens the strands of gluten, resulting in an even more tender cake.

CANOLA OIL or EXTRA LIGHT OLIVE OIL
These two oils without strong flavors are the oils I most commonly use for baking.
This allows the flavor of your cake to shine while still achieving a moist texture.

EGG WHITES
The main difference between White Cake and other cakes is the absence of Egg Yolks.
Since we’re making a White Cake recipe, we use egg whites to keep the color nice and bright. Egg whites also produce a lighter, more tender crumb.

UNBLEACED CAKE FLOUR
White Cake typically calls for Cake Flour rather than All-Purpose Flour to create a lighter batter with a finer crumb.
There is no need to use bleached cake flour (I used unbleached cake flour in the recipe). Bleached cake flour can have a slightly bitter taste for people with a sensitive palate.
Apart from health reasons, there is not much difference.

Be Careful when you choose butter 🤔

BUTTER
Pay attention when you choose butter. Some brands have a yellowish tint, which will affect the final colour of your cake.

I recommend LURPAK brand for best results

SUGAR
Make sure you use White Caster Sugar and not Gold Caster Sugar otherwise your cake will be yellowish

VANILLA
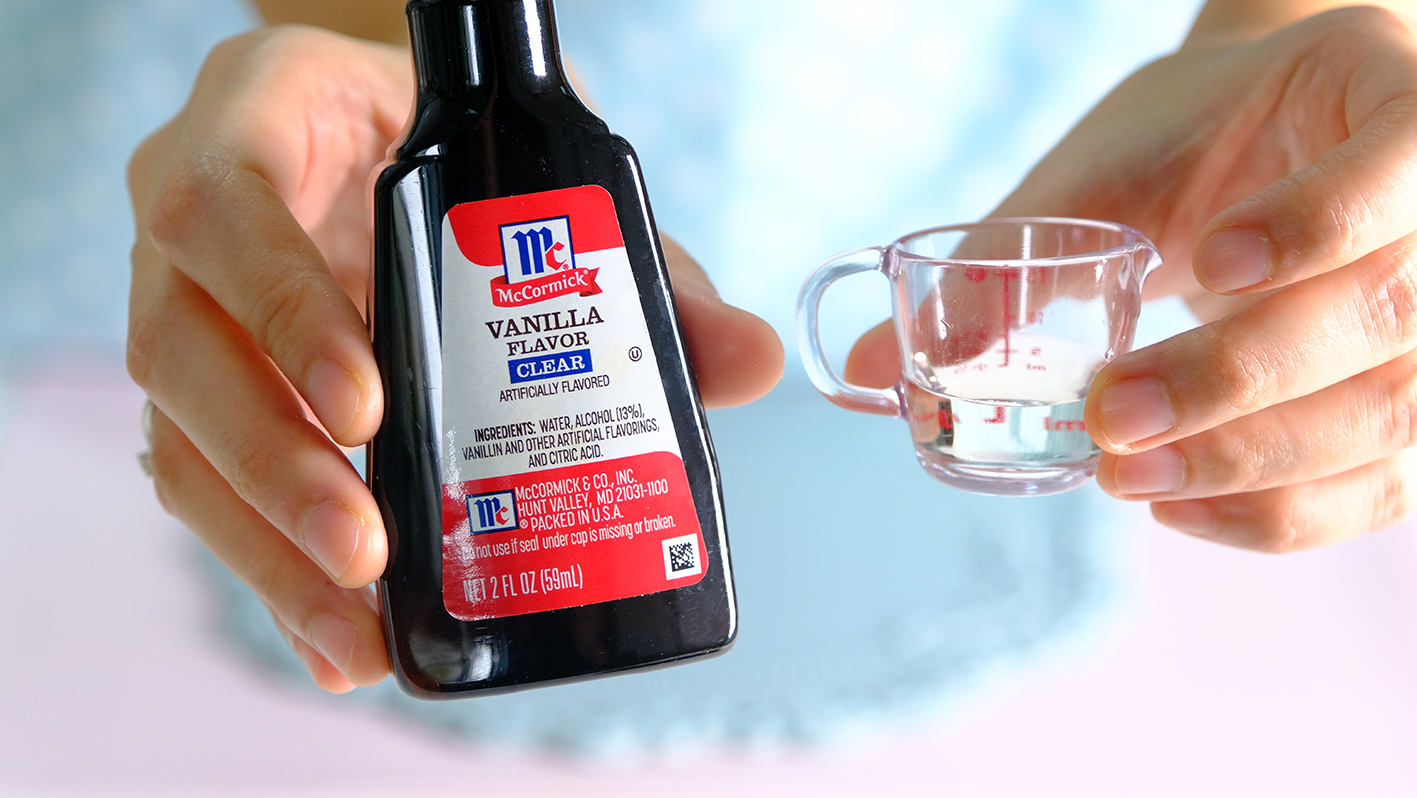
McCormick Clear Vanilla provides a pleasantly sweet, complementary Vanilla taste.
This Artificial Clear Vanilla Flavoured is used to preserve the white color.
You can use real Vanilla Extract but the cake will not be quite as light in colour.

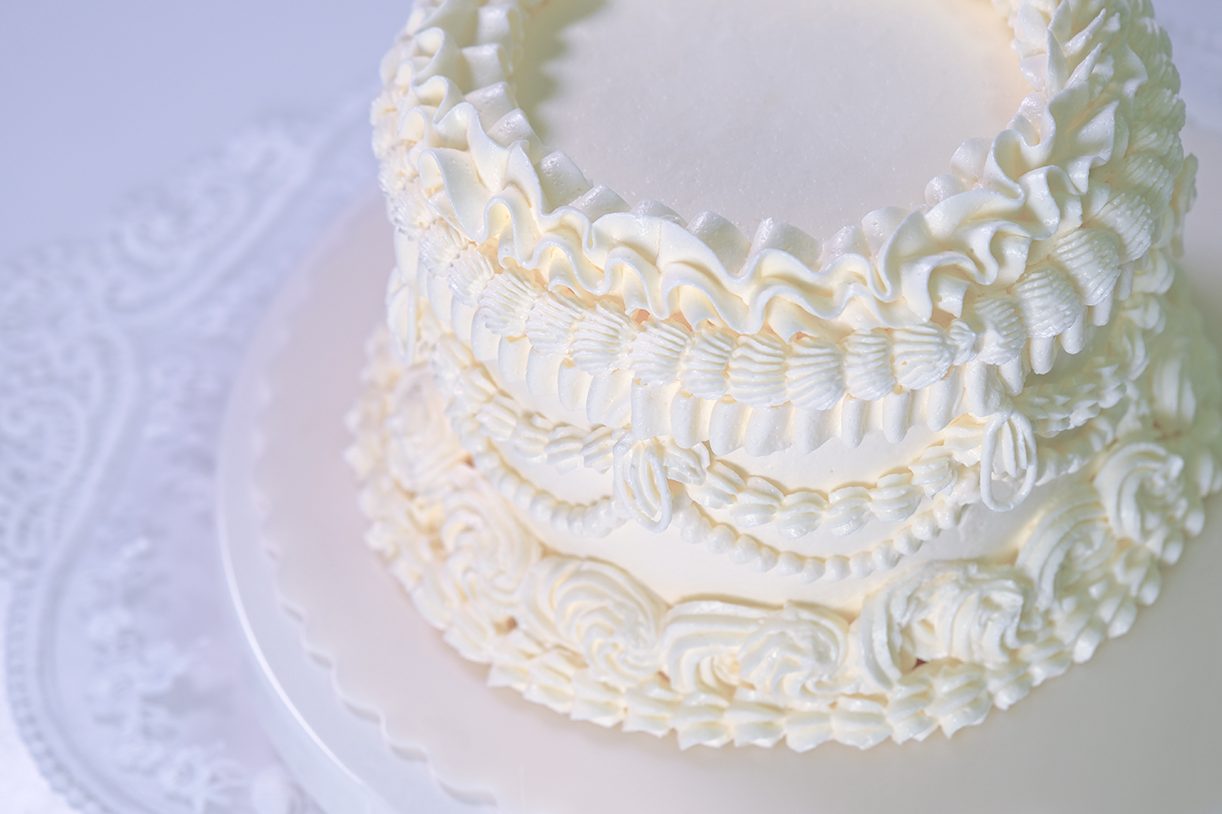
Lambeth Pipe Buttercream Cake is my all-time favorite 🥰

It’s the centuries-old English tradition of “over-piping,” an ornate style of cake decorating.

White cake is a typical choice for tiered Wedding Cakes because of the appearance and texture of the cake.
The idea that white symbolizes purity at a white wedding was invented by the Victorians.

It is also used as the base for brightly colored cakes, such as a rainbow-colored cake; As the food colouring will produce clearer, brighter colors on white cake batter than if the cake has its own color.

The cake is very light, soft and not too sweet ☺️

🤤 so light and yummy

And the creamy buttercream frosting is so fluffy.

🙄 I want another slice

I hope this beautiful heart-warming cake will make you smile from ear to ear 😊
Love you All and Happy Baking!

WATCH HOW TO MAKE WEDDING WHITE CAKE

RECIPE

FLUFFY MOIST WEDDING WHITE CAKE
Yield: One 14 cm diameter round pans (3 layers)

INGREDIENTS
🎂 White Cake
171 g Cake Flour (unbleached)
1 tsp Baking Powder (double acting)
1/4 tsp Baking Soda

1/4 tsp Salt
114 g Whole Milk (room temperature)

1½ tsp Vinegar
27 g Vegetable Oil
1 tsp Clear Vanilla

114 g Full Fat Cream Cheese (softened)

85 g Unsalted Butter (softened)

200 g Caster Sugar

105 g Egg Whites (Approx, 3 Egg Whites at room temperature)

🎂 Meringue Buttercream

140 g Egg Whites (room temperature)

1/4 tsp Salt
2 tbs Caster Sugar
240 g Water
300 g Caster Sugar
340 g Unsalted Butter (softened)
1 tsp Clear Vanilla (optional)

INSTRUCTIONS
🎂 White Cake

  1. Preheat the oven 140°C fan/ 160°C/ Gas Mark 3
  2. Grease three 14 centimeters diameter round pans, adding a circle of parchment paper to the bottom of each pan
  3. Sift all dry ingredients (Cake Flour, Baking Powder, Baking Soda and Salt); Set aside
  4. For the Buttermilk
    Combine Milk and Vinegar, let stand for about 5 minutes
    After 5 minutes, add in the Oil and Vanilla and stir well until evenly mixed; Set aside
  5. In a large mixing bowl, combine the Cream Cheese and Butter and mix at medium speed until smooth
  6. Gradually add the Sugar to the mixing bowl and continue mixing at medium speed for 2-3 minutes
  7. After 3 minutes, reduce speed, add 3 Egg Whites one at a time, mixing until smooth after each addition
  8. Then, alternately add the Flour mixture and the Buttermilk mixture, beginning and ending with the flour mixture (3 additions of the dry mixture, 2 additions of wet)
    * Be careful not to over-mix; Mix the batter just until well combined
  9. Divide the batter between three pans; tap the pan a few times to remove air bubbles
  10. Bake in the preheated 140 degrees C fan oven for 28-30 minutes or until a toothpick inserted into the center comes out clean
  11. Once it’s done, let cool for 5 minutes in the pans; then turn it over and let it cool completely on a cooling rack

🎂 Meringue Buttercream

  1. Cut the Butter into a small cubes and softened at room temperature but not melted, Set aside
  2. In a large mixing bowl, beat the Egg Whites until frothy
    Add the Salt along with 2 tablespoons of Sugar, and beat at MEDIUM SPEED until soft peak; Set aside
  3. Then in a medium saucepan, mix Water and 300 grams of Sugar
    Cook over medium heat, stirring until the Sugar dissolves and bring to a boil
    Once boiling, let it simmer for 3 minutes
    Then slowly pour this Hot Syrup into the Egg Whites mixture; And continue beating until this Meringue is cool to the touch
    * Please be careful when you work with hot sugar syrup as it can cause severe burns!
  4. Once it’s cooled, add softened Butter 1 cubes at a time (the mixture will become runny, it is normal)
    Keep mixing on HIGH SPEED scrape the bowl occasionally to make sure everything is mixed evenly)
    This process will take approximately 5 minutes (if you use a hand mixer, it may take longer for about 10-15 minutes)
  5. When you see the mixture curdling, this is a sign that the Buttercream is almost done; continue mixing, it will come back together and become a smooth buttercream
  6. Once it’s done, switch to the paddle attachment; and beat again on MEDIUM LOW SPEED for another 3-5 minutes
    * This process will help remove air bubbles that form during the beating process, so you will get a silky-smooth texture

NOTES

  1. If stored in the fridge, this cake will last for up to 1 week; however, it will taste at its best for the first 3 days
  2. Serve at room temperature
    Remove from the refrigerator about 1 hours before serving so that it has plenty of time to warm to room temperature for best texture and flavor.

Choux Pastry 101 (Pâte à Choux)

Choux Pastry or Pate A Choux (French: [pat a ʃu]) is a delicate and the most versatile French Pastry that everybody loves.

The essential ingredients are Butter, Water, Flour and Eggs.

The signature feature is the hollow center that forms when baked. It’s perfect to fill with Pastry Cream, Jam, Curd or even Ice Cream 😘

Instead of a raising agent, this dough is dependent on the steam created from the liquid content and the heat that expands and stretches the dough into beautiful hollow shapes just waiting to be filled or eaten as is!

The high moisture content is achieved by boiling the water and butter, then adding the flour. The mixture is cooked a few minutes longer, then cooled before adding enough eggs to achieve the desired consistency.

The key to Choux Pastry is looking for the right texture to know that enough egg has been added and NOT opening the oven during the baking process.

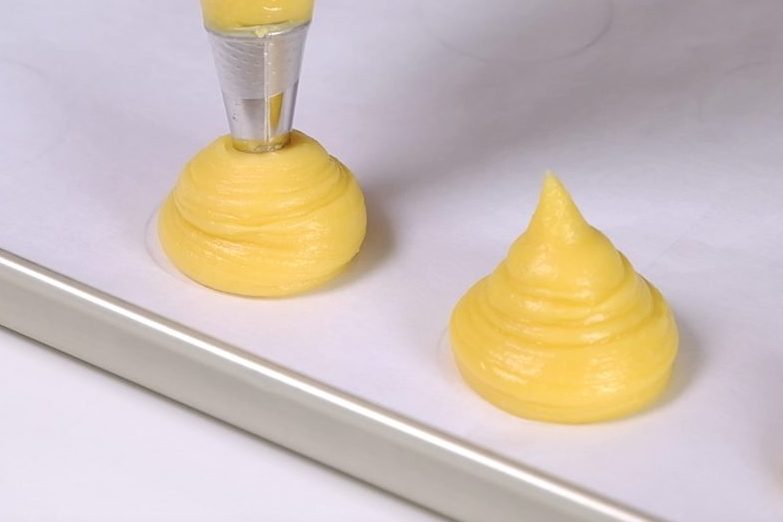
For pipping, you can use 12 mm round or star nozzle

If the eggs are not enough, the dough will be too thick, difficult to pipe and won’t rise perfectly; on the other hand, if use too many eggs, it will be too runny and become flat when baked.

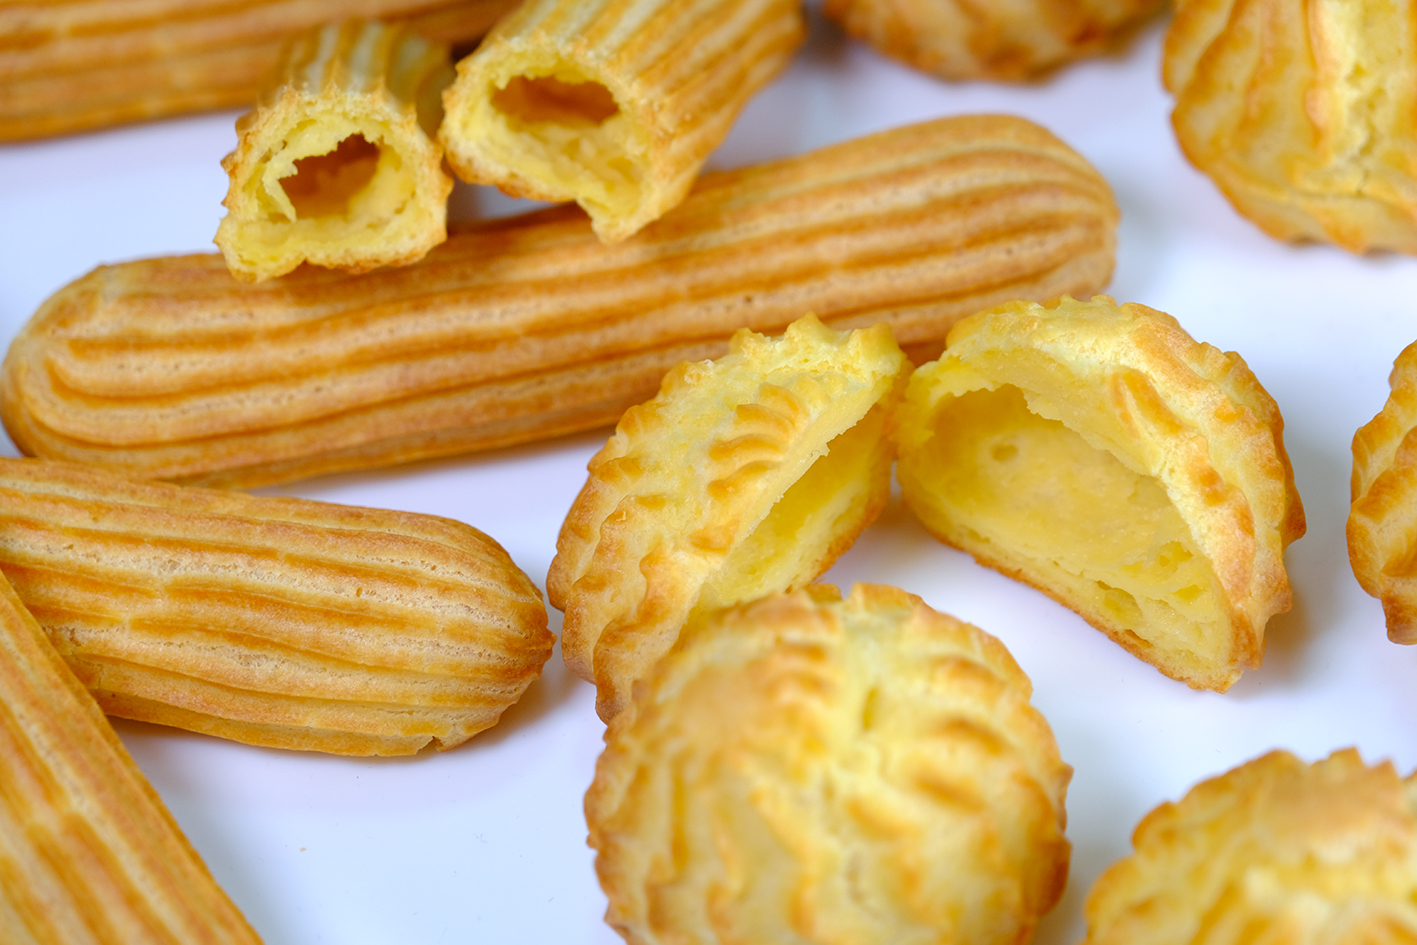
Eclairs 😻

The number of eggs depends on the egg size, flour absorption and the humidity in your kitchen on any given day.

Dip your fingers in water, pat down any points or help form of your piped shapes into better mounds

DO NOT OPEN the oven door when the dough is baking, especially in the first 30 minutes until they are a deep golden brown or it may collapse as the structure is still unstable

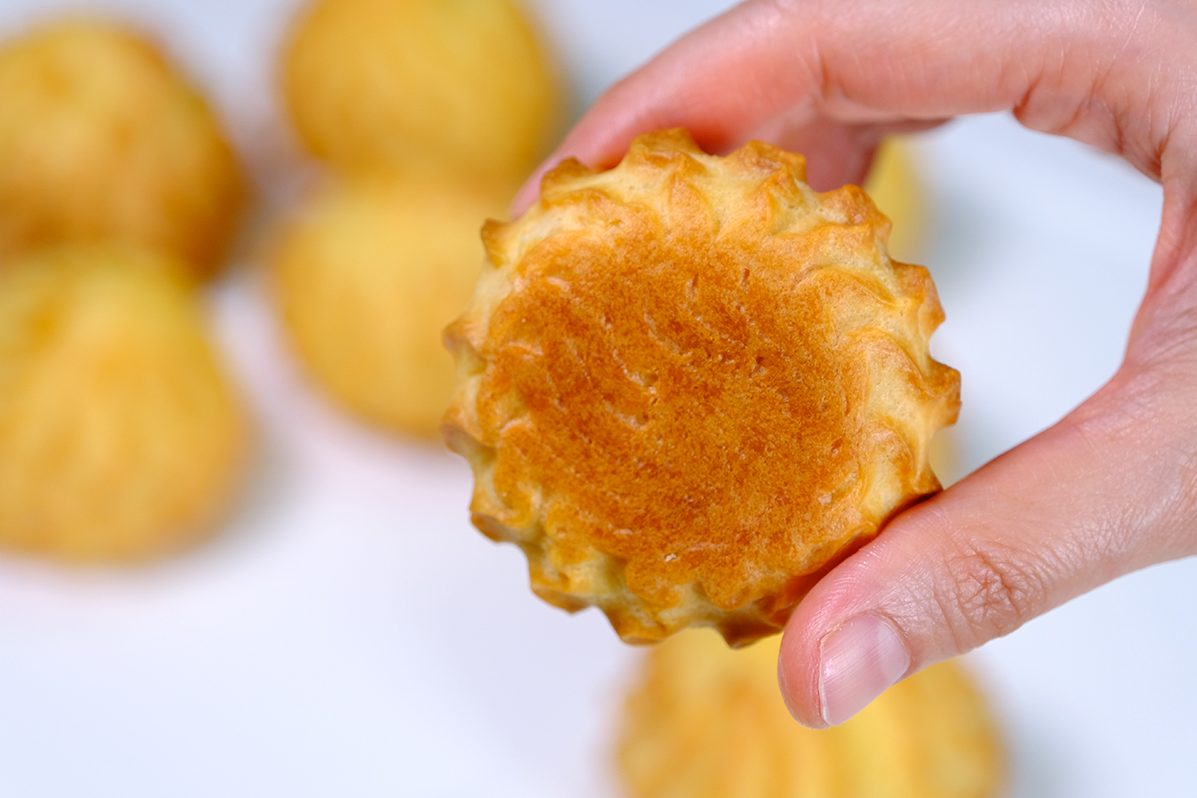
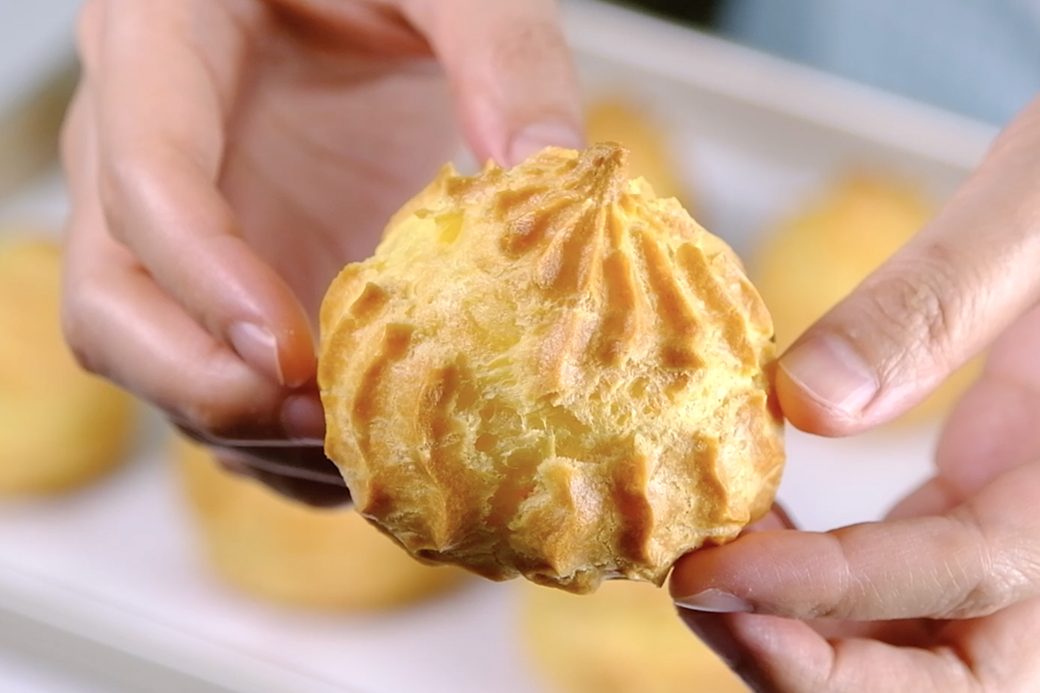
Look how beautiful and puffy this Choux Pastry is !! 😍

In this recipe, I will share with you a few tips to make this multipurpose dough along with filling and decorating options.

Produce large, sturdy pockets with visible shape but still soft inside 🤗

Once you understand the basic technique, you can make everything from irresistible Cream Puffs, Eclairs, Profiteroles or even Paris-Brest.

I LOVE IT Cream Puff shell with a star nozzle, it’s beautiful with the top points
♥️❤️

Let’s Talk about choux PASTRY ingredients

  • FLOUR – All-Purpose or Bread Flour works well for Choux Pastry
    Bread Flour produce thicker, sturdier shell and more visible shape; while using All-Purpose Flour produce a softer shell.
    After years of experimentation, combining the two flours yielded the best results; the Choux will produce large, sturdy pockets with visible shape but still soft inside.
  • FAT – You can use either Margarine, Unsalted Butter or Salted Butter There is not much different. If you prefer Margarine, make sure you choose a good quality one.
  • LIQUID – You can use just Water or a combination of Milk and Water.
    Milk gives a nice aroma and color to the Choux shell.
  • EGGS – Use fresh room temperature eggs for best result
    If your eggs are too cold, you will have trouble incorporating them into the dough.
  • SUGAR – Traditionally NO Sugar was added, but it does make the Choux Pastry shell more flavourful and enhances browning.
  • SALT – Salt is use for flavouring, avoid using coarse salt. Omit salt if you use Margarine or Salted Butter.
Eclair with Round Nozzle 😃

Once its baked, you can store in a freezer bags and freeze them.
Then when you need it, re-crisp the Choux directly from frozen, baking in the preheated 170°C fan oven for 2 to 3 minutes or until hot to the touch.

😌 Eclair with Star Nozzle

And the good thing about this dough; You can freeze them before baking.

Pipe them on baking pan (lined with parchment paper) and freeze. They will harden like a rock, store in a freezer bag, put in the freezer.
When you need it, bake from frozen according to the same baking times and temperatures as called for in this recipe.

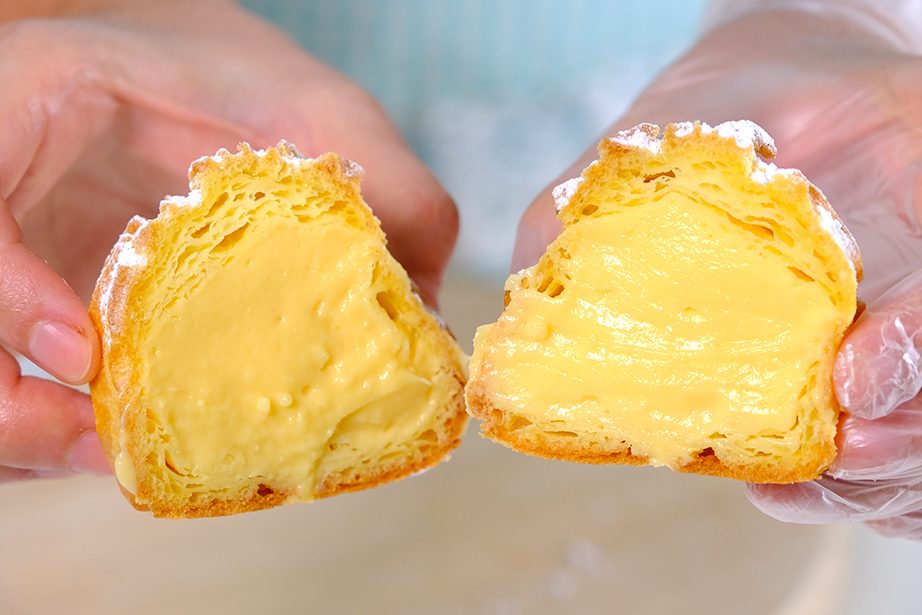
For the filling, one of my favourite is Cream Patissiere or Pastry Cream. A delicious custard filling which is adaptable and delectable. It’s easy to change the flavor of this custard to make your own creations.

Delicious Vanilla Pastry Cream 🥲 hungry….
Tasty Chocolate Pastry Cream 😍🥰 my favourite …
Various choices of Eclairs

There are endless possibilities !!

🤤
Something I usually do for my dinner parties; take it to the next level !!
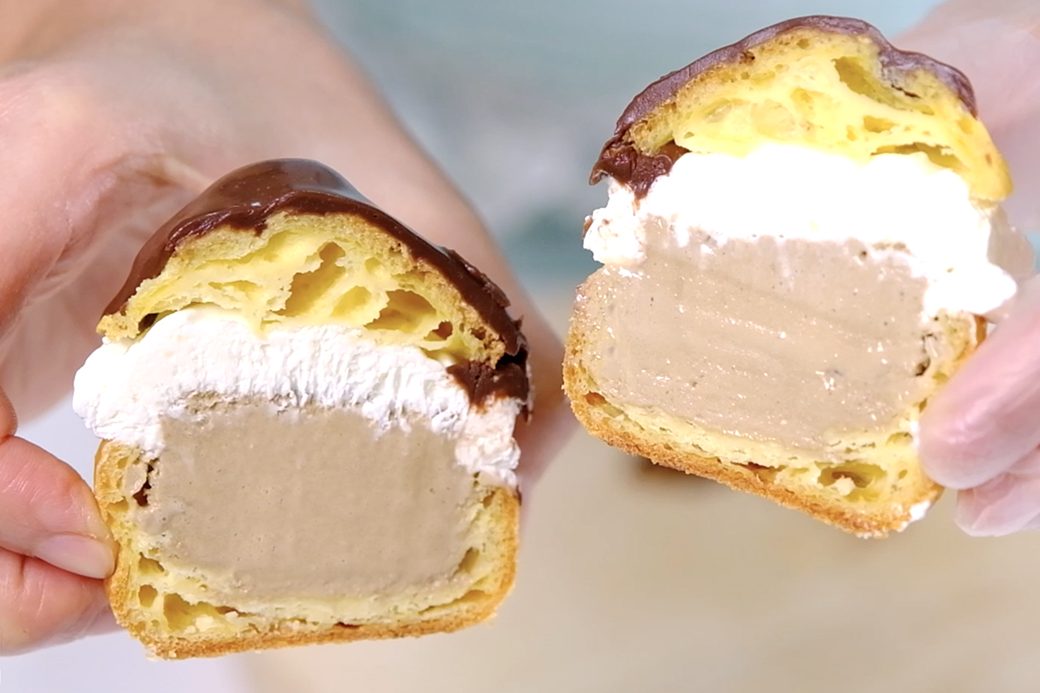
I cut the cooled Choux in half, fill it with a small scoop of my favourite ice cream
Pipe some Chantilly Cream on top, put the top back on and store in the freezer until ready to eat.
Then when it’s ready to serve, I will poured some warm chocolate sauce on top 😂
I’m sure your guest will fall in love with it 😊
And I promise you, they are so delicious !!
Bon Appétit

Hopefully this video can build your confidence in making Choux Pastry 😚
LOVE you ALL !!! ❤️

WATCH HOW TO MAKE “CHOUX PASTRY 101”

TIPS FOR SUCcESS for making choux pastry (PLEASE READ FIRST):

  • Use fresh room temperature eggs for best result
    If your eggs are too cold, you will have trouble incorporating them into the dough
  • It is important that the butter is at room temperature and cut into small cubes, so the liquid doesn’t boil for a long time while it melts (this can cause too much water to evaporate and can affect the final texture)
  • When you cook the liquid mixture, make sure it reaches full boiling point otherwise it will not come together into a smooth ball (it will look like oatmeal)
  • Avoid adding the eggs before the cooked mixture has cooled or you will end up with scrambled eggs
  • Add eggs one at a time
    Fully incorporating each egg before adding the next and check the consistency after you have added 4 eggs
    If the eggs are not enough, the dough will be too thick, difficult to pipe and won’t rise perfectly; on the other hand, if use too many eggs, it will be too runny and become flat when baked
  • DO NOT OPEN the oven door when the dough is baking, especially in the first 30 minutes until they are a deep golden brown or it may collapse as the structure is still unstable
  • Once it’s baked, remove from the oven and let it cool completely before filling

RECIPE

CHOUX PASTRY 101
Yield: Makes about 20 Cream Puffs or 30 Eclairs

INGREDIENTS
❄️ Choux Pastry Dough
180 g Water
180 g Whole Milk
150 g Salted Butter (cubes, room temperature)
1½ tsp Sugar
3/4 tsp Salt (omit if you use Salter Butter or Margarine)
45 g Bread Flour
180 g All-Purpose Flour
4-5 Eggs (large)

❄️ Pastry Cream
85 g Egg Yolk
75 g Sugar
22 g All-Purpose Flour
15 g Corn Starch
90 g Whole Milk
360 g Whole Milk
21 g Unsalted Butter (room temperature)
15 g Sugar
1½ tbs Vanilla Extract or 3/4 tbs Vanilla Paste or 1½ Vanilla Bean

Flavour Combination:
– Chocolate: Add 80 g Dark Chocolate (chopped) in the end of cooking
– Fruit: Let the pastry cream cool completely, then add fruit puree or jam (start with 3 tablespoons)
– Coffee: Add 1½ tablespoon of Instant Expresso Powder to thickening ingredients at the begining

❄️ Chantilly Cream
240 g Heavy Cream
20 g Icing Sugar
1 tsp Vanilla Extract
1 tsp Gelatine Powder
1½ tbs Cold Water
1½ tbs Boiling Water

❄️ Chocolate Sauce
85 g Dark Chocolate (chopped)
120 g Heavy Cream

INSTRUCTIONS
❄️ Choux Pastry Dough

  1. Preheat the oven to 170°C fan/ 190°C/ gas mark 5
  2. Prepare the pan in advance (lined with parchment paper) and weigh all the ingredients before starting to make the dough
    Pipe a small dots of the batter in the corners to glue the parchment paper to the pan so it doesn’t move around
  3. In a medium saucepan, combine Water along with Milk, Salted Butter and Sugar
    Cook over medium heat, stirring as needed until they come to a full boil and the butter is melted (take it off the heat as soon as full boil is reached)
  4. Add both flour all at once and stir with a spatula or wooden spoon until a ball of dough forms
  5. Once you reach this smooth ball, turn the pan back to medium heat and stir continuously for 30 seconds to 1 minute until a slight film covers the bottom of the pan (this dries out the dough a little and also cooks off any flour flavour)
  6. Then transfer the dough to a clean large bowl, spread the dough around the sides of the bowl and let it cool for a few minutes until no longer hot (avoid adding the eggs before the mixture has cooled or you will end up with scrambled eggs)
  7. Once it’s cooled, add 4 eggs first (one at a time); fully incorporating each egg before adding the next
    Use a wooden spoon or spatula stir the mixture (I found using a hand mixer and spatula is the best and least tiring way) Kindly use a stand mixer with a paddle attachment for a large batch.
    The dough will look separated and then come together as you continue to mix it
  8. Check the consistency after you have added 4 eggs
    To test, scoop up a large amount of dough, turn the spatula to the side and wait for the dough to fall, it should be take about 5 to 10 seconds to drop;
    If the dough still seems thick and it doesn’t fall, add just a little beaten egg at a time and test until you reach the right texture
  9. There are 3  important things to look for to know that your Choux Pastry is ready:

FIRST, the dough looks shiny

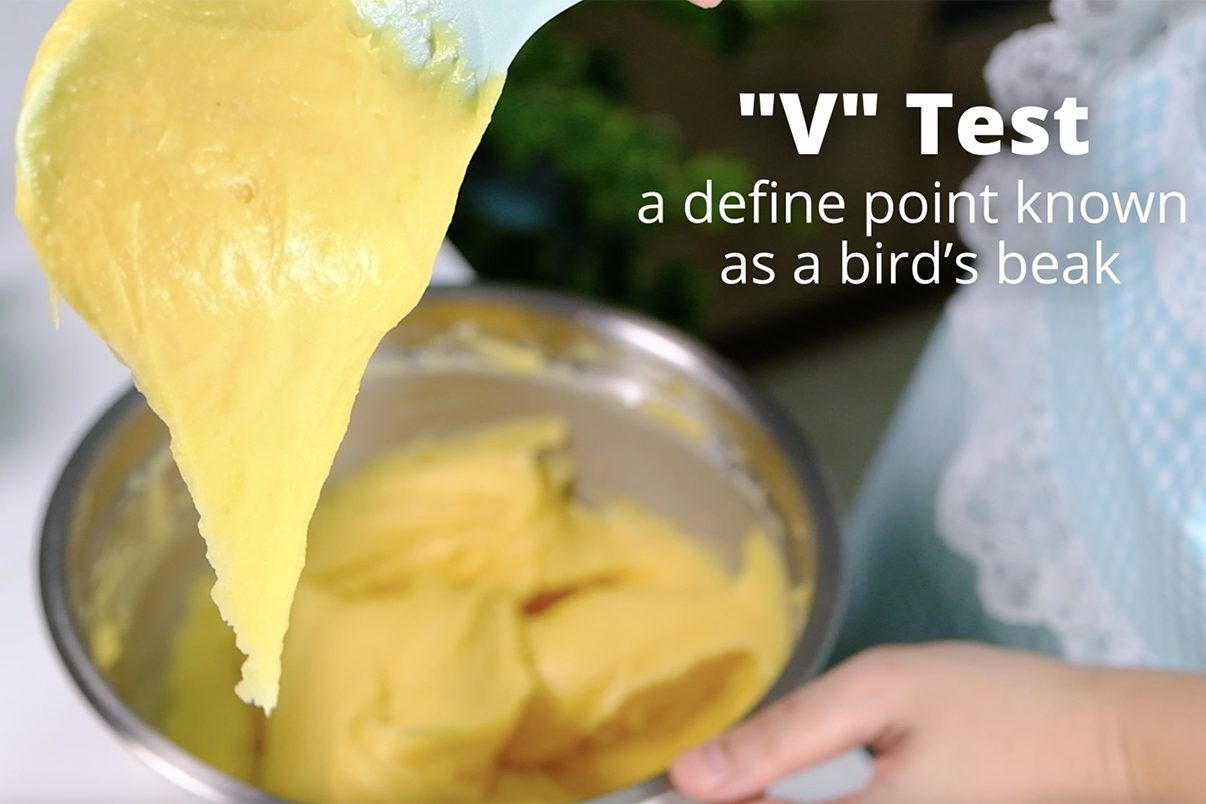
SECOND, is the V test (when it is the right texture, it will fall in a define point known as a bird’s beak like this)

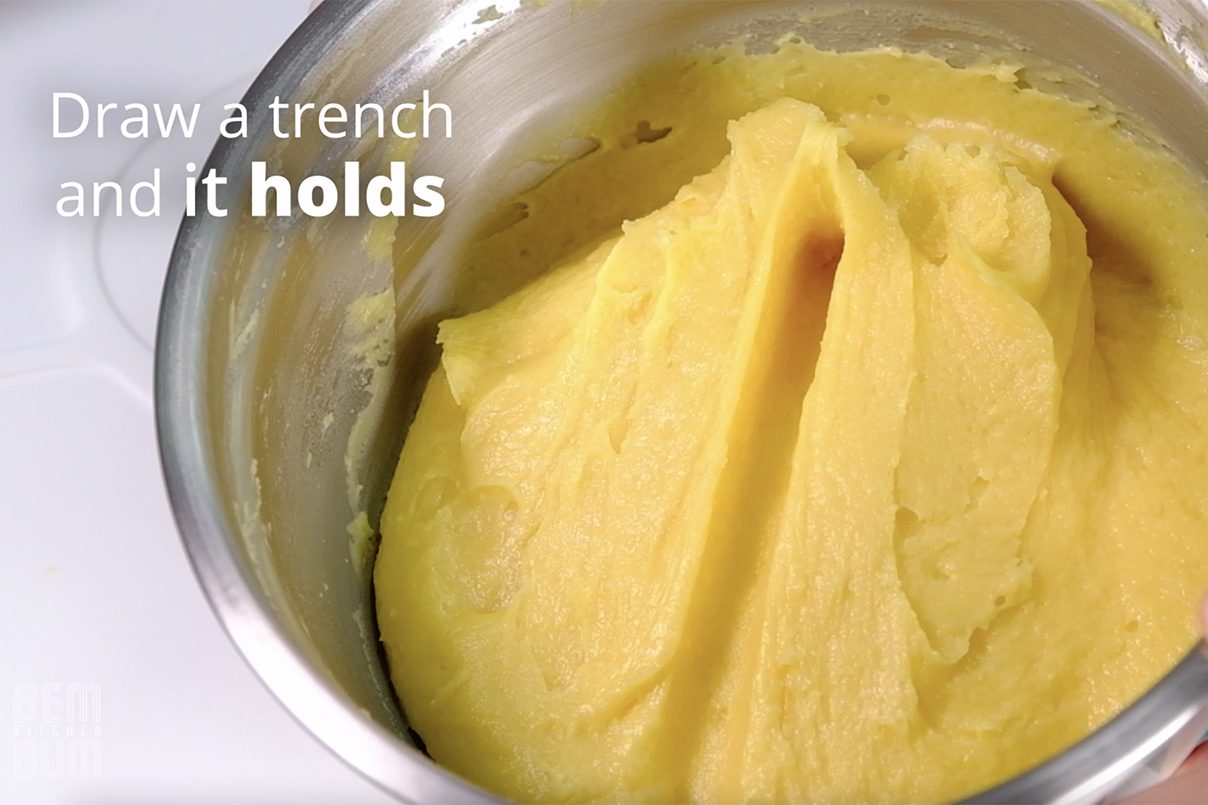
THIRD, to make sure that our mixture is not too runny is to take your finger and draw a trench, if it holds that’s means it’s ready

9. Once the dough is ready, pipe the dough into the desired shape (kindly watch the video for complete instuctions)
10. Then you can dip your fingers into water, using wet fingers pat down any points or help form your piped shapes into better mounds
11. Once it’s done, bake in the preheated 170°C fan/ 190°C/ gas mark 5 , on the middle rack for 40 minutes
DO NOT OPEN the oven door when the dough is baking, especially in the first 30 minutes until they are a deep golden brown or it may collapse as the structure is still unstable (so if you have small oven, bake only one pan at a time; the remaining dough can be sit in a piping bag until the oven is free)
12. Once it’s baked, remove from the oven and let it cool completely on the cooling rack before filling

❄️ Pastry Cream
(make sure you follow the steps carefully, adding the ingredients in this order will prevent lumps)

  1. For the thickeners
    In a medium bowl, beat the Egg Yolks and 75 grams of Sugar vigorously for 30 seconds or until the color of the mixture brightens slightly
  2. Add in the All-Purpose Flour and Cornstarch, stir well until there are no lumps
  3. Then slowly pour 90 grams of Whole Milk and mix again until smooth (milk will loosen up the mixture, making it easier to incorporate with the pastry cream liquids later), set this aside
  4. Then, in a medium saucepan, combine the 360 grams of Milk along with Unsalted Butter, 15 grams of Sugar and your choice of Vanilla Flavoring (the small amount of sugar will keep the milk from scalding)
    Cook over medium heat, stir once or twice to help the sugar dissolve
    When it comes to a simmer, take it off from the heat; and slowly pour this mixture into the egg yolk mixture while whisking (this is called tempering the eggs, bringing both mixtures to the same temperature so the eggs won’t cook)
  5. Pour the mixture back to the saucepan, increase the heat to medium high and whisk strongly for several minutes
  6. When the mixture start thickens and boils, whisk for an additional 30 seconds
    It is very important to whisk while the mixture boils for 30 seconds or your Pastry Cream might not set (sometimes it’s hard to see the boil unless you stop whisking for couple of seconds to look for big plops coming to the surface)
  7. Once you see that the texture is really smooth and thick like a pudding, take it off from the heat (if you don’t see any little bits or lumps, there’s no need to strain out)
    Pour into a clean bowl, cover with plastic wrap, touching the surface of the Pastry Cream (this helps it cool faster and prevent skin from forming on top)
  8. Chill until cold about 1 hour
  9. If you want to make the Chocolate version, simply add chopped bittersweet, semisweet or milk chocolate to the hot Pastry Cream right after you finish cooking it and whisk until smooth
  10. Once it’s cooled, you will find the texture is like jelly
    Whisk by hand just until it’s smooth, this only takes a minute (DON’T whisk too long, you can loosen the firm structure too much and it might start to get runny)

❄️ Chantilly Cream

  1. Simply mix Heavy Cream along with Icing Sugar and Vanilla Extract over an ice bath
    Whip at high speed until the mixture is at medium-firm peak, set aside
  2. Then in a small bowl, bloom the Gelatine in Cold Water, let stand for about 5 minutes
  3. After 5 minutes, add Boiled Water to the Gelatine mixture, stir to dissolve
    And pour immediately into the Cream, mix well (Gelatine mixture acts as a stabilizer so that the cream is more stable)

❄️ Chocolate Sauce

  1. Chop the Dark Chocolate into small pieces so it will be easier to melt and combine, then place in a heatproof bowl
  2. In a medium saucepan, heat the Whipped Cream until it starts simmering and pour it all in one go over the chopped Chocolate
  3. Let is sit for a couple minutes for the chocolate to start to melt, then whisk until it come together into a thick, glossy chocolate sauce
    If you have a chocolate pieces that haven’t melted, gently warm in a Microwave or place the bowl on top of a saucepan of steaming water to make a double boiler
  4. This Chocolate Sauce can be used as an icing, letting it cool to spreadable consistency on Eclairs or you can also drizzle it over a Cream Puffs as topping or garnish

METHODS TO FILL CHOUX PASTRY
First Method

  1. Using a chopstick or skewer, punch a hole in the bottom of the Cream Puff or 3 holes in the bottom of Eclair
  2. Transfer the filling to a piping bag fitted with a 5 mm round piping tip
  3. Press to fill
  4. When the shell feels heavy and a little bit comes out the hole, it’s full
  5. Wipe off any excess with clean finger
  6. And to finish, you can dust the top with icing sugar just before serving or dip to coat the top with chocolate sauce

Second Method

  1. Cut the Cream Puff or Éclair in half with a serrated knife
  2. Fill the base with delicious filling or if you like berries, that’s also a great choice
  3. Place the bit that was cut off on top as a little hat or enjoy it as a snack
  4. To finish brush or drizzle chocolate sauce on top and sprinkle with some rice chocolate or shavings
  5. If you want Ttake it to the next level
    I usually cut the cooled Choux in half, fill the base with a small scoop of my favourite ice cream; Pipe some Chantilly Cream on top
    Put the top back on; And store in the freezer until ready to eat
     Then when it’s ready to serve, I will poured some warm chocolate sauce on top (yummy!!) 🥰

NOTES

  1. You can freeze the unbaked Choux Pastry Dough before baking
    Pipe them on baking pan and freeze, they will harden like a rock
    Store the frozen dough in a freezer bag, put in the freezer
    When you need it, bake from frozen according to the same baking times and temperatures as called for in this recipe
  2. Once the Choux Pastry shells is baked, store unfilled shells at room temperature for up to a day, or in an airtight container in the freezer for up to a month.
    Then when you need it, re-crisp the shell directly from frozen, baking in the preheated 170°C fan oven for 2 to 3 minutes or until hot to the touch
  3. Once the sheells filled with cream, Choux Pastries should be kept in the fridge for up to 5 days (but it taste best eaten within a day or two).
  4. Pastry Cream can be made 3 to 5 days in advance, depending on the expiration date of your milk.

Red Velvet Cake without Artificial Food Colouring

Most red velvet cake recipes use a lot of food coloring.
The Original Red Velvet Cake is actually a chocolate cake, it never contains red coloring.

The reddish color is produced from the use of Raw or Natural Cocoa powder (NOT Dutch Processed) and Brown Sugar in the recipe.

Raw Cacao contains antioxidants called Anthocyanins. When this substance reacts with an acidic ingredient such as Buttermilk or Vinegar, the batter will turn reddish in color after baking.
That is how real Red Velvet Cake is made!

However, in the early 1800s, chocolate factories in the Netherlands began alkalizing Raw Cacao Powder to give them a deeper color, richer taste while reducing acidity, and thus a higher price; that’s what we call Dutch Processed Cocoa.
Nevertheless, the use of Dutch Processed Cocoa tends to produce less or lighter red color than Raw/Natural Cacao.

In terms of appearance, Dutch Processed Cocoa has a deeper chocolate color and taste while Raw Cacao appears lighter in color and has a pleasant citrusy flavor

That’s when people started adding RED FOOD COLORING to the Red Velvet Cake recipe to deepen the color (when using dutch processed) and because old-fashioned Red Velvet Cake with Raw Cacao Powder also was considered NOT RED ENOUGH

Adams Extract Recipe Card

Adams Extract is credited with bringing the red velvet cake to kitchens across America during the Great Depression era, by being one of the first to sell red food coloring and other flavor extracts with the use of point-of-sale posters and tear-off recipe cards.

With this No-Dye Red Velvet Layer Cake Recipe, you can make a beautiful Red Velvet Cake without food coloring

Don’t forget to wear gloves to prevent the beets from staining your hands 😉

This cake uses the bright red color of fresh baked beets.
If you are worried about the taste of beets in your cake, I promise you; there is no strange or funny taste at all! ☺️
Beets not only enhance the red colour of the cake but also impart tenderness and a natural sweetness.

Beetroot contains natural red color called Betanin.
This molecule can break down when exposed to oxygen or air over time and even if you stored it in the fridge.

Once they’re broken down, the red beetroots will lose their red colour, instead turning brown.
So make sure you prepare the beets on the same day you are going to make the cake.

The cake batter looks rosy, so beautiful….,🥰 then when it is taken out of the oven it turns dark red 😱 MAGIC !!

This is how the color of the batter looks like before baking

This cake is paired with traditional Ermine Frosting which is very light and fluffy.

Boiled Milk for the Frosting

Ermine Frosting, also known as Boiled Milk Frosting or Flour Buttercream is the traditional frosting used on a Red Velvet cake, not the Cream Cheese Icing that many of us are familiar with.

An irresistible velvety Ermine Frosting 🤤

So fluffy, silky smooth delicious frosting. If you’re not a fan of overly sweet icing, you will love the milder sweetness yet amazing pipe ability of this frosting.

This frosting can be made a week in advance (store it in airtight container in the fridge); and before using, allow frosting to sit at room temperature for 30 minutes and then re-whip with hand whisk until fluffy.

Deeply moist, earthy and not overly sweet . . .

Let’s take a moment to appreciate the sheer beauty of this cake 😚

The word “RED VELVET” describes that the cake will have a red colour with a smooth and soft texture.
“A More Subtle Chocolate Flavor with a Slightly Tanginess“, that’s how I describe the taste of this Red Velvet Cake.

Time to dig in 🤩

With its vibrant red hue and tantalizing Ermine frosting
It’s perfect if you want to bake your way into someone’s heart 😍

I think I need another slice 😅

Once you try it, I’m sure you will fall in love with it! 😍
HAPPY BAKING !

WATCH HOW TO MAKE “NO DYE RED VELVET CAKE”

TIPS FOR SUCCESS (PLEASE READ FIRST):

  • Prepare the beets on the same day you are going to make the cake (DON’T prepare it a day in advance or store roasted beets in the refrigerator, as they will turn brown)
  • Use shallow round sandwich tins to ensure that the cake is not overbaked, causing the color to change
  • Grease and line the bottom of the pan with parchment paper to prevent sticking
  • Preheat the oven before you start (don’t let the batter wait too long)
  • Use Raw Cacao Powder (NOT Dutch Processed) to get the right red colour
  • All ingredients must be at room temperature (including Milk, Eggs and Beet Puree) to get a smoother and more homogeneous batter
  • Sift and stir the dry ingredients first before mixing with the wet ingredients (if the dry ingredients are not mixed well, areas containing concentrated leavening agent in the batter can create holes in the cake)
  • Make sure you are using Baking Powder NOT Soda as a leavening agent or you will get some weird shade of brownish or pinkies gray instead of vibrant red
  • Pour the batter from a position about 15 cm from the pan, so that the excess bubbles can burst
  • Tap the pan a few times on your work surface to remove excess bubbles before baking
  • Resist the urge to peek until your cake is done. Opening the door while you bake will release some of the heat, this can lead to the cake being to damp in the middle or even falling
  • Once it’s baked, let the cake cool completely on a cooling rack before storing or assembling
  • For the frosting
    Prepare the roux starter in advance.
    Make sure that the roux is cool completely before you mix with the butter (you can make it 2 days in advance and store it in the fridge)
    Then before you start making the buttercream, make sure that you take out the roux and butter from the fridge and let sit at room temperature for at least 30 minutes otherwise it’s going to solidify your butter

RECIPE

RED VELVET CAKE
Yield: One 15 cm (15 cm Tall) Round Cake ~ 3 Layers

INGREDIENTS
🪴 Red Velvet Cake
210 g Beet Puree (room temp.)
120 g Whole Milk (room temp.)
39 g Apple Cider Vinegar
300 g Cake Flour (Unbleached)
1 tbs Baking Powder (Double Act.)
21 g Raw Cacao Powder (NOT Dutch)
1/2 tsp Salt
75 g Eggs (room temp.)
300 g Caster Sugar
135 g Vegetable Oil


🪴 Ermine Frosting
82 g All-Purpose Flour (Unbleached)
300 g Granulated/ Caster Sugar
360 g Whole Milk (room temp.)
340 g Unsalted Butter (room temp.)
1 ½ tsp Vanilla Extract (optional)
1/8 tsp Salt

INSTRUCTIONS
🪴 Preparation

  1. To make Beets Puree
    Wash the beets under running water to clean it of any dirt (pat dry)
    Apply some oil and wrap tightly in foil, then bake in the preheated 200°C for 1 hour or until the beets are really soft
    Once its cooked, peel off the skin
    Using a high-speed blender or food processor, puree until smooth (you can add 2 tablespoons of water to help the blending process)
    Set aside 210 grams for the cake and let it cool completely
  2. Lightly grease the pans with oil and place parchment paper at the bottom of each pan
  3. Preheat the oven to 160°C fan/ 180°C/ gas mark 4
  4. Make sure all ingredients including Milk, Eggs and Beet Puree are at room temperature

🪴 Red Velvet Cake

  1. To make the Buttermilk
    Combine Milk with Apple Cider Vinegar, let it sit for 5 minutes to curdle and thicken before using
  2. Sift the dry ingredients (Cake Flour, Raw Cacao Powder and Baking Powder)
    After sifting, stir with a whisk to ensure everything is mixed evenly
  3. In a large mixing bowl, combine 210 grams Beets Puree along with Salt, Eggs, Sugar, Oil and Buttermilk
    Whisk until all the sugar completely dissolved
  4. Add the sifted dry ingredients;
    And whisk again until the batter really smooth
    Scrape the sides and bottom of the bowl to ensure everything is evenly mixed
  5. Divide the batter evenly between the pans
    Slowly pour the batter from a position about 15 cm from the pan, so that the excess bubbles can burst
  6. Using a skewer make this circular motion to flatten the batter and break the large bubbles
  7. Tap the pan to remove excess bubbles
  8. Then immediately bake in the preheated 160°C fan/ 180°C/ gas mark 4 on the middle rack for 30-35 Minutes
    * Resist the urge to peek until your cake is done. Opening the door while you bake will release some of the heat, this can lead to the cake being to damp in the middle or even falling
  9. Once it’s done, let the cake cool in the pan for about 5 minutes; then flip onto a cooling rack to cool completely before storing or assembling

🪴 Ermine Frosting

  1. Prepare the Roux Starter
    In a non-stick pan, combine Flour and Sugar
  2. Cook over medium heat, let the flour toast for about 2 minutes (stir constantly so that the bottom doesn’t burn)
  3. Once the flour has been toasting, you can start adding the milk (slowly pour the milk and stir continuously until smooth, make sure there are no lumps left in the corners and bottom of the pan)
  4. Once the mixture is completely smooth, continue cook over medium high heat;
    the mixture will gradually thicken, resembling a custard
  5. Once it’s start to bubble gently, remove from the heat; strain through a fine-mesh sieve to get rid of any lumps
  6. Place a piece of plastic wrap directly on the surface to prevent skin forming
  7. Store the Roux in the fridge for at least 1 hour to chill
    * Please note; make sure that the roux is cool completely before you mix with the butter
  8. Once it’s cooled, take the Roux Starter and Butter out from the fridge and let sit at room temperature for at least 30 minutes
  9. After 30 minutes
    In a mixing bowl, beat room temperature Butter on medium high speed for 3 minutes until pale and creamy
  10. Add Vanilla and Salt, mix well
  11. Add the room temperature Roux in 4 batches, and beat again on medium speed for another 5 minutes until very smooth and pale in colour
    *Don’t forget to occasionally scrape down the sides and bottom of the bowl to make sure everything is mixed well

🪴 Assembly the Cake

  1. Trim the top of the cake to make sure the layers is nice and flat (don’t throw away the top, you can crush them in a food processor for garnish)
  2. Place the first layer on a cake board
  3. Pipe 1 cm thick frosting on top
  4. Add the second layer of cake, repeat the same process with the remaining layer (make sure everything is even and straight)
  5. Once it’s done place the layered cake in the fridge for about 30 minutes to let the filling harden, so the top layer does not sliding around
  6. Then for the crumb coat; apply just a thin layer of frosting to the top and the sides of the cake before you do the swirls finish on the outside (it doesn’t have to be perfect)
  7. Chill the crumb coated cake for about 20 minutes
  8. After 20 minutes, using 1 M tip pipe the swirls around the cake and spread some garnish on the top


NOTES

  1. This cake will stay fresh at room temperature for up to 2 days; unless if you are living in hot or humid conditions, I suggest that you store it in the fridge
  2. This cake can be refrigerate for up to 1 week
  3. Ermine frosting can be made a week in advance Store it in airtight container in the fridge; Before using, allow frosting to sit at room temperature for 30 minutes and then re-whip with hand whisk until fluffy

Fluffy Flaky British Scones Baked to Perfection (in 30 Minutes)

WHAT IS THE SECRET OF MAKING GOOD SCONES?
The recipe seems so simple, but the perfect Scone doesn’t come easy.

There are many little gritty things that can get in the way of achieving that all-buttery point of perfection.

Scones are supposed to be light, fluffy and soft interior with a little crisp to the edges and top.

Can you see those layers?? 🧐
A little crisp to the edges and top 🥲🥲

Making Scones requires a VERY light touch.

Only use the tips of your fingers to rub in the butter into the flour, lightly lifting and dropping the mixture.

Scones Dough before baking

The trick is to use light pressure and only work the dough until it just comes together.

One common mistakes that causes Scones to be dry and tough is being too heavy-handed with the dough.

When you overwork the dough, your Scones can come out tough and chewy, rather than that desired light and crumbly texture.

If scones aren’t part of your baking repertoire, I suggest you give them a try.

Look at those flaky texture 🤗

They come together quicker than almost any other baked good and taste absolutely delicious 🤤

Messy and crumbly is a good thing! 🤩

Scones are best served warm, with Clotted Cream and Strawbery Jam of course; And not forgetting a pot of good Earl Grey Tea.

Choose your favourite Strawberry Jam 😍

If you cannot get Clotted Cream, you can try Crème Fraîche or Unsalted Butter; it goes quite well with Strawberry Jam.

And what is the proper way to eat a scone? Jam first or Cream first?
Lots of people are debating this 🤭

The Cornish tradition is to cut the scone in half, so you have two flat rounds;
On each side, Jam is spread first and then the cream on top.
The Jam being spread first is what makes it the ‘Cornish way‘

I personally prefer the Royal Way
I would put Jam on first, with cream on top and then sandwich them together so it’s not overly sweet 😚

😱😱😱 ……can’t wait to eat them!!!

But ultimately, You can do what you want! 🤣😂
The scones will still be tasty 😍

I will eat my Scones like The Queen… 👸🏻 …. shy…. 😌☺️

Take a small bite and enjoy the happiness brought by the Scones … 🥰

Look at those beautiful texture … 🤪

Kindly follow all the tips and instructions in this recipe, I’m sure you’ll end up with tender, flaky Scones that will literally melt in your mouth.

😊 😍 HAPPY BAKING !!!

WATCH HOW TO MAKE “FLUFFY FLAKY BRITISH SCONES”

The Key to Perfect Scones (Please Read First) :

PREPARE A LARGE MIXING BOWL
Prepare a large bowl for making scones. You will need some space for the mixing process; this provides plenty of room to spread the butter and mix the dough easily.

USE COLD BUTTER STRAIGHT FROM THE FRIDGE
Make sure that the butter is extremely cold.
Cold butter promotes the flakiness, high-rise and fluffy scones.
I usually take the butter out of the fridge and cut it into large cubes right before I’m ready to mix the dough.
Don’t cut it too small or even grate it. That will make the butter melt faster and you’ll have trouble with a sticky dough.
If you keep the butter in larger pieces, you get flakiness.
Once it hits the oven, the dough around the butter starts to set, the butter melts, and steam from the water content puffs the layers apart.

COLD BUTTERMILK FOR TENDER SCONES
For the liquid, most recipes calls for Whipped Cream or Milk.
However, when the Scones are served with Clotted Cream or Butter and Jam, I found this combination way too rich and not tasty.
I prefer to use homemade Buttermilk for the Scones which is the key to softness and lightness.
Buttermilk makes the scones very tender, has a better crumb and provides a slightly tangy taste
To make it: simply mix regular cold milk with some lemon juice or white vinegar, then let the mixture sit for 5 minutes to curdle and thicken slightly before using.

SIFTING ALL THE DRY INGREDIENTS
Don’t skip this step, it helps to build a light texture

INCLUDE BAKING SODA TO THE RECIPE
Since we are using Buttermilk, Baking Soda is added to this recipe.
The acid in the Buttermilk reacts with the Baking Soda and produces Carbon Dioxide which helps the Scones rise.

DON’T OVERWORKED THE BUTTER
When you mix the Butter with the Dry Ingredients, don’t pinch or overworked the butter into too tiny pieces or you will end up with Scones that are soft but not flaky.

USE A FORK TO WHEN ADDING THE LIQUID
By using a fork, the liquid (Buttermilk) will evenly distribute without overmixing the dough.

A ROUGH PASTRY-STYLE FOR EXTRA FLAKINESS
For extra flakiness, do a “Rough Puff Pastry-Style” flattening and folding the dough.
Fold three to four times, Building in those layers.
DO NOT kneading or stretching the dough, we don’t want to develop gluten and have a very tough Scones.

SHAPE THE DOUGH INTO A THICK DISC
The thickness of your Scone dough is all important.
Before you cut, Shape the dough into a thick disc about 3-4 cm thick

DO NOT TWIST THE CUTTER
Remember when you cut it, don’t twist the cutter or the Scones will be lopsided (it won’t look pretty 😒)

COLLECT AND PRESS THE SCRAPES
After you cut the dough, you will have those little scraps.
DO NOT knead it!
What you can do is collect and press it together; stand the dough up and press again.
Press until it is 3 cm thick and then you can cut again.

APPLY SOME EGGWASH
To give the top of the Scones a bit of shine, apply some egg wash.
Avoid the sides and bottom because they will affect the rise.
This will give your Scones a nice golden brown finished.

BAKE WITH IDEAL TEMPERATURE AND TIME
Use 15 minutes of a Scones in oven as a good rule, you can’t foget about it! 🤖

Recipe

FLUFFY FLAKY BRITISH SCONES
Yield: 9 Scones (Diameter 5 cm, 3 cm Tall)

🍰 Ingredients
115 g Cold Unsalted Butter
150 g Cold Milk + 2 tsp Vinegar (to make Homemade Buttermilk)
335 g All-Purpose Flour
50 g Caster Sugar
1 ⅓ tsp Double-Acting Baking Powder
1/3 tsp Baking Soda
1/3 tsp Salt
Zest from 1 Lemon
(1 Egg for egg wash~beat the eggs)

🍰 Instructions
Preparation

  1. Prepare a large bowl for making scones.
  2. Right before you are ready to mix the dough, take the butter out of the fridge and cut it into large cubes.
    Don’t cut it too small or even grate it; that will make the butter melt faster and you’ll have trouble with a sticky dough.
  3. Prepare Homemade Buttermilk
    Simply mix regular Cold Milk with Lemon Juice or White Vinegar; let the mixture sit for 5 minutes to curdle and thicken slightly before using.

To Make Scones Dough (Kindly watch the video for completed instructions)

  1. Sift All the dry ingredients (All Purpose Flour, Caster Sugar, Baking Powder, Baking Soda, Salt).
  2. Add grated Lemon Zest; mix well.
  3. Add Unsalted Butter in Cubes to the dry ingredients.
    Then, to incorporate the butter:
    – FIRST STEP
    Coat the butter with the flour,
    Using your fingers pinching and squishing the pieces of butter (broke down the butter into smaller pieces).
    Don’t pinch or overworked the butter into too tiny pieces or you will end up with scones that are soft but not flaky.
    – SECOND STEP
    Take a handful of the dough with the bits of butter and flatten it between your palms
    (this thin sheets of butter that’s once it enters the oven, it melts and releases steam, which leads to that magical texture) 
    When you feel between your hands all the butter pieces are flattened, you can start adding the liquid
  4. Slowly pour in the Buttermilk.
    Stir gently with a fork (by using a fork, the liquid will evenly distribute without overmixing the dough).
  5. Once you see the dough comes together, you can stop mixing it (if there are a few dry crumbs left, that’s okay).
  6. Dust your work surface with some flour (not too much) and transfer the dough over.
  7. Gather and press the dough together into a large ball, gather up any small crumbs (you can flour your hands lightly).
  8. Then using a large scraper; do a rough Puff Pastry-Style flattening and folding the dough.
    Fold three to four times, building in those layers (DO NOT kneading or stretching the dough; because we don’t want to develop gluten and have a very tough Scones).
    * If you like to add some dried fruit, nuts or maybe fresh fruit, you can add while you building this layers.
  9. Once it’s done, shape the dough into a thick disc about 3 cm thick
  10. Cut into rounds with a 5 cm diameter floured round cutter (remember when you cut it, don’t twist the cutter or the scones will be lopsided). Place them on a parchment-lined baking tray.
    * Feel free to vary the cutter size a little bit, as long as the thickness is the same, it will bake at the same speed
  11. After you cut the dough, now you have those little scraps. DO NOT knead these scraps.
    What you can do is collect and press it together; then stand the dough up and press again
    until it is 3 cm thick; And then you can cut again.
    * Do the same with the remaining dough (if there is only a little dough left, just shape it into a round with your hands.
  12. To give the top of the Scones a bit of shine; using small brush apply some Egg Wash.
    Avoid the sides and bottom because they will affect the rise (this will give your Scones a nice golden brown finished).
  13. Bake them in the preheated 200°C fan/ 220°C/ gas mark 7 for 15 minutes.
  14. Once it’s done, you can serve them immediately (Scones are best enjoyed when still warm) or let them cool completely on a cooling rack before storing.

Notes

  1. Scones are best enjoyed when fresh while still warm, but with proper storage they can extend their delight beyond the baking day while keeping safe to eat.
  2. Storage Method Room temperature 1-2 days in a covered container away from heat and sunlight
  3. Refrigerator Up to 3 days in an airtight container with a paper towel lining
  4. Freezer Up to 1 months in a freezer bag or tightly wrapped in an airtight container
  5. To preheat: In the preheated 180°C oven for 5-10 minutes or Microwave on high 10-20 seconds; They should be as good as freshly baked 😄.