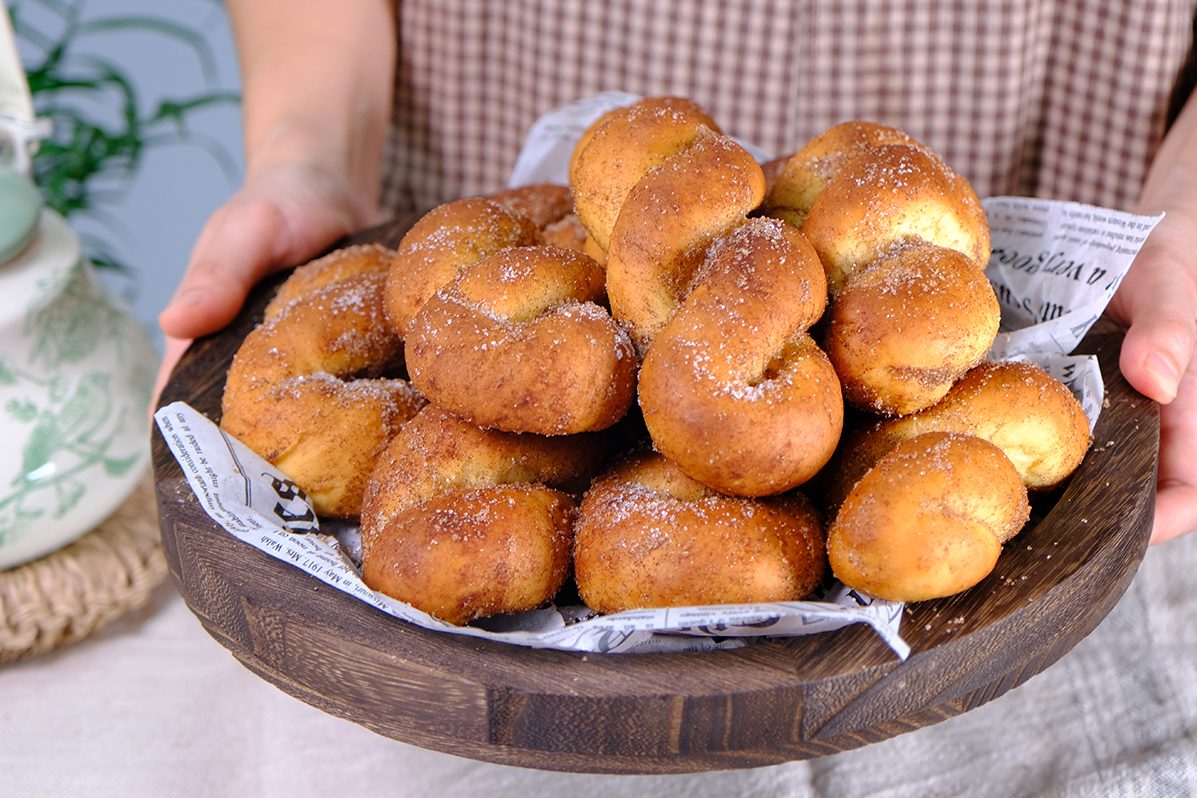
Baked Korean Twisted Donut (꽈배기) Kkwabaegi

In Korea, Kkwabaegi is a popular after-school snack 🥰
“Kkwabaegi 꽈배기” or Korean Twisted Donuts;
I absolutely love them, but I don't like frying them; they're too greasy and troublesome.
This recipe doesn't require frying, you just bake them instead! A healthier version of Donuts 😋
Mashed potatoes help keep the dough soft and moist, which is especially helpful in baked Donuts that can otherwise turn out dry. They give the Donuts a tender, slightly chewy, and fluffy texture; The starch in the Potatoes binds with the flour, creating a softer crumb
The key to making beautiful kkwabaegi is “Don’t roll the dough thinner in the middle and thicker at the ends, or vice versa” AND “Don’t twist it too much”
That will cause the twist to break during the proofing or baking process
Your twisted donut won’t look pretty ☹️
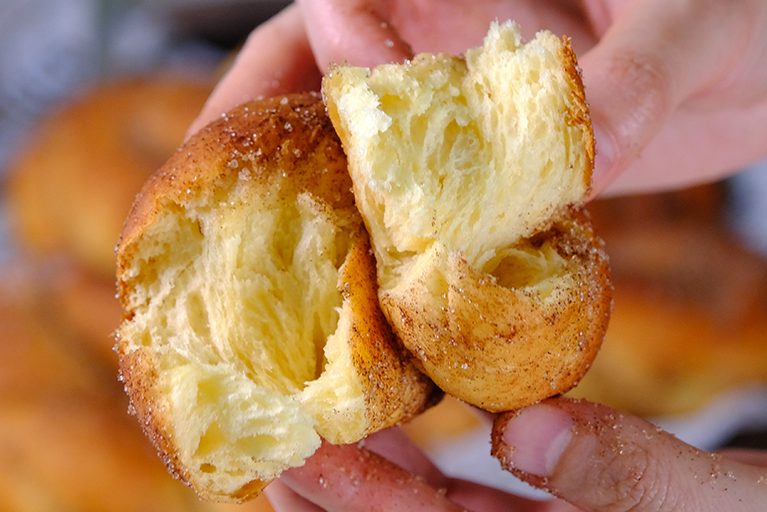
These mildly sweet, fluffy, spongy, twisted doughnuts are simply irresistible 😳🤤🤤

Crispy sugar on the outside, soft and slightly chewy on the inside;
And most importantly, it’s not greasy 😜
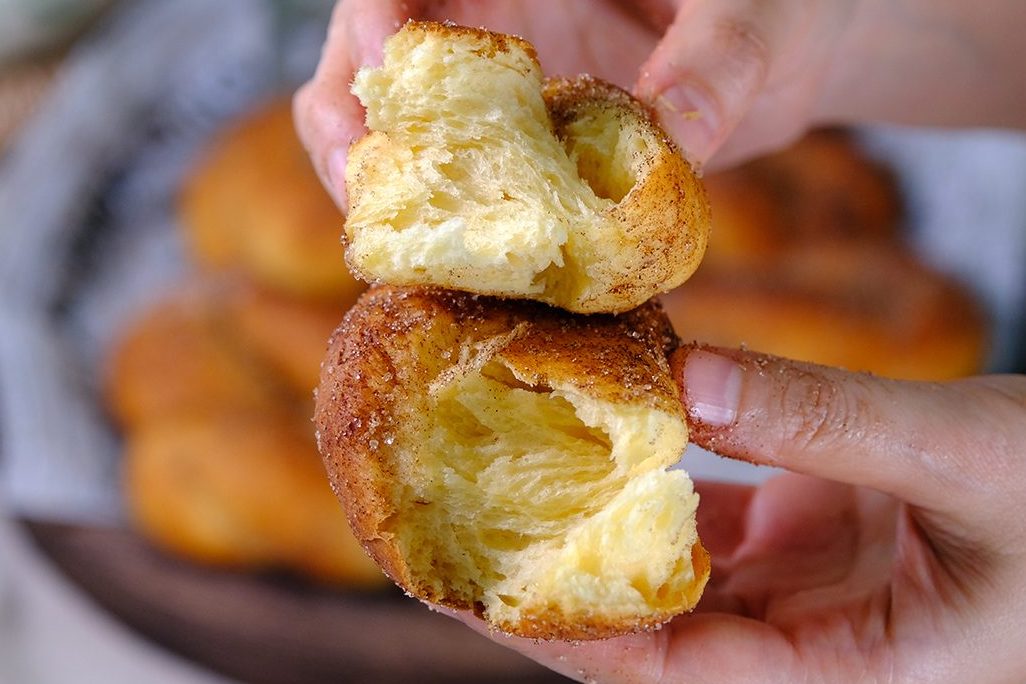
They pair really well with Coffee, Milk, Chai Tea or even Hot Chocolate.
Make this for your loved ones, or your kids; They’ll love it !! 🤗
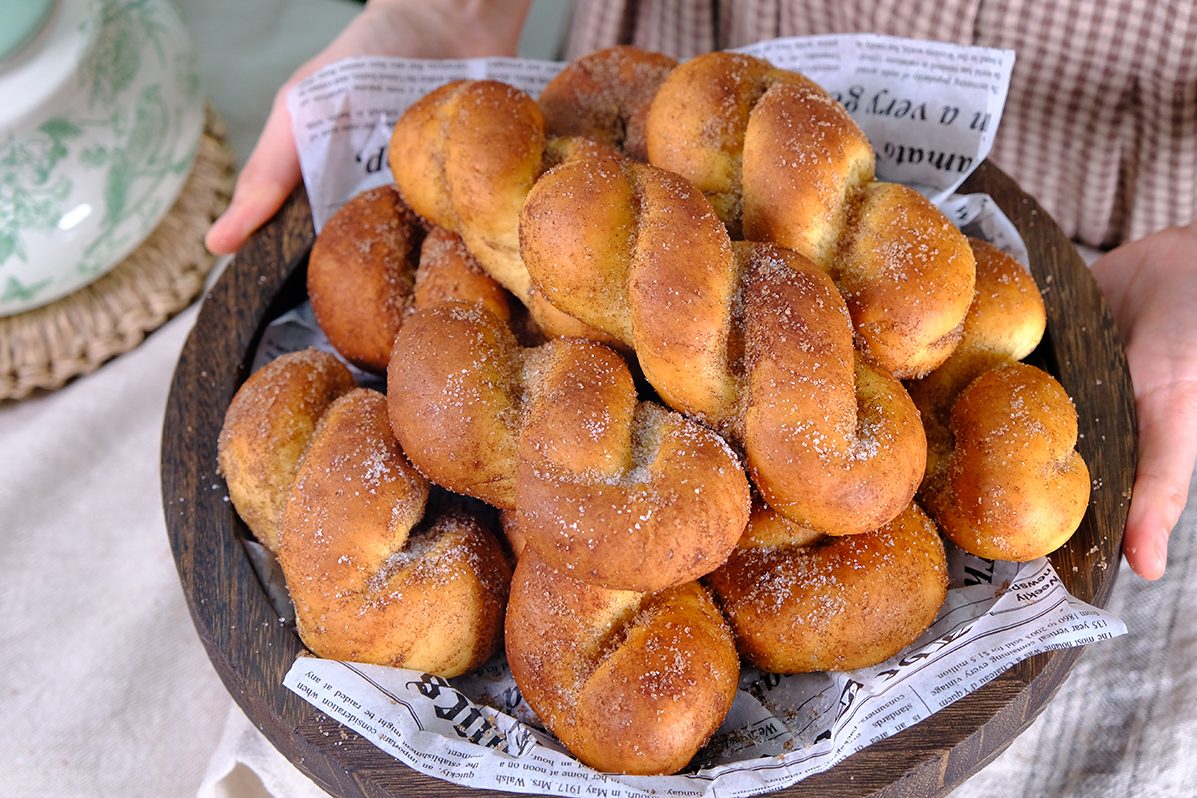
I hope you will enjoy it as much as I do 😍

WATCH HOW TO MAKE Baked Korean Twisted Donut (꽈배기) Kkwabaegi

RECIPE

BAKED KOREAN TWISTED DONUTS
Yield: 10 pieces


INGREDIENTS
🍩 Donut Dough
315 g All-Purpose Flour
50 g Caster Sugar

1⅔ tsp Instant Yeast
1/3 tsp Salt
125 g Mashed Potatoes

50 g Egg Yolks
100 g Full Cream Milk (cold)
40 g Unsalted Butter


🍩 Coating

60 g Unsalted Butter (melted)

100 g Caster Sugar

1 tbs Cinnamon Powder


INSTRUCTIONS

  1. Cook Potaoes until tender. Place potatoes in a saucepan, add enough water to submerge. Cook over hight heat until the water comes to a boil. Reduce the heat and let simmer until the Potatoes are tender. Once it’s done, drain the Potatoes and mash them smoothly, set aside.
  2. Preheat the Oven to 400 F/ 200°C/ 180°C fan/ gas mark 6 and line baking tray with parchment paper.
  3. Combine the dry ingredients. In a large bowl, place the Flour, Sugar, and Instant Yeast. Add the salt to the opposite side of the bowl (be careful not to let the Yeast and Salt come into direct contact, as this can kill or slow the yeast’s growth). Stir until thoroughly combined.
  4. Add the wet ingredients to the dry mixture. Add the cooled Mashed Potatoes, Egg Yolks and Cold Milk to the dry mixture. Use a wooden spoon mix well until it forms a lump. And then, using your hands start kneading the dough. Gather all the small crumbs and dry flour to form a ball of dough.
  5. Knead the dough until smooth and elastic. Once the dough forms a rough ball, add the Butter and knead for about 5 minutes until the dough is smooth and elastic.
    The dough will be slightly sticky, resist the urge to add more Flour as it can make your Donuts tough.
  6. Portions the dough. Divide the dough into 10 equal portions (about 68 grams each). Shape each portion into a ball. Cover the dough with plastic wrap while shaping to prevent it from drying out. And let the dough rest for 10 minutes.
  7. Shape the dough. 10 minutes later, Take one portion of the dough, roll it out. Starting from the center, roll out to both sides, until it is about 28 cm long.
    The dough should be evenly thick from end to end.
    I recommend using a ruler as a guide. Don’t sprinkle too much Flour on the surface, as it will be difficult to shape.
  8. Twist the dough (Please watch the video for clear instructions)
    Roll the 28 cm long dough with your both hands in different directions; right hand up and left hand down; DON’T twist it too much. Once you feel tension between the two ends, stop twisting. Then, pick up both ends, they will automatically twist. Using your hands twist it a little more. Pinch the ends and fold them under. Place it on a baking sheet lined with Parchment Paper
    and cover with plastic wrap to prevent drying.
    Don’t roll the dough thinner in the middle and thicker at the ends, or vice versa; That will cause the twist to break during the proofing or baking process. Your twisted donut won’t look pretty.
  9. Final proof. After shaping, let the dough proof for 20 minutes
    Meanwhile, we can prepare the Donuts coating
  10. Prepare Coating. Melt the Butter in a double boiler, set aside.
    In a Ziploc bag, mix Caster Sugar and Cinnamon Powder, shake it.
  11. Bake the Donuts. After 20 minutes, you can see that the dough puffy and bigger in size. If you press it lightly, the fingerprint returns slowly and does not bounce immediately. Bake in a preheated oven for 12 minutes.
    After 12 minutes, flip the donuts and bake for another 3 minutes.
  12. Apply Coating. Once baked, brush with melted Butter while still hot.
    Place in a bag of Cinnamon Sugar (shake it), then place the donuts on a cooling rack or a plate.
    Twisted Donuts are best enjoyed while still warm, on the day it’s made.

    NOTES
    * If you make a large batch and can not finished it in one day, after baked, don’t apply the coating. Place Donuts in an airtight container in the fridge (it will last for 3 days). When you need it, take them to room temperature for about 30 minutes; then reheat donuts in the preheated (400 F/ 200°C/ 180°C fan/ gas mark 6) for about 10 Minutes (the Donuts will be soft and fluffy again); Then coat with melted Butter and Cinnamon Sugar and serve.
    * Like all raised donuts, they can get a little bready as they age. It’s best to have them warm when they are first made, but if you have to store them, ensure they are completely cooled before packing them into a container.

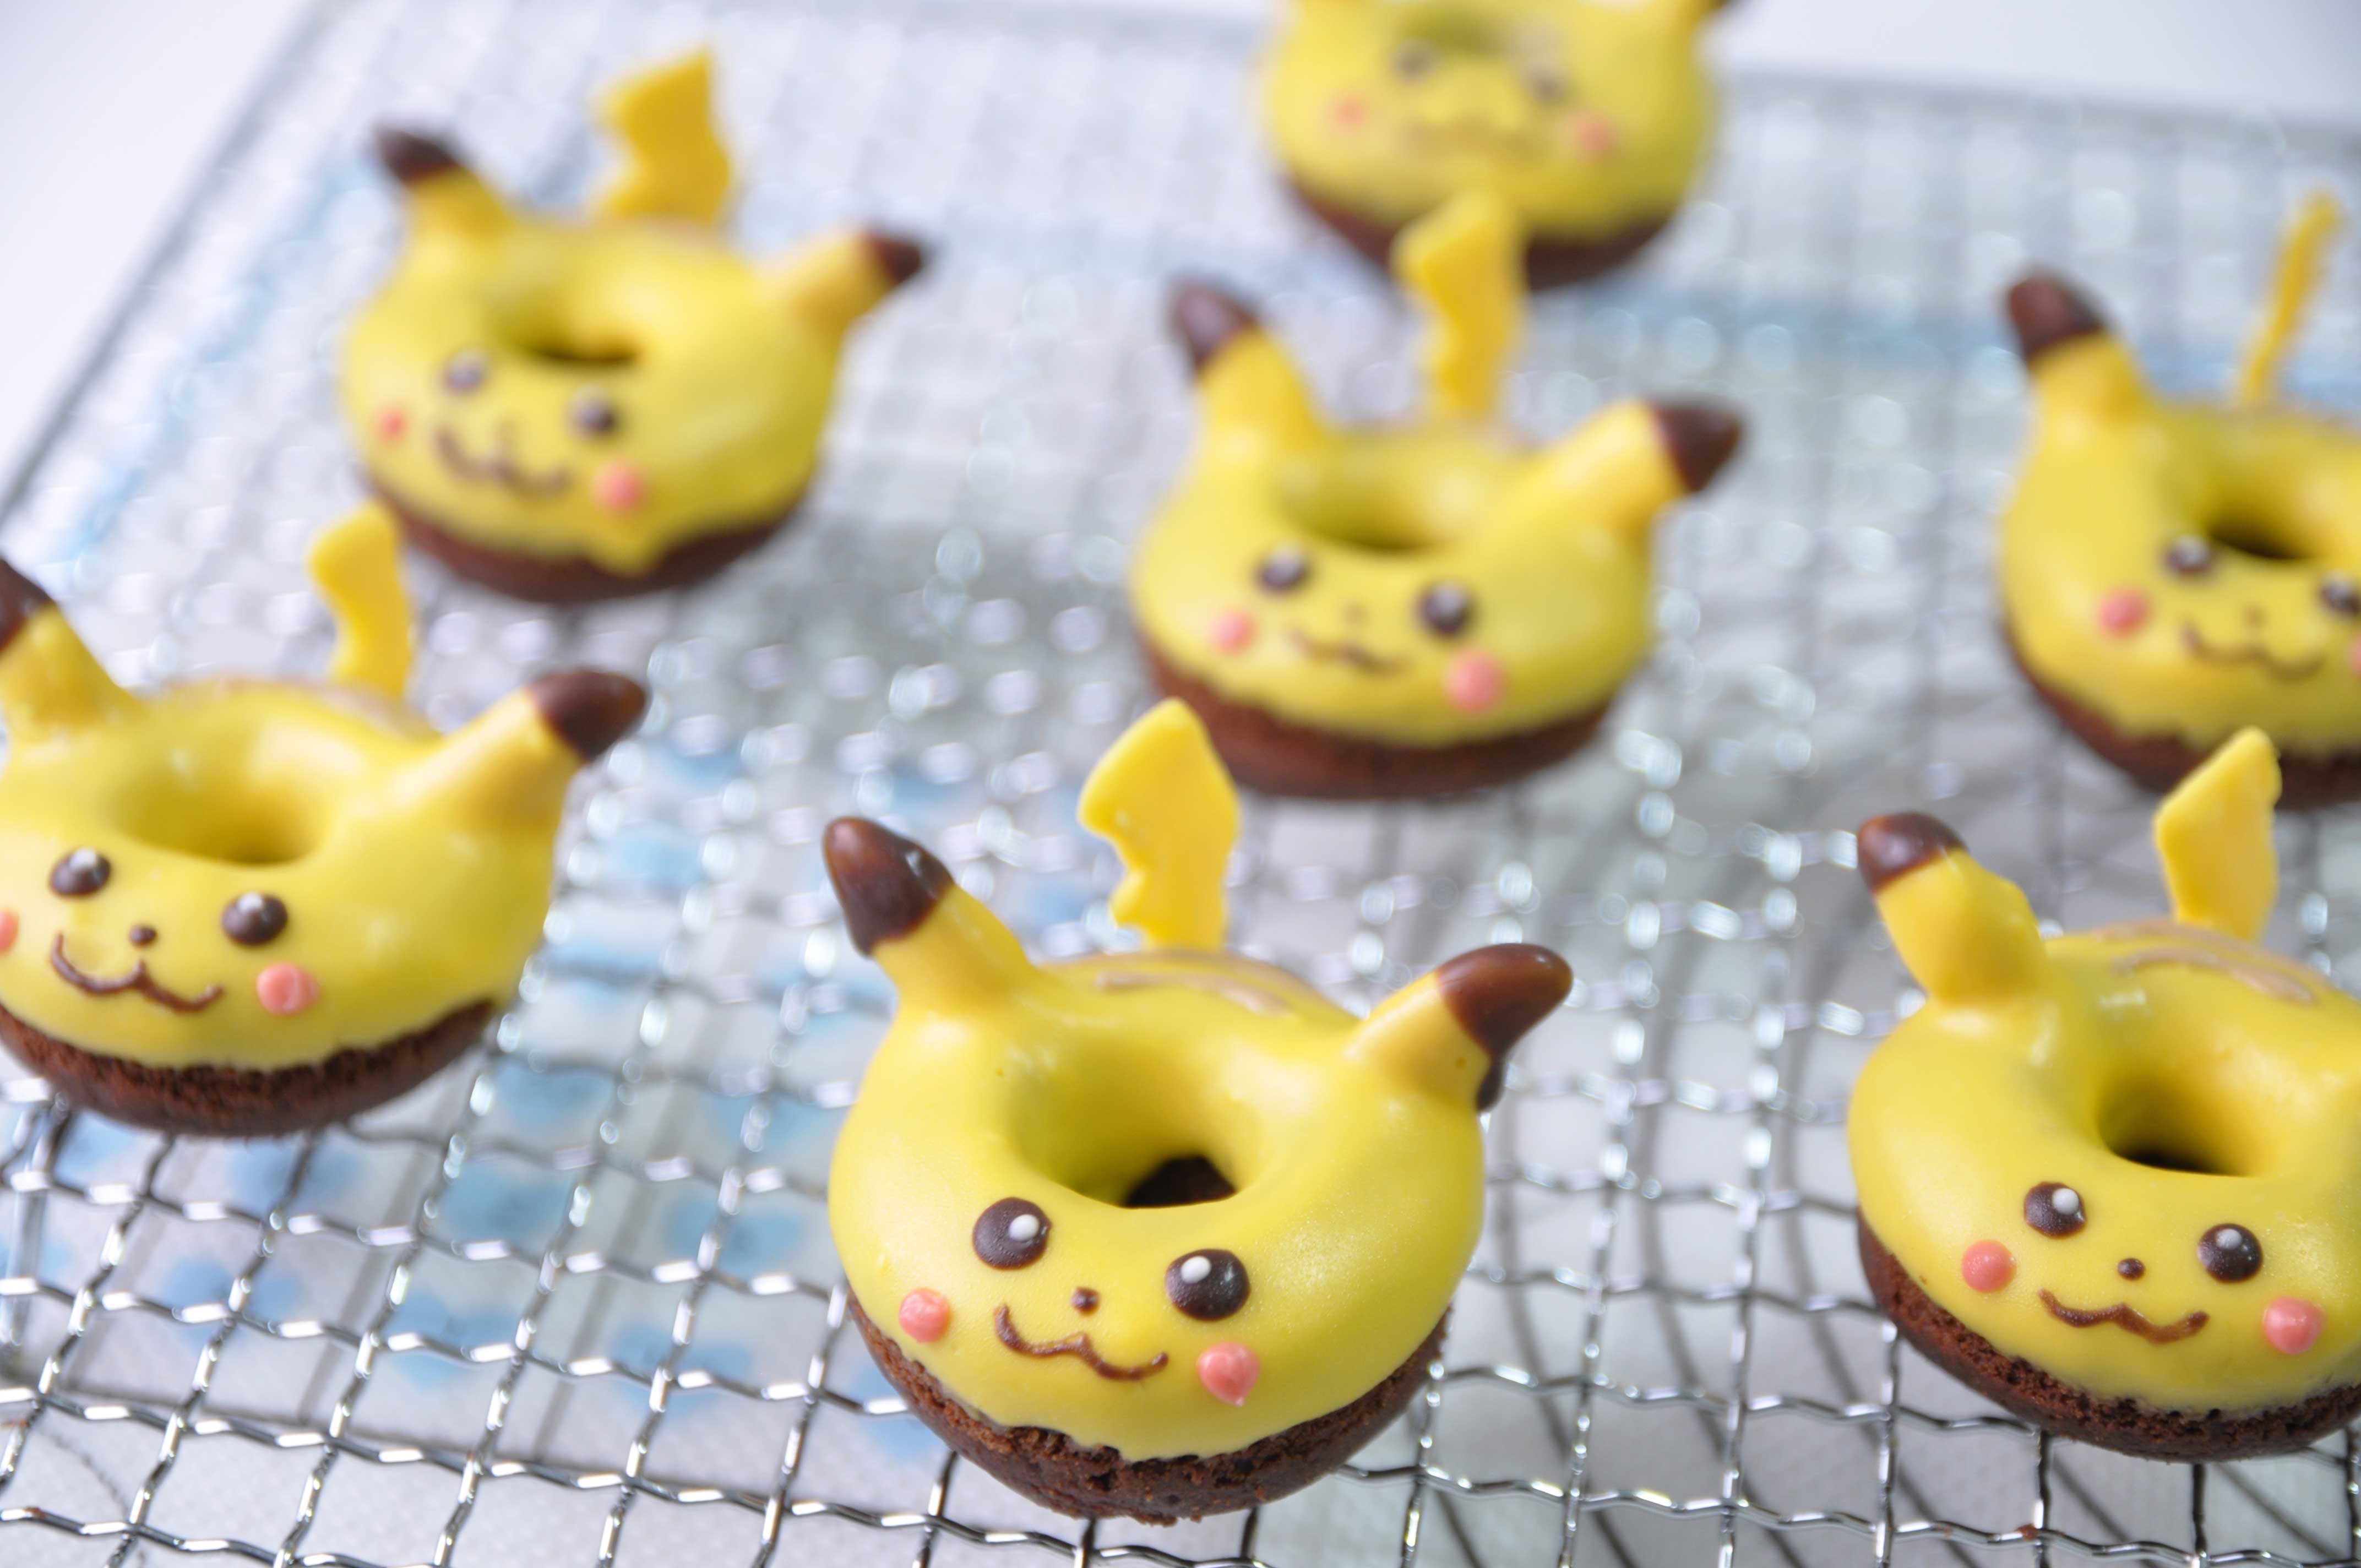


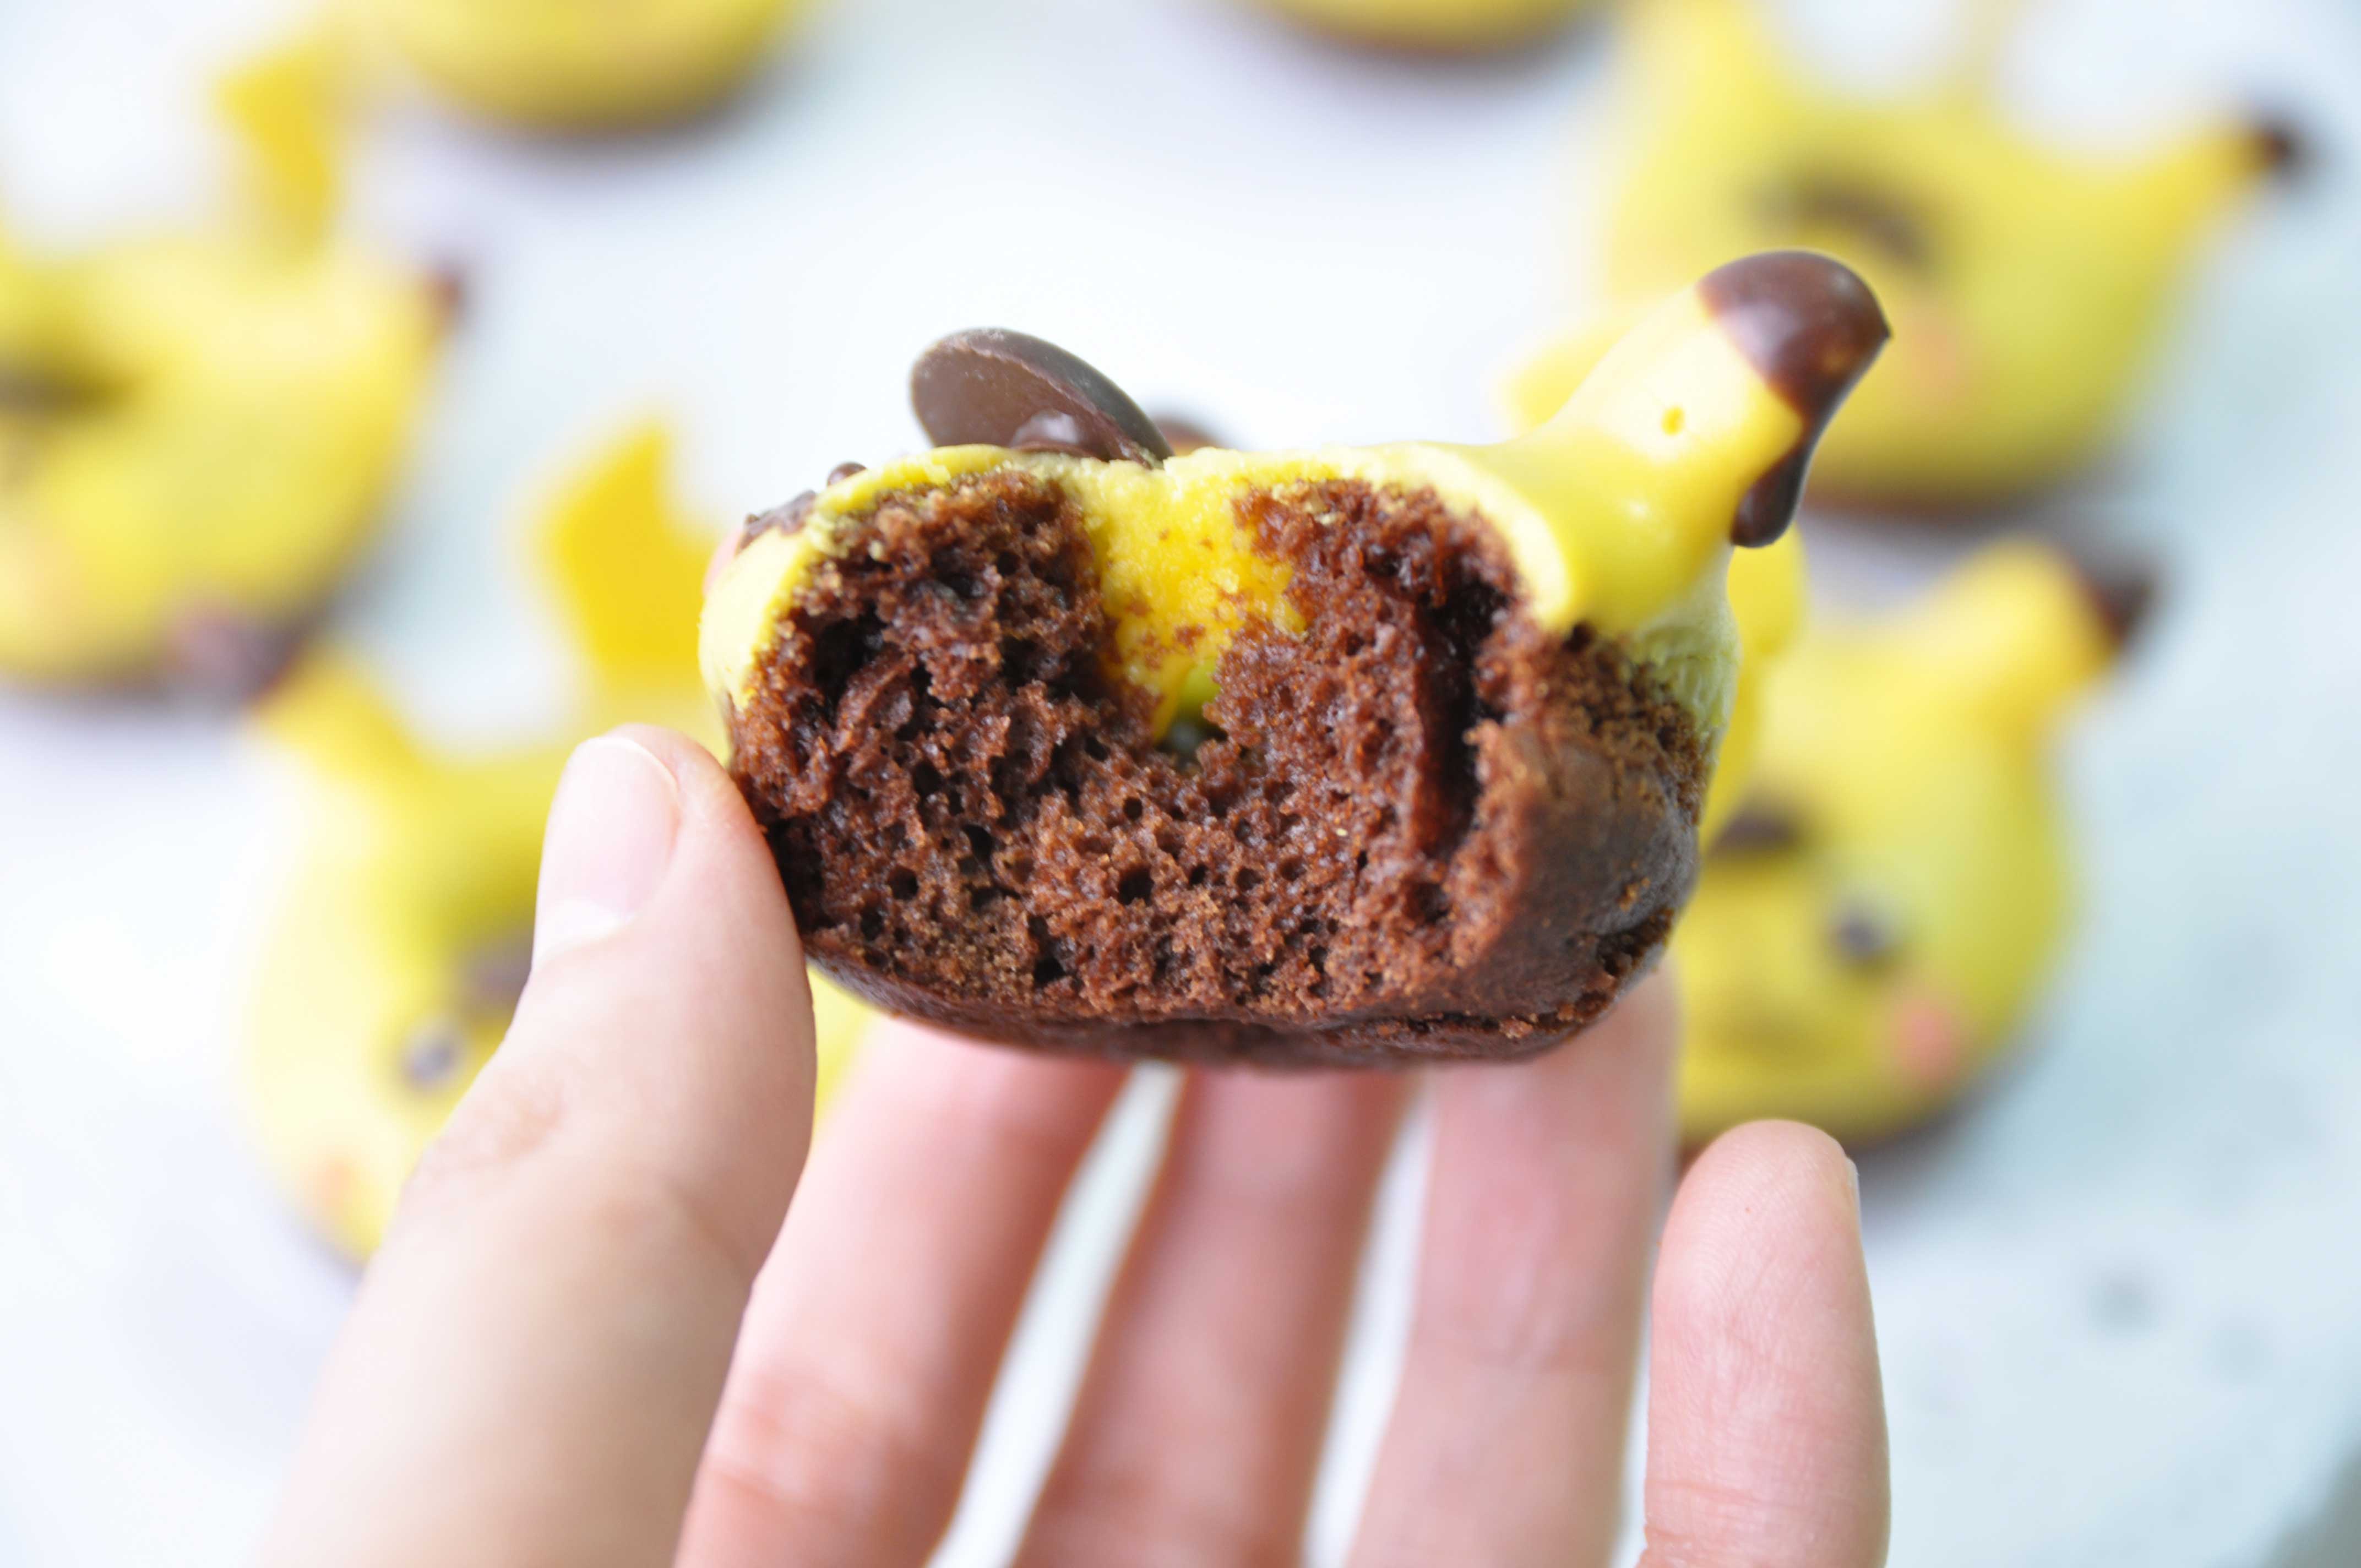



Detective Pikachu Mini Donuts

Hellooo friends and welcome back!! Today we are making some cute “Detective Pikachu Mini Donuts”. The beloved Pokémon mascot has fallen into a bit of a cuteness slump this week. The movie for Detective Pikachu hit the cinema, people are sort of losing their minds over this movie, and while almost none of it makes any sense to me, I am absolutely in love with the enthusiasm. 😀

I know next to nothing about Pokemon at all. I’ve never seen an episode of the animated series and I’ve never played a dedicated Pokemon video game. I just saw the movie and thought that these are very cool donuts that fans of Pokemon will love 😛

These Devil’s Food Mini Donuts are made with cocoa powder, instant espresso granules and brown sugar to ensure they stay dark and devilish. Baked Donuts are really moist, incredibly soft, airy and melt-in-you-mouth.

These mini baked donuts are a style of cake donuts that are baked instead of fried. This keeps the donuts soft and tender and they are much easier to make than frying! 
It doesn’t matter if you spell them “doughnuts” or “donuts”, homemade donuts are a fun and tasty do-it-yourself project.

There are quite a few processes in the making of these donuts, but I’m not going to apologize as they are more than worth it! 🙂 Enjoy Guys!!!

DETECTIVE PIKACHU MINI DONUTS
Yield: 7 pieces
Active time: 1 hours
Total times: 2 hours

INGREDIENTS

  • 35 grams All-purpose flour
  • 8 grams Cocoa powder
  • 1/2 teaspoon Baking powder
  • 1/4 teaspoon Instant espresso granules
  • A pinch of Salt
  • 15 grams Eggs
  • 13 grams Granulated sugar
  • 13 grams Brown sugar
  • 45 grams Milk
  • 1/2 tablespoon Vegetable oil
  • 1/2 tablespoon Sour cream
  • 1/8 teaspoon Vanilla extract
  • Rice Crackers
  • Candy Melts (Yellow, Dark Brown, White, Red and Light Brown)

INSTRUCTIONS
Lightning Tails:

  1. To create Pikachu lightning tails (using the printed template or hand sketch), place the tails template in a pan. Then place a new clean piece of wax paper on top to pipe candy coating on.
  2. Melt some yellow and brown candy melts. If your candy melts is too thick, you can add a little bit of shortening or what is called EZ thin by Wilton.
  3. Pipe the tails follow video instructions.
  4. Place the tails in the freezer for several minutes to dry. Set aside.

Donuts Batter:

  1. Preheat the oven to 350 degrees Fahrenheit.
  2. Grease donuts pan with vegetable oil.
  3. In a large bowl, sift together flour, cocoa powder, baking soda, instant espresso and salt. Set aside.
  4. For the wet ingredients; in a medium bowl whisk together eggs, granulated sugar and brown sugar. Then add milk, oil, sour cream and vanilla extract. Mixing until throughly combined.
  5. Gently stir in the wet ingredients to the flour mixture, stirring until there are no lumps.
  6. Transfer the batter to a large pastry bag (a Ziploc bag would work here too). You also can scoop it in to the pan if you don’t have pastry or a Ziploc bag.
  7. Carefully fill each donut indentation 3/4 full.
  8. Bake for about 7-9 minutes or until toothpick inserted into a donut comes out clean.
  9. Remove it from the pan, transfer to a cooling rack and let cool completely.

Assembly:

  1. To add his ears, take a rice crackers and then grab the sharper end of the crackers and just poke that into the donut (make 2 holes for each donut to place the ears). Then dip your cracker into some melted yellow candy melts and stick it into the donut. Let it dry.
  2. After the ears dry and set hard, dip the donuts into the melted yellow candy melts, shake off the excess. Shake the donut to get it nice and smooth. Set aside to dry.
  3. Melt some dark chocolate colour candy melts, dip 1/3 top part of the ears to create the little brown tips on his ears.
  4. Using toothpick, dot some melted dark chocolate candy melts to create his eyeballs. And before eyeballs sets, add on little white candy melts for the eyes sprinkles.
  5. Then add on his nose, and his happy little mouth with some melted dark chocolate candy melts.
  6. Then to create his cheeks, dot those on with some melted red candy melts.
  7. Using a melted light brown candy melts create his body mark at the back.
  8. Carve a bit strip at the back to place his tail. Then carefully attach the tail to the body with some melted yellow candy melts.
  9. For the hat, add some melted chocolate in the center of the dark chocolate button, then stick the chocolate button onto his head.

NOTES

  1. You can double or triple the recipe If you want to make bigger or normal size donuts. Just make sure to adjust the baking time if you want to make the bigger version. Don’t overbake cause it will result a dry donuts.
  2. You can also use your doughnut maker to make it. Follow machine instructions.


Mini Rainbow Donuts

Hellloooo there and welcome back!! Today we are making these “Mini Rainbow Donuts”. These cute, buttery, tender donuts are baked then iced with vanilla icing and chocolate sprinkles and they’ll leave everyone craving more! Easy to make and no frying mess here.

I finally bought a couple of mini doughnut pans, coz they are so cute… I really couldn’t resist it :'(

These mini donuts are amazing for days when it seems like you don’t have enough time to do anything. It takes more time to preheat the oven than it does to make the batter.

 Doughnuts are usually fried, not baked at our local doughnut shop. This recipe however bakes just as delicious that those fried doughnuts. Of course clean up is far easier and minus the calories too. Unlike the typical fried donuts, these baked ones stay fresh longer. I hope you like it too! 😉

MINI RAINBOW DONUTS
Yield: 12 pieces
Active time: 30 minutes
Total time: 1 hours

INGREDIENTS
Batter:

  • 35 grams Eggs
  • 60 grams Milk
  • 10 grams Unsalted butter (melted)
  • 2/3 teaspoon Vanilla extract (optional)
  • 90 grams All-purpose flour
  • 50 grams Granulated sugar
  • 1/3 teaspoon Baking powder
  • 1/3 teaspoon Baking soda
  • 1/6 teaspoon Salt

Icing:

  • 90 grams Icing sugar
  • 1/2 teaspoon Vanilla extract (optional)
  • 1 1/2 teaspoons Milk
  • Coloured chocolate sprinkles (optional)

INSTRUCTIONS
Batter:

  1. Preheat oven to 325 degrees Fahrenheit. Grease the pan with vegetable oil or butter.
  2. In a large bowl, mix vanilla, eggs, milk, and butter. Set aside.
  3. In a separate bowl, combine flour, sugar, baking powder, baking soda, and salt. Pour the dry ingredients into the wet ingredients and mix until just combined. Separate batter into 3 bowls.
  4. Color one bowl pink, one blue, and one yellow. Put each color of batter into a piping bag.
  5. Follow video instructions on how to marble the colors together in a greased donut pan. Fill each pan with three colours alternately for about three quarters (3/4) full.
  6. Bake for about 7-9 minutes or until toothpick inserted to a donut comes out clean, then allow to cool completely.

Icing:

  1. Combine all of the ingredients, mix until smooth.
    **Dip the donuts into the glaze then shake off the excess. Sprinkle with some coloured chocolate sprinkles.

NOTES

  1. You can double or triple the recipe If you want to make bigger or normal size donuts. Just make sure to adjust the baking time if you want to make the bigger version. Don’t overbake cause it will result a dry donuts.
  2. You can also use your doughnut maker to make it. Follow machine instructions.