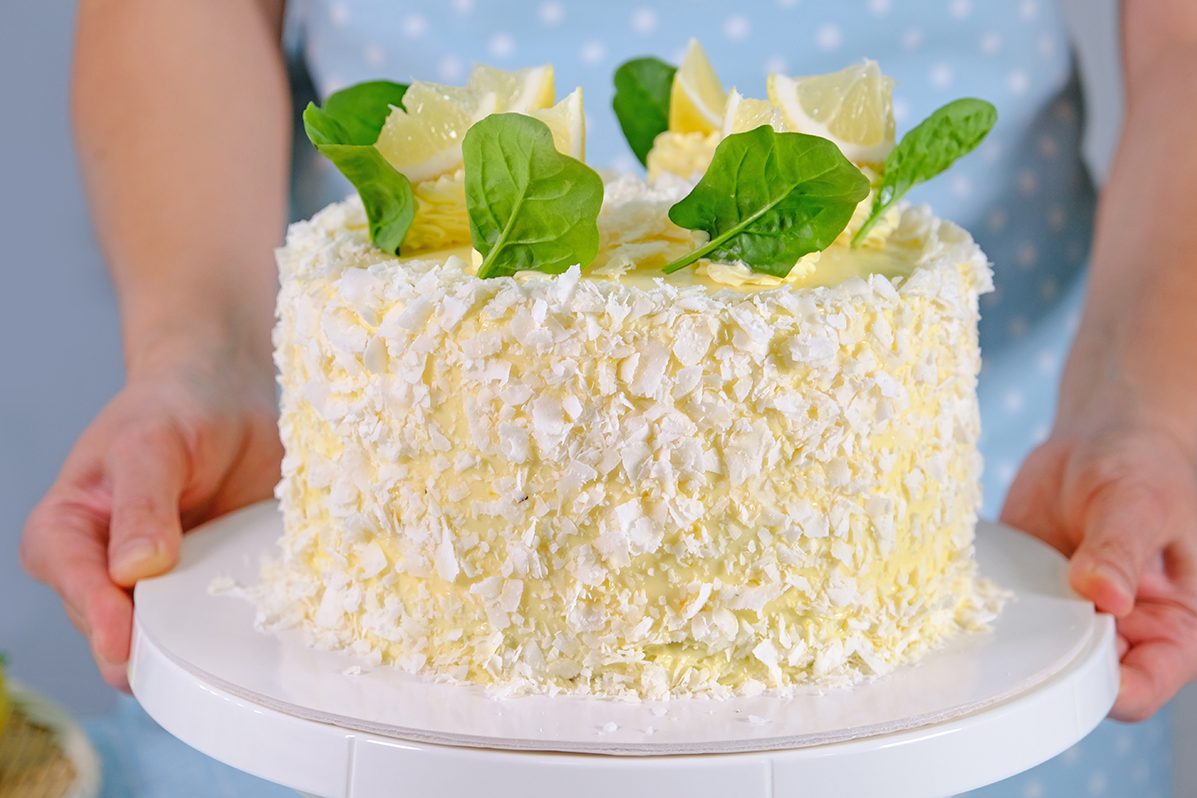
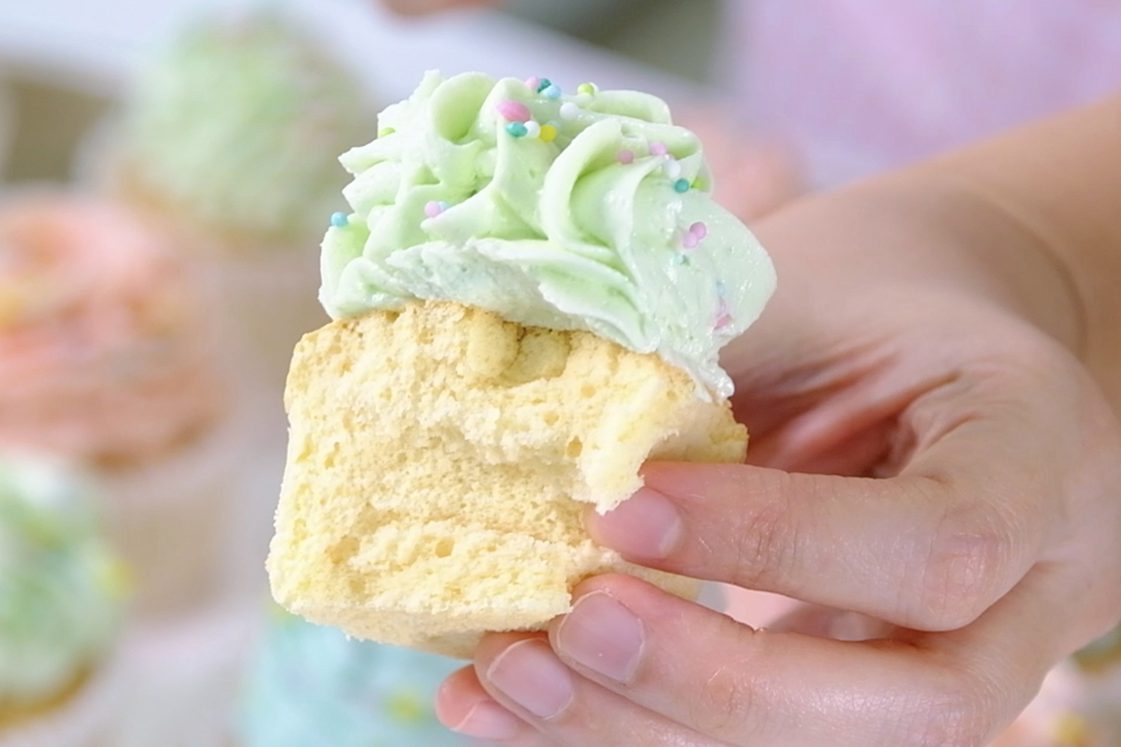
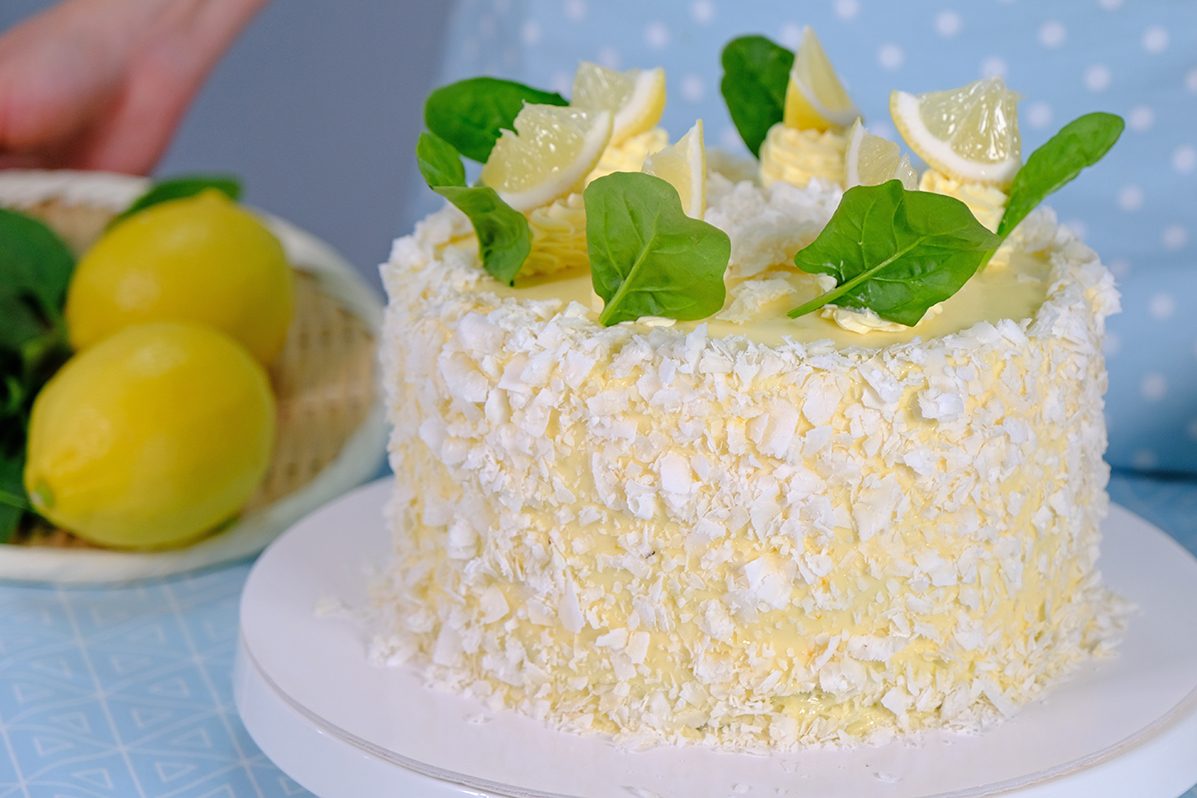
Luscious Spinach 🌱 Lemon🍋Coconut🥥 Cake

Spinach cake sounds unusual, but it’s surprisingly delicious.
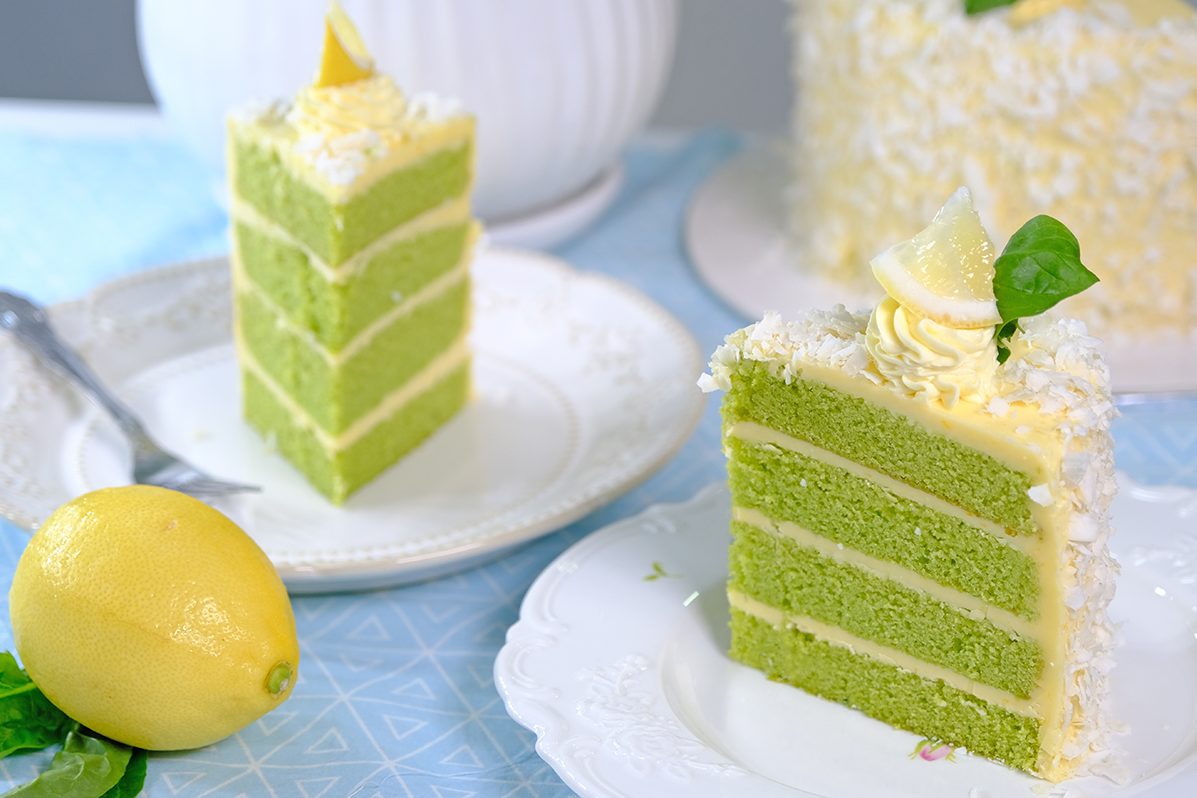
Naturally bright green, soft, and full of flavour; This cake is a beautiful balance of colour, texture, and nutrition.

Beautiful green colour ! 🥰

The spinach doesn’t shout or dominate; instead, it melts into the batter, lending a gentle earthiness and a deep green hue that feels both rustic and elegant.

The result is a cake that’s moist, tender, and balanced—sweet, but not cloying, with a subtle complexity that makes you pause for another bite.
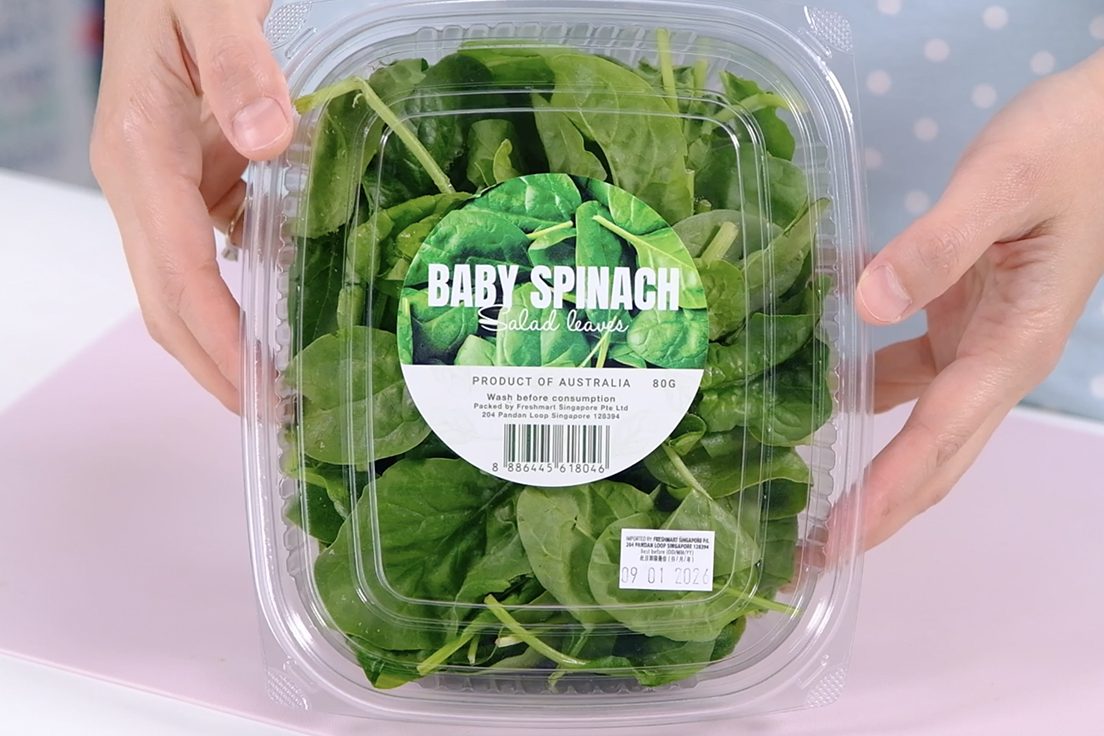
Its tender leaves blend smoothly, while older spinach are harder to fully blend and may leave specks or texture in the crumb

Baby spinach is ideal for spinach cake because it has a mild flavour that doesn’t affect the taste of the cake.

You will need to blanch Spinach in boiling water for 20 seconds,
A quick blanch sets the Chlorophyll, preserving a brighter, more vibrant green color in the cake.
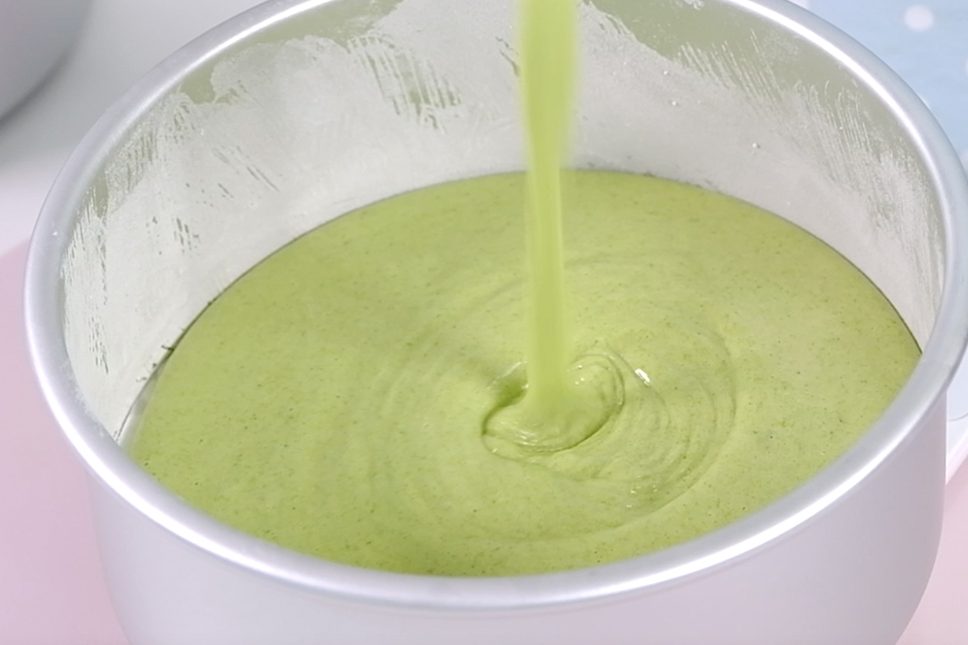
The greens add natural moisture, so the crumb stays soft for days, and they pair beautifully with lemon.
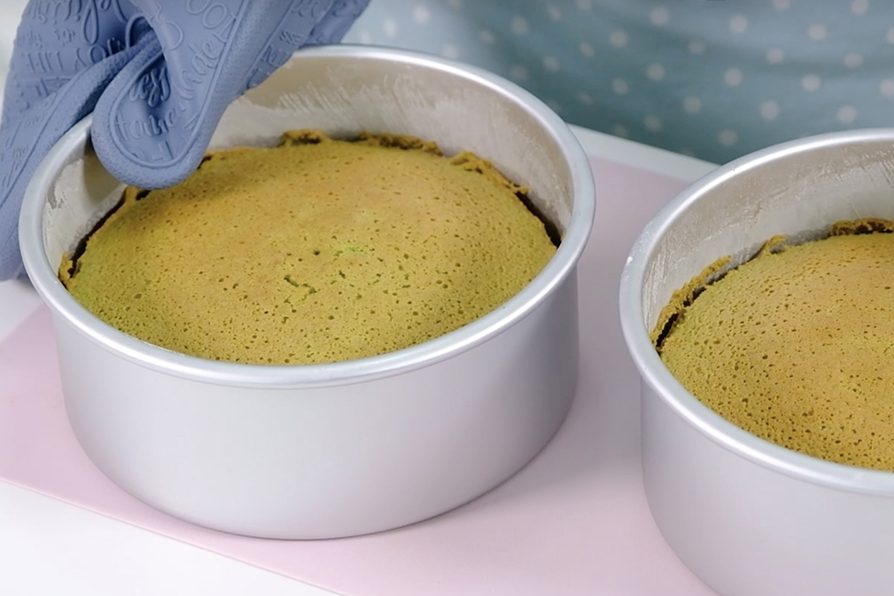
The Lemon Buttercream is where the brightness comes in.
Whipped until light and silky, it brings a sharp, sunny contrast to the mellow cake beneath.

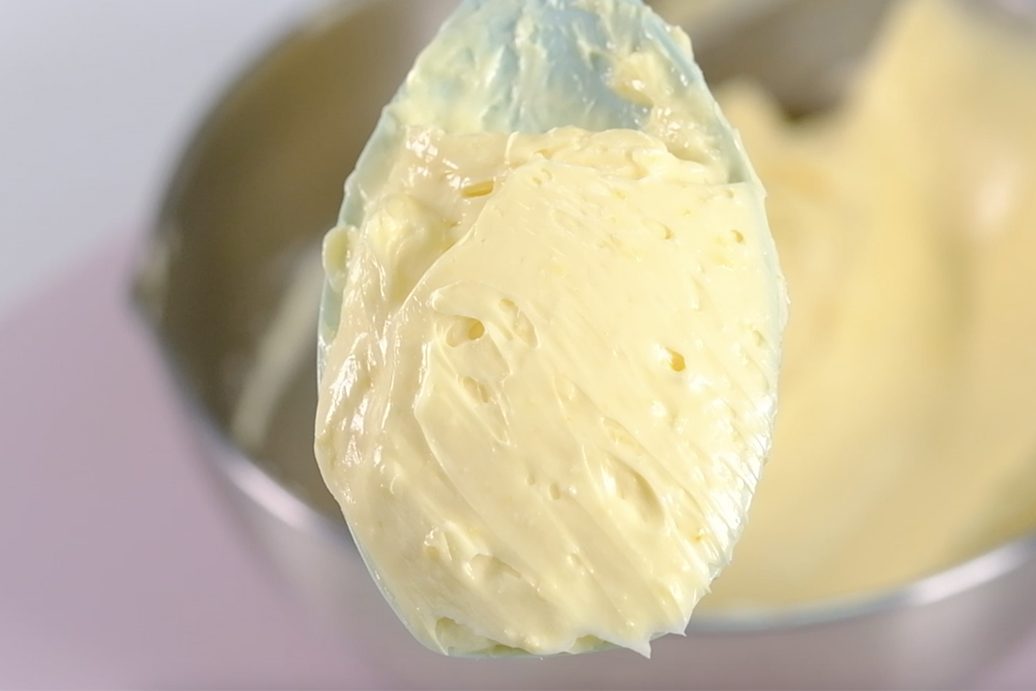
Lemon buttercream is bright, creamy, and impossibly smooth, with a zesty tang that dances on the tongue 😏
🤤

Each forkful balances earthy and zesty, soft and creamy, indulgent but not heavy.

The citrus lifts the cake, turning it from comforting to refreshing.

Decorate however you like 😙😚

Spinach Cake with Lemon Buttercream looks striking on the table 😇
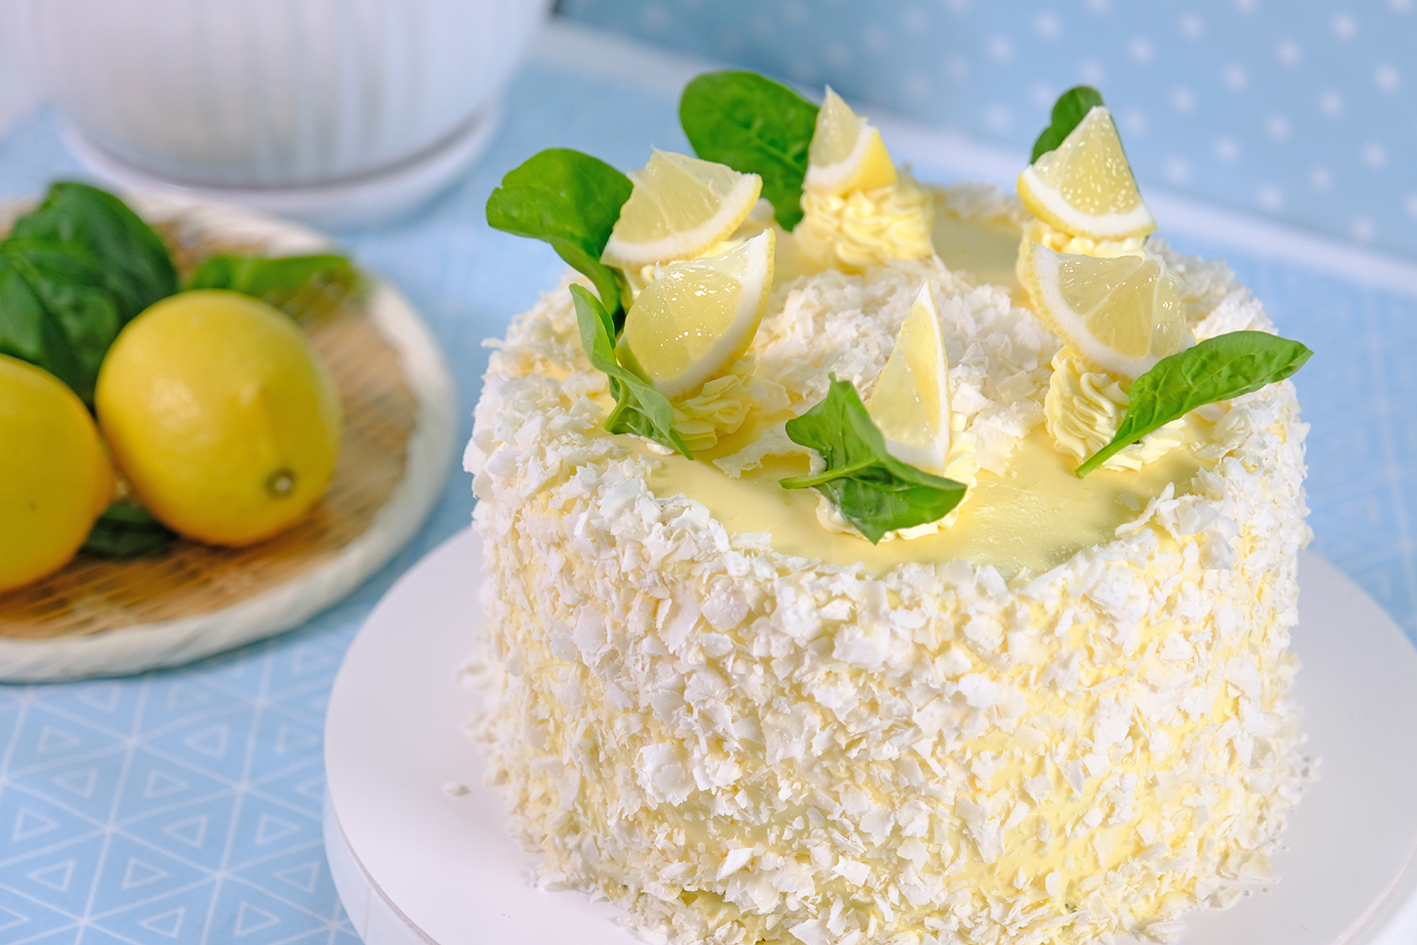
Tastes unexpectedly elegant 😋 😊…

The most common reaction is disbelief: “No way—this has spinach in it?” 😁🙃
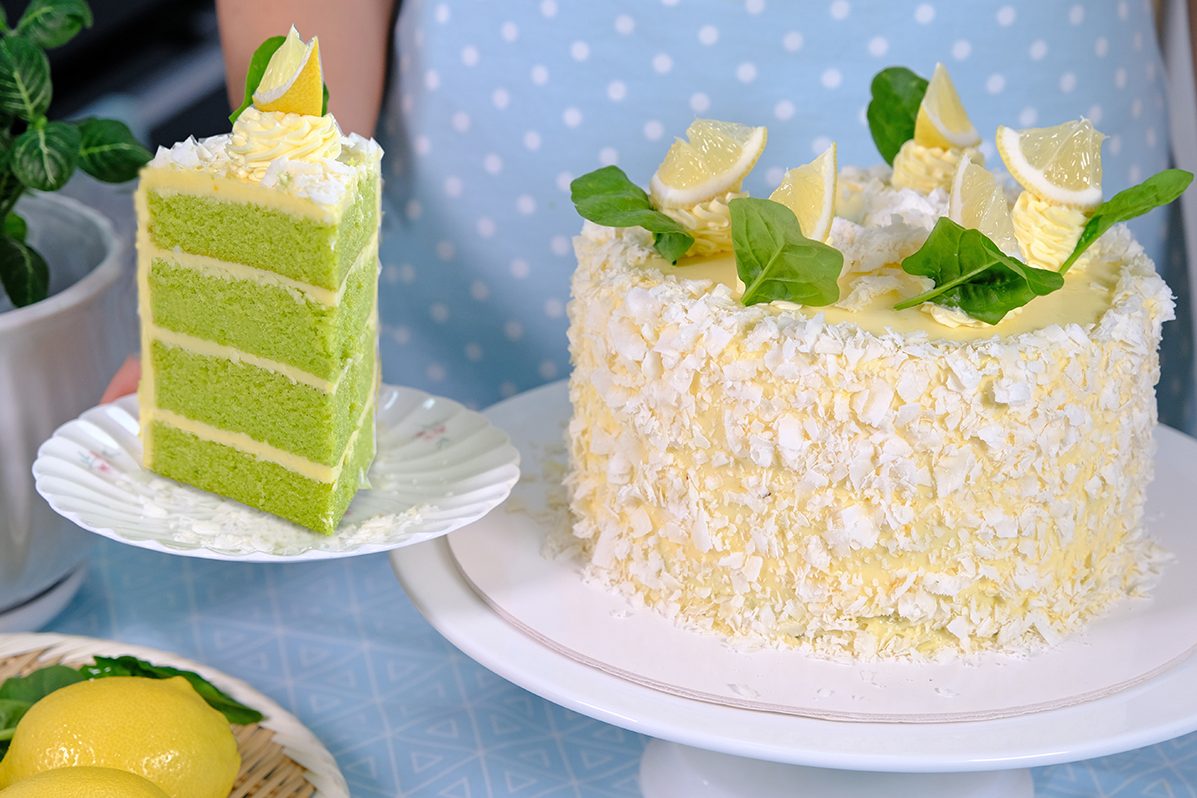
LOVE IT! 😍
🥲 HUNGRY…
🥰 😘

Spinach cake feels wholesome without trying too hard, comforting without being boring, and just a little magical in how something so green can taste so good 😉
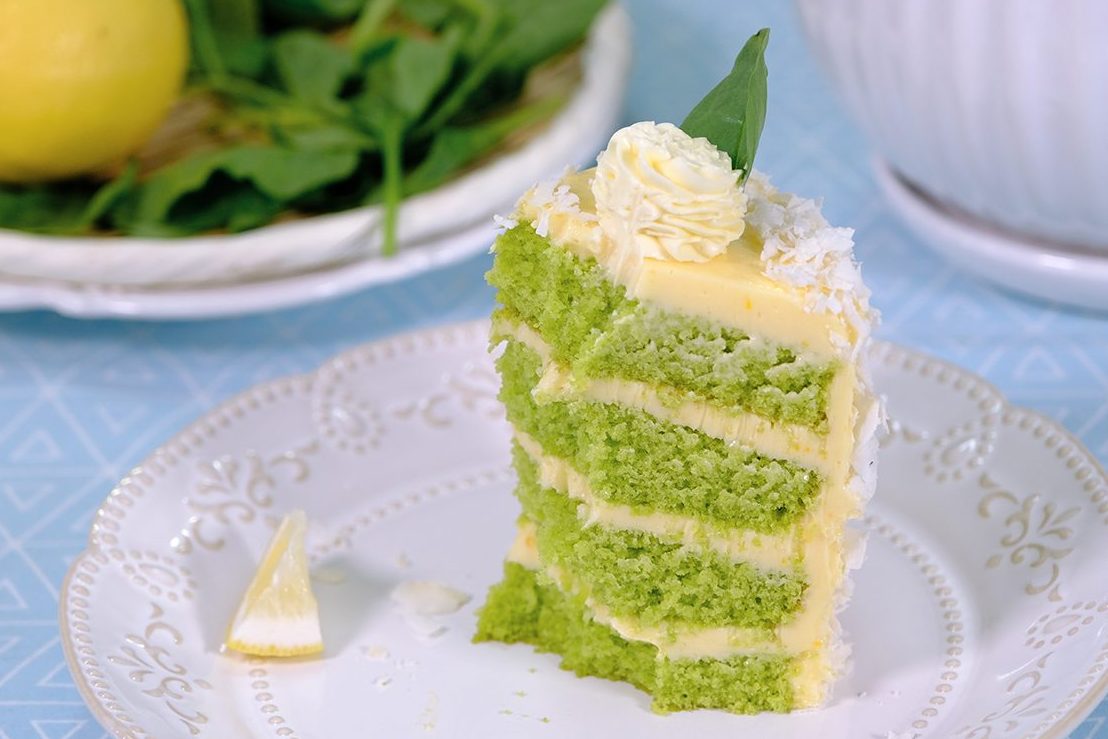
Enjoy every bite !

I hope it adds a little brightness and joy to your table
Love you all and happy baking! 💗

WATCH HOW TO MAKE LUSCIOUS SPINACH LEMON COCONUT CAKE

Tips for Success (Please Read First):

  • It’s important that your mixing bowl is clean
    Any residue or fat will prevent the Egg Ehites from whipping properly (wipe the bowl and utensil with lemon juice or vinegar to helps remove grease)
  • Use Baby Spinach for spinach cake because it has a mild flavour that doesn’t affect the taste of the cake; Its tender leaves blend smoothly, while older spinach are harder to fully blend and may leave specks or texture in the crumb
  • Blanch Spinach in boiling water for 20 seconds, A quick blanch sets the chlorophyll, preserving a brighter, more vibrant green color in the cake
    Then immediately cool in cold ice water, squeeze dry
  • Preheat the oven at least 30 minutes before starting
    Once the Cake batter is fully mixed, it needs to be baked right away (if you let the batter sit, that air starts escaping and the batter will lose volume)
  • For the cake; sift the dry ingredients
  • For Lemon Curd, be sure to use fresh Lemons, bottled juice won’t give the same bright flavour
  • Use room-temperature eggs for Lemon Curd, as they blend more smoothly and reduce the risk of curdling
  • Low and slow heat is the key to a good Lemon Curd, so don’t rush the thickening process. Keep the water at a gentle simmer, NOT a boil

RECIPE

LUSCIOUS SPINACH LEMON COCONUT CAKE
Yield: One 7-Inch Round Cake (4 layers)

INGREDIENTS
🌱🍋 Lemon Curd
70 g Caster Sugar
45 g Lemon Juice
1 tsp Lemon Zest
50 g Egg Yolks
40 g Unsalted Butter (room temp.)

🌱🍋 Spinach Cake
70 g Raw Baby Spinach
70 g Cold Water
135 g Unsalted Butter
70 g Whole Milk
180 g Eggs
230 g Caster Sugar
2/3 tsp Vanilla Extract
210 g All-Purpose Flour
2 ½ tsp Baking Powder (double act.)
1/2 tsp Salt

🌱🍋 Lemon Buttercream
200 g Caster Sugar
40 g Water
75 g Egg Whites
1/2 tsp Cream of Tartar
345 g Unsalted Butter
1 tsp Vanilla Extract
1 Batch Lemon Curd Recipe (above)

INSTRUCTION
🌱🍋 Lemon Curd
We will use this Lemon Curd for the Buttercream; Be sure to use fresh Lemons, bottled juice won’t give the same bright flavour

  1. Zest the Lemons first (using only the yellow part, the white pith is bitter);
    Then juice and strain to remove seeds and pulp
  2. In a heatproof bowl, whisk together the Caster Sugar, Lemon Juice,Zest, and Egg Yolks (use room-temperature eggs, as they blend more smoothly and reduce the risk of curdling)
  3. Cook the mixture over a double boiler, making sure the bowl does not touch the water, the heat should come from the steam (keep the water at a gentle simmer, NOT a boil) Low and slow heat is the key to a good Lemon Curd, so don’t rush the thickening process
  4. Whisk occasionally and cook for about 8-10 Minutes until the mixture thickens enough to coat the back of a spoon and leaves a clean line when you run your finger through it (about 170°F / 77°C if using a thermometer)
  5. Once it’s done, take it off from the heat (for an extra-smooth curd, you can strain the mixture)
  6. Add the Unsalted Butter and whisk for about 3 minutes, until it is fully incorporated and the curd becomes silky and glossy
  7. Transfer the Lemon Curd to a shallow heatproof dish; Press plastic wrap directly onto the surface to prevent a skin from forming, then refrigerate until well chilled before using

🌱🍋 Spinach Cake
For the cake, make sure all utensils clean and grease free; Any residue of fat will prevent eggs from beating up properly. Wipe the bowl and beater with Lemon Juice or Vinegar; The acid help remove grease.

  1. Preheat the oven to 160°C fan/ 180°C/ Gas Mark 4
  2. Prepare the pan in advanced (use a metal cake pan for best rise and even baking)
    Grease the bottom and the sides of the pan with Butter; Line the bottom with Parchment Paper
  3. Rinse the Baby Spinach, then blanch it in boiling water for 20 seconds. Immediately transfer to ice water, then squeeze dry
  4. Place the blanched Spinach in a blender, add 70 g cold Water, and blend until completely smooth; set aside
    *This purée must be very fine for good texture and colour
  5. Then, in a medium saucepan heat Unsalted Butter and Milk together over MEDIUM-LOW heat until Butter is fully melted; Let it cool to room temperature
    Set aside
  6. In a large heatproof bowl, combine the Eggs and Caster Sugar; mix well
    Place the bowl over a double boiler and heat gently, stirring, just until the Sugar dissolved (to test, rub small amount between your fingers; if it feels smooth with no grains, it’s done)
    Once the Sugar has completely dissolved, remove the bowl from the heat and beat on HIGH speed for about 10 minutes, until the mixture is pale, thick, and fluffy
    Gently fold in the Spinach Purée and Vanilla Extract, taking care not to deflate the mixture
  7. In another bowl, combine all the dry ingredients, then sift them into the Egg batter (number 6) in two additions; folding gently until just incorporated
  8. Then, in a separate bowl, mix the heated Milk and Butter until fully combined
    Add one-third of the Egg-Flour batter (number 7) to the Milk-Butter mixture and whisk until smooth
    * Using this pre-mix method prevents the Butter and Milk from sinking to the bottom of the bowl, which could cause the cake to not rise properly
    Pour this mixture back into the remaining Egg-Flour batter and gently fold until well blended
    Then use a spatula scrape down the sides and bottom of the bowl, folding carefully to ensure everything is evenly mixed
  9. Divide the batter evenly between two prepared pans
  10. Bake in the preheated oven for 32–35 minutes, or until a skewer inserted into the center comes out clean (begin checking at 32 minutes)
  11. Once baked, let the cakes cool in the pans for 5 minutes, then run a spatula around the edges to loosen them
    Invert onto wire racks and allow to cool completely before decorating


🌱🍋 Lemon Buttercream

  1. Place the Egg Whites and Cream of Tartar in the bowl of a stand mixer, set aside
  2. In a small saucepan, combine the Sugar and Water
    Cook over MEDIUM heat; Stir gently until the Sugar has dissolved, then bring to a boil
    Once boiling, cook until it reaches the soft-ball stage (about 240°F / 115–118°C;
    Remove the syrup from the heat
    * If you don’t have a thermometer, use the cold water test; When the syrup is boiling, drop a small amount of syrup into cold water; If it forms a soft, pliable ball that flattens when pressed, it’s done.
  3. Immediately start whisking the Egg Whites on MEDIUM speed, then slowly pour the hot Sugar Syrup down the side of the bowl in a steady stream
    Then increase the speed to high and beat until the Meringue is thick, glossy, and cool to the touch, about 10 minutes
  4. Once the Meringue is fully cooled, add the Butter in 3 batches, beating well after each addition until the Buttercream becomes smooth and thick
  5. Finally, add the Lemon Curd and Vanilla Extract, and mix until fully combined and silky

🌱🍋 Assemble & Decorate

Once the cake is cooled, you can start decorate the cake

  1. For a neat finish (optional), trim the edges of the cake with a serrated knife to remove the browned crust; And do the same with the top as well
  2. Slice each sponge into two even layers
  3. Sandwich the layers together with about 5 mm of Buttercream (make sure everything is even and straight)
  4. Fill in any gas between the cake layers with Buttercream
  5. Then apply a crumb coat (it’s basically just a thin layer of Buttercream that we are going to apply to the top and the sides of the cake before we do the final coat)
    It doesn’t have to be perfect
  6. Chill for 15 minutes in the freezer or 30 minutes in the fridge to firm it up (this makes it easier to apply the final coat of Buttercream without the layers sifting)
  7. For the final coat, spread about 5 mm of Buttercream over the entire cake
  8. Smooth the top and sides with a spatula (don’t worry about achieving a perfectly smooth finish, as the sides will be coated with Coconut Flakes)
  9. Press the Coconut Flakes onto the sides by hand
  10. Using a star nozzle, pipe buttercream decorations on top; And finish with Spinach Leaves and Lemon Slices


NOTES

  1. To store Lemon Curd
    In the refrigerator (in a sealed container) for up to 7 days
  2. To store Lemon Buttercream
    In the refrigerator (in an airtight container) for up to 5 day (rewhip briefly before use); Can be frozen for up to 1 month
  3. To store Unfrosted Spinach Cake
    Wrap tightly in plastic wrap; Store at room temperature for 1 day or refrigerate for up to 3 days; Can be frozen for up to 2 months (thaw overnight in the fridge)
  4. Fully Assembled Cake
    Store the cake in an airtight container in the refrigerator; it will keep well for 3–4 days Bring to room temperature for 20–30 minutes before serving for the best texture and flavor
  5. To Freeze Fully Assembled Cake
    Chill the fully assembled cake in the refrigerator until the buttercream is firm. Wrap the cake tightly in plastic wrap, then a second layer of foil (or place in an airtight freezer-safe container).
    Freeze for up to 2 weeks for best quality (up to 1 month maximum).
    ** Thawing: Transfer the cake to the refrigerator and thaw overnight Before serving, let it sit at room temperature for 20–30 minutes. Do not unwrap until fully thawed to prevent condensation from damaging the buttercream

Wonderful Light & Fluffy Strawberry Cake 🍰🍓

The Sweet Dream of a Perfect Strawberry Cake 🍓

I think every girl carries a sweet little dream in her heart—a dream of a pretty, soft, and irresistibly yummy Strawberry Cake.
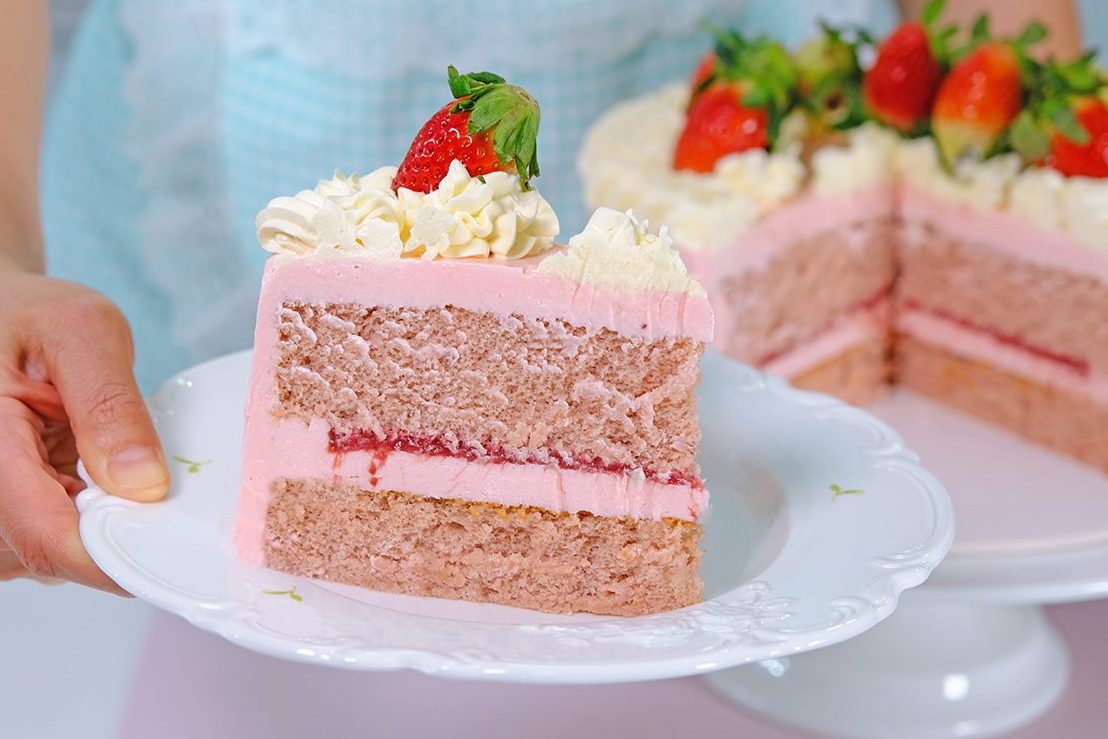
There’s something magical about it. The gentle pink color, the fresh aroma, and that slightly sour strawberry taste that instantly makes your mouth water

It reminds me of Strawberry Milk in a cute cartoon box, the kind we loved as children. One sip, and suddenly you’re back in childhood—carefree, happy, and smiling without a reason.
That feeling is exactly what I want a strawberry cake to bring 🥰

I’ve been thinking for a long time about how to make the perfect Strawberry Cake. Not just any cake—but one that truly captures the essence of strawberries.
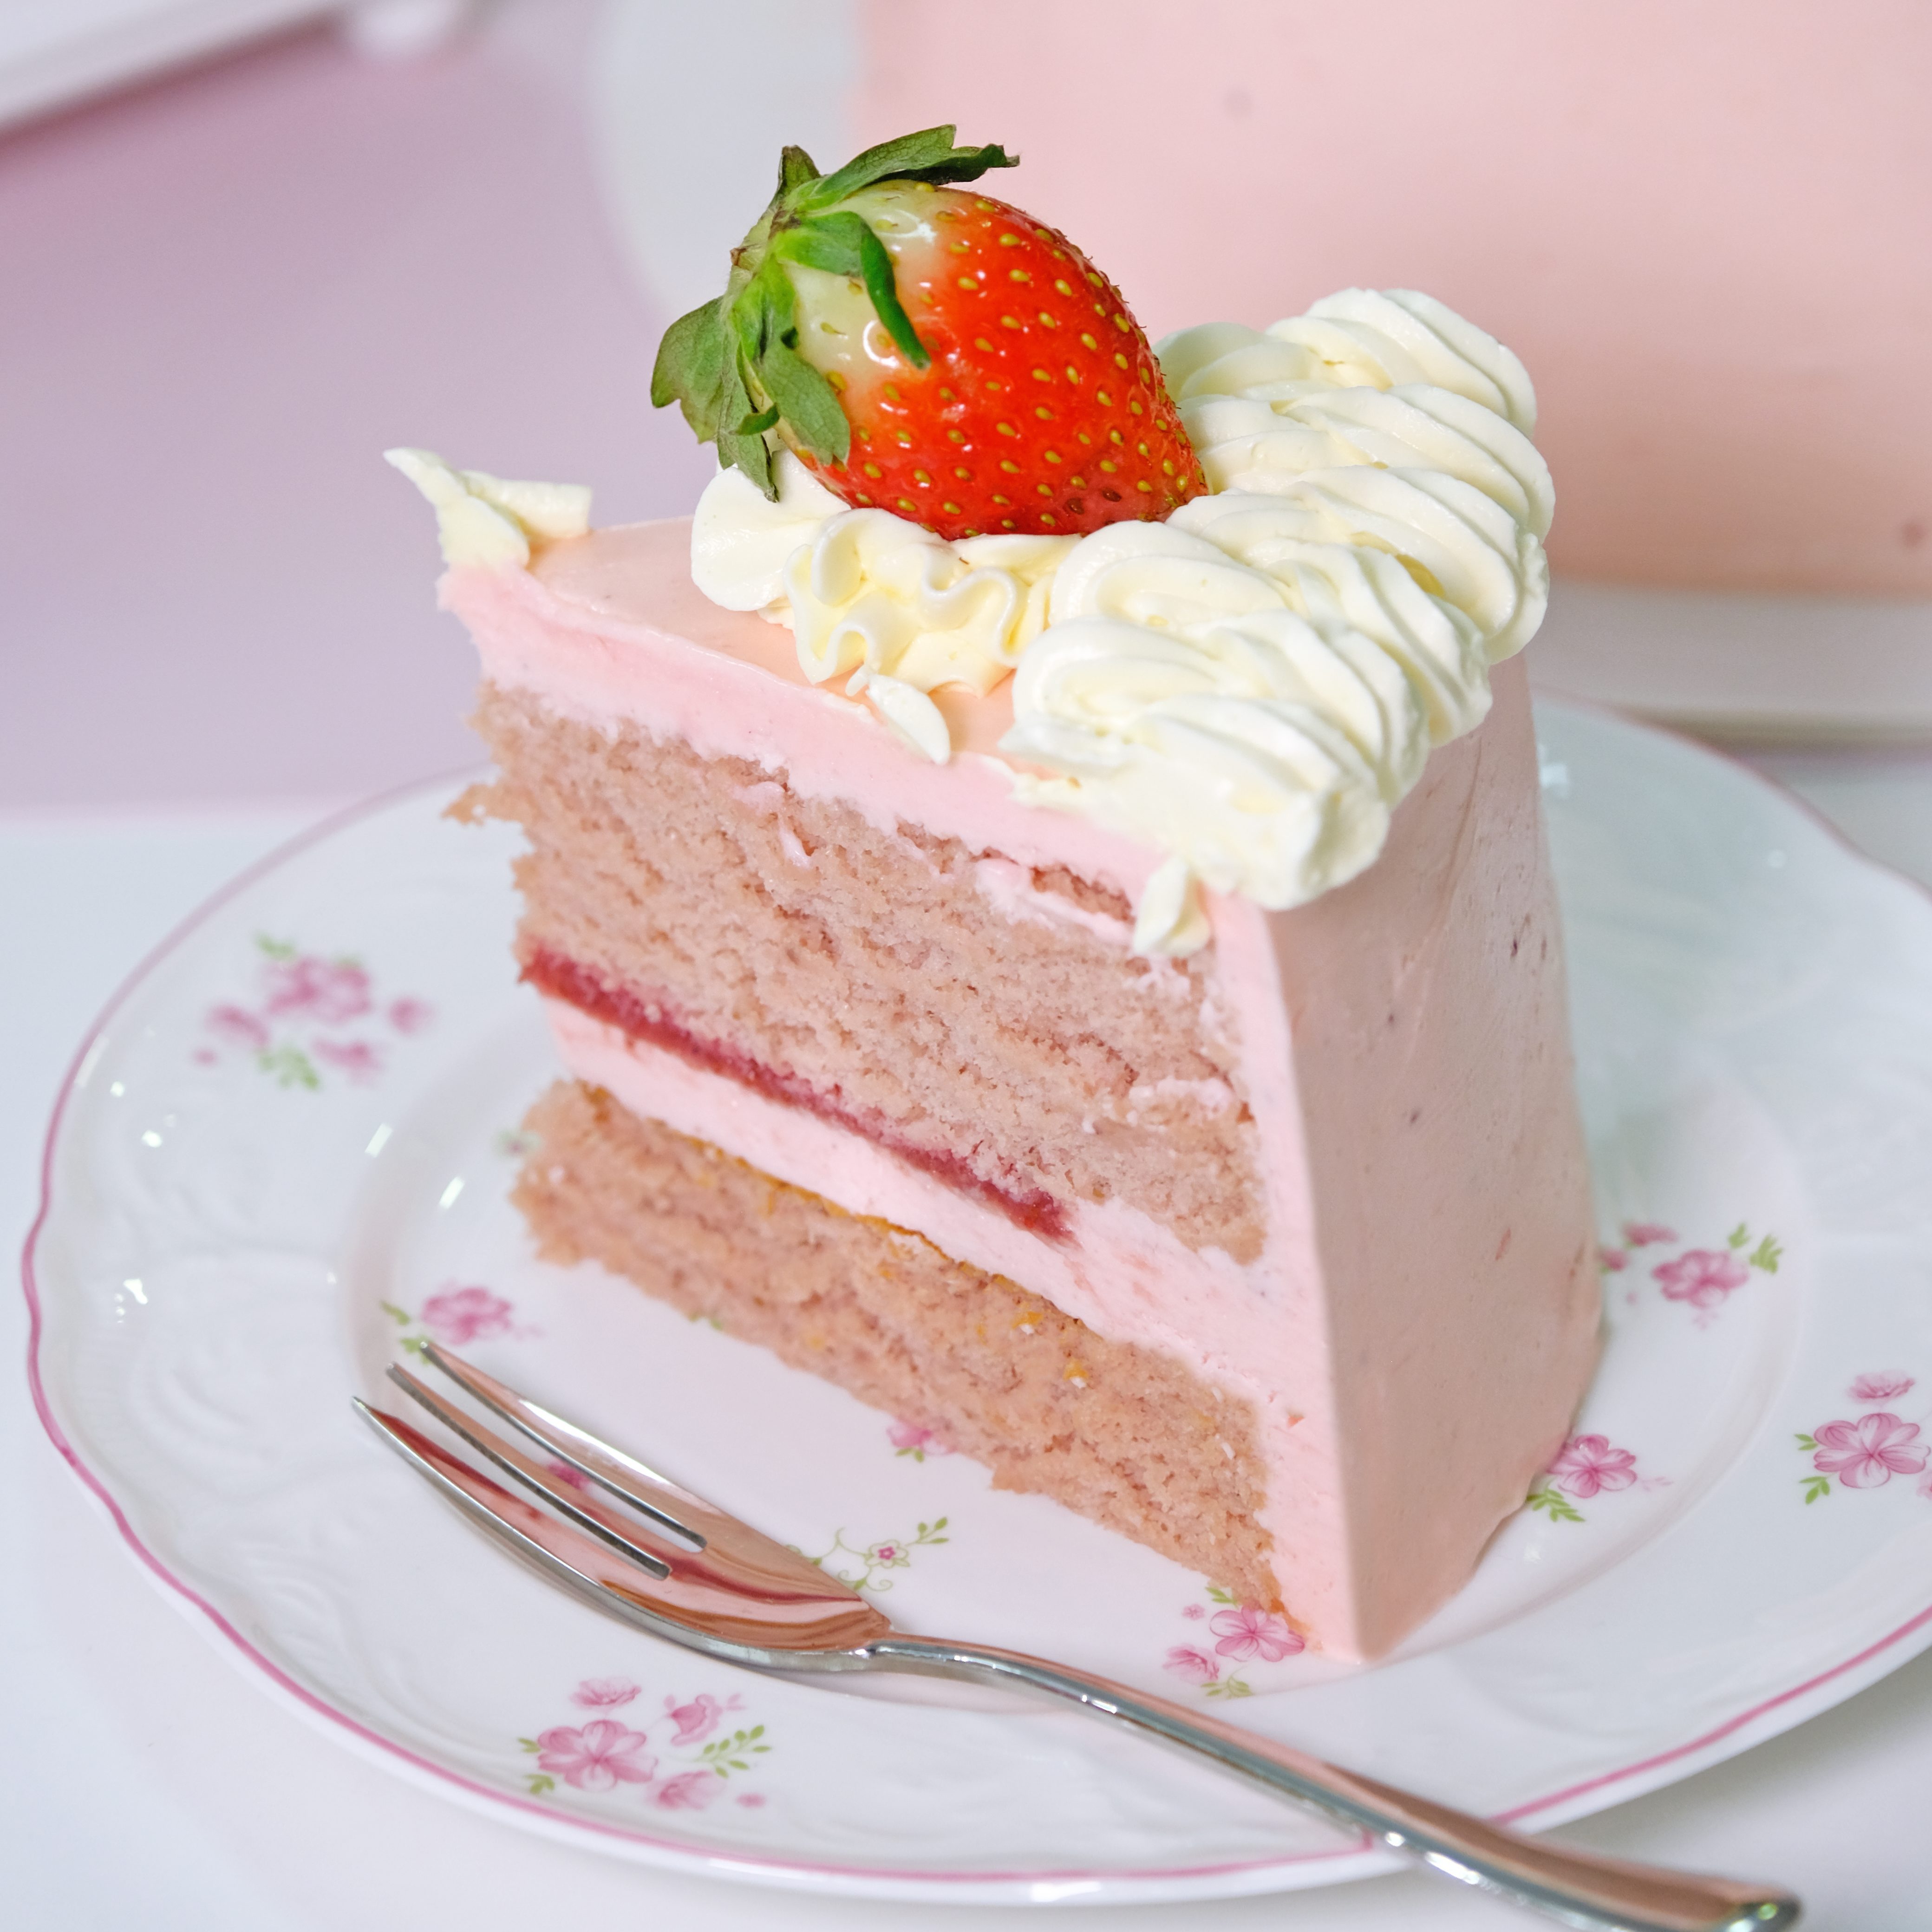
This cake must be made with real strawberry purée, not artificial flavoring. The taste should feel natural and fresh, like biting into a ripe strawberry on a sunny day 🤩

The texture is just as important: light, fluffy, and airy—not heavy, not dense, and definitely not overly sweet. Every bite should melt softly in your mouth, followed by a gentle burst of strawberry flavor.
The Buttercream Matters 🤔

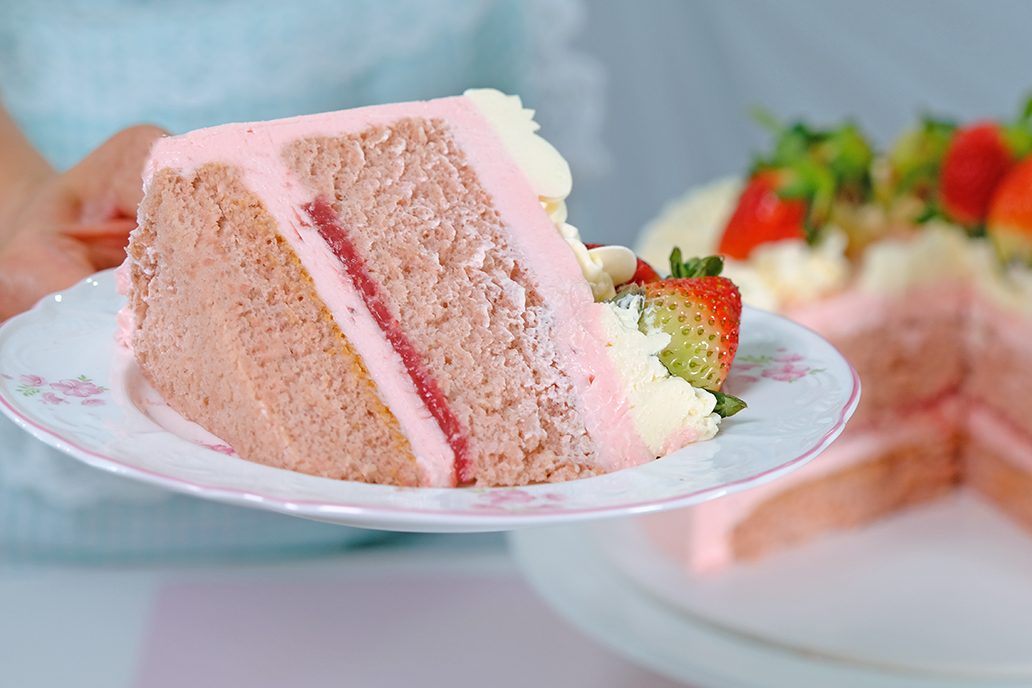
And then comes the buttercream—the soul of the cake. It must also carry a strawberry flavor, but in a soft and delicate way.
Light, smooth, and balanced. Sweet, but not too sweet.

The kind of buttercream that complements the cake instead of overpowering it. When cake and cream come together, they should feel like a perfect harmony.
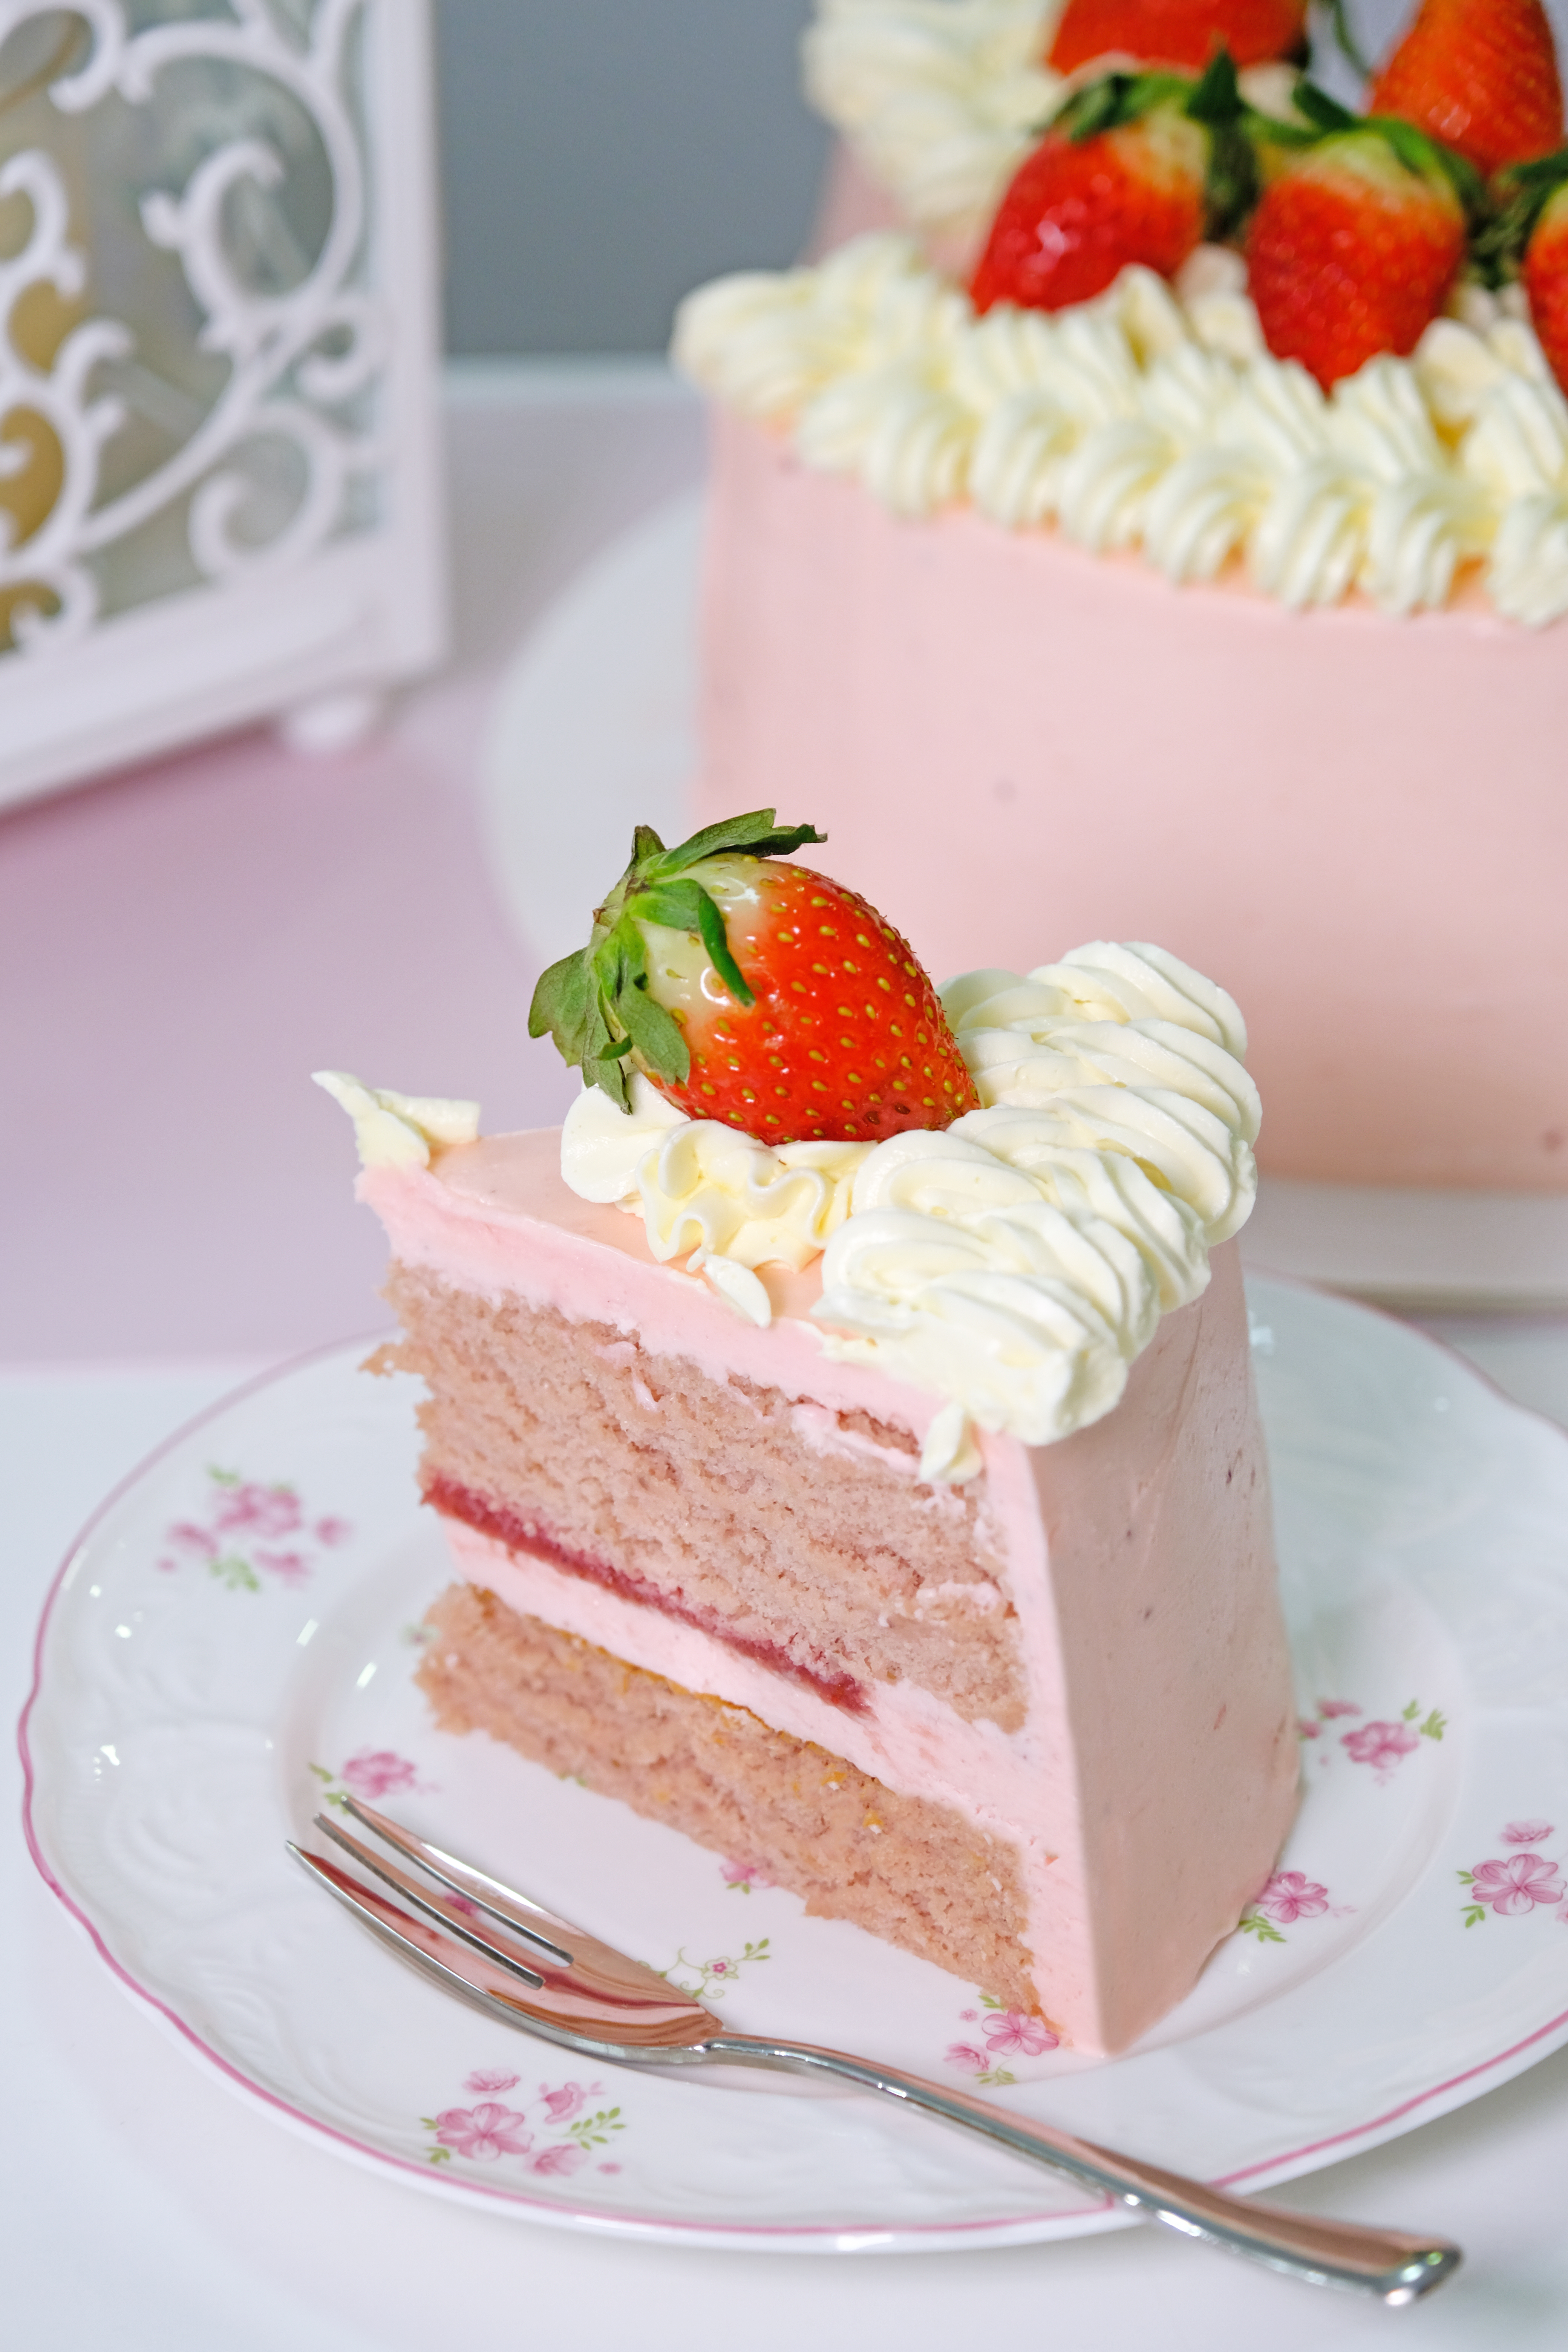
Of course, the look of the cake matters too 😂

The color of the cake must be baby pink or soft pink—nothing loud, nothing artificial.
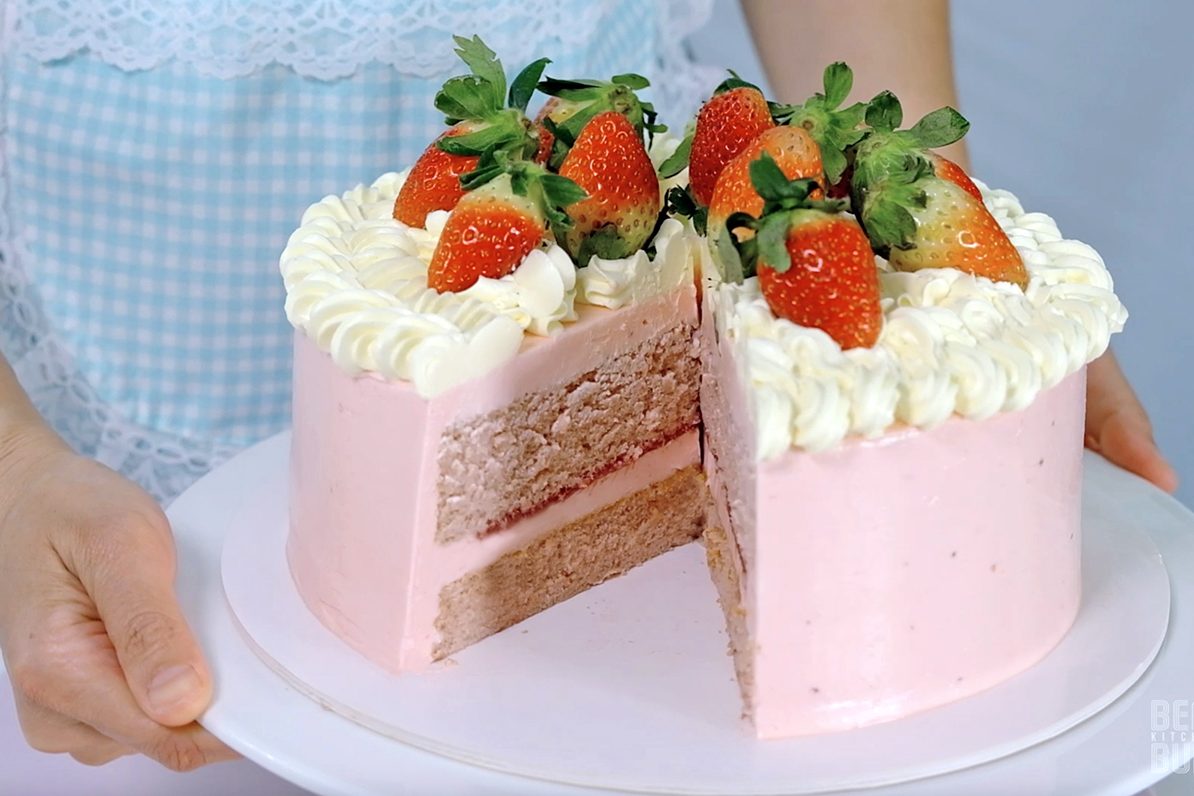
🥲

Just a gentle, pastel shade that instantly makes you feel happy and calm. A cake that looks as soft as it tastes. A cake that feels like a hug.

This strawberry cake isn’t just dessert. It’s a memory. It’s nostalgia. It’s childhood joy wrapped in layers of fluffy cake and strawberry cream.
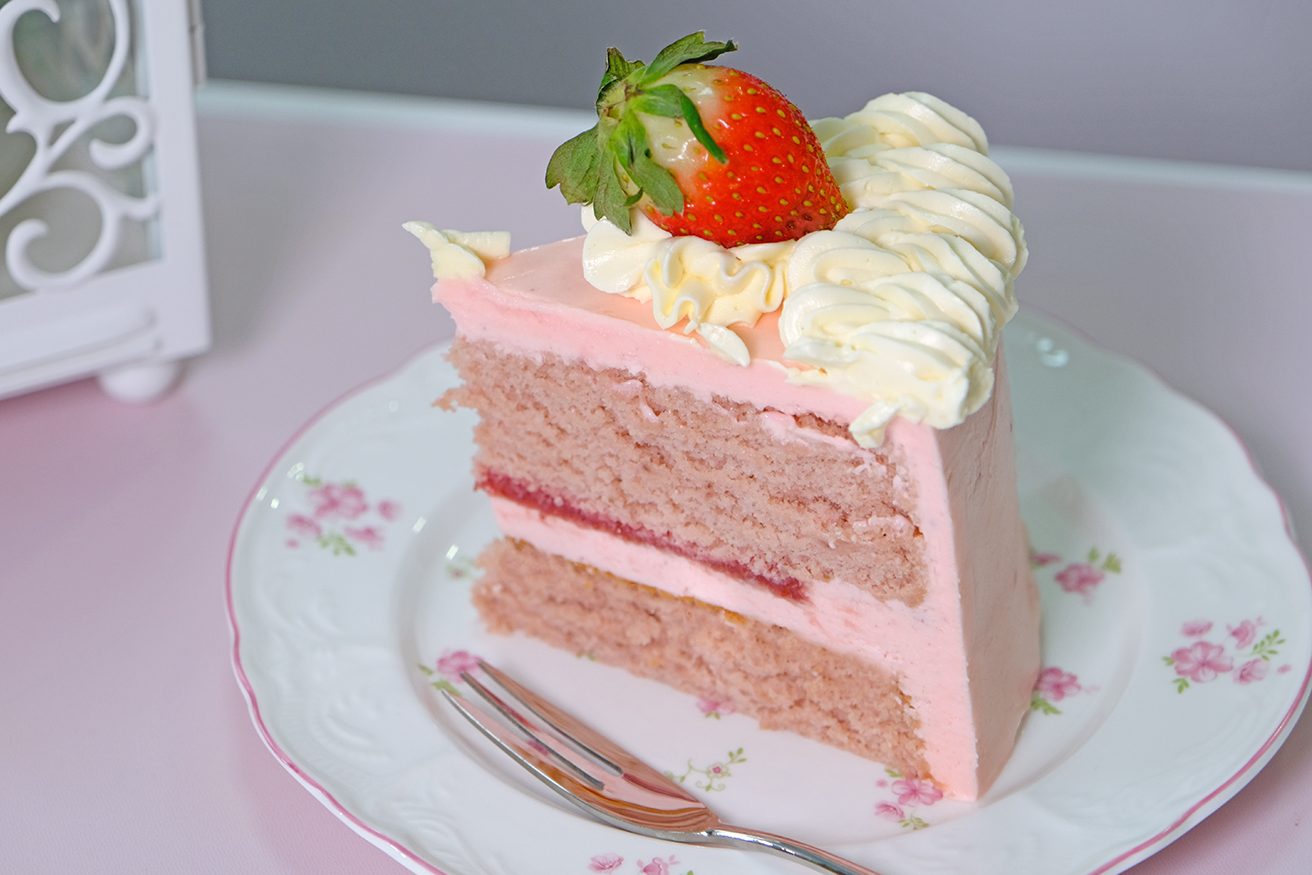
It’s proof that sometimes, the simplest dreams—the pink ones, the sweet ones—are the most beautiful to chase.
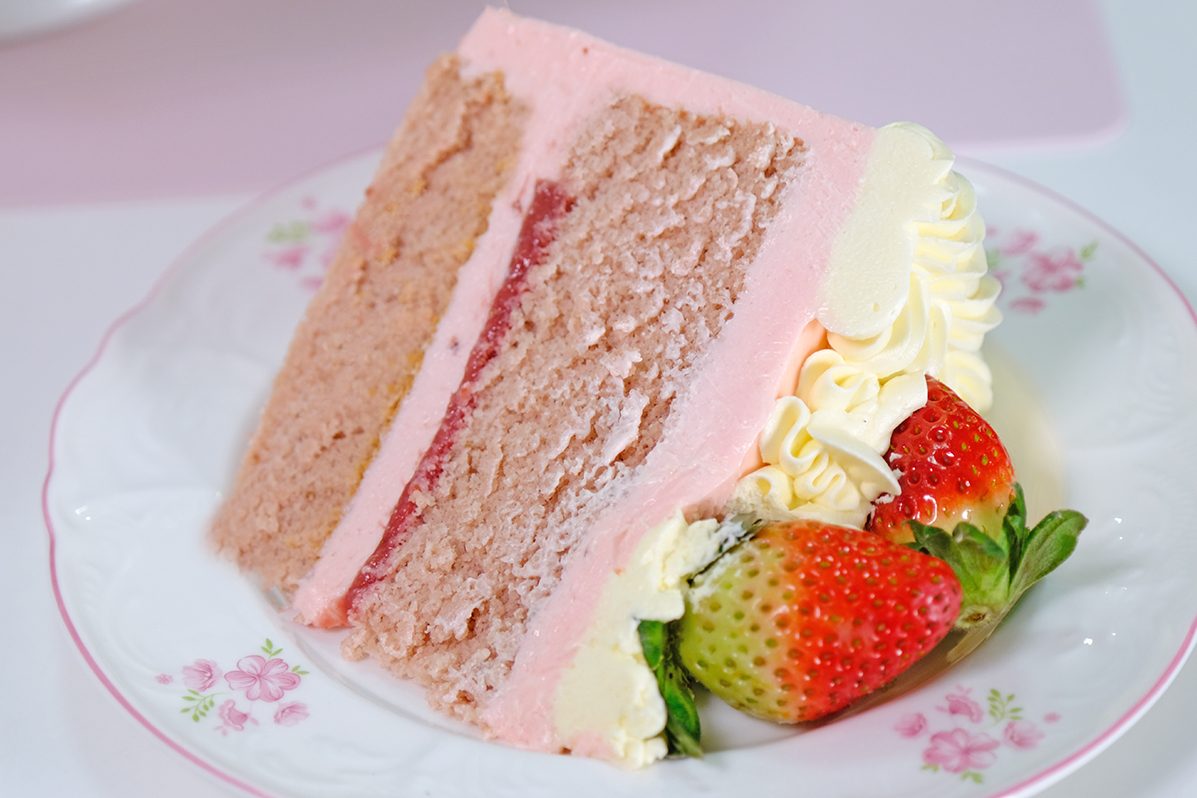
A Soft, moist cake made with real fresh strawberry puree, giving it a beautifully tender texture and a rich, fruity strawberry flavor in every bite.
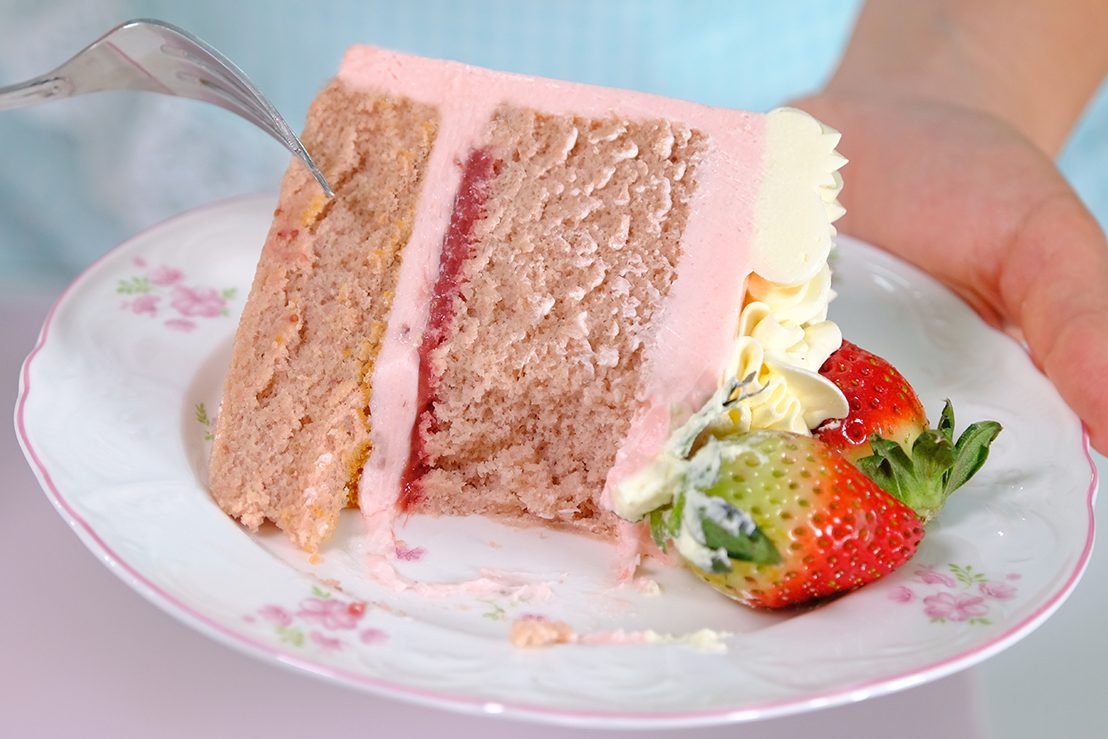
Whether it’s for a special day, for your loved ones, or simply as a sweet treat;
This strawberry cake is sure to please and bring joy to those you share it with
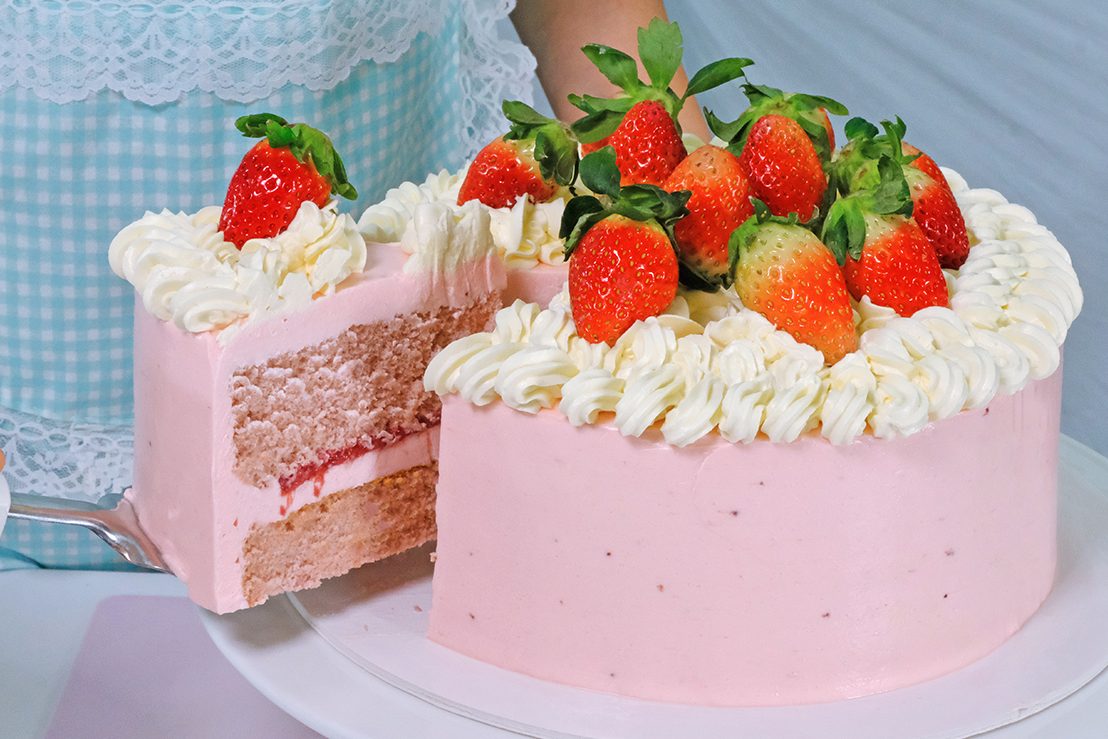
This cake is full of fresh strawberry flavour, with a soft crumb and delicious strawberry puree
It’s wonderful light and fluffy 😚

I hope you enjoy making and tasting it !
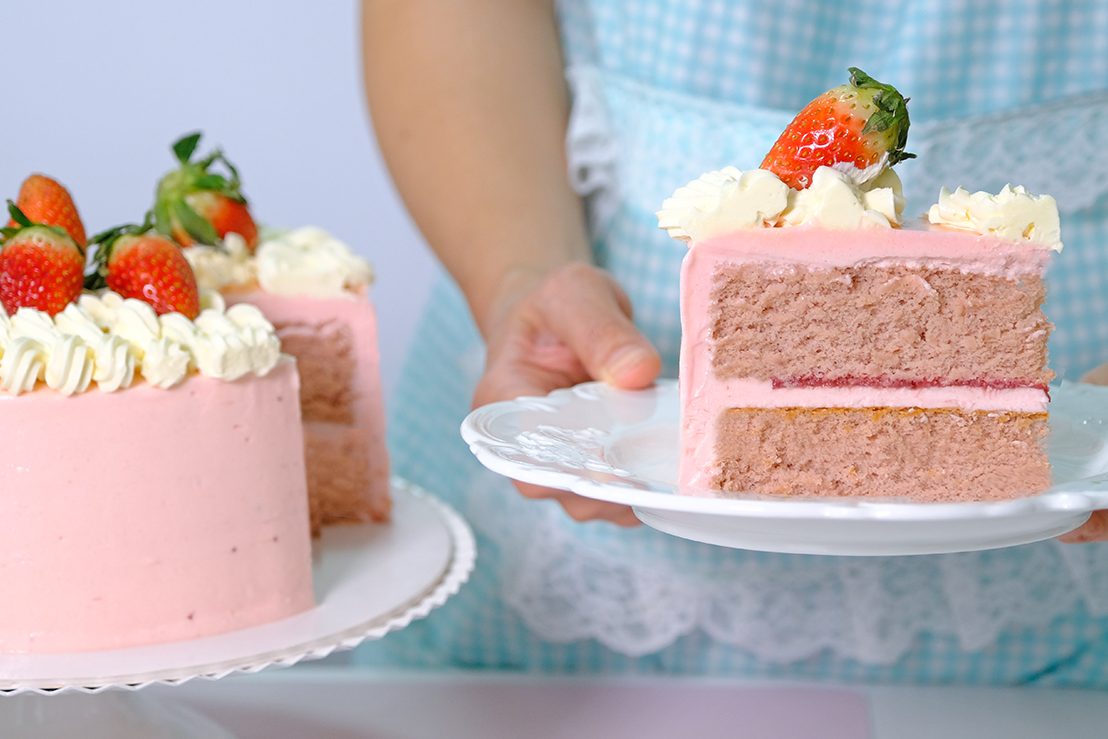
Love you All 🍰🍓

WATCH HOW TO MAKE Wonderful LigHt & Fluffy Strawberry Cake

RECIPE

LIGHT & FLUFFY STRAWBERRY CAKE
Yield: One 8-Inch Round Cake (2 layers)

INGREDIENTS
🍓Strawberry Puree
450 g Frozen or Fresh Strawberries
1 tsp Corn Flour
2 tsp Water

🍓Strawberry Cake
5 Egg Yolks (95-100 g) ~ room temp.
1 Egg (50-55 g) ~ room temp.
50 g Vegetable Oil
40 g Plain Greek Yogurt (room temp.)
80 g Strawberry Puree (room temp.)
90 g Cake Flour (sifted)
A Drop of Pink Liquid Gel Food Colour
5 Egg Whites (165-175 g)~ room temp.
1/4 tsp Salt
1 tbs Lemon Juice
90 g Caster Sugar

🍓Buttercream
180 g Egg whites
300 g Caster Sugar
240 g Icing Sugar
170 g Vegetable Shortening (High Ratio)
454 g Unsalted Butter (room temp.)
2 tbs Strawberry Puree
2 tsp Rose Water
1/4 tsp Salt
A Few Drops of Pink Liquid Gel Food Colour


INSTRUCTIONS
🍓Strawberry Puree
We will use this strawberry puree for the Cake, Buttercream and Filling

  1. Prepare the corn slurry ahead of time; Mix Corn Flour and Water (we’ll use it to thicken the strawberry purée)
  2. In a medium saucepan, heat the Strawberries over medium-high heat
    Once they start to soften and release juice, lower the heat and mash them with a potato masher (no need for a blender or food processor)
  3. Continue cooking over low heat, uncovered, to let the excess water evaporate; this can take a while, so be patient (with frozen strawberries, mine took about 30 minutes to reduce)
  4. Once the purée is thick and most of the water has evaporated, stir in the corn slurry until well combined
  5. Remove from the heat
    Pour the purée into a shallow dish, cover, and chill in the fridge until completely cool
  6. Once cool, set aside 80 grams for the cake batter, 2 tablespoons for the Strawberry Buttercream and the rest for the cake filling


🍓Strawberry Cake

  1. Preheat the oven to 155°C/ 135°C fan, place the rack at the bottom
  2. Make sure your Eggs, Strawberry Puree, and Yogurt are at room temperature (this makes the batter smoother and easier to mix)
  3. Prepare the pans in advance
    Line 8-Inch Round Pan (4-Inch Tall) with parchment paper, but DON’T grease it
    ** You’ll also need a larger pan to create the bain-marie, which will hold the water and support the cake pan while baking
  4. Make sure your bowl and utensils grease free, any residue of fat will prevent egg whites from beating properly;
    Wipe the bowl and utensils with Vinegar or Lemon Juice; the acid in Vinegar or Lemon Juice helps remove grease
  5. In a large mixing bowl, combine the Egg Yolks with one Whole Egg
  6. Stir in the Oil; whisk vigorously until wel combined
  7. Add in the Yogurt along with 80 grams of Strawberry Puree and mix until the mixture is fully combined
  8. Fold in the sifted Flour and mix gently
    DON’T overmix, gently folding keeps the cake light and fluffy instead of dense
  9. Add a touch of pink food colouring (it helps enhance the natural pink colour from the Strawberry Puree); Set this mixture aside
  10. Then in another large bowl, combine the Egg Whites, Salt and Lemon Juice
    Beat over high speed for about 30 seconds until foamy
  11. Add Sugar to the Egg Whites mixture in 3 batches every 1 minute
  12. Once all the Sugar is added, continue beating on HIGH speed until medium peaks for about 3 minutes
    ** Medium peaks are glossy and hold their shape, but the tip of the peaks curl slightly when the beaters are lifted
  13. Then, fold the whipped Egg Whites into the Egg Yolks mixture in 3 batches
    Start by adding 1/3 of the beaten Egg Whites to the Egg Yolk mixture; use a balloon whisk to gently stir (this first addition helps loosen the batter)
    ** Scrape the bottom and sides of the bowl to ensure everything is evenly combined
  14. Add another third of the Egg Whites and fold again (be gentle to avoid deflating the batter)
  15. Finally, pour this mixture into the bowl with the remaining Egg Whites
    Fold carefully until the mixture is smooth and well combined (make sure there are no bits of Egg Whites left)
  16. Then use a spatula to scrape the sides and bottom of the bowl to ensure the mixture is evenly mixed
  17. Slowly pour the batter into the pan from about 15 cm above to help burst an excess air bubbles
  18. Gently run a small metal skewer or spatula through the batter to eliminate any trap air pockets (avoid tapping or shaking the pan as this can cause the bubbles to deflate prematurely, resulting in a denser cake with less volume)
  19. Place your cake pan inside a larger pan and pour hot water around it, about 1 cm up the sides (this water bath helps the cake bake gently and evenly, keeping it soft and preventing cracks)
  20. Bake immediately in the preheated oven for 80 minutes or until a cake tester inserted in the center comes out clean
    ** Avoid opening the oven door during baking, as sudden temperature changes can cause the cake to collapse
  21. Once it’s done, carefully remove the cake pan from the oven and take it out of the water bath
  22. Tap the 8-Inch cake pan 3 times on the counter to release the trapped steam (this helps prevent the cake from shrinking too much)
  23. Then, remove the cake immediately from the pan; scrape the sides of the pan; turn it over, peel the parchment paper, flip again so the top facing up;
    And let it cool completely on a cooling rack

🍓Buttercream

  1. Make sure the Butter and Shortening are at room temperature before you start
    If Butter is too cold, it won’t mix evenly, and you’ll get lumps or grainy buttercream
  2. In a large metal bowl, mix the Egg Whites and Sugar
  3. Then place the bowl over a double boiler and whisk constantly until the mixture reaches about 115°F
    ** If you don’t have a thermometer, you can check by feeling; when the sugar has completely dissolved and is no longer gritty, it’s ready
  4. Remove the bowl from the double boiler
    Whip this mixture on HIGH speed until the mixture is thick, glossy, and white (the peaks should be as firm as possible)
  5. Then pour in the Icing Sugar
    Start mixing on low speed so it doesn’t fly all over (don’t forget to scrape the bowl to mix everything evenly)
  6. Once all the Icing Sugar has been incorporated, add the Butter and Shortening in 2 fast additions
    Then continue whip on HIGH speed for about 5 minutes until smooth and fluffy
  7. Once finished, set aside 250 grams for the decoration on top
  8. Then mix the remaining buttercream with 2 tablespoons of Strawberry Puree, Salt, and Rose Water
  9. Add a touch of pink food colouring to make it pop, mix well
    This silky, smooth Strawberry Buttercream is ready to use;
    It’s lightly sweet, stable, easy to pipe, and holds its shape beautifully

ASSEMBLE & DECORATE THE CAKE
Once the cake is cooled, we can start assemble the cake

  1. Divide the cake into 2 layers
  2. Give your buttercream a good stir with a spatula before filling the piping bag; it helps to eliminate small air pockets that could create bubbles when piping
    Scoop it into the piping bag slowly instead of dumping it in; pressing it down to remove air bubbles (this keeps your piping smooth and even)
  3. Place the first cake layer on your cake board or pedestal
  4. Pipe a layer of Strawberry Buttercream about 1 cm thick on top and spread it evenly
  5. Then pipe a 1-cm-thick ring of Strawberry Buttercream around the edges
  6. Spread the remaining Strawberry Puree in the center
  7. Place the top cake layer on carefully, making sure it’s even and straight
  8. Fill any gaps between the cake layers with Strawberry Buttercream
  9. Apply a crumb coat
    It’s basically just a thin layer of Strawberry Buttercream that you are going to appy to the top and the sides of the cake before you do the final coat (it doesn’t have to be perfect)
  10. Chill the cake for 15 minutes in the freezer or 30 minutes in the fridge to firm it up (this makes it easier to apply the final coat without the layers shifting)
  11. And for the final coat;
    Pipe 1 cm thick of Strawberry Buttercream around the sides and the top of the cake
    Use a spatula to roughly smooth the sides and the top of the cake;
    Then use a scraper to smooth the sides completely
    Clean up the top edges by gently swiping the buttercream inward
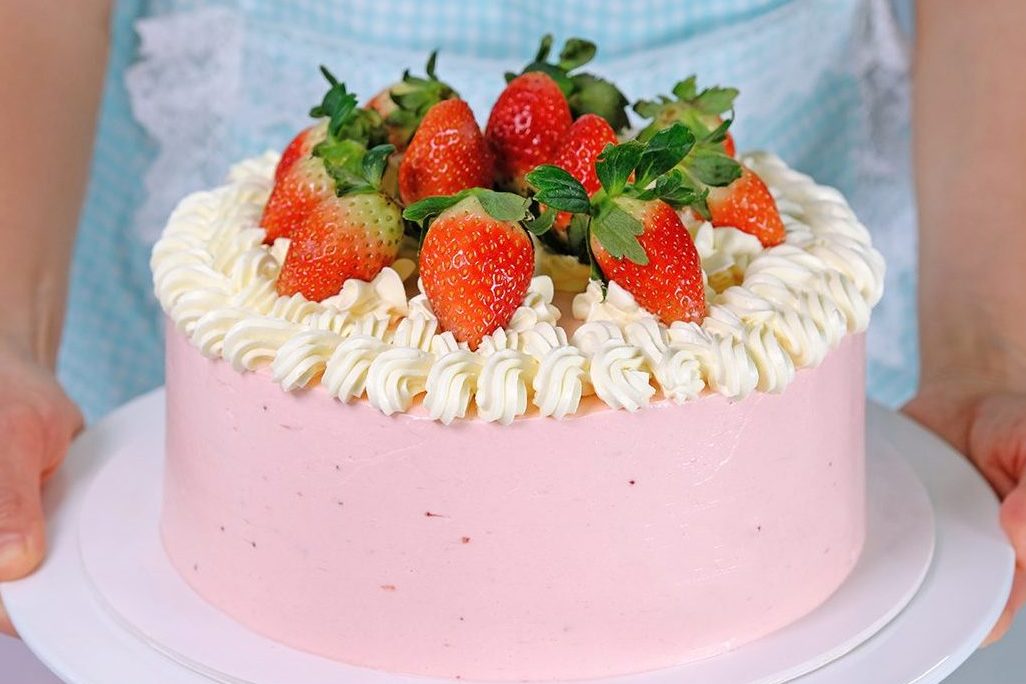
  12. Decorate the top however you like with 250 grams basic white buttercream ; finish the cake with lots of fresh strawberries
  13. Once the cake is done, refrigerate for about 1 hour before serving

NOTES
Store the cake in the fridge if not serving immediately, keep away from heat or direct sunlight.
The cake best if consumed within 3 days of baking, but will last for up to 5 days if store in the fridge.
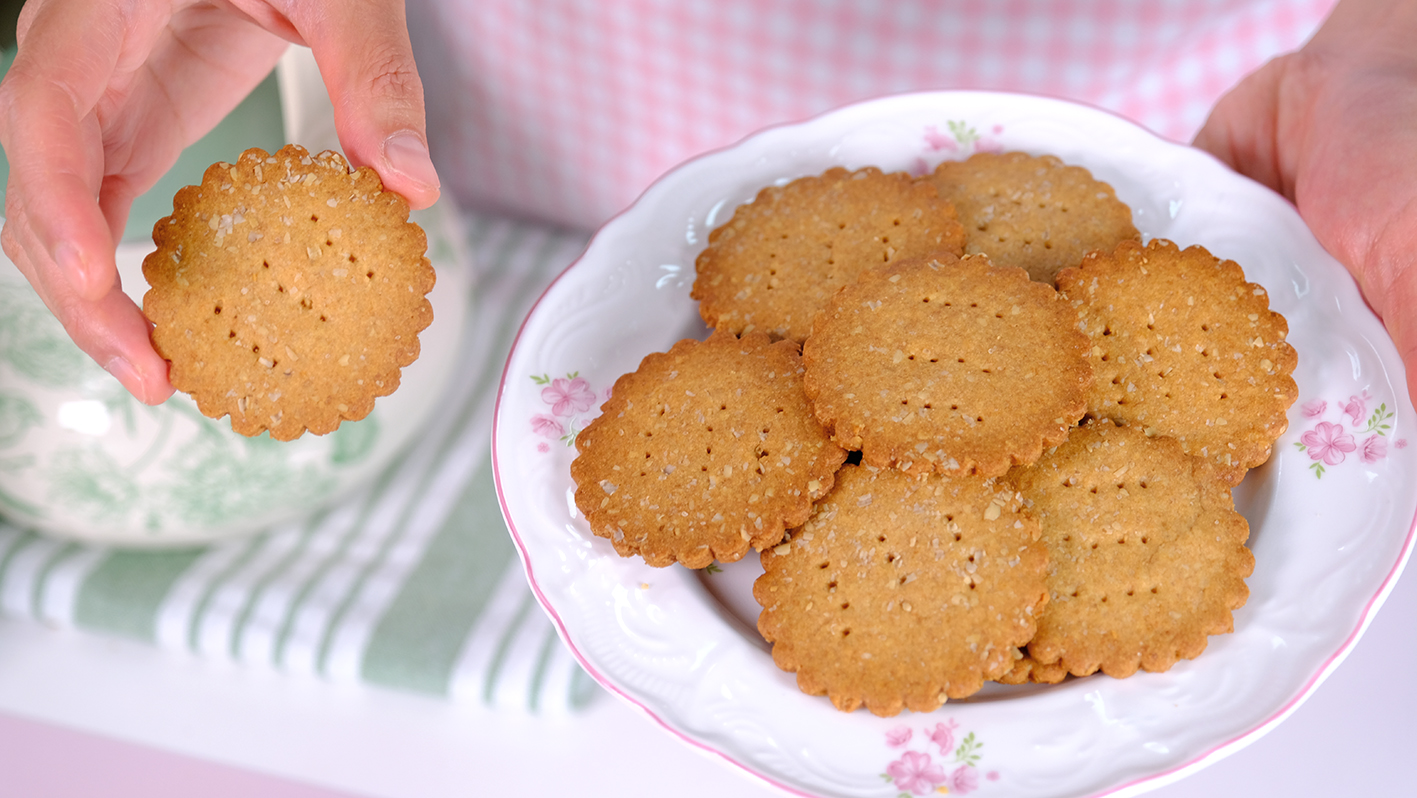
Crispy Thin Whole Wheat Biscuits

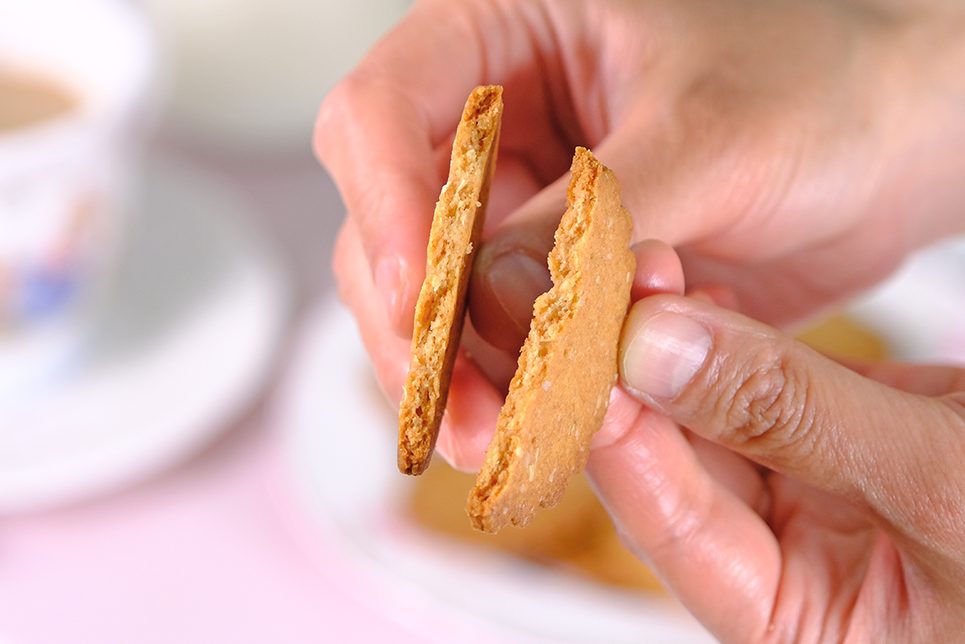
If you love snacking but want to keep things light, wholesome, and irresistibly crunchy; crispy thin Whole Wheat Biscuits might just become your new favorite treat.
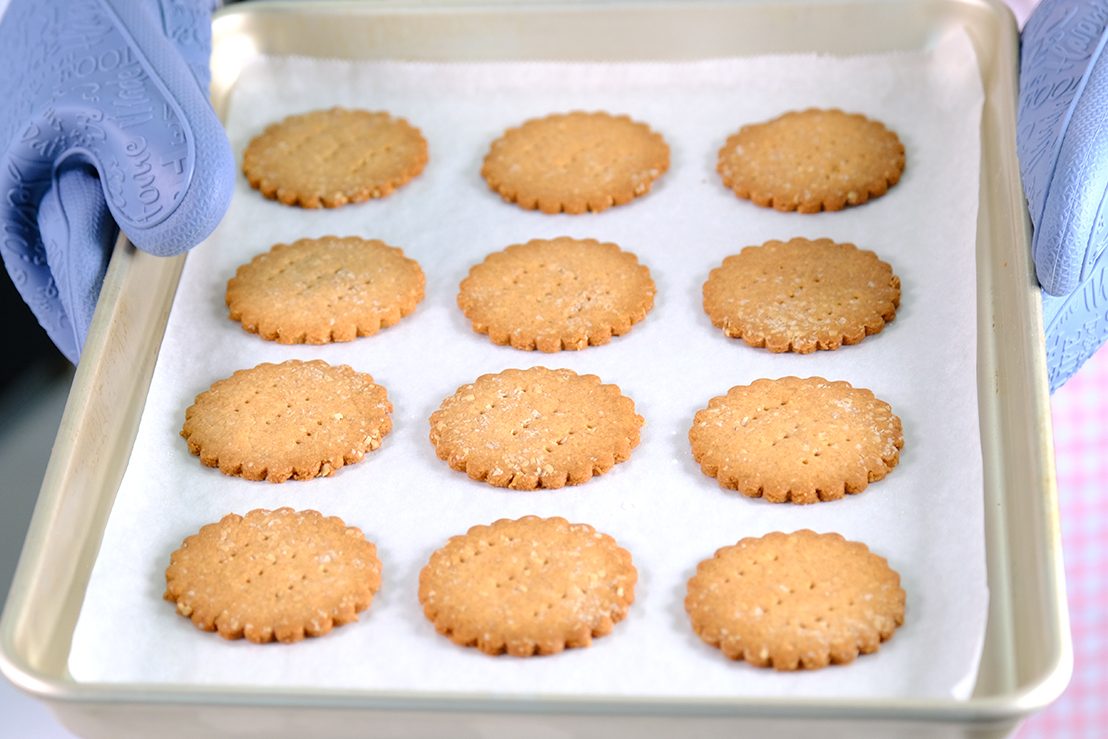
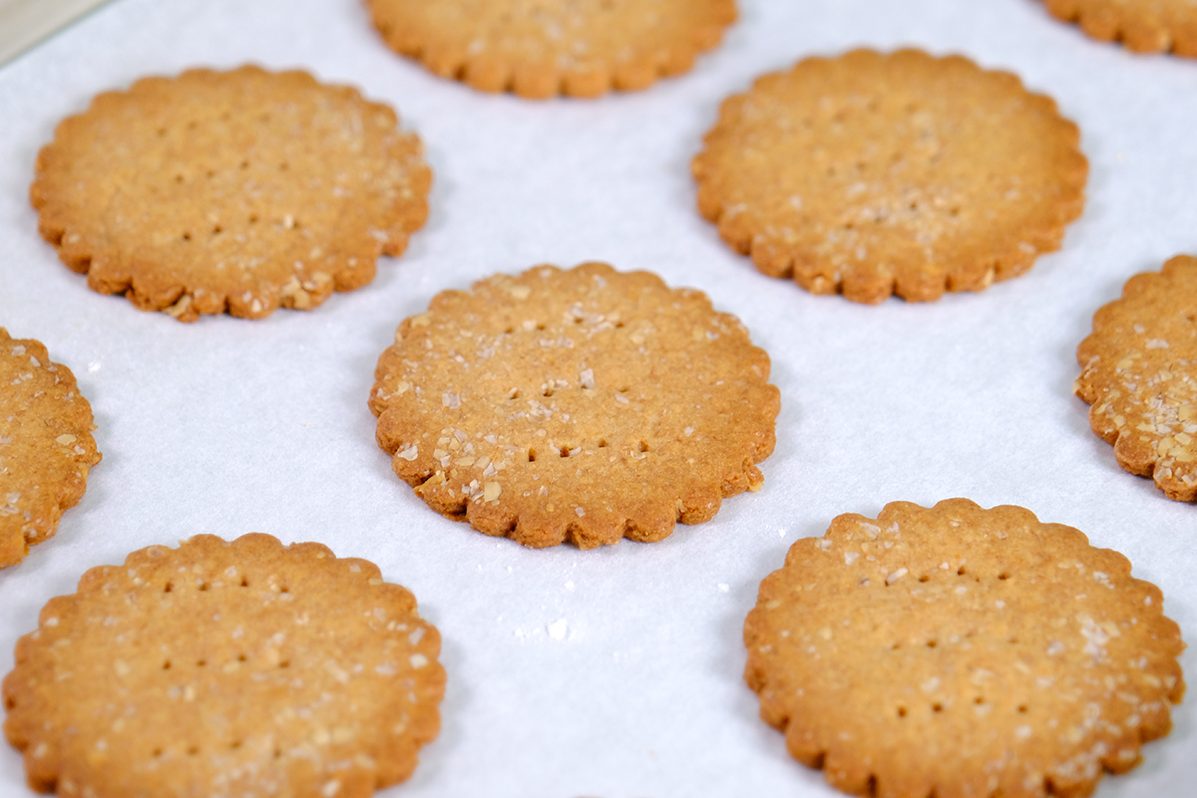
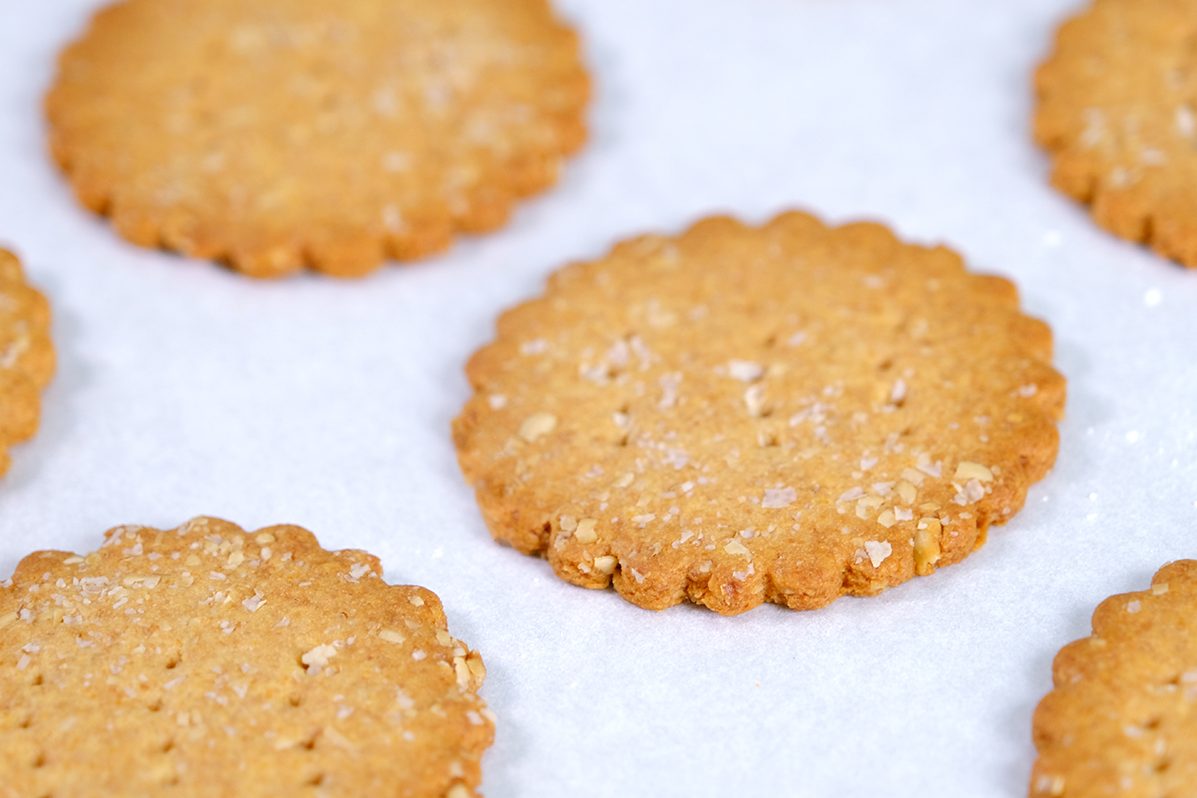
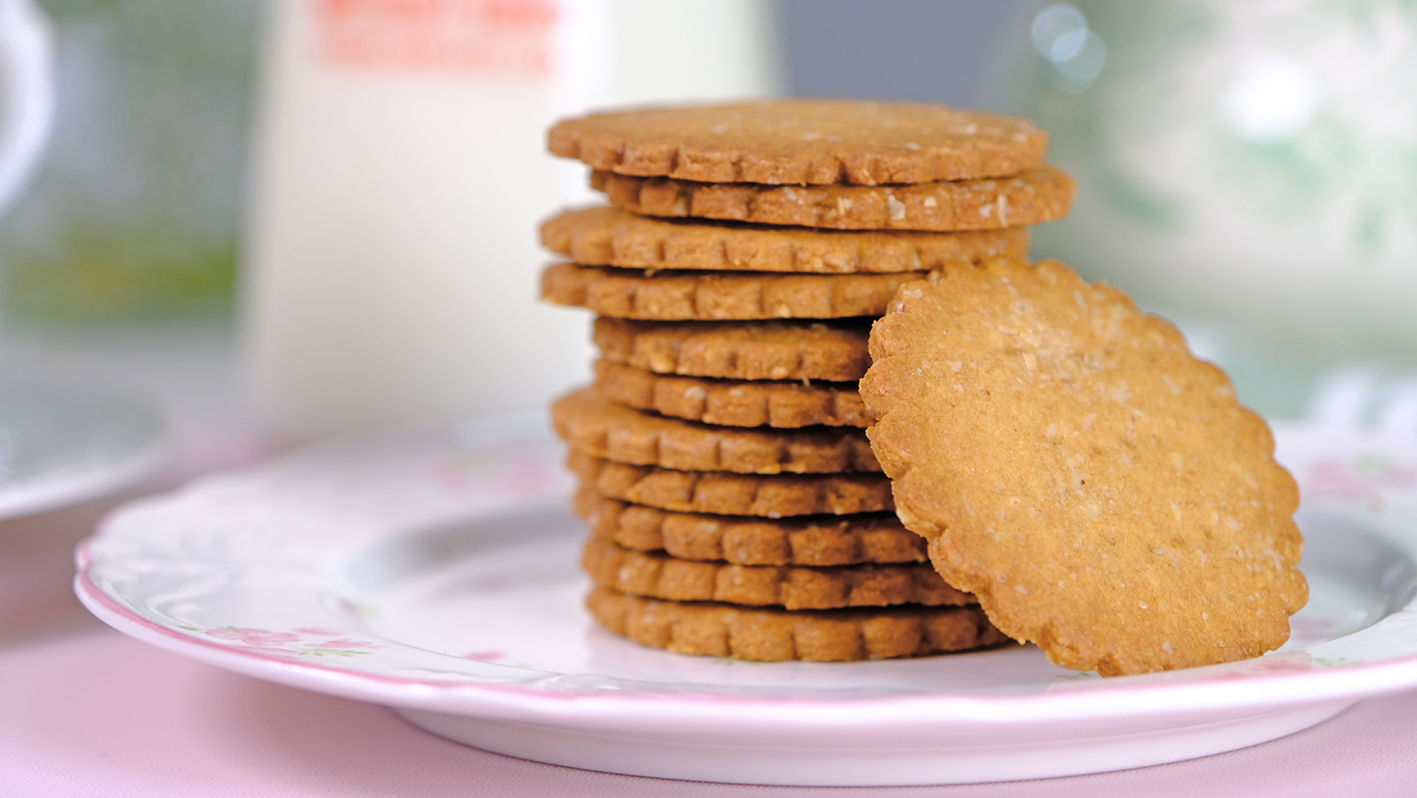
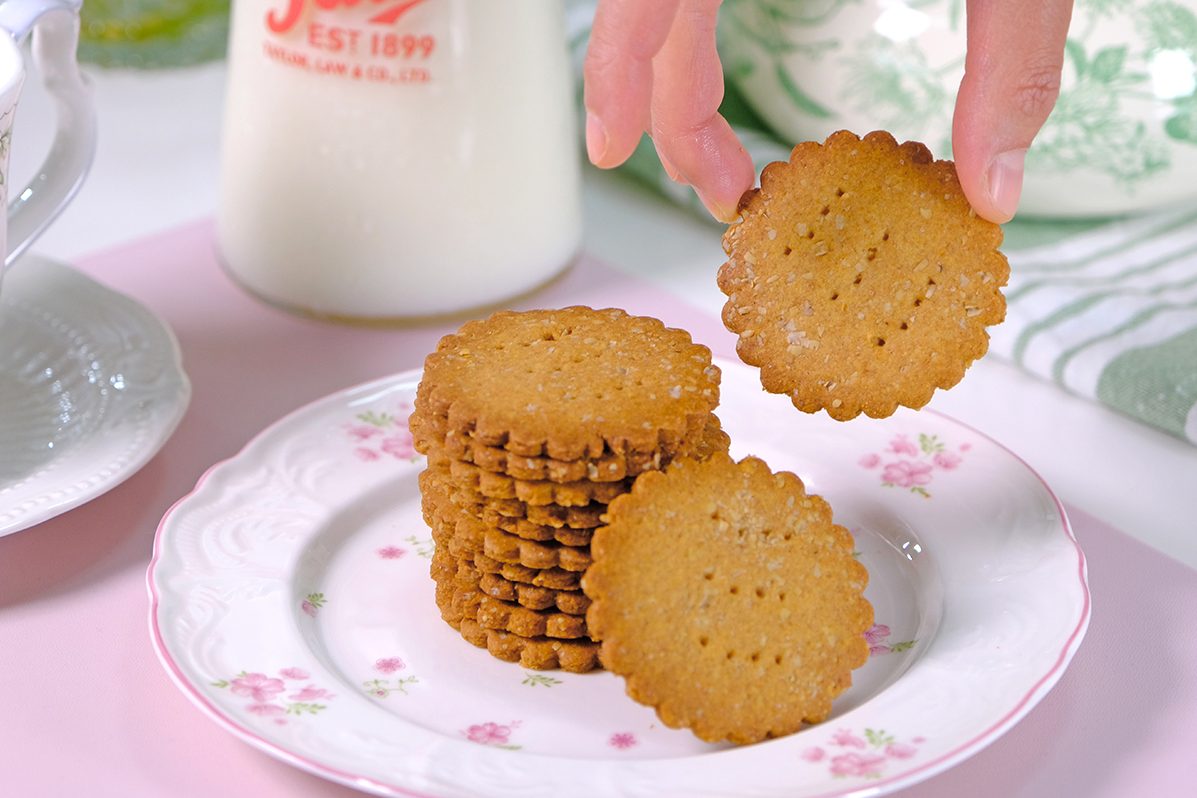
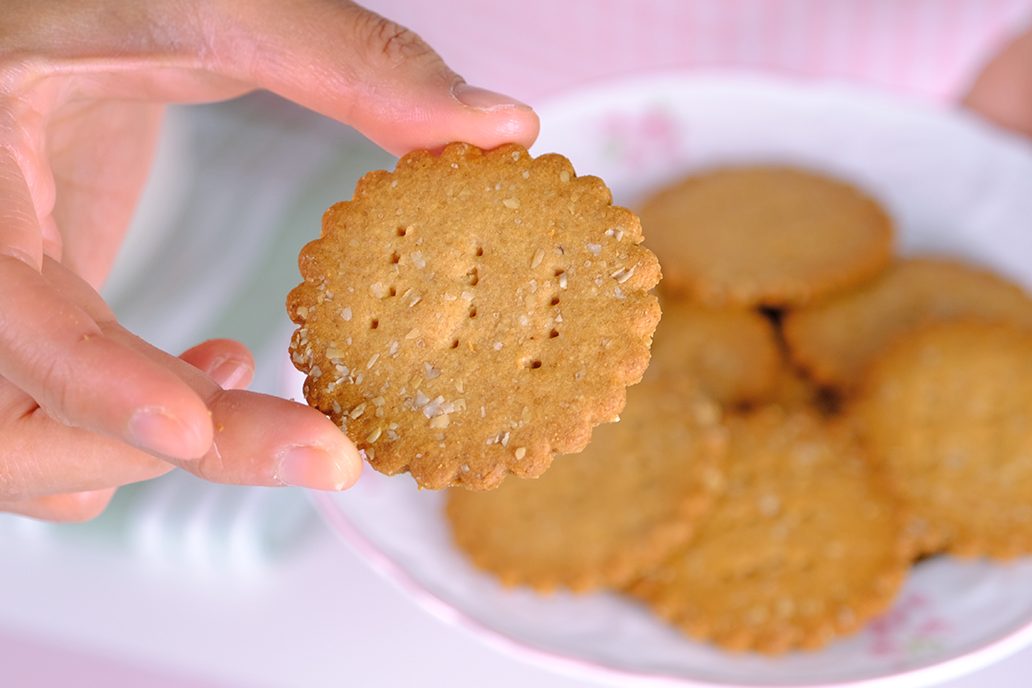
Packed with the nutty flavor of whole grains and baked to delicate, golden perfection, these biscuits strike the ultimate balance between health and taste 🤩
🤤 Whole wheat retains the bran and germ of the grain, making these biscuits naturally high in fiber, which supports digestion and keeps you feeling satisfied longer
Compared to many commercial cookies, these crispy thin whole wheat biscuits are light on sugars and fats
Perfect for those watching their calorie intake without giving up flavor 😘
You will need Whole Wheat Flour and Oat Bran for this recipe
My go-to brand is Bob’s Red Mill 😚

If you haven’t seen Oat Bran before, it’s the outer layer of the oat grain
Adding oat bran to biscuits is an easy way to boost fiber, texture, and nutrition without changing the flavor too much. It gives your baked goods a slightly nuttier, hearty crunch that’s really tasty.
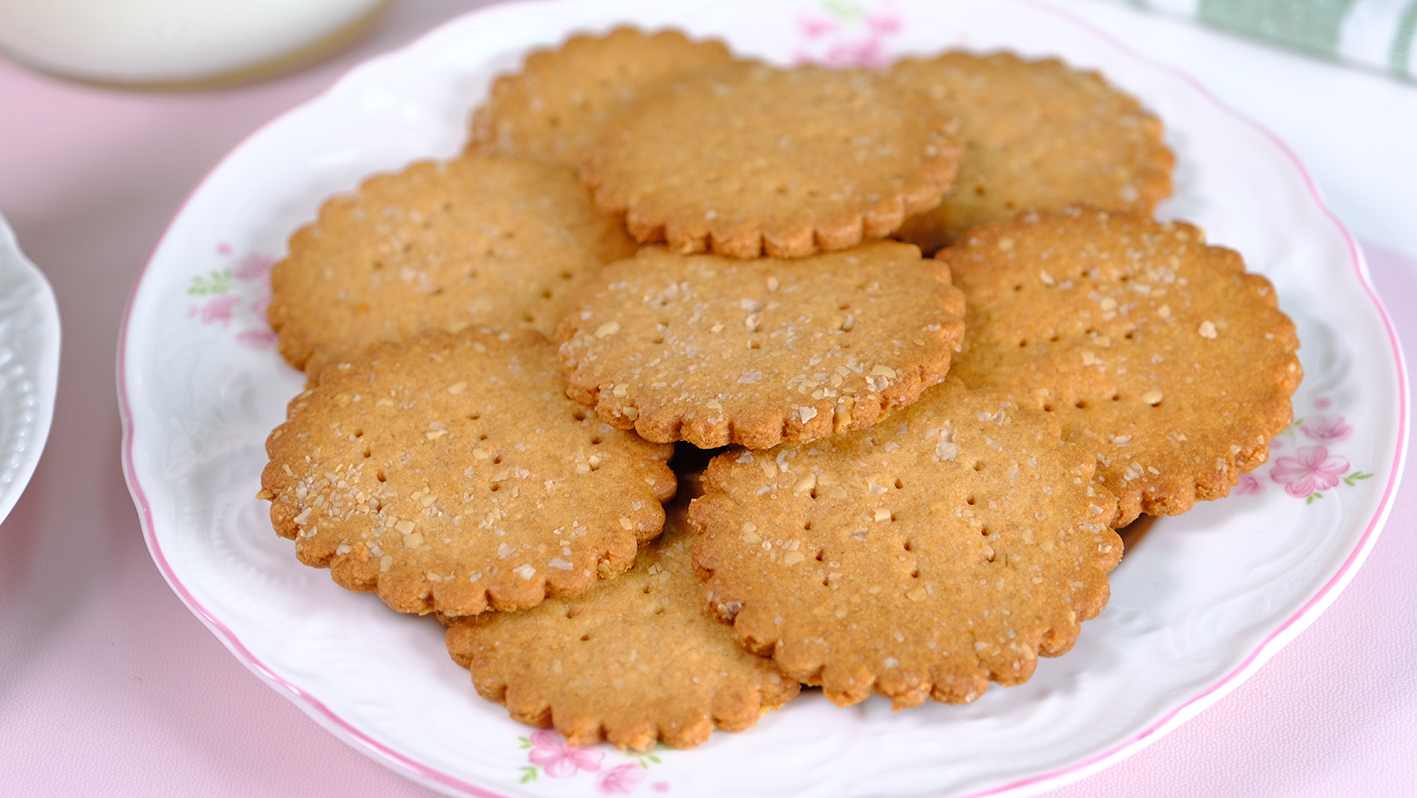
Whether you pair them with tea, enjoy them as a mid-day munch, or use them as a base for creative toppings.
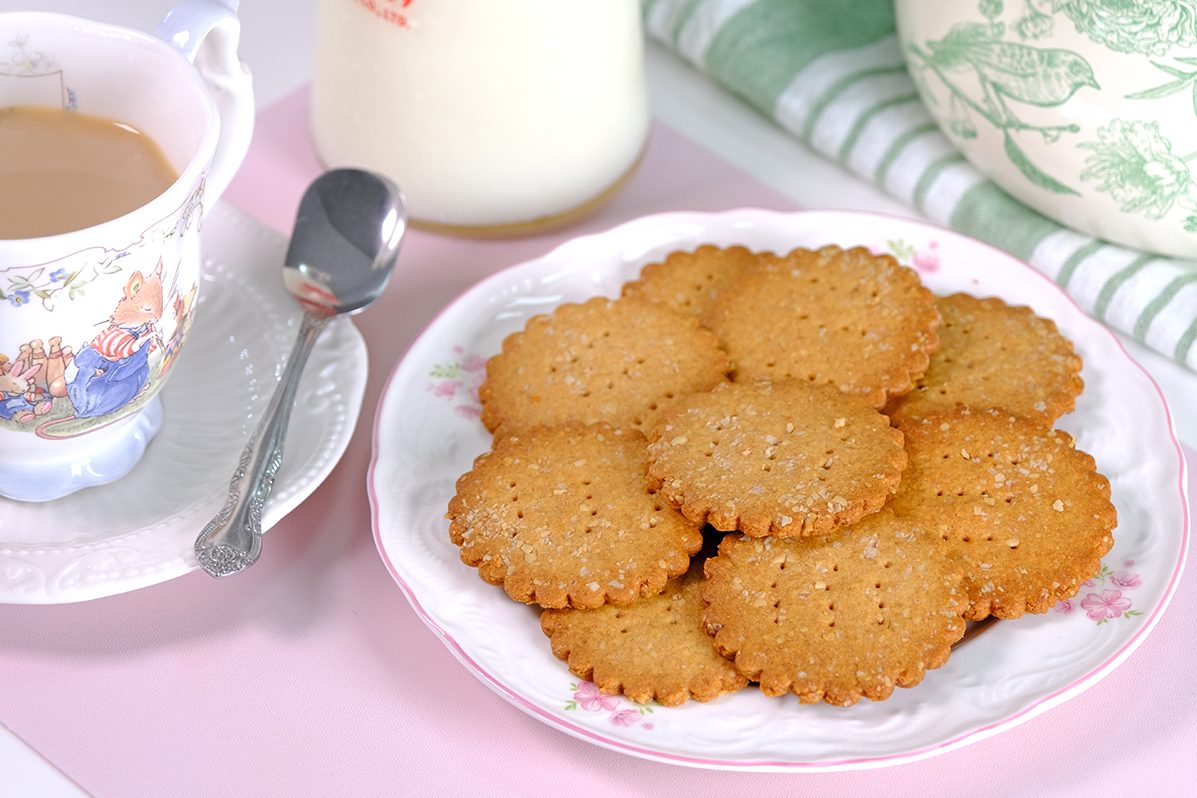
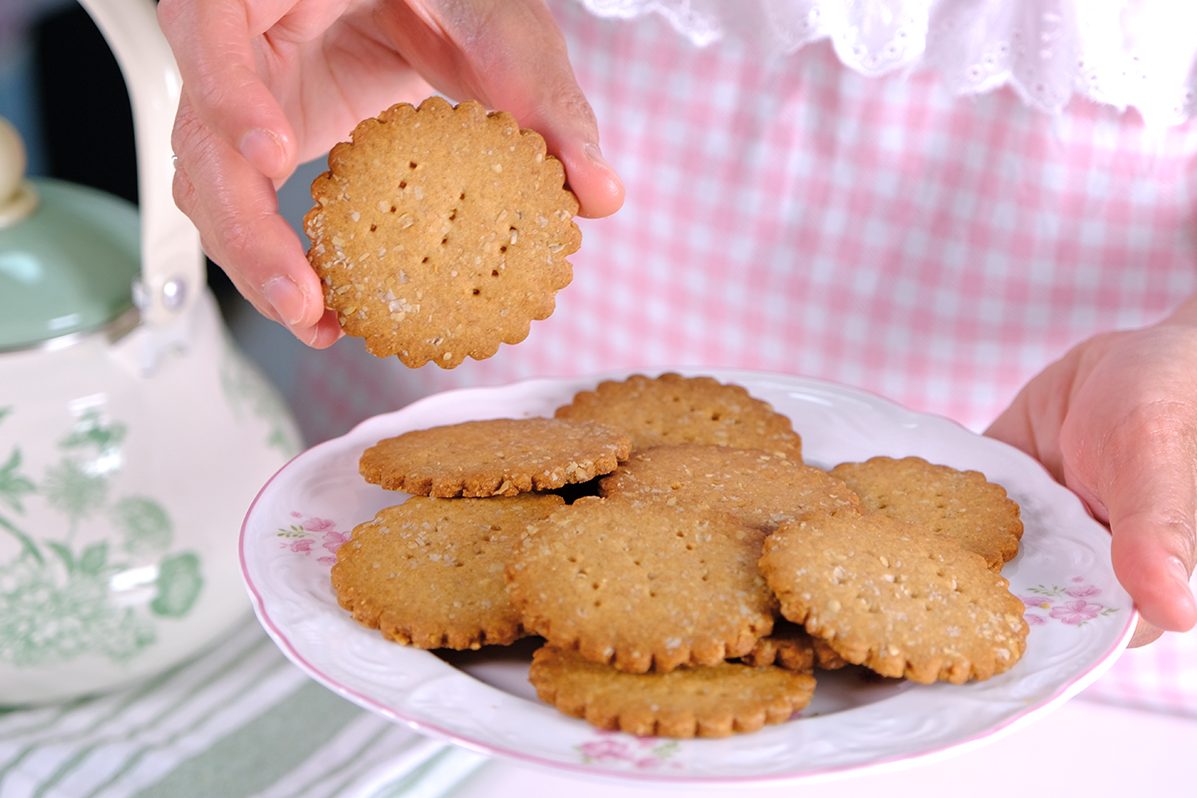
These biscuits deliver a rich, nutty flavor and a hearty crunch; they’re so easy to bake 😉
I’ve been making these for a while now, and I haven’t bought store-bought biscuits since 😇

Crispy, golden, and baked with love 💞

Perfect anytime, especially with coffee or milk 🤓😋
A little healthy, a whole lot yummy! 😍😁
Hope these biscuits bring a little comfort and joy to your day 🥳

Give them a try and let me know how yours turn out! 😉

WATCH HOW TO MAKE CRISPY THIN WHOLE WHEAT BISCUITS

Tips for Success (Please Read First):

  • Make sure the Butter and Eggs are at room temperature before you start.
    This helps the dough come together smoothly and makes your biscuits light and tender
  • Prepare the pan in advance, line a baking tray with Parchment Paper
  • Keep two additional pieces of parchment paper ready (you’ll use these to roll out the dough)
    Using parchment paper helps you to roll thinner, avoid sticking and transfer easily
  • If you can get 3 mm perfection strips, I highly recommend using it (those strips are very helpful for rolling evenly)
  • Don’t be tempted to add flour to the dough or sprinkle too much flour on the work surface, as this will make the biscuits tough
  • Try not to roll the biscuits too thick, or it will take longer to bake and won’t be as crispy
  • Don’t forget to lightly prick each biscuit with a fork before baking; this allows steam to escape and helps them bake evenly, staying flat and crisp
  • Bake in a preheated oven until they turn light golden brown (don’t bake it for too long or it will burn and taste bitter)
    Rotate the pan halfway through baking so the colour of the biscuits bakes evenly
  • Once they’re fully cooled, pop them into an airtight container to keep them nice and crisp
  • Never store warm biscuits, as they can become mushy and may develop mold

RECIPE

CRISPY THIN WHOLE WHEAT BISCUITS
Yield: 21 Pieces (6 cm diameter)

🪴 Ingredients
65 g Unsalted Butter
25 g Caster Sugar
1 tbs Honey
25 g Eggs
60 g All-Purpose Flour
60 g Whole Wheat Flour (100% Stone Ground)
Less than 1/2 tsp Baking Powder (Double Acting)
A pinch Salt
8 g Oat Bran
* Extra Oat Bran (for sprinkle)

🪴 Instructions

  1. Cream the Unsalted Butter and Caster Sugar for about 3 minutes, or until the mixture is pale, light, and fluffy
  2. Add the Honey and mix thoroughly
  3. Add the Eggs and beat again until fully combined (this creamed mixture should be soft and smooth)
  4. Add the sifted dry ingredients (All -Purpose Flour, Whole Wheat Flour, Baking Powder, Salt, Oat Bran)
    Don’t throw away the Bran left in the sifter, return it to the bowl and mix in gently
    Mix until just combined
  5. Once the mixture comes together into a rough dough, use your hands to knead it lightly until it’s uniform (be gentle, over-kneading can make the biscuits tough)
  6. Roll the dough
    Place the dough between two sheets of Parchment Paper and roll it out to about 3 mm thickness (use perfection strips if available); Sprinkle a little extra Oat Bran while rolling the dough
    Add a little flour (NOT too much) to the surface of the parchment paper, cutter or rolling pin as needed to prevent sticking (If you don’t have perfection strips, try not to roll it too thick, or the biscuits will take longer to bake and won’t be as crispy)
  7. Then using a 6 cm fluted or plain cutter, cut the dough into rounds
  8. Use the bottom parchment sheet to help lift the cut dough; this keeps the pieces from stretching or breaking; place them into prepared baking trays
    If you have any dough scraps, collect them, press them gently into a ball, and reroll to cut again
  9. Lightly prick each biscuit with a fork 6 tiny holes before baking (this allows steam to escape and helps them bake evenly, staying flat and crisp)
  10. Bake in a preheated oven at 180°C/ 160°C fan) / Gas Mark 4 for 13-15 minutes, until they turn light golden brown
    Rotate the pan halfway through baking so the colour of the biscuits bakes evenly
  11. Once done, let the biscuits rest in the pan for a few minutes, then transfer them to a wire rack to cool completely
  12. When they’re fully cooled, place the biscuits in an airtight container to keep them nice and crisp

NOTES

  • Never store warm biscuits, as they can become mushy and may develop mold
  • These Biscuits stay fresh for up to 2 weeks at room temperature or around 3 weeks in the fridge
  • They can also be frozen for 2–3 months
     

Foolproof Fluffy Pandan Chiffon Cake

Pandan Chiffon Cake is a light, fluffy, green-coloured sponge cake flavoured with the juice or extract of Pandanus amaryllifolius leaves. This fragrant and airy dessert is especially popular in several Southeast Asian countries, including Malaysia, Indonesia, and Singapore.
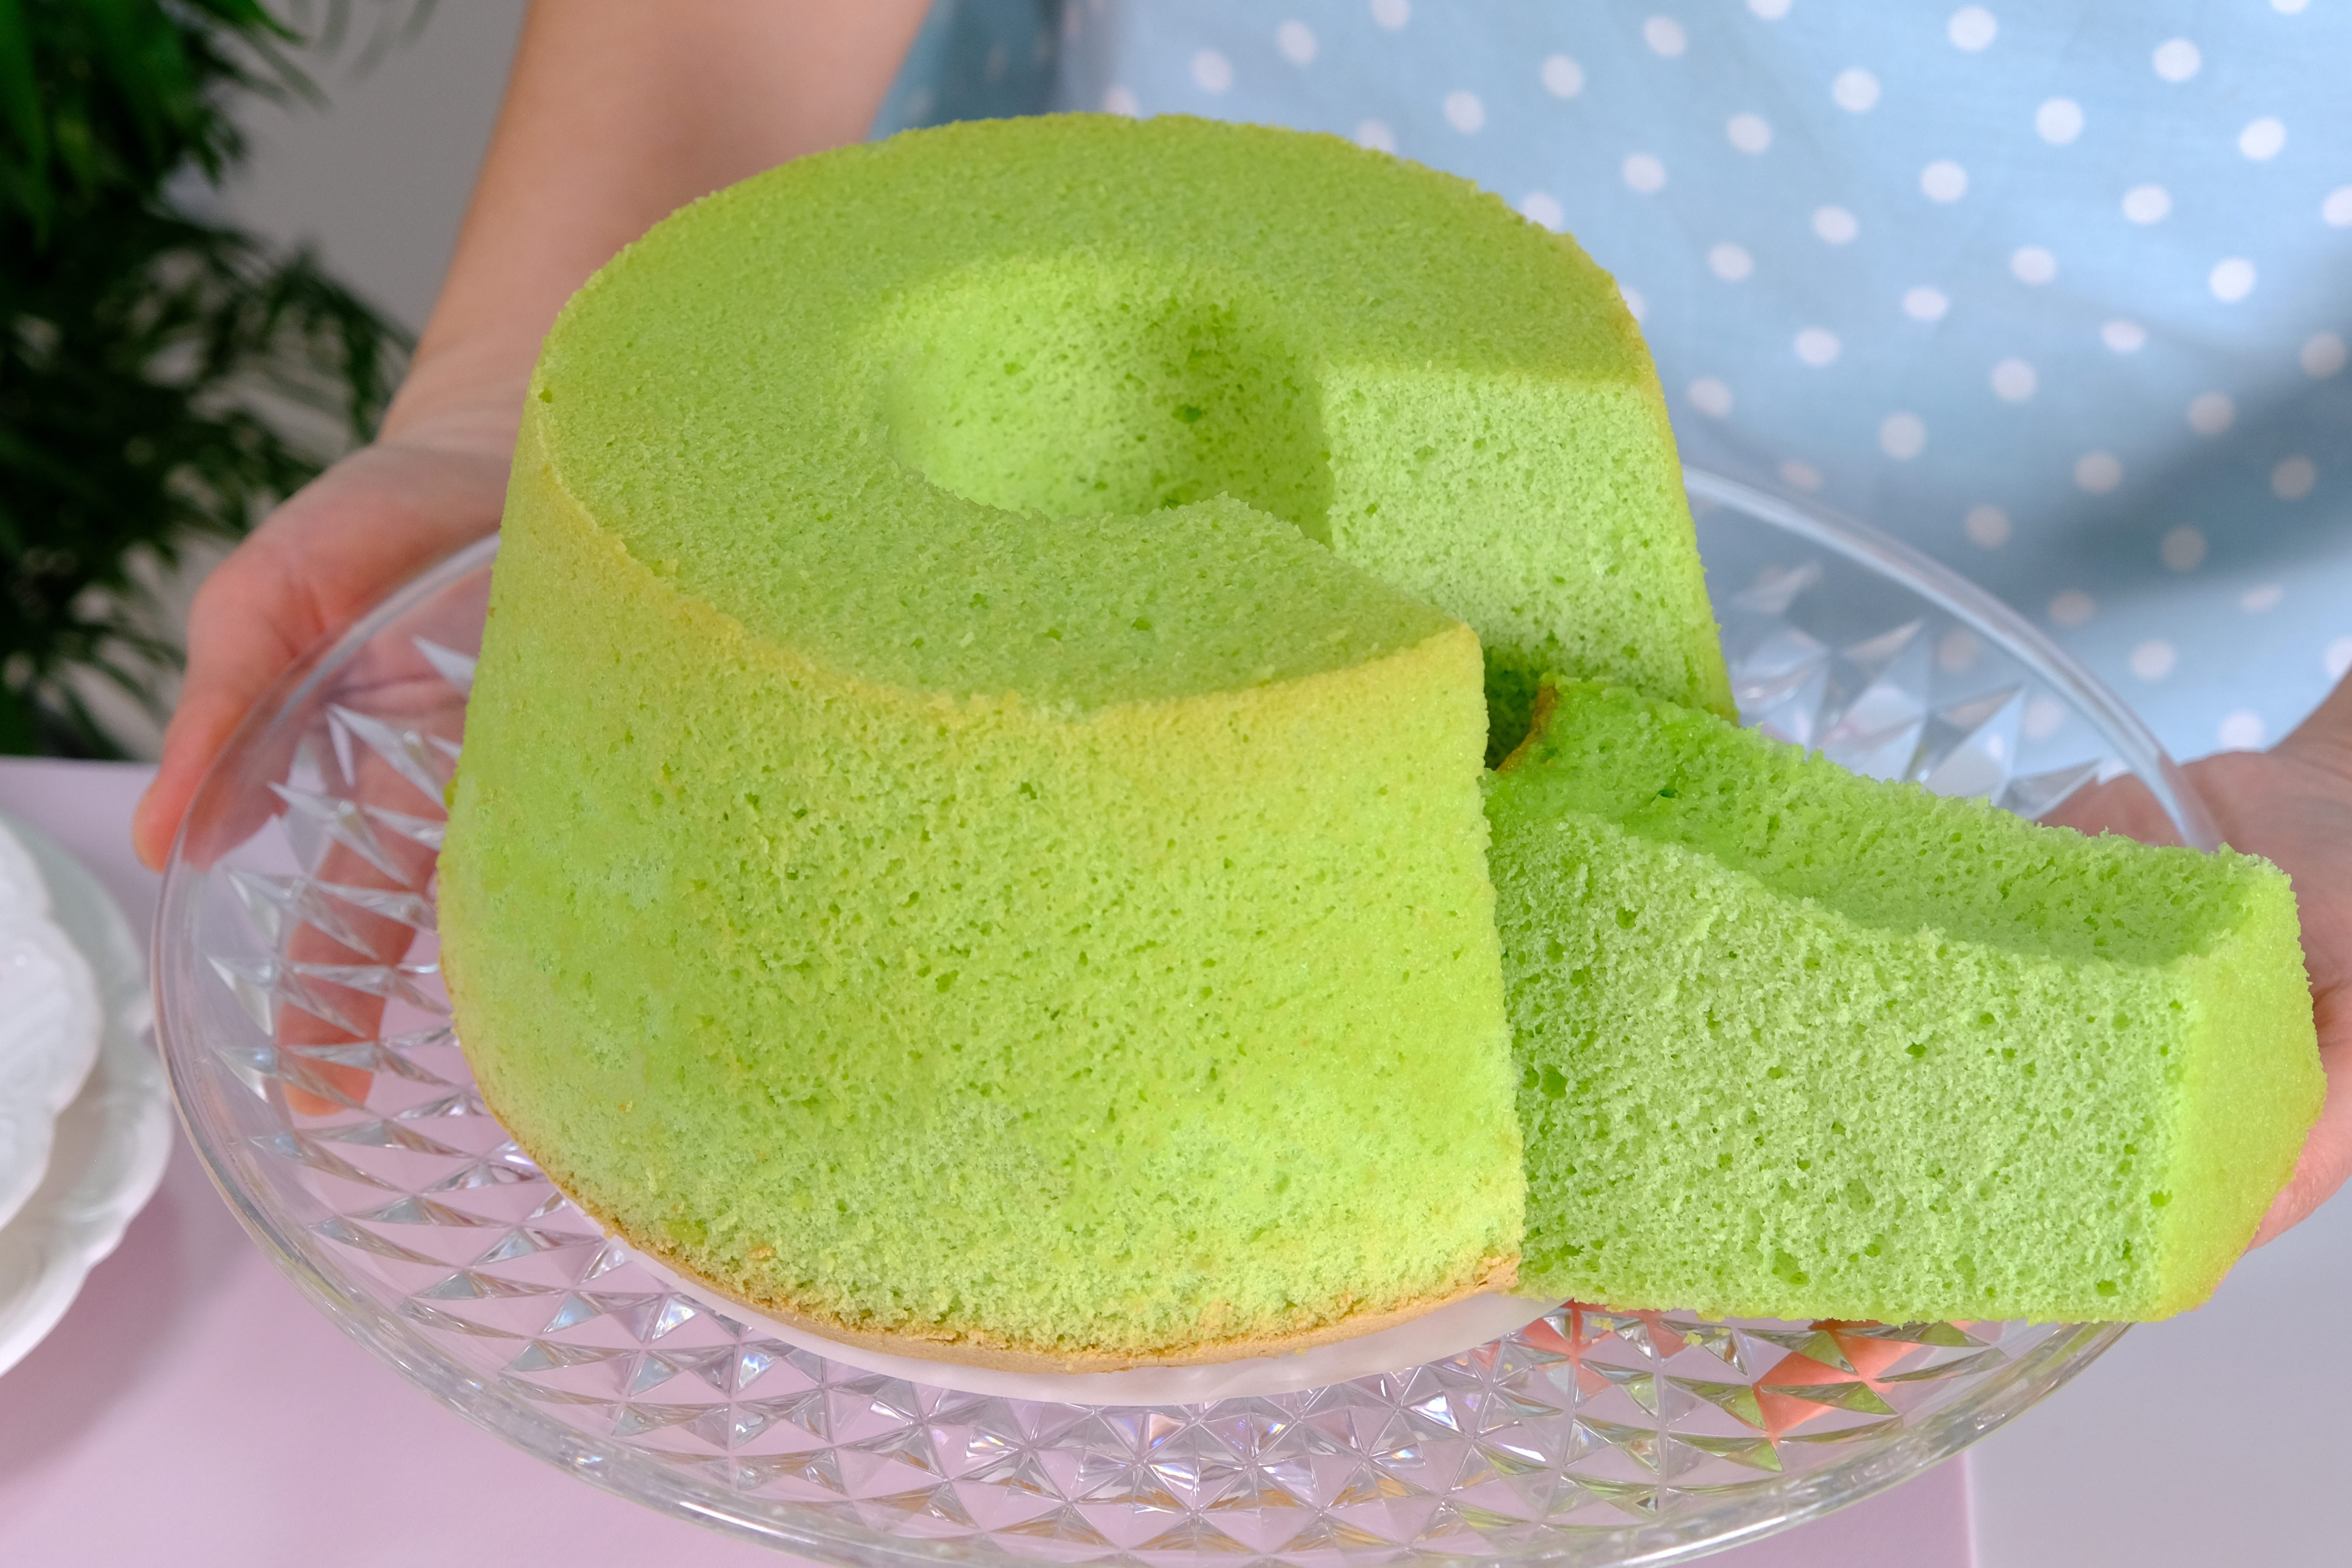
Chiffon Cakes are traditionally baked in tube pans because their delicate structure requires support from both the center tube and the sides of the pan.
This allows the cake to rise properly during baking and prevents it from collapsing as it cools.
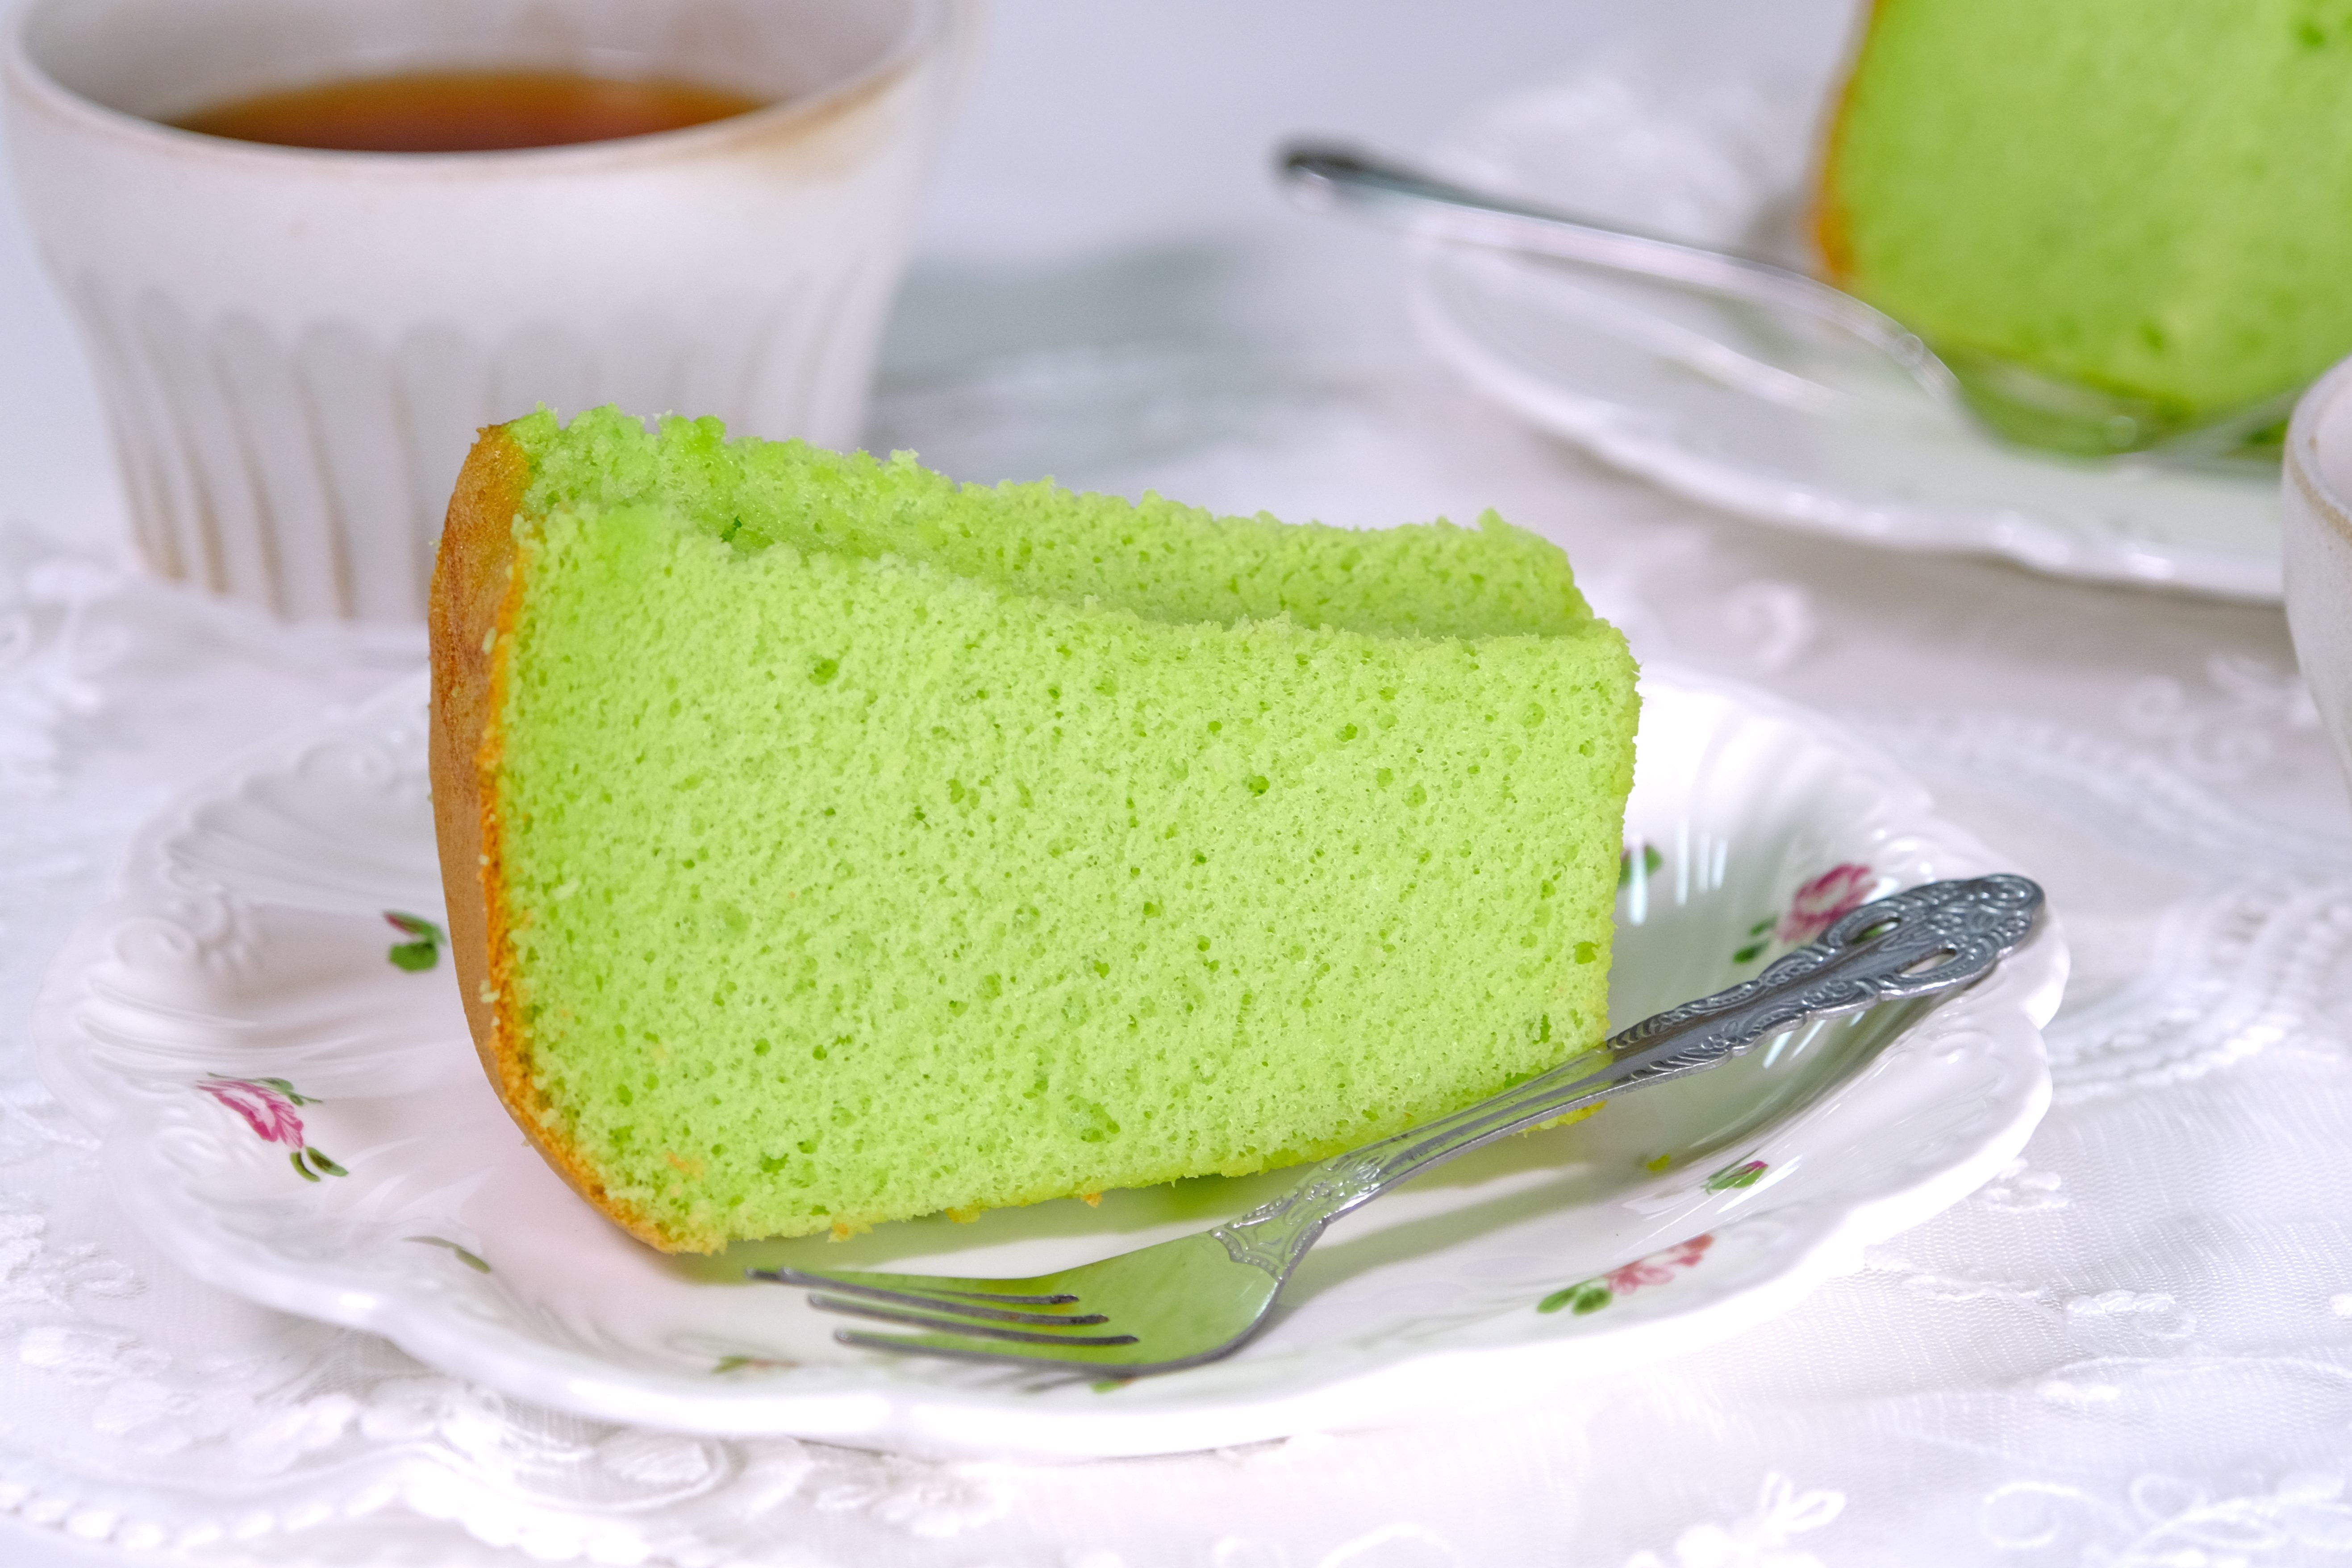
🤩 beautiful bright colour 😉

For this reason, Chiffon tube pans should NOT be greased, and non-stick pans should be avoided, as the batter needs to cling to the sides and center tube to rise properly.
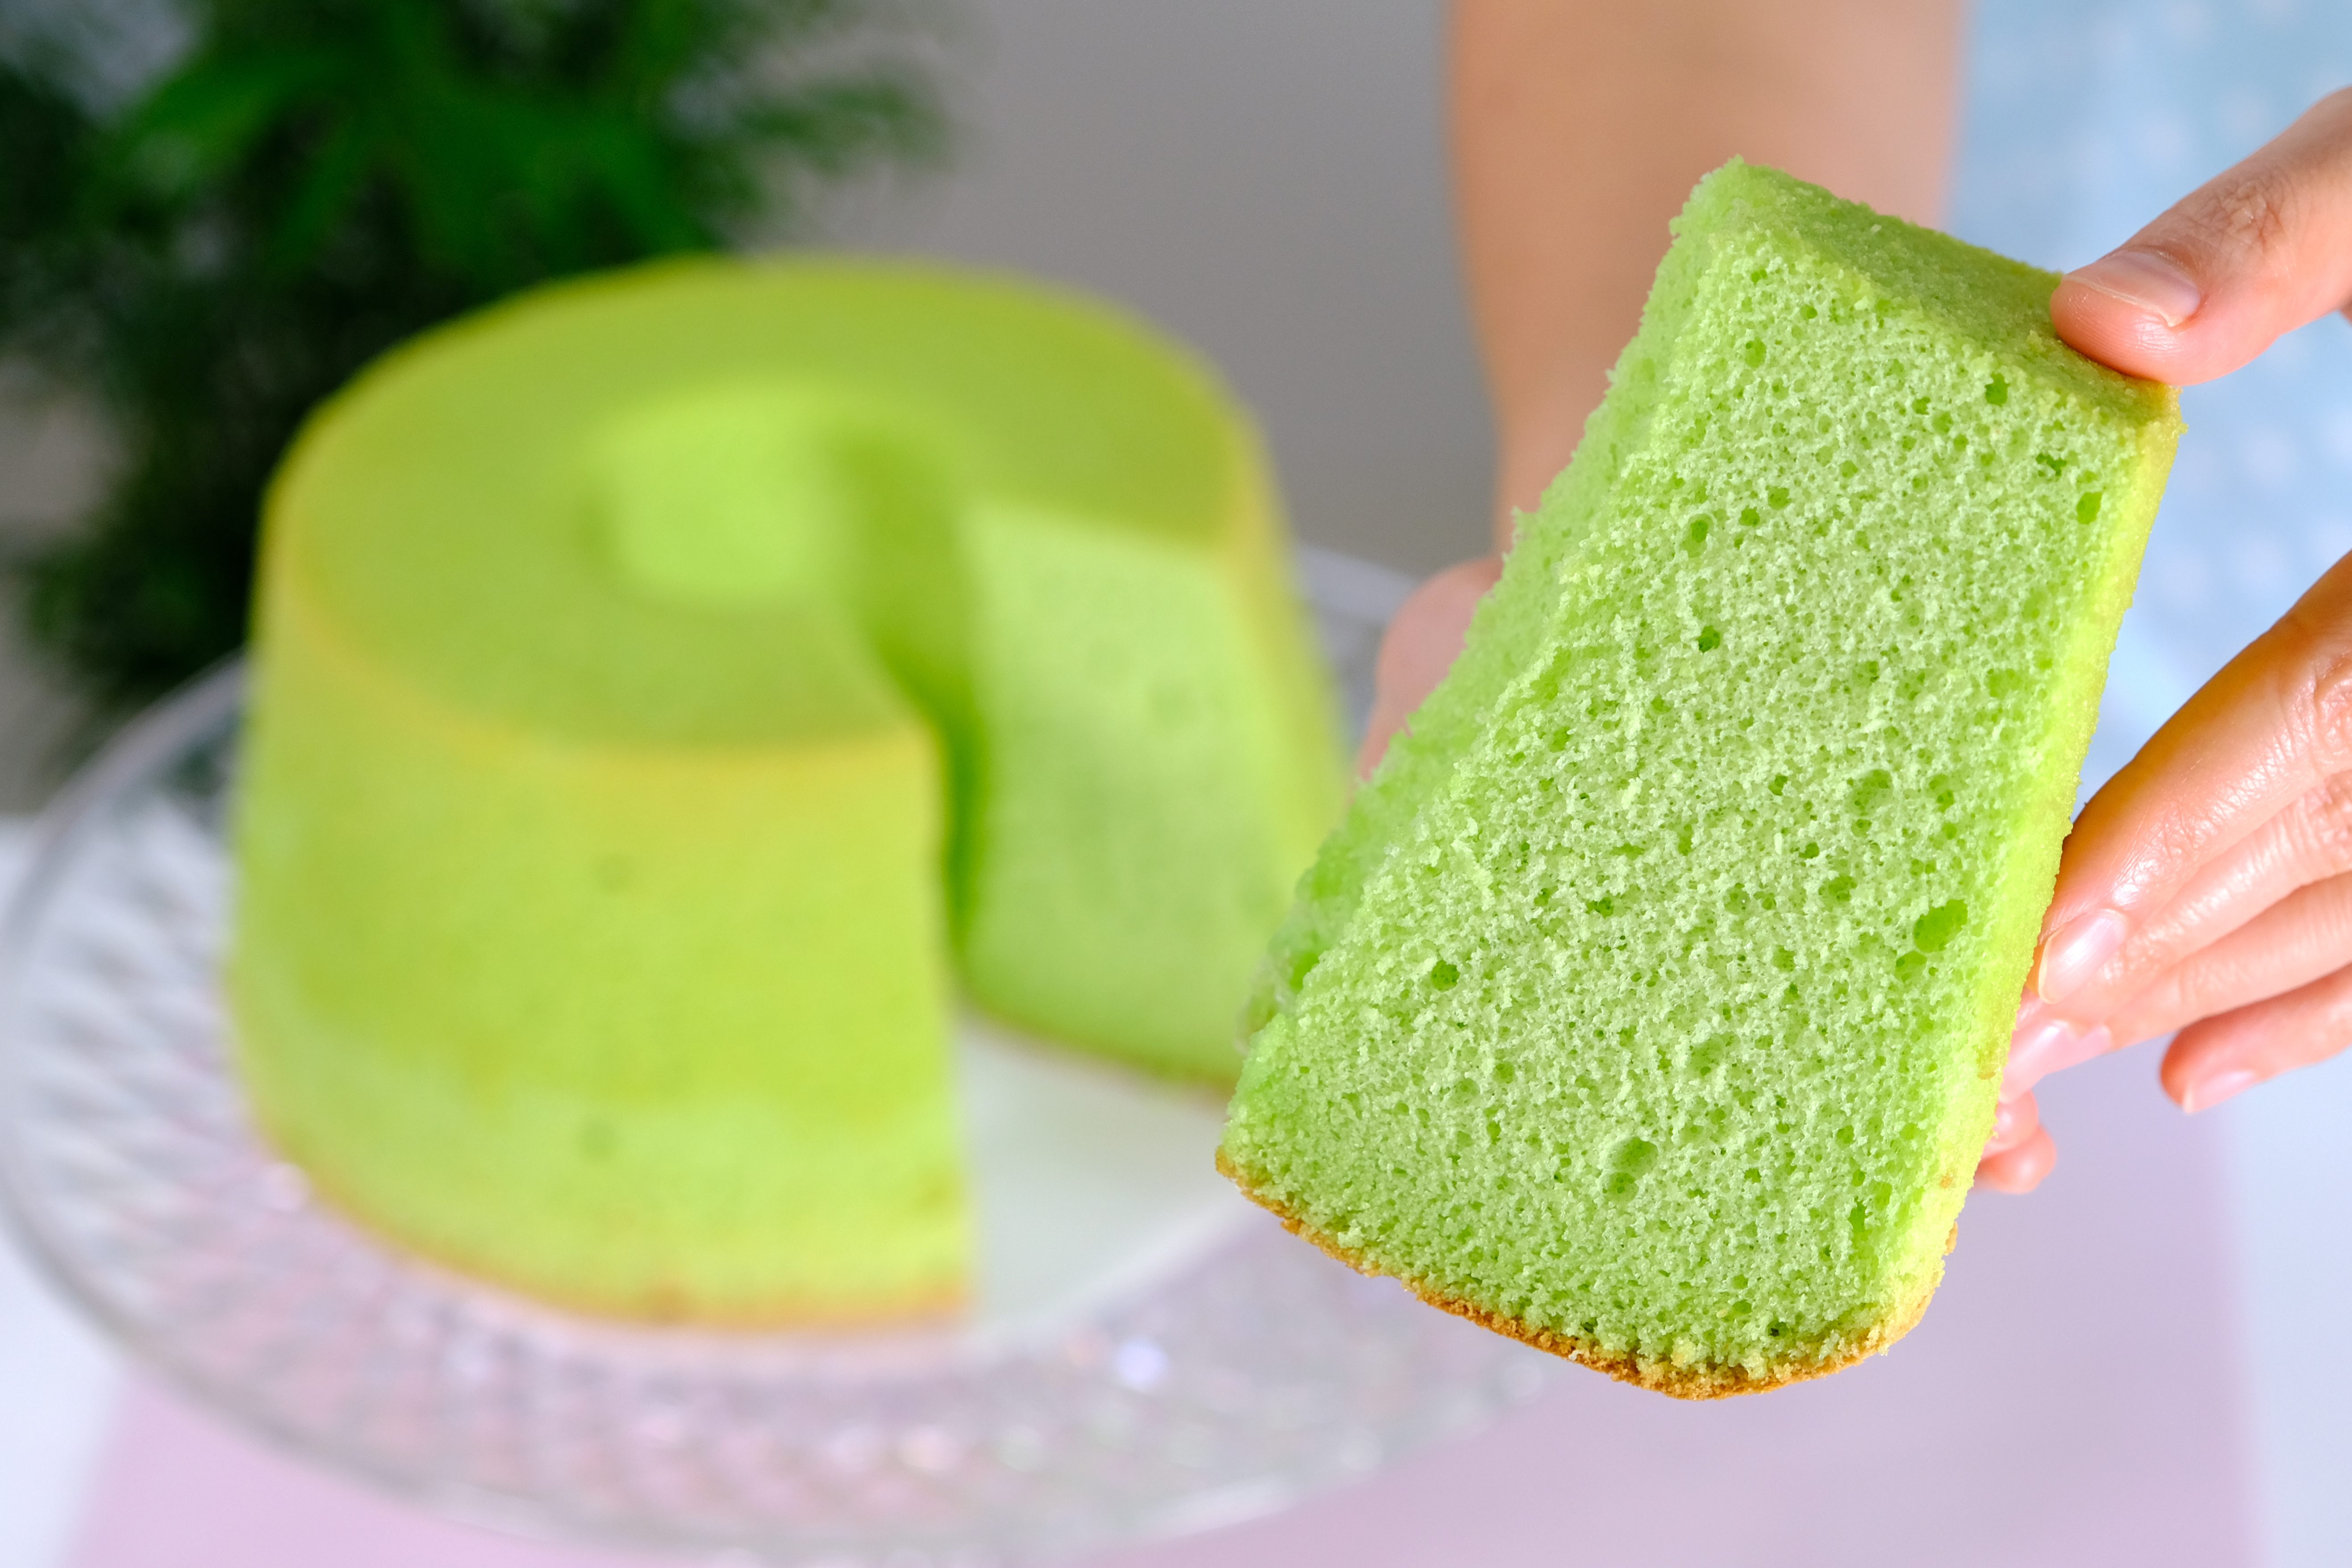
I prefer using Pandan Paste, it gives a strong, consistent flavor and saves time compared to extracting it from fresh leaves

When adding Pandan Paste, start with a small amount, I usually begin with ¼ teaspoon.
Be careful when using Pandan Paste, as it’s very concentrated; too much can leave a bitter or artificial aftertaste. It can also turn the green color overly intense and unappealing.

Making this cake is not difficult, but it does require precision and attention to the making technique.
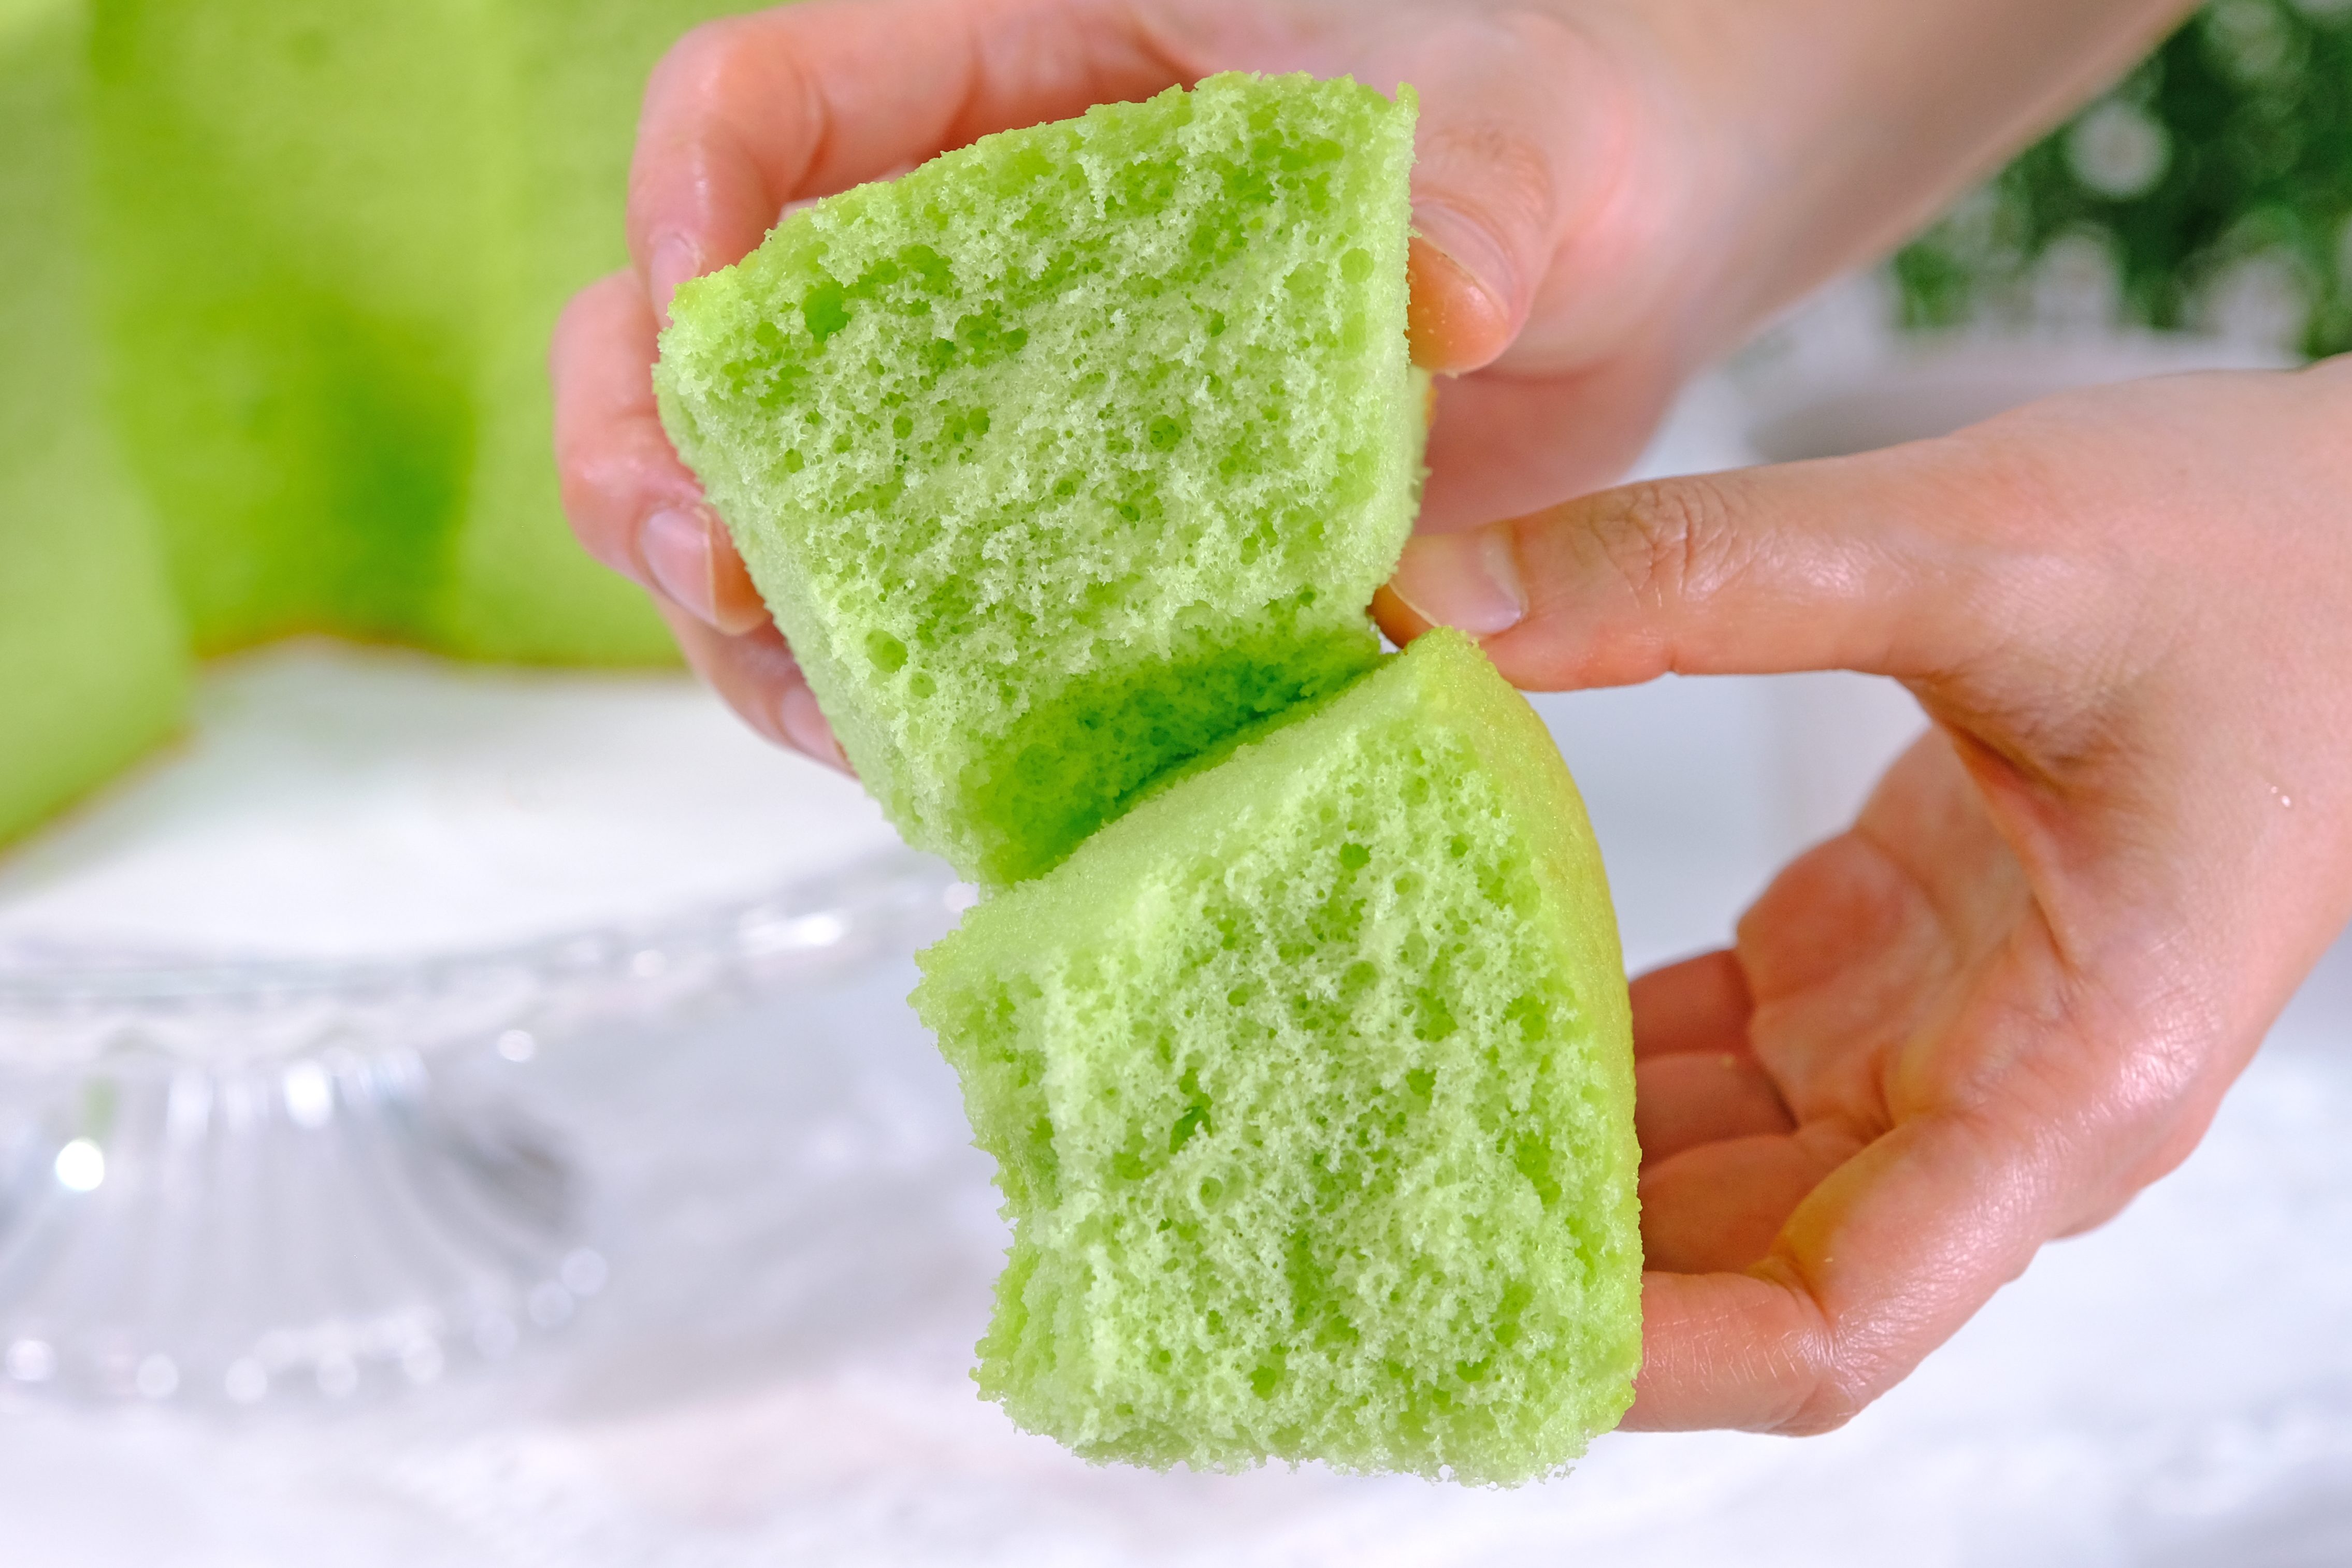
In this recipe, I will be sharing some helpful tips to make sure your Chiffon Cake turns out perfectly soft and airy.
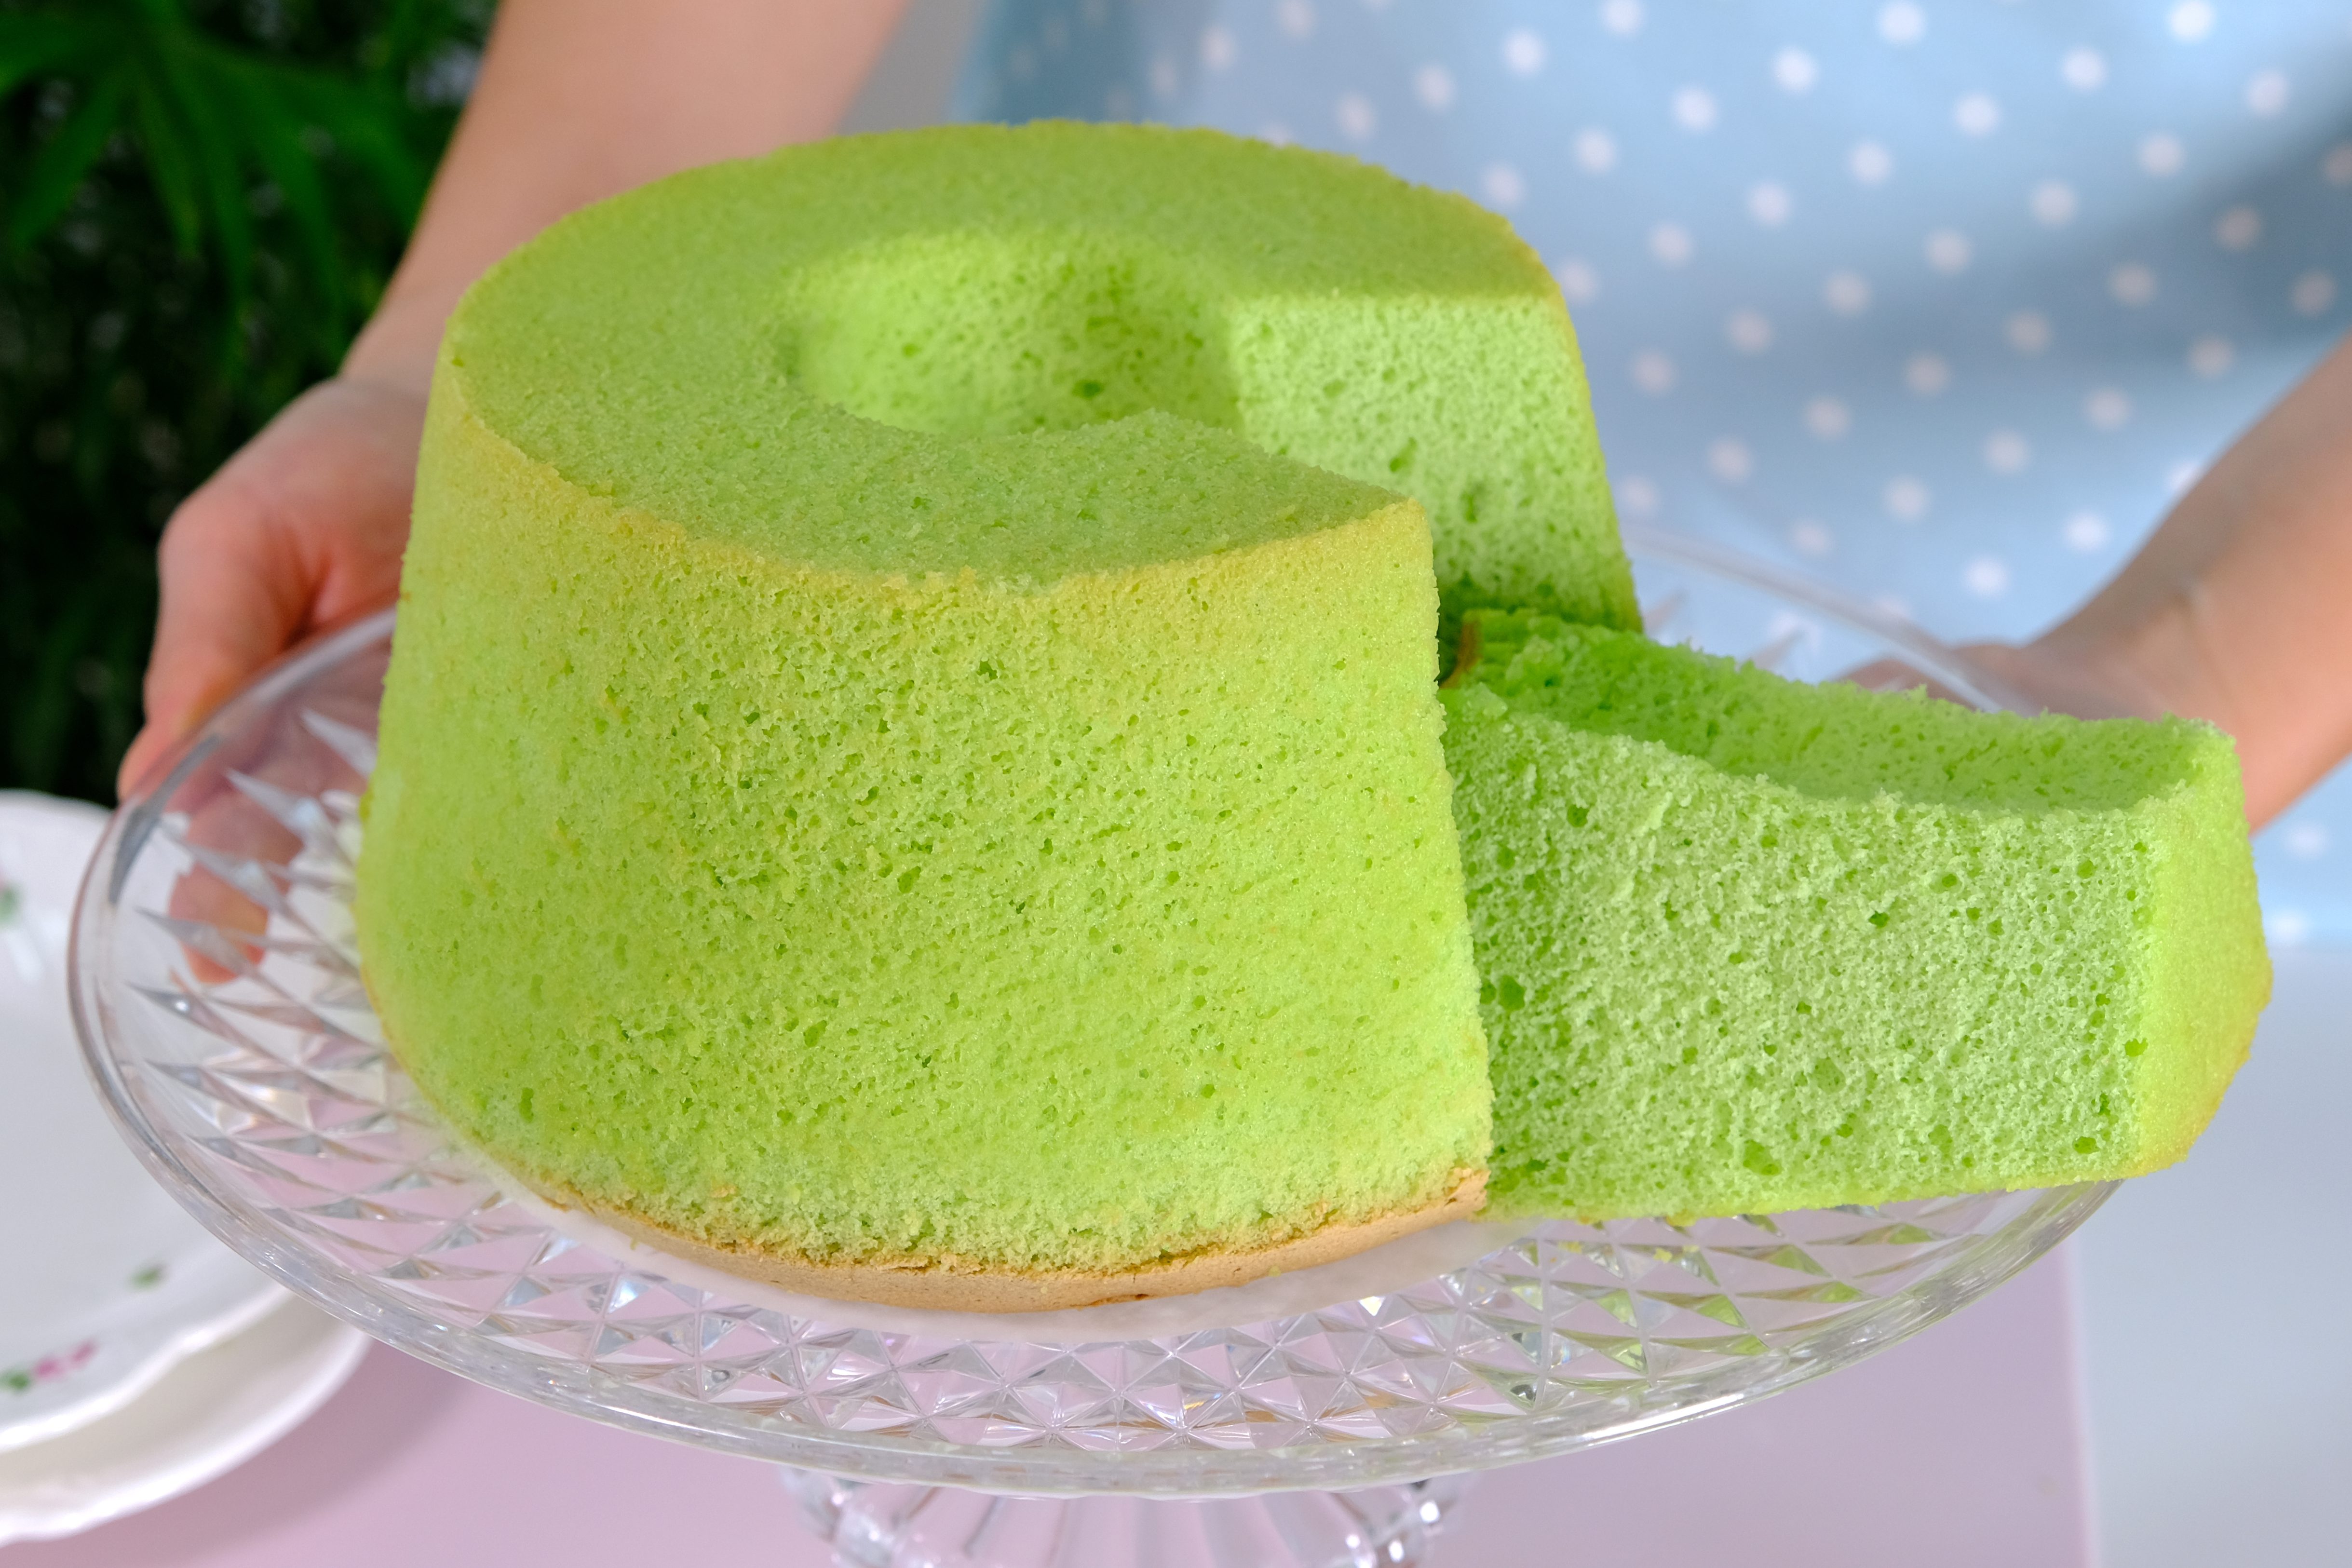
Pandan Chiffon Cake offers a delicate, fragrant, and slightly nutty flavour — a refreshing change from more traditional cake varieties.
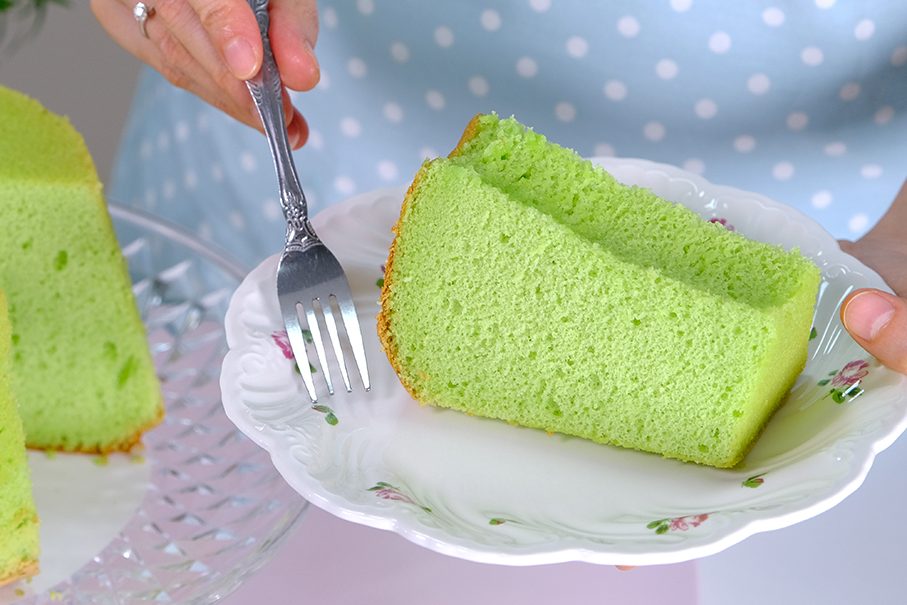
Its soft, fluffy texture practically melts in your mouth, making it an ideal choice for those who enjoy light, airy desserts.
I hope you will enjoy this recipe 🥰

Watch How To Make “foolproof fluffy pandan chiffon cake”

Tips for Success (Please Read First):

  • It’s very important NOT to grease the Chiffon Cake Pan because the batter needs to cling to the sides to rise properly
  • Preheat the oven at least 30 minutes before starting
    Once the Chiffon Cake batter is fully mixed, it needs to be baked right away (if you let the batter sit, that air starts escaping and the batter will lose volume)
  • It’s important that your mixing bowl is clean
    Any residue or fat will prevent the Egg Ehites from whipping properly (wipe the bowl and utensil with lemon juice or vinegar to helps remove grease)
  • Use fresh Eggs that are room temperature
    Other ingredients also must be at room temperature
  • Be careful when using Pandan Paste, as it’s very concentrated
    Too much can leave a bitter or artificial aftertaste, it can also turn the green color overly intense and unappealing
  • Sift the dry ingredients
  • Make sure the Egg Yolk mixture is well blended before folding it into the beaten Egg Whites
  • Beat Egg Whites until stiff peak
  • Fold the whipped Egg Whites into the Egg Yolk mixture in three batches
    Be gentle to avoid deflating the batter, fold carefully until the mixture is smooth and well combined (make sure there are no bits of egg whites left)
  • Slowly pour the batter into the pan from about 15 cm above to help burst any excess air bubbles
    Gently run a small metal skewer or spatula through the batter to eliminate any trapped air pockets
  • Avoid tapping or shaking the pan as this can cause the bubbles to deflate prematurely, resulting in a denser cake with less volume
  • Don’t let the batter sit too long before baking, bake it immediately
  • Avoid opening the oven door during baking, as sudden temperature changes can cause the Chiffon Cake to collapse
  • When the cake is done, immediately invert the pan onto a wire rack (if your pan has built-in supports)
    If your pan doesn’t have supports, you can place the tube hole over the neck of a soda or wine bottle to hang it high above the table, and cool the cake completely in the pan
  • Once cool, when unmold the cake; Don’t use a spatula to loosen the edges of the cake (this can cause the edges to become rough and uneven)
    Use your hand to gently press along the sides, going all the way around; Carefully peel about 1 cm of the cake away from the edges
    Similarly, gently press the center of the cake down with your index finger, about 1 cm deep, to loosen the middle (kindly watch the video for clearer instructions)
  • Chiffon Cake should generally be kept in an airtight container and refrigerated
    They are delicious cold, straight from the fridge

RECIPE

PANDAN CHIFFON CAKE
Yield: One 20 cm diameter Chiffon Pan

🌿 Ingredients
85 g Egg Yolks (room temp.)
60 g Coconut Milk (room temp.)
1/4 tsp Pandan Paste
125 g Cake Flour
(3/4 + 1/8) tsp Baking Powder (Double Act.)
(1/4 +1/8) tsp Salt
80 g Caster Sugar
70 g Vegetable Oil
160 g Egg Whites (room temp.)
1/4 tsp Cream of Tartar
85 g Caster Sugar

Notes: you can substitute Cream of Tartar with 1/2 tsp Lemon Juice or White Vinegar (or Apple Cider Vinegar)


🌿 Instructions
Preparation

  1. It’s very important NOT to grease the chiffon cake pan because the batter needs to cling to the sides to rise properly. I’m using 20 cm diameter pan for this recipe
  2. Preheat the oven at least 30 minutes before starting 160°C fan/ 180°C/ gas mark 4
  3. It’s important that your mixing bowl is clean
    Any residue or fat will prevent the Egg Whites from whipping properly (wipe the bowl and utensil with lemon juice or vinegar to helps remove grease)
  4. Take the Eggs and other cold ingredients out of the fridge
    Separate Egg Whites and Egg Yolks; then let them come to room temperature

To Make Pandan Chiffon Cake

  1. Combine Egg Yolks, Coconut Milk, and Pandan Paste in a medium mixing bowl
  2. Add the sifted dry ingredients (Cake Flour, Baking Soda and Salt) along with 80 grams of Caster Sugar, stir using a balloon whisk until well mixed
  3. Pour in the Vegetable Oil and mix until the batter looks smooth and well blended; Set this mixture aside
  4. In another large mixing bowl, beat the Egg Whites and Cream of Tartar until foamy
    Add the 85 grams of Caster Sugar in 3 batches, adding each portion every 30 seconds
    Once all the sugar is added, continue beating on high speed until stiff peak for about 3 minutes (the mixture will gradually thicken and looks shiny)
  5. Fold the whipped Egg Whites into the Egg Yolk mixture in 3 batches
    Start by adding one-third of the beaten Egg Whites to the Egg Yolk mixture (this first addition helps loosen the batter)
    Use a balloon whisk to gently stir, scrape the bottom and sides of the bowl to ensure everything is evenly combined
  6. Add another third of the Egg Whites and fold again (be gentle to avoid deflating the batter)
  7. Finally, pour the Egg Yolk mixture into the bowl with the remaining Egg Whites
    Fold carefully until the mixture is smooth and well combined (make sure there are no bits of egg whites left)
    Use a spatula to scrape the sides and bottom of the bowl to ensure the mixture is evenly mixed
  8. Slowly pour the batter into the pan from about 15 cm above to help burst any excess air bubbles.
    Gently run a small metal skewer or spatula through the batter to eliminate any trapped air pockets (avoid tapping or shaking the pan as this can cause the bubbles to deflate prematurely, resulting in a denser cake with less volume)
  9. Bake immediately in the preheated 160°C fan/ 180°C/ gas mark 4 oven for 45 minutes or until a cake tester inserted in the center comes out clean
    * Avoid opening the oven door during baking, as sudden temperature changes can cause the chiffon cake to collapse
  10. When the cake is done, immediately invert the pan onto a wire rack (if your pan has built-in supports)
    If your pan doesn’t have supports, you can place the tube hole over the neck of a soda or wine bottle to hang it high above the table, and cool the cake completely in the pan (This takes about 1½ to 2 hours, do not touch until completely cool)
  11. Once cool, you can unmold the cake
    Don’t use a spatula to loosen the edges of the cake; this can cause the edges to become rough and uneven
    Use your hand to gently press along the sides, going all the way around
    Carefully peel about 1 cm of the cake away from the edges
    Similarly, gently press the center of the cake down with your index finger, about 1 cm deep, to loosen the middle
    Then place your fingers on the bottom of the pan and press down firmly to lift out the center tube
    Finally, press the entire bottom of the cake inward to release it from the bottom of the pan (handle with care as the cake is very light and fluffy)
    “Kindly watch the video for clearer insturctions”


NOTES

  1. Ensure the cake has cooled completely before storing, as warmth creates condensation, which makes the cake soggy and encourages mold growth
  2. Chiffon Cake should generally be stored in an airtight container and kept refrigerated. This is especially important for Pandan Chiffon Cake, as it contains Coconut Milk, which can spoil more quickly at room temperature.
    The cake tastes delicious when served cold, straight from the fridge.
  3. This cake can last for up to 5 days to a week in the refrigerator.
  4. Chiffon cake freezes well
    Wrap individual slices tightly in plastic wrap, then add a layer of aluminum foil to prevent freezer burn.
  5. This cake can be frozen for up to 2 months
  6. Thawing: Thaw the frozen cake in the refrigerator overnight or at room temperature for a couple of hours before serving. Avoid using a Microwave for thawing, as this can affect the texture. 

Baked Korean Twisted Donut (꽈배기) Kkwabaegi

In Korea, Kkwabaegi is a popular after-school snack 🥰
“Kkwabaegi 꽈배기” or Korean Twisted Donuts;
I absolutely love them, but I don't like frying them; they're too greasy and troublesome.
This recipe doesn't require frying, you just bake them instead! A healthier version of Donuts 😋
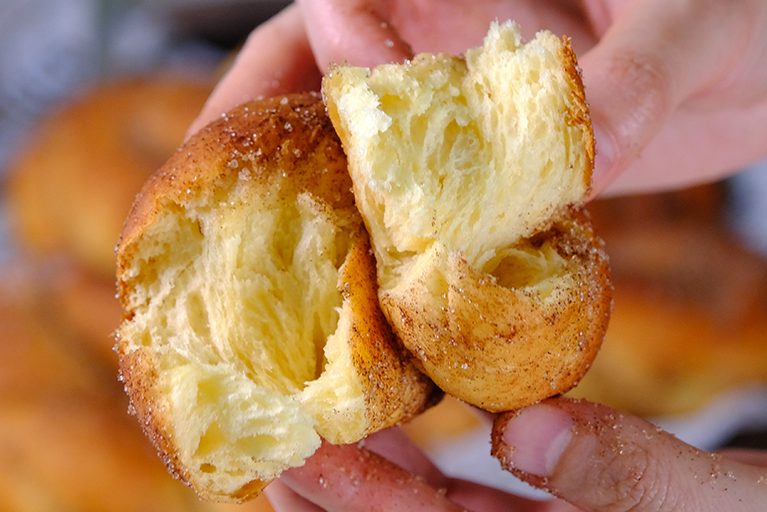
Mashed potatoes help keep the dough soft and moist, which is especially helpful in baked Donuts that can otherwise turn out dry. They give the Donuts a tender, slightly chewy, and fluffy texture; The starch in the Potatoes binds with the flour, creating a softer crumb
The key to making beautiful kkwabaegi is “Don’t roll the dough thinner in the middle and thicker at the ends, or vice versa” AND “Don’t twist it too much”
That will cause the twist to break during the proofing or baking process
Your twisted donut won’t look pretty ☹️
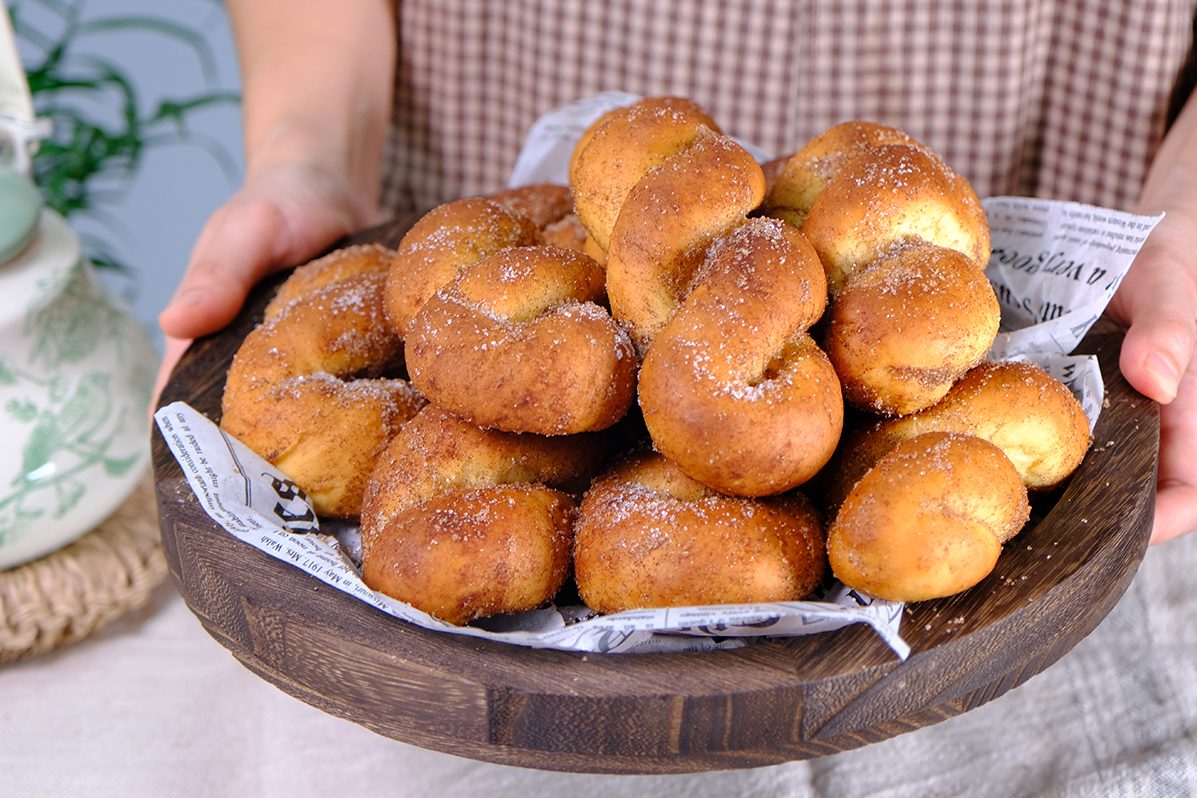
These mildly sweet, fluffy, spongy, twisted doughnuts are simply irresistible 😳🤤🤤

Crispy sugar on the outside, soft and slightly chewy on the inside;
And most importantly, it’s not greasy 😜
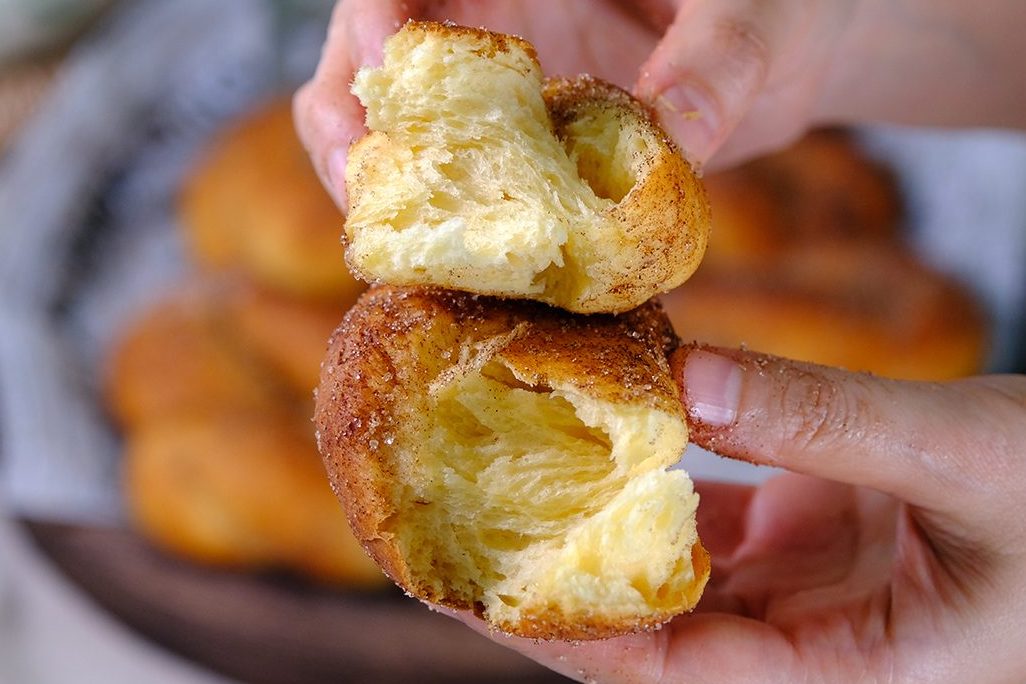
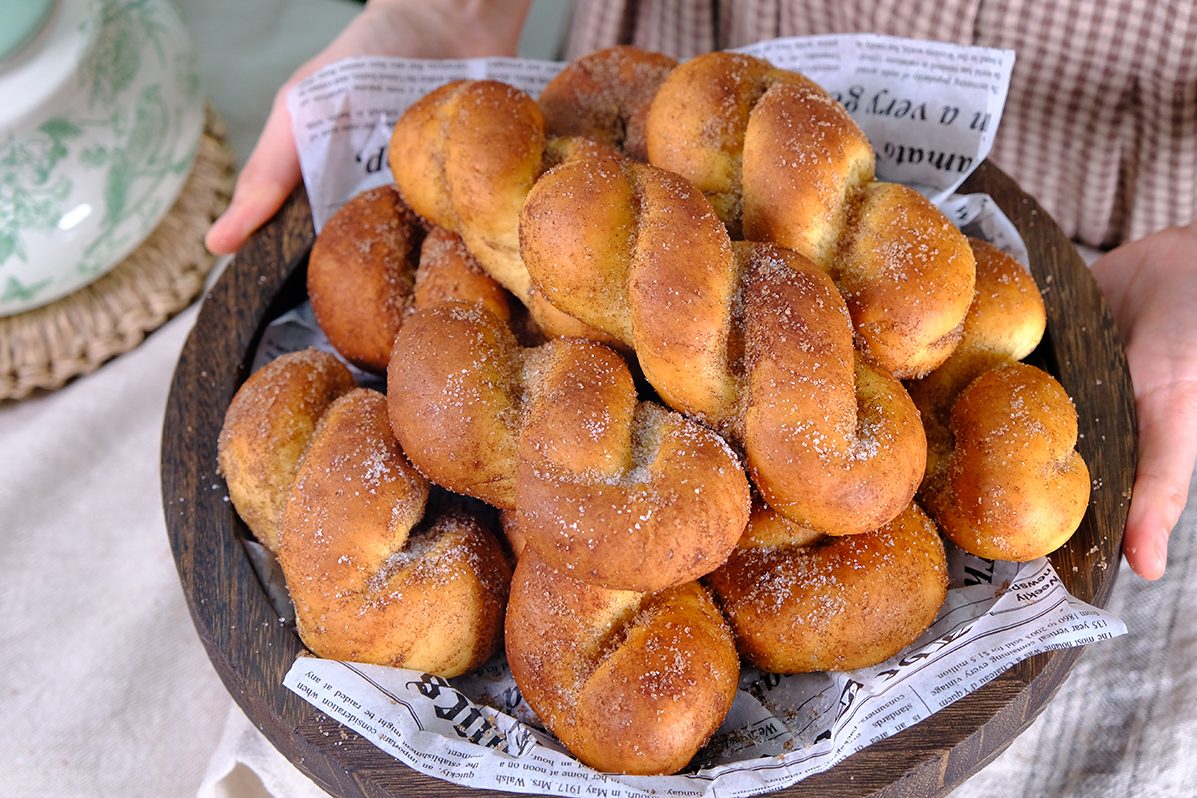
They pair really well with Coffee, Milk, Chai Tea or even Hot Chocolate.
Make this for your loved ones, or your kids; They’ll love it !! 🤗
I hope you will enjoy it as much as I do 😍

WATCH HOW TO MAKE Baked Korean Twisted Donut (꽈배기) Kkwabaegi

RECIPE

BAKED KOREAN TWISTED DONUTS
Yield: 10 pieces


INGREDIENTS
🍩 Donut Dough
315 g All-Purpose Flour
50 g Caster Sugar

1⅔ tsp Instant Yeast
1/3 tsp Salt
125 g Mashed Potatoes

50 g Egg Yolks
100 g Full Cream Milk (cold)
40 g Unsalted Butter


🍩 Coating

60 g Unsalted Butter (melted)

100 g Caster Sugar

1 tbs Cinnamon Powder


INSTRUCTIONS

  1. Cook Potaoes until tender. Place potatoes in a saucepan, add enough water to submerge. Cook over hight heat until the water comes to a boil. Reduce the heat and let simmer until the Potatoes are tender. Once it’s done, drain the Potatoes and mash them smoothly, set aside.
  2. Preheat the Oven to 400 F/ 200°C/ 180°C fan/ gas mark 6 and line baking tray with parchment paper.
  3. Combine the dry ingredients. In a large bowl, place the Flour, Sugar, and Instant Yeast. Add the salt to the opposite side of the bowl (be careful not to let the Yeast and Salt come into direct contact, as this can kill or slow the yeast’s growth). Stir until thoroughly combined.
  4. Add the wet ingredients to the dry mixture. Add the cooled Mashed Potatoes, Egg Yolks and Cold Milk to the dry mixture. Use a wooden spoon mix well until it forms a lump. And then, using your hands start kneading the dough. Gather all the small crumbs and dry flour to form a ball of dough.
  5. Knead the dough until smooth and elastic. Once the dough forms a rough ball, add the Butter and knead for about 5 minutes until the dough is smooth and elastic.
    The dough will be slightly sticky, resist the urge to add more Flour as it can make your Donuts tough.
  6. Portions the dough. Divide the dough into 10 equal portions (about 68 grams each). Shape each portion into a ball. Cover the dough with plastic wrap while shaping to prevent it from drying out. And let the dough rest for 10 minutes.
  7. Shape the dough. 10 minutes later, Take one portion of the dough, roll it out. Starting from the center, roll out to both sides, until it is about 28 cm long.
    The dough should be evenly thick from end to end.
    I recommend using a ruler as a guide. Don’t sprinkle too much Flour on the surface, as it will be difficult to shape.
  8. Twist the dough (Please watch the video for clear instructions)
    Roll the 28 cm long dough with your both hands in different directions; right hand up and left hand down; DON’T twist it too much. Once you feel tension between the two ends, stop twisting. Then, pick up both ends, they will automatically twist. Using your hands twist it a little more. Pinch the ends and fold them under. Place it on a baking sheet lined with Parchment Paper
    and cover with plastic wrap to prevent drying.
    Don’t roll the dough thinner in the middle and thicker at the ends, or vice versa; That will cause the twist to break during the proofing or baking process. Your twisted donut won’t look pretty.
  9. Final proof. After shaping, let the dough proof for 20 minutes
    Meanwhile, we can prepare the Donuts coating
  10. Prepare Coating. Melt the Butter in a double boiler, set aside.
    In a Ziploc bag, mix Caster Sugar and Cinnamon Powder, shake it.
  11. Bake the Donuts. After 20 minutes, you can see that the dough puffy and bigger in size. If you press it lightly, the fingerprint returns slowly and does not bounce immediately. Bake in a preheated oven for 12 minutes.
    After 12 minutes, flip the donuts and bake for another 3 minutes.
  12. Apply Coating. Once baked, brush with melted Butter while still hot.
    Place in a bag of Cinnamon Sugar (shake it), then place the donuts on a cooling rack or a plate.
    Twisted Donuts are best enjoyed while still warm, on the day it’s made.

    NOTES
    * If you make a large batch and can not finished it in one day, after baked, don’t apply the coating. Place Donuts in an airtight container in the fridge (it will last for 3 days). When you need it, take them to room temperature for about 30 minutes; then reheat donuts in the preheated (400 F/ 200°C/ 180°C fan/ gas mark 6) for about 10 Minutes (the Donuts will be soft and fluffy again); Then coat with melted Butter and Cinnamon Sugar and serve.
    * Like all raised donuts, they can get a little bready as they age. It’s best to have them warm when they are first made, but if you have to store them, ensure they are completely cooled before packing them into a container.


Fluffy Steamed Pork Bun 鲜肉包子 (Baozi)

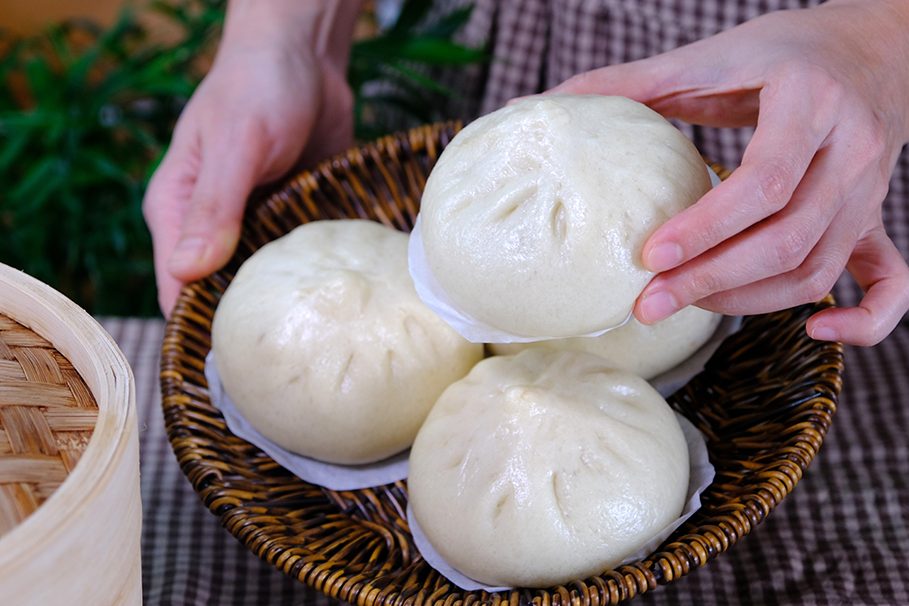
Many people struggle making Steamed Meat Buns; A common mistake is that the Steamed Buns end up collapse or come out wrinkled.

Making steamed Pork buns is not complicated if you get the right tips and of course like they say practice makes perfect.
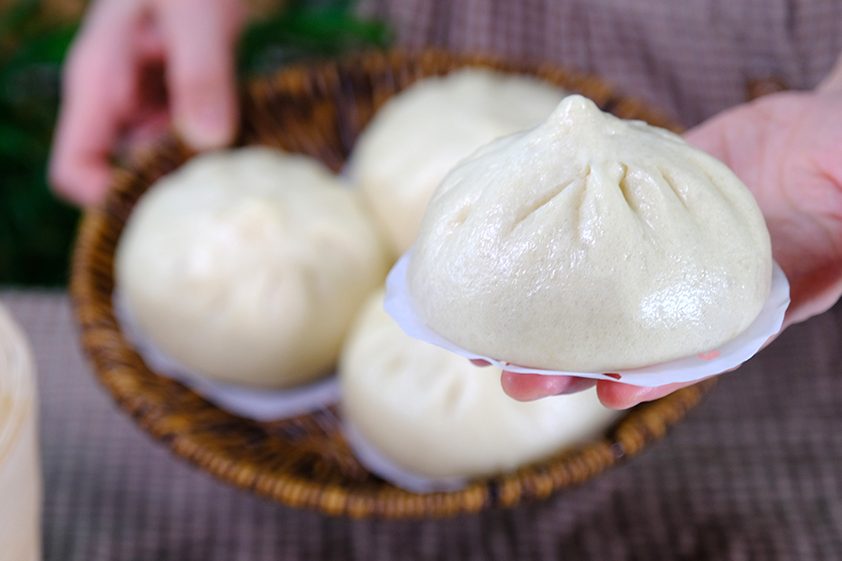
Homemade Pork Buns fresh out of the steamer are delicious to eat, and they taste even better if you make the dough yourself.
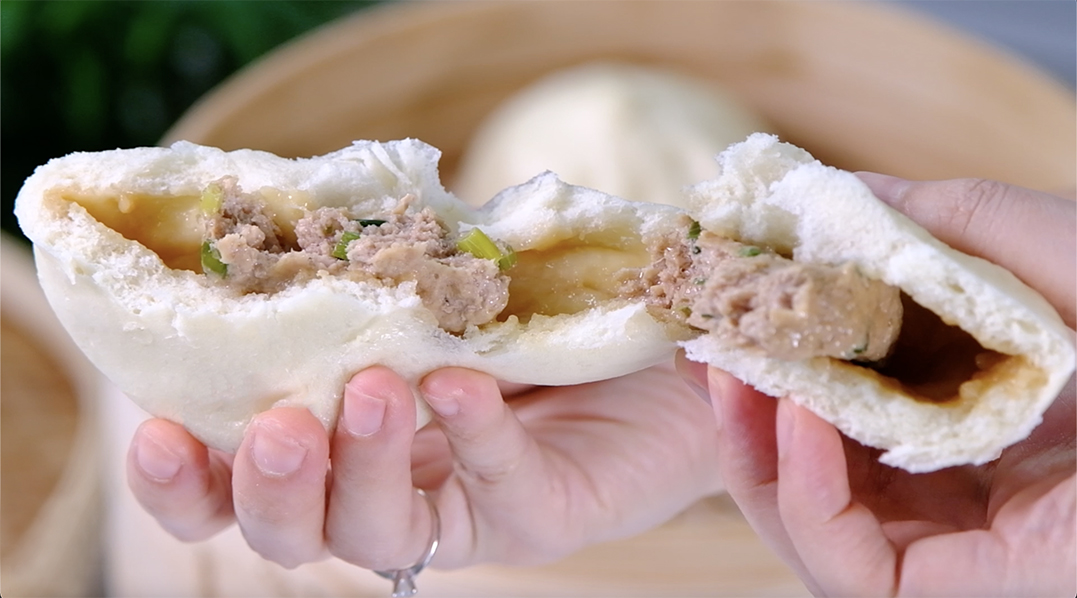
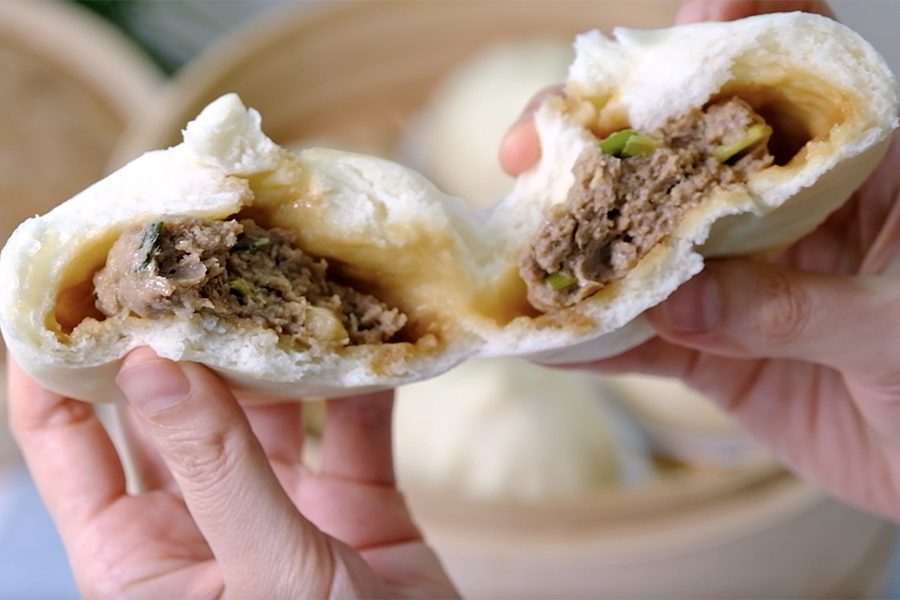
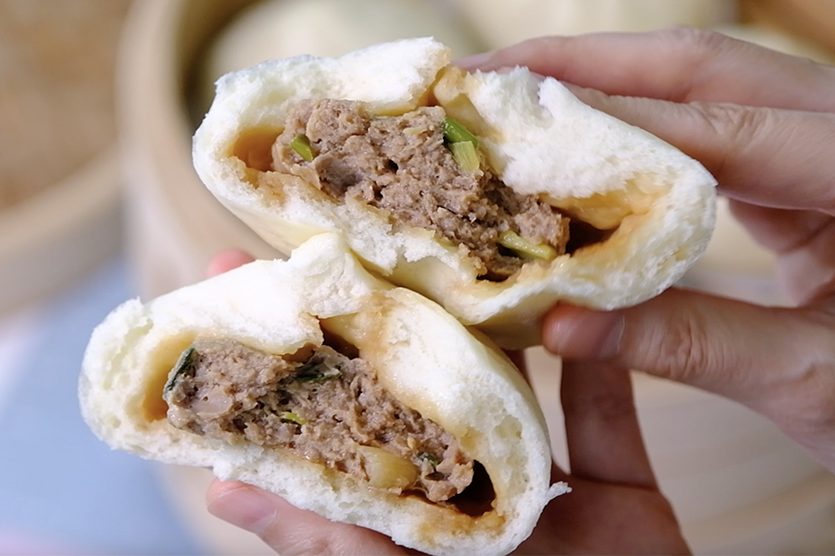
Soft and fluffy Steamed Buns filled with a juicy savory pork filling.
The filling is juicy, and you can taste the savoury broth as soon as you bite into them 🥲
🤤 hungry…
The texture is soft and fluffy with small, evenly distributed air bubbles
It spring back when pressed lightly 🤗

The buns are incredibly soft and won’t deflate or wrinkle after steaming
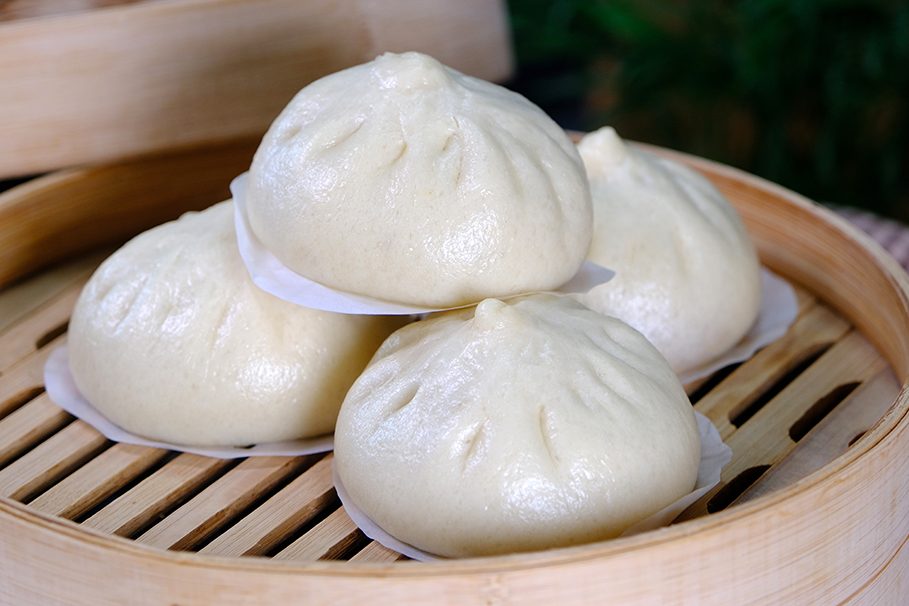
You can see that the bun does not collapse or wrinkle at all, they look so smooth and puffy

Hopefully, this recipe will give you more confidence in making your own Steamed Buns!
🍀 Love you All!

WATCH HOW TO MAKE FLUFFY STEAMED PORK BUN

TIPS FOR SUCCESS (PLEASE READ FIRST):

THE SECRET OF A DELICIOUS JUICY FILLING
When mixing the filling, it’s important to stir it in one direction; usually clockwise or counterclockwise (This is a traditional technique in Chinese cooking)
Stirring in one direction activates and aligns the meat proteins, which creates a stronger bind; this results in a firm, springy, and juicy filling that holds together well during steaming

  1. The infused liquid Soak Star Anise and Sichuan Peppercorn in a boiling water. This infused liquid adds depth of flavor and helps maintain a juicy texture in the pork filling after steaming.
  2. Minced Pork Using minced pork with some fat is definitely better than using lean meat alone (70/30 or 80/20 LEAN-to-FAT ratio is ideal)
    Fat adds essential moisture to the filling, it will taste richer and more savoury
  3. Light Soy Sauce & Dark Soy Sauce
    Light Soy Sauce gives the dish a salty base.
    Dark Soy Sauce is generally thicker, less salty and slightly sweeter than Light Soy Sauce; it completes the salty template while giving the dish a richer color (you can add a little more if you like a slightly darker filling)
  4. Caster Sugar Sugar balances the savory and salty elements in the filling
  5. Ginger Ginger neutralizes Pork odor and brings a fresh, zesty heat that lifts the overall flavor of the filling
  6. Oyster Sauce and White Pepper This will adds depth and complexity to the flavor profile
  7. Sesame Oil and Vegetable Oil Sesame Oil adds a rich, nutty aroma and deep flavor that’s iconic in Chinese cooking; while Vegetable Oil keeps the filling moist and tender during steaming
  8. Spring Onion Spring onion adds fresh flavor, balances richness, boosts aroma, and gives authentic character to the pork filling (making it more delicious and well-rounded)

WHAT IS IMPORTANT IN MAKING DOUGH SKIN ?

  1. Yeast Instant Yeast is more stable than Active Dry Yeast
    This allows the dough to rise more consistently, which is important for achieving a fluffy bun texture
  2. Water The water should be lukewarm around 35–38°C (95–100°F); Avoid water that is too hot, as it can kill the yeast
  3. Flour I use Unbleached All-Purpose Flour, which has a protein content around 9.3–10.3%, making it suitable for soft Steamed Buns.
    I do not recommend using bleached wheat flour as it can leave a slightly chemical aftertaste and can weaken gluten development
  4. Baking Powder Double Acting Baking Powder gives buns a reliable two-stage rise, perfect for steaming; It creates fluffiness, helps with shaping, and can boost yeast
  5. Sugar Caster sugar dissolves quickly, sweetens evenly, boosts yeast, and improves dough texture (making it perfect for smooth, fluffy buns)

RECIPE

STEAMED PORK BUN
Yield: 6 pieces
INGREDIENTS
🍀 Filling
1/2 tsp Chinese Peppercorn
3 Star Anise
15 g Boiling Water
250 g Minced Pork (with fat 70/30 or 80/20 LEAN-to-FAT ratio is ideal )
1 tbs Light Soy Sauce
2/3 tsp Dark Soy Sauce
2/3 tsp Caster Sugar
1⅓ tsp Ginger (grated)
1⅓ tsp Oyster Sauce
1/8 tsp White Pepper
1½ tsp Sesame Oil
1½ tsp Vegetable Oil
20 g Spring Onion (chopped)

🍀 Dough Skin
210 g All-Purpose Flour (Unbleached, 9.3–10.3% Protein)
1 tsp Instant Yeast
1½ tbs Caster Sugar
3/4 tsp Baking Powder (Double Act.)
125 g Lukewarm Water (35-38°C)


INSTRUCTIONS
🍀 Filling

  1. Soak Star Anise and Sichuan Peppercorn in a boiling Water, let it sit for 10 minutes
  2. In a medium bowl, combine Minced Pork, Light Soy Sauce, Dark Soy Sauce, Caster Sugar, Grated Ginger, Oyster Sauce and White Pepper
    Use chopsticks or a wooden spoon, stir evenly in one direction
  3. Pour in the infused Water that we prepared earlier and stir until well combined
  4. Add Sesame Oil and Vegetable Oil; stir vigorously in one direction until the mixture becomes sticky and cohesive
  5. Add chopped Spring Onion and mix again
  6. Cover and store the filling in the fridge for at least 30 minutes before using; it will firms up, making it even easier to wrap into buns

🍀 Dough Skin

  1. Mix all dry ingredients (All-Purpose Flour, Instant Yeast, Caster Sugar, Baking Powder)
  2. Slowly add lukewarn Water to the dry ingredients; and stir until it clump together
  3. Then, knead the dough by hand for 10 minutes until smooth and elastic
  4. Once it’s done, shape it into a ball;
    Place the dough in a lightly oiled mixing bowl, brush the dough lightly with oil
    Cover and let stand at room temperature until doubled in size
    Please note, proofing time varies depending on room temperature
    My dough took 30 minutes; a warmer room temperature means a faster proofing time, and vice versa
  5. Once proofed; you’ll notice that a well-fermented dough should have doubled in size (poke the center with your finger, the dough should not deflate)
    Knead again for 3 minutes to knock back any air bubbles; then cover and leave to rest for another 10 minutes
  6. After 10 minutes, sprinkle a little flour on your work surface to prevent sticking and transfer the dough onto it
    Shape the dough into a long sausage and knead until the dough becomes longer, then fold the dough into thirds
    Repeat this process six times
    By kneading and pressing the dough, the gas will be distributed evenly, the buns will have a smoother texture and also prevent the risk of the filling leaking due to large air bubbles
  7. Then, divide the dough into 6 equal pieces (about 60 grams each)
    Round each piece into a ball
    Cover the dough with plastic wrap during the process to prevent it from drying out
  8. To shape the bun (kindly watch the video for completed instructions)
    – Take the first dough; roll the dough into a thick disc 10 cm in diameter
    – Then grab the dough with your left hand and rolling pin on the other hand; use a rolling pin to flatten the edges of the dough while turning it little by little (the center part should be thicker so it gives more support to hold juicy meat fillings without collapsing or leaking during steaming) The wrapper should be 13 cm in diameter
    – Turn it over; sprinkle flour on your hands and place the wrapper in the palm of your hand
    – Add about 50 grams of the Pork filling to the centre of the dough (flatten the filling with a spatula, leaving about 1.5 cm of skin around the edges)
    – Place your right thumb on top of the wrapper and your index finger underneath it; And the thumb that holding the wrapper should hold the filling
    Start folding the dough around the filling in a circular motion while using your left thumb to lightly press the filling down (press each fold firmly)
    – Once all the edges are centered, twist the center of the bun to close it (pinch the top of the bun to make sure it is sealed tightly otherwise the filling will leak out)
  9. Once it’s done, place the bun on a work surface; then rotate it between your palms to shape it
  10. Then place the bun on a piece of Parchment Paper and lay on the base of a Bamboo or Metal Steamer; put the lid on while continuing with the remaining dough
    Meanwhile, you can start preheat your steamer
    Leave some space between the buns to allow them to expand during steaming
  11. Once the buns have formed, immediately steam them over HIGH heat for 15 minutes; final proofing is not necessary, as it will overproofed the buns and cause the buns to collapse
    If you use a metal or plastic steamer, cover the lid with a cloth so condensation doesn’t drip onto the buns
    If you cook two layers at once, as I did; place the last batch on the bottom; It is closer to the water, which helps the dough rise faster
  12. After 15 minutes, turn OFF the heat, remove the lid and let it sit for 5 minutes to let the excess steam to dissipate
  13. You can serve the steamed buns immediately or let them cool completely on a cooling rack if you want to store them


NOTES

  1. AVOID leaving buns at room temperature for more than 2 hours, especially if they contain meat — it’s unsafe
  2. AVOID Refrigerating buns uncovered — they’ll dry out quickly.
  3. Storage
    – Fridge: place in an airtight container or ziplock bag with the air squeezed out; store in the refrigerator for up to 2 days.
    – Freezer: wrap each bun individually in plastic wrap or Parchment Paper to prevent freezer burn; place wrapped buns in a freezer bag or airtight container (label with the date and freeze for up to 2 months)
  4. Reheat
    – From the Fridge: Steam for 5–8 minutes over boiling water until hot and soft
    Or Microwave with a damp paper towel for 30–60 seconds (avoid overheating or they’ll dry out)
    – From the Freezer: DO NOT THAW— reheat directly from frozen
    Steam for 10–15 minutes until fully hot Or Microwave with a damp paper towel for 1–2 minutes in 30-second intervals

Frying Pan Milk Bread

Baking bread is my favorite,
the kneading process is very calming and meditative for me.
But as my work gets busier, I find I don’t have time to make homemade bread.
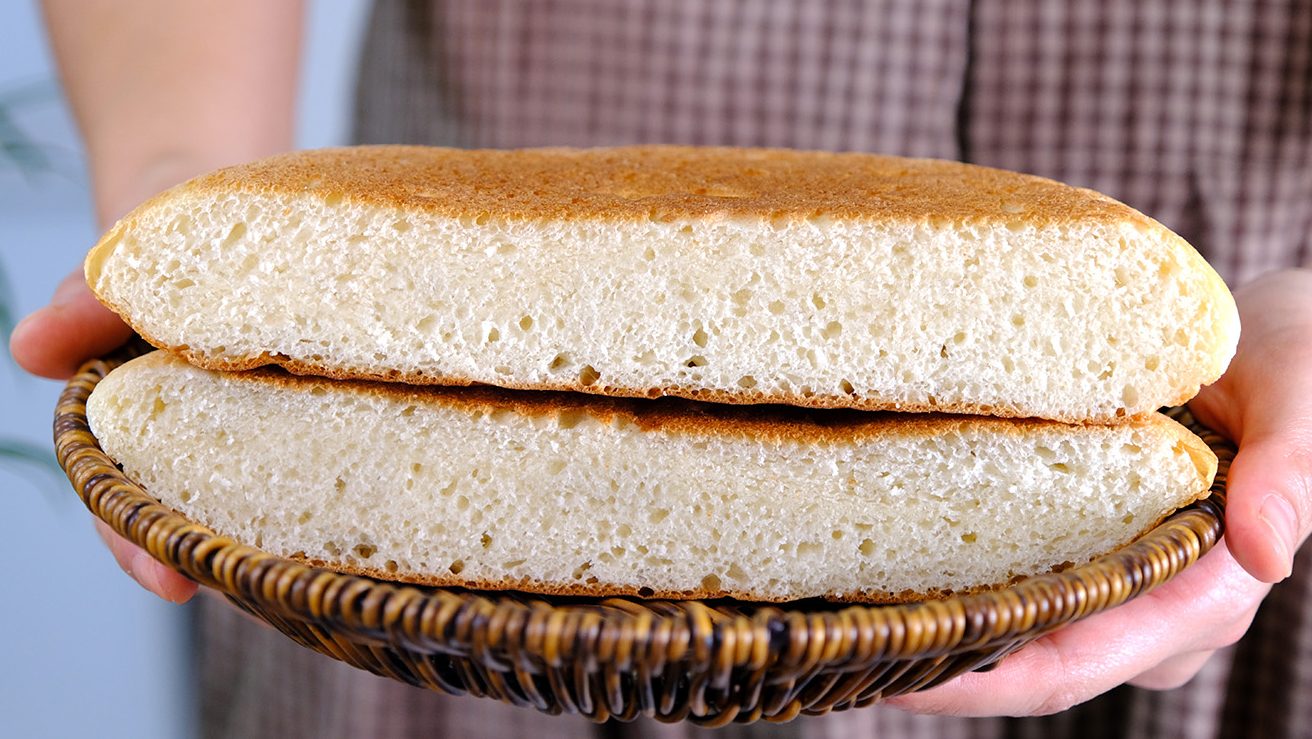
Through trial and error, this Frying Pan Bread was born!
This recipe minimizes time and effort and can be made in just one frying pan.

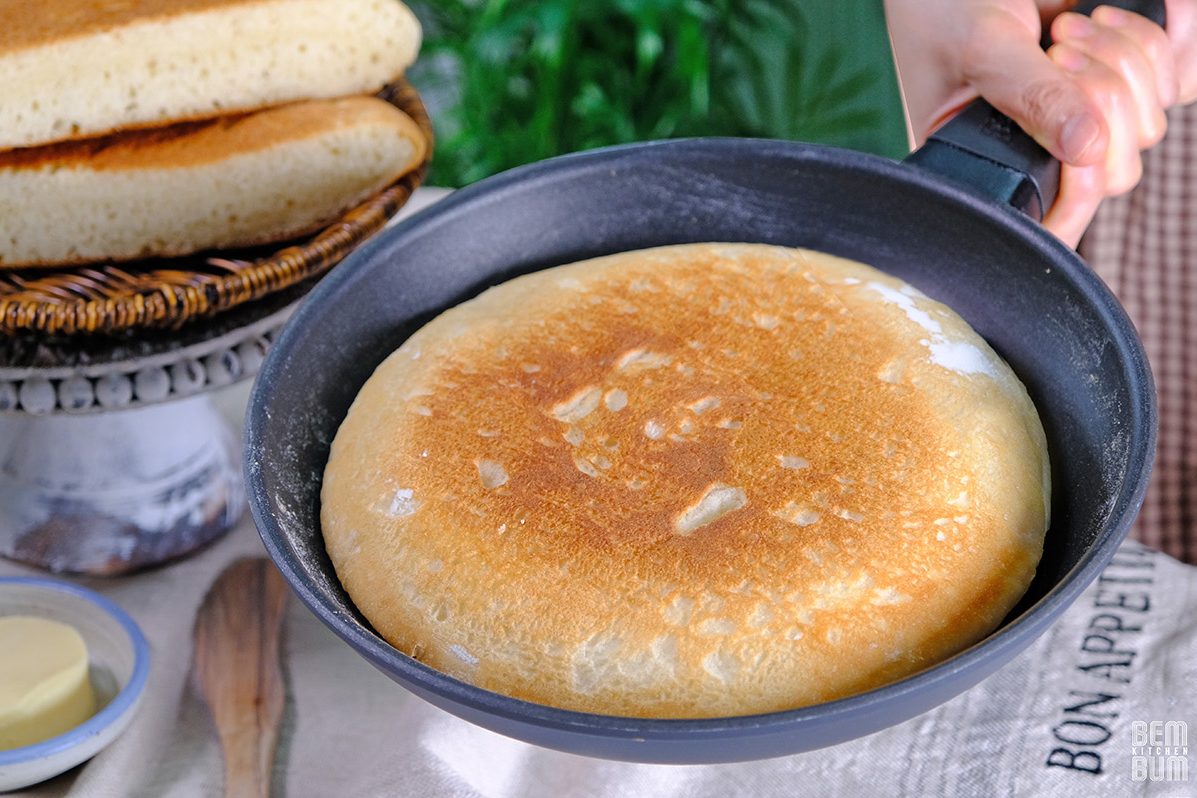
A super quick and delicious way to make soft homemade bread.

When making this bread; It is important to use a non-stick pan with a thick base, otherwise the dough will stick to the bottom of the pan.

You can use either gas stove or an Induction cooktop to cook the bread
If you are using an induction, please use a special frying pan

The pan lid is also essential; It use to prevent the bread from drying out during fermentation and cooking.
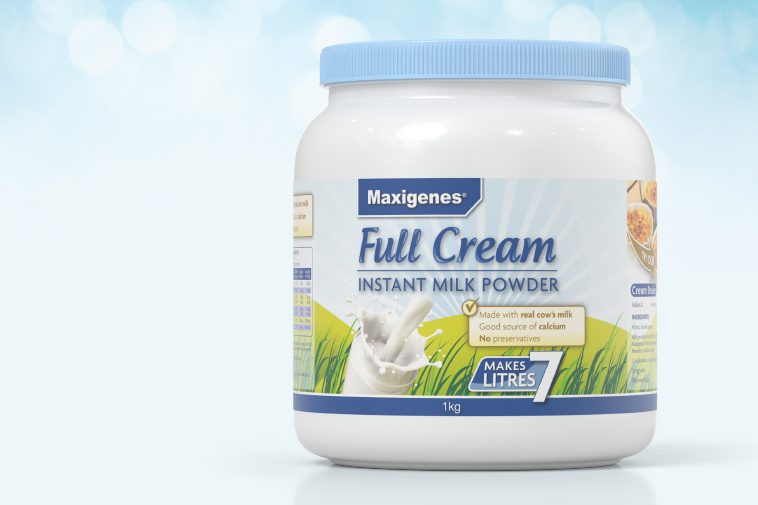
This powder proteins increase the strength of the dough, especially when mixed with Bread Flour

I use Full Cream Powdered Milk, not Liquid Milk in this recipe.
The fat from Milk Powder adds rich flavor and tenderizes the dough, resulting in a softer, finer, more tender crumb.
The bread will also have a longer shelf life.
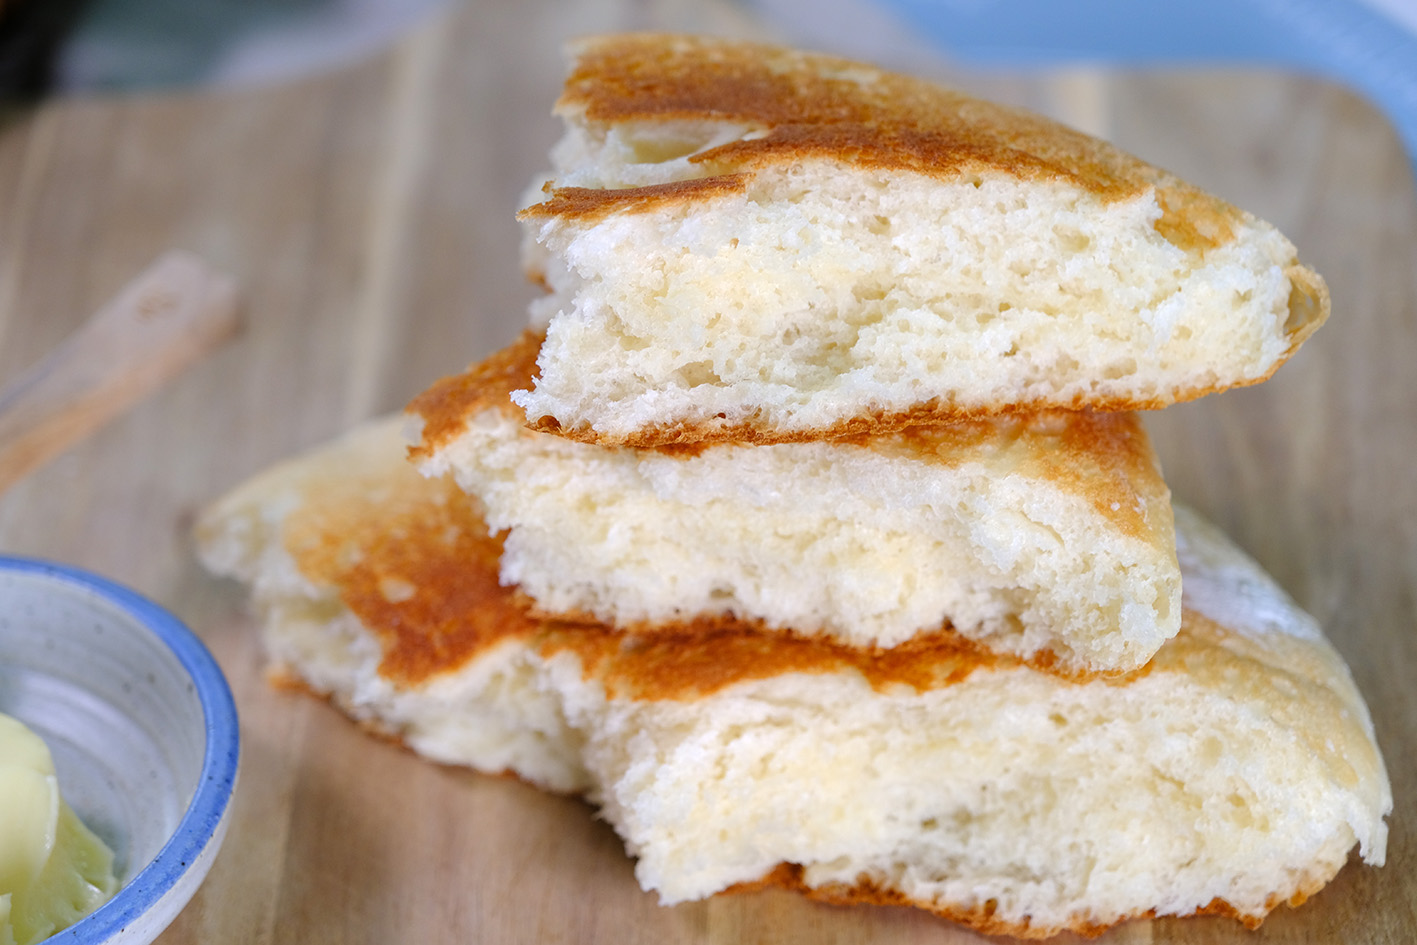
🙄….. 🤤 SO SOFT…

The bread is so soft and fluffy; perfect served with Butter or jam, or as a delicious accompaniment to a bowl of warm soup.

I love making it into sandwiches 😁
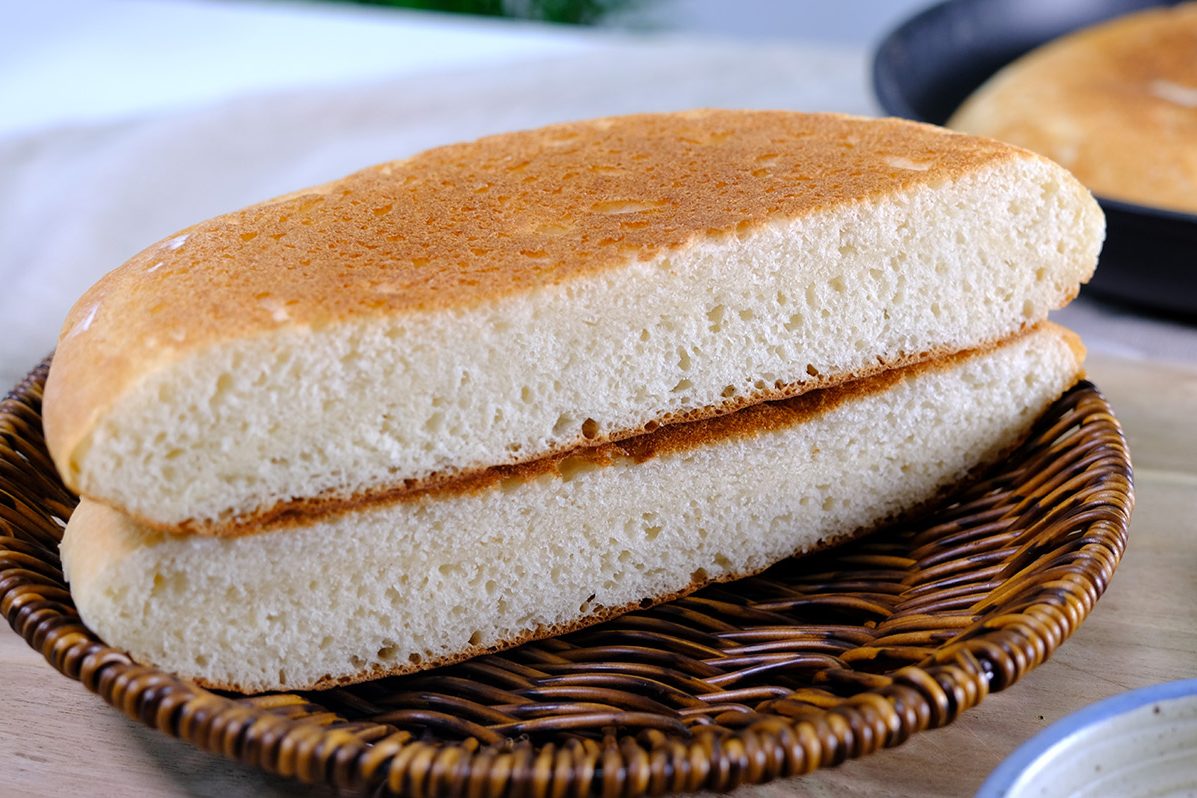
I hope this recipe helps those of you who are busy; The simplest and most delicious homemade bread.
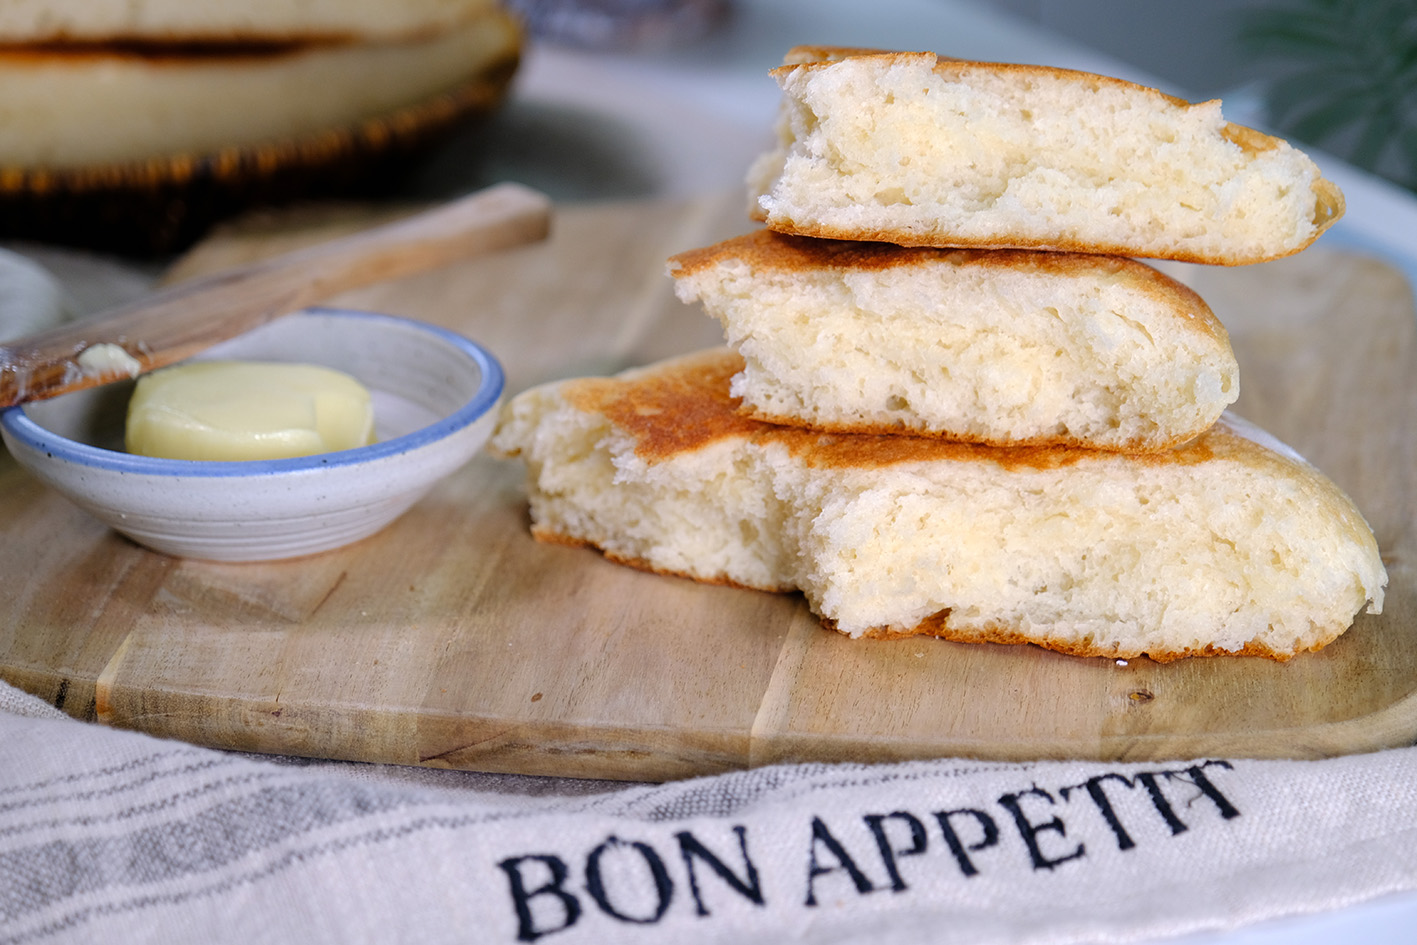
Make it for your loved ones; Give them freshly baked, healthy bread 🥰
LOVE YOU ALL!!

WATCH HOW TO MAKE FRYING PAN MILK BREAD

TIPS FOR SUCCESS (PLEASE READ FIRST):

  • Use a heavy bottom non-stick pan, otherwise the dough will stick to the bottom of the pan
  • The pan lid is also essential; It use to prevent the bread from drying out during fermentation and cooking
  • You can use either gas stove or an Induction cooktop to cook the bread (if you are using an Induction, please use a special frying pan)
  • The optimal size for the dough volume is 20 cm in diameter and 5 to 7 cm in depth (make sure your pan is large enough to accommodate the dough; I am using 10-Inch Frying Pan)
  • Choose “STRONG” Bread Flour for best result
  • Use Full Cream Powdered Milk instead of Liquid Milk
  • The water should be lukewarm; roughly matching body temperature, which is about 35°C to 37°C (this is the ideal range for activating yeast effectively)
    AVOID water that is too HOT, as this can kill the yeast
  • Follow the steps carefully, don’t skip any proofing time
  • While cooking bread DON’T use HIGH heat
    Please note: Stove temperatures vary, the correct temperature is determined by trial and error (you may need to experiment until you find the right temperature for your stove)
    If the temperature is too high, the surface of the bread will burn; Conversely, if it’s too low, the interior of the bread will be undercooked
  • Don’t forget to cover the pan when cooking
    Covering the pan and cooking slowly over medium-low heat, the water content in the dough will be locked in, resulting in soft, moist bread
  • Once done, place the bread on a cooling rack to cool completely before storing (by allowing excess moisture to escape and the structure to set, cooling helps the bread stay fresh longer)

recipe

FRYING PAN MILK BREAD
Yield: One 20 cm diameter (5 cm thick)

🍞 INGREDIENTS
15 g Unsalted Butter (melted)
200 g Strong Bread Flour
30 g Caster Sugar
3 g Salt
150 g Water (lukewarm ~ 35-37°C)
15 g Full Cream Milk Powder
3 g Instant Yeast


INSTRUCTIONS

  1. Melt the Unsalted Butter in a double boiler, set aside
  2. For the dry ingredients, mix Bread Flour with Sugar and Salt; set aside
  3. In another bowl, mix Water with Milk Powder, stir well
    Add the Instant Yeast and stir again; set aside
  4. To make the dough
    Place the dry ingredients to the pan
    Pour in the Milk and melted Butter mixture
    Using a spatula stir thoroughly until comes together, then place the lid and let it sit for 10 minutes
  5. After 10 Minutes
    Sprinkle a thin layer of flour and knead the dough with your fingertips for 1 Minute (you can feel the dough gradually becoming less sticky)
  6. Then form the dough into a ball (you can add little flour to your palms to prevent sticking)
    Place the dough in the center of the pan with the smooth side facing up, cover and let it sit at room temperature for about 30 minutes
  7. After 30 minutes (you will see the dough has risen to about 1.8 times its original size)
    Sprinkle the dough surface with a little flour; gently press the dough to release the gas and flatten it into a round disc shape (approximately 18 cm in diameter)
    Then, cover the pan again and leave at room temperature for about 30 minutes for the final rise
  8. 30 minutes later
    The dough looks puffed up and bigger in size (it’s time to cook the dough)
  9. Over MEDIUM heat, cover and cook the dough for about 7 minutes (I use medium heat or level 5 on my induction stove)
    * Please note that stove temperatures vary, the correct temperature is determined by trial and error; You may need to experiment until you find the right temperature for your stove
  10. After 7 minutes
    Once the bottom is brown and the spatula can be inserted easily, gently flip the bread then immediately reduce the heat to MEDIUM-LOW (I use level 4 on my Induction stove)
    Cover again and continue cooking for 7 minutes
  11. 7 minutes later
    Finally turn it over and cook again for 1 minute
  12. Once it’s done, place the bread on a cooling rack to cool completely before storing or you can serve while still warm

notes

  • The bread will stay soft and can be stored at room temperature in an airtight container for up to 3 days
  • In the refrigerator, Milk Bread can last for up to a week (in an airtight container)
  • To Freeze
    Place the slices in freezer-safe bags, removing as much air as possible before sealing. Store the bread in the freezer, preferably in the coldest part, for up to 1 month
  • To reheat
    From the fridge: wrap the bread in foil and bake at 350°F (177°C) for 10-15 minutes
    From the freezer: thaw frozen bread on the counter for 1-2 hours or in the fridge overnight; then wrap the bread in foil and bake at 350°F (177°C) for 10-15 minutes

Light Fluffy Vanilla Sponge Cupcakes

Everyone’s got their own idea of what the perfect Vanilla Cupcake should taste like; And this is my favourite Vanilla Cupcake recipe.
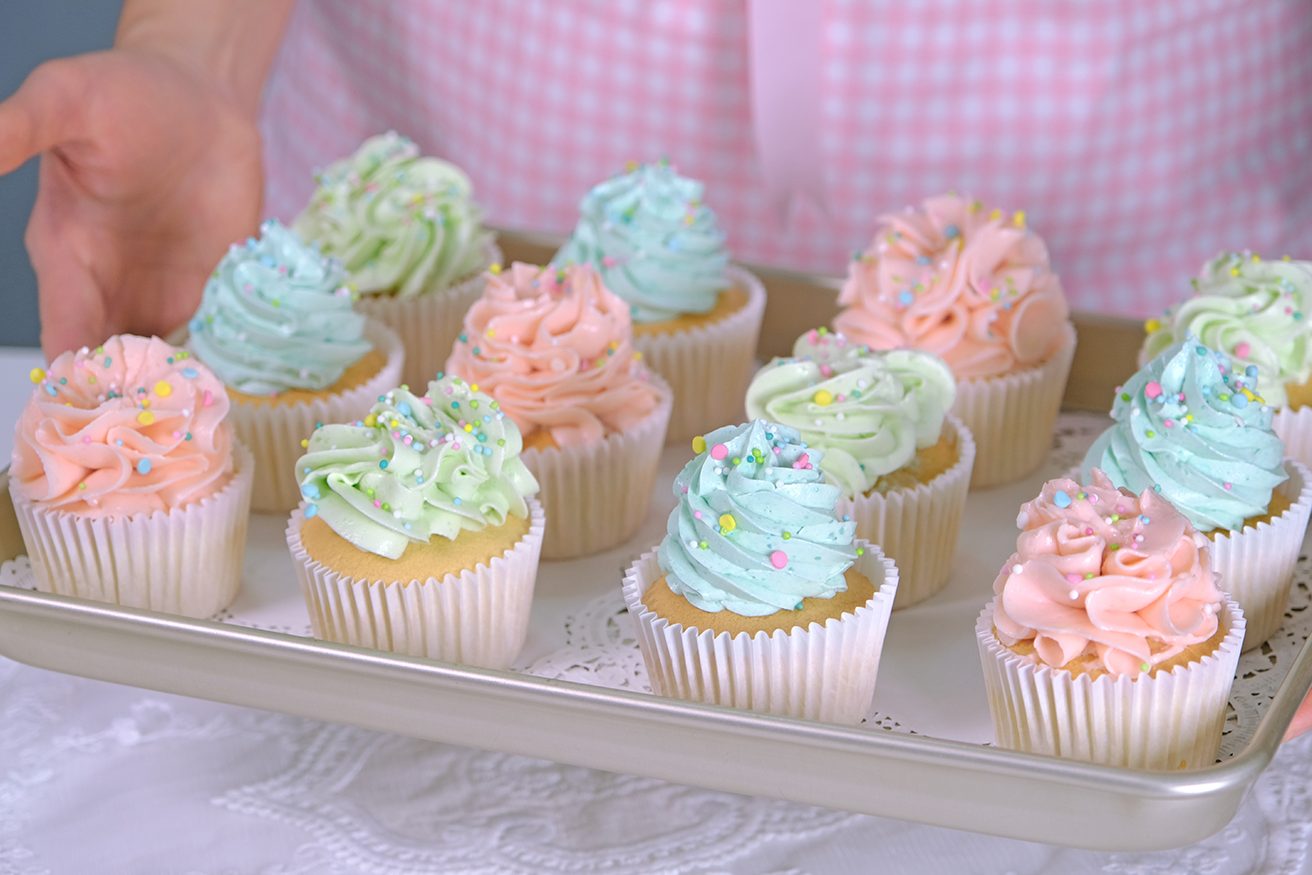
What makes this Cupcake special for me is because it’s light, not heavy, and just the right amount of sweet.

It’s the kind of Vanilla Sponge that pairs beautifully with whatever you like
Whether you’re adding frosting, berries or enjoying it plain.
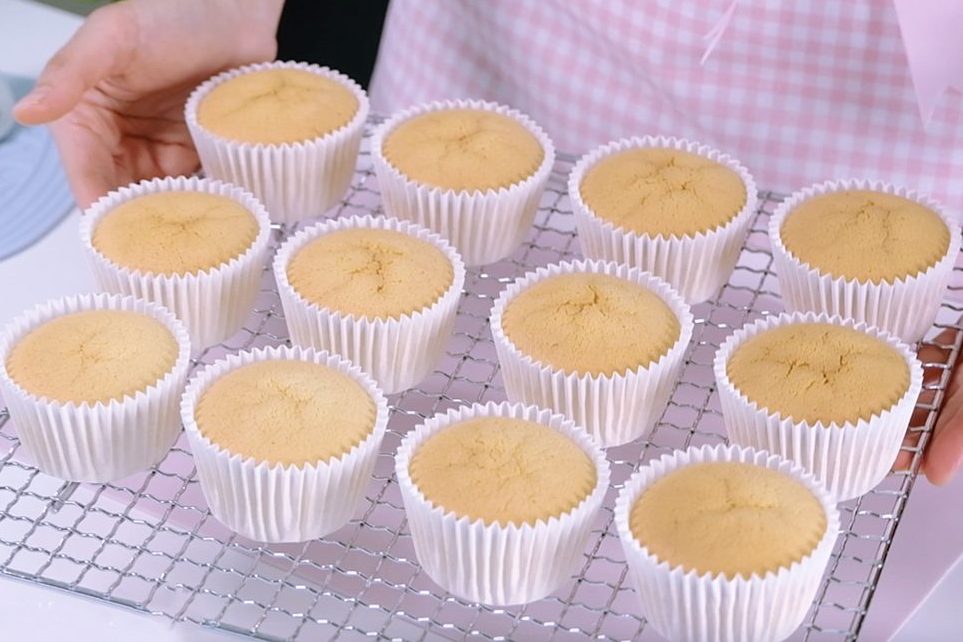
They stay wonderfully moist for days and have a deep Vanilla flavour.
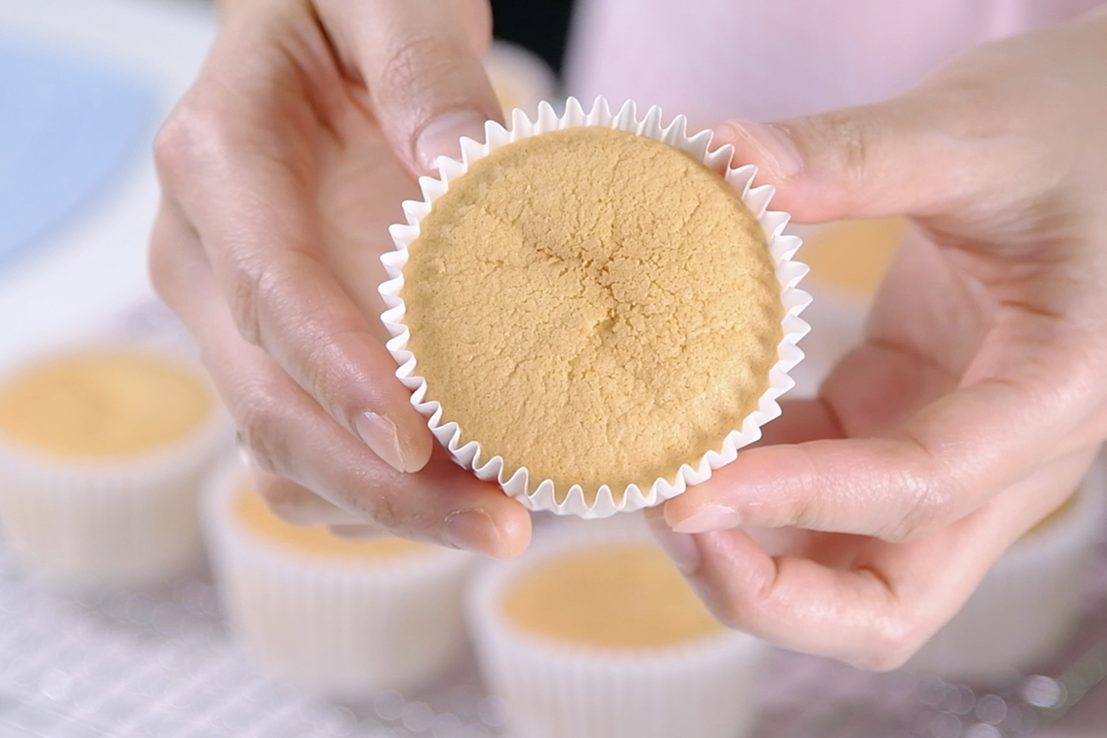
This Cupcakes are delicate but stable enough to hold the frosting
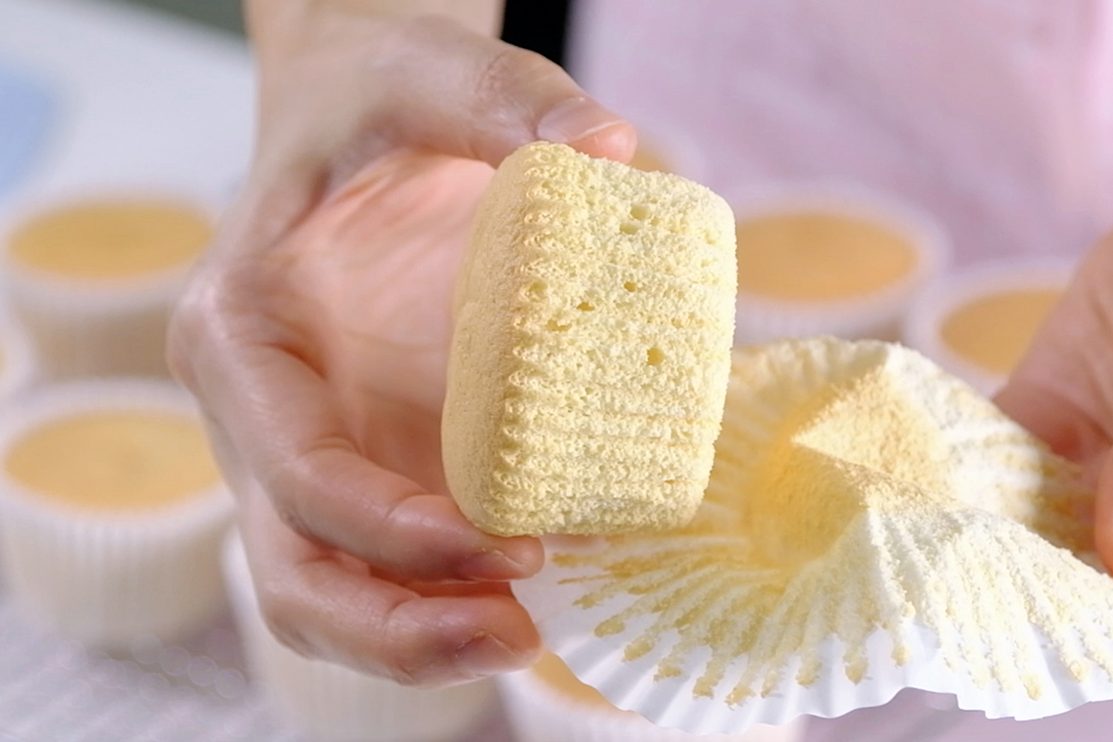
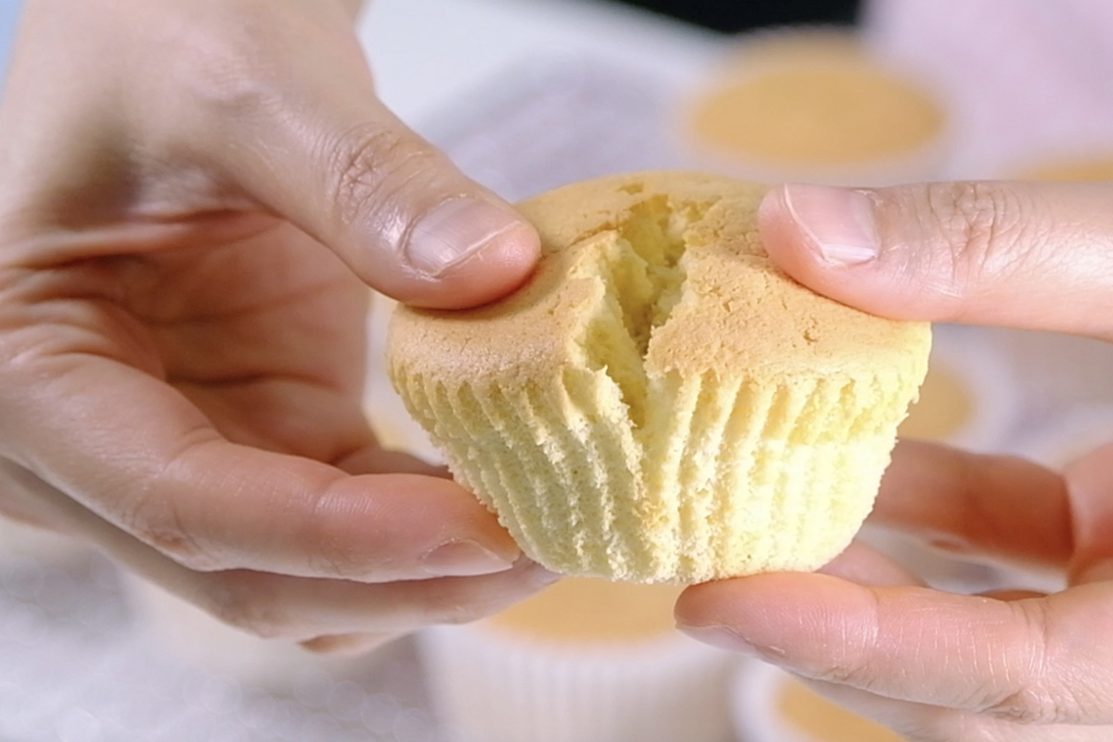
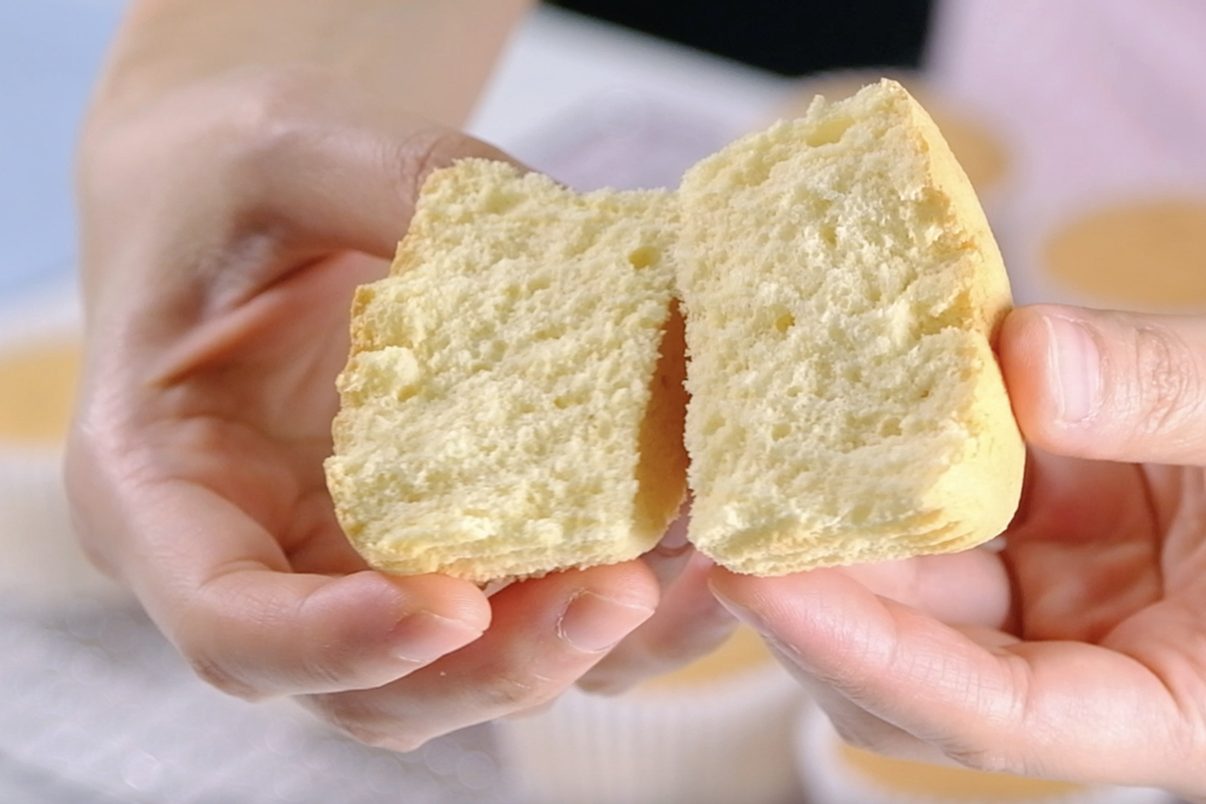
Let’s cut open and l00k inside
☺️
Soft and Moist but not too crumbly
Not too sweet and not heavy
🤗 So soft and fluffy
😍 And what’s the best frosting to pair it with?
The clasic Boiled-Milk Frosting 😘

Boiled Milk Frosting is an old-school buttercream that is not too sweet, not too buttery, and not too heavy.

My version with Icing Sugar is more stable at room temperature.
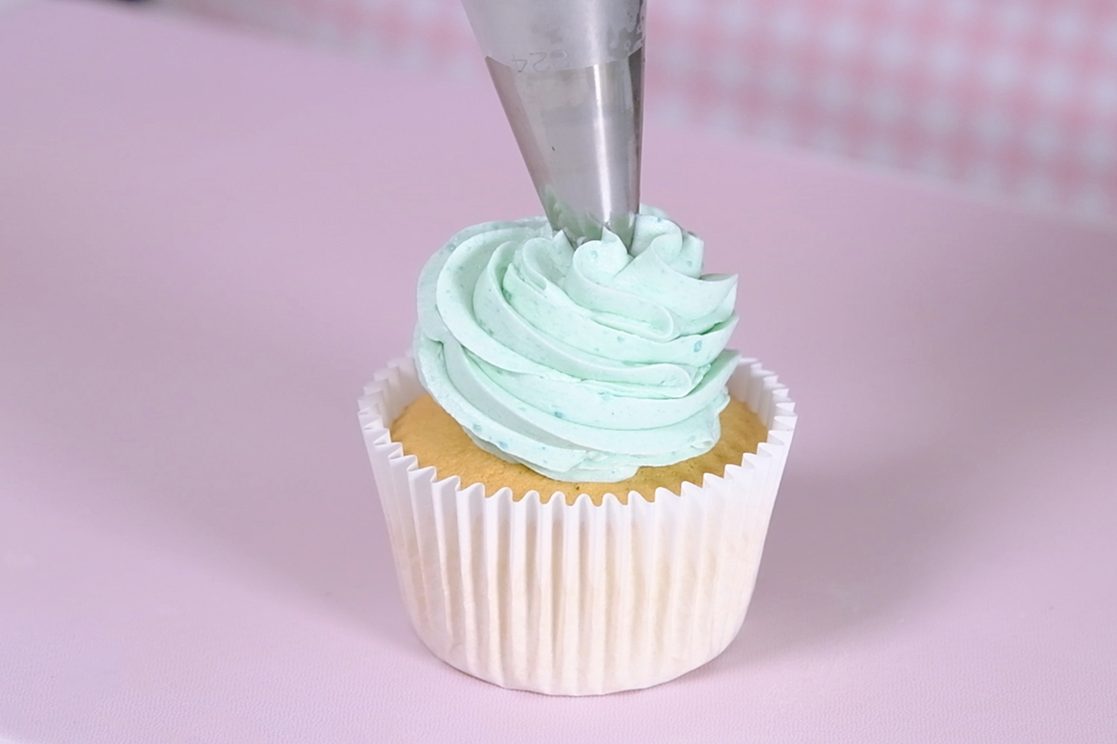
This beautiful frosting also easy to color and you can create any flavour you want; simply by adding some liquors, flavour oils or emulsions, extracts or even dried fruit powder.

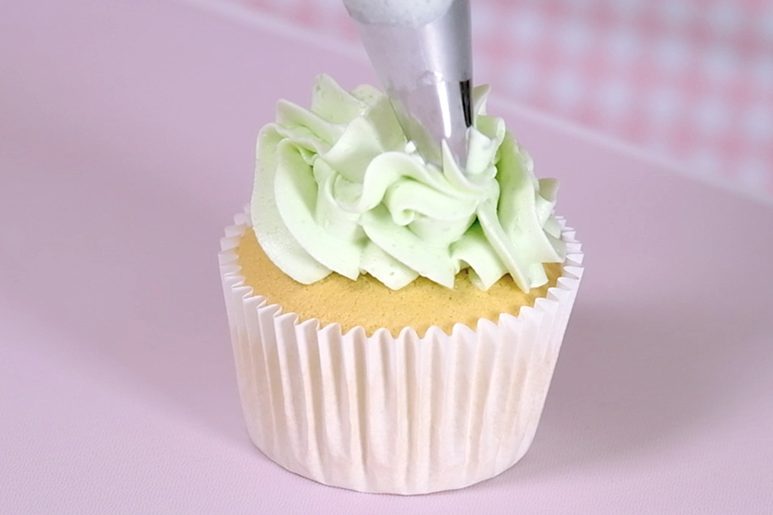
This Russian Ball tip creates beautiful ruffles 🥰
🥲 So beautiful !
Get creative with your own designs !!
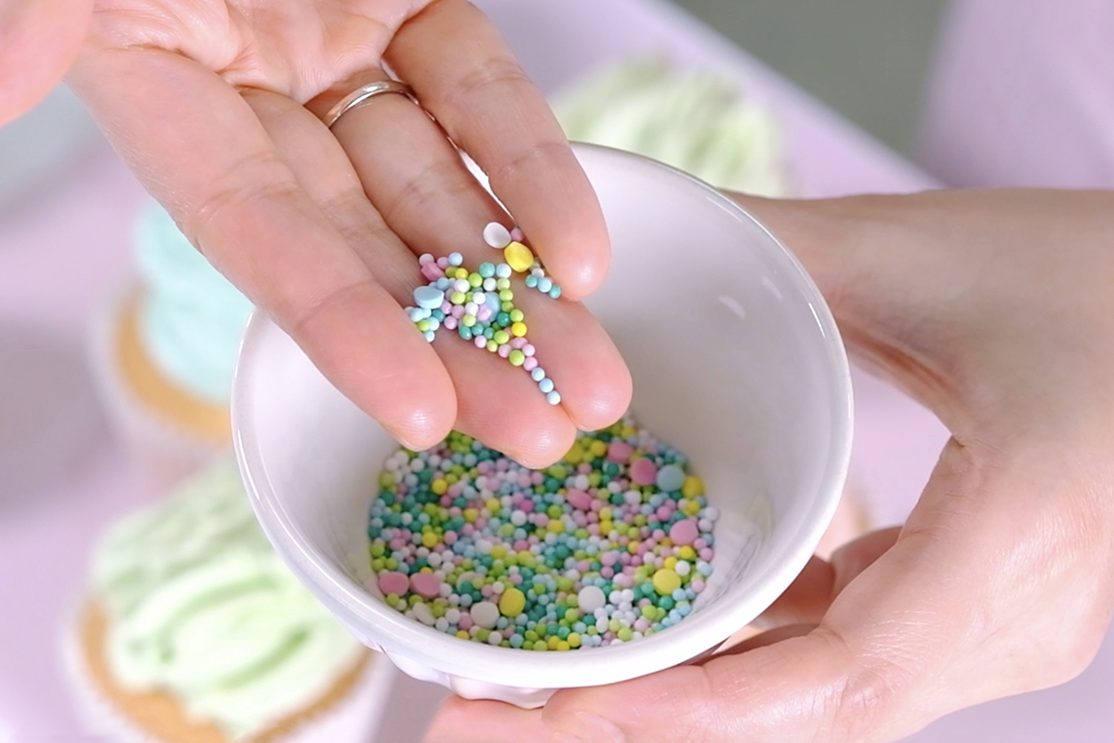
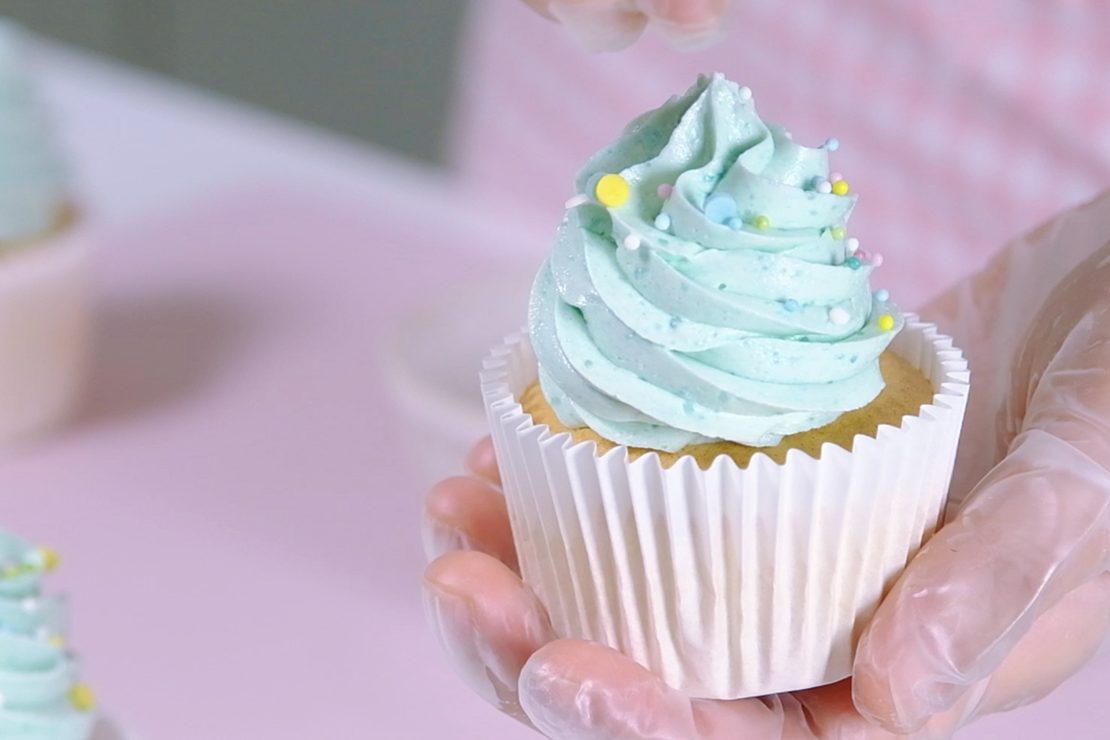
And finish with colourful confetti sprinkles   

So pretty! ☺️

I always flavor my frosting by adding a little at a time and tasting it as I go; Start with ½ teaspoon of extract or emulsion and taste.
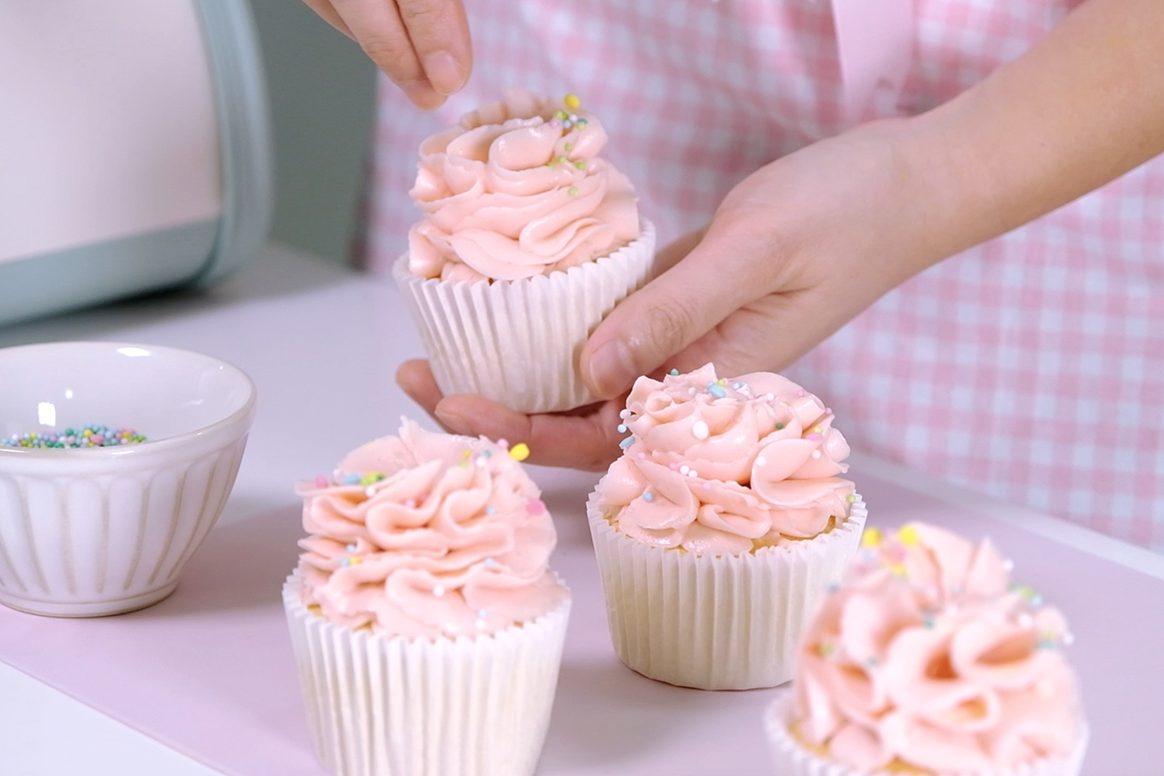
Be careful with strong extracts like Almond and Mint,
I suggest starting with 1/8 teaspoon so the flavor doesn’t get too strong.
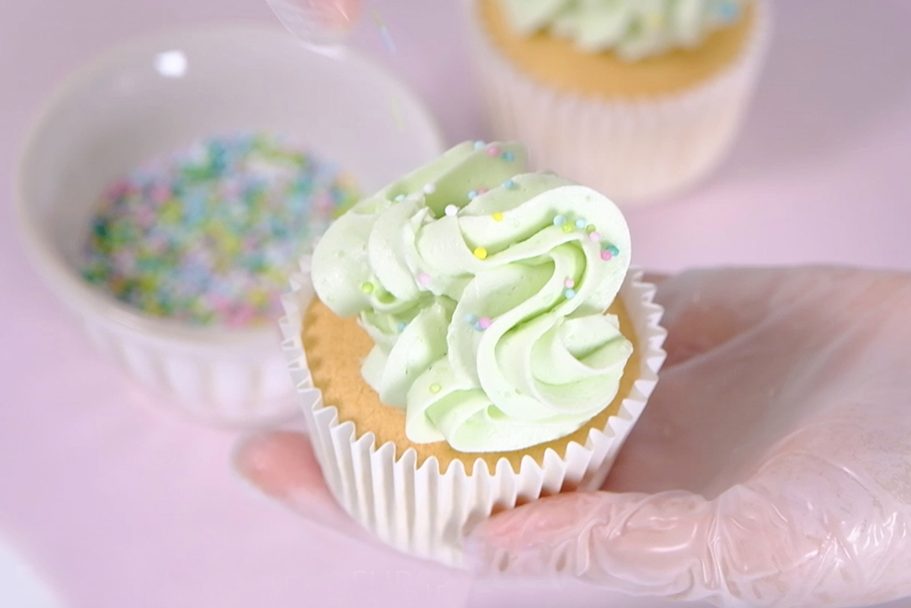
It’s time to enjoy the cupcakes 🥴

These cupcakes are perfect for any occasion and you can customize them to your taste by choosing your own frosting.
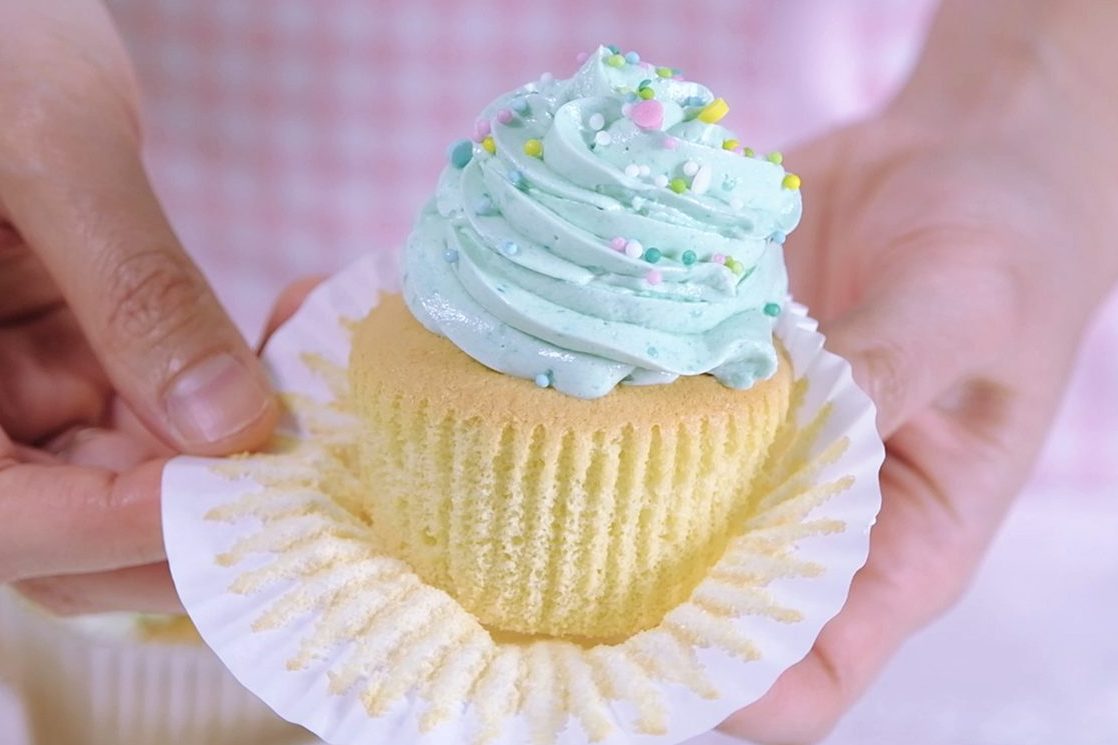
The frosting is a beautiful old-school classic.

It’s incredibly smooth and creamy, but not overly sweet.
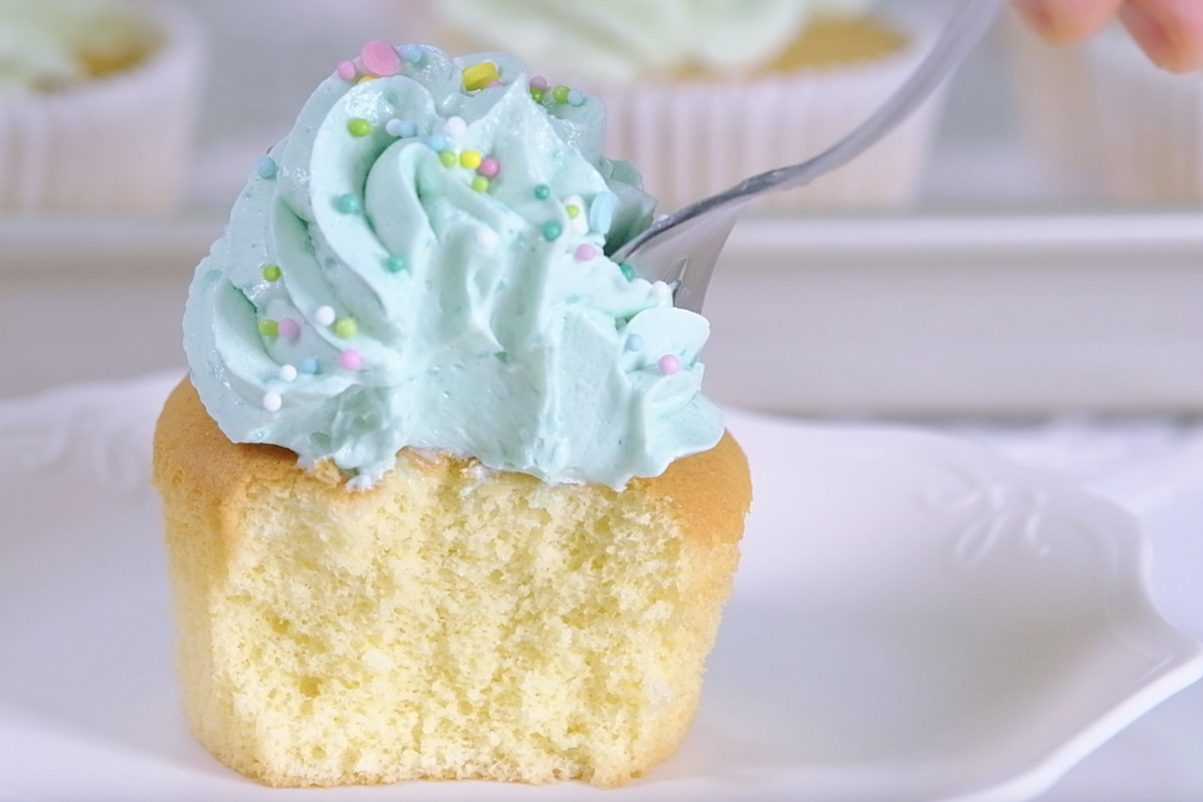
With a soft, airy texture that melts in your mouth

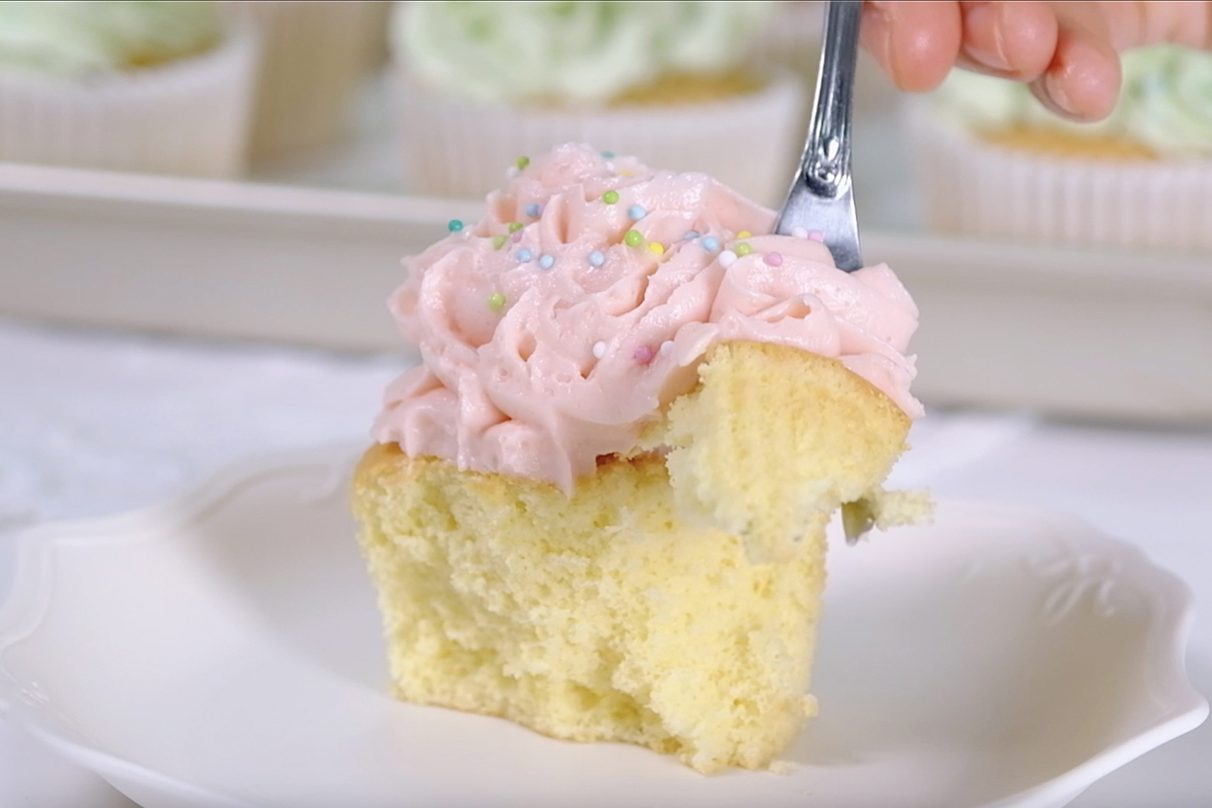
🥲
🤤

These cupcakes always make me smile

And I hope they bring a little joy to your kitchen too !!

Love you All and Happy Baking!!

WATCH HOW TO MAKE LIGHT FLUFFY VANILLA SPONGE CUPCAKES

TIPS FOR SUCCESS (PLEASE READ FIRST):

FOR THE BOILED-MILK FROSTING

  • Prepare the Roux in advanced, so it has time to cool completely at room temperature
  • It is important to strain the Roux mixture (before and after cooking), you don’t want any lumps in your frosting
  • Remember to stir the Roux mixture constantly during cooking, otherwise the bottom will burn
  • Once the Roux cooked, place a piece of plastic wrap directly on the surface to prevent a skin forming
  • Always use real Butter (100 percent High Quality Butter)
  • Take the Butter out of the fridge allow to sit on the counter for about 30 minutes before you start making the frosting.
    The Butter must be softened until it is pliable but still cold and holds its shape, rather than melting or becoming too soft.
  • Once you mix the Roux with Butter, it may look curdling at first;
    Keep mixing on medium-high speed for about 3 to 5 minutes, the frosting will become very smooth, light, and fluffy
  • If you find the frosting is too soft to pipe, you can place it in the fridge for about 30 minutes and it will firm up a bit to a nice consistency
     

FOR THE CUPCAKES BATTER

  • Make sure all utensils clean and grease free (wipe the bowl and utensil with lemon juice or vinegar to helps remove grease)
  • Preheat the oven 20 minutes or longer before you start (use an oven thermometer to ensure the temperature is correct)
    Set an oven rack in the middle of the oven
  • Use fresh eggs that are room temperature (other ingredients also must be at room temperature)
  • Beat egg whites until stiff peak
  • Sift the Flour
  • Mix each batches of the flour evenly until there are no lumps
  • Make sure the wet ingredients are combined well with the batter
  • Don’t mix the batter too hard, just make sure it is well blended (the consistency should be thick but flowing)
    If the batter looks runny, it means you’ve over-mixed it and the cupcakes won’t rise properly
  • Don’t let the batter sit too long before baking, bake it immediately (especially if the batter does not use any raising agents at all, there is a risk that the batter will deflate)
  • Resist the urge to open the oven door while baking; this can lead to the cake being too damp in the middle or even falling
  • Once baked, tap the pan on the counter 3 times, this will prevent the cupcakes from shrinking or deflating when they cool
    Then immediately transfer to a cooling rack to cool completely

RECIPE

VANILLA SPONGE CUPCAKES
Yield: 12 regular Cupcakes

Ingredients
🧁 CUPCAKE BATTER
4 Egg Whites (130 g) ~ room temperature
1 tsp Lemon Juice
80 g Caster Sugar
4 Egg Yolks (85 g) ~ room temperature
40 g Milk ~ room temperature
26 g Vegetable Oil
30 g Maple Syrup
1/2 tsp Vanilla Extract
120 g Cake Flour (sifted)
Notes: you can substitute Lemon Juice with 1 tsp White Vinegar or 1/2 tsp of Cream of Tartar

🧁 BOILED-MILK FROSTING
270 g Milk
36 g All-Purpose Flour
1/8 tsp Salt
270 g Unsalted Butter ~ softened at room temperature
135 g Icing Sugar
1/2 tsp Vanilla Extract
Food Colouring

Instructions
PREPARATION

  1. Line 12-cup Muffin Tins with paper liners
  2. Make sure all utensils clean and grease free (wipe the bowl and utensil with Lemon Juice or Vinegar to helps remove grease).
  3. Take the eggs and other cold ingredients out of the fridge
    Separate Egg Whites and Egg Yolks; then let them come to room temperature.
  4. Preheat the oven 180°C/ 160°C fan/ gas mark 4.
  5. Mix the wet ingredients (Milk, Oil, Maple Syrup and Vanilla Extract)


CUPCAKE BATTER

  1. Beat the Egg Whites over HIGH speed for about 30 seconds until foamy.
  2. Add Lemon Juice (or white Vinegar or Cream of Tartar) and continue beating for another 30 seconds.
    * Acid in Lemon Juice/ Vinegar/ Cream of Tartar will help stabilizing the egg whites
  3. Add Sugar in 3 batches every 30 seconds.
  4. Once all the Sugar is added, continue beating on high speed until stiff peak for about 3 to 5 minutes (the mixture will gradually thicken and look shiny).
  5. Pour in the Egg Yolks; Using a hand whisk, stir gently until evenly mixed.
  6. Add sifted Flour in 2 batches (don’t skip this process; by sifting the Flour, it will break up any lumps, create a light, delicate, and fluffy results).
    Stir gently; Make sure that you scrape the entire surface of the bowl so that there is no flour residue on the sides and bottom of the bowl (mix each batches evenly until there are no lumps).
  7. Then take about 1 cup of this egg-flour mixture into the wet ingredients; mix really well.
    * By using this pre-mix method, the milk-oil mixture will incorporated easily with the egg mixture.
    It prevents the oil and milk from falling directly to the bottom of the bowl, which would cause the cake didn’t rise properly
  8. Pour the pre-mix mixture back to the egg-flour mixture; using a hand whisk stir gently (don’t mix too hard, just make sure the mixture is well blended)
  9. Then using spatula, scrape all the bottom and sides of the bowl, make sure it is evenly mixed.
    The batter should be thick but flowing (if the batter looks runny, it means you’ve over-mixed it and the cupcakes won’t rise properly)
  10. Evenly scoop the batter into prepared muffin cups.
  11. Using a skewer make this circular motion to flatten the batter and break the large bubbles.
  12. Bake in the preheated oven at 180°C/ 160°C fan/ gas mark 4 for 23 Minutes (Middle rack).
    * Resist the urge to peek until your cake is done; this can lead to the cake being too damp in the middle or even falling
  13. Once baked, tap the pan on the counter 3 times, this will prevent the cupcakes from shrinking or deflating when they cool.
    And then immediately transfer to a cooling rack to cool completely.


BOILED-MILK FROSTING

  1. In a medium bowl, whisk the Flour and Salt into Milk until smooth
    Strain this mixture to the non-stick pan (you don’t want any lumps in your frosting)
  2. Cook over MEDIUM-HIGH heat, the mixture will gradually thicken.
    Stir constantly until very thick and bubbling, about 3 minutes.
    *It is important to stir the mixture constantly during cooking, otherwise the bottom will burn
  3. Once it’s done, strain the mixture through a fine sieve into a shallow heatproof dish
  4. Place a piece of plastic wrap directly on the surface to prevent a skin forming
  5. Let the Roux cool completely to room temperature (this will take about 2 hours)
  6. After the Roux has cooled,
    Start beating the Butter on medium speed for 1 minute until smooth and creamy
  7. Add the Icing Sugar and Vanilla Extract, continue beating for 1 minute
    * Scrapping down the sides and bottom of the bowl occasionally until all the Sugar has been incorporated
  8. Pour the room temperature Roux, continue mixing (It may look curdling at first) Using spatula, scrape down the sides and bottom of the bowl occasionally to make sure everything is mixed well
    Keep mixing on MEDIUM-HIGH speed for about 3 to 5 minutes, the frosting will become very smooth, light, and fluffy
    * If you find the frosting is too soft to pipe, you can place it in the fridge for about 30 minutes and it will firm up a bit to a nice consistency

NOTES

  1. Make sure the unfrosted Sponge Cupcakes to cool completely before storing
  2. Unfrosted Sponge Cupcakes can be stored at room temperatur for 2-3 days in an airtight container to prevent them from drying out
  3. For longer storage, they can be placed in the refrigerator for up to a week in an airtight container.
    If refrigerated, let the Cupcakes come to room temperature before serving to soften them up. This usually takes about 30 minutes to an hour
  4. Unfrosted Cupcakes can also be frozen for longer storage (up to 1 month). 
    Wrap each cupcake individually in plastic wrap and then place them in a freezer-safe container or bag. 
    To thaw, unwrap the Cupcakes, place in an airtight container and let them come to room temperature. 
  5. To store frosted Sponge Cupcakes; keep them in an airtight container for 1 day,
    If you can’t finish it, preferably refrigerated if the frosting contains dairy or perishable ingredients; they can last up to 5 days.