3D Magical Carousel Cookies

Many or all of the products featured here are from our partners who compensate us


Hi Guys, today we are making something very special “a Magical Carousel Cookies”. This was replicated from my previous cake project that I have designed for my client a few years ago.

Original Cake Design

Instead of using cake as a base structure of the design, I’m gonna use sugar cookies for the construction.

Cut off every pieces according to the templates

Special Cut Method for the Unicorns (with bamboo skewers underneath)

When you had this kind of project, it is very important to start by designing the construction drawing in 2 dimension.

Edges are golden brown means the cookies is done

The main purpose of construction drawings is to provide a graphic presentation of what is to be built. It showing the relationship between the components and how they fit together.

Stacking and Sticking to Develop the Structure

Carousel Design Construction

This dazzling Vintage Carousel Cookies featuring whimsical Unicorns would make a spectacular gift.


If you are looking for some cookies design that will have a hint of playful and look strikingly attractive just opt for these lovely Carousel Cookies and you are good to go.

Using Embossing Cutter for the Design

This also make a really cool birthday, upcoming christmas or even a wedding present.

Gorgeous Unicorns

You can simplify the design or even change the colour to suit the theme of your party.
How about A Magical Carousel Cookies for a magical party?

Center Pole Design

Our Magical Carousel Cookies goes round and round it goes, it looks so beautiful and amazing!


If you keen to make these kind of project kindly find the completed design templates in the description below.


I hope that you will fall in love with this Magical  and Dreamy Carousel Cookies as much as I do. Take care Guys, Love you all!

Print the attached files below in a standard A4 paper and simply cut the design out

Print in A4 Paper- Cut out the Design

Print in A4 Paper- Cut out the Design

Print in A4 Paper- Cut out the Design

Print in A4 Paper- Cut out the Design

Guide for Grouping, Sticking and Colouring Each Group

List of Tools That I Used in Creating This Project
Scissors https://amzn.to/3CEmqk5
Rolling Pin & Cutting Tools https://amzn.to/3V8yH7g
Marzipan Spacers https://amzn.to/3eaqoaB
Round Plunger Cutter https://amzn.to/3e8fYsa
X-ACTO Knife https://amzn.to/3ehZVrw
Dual Sided Cookie Cutter Rectangle https://amzn.to/3V1N9yd
Scriber Needle https://amzn.to/3rBtQyc
Straight Frill Cutter https://amzn.to/3EirQSY
Strip Cutter https://amzn.to/3CCeyPV
Textured Lace Set https://amzn.to/3CcJapQ
Mini Heart Plunger https://amzn.to/3CaYjrO


3D MAGICAL CAROUSEL COOKIES
Yield: 1 Carousel (16 cm diameter, 24 cm height)
Active time: 3 hour
Total time: 5 hour

INGREDIENTS
Sugar Cookies:

  • 200 grams Unsalted Butter (soft)
  • 200 grams Granulated Sugar
  • 50 grams Whole Eggs
  • 400 grams All-Purpose Flour
  • 1 teaspoon Favorite Extract or Grated Zest (optional)


Marshmallow Fondant:

  • 150 grams Marshmallow
  • 2 tablespoons Water
  • 350-450 grams Icing Sugar
  • 35 grams Shortening
  • Food Colouring (Rose, Delphinium Blue, Turquoise)
  • Edible Pen (Black)


Royal Icing:

  • 15 grams Egg Whites
  • 100 grams Icing Sugar
  • 1/6 teaspoon Cream of Tartar 
  • 1/3 teaspoon Vanilla Extract
  • 1-2 teaspoons Water

Sugar Syrup: 50 grams Granulated Sugar, 50 grams Water

Assembly: Paper Straws, Bamboo Skewers, Small Brush, Gold Luster Dust, Embossing Cutter, Silver sugar pearls sprinkles

INSTRUCTIONS
Design Structure and Templates
Print Side View Design Structure and cookie templates on standard A4 paper, then simply cut all the design out

Sugar Cookies

  1. In a large bowl mix the butter, sugar and favorite extract or zest until well combined and just becoming creamy in texture.
    Do not overwork, or the cookies will spread during baking.
  2. Slowly beat in the eggs until well combined.
  3. Add in the flour and mix until it creates a dough ball.
  4. Gather it into a flat disk, wrap it in a plastic wrap and chill it in the fridge for at least 1 hour.
  5. Trace and Cut
    Prepare marzipan spacers for an even thickness (you can use wooden chopstick if you don’t have it on hand), rolling pin, knife, cut off templates and some greaseproof paper for the base of the cookies.

    Place the chilling dough on a floured surface and knead it briefly so it’s pliable.
    Place the dough on top of a greaseproof paper, using marzipan spacers on both sides and another greaseproof paper on top, roll it out into an even thickness.

    Trace and cut out the shapes according to the templates (to maintain each shapes make sure that every pieces cut on top on their own greaseproof paper that will be bake later).
  6. Lay cut out pieces on a baking tray. Please note, always bake equally sized cookies together to make sure they are cook in the same time.
    If you mix different sizes, the small ones are already cooked when the larger ones are still raw in the middle.
  7. Chill the cut out cookies in the fridge for about 30 minutes before baking to maintain it’s shapes, and then bake them for about 8–15 minutes, depending on size, until golden brown around the edges. 
  8. Take it off from the heat, wait for 5 minutes then transfer them to a cooling rack to cool completely.

Marshmallow Fondant

  1. Pour marshmallows into a microwave-safe bowl or in a double boiler (you might want to grease the bowl and spatula with a bit of shortening before mixing, to prevent stickiness).
    Add about 2 tablespoons of water and microwave it in 30 seconds intervals, stirring in between, until the marshmallows completely melted.
  2. Add in ¾ of the icing sugar and mix (you can add any flavouring you want).
    After the fondant begins comes together, grease hands and table work generously with shortening, and then turn marshmallow mixture onto the table work.

    Add some more left over icing sugar, and continue kneading until it’s form a firm nice and smooth elastic ball (you might need less or more icing sugar).

    If it’s a bit dry, add 1 teaspoon of water at a time and if it’s too wet, add a bit more icing sugar. Knead until it feels soft and pliable.
  3. Once it’s done, grease the outside of the fondant with shortening to prevent dryness and then store them in a ziplock bag to keep it moist.

Simple Syrup
Over medium heat, bring equal amount of sugar and water to a boil, turn the heat to low, stir constantly until the sugar dissolves and the mixture is clear and thickened.
Take it off from the heat, pour into a clean glass jar and let it cool completely.

Royal Icing
In a medium bowl, combine egg whites, Cream of Tartar, icing sugar, and Vanilla Extract.
Beat on high speed for 5 to 10 min or until very stiff (feel free to add 1 or 2 teaspoons of water as needed if you fill it’s to thick).
Covering icing in bowl at all times with a plastic wrap to prevent from drying.


Assembly

  1. Group, stick (use royal icing as a glue) and cover baked cookies with fondant (use simple syrup as a glue) according to the “Side View Design Structure” template.
  2. Decorate the Unicorns.
  3. Place paper straw as Carousel Center Pole (which has been inserted by 2 pieces of bamboo skewers to make it stronger), using royal icing as a glue to assemble and build the cookies group (except for the rooftop).
  4. Decorate the Carousel Center Pole (feel free to use any embossing cutter).
  5. Insert another 3 bamboo skewers around Carousel center pole for the Unicorns. Using paper straw (to cover the bamboo skewers) and thick round paper to support the Unicorns.
    Using royal icing to fill in the base of the pole.
    Place Unicorn on top of round paper, stick both sides together (use royal icing as a glue).
  6. Place and decorate the Carousel rooftop. 
  7. Add finishing details.    


NOTES

  1. To Store Decorated Carousel Cookies; 1 week at room temperature in an airtight packaging.
  2. To store baked cookies; 1 week at room temperature in an airtight container. For longer storage, pop in the freezer (in an airtight container) for up to 3 months.
  3. To store Sugar Syrup; keeps for a while in the refrigerator. Eventually mold will begin to grow if stored too long.  You can also stir in 1 tablespoon corn syrup to help ensure the syrup stays smooth.
  4. To store Royal icing; 1 week in the fridge, always cover bowl in a plastic wrap.

Traditional Mooncake (Inspired by Sin Hap Hoat Brand)

Hi Guys, today we are making my favorite childhood Traditional Mooncake inspired by the famous brand “Sin Hap Hoat”.
And until now, I still fall in love with this moon cake.
Mid-Autumn Festival takes place when the full moon is said to be the largest and brightest of the whole year. It was traditionally a time to give thanks to the Gods.

This is the type of moon cake that capture my heart, it brings fond memories for me and my family.
The round moon cakes are symbols of the great family reunion just like the round, as usual we sit together under the bright light of the moon, sip tea, nibble on mooncakes.

It’s completely different with alkaline water or snow skin kind moon cake, no need any fancy ingredients such as golden syrup or alkaline water.
They original Brand “Sin Hap Hoat” have flavour varieties such as Chocolate, Milk, Durian, Jackfruit, cheese and many more. My favorite flavour will always be these lovely chocolate.

Yummy Thick Chocolate Paste

The chocolate paste mixed nut filling is not too sweet, it’s pretty thick and so flavourful.

“Tjoklat” Old Stamp Spelling

And originally it still use the old stamp spelling of the flavour on the top of the Mooncake, like Tjoklat means Chocolate.

DIY Stencil

As I don’t have customized stamp for the cake design so I decided to make my own DIY cake stencil.

These mooncake has an equal proportions of skin and filling. That helps the mooncake to balance out the sweetness and make it taste so good.
They are best enjoyed with a strong, palate-cleansing cup of Chinese tea.

The cake skin will be sturdy and a bit crunchy after baking, but as you store them, it will absorb the oil from the filling and become softer, which is a good thing! Make them even tastier.

I hope that you will enjoy these recipe, maybe turned them into gifts for friends or relatives and have a happy Mid-Autumn Festival.
Love you Guys!


TRADITIONAL MOONCAKE (INSPIRED BY SIN HAP HOAT BRAND)
Yield: 4 pieces
Active time: 1 hour
Total time: 1 1/2 hour

INGREDIENTS
Chocolate Nut Filling:

  • 15 grams Unsalted Butter
  • 45 grams Dark Baking Chocolate (Compound or Couverture)
  • 65 grams Granulated/ Raw Sugar
  • 40 grams Water
  • 1/2 tablespoon Vanilla Extract
  • 80 grams All-Purpose Flour
  • 20 grams Cocoa Powder
  • 60 grams Baked Cashew Nut

*For those of you who prefer savoury flavour, you can substitute the chocolate filling with this delicious Cheese Filling:

  • 120 grams Grated Cheddar Cheese
  • 95 grams Icing Sugar
  • 80 grams All-Purpose Flour
  • 40 grams Salted Butter

Skin Dough:

  • 125 grams Condensed Milk
  • 44 grams Eggs
  • 1/2 teaspoon Vanilla Extract
  • 165 grams All-Purpose Flour
  • 1 1/2 tablespoons Milk Powder
  • 1/3 teaspoon Baking Powder

Cake Stencil:

  • Printed design on A4 paper
  • Greaseproof Paper
  • Double Tape
  • Red Food Colouring Powder
  • White Vinegar
  • Small Brush


INSTRUCTIONS
Cake Stencil
Print the design on a piece of standar A4 paper. Laminate back side of the A4 printed design with a greaseproof paper using double tape. Then using sharp Xacto knife carefully cut out the design out.


Chocolate Nut Filling

  1. In a medium pan, combine the unsalted butter, dark sweet chocolate, granulated or raw sugar, water and Vanilla Extract. Cook over medium low heat until start to boil and the chocolate melted. Take it off from the heat.
  2. Sift the flour and cocoa powder immediately into the pan, mix until well combined until it create a smooth shiny chocolate dough.
  3. Add the crushed cashew nuts into the chocolate filling, mix well.
  4. Divide the fillings into 4 equal pieces (about 80 grams each), shape the chocolate filling into a disk about 1-inch thick, set aside.

Cheese Filling
Simply combine all the ingredients. The mixture will be gritty at first, keep kneading until it creates a dough ball.

Divide into 4 equal pieces (about 80 grams each) shape into a disk.

Skin Dough
In a large bowl combine the condensed milk, eggs, and vanilla extract, mix well. Then pour in the all-purpose flour, milk powder and baking powder Mix until well combined.
The dough should be sticky at first, cover and let it rest for about 5 minutes to let the flour absorbed the water so it’s will be less sticky.
Divide the skin dough into 4 equal pieces (about 80 grams each).


Wrapping, Decorating and Baking

  1. Wrapping;
    Using rolling pin, gently flatten and roll the skin dough into 7 cm in diameter disk, put some flour on your palm, then pick up the skin and put it on your palm.
    Place one portion of the chocolate nuts filling ball at the center of the skin, gently wrap the dough upwards and around the filling, tighten your palm, pinching edges at the top to seal.
    Make sure the skin and the filling stick together evenly.
  2. Place a piece of greaseproof paper on top of the mooncake. Using flat surface, press the mooncake gently into a thick flat disk (make sure the top is flat and it should be about the same diameter size as the template).
    *If you see a shadow of the chocolate filling on the skin surface, don’t worry it won’t be visible after the skin dough risen in the oven.
  3. Decorating;
    Dilute about 1/2 teaspoon red food colouring powder with a bit of white vinegar. Place your stencil on top of the mooncake, using round brush tap the coloured gently over holes in the stencil (make sure it doesn’t move around while you stenciling).
    Gently peel away the stencil, using tiny brush paint the rest of the missing details.
  4. Baking;
    Bake the mooncake in the preheated 160°C oven for about 25 minutes.
    After baking, remove it from the heat and let it cool completely on the cooling rack.
  5. Store them in an air-tight container.

NOTES

  1. The cake skin will be sturdy and a bit crunchy after baking, but as you store them, It will absorb the oil from the filling and become softer, which is a good thing, Make them even tastier.
  2. The mooncake has an equal proportions of skin and filling. That helps the mooncake to balance out the sweetness and make it taste so good
  3. You can substitute cashew nut with any other baked nut you like (macademia, almond, walnut or peanut).
  4. Best serve after you keep them 1-2 days at room temperature (in an airtight container), when the skin soften a bit.
  5. You can store them 4 days at room temperature or 3 months in the fridge.

Rabokki 라볶이 (Ramen+Tteokbokki 떡볶이) | Homemade Rice Cakes & Gochujang Sauce

Hi Guys, today I’m going to show you how to make Rabokki. It’s actually the same thing as Tteokbokki. But besides using rice cake which is called Tteok, we will add some Ramen noodles for Rabokki. So there’s where the “Ra” words in Rabokki coming from.

Rabokki (라볶이) is consists of Tteok, a cylinder-shaped white rice cake and Ramyeon (Ramen) as the main ingredients; with other ingredients such as vegetables, fish cake, boiled egg, seafood, and even melted cheese.

I will use my homemade rice cakes and also my homemade Gochujang Sauce in this recipe.
I really recommend to use the freshly made rice cakes because the frozen one tends to be dry, easy to crack, and not chewy.

Look how chewy and flexible this homemade Rice Cakes are, they even don’t gets hard when they are cold.

The ingredients are coated with sweet and spicy homemade Gochujang Sauce and the chewy rice cakes and soft noodles soak up a lot of the flavor. 
You can simply use water to make Rabokki or you can use broth if you want to make it tastier.

Add ramen noodle at the last minute of cooking Rabokki, when you add them at the beginning, the noodles will soak too much water and become to soft and soggy.
Some people also add the instant Ramen seasoning to make the flavor more savoury.

You can use ready made Gochujang Sauce, I’m prefer homemade version coz it’s healthier. The rice cakes and ramen noodle will thicken the Gochujang Sauce. 
If you do not like the sauce to be too spicy, omit the cayenne pepper or chili powder. If you like it super spicy, adding Cayenne Powder or chilli powder is the way to increase the heat level without altering the flavor.

Best serve the same day you cook it as Rabokki leftover does not reheat well. If you want to store them in the fridge, make sure there is no Ramen left before you put your Rabokki, considering leaving Ramen in liquid will make it soggy and disintegrate into porridge texture.
Enjoy the recipe!

RABOKKI (RAMEN+TTEOKBOKKI)
Yield: 4 Servings
Active time: 1 hour
Total time: 1 1/2 hour

INGREDIENTS
Tteok (Korean Rice Cakes):

  • 120 grams Glutinous Rice Flour
  • 75 grams Tapioca Starch
  • 1/4 teaspoon Salt
  • 150 grams Boiling Water
  • Sesame Oil (for grease)

Side Dishes:

  • 1 large Onion
  • 1 large Carrot Cabbage (optional)
  • Fish Cake
  • Ramen Noodle


Gochujang Sauce:

  • 800 Boiling Water
  • 6 tablespoons Miso Paste
  • 4 1/2 tablespoons Granulated Sugar
  • 4 1/2 tablespoons Chili Sauce (preferable with garlic)
  • 1 teaspoon Ceyenne Pepper or Chilli Powder (optional)
  • 1 1/2 teaspoons Garlic Powder
  • 1 teapoon Salt
  • 1 tablespoon Sesame Oil
  • 1 tablespoon White Vinegar


Garnish: Spring Onion, Roasted Sesame


INSTRUCTIONS
Tteok (Korean Rice Cakes)

  1. In a large bowl combine glutinous rice flour, tapioca starch and salt. Pour in the hot boiling water and mix until just combine.
    Then using my hand I will continue to knead them (it will look a bit dry and floury at first, continue kneading it until it create a smooth ball).
  2. Divide the dough into 8 equal pieces. Roll each dough into 1 cm thick, and then bend and cut them into 2 equal pieces. Set aside to the tray, continue with the rest dough.
  3. To cook the rice cakes
    Bring a medium pan of water to a boil and carefully place the rice cakes into the simmering water.
    In the meanwhile, grease a tray with a bit of sesame oil to prevent stickiness.
    When the rice cakes start to float that means they are ready to be picked up, scoop them out and place them into the tray.
  4. The rice cakes is ready to use, if you want to keep your rice cakes for a long time, make sure they are grease well with sesame oil, place them in an airtight container and store them in the fridge or freezer.

To Cook Rabokki

  1. Slice onions, carrots, spring onions, fish cake and rice cakes into small pieces.
  2. Pour some hot water into a wok, add all the Gochujang ingredients (Miso paste, sugar, chilli sauce, cayenne pepper or chilli powder, garlic powder, salt, sesame oil and vinegar).
    Stir until well combined and bring it to a boil.
  3. After boiling, pour the red onions and carrots. Cook for about 5 minutes so they’re soften a bit. Add in fish cakes and rice cakes, stir well.
    Add your favorite ramen noodle and cook until they soft enough.
    *Be careful not to cook the noodles too long, as they become mushy very quickly.
  4. Sprinkle with spring onions and roasted sesame as a garnish.

NOTES

  1. To store the Rice cakes; place them in an airtight container and store them in fridge (1-2 days) or freezer (3 months).
  2. Please note; add ramen noodle at the last minute of cooking Rabokki, when you add them at the beginning, the noodles will soak too much water and become to soft and soggy.
    Some people also add the instant Ramen seasoning to make the flavor more savoury.
  3. The rice cakes and ramen noodle will thicken the Gochujang Sauce.
  4. You can find Tteok (Korean Rice Cakes) sold freshly made, refrigerated, or frozen at Korean grocery stores.
    I really recommend to use the freshly made rice cakes because the frozen one tends to be dry, easy to crack, and not chewy.
  5. You can use ready made Gochujang Sauce, I’m prefer homemade version coz it’s healthier.
  6. If you do not like the sauce to be too spicy, omit the cayenne pepper or chili powder. 
    If you like it super spicy, adding cayenne powder or chilli powder is the way to increase the heat level without altering the flavor.
  7. You can simply use water to make Rabokki or you can use broth if you want to make it tastier.
  8. Best serve the same day you cook it as Rabokki leftover does not reheat well.
    If you want to store them in the fridge, make sure there is no Ramen left before you put your Rabokki, considering leaving Ramen in liquid will make it soggy and disintegrate into porridge texture.
    You can reheat any leftover along with a little bit of water in a small pan over low heat.

Banana Hand Pies

Hey Guys, today we are making these adorable “Banana Hand Pies”. These hand pies is decadent  and really easy to make.

Slices of fresh bananas, brown sugar and cinnamon, baked to perfection inside of an individual pie crust. The most perfect, amazing pie crust I’ve ever made.

The key to a really good pie crust is to have super cold butter, so, make sure you freeze them well in advance.
Instead of that classic ice water, we are gonna use sour cream to make the pie crust. Not only the dough extremely easy to work with, but the crust also buttery, light and flaky.

The pie crust dough can be prepared in advance and have it ready for whenever you are craving for some delicious snack.
You also can choose each time a different filling, there are so many options apple, pineapple, chocolate and various savory fillings.

The great thing about this dough is we don’t need store them in the fridge for a few hours before rolling. But even you can roll the dough immediately, I suggest to finish with all the pie details first to avoid the filling sit to long and becomes watery.

The uncooked pies

It’s really hard not to fall in love with them…

I like these best when they are still warm from the oven, when the filling is hot and the brown sugar is melted.

They will still be delicious the day after they were baked. You just need to reheating them a few minutes in the oven to crisp up the pastry.

And a scoop Vanilla ice cream served alongside makes a perfect combination with these adorable pie.

Hm..mm it’s really smells good. I hope that you will love these recipe and give them a try, enjoy the recipe!

BANANA HAND PIES
Yield: 5 Pieces
Active time: 1/2 hour
Total time: 1 hour

INGREDIENTS
Pie Dough:

  • 150 grams All-Purpose Flour
  • 1/4 teaspoon Salt
  • 1 1/2 teaspoons Granulated Sugar
  • 1/4 teaspoon Tumeric Powder
  • 105 grams Unsalted Butter (Frozen)
  • 90 grams Sour Cream (Not Lowfat or Light)


Filling:

  • 2 Bananas (Overripe)
  • 30 grams Brown Sugar
  • 1 teaspoon Cinnamon Powder

    Cocoa and Red Food Colouring
    Egg Whites (For Glue)


INSTRUCTIONS
Design Template
Tracing the outline template to some greaseproof paper and gently cut the outline.

Pie Filling
Cut the bananas into small pieces, mix it with the brown sugar and cinnamon, set aside.


Pie Dough

  1. Preheat the oven to 200°C
  2. In a medium bowl, lightly whisk together all the dry ingredients the flour, salt, granulated sugar and turmeric powder.
  3. Using the large holes of a box grater, grate the frozen butter into the dry ingredients.Using a fork, toss the butter and flour mixture.
    Do not break down the butter pieces in this step, just lightly toss until they are coated with flour or until you see a crumbly consistency.
  4. Add in the sour cream
    Using the same fork, mix the sour cream into the butter flour mixture. Pressing the fork down into the sour cream, in order to mash the large clumps of sour cream into the flour and butter.
    Try not to overwork the dough, if the butter pieces get too small and overprocessed, the crust will be tough.
    Then use hands to pull out the dough together (it will look a bit shaggy at first, but as you press it quickly and firmly together, it should start to form a cohesive ball).
    *If the dough seems overly wet, you can add a tablespoon of flour and if it’s too dry, add a teaspoon of sour cream at a time.
  5. Spare some pie dough for the details
    About 10 grams for the dark chocolate and 2 grams for the red.
    I am using cocoa powder and red food colouring powder for colouring, you can also use liquid food colouring if you want.
  6. Making pie details
    – Combine the oval shape of dark brown and red dough to create his mouth and tongue.
    – Using a dark brown dough to create his eyes, eyebrows and hands.
    – A bit of red dough for his cheeks.
  7. Roll the pie dough
    Divide the dough into 2 batches, for the bottom and top, so it’s easier to handle.
    Using a rolling pin, roll this out into about a half centimetre thick, then cut 5 pieces out of the each batch according to the design template (total 10 pieces of the cut dough).
  8. Fill the doughLay the bottom side of the cut dough on the tray with a parchment paper, place banana filling in the middle of the dough.
    Brush the egg whites as a glue on the underside rim and then place the top cut dough on top of the filling.
    Gently pasting the edges dough with fingers, and then using the prongs of a fork press the edges to seal the pies.
  9. Pie details
    Using egg whites as a glue to stick all the details to each position.
  10. Bake for about 20 minutes. Take off from the heat, let it cool on the pans for 5 minutes before transferring to a cooling rack to finish cooling. 


NOTES

  1. The key to a really good pie crust is to have super cold butter. So, make sure you freeze them well in advance.
  2. Best serve when they are still warm from the oven, when the filling is hot and the brown sugar is melted.
  3. A scoop Vanilla ice cream served alongside makes a perfect combination with these adorable pie.
  4. They will still be delicious the day after they were baked, just store them in the fridge and reheat them a few minutes in the oven to crisp up the pastry.
  5. The pie dough can also be pressed into a flat disc and wrapped in plastic to be refrigerated for 1-2 days or frozen for up to a month.
  6. The uncooked pie can be assembled a day ahead of time and stored in the fridge on the baking sheet until ready to bake.
  7. To freeze uncooked the pies, assemble the uncooked pies on a baking sheet, place the sheet in the freezer for one hour in order to harden and then transfer the frozen pies to a freezer bag.
    To prevent the pies from sticking to each other, place a sheet of parchment paper between them. Can be frozen for up to 3 months.
    And when you are ready to bake them, place desired amount of pies 2-3 inches apart on a rimmed parchment lined pan and bake them in preheated 200°C oven for about 20-25 minutes.

Fluffy Snow Cheese Cake

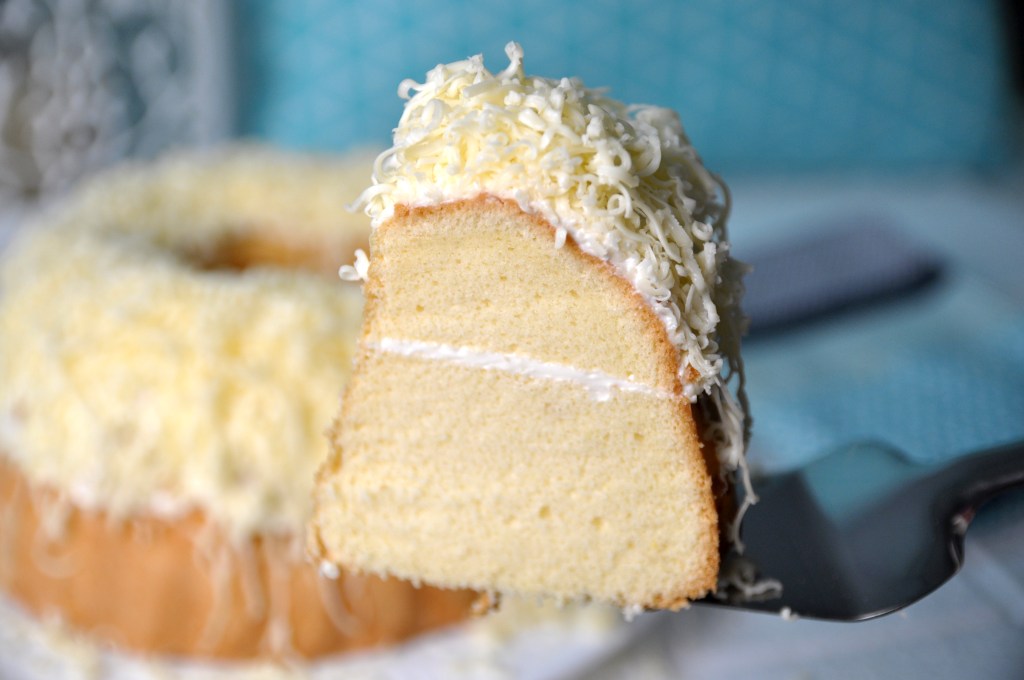
Hi Guys, today we are making these classic “Fluffy Snow Cheese Cake”. Ultimately soft, moist and cheesy sponge cake that you cheese lover will surely love!

This cake bakes up so nice and beautifuly even on the top, making it perfect for layering.

Fluffy Vanilla Buttercream

A light, moist and fluffy vanilla sponge cake, lightly filled and frosted with fluffy vanilla buttercream on top.

Finished with a generous topping of shredded cheddar cheese.
The combination of soft cake, sweet vanilla buttercream and salty cheddar cheese are perfect match in every bite.

And if you are a true cheese lover, feel free to add shredded cheedar cheese in the middle of the filling if you want.

Pillowy Soft Crumb

Look how soft and pillowy the crumb is. They are amazingly fluffy and stay moist even if you keep them in the fridge for a few days.

This cake is perfect little snack to go with your afternoon tea or after dinner time with coffee or tea. You will literally could not stop eating it!

There’s something about milky and creamy cheese that really gives depth of flavor of the cake.
If you not exactly a sweet tooth, these Snow Cheese Cake might be just right for you!

SNOW CHEESE CAKE
Yield: One 8-inch bundt pan 
Active time: 1/2 hour
Total time: 1 1/2 hour

INGREDIENTS
Sponge Cake :

  • 150 grams Egg Whites
  • 1 1/2 teaspoons Lemon Juice
  • 150 grams Granulated Sugar
  • 90 grams Egg Yolks
  • 135 grams Cake Flour
  • 20 grams Corn Flour
  • 1/4 teaspoon Salt
  • 40 grams Milk
  • 25 grams Vegetable Oil
  • 1 teaspoon Vanilla Extract


Vanilla Buttercream:

  • 140 grams Shortening
  • 35 grams Salted Butter
  • 35 grams Condensed Milk
  • 1 teaspoon Vanilla Extract

Grated Cheedar Cheese


INSTRUCTIONS
Sponge Cake

  1. Preheat the oven to 150° C, grease the pan (I am using my bakery pan grease https://www.youtube.com/watch?v=ilWe6_4ZDuI or  you can brush it with some butter and sprinkle flour to grease them).
    One important tips, if you are using bundt pan, just make sure that you coat all of it’s nooks and crannies or else the cake will stuck inside the pan.
  2. For the wet ingredients;
    In a medium bowl  combine the milk, vegetable oil and vanilla extract. Mix that all through, set aside.
  3. For the batter;
    – In a large bowl, pour in the egg whites, whip at low speed until foamy, then add the lemon juice and continue mixing it (by adding small amounts of lemon juice helps to stabilize the egg whites, help prevent overbeating and allows the beaten whites to reach their full volume and stiffness).
    – When the mixture start become white, add the sugar gradually, continue beating until it reach a stiff peak (they will look shiny and the tips can stand straight up).
    – Add in the egg yolks, mix slowly until just combine.
    – Sift all the dry ingredients into a bowl in 3 batches. Mix after each addition, stirring just top part of egg mixture
  4. Take about 3 tablespoon of the eggs mixture and mix them to the wet ingredients.
    Then gently pour it back to the egg mixture.
    Scrape down and fold with spatula until well combined (this technique is used to make sure that the batter is well combined and there’s no liquid left at the bottom of the batter).
  5. Pour the batter slowly to the pan. Pour it from above 15 cm height to help get rid of air bubbles and then shake and tap the pan against worktop for 2-3 times. 
  6. Bake this off at 150° C for 40 minutes, then increase the heat to 170° C and continue baking for another 5-10 minutes.
  7. Take it off from the heat.
    Tap the pan immediately about 2-3 times against worktop so the cake won’t shrink too much.
    Put the greaseproof paper and cooling rack on top, flip the pan and let it sit for about 10-15 minutes.
  8. After 15 minutes, remove the pan and let it cool completely.

    Vanilla Buttercream
    In a large bowl, combine the shortening, salted butter, condensed milk and vanilla extract.
    Mix it all through until it becomes pale white, light and fluffy.

ASSEMBLY

  1. Using serrated knife, divide the cake horizontally into half (make sure the cake is perfectly flat all the way around).
  2. Apply about half of the vanilla buttercream as a filling, spread evenly.
  3. Place the other layer of the cake on top
  4. Spread the rest buttercream over the cake
  5. Coat the cake with a generous amount of shredded cheddar cheese.

*If you are a true cheese lover, feel free to add shredded cheedar cheese in the middle of the filling if you want. 

NOTES

  1. This basic sponge cake recipe is perfect for many other delicious treats.
  2. After the cake cooled completely, if you are not gonna assembly the cake immediately, wrap it with a cling wrap to prevent the cake dry.
  3. They are amazingly fluffy and stay moist even if you keep them in the fridge (in an airtight container) for a few days.
  4. To serve the cake from the fridge; let it the cake sit at the counter (in an airtight container) for about 20 minutes and enjoy.
  5. You can keep them in the refrigerator (in an airtight container for 3-4 days.

Baby Eeyore Spiral Mantou

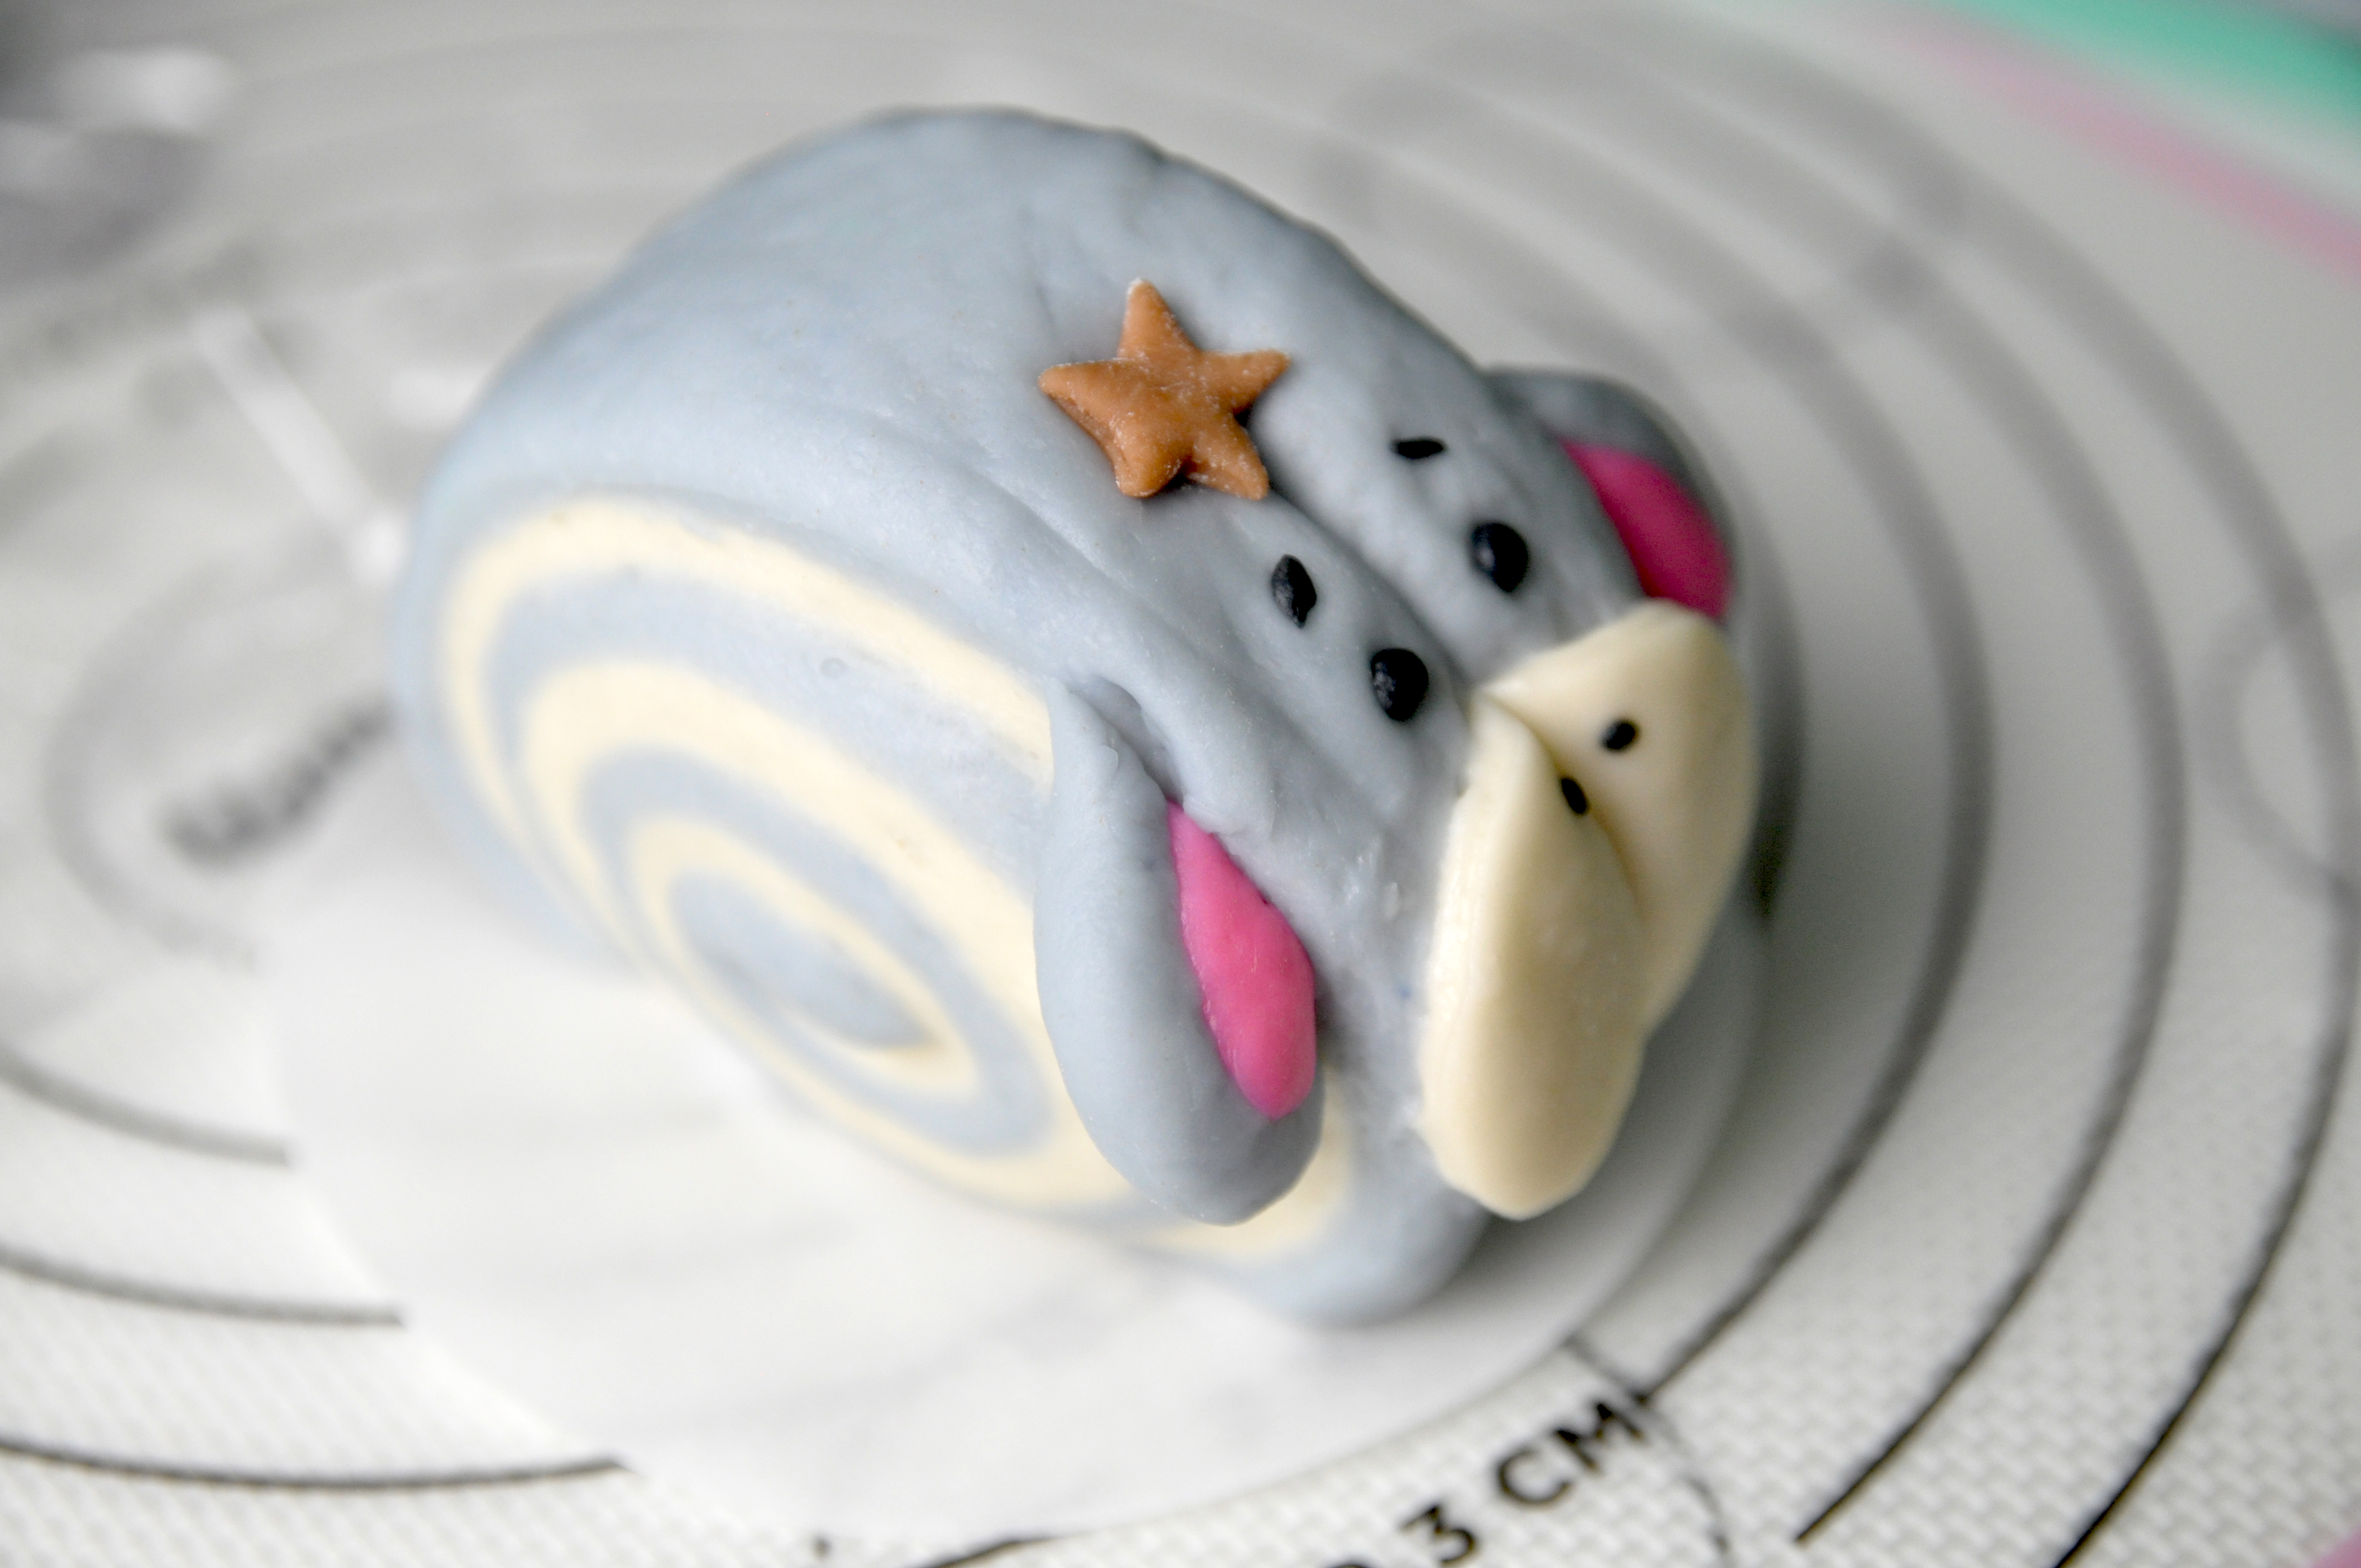
Hey Guys, today we are making these adorable “Baby Eeyore Spiral Mantou”.
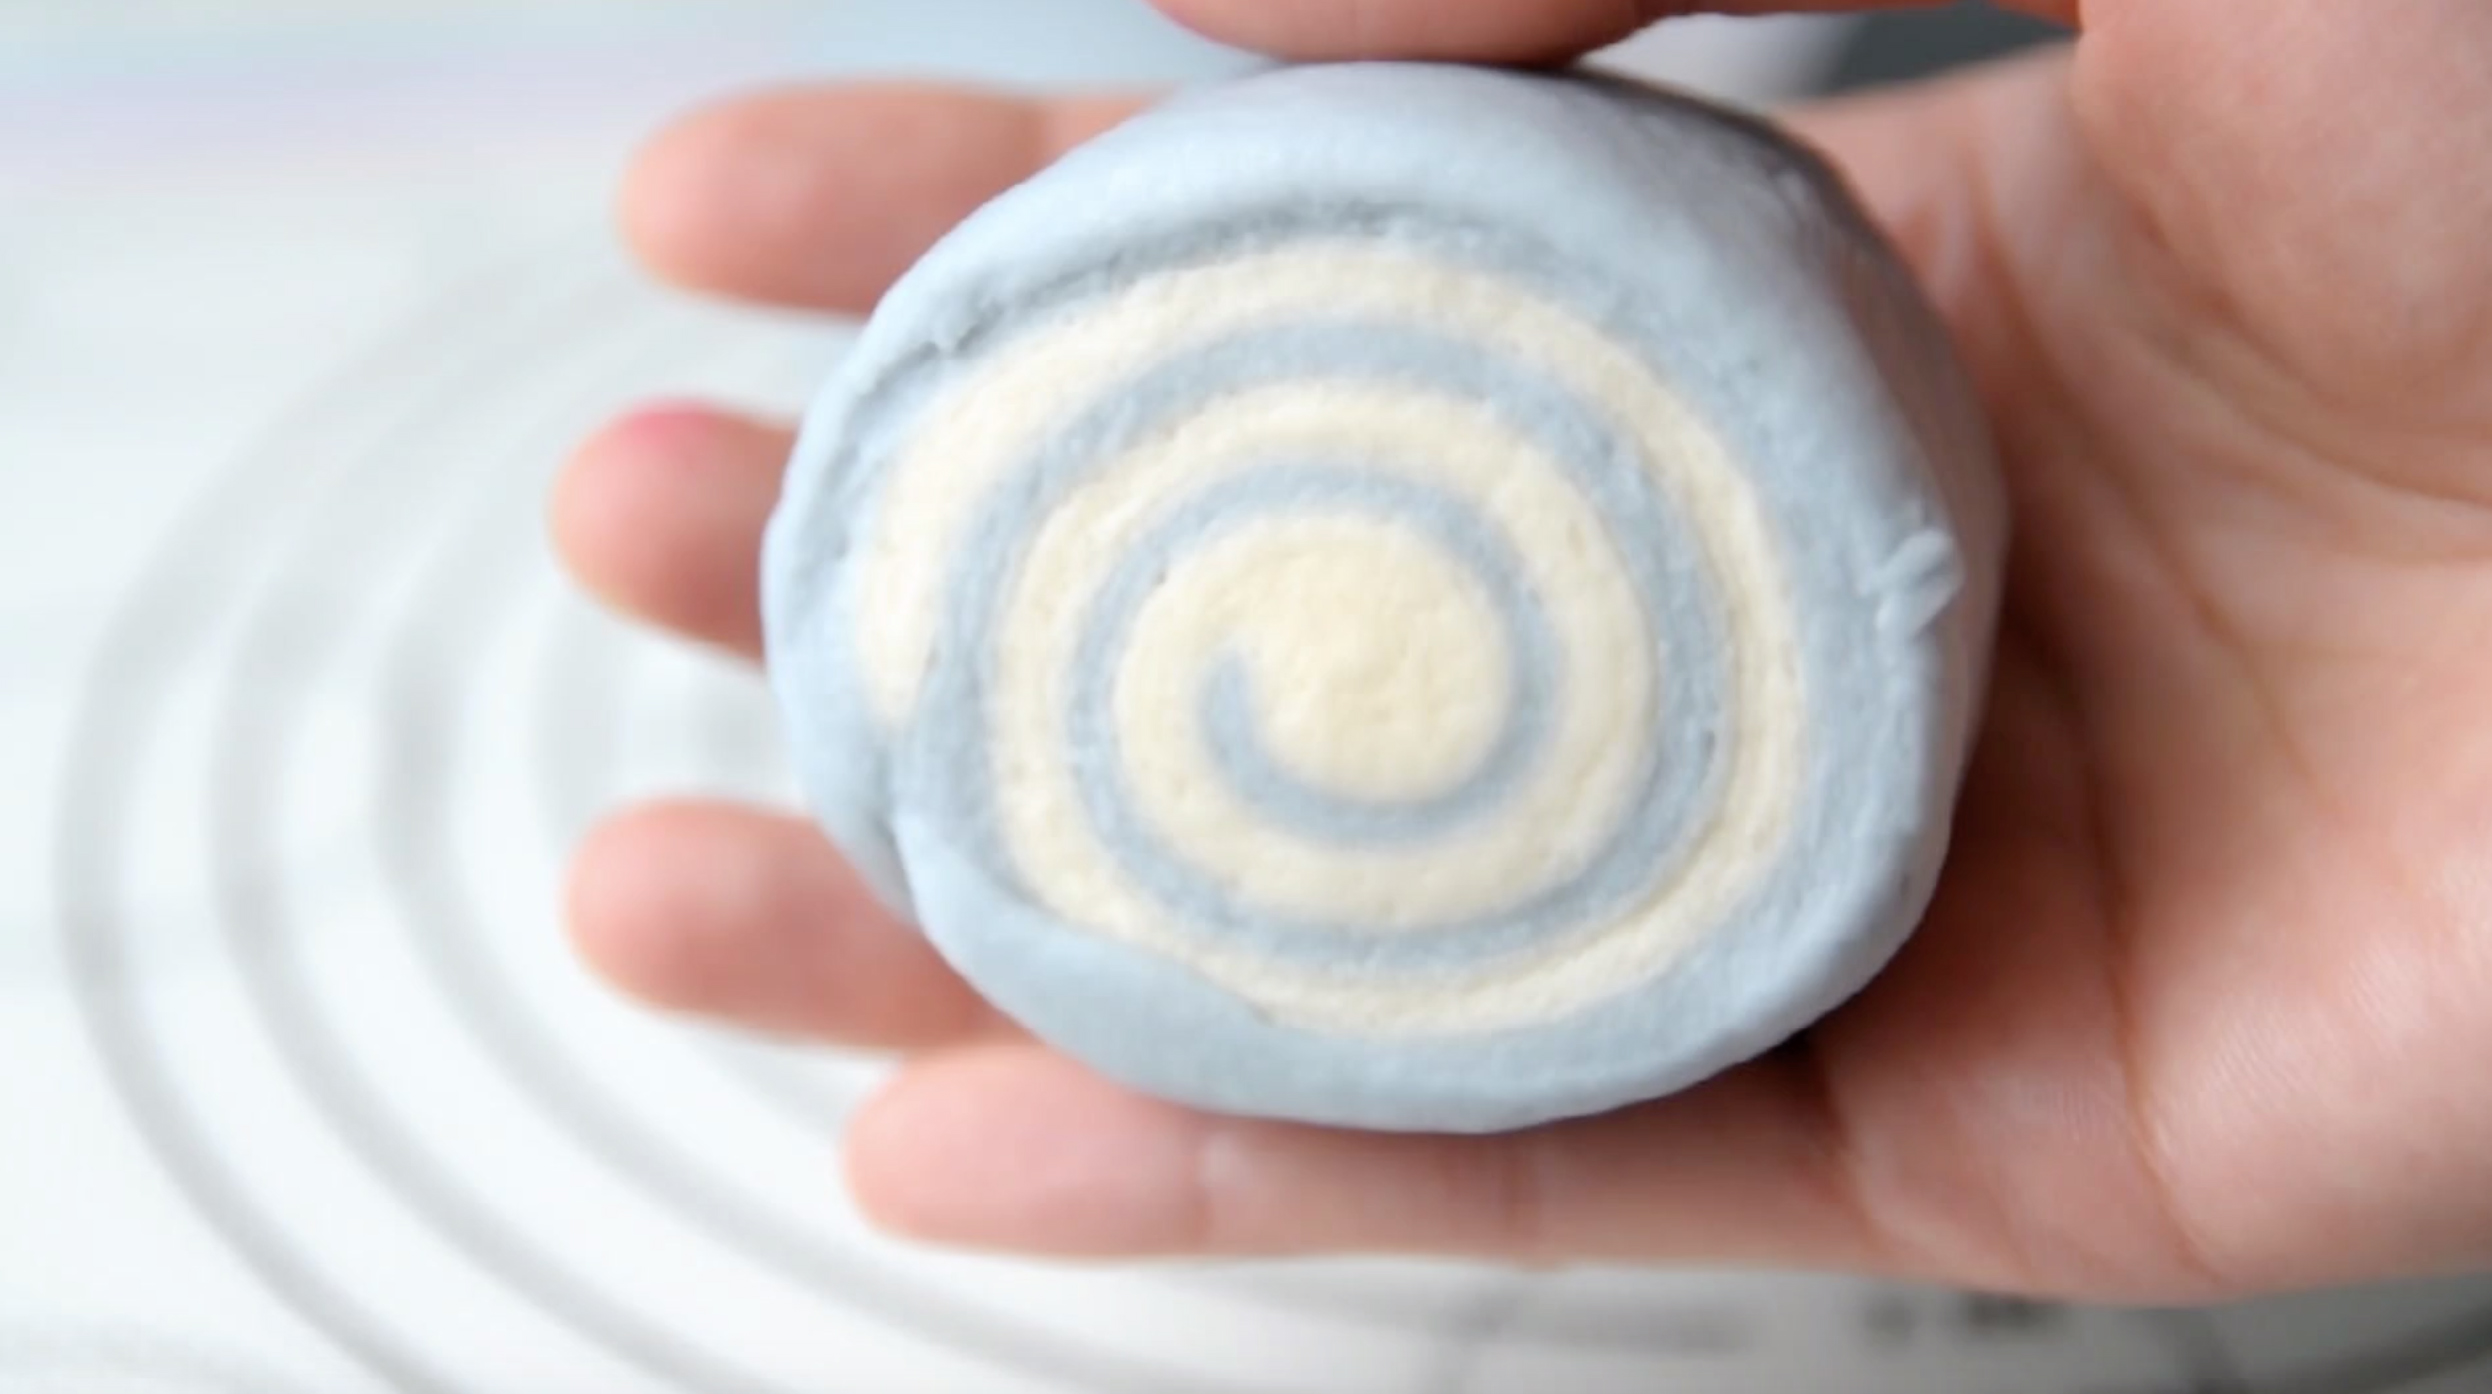
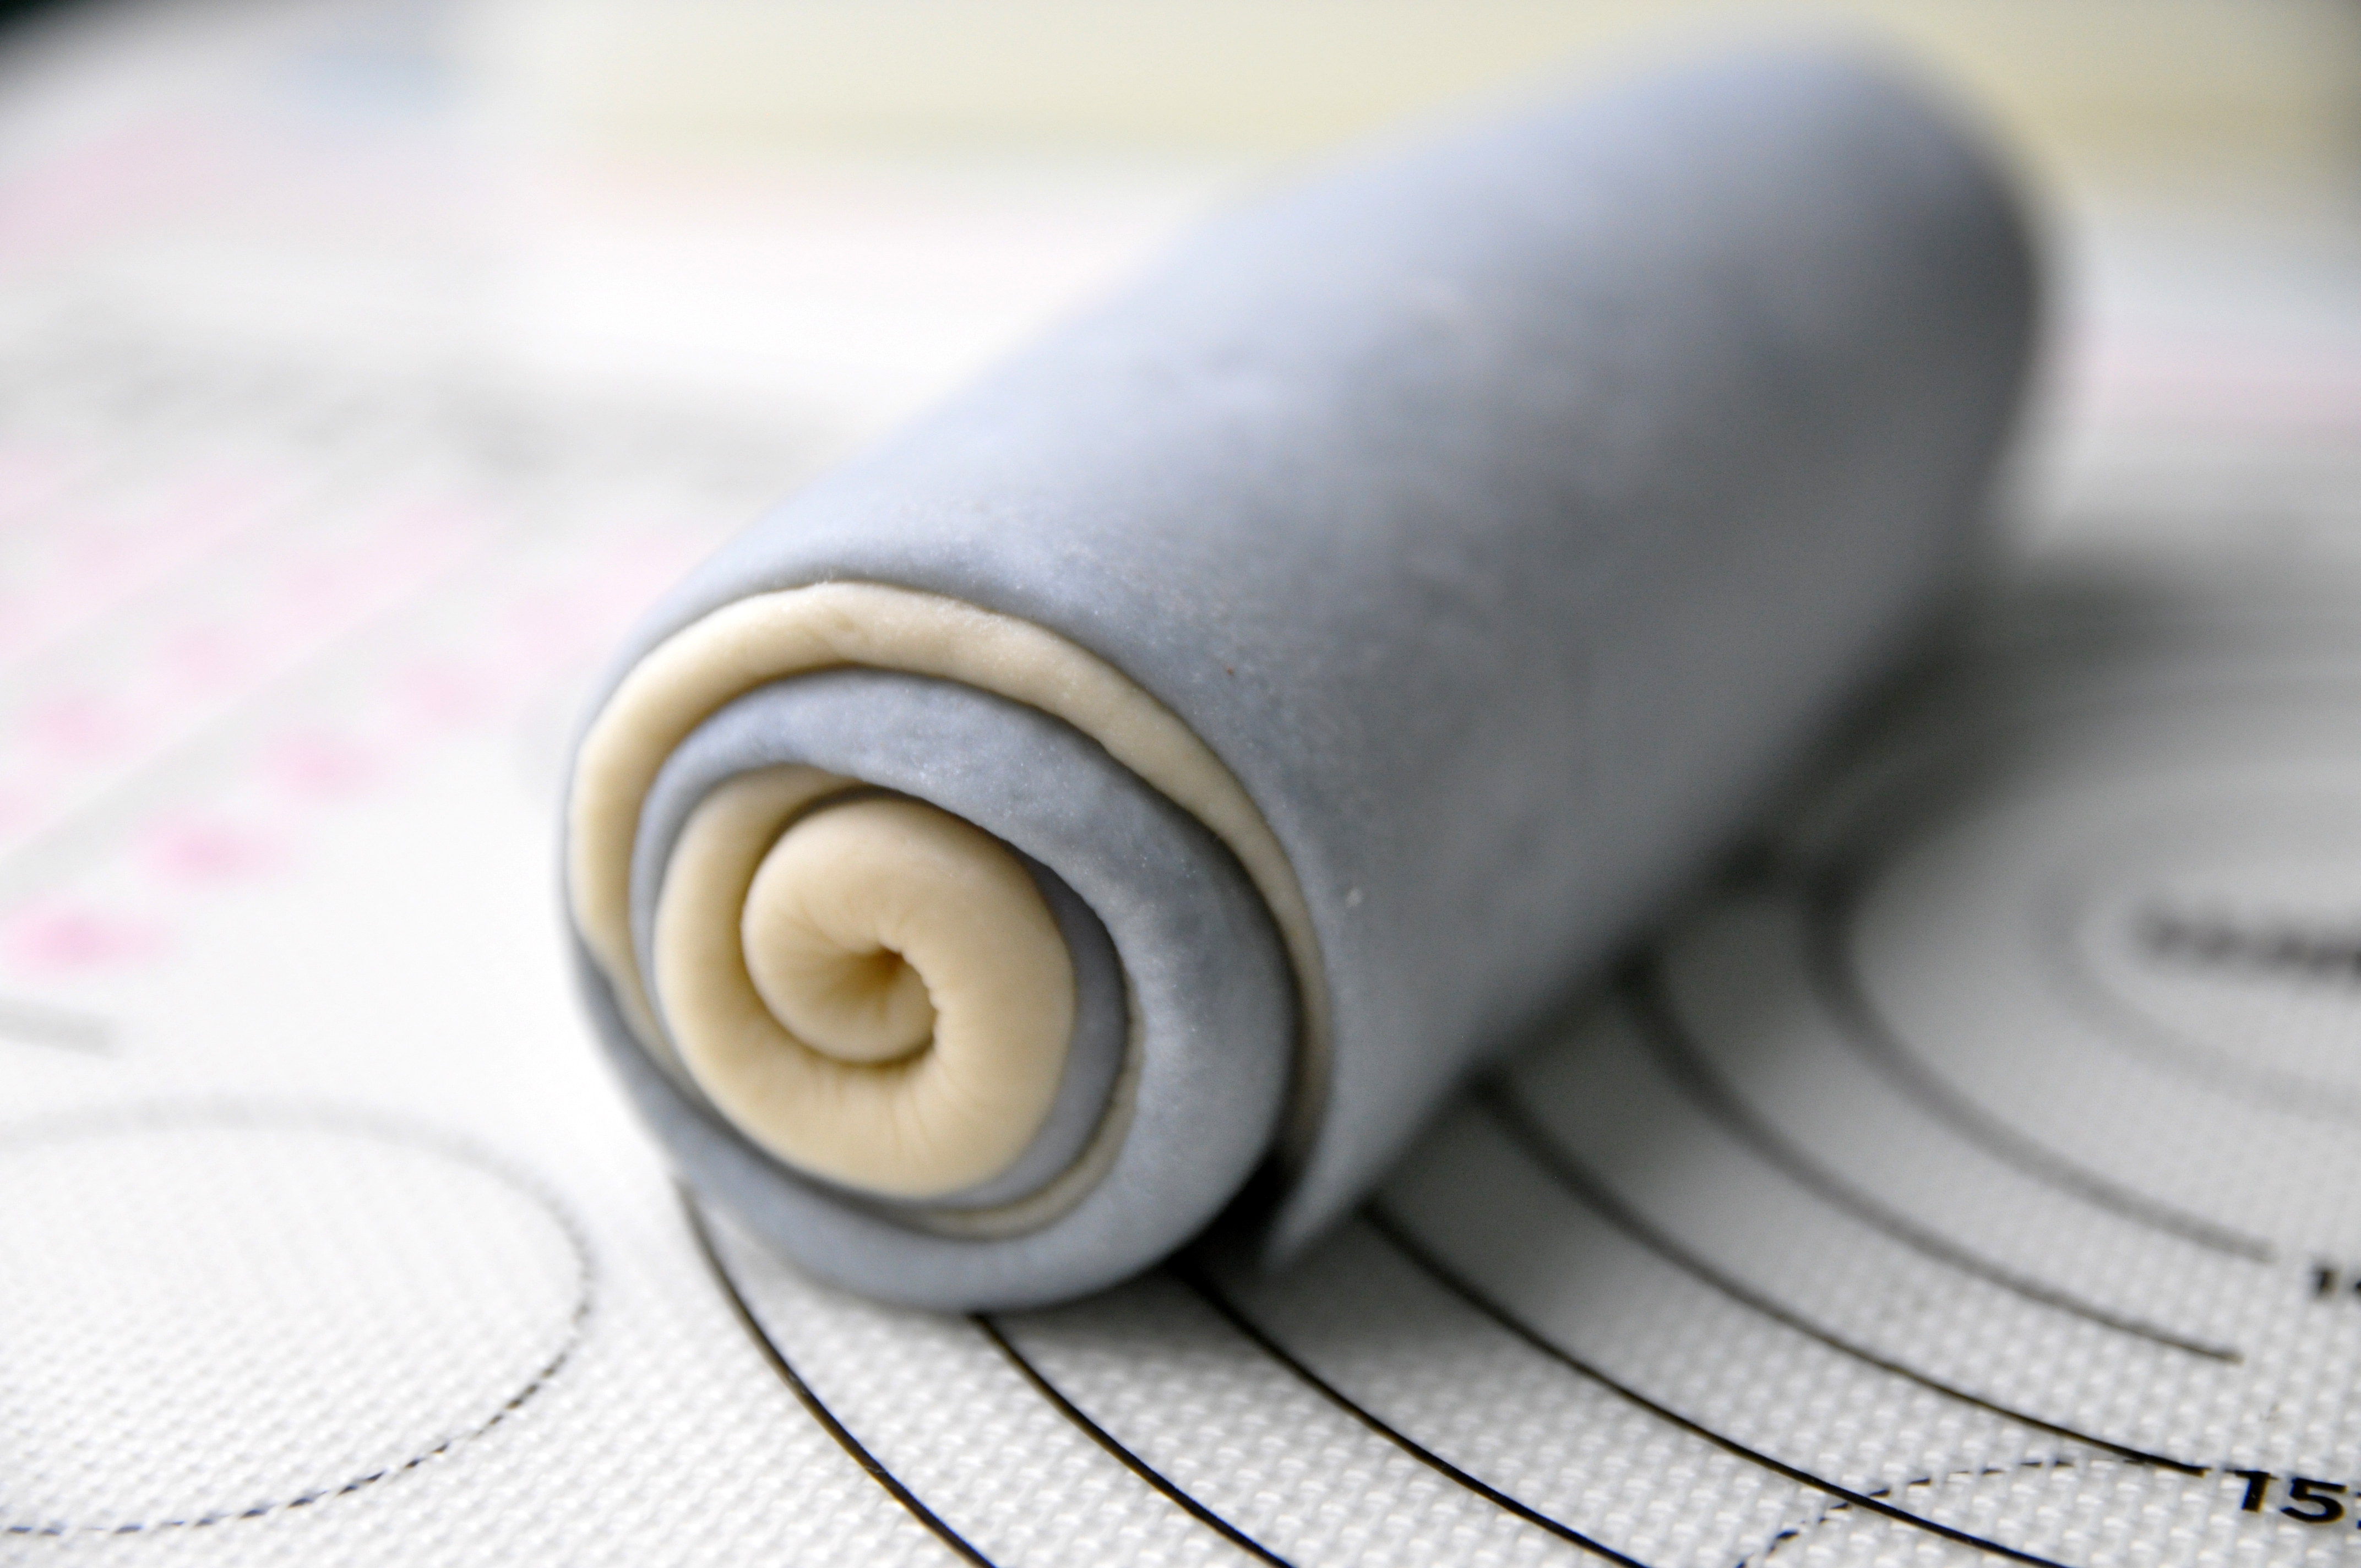
They are fun to make with a super soft fluffy texture and pretty spiral patterns.

The pattern is created by using doughs with two different colors; one plain dough and the other soft blue has been coloured with this natural Blue Butterfly Pea Flower powder.

It’s more expensive but healthier and a great way to add more visual and to infuse flavors.
You will only need a small amount to achive the right colour tone, add the powder gradually until the desired colour is reached.

If you not keen to buy this kind of natural colour powder, kindly substitute it with standard food colouring.

And to cut the dough, you can use serrated knife if you want.
For me, the best way to do this is to use unflavoured dental floss, where as a knife kind of pushes from the top down and squished the slices.

When attaching small details, make sure to apply just a bit of water, coz the dough will not stick firmly if too much water is used.

Please do remember always cover them with a plastic wrap to prevent the dough dry while they are waiting working on the details.

These buns are favorites from kids to adults and it’s super easy to make at home. I grew up eating it a lot.
I remember having that for breakfast and great options for snack too.

Mantou was my childhood favorite and still is. I fell in love with this swirls since the first time I saw them, it looks beautiful and so tempting. And I know you’ve gonna love them too.

The texture so soft and fluffy, you won’t be able to resist them. If you keep them at room temperature in an airtight container, they even will stay soft moist on the next day.

These buns are great for whatever you’d like to fill them.
It can be eaten on its own or with some sweet spread like jams, condensed milk or to accompany savory dishes like your favorite floss.
I hope that you will enjoy making mantou as much as I do, and I really love to see what creations that you have been made from this recipe. Love you Guys!


BABY EEYORE SPIRAL MANTOU
Yield: 5 pieces
Active time: 1 hour
Total time: 1 1/2 hour

INGREDIENTS

  • 315 grams Cake Flour
  • 2 1/2 tablespoons Granulated Sugar
  • 1 1/4 teaspoons Instant Yeast
  • 1/2 + 1/8 teaspoon Baking Powder
  • 165 grams Cold Water
  • 16 grams Shortening
  • 1/2 + 1/8 teaspoon Salt
  • Food Colouring (Blue Pea Flower Powder for blue, Cocoa Powder for brown, standard food colouring for pink and black)


INSTRUCTIONS

  1. In a large bowl, mix in the flour, sugar, yeast and baking powder.
  2. Pour in the cold water and mix until just combined. By using cold water yeast becomes less active, so it give us more time to create the dough details.
  3. Add in the shortening and salt (you can use your hands to mix this or a stand mixer) keep on going until it’s create a dough ball.
    Place the dough onto a work surface, continue kneading it for 5-10 minutes until it create a smooth ball (sometimes different brand flour can have different moisture level, so if it’s too dry add a tablespoon of water, if it’s too wet add a bit of flour).
  4. After the dough is ready, spare some dough for the details; 30 gr for white; 10 gr each for brown, pink and black.
    And for the rest dough, divide it into 2 equal portions for the spiral dough.
    Cover all dough with a cling wrap to prevent it from drying out while waiting the rest of the dough to be coloured.
  5. Colouring
    – Take one portion of the spiral dough, add about 1/2 teaspoon Blue Pea powder, knead it to even the colour. You’ll only need a small amount to achive the right colour tone, add the powder gradually until the desired colour is reached.
    It will be much harder to color the dough evenly this way (be patient), should the dough become dry when kneading, spray it with some water and continue kneading it.
    * Please note that the colour will be darker after steaming so be mindful with the colour.
    If you not keen to buy this kind of natural colour powder, kindly substitute it with food colouring.
    Spare 30 gr of blue dough for the ears.
    – Add some cocoa powder for the brown colour
    – Using standard food colouring for pink and black.
    After finish with the colouring, let all the coloured dough covered and rest for about 10 minutes so the gluten can relax a bit.
  6. Rolling
    Using rolling pin roll both white and blue spiral dough into about a same size thin rectangle.
    Brush a thin layer of water as a glue on top of the blue dough, and then place the white dough on top of the blue dough.
    Using rolling pin, roll the stack dough one more time to make sure that they are stick well and the surface is even.
    Cut the edges of the dough to make it more tidy, brush a little water on top of the white dough.|
    Starting from the side near you, roll them up tightly into a log.
    Mark the dough into 5 equal pieces (you will have 2 extra ends).
  7. Cutting
    The best way to do this is to use unflavoured dental floss, where as a knife kind of pushes from the top down and squished the slices. You can also use serrated knife to do this.
  8. Detailing
    Place each cut spiral mantou on each parchment paper.
    Always cover all the dough with a plastic wrap to prevent the dough dry while they are waiting working on the details.
    When attaching small details, make sure to apply just a bit of water, coz the dough will not stick firmly if too much water is used.
    – Face: roll some white dough thinly, cut with oval shape cutter ,apply a thin layer of water as a glue, stick it to the front side of the mantou.
    – Ears: roll some blue and small pink dough into a teardrop shaped, stick and press the pink dough on top of the blue dough. Cut the sides of the dough and stick them each side of the head.
    – Eyes, nose and eyebrows: roll some black dough, place and stick it according to position.
    – For the Hair: cut some brown dough with star shape cutter and stick it on top of the head.
    – Mark his face line verticaly from hair down to face with blade tool.
  9. Final Proof
    After finish with all the details, cover mantou with a clear container or cling wrap and set it aside to proof.
  10. Prepare steamer
    Preheat the steamer (the water level should be no more than 3 cm deep as excessive steam will ruin the look of the buns).
    Wrap the lid with kitchen towel to prevent the water drops to the buns.
  11. To check if the dough has been optimally proofed
    The dough should look larger in size. rounded and airy, they also feel soft and spring back slowly when the surface is touched.
  12. Steaming
    Arrange the buns in the steamer and place the lid. Place a chopstick under the lid to create a small gap to allow the steam to escape. Steam over a medium heat for about 10-12 minutes.
  13. Turn off the heat, let the buns rest in the steamer for 3 minutes and then remove the buns, serve them immediately or place on a wire rack to cool completely before you store them (this will prevent the bottom of the steamed buns from getting soggy).


NOTE

  1. If you keep them at room temperature in an airtight container, they will stay soft moist on the next day.
  2. You may keep them in the fridge for up to 4 days or in the freezer for up to 2 months.
  3. You may make lots of these mantou ahead of time and freeze it. To serve fridge or freeze mantou; steam for 10 minutes or wrap mantou with cling film and microwave on high for 1 minute.

Fluffy Banana Cinnamon Rolls|No Egg

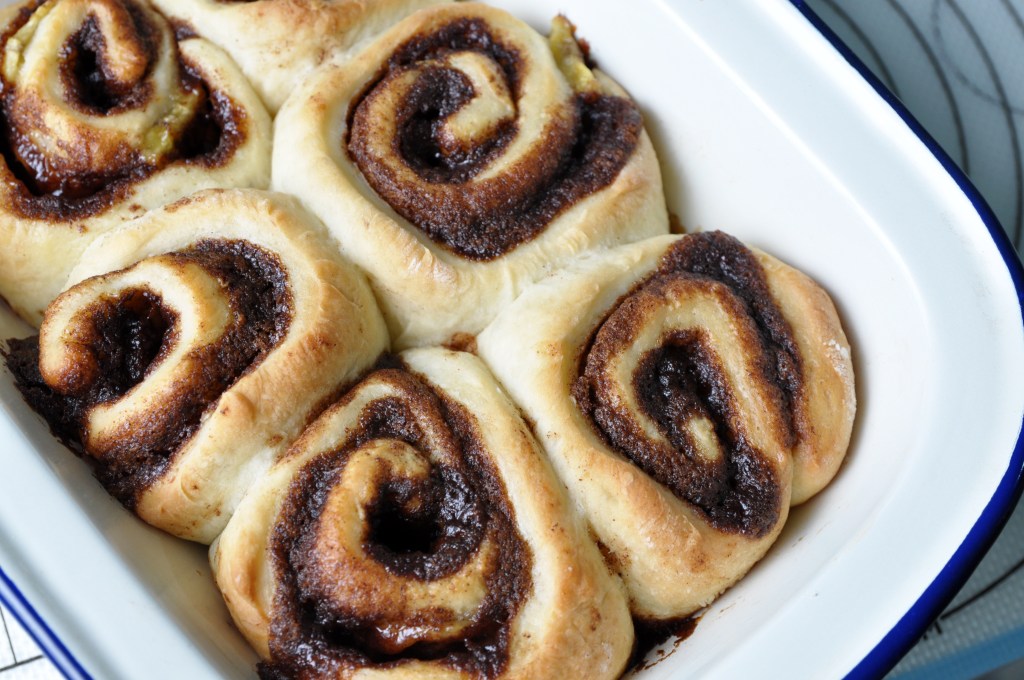
Hey Guys, today I’m gonna show you how to make my signature “Fluffy Banana Cinnamon Rolls”. These gorgeous cinnamon buns are filled with Buttery Brown Sugar Cinnamon and covered in gooey Cream Cheese Frosting.
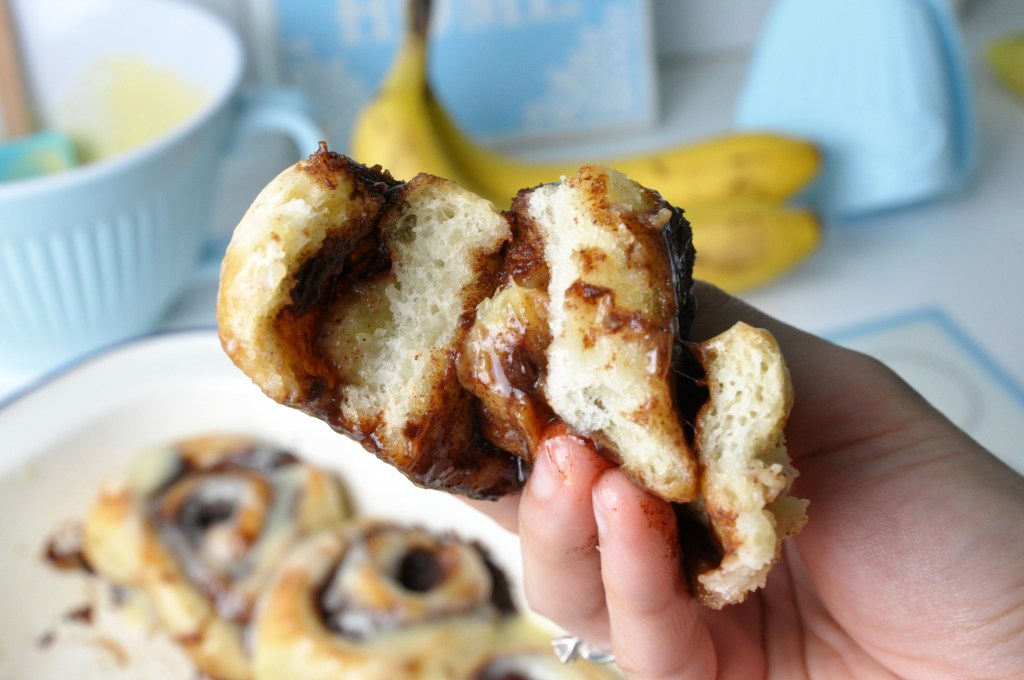
They’re incredibly  fluffy and soft, the smell of Cinnamon Rolls is heavenly, these fluffy buns are definitely perfect treat for any occasion.

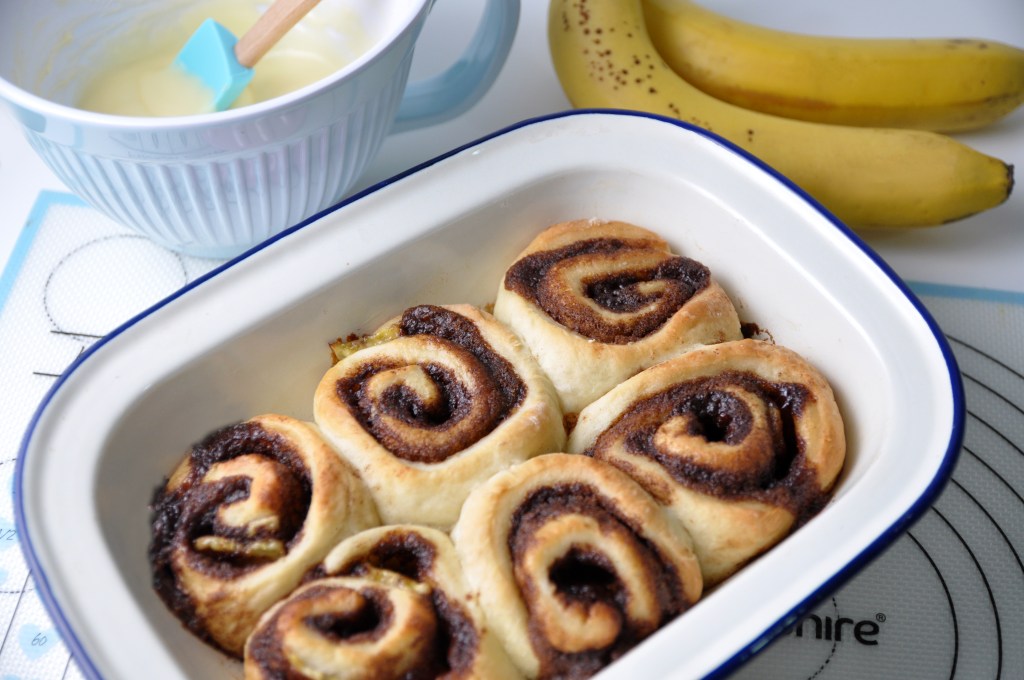
Unbaked Buns

And as an egg-free recipe, we will be use banana puree as an eggs substitute. The result is amazingly moist and fluffy; and the banana slices in the centers, even makes this buns more delightful.

They are tender, warm, gooey, perfectly sweet, and so comforting… They are just gorgeous!

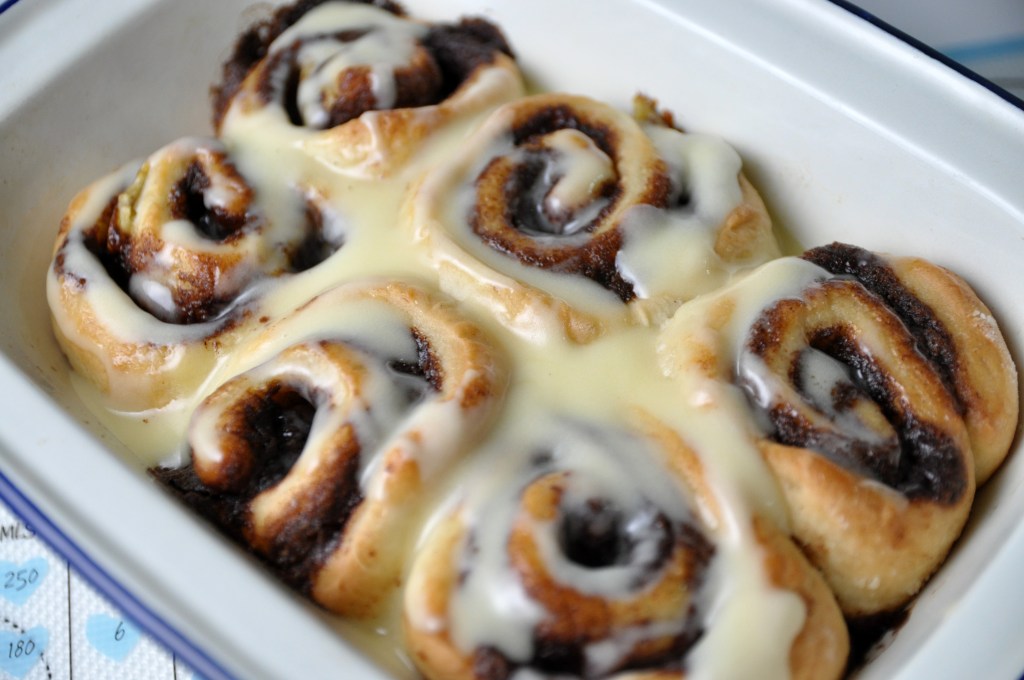
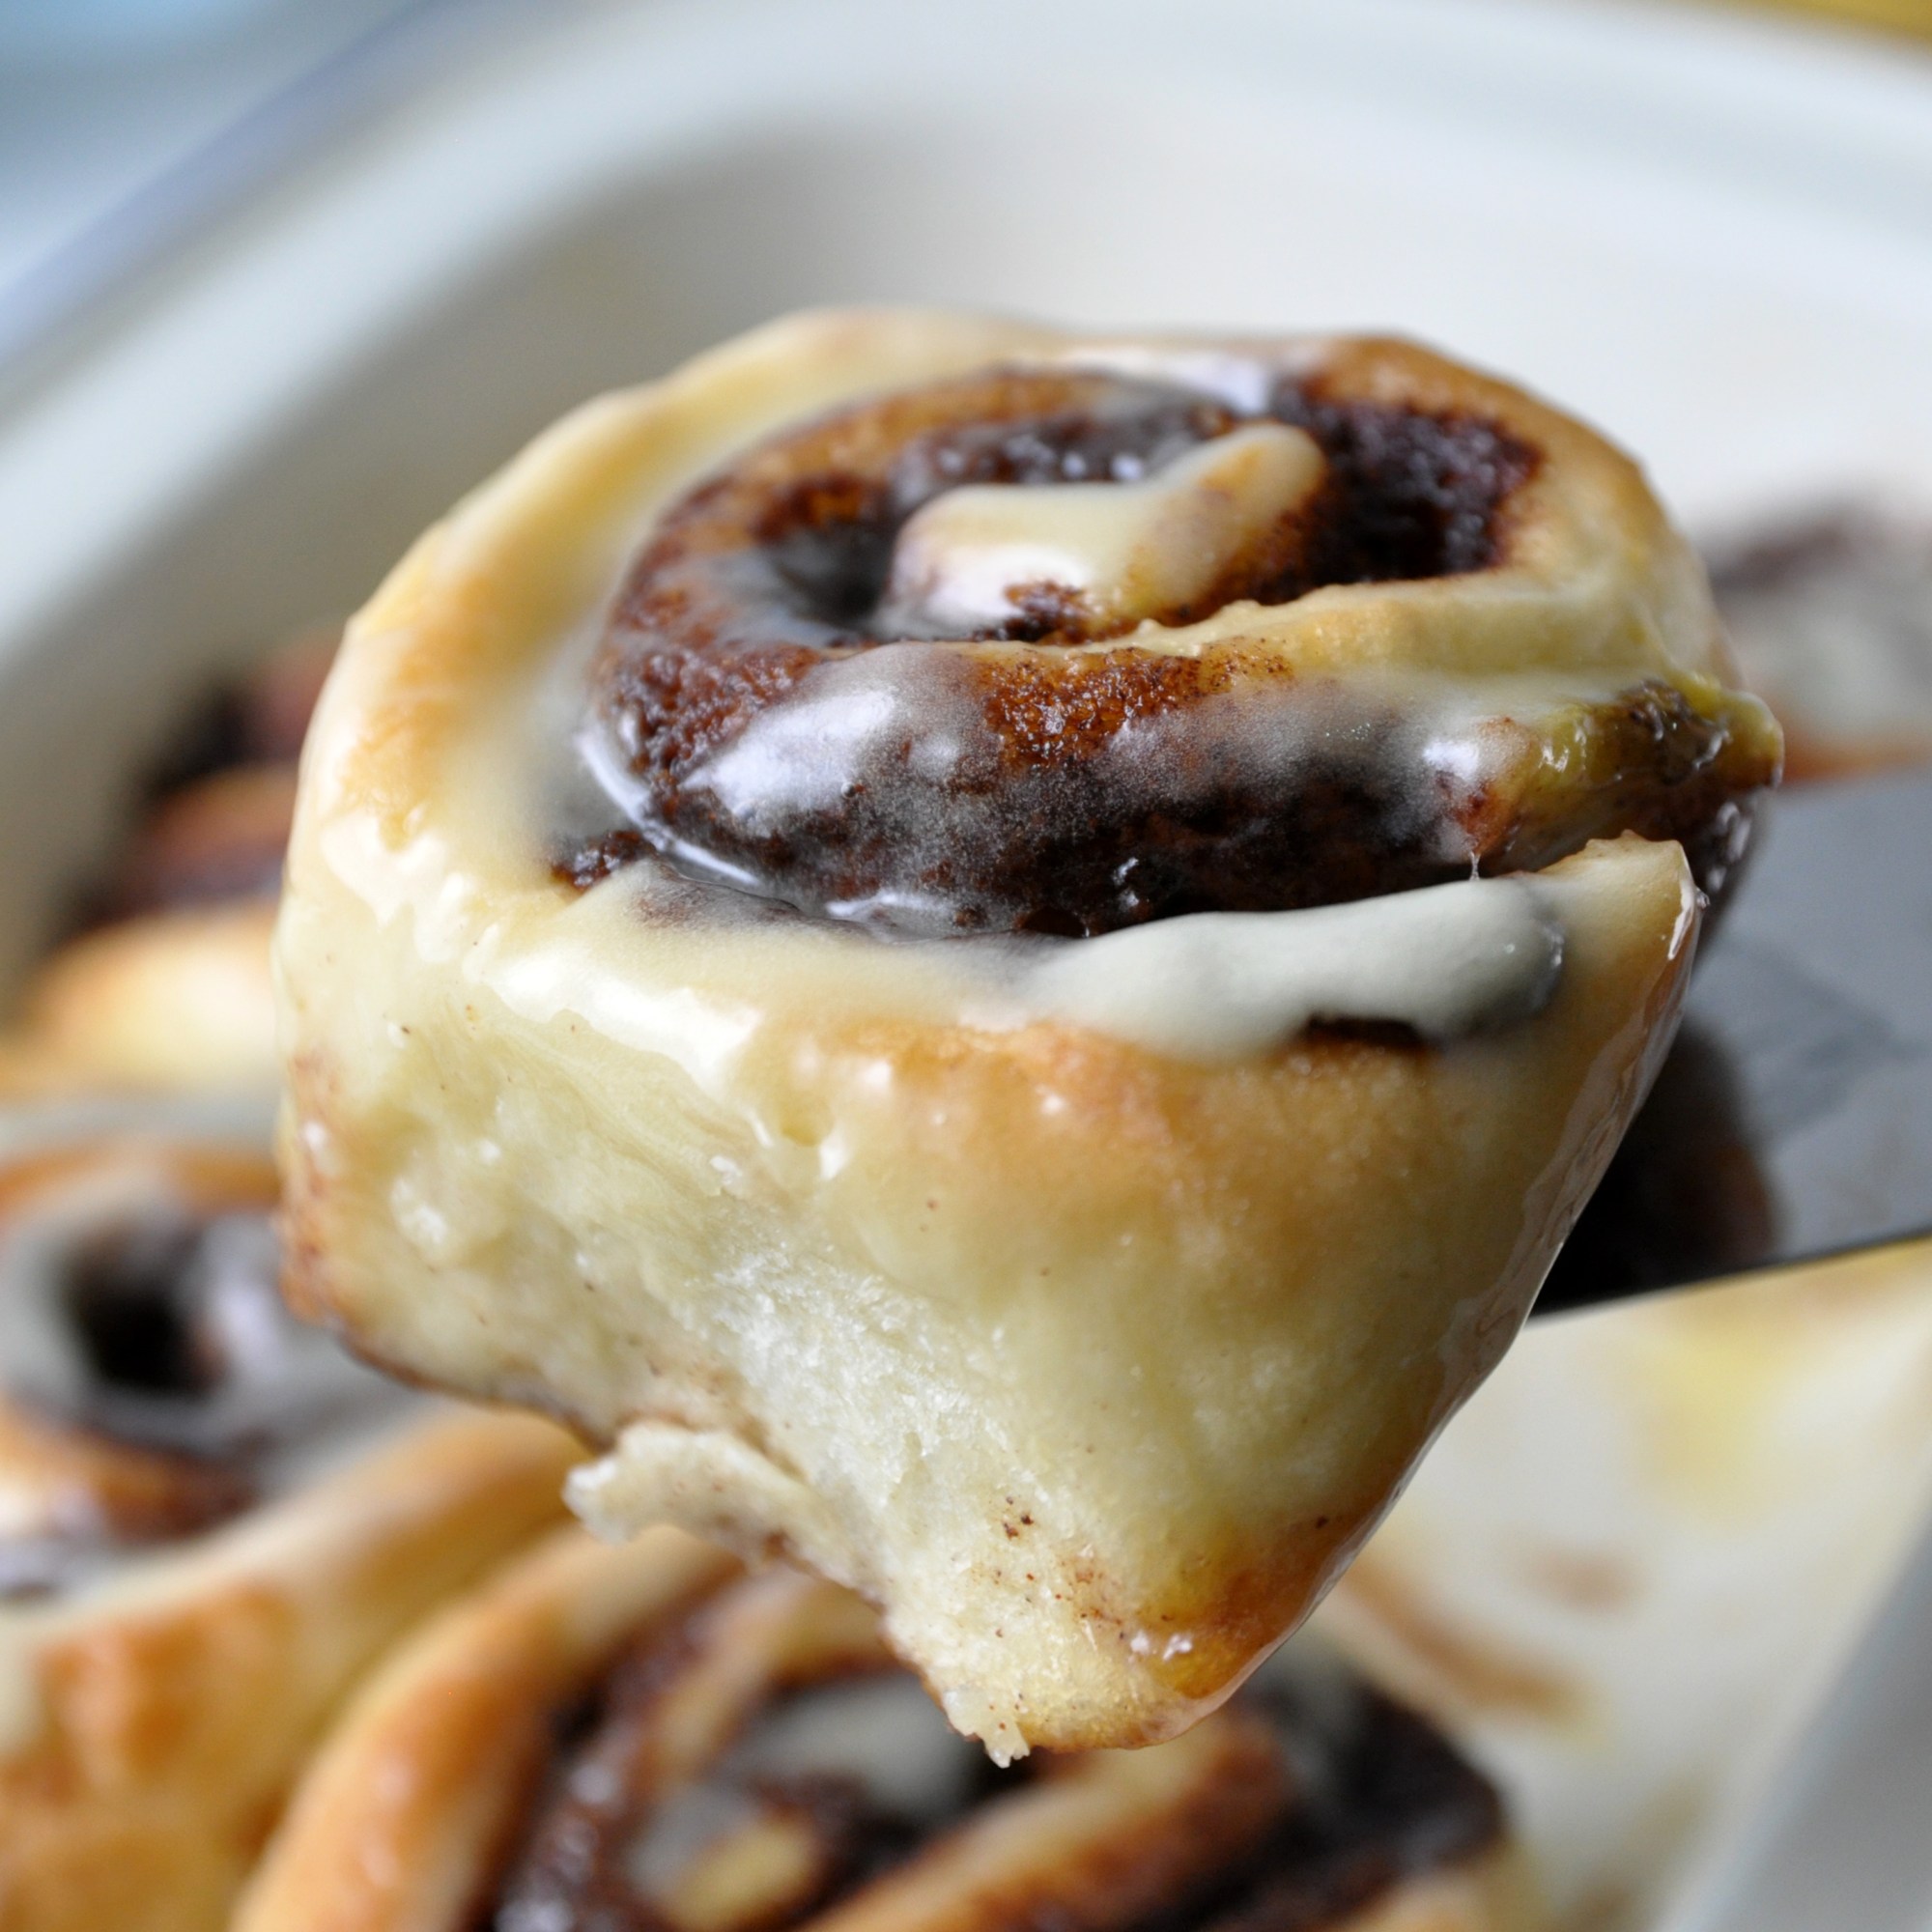
Look at that icing on those rolls. These wonderful icing is not too cream cheesy; it’s really creamy, buttery, a bit tangy but not overly sweet.
If you are the type of person that really loves icing, you could make double of this.

Besides our fluffy Banana Bread, this is another our original recipe that we are really love and have become a family favorite here at Bembum Kitchen.
You even can make this lovely buns in advance and freeze them. So you could still have them fresh whenever you are ready to bake them. Does it make everybody quite happy?

Is there anything better than a fresh Cinnamon Roll, dripping with frosting, hot from the oven? I just wish you Guys can smell this, they are really smell amazing!
I hope you enjoy them as much as we did, stay healthy and safe Guys! Love you all!!

BANANA CINNAMON ROLLS
Yield: One 8×6-inch rectangle pan (6 pieces)
Active time: 1/2 hour
Total time: 2 1/2 hour

INGREDIENTS
Buns Dough:

  • 60 grams Milk
  • 10 grams Unsalted Butter
  • 1 teaspoon Granulated Sugar
  • 1/2 + 1/8 teaspoon Instant Yeast
  • 40 grams Mashed Bananas
  • 125 grams All Purpose Flour
  • 1/8 teaspoon Salt

Filling:

  • 30 grams Unsalted Butter (softened)
  • 40 grams Brown Sugar
  • 1 tablespoon Cinnamon Powder
  • Thinly Banana Slices
  • 1/6 cup Chopped Walnuts (optional)

Icing:

  • 30 grams Cream Cheese (softenend)
  • 55 grams Unsalted Butter
  • 1 tablespoon Milk
  • 1/2 teaspoon Vanilla Extract
  • 40 grams Icing Sugar


INSTRUCTIONS

  1. Prepare the pan, grease it with butter, set aside.
  2. Bloom the yeast; In a small pan, mix the butter and milk. Place over a medium low heat until the butter melted, let it warm.
    Warm means if you put your finger into the milk, It shouldn’t feel like anything. It should feel like your body temperature (could be a little bit warmer than that, but not too hot, coz it will kill the yeast).
    Sprinkle on sugar and yeast, stir well. Let it sit for about 5-10 minutes until the yeast has activated.
  3. Once it has bloomed, add mashed bananas to the milk mixture, mix well.
    Pour in the flour and salt, mix until just combined (doesn’t need to be totally smooth at this point, it just needs to be brought together and homogenous).
    It’s gonna make a really wet, messy dough. No worries, that’s exactly what we are looking for.
  4. Transfer to a lightly floured surface and start kneading the dough. The dough will be sticky, knead the dough for at least 10 minutes until the dough just loses its stickiness and does not stick to the surface or your hands.
  5. Roll the dough into a big ball, grease mixing bowl with a bit of oil and then place the dough inside the bowl. Cover it with plastic wrap and set in a warm place to rise for about 1 hour, or until doubled in size.
  6. To make the filling; Combine very softened butter, brown sugar and cinnamon. Mix until smooth.
  7. To roll; After 1 hour, the dough will be rise (it almost double in size). Place it onto a clean surface (sprinkle a little bit of flour, we don’t want the dough sticking on the mat).
    Roll the dough out into a large rectangle, spread the filling evenly over the dough.
    Add thinly banana slices on top of the filling (remember, not too thick otherwise will be hard to roll later).
    Starting from one short end, roll up the dough into a log and pinch the seam closed.
    Using unflavored dental floss, cut the log into 6 evenly pieces, place them in the prepared pans.
  8. Preheat the oven to 180˚C. Cover the rolls with a plastic wrap and let rise in a warm place for about 20 minutes, until expanded by about half of their original volume.
  9. Bake the cinnamon rolls for 20 minutes, until golden brown. Let cool for about 10 minutes.
  10. To make the frosting; In a medium bowl, whisk together the Cream Cheese, softened butter, milk, and vanilla extract until smooth.
    Gradually add the powdered sugar and mix until smooth. Drizzle the frosting over the cinnamon rolls.

NOTE:

  1. After baking, leave them to cool at least 10 minutes, before you put the icing on, coz when it’s too warm the icing is just gonna completely melt and it’s not gonna be that really nice glaze on top.
  2. Best serve on the day it’s made or you can store left over baked Cinnamon Rolls (airtight container) in the fridge for 5 days and up to 2-3 months in the freezer.
  3. To reheat; remove the roll from the container, preheat the oven or toaster to 180˚C. Put the cinnamon buns on a baking sheet and cover with aluminium foil and let the rolls heat up for about 10-15 minutes.
    Another option is using the microwave for about 30 to 60 seconds. Check on them to ensure they don’t become soggy.
  4. How to freeze unbake Cinnamon Rolls; If you have plan to make the cinnamon rolls in advance and bake later, kindly follow instructions until number 7, and then cover the pan with plastic wrap and freeze for up to 3 months.
    And when you are ready for them, you can defrost them in the fridge overnight or you can leave them out for a few hours at room temperature and throw them in the oven. They might take a little bit longer to bake, just keep an eye of them.

Martabak (Indonesian Thick Pancake)

Hey Guys, today we are making these “Indonesian Thick Pancake”. These thick sweet pancakes are known as Martabak, it was one of the most famous street food in Indonesia.
They are usually lining up on the street at night to get this Martabak as a midnight snack.

These thick yummy pancake characterized by its honeycomb textures and the sweet decadent stuff like chocolates, condensed milk, butter, cheese, peanuts, Nutella, etc.
It really doesn’t require any fancy ingredients to make it.

There are many recipes to make Martabak, some of them used Baking Soda as a leavening agent.
I personally not prefer to use Baking Soda in the recipe, coz it’s a base or alkaline ingredient, which naturally has a bitter taste.

A popular and indulgent choice of toppings for Martabak in Indonesia includes butter, condensed milk, chocolate rice and shredded cheese -which is my favorite!

I love this martabak so much because they are so soft, spongy, the rich of the butter and sweet mild savory combination was truly amazing!!!

The sides and bottom of the pancake should be nicely brown and the middle of the pancake is lightly springy when you touch it.

Crispy and golden brown on the out side, but moist in the inside. It’s really easy and comforting, especially for us who stay at home 24/7.

Making Martabak is about patience and many many trial and errors. Never give up, keep practice Guys! And once get the hang of it, you will always want to make and crave it! Enjoy the recipe!!

MARTABAK (INDONESIAN THICK PANCAKE)
Yield: One 8-inch round pan
Active time: 1/2 hour
Total time: 1 hour

INGREDIENTS
Batter:

  • 1 teaspoon Instant Yeast
  • 1 teaspoon Granulated Sugar
  • 25 grams Slightly Warm Milk (too hot will kill the yeast)
  • 100 grams Cake Flour
  • 1 tablespoon Granulated Sugar
  • 1/4 teaspoon Vanilla Extract (optional)
  • 25 grams Eggs
  • 100 grams Water
  • 45 grams Salted Butter (melted)
  • 1/4 teaspoon Baking Powder

Filling:

  • Pure Creamy Butter (butter in a can)
  • Condensed Milk
  • 100 grams Cheddar Processed Cheese Block
  • Chocolate Rice Sprinkles

INSTRUCTIONS

  1. To activate the yeast; In a medium bowl, combine warm milk, 1 teaspoon of sugar and the yeast. Allow to stand for about 5-10 minutes until the mixture begins to foam.
  2. In a large bowl combine the flour, sugar, eggs, water. Mix until just combined. Stir in the activated yeast, mix well. Pour in the melted butter, mix until smooth and no lumps remains (you will have a thin, shiny batter.
    Cover the bowl and set aside for about 30 minutes (the volume of batter will increase and have air bubbles all over the surface).
    In the meanwhile, you can prepare your favorite fillings.
  3. Prepare 8 inch non-stick pan, make sure the pan has a glass lid so that you can check the pancake while cooking it.
    Heat the pan over medium high heat (it’s really important to preheat the skillet fully before you add the batter, or it won’t rise and get those honeycomb textures).
    To test whether the pan is hot enough; a drop of water thrown into the pan should sizzle right away.
  4. Once the pan is hot and ready, add baking powder into the batter. Mix it well and pour the batter immediately into the pan, don’t let the batter sit around for too long after the baking powder is in.
    Very gently slightly turn the pan around in circular motion so the batter thinly coat the side of the pan (this will form a nice crust later and that’s one of the best part of martabak).
  5. Let it cook on medium high heat until the bubbles came out into the entire surface and then reduce the heat immediately to the lowest setting.
    Please note, never use high heat because it could burn the bottom of pancake while cooking.
  6. When the edges of the pancake begin to look dry, sprinkle the top with 1 tablespoon of sugar and then cover the pan with the lid. Let it cook for about 5 minutes or until the center of pancake surface is fully dry and cooked.
  7. Remove pancake from the pan and place it on a cutting board. Spread a generous amount of pure creamy butter on top of the pancake. Cut them into half before you start adding the filling.
  8. Add your favourite fillings (grated cheese, chocolate rice, etc).
  9. Drizzle with some condensed milk.
  10. Gently fold half of the pancake to the other half to form a sandwich.
  11. Spread with some more pure creamy butter on top (you don’t have to do this if you feel it’s too oily, but actually it’s the main thing that makes the martabak more appealing and delicious)
  12. Cut them into pieces according to your preference’s size, traditionally, they will cut them into these square shapes. Don’t forget to wipe your knife with a clean damp kitchen towel between each cut, so the filling doesn’t stick everywhere.

    NOTES
  1. Making Martabak is about patience and many many trial and errors. Pay more attention to the heat, it’s very critical.
    Never use high heat to cook Martabak, because it could burn the bottom of the pancake before it’s completely cooked. Once the entire top surface of the pancake has bubbles, reduce the heat to the lowest setting to continue cooking.
  2. I will recommend to use heavy thick high quality non-stick skillets if possible.
    If you use non-stick regular pans, apply a thin layer of oil might be needed and you will need to peek the bottom part occasionally as they generally burn more easily.
  3. After mixing the batter with baking powder, immediately pour the batter to the heated pan for optimum results. So make sure by this time, the heated pan is ready. 
  4. Instead of using Pure Creamy Butter, you can substitute it with regular salted butter.
  5. Best serve immediately while still warm. You can store left over in the fridge for 3-4 days.
  6. To reheat; 200° C oven for 10-15 minutes or 1000 W microwave for 1 minute (most of the fillings will be melt).

Purin Steamed Birthday Brownie

Hey Guys, today I’m gonna show you how to make my signature “Steamed Brownie Birthday Cake”. It is the moistest steamed brownie possible, filled with melted dark sweet chocolate, cover with fluffy classic steamed buttercream, and then decorate as a Purin, my favorite Sanrio character.

Brownie Batter

Have you ever steamed your brownies batter? Or you always bake your brownies? Have you ever tried steamed brownies?
The texture of steamed brownie is different than a baked brownie. It is very soft and moist, light and cakey. It is more like a chocolate cake and it’s so tasty.

Look at all those layers, melted chocolate and fluffy buttercream! This cake is soft and moist, and the taste of chocolate is just gorgeous.

I’m sure most of you have heard the method “steam buttercream”. More appropriate would be sort of, “melted or poured buttercream”.

Steamed Buttercream

To cover the cake with steamed buttercream start by fill a medium sized saucepan about a quarter full with boiling water, and then place a heatproof bowl with a yellow buttercream on top.
You need to stir the buttercream, keep stirring until the buttercream is softened to a pouring consistency.

As it doesn’t need an oven to make it, it is suitable for anyone who wants to make a good quality dessert without an oven.
I’m pretty sure you can already see why I love this recipe and the method of decorating and you don’t have to be a perfect cake decorator to be able to do this!

PURIN STEAMED BIRTHDAY BROWNIE
Yield: One 16-inch round pan
Active time: 1 1/2 hours
Total time: 3 hours

INGREDIENTS
Brownie Batter

  • 120 grams Salted Butter
  • 80 grams Dark Sweet Baking Chocolate
  • 200 grams Eggs
  • 150 grams Granulated Sugar
  • 1 teaspoons Vanilla Extract/ Paste
  • 80 grams All Purpose Flour
  • 35 grams Cocoa Powder
  • 1 teaspoon Baking Powder

Chocolate Filling
40 grams Dark Sweet Baking Chocolate (melted)

Buttercream

  • 200 grams Shortening
  • 20 grams Salted Butter
  • 40 grams Condensed Milk
  • Yellow Food Colouring

Purin Hat Covering
100 grams Dark Sweet Baking Chocolate (melted)


Details Decoration

  • 50 grams Dark Sweet Baking Chocolate (melted)
  • 80 grams White Baking Chocolate (melted)
  • Candy Colouring/ Colouring Powder (Yellow, Pink)


INSTRUCTIONS
Details Decoration

  1. Prepare the template, tape some greaseproof paper right on top, make sure it doesn’t budge.
  2. Melt some white and dark chocolate (using microwave or a double boiler). Colour them as needed (you can use candy or powder colouring). Pour each colour into a piping bag.
  3. Start create the details (according to the template): Dark chocolate for the nose, mouth and eyes (using toothpick to remove any air bubbles); yellow for ears; soft pink for cheeks and tongue.
  4. Allow them to chill and sets hard in the fridge.

Brownie Batter

  1. Preheat steamer.
  2. Prepare pans; 6-inch stainless steel bowl for the face and 4-inch round plate for the hat. Grease them (brush with butter and spinkle some flour) or use baking pan grease kindly find the recipe in this link https://www.youtube.com/watch?v=ilWe6…
  3. Melt butter and dark chocolate in a double boiler, set aside until slightly warm.
  4. In a large bowl, mix eggs, sugar and Vanilla Extract. Whip them until the mixture is pale yellow, thick and forms a ribbon. Sift in flour, cocoa powder and baking powder; mix well. Pour in butter chocolate mixture. Mix until well combined. Using spatula, gently folding the bottom over the top to make sure there’s no butter mixture left underneath.
  5. Pour about 4 tablespoons batter into the hat pan and half of the left over mixture into the bowl.
  6. Tap it and place them in the steamer that has been pre heated (don’t forget to cover the steamer lid with a kitchen towel so the water doesn’t drip into the brownie). Steam on a medium high heat for about 20 minutes.
  7. After 20 minutes, take both pans off the heat. Set aside the hat. And for the face, pour the 40 gr melted chocolate as a brownie filling, spread it evenly. And then pour another half part or the rest of the batter on top of the first batch. Put it back to a steamer and steam for another 35-40 minutes
  8. Take it off from the heat (it’s done when a skewer inserted in the center comes out clean). Remove it from the pan and let it cool completely on the cooling rack.

Buttercream
In a large bowl, mix shortening, salted butter and condensed milk. Whisk for about 5 minutes or until it’s really light and fluffy. Split the buttercream into 2 batches; colour 2/3 of the buttercream with yellow food colouring and the rest will remains bright white. Set aside.

Design Cake

  1. The Hat
    Cover the hat cake with 100 gr melted dark chocolate. Place them in the fridge so the chocolate will sets hard.
  2. The face
    Place the face cake onto 6-inch cake board. Cover entire surface with white buttercream (just a thin coat of buttercream to protect the cake from any crumbiness). Use elastic scraper to help the smoothing process.
  3. To cover the face cake with steamed buttercream; Fill a medium sized saucepan about a quarter full with boiling water, and then place a heatproof bowl with a yellow buttercream on top (make sure it isn’t touching the water).
    Stir continuously until the buttercream is liquidy. You’ll see some of the oil comes out and separate from the buttercream. Don’t worry, keep on stirring until the mixture incorporated. After reach the right consistency, pour it onto our crumb coated cake. Allow them to set up a bit before continue to decorate it
  4. Using medium star tip, pipe some white buttercream on top of the face cake, place the hat on it. Decorate the gap between hat and face with some more white buttercream.
  5. Stick and insert the ears on each sides of the face.
  6. Using small round tip pipe a tiny pearls around the bottom part of the face.
  7. Stick the details (nose, mouth, eyes and cheeks).


NOTES

  1. You can use candy melts for the details decoration.
  2. Store cake 1 day at room temperature, 3 days in the fridge.

One Hour Bomboloni (Vanilla Rum Custard Cream Donuts)

Hi Everyone, today we are making these “One Hour Bomboloni” irresistibly light and delicious Italian donuts that are fried, coated in sugar, and traditionally stuffed with a pastry cream.

Usually you will find these either stuffed with Nutella, fruit jam or with cream like custard.
I’m gonna do Vanilla Rum Custard today and they are so good! The donuts itself so soft and fluffy.
These are completely homemade and easier than you’d imagine!

And the great thing about this recipe is you even don’t need to rise the dough twice!

If you never made bread before you have to try it sometime. It really so much fun and fresh homemade bread taste amazing.

And while they are still warm, pour some granulated sugar in a container.
I like to mix them with some Cinnamon Powder here to add more delightful taste. Roll them around until completely coated in the Cinnamon Sugar.

Look how soft and fluffy those are! These look and smell amazing!

They are absolutely incredible, and you’ll fall in love with them! Make Bomboloni at home and bring a little taste of Italy to you! 🙂

BOMBOLONI (VANILLA RUM CUSTARD CREAM DONUTS)
Yield: 6 pieces
Active time: 1 hour
Total time: 2 hours

INGREDIENTS
Custard

  • 66 grams Granulated Sugar
  • 36 grams Egg Yolks
  • 30 grams Corn Starch
  • 320 grams Milk
  • 2/3 teaspoon Vanilla Extact/ Paste
  • 2 tablespoons Rum Liquor (optional)


Donuts Dough

  • 150 grams Bread Flour
  • 38 grams Cake Flour
  • 1/2 + 1/4 teaspoon Instant Yeast
  • 1/4 teaspoon Baking Powder
  • 23 grams Granulated Sugar
  • 1/3 teaspoon Salt
  • 77 grams Water
  • 25 grams Milk
  • 18 grams Egg Yolks
  • 12 grams Margarine
  • 10 grams Pure Creamy Butter/ Salted Butter


Coating:

  • 3 tablespoons Granulated Sugar
  • 1 tablespoons Cinnamon Powder


INSTRUCTIONS
Custard

  1. In a bowl combine sugar, egg yolks and corn starch. Whisk until the color lightens and the texture thickens, set aside.
  2. In a medium saucepan pour in milk and Vanilla Extract. Place over medium heat until boil, take it off from the heat.
  3. Whisk in 1/4 cup of the hot milk mixture into the eggyolks mixture until it’s incorporated then slowly drizzle in the remaining hot milk mixture while whisking.
    Strain the mixture back into the saucepan, and then place over medium-high heat and cook while whisking continuously until the mixture thickened and slowly boiling.
  4. Remove from the heat, strain the mixture to remove tiny lumps, add in rum. Mix well.
  5. Let the custard cool slightly and then pour it into the piping bag fitted with a medium size round tip. Set aside.


Donuts Dough

  1. Combine all the dry ingredients; bread flour, cake flour, instant yeast, baking powder and granulated sugar, mix well.
  2. Add in salt, mix well.
    Please note that never let the yeast and salt touch one another without mixing fist, coz it will kill the yeast.
  3. Pour in water, milk and egg yolks. Mix until just combined.
  4. Add in margarine and creamy butter. Spread and fold the butter into the dough until just combined.
  5. Pour the mixture onto a work surface and start kneading the dough.
    You will know the dough is done mixing if you touch the dough, it doesn’t leave a lot if residue on your fingers.
    And you can also do the windowpane test by taking a piece of dough gently spread your fingers and thumbs apart, stretching the dough into a thin translucent membrane.
    If you can stretch the dough without it breaking, that means the gluten is well-developed and your dough is ready.
    But if it tears when you stretching it out, that’s mean it’s not ready and you need to knead it a little bit longer.
  6. After the dough is ready, roll them into a big smooth ball.
    Let it sit on the counter for about 10 minutes so the gluten can relax a little bit.
  7. While our gluten is chilling out, preheat the oven to 90 degress C to create warm environment for proofing the dough later.
  8. Cut some greaseproof paper and grease them with a little bit of oil for the donuts base. This paper will make us easier to handle the proofed dough, which is very soft after rising.
  9. To Form
    Divide the dough into 6 equal protions, it’s about 58 grams each.
    Roll each pieces into a smooth ball. Hold and roll the dough
    with our hands in C shape, give a little pressure to it, keep rolling until it create a smooth ball.
    After finished with all the dough, cover and let the dough rest for about 15 minutes.
  10. Place each dough ball onto a greaseproof paper. Using round flat surface, press the ball gently into a thick flat disk, about 3 inches diameter each. 
  11. To Proof
    Place them in the preheated 90° C oven that has been turned off for about 20 minutes.
    If you do not keen to use this method, you also can proof them at room temperature. Just make sure to covered them with a plastic wrap to prevent the dough dry and they might need more time to rise (depends on the room condition).
  12. Let all the donuts rise until noticeably puffy, they should look pretty darn fat and happy. If you simply touch them lightly with your fingertip and the indentation remains, that’s means they are ready to fried. Do not overfproof.
  13. To Fried
    Heat about 2-3 inches of vegetable oil in a heavy pot on the stove, wait until it reaches between 350-360° F (175-180° C).
    Feel free to use electric deep fryer according to manufacturer directions.
  14. Gently pick Proofed donuts up off the baking sheets and carefully place the top sides facing down into the hot oil.
    Cook for about 60-90 seconds per side until they’ve got beautiful golden colour on both sides.
    Drain off the excess oil, and transfer them to a lined baking sheet 
  15. To Coat
    While they are still warm, mix granulated sugar and cinnamon powder in a container. Roll donuts around until completely coated in the cinnamon sugar.
  16. To Fill
    Poke a hole on the side, create empty space inside the donuts. You can use chopstick or small knife.
    Push the custard fillings piping bag tip into the small hole and squeeze to fill. Allow a little bit of the filling to spill out and show through the hole.


NOTES

  1. The best oils for frying is a neutral flavour oil; like peanut oil and canola oil because of their high smoke points. Although sunflower and corn oil work well too. 
  2. It is always best to eat the Bomboloni immediately. You could keep them unfilled in an airtight container at room temperature for 1-2 days at most. If filled they should be kept in the refrigerator for a couple of days. Freezing is not a good idea.
  3. To Reheat
    Place the cold Bomboloni in a pan (uncovered), reheat in preheated 300°F/ 150°C oven until warm for about 4 to 5 minutes.