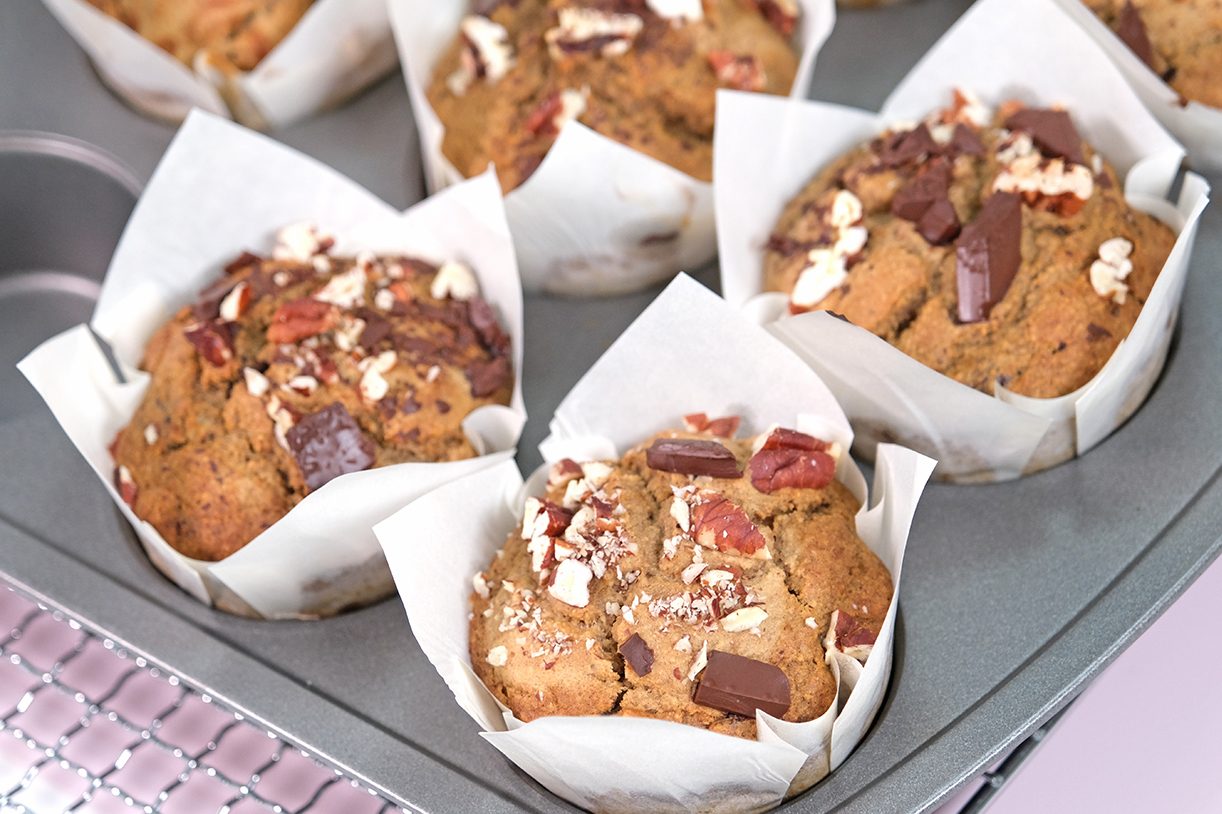
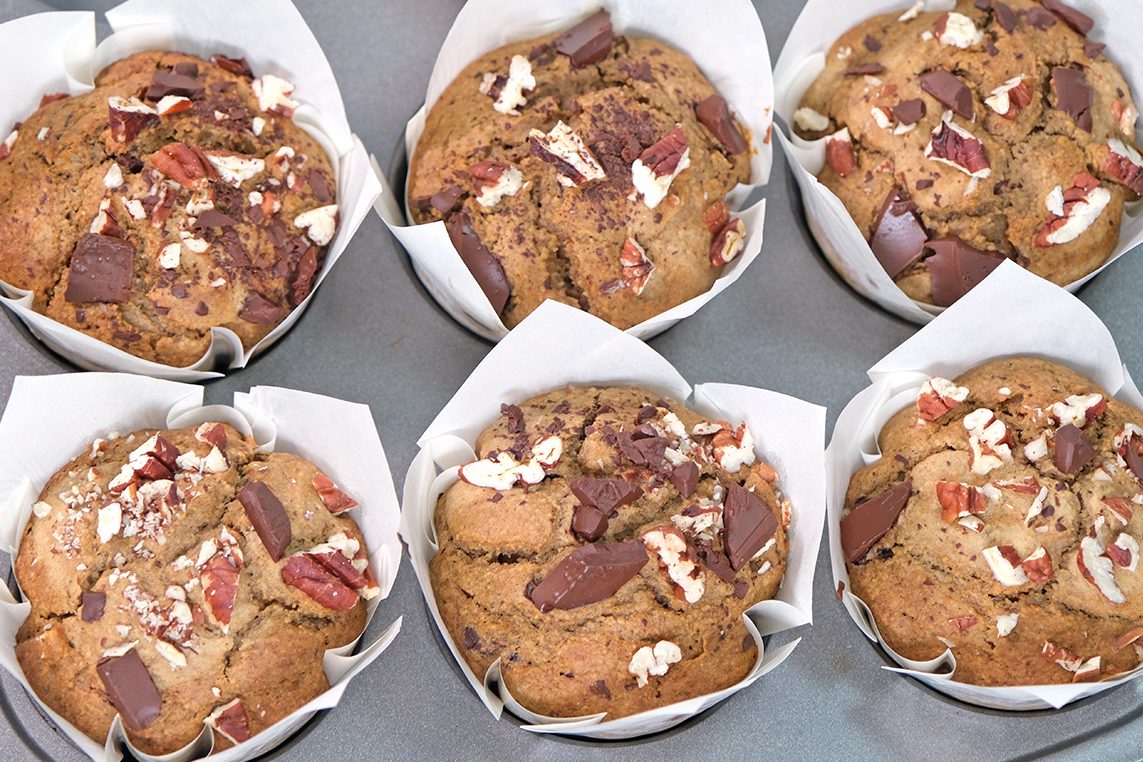
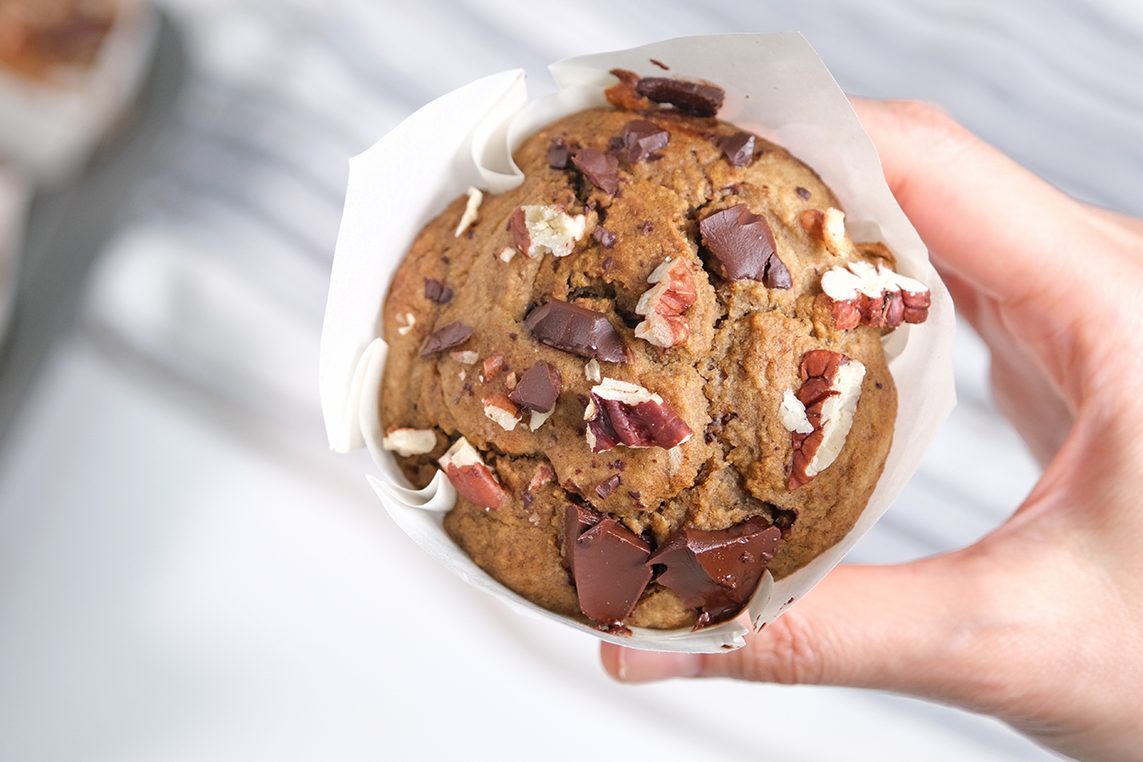
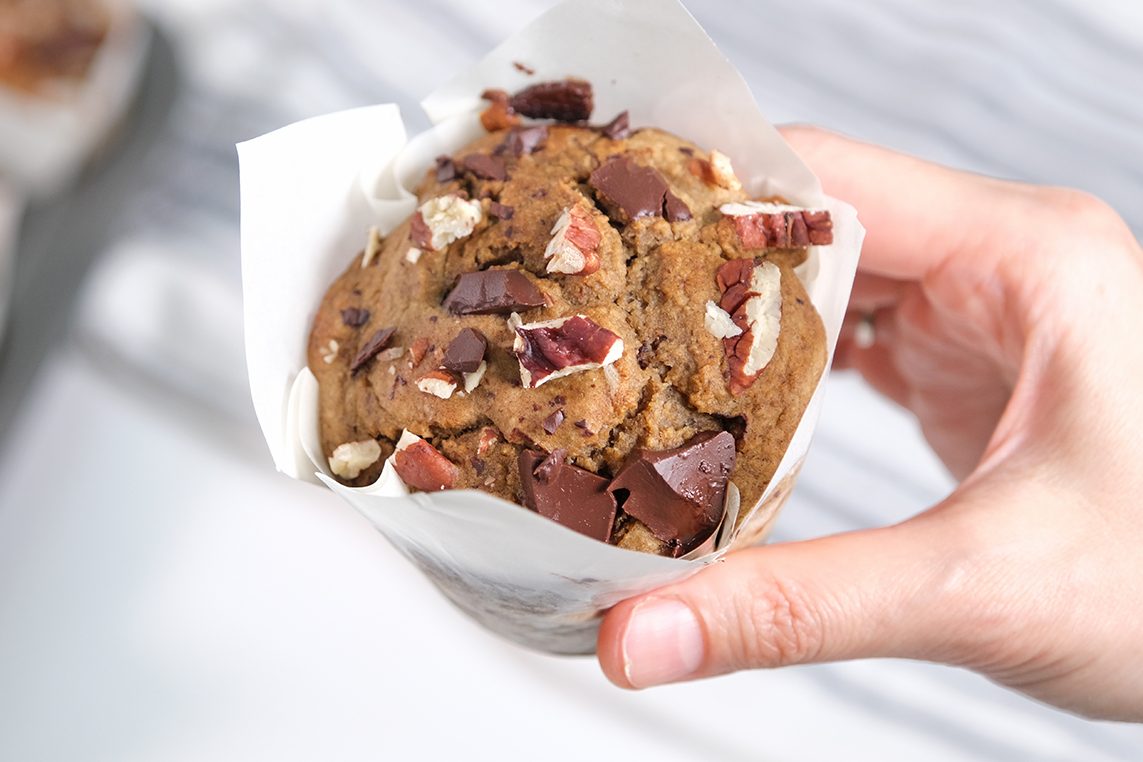
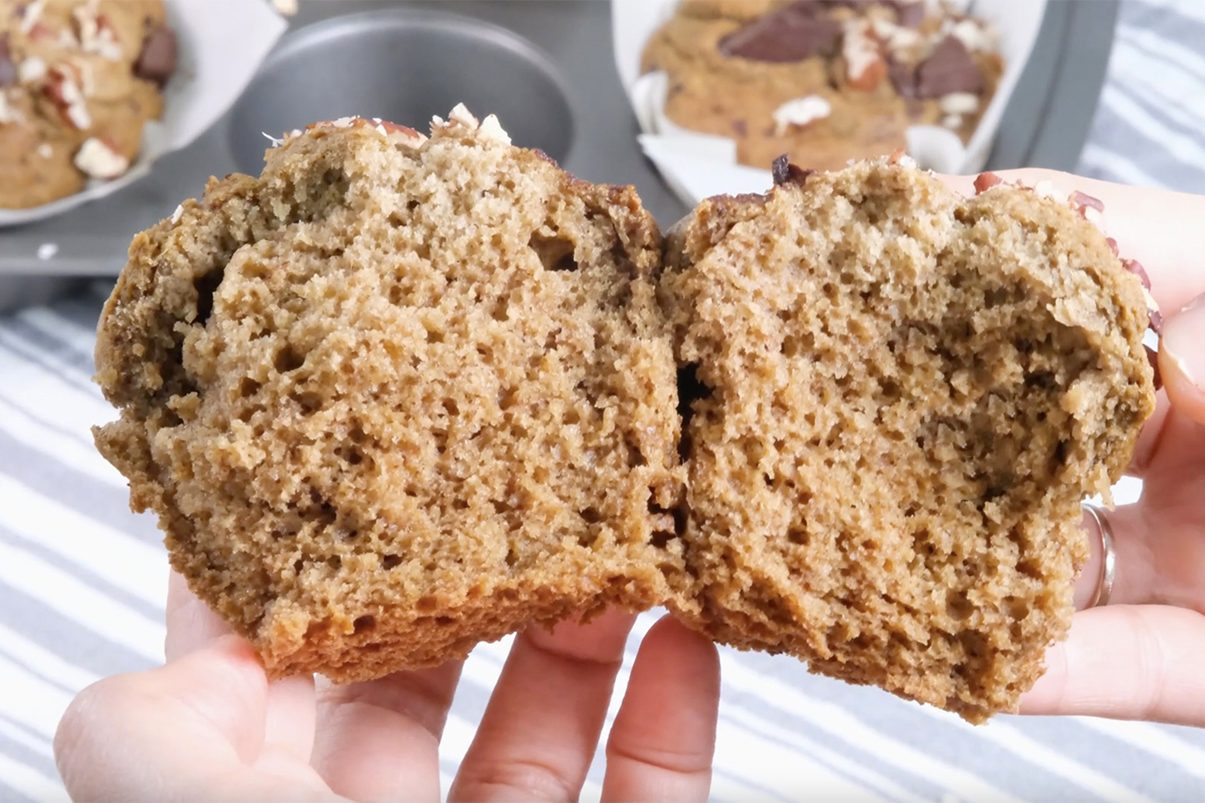
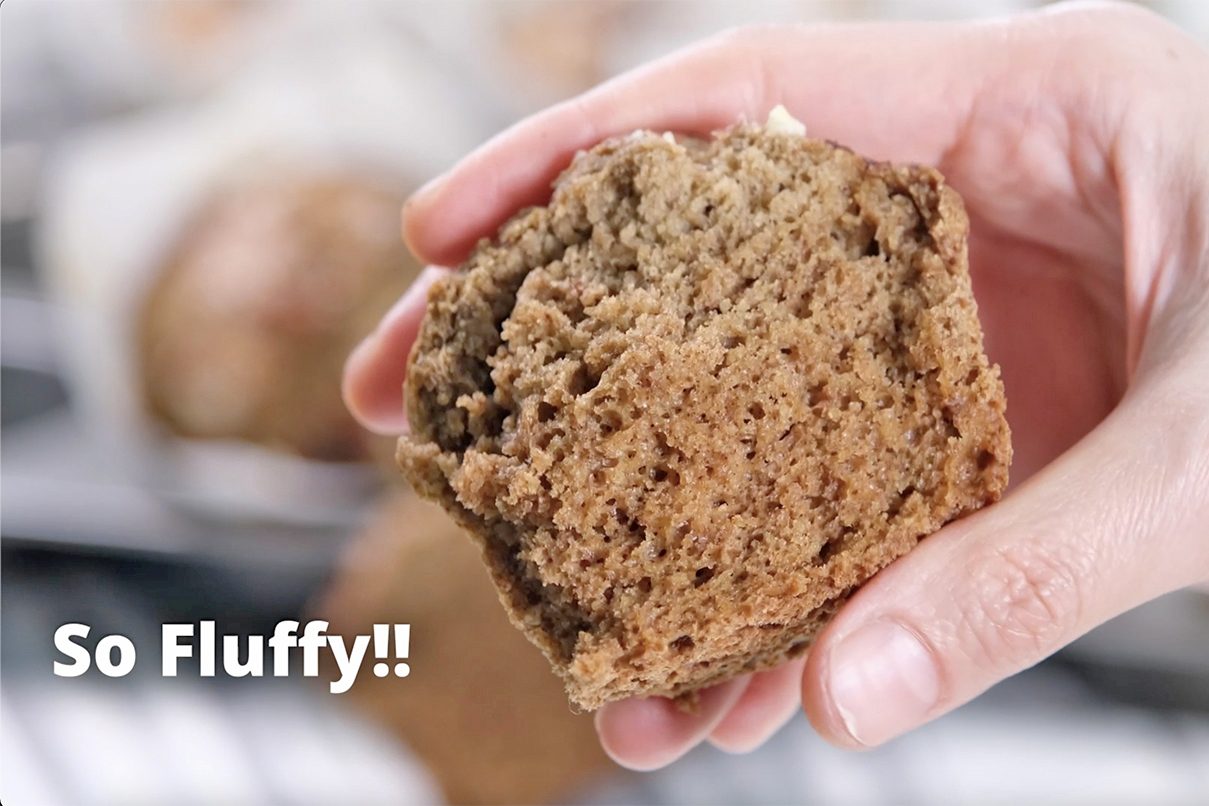
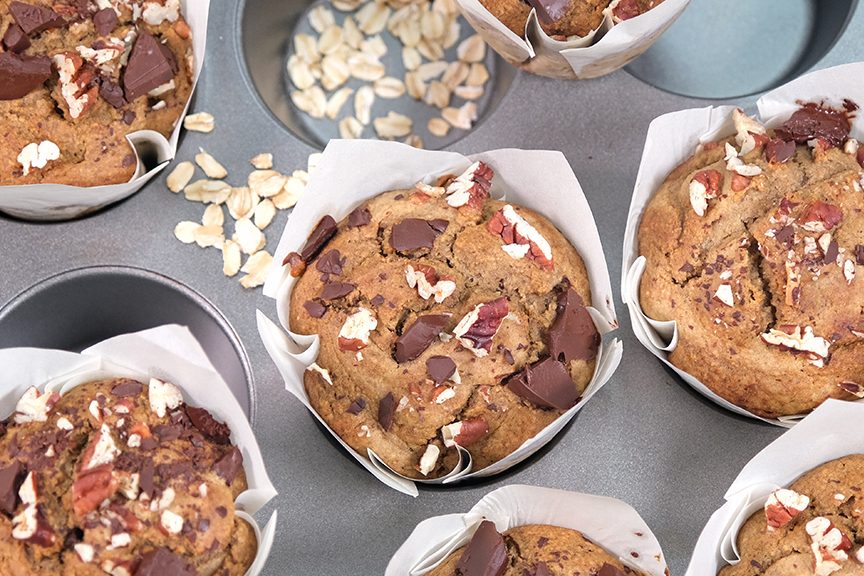
If you love Muffins but don’t love the sugar crash, these “Healthy Banana Oat Muffins” are about to become your new favorite bake.
They’re naturally sweet, incredibly moist, and made with simple, wholesome ingredients — without Oil, Refined Sugar, Flour, or Dairy.
😍 My favourite Muffin 🥰
Yes, really! These muffins are perfect for busy mornings, post-workout snacks, or even a light dessert. And the best part? Everything goes into one blender 😘
💋 WHY YOU WILL LOVE THESE MUFFINS
Naturally sweetened with ripe bananas & dates
No refined Sugar
No white Flour (just oats!)
No Oil or Butter
Dairy-free
Kid-friendly & freezer-friendly
Ready in 30 minutes
They’re soft, tender, and perfectly sweet, packed with fiber-rich Oats, and finished with Dark Chocolate and crunchy Pecans.
🍌 Why These Muffins Work
Bananas provide moisture and natural sweetness
Dates enhance sweetness without refined sugar
Oats replace flour entirely
Eggs give structure and lift
Dark Chocolate + Pecans add richness and crunch
They’re hearty, filling, and perfect for breakfast or a snack 🤓
It’s golden, fluffy, and totally healthy!! 🤤
These Banana Oat Muffins prove that healthy baking doesn’t mean sacrificing flavor. With just a handful of wholesome ingredients, you get a rich, satisfying muffin that feels indulgent — but fuels your body well.
Perfect for a guilt-free snack, breakfast or a cozy coffee break 😘 ☕
Give them a try, and let me know what you think! 😁
WATCH HOW TO MAKE HEALTHY BANANA OAT MUFFINS
RECIPE
HEALTHY BANANA OAT MUFFINS Yield: 7 Big Muffin
🍌🧁 INGREDIENTS 350 g Bananas (ripe to overripe with brown spots) 70 g Dates (pitted) 160 g Rolled Oats (blend into powder) 115 g Eggs (room temp.) 1 tsp Baking Soda 30 g Dark Chocolate 70% (chopped) 30 g Pecans (chopped)
🍌🧁 INSTRUCTIONS
Preheat the oven before you start 160°C fan/ 180°C/ Gas Mark 4 Once the batter is ready, bake it right away; letting it sit too long can cause the batter to lose its rise and collapse
Blend the Oats into a fine powder (don’t skip this step, you want a smooth, lump-free batter), set aside
In a large blender bowl, add the Eggs first, then the Bananas, Dates, and Oat Powder (make sure to follow this order; otherwise, the blender could get stuck!) Blend everything until it’s nice and smooth
Sift the Baking Soda into the batter to break up any lumps and ensure it’s evenly distributed; Mix well
Add half of the chopped Pecans and Dark Chocolate to the batter, then mix until everything is well combined
Scoop batter into muffin liners
Sprinkle the remaining Pecans and Dark Chocolate on top
Bake them in a preheated 160°C fan oven for about 25 minutes or until a toothpick inserted into the center comes out clean
Once the Muffins are done, you can serve them warm immediately, or carefully transfer them to a cooling rack and allow them to cool completely before storing
Storing instructions
Because these muffins contain fruit and no preservatives, proper storage is important:
Room Temperature: Store in an airtight container; Best consumed within 2 days; Keep in a cool, dry place
Refrigerator: Store in an airtight container; Lasts up to 5 days; Texture becomes slightly firmer when chilled
Freezer: Wrap individually or store in freezer-safe container; Freeze for up to 3 months; Thaw overnight in the fridge or microwave for 20–30 seconds
Reheating Tips
Microwave for 15–30 seconds to soften
Or warm in oven at 150°C for 5–8 minutes
Enjoy slightly warm for the best texture and melted chocolate pockets
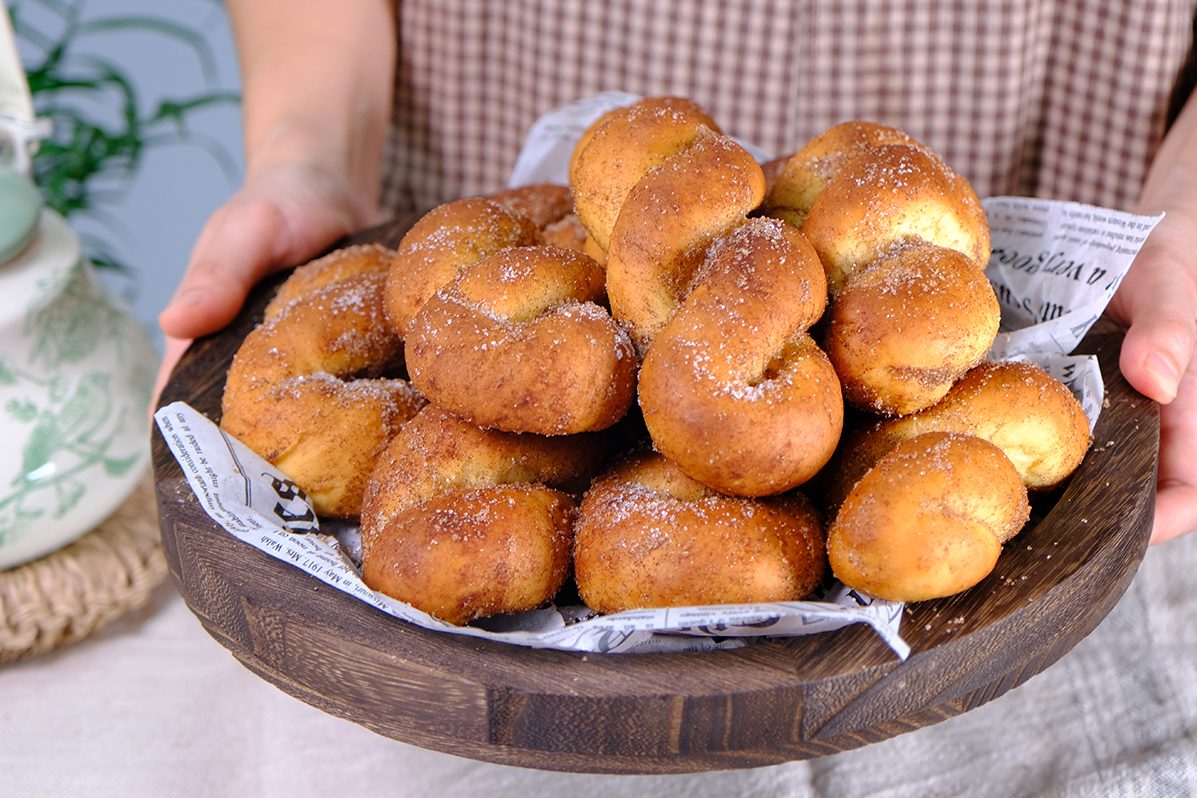
In Korea, Kkwabaegi is a popular after-school snack 🥰
“Kkwabaegi 꽈배기” or Korean Twisted Donuts;
I absolutely love them, but I don't like frying them; they're too greasy and troublesome.
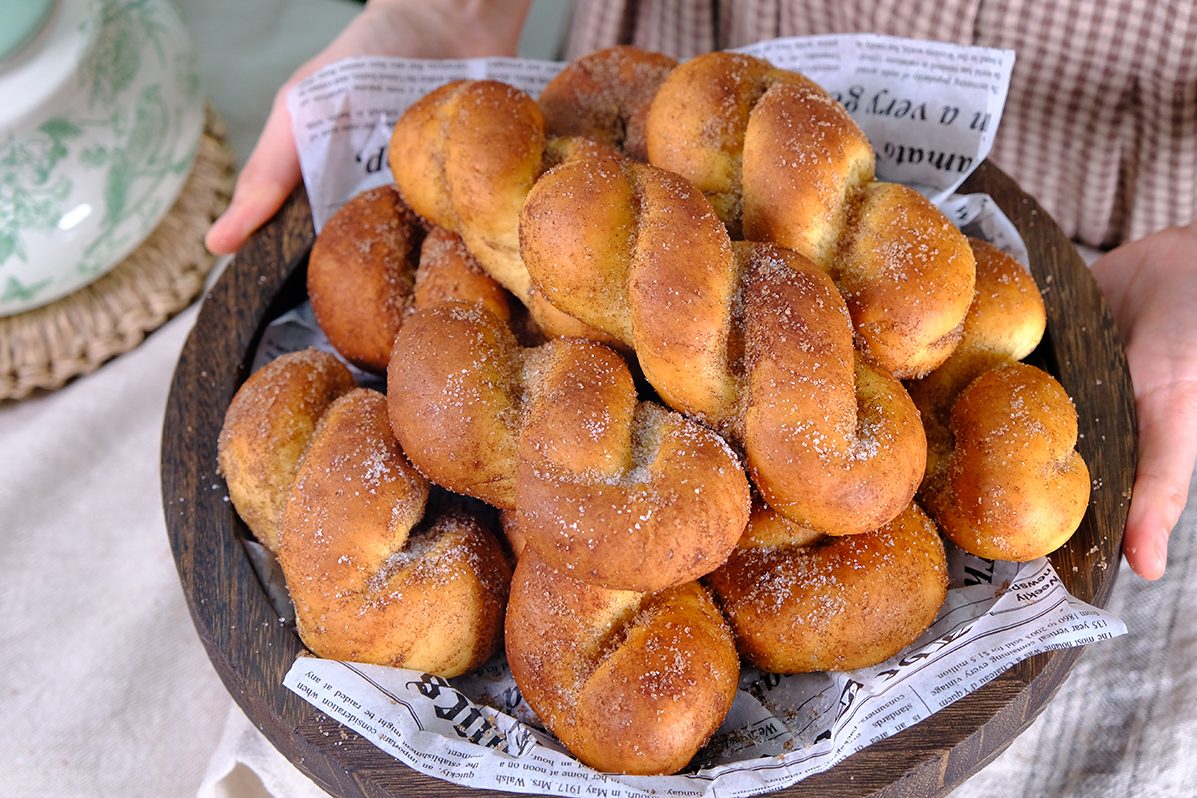
This recipe doesn't require frying, you just bake them instead! A healthier version of Donuts 😋
Mashed potatoes help keep the dough soft and moist, which is especially helpful in baked Donuts that can otherwise turn out dry. They give the Donuts a tender, slightly chewy, and fluffy texture; The starch in the Potatoes binds with the flour, creating a softer crumbThe key to making beautiful kkwabaegi is “Don’t roll the dough thinner in the middle and thicker at the ends, or vice versa” AND “Don’t twist it too much” That will cause the twist to break during the proofing or baking process Your twisted donut won’t look pretty ☹️These mildly sweet, fluffy, spongy, twisted doughnuts are simply irresistible 😳🤤🤤
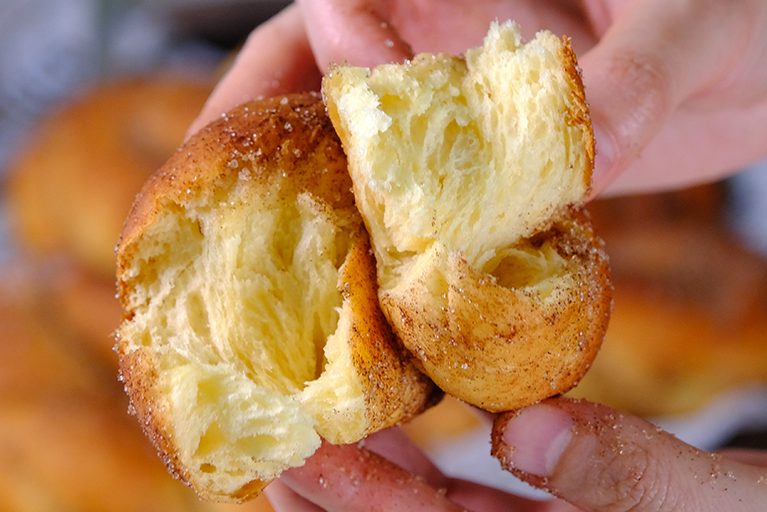
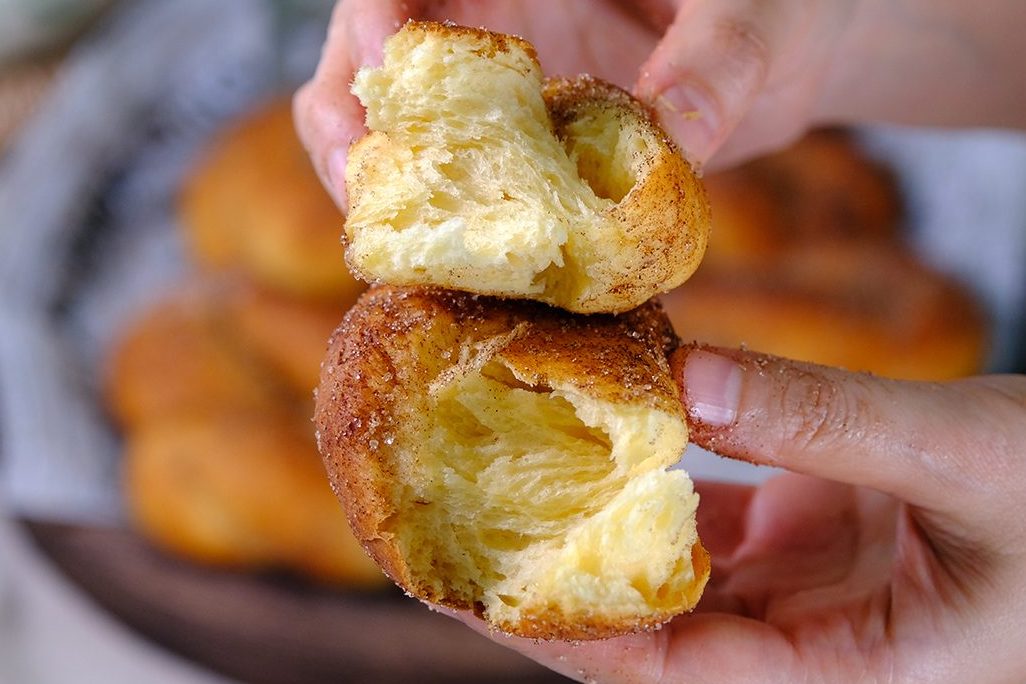
Crispy sugar on the outside, soft and slightly chewy on the inside; And most importantly, it’s not greasy 😜
They pair really well with Coffee, Milk, Chai Tea or even Hot Chocolate. Make this for your loved ones, or your kids; They’ll love it !! 🤗
I hope you will enjoy it as much as I do 😍
WATCH HOW TO MAKE Baked Korean Twisted Donut (꽈배기) Kkwabaegi
RECIPE
BAKED KOREAN TWISTED DONUTS Yield: 10 pieces
INGREDIENTS 🍩 Donut Dough 315 g All-Purpose Flour 50 g Caster Sugar 1⅔ tsp Instant Yeast 1/3 tsp Salt 125 g Mashed Potatoes 50 g Egg Yolks 100 g Full Cream Milk (cold) 40 g Unsalted Butter
🍩 Coating 60 g Unsalted Butter (melted) 100 g Caster Sugar 1 tbs Cinnamon Powder
INSTRUCTIONS
Cook Potaoes until tender. Place potatoes in a saucepan, add enough water to submerge. Cook over hight heat until the water comes to a boil. Reduce the heat and let simmer until the Potatoes are tender. Once it’s done, drain the Potatoes and mash them smoothly, set aside.
Preheat the Oven to 400 F/ 200°C/ 180°C fan/ gas mark 6 and line baking tray with parchment paper.
Combine the dry ingredients. In a large bowl, place the Flour, Sugar, and Instant Yeast. Add the salt to the opposite side of the bowl (be careful not to let the Yeast and Salt come into direct contact, as this can kill or slow the yeast’s growth). Stir until thoroughly combined.
Add the wet ingredients to the dry mixture. Add the cooled Mashed Potatoes, Egg Yolks and Cold Milk to the dry mixture. Use a wooden spoon mix well until it forms a lump. And then, using your hands start kneading the dough. Gather all the small crumbs and dry flour to form a ball of dough.
Knead the dough until smooth and elastic. Once the dough forms a rough ball, add the Butter and knead for about 5 minutes until the dough is smooth and elastic. The dough will be slightly sticky, resist the urge to add more Flour as it can make your Donuts tough.
Portions the dough. Divide the dough into 10 equal portions (about 68 grams each). Shape each portion into a ball. Cover the dough with plastic wrap while shaping to prevent it from drying out. And let the dough rest for 10 minutes.
Shape the dough. 10 minutes later, Take one portion of the dough, roll it out. Starting from the center, roll out to both sides, until it is about 28 cm long. The dough should be evenly thick from end to end. I recommend using a ruler as a guide. Don’t sprinkle too much Flour on the surface, as it will be difficult to shape.
Twist the dough(Please watch the video for clear instructions) Roll the 28 cm long dough with your both hands in different directions; right hand up and left hand down; DON’T twist it too much. Once you feel tension between the two ends, stop twisting. Then, pick up both ends, they will automatically twist. Using your hands twist it a little more. Pinch the ends and fold them under. Place it on a baking sheet lined with Parchment Paper and cover with plastic wrap to prevent drying. Don’t roll the dough thinner in the middle and thicker at the ends, or vice versa; That will cause the twist to break during the proofing or baking process. Your twisted donut won’t look pretty.
Final proof. After shaping, let the dough proof for 20 minutes Meanwhile, we can prepare the Donuts coating
Prepare Coating. Melt the Butter in a double boiler, set aside. In a Ziploc bag, mix Caster Sugar and Cinnamon Powder, shake it.
Bake the Donuts. After 20 minutes, you can see that the dough puffy and bigger in size. If you press it lightly, the fingerprint returns slowly and does not bounce immediately. Bake in a preheated oven for 12 minutes. After 12 minutes, flip the donuts and bake for another 3 minutes.
Apply Coating. Once baked, brush with melted Butter while still hot. Place in a bag of Cinnamon Sugar (shake it), then place the donuts on a cooling rack or a plate. Twisted Donuts are best enjoyed while still warm, on the day it’s made.
NOTES * If you make a large batch and can not finished it in one day, after baked, don’t apply the coating. Place Donuts in an airtight container in the fridge (it will last for 3 days). When you need it, take them to room temperature for about 30 minutes; then reheat donuts in the preheated (400 F/ 200°C/ 180°C fan/ gas mark 6) for about 10 Minutes (the Donuts will be soft and fluffy again); Then coat with melted Butter and Cinnamon Sugarand serve. * Like all raised donuts, they can get a little bready as they age. It’s best to have them warm when they are first made, but if you have to store them, ensure they are completely cooled before packing them into a container.
WHAT IS THE SECRET OF MAKING GOOD SCONES? The recipe seems so simple, but the perfect Scone doesn’t come easy.
There are many little gritty things that can get in the way of achieving that all-buttery point of perfection.
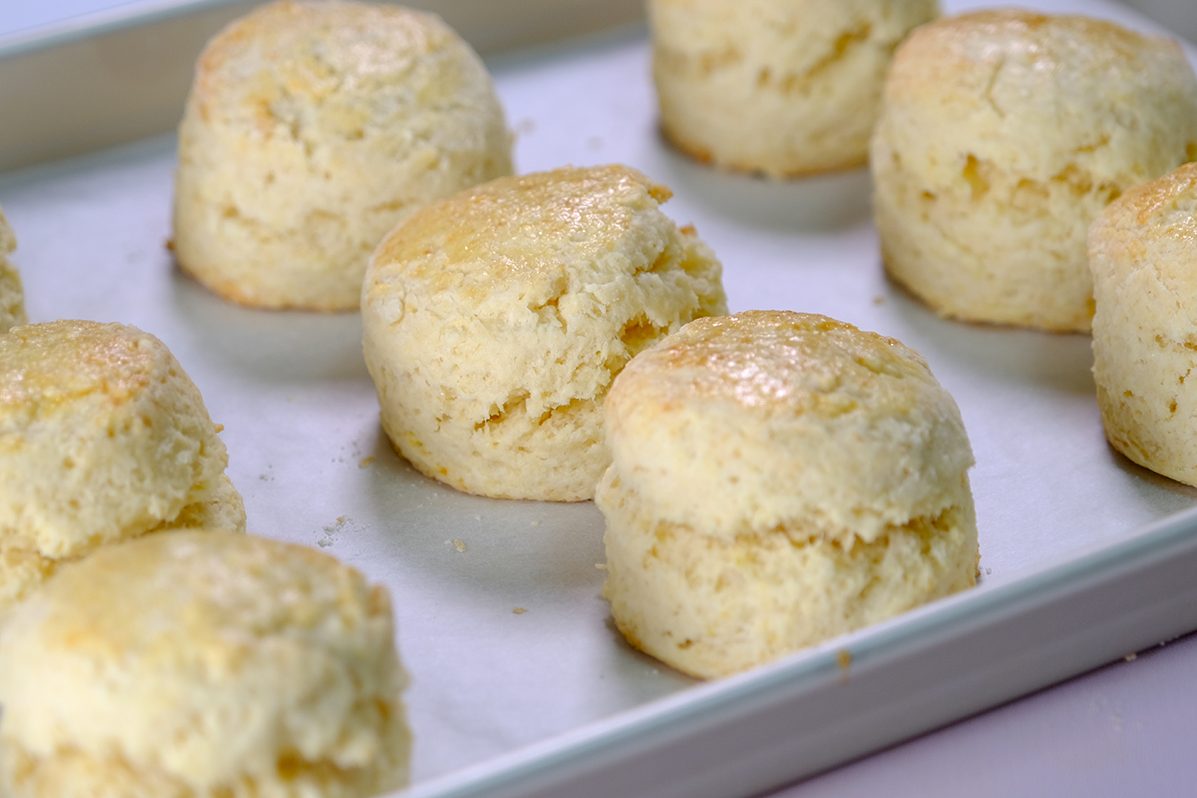
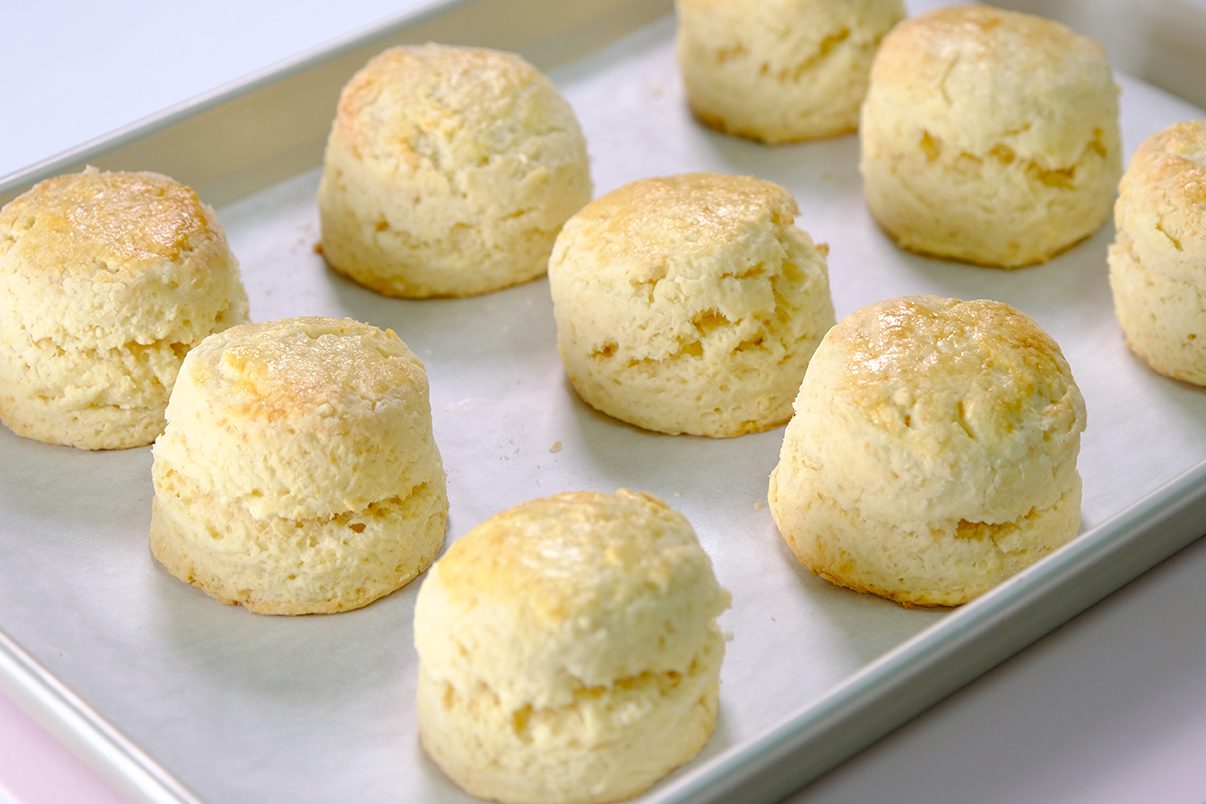
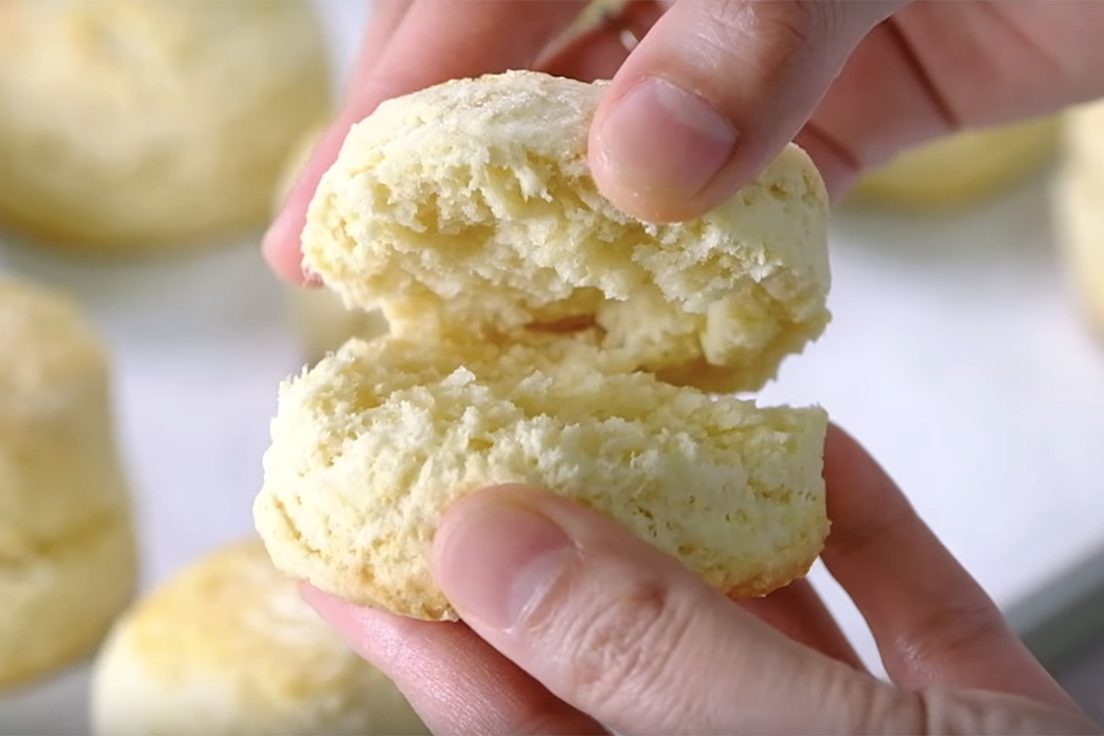
Scones are supposed to be light, fluffy and soft interior with a little crisp to the edges and top.
Can you see those layers?? 🧐A little crisp to the edges and top 🥲🥲
Making Scones requires a VERY light touch.
Only use the tips of your fingers to rub in the butter into the flour, lightly lifting and dropping the mixture.
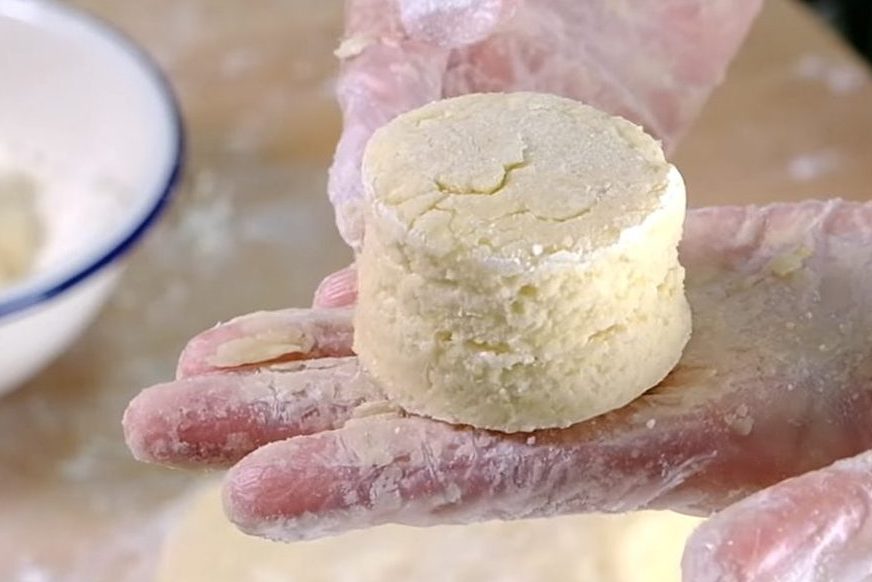
Scones Dough before baking
The trick is to use light pressure and only work the dough until it just comes together.
One common mistakes that causes Scones to be dry and tough is being too heavy-handed with the dough.
When you overwork the dough, your Scones can come out tough and chewy, rather than that desired light and crumbly texture.
If scones aren’t part of your baking repertoire, I suggest you give them a try.
Look at those flaky texture 🤗
They come together quicker than almost any other baked good and taste absolutely delicious 🤤
Messy and crumbly is a good thing! 🤩
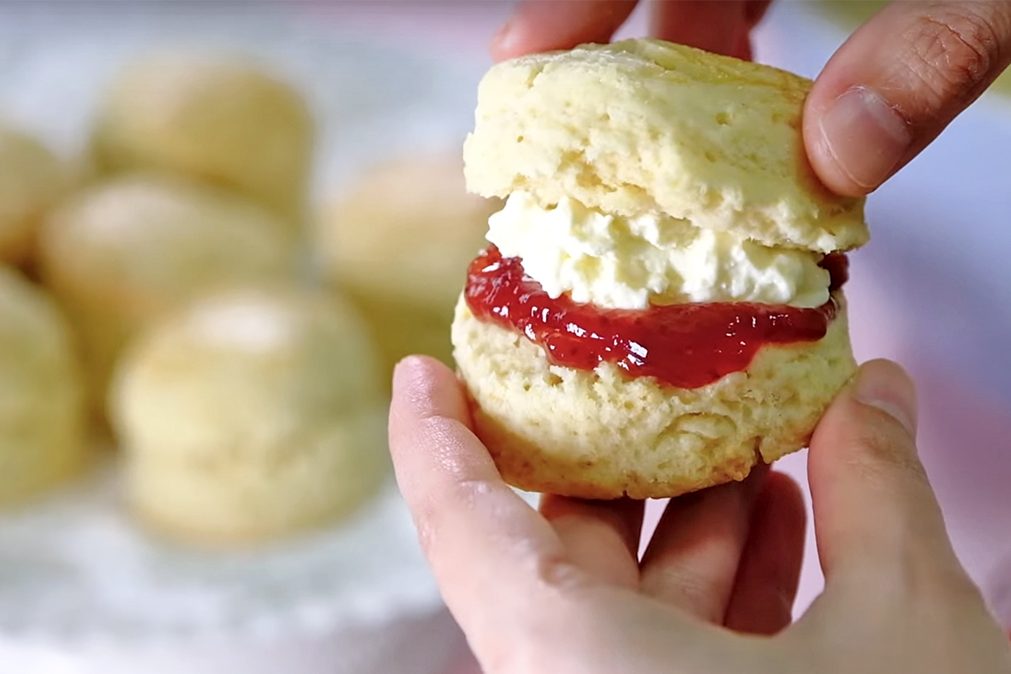
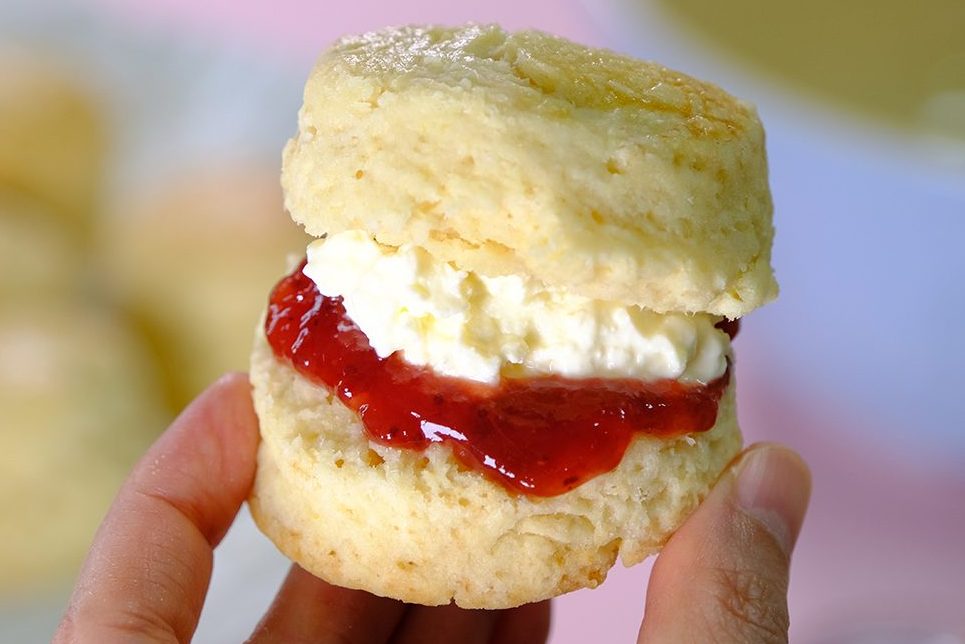
Scones are best served warm, with Clotted Cream and Strawbery Jam of course; And not forgetting a pot of good Earl Grey Tea.
Choose your favourite Strawberry Jam 😍
If you cannot get Clotted Cream, you can try Crème Fraîche or Unsalted Butter; it goes quite well with Strawberry Jam.
And what is the proper way to eat a scone? Jam first or Cream first? Lots of people are debating this 🤭
The Cornish tradition is to cut the scone in half, so you have two flat rounds; On each side, Jam is spread first and then the cream on top. The Jam being spread first is what makes it the ‘Cornish way‘
I personally prefer the Royal Way I would put Jam on first, with cream on top and then sandwich them together so it’s not overly sweet 😚
😱😱😱 ……can’t wait to eat them!!!
But ultimately, You can do what you want! 🤣😂 The scones will still be tasty 😍
I will eat my Scones like The Queen… 👸🏻 …. shy…. 😌☺️
Take a small bite and enjoy the happiness brought by the Scones … 🥰
Look at those beautiful texture … 🤪
Kindly follow all the tips and instructions in this recipe, I’m sure you’ll end up with tender, flaky Scones that will literally melt in your mouth.
😊 😍 HAPPY BAKING !!!
WATCH HOW TO MAKE “FLUFFY FLAKY BRITISH SCONES”
The Key to Perfect Scones (Please Read First) :
PREPARE A LARGE MIXING BOWL Prepare a large bowl for making scones. You will need some space for the mixing process; this provides plenty of room to spread the butter and mix the dough easily.
USE COLD BUTTERSTRAIGHT FROM THE FRIDGE Make sure that the butter is extremely cold. Cold butter promotes the flakiness, high-rise and fluffy scones. I usually take the butter out of the fridge and cut it into large cubes right before I’m ready to mix the dough. Don’t cut it too small or even grate it. That will make the butter melt faster and you’ll have trouble with a sticky dough. If you keep the butter in larger pieces, you get flakiness. Once it hits the oven, the dough around the butter starts to set, the butter melts, and steam from the water content puffs the layers apart.
COLD BUTTERMILK FOR TENDER SCONES For the liquid, most recipes calls for Whipped Cream or Milk. However, when the Scones are served with Clotted Cream or Butter and Jam, I found this combination way too rich and not tasty. I prefer to use homemade Buttermilk for the Scones which is the key to softness and lightness. Buttermilk makes the scones very tender, has a better crumb and provides a slightly tangy taste To make it: simply mix regular cold milk with some lemon juice or white vinegar, then let the mixture sit for 5 minutes to curdle and thicken slightly before using.
SIFTING ALL THE DRY INGREDIENTS Don’t skip this step, it helps to build a light texture
INCLUDE BAKING SODA TO THE RECIPE Since we are using Buttermilk, Baking Soda is added to this recipe. The acid in the Buttermilk reacts with the Baking Soda and produces Carbon Dioxide which helps the Scones rise.
DON’T OVERWORKED THE BUTTER When you mix the Butter with the Dry Ingredients, don’t pinch or overworked the butter into too tiny pieces or you will end up with Scones that are soft but not flaky.
USE A FORK TO WHEN ADDING THE LIQUID By using a fork, the liquid (Buttermilk) will evenly distribute without overmixing the dough.
A ROUGH PASTRY-STYLE FOR EXTRA FLAKINESS For extra flakiness, do a “Rough Puff Pastry-Style” flattening and folding the dough. Fold three to four times, Building in those layers. DO NOT kneading or stretching the dough, we don’t want to develop gluten and have a very tough Scones.
SHAPE THE DOUGH INTO A THICK DISC The thickness of your Scone dough is all important. Before you cut, Shape the dough into a thick disc about 3-4 cm thick
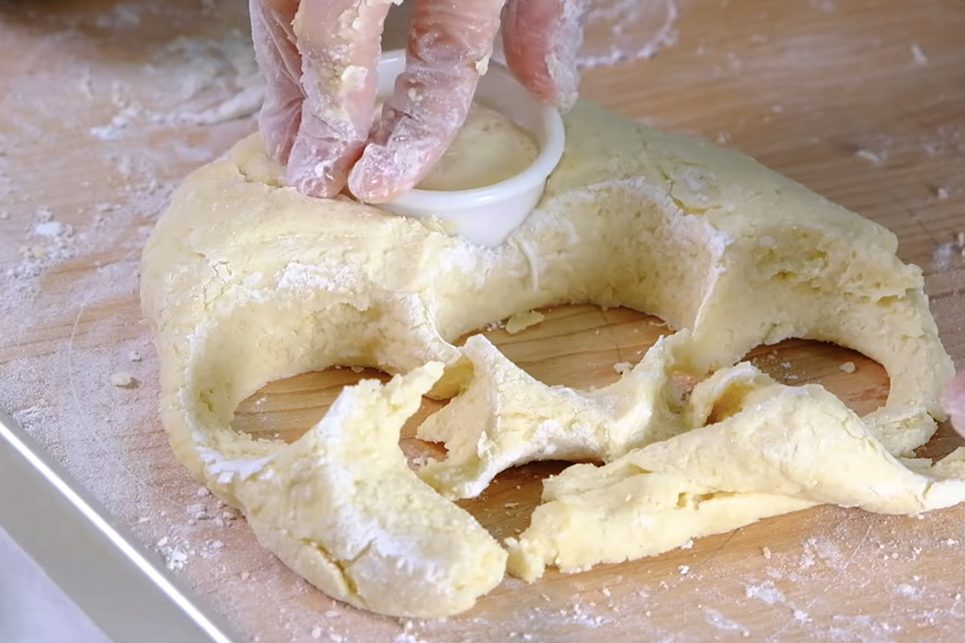
DO NOT TWIST THE CUTTER Remember when you cut it, don’t twist the cutter or the Scones will be lopsided (it won’t look pretty 😒)
COLLECT AND PRESS THE SCRAPES After you cut the dough, you will have those little scraps. DO NOT knead it! What you can do is collect and press it together; stand the dough up and press again. Press until it is 3 cm thick and then you can cut again.
APPLY SOME EGGWASH To give the top of the Scones a bit of shine, apply some egg wash. Avoid the sides and bottom because they will affect the rise. This will give your Scones a nice golden brown finished.
BAKE WITH IDEAL TEMPERATURE AND TIME Use 15 minutes of a Scones in oven as a good rule, you can’t foget about it! 🤖
Recipe
FLUFFY FLAKY BRITISH SCONES Yield: 9 Scones (Diameter 5 cm, 3 cm Tall)
🍰 Ingredients 115 g Cold Unsalted Butter 150 g Cold Milk + 2 tsp Vinegar (to make Homemade Buttermilk) 335 g All-Purpose Flour 50 g Caster Sugar 1 ⅓ tsp Double-Acting Baking Powder 1/3 tsp Baking Soda 1/3 tsp Salt Zest from 1 Lemon (1 Egg for egg wash~beat the eggs)
🍰 Instructions Preparation
Prepare a large bowl for making scones.
Right before you are ready to mix the dough, take the butter out of the fridge and cut it into large cubes. Don’t cut it too small or even grate it; that will make the butter melt faster and you’ll have trouble with a sticky dough.
Prepare Homemade Buttermilk Simply mix regular Cold Milk with Lemon Juice or White Vinegar; let the mixture sit for 5 minutes to curdle and thicken slightly before using.
To Make Scones Dough (Kindly watch the video for completed instructions)
Add Unsalted Butter in Cubes to the dry ingredients. Then, to incorporate the butter: – FIRSTSTEP Coat the butter with the flour, Using your fingers pinching and squishing the pieces of butter (broke down the butter into smaller pieces). Don’t pinch or overworked the butter into too tiny pieces or you will end up with scones that are soft but not flaky. – SECONDSTEP Take a handful of the dough with the bits of butter and flatten it between your palms (this thin sheets of butter that’s once it enters the oven, it melts and releases steam, which leads to that magical texture) When you feel between your hands all the butter pieces are flattened, you can start adding the liquid
Slowly pour in the Buttermilk. Stir gently with a fork (by using a fork, the liquid will evenly distribute without overmixing the dough).
Once you see the dough comes together, you can stop mixing it (if there are a few dry crumbs left, that’s okay).
Dust your work surface with some flour (not too much) and transfer the dough over.
Gather and press the dough together into a large ball, gather up any small crumbs (you can flour your hands lightly).
Then using a large scraper; do a rough Puff Pastry-Style flattening and folding the dough. Fold three to four times, building in those layers (DO NOT kneading or stretching the dough; because we don’t want to develop gluten and have a very tough Scones). * If you like to add some dried fruit, nuts or maybe fresh fruit, you can add while you building this layers.
Once it’s done, shape the dough into a thick disc about 3 cm thick
Cut into rounds with a 5 cm diameter floured round cutter (remember when you cut it, don’t twist the cutter or the scones will be lopsided). Place them on a parchment-lined baking tray. * Feel free to vary the cutter size a little bit, as long as the thickness is the same, it will bake at the same speed
After you cut the dough, now you have those little scraps. DO NOT knead these scraps. What you can do is collect and press it together; then stand the dough up and press again until it is 3 cm thick; And then you can cut again. * Do the same with the remaining dough (if there is only a little dough left, just shape it into a round with your hands.
To give the top of the Scones a bit of shine; using small brush apply some Egg Wash. Avoid the sides and bottom because they will affect the rise (this will give your Scones a nice golden brown finished).
Bake them in the preheated 200°C fan/ 220°C/ gas mark 7 for 15 minutes.
Once it’s done, you can serve them immediately (Scones are best enjoyed when still warm) or let them cool completely on a cooling rack before storing.
Notes
Scones are best enjoyed when fresh while still warm, but with proper storage they can extend their delight beyond the baking day while keeping safe to eat.
Storage Method Room temperature 1-2 days in a covered container away from heat and sunlight
Refrigerator Up to 3 days in an airtight container with a paper towel lining
Freezer Up to 1 months in a freezer bag or tightly wrapped in an airtight container
To preheat: In the preheated 180°C oven for 5-10 minutes or Microwave on high 10-20 seconds; They should be as good as freshly baked 😄.