Christmas & Holiday Treats

Hi Everyone, how is your Christmas preparation?
I usually start making Christmas treats 3 days in advance …
This year, I decided to make Gingerbread Cookies on the first day;
Fruit Tea Bread, Triple Chocolate Peppermint Donuts and Ginger Milk Tea on the second day.
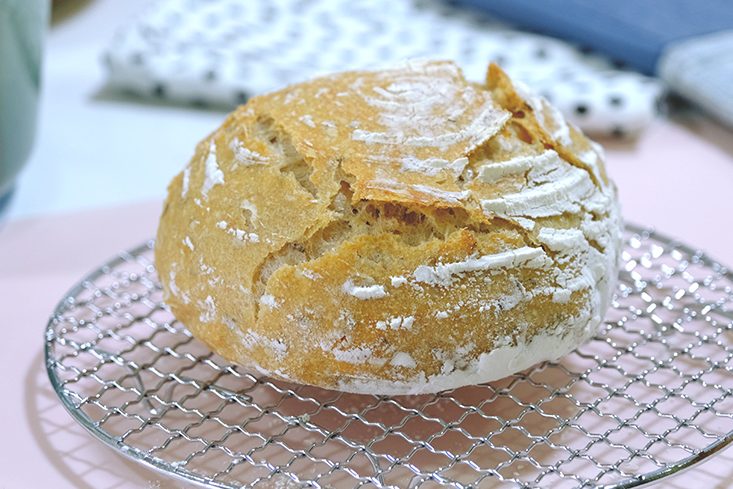
I also will share with you my favorite NO KNEAD Bread in the video

GINGER COOKIES WITH FRESH GINGER CAN'T BE BEAT FOR FLAVOUR
Nothing makes me feel more like Christmas is here than a batch of my favourite Gingerbread Cookies; 
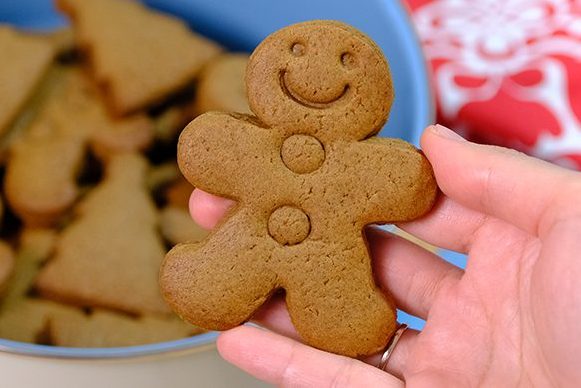
Hi Everyone! 😬

Soft in the centers, crisp on the edges, and perfectly spiced.
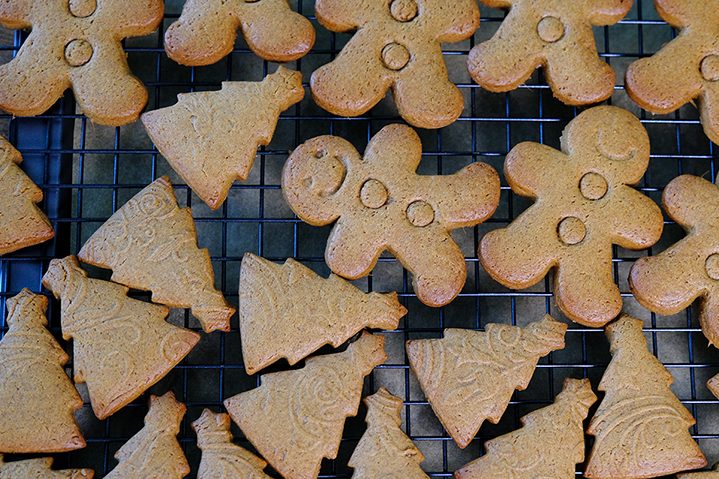
This is my trusty gingerbread recipe that I have used over the years and let me tell you it never disappoints. 

An embossed rolling pin makes even simple Christmas tree shape cookies look elegant

To use one, you’ll need to roll the dough out with a standard rolling pin first, then use the embossing rolling pin to leave pretty patterns. Do this before cutting the cookies into shapes.

The cookie dough or uncooked cookies can be wrapped in cling-film and stored in the freezer for up to 3 months

Always bake equally sized cookies together to make sure they cook in the same time
If you mix different sizes, the smaller ones are already cooked when the larger ones are still raw in the middle.

Baked Gingerbread Cookies will keep for up to 3 months if kept in airtight container or cookie jar 😚

How you decorate your adorable Gingerbread Cookies is completely up to you!
If you want to get extra creative you can pipe some coloured icing on top of your cookies and give them a bit of character! 

AS WE ARE ENJOYING CLASSIC CHRISTMAS FRUITCAKE SINCE CHILDHOOD, I HAD TAKEN A MISSION TO BAKE DIFFERENT KIND OF FRUITCAKE ON THIS CHRISTMAS
If you like fruit cake but don't have much of a sweet tooth, I highly suggest you try my Fruit Tea Bread recipe.

It’s a beautifully flavoured tea cake; a unique nut free non-alcoholic tea cake aka fruit cake loaded with fruits and raisins.

The raisins and dried fruits are soaked in strongly brewed tea overnight to plum them up and next day tea soaked fruits are added in the cake batter along with the tea and some additional spices.
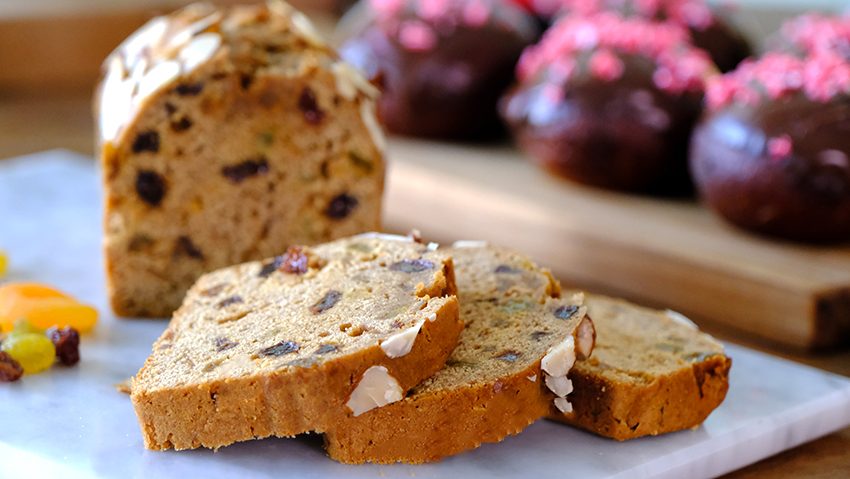
Because the fruit is soaked before baking, it allows the fruit to impart moisture to the bread for days afterwards, keeping it from drying out;
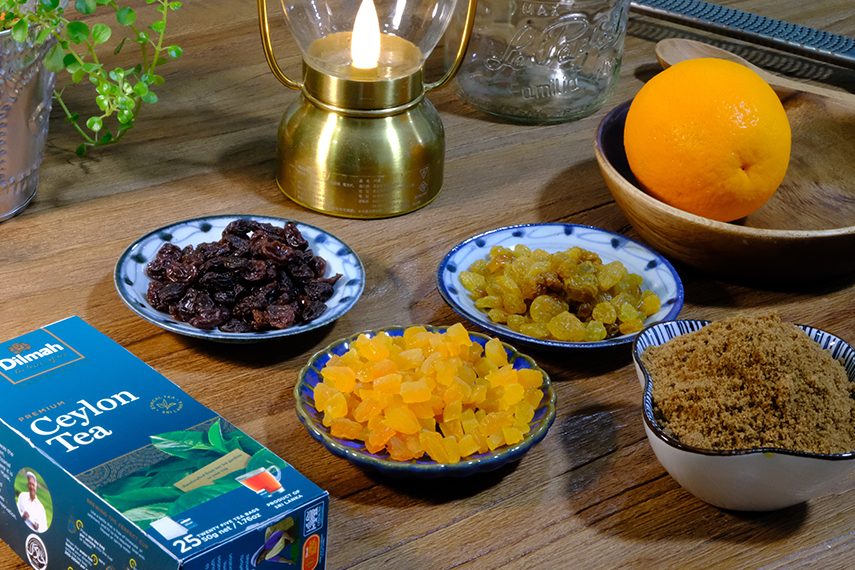
You can use your favourite black tea 😇

And it will stay good for up to a week.

I’m prefer to use Ceylon Tea or Earl Grey, it really works beautifully 😘
CHRISTMAS DONUTS ARE A DELICIOUS AND FUN WAY TO ADD A LITTLE SWEETNESS TO YOUR CHRISTMAS BREAKFAST OF BRUNCH
Have I told you all how much I love chocolate? I mean, who doesn’t – right?
My family also loves donuts – chocolate ones, especially! I don’t make these too often, but they are a nice treat now and then.
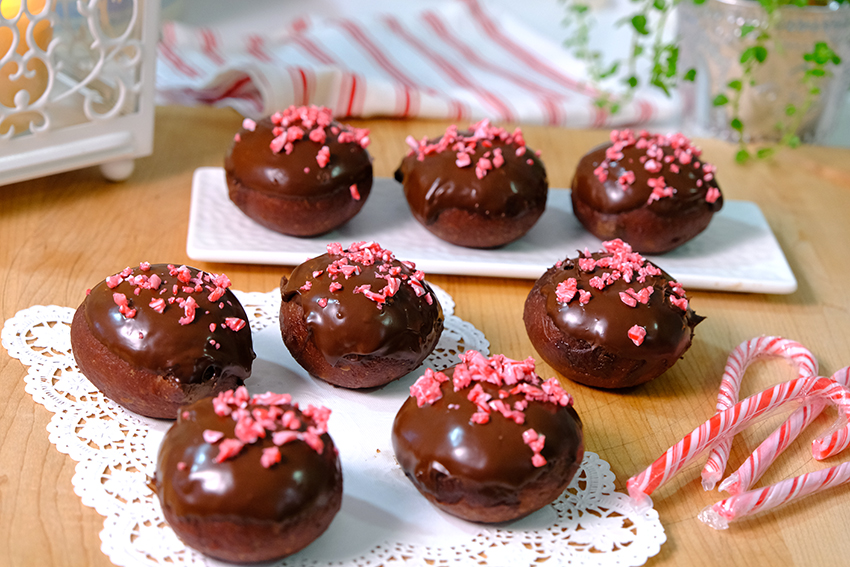
You probably want to try these Triple Chocolate Peppermint Donuts;
decadent and delicious, these yeast chocolate donuts are heaven in every bite. 

Adorable puffy donuts 🙄 I can’t wait to take a bite

They’re loaded with creamy Chocolate Custard, topped with a silky Dark Chocolate and sprinkled with Peppermint Candy.
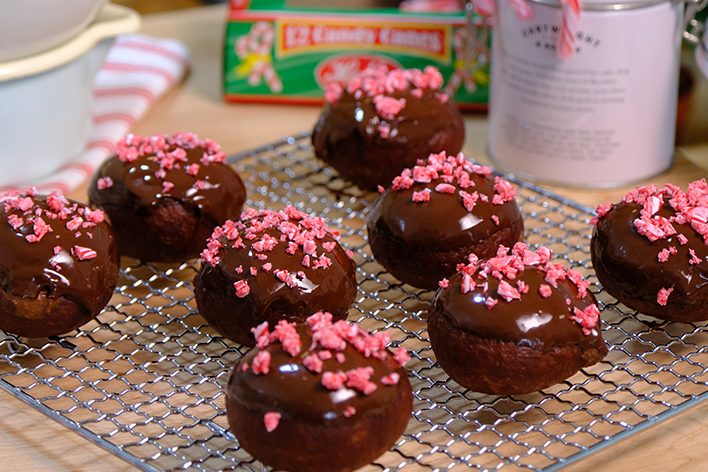
Frying Chocolate Donuts can be tricky coz you can’t see the browning colour.
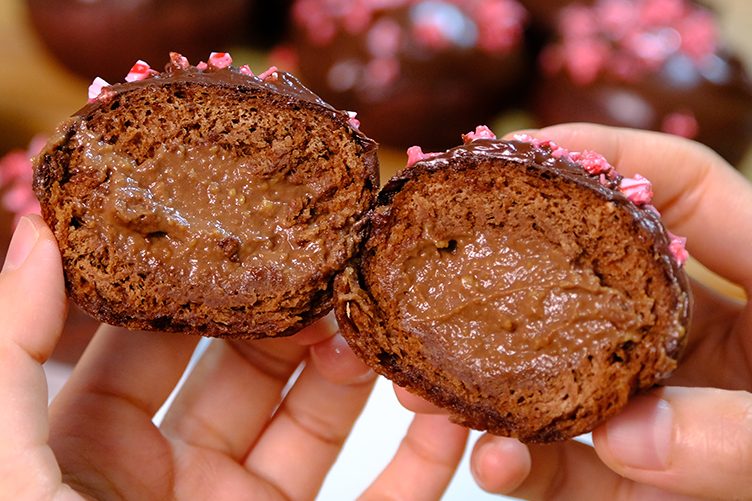
Moist and fluffy, these Triple Chocolate Donuts are perfect for any chocoholic! 🍩🥰

No matter how you decorate and serve them, these Christmas donuts make for a fun and merry holiday treat. I know you’re going to love them
These treat that’s sure to please any chocolate lover!

WHAT IS YOUR MOST POPULAR DRINK AT CHRISTMAS?
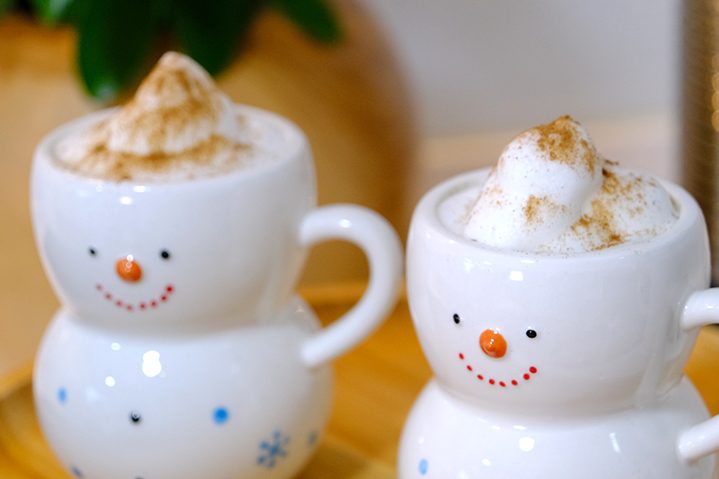
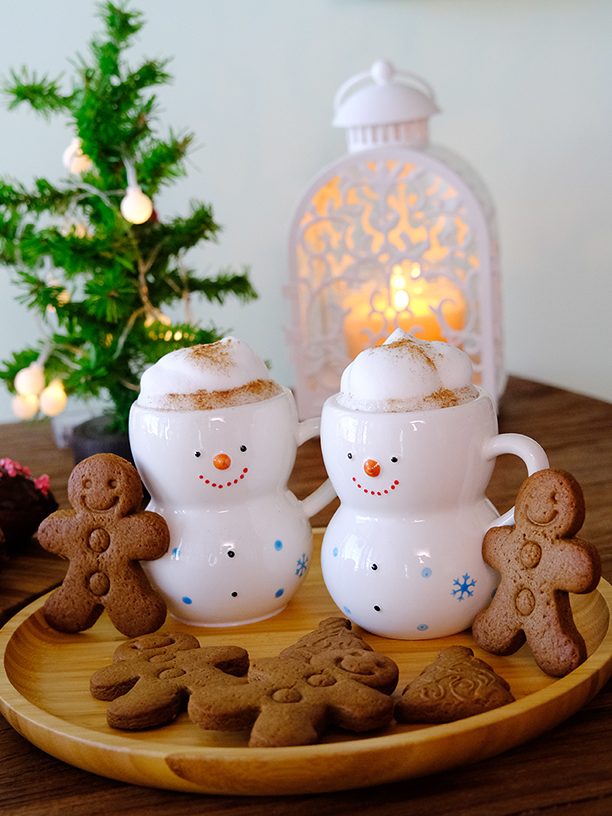
How about Ginger Milk Tea to warm up the holidays? ☃️☕
This Ginger Tea Latte is perfect for Christmas and winter. It's also a healthy alternative to coffee and tastes so good!

Ginger tea with some spices is a lovely, lightly spicy drink for warming up on cold days.

It’s a light, alcohol-free alternative to a nightcap. It soothes upset stomachs and eases indigestion if you over-indulge this holiday season (don’t we all?) 🤣
I wish you all the best that life can bring, May the true meaning of this season fill our hearts.
And that’s it, to appreciate the love given to us by not taking it for granted.
Merry Christmas Everyone… ❤️ 💋


OVERNIGHT NO-KNEAD BREAD
Yield: One 15 diameter loaf
Active time: 1 Hour
Total time: 11 Hours

🌿 Ingredients
200 g All-Purpose Flour (unbleached)
50 Whole Wheat Flour (100% Stone Ground)
1/3 tsp Instant Yeast
1/4 tsp Granulated Sugar
1 tsp Salt
1/2 tbsp Caraway Seeds (optional)
180 g Water (room temperature)

🌿 Instructions

  1. In a large bowl; mix all dry and wet ingredient (make sure salt doesn’t have direct contact with the yeast); Cover the bowl with a plastic wrap and let it sit at room temperature for 8 to 18 hours or until doubled in size and the top of the dough has a lot of air bubbles (time will depend on your room temperature – the cooler the room the longer it will take).
  2. On the next day, roll the dough into a smooth ball, place it in the proofing basket ( has been floured) and let it proof for 1 ½ – 2 hours or until almost double in size (if you lightly press into the dough, it will leave a slight indentation).
    In the meantime, place 16 cm diameter Cast Iron Pot in the oven, and preheat the oven to 210°C.
  3. Turn the proofed bread upside down into HOT Cast Iron Pot, close the lid and bake in the preheated 210°C oven for 30 minutes.
  4. After 30 minutes, remove the pot lid and continue bake for about 10-20 minutes or until golden brown.
  5. Remove the bread from the pot and let it cool completely on the cooling rack.

🌿 Notes

  1. What’s unique about this recipe is that the bread is baked in a covered pot.
    You can use either a Cast Iron (can be enameled) Dutch Oven or a Ceramic Pot.
    The pot needs to be placed in the oven as it preheats so it gets really hot. The idea is that when the bread bakes in the pot you are actually trying to simulate a small brick oven where the steam released from the wet bread dough is trapped inside the pot. This will produce a bread with a crisp golden brown crust and a soft and tender crumb.
  2. If you are not keen to buy Cast Iron, you can also use a shallow pan as a base and a tall round baking pan as a lid. Don’t forget to put both pans inside the oven before you preheat the oven (so it gets really hot).
  3. Store the bread in plastic wrap. Avoid storing bread in damp, airy locations, which can speed up moulding.
    If you’re not going to eat the loaf in 2-3 days, the best option is to freeze it for later (max. 2 month).

GINGERBREAD COOKIES
Yield: 2 Dozen Medium Size
Active time: 1 Hour
Total time: 3 1/2 Hours

🌿 Ingredients
25 g Water
70 g Brown Sugar
1 tbsp Molasses
1 tbsp Maple Syrup/ Honey
1 tbsp Cinnamon Powder
1 tbsp Fresh Ginger (grated)
1/3 tsp Ground Cloves 
85 g Salted Butter
1/3 tsp Baking Soda
185 g All-Purpose Flour

🌿 Instructions

  1. In a medium saucepan, combine the Water, Brown Sugar, Molasses, Cinnamon Powder, Fresh Ginger and Ground Cloves. Bring the mixture to a boil. 25 g Water; 70 g Brown Sugar; 1 tbsp Molasses; 1 tbsp Maple Syrup/ Honey; 1 tbsp Cinnamon Powder; 1 tbsp Fresh Ginger (grated); 1/3 tsp Ground Cloves.
  2. Once boiled, remove from the heat then stir in the Salted Butter, mix well. 85 g Salted Butter
    Add in Baking Soda and mix. 1/3 tsp Baking Soda
  3. Allow to cool until just slightly warm; then pour in the All-Purpose Flour. Mix until it forms a wet and sticky dough. 185 g All-Purpose Flour
  4. Wrap the dough in Cling-Film and chill for at least 2 hours.
  5. After 2 hours, place the dough in between a pair of Marzipan Spacers and roll it out to an even thickness.
  6. Using your favourite cutter, cut the dough. Place it on the pan (lined with a Parchment Paper).
  7. Chill again for about 30 minutes before baking (chilled cookies hold better in shape as they don’t tend to spread too much).
  8. Bake in the preheated 200°C oven for about 12 minutes (for large size); 8 minutes (for small size). Rotating your pans approximately halfway through the bake time.
  9. Remove cookies from the pan and let it cool completely on the cooling rack.

🌿 Notes

  1. Cookie dough or uncooked cookies can be wrapped in Cling-Film and stored in the freezer for up to 3 months.
  2. Cookies baked from frozen hold better in shape as they don’t tend to spread as much as chilled ones.
  3. Baked Gingerbread Cookies will keep for up to 3 months in an airtight container or cookie jar.

FRUIT TEA BREAD/ CAKE
Yield: One 17x8x6 cm Loaf Pan
Active time: 30 Minutes
Total time: 10 Hours

🌿 Ingredients
2 Bags Black Tea (Ceylon)
125 g Hot Water
100 g Jaggery/ Muscovado Sugar
40 g Golden Raisins
40 g Black Raisins
25 g Dried Apricots (chopped)
Zest of 1 Orange
175 g All-Purpose Flour
1/3 tsp Baking Powder
1/8 tsp Salt
1 tsp Mixed Spice Powder
30 g Whole Eggs
25 g Unsalted Butter (softened)
Almond Slices (optional)

🌿 Instructions

  1. In a heat proof jar, combine Black Tea Bags and Hot Water. Let it brew for 5 minutes. 2 Bags Black Tea (Ceylon); 125 g Hot Water
    Remove tea bags, then add in the Jaggery Sugar, Golden and Black Raisins, Dried Apricots and Orange Zest. Mix well, let it soak overnight. 100 g Jaggery/ Muscovado Sugar; 40 g Golden Raisins; 40 g Black Raisins; 25 g Dried Apricots (chopped); Zest of 1 Orange.
  2. On the next day; In a large bowl, combine the All-Purpose Flour, Baking Powder, Salt and Mixed Spice Powder. 175 g All-Purpose Flour; 1/3 tsp Baking Powder; 1/8 tsp Salt; 1 tsp Mixed Spice Powder
  3. Add in the Eggs and the Soaked Dried Fruit along with the tea liquid; Mix well. 30 g Whole Eggs
  4. Add in the Unsalted Butter and mix all together until well combined. 25 g Unsalted Butter (softened)
  5. Pour the batter onto prepared pan (loaf pan lined with Parchment Paper). Tap the pan a few times to remove air bubbles and the batter spread evenly.
  6. Sprinkle with some Almond slices; then bake in the preheated 160°C oven for 45 minutes.
  7. After 45 minutes, turn off the heat. Let the bread sit in the oven for about 10 minutes;
    Remove the bread from the oven, let it sit in the pan for another 10 minutes;
    Then remove the bread from the pan and let it cool completely on the cooling rack.

🌿 Notes

  1. The cake/ bread best made two days ahead of time (if you have the time as this allows the flavours to absorb and develop). If you don’t have the time, it is also rather good straight from the oven.
  2. The cake/ bread can be stored at room temperature for up to a week. Cover in plastic wrap or place in an airtight container to prevent it from drying out.
  3. This cake/ bread freezes well for up to three months. Wrap it in plastic wrap and foil, then place it in an airtight plastic container or freezer storage bag.

TRIPLE CHOCOLATE PEPPERMINT DONUTS
Yield: 8 Pieces (6 cm Diameter)
Active time: 2 Hours
Total time: 3 Hours

🌿 Chocolate Custard
35 g Egg Yolks
10 g All-Purpose Flour
1 tsp Corn Starch
170 g Milk
25 g Granulated Sugar
50 g Dark Chocolate (Couverture/ Compound)
1 tbsp Dark Rum/ Vanilla Extract 

🌿 Chocolate Donuts Dough
80 g Water
40 g Milk
20 g Egg Yolks
30 g Granulated Sugar
1/3 tsp Salt
2/3 tsp Instant Yeast
140 g Bread Flour
40 g All-Purpose Flour
20 g Cocoa Powder
1/4 tsp Baking Powder
30 g Salted Butter

🌿 Top Coating
150 g Dark Chocolate (Compound)

INSTRUCTIONS
🌿 Chocolate Custard

  1. In a medium bowl, combine the Egg Yolks, All-Purpose Flour, Corn Starch and 1/3 part of Milk. Mix until they are no lumps visible, set aside. 35 g Egg Yolks; 10 g All-Purpose Flour; 1 tsp Corn Starch; 1/3 part of 170 g Milk
  2. In a medium saucepan mix the Granulated Sugar and the rest of the Milk; Cook over medium heat. 25 g Granulated Sugar; the rest Milk
  3. Once it boiled, lower the heat, pour in the Egg Yolks mixture and continue stirring until the mixture thicken.
  4. Add in the Dark Chocolate while continue stirring, mix until all the chocolate melted (be careful not to burn it). 50 g Dark Chocolate (Couverture/ Compound)
  5. Take it off from the heat and strain the mixture (don’t skip this step, you don’t want any lumps in your Custard)
  6. Add in the Rum (optional), mix well. 1 tbsp Dark Rum/ Vanilla Extract 
  7. Cover Custard with a Cling Film (make sure the plastic touches the custard surface to prevent forming a thin crust on top); store in the fridge for at least 1 hour to set.

🌿 Chocolate Donuts Dough

  1. In a large bowl combine the Water, Milk, Egg Yolks, Granulated Sugar, Salt and Instant Yeast (NEVER add salt on top of yeast, it will indeed kill the yeast); Mix well. 80 g Water; 40 g Milk; 20 g Egg Yolks; 30 g Granulated Sugar; 1/3 tsp Salt; 2/3 tsp Instant Yeast
  2. Add in the Bread Flour, All-Purpose Flour, Cocoa Butter and Baking Powder; knead briefly until it form a dough ball.
    Cover the dough with clean towel or a plastic wrap; let it rest for 15 minutes. 140 g Bread Flour; 40 g All-Purpose Flour; 20 g Cocoa Powder; 1/4 tsp Baking Powder
  3. After 15 minutes, add in the Salted Butter, mix until well combined; then start kneading the dough for about 5 minutes. 30 g Salted Butter
  4. After 5 minutes, the dough become less sticky and really smooth. From the dough into a smooth ball, place onto a grease bowl; cover and let it rest for another 15 minutes.
  5. After 15 minutes, divide the dough into 8 equal portions. Roll each dough into a smooth ball (kindly follow video instructions).
    Place individually onto a Greaseproof Paper so it will be easier when you lift it.
    Cover with a clean towel, let it proof for about 30-45 minutes or until almost double in size (if you lightly press into the dough, it will leave a slight indentation).
  6. Frying Donuts
    Preheat the oil (temperature should be about 160°-170°C); don’t fry donuts all at once, the oil temperature will decrease.
    After you reach the right temperature, turn down to medium low heat, place about 2-3 donuts and fry for about 10 seconds
    After 10 seconds  the bottom is slightly cooked, turn it over (don’t flip it now, until the bottom is dry; about 1 minute)
    After 1 minute, flip it over and cook for another 1 minute; take it off from the heat, place onto a cooling rack and it’s done (So remember total frying time is about 2 minutes; otherwise, your donuts will definitely burn and taste bitter).
  7. Once the donuts reach room temperature, gently shimmy the chopstick inside of the donut a little ways (gently rotating from the initial opening but not widening it too much).
    This will open up a little more space inside of your donut for the filling.
  8. Spoon the filling into your piping bag, insert the tip of the piping bag into the donut, gently squeezing the filling inside. Squeeze slowly, so that the filling has a chance to reach into air pockets in the donut and generously fill it.
  9. Once the doughnut has been filled, melt some Dark Chocolate (if it’s too thick,  you can add 1-2 teaspoon of Shortening to thinning the chocolate);
    Ice one side of donut with melted chocolate and sprinkle it with some crushed Peppermint Candy for a pretty finish.


🌿 Notes

  1. Custard filled donuts can be stored in the refrigerator for up to three days; cover doughnuts with foil or plastic wrap or place in plastic bag when refrigerating to prevent drying out.
  2. Keep refrigerated; Because custard contains milk and eggs, it is quite perishable. The custard should be refrigerated at 40° or lower to stop the formation of bacteria.
  3. To freeze (max. 2 weeks), wrap doughnuts tightly with Aluminum foil or plastic freezer wrap, or place in heavy-duty freezer bags.

GINGER MILK TEA
Yield: 2 savings
Active time: 15 Minutes
Total Time: 45 Minutes

🌿 Ingredients
80 g Fresh Old Ginger
2 Stalks Lemongrass
1 Cinnamon Stick
4 Whole Cloves
30 g Palm Sugar
500 ml Water
200 ml Hot Milk (frothy)
Cinnamon Powder (garnish)

🌿 Instructions

  1. In a medium saucepan, combine all the ingredients (except milk). Bring to a boil, let it simmer for 15 minutes. 80 g Fresh Old Ginger; 2 Stalks Lemongrass; 1 Cinnamon Stick; 4 Whole Cloves; 30 g Palm Sugar; 500 ml Water
  2. Take it off from the heat, strain the mixture (divide into 2 glass); Add some hot milk or frothy milk and sprinkle some Cinnamon Powder for garnish. 200 ml Hot Milk or Frothy

🌿 Notes

  • Ginger Tea can be served with or without milk.
  • Sugar can be added or reduced according to taste.
  • To store; 3 days in the fridge in an airtight container.

Black Forest Cake

Hi Guys, there’s something about Christmas that makes everything a bit more magical, even the dessert. I grew up making treats to share with the entire family and I love baking so much.

And for this special day, I’m gonna share with you my signature “Christmas Blackforest Cake”. The perfect dessert for Christmas dinner that my whole family will love.

This is the first cake that I’ve learned to made when I was 13 years old. I was so happy and proud of myself at that time because everyone (specially my Mom) said that the cake was delicious.
Sometimes I think they gave me compliment just to make me feel good, they don’t want me to be disappointed.

But as I got older, I just realized that what they said was true.

Dark Sweet Cherry Filling

This Blackforest Cake combines a very soft chocolately chocolate sponge cake, layered with a rich dark cherry fillings, covered with fluffy frostings and sprinkle with a generous amount of dark chocolate shavings.

What make it special from other Blackforest Cake is the rich dark sweet cherry filling, which people usually use only whipped ceam.

And because it has always been very difficult to get Kirsch in my country (Kirsch is a traditional cherry liquor for Blackforest Cake), I always substitute it with my favourite Dark Rum for the wonderful aroma.

You can use Vodka, wine or Brandy if you want or just leave this out if you’d like to keep it kid-friendly.

Look how soft and chocolately this chocolate sponge cake!

The cake so soft, melts in your mouth, full of that rum flavour cherries filling, and the fluffy light frosting and dark chocolate shaves, really create a decadent, rich!

Light, fluffy, not too sweet frosting

Black Forest Cake was a staple when I was growing up. It’s a light and perfectly sweet German dessert that is easy to make and a chocolate-lover’s dream!

I created this special frosting recipe, coz I don’t like to use whipped cream for covering the cake which is melts easily.

And of course it’s not complete without some fresh cherries, sift some icing sugar for the snow effect, and I would like to add silver sugar pearls for a sweet touch.
Feel free to add other decoration as desire.

The frosting won’t melt , so you we don’t need to worry too much 🙂

Isn’t this cake look tempting? It’s ready to serve or you can pop it into the fridge to hang out for a while.

Look at the inside, that delicious chocolately sponge cake!
And the thick rich dark sweet cherry filling in between

I’m so ready for a Christmas celebration, they are also perfect with your favorite tea or coffee.

I now you can’t resist it!

No one thought we would be celebrating Christmas in the midst of a pandemic, yet here we are. But we are still grateful for everything we have and always hope for the best.
May your Christmas be a merry one! Stay safe!! Love you All…


BLACKFOREST CAKE
Yield: One 8-inch Round Pan
Active time: 1 hour
Total time: 3 hour

INGREDIENTS
Chocolate Sponge Cake:

  • 100 grams Cake Flour
  • 25 grams Cocoa Powder
  • 65 grams Granulated Sugar
  • 50 grams Vegetable Oil
  • 65 grams Milk
  • 1 teaspoon Vanilla Extract
  • A Pinch of Salt
  • 85 grams Egg Yolks
  • 165 grams Egg Whites
  • 1 teaspoon Lemon Juice/ Vinegar
  • 65 grams Granulated Sugar

Cherry Filling:

  • 1 can (16 Ounces) Dark Sweet Cherries
  • 80 grams Granulated Sugar
  • 30 grams Corn Flour
  • 3 tablespoons Dark Rum/ Kirsch

Frosting:

  • 225 grams Shortening
  • 40 grams Unsalted Butter
  • 190 grams Icing Sugar
  • 2 tablespoons Dark Rum/ Kirsch
  • A Pinch of Salt
  • 60 grams Whipped Cream


INSTRUCTIONS
Prepare the panFor the water bath; Line the inside bottom part of 8-inch round pan with parchment paper and wrap the outside bottom part of the pan with aluminium foil.
Place the wrapped pan on bigger baking pan, set aside.


Chocolate Sponge Cake

  1. Preheat the oven to 150°C.
  2. In a large bowl, sift the flour and cocoa powder, set aside.
    In a medium bowl, combine the sugar, vegetable oil, milk, vanilla, salt and egg yolks, mix well. Pour the egg yolks mixture into the flour mixture and mix until no lumps remain.
  3. In another large bowl, whip egg whites and lemon juice until a bit foamy. Add the sugar gradually, continue mixing until reach a stiff peak.
  4. Very gently fold the egg whites into the egg yolks batter in three batches (don’t mix it together all at once, to prevent the egg foam deflate).
    Using spatula, mix gently just until all incorporated, make sure there’s no egg yolks batter left on the bottom of the bowl.
  5. Pour the mixture into the baking pan, tap the pan a few times to get rid off air bubbles.
    And for the water bath; pour about ½-inch hot water onto the bigger pan.
    Place both pans on the bottom rack of the oven and bake it for about 85 minutes.
  6. Once it come out from the oven, take it out immediately from the water bath. Tap the pan a few times so it won’t shrink too much, remove the cake from the pan and let it cool on a cooling rack.


Cherry Filling

  1. Strain the cherries and place the syrup to a medium sauce pan.
  2. Soak the cherries with generous amount of dark rum for about 1 hour (you can leave this out if you’d like to keep it kid-friendly).
  3. To make the cherry filling; Combine the reserve cherry syrup with sugar and corn flour (strain to make sure there’s no any lumps) pour it back to the pan.
    Cook over medium low heat, keep stirring until it boil becomes transparant and thickened. Remove it from the heat, add in rum, mix well
  4. Drain the soaked cherries and combine with the cherry filling.


Frosting

  1. In a large bowl combine the shortening and unsalted butter mix until soft and well combined.
  2. Add in the icing sugar, rum and salt, continue mixing until becomes light and fluffy.
  3. Pour in the whipped cream and mix until just combined.


Assembly

  1. Using a large serrated knife, divide the cake into 3 equal layers.
  2. Place the first cake layer on a cake plate, brush it with rum. Pipe a rim of frosting around the cake layer before adding the filling (this creates a nice barrier so the filling stays in place), spread half of the cherry filling within the frosting barrier.
    Place the second layer on top, repeat the step. Place your final cake layer bottom side up on top of the cake.
  3. Crumb coat your cake with a light coat of frosting (freezer for about 10 or 30 minutes in the fridge to set the crumb coat). Continue frost the cake with remaining frosting.
  4. Press generous amount of the chocolate shaves onto the cake, sprinkle some for the top
    (Tip: grate the chocolate 1 hour in advance and store them in the fridge so it’s easier to handle).
  5. Pipe frosting to make it pretty, place some fresh cherries. Sift some icing sugar on top of the cake. Add another decoration if desire.


NOTES

  1. Best serve on the day it’s made.
  2. Cover in an airtight container and store leftover cake in the refrigerator for up to 5 days.
  3. I suggest to use 16 Oz S&W Dark Sweet Cherries brand for the best result coz it serve fresh cherries inside and better taste than any other brand.

3D Magical Carousel Cookies

Many or all of the products featured here are from our partners who compensate us


Hi Guys, today we are making something very special “a Magical Carousel Cookies”. This was replicated from my previous cake project that I have designed for my client a few years ago.

Original Cake Design

Instead of using cake as a base structure of the design, I’m gonna use sugar cookies for the construction.

Cut off every pieces according to the templates

Special Cut Method for the Unicorns (with bamboo skewers underneath)

When you had this kind of project, it is very important to start by designing the construction drawing in 2 dimension.

Edges are golden brown means the cookies is done

The main purpose of construction drawings is to provide a graphic presentation of what is to be built. It showing the relationship between the components and how they fit together.

Stacking and Sticking to Develop the Structure

Carousel Design Construction

This dazzling Vintage Carousel Cookies featuring whimsical Unicorns would make a spectacular gift.


If you are looking for some cookies design that will have a hint of playful and look strikingly attractive just opt for these lovely Carousel Cookies and you are good to go.

Using Embossing Cutter for the Design

This also make a really cool birthday, upcoming christmas or even a wedding present.

Gorgeous Unicorns

You can simplify the design or even change the colour to suit the theme of your party.
How about A Magical Carousel Cookies for a magical party?

Center Pole Design

Our Magical Carousel Cookies goes round and round it goes, it looks so beautiful and amazing!


If you keen to make these kind of project kindly find the completed design templates in the description below.


I hope that you will fall in love with this Magical  and Dreamy Carousel Cookies as much as I do. Take care Guys, Love you all!

Print the attached files below in a standard A4 paper and simply cut the design out

Print in A4 Paper- Cut out the Design

Print in A4 Paper- Cut out the Design

Print in A4 Paper- Cut out the Design

Print in A4 Paper- Cut out the Design

Guide for Grouping, Sticking and Colouring Each Group

List of Tools That I Used in Creating This Project
Scissors https://amzn.to/3CEmqk5
Rolling Pin & Cutting Tools https://amzn.to/3V8yH7g
Marzipan Spacers https://amzn.to/3eaqoaB
Round Plunger Cutter https://amzn.to/3e8fYsa
X-ACTO Knife https://amzn.to/3ehZVrw
Dual Sided Cookie Cutter Rectangle https://amzn.to/3V1N9yd
Scriber Needle https://amzn.to/3rBtQyc
Straight Frill Cutter https://amzn.to/3EirQSY
Strip Cutter https://amzn.to/3CCeyPV
Textured Lace Set https://amzn.to/3CcJapQ
Mini Heart Plunger https://amzn.to/3CaYjrO


3D MAGICAL CAROUSEL COOKIES
Yield: 1 Carousel (16 cm diameter, 24 cm height)
Active time: 3 hour
Total time: 5 hour

INGREDIENTS
Sugar Cookies:

  • 200 grams Unsalted Butter (soft)
  • 200 grams Granulated Sugar
  • 50 grams Whole Eggs
  • 400 grams All-Purpose Flour
  • 1 teaspoon Favorite Extract or Grated Zest (optional)


Marshmallow Fondant:

  • 150 grams Marshmallow
  • 2 tablespoons Water
  • 350-450 grams Icing Sugar
  • 35 grams Shortening
  • Food Colouring (Rose, Delphinium Blue, Turquoise)
  • Edible Pen (Black)


Royal Icing:

  • 15 grams Egg Whites
  • 100 grams Icing Sugar
  • 1/6 teaspoon Cream of Tartar 
  • 1/3 teaspoon Vanilla Extract
  • 1-2 teaspoons Water

Sugar Syrup: 50 grams Granulated Sugar, 50 grams Water

Assembly: Paper Straws, Bamboo Skewers, Small Brush, Gold Luster Dust, Embossing Cutter, Silver sugar pearls sprinkles

INSTRUCTIONS
Design Structure and Templates
Print Side View Design Structure and cookie templates on standard A4 paper, then simply cut all the design out

Sugar Cookies

  1. In a large bowl mix the butter, sugar and favorite extract or zest until well combined and just becoming creamy in texture.
    Do not overwork, or the cookies will spread during baking.
  2. Slowly beat in the eggs until well combined.
  3. Add in the flour and mix until it creates a dough ball.
  4. Gather it into a flat disk, wrap it in a plastic wrap and chill it in the fridge for at least 1 hour.
  5. Trace and Cut
    Prepare marzipan spacers for an even thickness (you can use wooden chopstick if you don’t have it on hand), rolling pin, knife, cut off templates and some greaseproof paper for the base of the cookies.

    Place the chilling dough on a floured surface and knead it briefly so it’s pliable.
    Place the dough on top of a greaseproof paper, using marzipan spacers on both sides and another greaseproof paper on top, roll it out into an even thickness.

    Trace and cut out the shapes according to the templates (to maintain each shapes make sure that every pieces cut on top on their own greaseproof paper that will be bake later).
  6. Lay cut out pieces on a baking tray. Please note, always bake equally sized cookies together to make sure they are cook in the same time.
    If you mix different sizes, the small ones are already cooked when the larger ones are still raw in the middle.
  7. Chill the cut out cookies in the fridge for about 30 minutes before baking to maintain it’s shapes, and then bake them for about 8–15 minutes, depending on size, until golden brown around the edges. 
  8. Take it off from the heat, wait for 5 minutes then transfer them to a cooling rack to cool completely.

Marshmallow Fondant

  1. Pour marshmallows into a microwave-safe bowl or in a double boiler (you might want to grease the bowl and spatula with a bit of shortening before mixing, to prevent stickiness).
    Add about 2 tablespoons of water and microwave it in 30 seconds intervals, stirring in between, until the marshmallows completely melted.
  2. Add in ¾ of the icing sugar and mix (you can add any flavouring you want).
    After the fondant begins comes together, grease hands and table work generously with shortening, and then turn marshmallow mixture onto the table work.

    Add some more left over icing sugar, and continue kneading until it’s form a firm nice and smooth elastic ball (you might need less or more icing sugar).

    If it’s a bit dry, add 1 teaspoon of water at a time and if it’s too wet, add a bit more icing sugar. Knead until it feels soft and pliable.
  3. Once it’s done, grease the outside of the fondant with shortening to prevent dryness and then store them in a ziplock bag to keep it moist.

Simple Syrup
Over medium heat, bring equal amount of sugar and water to a boil, turn the heat to low, stir constantly until the sugar dissolves and the mixture is clear and thickened.
Take it off from the heat, pour into a clean glass jar and let it cool completely.

Royal Icing
In a medium bowl, combine egg whites, Cream of Tartar, icing sugar, and Vanilla Extract.
Beat on high speed for 5 to 10 min or until very stiff (feel free to add 1 or 2 teaspoons of water as needed if you fill it’s to thick).
Covering icing in bowl at all times with a plastic wrap to prevent from drying.


Assembly

  1. Group, stick (use royal icing as a glue) and cover baked cookies with fondant (use simple syrup as a glue) according to the “Side View Design Structure” template.
  2. Decorate the Unicorns.
  3. Place paper straw as Carousel Center Pole (which has been inserted by 2 pieces of bamboo skewers to make it stronger), using royal icing as a glue to assemble and build the cookies group (except for the rooftop).
  4. Decorate the Carousel Center Pole (feel free to use any embossing cutter).
  5. Insert another 3 bamboo skewers around Carousel center pole for the Unicorns. Using paper straw (to cover the bamboo skewers) and thick round paper to support the Unicorns.
    Using royal icing to fill in the base of the pole.
    Place Unicorn on top of round paper, stick both sides together (use royal icing as a glue).
  6. Place and decorate the Carousel rooftop. 
  7. Add finishing details.    


NOTES

  1. To Store Decorated Carousel Cookies; 1 week at room temperature in an airtight packaging.
  2. To store baked cookies; 1 week at room temperature in an airtight container. For longer storage, pop in the freezer (in an airtight container) for up to 3 months.
  3. To store Sugar Syrup; keeps for a while in the refrigerator. Eventually mold will begin to grow if stored too long.  You can also stir in 1 tablespoon corn syrup to help ensure the syrup stays smooth.
  4. To store Royal icing; 1 week in the fridge, always cover bowl in a plastic wrap.

Giant Gingerbread Man Cake (Bonus Snowman Cake Pops)

Hi Guys, I’m back here with another Christmas treats ideas.
Today we are making these cute giant Gingerbread Man Cake along with Snowman Gingerbread Cake Pops.

They are great for a Christmas party which is never complete without loads of gingerbread around.

As you can see, They all look so adorable and they are really great for Christmas showstopper cakes.

This moist cakes is laced with all the best spices and it’s brimming with robust flavors.

The flavors are so rich and just layers upon layers of spice are to be found in so many sweet delights.

I am not sure if I said this before, but I love winter time baking. I had so much fun with this one and I know you will too! Enjoy Guys!

GIANT GINGERBREAD MAN CAKE (BONUS CAKE POPS)
Yield: One 8 x 11 inch Square Pan Cake & 10 pieces Cake Pops
Active time: 2 1/5 hours
Total time: 3 hours

INGREDIENTS
Fondant:

  • 200 grams Marshmallow
  • 2-3 tablespoons Water
  • 400 grams Icing Sugar
  • 50 grams Vegetable Shortening

Frosting:

  • 180 grams Milk
  • 3 tablespoons All-Purpose Flour
  • 80 grams Brown Sugar
  • 180 grams Unsalted Butter
  • 1/4 teaspoon Salt
  • 2 teaspoons Ginger Powder
  • 1 teaspoon Cinnamon Powder
  • 1/2 teaspoon Cloves
  • 1/2 teaspoon Nutmeg
  • 1 teaspoon Vanilla Extract

Cake Batter:

  • 290 grams All-Purpose Flour
  • 2 2/3 teaspoon Ginger Powder
  • 1 1/3 teaspoon Cinnamon Powder
  • 1/3 teaspoon Nutmeg
  • 1/6 teapoon Cloves
  • 2/3 teaspoon Baking Powder
  • 1/3 teaspoon Salt
  • 240 grams Boiling Water
  • 2/3 teaspoon Baking Soda
  • 265 grams Unsulphured Molasses
  • 200 grams Granulated Sugar
  • 96 grams Vegetable Oil
  • 133 grams Whole Eggs
  • 15 grams Mixed Peel

Cake Pops: White and Dark Chocolate Lolipop Stick


INSTRUCTIONS
Marshmallow Fondant

  1. Mix marshmallows and water, microwave it in 30 seconds intervals (or in double boiler), stirring in between, until the marshmallows completely melted.
  2. Add in ¾ of the icing sugar and mix (you can add any flavouring extract if you want).
  3. After the fondant comes together, turn marshmallow mixture onto the counter. Add some more left over icing sugar, and continue kneading until it’s form a firm nice and smooth elastic ball (if it starts to feel a bit dry, add 1/2 tablespoon of water at a time and knead it again until it feels soft and pliable).
  4. Once it’s kneaded, grease the outside of the ball with shortening to prevent dryness and then store them in a ziplock bag to keep it moist.
  5. Colour it as needed.

Cake Batter

  1. Preheat the oven to 180 C.
  2. Grease the pan, line bottom with a parchment paper, and grease it again.
  3. In a large bowl, combine the flour, ginger, cinnamon, nutmeg, cloves, baking powder and salt. Mix well.
  4. For molasses mixture, mix the baking soda, boiling water, molasses and the granulated sugar, mix it all through (it’s gonna fizz up a bit, keep on stiring until the sugar dissolved).
  5. Add in the vegetable oil and eggs, mix well.
  6. Then whisk in the dry ingredients into molasses mixture 1/3 at a time, mixing well after each addition.
  7. Strain the batter to remove any lumps.
  8. Pour mixture into a prepared pan, sprinkle some mixed peel and sink them into cake mixture.
  9. Bake it in the preheated 180 C oven for about 30-35 minutes until toothpick inserted into center comes out clean. After baking, remove it from the pan, let it cool completely on the cooling rack.

Brown Sugar Buttercream Frosting

  1. Mix the flour and milk together, strain the mixture to remove any lumps. Cook on the stove or just microwave it in 20 seconds intervals until it just become a paste. Set aside and cool completely.
  2. In a large bowl, cream the butter, brown sugar, and salt together until it gets a really smooth consistency. Add in the cooled flour paste, beat for about 5 minutes on medium-high to high until it looks like whipped cream. Add in all the spices, ginger, cinnamon, cloves, nutmeg along with Vanilla Extract. Mix until well combined.


ASSEMBLE
Gingerbread Man Cake

  1. Slice the cake into 2 layers, top with a layer of frosting. Smooth it out. Place the second layer of cake on top.
  2. Using gingerbread man template cutting the cake layers with a serated knife.
  3. Cover the cake with frosting; using small spatula, apply a thin layer all over the cake (this is just going to lock in all of those little crumbs). Smooth it out , put it in the fridge for about 25 minutes to firm up a bit.
  4. Rolling out the fondant on a corn starch surface to about 3 mm thick. Draping it over chilled cake. Working quickly with my hands just to get all the air pushed out from underneath that fondant (going around the head and the arms and the legs, gently press in the fondant). Using serated knife cut around the excess fondant.
  5. Decorate them with gingerbread man fondant details.

Snowman Gingerbread Cake Pops

  1. Crush left over cakes into fine crumbs. Take about 25 grams for the body, 10 grams for the head, roll it into a ball. Put the cake balls in the freezer for about 15 minutes (you don’t want them to be frozen), so after about 15 minutes put them in the fridge and let them stay chilled there. 2.
  2. Dip the lollipop stick it into the melted chocolate just about a half inch, take it out and insert it straight into the large cake ball (insert it until past the cake ball). And then dip it into melted chocolate again, insert it into the small cake ball.
  3. Dip all into the melted chocolate, tap it off with a gentle motion to remove any excess. Place it in your Styrofoam block to dry.
  4. Decorate them with fondant and melted chocolate.

Blackforest Mousse Christmas Bombe Cakes

Hi Guys, Christmas is coming soon and today we are making some Blackforest Mousse Christmas Bombe Cakes. It’s really a special dessert. They have a Chocolate Sponge on the bottom, filled with Dark Sweet Cherries and White Chocolate Mousse. And it’s all covered with a chocolate shell and of course decorated with different Christmas characters.

These are so perfect for holiday season, because we are all so busy around this time of year. You can make these ahead of time for a stress free dessert at Christmas, just keep them in the fridge for up to three days before servings.

It’s glamorous and gorgeous and definitely centerpiece-worthy. The bombe looks seriously complicated and I love that about it, but is easier to make than it looks. 
I have to admit, this are kind of a lot of work but there’s no step that’s really difficult. It’s just a lot of small easy steps.

The cake is super soft and moist, a hint of Rum from Cherries and White Chocolate Mousse is so flavourfull, the modelling chocolate for decoration is really yummy, it’s really good Guys!

These showstopping bombe desserts are perfect for special occasions, I hope you can impress your friends and family over the festive season. Have fun with it!

BLACKFOREST MOUSSE CHRISTMAS BOMBE CAKES
Yield: 5 pieces (4 oz each)
Active time: 2 hour
Total time: 4 hours

INGREDIENTS
Modeling Chocolate (Using Candy Melts):

  • 200 grams White Candy Melts
  • 50 grams Corn Syrup
  • Food Colouring

Modeling Chocolate (Using Real Chocolate):

  • 200 grams White Chocolate
  • 75 grams Corn Syrup
  • Food Colouring

Chocolate Mousse:

  • 1 teaspoon Gelatine Powder
  • 30 grams Water
  • 108 grams White Baking Chocolate
  • 40 grams Milk
  • 238 grams Heavy Cream
  • 8 grams Icing Sugar
  • 1 tablespoon Rum (optional)

Chocolate Sponge Cake:

  • 23 grams Vegetable Oil
  • 8 grams Cocoa Powder
  • 23 grams Granulated Sugar
  • 45 grams Water
  • A Pinch of Salt
  • 3/4 teaspoon Vanilla Extract
  • 45 grams Egg Yolks
  • 53 grams Cake Flour
  • 120 grams Egg Whites
  • 30 grams Granulated Sugar

Cake Shells: Candy Melts or White Chocolate Compound with Candy Colouring
Assembly: Dark Sweet Cherry, Rum

INSTRUCTIONS
Modeling Chocolate:

  1. Melt the chocolate in the microwave or a double boiler (let it cool to the touch). Add the corn syrup, stir just until it turns into a thick, smooth paste.
  2. Pick up the dough as soon as you can easily handle it and knead it over the bowl (knead out as much oil as possible).
  3. Pat the surface of the dough with some paper towel to sop up the oil (pat the dough quickly because the dough is quite sticky at this stage,if the paper sits too long it will get stuck in it).
  4. Once patted dry, wrap it tightly in plastic. Store in an airtight container. Allow the dough to sit 8-10 hours at room temperature or in the fridge to set faster.

Cherries
Strain the cherries, soak it with a generous amount of rum, let it sit for about 1-2 hours.

Chocolate Mousse:

  1. Sprinkle the gelatine over cold water, let it stand for 5 minutes. Then gently melt it in the microwave or in a small pot on the stove (do not boil).
  2. Heat the milk and chocolate until the chocolate melted.
    Combine the gelatin with the chocolate mixture, mix well. Let it cool so it’s no longer hot.
  3. Whip the heavy cream and the icing sugar until firm peaks. Fold 1/3 of the whipped cream to lighten the chocolate mixture, then fold in gently the remaining cream. Add in the rhum. Cover and let them set in the fridge for about 2 hours (it’s very liquidy like soup now, but it will firm up as the gelatine and chocolate sets).

Cake Shell
Melted some chocolate candy melts, use a pastry brush and brush mould on some thin layers of chocolate (let it set in between each layer), 3 coats in total.

Chocolate Sponge Cake

  1. Preheat the oven to 170 degress C.
  2. Grease the pan (10 inch square), place the parchment paper at the bottom of the pan.
  3. Heat the oil until warm, add in to the cocoa powder, mix.
    Add in the sugar, mix. Pour in the water, mix. Add in salt, vanilla, the egg yolks, mix well.
    Sift half of the cake flour into the mixture, mix. Sift in the remaining flour, mix until well combined.
  4. Whisk egg whites until forthy, gradually add sugar, continue whisk until stiff peaks.
  5. Combine the egg whites to the cake mixture (in 2 batches), whisk after each addition, using spatula scrape down and fold it (make sure the batter is well combined).
  6. Pour the batter into the pan. Spread with spatula, Jjggle vigorously till the batter even, tap pan against work surface twice, bake for about 20 minutes.
  7. Once come out off the oven, drop the pan from 2 inch high for about 3 times. Unmould the cake from the pan, peel the parchment paper from sides of the cake and let it cool completely.

Decoration
Knead and colour the Modeling Chocolate as needed. Using template as guide, create the details.

Assembly

  1. Cut the cake (using 2 size of round cookie cutters, one is that the same size as the hemisphere mold and other size is half size of the mold).
  2. Pipe a little bit of mousse into each chocolate shell. Sink in the dark sweet cherries to the mousse. Cover it with some mousse. Place small cake on top of the mousse. Pipe mousse to cover all the inner part. Place the large cake on top.
  3. Store in the fridge for about 30-60 minutes to firm up.
  4. Unmold cakes, decorate them.

NOTES

  1. You can store the cakes in the fridge for up to 3 days before servings.
  2. You can use Candy Melts or real white chocolate to make Modeling Chocolate. Find the recipe in the description above.
  3. There is no special food colouring required to colour Modeling Chocolate.
    Modeling Chocolate already has liquid in it (corn syrup) so adding more won’t hurt. I like to use regular gel food colours like Americolor.
  4. If Modeling Chocolate is too soft and sticky while shaping, you can add add a little bit of cornstach.
  5. Modeling Chocolate Dough will last a very long time (at least a few months). But as it sits, it continues to harden and may require more kneading to return it to a nice workable consistency.