I grew up eating Mochi and I love it so much! Mochi has always been a delicious source of comfort.
My Grandpa would buy homemade Mochi from the local store. They sold 2 kinds of Mochi, plain and the one that filled with sweet crumbled peanut filling.
Although the contrast of texture between the smooth, supple, sticky outer layer of Mochi and the crunchy peanut fillings is so awesome; plain Mochi is always my favourite.

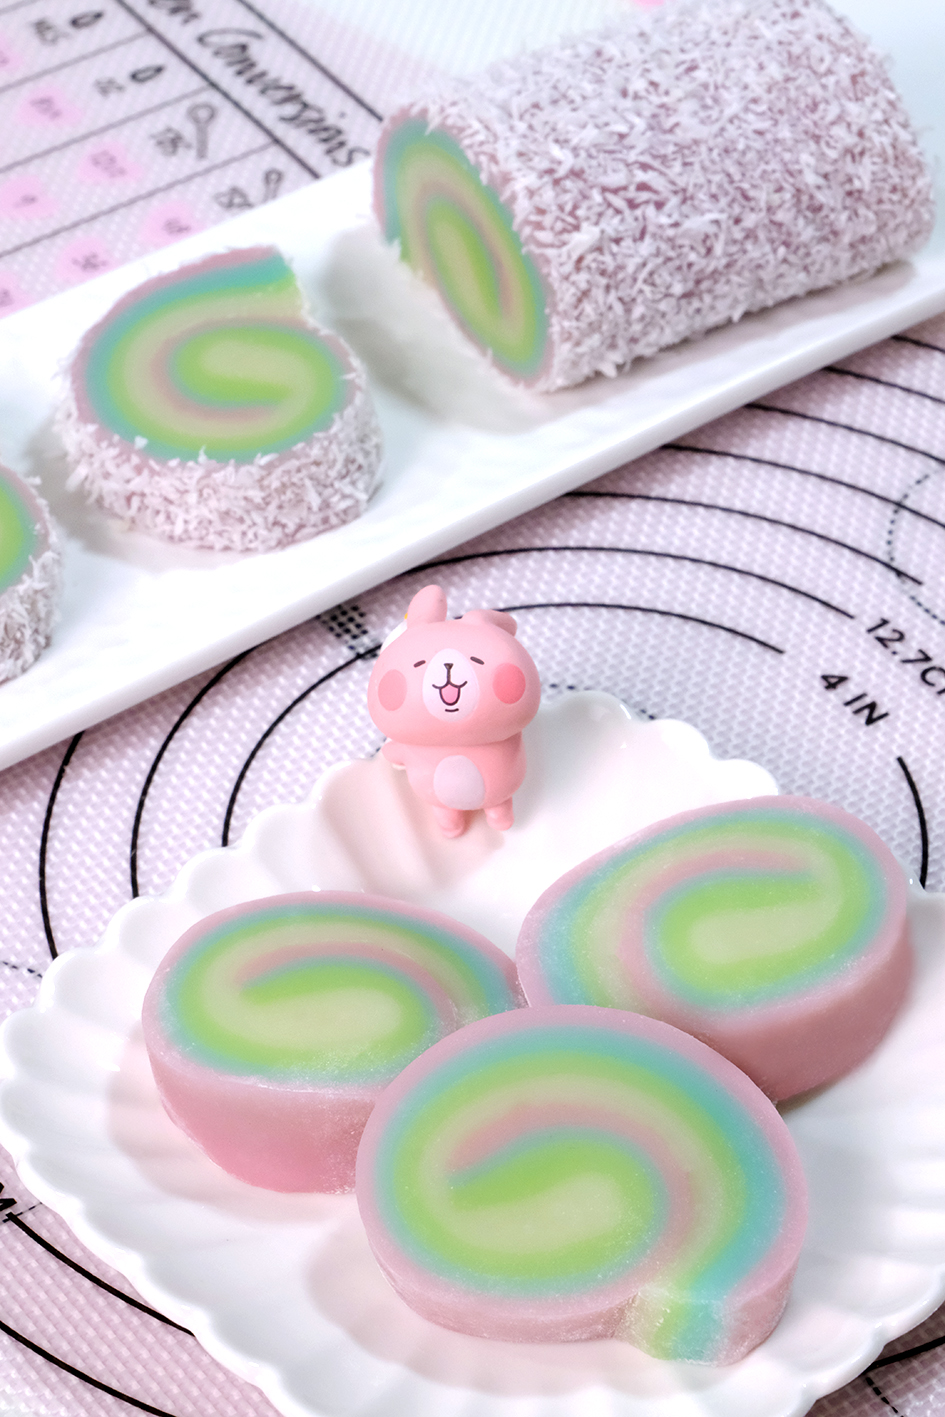
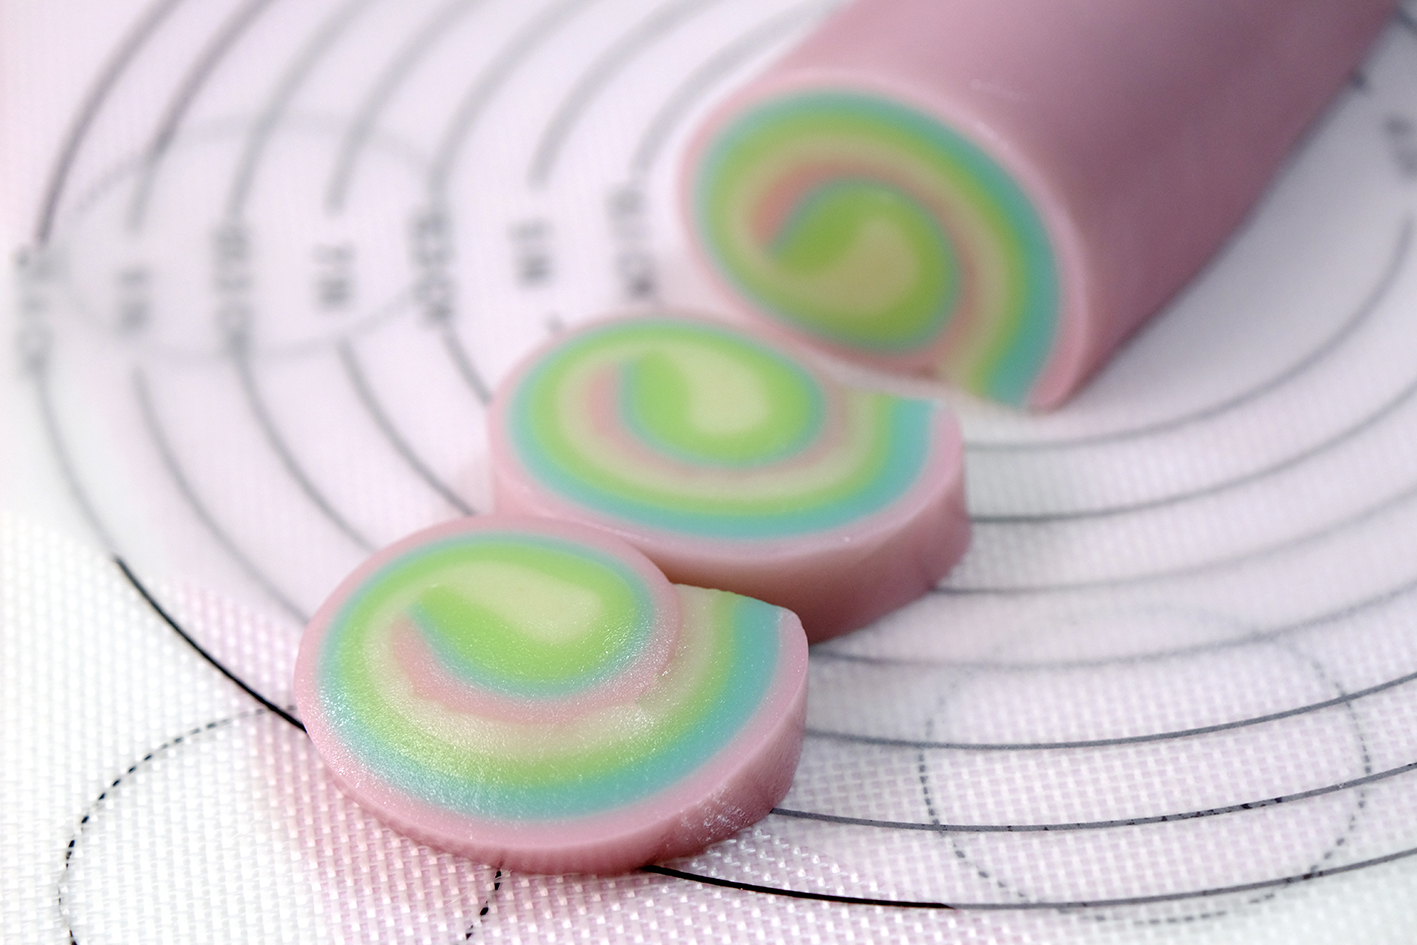
In this recipe, I am going to show you how to make these Rainbow Mochi Rolls.
It’s basically my favourite plain Mochi, but I tried to make it more interesting 😋
We need only 4 ingredients to make it; colour it, steam and roll it into kinda a Swiss Roll .
They are not only look pretty ☺️ and adorable but also yummy; A beautiful dessert that you can actually make it at home.
TO CHOOSE THE RIGHT FLOUR
It is important to use fresh glutinous rice flour for your Mochi dough, because this kind of flour tends to get mouldy while it’s being stored. If you notice any changes in smell, taste, or texture, don’t use it; make sure to discard it right away.
I highly suggest to use Thailand brand for the best results. Try to find the unbleached one, coz bleached flour will produce a slightly bitter taste and unpleasant smell on your final Mochi.

TO HANDLE STICKY MOCHI DOUGH
Vegetable oil and Potato Starch (or Corn Starch) is always be your best friend.
Because Mochi dough is really sticky, it’s crucial to grease the pan with generous amount of vegetable oil ; I also found that line the pan with parchment paper really helps me a lot when I unmould the cooked Mochi.

You can dust Mochi pieces with a bit of Potato Starch or Corn Starch to prevent stickiness; and then brush off any excess starch so the Mochi doesn’t taste powdery.
If you are worried about eating raw starch, you can actually heat the starch in the pan on medium heat for about 3-5 minutes until it turns slightly yellowish and feels lighter
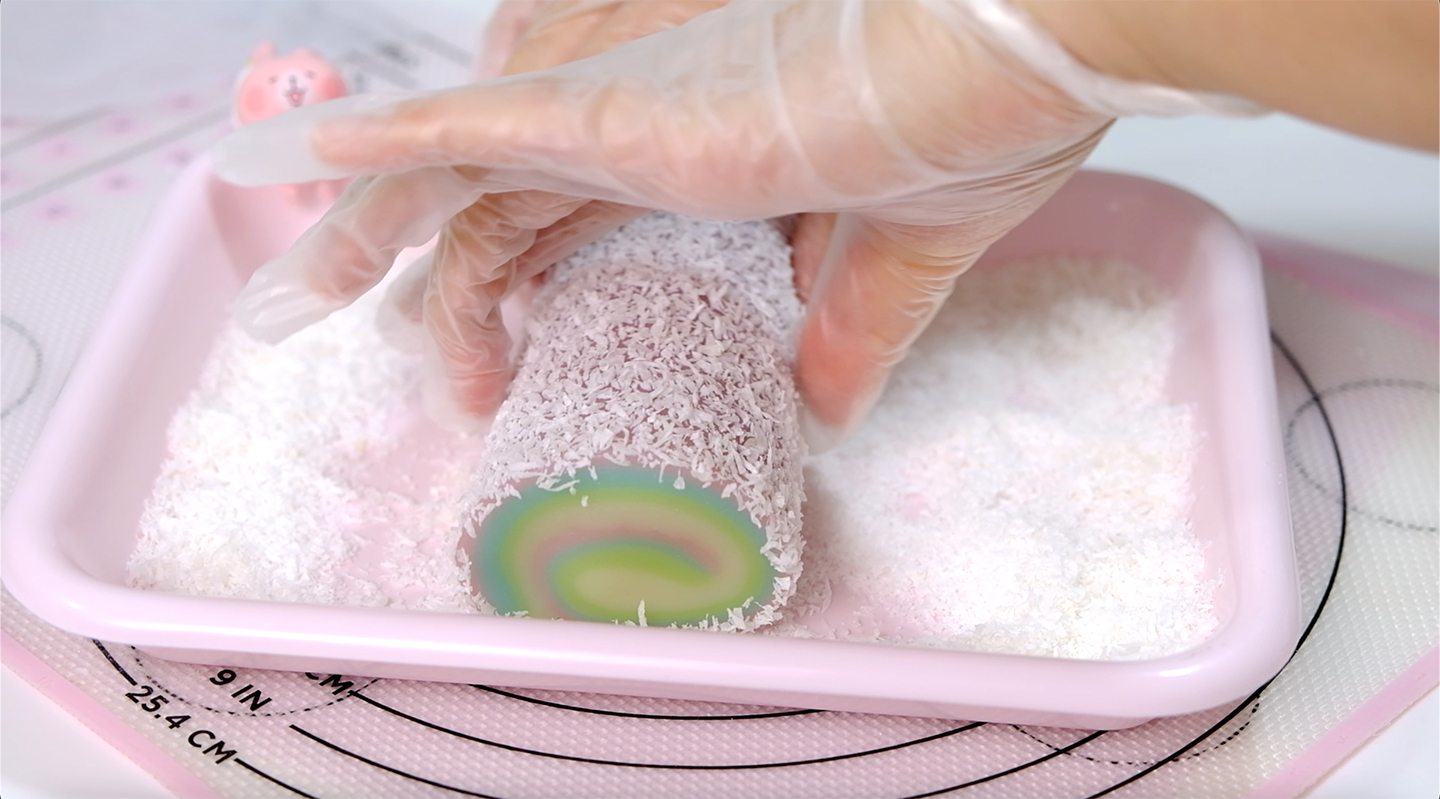
You also can coat the outside part of Mochi with Desiccated Coconut. I found vanilla create a beautiful flavour combinations with Coconut. If you a coconut lover I highly recommend it.

HOW TO CUT MOCHI
Mochi is very soft and sticky, so to cut it will be a bit tricky. Some people said that the right and easy way is to use string; I’m personally prefer to layer my knife with a greased plastic for a clean-cut.

The Mochi just so wonderfully chewy, stretchy and bouncy 😙

These mochi can be kept about 3 days in the fridge in a sealed container.
But mochi really should be eating the day of making. They TASTE best FRESH.
I highly recommend to try them.

And how about sprinkle some Mochi pieces on your favourite ice cream?
I’m sure you will be addicted to it 😇, Trust me….I can’t stop eating it 😅
In this video list of tools that I used in creating this project
♥ Baking:
6-Inch Square Cake Pan https://amzn.to/3s3gA5z
Turquoise Pastel Jug https://amzn.to/3D6c6kY
Blue Pastel Pan https://amzn.to/3CDPLtD
Bamboo Steamer https://amzn.to/3MCPRq3
♥ Cameras: Fujifilm X-T3 Mirrorless https://amzn.to/3TgeZVV
♥ Tripod: VILTROX VX-18M https://amzn.to/3gl5mXj
♥ Microphone: Rode NT-USB https://amzn.to/3CKuAWS
♥ Camera Field Monitor: FEELWORLD T7 7 Inch https://amzn.to/3TAcPAs
Many or all of the products featured here are from our partners who compensate usRAINBOW MOCHI ROL
Yield: One 6-Inch Square Pan
Active Time: 30 minutes
Total Time: 1 ½ hours
INGREDIENTS
Mochi Dough
- 135 g Glutinous Rice Flour
- 75 g Granulated Sugar
- 180 g Milk
- 1 tsp Vanilla Extract
Coating
- 50 g Potato or Corn Starch
- Desiccated Coconut
INSTRUCTIONS
Mochi Dough
- Simply combine the Glutinous Rice Flour and Sugar; give a quick whisk.
- Pour in the milk and blend that all up until there are no lumps and the sugar completely dissolved.
- Strain the mixture to make sure there’s no granules are left at the bottom of the bowl.
- Add Vanilla Extract, mix it really well.
*If you use other extracts; make sure the taste is not overwhelm; for example Almond Extract which has a very strong taste; you just need a little bit is enough. - Divide the mixture into 4 equal portions.
- Colour each portions (Baby Pink, Soft Green, Baby Blue and White)
Using toothpick add food colouring a little by little so that you can control the amount of the colour to reach the desire pastel colour. - Preheat the steamer
*I am using bamboo steamer; if you use metal or plastic steamer, make sure that you cover the lid with a piece of cloth; so the water condensation during steaming won’t ruin the look of your Mochi. - Start with the white colour mixture for the first layer
Pour the white colour mixture to the pan (don’t forget to stir the mixture first before you pour it into the pan; so that the flour is evenly mixed with the liquid).
Steam over medium high heat for 5 minutes. - After 5 minutes, the white layer is half cooked and sets hard a bit.
Pour the green mixture on top of the white layer; and continue steam for another 5 minutes. - Pour the blue mixture on top of the green layer; and continue steam for another 5 minutes.
- Finally, pour in the pink mixture and steam the Mochi longer for about 15 minutes.
- Take it off from the heat and let it chill down a bit for about 10 minutes before you roll it.
Rolling
- Grease piece of food grade plastic with vegetable oil as a base for Mochi so it will be easier when you roll it.
- Unmould the Mochi, place it onto the plastic base.
Roll it up then turn it over. - To tighten the roll, press the long ruler against the Mochi roll while holding the paper at the bottom of the roll (you can also use scraper to do this)
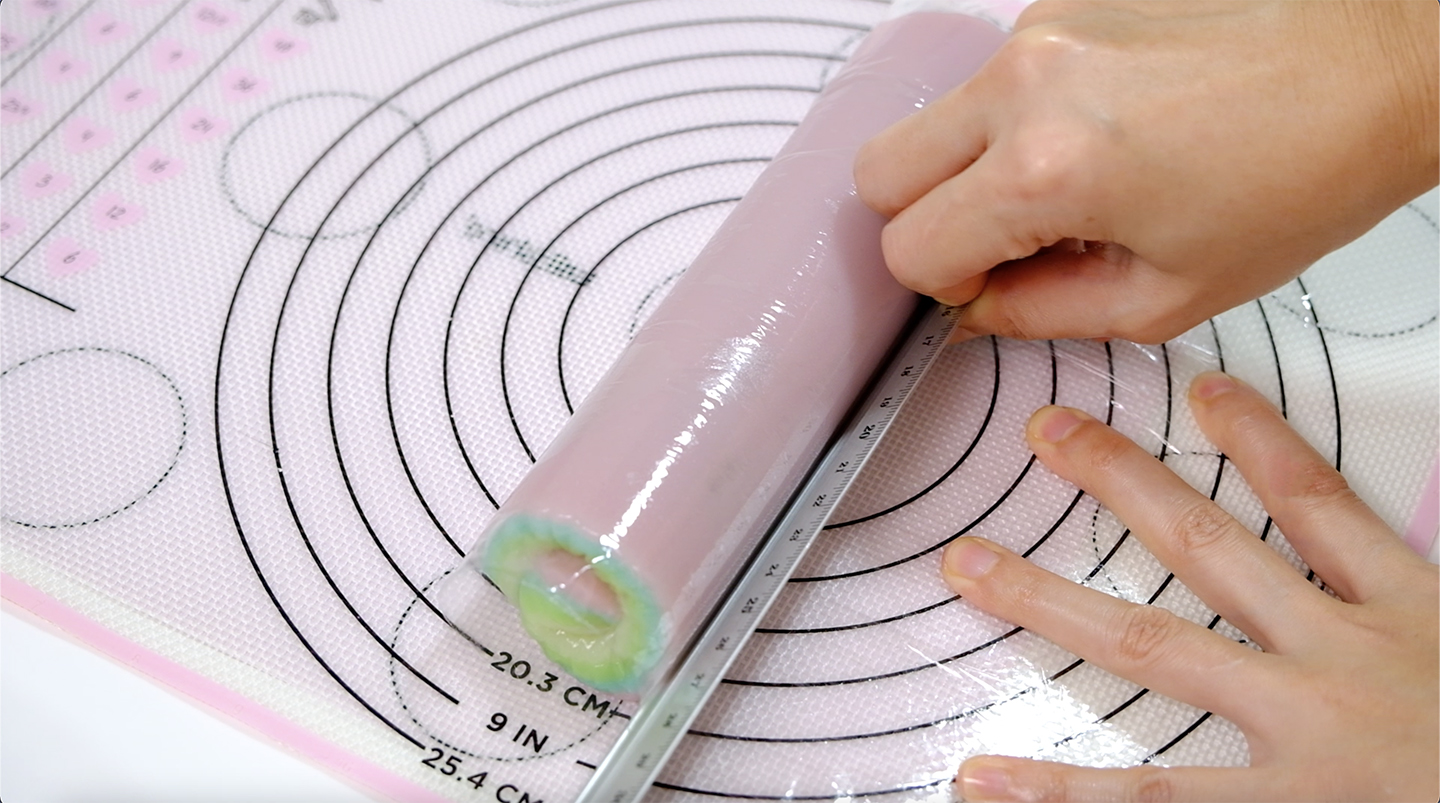
4. Cover Mochi roll with a plastic wrap and let it sit in the fridge for about half hour to set up a bit.
Coating & Cutting
- For coating
Heat the Potato Starch or Corn Starch in the pan on medium heat for about 3-5 minutes until it turns slightly yellowish and feels lighter; take it off from the heat, transfer to a bowl.
Place some Desiccated Coconut in a small tray. - For Cutting
Layer knife with a food grade plastic and grease the plastic with some vegetable oil. - For Plain Mochi
Cut the Mochi roll into small pieces (about 1 cm wide). Dust Mochi pieces with a bit of starch to prevent stickiness and then brush off any excess starch so the Mochi doesn’t taste powdery. - For Coconut Coated Mochi
Roll Mochi roll onto Desiccated Coconut and then cut into small pieces (1 cm wide).
NOTES
- Mochi should be eating the day of making, they taste best fresh.
- Left over Mochi can be kept about 3 days in the fridge in a sealed container; on the 4’th day the chewiness will start to decrease.
- Cut some Mochi into small pieces, sprinkle on your favourite ice cream
I’m sure you will be addicted to it