Luscious Spinach 🌱 Lemon🍋Coconut🥥 Cake

Spinach cake sounds unusual, but it’s surprisingly delicious.
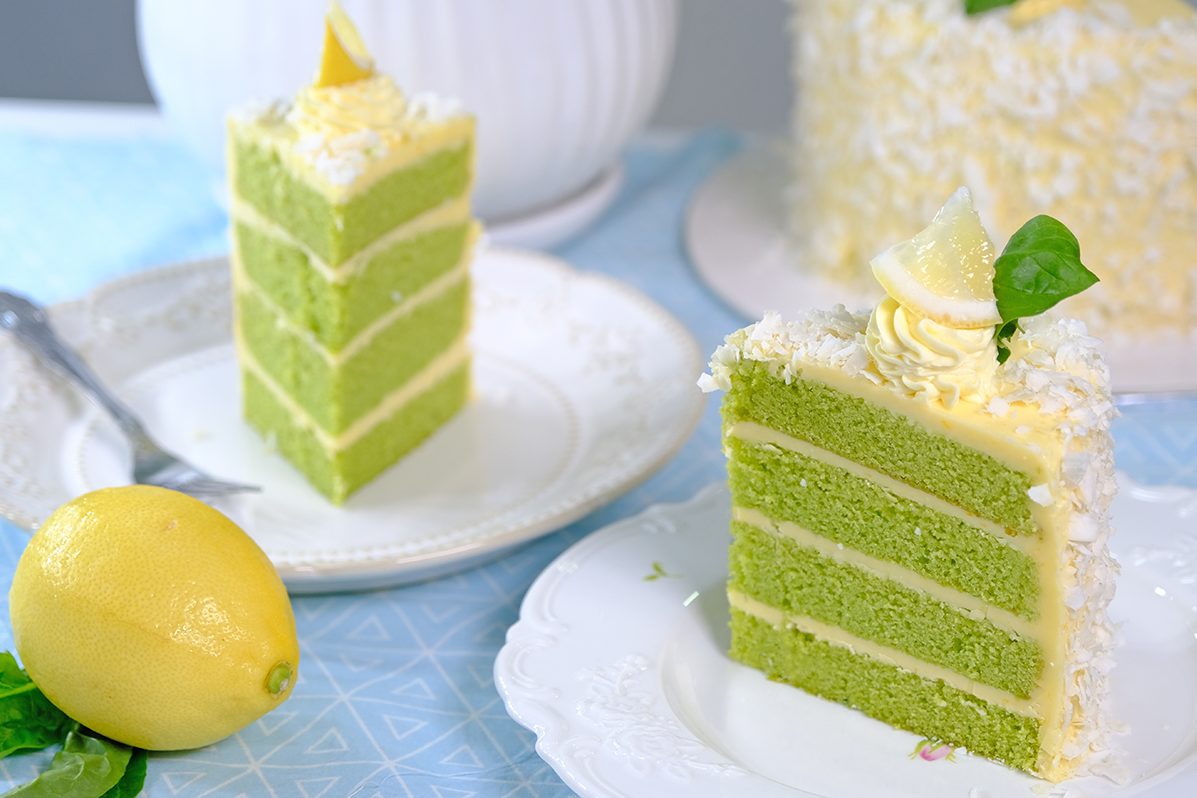
Naturally bright green, soft, and full of flavour; This cake is a beautiful balance of colour, texture, and nutrition.

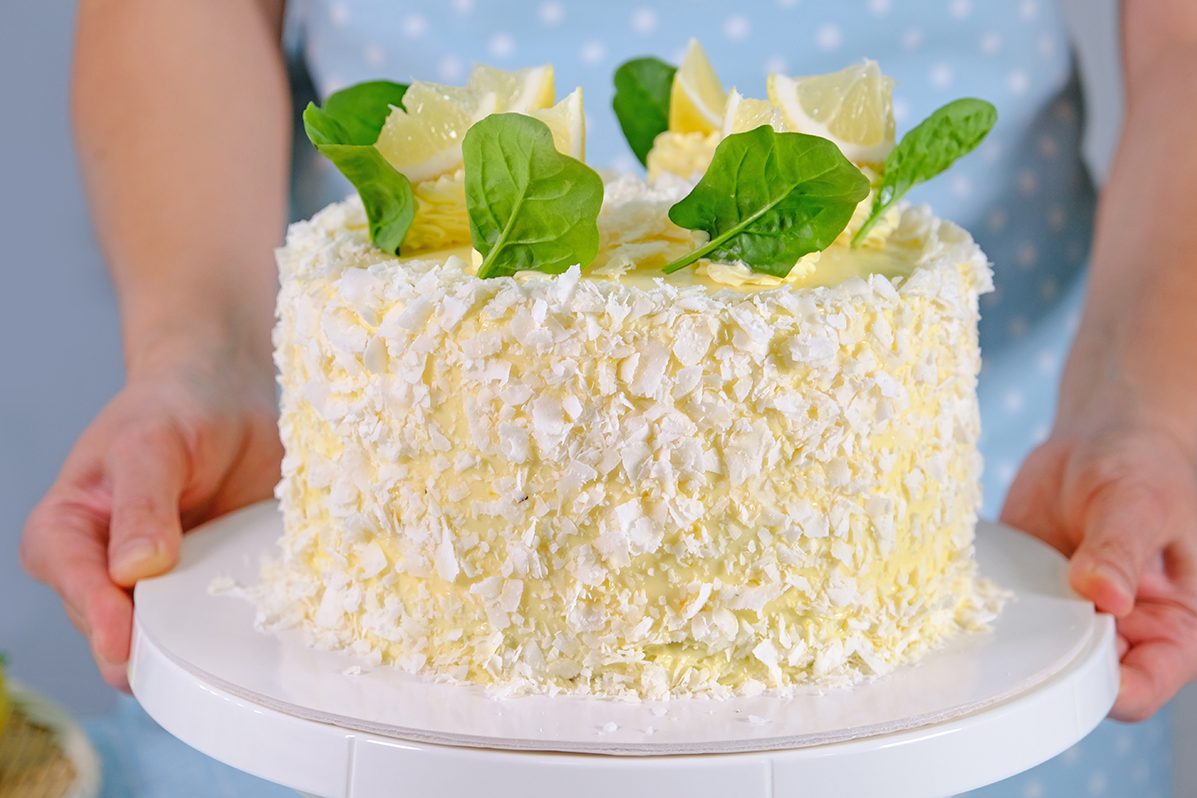
Beautiful green colour ! 🥰

The spinach doesn’t shout or dominate; instead, it melts into the batter, lending a gentle earthiness and a deep green hue that feels both rustic and elegant.

The result is a cake that’s moist, tender, and balanced—sweet, but not cloying, with a subtle complexity that makes you pause for another bite.
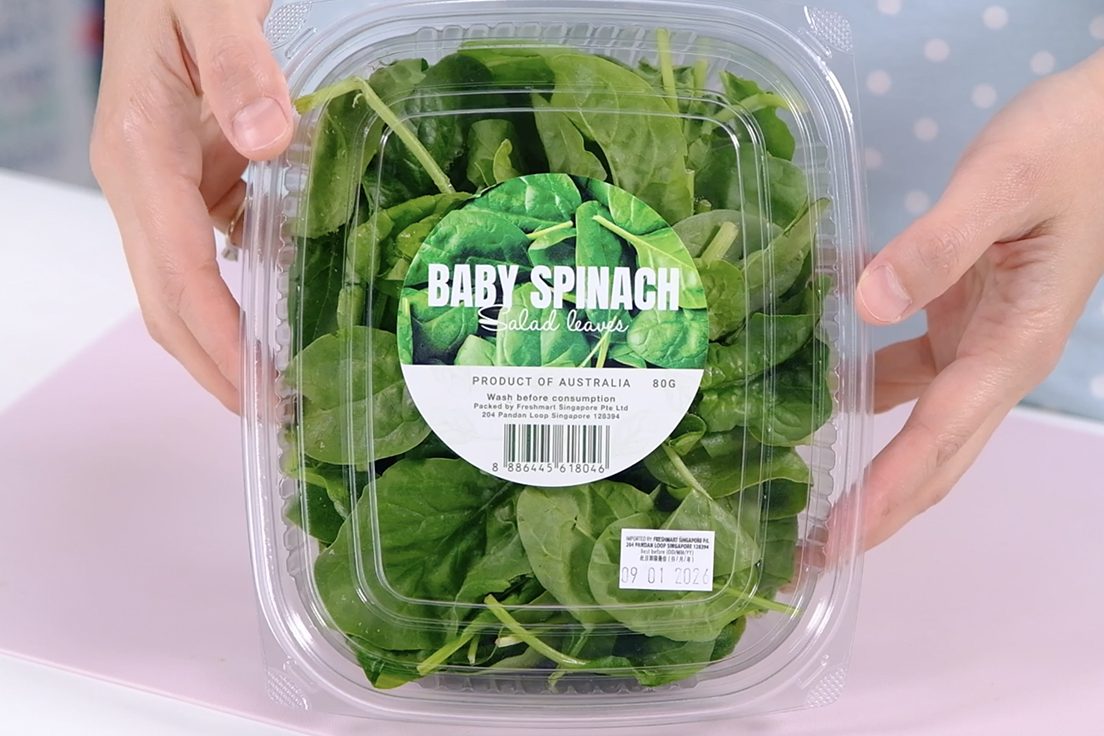
Its tender leaves blend smoothly, while older spinach are harder to fully blend and may leave specks or texture in the crumb

Baby spinach is ideal for spinach cake because it has a mild flavour that doesn’t affect the taste of the cake.

You will need to blanch Spinach in boiling water for 20 seconds,
A quick blanch sets the Chlorophyll, preserving a brighter, more vibrant green color in the cake.
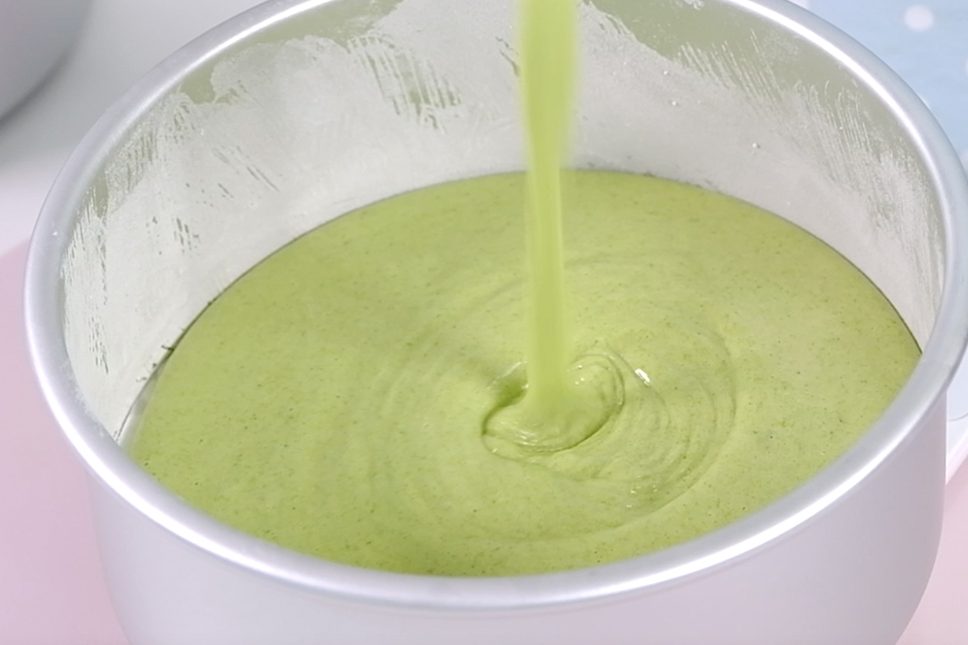
The greens add natural moisture, so the crumb stays soft for days, and they pair beautifully with lemon.
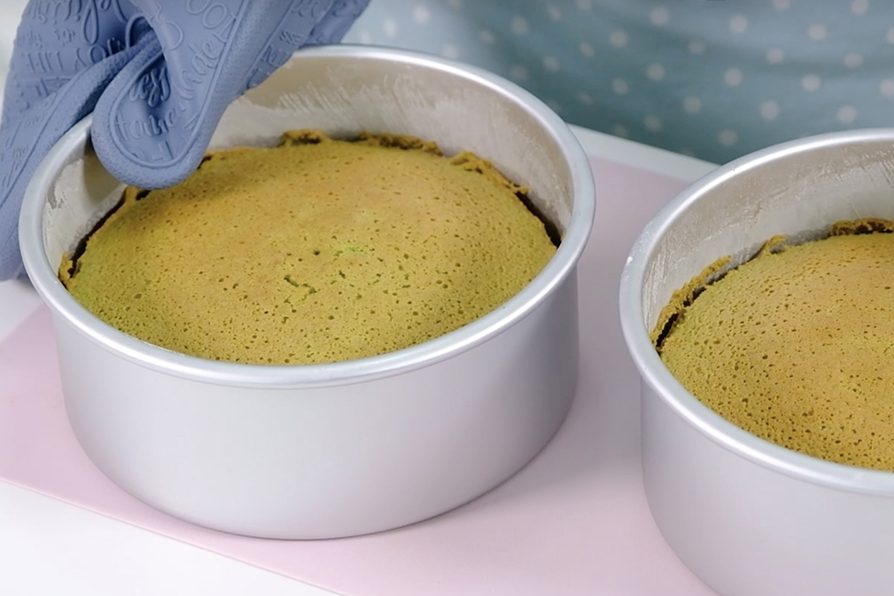
The Lemon Buttercream is where the brightness comes in.
Whipped until light and silky, it brings a sharp, sunny contrast to the mellow cake beneath.

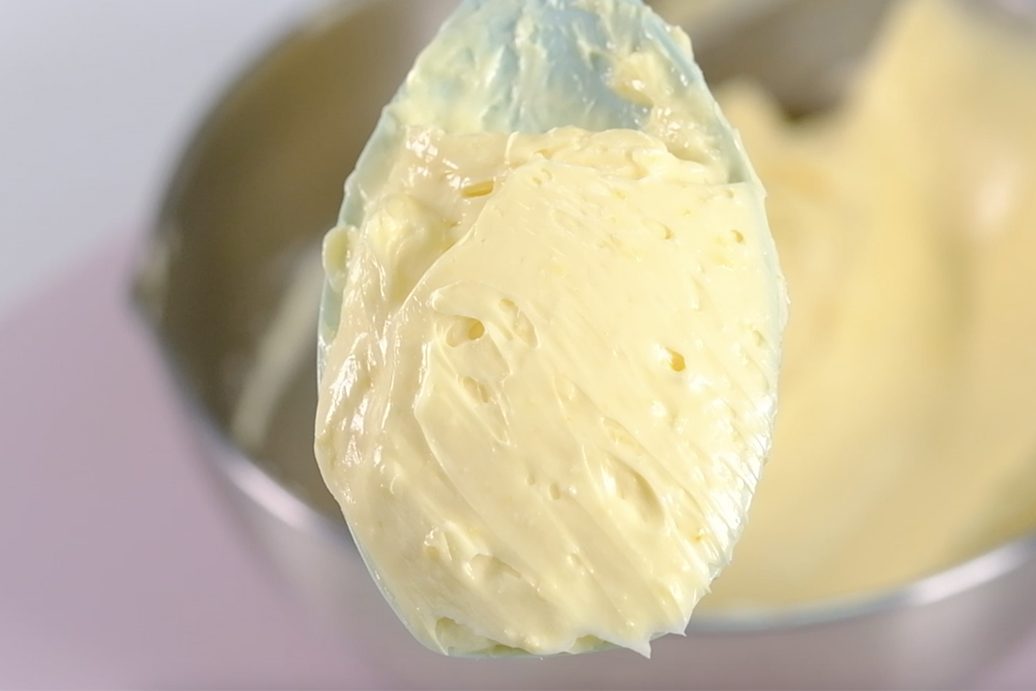
Lemon buttercream is bright, creamy, and impossibly smooth, with a zesty tang that dances on the tongue 😏
🤤

Each forkful balances earthy and zesty, soft and creamy, indulgent but not heavy.

The citrus lifts the cake, turning it from comforting to refreshing.

Decorate however you like 😙😚

Spinach Cake with Lemon Buttercream looks striking on the table 😇
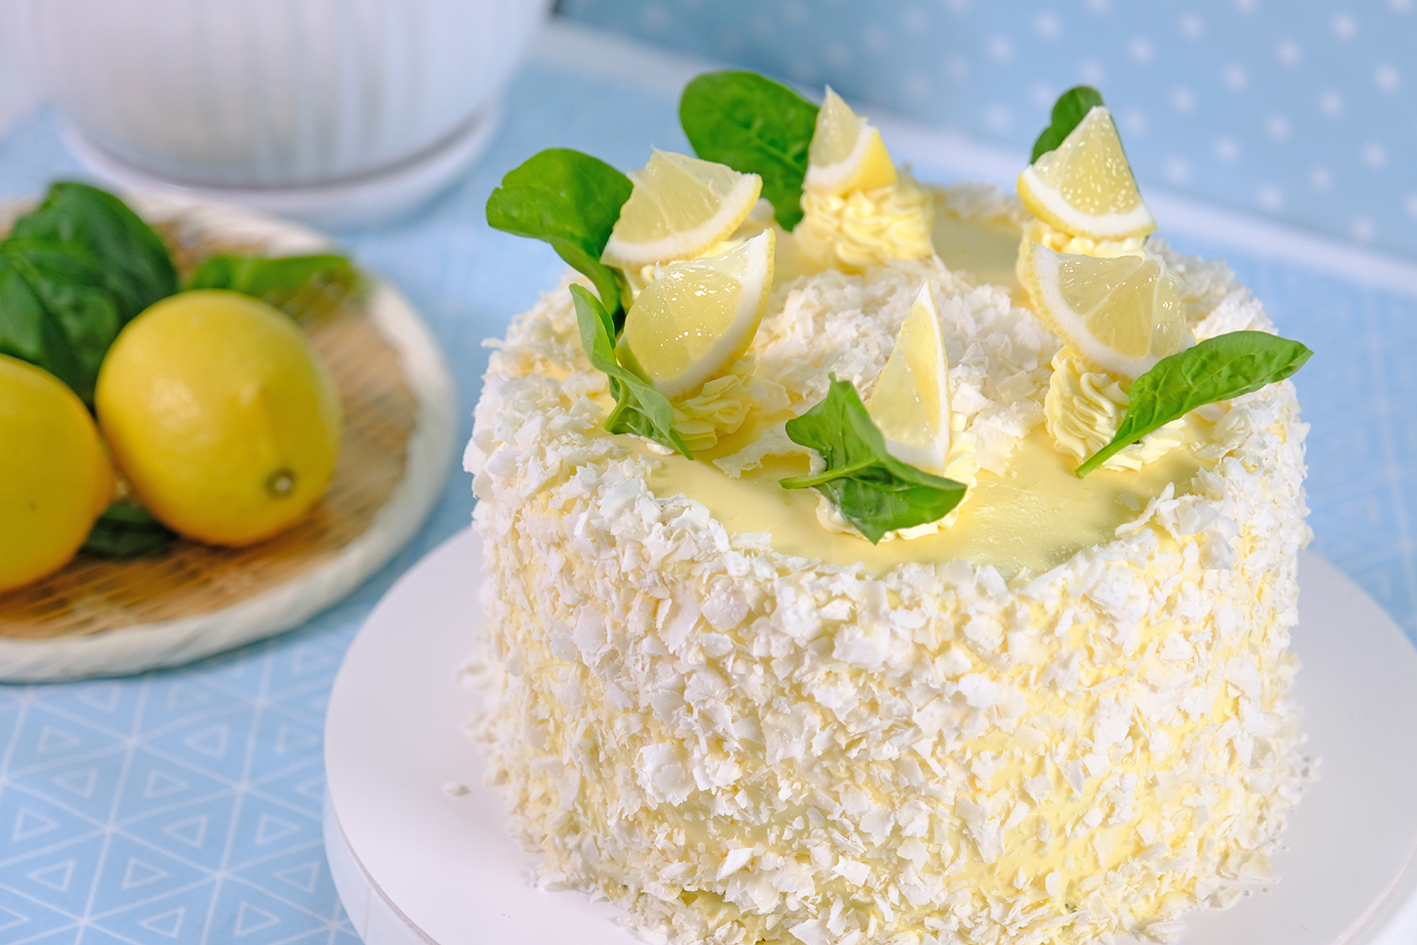
Tastes unexpectedly elegant 😋 😊…

The most common reaction is disbelief: “No way—this has spinach in it?” 😁🙃
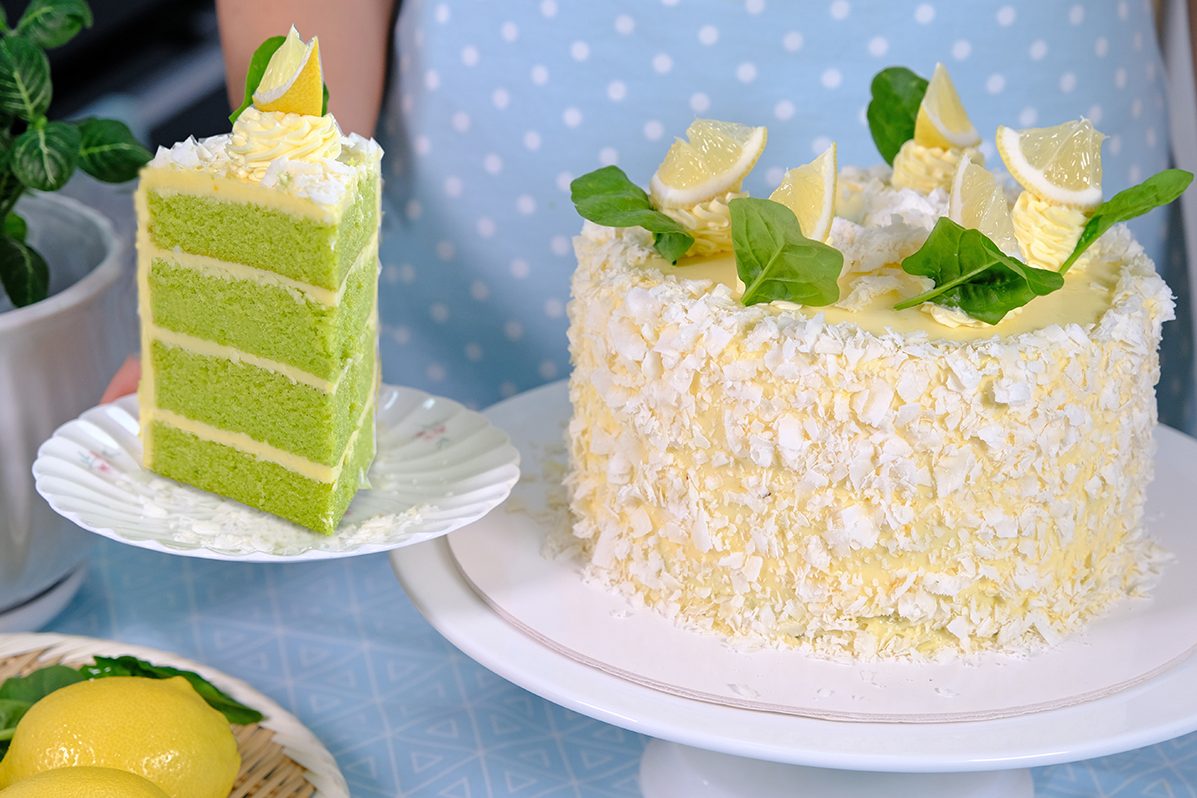
LOVE IT! 😍
🥲 HUNGRY…
🥰 😘

Spinach cake feels wholesome without trying too hard, comforting without being boring, and just a little magical in how something so green can taste so good 😉
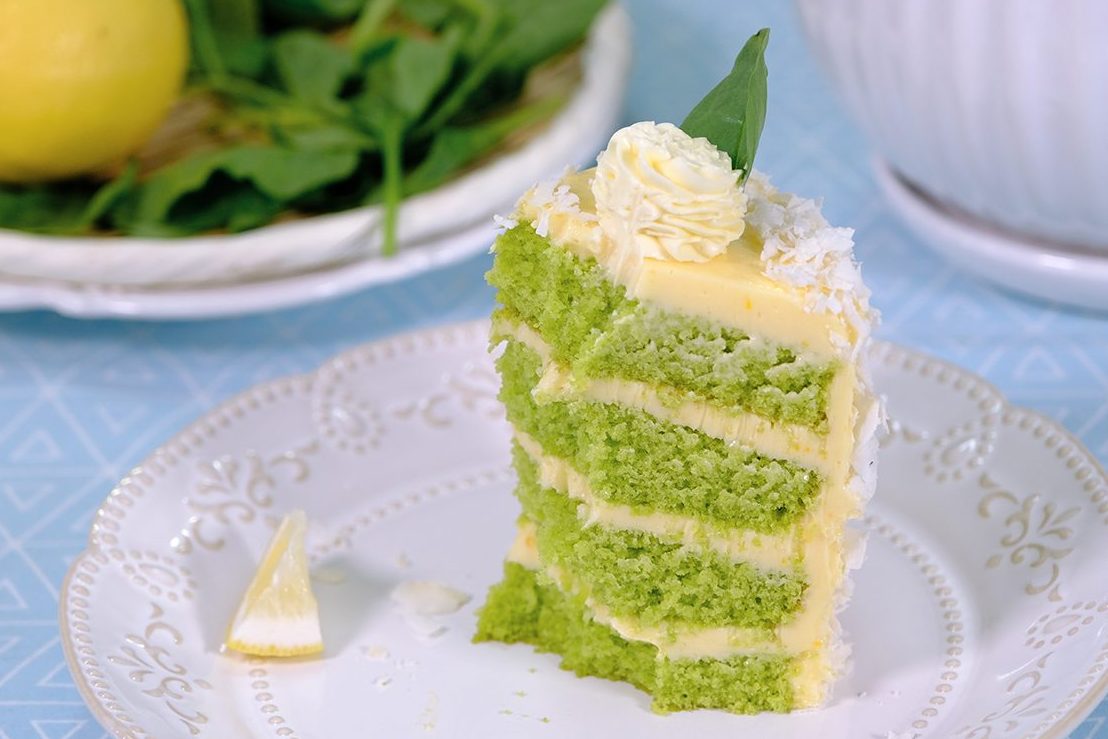
Enjoy every bite !

I hope it adds a little brightness and joy to your table
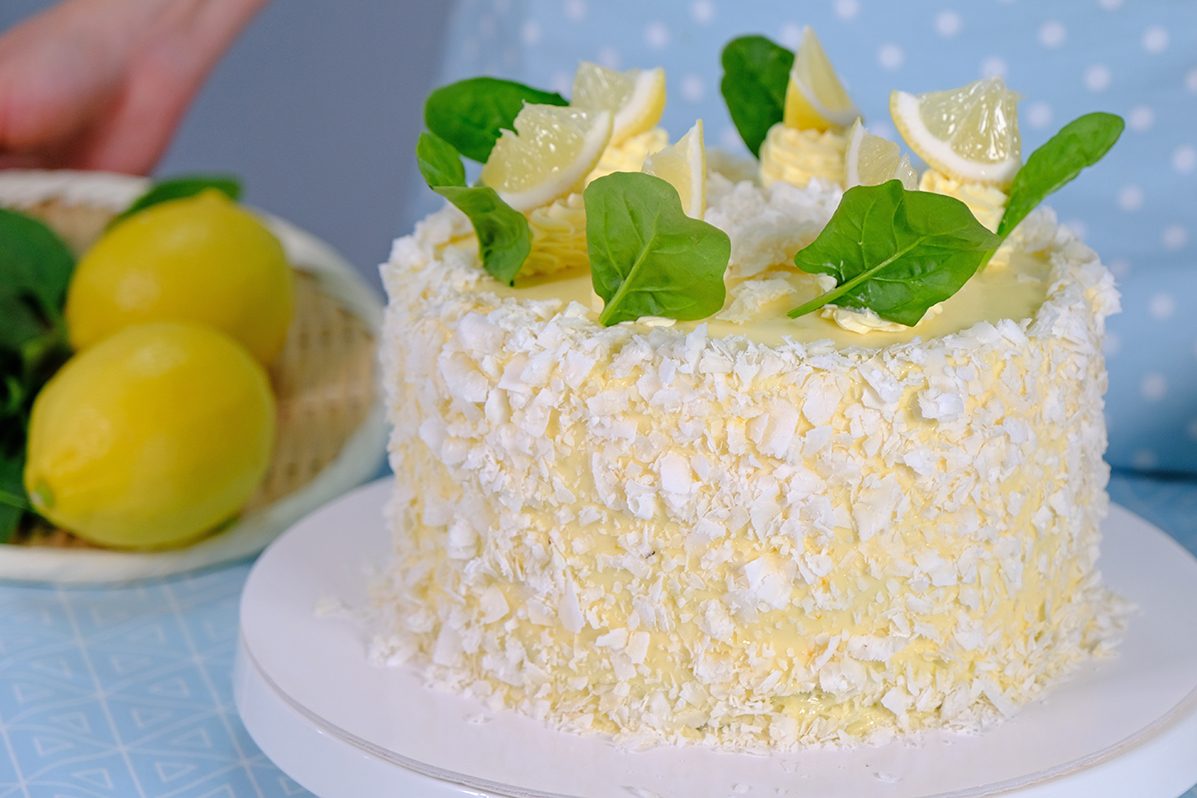
Love you all and happy baking! 💗

WATCH HOW TO MAKE LUSCIOUS SPINACH LEMON COCONUT CAKE

Tips for Success (Please Read First):

  • It’s important that your mixing bowl is clean
    Any residue or fat will prevent the Egg Ehites from whipping properly (wipe the bowl and utensil with lemon juice or vinegar to helps remove grease)
  • Use Baby Spinach for spinach cake because it has a mild flavour that doesn’t affect the taste of the cake; Its tender leaves blend smoothly, while older spinach are harder to fully blend and may leave specks or texture in the crumb
  • Blanch Spinach in boiling water for 20 seconds, A quick blanch sets the chlorophyll, preserving a brighter, more vibrant green color in the cake
    Then immediately cool in cold ice water, squeeze dry
  • Preheat the oven at least 30 minutes before starting
    Once the Cake batter is fully mixed, it needs to be baked right away (if you let the batter sit, that air starts escaping and the batter will lose volume)
  • For the cake; sift the dry ingredients
  • For Lemon Curd, be sure to use fresh Lemons, bottled juice won’t give the same bright flavour
  • Use room-temperature eggs for Lemon Curd, as they blend more smoothly and reduce the risk of curdling
  • Low and slow heat is the key to a good Lemon Curd, so don’t rush the thickening process. Keep the water at a gentle simmer, NOT a boil

RECIPE

LUSCIOUS SPINACH LEMON COCONUT CAKE
Yield: One 7-Inch Round Cake (4 layers)

INGREDIENTS
🌱🍋 Lemon Curd
70 g Caster Sugar
45 g Lemon Juice
1 tsp Lemon Zest
50 g Egg Yolks
40 g Unsalted Butter (room temp.)

🌱🍋 Spinach Cake
70 g Raw Baby Spinach
70 g Cold Water
135 g Unsalted Butter
70 g Whole Milk
180 g Eggs
230 g Caster Sugar
2/3 tsp Vanilla Extract
210 g All-Purpose Flour
2 ½ tsp Baking Powder (double act.)
1/2 tsp Salt

🌱🍋 Lemon Buttercream
200 g Caster Sugar
40 g Water
75 g Egg Whites
1/2 tsp Cream of Tartar
345 g Unsalted Butter
1 tsp Vanilla Extract
1 Batch Lemon Curd Recipe (above)

INSTRUCTION
🌱🍋 Lemon Curd
We will use this Lemon Curd for the Buttercream; Be sure to use fresh Lemons, bottled juice won’t give the same bright flavour

  1. Zest the Lemons first (using only the yellow part, the white pith is bitter);
    Then juice and strain to remove seeds and pulp
  2. In a heatproof bowl, whisk together the Caster Sugar, Lemon Juice,Zest, and Egg Yolks (use room-temperature eggs, as they blend more smoothly and reduce the risk of curdling)
  3. Cook the mixture over a double boiler, making sure the bowl does not touch the water, the heat should come from the steam (keep the water at a gentle simmer, NOT a boil) Low and slow heat is the key to a good Lemon Curd, so don’t rush the thickening process
  4. Whisk occasionally and cook for about 8-10 Minutes until the mixture thickens enough to coat the back of a spoon and leaves a clean line when you run your finger through it (about 170°F / 77°C if using a thermometer)
  5. Once it’s done, take it off from the heat (for an extra-smooth curd, you can strain the mixture)
  6. Add the Unsalted Butter and whisk for about 3 minutes, until it is fully incorporated and the curd becomes silky and glossy
  7. Transfer the Lemon Curd to a shallow heatproof dish; Press plastic wrap directly onto the surface to prevent a skin from forming, then refrigerate until well chilled before using

🌱🍋 Spinach Cake
For the cake, make sure all utensils clean and grease free; Any residue of fat will prevent eggs from beating up properly. Wipe the bowl and beater with Lemon Juice or Vinegar; The acid help remove grease.

  1. Preheat the oven to 160°C fan/ 180°C/ Gas Mark 4
  2. Prepare the pan in advanced (use a metal cake pan for best rise and even baking)
    Grease the bottom and the sides of the pan with Butter; Line the bottom with Parchment Paper
  3. Rinse the Baby Spinach, then blanch it in boiling water for 20 seconds. Immediately transfer to ice water, then squeeze dry
  4. Place the blanched Spinach in a blender, add 70 g cold Water, and blend until completely smooth; set aside
    *This purée must be very fine for good texture and colour
  5. Then, in a medium saucepan heat Unsalted Butter and Milk together over MEDIUM-LOW heat until Butter is fully melted; Let it cool to room temperature
    Set aside
  6. In a large heatproof bowl, combine the Eggs and Caster Sugar; mix well
    Place the bowl over a double boiler and heat gently, stirring, just until the Sugar dissolved (to test, rub small amount between your fingers; if it feels smooth with no grains, it’s done)
    Once the Sugar has completely dissolved, remove the bowl from the heat and beat on HIGH speed for about 10 minutes, until the mixture is pale, thick, and fluffy
    Gently fold in the Spinach Purée and Vanilla Extract, taking care not to deflate the mixture
  7. In another bowl, combine all the dry ingredients, then sift them into the Egg batter (number 6) in two additions; folding gently until just incorporated
  8. Then, in a separate bowl, mix the heated Milk and Butter until fully combined
    Add one-third of the Egg-Flour batter (number 7) to the Milk-Butter mixture and whisk until smooth
    * Using this pre-mix method prevents the Butter and Milk from sinking to the bottom of the bowl, which could cause the cake to not rise properly
    Pour this mixture back into the remaining Egg-Flour batter and gently fold until well blended
    Then use a spatula scrape down the sides and bottom of the bowl, folding carefully to ensure everything is evenly mixed
  9. Divide the batter evenly between two prepared pans
  10. Bake in the preheated oven for 32–35 minutes, or until a skewer inserted into the center comes out clean (begin checking at 32 minutes)
  11. Once baked, let the cakes cool in the pans for 5 minutes, then run a spatula around the edges to loosen them
    Invert onto wire racks and allow to cool completely before decorating


🌱🍋 Lemon Buttercream

  1. Place the Egg Whites and Cream of Tartar in the bowl of a stand mixer, set aside
  2. In a small saucepan, combine the Sugar and Water
    Cook over MEDIUM heat; Stir gently until the Sugar has dissolved, then bring to a boil
    Once boiling, cook until it reaches the soft-ball stage (about 240°F / 115–118°C;
    Remove the syrup from the heat
    * If you don’t have a thermometer, use the cold water test; When the syrup is boiling, drop a small amount of syrup into cold water; If it forms a soft, pliable ball that flattens when pressed, it’s done.
  3. Immediately start whisking the Egg Whites on MEDIUM speed, then slowly pour the hot Sugar Syrup down the side of the bowl in a steady stream
    Then increase the speed to high and beat until the Meringue is thick, glossy, and cool to the touch, about 10 minutes
  4. Once the Meringue is fully cooled, add the Butter in 3 batches, beating well after each addition until the Buttercream becomes smooth and thick
  5. Finally, add the Lemon Curd and Vanilla Extract, and mix until fully combined and silky

🌱🍋 Assemble & Decorate

Once the cake is cooled, you can start decorate the cake

  1. For a neat finish (optional), trim the edges of the cake with a serrated knife to remove the browned crust; And do the same with the top as well
  2. Slice each sponge into two even layers
  3. Sandwich the layers together with about 5 mm of Buttercream (make sure everything is even and straight)
  4. Fill in any gas between the cake layers with Buttercream
  5. Then apply a crumb coat (it’s basically just a thin layer of Buttercream that we are going to apply to the top and the sides of the cake before we do the final coat)
    It doesn’t have to be perfect
  6. Chill for 15 minutes in the freezer or 30 minutes in the fridge to firm it up (this makes it easier to apply the final coat of Buttercream without the layers sifting)
  7. For the final coat, spread about 5 mm of Buttercream over the entire cake
  8. Smooth the top and sides with a spatula (don’t worry about achieving a perfectly smooth finish, as the sides will be coated with Coconut Flakes)
  9. Press the Coconut Flakes onto the sides by hand
  10. Using a star nozzle, pipe buttercream decorations on top; And finish with Spinach Leaves and Lemon Slices


NOTES

  1. To store Lemon Curd
    In the refrigerator (in a sealed container) for up to 7 days
  2. To store Lemon Buttercream
    In the refrigerator (in an airtight container) for up to 5 day (rewhip briefly before use); Can be frozen for up to 1 month
  3. To store Unfrosted Spinach Cake
    Wrap tightly in plastic wrap; Store at room temperature for 1 day or refrigerate for up to 3 days; Can be frozen for up to 2 months (thaw overnight in the fridge)
  4. Fully Assembled Cake
    Store the cake in an airtight container in the refrigerator; it will keep well for 3–4 days Bring to room temperature for 20–30 minutes before serving for the best texture and flavor
  5. To Freeze Fully Assembled Cake
    Chill the fully assembled cake in the refrigerator until the buttercream is firm. Wrap the cake tightly in plastic wrap, then a second layer of foil (or place in an airtight freezer-safe container).
    Freeze for up to 2 weeks for best quality (up to 1 month maximum).
    ** Thawing: Transfer the cake to the refrigerator and thaw overnight Before serving, let it sit at room temperature for 20–30 minutes. Do not unwrap until fully thawed to prevent condensation from damaging the buttercream

Wonderful Light & Fluffy Strawberry Cake 🍰🍓

The Sweet Dream of a Perfect Strawberry Cake 🍓

I think every girl carries a sweet little dream in her heart—a dream of a pretty, soft, and irresistibly yummy Strawberry Cake.
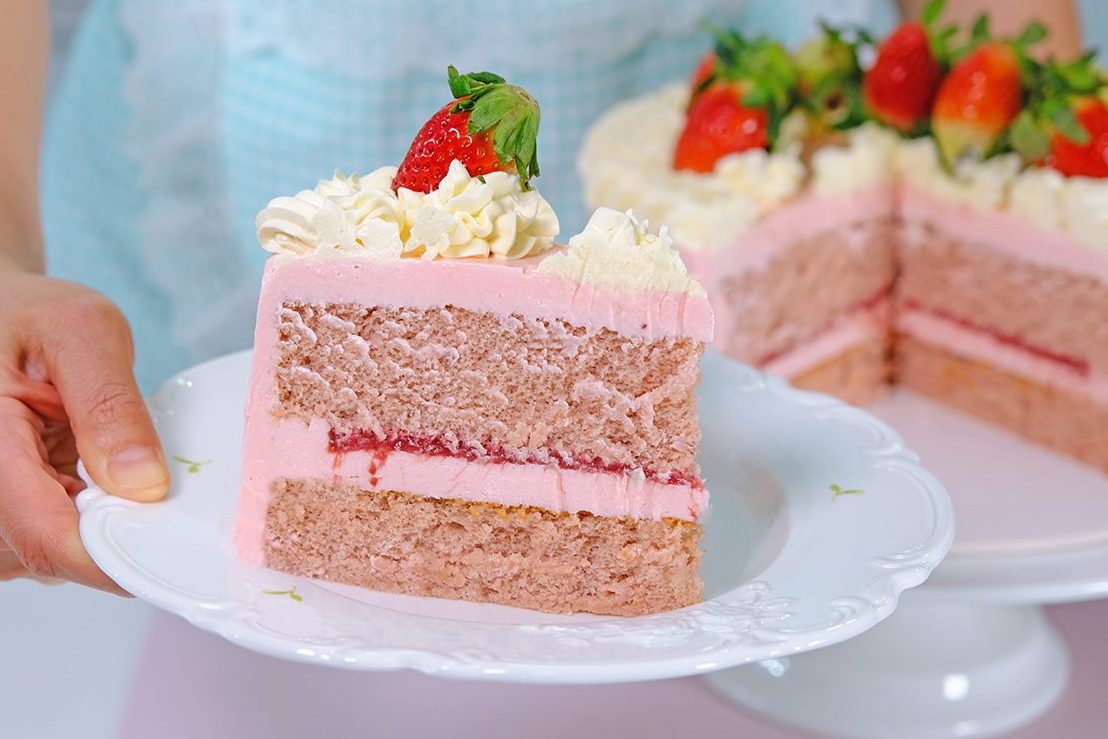
There’s something magical about it. The gentle pink color, the fresh aroma, and that slightly sour strawberry taste that instantly makes your mouth water

It reminds me of Strawberry Milk in a cute cartoon box, the kind we loved as children. One sip, and suddenly you’re back in childhood—carefree, happy, and smiling without a reason.
That feeling is exactly what I want a strawberry cake to bring 🥰

I’ve been thinking for a long time about how to make the perfect Strawberry Cake. Not just any cake—but one that truly captures the essence of strawberries.
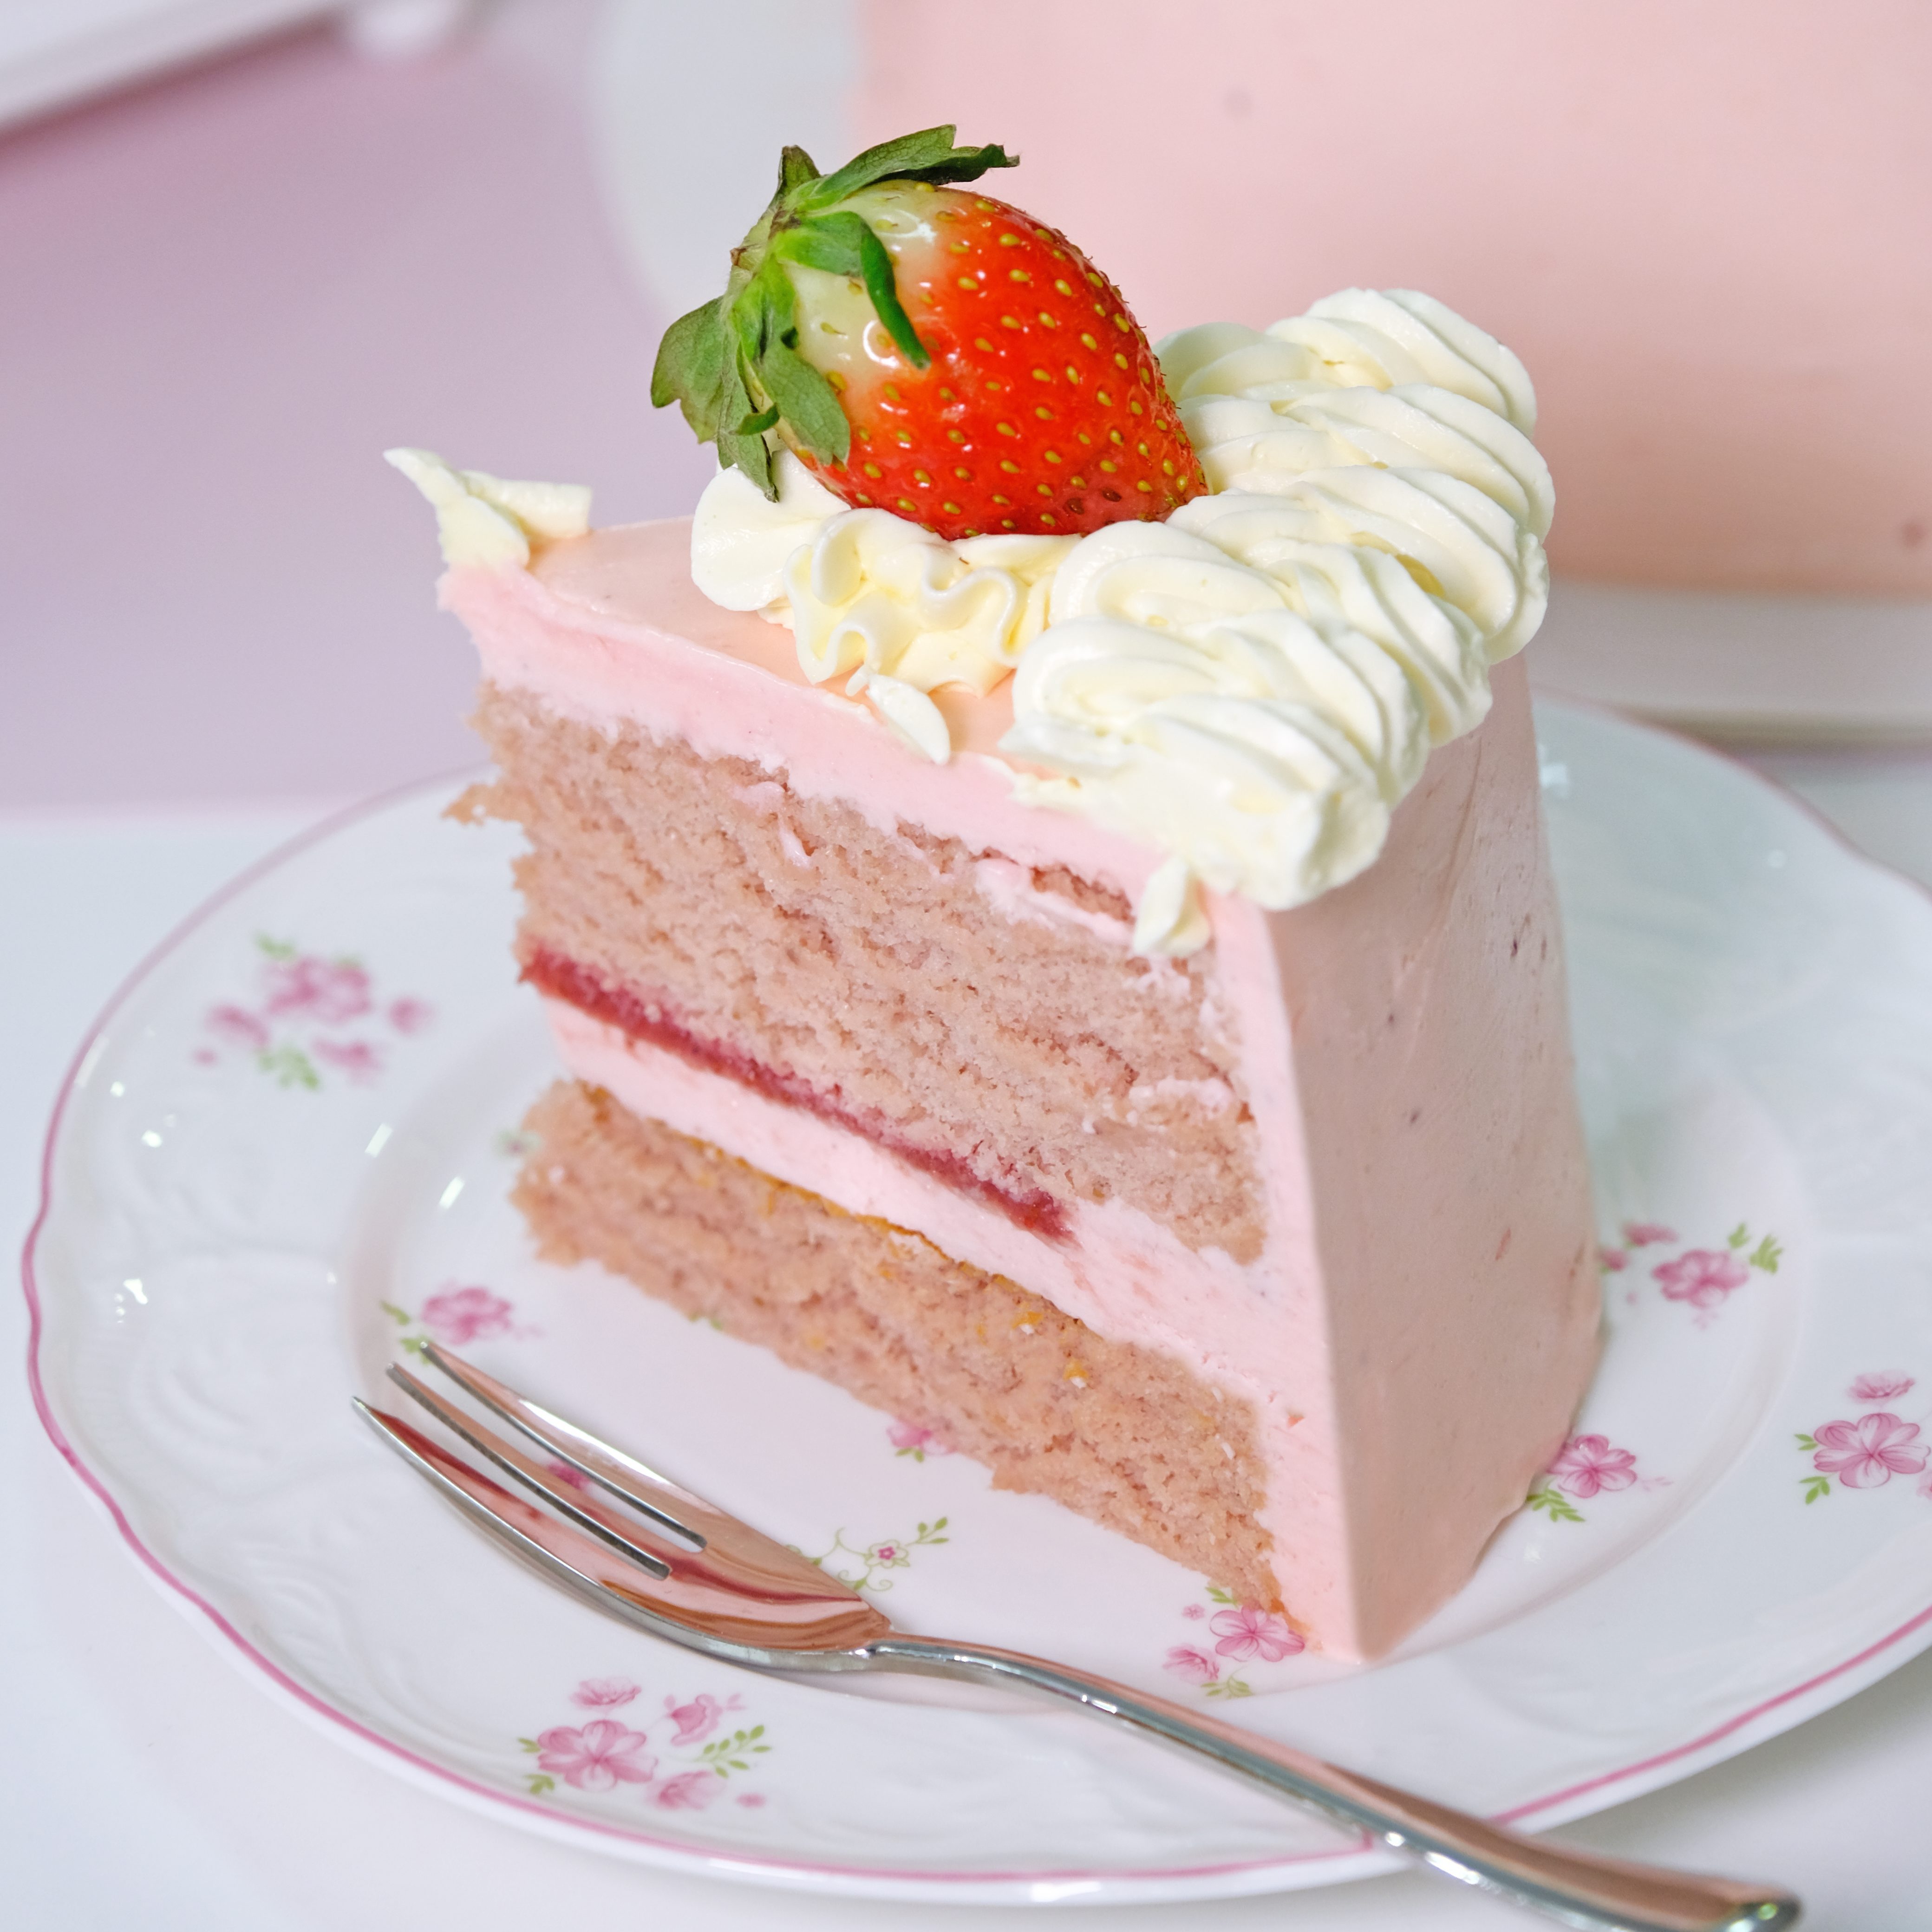
This cake must be made with real strawberry purée, not artificial flavoring. The taste should feel natural and fresh, like biting into a ripe strawberry on a sunny day 🤩

The texture is just as important: light, fluffy, and airy—not heavy, not dense, and definitely not overly sweet. Every bite should melt softly in your mouth, followed by a gentle burst of strawberry flavor.
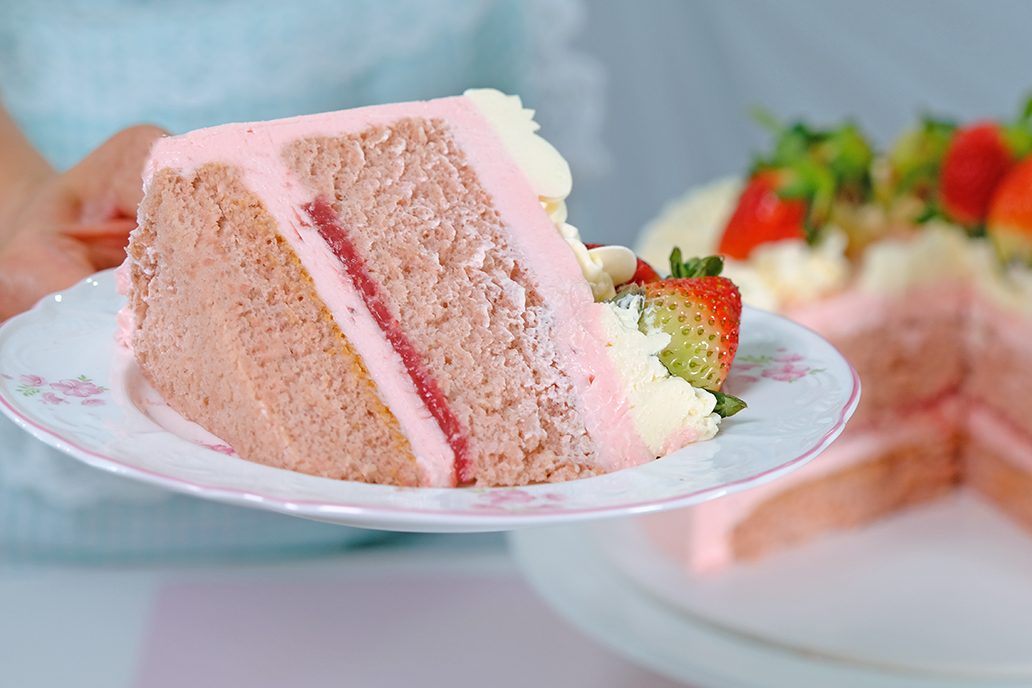
The Buttercream Matters 🤔

And then comes the buttercream—the soul of the cake. It must also carry a strawberry flavor, but in a soft and delicate way.
Light, smooth, and balanced. Sweet, but not too sweet.

The kind of buttercream that complements the cake instead of overpowering it. When cake and cream come together, they should feel like a perfect harmony.
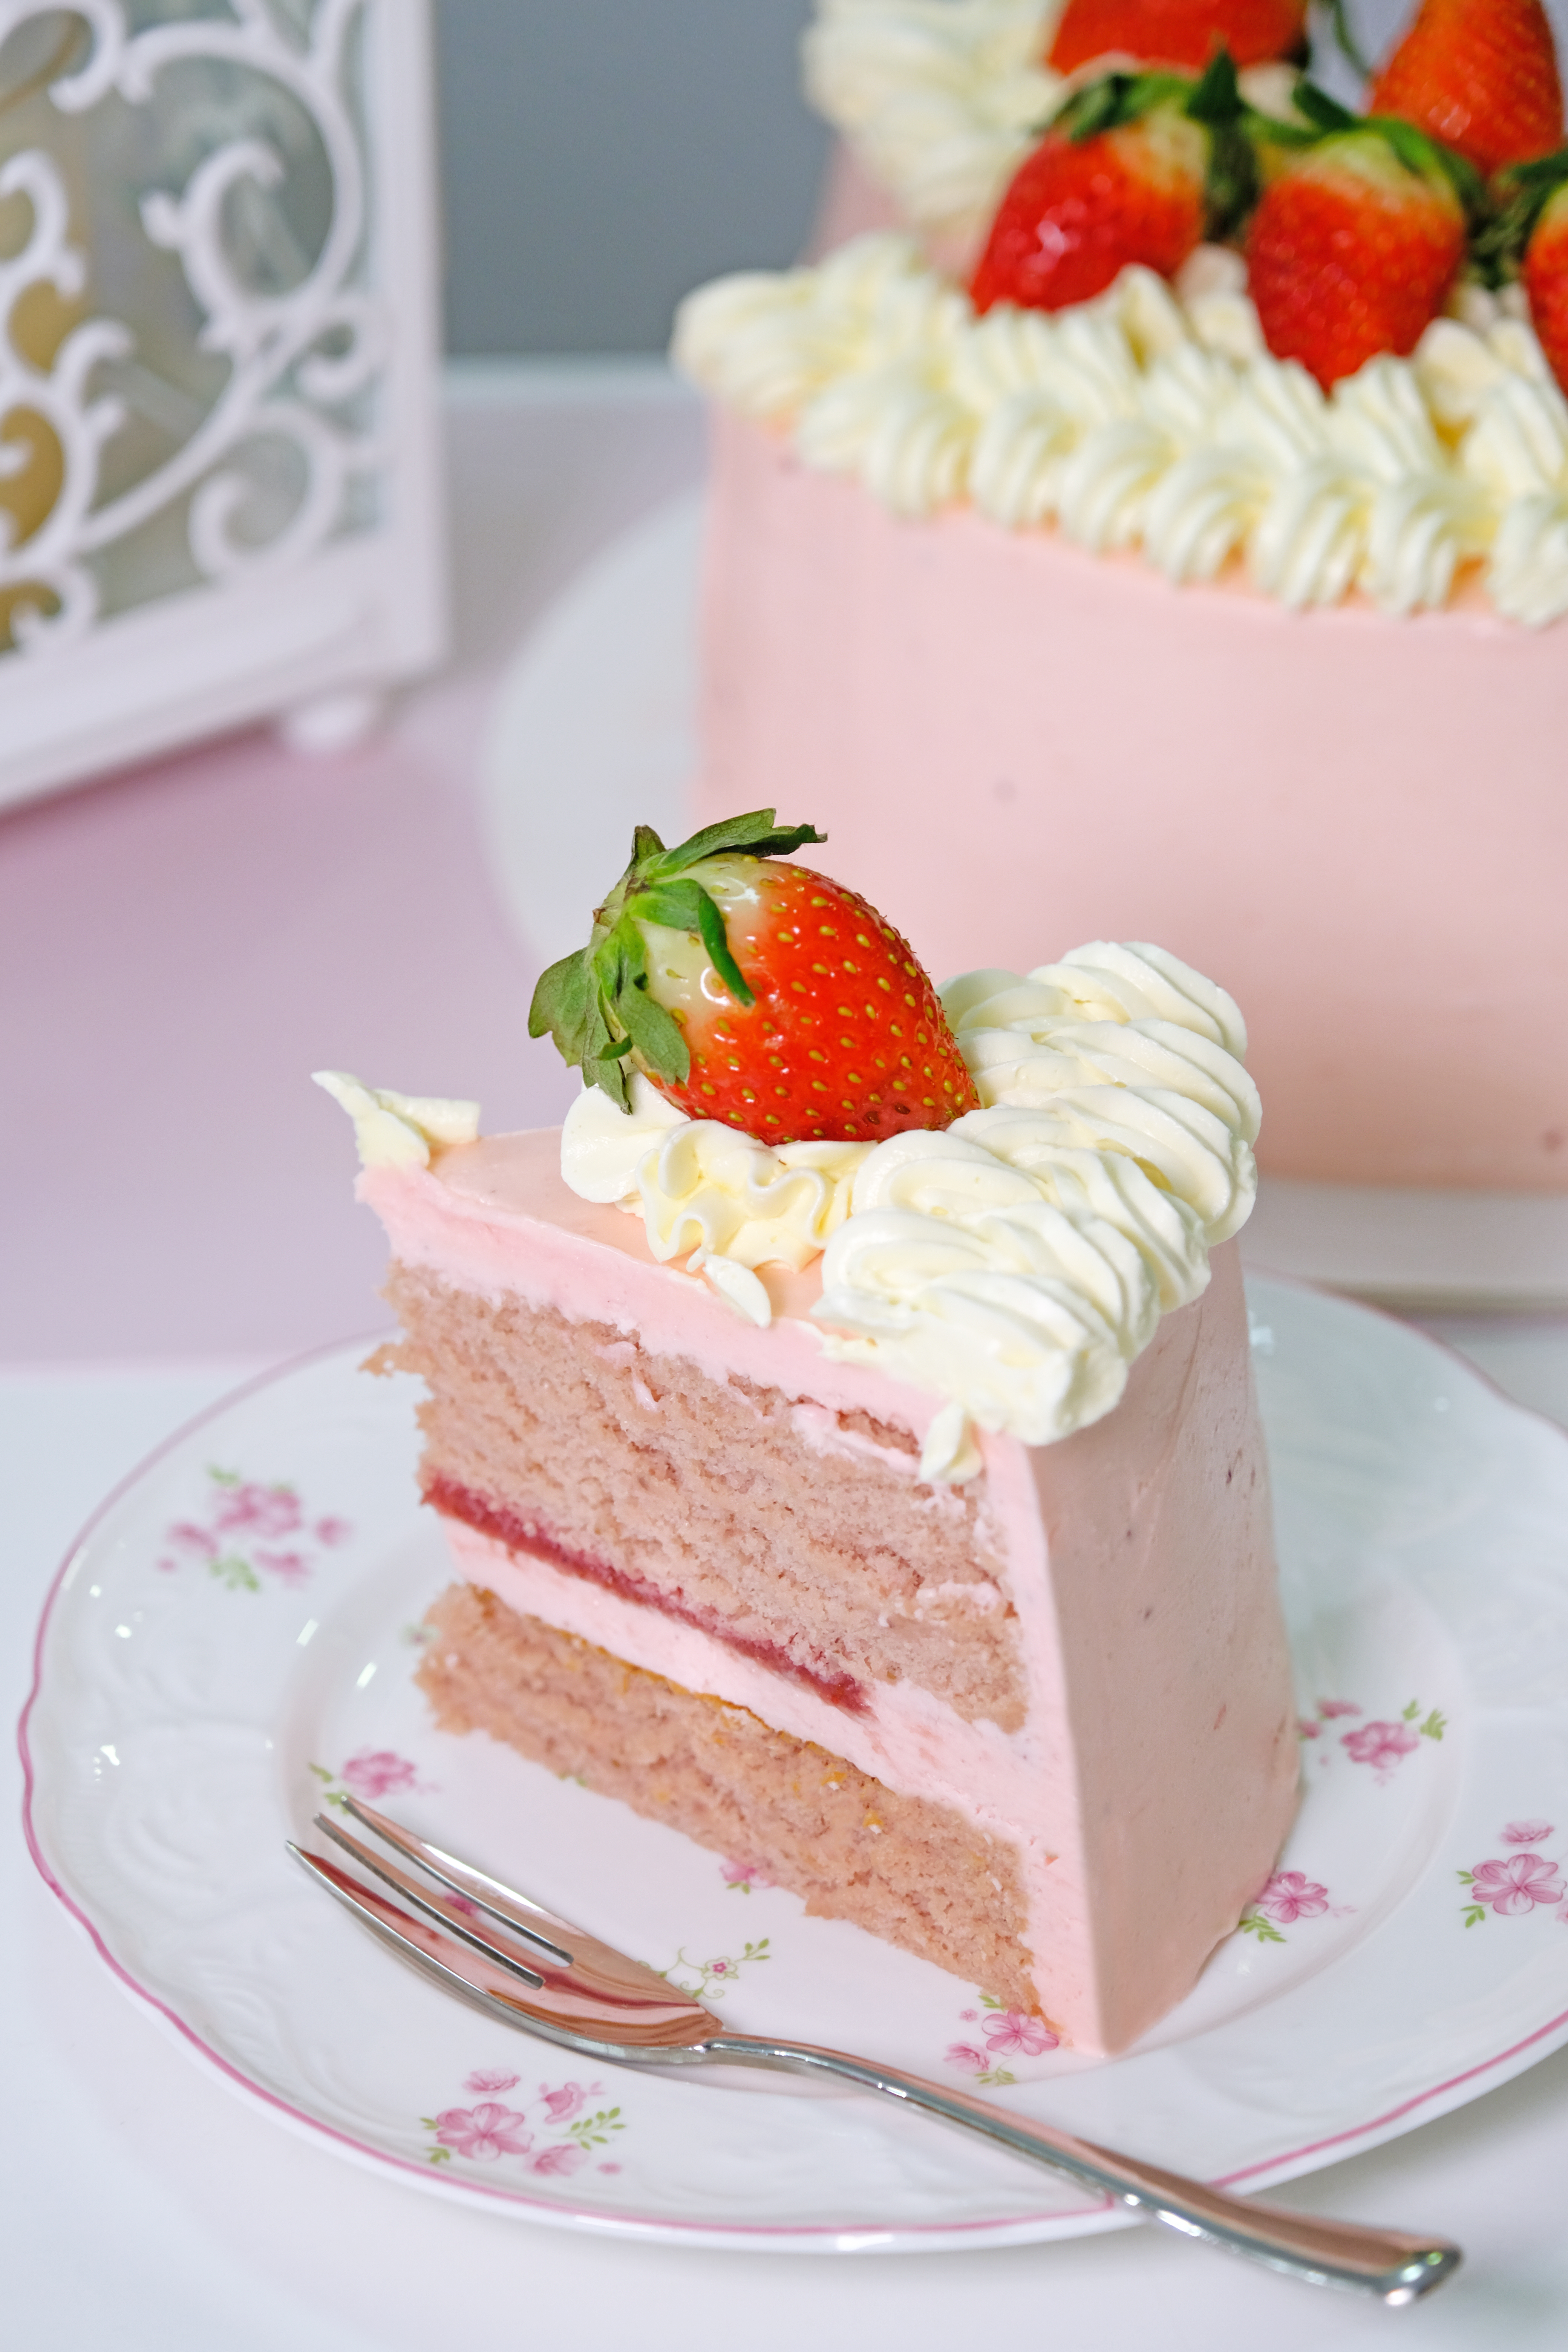
Of course, the look of the cake matters too 😂

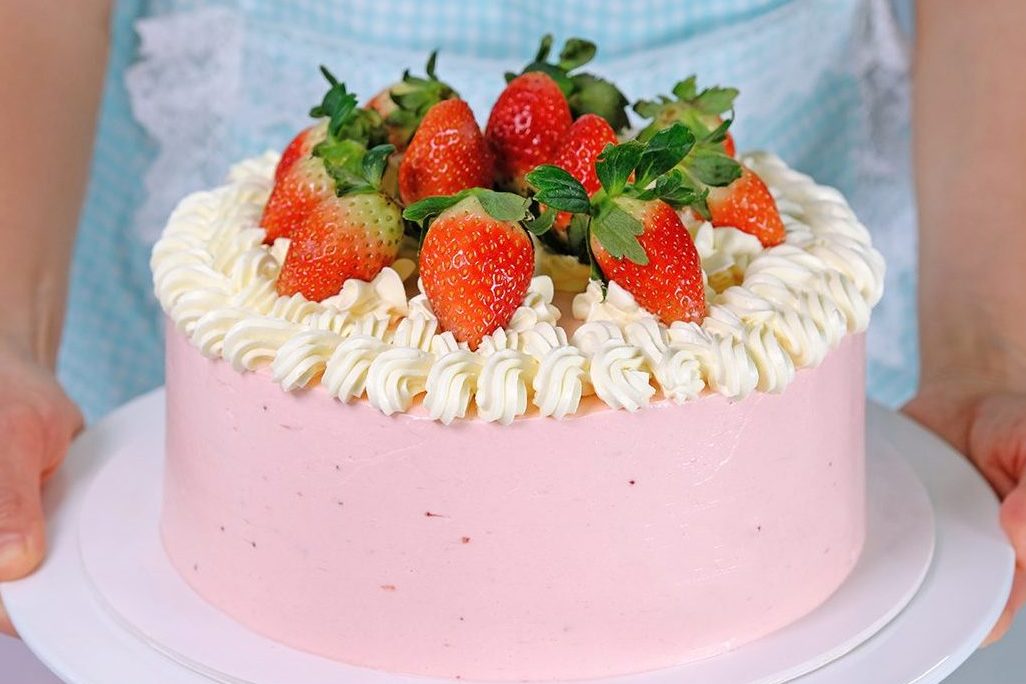
The color of the cake must be baby pink or soft pink—nothing loud, nothing artificial.
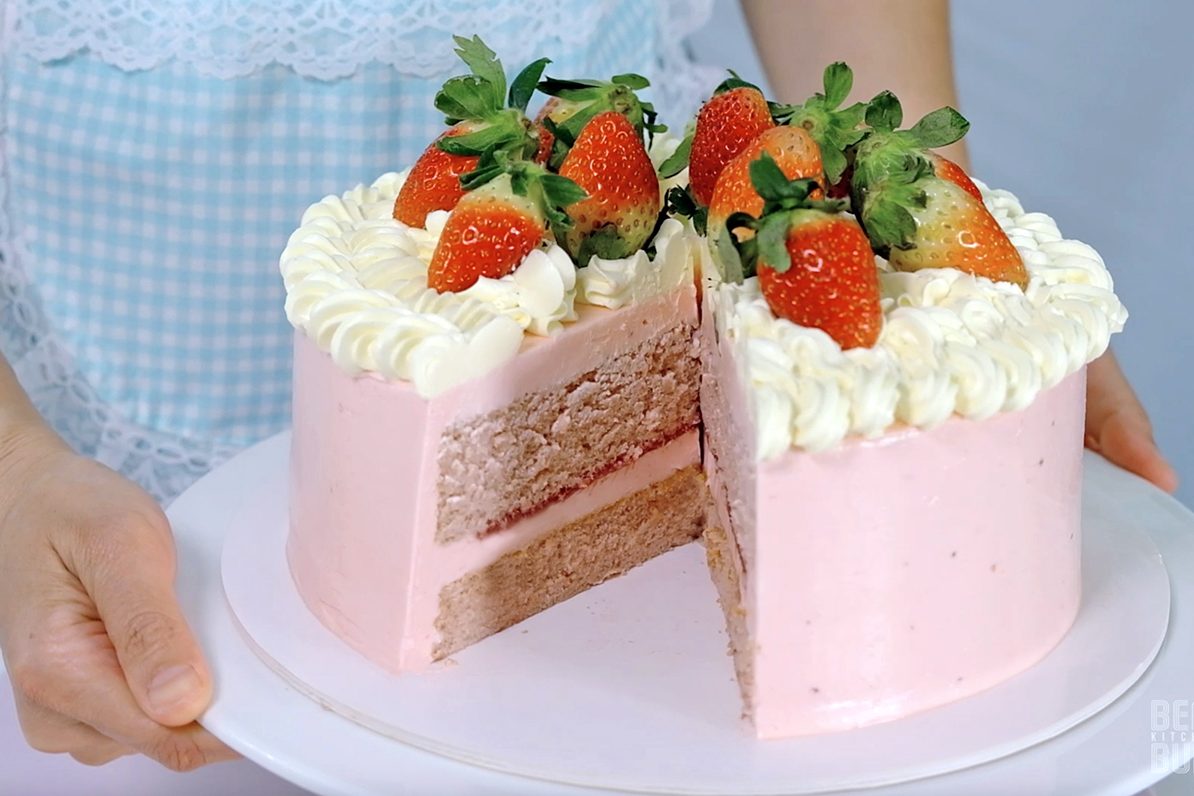
🥲

Just a gentle, pastel shade that instantly makes you feel happy and calm. A cake that looks as soft as it tastes. A cake that feels like a hug.

This strawberry cake isn’t just dessert. It’s a memory. It’s nostalgia. It’s childhood joy wrapped in layers of fluffy cake and strawberry cream.
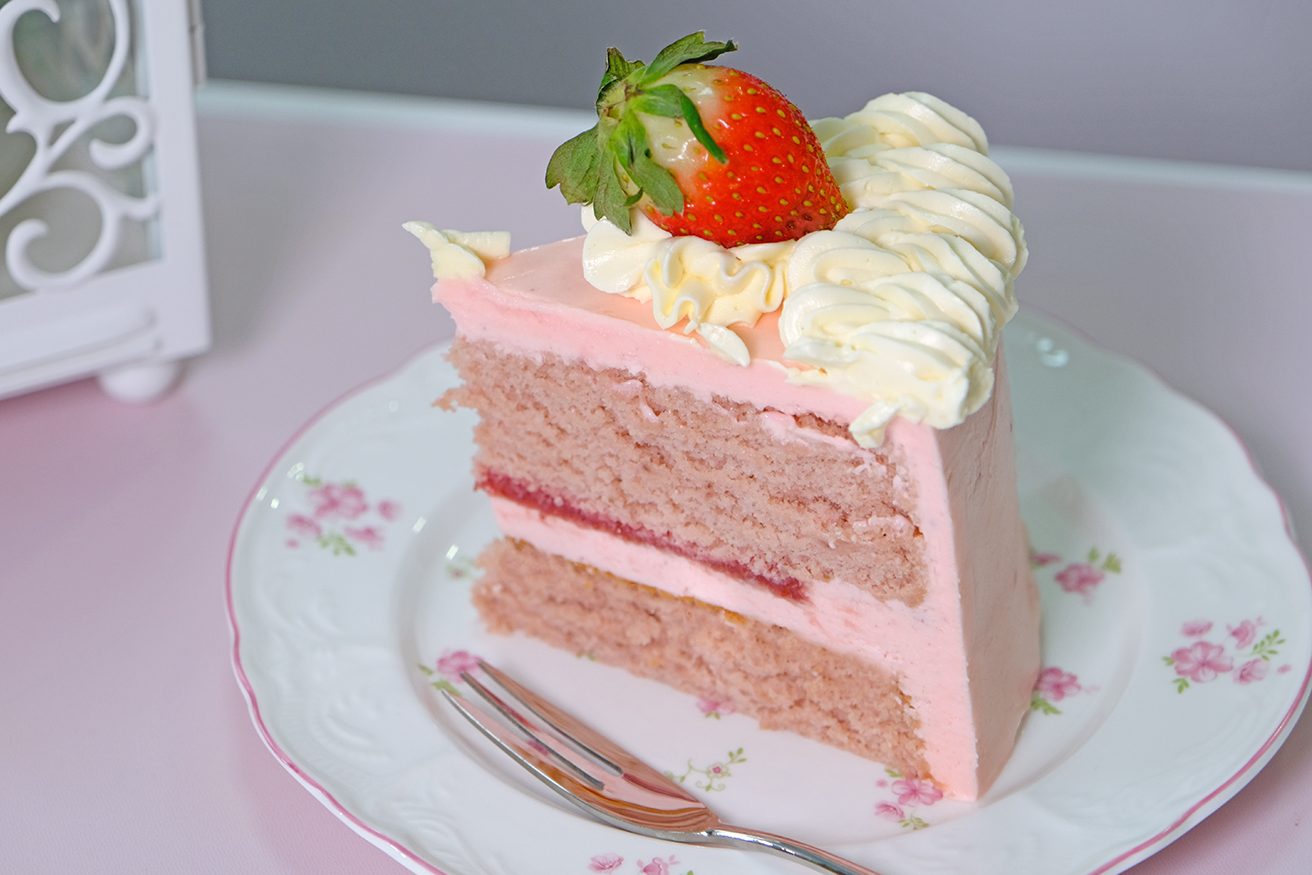
It’s proof that sometimes, the simplest dreams—the pink ones, the sweet ones—are the most beautiful to chase.
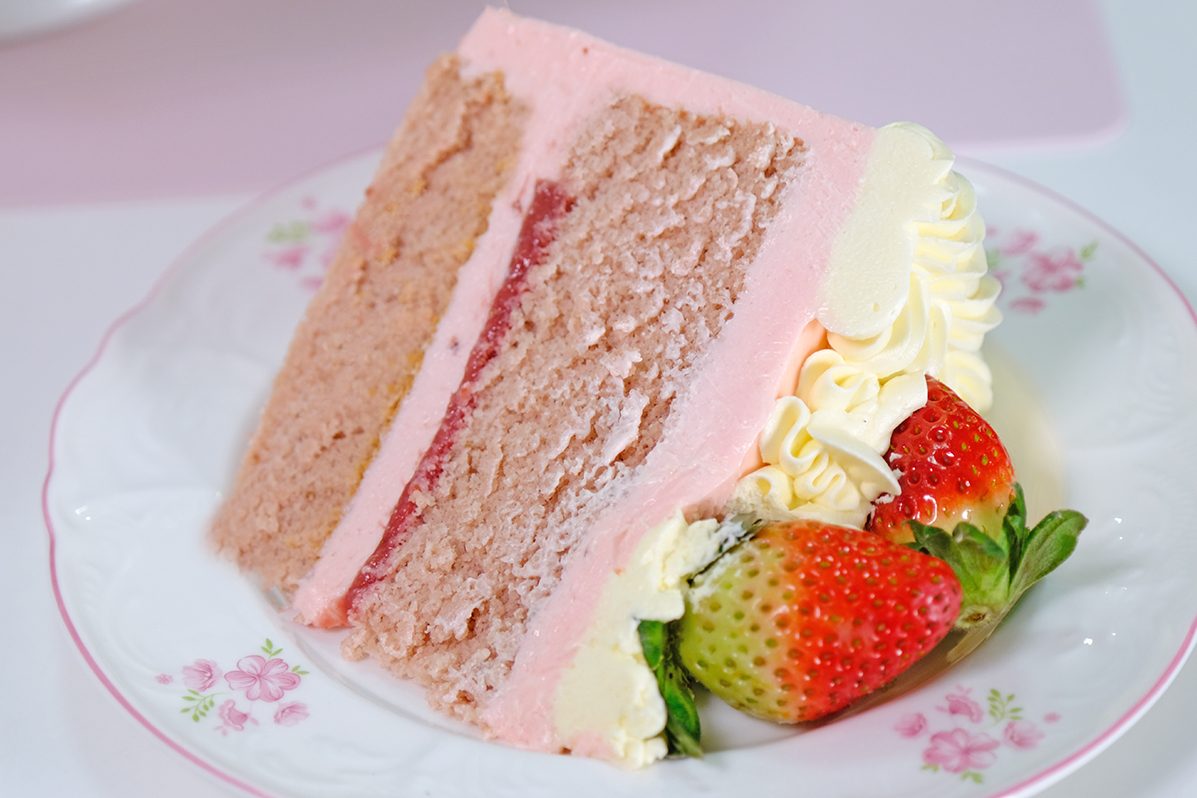
A Soft, moist cake made with real fresh strawberry puree, giving it a beautifully tender texture and a rich, fruity strawberry flavor in every bite.
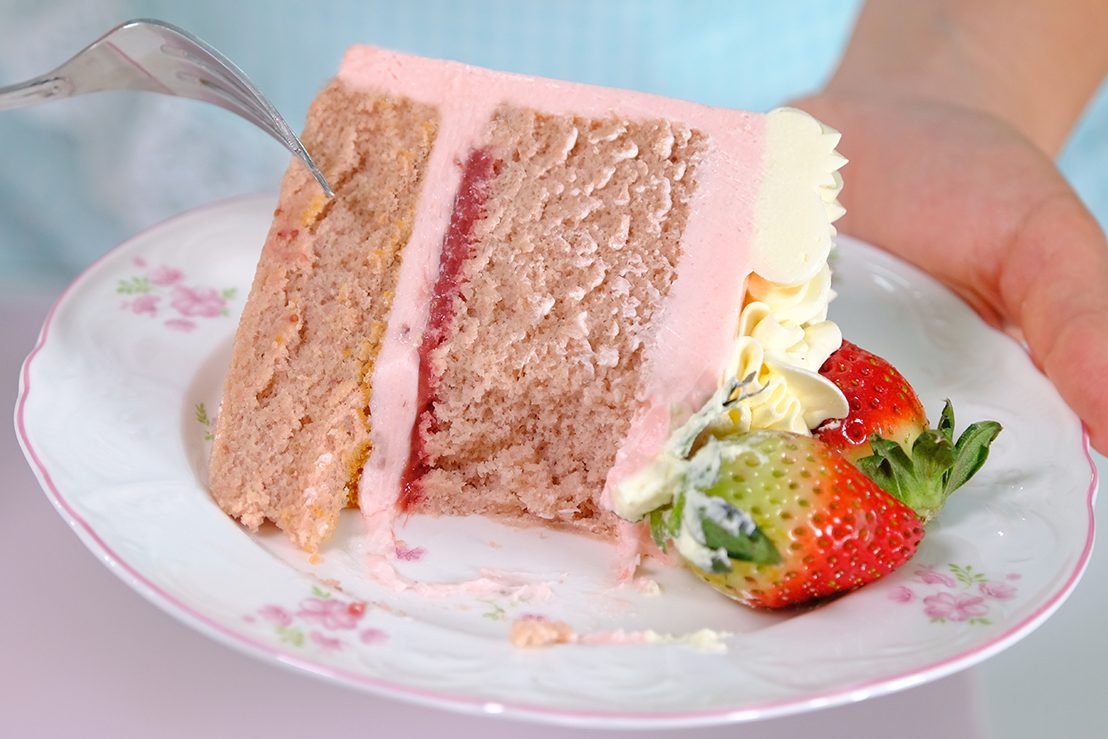
Whether it’s for a special day, for your loved ones, or simply as a sweet treat;
This strawberry cake is sure to please and bring joy to those you share it with
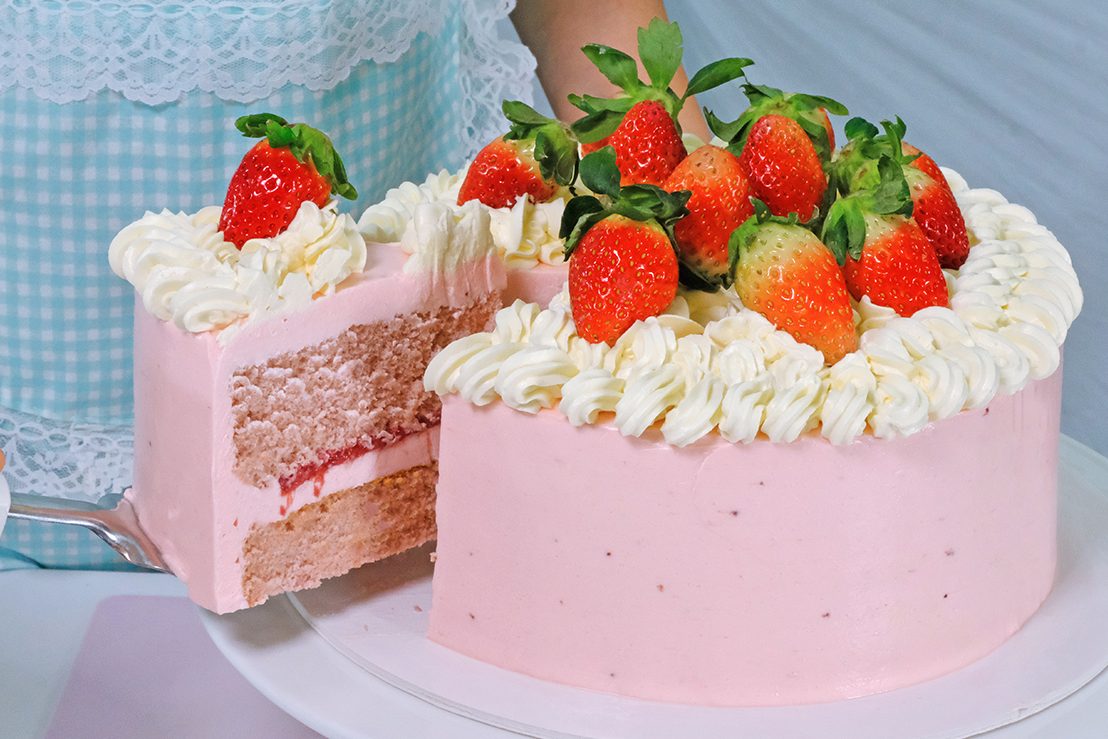
This cake is full of fresh strawberry flavour, with a soft crumb and delicious strawberry puree
It’s wonderful light and fluffy 😚

I hope you enjoy making and tasting it !
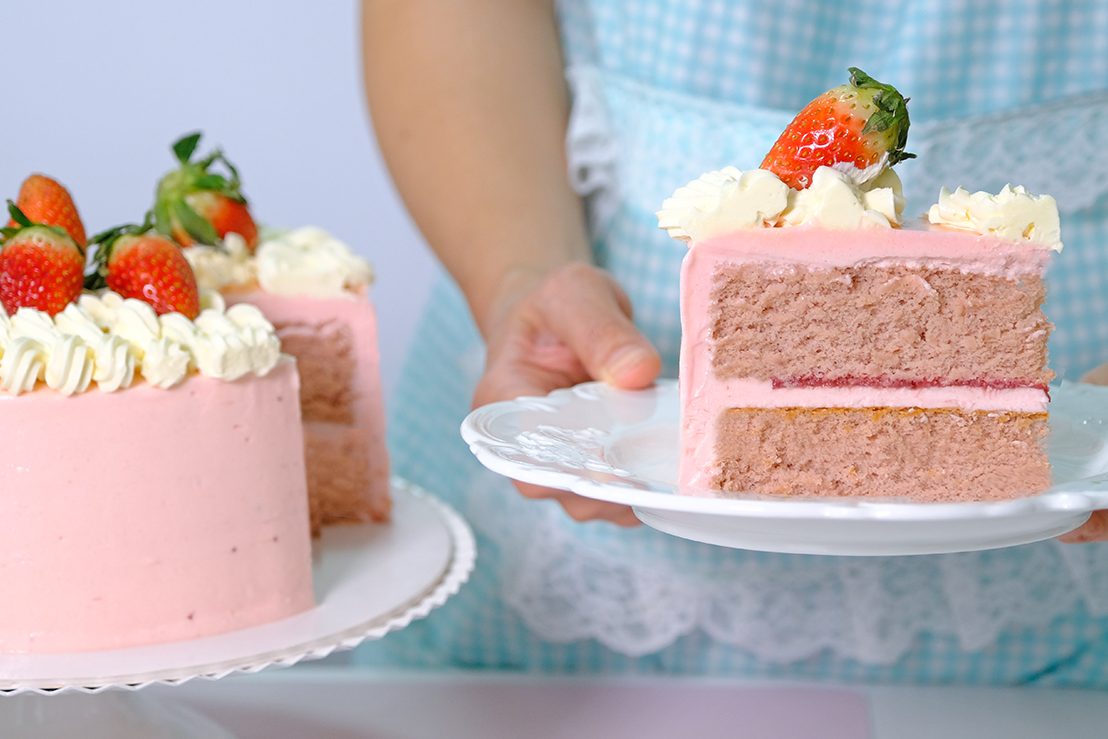
Love you All 🍰🍓

WATCH HOW TO MAKE Wonderful LigHt & Fluffy Strawberry Cake

RECIPE

LIGHT & FLUFFY STRAWBERRY CAKE
Yield: One 8-Inch Round Cake (2 layers)

INGREDIENTS
🍓Strawberry Puree
450 g Frozen or Fresh Strawberries
1 tsp Corn Flour
2 tsp Water

🍓Strawberry Cake
5 Egg Yolks (95-100 g) ~ room temp.
1 Egg (50-55 g) ~ room temp.
50 g Vegetable Oil
40 g Plain Greek Yogurt (room temp.)
80 g Strawberry Puree (room temp.)
90 g Cake Flour (sifted)
A Drop of Pink Liquid Gel Food Colour
5 Egg Whites (165-175 g)~ room temp.
1/4 tsp Salt
1 tbs Lemon Juice
90 g Caster Sugar

🍓Buttercream
180 g Egg whites
300 g Caster Sugar
240 g Icing Sugar
170 g Vegetable Shortening (High Ratio)
454 g Unsalted Butter (room temp.)
2 tbs Strawberry Puree
2 tsp Rose Water
1/4 tsp Salt
A Few Drops of Pink Liquid Gel Food Colour


INSTRUCTIONS
🍓Strawberry Puree
We will use this strawberry puree for the Cake, Buttercream and Filling

  1. Prepare the corn slurry ahead of time; Mix Corn Flour and Water (we’ll use it to thicken the strawberry purée)
  2. In a medium saucepan, heat the Strawberries over medium-high heat
    Once they start to soften and release juice, lower the heat and mash them with a potato masher (no need for a blender or food processor)
  3. Continue cooking over low heat, uncovered, to let the excess water evaporate; this can take a while, so be patient (with frozen strawberries, mine took about 30 minutes to reduce)
  4. Once the purée is thick and most of the water has evaporated, stir in the corn slurry until well combined
  5. Remove from the heat
    Pour the purée into a shallow dish, cover, and chill in the fridge until completely cool
  6. Once cool, set aside 80 grams for the cake batter, 2 tablespoons for the Strawberry Buttercream and the rest for the cake filling


🍓Strawberry Cake

  1. Preheat the oven to 155°C/ 135°C fan, place the rack at the bottom
  2. Make sure your Eggs, Strawberry Puree, and Yogurt are at room temperature (this makes the batter smoother and easier to mix)
  3. Prepare the pans in advance
    Line 8-Inch Round Pan (4-Inch Tall) with parchment paper, but DON’T grease it
    ** You’ll also need a larger pan to create the bain-marie, which will hold the water and support the cake pan while baking
  4. Make sure your bowl and utensils grease free, any residue of fat will prevent egg whites from beating properly;
    Wipe the bowl and utensils with Vinegar or Lemon Juice; the acid in Vinegar or Lemon Juice helps remove grease
  5. In a large mixing bowl, combine the Egg Yolks with one Whole Egg
  6. Stir in the Oil; whisk vigorously until wel combined
  7. Add in the Yogurt along with 80 grams of Strawberry Puree and mix until the mixture is fully combined
  8. Fold in the sifted Flour and mix gently
    DON’T overmix, gently folding keeps the cake light and fluffy instead of dense
  9. Add a touch of pink food colouring (it helps enhance the natural pink colour from the Strawberry Puree); Set this mixture aside
  10. Then in another large bowl, combine the Egg Whites, Salt and Lemon Juice
    Beat over high speed for about 30 seconds until foamy
  11. Add Sugar to the Egg Whites mixture in 3 batches every 1 minute
  12. Once all the Sugar is added, continue beating on HIGH speed until medium peaks for about 3 minutes
    ** Medium peaks are glossy and hold their shape, but the tip of the peaks curl slightly when the beaters are lifted
  13. Then, fold the whipped Egg Whites into the Egg Yolks mixture in 3 batches
    Start by adding 1/3 of the beaten Egg Whites to the Egg Yolk mixture; use a balloon whisk to gently stir (this first addition helps loosen the batter)
    ** Scrape the bottom and sides of the bowl to ensure everything is evenly combined
  14. Add another third of the Egg Whites and fold again (be gentle to avoid deflating the batter)
  15. Finally, pour this mixture into the bowl with the remaining Egg Whites
    Fold carefully until the mixture is smooth and well combined (make sure there are no bits of Egg Whites left)
  16. Then use a spatula to scrape the sides and bottom of the bowl to ensure the mixture is evenly mixed
  17. Slowly pour the batter into the pan from about 15 cm above to help burst an excess air bubbles
  18. Gently run a small metal skewer or spatula through the batter to eliminate any trap air pockets (avoid tapping or shaking the pan as this can cause the bubbles to deflate prematurely, resulting in a denser cake with less volume)
  19. Place your cake pan inside a larger pan and pour hot water around it, about 1 cm up the sides (this water bath helps the cake bake gently and evenly, keeping it soft and preventing cracks)
  20. Bake immediately in the preheated oven for 80 minutes or until a cake tester inserted in the center comes out clean
    ** Avoid opening the oven door during baking, as sudden temperature changes can cause the cake to collapse
  21. Once it’s done, carefully remove the cake pan from the oven and take it out of the water bath
  22. Tap the 8-Inch cake pan 3 times on the counter to release the trapped steam (this helps prevent the cake from shrinking too much)
  23. Then, remove the cake immediately from the pan; scrape the sides of the pan; turn it over, peel the parchment paper, flip again so the top facing up;
    And let it cool completely on a cooling rack

🍓Buttercream

  1. Make sure the Butter and Shortening are at room temperature before you start
    If Butter is too cold, it won’t mix evenly, and you’ll get lumps or grainy buttercream
  2. In a large metal bowl, mix the Egg Whites and Sugar
  3. Then place the bowl over a double boiler and whisk constantly until the mixture reaches about 115°F
    ** If you don’t have a thermometer, you can check by feeling; when the sugar has completely dissolved and is no longer gritty, it’s ready
  4. Remove the bowl from the double boiler
    Whip this mixture on HIGH speed until the mixture is thick, glossy, and white (the peaks should be as firm as possible)
  5. Then pour in the Icing Sugar
    Start mixing on low speed so it doesn’t fly all over (don’t forget to scrape the bowl to mix everything evenly)
  6. Once all the Icing Sugar has been incorporated, add the Butter and Shortening in 2 fast additions
    Then continue whip on HIGH speed for about 5 minutes until smooth and fluffy
  7. Once finished, set aside 250 grams for the decoration on top
  8. Then mix the remaining buttercream with 2 tablespoons of Strawberry Puree, Salt, and Rose Water
  9. Add a touch of pink food colouring to make it pop, mix well
    This silky, smooth Strawberry Buttercream is ready to use;
    It’s lightly sweet, stable, easy to pipe, and holds its shape beautifully

ASSEMBLE & DECORATE THE CAKE
Once the cake is cooled, we can start assemble the cake

  1. Divide the cake into 2 layers
  2. Give your buttercream a good stir with a spatula before filling the piping bag; it helps to eliminate small air pockets that could create bubbles when piping
    Scoop it into the piping bag slowly instead of dumping it in; pressing it down to remove air bubbles (this keeps your piping smooth and even)
  3. Place the first cake layer on your cake board or pedestal
  4. Pipe a layer of Strawberry Buttercream about 1 cm thick on top and spread it evenly
  5. Then pipe a 1-cm-thick ring of Strawberry Buttercream around the edges
  6. Spread the remaining Strawberry Puree in the center
  7. Place the top cake layer on carefully, making sure it’s even and straight
  8. Fill any gaps between the cake layers with Strawberry Buttercream
  9. Apply a crumb coat
    It’s basically just a thin layer of Strawberry Buttercream that you are going to appy to the top and the sides of the cake before you do the final coat (it doesn’t have to be perfect)
  10. Chill the cake for 15 minutes in the freezer or 30 minutes in the fridge to firm it up (this makes it easier to apply the final coat without the layers shifting)
  11. And for the final coat;
    Pipe 1 cm thick of Strawberry Buttercream around the sides and the top of the cake
    Use a spatula to roughly smooth the sides and the top of the cake;
    Then use a scraper to smooth the sides completely
    Clean up the top edges by gently swiping the buttercream inward
  12. Decorate the top however you like with 250 grams basic white buttercream ; finish the cake with lots of fresh strawberries
  13. Once the cake is done, refrigerate for about 1 hour before serving

NOTES
Store the cake in the fridge if not serving immediately, keep away from heat or direct sunlight.
The cake best if consumed within 3 days of baking, but will last for up to 5 days if store in the fridge.

Foolproof Fluffy Pandan Chiffon Cake

Pandan Chiffon Cake is a light, fluffy, green-coloured sponge cake flavoured with the juice or extract of Pandanus amaryllifolius leaves. This fragrant and airy dessert is especially popular in several Southeast Asian countries, including Malaysia, Indonesia, and Singapore.
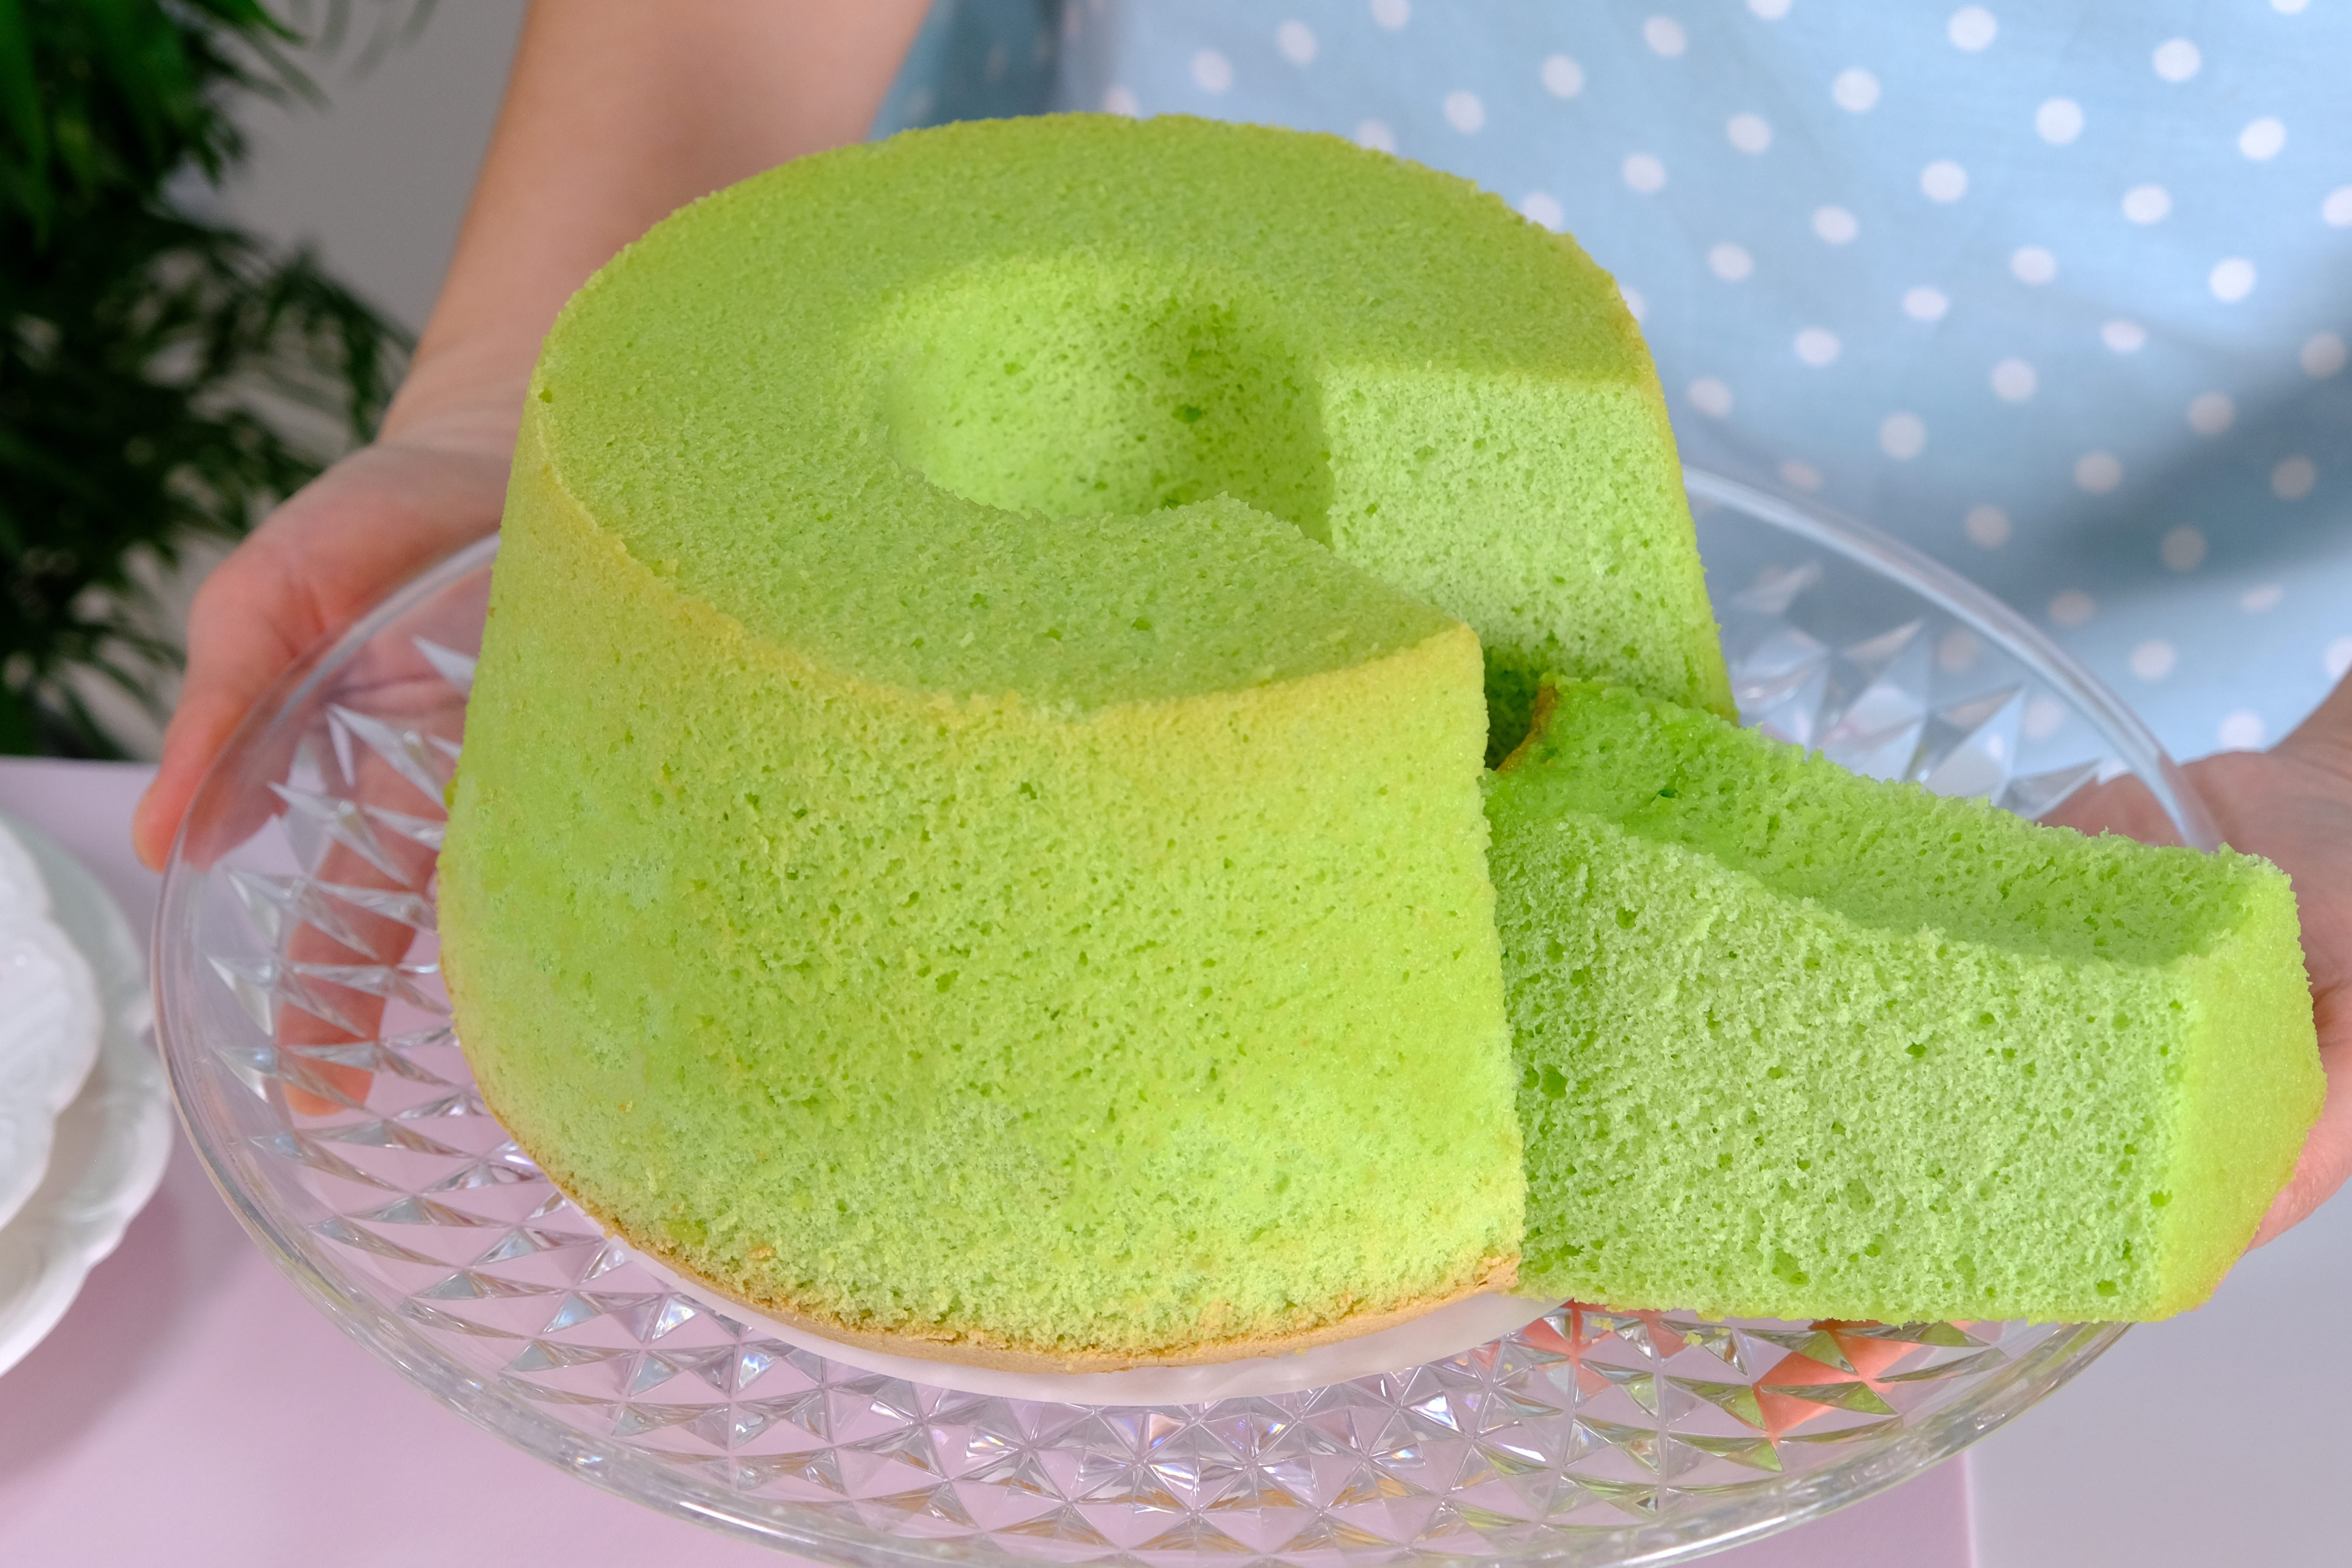
Chiffon Cakes are traditionally baked in tube pans because their delicate structure requires support from both the center tube and the sides of the pan.
This allows the cake to rise properly during baking and prevents it from collapsing as it cools.
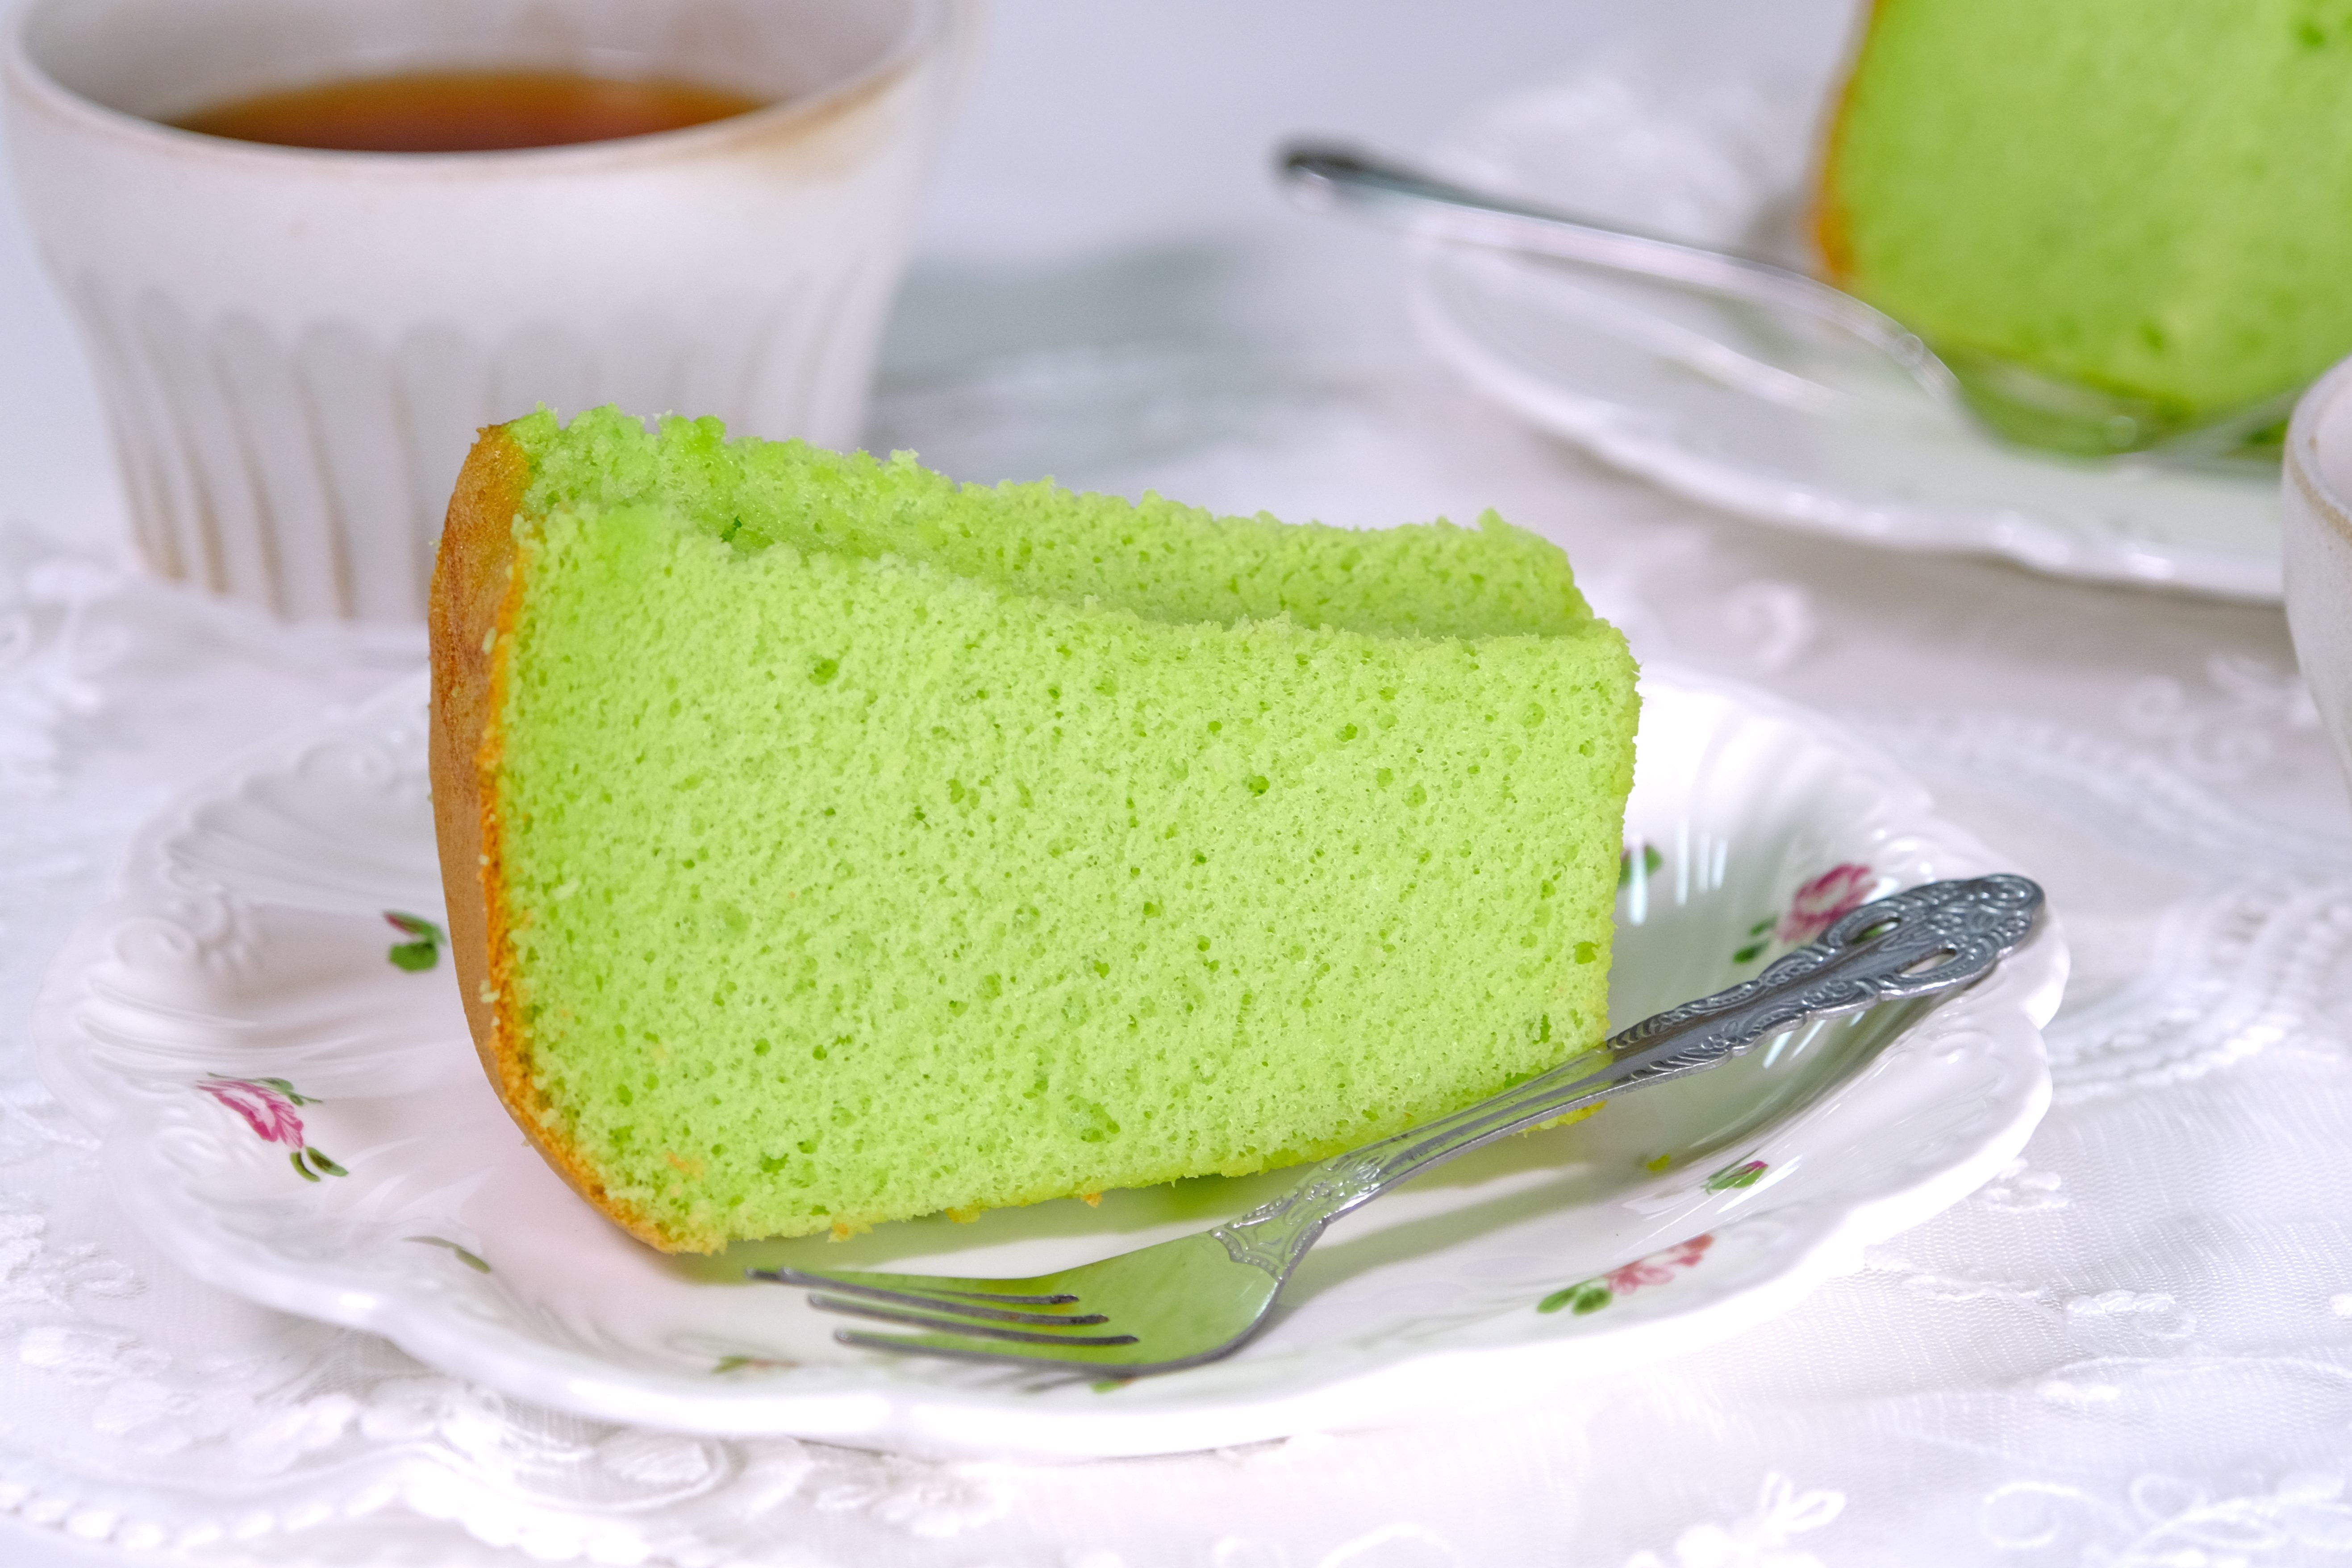
🤩 beautiful bright colour 😉

For this reason, Chiffon tube pans should NOT be greased, and non-stick pans should be avoided, as the batter needs to cling to the sides and center tube to rise properly.
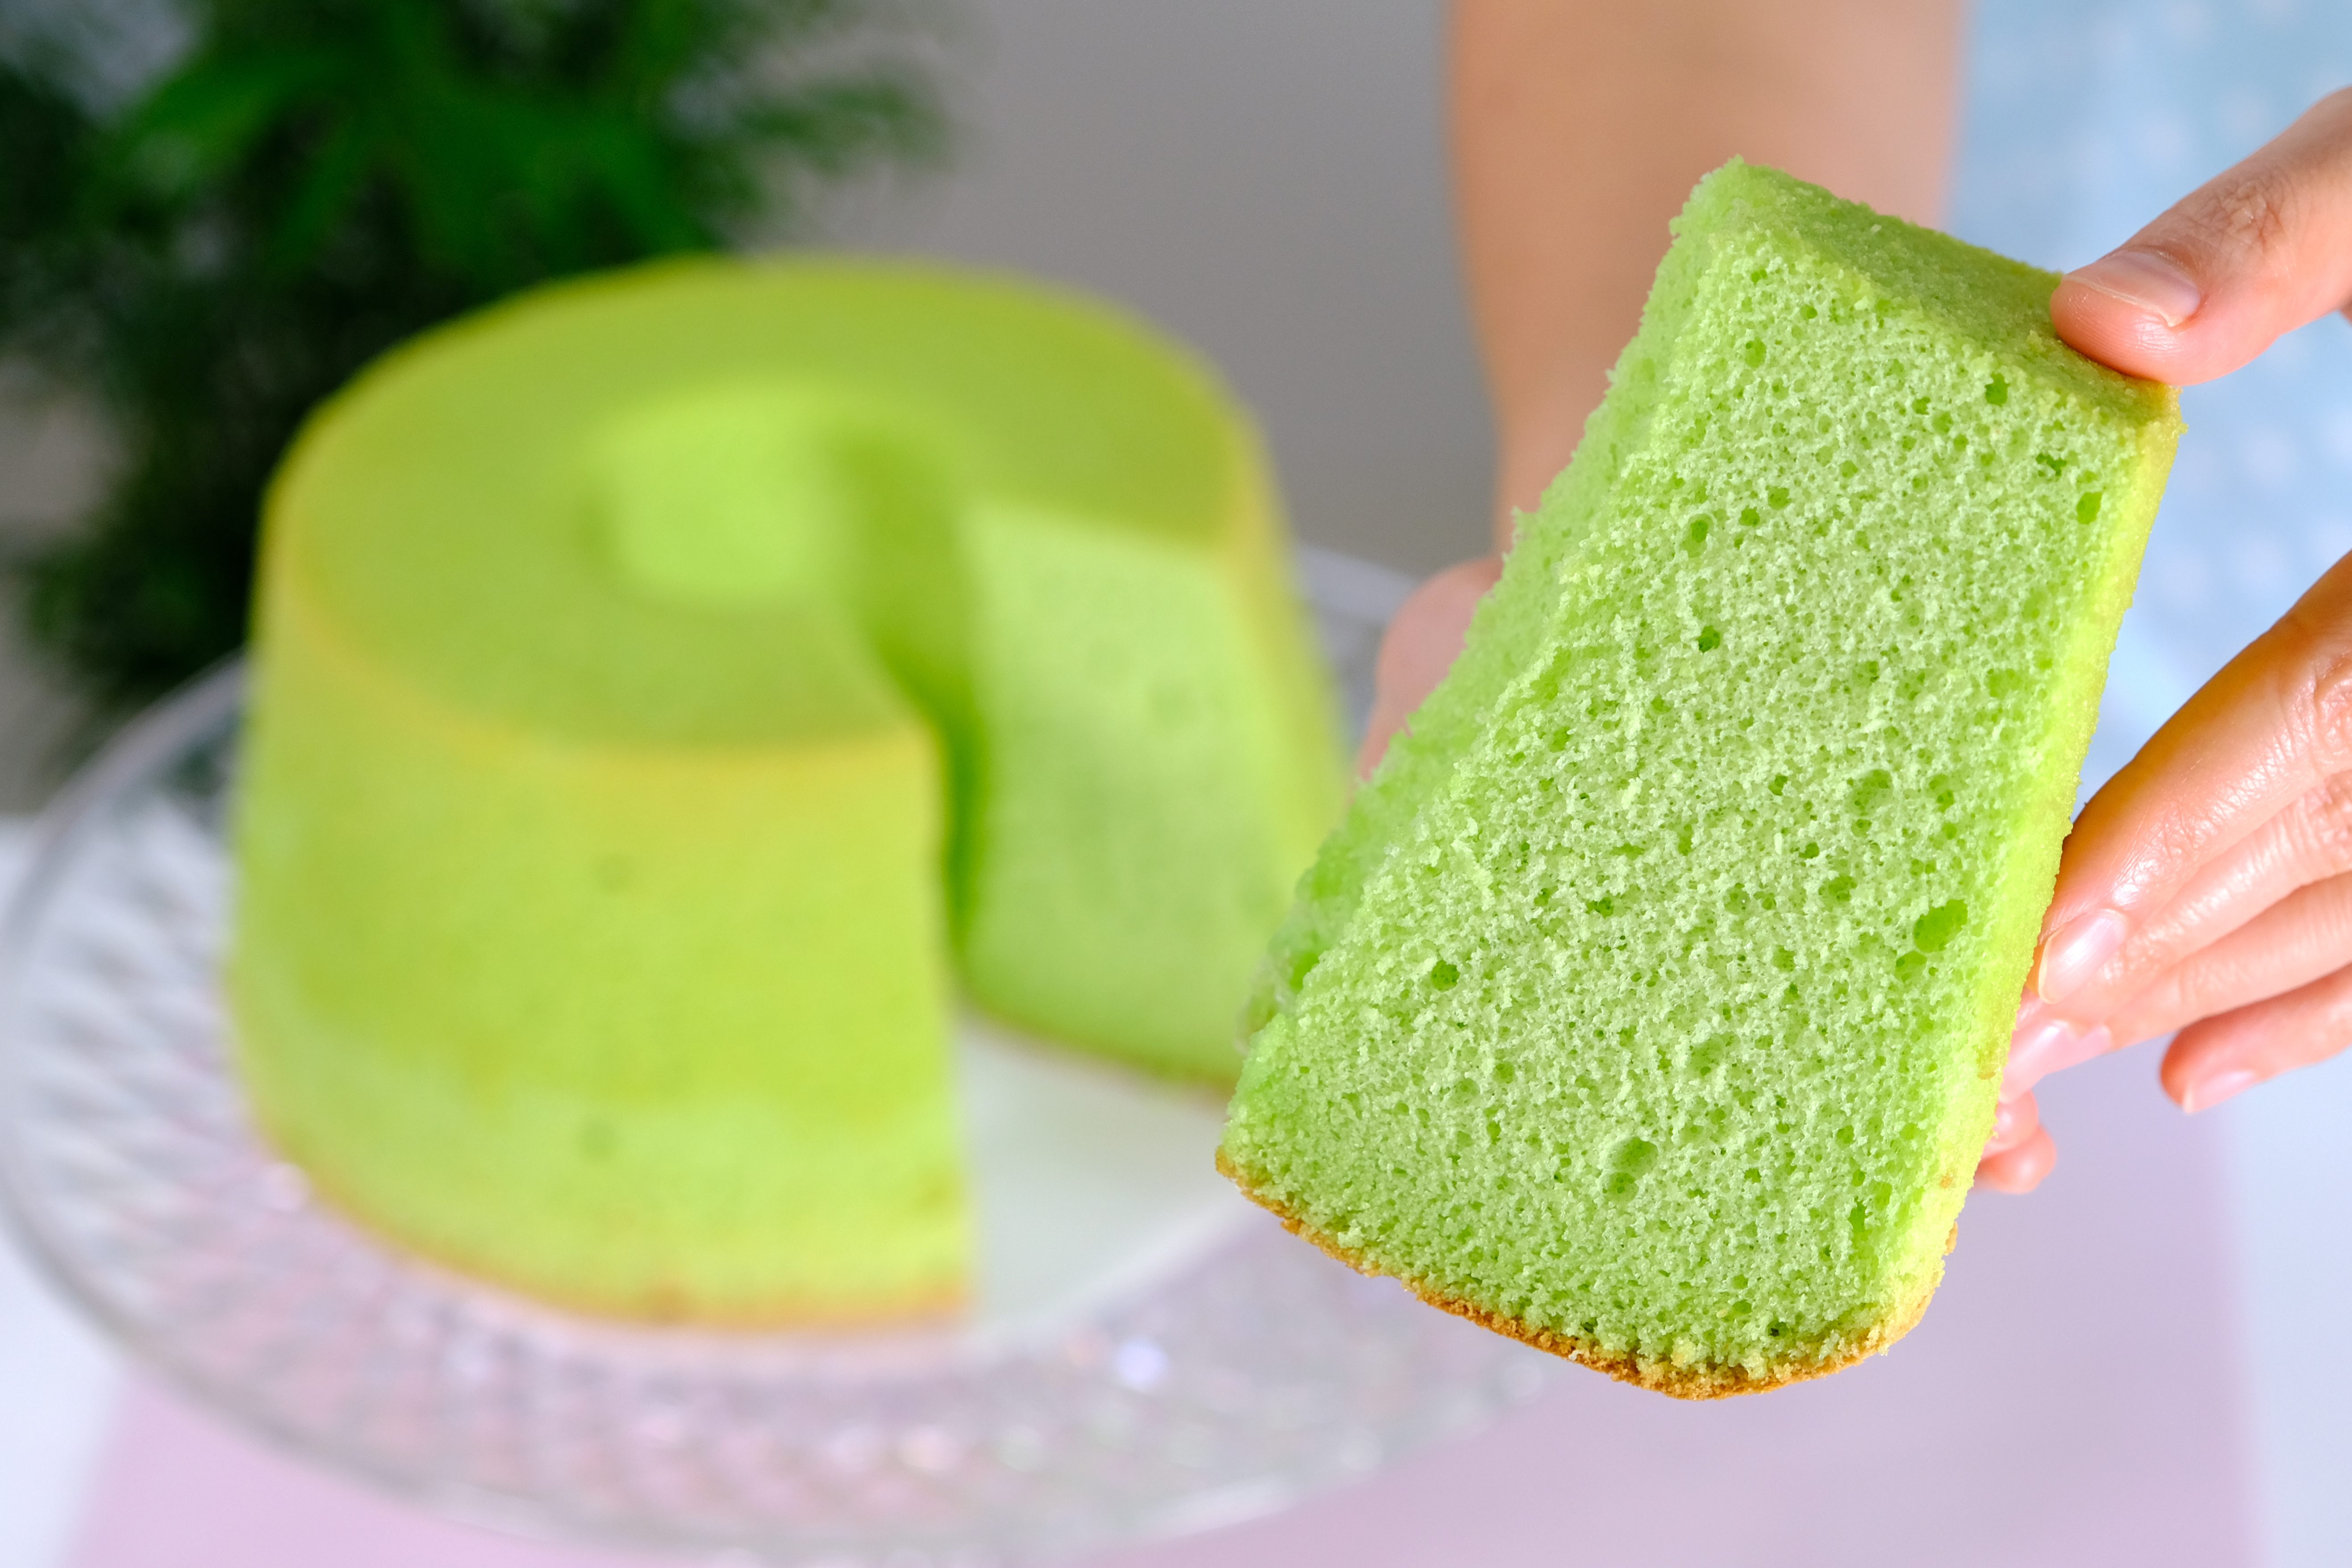
I prefer using Pandan Paste, it gives a strong, consistent flavor and saves time compared to extracting it from fresh leaves

When adding Pandan Paste, start with a small amount, I usually begin with ¼ teaspoon.
Be careful when using Pandan Paste, as it’s very concentrated; too much can leave a bitter or artificial aftertaste. It can also turn the green color overly intense and unappealing.

Making this cake is not difficult, but it does require precision and attention to the making technique.
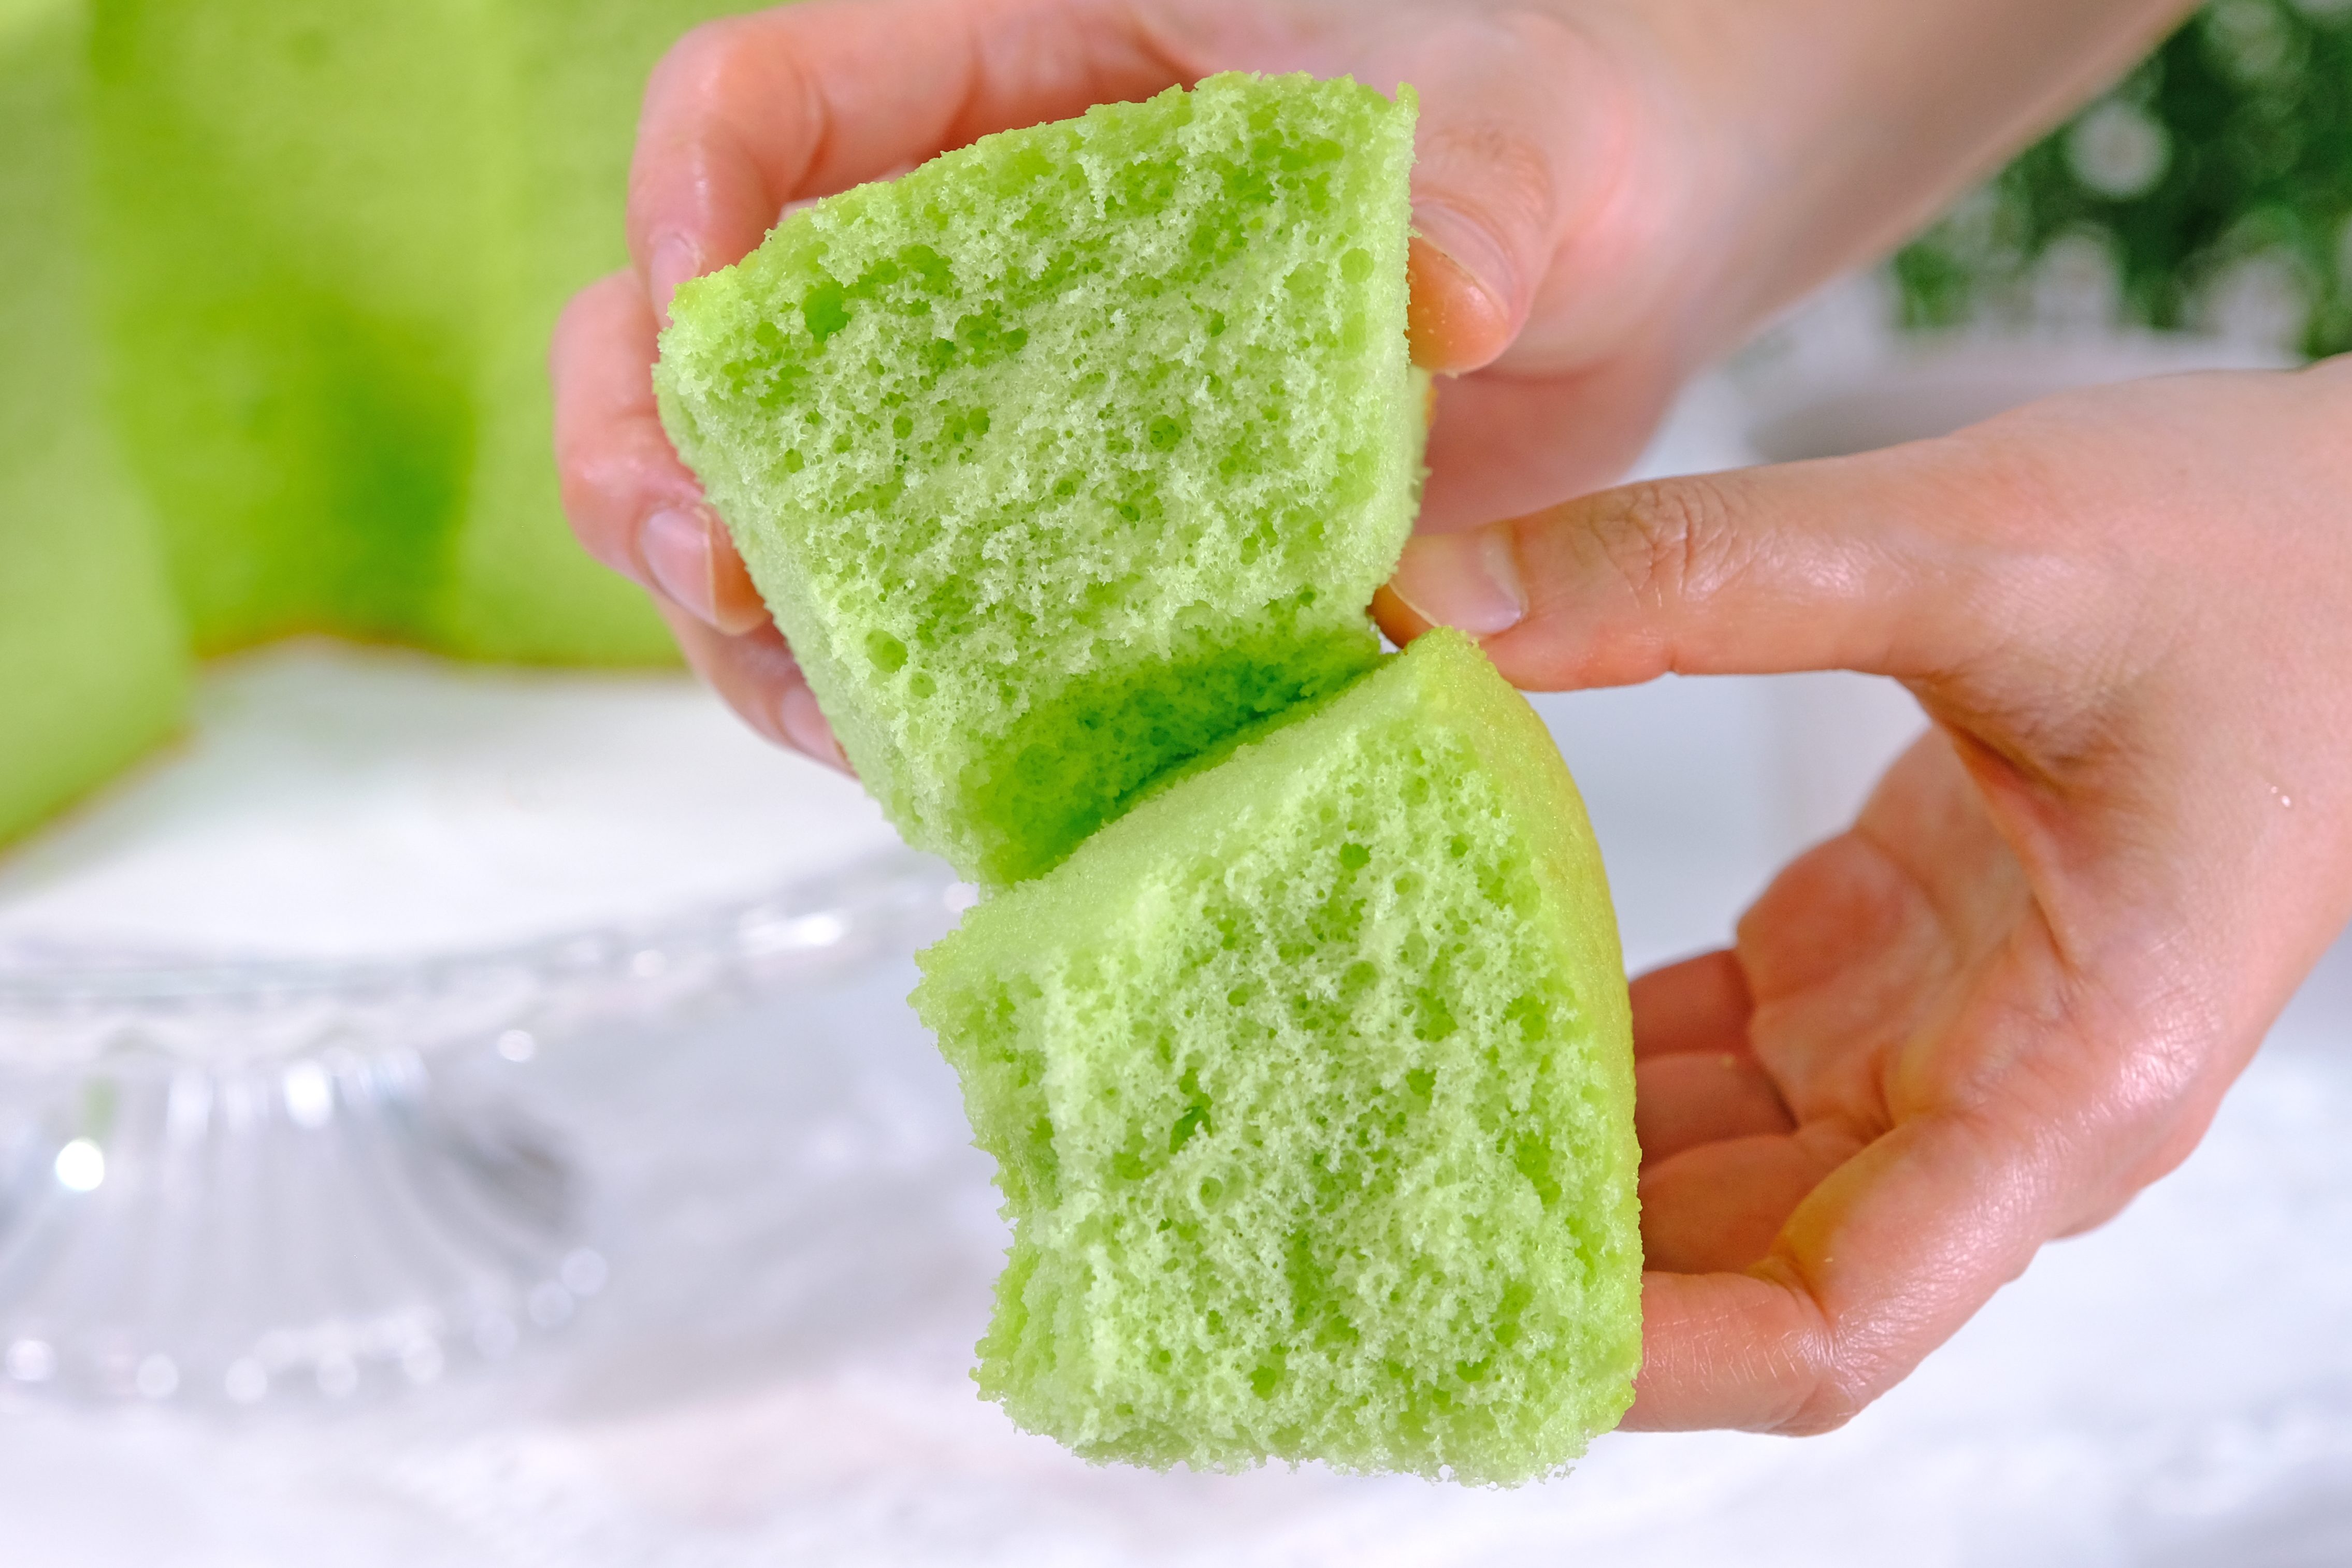
In this recipe, I will be sharing some helpful tips to make sure your Chiffon Cake turns out perfectly soft and airy.
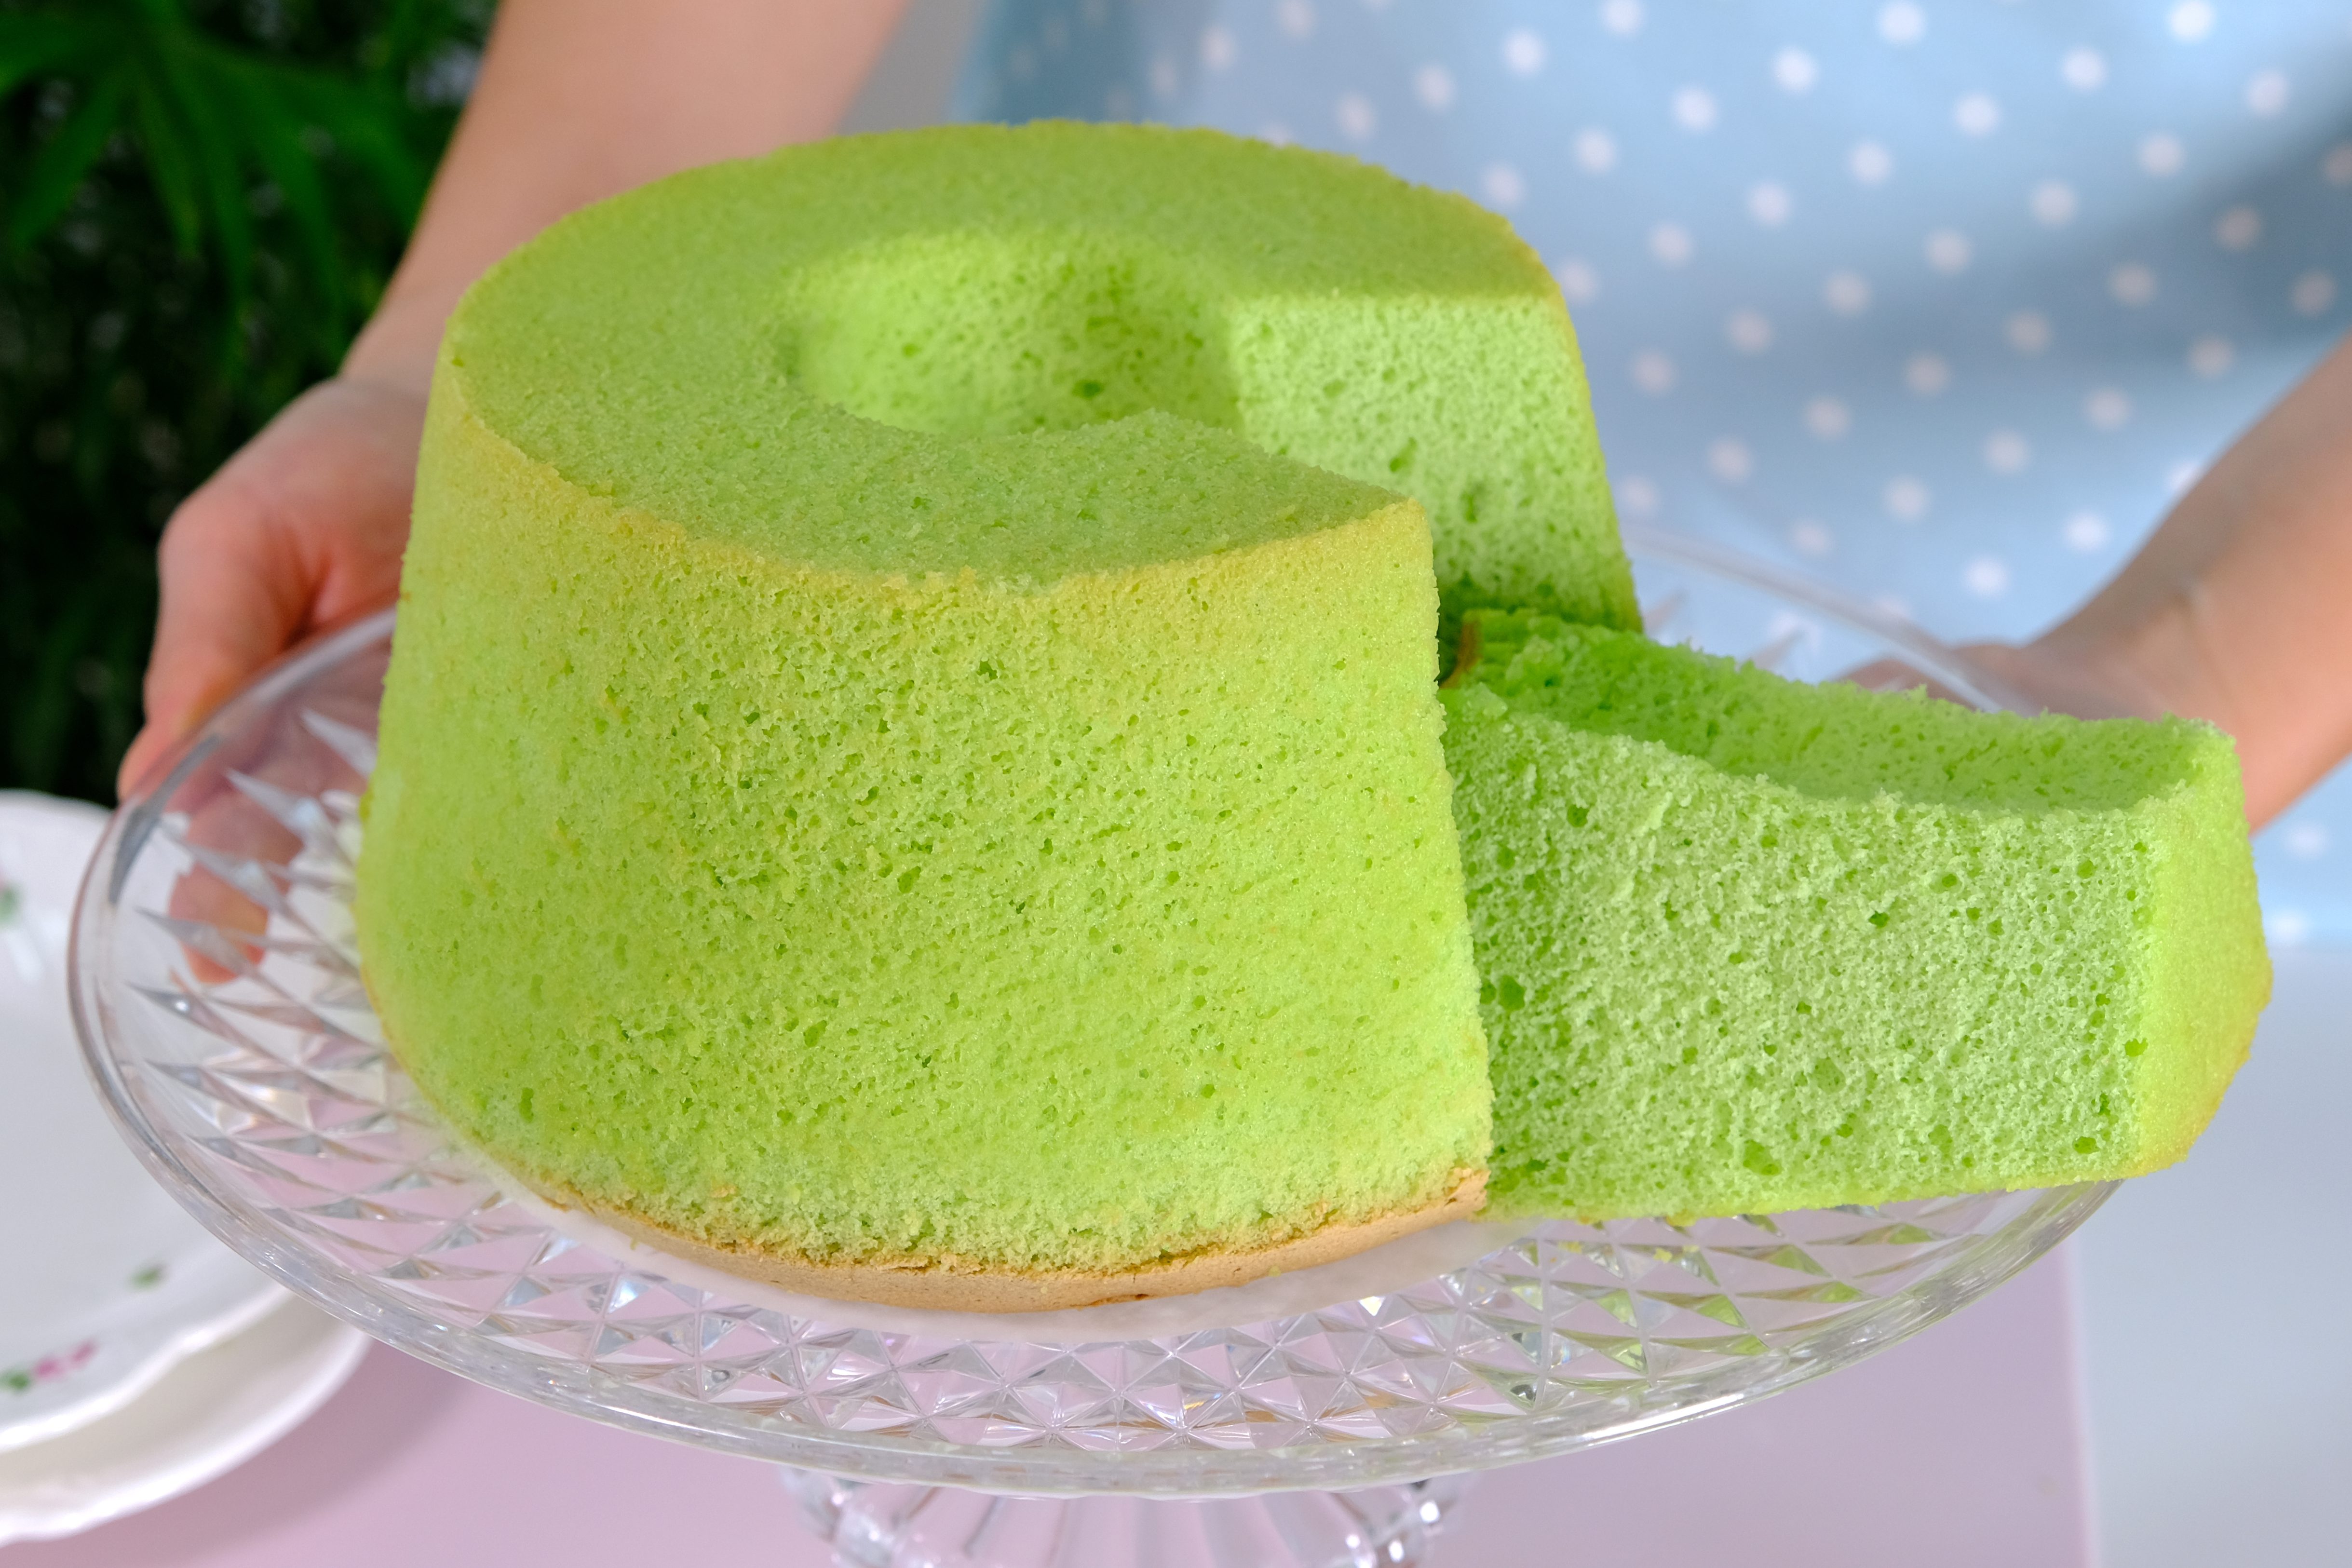
Pandan Chiffon Cake offers a delicate, fragrant, and slightly nutty flavour — a refreshing change from more traditional cake varieties.
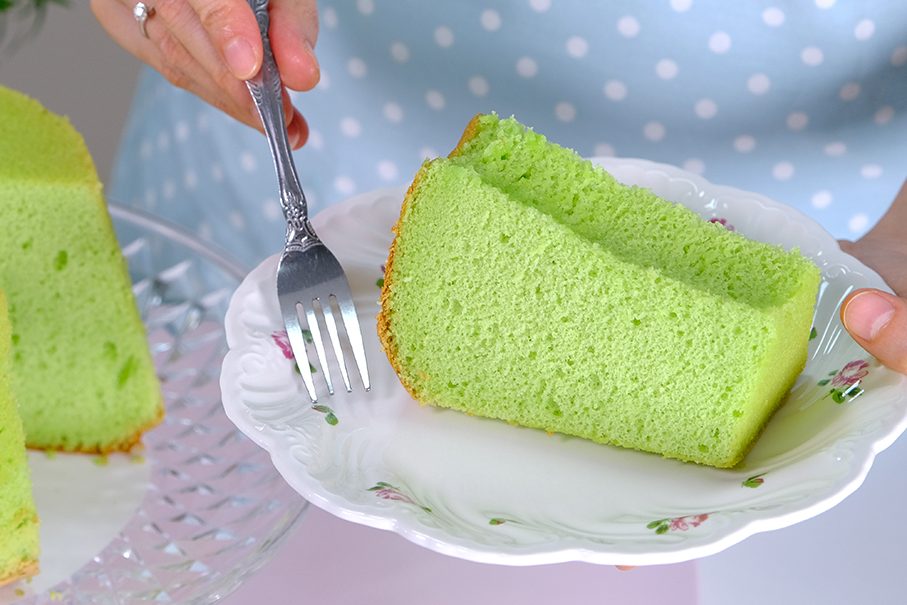
Its soft, fluffy texture practically melts in your mouth, making it an ideal choice for those who enjoy light, airy desserts.
I hope you will enjoy this recipe 🥰

Watch How To Make “foolproof fluffy pandan chiffon cake”

Tips for Success (Please Read First):

  • It’s very important NOT to grease the Chiffon Cake Pan because the batter needs to cling to the sides to rise properly
  • Preheat the oven at least 30 minutes before starting
    Once the Chiffon Cake batter is fully mixed, it needs to be baked right away (if you let the batter sit, that air starts escaping and the batter will lose volume)
  • It’s important that your mixing bowl is clean
    Any residue or fat will prevent the Egg Ehites from whipping properly (wipe the bowl and utensil with lemon juice or vinegar to helps remove grease)
  • Use fresh Eggs that are room temperature
    Other ingredients also must be at room temperature
  • Be careful when using Pandan Paste, as it’s very concentrated
    Too much can leave a bitter or artificial aftertaste, it can also turn the green color overly intense and unappealing
  • Sift the dry ingredients
  • Make sure the Egg Yolk mixture is well blended before folding it into the beaten Egg Whites
  • Beat Egg Whites until stiff peak
  • Fold the whipped Egg Whites into the Egg Yolk mixture in three batches
    Be gentle to avoid deflating the batter, fold carefully until the mixture is smooth and well combined (make sure there are no bits of egg whites left)
  • Slowly pour the batter into the pan from about 15 cm above to help burst any excess air bubbles
    Gently run a small metal skewer or spatula through the batter to eliminate any trapped air pockets
  • Avoid tapping or shaking the pan as this can cause the bubbles to deflate prematurely, resulting in a denser cake with less volume
  • Don’t let the batter sit too long before baking, bake it immediately
  • Avoid opening the oven door during baking, as sudden temperature changes can cause the Chiffon Cake to collapse
  • When the cake is done, immediately invert the pan onto a wire rack (if your pan has built-in supports)
    If your pan doesn’t have supports, you can place the tube hole over the neck of a soda or wine bottle to hang it high above the table, and cool the cake completely in the pan
  • Once cool, when unmold the cake; Don’t use a spatula to loosen the edges of the cake (this can cause the edges to become rough and uneven)
    Use your hand to gently press along the sides, going all the way around; Carefully peel about 1 cm of the cake away from the edges
    Similarly, gently press the center of the cake down with your index finger, about 1 cm deep, to loosen the middle (kindly watch the video for clearer instructions)
  • Chiffon Cake should generally be kept in an airtight container and refrigerated
    They are delicious cold, straight from the fridge

RECIPE

PANDAN CHIFFON CAKE
Yield: One 20 cm diameter Chiffon Pan

🌿 Ingredients
85 g Egg Yolks (room temp.)
60 g Coconut Milk (room temp.)
1/4 tsp Pandan Paste
125 g Cake Flour
(3/4 + 1/8) tsp Baking Powder (Double Act.)
(1/4 +1/8) tsp Salt
80 g Caster Sugar
70 g Vegetable Oil
160 g Egg Whites (room temp.)
1/4 tsp Cream of Tartar
85 g Caster Sugar

Notes: you can substitute Cream of Tartar with 1/2 tsp Lemon Juice or White Vinegar (or Apple Cider Vinegar)


🌿 Instructions
Preparation

  1. It’s very important NOT to grease the chiffon cake pan because the batter needs to cling to the sides to rise properly. I’m using 20 cm diameter pan for this recipe
  2. Preheat the oven at least 30 minutes before starting 160°C fan/ 180°C/ gas mark 4
  3. It’s important that your mixing bowl is clean
    Any residue or fat will prevent the Egg Whites from whipping properly (wipe the bowl and utensil with lemon juice or vinegar to helps remove grease)
  4. Take the Eggs and other cold ingredients out of the fridge
    Separate Egg Whites and Egg Yolks; then let them come to room temperature

To Make Pandan Chiffon Cake

  1. Combine Egg Yolks, Coconut Milk, and Pandan Paste in a medium mixing bowl
  2. Add the sifted dry ingredients (Cake Flour, Baking Soda and Salt) along with 80 grams of Caster Sugar, stir using a balloon whisk until well mixed
  3. Pour in the Vegetable Oil and mix until the batter looks smooth and well blended; Set this mixture aside
  4. In another large mixing bowl, beat the Egg Whites and Cream of Tartar until foamy
    Add the 85 grams of Caster Sugar in 3 batches, adding each portion every 30 seconds
    Once all the sugar is added, continue beating on high speed until stiff peak for about 3 minutes (the mixture will gradually thicken and looks shiny)
  5. Fold the whipped Egg Whites into the Egg Yolk mixture in 3 batches
    Start by adding one-third of the beaten Egg Whites to the Egg Yolk mixture (this first addition helps loosen the batter)
    Use a balloon whisk to gently stir, scrape the bottom and sides of the bowl to ensure everything is evenly combined
  6. Add another third of the Egg Whites and fold again (be gentle to avoid deflating the batter)
  7. Finally, pour the Egg Yolk mixture into the bowl with the remaining Egg Whites
    Fold carefully until the mixture is smooth and well combined (make sure there are no bits of egg whites left)
    Use a spatula to scrape the sides and bottom of the bowl to ensure the mixture is evenly mixed
  8. Slowly pour the batter into the pan from about 15 cm above to help burst any excess air bubbles.
    Gently run a small metal skewer or spatula through the batter to eliminate any trapped air pockets (avoid tapping or shaking the pan as this can cause the bubbles to deflate prematurely, resulting in a denser cake with less volume)
  9. Bake immediately in the preheated 160°C fan/ 180°C/ gas mark 4 oven for 45 minutes or until a cake tester inserted in the center comes out clean
    * Avoid opening the oven door during baking, as sudden temperature changes can cause the chiffon cake to collapse
  10. When the cake is done, immediately invert the pan onto a wire rack (if your pan has built-in supports)
    If your pan doesn’t have supports, you can place the tube hole over the neck of a soda or wine bottle to hang it high above the table, and cool the cake completely in the pan (This takes about 1½ to 2 hours, do not touch until completely cool)
  11. Once cool, you can unmold the cake
    Don’t use a spatula to loosen the edges of the cake; this can cause the edges to become rough and uneven
    Use your hand to gently press along the sides, going all the way around
    Carefully peel about 1 cm of the cake away from the edges
    Similarly, gently press the center of the cake down with your index finger, about 1 cm deep, to loosen the middle
    Then place your fingers on the bottom of the pan and press down firmly to lift out the center tube
    Finally, press the entire bottom of the cake inward to release it from the bottom of the pan (handle with care as the cake is very light and fluffy)
    “Kindly watch the video for clearer insturctions”


NOTES

  1. Ensure the cake has cooled completely before storing, as warmth creates condensation, which makes the cake soggy and encourages mold growth
  2. Chiffon Cake should generally be stored in an airtight container and kept refrigerated. This is especially important for Pandan Chiffon Cake, as it contains Coconut Milk, which can spoil more quickly at room temperature.
    The cake tastes delicious when served cold, straight from the fridge.
  3. This cake can last for up to 5 days to a week in the refrigerator.
  4. Chiffon cake freezes well
    Wrap individual slices tightly in plastic wrap, then add a layer of aluminum foil to prevent freezer burn.
  5. This cake can be frozen for up to 2 months
  6. Thawing: Thaw the frozen cake in the refrigerator overnight or at room temperature for a couple of hours before serving. Avoid using a Microwave for thawing, as this can affect the texture. 

Baked Korean Twisted Donut (꽈배기) Kkwabaegi

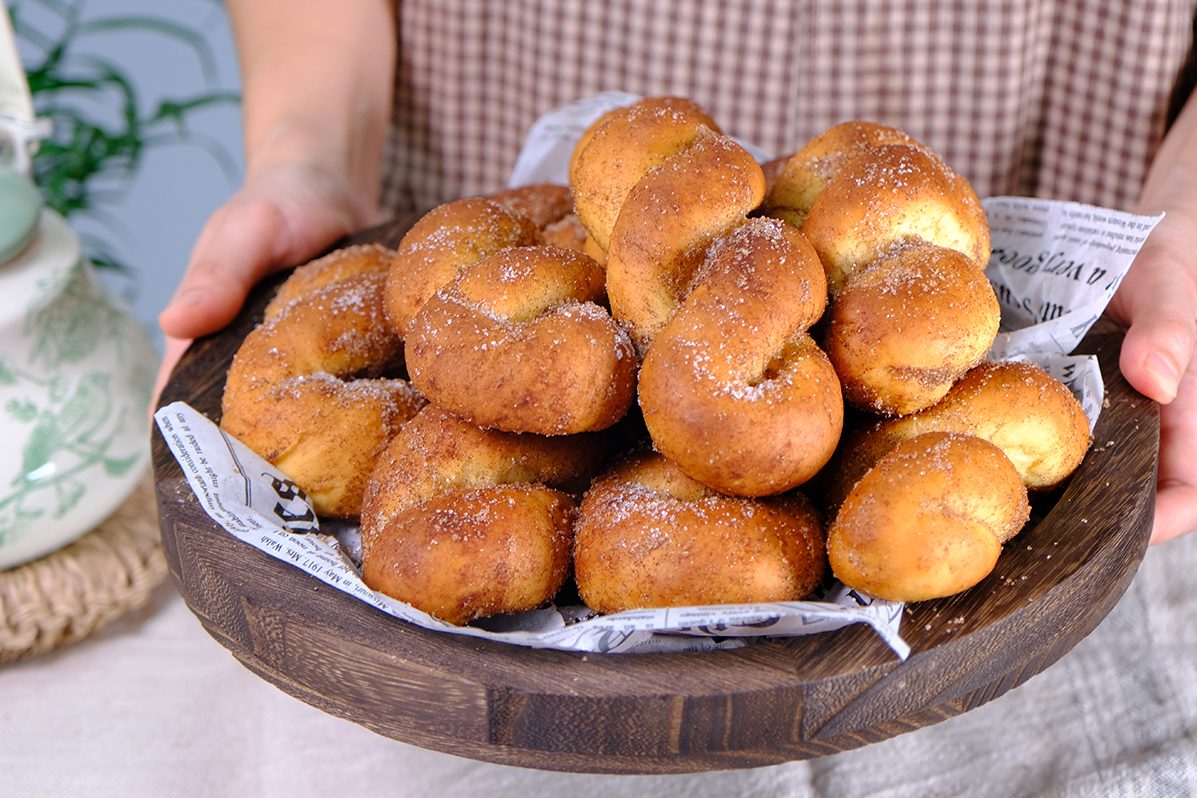
In Korea, Kkwabaegi is a popular after-school snack 🥰
“Kkwabaegi 꽈배기” or Korean Twisted Donuts;
I absolutely love them, but I don't like frying them; they're too greasy and troublesome.
This recipe doesn't require frying, you just bake them instead! A healthier version of Donuts 😋
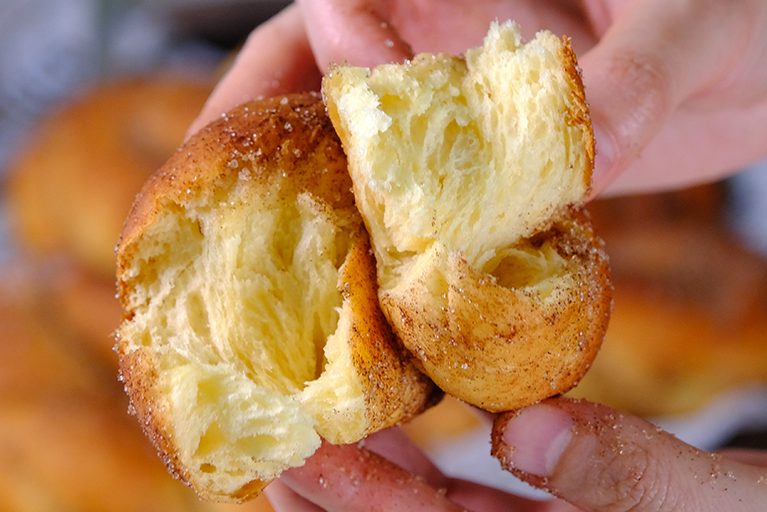
Mashed potatoes help keep the dough soft and moist, which is especially helpful in baked Donuts that can otherwise turn out dry. They give the Donuts a tender, slightly chewy, and fluffy texture; The starch in the Potatoes binds with the flour, creating a softer crumb
The key to making beautiful kkwabaegi is “Don’t roll the dough thinner in the middle and thicker at the ends, or vice versa” AND “Don’t twist it too much”
That will cause the twist to break during the proofing or baking process
Your twisted donut won’t look pretty ☹️
These mildly sweet, fluffy, spongy, twisted doughnuts are simply irresistible 😳🤤🤤

Crispy sugar on the outside, soft and slightly chewy on the inside;
And most importantly, it’s not greasy 😜
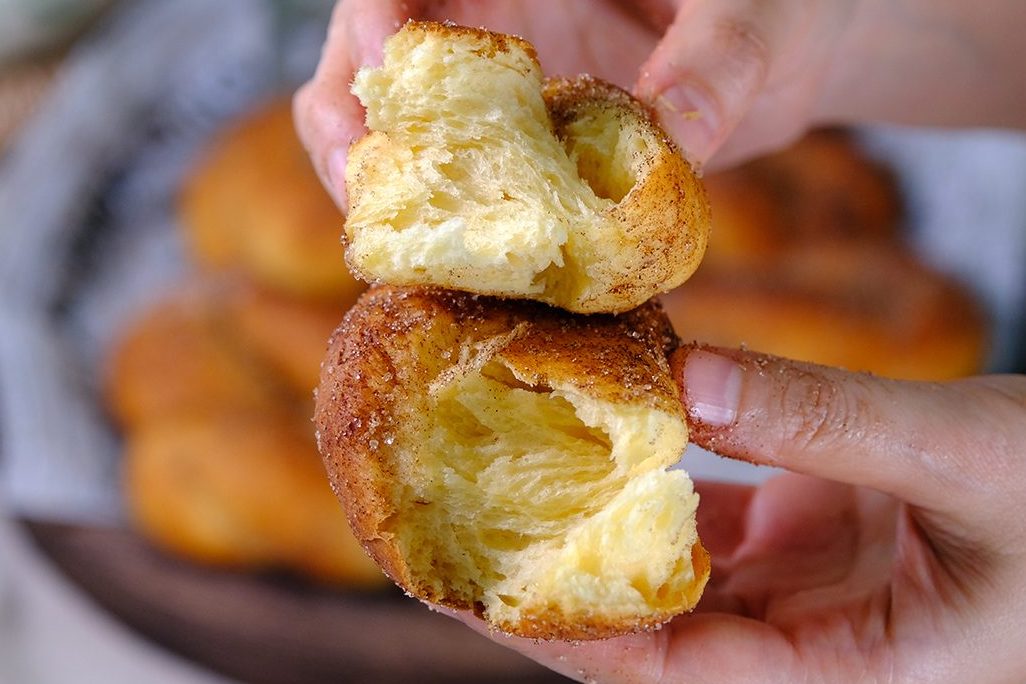
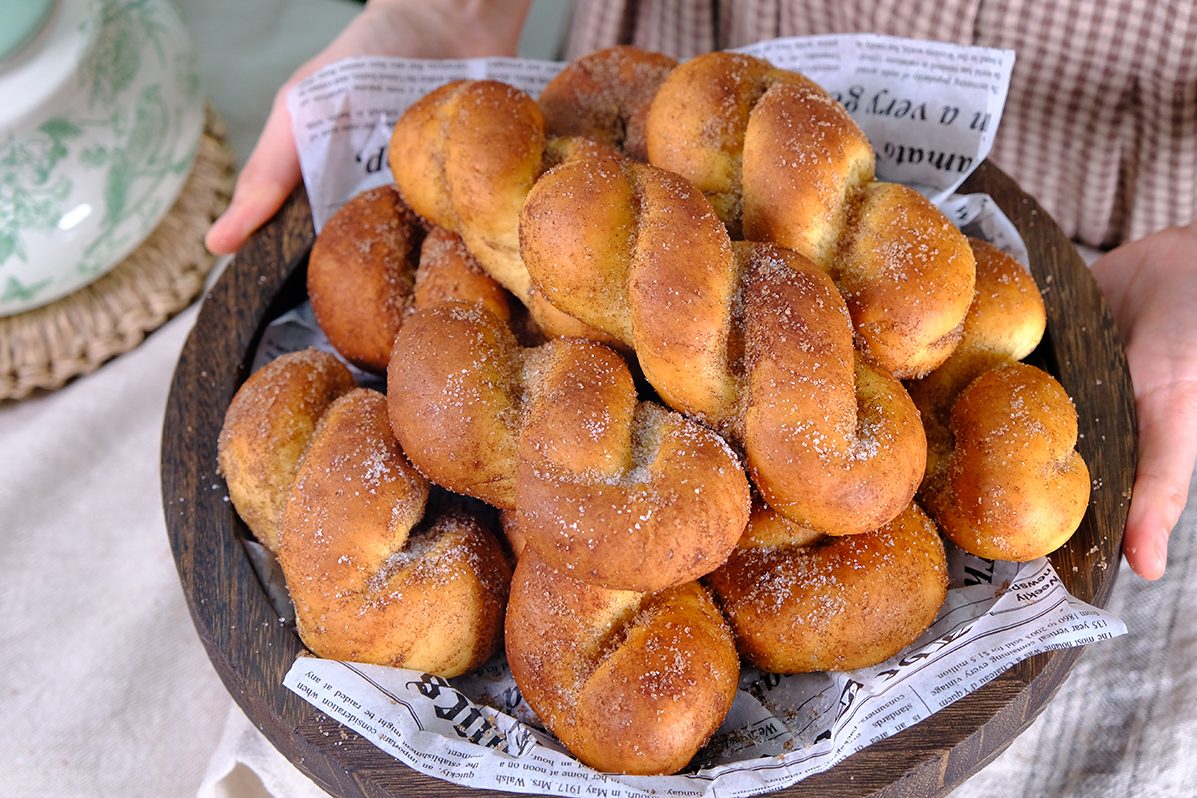
They pair really well with Coffee, Milk, Chai Tea or even Hot Chocolate.
Make this for your loved ones, or your kids; They’ll love it !! 🤗
I hope you will enjoy it as much as I do 😍

WATCH HOW TO MAKE Baked Korean Twisted Donut (꽈배기) Kkwabaegi

RECIPE

BAKED KOREAN TWISTED DONUTS
Yield: 10 pieces


INGREDIENTS
🍩 Donut Dough
315 g All-Purpose Flour
50 g Caster Sugar

1⅔ tsp Instant Yeast
1/3 tsp Salt
125 g Mashed Potatoes

50 g Egg Yolks
100 g Full Cream Milk (cold)
40 g Unsalted Butter


🍩 Coating

60 g Unsalted Butter (melted)

100 g Caster Sugar

1 tbs Cinnamon Powder


INSTRUCTIONS

  1. Cook Potaoes until tender. Place potatoes in a saucepan, add enough water to submerge. Cook over hight heat until the water comes to a boil. Reduce the heat and let simmer until the Potatoes are tender. Once it’s done, drain the Potatoes and mash them smoothly, set aside.
  2. Preheat the Oven to 400 F/ 200°C/ 180°C fan/ gas mark 6 and line baking tray with parchment paper.
  3. Combine the dry ingredients. In a large bowl, place the Flour, Sugar, and Instant Yeast. Add the salt to the opposite side of the bowl (be careful not to let the Yeast and Salt come into direct contact, as this can kill or slow the yeast’s growth). Stir until thoroughly combined.
  4. Add the wet ingredients to the dry mixture. Add the cooled Mashed Potatoes, Egg Yolks and Cold Milk to the dry mixture. Use a wooden spoon mix well until it forms a lump. And then, using your hands start kneading the dough. Gather all the small crumbs and dry flour to form a ball of dough.
  5. Knead the dough until smooth and elastic. Once the dough forms a rough ball, add the Butter and knead for about 5 minutes until the dough is smooth and elastic.
    The dough will be slightly sticky, resist the urge to add more Flour as it can make your Donuts tough.
  6. Portions the dough. Divide the dough into 10 equal portions (about 68 grams each). Shape each portion into a ball. Cover the dough with plastic wrap while shaping to prevent it from drying out. And let the dough rest for 10 minutes.
  7. Shape the dough. 10 minutes later, Take one portion of the dough, roll it out. Starting from the center, roll out to both sides, until it is about 28 cm long.
    The dough should be evenly thick from end to end.
    I recommend using a ruler as a guide. Don’t sprinkle too much Flour on the surface, as it will be difficult to shape.
  8. Twist the dough (Please watch the video for clear instructions)
    Roll the 28 cm long dough with your both hands in different directions; right hand up and left hand down; DON’T twist it too much. Once you feel tension between the two ends, stop twisting. Then, pick up both ends, they will automatically twist. Using your hands twist it a little more. Pinch the ends and fold them under. Place it on a baking sheet lined with Parchment Paper
    and cover with plastic wrap to prevent drying.
    Don’t roll the dough thinner in the middle and thicker at the ends, or vice versa; That will cause the twist to break during the proofing or baking process. Your twisted donut won’t look pretty.
  9. Final proof. After shaping, let the dough proof for 20 minutes
    Meanwhile, we can prepare the Donuts coating
  10. Prepare Coating. Melt the Butter in a double boiler, set aside.
    In a Ziploc bag, mix Caster Sugar and Cinnamon Powder, shake it.
  11. Bake the Donuts. After 20 minutes, you can see that the dough puffy and bigger in size. If you press it lightly, the fingerprint returns slowly and does not bounce immediately. Bake in a preheated oven for 12 minutes.
    After 12 minutes, flip the donuts and bake for another 3 minutes.
  12. Apply Coating. Once baked, brush with melted Butter while still hot.
    Place in a bag of Cinnamon Sugar (shake it), then place the donuts on a cooling rack or a plate.
    Twisted Donuts are best enjoyed while still warm, on the day it’s made.

    NOTES
    * If you make a large batch and can not finished it in one day, after baked, don’t apply the coating. Place Donuts in an airtight container in the fridge (it will last for 3 days). When you need it, take them to room temperature for about 30 minutes; then reheat donuts in the preheated (400 F/ 200°C/ 180°C fan/ gas mark 6) for about 10 Minutes (the Donuts will be soft and fluffy again); Then coat with melted Butter and Cinnamon Sugar and serve.
    * Like all raised donuts, they can get a little bready as they age. It’s best to have them warm when they are first made, but if you have to store them, ensure they are completely cooled before packing them into a container.


Light Fluffy Vanilla Sponge Cupcakes

Everyone’s got their own idea of what the perfect Vanilla Cupcake should taste like; And this is my favourite Vanilla Cupcake recipe.
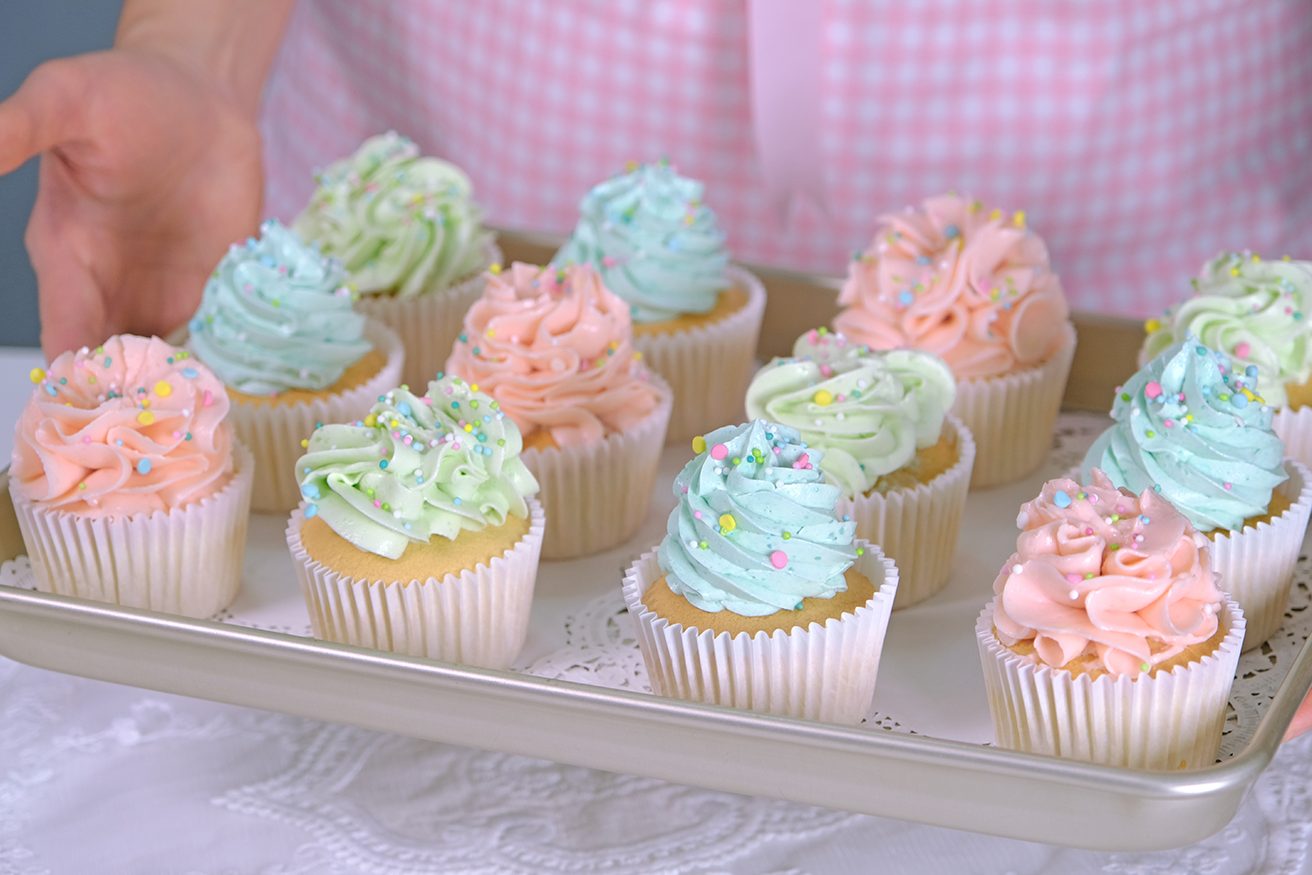
What makes this Cupcake special for me is because it’s light, not heavy, and just the right amount of sweet.

It’s the kind of Vanilla Sponge that pairs beautifully with whatever you like
Whether you’re adding frosting, berries or enjoying it plain.
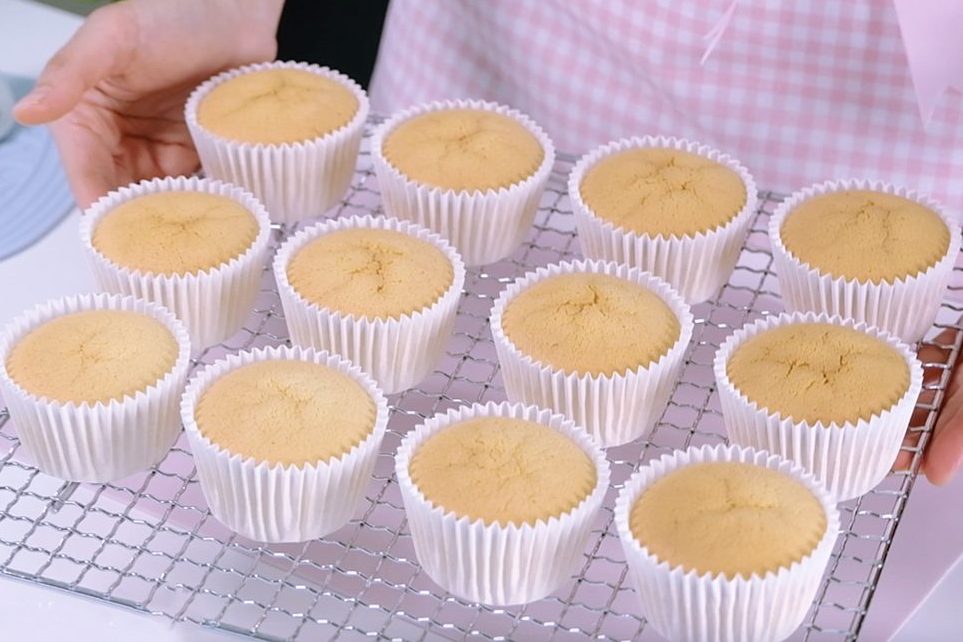
They stay wonderfully moist for days and have a deep Vanilla flavour.
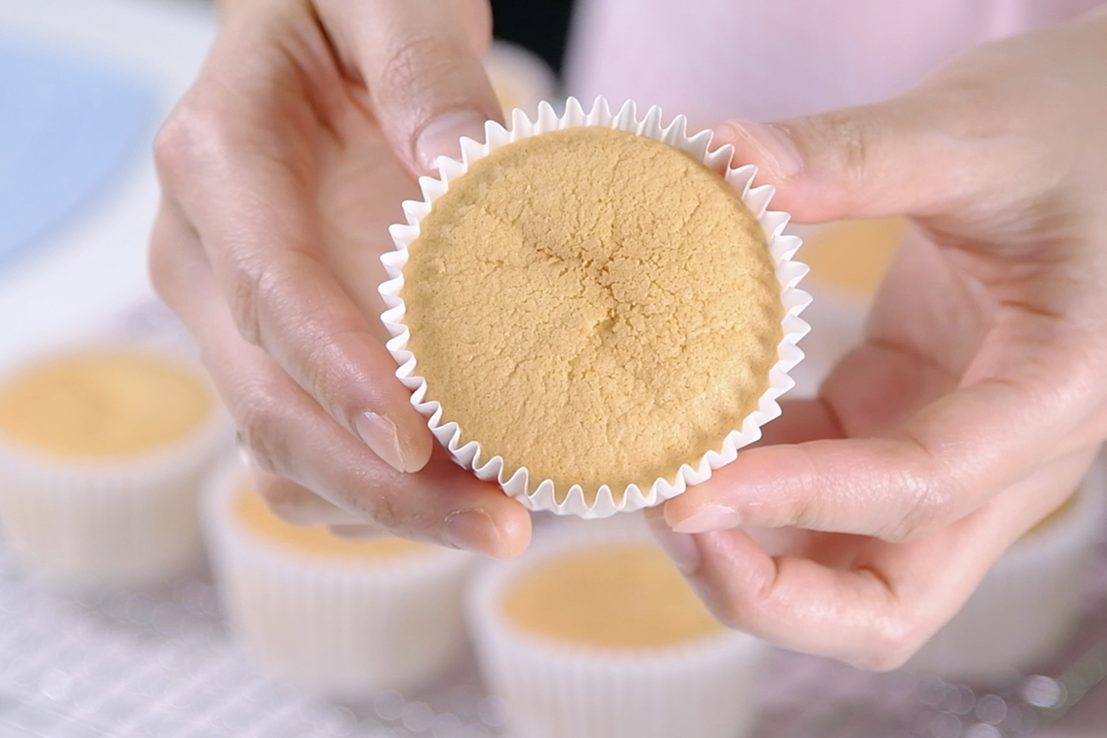
This Cupcakes are delicate but stable enough to hold the frosting
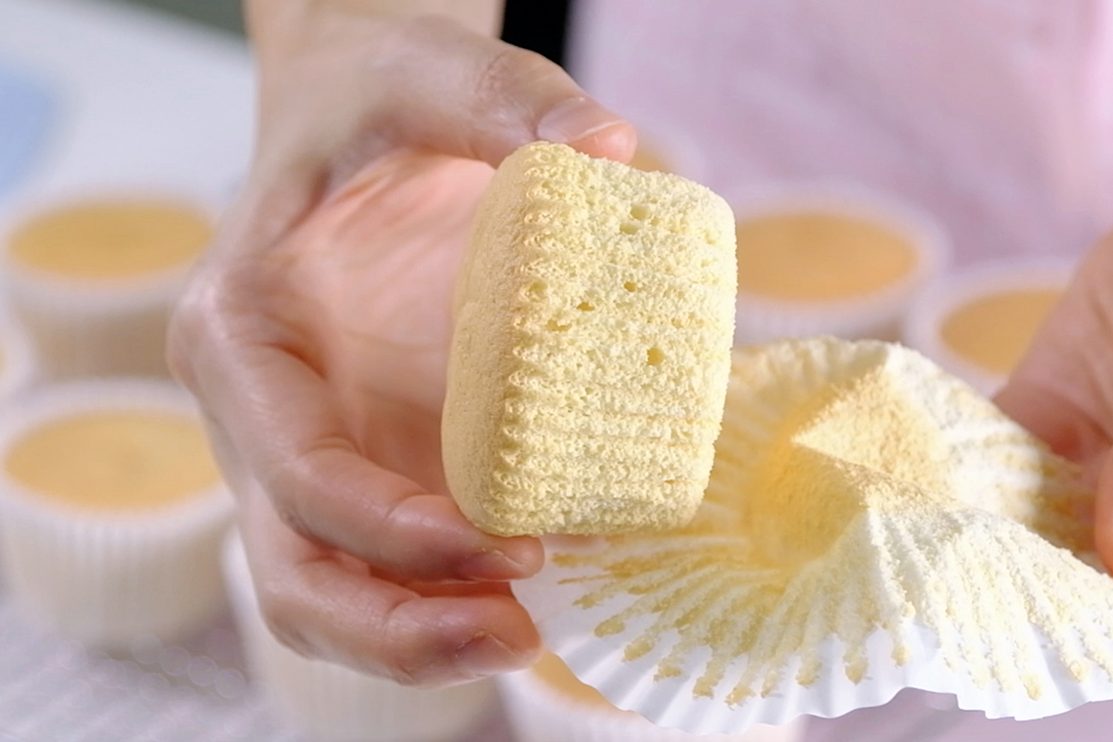
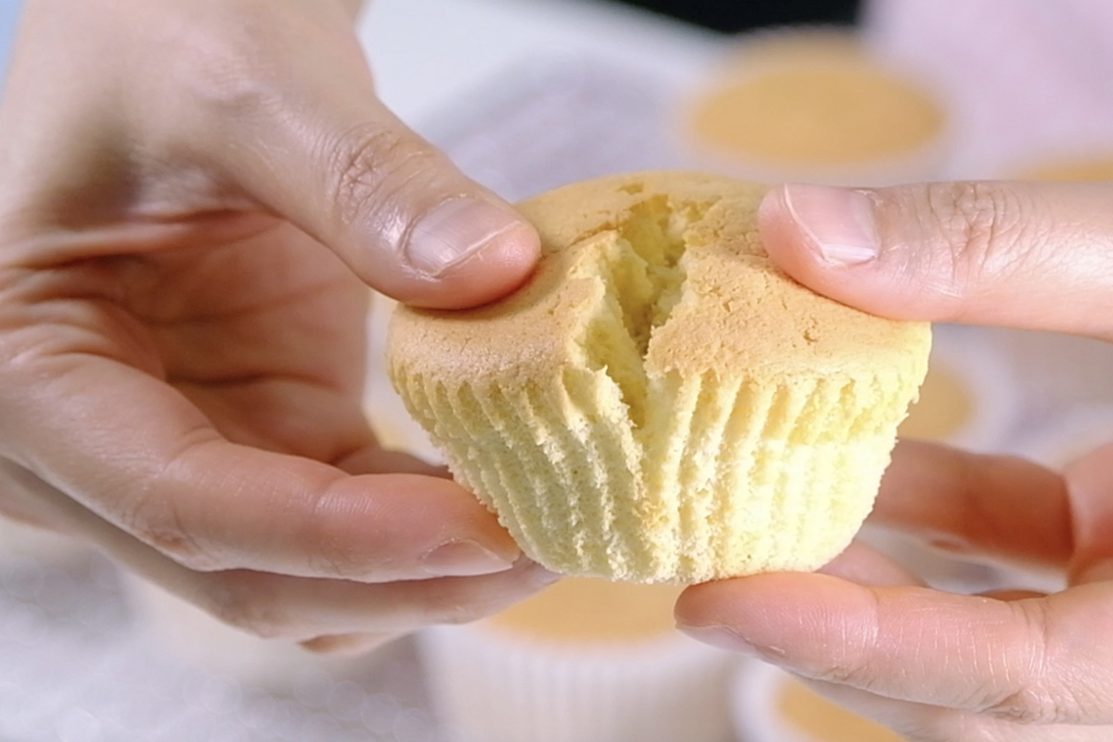
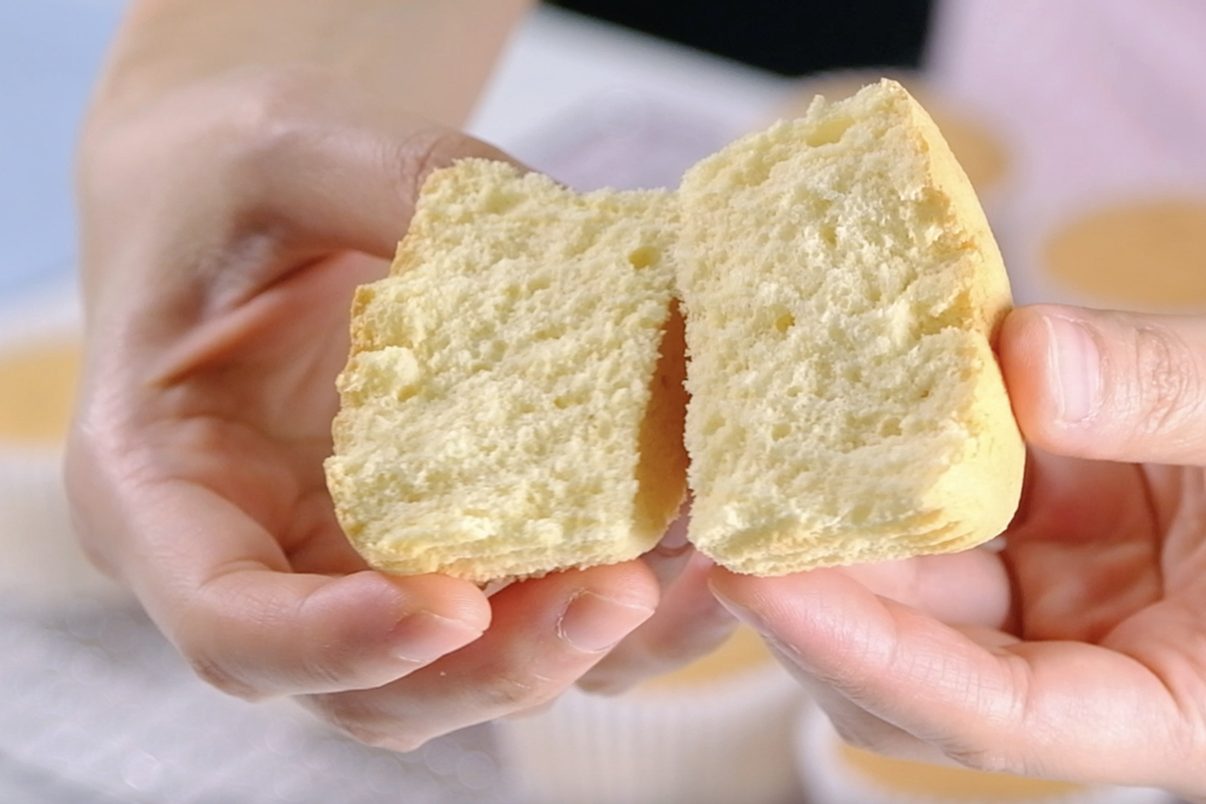
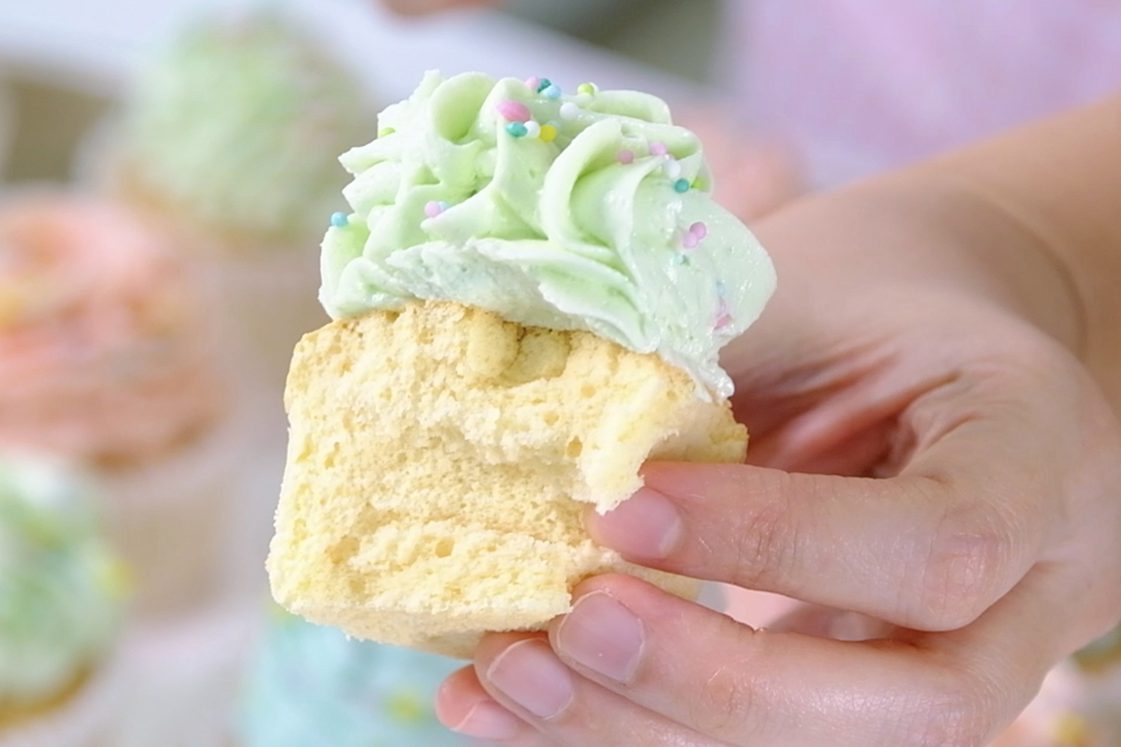
Let’s cut open and l00k inside
☺️
Soft and Moist but not too crumbly
Not too sweet and not heavy
🤗 So soft and fluffy
😍 And what’s the best frosting to pair it with?
The clasic Boiled-Milk Frosting 😘

Boiled Milk Frosting is an old-school buttercream that is not too sweet, not too buttery, and not too heavy.

My version with Icing Sugar is more stable at room temperature.
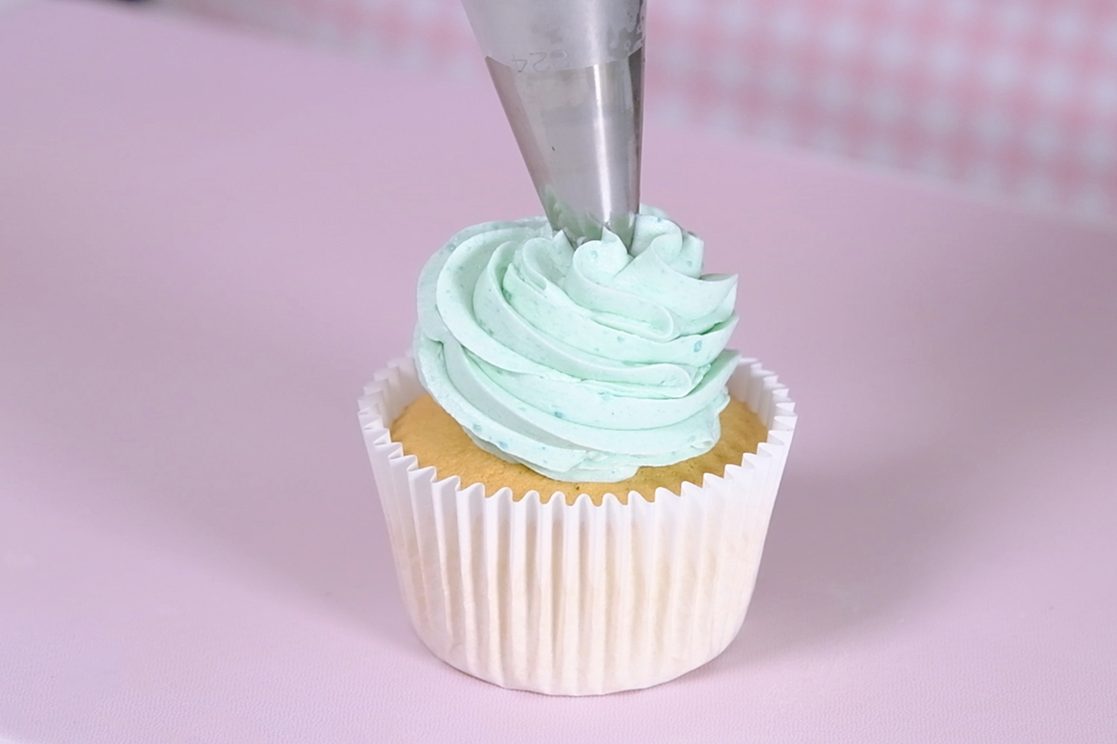
This beautiful frosting also easy to color and you can create any flavour you want; simply by adding some liquors, flavour oils or emulsions, extracts or even dried fruit powder.

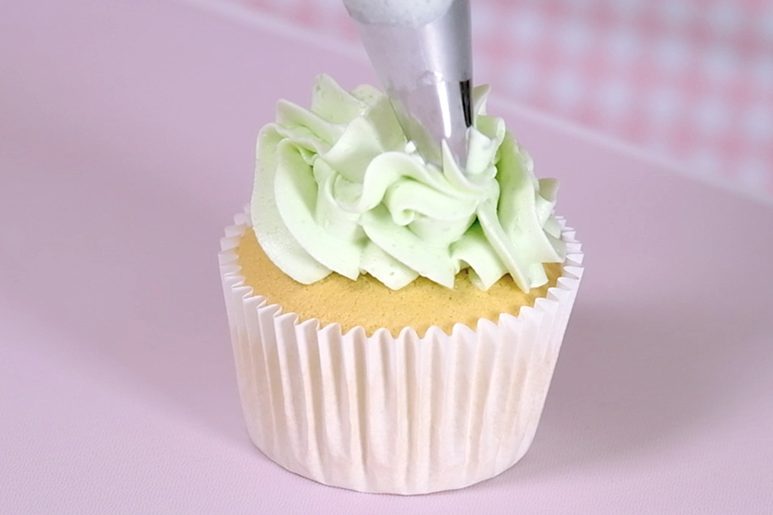
This Russian Ball tip creates beautiful ruffles 🥰
🥲 So beautiful !
Get creative with your own designs !!
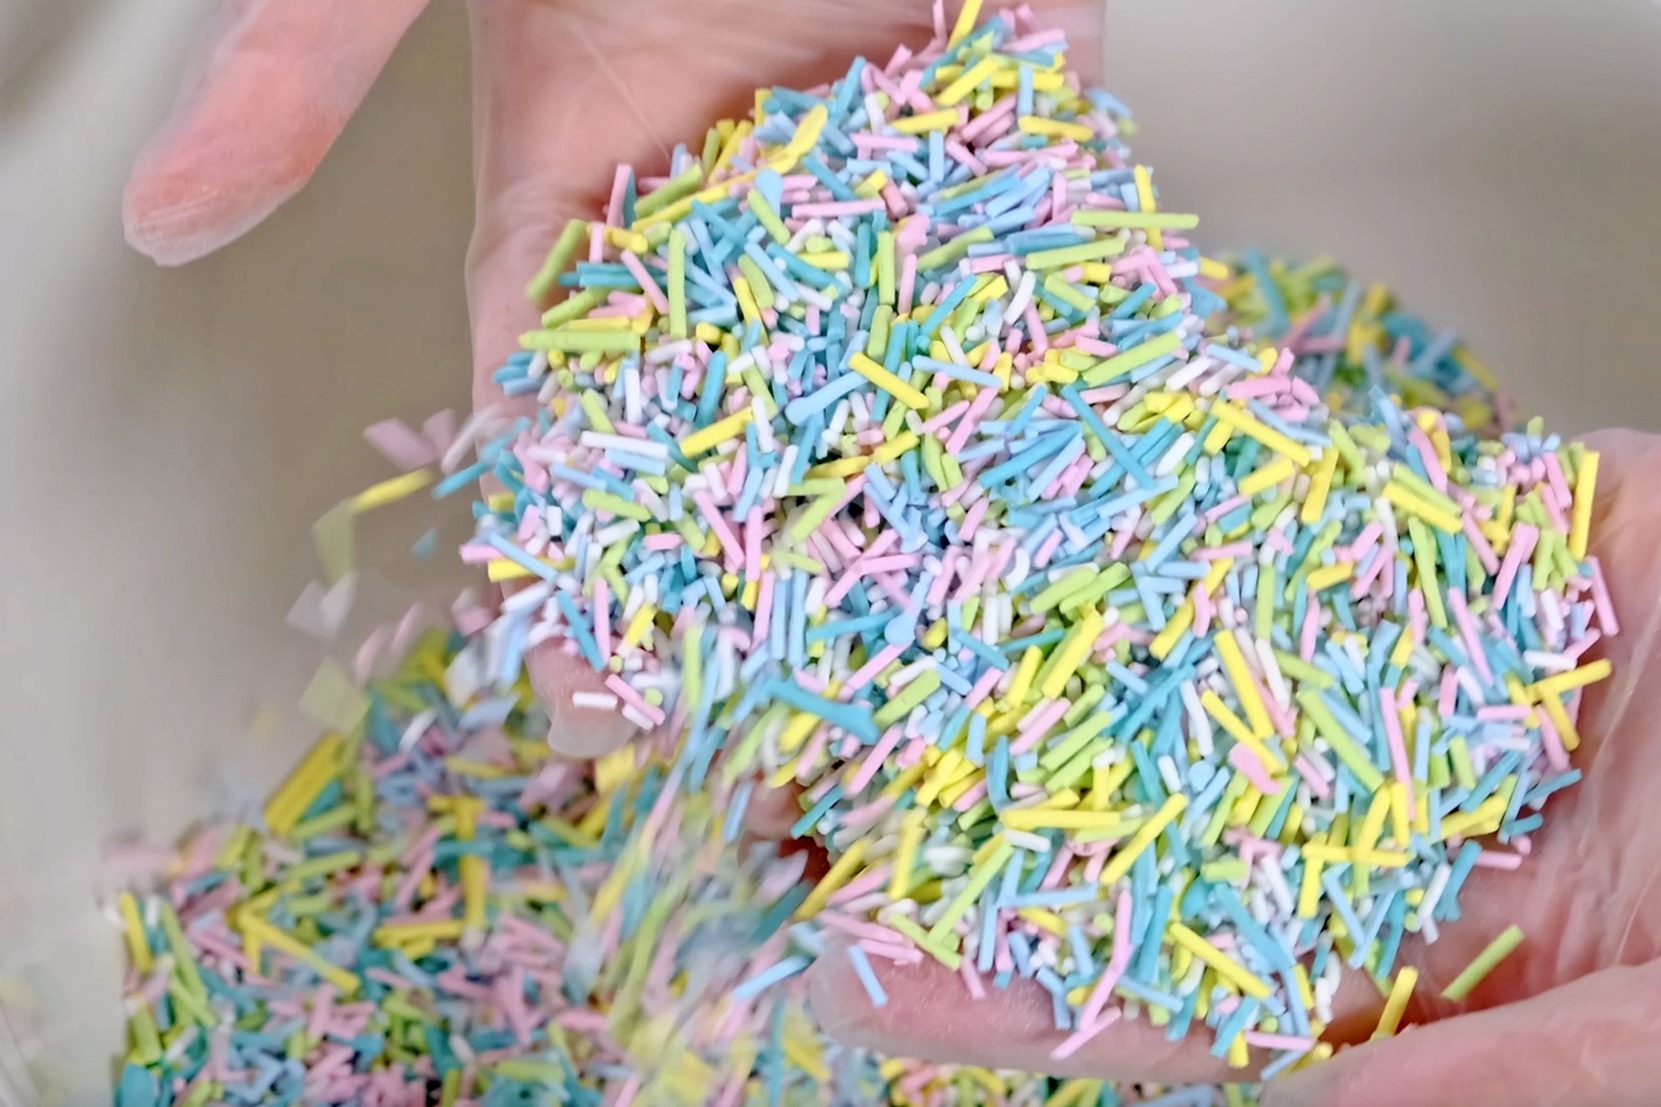
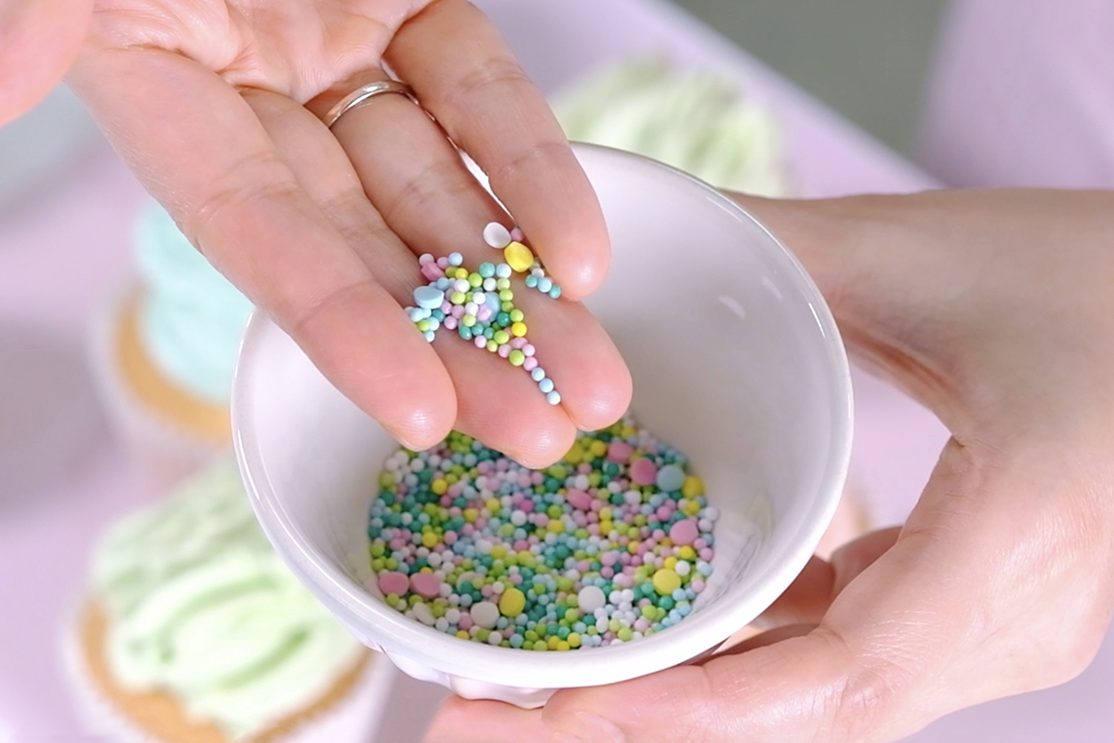
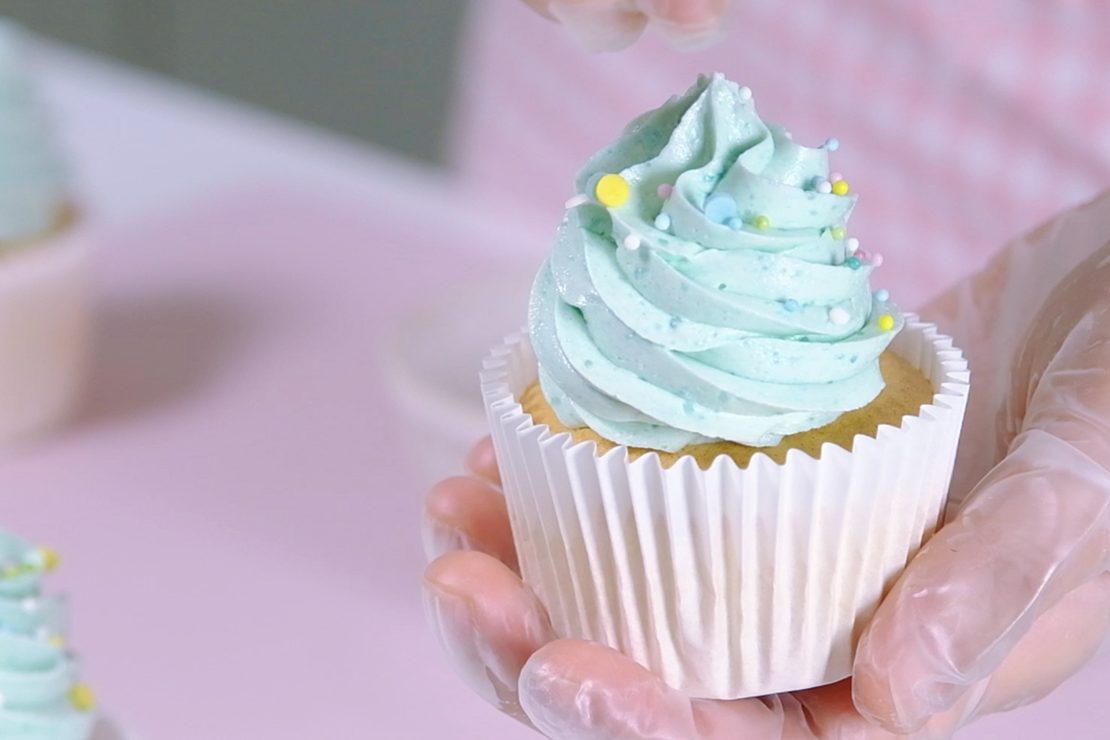
And finish with colourful confetti sprinkles   

So pretty! ☺️

I always flavor my frosting by adding a little at a time and tasting it as I go; Start with ½ teaspoon of extract or emulsion and taste.
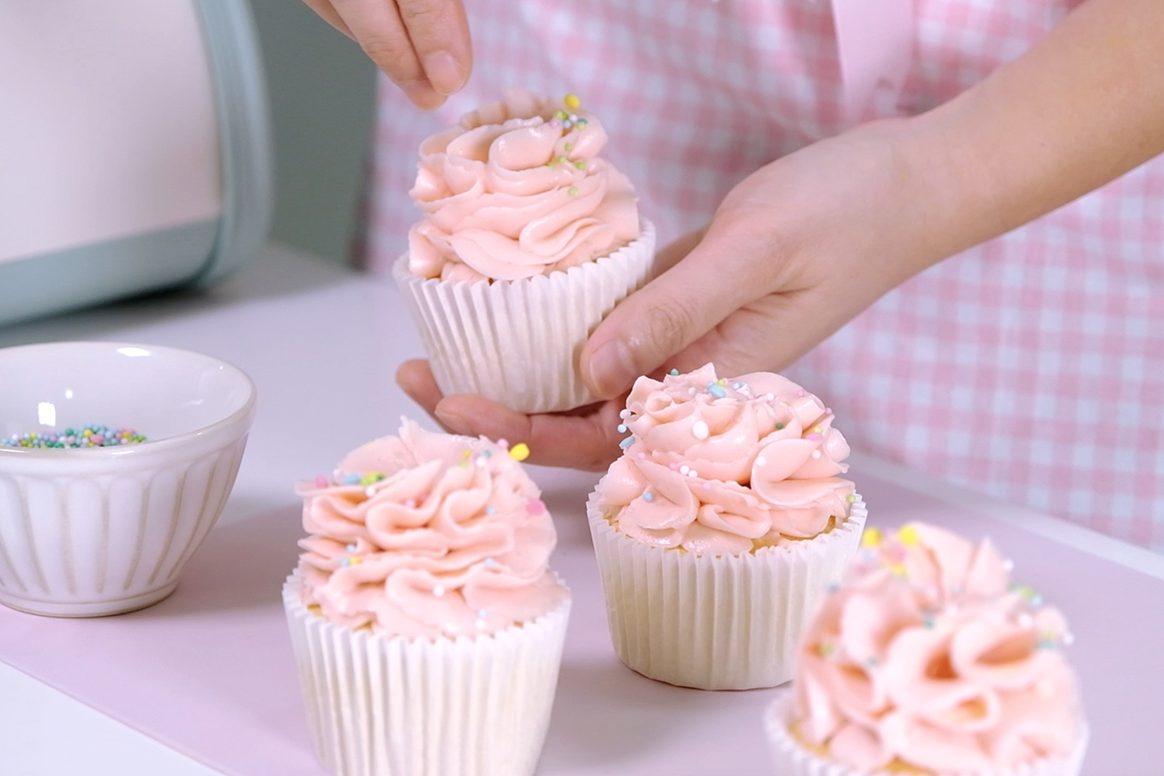
Be careful with strong extracts like Almond and Mint,
I suggest starting with 1/8 teaspoon so the flavor doesn’t get too strong.
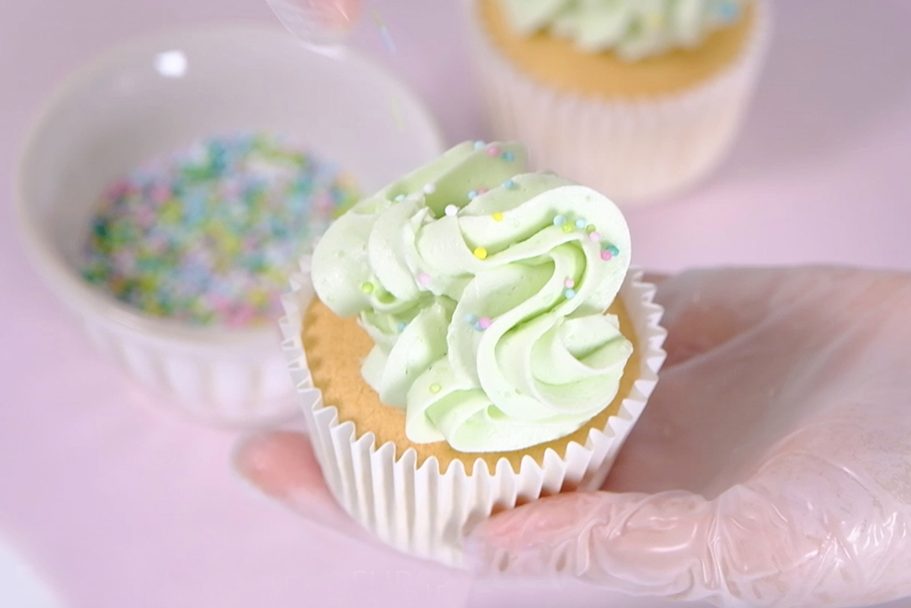
It’s time to enjoy the cupcakes 🥴

These cupcakes are perfect for any occasion and you can customize them to your taste by choosing your own frosting.
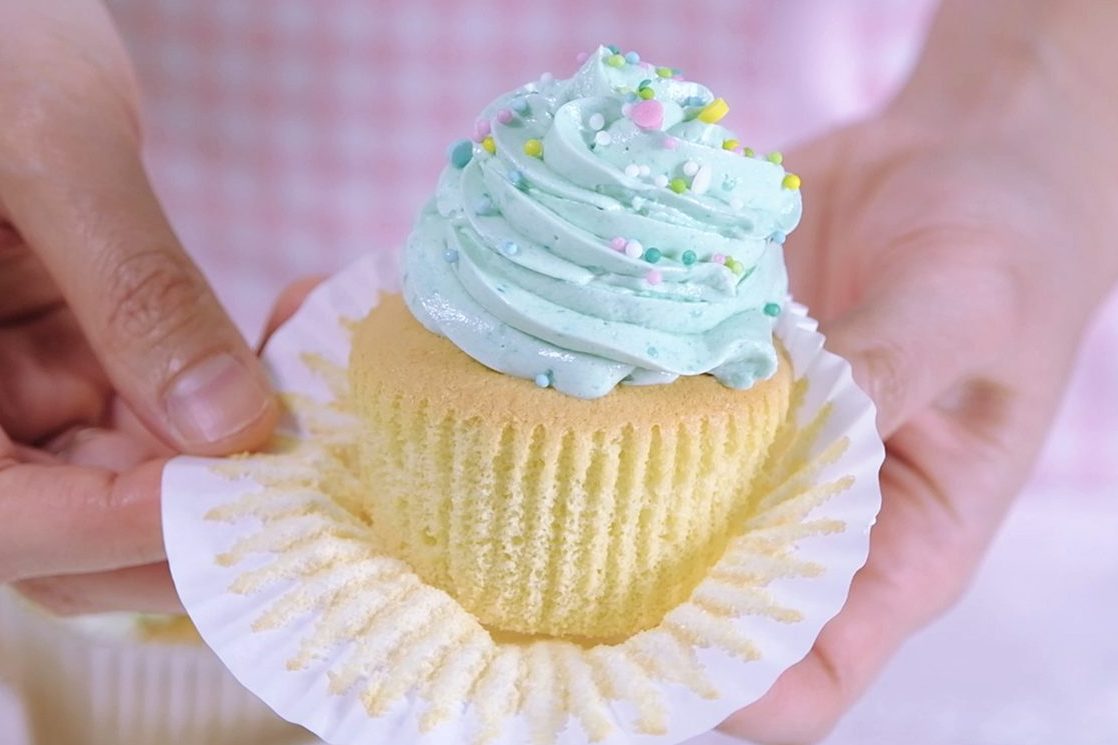
The frosting is a beautiful old-school classic.

It’s incredibly smooth and creamy, but not overly sweet.
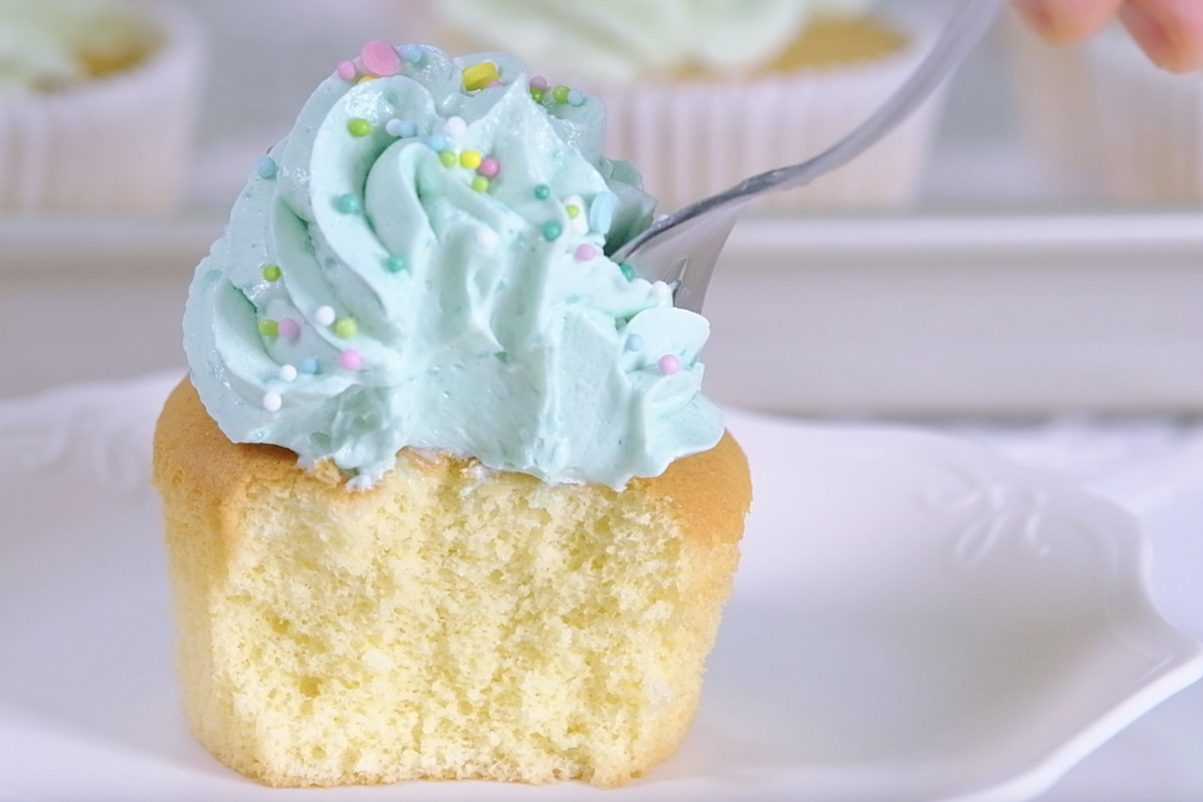
With a soft, airy texture that melts in your mouth

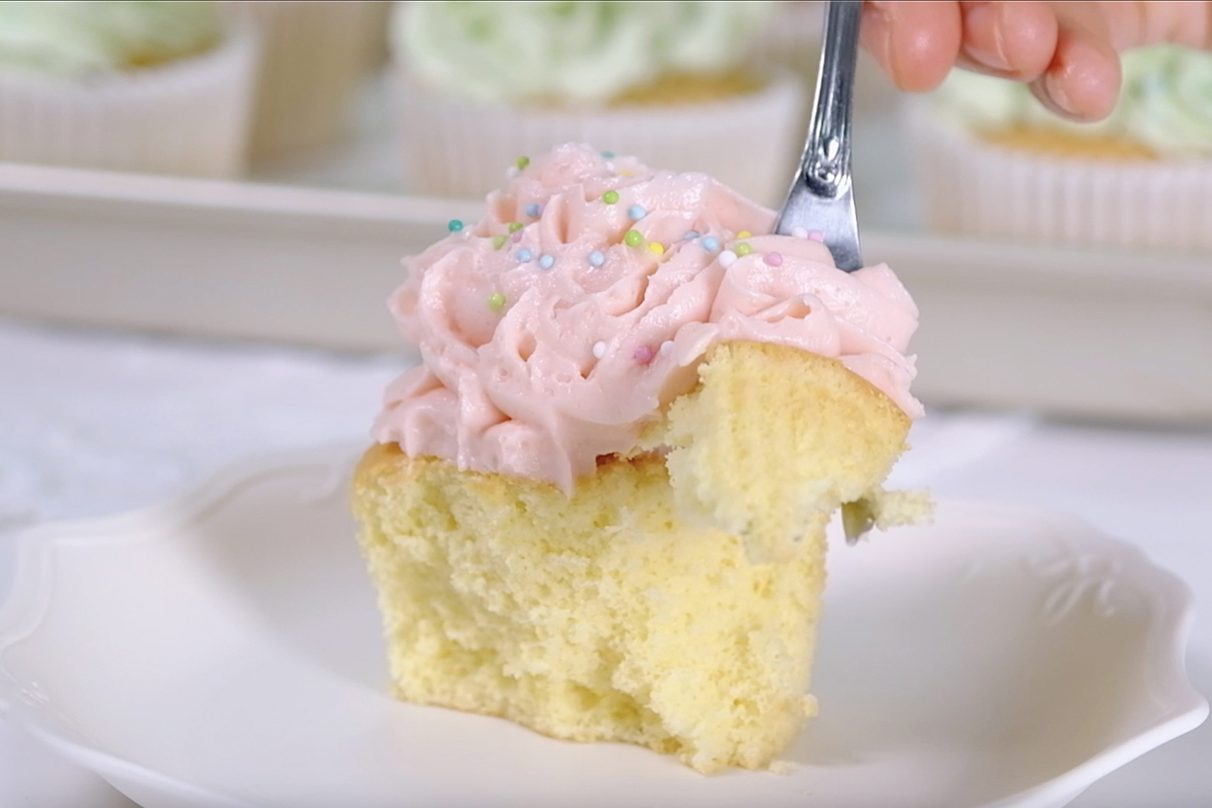
🥲
🤤

These cupcakes always make me smile

And I hope they bring a little joy to your kitchen too !!

Love you All and Happy Baking!!

WATCH HOW TO MAKE LIGHT FLUFFY VANILLA SPONGE CUPCAKES

TIPS FOR SUCCESS (PLEASE READ FIRST):

FOR THE BOILED-MILK FROSTING

  • Prepare the Roux in advanced, so it has time to cool completely at room temperature
  • It is important to strain the Roux mixture (before and after cooking), you don’t want any lumps in your frosting
  • Remember to stir the Roux mixture constantly during cooking, otherwise the bottom will burn
  • Once the Roux cooked, place a piece of plastic wrap directly on the surface to prevent a skin forming
  • Always use real Butter (100 percent High Quality Butter)
  • Take the Butter out of the fridge allow to sit on the counter for about 30 minutes before you start making the frosting.
    The Butter must be softened until it is pliable but still cold and holds its shape, rather than melting or becoming too soft.
  • Once you mix the Roux with Butter, it may look curdling at first;
    Keep mixing on medium-high speed for about 3 to 5 minutes, the frosting will become very smooth, light, and fluffy
  • If you find the frosting is too soft to pipe, you can place it in the fridge for about 30 minutes and it will firm up a bit to a nice consistency
     

FOR THE CUPCAKES BATTER

  • Make sure all utensils clean and grease free (wipe the bowl and utensil with lemon juice or vinegar to helps remove grease)
  • Preheat the oven 20 minutes or longer before you start (use an oven thermometer to ensure the temperature is correct)
    Set an oven rack in the middle of the oven
  • Use fresh eggs that are room temperature (other ingredients also must be at room temperature)
  • Beat egg whites until stiff peak
  • Sift the Flour
  • Mix each batches of the flour evenly until there are no lumps
  • Make sure the wet ingredients are combined well with the batter
  • Don’t mix the batter too hard, just make sure it is well blended (the consistency should be thick but flowing)
    If the batter looks runny, it means you’ve over-mixed it and the cupcakes won’t rise properly
  • Don’t let the batter sit too long before baking, bake it immediately (especially if the batter does not use any raising agents at all, there is a risk that the batter will deflate)
  • Resist the urge to open the oven door while baking; this can lead to the cake being too damp in the middle or even falling
  • Once baked, tap the pan on the counter 3 times, this will prevent the cupcakes from shrinking or deflating when they cool
    Then immediately transfer to a cooling rack to cool completely

RECIPE

VANILLA SPONGE CUPCAKES
Yield: 12 regular Cupcakes

Ingredients
🧁 CUPCAKE BATTER
4 Egg Whites (130 g) ~ room temperature
1 tsp Lemon Juice
80 g Caster Sugar
4 Egg Yolks (85 g) ~ room temperature
40 g Milk ~ room temperature
26 g Vegetable Oil
30 g Maple Syrup
1/2 tsp Vanilla Extract
120 g Cake Flour (sifted)
Notes: you can substitute Lemon Juice with 1 tsp White Vinegar or 1/2 tsp of Cream of Tartar

🧁 BOILED-MILK FROSTING
270 g Milk
36 g All-Purpose Flour
1/8 tsp Salt
270 g Unsalted Butter ~ softened at room temperature
135 g Icing Sugar
1/2 tsp Vanilla Extract
Food Colouring

Instructions
PREPARATION

  1. Line 12-cup Muffin Tins with paper liners
  2. Make sure all utensils clean and grease free (wipe the bowl and utensil with Lemon Juice or Vinegar to helps remove grease).
  3. Take the eggs and other cold ingredients out of the fridge
    Separate Egg Whites and Egg Yolks; then let them come to room temperature.
  4. Preheat the oven 180°C/ 160°C fan/ gas mark 4.
  5. Mix the wet ingredients (Milk, Oil, Maple Syrup and Vanilla Extract)


CUPCAKE BATTER

  1. Beat the Egg Whites over HIGH speed for about 30 seconds until foamy.
  2. Add Lemon Juice (or white Vinegar or Cream of Tartar) and continue beating for another 30 seconds.
    * Acid in Lemon Juice/ Vinegar/ Cream of Tartar will help stabilizing the egg whites
  3. Add Sugar in 3 batches every 30 seconds.
  4. Once all the Sugar is added, continue beating on high speed until stiff peak for about 3 to 5 minutes (the mixture will gradually thicken and look shiny).
  5. Pour in the Egg Yolks; Using a hand whisk, stir gently until evenly mixed.
  6. Add sifted Flour in 2 batches (don’t skip this process; by sifting the Flour, it will break up any lumps, create a light, delicate, and fluffy results).
    Stir gently; Make sure that you scrape the entire surface of the bowl so that there is no flour residue on the sides and bottom of the bowl (mix each batches evenly until there are no lumps).
  7. Then take about 1 cup of this egg-flour mixture into the wet ingredients; mix really well.
    * By using this pre-mix method, the milk-oil mixture will incorporated easily with the egg mixture.
    It prevents the oil and milk from falling directly to the bottom of the bowl, which would cause the cake didn’t rise properly
  8. Pour the pre-mix mixture back to the egg-flour mixture; using a hand whisk stir gently (don’t mix too hard, just make sure the mixture is well blended)
  9. Then using spatula, scrape all the bottom and sides of the bowl, make sure it is evenly mixed.
    The batter should be thick but flowing (if the batter looks runny, it means you’ve over-mixed it and the cupcakes won’t rise properly)
  10. Evenly scoop the batter into prepared muffin cups.
  11. Using a skewer make this circular motion to flatten the batter and break the large bubbles.
  12. Bake in the preheated oven at 180°C/ 160°C fan/ gas mark 4 for 23 Minutes (Middle rack).
    * Resist the urge to peek until your cake is done; this can lead to the cake being too damp in the middle or even falling
  13. Once baked, tap the pan on the counter 3 times, this will prevent the cupcakes from shrinking or deflating when they cool.
    And then immediately transfer to a cooling rack to cool completely.


BOILED-MILK FROSTING

  1. In a medium bowl, whisk the Flour and Salt into Milk until smooth
    Strain this mixture to the non-stick pan (you don’t want any lumps in your frosting)
  2. Cook over MEDIUM-HIGH heat, the mixture will gradually thicken.
    Stir constantly until very thick and bubbling, about 3 minutes.
    *It is important to stir the mixture constantly during cooking, otherwise the bottom will burn
  3. Once it’s done, strain the mixture through a fine sieve into a shallow heatproof dish
  4. Place a piece of plastic wrap directly on the surface to prevent a skin forming
  5. Let the Roux cool completely to room temperature (this will take about 2 hours)
  6. After the Roux has cooled,
    Start beating the Butter on medium speed for 1 minute until smooth and creamy
  7. Add the Icing Sugar and Vanilla Extract, continue beating for 1 minute
    * Scrapping down the sides and bottom of the bowl occasionally until all the Sugar has been incorporated
  8. Pour the room temperature Roux, continue mixing (It may look curdling at first) Using spatula, scrape down the sides and bottom of the bowl occasionally to make sure everything is mixed well
    Keep mixing on MEDIUM-HIGH speed for about 3 to 5 minutes, the frosting will become very smooth, light, and fluffy
    * If you find the frosting is too soft to pipe, you can place it in the fridge for about 30 minutes and it will firm up a bit to a nice consistency

NOTES

  1. Make sure the unfrosted Sponge Cupcakes to cool completely before storing
  2. Unfrosted Sponge Cupcakes can be stored at room temperatur for 2-3 days in an airtight container to prevent them from drying out
  3. For longer storage, they can be placed in the refrigerator for up to a week in an airtight container.
    If refrigerated, let the Cupcakes come to room temperature before serving to soften them up. This usually takes about 30 minutes to an hour
  4. Unfrosted Cupcakes can also be frozen for longer storage (up to 1 month). 
    Wrap each cupcake individually in plastic wrap and then place them in a freezer-safe container or bag. 
    To thaw, unwrap the Cupcakes, place in an airtight container and let them come to room temperature. 
  5. To store frosted Sponge Cupcakes; keep them in an airtight container for 1 day,
    If you can’t finish it, preferably refrigerated if the frosting contains dairy or perishable ingredients; they can last up to 5 days.

Rich Fluffy Moist Classic Marble Cake

Marble Cake is my classic childhood baking memory 🥰
Swirls of tender Vanilla and rich Chocolate Cake baked together in one beautiful Tube Pan.
This cake was a childhood favorite, but it seems a bit dated now; which is a shame, because it’s worth the energy it takes to bake.
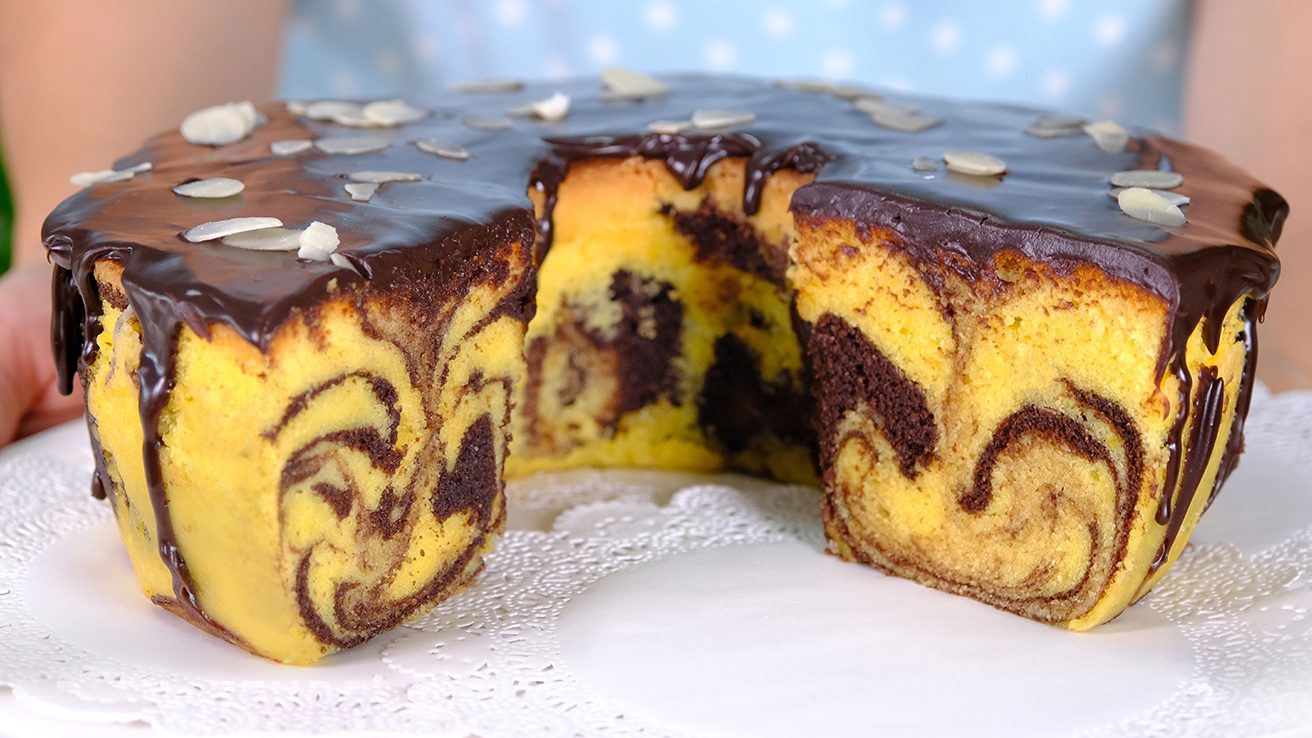
😱

Many Marble Cake recipes will simply use a basic Pound Cake recipe, and introduce a couple of tablespoons of Cocoa Powder to half of the batter.
A pound cake recipe is an extremely useful one to have up your sleeve; but for me, it isn’t the perfect Marble Cake recipe.
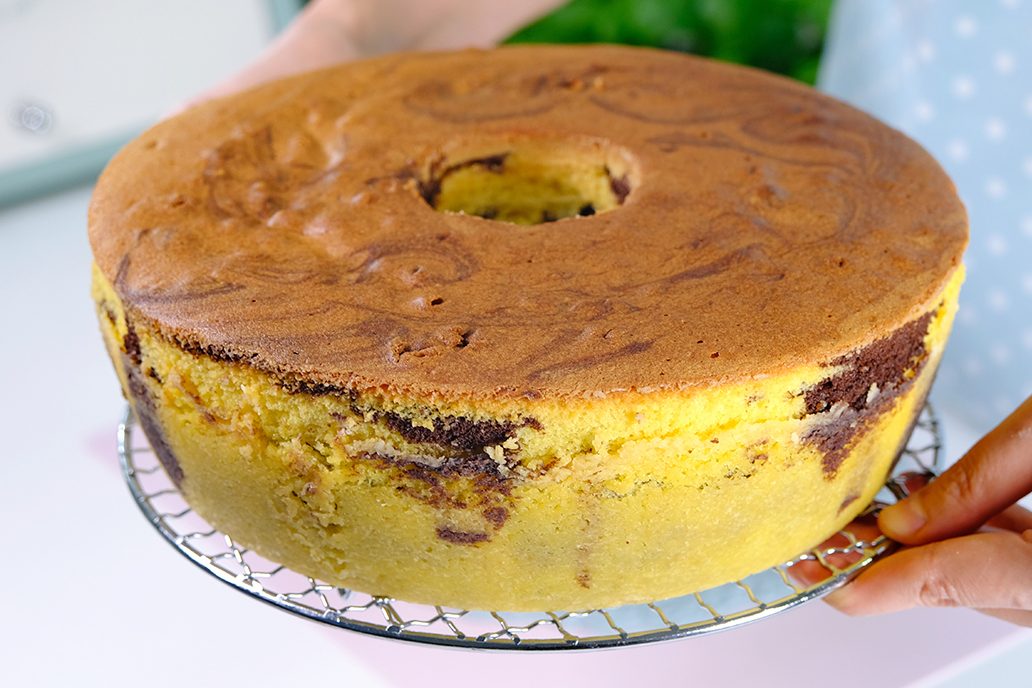
I love making this marble cake using my old tube pan 😙

So this recipe is based on a Vanilla Sour Cream Cake that I’ve been making for years: as well as the tang of the Sour Cream softening the sugar content,  
Adding Sour Cream will result in a richer, super moist and soft cake.
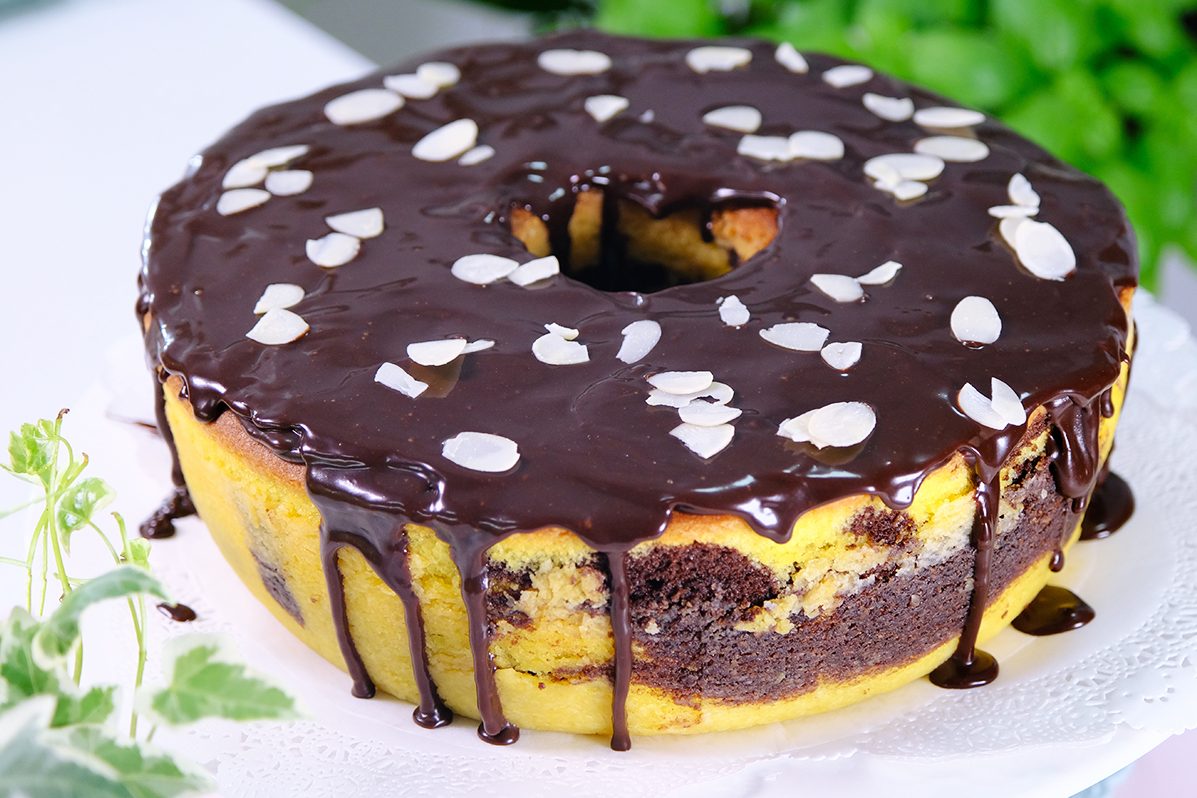
The cake is ridiculously moist and keeps extremely well (Unglazed Marble Cake should last 4 days at room temperature in an airtight container, without becoming dry or stale).
Likewise, the mixture of Cocoa Powder and melted Butter in the darker batter creates richness and depth of flavor; no dry or bland cake here.
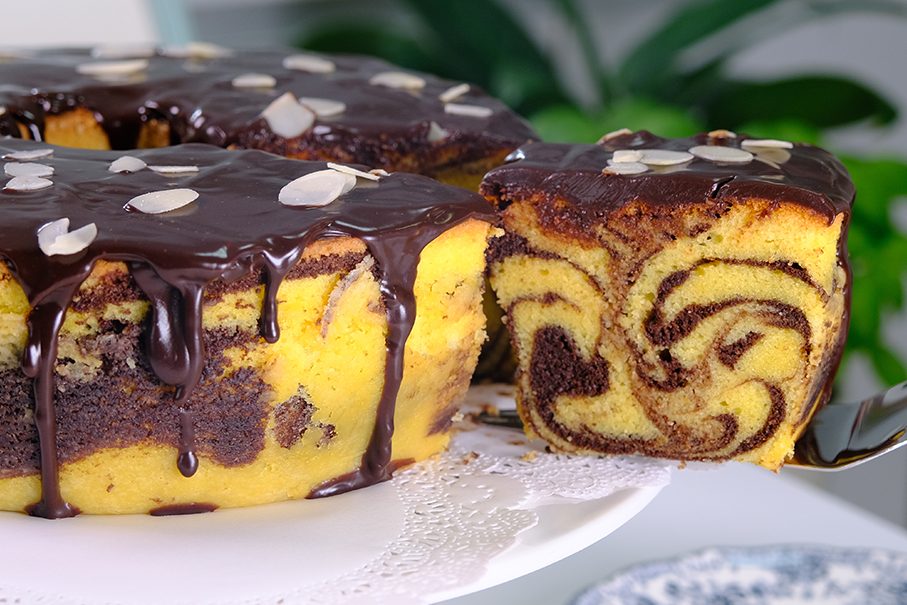
I used the Flour Batter Mixing Method to make this cake.
This method produces a more tender cake because the Butter coats some of the gluten-forming proteins in the flour at the beginning of the mixing process, preventing excessive gluten formation.

Flour Batter Method works only if the Butter is softened or 65° to 75°F/ 19° to 23°C.
At this temperature, the Butter when whipped will hold the maximum amount of air; And make sure that all other ingredients are room temperature as well, this includes Eggs and Sour Cream.

I love to serve this cake with Chocolate Glaze, but you can serve it just plain or dust the top with Icing Sugar.
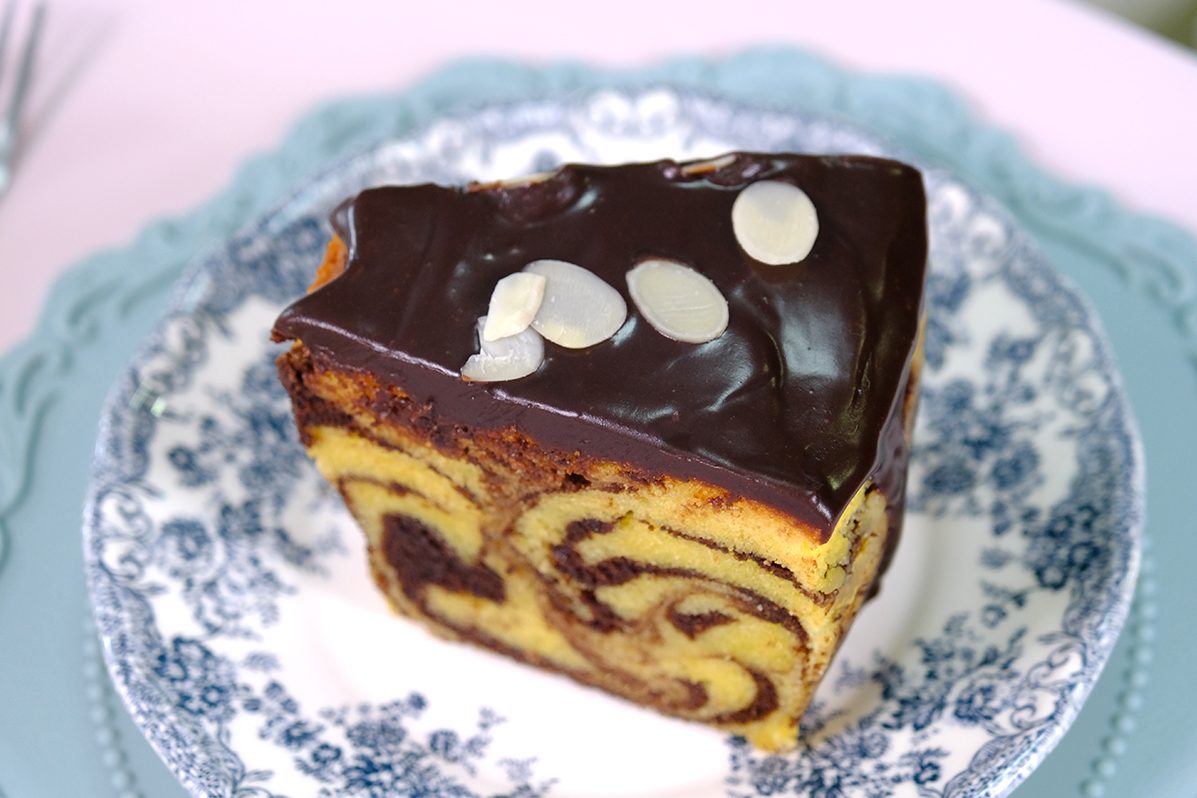
Once the glaze is poured, I highly recommend storing it in the refrigerator, since the glaze contains Butter as a perishable ingredient.
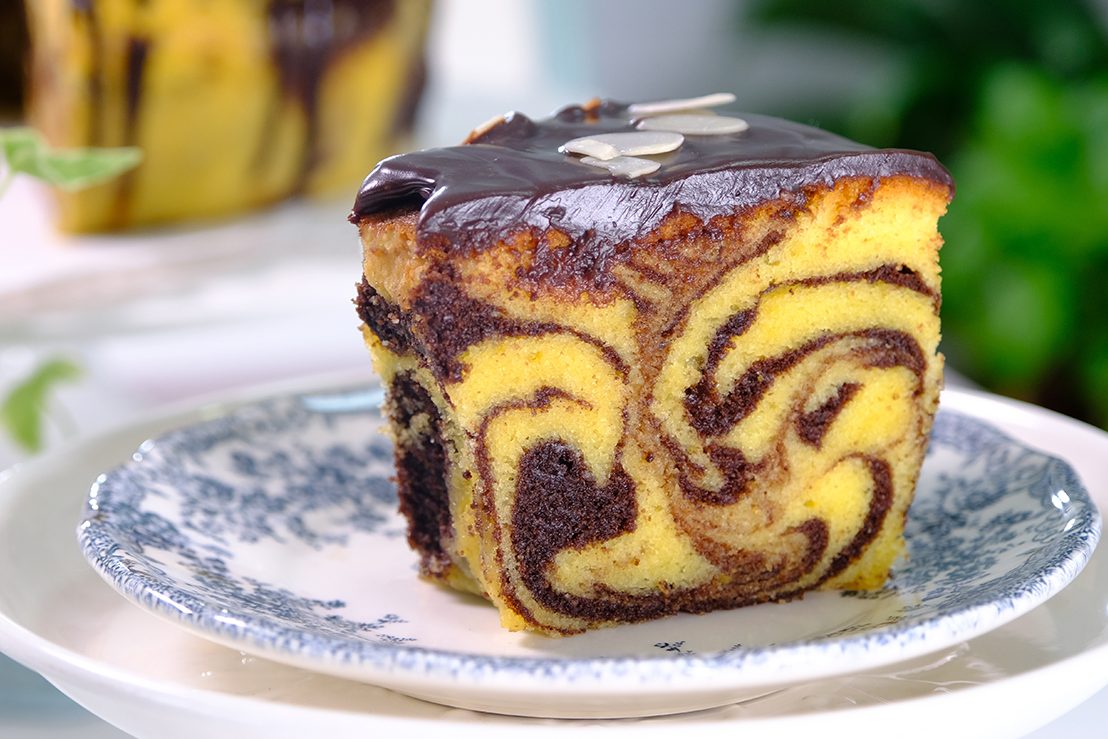
🤤 I want to bite it !

The cake smells amazing 🤪 🙃 😘 …
There is something special about a classic marble cake, it catches the eye but also makes you excited to bite into it because it has two different flavors.
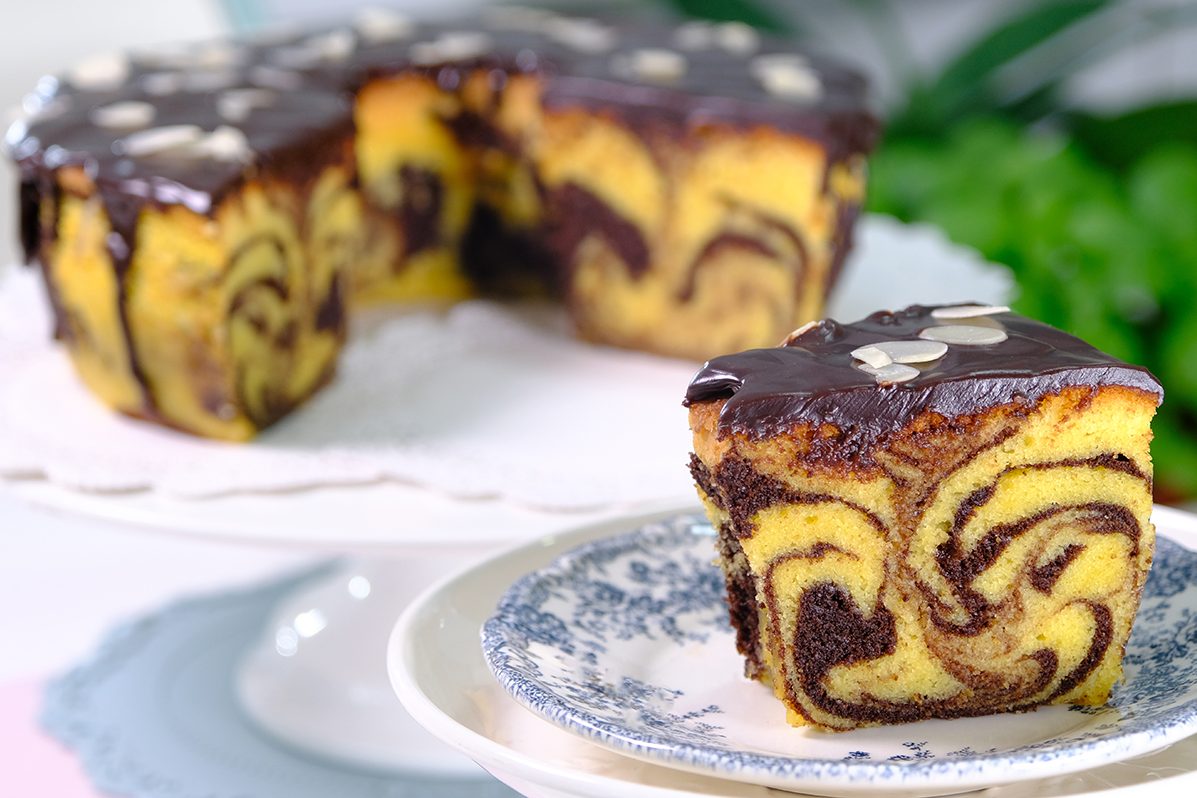
You can use a Bundt Pan to make this simple homemade treat much more sophisticated.

It is wonderfully rich and buttery with a moist and tender crumb.

If you love soft, velvet Marble Cake then please give this cake a try.
I will also show you how to get the perfect Marble swirl (kindly watch the video)
This beautiful moist cake perfect for serving with a cup of tea or coffee.

Marble cake is a simple concept, but the baked result is very satisfying, with a delightful look when you cut into the cake and reveal the hidden pattern.
I hope you will enjoy it as much as I do 😃

WATCH HOW TO MAKE RICH FLUFFY MOIST CLASSIC MARBLE CAKE

TIPS FOR SUCCESS (PLEASE READ FIRST):

  • Choose the right pan
    Use a cake pan made of a highly conductive metal such as Aluminium
    If you prefer to use a Bundt Pan, make sure that you choose a thick, non-stick metal pan that is not too dark, since they are sturdy and conduct heat consistently
  • Make sure every crack and crevice of your pan has been greased with solid Shortening and flour to ensure a perfect crust
  • Preheat the oven 20 minutes or longer before you start (use an oven thermometer to ensure the temperature is correct)
    Set an oven rack in the lower third of the oven
  • Start with room temperature ingredients (the Butter must be softened or 65° to 75°F/ 19° to 23°C).
    I usually take the ingredients out of the fridge (including Eggs and Sour Cream), allow to sit on the counter for about 30 minutes before I start making the cake. The amount of time depends on the weather and how cool you keep your kitchen (the temperature where I live is 29.5°C)
    DON’T heat the butter in the Microwave, melted Butter won’t cream properly
  • Always use real Butter (100 percent High Quality Butter)
  • Sift the Flour Mixture (160 grams of Flour, Baking Powder and Salt)
  • When adding Flour mixture and Sour Cream, DON’T overmix
  • When making the marbling effect, DO NOT overdo it (2 rounds max) as you want the Vanilla and Chocolate swirls to be clearly visible
  • NEVER try to speed up the baking process and DO NOT open the oven door until your cake has baked at least three-quarters of the recommended baking time
  • Once it’s baked, let Marble Cake rest for at least 15 minutes in the pan; then remove the pan and let it cool completely on a cooling rack
  • Marble cake is best eaten the day after baking
    Once cool, store Marble Cake at room temperature (in an airtight plastic bag) overnight
    And the next day; you can pour the glaze on top and serve.

RECIPE

MARBLE CAKE
Yield: One 10-Inch (7 cm tall) TUBE PAN

❄️ Ingredients
CAKE BATTER
🪴Cocoa Mixture:
40 g Unsalted Butter (melted)
20 g Cocoa Powder (Dutch-Processed)

🪴 Creamed Butter Mixture:
255 g Unsalted Butter ~ softened at room temperature
180 g All-Purpose Flour

🪴Flour Mixture:
160 g All-Purpose Flour
2 ¼ tsp Baking Powder (Double Acting)
3/4 tsp Salt

240 g Sour Cream (room temp.)
1/2 tbs Vanilla Extract
225 Whole Eggs (room temp.)
90 g Egg Yolks (room temp.)
375 g Caster Sugar

CHOCOLATE GLAZE
170 g Dark Chocolate Compound (Semi-Sweet)
120 g Heavy Cream
20 g Unsalted Butter
1 tbs Dark Rum


❄️ Instructions
Preparation

  1. Coat the entire inside of the pan with solid Shortening
    After greasing the pan, sprinkle some All-Purpose Flour, tilt the pan and rotate it (tapping the sides to spread the flour evenly)
    Invert the pan and tap it lightly to get rid of any excess flour (make sure every nook and cranny of the pan is greased and floured to ensure a perfect crust)
  2. Preheat the oven 20 minutes or longer before you start 160°C fan/ 180°C/ Gas Mark 4 (use an oven thermometer to ensure the temperature is correct)
    Set an oven rack in the lower third of the oven
  3. Make sure all utensils clean and grease free (wipe the bowl and utensil with lemon juice or vinegar to helps remove grease).
  4. Make sure all ingredients are at room temperature
    Take the Butter, Eggs and Sour Cream out of the fridge, allow to sit on the counter for about 30 minutes before you start making the cake (the amount of time depends on the weather and how cool you keep your kitchen. The temperature where I live is 29.5°C)
    The Butter must be softened or 65° to 75°F/ 19° to 23°C; To test poke it with your finger; your finger should make an indent without sinking into the Butter (it should not be shiny or greasy and cool to touch, not warm)
    DON’T take a shortcut and Microwave the Butter because it will not heat evenly
  5. Melt 40 grams of Unsalted Butter in the double boiler, then mix with Cocoa Powder until smooth; set aside
  6. Using a baloon whisk, combine the Flour Mixture (160 grams of All-Purpose Flour, Baking Powder and Salt), set aside
  7. Mix Sour Cream and Vanilla Extract, set aside


To Make Marble Cake

  1. In the first bowl
    Beat the softened 255 grams Unsalted Butter for 30 seconds until soft
    Add 180 grams of All-Purpose Flour, mix on LOW SPEED first until the dry ingredients are moistened; then raise the speed to MEDIUM-HIGH and continue beat for about 3 minutes until light, fluffy and pale in color (scrape the sides and bottom of the bowl occasionally to make sure everything is evenly mixed)
    This method produces a more tender cake because the Butter coats some of the gluten-forming proteins in the flour at the beginning of the mixing process, preventing excessive gluten formation
    Set aside
  2. In a second bowl
    Beat the Eggs and Caster Sugar at MEDIUM-HIGH speed for about 3 Minutes to form a semi-firm foam
    The egg whipping is not as thorough as that needed for a Sponge Cake
  3. Using a hand whisk, gently combine the Beaten Eggs to the Creamed Butter Mixture in 3 batches (mixing well after each addition)
  4. Then gradually add sifted Flour Mixture alternately with Sour Cream that we prepared earlier in 3 batches (beginning and ending with Flour Mixture).
    Please note that the flour mixture must be sifted
    Mix gently with a hand whisk until just combined after each addition
    Make sure that you scrape the entire surface of the bowl so there is no flour residue on the sides and bottom of the bowl (avoid over-mixing the batter or your Marble Cake will be tough)
  5. Using a spatula, scrape down the sides of the bowl, making sure everything is mixed well (the consistency should be thick)
  6. For the Chocolate batter, pour 360 ​​grams of the batter into another bowl
    Add the Cocoa mixture that we have prepared earlier and stir until well combined
  7. Scoop the batter into the prepared pan
    Place 1/3 of the Vanilla batter first
    Then 1/2 of the Chocolate batter
    Repeat the process
    Finished with the Vanilla batter
  8. For marbling effect
    Using a wide spoon, fold through bit by bit
    Then use a spatula, lightly swirling the batter in a spiral motion (make sure the spatula doesn’t touch the bottom of the pan)
    Don’t overdo it here, 2 rounds max, as you want the Vanilla and Chocolate swirls to be clearly visible (this process will also help to flatten the batter and break the large bubbles)
  9. Tap the pan to remove excess bubbles
  10. Bake in the preheated 160°C fan/ 180°C/ Gas Mark 4 (the lower third rack) for 1 hour or until a skewer inserted into the center comes out clean
    Never try to speed up the baking process and Do not open the oven door until your cake has baked at least three-quarters of the recommended baking time
    The rush of cold air that hits the cake when the door is opened could cause the cake to collapse
    ** If you feel your cake is a little too brown, what you can do is after 45 minutes of baking, cover the pan loosely with Aluminium Foil to prevent overbrowning and continue bake for another 15 minutes until the cake is done
  11. Once it’s baked, let the cake cool in the pan for about 15 minutes
  12. 15 minutes later, remove the pan and let it cool completely on a cooling rack
  13. Marble cake is best eaten the day after baking
    Once it’s cools completely, wrap tightly with airtight plastic and let it sit at room temperature overnight. This storage method can maximize the moisture of the Marble Cake

To Make Chocolate Glaze

  1. Heat the Heavy Cream in a medium saucepan until start to simmer
  2. Remove from heat, add in the chopped Chocolate, let it sit for 30 seconds then whisk until smooth
  3. Add the Butter while the mixture still hot (Butter fat adds a creamier, shinier, and more stable Ganache)
  4. Pour in Dark Rum, this is optional and mix until well combined
    Now you can see, the consistency of the glaze is runny
    Let the glaze cool to lukewarm and thickened for about 20 minutes
  5. After 20 Minutes the glaze will be thicken
    Drizzle over the cake and sprinkle with some toasted Almonds

NOTES

  1. DON’T use Butter to grease the pan
    Shortening is preferable to Butter because it is solid at room temperature; It will stick the pan and provides a better barrier
    Butter unless it is clarified will leave gaps where the flour will not adhere but the cake unfailingly will
  2. Ensure the cake is completely cooled before wrapping or storing
    If you are wrapping a warm Marble Cake, condensation may occur, which can make the cake soggy and sticky
    That moisture buildup can affect the crumb—making it feel overly dense or gummy
    Condensation = Mold Risk; If it’s wrapped warm and stored for a while, that trapped moisture can speed up spoilage
  3. The unglazed Marble Cake can simply be stored at room temperature (wrap the cake tightly in plastic wrap or place it in an airtight container); store in a cool, dry place away from direct sunlight, it can last for 3-4 days at room temperature
  4. Once the glaze is poured, I highly recommend storing it in the refrigerator, since the glaze contains Butter as a perishable ingredient
  5. If storing in the refrigerator, wrap the cake well to prevent it from drying out and absorbing odors; Marble Cake can be kept in the refrigerator for up to a week
  6. For longer storage, it can be frozen for up to 3 months
    Wrap the cake or individual slices tightly in plastic wrap and then foil; Store in an airtight container or freezer bag
    To thaw, remove from the freezer and let it sit at room temperature for a few hours

Soft Fluffy Moist Vanilla Pound Cake

“Plain Old Vanilla Pound Cake”
This simple yet classic and elegant cake has become recognized as a basic foundation for many of our modern confections.
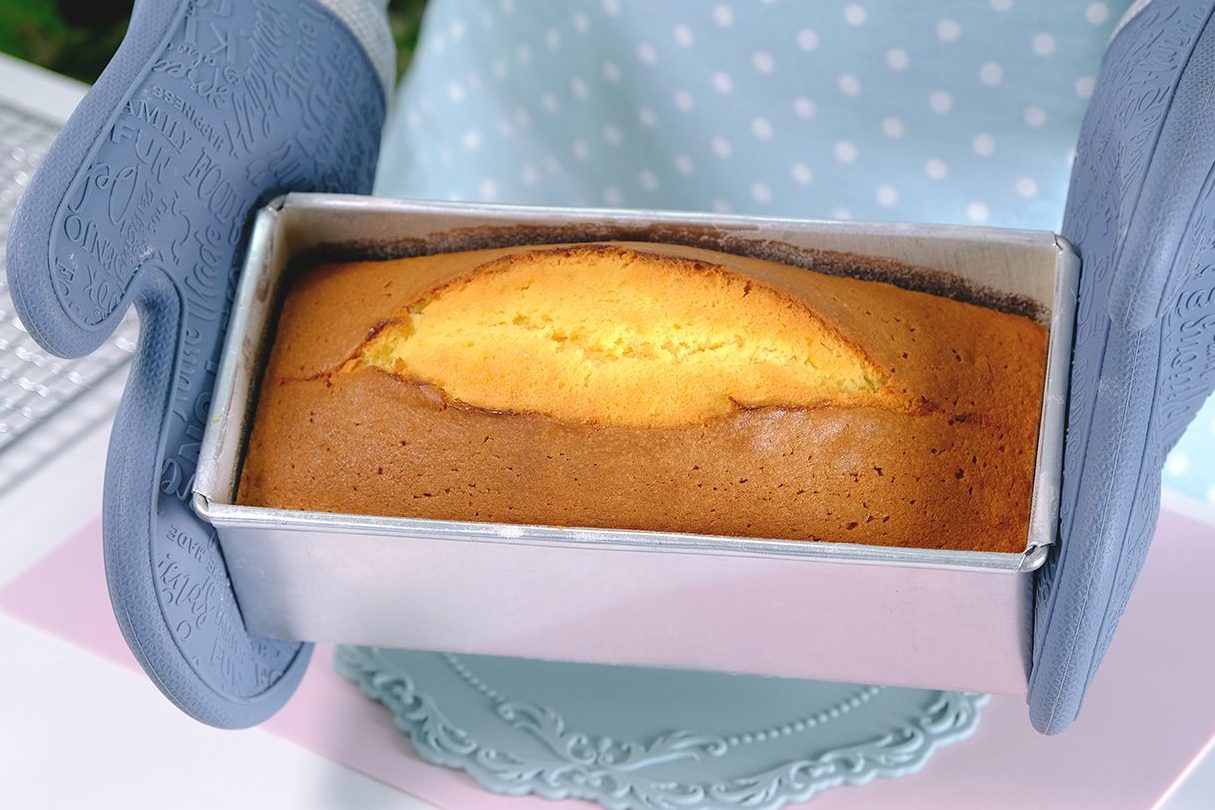

Pound cake gets its name from its traditional recipe: it used a pound each of four main ingredients — Flour, Butter, Sugar, and Eggs. That’s it!

A pound of this, a pound of that, super straight forward and easy to remember which would yield a cake large enough to feed several families.

Rich and buttery, heavy and dense are the original characteristics of Pound Cake.
It’s not light and fluffy like a Sponge Cake—it’s got weight to it.

Nowadays, many people don’t like Pound Cake because it’s too heavy and dense.
The dense crumb comes from all that butter and eggs, with NO leavening agents like Baking Powder or Baking Soda in the original recipe.

However, methods and ingredients have changed over time to suit evolving tastes.

Along with new ingredients, proportions of the basic ingredients I adjusted to make less dense cake.

In this recipe, I will use the Flour Batter Mixing Method and share some tips for making a Mile High yet moist Vanilla Pound Cake.


FLOUR BATTER MIXING METHOD produces a more tender cake because the Butter coats some of the gluten-forming proteins in the flour at the beginning of the mixing process, preventing excessive gluten formation.
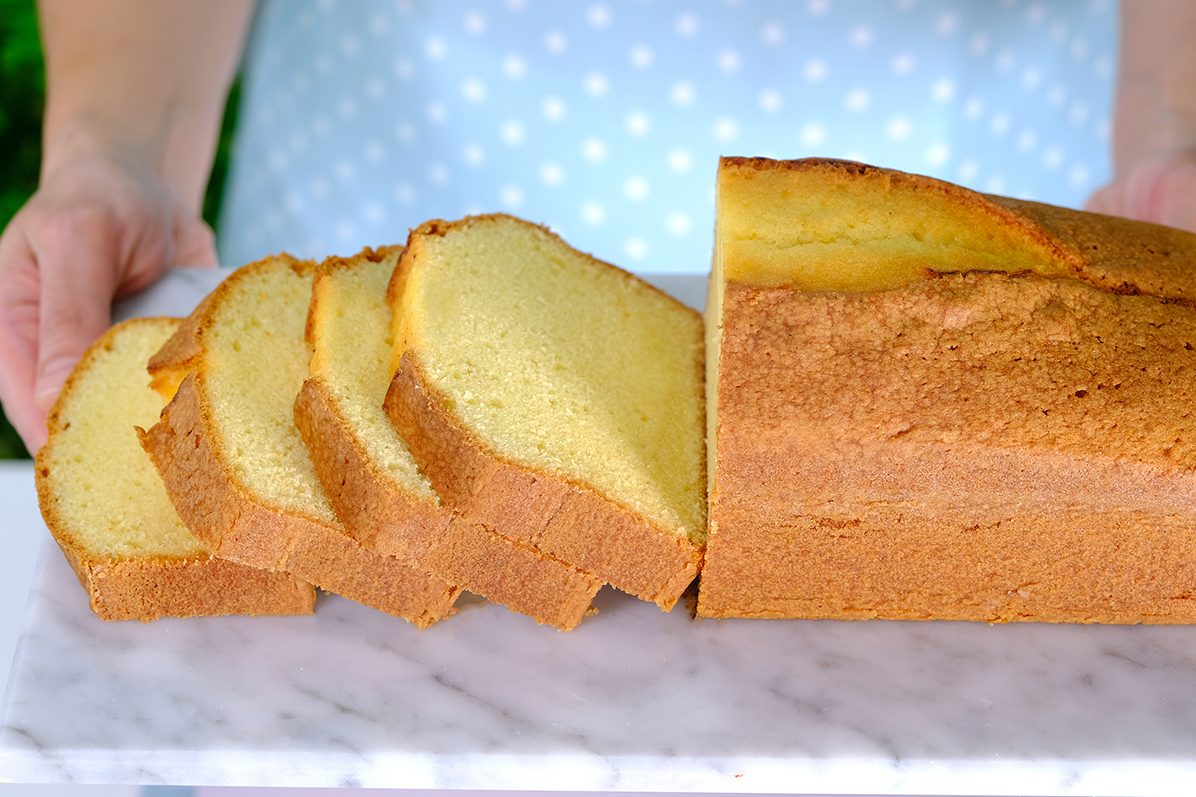
This method works only if the Butter is softened or 65° to 75°F/ 19° to 23°C and all other ingredients are ROOM TEMPERATURE as well (this includes Eggs and Milk).
At this temperature, the Butter when whipped will hold the maximum amount of air.
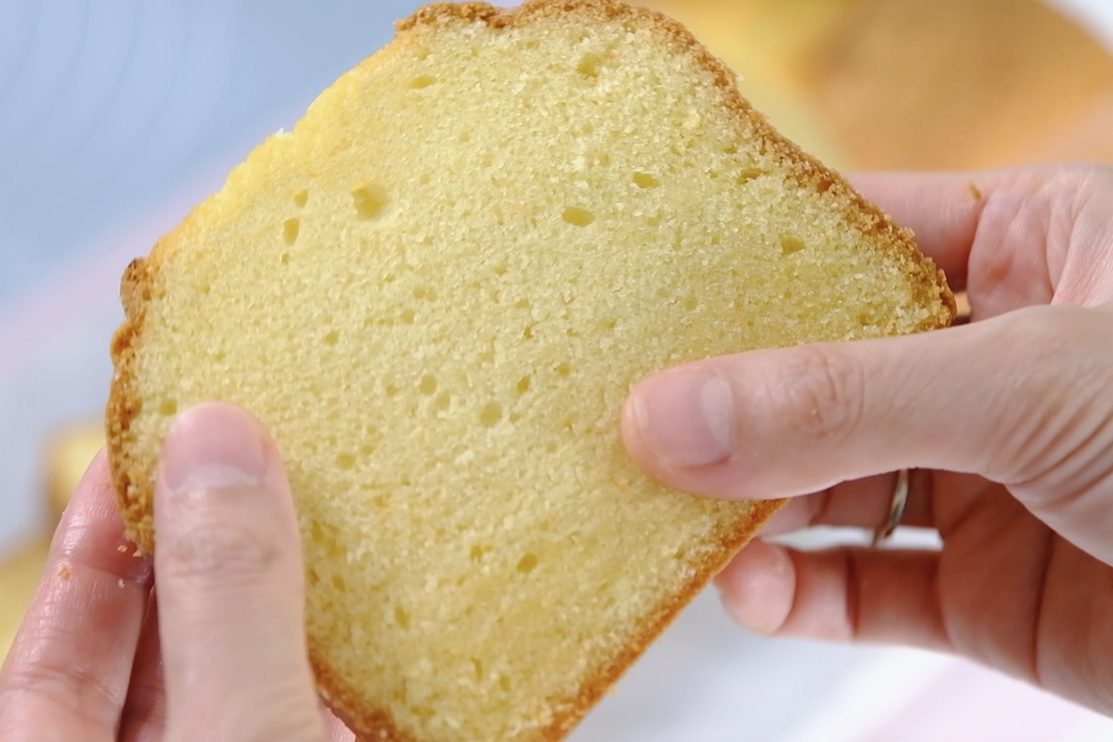
Soft fluffy Vanilla Pound Cake 😇

ALWAYS USE REAL BUTTER when making Pound Cake. Using 100 percent high quality Butter at the correct temperature yields perfect texture in addition to superior flavor.
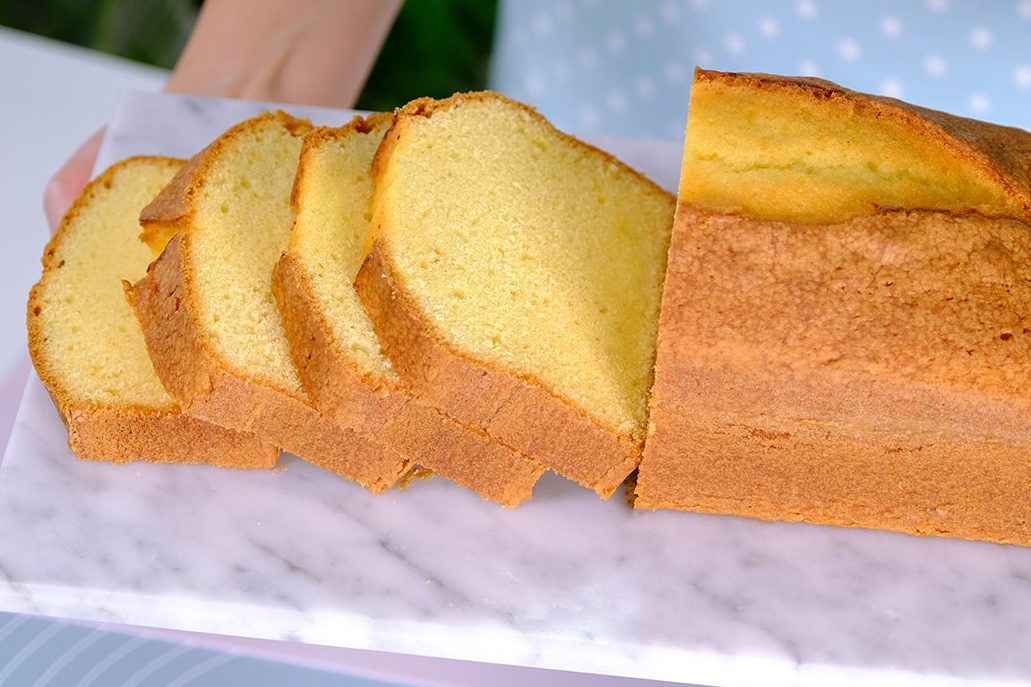
CHOOSING THE RIGHT PAN IS VERY IMPORTANT IN MAKING POUND CAKE
Pound Cake can be baked in a Loaf, Tube or Bundt Pan.
Rapid heat penetration gives the cake a superior texture, so it is best to use a cake pan made of a highly conductive metal that has a dull, heat-absorbing finish such as Aluminium.

If you prefer to use a Bundt Pan, make sure that you choose a thick, non-stick metal pan that is not too dark, since they are sturdy and conduct heat consistently (Nordic Ware Cast Aluminium Bundt Pan does a great job).

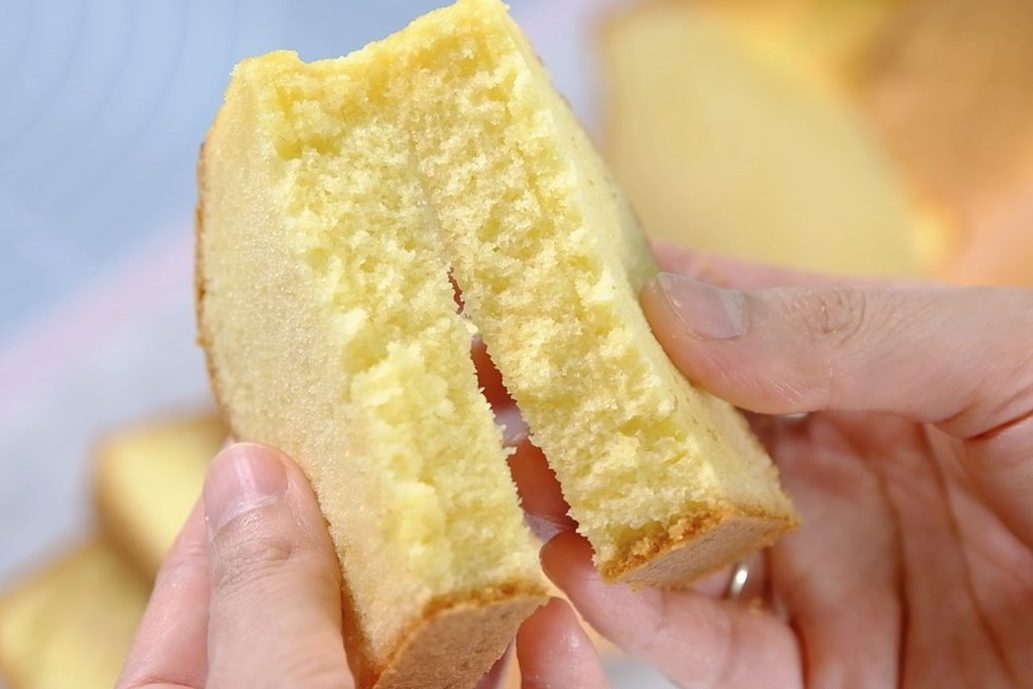
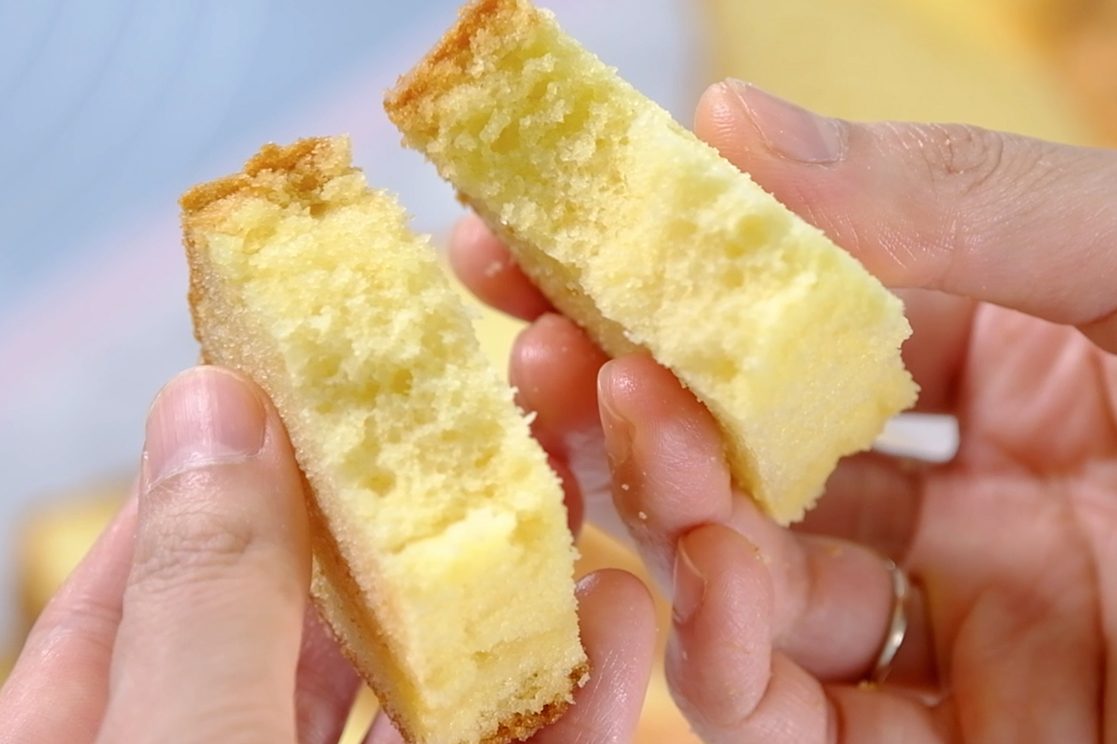
This classic Butter Cake will be so fluffy, light, buttery and very tasty 😘
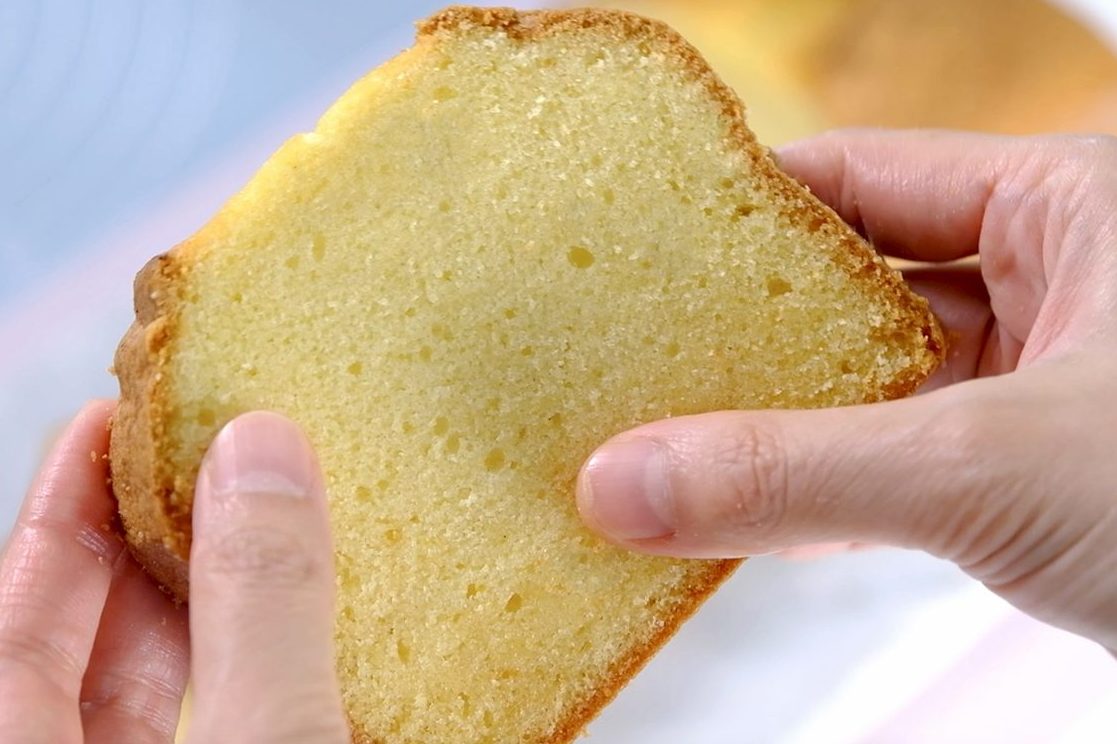
So.. soft, light and fluffy 🥲
😱 !!
😚 🤤
I used to not like sponge cake either 😏
But now, I started to fall in ❤️ with it 😳
I never imagined a simple cake could be so tasty 😬
Eat it plain …
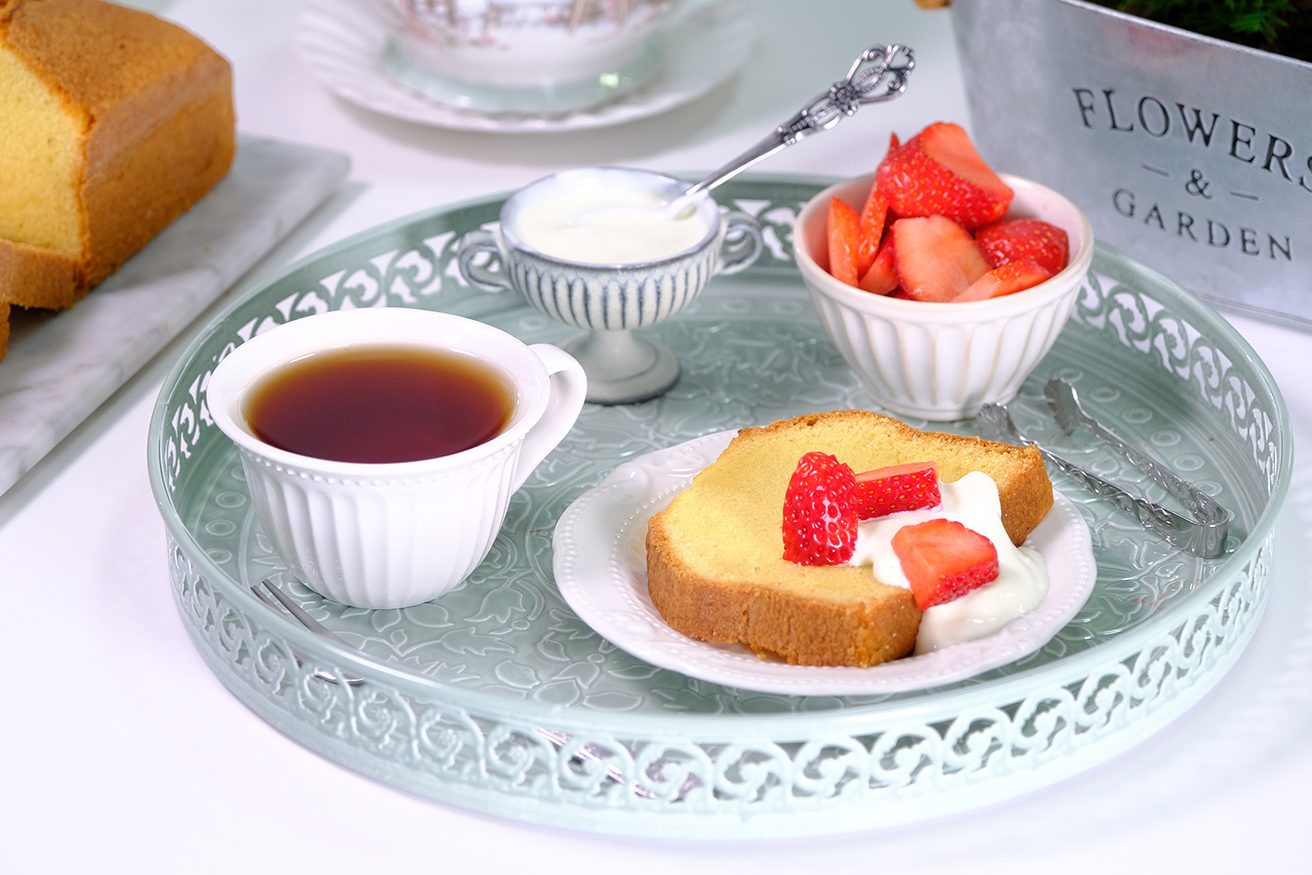
Frosted or lightly toasted with Strawberries 🍓 and fresh Whipped Cream
The cake will still be delicious 🥰
Pound Cake is classic for afternoon tea
It’s rich, buttery, and not too fussy, which makes it perfect alongside a cup of tea
The dense texture balances really well with lighter tea, sandwiches or more delicate pastries on the table

I hope this beautiful cake will add to your baking repertoire 😉

🍰 Love you All !

WATCH HOW TO MAKE “SOFT FLUFFY MOIST VANILLA POUND CAKE”

TIPS FOR SUCCESS (PLEASE READ FIRST):

  • Choose the right pan
    Use a cake pan made of a highly conductive metal such as Aluminium
    If you prefer to use a Bundt Pan, make sure that you choose a thick, non-stick metal pan that is not too dark, since they are sturdy and conduct heat consistently
  • Make sure every crack and crevice of your pan has been greased with solid Shortening and flour to ensure a perfect crust
  • Preheat the oven 20 minutes or longer before you start (use an oven thermometer to ensure the temperature is correct)
    Set an oven rack in the lower third of the oven
  • Start with room temperature ingredients (the Butter must be softened or 65° to 75°F/ 19° to 23°C).
    I usually take the ingredients out of the fridge (including Eggs and Milk), allow to sit on the counter for about 30 minutes before I start making the cake. The amount of time depends on the weather and how cool you keep your kitchen (the temperature where I live is 29.5°C)
    DON’T heat the butter in the Microwave, melted Butter won’t cream properly
  • Always use real Butter (100 percent High Quality Butter)
  • Sift the Flour Mixture (120 grams of Flour, Baking Powder, Baking Soda and Salt)
  • When adding Flour mixture and Buttermilk, Don’t overmix
  • Always fold fruit (if using) by hand (blueberries, etc)
  • NEVER try to speed up the baking process and DO NOT open the oven door until your cake has baked at least three-quarters of the recommended baking time
  • Once it’s baked, let Pound Cake rest for at least 10 minutes in the pan; then remove the pan and let it cool completely on a cooling rack
  • Refrigerating the cake will distort the fresh texture and flavor
    Once cool, store Pound Cake at room temperature (in an airtight plastic bag) for 4-5 days

RECIPE

VANILLA POUND CAKE
Yield: One (9” X 4” X 3”) or (23 x 10 x 7.5) cm Loaf Pan

❄️ Ingredients
FOR THE CREAMED BUTTER MIXTURE:
135 g Unsalted Butter ~ softened at room temperature
115 g All-Purpose Flour

160 g Eggs ~ room temperature
240 g Caster Sugar
120 g All-Purpose Flour
1/3 tsp Double Acting Baking Powder
1/3 tsp Baking Soda
1/3 tsp Salt
120 g Milk ~ room temperature
1/2 tbs Lemon Juice/ Vinegar
2/3 tsp Vanilla Extract

❄️ Instructions
Preparation

  1. Coat the entire inside of the pan with solid Shortening
    After greasing the pan, sprinkle some All-Purpose Flour, tilt the pan and rotate it (tapping the sides to spread the flour evenly)
    Invert the pan and tap it lightly to get rid of any excess flour (make sure every nook and cranny of the pan is greased and floured to ensure a perfect crust)
  2. Preheat the oven 20 minutes or longer before you start 160°C fan/ 180°C/ Gas Mark 4 (use an oven thermometer to ensure the temperature is correct)
    Set an oven rack in the lower third of the oven
  3. Make sure all utensils clean and grease free (wipe the bowl and utensil with lemon juice or vinegar to helps remove grease).
  4. Make sure all ingredients are at room temperature
    Take the Butter, Eggs and Milk out of the fridge, allow to sit on the counter for about 30 minutes before you start making the cake (the amount of time depends on the weather and how cool you keep your kitchen. The temperature where I live is 29.5°C)
    The Butter must be softened or 65° to 75°F/ 19° to 23°C; To test poke it with your finger; your finger should make an indent without sinking into the Butter (it should not be shiny or greasy and cool to touch, not warm)
    DON’T take a shortcut and Microwave the Butter because it will not heat evenly
  5. Using a baloon whisk, combine the Flour Mixture (120 grams of All-Purpose Flour, Baking Powder, Baking Soda and Salt), set aside
  6. Prepare the Buttermilk Mixture (combine Milk, Lemon Juice or Vinegar and Vanilla Extract), set aside


To Make Vaniila Pound Cake

  1. In the first bowl
    Beat the softened Unsalted Butter for 30 seconds until soft
    Add 115 grams of All-Purpose Flour, mix on LOW SPEED first until the dry ingredients are moistened; then raise the speed to MEDIUM-HIGH and continue beat for about 3 minutes until light, fluffy and pale in color (scrape the sides and bottom of the bowl occasionally to make sure everything is evenly mixed)
    This method produces a more tender cake because the Butter coats some of the gluten-forming proteins in the flour at the beginning of the mixing process, preventing excessive gluten formation
    Set aside
  2. In a second bowl
    Beat the Eggs and Caster Sugar at MEDIUM-HIGH speed for about 3 Minutes to form a semi-firm foam
    The egg whipping is not as thorough as that needed for a Sponge Cake
  3. Using a hand whisk, gently combine the Beaten Eggs to the Creamed Butter Mixture in 3 batches (mixing well after each addition)
  4. Then gradually add sifted Flour Mixture alternately with Buttermilk Mixture that we prepared earlier in 3 batches (beginning and ending with Flour Mixture).
    Please note that the flour mixture must be sifted
    Mix gently with a hand whisk until just combined after each addition
    Make sure that you scrape the entire surface of the bowl so there is no flour residue on the sides and bottom of the bowl (avoid over-mixing the batter or your Pound Cake will be tough)
  5. Using a spatula, scrape down the sides of the bowl, making sure everything is mixed well (the consistency should be thick)
  6. Spoon batter into prepared pan (the batter will fill the loaf pan 1-inch from the top)
  7. Using a knife, lightly swirling the batter in spiral motion to flatten the batter and break the large bubbles (make sure the knife doesn’t touch the bottom of the pan)
  8. Smooth the surface of the batter
  9. Tap the pan to remove excess bubbles
  10. Place a line of cold butter in the center of the batter (long side)
    By doing this, perfect cracks will appear after baking, resulting in a very neat appearance
    If you don’t put Butter on top, cracks will still form, but they will be irregular in shape
  11. Bake in the preheated 160°C fan/ 180°C/ Gas Mark 4 (the lower third rack) for 1 hour or until a skewer inserted into the center comes out clean
    Never try to speed up the baking process and Do not open the oven door until your cake has baked at least three-quarters of the recommended baking time
    The rush of cold air that hits the cake when the door is opened could cause the cake to collapse
    ** If you feel your cake is a little too brown, what you can do is after 50 minutes of baking, cover the pan loosely with Aluminium Foil to prevent overbrowning and continue bake for another 10 minutes until the cake is done
  12. Once it’s baked, let the cake cool in the pan for about 10 minutes
    The cake should start to shrink from the sides of the pan only after removal from the oven
  13. 10 minutes later, remove the pan and let it cool completely on a cooling rack
  14. Pound cake is best eaten the day after baking
    Once it’s cools completely, wrap tightly with airtight plastic and let it sit at room temperature overnight. This storage method can maximize the moisture of the Pound Cake

NOTES

  1. DON’T use Butter to grease the pan
    Shortening is preferable to Butter because it is solid at room temperature; It will stick the pan and provides a better barrier
    Butter unless it is clarified will leave gaps where the flour will not adhere but the cake unfailingly will
  2. If you want to add Fruit to Pound Cake Batter (fresh or frozen), pat them dry after washing to remove excess moisture, then lightly coat the fruit in a tablespoon or two of flour (taken from the flour in your recipe); this helps keep it from sinking to the bottom during baking
    Once your batter is fully mixed and smooth, gently fold the floured fruit in using a spatula. Don’t overmix—just fold enough so the fruit is evenly distributed
  3. Ensure the cake is completely cooled before wrapping or storing
    If you are wrapping a warm Pound Cake, condensation may occur, which can make the cake soggy and sticky
    That moisture buildup can affect the crumb—making it feel overly dense or gummy
    Condensation = Mold Risk; If it’s wrapped warm and stored for a while, that trapped moisture can speed up spoilage
  4. The cake can simply be stored at room temperature (wrap the cake tightly in plastic wrap or place it in an airtight container); store in a cool, dry place away from direct sunlight, it can last for 3-5 days at room temperature
  5. Refrigerating the cake is NOT recommended as it will distort the fresh texture and flavor
    If storing in the refrigerator, wrap the cake well to prevent it from drying out and absorbing odors; Pound Cake can be kept in the refrigerator for up to a week
  6. For longer storage, it can be frozen for up to 3 months
    Wrap the cake or individual slices tightly in plastic wrap and then foil; Store in an airtight container or freezer bag
    To thaw, remove from the freezer and let it sit at room temperature for a few hours

A Very Light Carrot Cake with Less Sweet yet Stable Cream Cheese Frosting

Carrot Cake tends to be a bit dense or heavy and the Frosting is usually too sweet.
In this recipe, I will share a few tips to make a very light Carrot Cake.
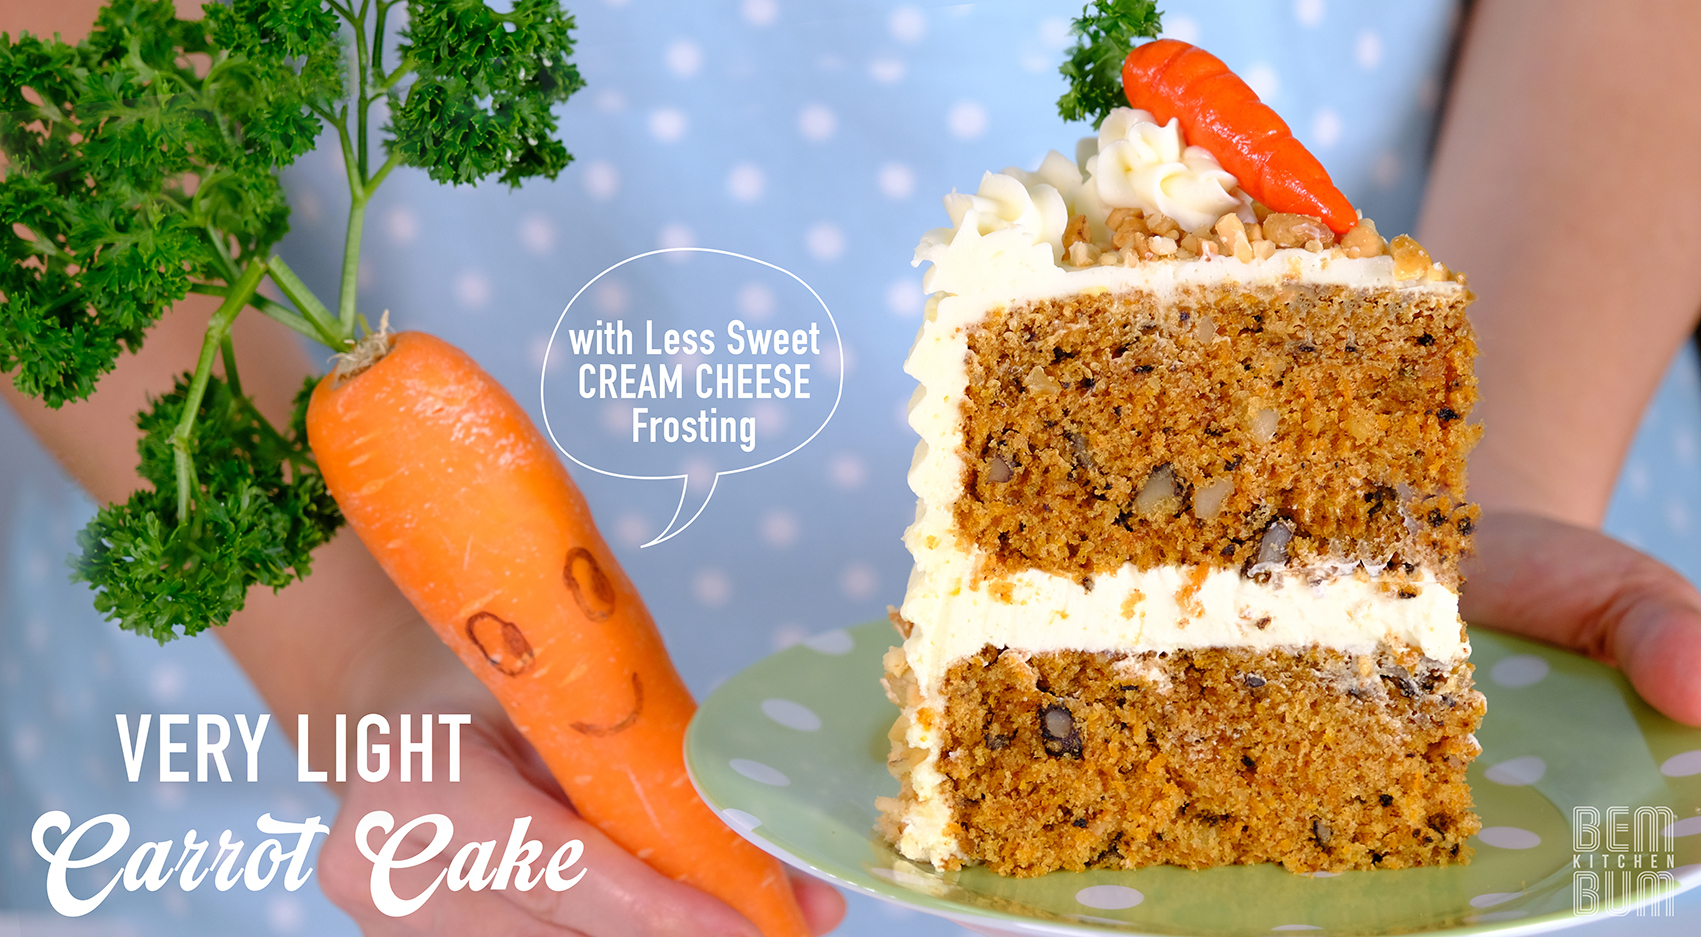
My second Brother is a Carrot Cake lover.
He likes light and fluffy cakes, that’s why I was motivated to make this recipe for Him.
Especially for you BRO! 😘

The texture of the cake is very soft and fluffy like a Sponge Cake; and the Frosting is not too sweet but stable enough to fill and decorate your cake.

Eggs must be whip until thick, fluffy and pale yellow in colour 😉
Or reach a ribbon stage
Unlike most Carrot Cake recipes, the eggs do not need to be beaten first; 
This recipe starts by beating the eggs and sugar first until thick and fluffy.
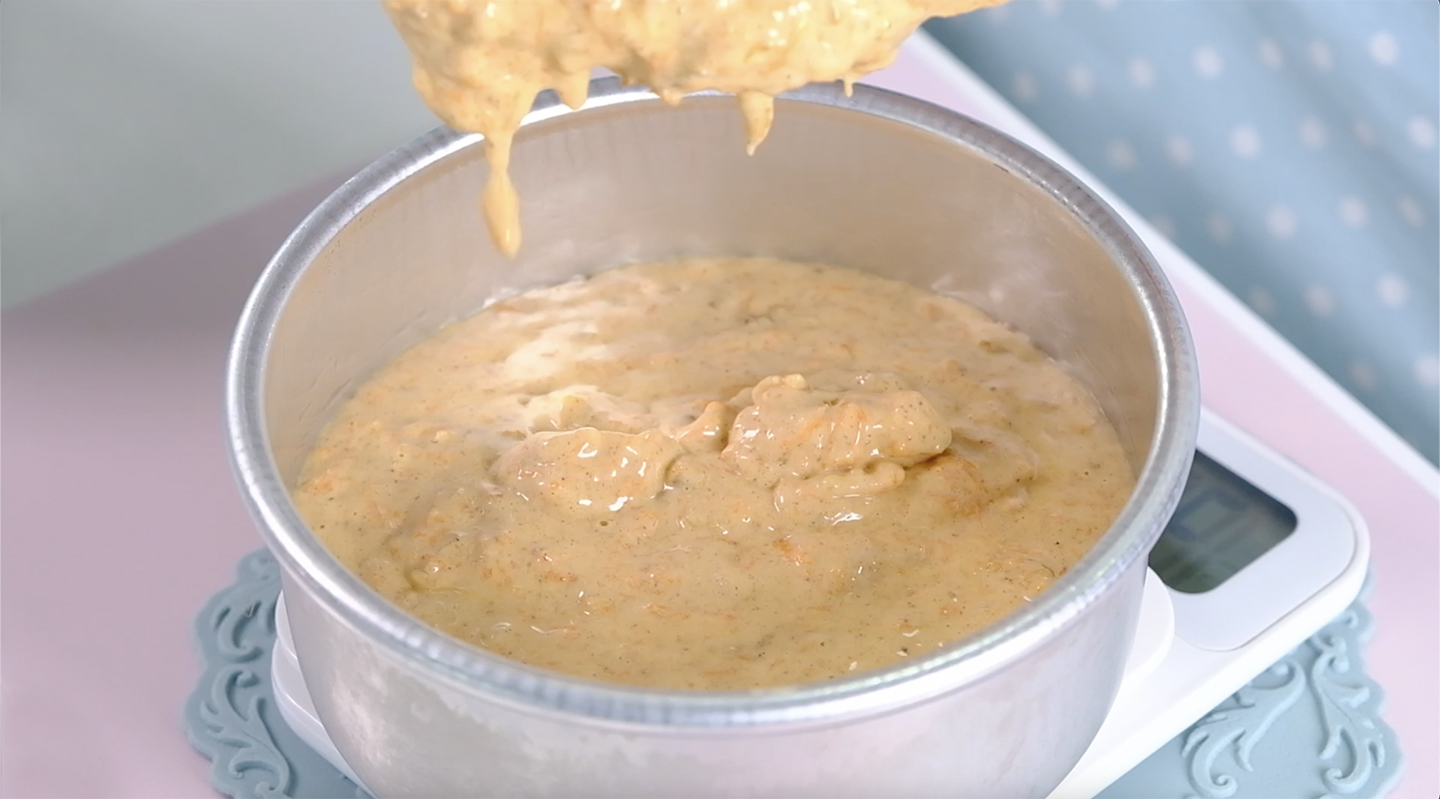
Therefore the use of fresh eggs is very important. Fresh eggs will achieve more volume and have greater stability when beaten than older eggs.

The Eggs must be at room temperature. If your eggs are cold, it may take longer to whip.
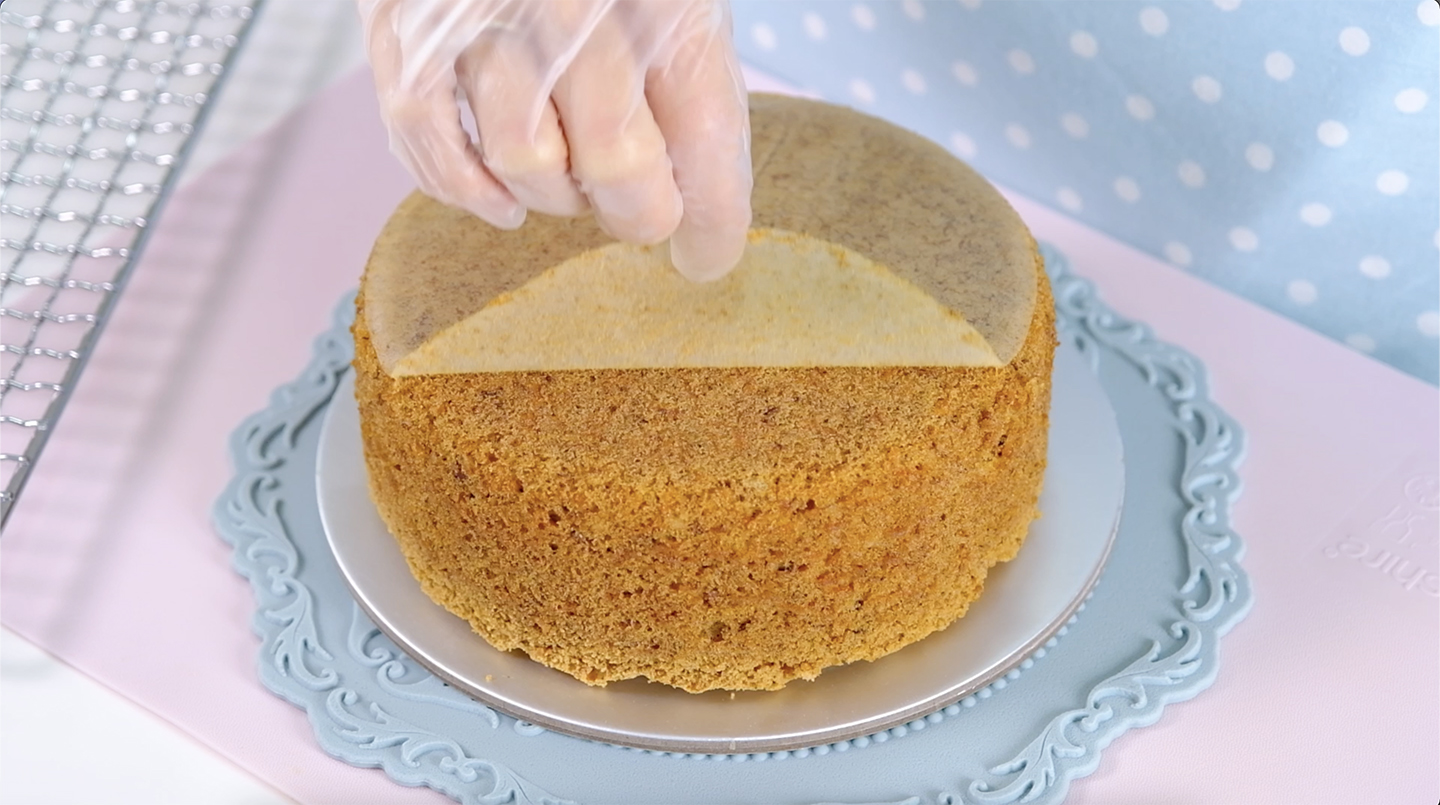
Fluffy Light Carrot Cake 🥲
Then the Eggs and Sugar will be warmed in a double boiler.
Warming the ingredients simply helps dissolve the sugar better and improves the emulsifying properties of the egg.
As a result, it helps them achieve maximum volume when beaten.
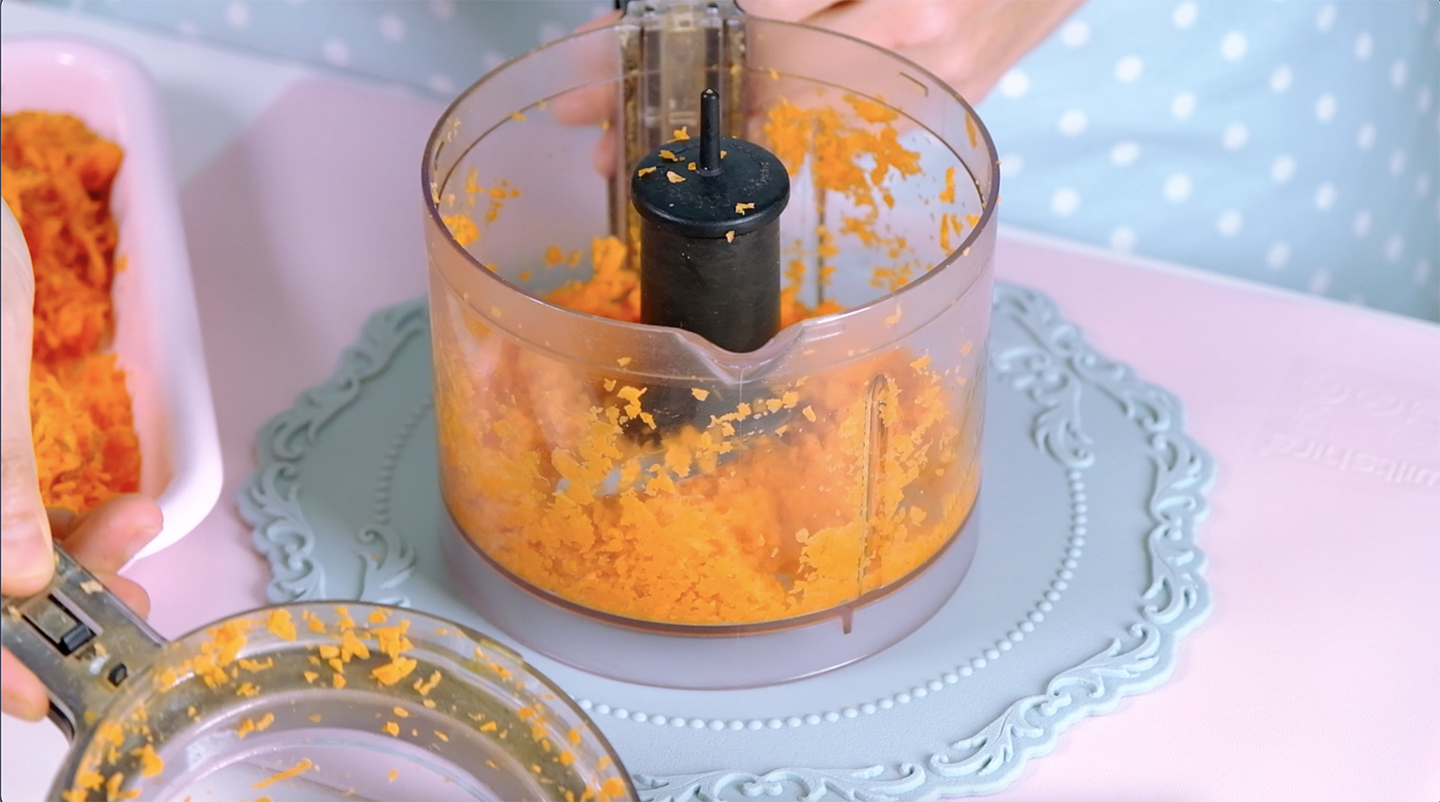
The Carrrots can be grated on a metal grater or in a food processor.
I have used all these methods and found using a fine grater or a food processor was better than use a coarse grater.

NOT GOOD 🙁

Grate the carrots more finely so you don’t get weird, chewy carrot pieces.

You will LOVE this Frosting 😁

For the Frosting, I use less Icing Sugar than most Cream Cheese Frosting recipes.

Less Icing Sugar means less stability, This is where the magic ingredient Milk Powder plays a role in stabilizing the frosting.

NOT overly SWEET yet STABLE Cream Cheese Frosting!!! 🥲
Really SMOOTH and CREAMY 🙄

This frosting recipe relies on good quality ingredients at the right temperature.
A good quality Butter is important otherwise your frosting might split.

I prefer to use a French Brand for best results and take the butter out of the fridge 20 minutes before I start making the frosting

The butter must be softened, that means when you press it with your finger there is an indentation, it’s not sticky and it doesn’t lose its shape.

I highly recommend the Philadelphia Brand

And please use “block style” Cream Cheese. The Cream Cheese must be cold, straight out of the fridge.
Do not use the Cream Cheese spread that comes in the container as it will not provide structure to the frosting
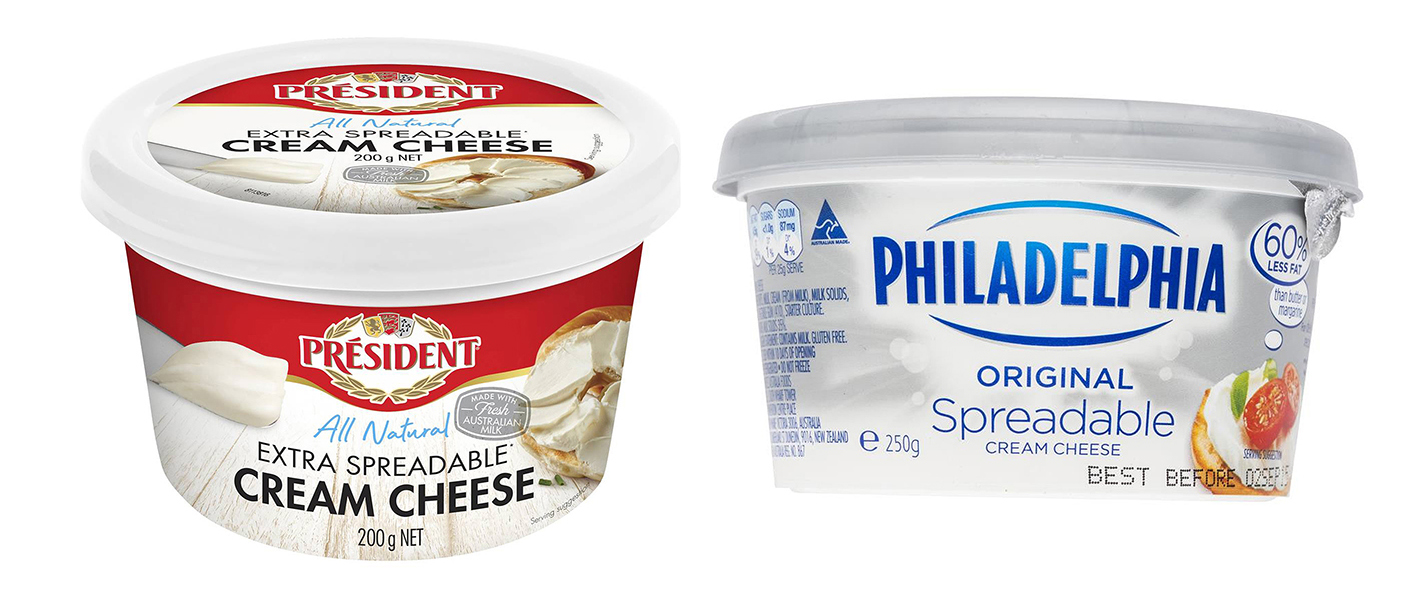
DO NOT USE this kind of Cream Cheese 😓

This frosting must be mix on high speed to ensure it comes out fluffy!

Perfectly pipeable 😍

For decorations, I am completely obsessed with Marzipan Carrot. They look so realistic and perfect, and they are so easy to make!  

Screenshot
You can use homemade Marzipan, I prefer store bought.
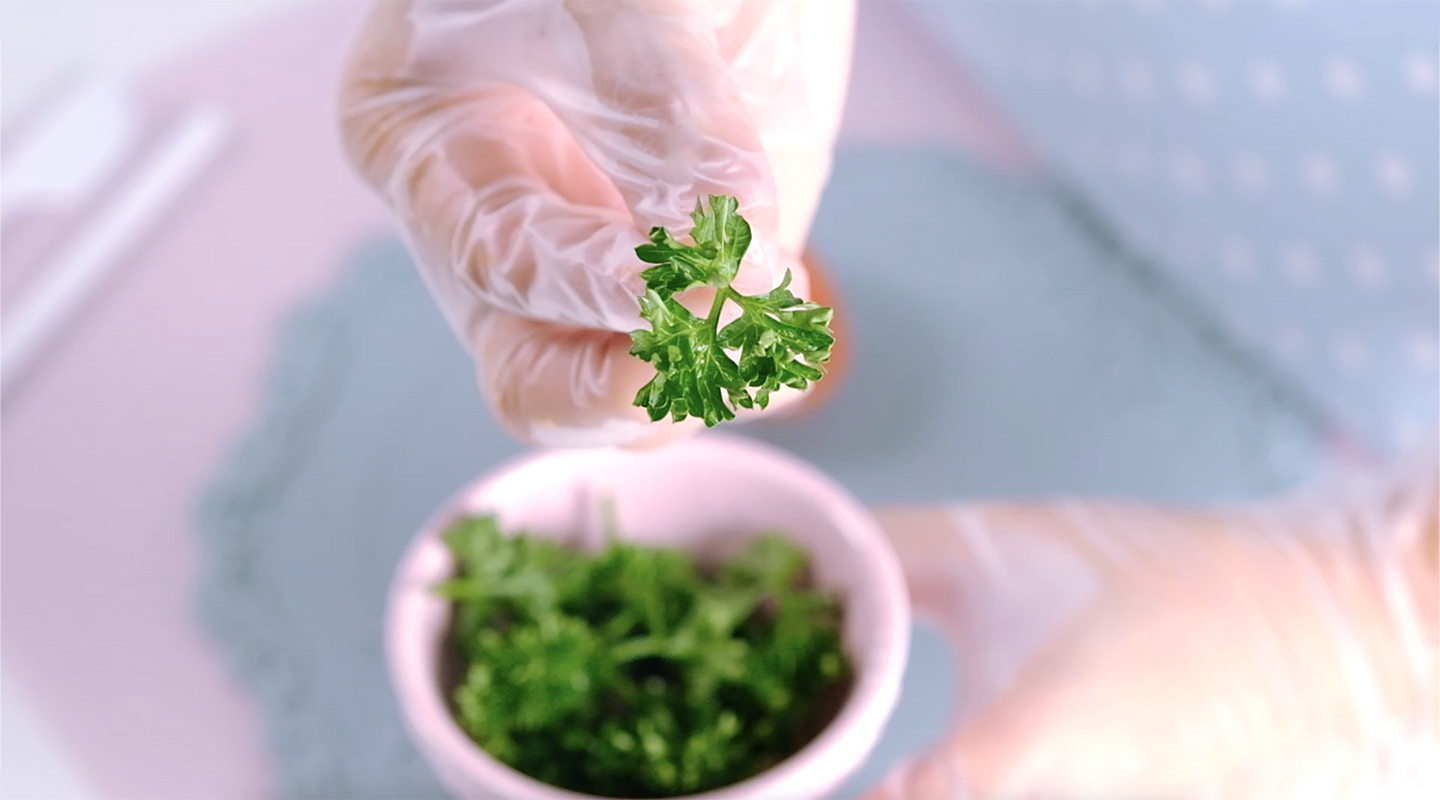
Don’t forget to prepare some parsley for the carrot greens ☺️

Look how adorable and CUTE they were turning out!

The carrots are also completely edible
This is absolutely delicious! 😍

If you desired, you can save some of the frosting to pipe decorations onto the cake.

Or press chopped toasted pecans into the frosting 🤗🤭
Be creative with the decorations 😃
I was so excited to cut this beautiful cake 😜 !!!

Addictive tender crumb, warm spices, crunchy pecans, and not-too-sweet Cream Cheese Frosting 😍😘
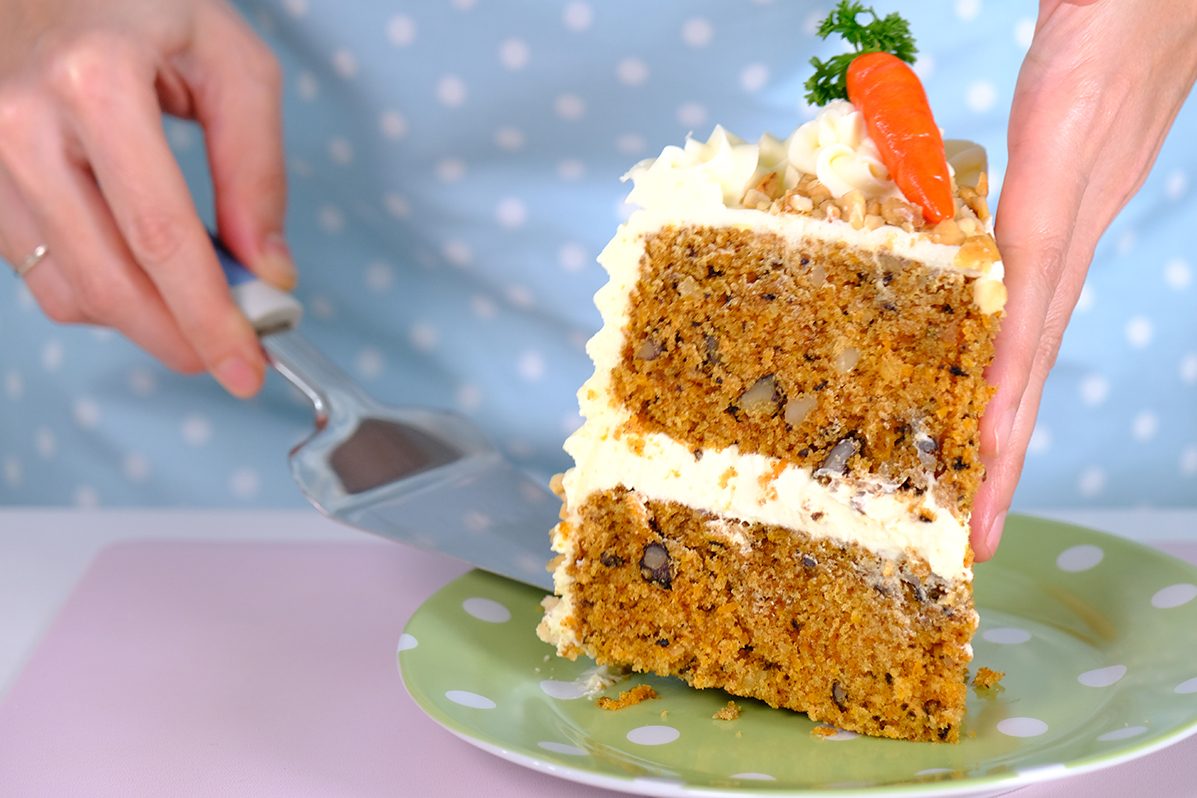
No more dense, heavy carrot cake 🤩

I hope this cake will change your perception ☺️
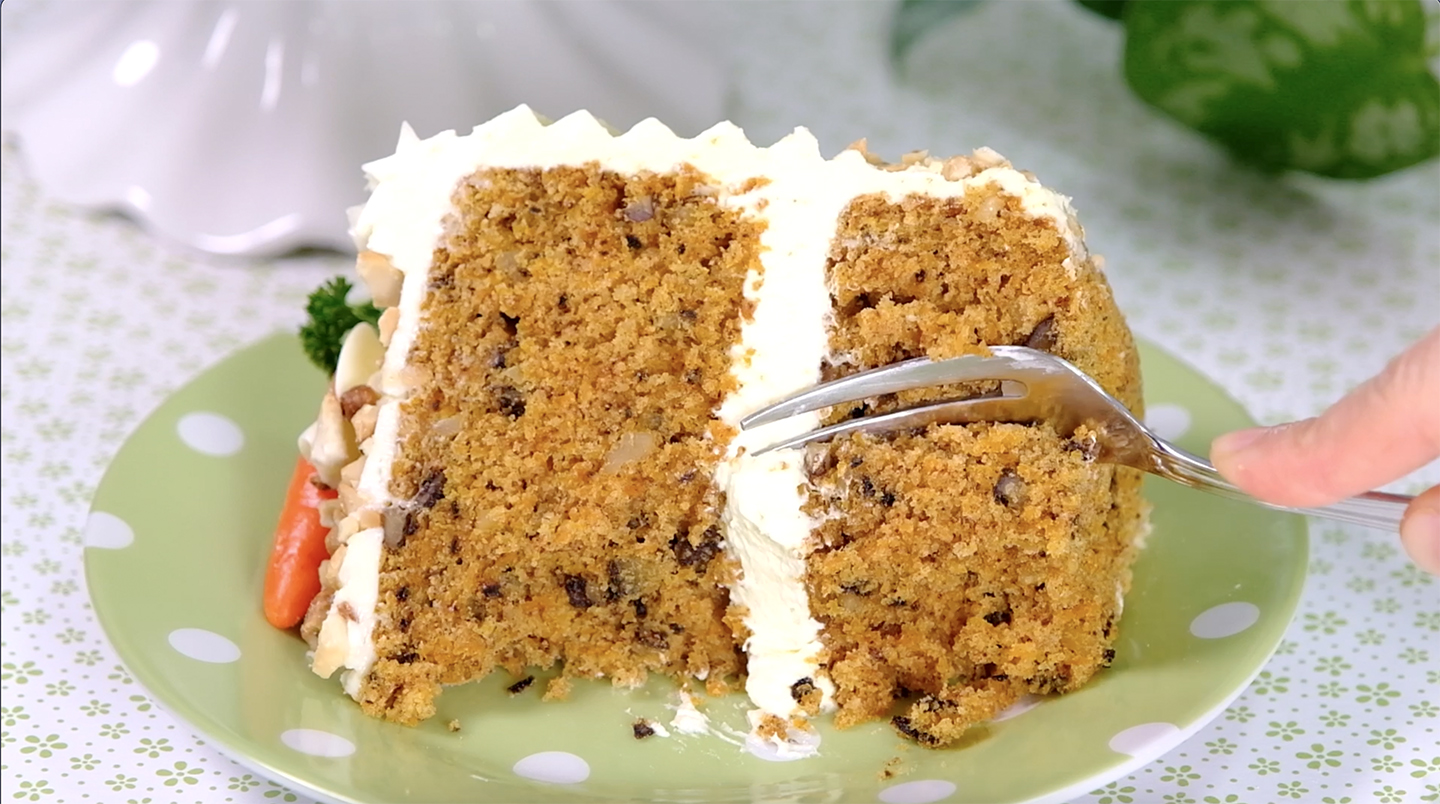
One slice is never enough 🤗

You will always miss this cake 😉

My second Brother will fall in love with this cake! 😍 🥰 😘

Love You All …
Enjoy the recipe and Happy Baking !

WATCH HOW TO MAKE A VERY LIGHT CARROT CAKE

TIPS FOR SUCCESS (PLEASE READ FIRST):

  • Grease the pans with Oil or Butter and place a piece of Parchment Paper on the bottom of each pan
  • Make sure all utensils clean and grease free (wipe the bowl and utensil with lemon juice or vinegar to helps remove grease)
  • Preheat your oven before you start
  • Use fresh eggs that are room temperature
  • Prepare grated carrots in advance (grate the carrots more finely so you don’t get weird, chewy carrot pieces)
  • Grind the nuts into small pieces
  • Beat the Eggs and Sugar until reach a ribbon stage (thick, fluffy and pale yellow in colour)
  • Sift the dry ingredients
  • Mix the dry ingredients evenly until there are no lumps
  • Make sure the oil are combined well with the batter
  • Don’t let the batter sit too long before baking, bake it immediately
  • Resist the urge to open the oven door while baking
  • Once it’s baked, let it sit rest in the pan for 5 minutes then remove the cake immediately from the pan
  • Let the cake cool completely on a cooling rack before add frosting to the cake
  • Wrap the cooled cake tightly in a cling wrap so it doesn’t dry up
  • Store the cake in the fridge in an airtight container

RECIPE

A VERY LIGHT CARROT CAKE WITH LESS SWEET YET STABLE CREAM CHEESE FROSTING
Yield: One 6-Inch Round Cake (2 or 4 Layers)

INGREDIENTS
🥕 Carrot Cake
170 g Eggs (room temp.)

200 g Caster Sugar
175 g All-Purpose Flour
1/2 tsp Baking Soda
1 tsp Baking Powder (Double Act.)
1/4 tsp Salt
1½ tsp Cinnamon Powder
1/4 tsp Ground Cloves
1/4 tsp Ground Nutmeg
100 g Vegetable Oil
200 g Grated Carrots (finely)
100 g Chopped Walnuts/ Pecans/ Cashews (optional)

🥕 Cream Cheese Frosting
240 g Unsalted Butter (softened)
240 g Cream Cheese (cold, straight out of the fridge)
120 g Icing Sugar
145 g Milk Powder
1½ tsp Vanilla Extract

🥕 Decorations
Store Bought White Marzipan
Orange Food Colouring
Parsley

INSTRUCTIONS
🥕 Carrot Cake

  1. Grease Two 6-Inch Round pans with Oil or Butter and place a piece of Parchment Paper on the bottom of each pan
  2. Preheat the oven 160°C Fan/ 180°C/ Gas Mark 4
  3. Prepare grated carrots in advance; no need to peel, just cut off the ends, wash them well and dry them.
    They can be grated on a fine metal grater or in a food processor (grate the carrots more finely so you don’t get weird, chewy carrot pieces)
  4. If you use nuts, grind the nuts into small pieces
  5. Perpare a double boiler
    Heating a pot of water until it’s almost boiling; take it off from the heat
  6. Then, in a large heatproof bowl combine the Eggs and Caster Sugar
    And immediately place the bowl over the pan of hot water (double boiler) and start whisking vigorously (make sure that the bottom of the bowl doesn’t touch the water)
    Keep mixing until the Sugar has completely dissolved
    Check by rubbing a small amount of the mixture between your fingers, it should not be gritty
  7. Once the sugar completely dissolved; using a hand mixer or stand mixer fitted with a whisk, continue beat the mixture on high speed until the mixture reach a ribbon stage (thick, fluffy and pale yellow in colour) this process will take for about 8 to 10 minutes
    The ribbon stage means when you lift the whisk from the mixture, the batter should fall back in thick trails. The ribbon lines will stay suspended on top of the batter, remaining clearly visible on the surface for a few moments before slowly disappearing
  8. Sift the dry ingredients into Eggs mixture (All-Purpose Flour, Baking Soda, Baking Powder, Salt, Cinnamon Powder, Ground Cloves, Ground Nutmeg), Gently fold with a hand whisk, mix until there are no lumps (don’t overworked the batter)
  9. Then, in another bowl mix about a third of the eggs-flour mixture with the Vegetable Oil; mix until well combined
    By using this pre-mix method, it prevents the oil from falling directly to the bottom of the bowl which would cause the cake didn’t rise properly
  10. Pour the pre-mix mixture back to the rest eggs mixture, stir well
  11. Add grated Carrots and chopped Nuts
    Using spatula, scrape the bottom and sides of the bowl, make sure it is evenly mixed
  12. Divide the batter into prepared pans, tap the pan to remove excess bubbles
  13. Then immediately bake in the preheated 160°C Fan/ 180°C/ Gas Mark 4 on the middle rack for 40 minutes
    Resist the urge to peek until your cake is done; Opening the oven door while you bake will release some of the heat, this can lead to the cake being to damp in the middle or even falling
  14. Once it’s done, let the cake rest in the pan for about 5 minutes
    Then scrape the sides of the pan, turn it over and let it cool completely on a cooling rack

🥕 Cream Cheese Frosting

  1. Beat the softened Unsalted Butter for a few second until soft
  2. Add cold Cream Cheese and beat again until this two ingredients are well combined
  3. Add the Icing Sugar and Milk Powder
    Mix on low speed first until the dry ingredients are mixed in (scrape the bowl occasionally to make sure everything is mixed well)
  4. Add Vanilla Extract and continue beat on high speed for 5 minutes
    Please note, this frosting must be mix on high speed to ensure it comes out fluffy
  5. Cover the bowl with plastic wrap and store frosting in the fridge for 1 hour until semi stiff

🥕 Decorations

  1. Add a little orange food colouring to the Marzipan, knead well.
  2. Cut the Marzipan into roughly equal pieces for each Carrot (about 8 grams each)
  3. Using your hands, shape it to resemble the appearance of a Carrot
  4. Use a toothpick or fondant tools to make the Carrot ridges and then a hole in the top to insert a Parsley

🥕 Assemble the Cake

  1. If you like more frosting between the cakes, you can cut each cake into 2 layers
  2. Place the first cake layer into a cake board, then spread some of the frosting evenly over the top.
    Repeat the same process until the final cake layer
  3. Before cover the cake with frosting, chill the cake in the fridge for at least 30 minutes. This will make easier to apply the final coat without shifting the layers
  4. After 30 minutes, spread the remaining frosting over the top and sides of the cake
    If you desired, you can save some of the frosting to pipe decorations onto the cake or press chopped toasted pecans into the frosting (be creative with the decorations)
  5. Decorate the top with Marzipan Carrots and Chopped Nuts


NOTES

  1. Store unfrosted or frosted Carrot Cake in the fridge (in an airtight container) if not serving immediately, and serve at room temperature
  2. Keep away frosted cake from heat or direct sunlight
  3. Unfrosted or frosted Carrot Cake can be kept in the fridge for up to 5 days (in an airtight container)
  4. Unfrosted Carrot Cake can be kept in the freezer for up to 3 months.
    Frosted Carrot Cake is not recommended for freezing because the frosting doesn’t thaw well
  5. If you want freeze the unfrosted Carrot Cake, you can wrap it in individual slices or the whole cake tightly in plastic wrap and aluminum foil before placing it in a freezer bag
  6. To defrost unforsted Carrot Cake from the freezer
    The best method is to transfer it directly from the freezer to the fridge (still wrap in plastic wrap) and let it thaw overnight (around 8 hours) before serving
    This slow refrigerated thawing process helps preserve the cake’s texture and moisture