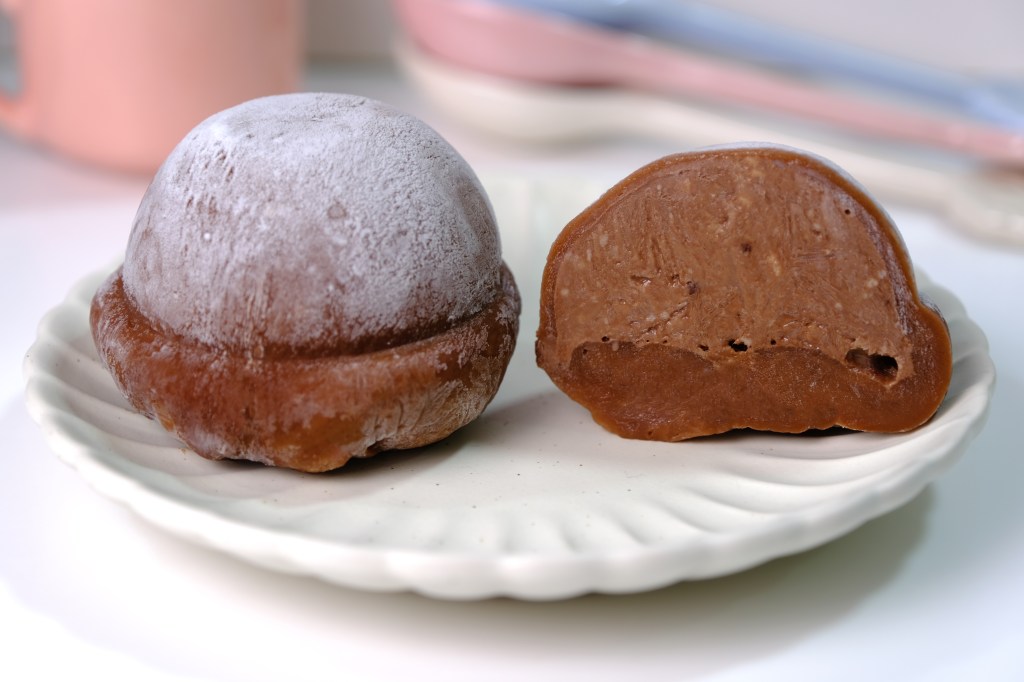
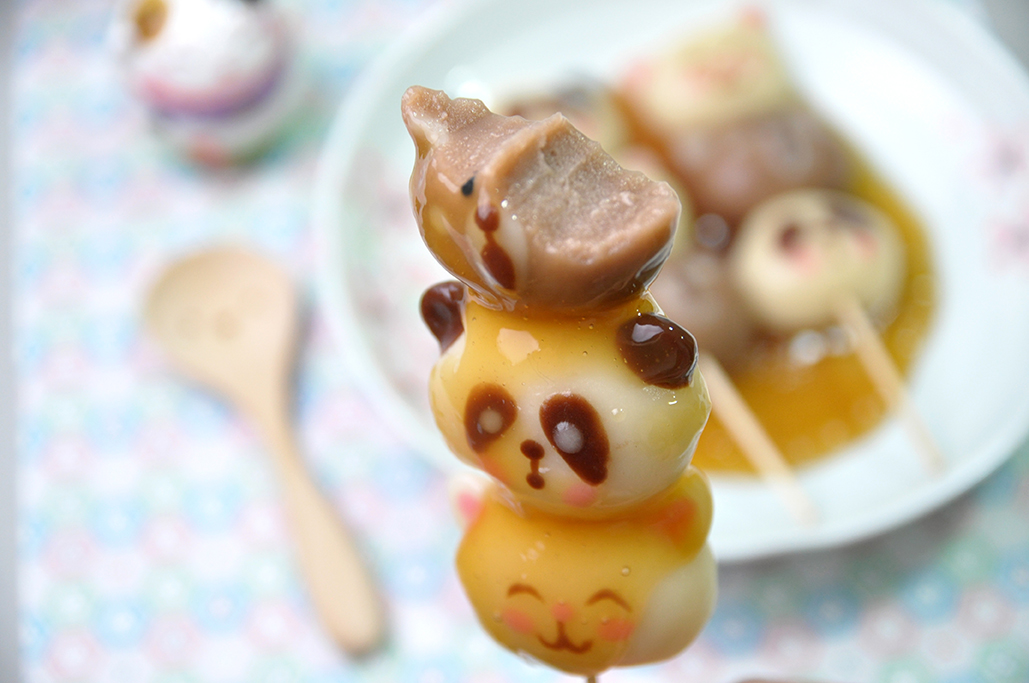
Sumikko Gurashi Mochi Browniesicle

Hey Guys, today we are making these “Sumikko Gurashi Mochi Browniesicle”. Adorable chocolatey fudgy chewy brownie on a stick.

They are the perfect blend of “Japanese Butter Rice Cake” with “Classic Brownies”, crispy on the outside and ooey-gooey mochi-licious on the inside.
They look just like traditional brownie but a lot less sweet than normal brownies.

Are they so Kawaii?

It’s important to use glutinous rice flour (or Mochiko — sweet glutinous rice flour) for these brownies. It does not contain gluten and gives us the chewy, sticky mochi texture that we want.

These brownies come together quickly, paired with melted and modelling chocolate, pack a serious chocolate punch!
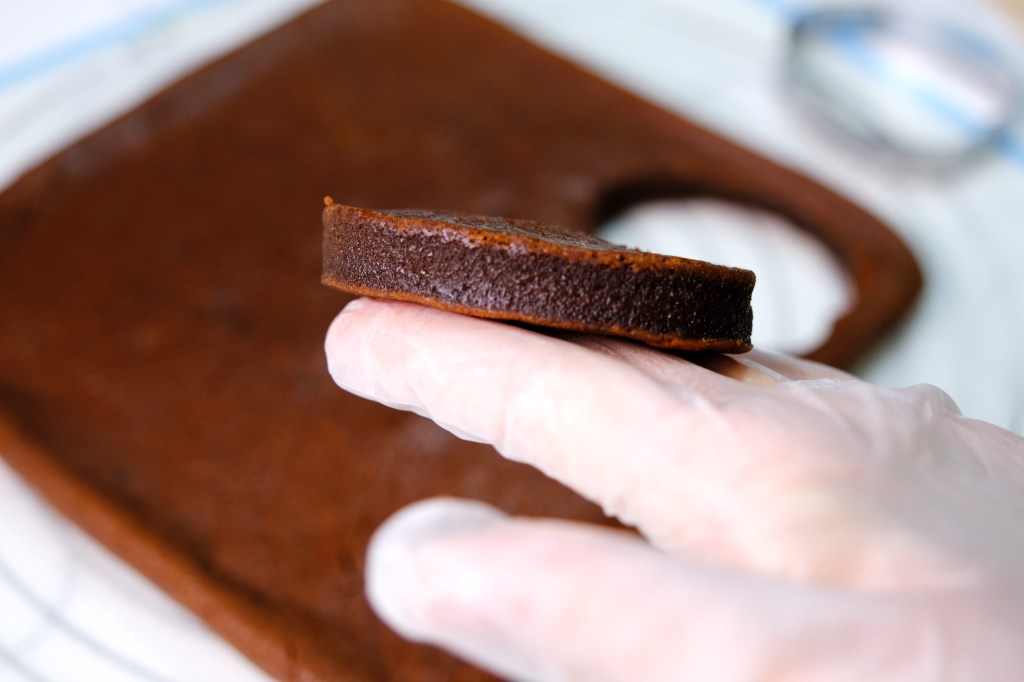
The exterior is similar to Brownie, but the interior is chewy like Mochi

Look! It has a crackly shiny crust, crispy edges and also a rich chocolate flavour and a chewy texture. It is the perfect blend of brownie and mochi.
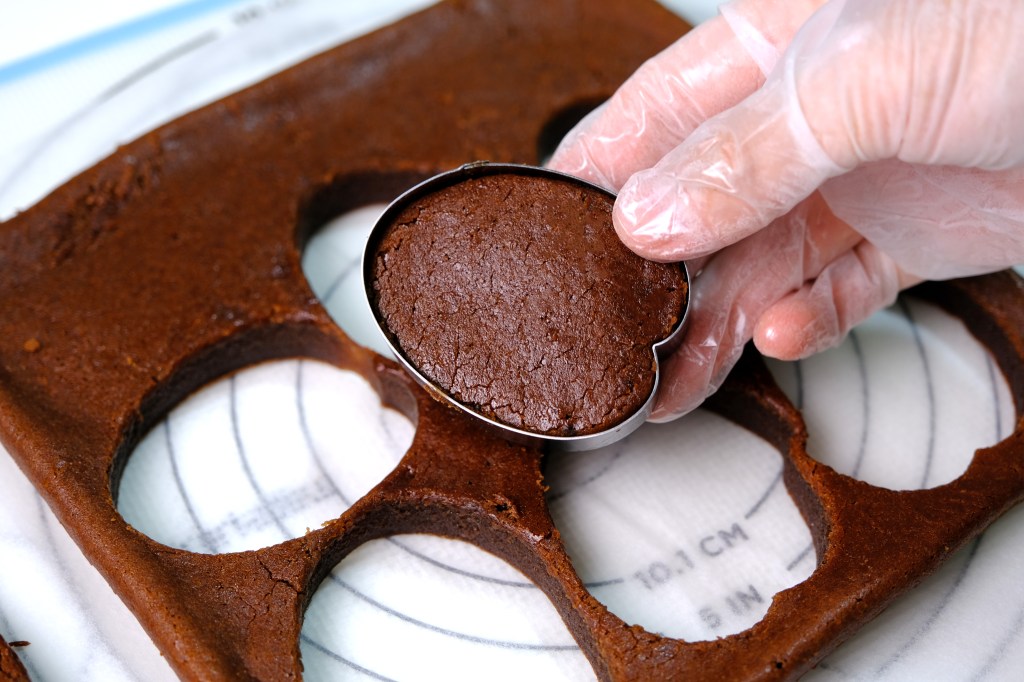
And when still hot, they are more sticky and difficult to cut, so make sure the brownies cool completely before cutting.
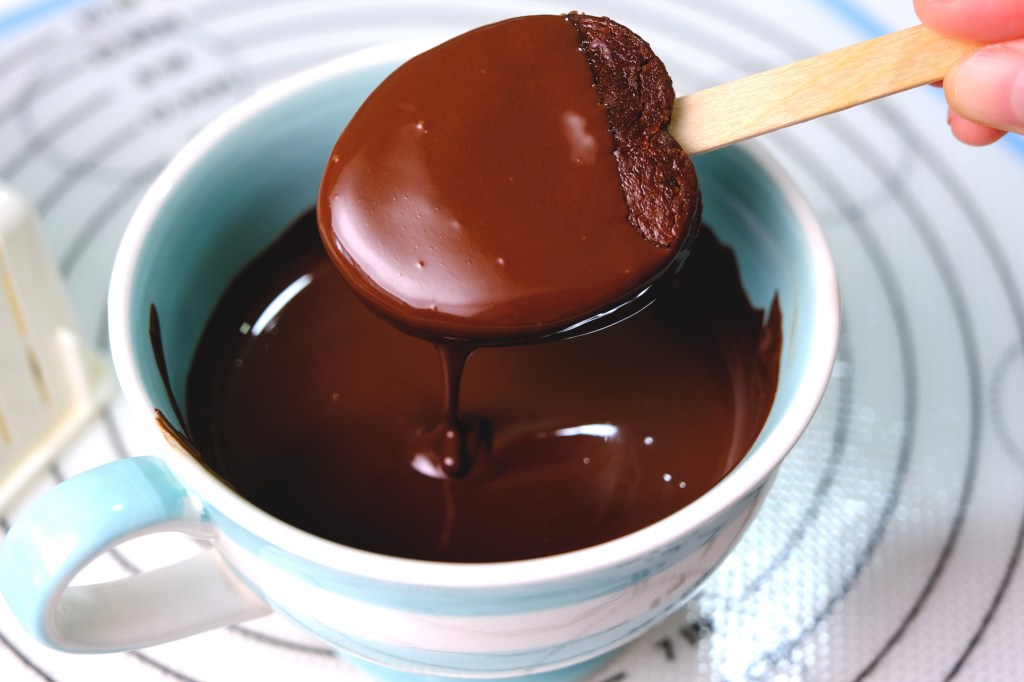
Then simply insert regular popsicle stick into the base of the brownie, cover them with melted dark chocolate and then decorate each character with modelling chocolate.
I love modelling chocolate so much as they are really flexible mouldable delicious clay and there’s no special food colouring require to color the chocolate.

It’s not necessary to use expensive Couverture Chocolate, I found a good dark and white compound chocolate (or candy melts) works best for texture and still tastes pretty good.
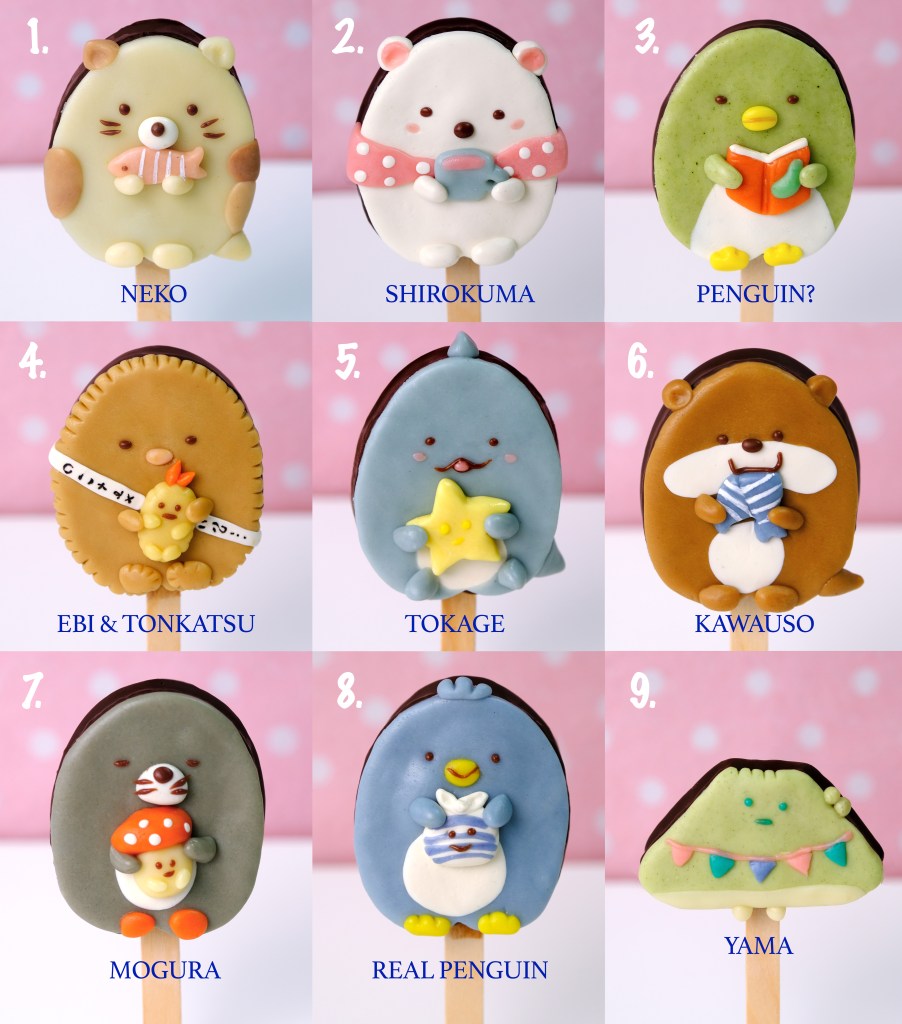
I will create my favorite 9 characters: 5 larger pieces for the main characters “Sumikko”, 3 smaller side characters “Minikko” and 1 piece for lovely Mount Fuji “Yama”.
It can be any design or character you want… The sky is the limit!
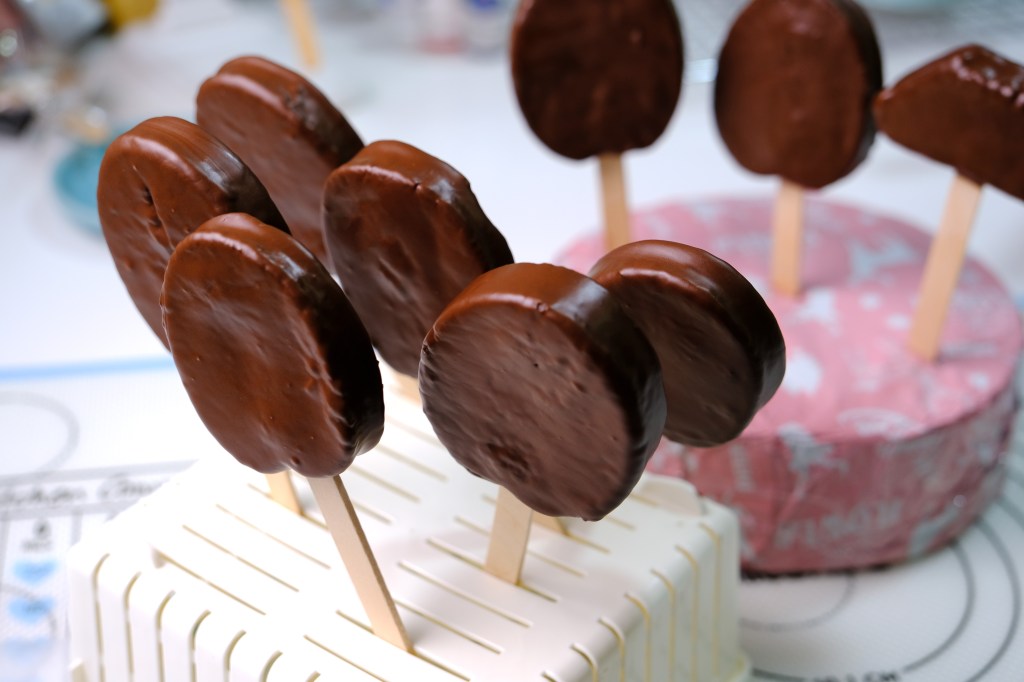
And can you imagine, what do you get when Mochi and Chocolate Brownies get together???
I’m sure after you tasted it, you may never want to go back to eating plain fudge brownie ever again!
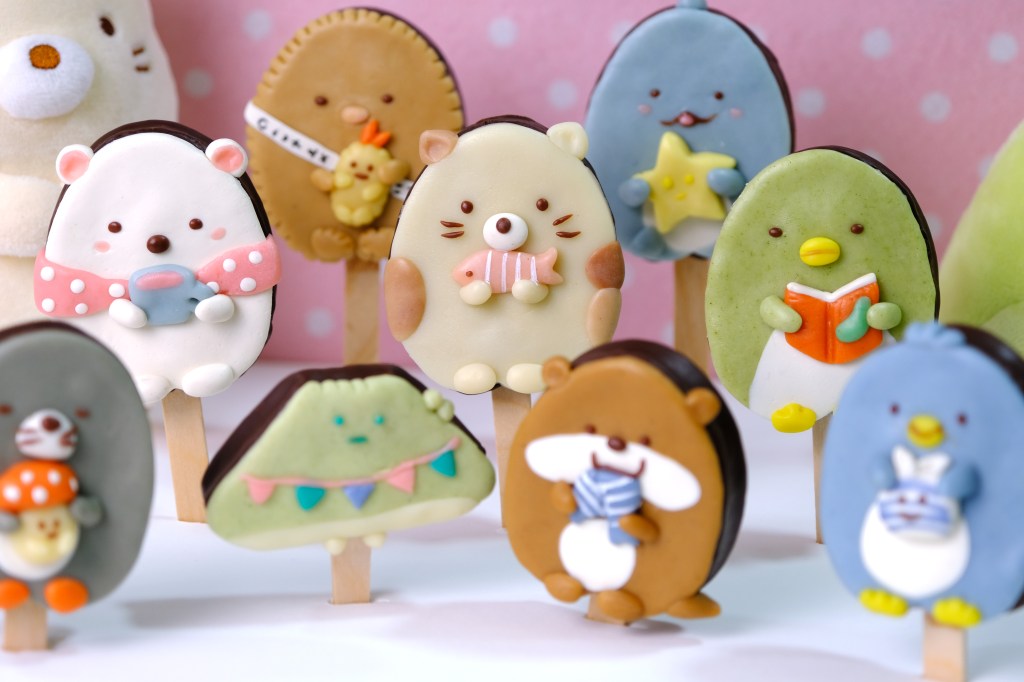
Which one is your favourite character?

They are a perfect gift, dessert or snack for when you get the nighttime munchies, and make sure you pour yourself a really nice glass of cold milk or hot coffee. Because you can’t have brownies without milk or coffee, just like cookies.

Very Chocolatey Ooey-Gooey Mochi-licious on the inside

I hope that you give this recipe a try , it’s really fun, so tasty and I’m sure you are gonna love them.
For all the chocolate lovers out there, enjoy the recipe and happy baking!
Love You All!!

SUMIKKO GURASHI MOCHI BROWNIESICLE
Yield: 9 pieces (8-inch Square Pan)
Active time: 3 hours
Total time: 4 hours

INGREDIENTS
White Modelling Chocolate:

  • 300 gr White Chocolate Compound or White Candy Melts
  • 70 gr Corn Syrup
  • Food Colouring


Mochi Brownies:

  • 35 gr Unsalted Butter
  • 190 gr Milk
  • 35 gr Vegetable Oil
  • 125 gr Brown Sugar
  • 1/2 teaspoon Vanilla Extract
  • 30 gr Eggs
  • 150 gr Glutinous Rice Flour
  • 20 gr Cocoa Powder
  • 1 teaspoon Baking Powder
  • 1/8 teaspoon Salt

INSTRUCTIONS
Modeling Chocolate

  1. Melt the chocolate in the microwave or a double boiler (let it cool to the touch). Add the corn syrup, stir just until it turns into a thick, smooth paste.
  2. Pick up the dough as soon as you can easily handle it and knead it over the bowl (knead out as much oil as possible).
  3. Pat the surface of the dough with some paper towel to sop up the oil (pat the dough quickly because the dough is quite sticky at this stage, if the paper sits too long it will get stuck in it).
  4. Once patted dry, wrap it tightly in plastic. Store in an airtight container.
    Allow the dough to sit 8-10 hours at room temperature or at least 1 hour in the fridge to set faster.


Mochi Brownies

  1. Preheat the oven to 180° C, grease and line pan with parchment paper.
  2. Place the unsalted butter and milk in small pan, cook over medium low heat until the butter melted. Take it off from the heat and pour it into a bowl.
    Add in the oil, sugar and vanilla extract, mix until all the sugar dissolved and well combine.
    Allow to cool slightly before you add the egg yolks (we don’t want it turned into scramble eggs).
  3. In another bowl combine all the dry ingredients, mix well.
    Pour in milk mixture onto the dry ingredients, do not over mix, whisk until just combined and no lumps remain.
  4. Pour the batter into the prepared pan (the batter will be on the thinner side).
    Tap few times to remove air bubbles and then bake for about 20-25 minutes or until toothpick inserted to the center comes out clean.
  5. Take it off from the heat, remove it from the pan, peel the parchment paper and let them cool completely on a cooling rack.


Decorate

  1. Cut mochi brownie according to the template.
  2. Insert regular popsicle stick into the base of the brownie until it’s about almost to the top.
  3. Dip them into a melted dark chocolate, tap a bit to get off any excess, stand these brownies up in a block of Styrofoam until the chocolate is completely hardened.
  4. Colour modelling chocolate as needed and start decorate the browniesicle (kindly follow video instructions)

NOTES

  1. When still hot mochi brownies are more sticky and difficult to cut, so make sure it cool completely before cutting.
  2. Remember when making or working with modelling chocolate are to never overheat and never overwork the mixture when it’s warm. On extremely hot days have a shelf in the freezer set aside so you can pop the piece/pieces you are working on in the freezer for a few minutes to firm up before you continue to work on it.
  3. There is no special food colouring required to colour Modeling Chocolate.
    Modeling Chocolate already has liquid in it (corn syrup) so adding more won’t hurt. I like to use regular gel food colours like Americolor.
  4. Mochi browniesicle serve freshly made.
  5. To store; 2 days at room temperature, 3 days in the fridge or freezer for up to 1 month.
  6. Please note; after 2 days in the fridge or 1 day in the freezer, they will lose the chewiness and the texture will becomes like normal brownie.
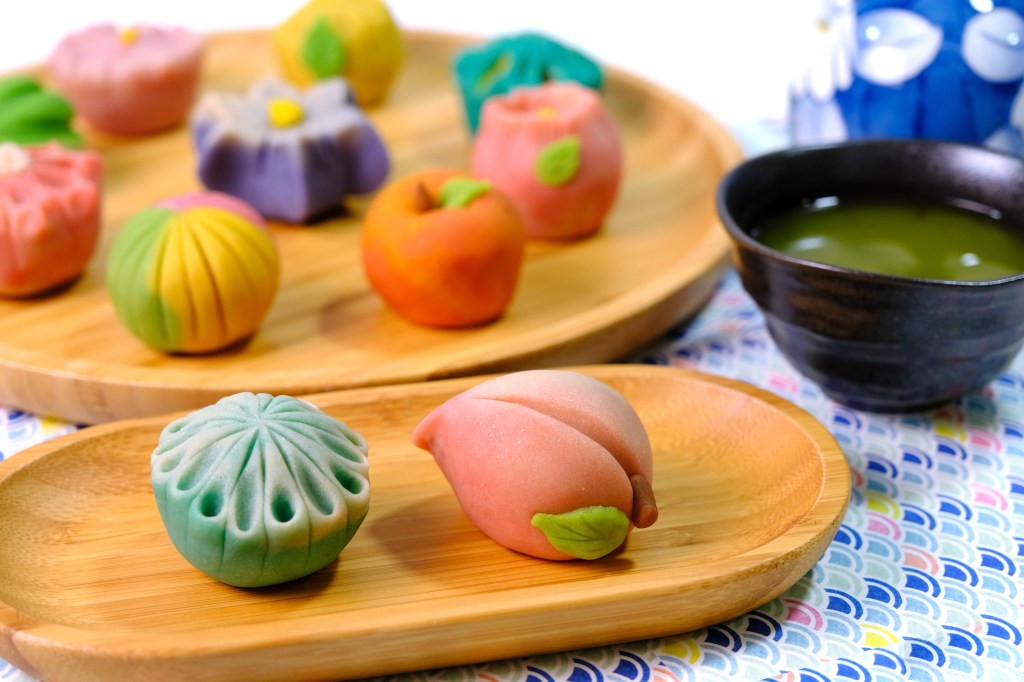
Quick and Easy Nerikiri Wagashi

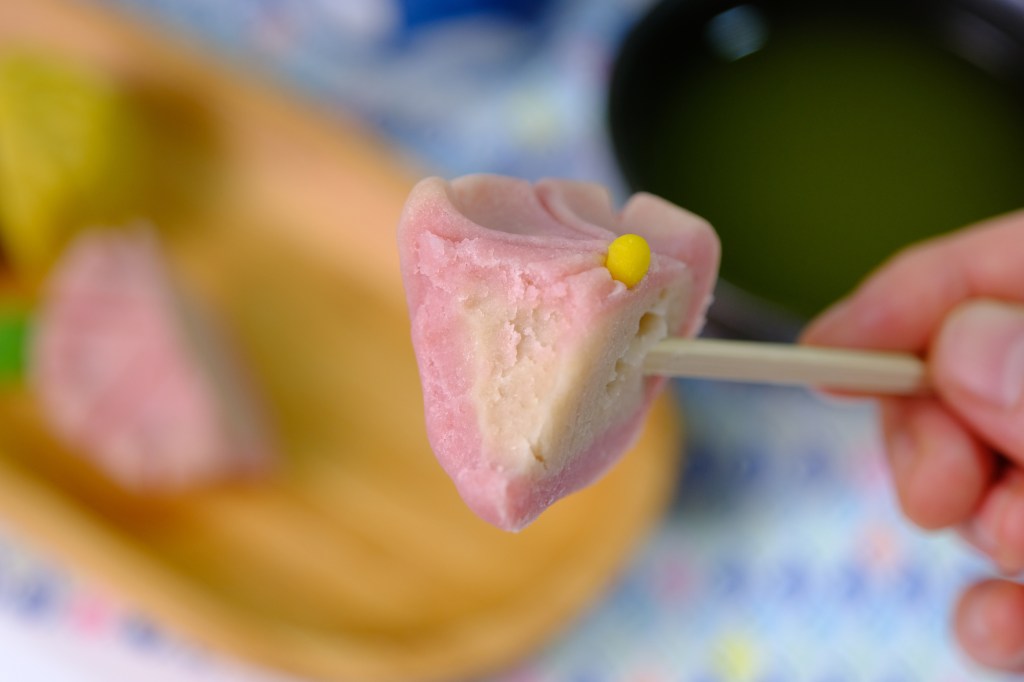
Hey Guys, today we are making these beautiful Japanese dessert “Nerikiri Wagashi”. The word of wagashi refer to Japanese traditional sweet which are delightful tea treats eaten across Japan.

Compare to the other type, I found that Nerikiri is the most artistic and interesting wagashi that meticulously hand-carved.

Shiro-An (White Bean Paste)

The outside layer Nerikiri dough made by combining white bean paste  called Shiro-An with the soft mochi dough called Gyuhi. 

By adding Gyuhi, it adds a smooth chewy texture to it. A very moldable malleable type of paste that can be design into various shapes.

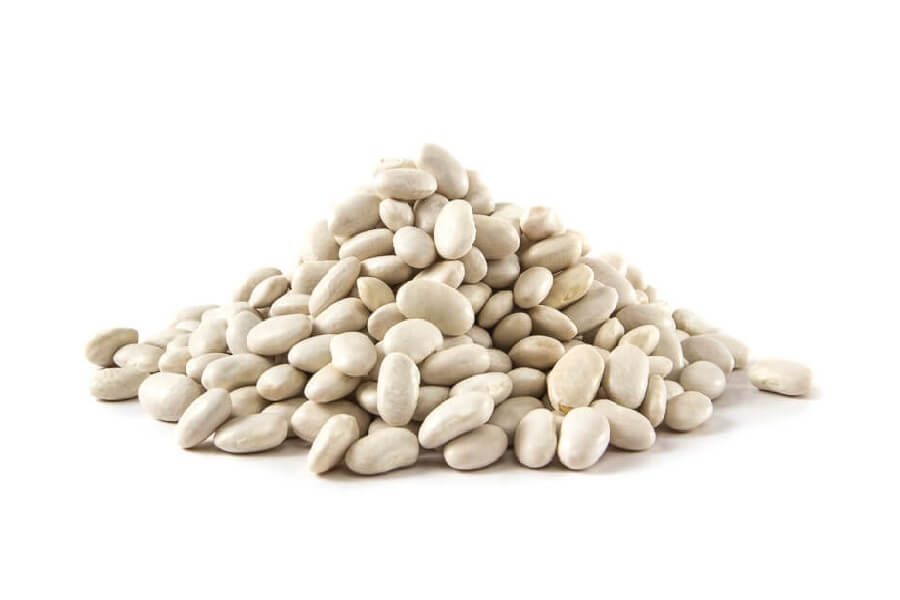
Lima Beans

And while you can easily buy red bean paste in Japanese or Asian grocery stores, premade white bean paste almost impossible to find outside of Japan. 

It’s actually quite simple to make from fresh Lima or Navy beans, but that kind of beans are also hard to find and the process does take some time.

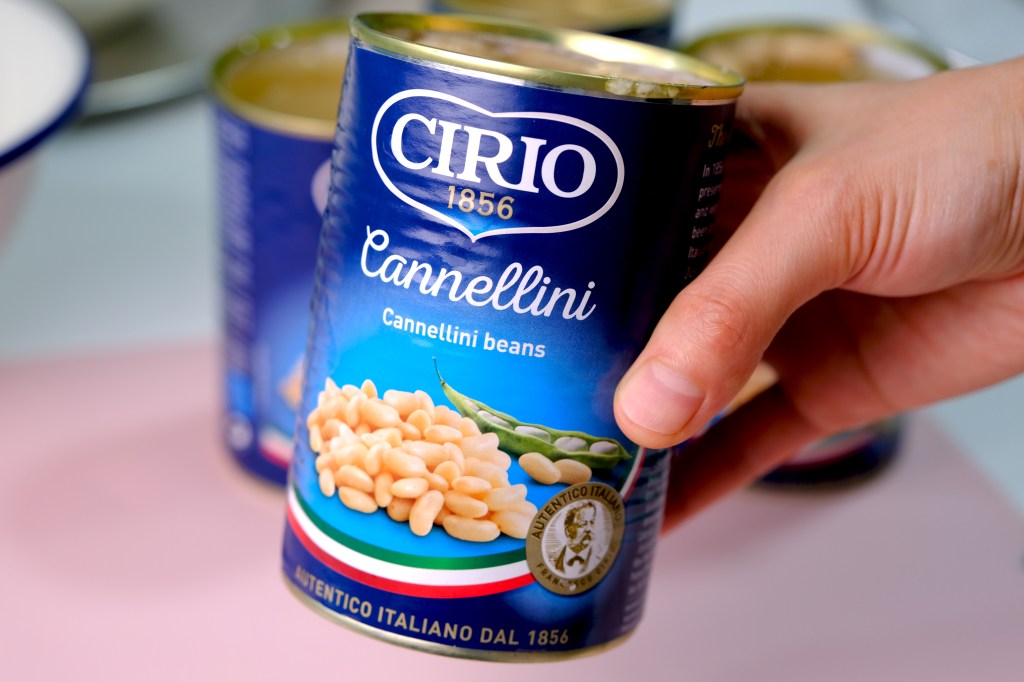
Cannellini Canned Beans

In this recipe, I will show you how to make Quick and Easy Nerikiri dough using Cannellini Canned Beans.
With this method you can skip a few step of making fresh white bean paste from scratch, the process will be faster and even simpler.

The beans slightly beige in colour

It won’t be as white as the authentic fresh Nerikiri Dough, the colour will be slightly beige, but still taste really good.

We will be use back side of flour sifter to separate the skin from the bean paste, but if you don’t have it on hand, just use regular strainer. It will be harder and more time consuming, but still works well.

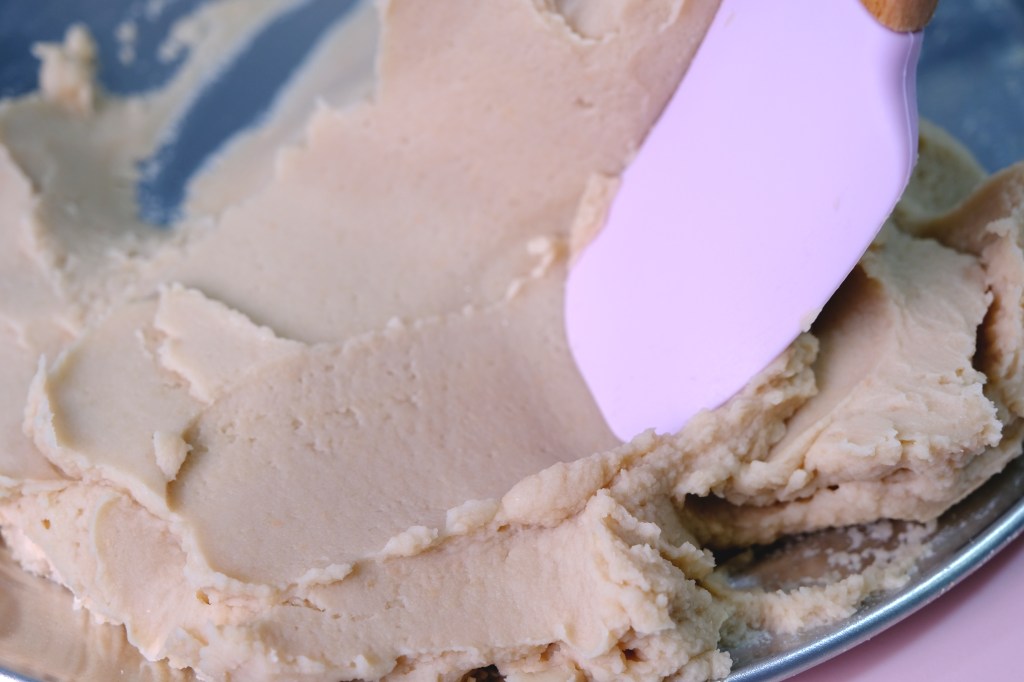
Look! The bean paste is so soft and creamy with slightly beige in colour.

Smooth White Bean Paste

You can choose to color the Shiro-An or Nerikiri dough with either natural colors like powders made from the vibrant red beetroot, cocoa powder and matcha or even food colouring

Whenever I make Nerikiri I try to use natural food colouring as much as I can. It’s not just because healthier, yet the fragrance and flavour also makes your sweets more appetising and delightful to enjoy.

And for the tools, there are specific traditional tools used in shaping the Nerikiri.
This wooden triangle stick is one of the most common wagashi tools that are not easy to come by. It has 3 different shapes in one stick and cost around 3000 to 4000 yen.

Wagashi Wooden Triangle Stick

I personally a fan of the plastic fondant or clay modelling tools as they are cheaper and easier to find. Compare to triangle stick, they even have so many different shapes that allow us to create more various forms.

Modelling Fondant and Clay Tools

Each piece of Nerikiri are unique and has their own names; A cherry blossom, fireworks, chrysanthemum, papple pear.

It’s an art form that serves meaningful purposes and traditions of the Japanese culture.

They are delicate and beautiful, SO MUCH! that you may actually find it hard to eat in the end. 
I’m usually keeping my homemade nerikiri in my freezer to show off to all my family before I finally decide to enjoy them with my tea!

Even though nerikiri are not your everyday snacks, They are  perfect for the festive seasons as gifts.

A box of 10 edible art pieces can brighten up anyone’s day.

And don’t forget, once we finished we got to enjoy some matcha green tea with the elegant sweets we had made.

Nerikiri being slightly sweeter than other typical Japanese traditional sweets. 
It’s perfectly complement the matcha, it’s balance the sweetness with a little bit bitterness of the tea creating a harmonious flavour palette that enhances the already amazing tea ceremony experience.

The texture is really soft, it’s much more firm, not too chewy like dango and you can really taste the white bean paste.

It’s very light, much softer than the typical red bean.

I hope that you will love the recipe, take your time to finish this process nicely, enjoy the art of beautiful Nerikiri!

QUICK AND EASY NERIKIRI WAGASHI
Yield: 10-12 pieces (about 55-60 grams each)
Active time: 3 hours
Total time: 3 1/2 hours

INGREDIENTS

Shiro-An (White Bean Paste):

  • 960 grams Cannellini Canned Beans (4 cans)
  • 200 grams Granulated Sugar


Gyuhi (Soft Mochi Dough):

  • 32 grams Glutinous Rice Flour
  • 44 grams Water

Food Colouring

INSTRUCTIONS
Shiro-An (White Bean Paste)

  1. Strain and place Cannellini Beans in a large heatproof bowl, then pour enough of the boiling water to cover the beans for about 1-inch.
    Soak the beans for about 10 minutes, then transfer to a fine-mesh strainer to drain. 
    Rinse the beans under cold running water and drain.
    *Soaking and rinsing purpose is to remove some of the beany smell and taste.
  2. To mash the beans
    Set the flour sifter upside down on top of a flat tray, using spatula or rice spoon press the beans against the walls of the sifter to separate the skin from the bean paste.
    Continue to smash and push the beans against the sifter in a side to side motion until you have pressed all the beans through the mesh. A lot of skins will be left behind on the top of the sifter, these can be discarded.
    *You can use regular strainer to do this.
  3. Place the bean paste onto heavy bottomed non-stick pan, add in the sugar, cook over medium heat stirring constantly until all the sugar melted.
    It will be wet at first as the sugar melts, keep stirring until it gets drier.
    *I took about 50 minutes to cook this, if you have bigger pan that will be a good option coz in larger surface, the water will evaporate faster, so you can shorten the cooking process.
  4. When the dough starts to dry, lower the heat while keep stirring so it doesn’t gets burn.
    The dough is done when it’s forming a thick paste and you can see a few dry doughs left on the bottom and sides of the pan.
    At this point, you should be able to make a lasting indentation in the bean paste with your finger and the paste should not stick to your hands. If it still very sticky, cook for about 5 or 10 minutes longer.
    * Important Tip: Make sure that you remove enough water out of Shiro-An before you mix it with the Gyuhi coz if it still contains too much water while mix it with Gyuhi, the final Nerikiri dough will become watery, too soft, hard to shape, and there’s no turning back.
  5. Take it off from the heat and spread the Shiro-An inside the pan to cool completely (some moisture will evaporate while doing this). 
    *Please note, any dough or bean paste or wagashi should not be exposed to air too long, coz if it dries too much, it will gets hard and it won’t be easy to moistened or softened.
  6. Once it cools down at room temperature, spare the 200 grams of Shiro-An for the filling (cover in a plastic wrap) and keep the rest for Nerikiri Dough.

Nerikiri Dough

  1. To make the Gyuhi (Soft Mochi Dough)
    In a small pan, combine the glutinous rice flour and water. Mix until no lumps remain.
    Cook over medium low heat, keep stirring until the mixture becomes a bit transparent, sticky and thick, remove from the heat and let it cool a bit.
  2. To combine Shiro-An and Gyuhi
    The ratio of Shiro-An and Gyuhi should be 10 by 1;  for example if I have 500 grams of Shiro-An, I need around 50 grams of Gyuhi.

    Cut the Gyuhi into small pieces and place them into the Shiro-An, mix well until uniform in texture. 
    Squish the dough together with your hands for about 2 minutes until the mixture is soft and pliable (the dough should not stick to your finger too much). 

    Transfer the dough onto a clean cotton cloth, using your hands fold and knead the dough inside the cloth (repeat this process a few times for about 1 to 2 minutes).

    Then pull and tear the dough into small pieces, place them inside the cotton cloth, let them rest for 1 minute.
    After 1 minute, gather all small pieces together and knead again for 1 minute (you will notice that the dough will become smooth and really soft). Immediately cover the dough in a plastic wrap.
  1. Proceed with colouring, shaping and moulding according to the video.
    *Please note 1 portion Nerikiri will need 20 grams of Shiro-An (white bean paste) filling and 35 grams of Nerikiri Dough.

NOTES

  1. Nerikiri dough and Shiro-An can be made ahead of time, tightly sealed and frozen up to 1 month or refrigerate for up to 4 days. It can be easily reheated until it’s pliable again and ready to use.
  2. I highly recommend to divide Nerikiri Dough into each serving (35 gr each), wrap them individually with a plastic wrap and then store them in the freezer (in an airtight container) to use later.
  3. When making Nerikiri, always prepare some cooked glutinous rice flour (cook in the pan for 5 minutes) and vegetable oil to prevent stickiness.
    *If you feel the dough a bit soft and sticky, add a little bit of cooked glutinous rice flour or you can apply a little bit of vegetable oil on your palm and the tools to prevent stickiness.
  4. It’s completely up to you to decide how you want the wagashi to turn out. Kindly color and flavor your Nerikiri Dough and Shiro-An filling according to your preference.
    I like to use natural food colouring for Nerikiri because besides it gives beautiful colours, the fragrance and flavour makes your sweets more delightful to enjoy.
  5. To store Nerikiri; fridge for up to 5 days and 1 month in the freezer.
  6. To defrost
    Whenever you need want to make several “Nerikiri Wagashi”, take a few portions out from the freezer, thaw them on the counter at room temperature. Don’t open the plastic wrap while defrost, press the dough once in a time until you can feel that it soft and pliable again. Unwrap the dough, knead a while then you can use them.

Neapolitan Mochi Ice Cream


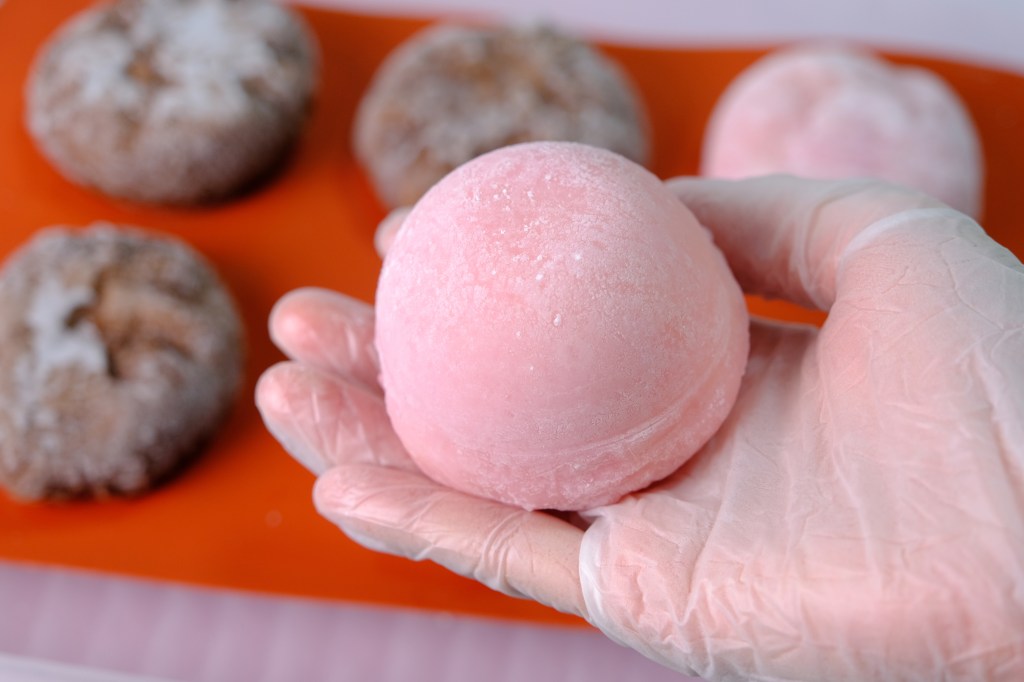
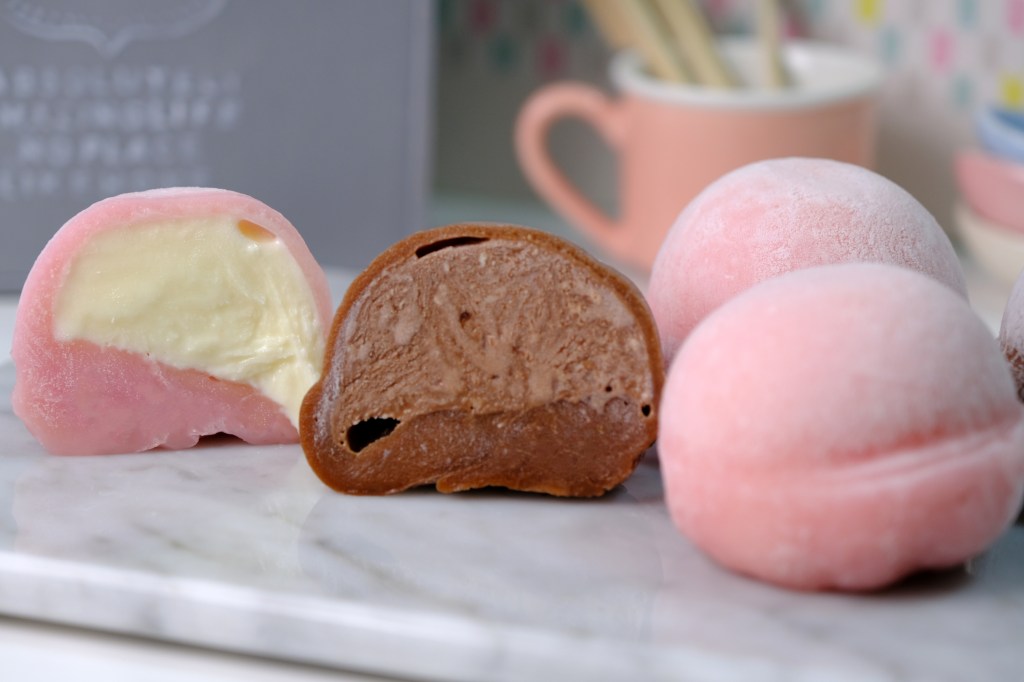
Hi Guys, today we are making these “Neapolitan Mochi Ice Cream”. It’s a soft sticky chewy sweet rice dough with an ice cream filling inside.
It’s been my all time favorite dessert since I was 15th, and you’ll be surprise to see how Kids love it so much.

These popular Japanese dessert is fairly easy to make at home. The famous brand that you can purchase in Japan is Lotte brand “Yukimi Daifuku”.

NO-CHURN Homemade Ice Cream without Eggs, Whipped Cream or Condensed Milk

Most of people use store bought ice cream to save time.
I personally love to make my own No-Churn ice cream for the fillings. Delicious creamy ice cream without any eggs, whipped cream nor condensed milk; and you can have 2 ice cream flavours in 1 go; The yummy chocolate flavour and vanilla almond to represent the traditional Neapolitan taste.

Vanilla Almond Soft Pink Mochi Dough

And YES, it’s always Shiratanako or Mochiko flour for making the best mochi dough. But for most of people is really hard to find them specially in Asian grocery stores and online.
That’s why I decided to substitute it with glutinous rice flour; there will be a difference in texture, but still taste great.

Yummy Chocolatey Mochi Dough

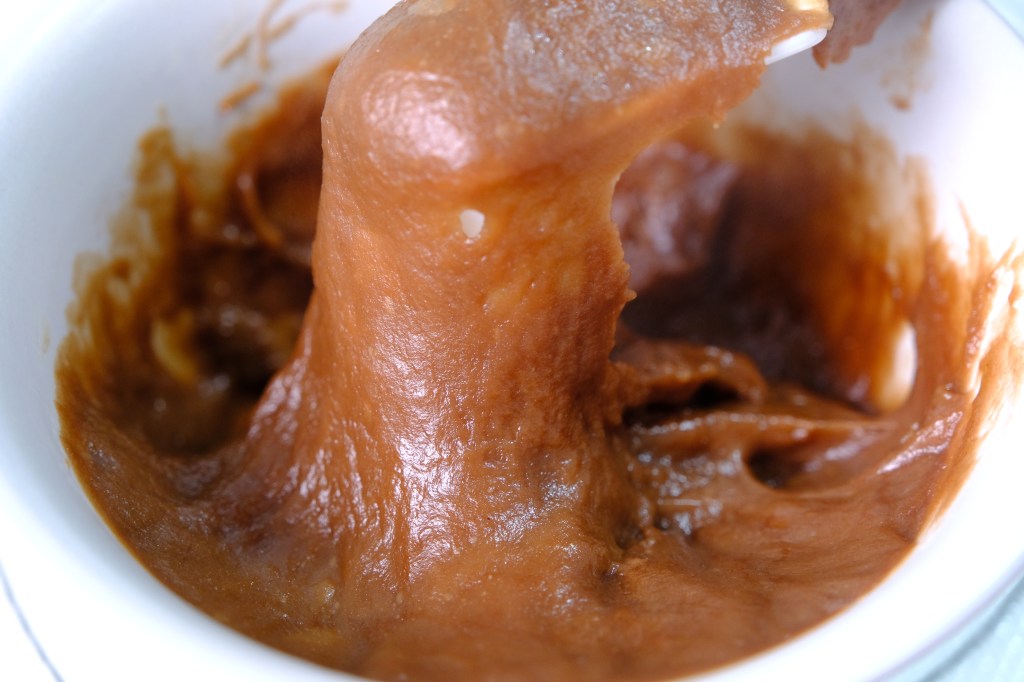
I don’t recommend to store the mochi dough in the fridge to speed up the cooling process, coz it will leads to condensation. The moisture will trap inside the dough and ends with sticky wet dough surface, it will be troublesome- hard to handle.

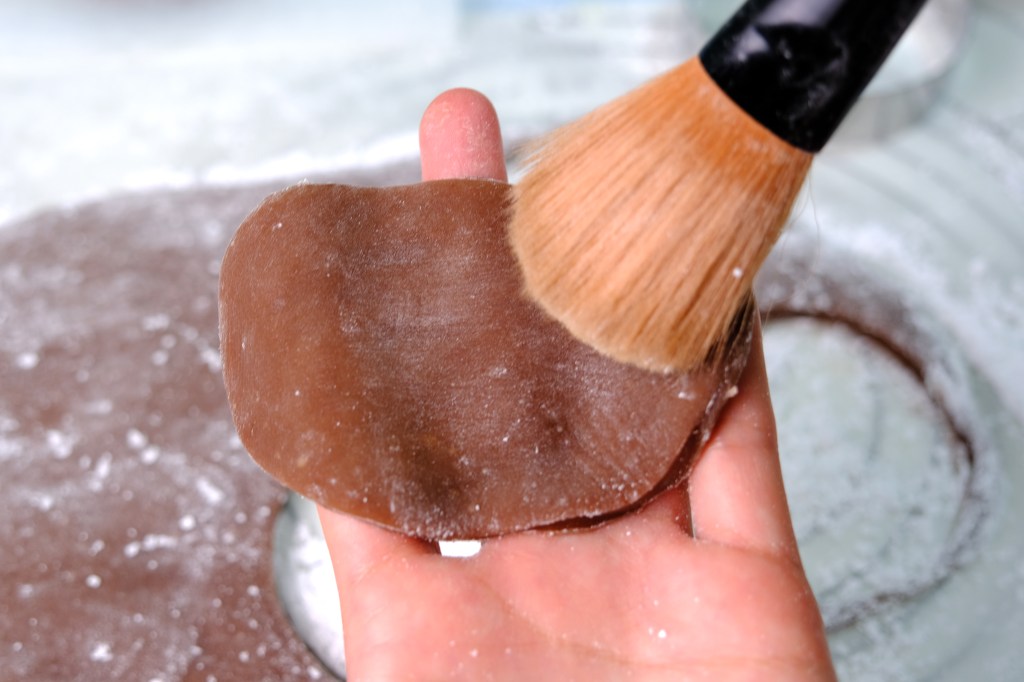
Soft Brush to Remove Excess Starch

The texture of the soft mochi so memorable and it can also be flavoured as a complement to the ice cream filling. It is quite chewy and sticky, so make sure that you have enough corn or potato starch to help manage the stickiness.

I loved the soft and chewy texture of this refreshing treats.
Is there any food happier and cuter than mochi? It’s subtly sweet and a pillowy-soft chew.
You can also add a few drops of food coloring to the mochi dough or natural food dyes, the sky’s really the limit.

This is only a basic ice cream mochi recipe, waiting to be dressed up however you like. Add about a teaspoon of matcha powder to make green tea mochi, or a flavored extract to the wet ingredients to flavor it to your liking.

Chocolatey Mochi with Chocolate Ice Cream Filling

The ice cream is creamy, not too soft and not overly sweet; and the chewy mochi itself not too sticky or floury in flavor.

Vanilla Mochi with Vanilla Almond Ice Cream Filling

You can do as many flavours and colours as you want.
Imagine your kids smiling faces when they bite into their favorite ice cream inside the soft mochi shell.

This will make a really cool summer treat and a really fun cooking project with your children.

If you want to make it for some kind of party, such as barbecue or something I think it would be a perfect dessert. I hope Guys enjoy this recipe!

NEAPOLITAN MOCHI ICE CREAM
Yield: 6 pieces (60 ml each)
Active time:  1 hours
Total time: 9 hours

INGREDIENTS
Ice Cream Mixture:

  • 240 gr Milk
  • 30 gr Granulated Sugar 
  • 48 gr Milk Powder
  • 10 gr Corn Starch
  • 30 gr Milk
  • 1 tsp Vanilla Extract 
  • 1 tbs Cocoa Powder
  • 1 tbs Hot Water


Vanilla Almond Mochi Dough:

  • 115 gr Water
  • 40 gr Milk
  • 40 gr Granulated Sugar
  • 15 gr Vegetable Oil
  • 1/8 tsp Beetroot Powder or Pink Food Colouring
  • 1/4 tsp Vanilla Extract
  • 1/2 tsp Almond Extract
  • 80 gr Glutinous Rice Flour


Chocolate Mochi Dough:

  • 115 gr Water
  • 40 gr Milk
  • 40 gr Granulated Sugar
  • 15 gr Vegetable Oil
  • 1/2 tsp Vanilla Extract
  • 2 tsp Cocoa Powder
  • 80 gr Glutinous Rice Flour

Corn or Potato Starch 


INSTRUCTIONS
Ice Cream Mixture

  1. Prepare the silicone mould (if you use small plastic cup, glass or cupcake pan, make sure that you line the mould with cling wrap so it’s easier when unmould the ice cream).
  2. In a medium pan, combine 240 grams of milk, sugar and milk powder, mix until no lumps remain.
    Cook over medium heat until simmering, stirring constantly to avoid the mixture burning. 
  3. In the meanwhile, in a small container combine the corn starch, 30 grams of milk and vanilla extract, mix well.
    Gently pour the corn starch mixture to the simmering milk mixture, continue whisking until the mixture starts to boil and thickened.
  4. Remove from the heat, divide half of the mixture to the 3 cavities of the mould.
    Mix the remaining mixture with cocoa powder that has been diluted with some hot water.
    Divide this chocolate mixture to the rest of cavities.
  5. Cover and store them in the freezer for at least 6 hours or preferably overnight to harden.
  6. Unmould the ice cream; place them in the container that has been lined with parchment paper so it won’t stick to the surface. Pop them again in the freezer while continue with the mochi dough.


Mochi Dough
Microwave Method

  1. In a microwave safe bowl, mix all the ingredients until well combined.
  2. Cover the bowl with a cling wrap, microwave it on high heat for 1 minute, take it out and stir with a wet rubber spatula, cover again and microwave it for another 1 minute (we will know that the mixture is well cooked when all the colour is semi translucent).

*For the chocolate mochi dough; strain the mixture before microwave it to make sure there’s no lumps remain.

Steaming Method

  1. In a medium bowl, mix all the ingredients until well combined.
  2. Place the bowl in the preheated steamer (cover the steamer lid with a towel so the condensation won’t drop into the mochi mixture) and steam for about 20 minutes (stir it with a wet rubber spatula at halfway cooking and cover it again to finish cooking). 


ROLLING

  1. Cover the work surface with a piece of large parchment paper and dust with generous amount of corn or potato starch (if you are worried about eating raw starch, heat the starch in the pan for about 5 minutes).
  2. Transfer the hot cooked mochi dough onto a parchment paper and sprinkle more starch on top of the dough.
  3. Using your palm gently press and spread the dough onto a long rectangular shape, about ¼ inch thick (until it’s big enough to fit into 3 pieces round circles shapes).
  4. Let the dough rest for about 45 minutes to 1 hour until the mochi is set and cooled down completely.


ASSEMBLY

  1. Using round cutter, divide the mochi dough into 3 pieces for each flavour. Pick up one circle of dough, gently brush off the starch on both sides.
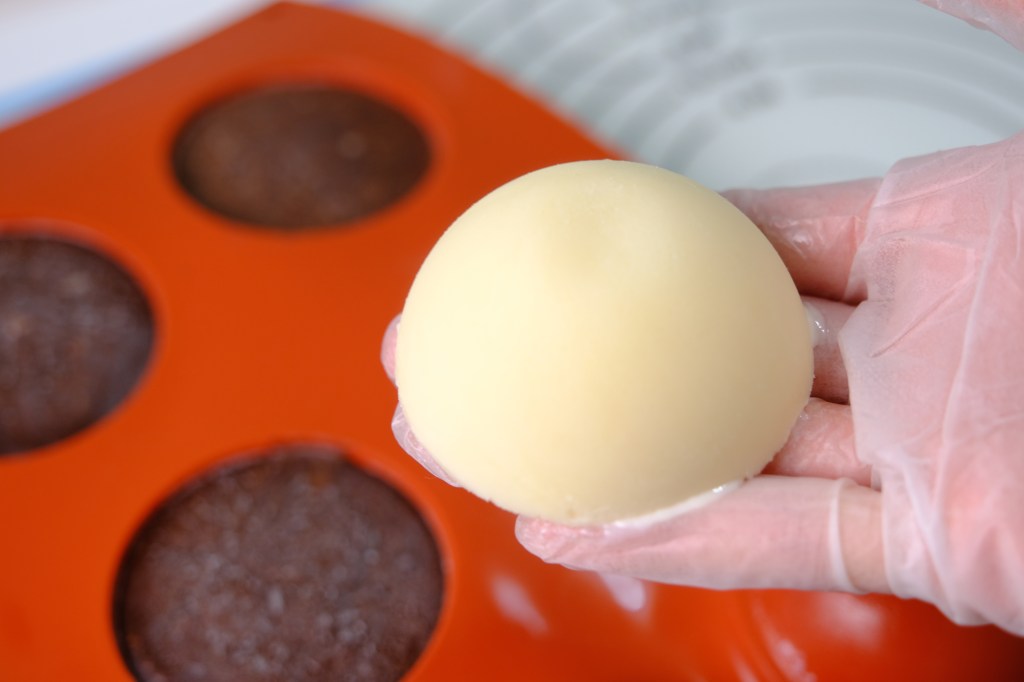
  2. Brush the mould with some starch to prevent stickiness and then lay the dough in the center of the mould
  3. Working with one scoop of ice cream at a time, (keep the rest in the freezer so they don’t melt), place one ice cream scoop in the center of the mochi dough and gently press the dough around the ice cream. Pinch the edges of the mochi to seal it. 
  4. Continue with remaining dough and ice cream (try to work fast or else the ice cream will starts to melts it will end up as a puddle on your hands).
  5. Cover and store them in the freezer for at least 1 hour before serving.

*If your use other than silicone moulds, make sure that you cover the finished ice cream mochi individualy in a cling wrap to prevent stickiness and then place them back into the mould to keep the shape.


NOTES

  1. Feel free to double or triple the recipe; more dough means longer time to cook the mochi dough.
  2. I don’t recommend to store the mochi dough in the fridge to speed up the cooling process, coz it will leads to condensation, the moisture will trap inside the dough and ends with sticky wet dough surface, it will be hard to handle it.
  3. It’s important to have a size of mochi dough that is just big enough to surround the ice cream, coz too much extra dough hanging off which will taste a bit hard once it frozen. 
  4. Mochi ice cream can be kept in an airtight container in the freezer for up to 1 week. When you’re ready to eat, let them sit out for at least 15 minutes to soften before biting in! 
  5. Recipe variations:
    – Matcha: Mix in 1 1/2 tsp of matcha (green tea powder) to the vanilla ice cream mixture (omit vanilla and almond extract)  and 1 tsp to the plain mochi dough (omit the beetroot powder).
    – Coffee: Mix in 1 tsp of instant coffee to the vanilla ice cream mixture (omit almond extract) and ½ tsp to the plain mochi dough (omit the beetroot powder).

Molang & Piu Piu Jiggly Pudding

Hey Guys, today we are making these Molang and Piu Piu Jiggly Pudding. A light, smooth, firm-yet-soft milky pudding pairs with chocolately creamy chocolate custard.

Unmould Pudding

This type of puddings are quite soft.
So I suggest to prepare them 1 day in advance to make sure that they are firm enough before we unmold them.

Creamy Chocolate Custard

This supersilky and chocolately chocolate custard quick and easy to make, it’s creamy and delicious and is kid friendly.

Edible Chocolate Cup

And to make it more special, we will serve them in individual edible chocolate cup. I am using these 4 oz half-sphere silicone mould for the the cups and donut silicone mould for the cup saucers.

If you not keen to buy this kind of mould, kindly substitute them with silicone cupcakes liner or maybe other shape and you can simply pipe circle chocolate decorations on parchment paper to create the saucer.

To kind of fancy the cup up, I dip the rim of the chocolate cup into the melted chocolate and then dip that into the nonpareils. Isn’t that beautiful?

Chinese Tea Cup

And for the pudding moulds, I found that my pretty chinese tea cup and this super tiny measuring cup suits perfectly for this kind of project.

Super Tiny Measuring Cups

Look how small and adorable they are!! They are perfect coz they have a round bottom shape, quite similar to our lovely character’s head.

What I love about this pudding is that it’s not too sweet and it’s pretty light. There’s something so satisfying about spooning out that first bite.
It should keep it’s shape on your tongue and until you sink into it, it will dissolve into a velvety smooth melty bite.

It’s really an easy, simple, yet stunning dessert. You can make them ahead of time and serve on a dinner party.
I hope you give the a try and I’m sure that everybody will love them!

MOLANG & PIU PIU JIGGLY PUDDING
Yield: 2 portions
Active time:  1 hour
Total time: 8 hour

INGREDIENTS
Pudding:

  • 20 grams Cold Water
  • 4 grams Gelatine Powder
  • 20 grams Granulated Sugar
  • 115 grams Milk
  • 1/2 teaspoon Vanilla Extract (optional)

Chocolate Custard:

  • 20 grams Granulated Sugar
  • 2 teaspoons Cocoa Powder
  • 2 teaspoons Cornstarch
  • A pinch of salt
  • 12 grams Egg Yolks
  • 160 grams Milk
  • 1 teaspoon Unsalted Butter
  • 2/3 teaspoon Vanilla Extract/ Rhum


Decoration:

  • White Chocolate Compound
  • Dark Chocolate Compound
  • Food Colouring (Pink Rose, Yellow)


INSTRUCTIONS
Prepare the templates and moulds

  1. For Templates
    Print some templates for Molang and Piu Piu details. Stick some greaseproof paper on top of the templates, then apply some shortening to the greaseproof paper to prevent the chocolate stick to the paper surface.
  2. Pudding Mould
    Prepare pudding mould for Molang and Piu Piu that have a round bottom shape (quite similar to our lovely character’s head, for example chinese tea cup).
  3. Edible Cups and Saucers Mould
    You can use 4 oz half-sphere silicone mould or silicone cupcakes liner and maybe other shape for the the cups and donut silicone mould for the cup saucer (or manually make simple circle chocolate decorations on parchment paper for these saucer).


Pudding

  1. Bloom the gelatine with cold water and let it stand for about 3-5 minutes.
  2. In a medium sauce pan, mix the milk and sugar. Cook until the mixture simmering or reach about 60°C. 
  3. Mix in the bloomed gelatine into the milk, stir until well combine.
  4. Pour the white pudding mixture into Molang mould, colouring the rest with a bit of yellow food colouring for the Piu Piu, and then pour the yellow mixture into Piu Piu’s mould.
  5. Store them in the fridge for at least 6 hours (preferably over night).


Custard

  1. In a medium saucepan, mix the sugar, cocoa powder, corn flour and salt. Add in the egg yolks and mix until just combined.
  2. Gradually pour in the milk and whisk until no lumps remain.
  3. Cook the mixture over medium heat, keep stirring until it starts to boil and the mixture thickens. Take it off from the heat, add in the unsalted butter and rum or vanilla extract, mix well.
  4. Strain the custard to get rid of any lumps. 
  5. Let it cool about 5-10 minutes. Cover the surface with plastic wrap, pushing it directly on top of the mixture (make sure there are no air pockets, to prevent skin formation on top of custards). 
  6. Let it chill in the fridge for about 2 hours.


Character Details
Melt some white and dark chocolate compound, colouring as needed, pour each colour into a piping bag then trace characters details onto a parchment paper. Let them set hards in the fridge for about half hour.


Edible Chocolate Cups and Saucers
Cups; Pour melted rose pink colour chocolate compound fill up our moulds here, fill it right up to the top.  Flip it right over to make sure all the excess drips out, scrape the edge of any of that excess (we don’t want it to be a real jagged looking cup).
Repeated this 2 times, make sure you let these set in between each layer.
Saucer; Fill about half of the donut mould
*Store both cups and saucer for about 10 minutes in the fridge so they are completely solid and sets.


ASSEMBLY

  1. Unmould the Cups and Saucers
    Pull that silicone away from the chocolate, being very careful not to crack the chocolate.
    To fancy the cup; dipped the rim of the chocolate cup into the melted chocolate and then dip that into the nonpareils.Stick the cup onto the saucers with some melted chocolate.
  2. Crush some marie biscuit for layering in between the custard to add crunchiness and strengthen the base of the pudding so it won’t sink too much (can substitute with digestive or oreo).
  3. Pour about 2 tablespoons of chocolate custard into the edible cup, sprinkle about 1 tablespoon of crushed marie biscuits, spread another layer of custard evenly over the biscuits. 
  4. Slowly and carefully unmould Molang and Piu Piu pudding then place the pudding on top of the custard.
  5. Stick all the details.


NOTES

  1. Prepare the pudding 1 day in advance to make sure that they are firm enough before we unmold them.
  2. You can make the pudding and custard ahead of time (store them in the fridge for 2-3 days).
  3. You can use Candy Melts for Chocolate Compound.
  4. If you made edibles cups and saucers in advance, I suggest to store them at room temperature in an airtight container, so there is no moisture when served.
  5. For the presentation purpose; I recommend to assembly these dessert directly before serving to make sure that the biscuits don’t get mushy so the pudding doesn’t sink into the custard.

Puffy Bear Ichigo Daifuku (Strawberry Mochi)

Hi Guys, I miss you Guys so much. Hope you and your family are healthy and safe during these uncertain and unprecedented times.

Today we are making these Puffy Bear Ichigo Daifuku or commonly known as Strawberry Mochi.

Daifuku is a popular traditional Japanese sweet and there are many varieties of Daifuku. They usually come with the same soft and chewy mochi exterior with different stuffing.  

During the springtime, Japanese confectionery shops sell a seasonal Strawberry Mochi called Ichigo Daifuku with a whole strawberry as the filling. 
The combination of fresh juicy strawberry, sweet bean paste and soft chewy mochi is a match in heaven.

They are smooth and springy, a nostalgic reminder of my childhood and all the happy memories in Japan.

Instead of sweet bean paste as a filling, I’m gonna show you how to make my homemade chocolate paste, which is very delicious and match perfectly with these lovely strawberry mochi.

The chocolate paste has supper deep rich chocolaty flavor, it’s really easy to make and tastes great on everything specially for bread filling.

Making daifuku is very much like a craft. The process can be fun and Soothing.
When working with mochi dough, make sure that you do not stretch it too thin to prevent tearing.

Sweet Treat Showcases

Pick fresh strawberries and also choose medium small round ones, because they are easy to handle and look cute when wrapped with bean paste and mochi.

You can use any type of strawberries which is available in your country. I personally fall in love with Korean Strawberry, because wherever I eat strawberry; the taste is never be so great like this, it’s light yet smooth juicy texture gives an excellent balance with unique berry fragrance and sweetness.

Japanese sweets “Daifuku” are best served with green tea, matcha green tea, or you could try matcha latte and hojicha as well.
I hope you enjoy making Strawberry Mochi. Take care and stay safe everyone! Love you all!!

PUFFY BEAR ICHIGO DAIFUKU (STRAWBERRY MOCHI)
Yield: 6 pieces
Active time: 1 hours
Total time: 3 hours

INGREDIENTS
Chocolate Paste:

  • 60 grams Granulated Sugar
  • 1 1/2 tablespoons Milk Powder
  • 20 grams Unsalted Butter
  • 25 grams Cocoa Powder
  • 75 grams Eggs
  • 1 teaspoon Vanilla Extract (optional)

Mochi Dough:

  • 100 grams Glutinous Rice Flour
  • 10 grams Tapioca Starch
  • 20 grams Corn Starch
  • 200 grams Milk
  • 80 grams Granulated Sugar
  • 5 grams Vegetable Oil
  • A pinch of Salt
  • Food Colouring (Brown and Red)

Assembly:

  • 6 Pieces Medium Strawberry
  • Potato or Corn Starch
  • Melted White Chocolate or White Food Colouring


INSTRUCTIONS
Strawberry Chocolate Filling

  1. In a small saucepan, combine sugar, milk powder, unsalted butter, cocoa powder, eggs, and vanilla extract. Mix it all through until no lumps remain.
  2. Cook over medium low heat, stirring constantly until the mixture thickens and it’s forms a smooth paste. 
  3. Take it off from the heat, pour it into a bowl, cover it with plastic wrap and store it in the fridge for about 1 hour.
  4. After 1 hour, divide the chocolate paste into 25 grams balls. Flatten the chocolate paste and place a strawberry on the center.
    Wrap the strawberry with the chocolate paste and shape it back into an oval shape, cover each strawberry chocolate with a cling wrap (like a piece of candy).
    Store them in a fridge to set for 1 hour.


Mochi Dough

  1. In a microwave proof bowl, combine the glutinous rice flour, tapioca starch, corn starch, along with milk and sugar. Mix that all through.
    Add in the vegetable oil, mix well until well combined and completely smooth.
  2. Cover the bowl loosely with cling wrap and microwave it on 1000 Watt for 1 minute. After one minute, removed the bowl from the microwave and stir (you can see the mixture will be still runny and floury). 
  3. Once you’ve stirred well, put the bowl back into microwave for another 1 minute. Take the bowl out of the microwave and stir again (by now, it should look partly floury and partly should be starting to resemble mochi texture).
  4. Cover again and microwave it for the last time, for about 45 seconds to 1 minute. The colour of the mochi should change from white to almost translucent.
    Stir well with a spatula (temperatures may vary, if centers still runny and undercooking, add cooking time for a few second). If the mochi has a translucent texture, that’s means it’s done.
  5. Mochi pounding; cover the work surface with large cling wrap and brush some vegetable oil to prevent stickiness, apply some oil to all areas that will contact with the hot dough and then transfer the hot cooked mochi on top, cover it with plastic wrap.
    Gently use tapping and rolling method with a rolling pin to even out the thickness, fold it into thirds (it’s very similar to folding on a letter that goes in an envelope or laminated dough process in making pastry).
    Repeat the tapping rolling and folding action for about 9 more times to create a smooth dough.
    To finish the process, I just wrap the dough, roll into a log, and then transfer it into the fridge (2 hours) or freezer (45 minutes). 


Assembly and Decoration

  1. Prepare some potato or corn starch for coating purpose (if you are worried about eating raw starch, you can heat the starch in the pan for about 5 minutes). 
  2. Cover the work surface with large cling wrap and brush some vegetable oil to the surface and scraper to prevent stickiness. Don’t forget to also put some oil and starch on your hands to prevent the dough from sticking.
  3. Divide mochi dough into 60 grams each, round it into a ball. Using rolling pin and place a piece of cling wrap on top of the dough, gently flatten and roll it into 3-inch diameter disc, make sure that the middle is slightly thicker that the edge of the dough (please note that the smooth surface underneath will be the outer skin of the head). 
  4. Place one portion of the strawberry chocolate paste filling at the center of the mochi disc, start covering the strawberry from all sides and use your thumb to hold the mochi on top, gather the mochi and pinch together to complete seal the filling.
    Gently shape the mochi as oval as possible, and then cut off the excess mochi dough underneath. Repeat this process for the rest of Daifuku.
    *You can dust off the excess potato or corn starch with a pastry brush, or if you find some sticky part, cover the area with starch first and then dust off.
  5. For decorations and details; colour some dough with dark brown, soft pink and deep pink.
    – Roll some white and soft pink dough for the ears, 2 pieces each and stick it together, cut the edge of the ears, brush some water and stick it to the head.
    – For the cheek, cut some soft pink dough with small round cutter.
    – For the nose, cut some deep pink dough with my tiny small heart cutter.
    – Using dark brown dough to create the eyes and mouth expression.
    – Add the spark of the eyes and teeth with some melted white chocolate or white food colouring. 


NOTES

  1. Steaming Method: If you’re using a steamer, cover the steamer lid with a towel so the condensation won’t drop into the mochi mixture. Put the bowl into a steamer basket and cover to cook for 20-30 minutes. Half way cooking, stir with spatula and cover to finish cooking. The color of mochi should change from white to almost translucent.
  2. The daifuku keep well for a day or two in the refrigerator.

Kawaii Mitarashi Dango

Hi Guys, today we are making these adorable “Kawaii Mitarashi Dango”.  Have you ever eaten Japanese confectionery DANGO? Small round sweet dumpling balls are skewered on bamboo sticks and covered with a gooey brown sauce.  

Mitarashi dango are my favorite traditional sweet, they are quite satisfying without being overly sweet 🤤

The shiny brown colored sauce (which is called Mitarashi Sauce) is sweet and savory at the same time.
It goes perfectly with the bland, slightly chewy Dango or dumplings (Dango is the name for unfilled solid dumplings.)

This traditional Dango dessert is not as difficult as you may think. I hope you enjoy these traditional snacks and a taste of history today!

WATCH HOW TO MAKE KAWAII MITARASHI DANGO


KAWAII MITARASHI DANGO
Yield: 18 pieces
Active time: 1 1/2 hour
Total time: 2 hours

INGREDIENTS
🍡 Dango
240 grams Glutinous Rice Flour
60 grams Icing Sugar
260 grams Japanese Silken Tofu
Cocoa Powder
Food Colouring (Black, Red)

🍡 Mitarashi Sauce
130 grams Water
20 grams Soy Sauce
10 grams Corn Starch
45 grams Brown Sugar


INSTRUCTIONS
🍡 Dango

  1. In a large bowl, mix together Glutinous Rice Flour, Icing Sugar and Japanese Silken Tofu. Simply mix the ingredients together until it’s form a dough ball.
    *If the dough is too dry, you can add more tofu and if it’s too sticky to handle just add more Glutinous Rice Flour.
  2. Once the dough reach the right consistency, you can start to colouring them (for the extra flavor, instead of using food colouring I’m using Cocoa Powder for the brown colour).
    *You can create any design and colour you want, just take note that after boiling, the colour will be darker than before, so be mindfull with the colour.
  3. Take about 20-25 grams of dough and roll it into a ball shape (for Teddy Bear, Lucky Cat and Panda head).
    Place EACH head onto a small piece of Greaseproof Paper, then add the details as shown in the video.
  4. To cook Dangos
    After finish with all the design, bring a small pot of water to a boil, then lower the heat to a simmer.
    Carefully lift the Greaseproof Paper; place the dangos into the simmering water (you can cook a few of them at a time). Remove the floating Greaseproof Paper.
  5. When Dangos start to float, that means they are ready to be picked up! (it will takes for about 3-5 minutes).
    Scoop them out and place it into a bowl of ice water so they don’t stick together.
  6. After cooling down a bit, take out the Dangos from the ice water, then simply stick the Dango into a skewer. Make sure that you stick it right in the middle of the head

🍡 Mitarashi Sauce
Put all the mitarashi ingredients in a saucepan, then set on a medium heat and bring it to a boil; Keep stiring until the sauce has thickened.
Pour it onto the Dangos and serve.

NOTES

  1. Dango comes with many different varieties, so they are usually named after the various seasonings served on or with it.
  2. In Japan, this Dango is easily found in markets or convenience stores and I think you also might find it at Japan store in your country.
  3. Some people use water to make these, but I’m prefer to use Tofu for a hint of extra flavor and it will give the Dangos a light and fluffy texture.
  4. It’s best to serve it hot, coz the colder it gets, the chewier it will become.
  5. Put the Dango in an airtight container and keep at room temperature up to 2 days.
    If you live in hot place, I recommend to put them in an airtight container or a ziplock bag and store them in the refrigerartor.
    If you can’t eat them after a day or 2, you might try freezing them (you can keep them for about a month in a freezer).
    When you want to eat them, It is the best to thaw them naturally at room temperature (this takes about 30-60 minutes) or you can Microwave it.
  6. As for the uncooked Dango, although you can freeze them in ziplock bag for up to 3 months, these method will dry them out and they cracked slightly around the edges.
    They did cook as per normal once they were dropped into the boiling water, but the cracked edges are not as perfect as you’ll like them to be, so better not freeze them too long.