Korilakkuma pineapple cakes

This unique Taiwanese Pineapple Cakes no longer makes us bored with the standard rectangular shape; And I’m sure that your kids will love it too

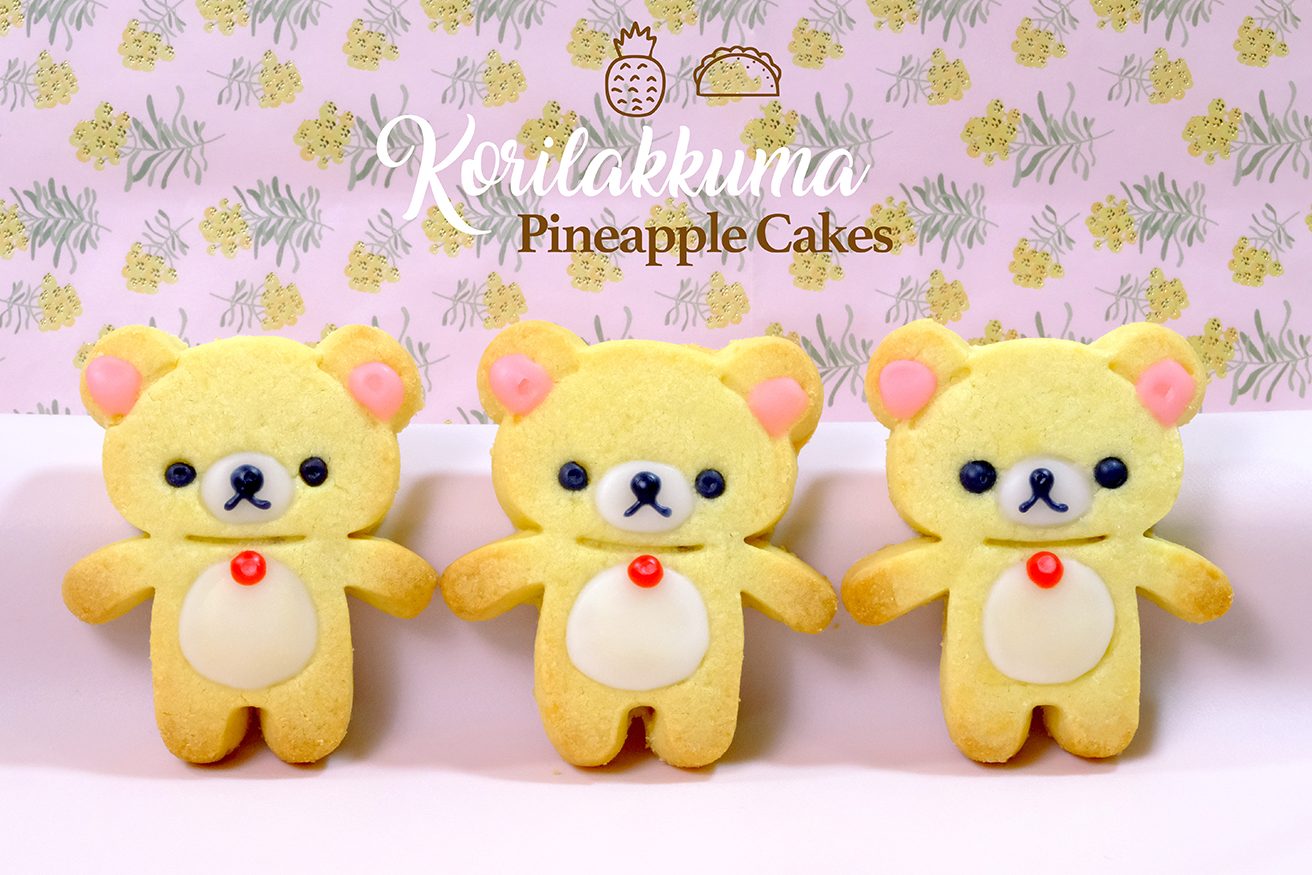
Hi Everyone, today I am making these cute “Korilakkuma Taiwanese Pineapple Cakes”.
Taiwanese Pineapple Cakes actually almost similar to other Asian Pineapple Cakes; but typically larger than the Singaporean / Malaysian Pineapple Cakes.
They are made with butter pastry crust filled with thick pineapple jam. The cakes are baked in an individual mould, usually in square or rectangle mould.

Taiwanese style (left) ~ Singapore/ Malaysia style (right)

I was told by several Taiwanese-style bakeries that the traditional kind of Taiwanese pineapple cakes are made of pineapple jam that is made of winter melon and maltose syrup so that the jam is extra sweet, heavy and sticky.

However, due to the change of time, most consumers are becoming more health conscious these days and prefer the less sweet and sticky version of pineapple cakes (I personally don’t like food that overly sweet). For this reason, in this recipe I would like to stick to my regular pineapple jam with NO winter melon and maltose syrup.

And I always think, how to make these Pineapple Cakes look more attractive?
This cute Rilakkuma cookie cutter with facial stamp really make life easier;
No longer makes us bored with the standard rectangular shape and I’m sure that your kids will love it too.

The crust to filling proportion is spot-on; thin crust with the right amount of filling.

And people often ask, what is the tips so that the crust is tender?
As soon as the bottom and edges golden brown, take them out from the oven.
Let it stay in the pan for about 5 minutes; Don’t wait it to cool, put in the sealed box while still hot (place kitchen paper on the bottom and the top to absorb the excess moisture).

This way, the cakes won’t be hardened and the crust will be tender.
These Pineapple Cakes will keep well for up to 3 months in the fridge, in an airtight container.

Some people use chocolate for the details;
I prefer royal icing because the chocolate that comes out of the fridge will “sweat”, melt easily, it definitely will ruin the look of your Korilakkuma.

Pineapple cakes make a great Chinese New Year gift for family and friends or a tasty birthday gift for loved ones!

The filling is just perfect not too sweet, they are such an addictive tea snack.
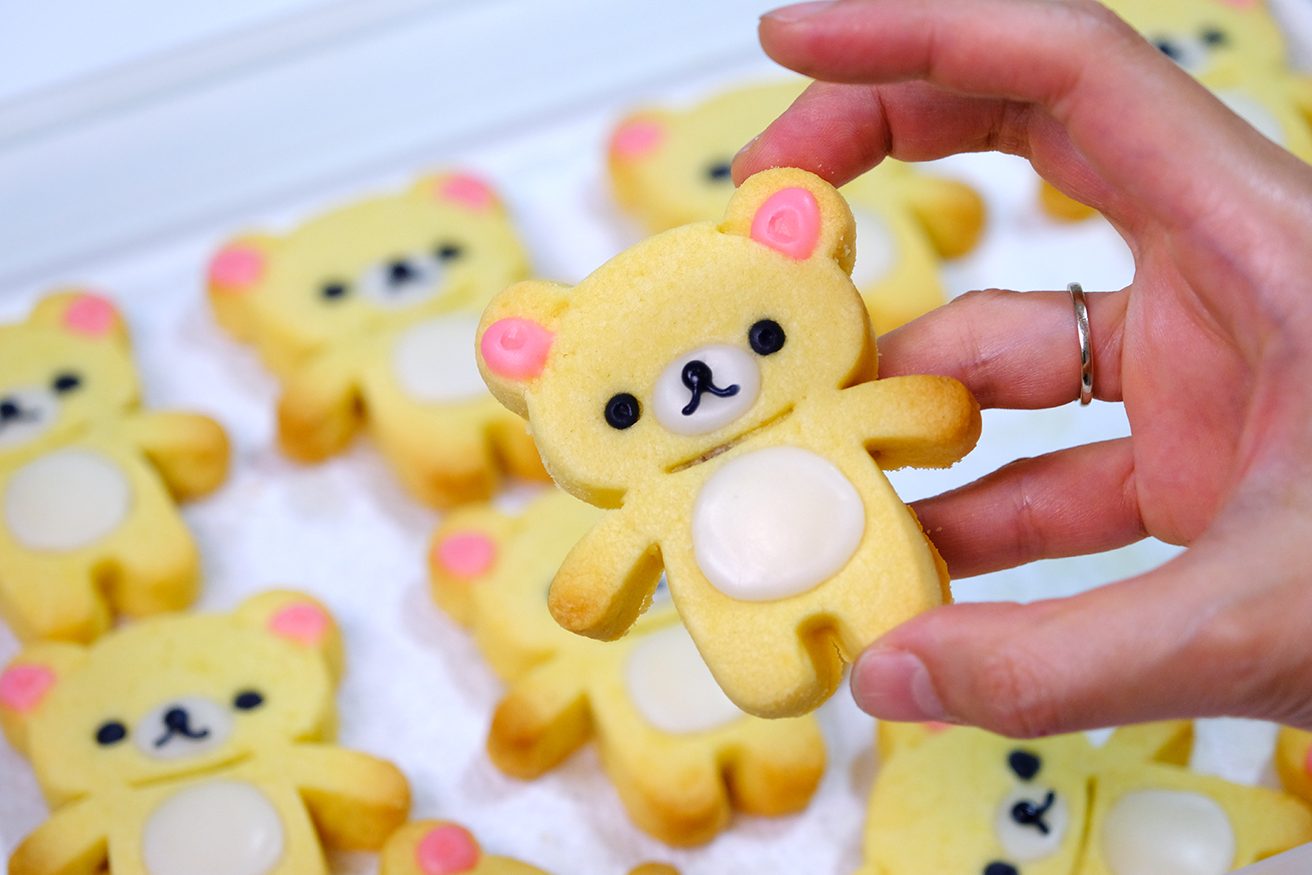
Tender buttery crust with a sweet and tang of homemade pineapple filling inside.
The crust is crumbly and melt-in-the-mouth and the pineapple jam is just perfectly thick but not tough.

I hope this korilakkuma cake can make everyone smile 🙃❤️.

Love you All 🥰


KORILAKKUMA PINEAPPLE CAKES
Yield: 40 pieces
Active Time: 3 hours
Total Time: 4 hours

🌿 Pineapple Filling
1000 g Pineapple (after peeled)
200 g Granulated Sugar
10 ml Lemon Juice
1/8 tsp Salt

🌿 Crust Dough
340 g Salted Butter (soft)
100 g Icing Sugar
85 g Egg Yolks
75 g Condensed Milk
530 g Cake Flour
1/2 tsp Salt

🌿 Royal Icing
130 g Icing Sugar (sifted)
4 tsp Lemon Juice
30 g Corn Syrup

Rilakkuma Cookie Cutter: https://amzn.to/3Y6iNvu

INSTRUCTIONS
🌿 Pineapple Filling

  1. Cut pineapple in half (the lower part of the core is a bit hard, so you need to remove it). 1000 g Pineapple (after peeled)
  2. Shred pineapple into small pieces (about 1×1 cm), cut he core thinly.
  3. Place the shredded pineapples along with the juice into a non-stick pan.
  4. Pour in the sugar along with lemon juice and salt; and then bring it to a boil. 200 g Granulated Sugar; 10 ml Lemon Juice; 1/8 tsp Salt
    There’s no need to cover with a lid, what you need to do now is to evaporate all the liquid.
    Cook over high heat (as long as there is a water in a pot, it will not burn the bottom).
  5. Once the pineapple juice almost completely dry, lower the heat to medium low;
    And continue cooking until it turn into dark brown caramel colour, take it off from the heat.
  6. When the filling is cooled completely, it will become sticky and a bit hard; make it easier to wrap.
    Divide them into small portions; 10 grams each;
    Roll each portion into an oval shape, flatten it; And cover them with a cling wrap to prevent from drying out.

🌿 Crust Dough

  1. In a large bowl, using whisk or mixer; beat the soft butter for a few seconds. 340 g Salted Butter (soft)
  2. Add in the icing sugar and continue beat over high speed until the mixture is pale and fluffy (about 5 minutes). 100 g Icing Sugar
  3. Mix in the egg yolks (this yolks is going to give extra flaky texture). 85 g Egg Yolks
  4. Pour in the condensed milk, mix it really well. 75 g Condensed Milk
  5. Sift in the flour along with the salt; mix until well combined. 530 g Cake Flour; 1/2 tsp Salt
    You don’t want to over-mix it, you can use whisk or mixer first (low speed) and then using spatula to make sure all is well combined and there’s no butter mixture left at the bottom of the bowl.
  6. Cover the bowl with a cling wrap and let the dough rest for half hour.
  7. After 30 minutes, the dough is ready.
    Divide it into small pieces; 30 grams each. Roll each piece into a smooth ball.
    Cover the balls with a cling wrap to prevent from drying out.

🌿 Moulding the Cake

  1. Take 1 piece of the crust dough, roll into a cylinder shape;
  2. Press down in the middle and place the filling in the centre; Wrap it up
  3. Then over a piece of parchment paper, put the filled dough inside the cutter with the smooth side facing down.
  4. Using your palm; press down while spreading the dough, filling in the blanks (this step will be time consuming especially hands part, so be patient).
  5. Release the cake from the cutter with a smooth part facing up (baking sheet lined with a parchment paper); And carefully; press the facial stamp on top of each cake.
  6. Store the cakes in the fridge for about 30 min before baking so it doesn’t spread too much
  7. Bake them in the preheated 170°C oven for about 18-20 minutes (rotate the pan halfway through baking).
  8. As soon as the bottom and edges golden brown, take them out.
    Let the cakes stay in the pan for 5 minutes; Don’t wait it to cool, put in the sealed box while still hot (place kitchen paper on the bottom and the top to absorb the excess moisture).
    This way, the Pineapple Cake won’t be hardened and the crust will be tender.
  9. On the next day, you can continue with the details.

🌿 Royal Icing
Simply combine the sifted icing sugar, lemon juice and Corn Syrup. 130 g Icing Sugar (sifted); 4 tsp Lemon Juice; 30 g Corn Syrup
*If you feel the consistency is too thick, you can add a little bit of boiling water; on the other hand if it’s too thin; add more icing sugar.


🌿 Notes

  1. These Pineapple Cakes will keep well for up to 3 months in the fridge, in an airtight container.
  2. For the details
    Some people use chocolate, I prefer royal icing because the chocolate that comes out of the fridge will “sweat”, melt easily, it definitely will ruin the look of your Korilakkuma.
    Let the first layer of the icing sets hard before you add another details on top.
    If you are in humid conditions, you can turn on the air conditioner to speed up the drying process.
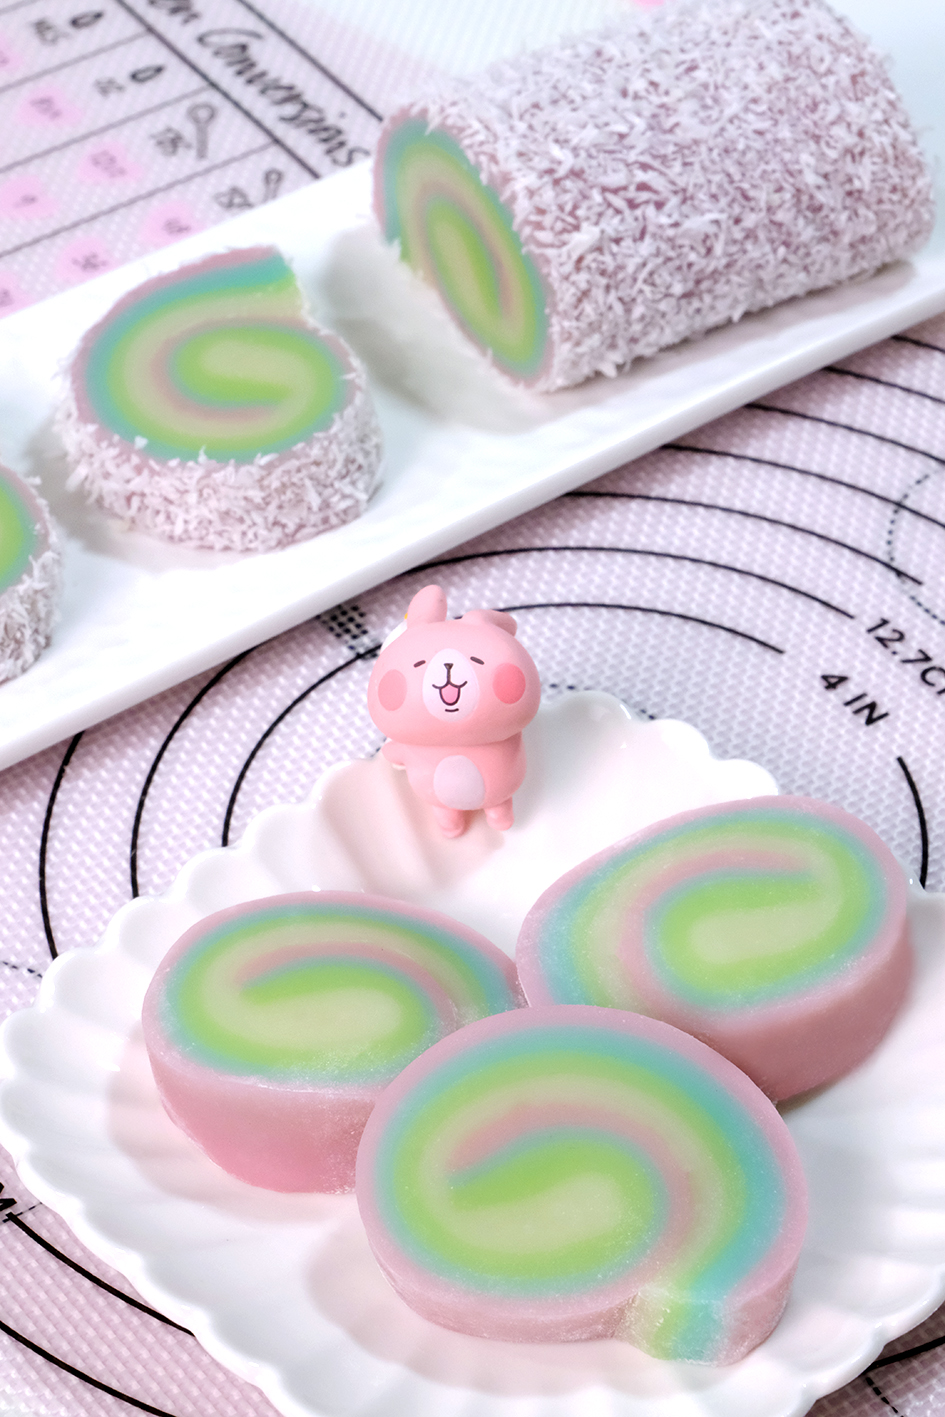
Rainbow Mochi roll


I grew up eating Mochi and I love it so much! Mochi has always been a delicious source of comfort.

My Grandpa would buy homemade Mochi from the local store. They sold 2 kinds of Mochi, plain and the one that filled with sweet crumbled peanut filling.

Although the contrast of texture between the smooth, supple, sticky outer layer of Mochi and the crunchy peanut fillings is so awesome; plain Mochi is always my favourite.

Roll in a food grade plastic grease with vegetable oil so it won’t get mess in your hands 😬

In this recipe, I am going to show you how to make these Rainbow Mochi Rolls.
It’s basically my favourite plain Mochi, but I tried to make it more interesting 😋

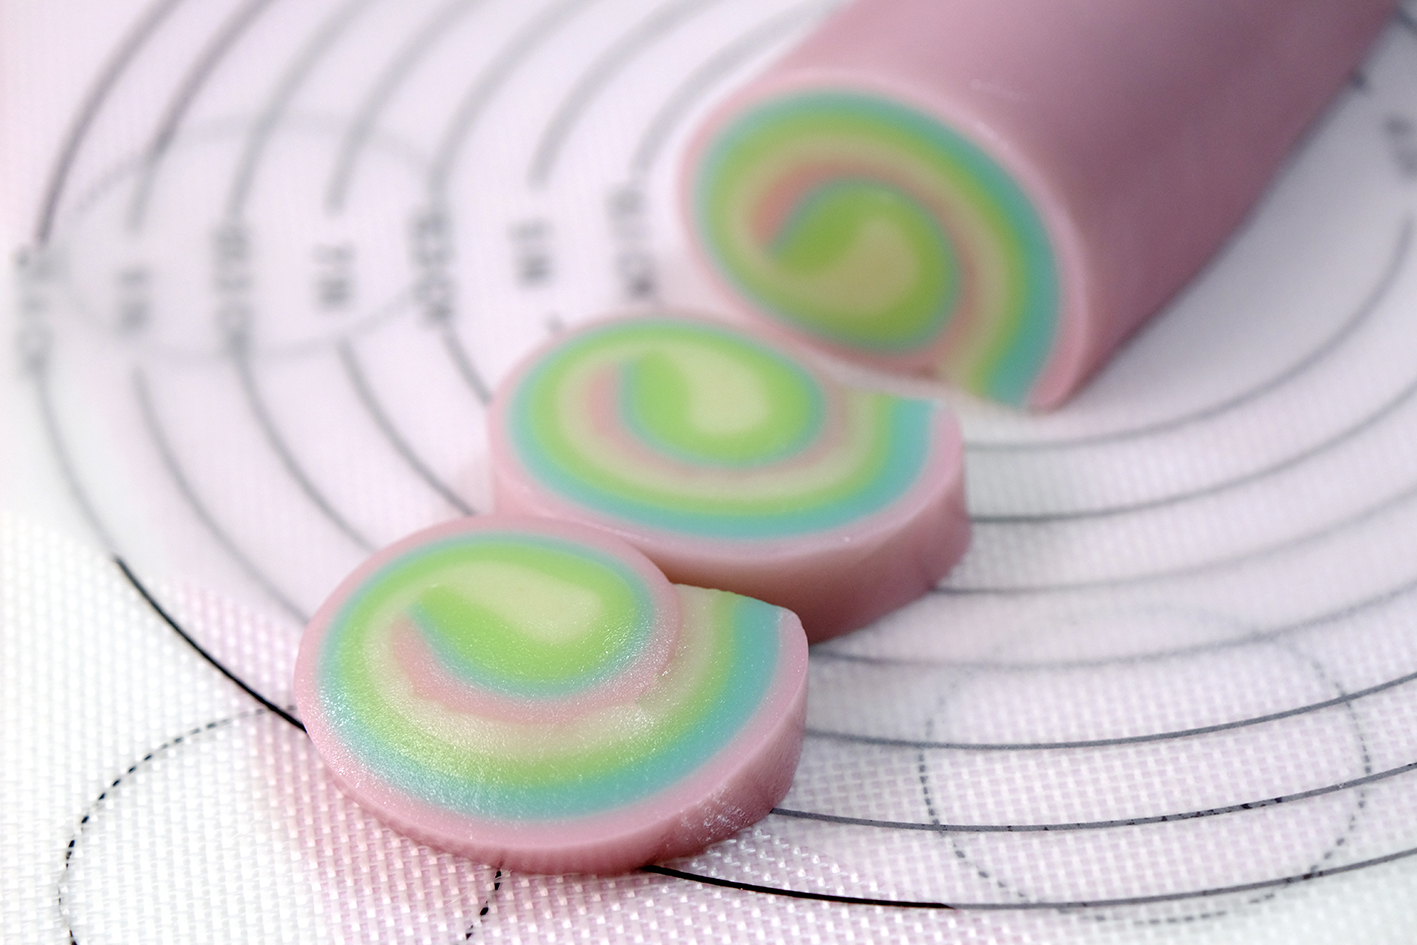
We need only 4 ingredients to make it; colour it, steam and roll it into kinda a Swiss Roll .
They are not only look pretty ☺️ and adorable but also yummy; A beautiful dessert that you can actually make it at home.

So beautiful 😘 I love you Mochi..

TO CHOOSE THE RIGHT FLOUR
It is important to use fresh glutinous rice flour for your Mochi dough, because this kind of flour tends to get mouldy while it’s being stored. If you notice any changes in smell, taste, or texture, don’t use it; make sure to discard it right away.
I highly suggest to use Thailand brand for the best results. Try to find the unbleached one, coz bleached flour will produce a slightly bitter taste and unpleasant smell on your final Mochi.


TO HANDLE STICKY MOCHI DOUGH
Vegetable oil and Potato Starch (or Corn Starch) is always be your best friend.
Because Mochi dough is really sticky, it’s crucial to grease the pan with generous amount of vegetable oil ; I also found that line the pan with parchment paper really helps me a lot when I unmould the cooked Mochi.


You can dust Mochi pieces with a bit of Potato Starch or Corn Starch to prevent stickiness; and then brush off any excess starch so the Mochi doesn’t taste powdery.
If you are worried about eating raw starch, you can actually heat the starch in the pan on medium heat for about 3-5 minutes until it turns slightly yellowish and feels lighter

Mochi in a snow…😱

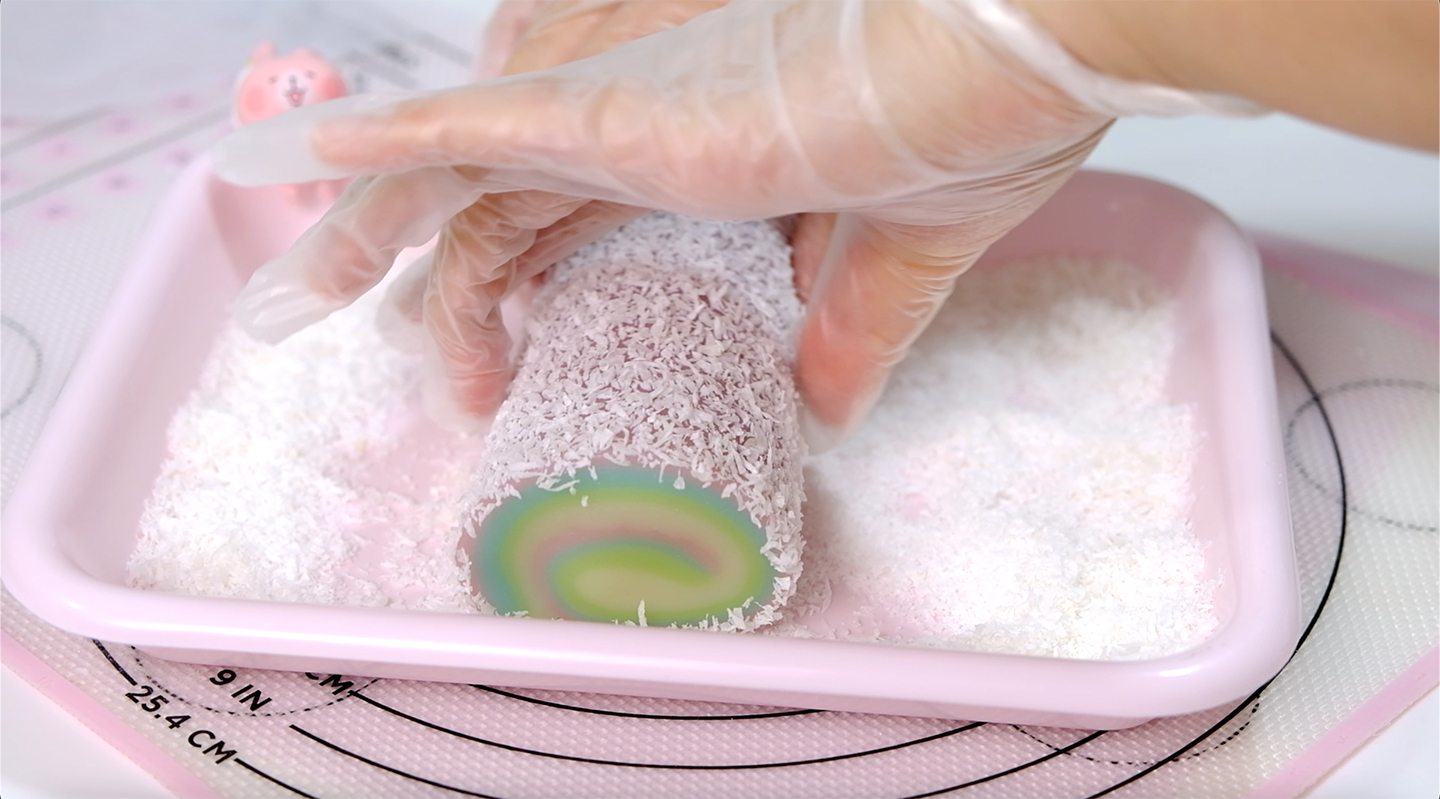
You also can coat the outside part of Mochi with Desiccated Coconut. I found vanilla create a beautiful flavour combinations with Coconut. If you a coconut lover I highly recommend it.


HOW TO CUT MOCHI
Mochi is very soft and sticky, so to cut it will be a bit tricky. Some people said that the right and easy way is to use string; I’m personally prefer to layer my knife with a greased plastic for a clean-cut.

It’s so adorable, I really can’t STOP to squeeze it ! 🤣

The Mochi just so wonderfully chewy, stretchy and bouncy 😙

How long can you go? 🙄

These mochi can be kept about 3 days in the fridge in a sealed container.
But mochi really should be eating the day of making. They TASTE best FRESH.
I highly recommend to try them.

I always need another scoop 😰

And how about sprinkle some Mochi pieces on your favourite ice cream?
I’m sure you will be addicted to it 😇, Trust me….I can’t stop eating it 😅


In this video list of tools that I used in creating this project
♥ Baking:
6-Inch Square Cake Pan https://amzn.to/3s3gA5z
Turquoise Pastel Jug https://amzn.to/3D6c6kY
Blue Pastel Pan https://amzn.to/3CDPLtD
Bamboo Steamer https://amzn.to/3MCPRq3
♥ Cameras: Fujifilm X-T3 Mirrorless https://amzn.to/3TgeZVV
♥ Tripod: VILTROX VX-18M https://amzn.to/3gl5mXj
♥ Microphone: Rode NT-USB https://amzn.to/3CKuAWS
♥ Camera Field Monitor: FEELWORLD T7 7 Inch https://amzn.to/3TAcPAs

Many or all of the products featured here are from our partners who compensate us

RAINBOW MOCHI ROL
Yield: One 6-Inch Square Pan
Active Time: 30 minutes
Total Time: 1 ½ hours

INGREDIENTS
Mochi Dough

  • 135 g Glutinous Rice Flour
  • 75 g Granulated Sugar
  • 180 g Milk
  • 1 tsp Vanilla Extract 

Coating

  • 50 g Potato or Corn Starch
  • Desiccated Coconut

INSTRUCTIONS
Mochi Dough

  1. Simply combine the Glutinous Rice Flour and Sugar; give a quick whisk.
  2. Pour in the milk and blend that all up until there are no lumps and the sugar completely dissolved.
  3. Strain the mixture to make sure there’s no granules are left at the bottom of the bowl.
  4. Add Vanilla Extract, mix it really well. 
    *If you use other extracts; make sure the taste is not overwhelm; for example Almond Extract which has a very strong taste; you just need a little bit is enough.
  5. Divide the mixture into 4 equal portions.
  6. Colour each portions (Baby Pink, Soft Green, Baby Blue and White)
    Using toothpick add food colouring a little by little so that you can control the amount of the colour to reach the desire pastel colour.
  7. Preheat the steamer
    *I am using bamboo steamer; if you use metal or plastic steamer, make sure that you cover the lid with a piece of cloth; so the water condensation during steaming won’t ruin the look of your Mochi.
  8. Start with the white colour mixture for the first layer
    Pour the white colour mixture to the pan (don’t forget to stir the mixture first before you pour it into the pan; so that  the flour is evenly mixed with the liquid).
    Steam over medium high heat for 5 minutes.
  9. After 5 minutes, the white layer is half cooked and sets hard a bit.
    Pour the green mixture on top of the white layer; and continue steam for another 5 minutes.
  10. Pour the blue mixture on top of the green layer; and continue steam for another 5 minutes.
  11. Finally, pour in the pink mixture and steam the Mochi longer for about 15 minutes.
  12. Take it off from the heat and let it chill down a bit for about 10 minutes before you roll it.

Rolling

  1. Grease piece of food grade plastic with vegetable oil as a base for Mochi so it will be easier when you roll it.
  2. Unmould the Mochi, place it onto the plastic base.
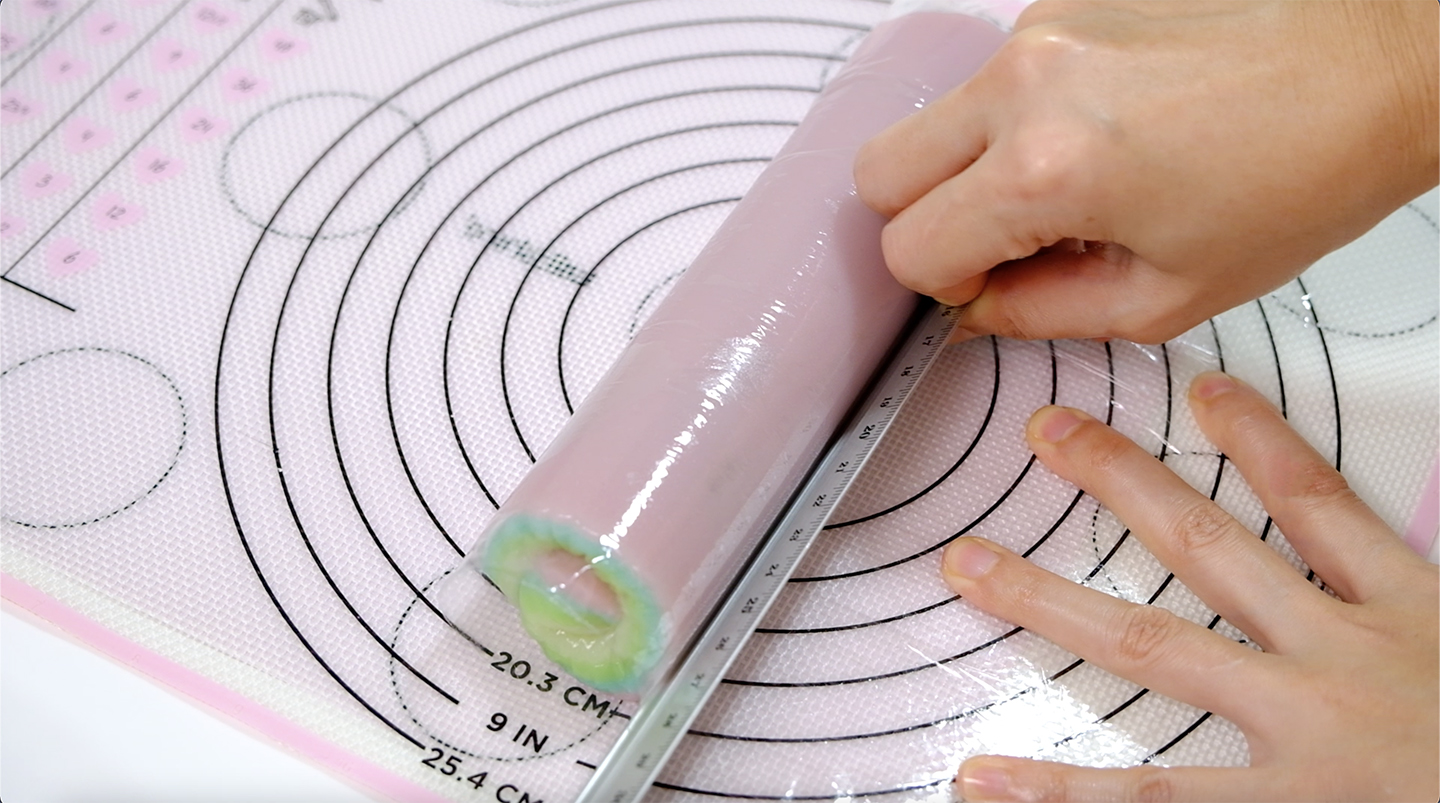
    Roll it up then turn it over.
  3. To tighten the roll, press the long ruler against the Mochi roll while holding the paper at the bottom of the roll (you can also use scraper to do this)


4. Cover Mochi roll with a plastic wrap and let it sit in the fridge for about half hour to set up a bit.

Coating & Cutting

  1. For coating
    Heat the Potato Starch or Corn Starch in the pan on medium heat for about 3-5 minutes until it turns slightly yellowish and feels lighter; take it off from the heat, transfer to a bowl.
    Place some Desiccated Coconut in a small tray.
  2. For Cutting
    Layer knife with a food grade plastic and grease the plastic with some vegetable oil. 
  3. For Plain Mochi
    Cut the Mochi roll into small pieces (about 1 cm wide). Dust Mochi pieces with a bit of starch to prevent stickiness and then brush off any excess starch so the Mochi doesn’t taste powdery.
  4. For Coconut Coated Mochi
    Roll Mochi roll onto Desiccated Coconut and then cut into small pieces (1 cm wide).

NOTES

  1. Mochi should be eating the day of making, they taste best fresh.
  2. Left over Mochi can be kept about 3 days in the fridge in a sealed container; on the 4’th day the chewiness will start to decrease.
  3. Cut some Mochi into small pieces, sprinkle on your favourite ice cream
    I’m sure you will be addicted to it

Puppy Love Deco Chiffon Cake

Chiffon cakes are typically baked in standard tubed pans.
But did you know…
You can also bake them in all sorts of exciting shapes or sizes and give them patterns or decorations created using the same cake batter as well.

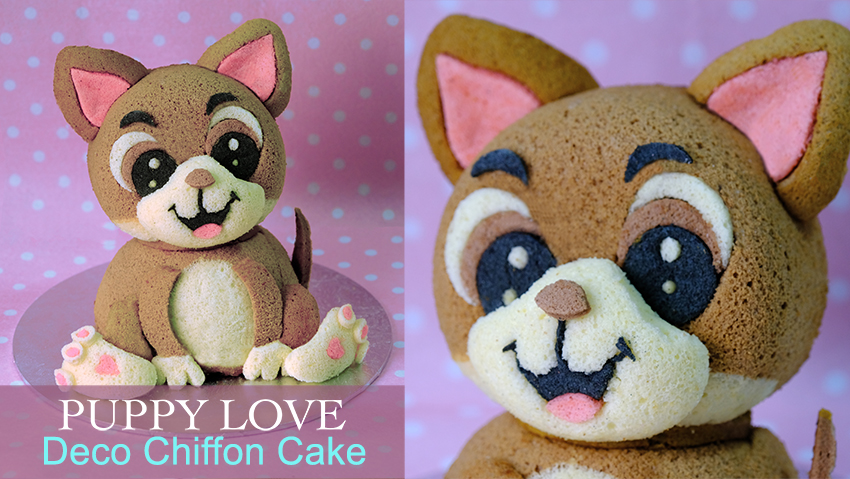
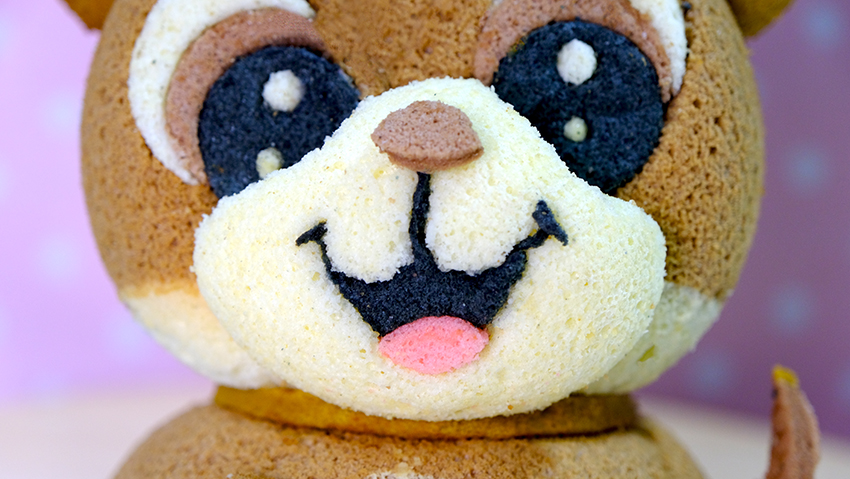
These “Puppy Love Deco Chiffon Cakes” are pretty enough to stand alone as the centrepiece at a party and a perfect surprise gift for your loves one.

You can print this A4 template as a size guide

Template in an actual cake size is very important as a size guidelines, especially when cutting the cake details
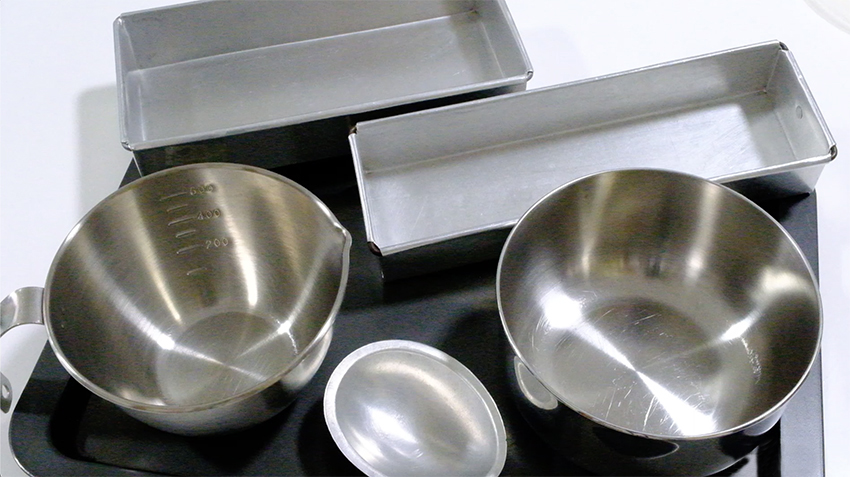
Another thing that you will need to prepare is the pan or mould which as much as possible represents the shape of each puppies details. It can be baked in a variety of moulds, such as glass, metal, silicone and paper cones.

Various pans that I used for this project

For example, I will use some egg shape pans to create the mouth, feet, hands and ears. 

I also need shallow baking pans for baking the thin layer used for decorating purpose.
The size of the shallow pan that we used is depend on the decoration required, for example if very little decoration required then the smaller pan is used.

Another pans that we use here is 5-inch, 6 cm deep round pan for the head and also 750 ml stainless steel cup for the body (wonder mold doll cake which is similar to this works well too).

Make sure that you prepare all the pans in advance and preheat the oven so the batter won’t sit too long, allowing air bubbles to escape and deteriorate.

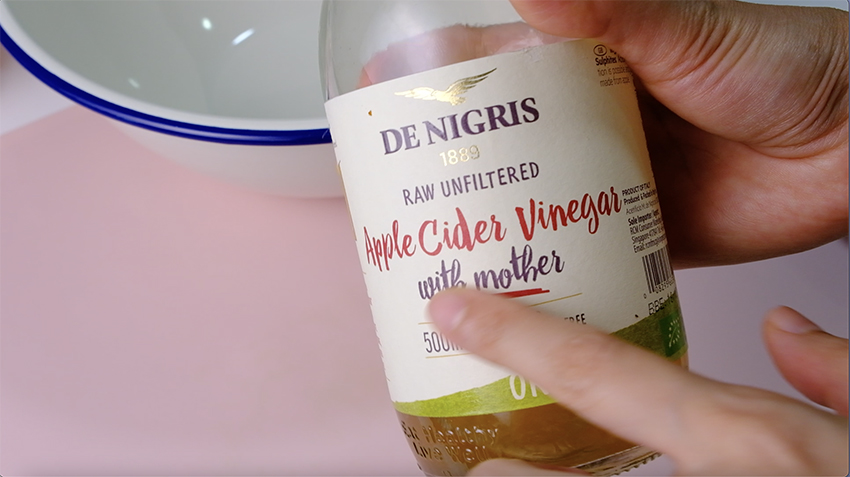
Vinegar to clean the bowl from grease

For meringue batter, I highly recommend to wipe the bowl and beater attachment with lemon juice of vinegar to make sure that it’s clean and grease free as the presence of grease may affect the foaming properties of the egg whites.

Invert the pan during cooling stage

Once it’s baked, it’s important to invert the pan immediately on the cooling rack layered with greaseproof paper and let them cool completely.
Moulds with a bigger volume are preferably inverted during the cooling stage so that gravity can help pull the cake to its maximum height before the cake structure stabilizes.
On the other hand smaller moulds, inverting does not make a difference to the height of the cooled cake.

Pockey stick and bubble tea straw as buffer to support the head

And because of the structure of chiffon cake not as strong as any other type of cake, it was a good idea if we can add some buffer around the body part to support the weight of the Puppie’s head.
how about some delicious pockey stick? since it was edible and sturdy enough (use pockey part which is covered with chocolate).

Another important tip, when it comes to stacking cakes I always use bubble tea straw in the middle as a centre pole to helps stabilize the cake structure (wooden chopstick works well too).

Always cover each part of chiffon cakes with plastic wrap during the process to prevent from drying out.

Handsome BOY!

OH.. MY lovely Puppy !!!

LOOK how gorgeous he is!

I’m sure that people will fall in love once they see him!

😊 😃 😀

The cake is so fluffy, low in sugar and very tasty, these are healthy treats suitable for people of all ages. It’s a very light and simple, yet delicious cake

🤤 SLURP….

I hope that once you recreating these recipe, you will have more confidence to create your own stunning design.
Thank you so much for staying with me…
LOVE YOU ALL!!


PUPPY LOVE DECO CHIFFON CAKE
Yield: 1 Deco Chiffon Cake (Width: 17 cm, Height: 25 cm)
Active time: 2 1/2 hours
Total time: 4 1/2 hours

INGREDIENTS
Egg Yolk Batter:

  • 50 grams Egg Yolks
  • 25 grams Caster Sugar
  • 100 grams Vegetable Oil
  • 100 grams Water
  • 1 teaspoon Vanilla Extract
  • 150 grams Cake Flour
  • 1/4 teaspoon Salt

Meringue Batter:

  • 350 grams Egg Whites
  • 1/2 teaspoon Cream of Tartar
  • 100 grams Castor Sugar
  • Food Colouring (soft pink, brown, black, yellow)

Pans/ Moulds:

  • 6 pieces Egg Pans (@50 ml)
  • 2 Rectangular Pan (22 cm x 10 cm) & (25 cm x 7,5 cm)
  • 1 Round Pan (12 cm diameter, 6 cm height)
  • 1 Wonder Pan (750 ml)

Edible Glue

  • 3 tablespoons Icing Sugar
  • 1 teaspoon Water

INSTRUCTIONS
Pans

  1. Grease the bottom part of the 2 rectangular pan with some butter and layered with parchment paper for easy release.
  2. Don’t grease the Egg, Round and Wonder pan.


Cake Batter

  1. Preheat the oven to 150° C.
  2. Egg Yolks Batter
    In a medium bowl, beat the egg yolks and sugar until pale, thick and creamy (ribbon stage). Add in the oil, water and vanilla extract, mix well.
    Gradually add sifted flour along with salt, whisking until just evenly mixed, set aside.
  3. Meringue Batter
    Wipe the bowl and beater attachment with lemon juice of vinegar to make sure that it’s clean and grease free (the presence of grease may affect the foaming properties of the egg whites).
    Pour in the egg whites along with cream of tartar to the bowl, using electric hand mixer whisk at high speed until foamy. Add in half of the sugar and whisk until soft peaks form.
    Then add in the remaining sugar, continue whisking until it reach a stiff peaks.
  4. Fold the meringue into the egg yolk batter in 3 batches, gently fold it with hand whisk in one direction.
    Mix after each addition until no white streaks visible and well combined.
    Make sure there’s no egg yolk mixture left at the bottom of the bowl.
  5. To Colour and Bake
    FIRST BATCH (wonder and round pans);
    Draw the white part of the puppies body and head with some plain batter (please refer to the template) for about 1/2 cm thick (make sure it’s an even thickness) and bake them immediately in the preheated 150 °C oven for about 3 minutes.
    *I suggest to place the pan vertically while baking this, to make sure the batter stays in place.
    SECOND BATCH (2 rectangular pans);
    – Divide 22 cm x 10 cm rectangular pan into 2 equal sections, place soft pink and plain batter side by side for about 25 grams each.
    – Divide 25 cm x 7,5 cm rectangular pan into 3 equal sections, place soft brown, dark brown and black batter side by side for about 20 grams each.
    Tap the pans a few times to flatten the surface and then bake them immediately in the preheated 150°C oven for about 15-20 minutes or until it doesn’t stick to your hands when you touch it.
    * Once it baked, invert sheet cakes immediately onto a cooling rack layered with greaseproof paper and let it cool completely.
    THIRD BATCH (6 egg, wonder and round pans)
    Fill 3 egg shape pans with plain batter and another 3 with dark brown batter for about 20 grams each.
    Colour the rest of the batter with dark brown colour and divide them onto wonder and round pan.I suggest to fill the pan almost to the top rather than ¾ full so we can achieve full round head and body shapes.
    Tap the pan a bit to remove air bubbles and bake them in the preheated 150°C oven (please note the bigger the pan, the longer it will takes)
    – 25 minutes for egg pans
    – 35 minutes for round pan
    – 40 minutes for wonder pan, reduce the heat to 140°C and continue baking for another 10 minutes or until toothpick inserted comes out clean.
    * Once it’s baked, invert them immediately on the cooling rack layered with greaseproof paper and let them cool completely.

Edible Glue
Simply mix icing sugar with water and mix until well combined.

To Unmold the Cake
Gently pull cake away from sides of pan to loosen the cake and peel greaseproof paper from the sheet cake.
* Always cover each part of chiffon cakes with plastic wrap during the process to prevent from drying out.

DETAILS & ASSEMBLY
Kindly follow template and instructions in the video (for the body buffer, use pockey stick which is covered with chocolate otherwise it will be mushy)

NOTES

  1. To colour the cake; try to use natural food colouring such as cocoa powder, charcoal or matcha powder as much as possible (diluted with a bit of hot water before adding to the batter).
  2. Cream of tartar is used for stabilising egg whites, it also helps to increase the volume of meringue.
    *You can substitute cream of tartar with lemon juice or vinegar (replace every ½ tsp cream of tartar with 1 tsp lemon juice or vinegar).
  3. Chiffon cakes can be baked in a variety of moulds, such as glass, metal, silicone and paper cones.
    *Never use non-stick baking pan for chiffon cakes.
  4. Never grease the pan (except pans for baking the thin layer used for decorating purpose) coz this type of cake needs to cling to the sides of the pan to enable rising during baking.
  5. Moulds with a bigger volume are preferably inverted during the cooling stage so that gravity can help pull the cake to its maximum height before the cake structure stabilizes”
  6. Oven mays vary, if the chiffon cake browns, hiding the colour/pattern, try reducing the oven temperature by 10°C each time until you get the right temperature.
  7. To store
    Always keep chiffon cakes well wrapped up or in airtight container to prevent them from drying out.
    Store in airtight containers, chiffon cakes will keep up to 2 days at room temperature or up to 5 days refrigerated.

Quick and Easy Nerikiri Wagashi

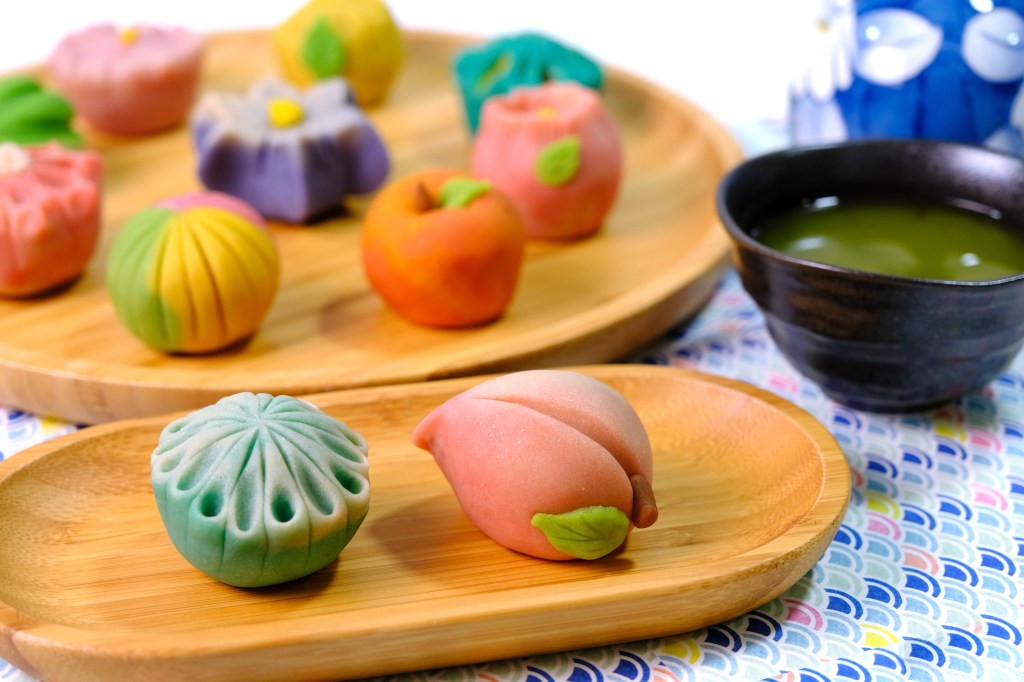
Hey Guys, today we are making these beautiful Japanese dessert “Nerikiri Wagashi”. The word of wagashi refer to Japanese traditional sweet which are delightful tea treats eaten across Japan.

Compare to the other type, I found that Nerikiri is the most artistic and interesting wagashi that meticulously hand-carved.

Shiro-An (White Bean Paste)

The outside layer Nerikiri dough made by combining white bean paste  called Shiro-An with the soft mochi dough called Gyuhi. 

By adding Gyuhi, it adds a smooth chewy texture to it. A very moldable malleable type of paste that can be design into various shapes.

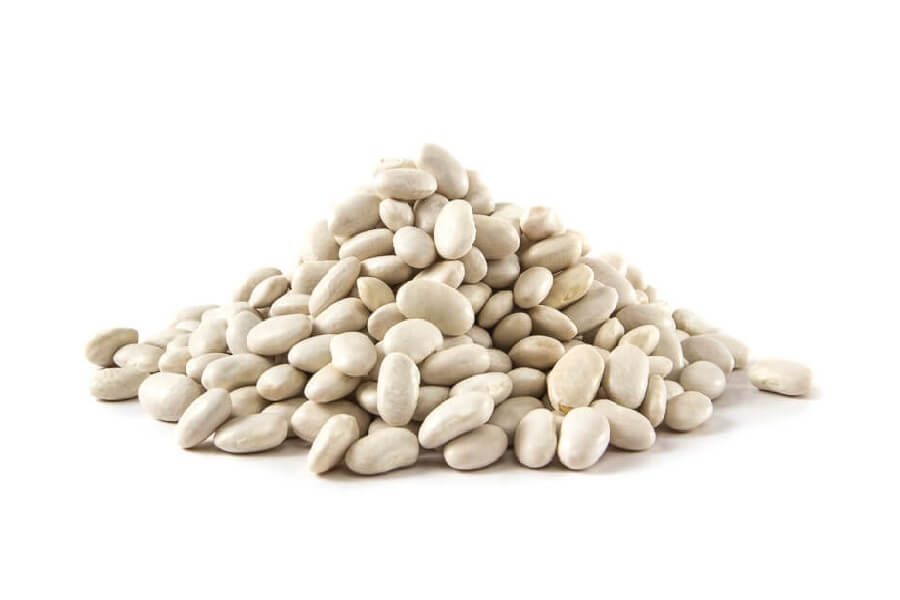
Lima Beans

And while you can easily buy red bean paste in Japanese or Asian grocery stores, premade white bean paste almost impossible to find outside of Japan. 

It’s actually quite simple to make from fresh Lima or Navy beans, but that kind of beans are also hard to find and the process does take some time.

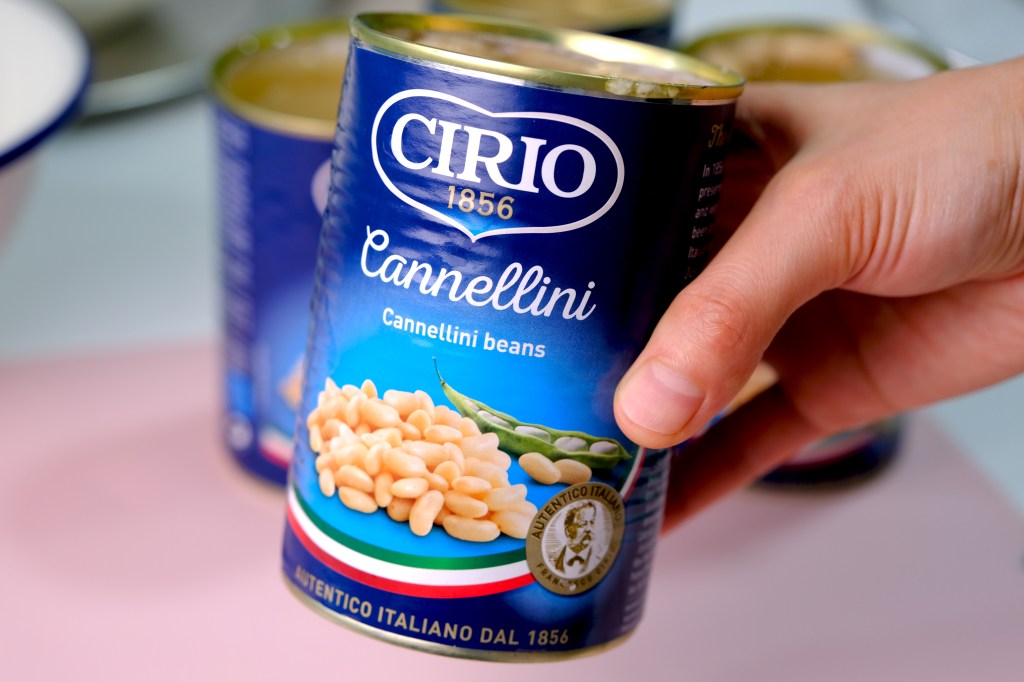
Cannellini Canned Beans

In this recipe, I will show you how to make Quick and Easy Nerikiri dough using Cannellini Canned Beans.
With this method you can skip a few step of making fresh white bean paste from scratch, the process will be faster and even simpler.

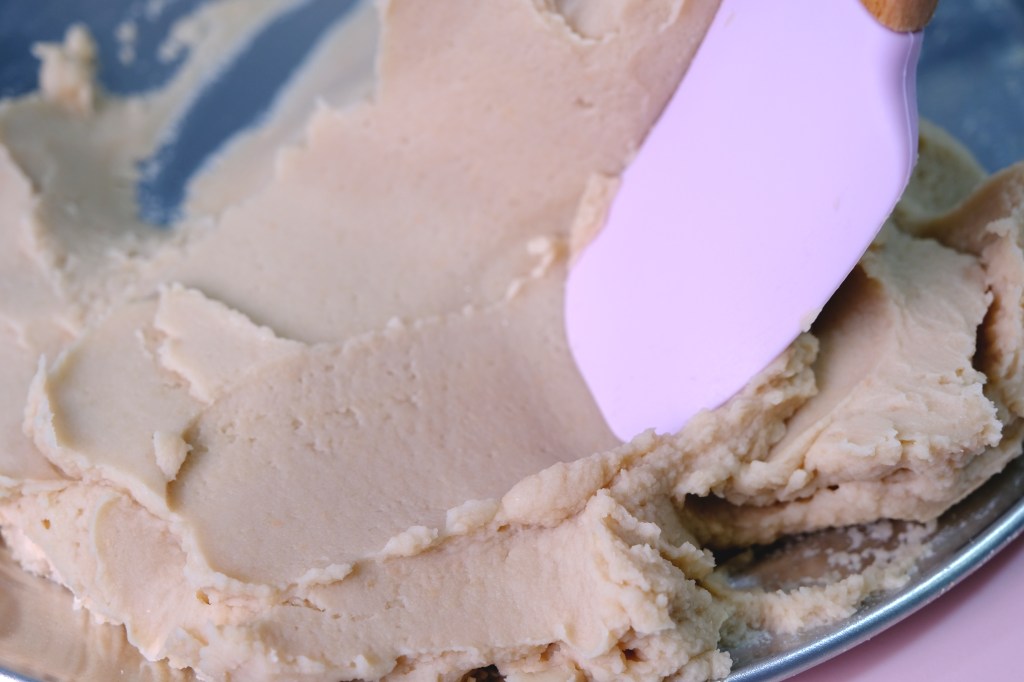
The beans slightly beige in colour

It won’t be as white as the authentic fresh Nerikiri Dough, the colour will be slightly beige, but still taste really good.

We will be use back side of flour sifter to separate the skin from the bean paste, but if you don’t have it on hand, just use regular strainer. It will be harder and more time consuming, but still works well.

Look! The bean paste is so soft and creamy with slightly beige in colour.

Smooth White Bean Paste

You can choose to color the Shiro-An or Nerikiri dough with either natural colors like powders made from the vibrant red beetroot, cocoa powder and matcha or even food colouring

Whenever I make Nerikiri I try to use natural food colouring as much as I can. It’s not just because healthier, yet the fragrance and flavour also makes your sweets more appetising and delightful to enjoy.

And for the tools, there are specific traditional tools used in shaping the Nerikiri.
This wooden triangle stick is one of the most common wagashi tools that are not easy to come by. It has 3 different shapes in one stick and cost around 3000 to 4000 yen.

Wagashi Wooden Triangle Stick

I personally a fan of the plastic fondant or clay modelling tools as they are cheaper and easier to find. Compare to triangle stick, they even have so many different shapes that allow us to create more various forms.

Modelling Fondant and Clay Tools

Each piece of Nerikiri are unique and has their own names; A cherry blossom, fireworks, chrysanthemum, papple pear.

It’s an art form that serves meaningful purposes and traditions of the Japanese culture.

They are delicate and beautiful, SO MUCH! that you may actually find it hard to eat in the end. 
I’m usually keeping my homemade nerikiri in my freezer to show off to all my family before I finally decide to enjoy them with my tea!

Even though nerikiri are not your everyday snacks, They are  perfect for the festive seasons as gifts.

A box of 10 edible art pieces can brighten up anyone’s day.

And don’t forget, once we finished we got to enjoy some matcha green tea with the elegant sweets we had made.

Nerikiri being slightly sweeter than other typical Japanese traditional sweets. 
It’s perfectly complement the matcha, it’s balance the sweetness with a little bit bitterness of the tea creating a harmonious flavour palette that enhances the already amazing tea ceremony experience.

The texture is really soft, it’s much more firm, not too chewy like dango and you can really taste the white bean paste.

It’s very light, much softer than the typical red bean.

I hope that you will love the recipe, take your time to finish this process nicely, enjoy the art of beautiful Nerikiri!

QUICK AND EASY NERIKIRI WAGASHI
Yield: 10-12 pieces (about 55-60 grams each)
Active time: 3 hours
Total time: 3 1/2 hours

INGREDIENTS

Shiro-An (White Bean Paste):

  • 960 grams Cannellini Canned Beans (4 cans)
  • 200 grams Granulated Sugar


Gyuhi (Soft Mochi Dough):

  • 32 grams Glutinous Rice Flour
  • 44 grams Water

Food Colouring

INSTRUCTIONS
Shiro-An (White Bean Paste)

  1. Strain and place Cannellini Beans in a large heatproof bowl, then pour enough of the boiling water to cover the beans for about 1-inch.
    Soak the beans for about 10 minutes, then transfer to a fine-mesh strainer to drain. 
    Rinse the beans under cold running water and drain.
    *Soaking and rinsing purpose is to remove some of the beany smell and taste.
  2. To mash the beans
    Set the flour sifter upside down on top of a flat tray, using spatula or rice spoon press the beans against the walls of the sifter to separate the skin from the bean paste.
    Continue to smash and push the beans against the sifter in a side to side motion until you have pressed all the beans through the mesh. A lot of skins will be left behind on the top of the sifter, these can be discarded.
    *You can use regular strainer to do this.
  3. Place the bean paste onto heavy bottomed non-stick pan, add in the sugar, cook over medium heat stirring constantly until all the sugar melted.
    It will be wet at first as the sugar melts, keep stirring until it gets drier.
    *I took about 50 minutes to cook this, if you have bigger pan that will be a good option coz in larger surface, the water will evaporate faster, so you can shorten the cooking process.
  4. When the dough starts to dry, lower the heat while keep stirring so it doesn’t gets burn.
    The dough is done when it’s forming a thick paste and you can see a few dry doughs left on the bottom and sides of the pan.
    At this point, you should be able to make a lasting indentation in the bean paste with your finger and the paste should not stick to your hands. If it still very sticky, cook for about 5 or 10 minutes longer.
    * Important Tip: Make sure that you remove enough water out of Shiro-An before you mix it with the Gyuhi coz if it still contains too much water while mix it with Gyuhi, the final Nerikiri dough will become watery, too soft, hard to shape, and there’s no turning back.
  5. Take it off from the heat and spread the Shiro-An inside the pan to cool completely (some moisture will evaporate while doing this). 
    *Please note, any dough or bean paste or wagashi should not be exposed to air too long, coz if it dries too much, it will gets hard and it won’t be easy to moistened or softened.
  6. Once it cools down at room temperature, spare the 200 grams of Shiro-An for the filling (cover in a plastic wrap) and keep the rest for Nerikiri Dough.

Nerikiri Dough

  1. To make the Gyuhi (Soft Mochi Dough)
    In a small pan, combine the glutinous rice flour and water. Mix until no lumps remain.
    Cook over medium low heat, keep stirring until the mixture becomes a bit transparent, sticky and thick, remove from the heat and let it cool a bit.
  2. To combine Shiro-An and Gyuhi
    The ratio of Shiro-An and Gyuhi should be 10 by 1;  for example if I have 500 grams of Shiro-An, I need around 50 grams of Gyuhi.

    Cut the Gyuhi into small pieces and place them into the Shiro-An, mix well until uniform in texture. 
    Squish the dough together with your hands for about 2 minutes until the mixture is soft and pliable (the dough should not stick to your finger too much). 

    Transfer the dough onto a clean cotton cloth, using your hands fold and knead the dough inside the cloth (repeat this process a few times for about 1 to 2 minutes).

    Then pull and tear the dough into small pieces, place them inside the cotton cloth, let them rest for 1 minute.
    After 1 minute, gather all small pieces together and knead again for 1 minute (you will notice that the dough will become smooth and really soft). Immediately cover the dough in a plastic wrap.
  1. Proceed with colouring, shaping and moulding according to the video.
    *Please note 1 portion Nerikiri will need 20 grams of Shiro-An (white bean paste) filling and 35 grams of Nerikiri Dough.

NOTES

  1. Nerikiri dough and Shiro-An can be made ahead of time, tightly sealed and frozen up to 1 month or refrigerate for up to 4 days. It can be easily reheated until it’s pliable again and ready to use.
  2. I highly recommend to divide Nerikiri Dough into each serving (35 gr each), wrap them individually with a plastic wrap and then store them in the freezer (in an airtight container) to use later.
  3. When making Nerikiri, always prepare some cooked glutinous rice flour (cook in the pan for 5 minutes) and vegetable oil to prevent stickiness.
    *If you feel the dough a bit soft and sticky, add a little bit of cooked glutinous rice flour or you can apply a little bit of vegetable oil on your palm and the tools to prevent stickiness.
  4. It’s completely up to you to decide how you want the wagashi to turn out. Kindly color and flavor your Nerikiri Dough and Shiro-An filling according to your preference.
    I like to use natural food colouring for Nerikiri because besides it gives beautiful colours, the fragrance and flavour makes your sweets more delightful to enjoy.
  5. To store Nerikiri; fridge for up to 5 days and 1 month in the freezer.
  6. To defrost
    Whenever you need want to make several “Nerikiri Wagashi”, take a few portions out from the freezer, thaw them on the counter at room temperature. Don’t open the plastic wrap while defrost, press the dough once in a time until you can feel that it soft and pliable again. Unwrap the dough, knead a while then you can use them.

Lovely Taiwanese Pineapple Cakes/ Tarts

Hi Everyone, today we are making these “Lovely Taiwanese Pineapple Cakes”.
It is a crumbly and nearly melt-in-the-mouth pastry with the pineapple jam as the filling inside.

The difference with the Singaporean/ Malaysian pineapple tart is they are typically larger and made in square or rectangle shape.

I personally prefer the Taiwanese version coz the pastries have a rich distinctively crumbly milky taste and filled with a generous portion of sweet sticky chewy pineapple filling inside.

Pineapple cakes filling from commercial manufactures usually made of winter melon and Maltose Syrup so that the filling is extra sweet, heavy and sticky, which is not healthy.

They usually substitute all or part of the pineapple with winter melon, a vegetable in the squash family that is much cheaper than pineapple.

Since winter melon has little flavour, artificial flavours and colours are added to the pastries to make them attractive to consumer, and then Maltose syrup has been added to stiffen the fillling.

For this reason, I would like to show you how to make the healthier style of Taiwanese Pineapple Cakes which is hold up pretty well, so adorable and taste much fresher.

A lot of research went into perfecting these treats. But the end result was wonderful.
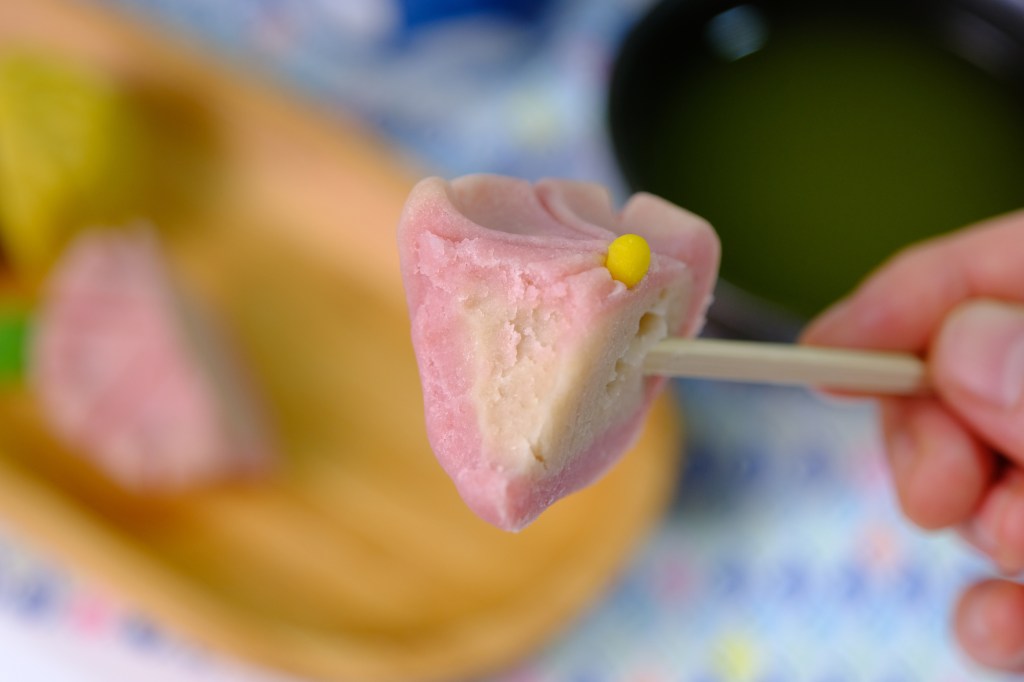
The key is the exterior, that’s how it will remain even after it is baked so you want the dough to be as smooth as possible. 

Pineapple Cakes before baking

So I actually found two versions of the crust that I liked, and there’s no need to put them in the fridge at all.

The first one I called a “basic dough” for the character’s body. It’s buttery, soft, yet also malleable and sturdy enough to hold its form.
And the second dough that I called the “colouring dough”. It’s soft and easy to work with, even for small details and also colour well with any kind of edible food colouring.

Is there anybody that wouldn’t want to box these as a present ? They are so cute, tasty, photogenic, everthing you could ever want!

They taste amazing when served slightly warm and paired with a cup of hot tea.
The buttery crust is rich and crumbly, filled with fruity sweet sour, chewy and sticky pineapple filling, they are absolutely delicious.

I really hope you Guys give it a try, they are a lot of fun to put together and they are pretty simple too! Love you all!!

LOVELY TAIWANESE PINEAPPLE CAKES
Yield: 10 pieces
Active time: 1 hour
Total time: 2 1/2 hours

INGREDIENTS
Pineapple Filling

  • 500 grams Pineapple (Chopped)
  • 120 grams Granulated Sugar
  • 20 grams Unsalted Butter
  • 30 grams Glutinous Rice Flour

Basic Dough

  • 100 grams Salted Butter (Cold)
  • 12 grams Icing Sugar
  • 22 grams Egg Yolks
  • 152 grams All-Purpose Flour
  • 24 grams Milk Powder

Colouring Dough

  • 25 grams Salted Butter (Cold)
  • 7 grams Condensed Milk
  • 3 grams Egg Yolks
  • 38 grams All-Purpose Flour
  • Food Colouring (Red, Soft Pink, Black, White)

INSTRUCTIONS
Pineapple Filling

  1. Cut off the pineapple skin, took off the core and coarsely cut them into chunks (if you use canned pineapple, make sure to adjust the sugar level. They will take longer to cook coz the heavy water content in the canned pineapple).
  2. Transfer the chunks into a non-stick pan, add in the sugar (since the sweetness of each pineapple is different, feel free to adjust the amount of the sugar accordingly). Cook over medium high heat. Stirring constantly until most of the moisture has evaporated. Don’t forget to adjust the heat level based on the water content that was left in the pan.
    *I suggest using a non-stick pan as it is sticky after when it becomes concentrated.
  3. When the pineapple is about to dry, looks translucent and a bit brownish, lower the heat, add in the butter. Stir continously until the butter melted and incorporated in the pineapple (the butter makes the pineapple fillings smoother and easier to handle during wrapping).
  4. For the binder, sprinkle in some of the glutinous rice flour. Add it gradually, to make sure that the flour are distribute evenly. Mix until well combined.
  5. Take it off from the heat, spread the fillings thinly on a large plate to cool completely.


Basic Dough

  1. In a large bowl, cream the butter and icing sugar until light and smooth.
  2. Add in the egg yolks, mix well 
  3. Pour in All-Purpose Flour and milk powder, mix until all the ingredients just combined and create a dough ball (do not overmix to avoid the formation of gluten, which will make the pastry less flaky).
  4. Cover them with a plastic wrap to prevent the dough dry. Set aside


Colouring Dough

  1. Combine the butter, condensed milk and egg yolks, mix well.
  2. Pour in the all-purpose flour, mix until it’s form a smooth dough.
  3. Colour it as needed (remember to always cover the dough with a plastic wrap to keep their moisture).


Wrapping, Decorating and Baking

  1. Divide pineapple filling into portions of 20 grams each, and basic dough 25 grams each.
  2. Roll each portion of pineapple filling into a ball.
  3. Flatten a portion of basic dough (you can do this in your palm or with a small rolling pin).
  4. And then place a portion of filling into the centre of the flattened dough. 
  5. Gently wrap the dough around the filling, pinching away and setting aside excess dough at the top and where the edges meet. 
  6. Gently roll the filled dough between your palms to form a smooth oval ball. 
  7. Using some basic dough and white colouring dough for the ears.
    Apply some white colouring dough for the face.
    Black dough for the nose, mouth and eyes.
    Soft pink for the cheeks and tounge.
    Using love shape plunger cutter to create the heart shape.
    And finally, use some basic dough to create her hands and legs.
    *Make sure the details sticks really well otherwise it will tilted or fall down while baking.
  8. Bake in the preheat 160°C oven for 20 minutes.
    Remove from the oven, allow  to cool slightly on the pan for about 20-25 minutes, and then transfer them onto a cooling rack to cool completely.


NOTES

  1. The dough will expand a bit when baked in the oven.
  2. You can use any food colouring for the “Colouring Dough” (powder, gel, liquid).
  3. Store the cakes at room temperature in an airtight container, the crust will have become more tender.
  4. Pineapple cakes turning mouldy even when stored in an airtight containers is due to the presence of too much moisture.
    Store pineapple cakes which are cooled to room temperature in an airtight container away from the sunlight for 3-4 days.
    Keep them refrigerated for up to 1 months.


Blackforest Mousse Christmas Bombe Cakes

Hi Guys, Christmas is coming soon and today we are making some Blackforest Mousse Christmas Bombe Cakes. It’s really a special dessert. They have a Chocolate Sponge on the bottom, filled with Dark Sweet Cherries and White Chocolate Mousse. And it’s all covered with a chocolate shell and of course decorated with different Christmas characters.

These are so perfect for holiday season, because we are all so busy around this time of year. You can make these ahead of time for a stress free dessert at Christmas, just keep them in the fridge for up to three days before servings.

It’s glamorous and gorgeous and definitely centerpiece-worthy. The bombe looks seriously complicated and I love that about it, but is easier to make than it looks. 
I have to admit, this are kind of a lot of work but there’s no step that’s really difficult. It’s just a lot of small easy steps.

The cake is super soft and moist, a hint of Rum from Cherries and White Chocolate Mousse is so flavourfull, the modelling chocolate for decoration is really yummy, it’s really good Guys!

These showstopping bombe desserts are perfect for special occasions, I hope you can impress your friends and family over the festive season. Have fun with it!

BLACKFOREST MOUSSE CHRISTMAS BOMBE CAKES
Yield: 5 pieces (4 oz each)
Active time: 2 hour
Total time: 4 hours

INGREDIENTS
Modeling Chocolate (Using Candy Melts):

  • 200 grams White Candy Melts
  • 50 grams Corn Syrup
  • Food Colouring

Modeling Chocolate (Using Real Chocolate):

  • 200 grams White Chocolate
  • 75 grams Corn Syrup
  • Food Colouring

Chocolate Mousse:

  • 1 teaspoon Gelatine Powder
  • 30 grams Water
  • 108 grams White Baking Chocolate
  • 40 grams Milk
  • 238 grams Heavy Cream
  • 8 grams Icing Sugar
  • 1 tablespoon Rum (optional)

Chocolate Sponge Cake:

  • 23 grams Vegetable Oil
  • 8 grams Cocoa Powder
  • 23 grams Granulated Sugar
  • 45 grams Water
  • A Pinch of Salt
  • 3/4 teaspoon Vanilla Extract
  • 45 grams Egg Yolks
  • 53 grams Cake Flour
  • 120 grams Egg Whites
  • 30 grams Granulated Sugar

Cake Shells: Candy Melts or White Chocolate Compound with Candy Colouring
Assembly: Dark Sweet Cherry, Rum

INSTRUCTIONS
Modeling Chocolate:

  1. Melt the chocolate in the microwave or a double boiler (let it cool to the touch). Add the corn syrup, stir just until it turns into a thick, smooth paste.
  2. Pick up the dough as soon as you can easily handle it and knead it over the bowl (knead out as much oil as possible).
  3. Pat the surface of the dough with some paper towel to sop up the oil (pat the dough quickly because the dough is quite sticky at this stage,if the paper sits too long it will get stuck in it).
  4. Once patted dry, wrap it tightly in plastic. Store in an airtight container. Allow the dough to sit 8-10 hours at room temperature or in the fridge to set faster.

Cherries
Strain the cherries, soak it with a generous amount of rum, let it sit for about 1-2 hours.

Chocolate Mousse:

  1. Sprinkle the gelatine over cold water, let it stand for 5 minutes. Then gently melt it in the microwave or in a small pot on the stove (do not boil).
  2. Heat the milk and chocolate until the chocolate melted.
    Combine the gelatin with the chocolate mixture, mix well. Let it cool so it’s no longer hot.
  3. Whip the heavy cream and the icing sugar until firm peaks. Fold 1/3 of the whipped cream to lighten the chocolate mixture, then fold in gently the remaining cream. Add in the rhum. Cover and let them set in the fridge for about 2 hours (it’s very liquidy like soup now, but it will firm up as the gelatine and chocolate sets).

Cake Shell
Melted some chocolate candy melts, use a pastry brush and brush mould on some thin layers of chocolate (let it set in between each layer), 3 coats in total.

Chocolate Sponge Cake

  1. Preheat the oven to 170 degress C.
  2. Grease the pan (10 inch square), place the parchment paper at the bottom of the pan.
  3. Heat the oil until warm, add in to the cocoa powder, mix.
    Add in the sugar, mix. Pour in the water, mix. Add in salt, vanilla, the egg yolks, mix well.
    Sift half of the cake flour into the mixture, mix. Sift in the remaining flour, mix until well combined.
  4. Whisk egg whites until forthy, gradually add sugar, continue whisk until stiff peaks.
  5. Combine the egg whites to the cake mixture (in 2 batches), whisk after each addition, using spatula scrape down and fold it (make sure the batter is well combined).
  6. Pour the batter into the pan. Spread with spatula, Jjggle vigorously till the batter even, tap pan against work surface twice, bake for about 20 minutes.
  7. Once come out off the oven, drop the pan from 2 inch high for about 3 times. Unmould the cake from the pan, peel the parchment paper from sides of the cake and let it cool completely.

Decoration
Knead and colour the Modeling Chocolate as needed. Using template as guide, create the details.

Assembly

  1. Cut the cake (using 2 size of round cookie cutters, one is that the same size as the hemisphere mold and other size is half size of the mold).
  2. Pipe a little bit of mousse into each chocolate shell. Sink in the dark sweet cherries to the mousse. Cover it with some mousse. Place small cake on top of the mousse. Pipe mousse to cover all the inner part. Place the large cake on top.
  3. Store in the fridge for about 30-60 minutes to firm up.
  4. Unmold cakes, decorate them.

NOTES

  1. You can store the cakes in the fridge for up to 3 days before servings.
  2. You can use Candy Melts or real white chocolate to make Modeling Chocolate. Find the recipe in the description above.
  3. There is no special food colouring required to colour Modeling Chocolate.
    Modeling Chocolate already has liquid in it (corn syrup) so adding more won’t hurt. I like to use regular gel food colours like Americolor.
  4. If Modeling Chocolate is too soft and sticky while shaping, you can add add a little bit of cornstach.
  5. Modeling Chocolate Dough will last a very long time (at least a few months). But as it sits, it continues to harden and may require more kneading to return it to a nice workable consistency.