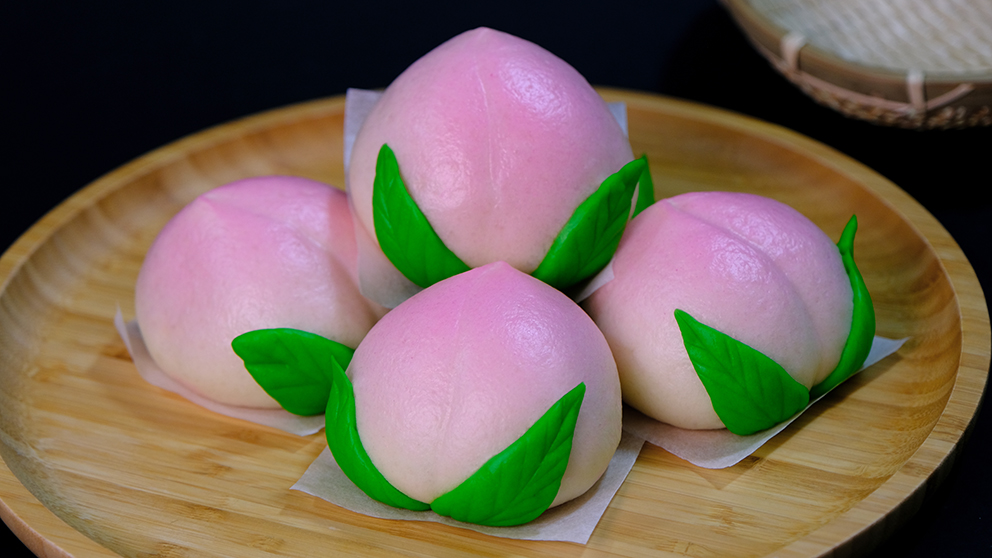
Longevity Peach Buns “Shou Tao Bao” 寿桃包 is a representation of Peaches of Immortality.
It is typically served to elders on their birthday as a cake or gift that symbolises long life and wishes of good health.
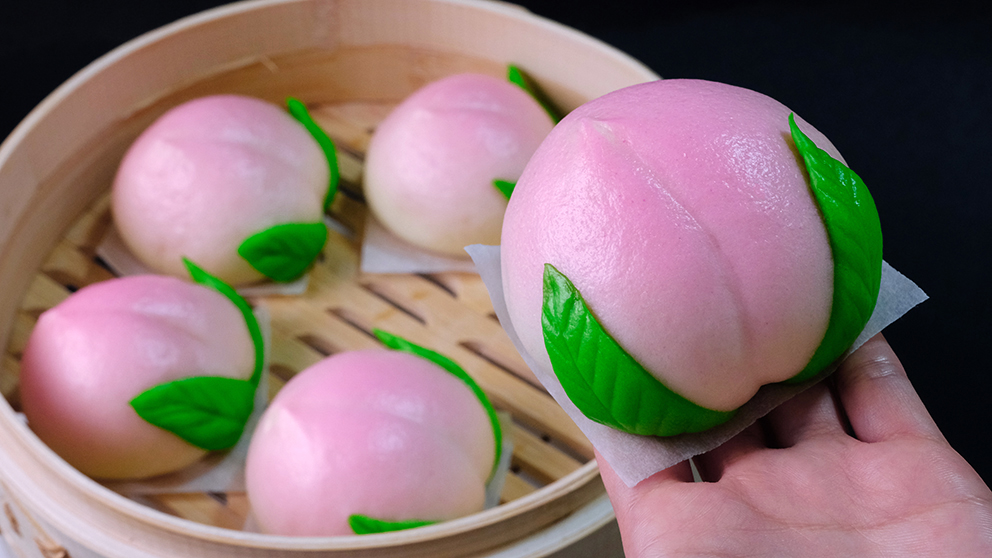
Traditionally, these buns are piled at least knee high on a tray.
I remember seeing this buns in my grandparents birthday when I was a kid; and I thought they were the cutest thing, I really loved the shape and their colour; And now when I grew up, I love eating and enjoy making them as well ☺️ .

The bun is really soft and fluffy but still a bit chewy with the creamy red bean paste filling inside; fragrant and not too sweet, just the way I like them.
In this recipe, I also will share a few tips to make this beautiful red bean paste. The method is not only faster but also produces a fragrant and flavourful filling.
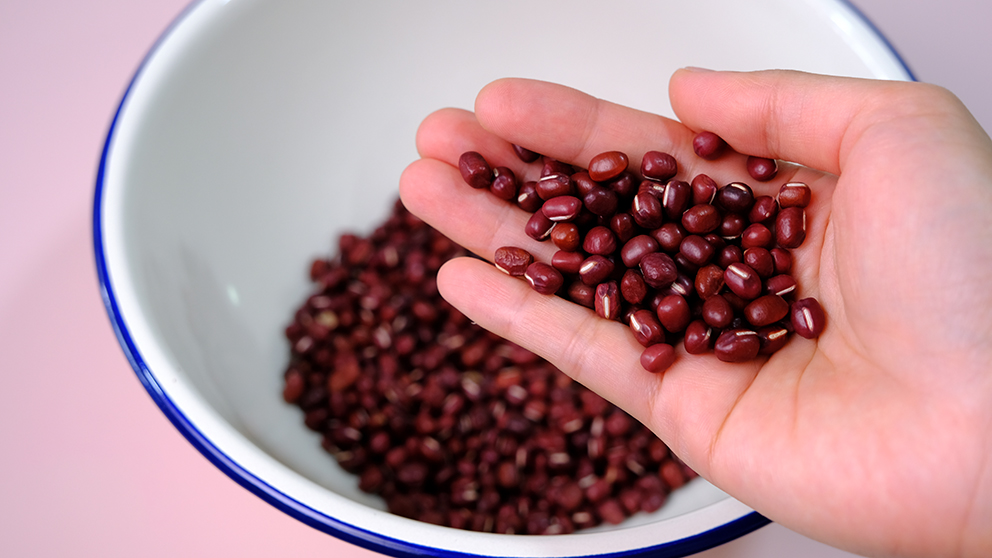
And when it comes to beans; people will debates whether need or no need to soaked the beans overnight.
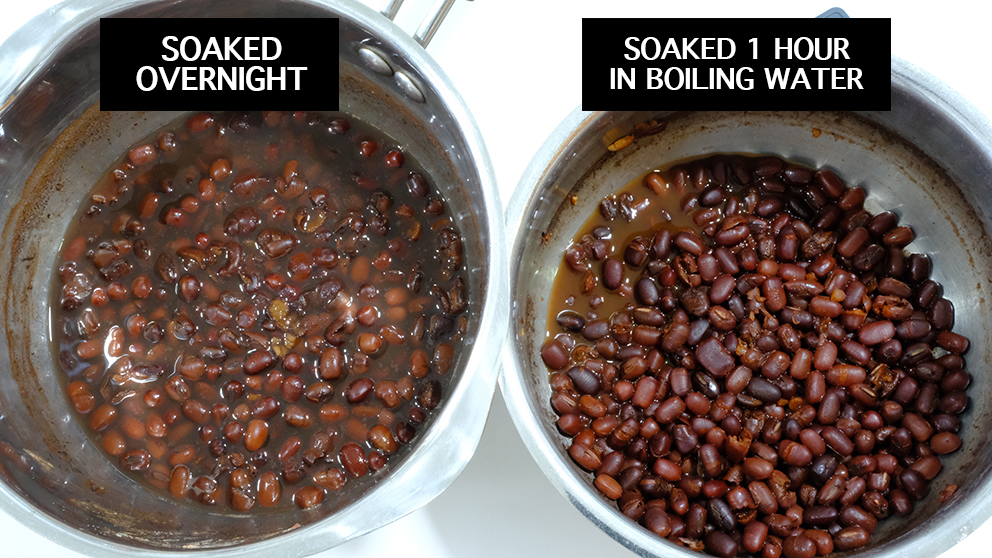
After testing, I found that the 1 hour soaked beans in the hot boiling water cooked just 5 minutes faster than the overnight soaked ones; So… why bother soak overnight?
ADDING SALT IN THE BEGINNING
We will add some salt to the beans soaking liquid. By adding salt at the beginning of cooking create more tender results.
A bit of salt is also used as a flavour enhancer, increase sweetness and umami; so instead of increasing the amount of sugar, add a pinch of salt to enhance the sweetness first.
DON’T THROW THE SOAKING LIQUID!
After soaked the beans in hot boiling water for 1 hour, there’s no need to rinse or change the water Coz the beans cooked in the soaking liquid were much more flavourful, had a prettier, darker colour, and retained their texture better.
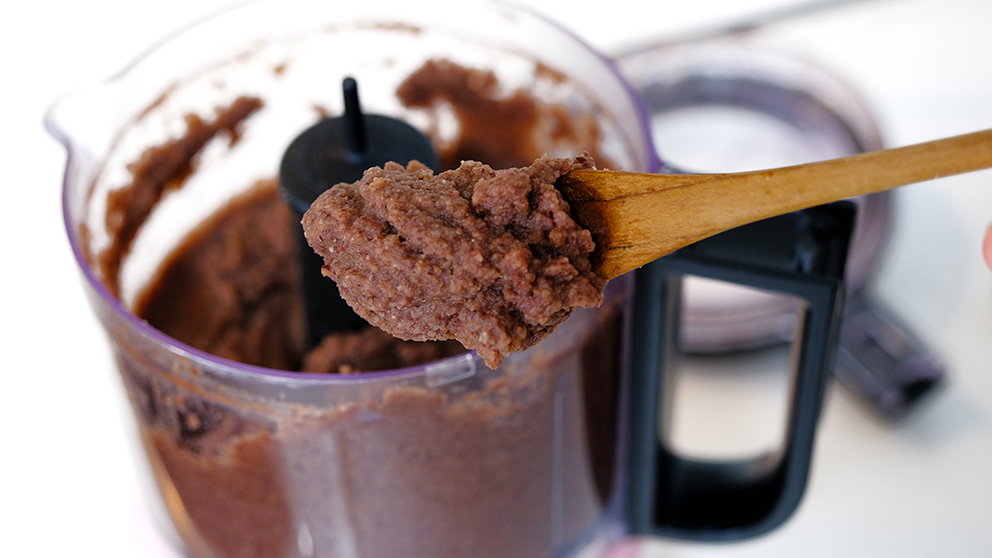
Then using food processor or immersion blender; grind the cooked beans into a fine paste and add some sugar to it.
In general, the beans to sugar ratio for is 1 to 1 (an equal amount). This sugar will preserve the paste for a longer time.
I don’t like it too sweet; so in this recipe I have already reduced the sugar to suit my taste bud; kindly add or reduce the amount of sugar according to your taste.

NO NEED TO REST THE BUNS DOUGH
Once the dough is ready, you can use it immediately. There’s no need to rest the dough because by proofed it twice will cause a lot of bumps or air bubbles on the surface, we don’t want that happened

And to create the pink shades of the buns, there’s no better way than these old school method; using a toothbrush and tea strainer.
It’s actually an old school method that I’ve learned when I was in primary school 😄.
FOR BEAUTIFUL EVEN COLOUR, DON’T RUSH THIS PART
Dip the toothbrush to the colouring mixture and then tap off the excess onto a kitchen towel; else it might drops and ruin the look of your buns.
Hold the strainer upside down 2 cm above the bun and then gently brush the toothbrush over the back of the strainer in a circular motion.
You can repeat the same process a few times until you get the desire colour shades.
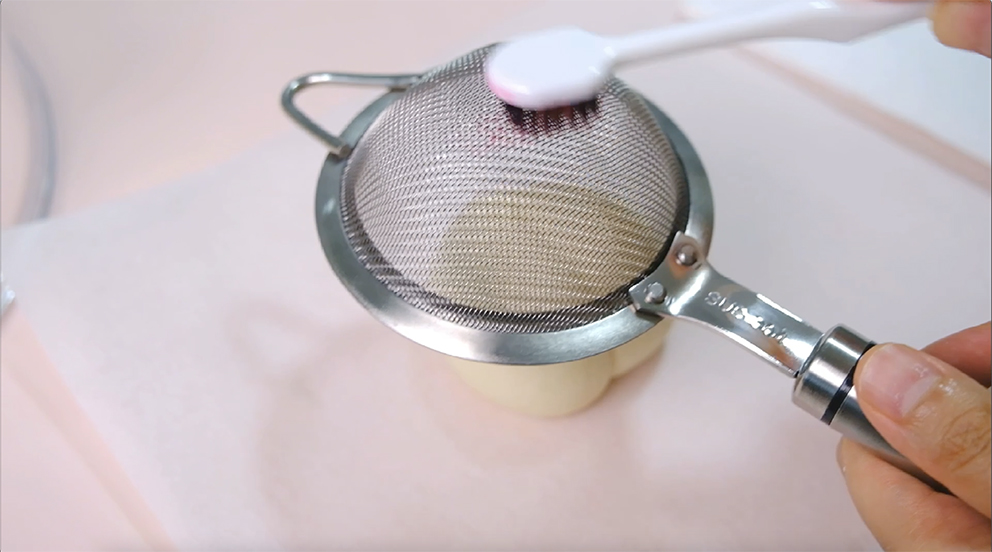
Some people attach the leaf first before they brush the pink shades. I prefer the other way around; so the pink food colouring won’t stain the leaves.
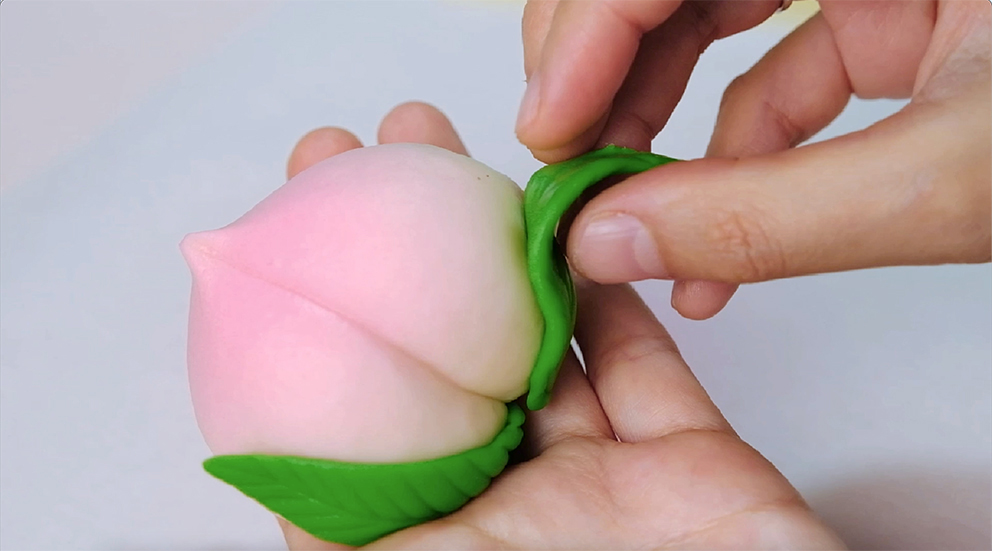
What do you think; is it cute enough to mimicking the shape of the peach? 🥲

And when you proof them, make sure that you give some space in between the buns so they won’t stick one another after fermentation or steaming.
Please pay attention, proofing time depends on room temperature, it may take longer or may not take that long.

After fermentation, the proofed buns should feel lighter and rise about 50% of their original size
And if you gently press it with your finger, the dough will make indentation and be able to slowly bounce back into shape.
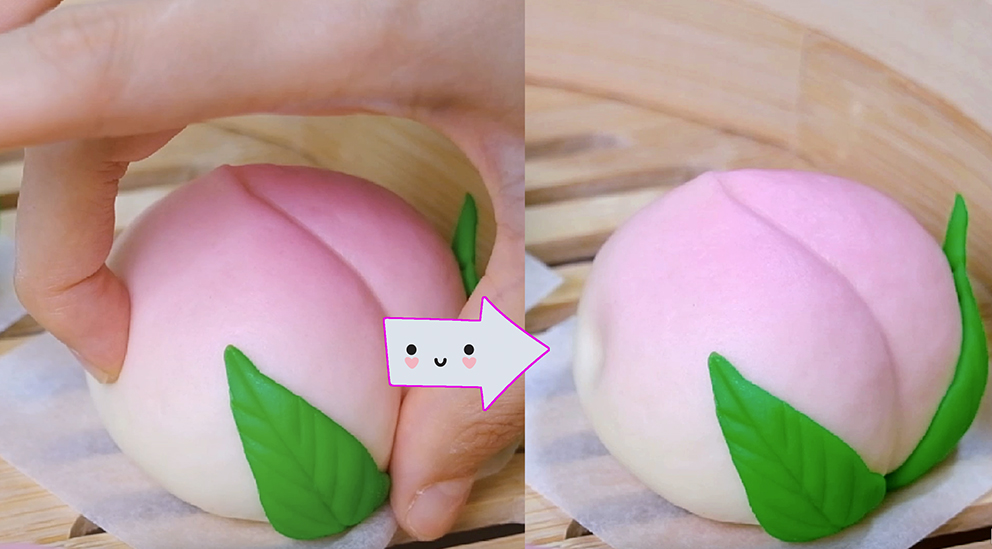
ONLY WELL-PROOFED BUNS ARE FLUFFY
Make sure that you don’t overproof the buns; over-proofed bun is likely to have a very open crumb structure.
Due to the development of excess CO2 during the proofing stage, the gluten ends up being over-stretched, and unable to hold up the internal structure of the buns.
You might just have a deflated buns with very coarse and crumbly texture.

CHOOSE THE RIGHT STEAMER
Bamboo steamer is the best choice in my opinion; because their lids don’t collect condensation
If you are using metal or plastic steamer, make sure that you cover the lid with a piece of cloth so the condensation during steaming won’t ruin the look of your buns.
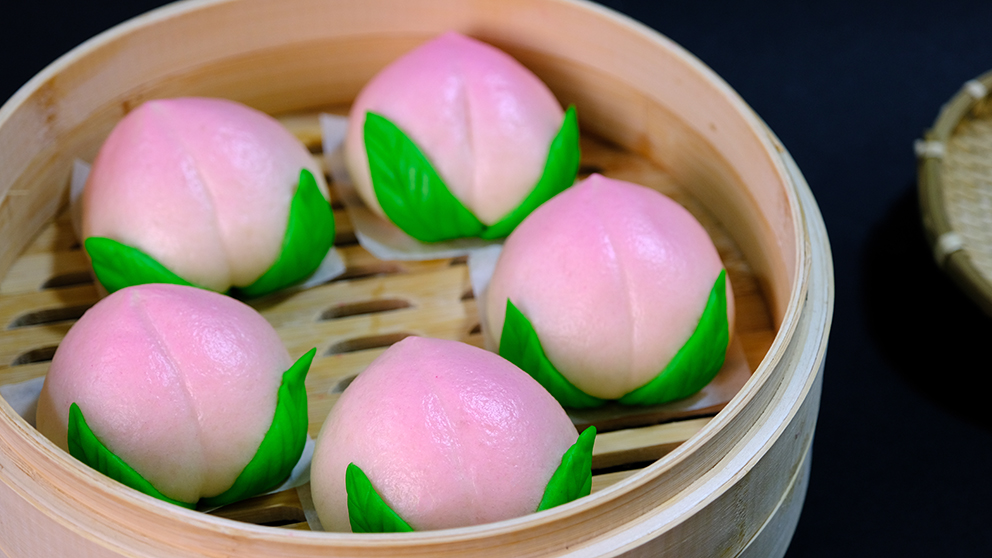
DO NOT OPEN THE LID DIRECTLY AFTER STEAMING
After steaming, turn off the heat and do not open the lid immediately; make sure that you leave the lid on for another 3 minutes; the buns might deflate without the proper resting.
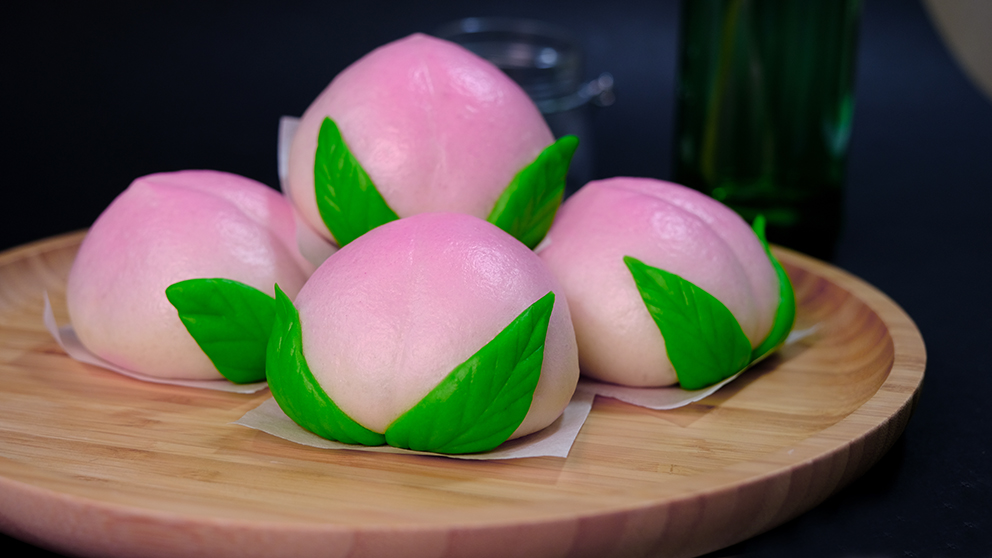
After 3 minutes…😱 fluffy peach, plump and beautiful birthday buns.

They are so lovely…😳😘

I hope these buns will light up faces and brings happiness and joy for your loved ones; Wishing them always be healthy and live a long life.
LONGEVITY PEACH BUNS
Yield: 5 buns
Active time: 2 hours
Total time: 5 hours
INGREDIENTS
Red Bean Paste:
- 60 g Red Bean
- 1/8 tsp Salt
- 1000 ml Water
- 40 g Granulated Sugar
- 10 g Vegetable Oil
- 5 g Glutinous Rice Flour
- 2 tbs Water
Buns Dough:
- 85 g Cold Milk
- 1/2 tsp Instant yeast
- 15 g Caster Sugar
- 150 g All Purpose Flour
- 4 g Vegetable Oil
Colouring
- Food Colouring (pink and green)
- Toothbrush
- Tea Strainer
INSTRUCTIONS
Red Bean Paste
- Rinse the beans and transfer it to a large pot.
- Add in the salt and water – bring it to a boil; then take it off from the heat and let it rest for 1 hour.
- After 1 hour, don’t forget to take the lid off – put it back to the stove (no need to rinse or change the water) and continue cooking on medium low heat until the beans are tender and creamy.
*The water will evaporate during cooking, adding more water as necessary to keep beans submerged. - After for about 1 ½ hours, pick 1 bean and mash it with your fingers; if it’s mashed easily, it’s done.
- Transfer beans to a food processor along with their cooking liquid (you can use regular or immersion blender).
If you find it too dry, kindly add 1-2 Tbsp of water as needed to help the spinning process.
Run the food processor until the beans become a fine paste. - Pour the fine paste into the non-stick pan.
On medium-low heat, add in the sugar along with oil and glutinous rice flour that has been diluted with some water.
Mix it really well and keep stirring for about 10-15 minutes until the mixture start comes together and doesn’t stick to the pan. - Take it off from the heat (don’t worry if it’s still a bit loose, this paste will continue to thicken as it cools.
- Spread onto a flat baking sheet; cover it with a cling wrap to prevent from drying out, open a little gap so the steam can escape and let it cool completely.
*Make sure the paste cool completely before you fill it into buns dough.
Buns Dough
- In large bowl, mix the cold milk along with instant yeast and sugar. Stir well until the sugar is completely dissolved and there’s no granules visible.
- Add in the flour and mix everything together, gather all small crumbs until it creates a dough ball.
- Pour in the vegetable oil.
It seems too many oil at first; collect all the oil in the bowl, and then continue kneading on a work surface for about 1 minute. - When you feel that the oil start to absorb completely; roll the dough into a long shape (moving the hand up and down as you roll to lengthen it).
Then take left and right ends and fold it to the centre of the dough (repeat the same process 2 times). The dough gradually will become really smooth.
*Do not overwork, this kneading process will only takes for about 3 minutes. - Once the dough is ready, you can use it immediately. There’s no need to rest the dough because by proofed it twice will cause a lot of bumps or air bubbles on the surface, we don’t want that happened.
Fill & Shape
- Spare 20 grams of the dough for the peach leaves and divide the rest into 5 equal pieces (about 47 g each).
*Please do remember always cover the buns with a plastic wrap to prevent from drying out. - Take 1 portions of the dough, press into a thick disk.
Using rolling pin, roll back and forth onto rectangular shape, fold into 2 equal pieces, turn it 90° angle and repeat the same process 2 times. - Then roll the dough into a square shape, grab the dough with my left hand and rolling pin on the other hand.
Using rolling pin roll up and back flatten the edges of the dough while turn the dough a little by little (middle part should be slightly thick). - Place 1 portion of the red bean paste filling to the centre of the dough; gather the sides to enclose the bun and pinch to seal.
- To shape the buns into peaches
– Flip the filled bun so the seam side is down and shape it to a smooth oval ball.
– Using your palms form a peak on the top.
– To make the seam of the peach, gently press the bench scraper in to create a line along the arch; pinch the top, mimicking the shape of the peach - Cover the filled buns with a plastic wrap and repeat this process with the rest of the dough and fillings.
- For the bun leaves
Colour the 20 grams left over dough with green food colouring and divide it into 10 equal pieces (2 gr each).
Take one portion of the green dough and shape it into a cone.
Using bend scraper, flatten the cone. Form a line in the centre and create the leaf vein patterns tilts towards the cone.
Colour & Decorate
- To create the pink shades of the buns, simply mix some water with a few drops of pink food colouring.
Dip the toothbrush to the colouring mixture; tap off the excess onto a kitchen towel.
Hold the strainer upside down 2 cm above the bun; then gently brush the toothbrush over the back of the strainer in a circular motion (repeat the same process until you get the desire colour shades). - Attach the leaves onto each peach bun with a dab of water (a pair for one bun) and place each bun onto a piece of parchment paper.
Proof & Steam
- Place the finished buns in the steamer; make sure that you give some space in between the buns so they won’t stick one another after fermentation or steaming.
Cover and allow to rise for about 15-45 minutes.
*Please pay attention, proofing time depends on room temperature, it may take longer or may not take that long (in the meantime you can start preheat your steamer). - After fermentation, the proofed buns should feel lighter and rise about 50% of their original size.
If you gently press it with your finger, the dough will make indentation and be able to slowly bounce back into shape. - Over medium high heat; steam the buns for about 10-12 minutes.
*If you are using metal or plastic steamer, make sure that you cover the lid with a piece of cloth so the condensation during steaming won’t ruin the look of your buns - After 10 minutes, take the steamer off from the heat; do not open the lid and let it sit for another 3 minutes; serve.
NOTES
- If you’re not using the red bean paste right away, you can transfer the red bean paste in an airtight container and store in the refrigerator for up to 3-4 days or in the freezer for up to 2 months.
- Before freezing, divide the red bean paste into small portions so that you can be flexible on how much to use each time. When you’re ready to use, you can defrost in the fridge overnight.
- The buns can be stored in the fridge for 5 days, or frozen for a month.
- I highly recommend to reheat the buns in the steamer; place the frozen peach buns on a plate.
Put the plate on top of the trivet in the steamer and let them steam over high heat for 10 minutes or until heated through. - If you want to reheat in the microwave; place the steamed buns on a plate.
Wet some paper towel, wring out excess water and place this on top of the steamed buns and microwave on high for 30 seconds; add the time as needed until heated through.