Rabokki 라볶이 (Ramen+Tteokbokki 떡볶이) | Homemade Rice Cakes & Gochujang Sauce

Hi Guys, today I’m going to show you how to make Rabokki. It’s actually the same thing as Tteokbokki. But besides using rice cake which is called Tteok, we will add some Ramen noodles for Rabokki. So there’s where the “Ra” words in Rabokki coming from.

Rabokki (라볶이) is consists of Tteok, a cylinder-shaped white rice cake and Ramyeon (Ramen) as the main ingredients; with other ingredients such as vegetables, fish cake, boiled egg, seafood, and even melted cheese.

I will use my homemade rice cakes and also my homemade Gochujang Sauce in this recipe.
I really recommend to use the freshly made rice cakes because the frozen one tends to be dry, easy to crack, and not chewy.

Look how chewy and flexible this homemade Rice Cakes are, they even don’t gets hard when they are cold.

The ingredients are coated with sweet and spicy homemade Gochujang Sauce and the chewy rice cakes and soft noodles soak up a lot of the flavor. 
You can simply use water to make Rabokki or you can use broth if you want to make it tastier.

Add ramen noodle at the last minute of cooking Rabokki, when you add them at the beginning, the noodles will soak too much water and become to soft and soggy.
Some people also add the instant Ramen seasoning to make the flavor more savoury.

You can use ready made Gochujang Sauce, I’m prefer homemade version coz it’s healthier. The rice cakes and ramen noodle will thicken the Gochujang Sauce. 
If you do not like the sauce to be too spicy, omit the cayenne pepper or chili powder. If you like it super spicy, adding Cayenne Powder or chilli powder is the way to increase the heat level without altering the flavor.

Best serve the same day you cook it as Rabokki leftover does not reheat well. If you want to store them in the fridge, make sure there is no Ramen left before you put your Rabokki, considering leaving Ramen in liquid will make it soggy and disintegrate into porridge texture.
Enjoy the recipe!

RABOKKI (RAMEN+TTEOKBOKKI)
Yield: 4 Servings
Active time: 1 hour
Total time: 1 1/2 hour

INGREDIENTS
Tteok (Korean Rice Cakes):

  • 120 grams Glutinous Rice Flour
  • 75 grams Tapioca Starch
  • 1/4 teaspoon Salt
  • 150 grams Boiling Water
  • Sesame Oil (for grease)

Side Dishes:

  • 1 large Onion
  • 1 large Carrot Cabbage (optional)
  • Fish Cake
  • Ramen Noodle


Gochujang Sauce:

  • 800 Boiling Water
  • 6 tablespoons Miso Paste
  • 4 1/2 tablespoons Granulated Sugar
  • 4 1/2 tablespoons Chili Sauce (preferable with garlic)
  • 1 teaspoon Ceyenne Pepper or Chilli Powder (optional)
  • 1 1/2 teaspoons Garlic Powder
  • 1 teapoon Salt
  • 1 tablespoon Sesame Oil
  • 1 tablespoon White Vinegar


Garnish: Spring Onion, Roasted Sesame


INSTRUCTIONS
Tteok (Korean Rice Cakes)

  1. In a large bowl combine glutinous rice flour, tapioca starch and salt. Pour in the hot boiling water and mix until just combine.
    Then using my hand I will continue to knead them (it will look a bit dry and floury at first, continue kneading it until it create a smooth ball).
  2. Divide the dough into 8 equal pieces. Roll each dough into 1 cm thick, and then bend and cut them into 2 equal pieces. Set aside to the tray, continue with the rest dough.
  3. To cook the rice cakes
    Bring a medium pan of water to a boil and carefully place the rice cakes into the simmering water.
    In the meanwhile, grease a tray with a bit of sesame oil to prevent stickiness.
    When the rice cakes start to float that means they are ready to be picked up, scoop them out and place them into the tray.
  4. The rice cakes is ready to use, if you want to keep your rice cakes for a long time, make sure they are grease well with sesame oil, place them in an airtight container and store them in the fridge or freezer.

To Cook Rabokki

  1. Slice onions, carrots, spring onions, fish cake and rice cakes into small pieces.
  2. Pour some hot water into a wok, add all the Gochujang ingredients (Miso paste, sugar, chilli sauce, cayenne pepper or chilli powder, garlic powder, salt, sesame oil and vinegar).
    Stir until well combined and bring it to a boil.
  3. After boiling, pour the red onions and carrots. Cook for about 5 minutes so they’re soften a bit. Add in fish cakes and rice cakes, stir well.
    Add your favorite ramen noodle and cook until they soft enough.
    *Be careful not to cook the noodles too long, as they become mushy very quickly.
  4. Sprinkle with spring onions and roasted sesame as a garnish.

NOTES

  1. To store the Rice cakes; place them in an airtight container and store them in fridge (1-2 days) or freezer (3 months).
  2. Please note; add ramen noodle at the last minute of cooking Rabokki, when you add them at the beginning, the noodles will soak too much water and become to soft and soggy.
    Some people also add the instant Ramen seasoning to make the flavor more savoury.
  3. The rice cakes and ramen noodle will thicken the Gochujang Sauce.
  4. You can find Tteok (Korean Rice Cakes) sold freshly made, refrigerated, or frozen at Korean grocery stores.
    I really recommend to use the freshly made rice cakes because the frozen one tends to be dry, easy to crack, and not chewy.
  5. You can use ready made Gochujang Sauce, I’m prefer homemade version coz it’s healthier.
  6. If you do not like the sauce to be too spicy, omit the cayenne pepper or chili powder. 
    If you like it super spicy, adding cayenne powder or chilli powder is the way to increase the heat level without altering the flavor.
  7. You can simply use water to make Rabokki or you can use broth if you want to make it tastier.
  8. Best serve the same day you cook it as Rabokki leftover does not reheat well.
    If you want to store them in the fridge, make sure there is no Ramen left before you put your Rabokki, considering leaving Ramen in liquid will make it soggy and disintegrate into porridge texture.
    You can reheat any leftover along with a little bit of water in a small pan over low heat.

Fluffy Snow Cheese Cake

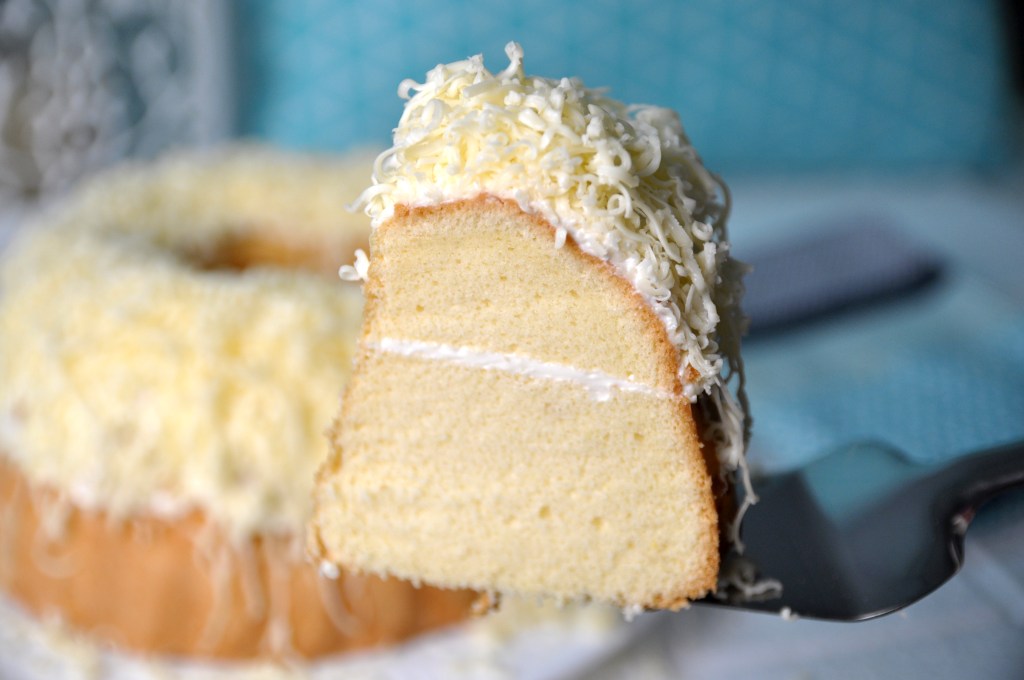
Hi Guys, today we are making these classic “Fluffy Snow Cheese Cake”. Ultimately soft, moist and cheesy sponge cake that you cheese lover will surely love!

This cake bakes up so nice and beautifuly even on the top, making it perfect for layering.

Fluffy Vanilla Buttercream

A light, moist and fluffy vanilla sponge cake, lightly filled and frosted with fluffy vanilla buttercream on top.

Finished with a generous topping of shredded cheddar cheese.
The combination of soft cake, sweet vanilla buttercream and salty cheddar cheese are perfect match in every bite.

And if you are a true cheese lover, feel free to add shredded cheedar cheese in the middle of the filling if you want.

Pillowy Soft Crumb

Look how soft and pillowy the crumb is. They are amazingly fluffy and stay moist even if you keep them in the fridge for a few days.

This cake is perfect little snack to go with your afternoon tea or after dinner time with coffee or tea. You will literally could not stop eating it!

There’s something about milky and creamy cheese that really gives depth of flavor of the cake.
If you not exactly a sweet tooth, these Snow Cheese Cake might be just right for you!

SNOW CHEESE CAKE
Yield: One 8-inch bundt pan 
Active time: 1/2 hour
Total time: 1 1/2 hour

INGREDIENTS
Sponge Cake :

  • 150 grams Egg Whites
  • 1 1/2 teaspoons Lemon Juice
  • 150 grams Granulated Sugar
  • 90 grams Egg Yolks
  • 135 grams Cake Flour
  • 20 grams Corn Flour
  • 1/4 teaspoon Salt
  • 40 grams Milk
  • 25 grams Vegetable Oil
  • 1 teaspoon Vanilla Extract


Vanilla Buttercream:

  • 140 grams Shortening
  • 35 grams Salted Butter
  • 35 grams Condensed Milk
  • 1 teaspoon Vanilla Extract

Grated Cheedar Cheese


INSTRUCTIONS
Sponge Cake

  1. Preheat the oven to 150° C, grease the pan (I am using my bakery pan grease https://www.youtube.com/watch?v=ilWe6_4ZDuI or  you can brush it with some butter and sprinkle flour to grease them).
    One important tips, if you are using bundt pan, just make sure that you coat all of it’s nooks and crannies or else the cake will stuck inside the pan.
  2. For the wet ingredients;
    In a medium bowl  combine the milk, vegetable oil and vanilla extract. Mix that all through, set aside.
  3. For the batter;
    – In a large bowl, pour in the egg whites, whip at low speed until foamy, then add the lemon juice and continue mixing it (by adding small amounts of lemon juice helps to stabilize the egg whites, help prevent overbeating and allows the beaten whites to reach their full volume and stiffness).
    – When the mixture start become white, add the sugar gradually, continue beating until it reach a stiff peak (they will look shiny and the tips can stand straight up).
    – Add in the egg yolks, mix slowly until just combine.
    – Sift all the dry ingredients into a bowl in 3 batches. Mix after each addition, stirring just top part of egg mixture
  4. Take about 3 tablespoon of the eggs mixture and mix them to the wet ingredients.
    Then gently pour it back to the egg mixture.
    Scrape down and fold with spatula until well combined (this technique is used to make sure that the batter is well combined and there’s no liquid left at the bottom of the batter).
  5. Pour the batter slowly to the pan. Pour it from above 15 cm height to help get rid of air bubbles and then shake and tap the pan against worktop for 2-3 times. 
  6. Bake this off at 150° C for 40 minutes, then increase the heat to 170° C and continue baking for another 5-10 minutes.
  7. Take it off from the heat.
    Tap the pan immediately about 2-3 times against worktop so the cake won’t shrink too much.
    Put the greaseproof paper and cooling rack on top, flip the pan and let it sit for about 10-15 minutes.
  8. After 15 minutes, remove the pan and let it cool completely.

    Vanilla Buttercream
    In a large bowl, combine the shortening, salted butter, condensed milk and vanilla extract.
    Mix it all through until it becomes pale white, light and fluffy.

ASSEMBLY

  1. Using serrated knife, divide the cake horizontally into half (make sure the cake is perfectly flat all the way around).
  2. Apply about half of the vanilla buttercream as a filling, spread evenly.
  3. Place the other layer of the cake on top
  4. Spread the rest buttercream over the cake
  5. Coat the cake with a generous amount of shredded cheddar cheese.

*If you are a true cheese lover, feel free to add shredded cheedar cheese in the middle of the filling if you want. 

NOTES

  1. This basic sponge cake recipe is perfect for many other delicious treats.
  2. After the cake cooled completely, if you are not gonna assembly the cake immediately, wrap it with a cling wrap to prevent the cake dry.
  3. They are amazingly fluffy and stay moist even if you keep them in the fridge (in an airtight container) for a few days.
  4. To serve the cake from the fridge; let it the cake sit at the counter (in an airtight container) for about 20 minutes and enjoy.
  5. You can keep them in the refrigerator (in an airtight container for 3-4 days.

Baby Eeyore Spiral Mantou

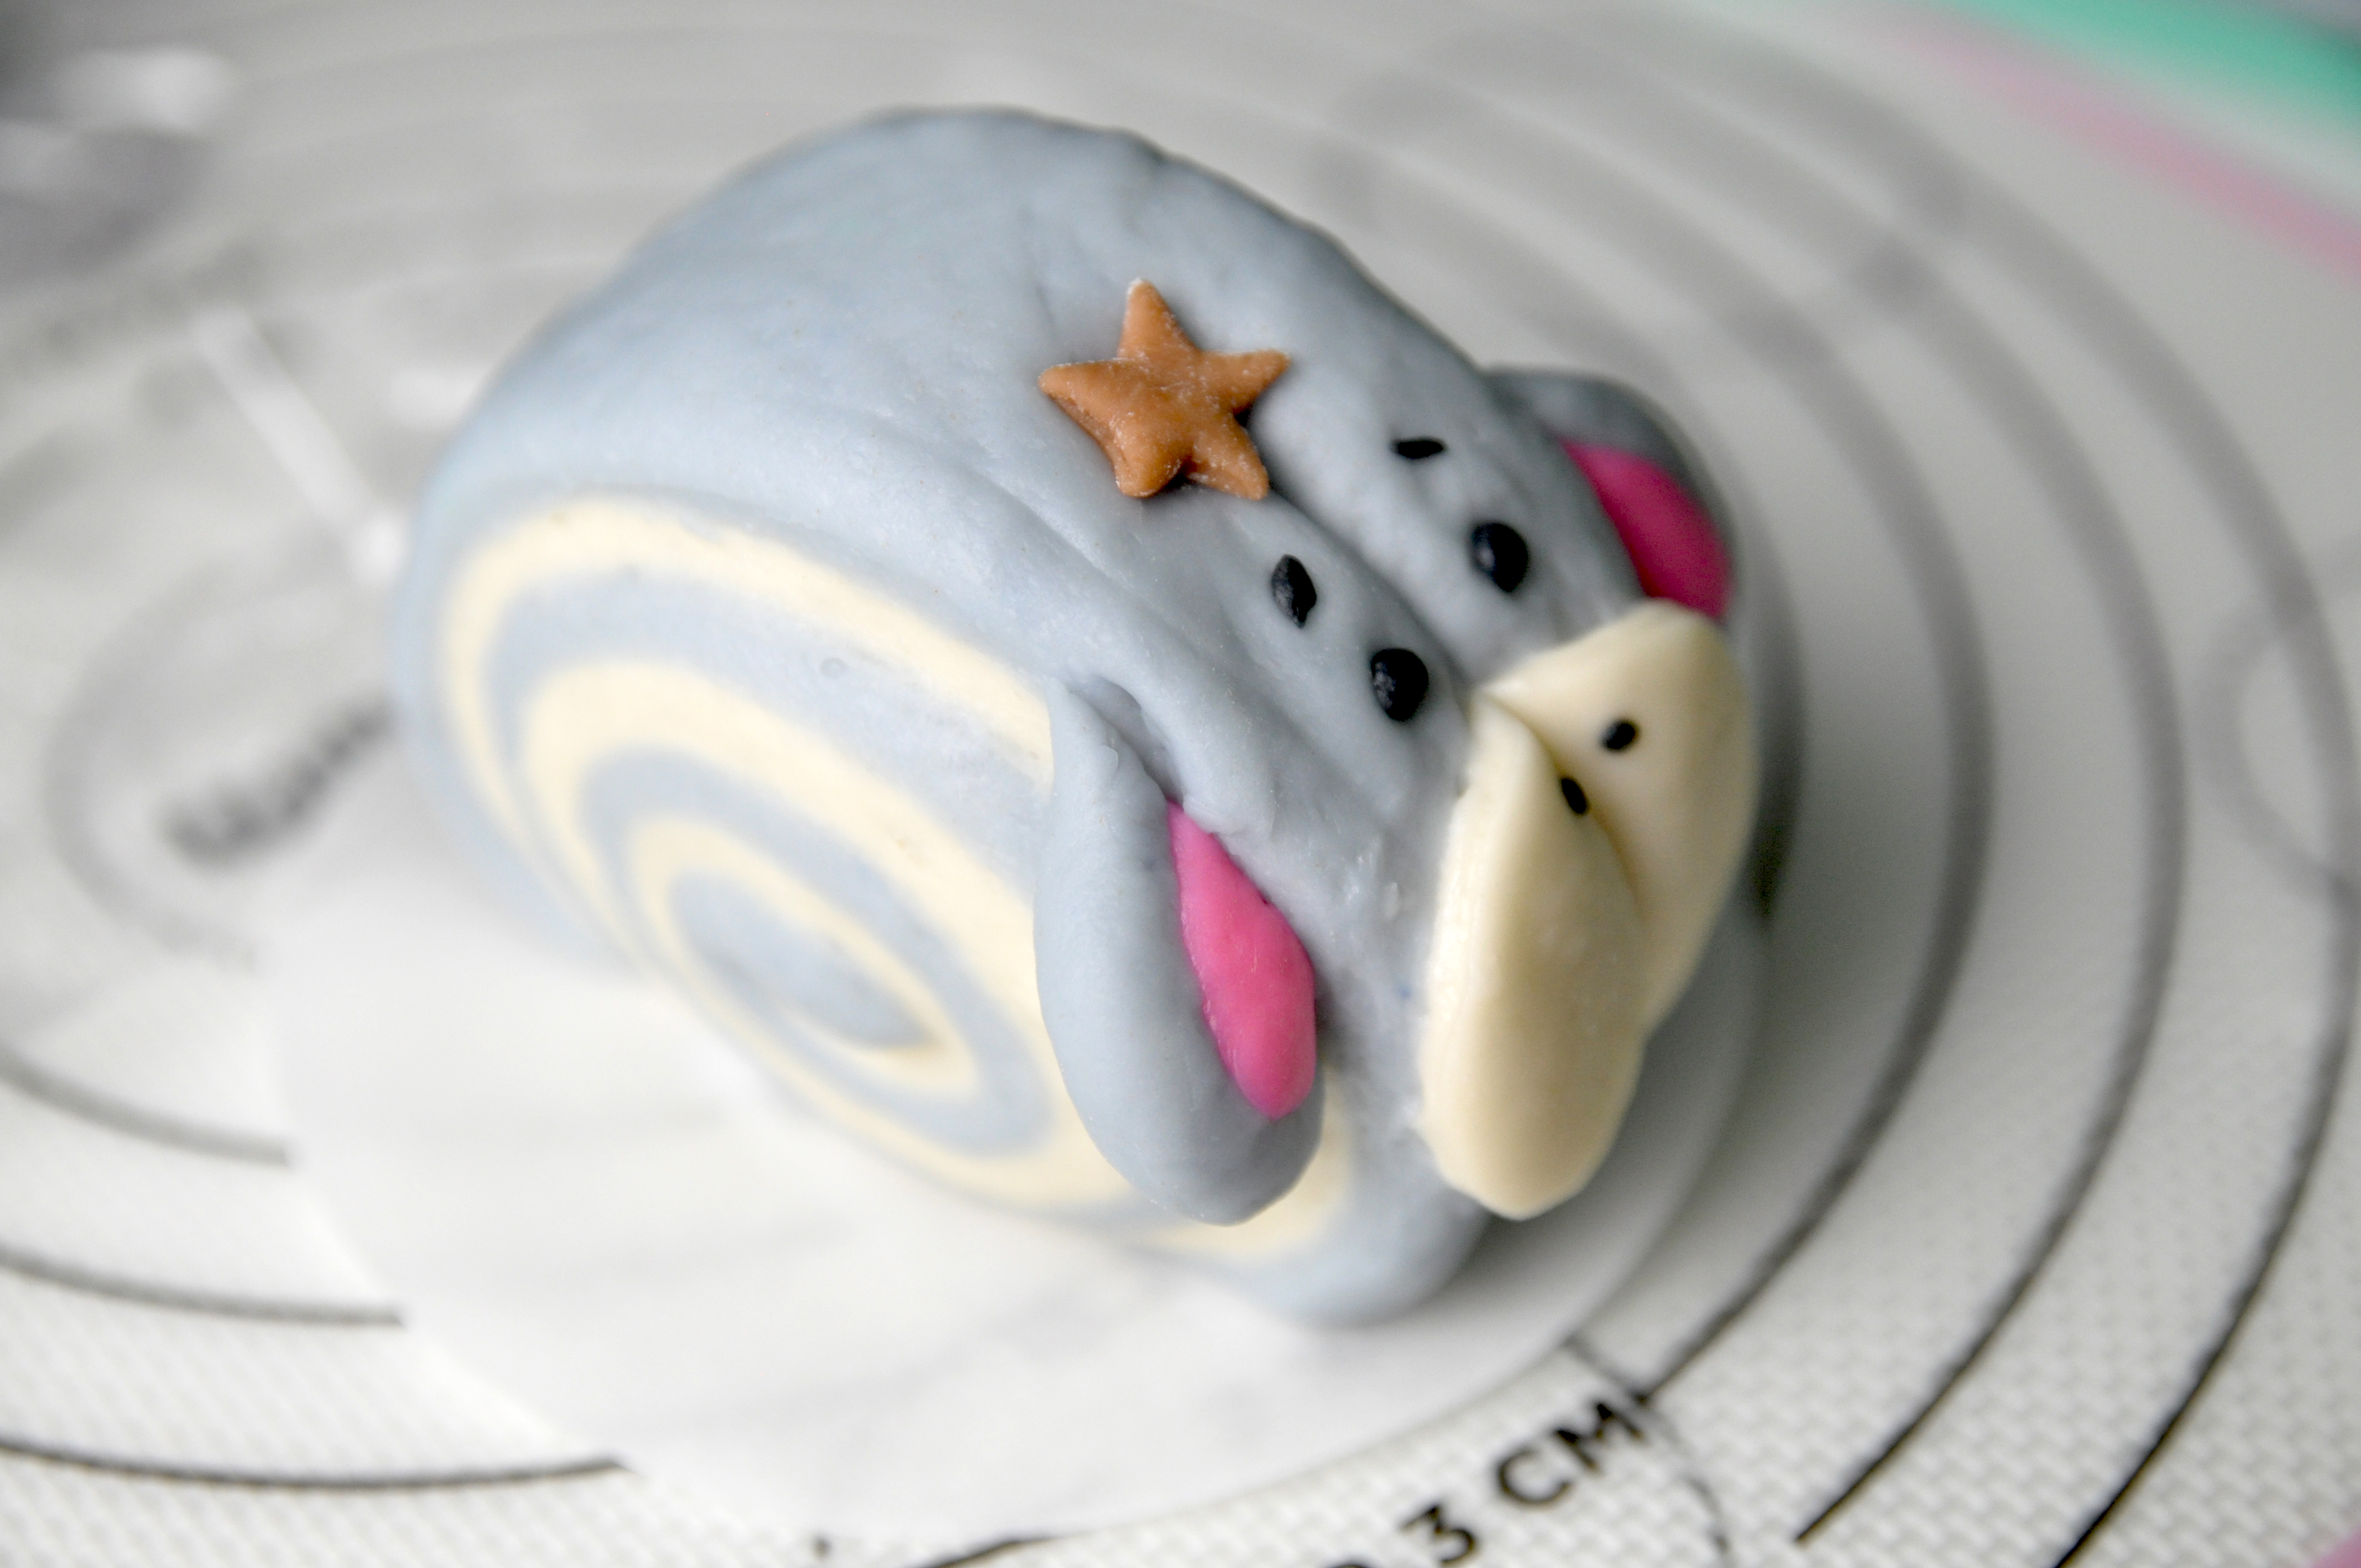
Hey Guys, today we are making these adorable “Baby Eeyore Spiral Mantou”.
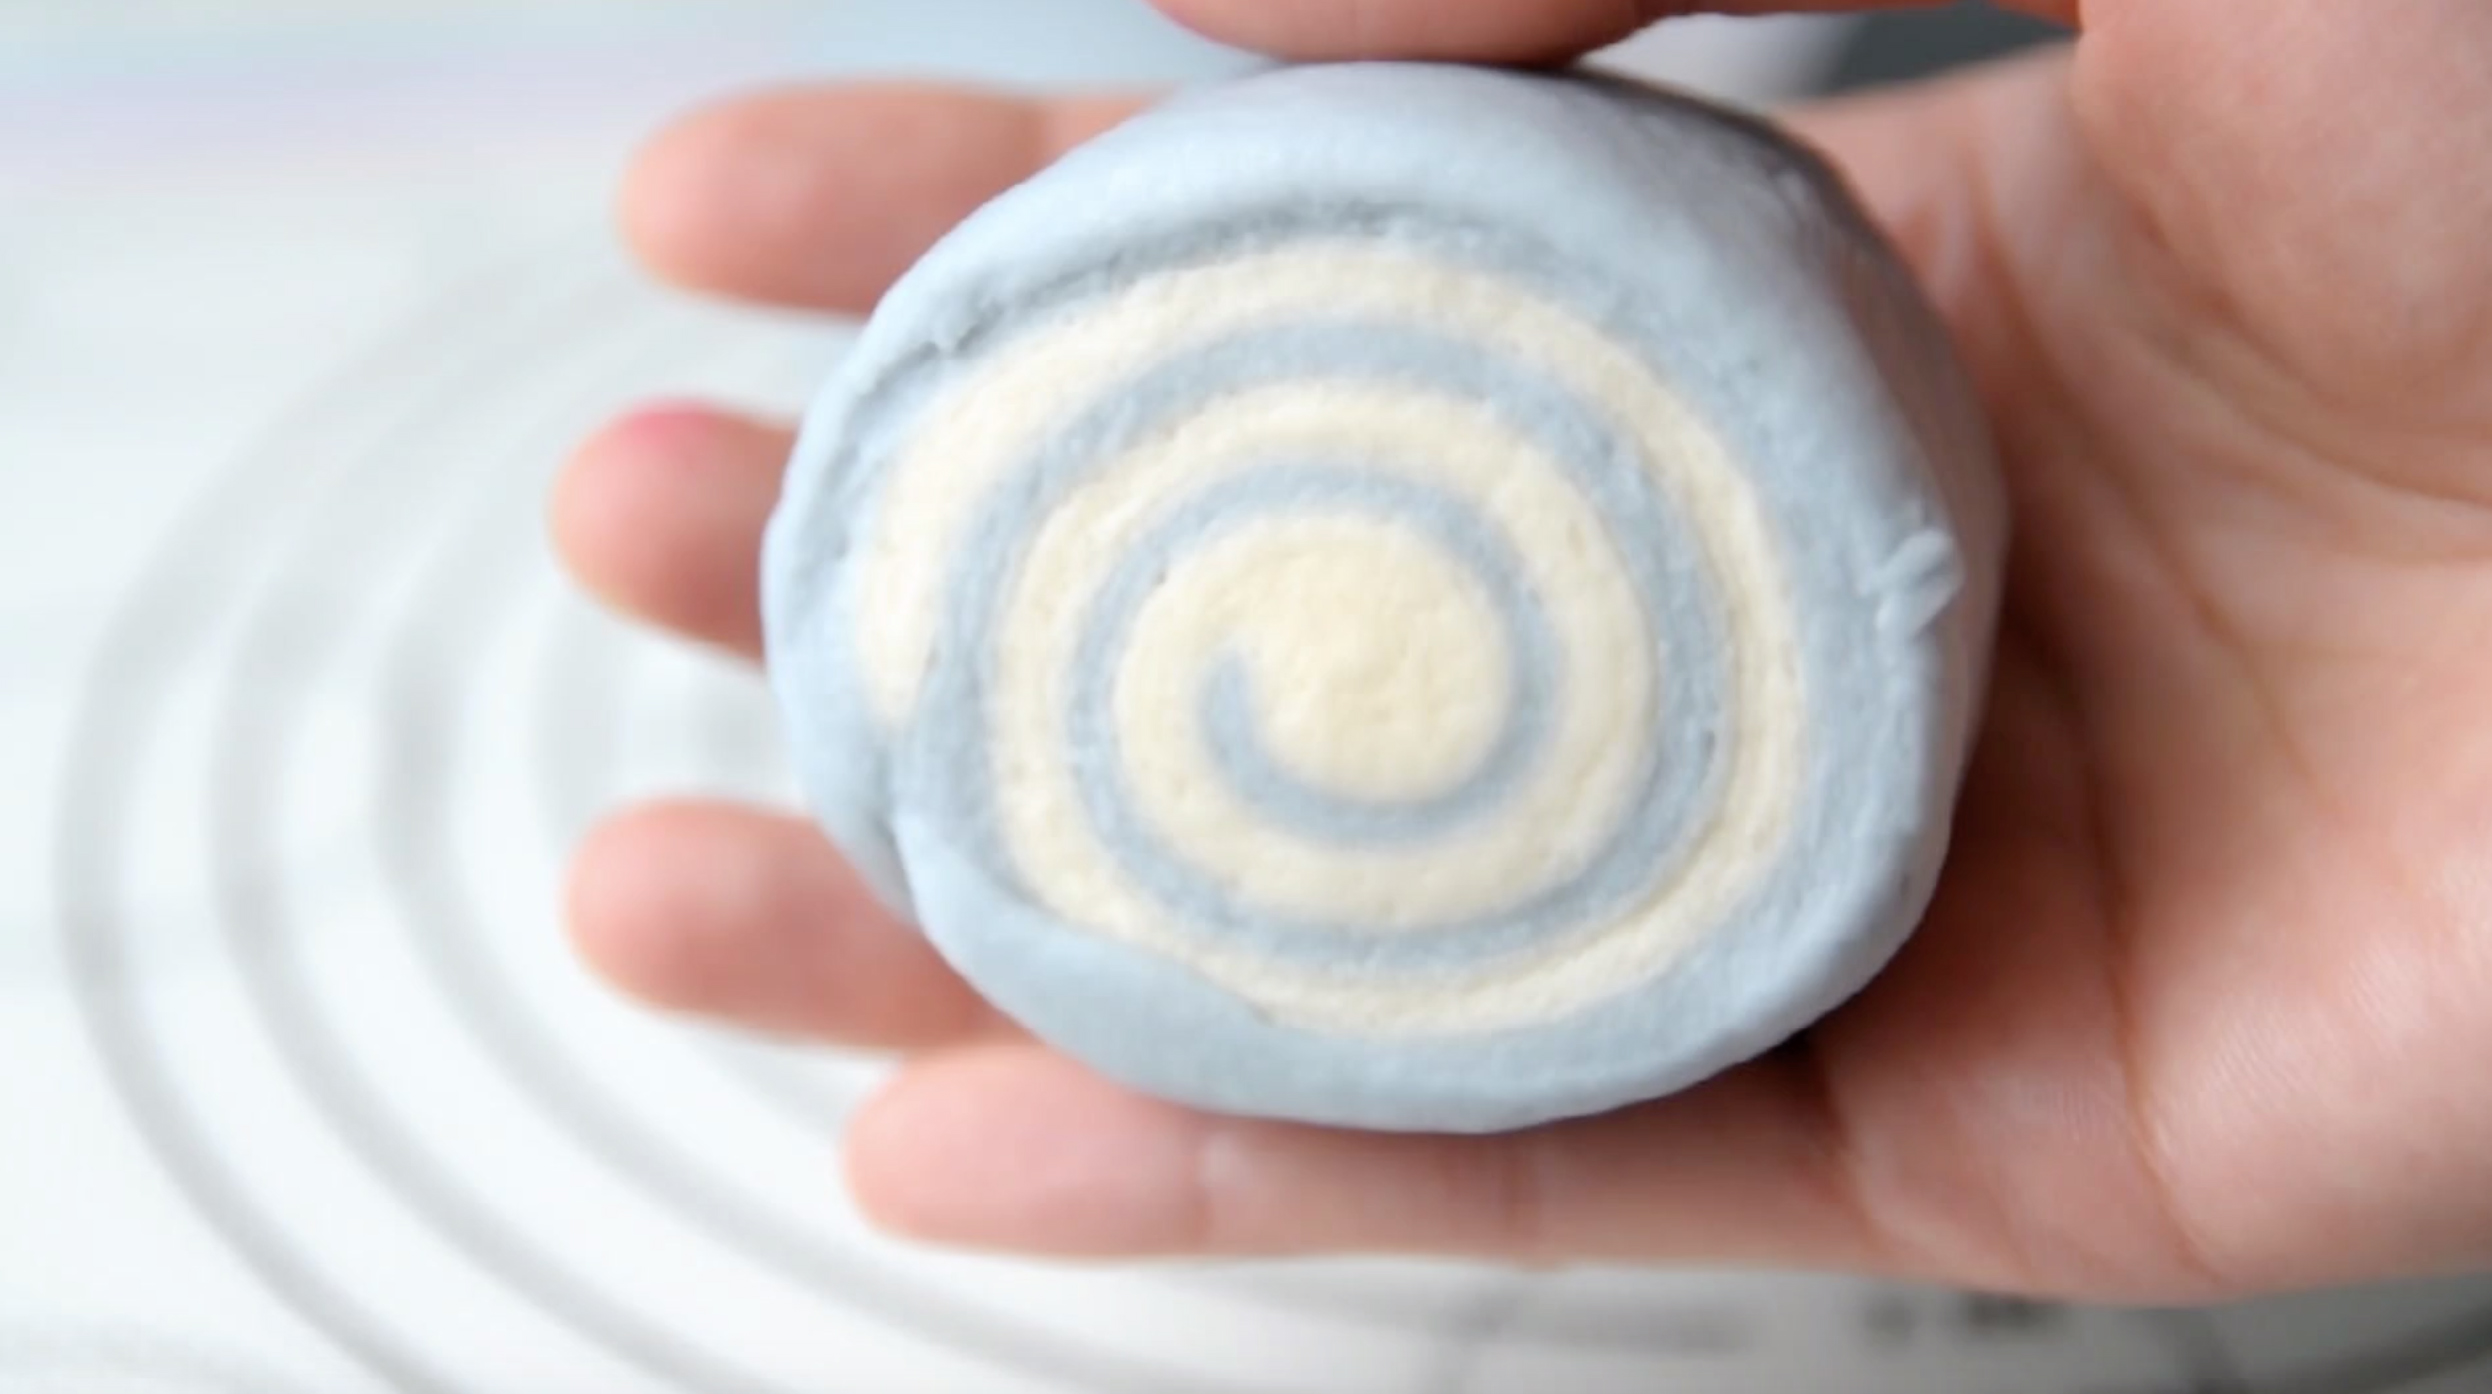
They are fun to make with a super soft fluffy texture and pretty spiral patterns.

The pattern is created by using doughs with two different colors; one plain dough and the other soft blue has been coloured with this natural Blue Butterfly Pea Flower powder.

It’s more expensive but healthier and a great way to add more visual and to infuse flavors.
You will only need a small amount to achive the right colour tone, add the powder gradually until the desired colour is reached.

If you not keen to buy this kind of natural colour powder, kindly substitute it with standard food colouring.

And to cut the dough, you can use serrated knife if you want.
For me, the best way to do this is to use unflavoured dental floss, where as a knife kind of pushes from the top down and squished the slices.

When attaching small details, make sure to apply just a bit of water, coz the dough will not stick firmly if too much water is used.

Please do remember always cover them with a plastic wrap to prevent the dough dry while they are waiting working on the details.

These buns are favorites from kids to adults and it’s super easy to make at home. I grew up eating it a lot.
I remember having that for breakfast and great options for snack too.

Mantou was my childhood favorite and still is. I fell in love with this swirls since the first time I saw them, it looks beautiful and so tempting. And I know you’ve gonna love them too.

The texture so soft and fluffy, you won’t be able to resist them. If you keep them at room temperature in an airtight container, they even will stay soft moist on the next day.

These buns are great for whatever you’d like to fill them.
It can be eaten on its own or with some sweet spread like jams, condensed milk or to accompany savory dishes like your favorite floss.
I hope that you will enjoy making mantou as much as I do, and I really love to see what creations that you have been made from this recipe. Love you Guys!


BABY EEYORE SPIRAL MANTOU
Yield: 5 pieces
Active time: 1 hour
Total time: 1 1/2 hour

INGREDIENTS

  • 315 grams Cake Flour
  • 2 1/2 tablespoons Granulated Sugar
  • 1 1/4 teaspoons Instant Yeast
  • 1/2 + 1/8 teaspoon Baking Powder
  • 165 grams Cold Water
  • 16 grams Shortening
  • 1/2 + 1/8 teaspoon Salt
  • Food Colouring (Blue Pea Flower Powder for blue, Cocoa Powder for brown, standard food colouring for pink and black)


INSTRUCTIONS

  1. In a large bowl, mix in the flour, sugar, yeast and baking powder.
  2. Pour in the cold water and mix until just combined. By using cold water yeast becomes less active, so it give us more time to create the dough details.
  3. Add in the shortening and salt (you can use your hands to mix this or a stand mixer) keep on going until it’s create a dough ball.
    Place the dough onto a work surface, continue kneading it for 5-10 minutes until it create a smooth ball (sometimes different brand flour can have different moisture level, so if it’s too dry add a tablespoon of water, if it’s too wet add a bit of flour).
  4. After the dough is ready, spare some dough for the details; 30 gr for white; 10 gr each for brown, pink and black.
    And for the rest dough, divide it into 2 equal portions for the spiral dough.
    Cover all dough with a cling wrap to prevent it from drying out while waiting the rest of the dough to be coloured.
  5. Colouring
    – Take one portion of the spiral dough, add about 1/2 teaspoon Blue Pea powder, knead it to even the colour. You’ll only need a small amount to achive the right colour tone, add the powder gradually until the desired colour is reached.
    It will be much harder to color the dough evenly this way (be patient), should the dough become dry when kneading, spray it with some water and continue kneading it.
    * Please note that the colour will be darker after steaming so be mindful with the colour.
    If you not keen to buy this kind of natural colour powder, kindly substitute it with food colouring.
    Spare 30 gr of blue dough for the ears.
    – Add some cocoa powder for the brown colour
    – Using standard food colouring for pink and black.
    After finish with the colouring, let all the coloured dough covered and rest for about 10 minutes so the gluten can relax a bit.
  6. Rolling
    Using rolling pin roll both white and blue spiral dough into about a same size thin rectangle.
    Brush a thin layer of water as a glue on top of the blue dough, and then place the white dough on top of the blue dough.
    Using rolling pin, roll the stack dough one more time to make sure that they are stick well and the surface is even.
    Cut the edges of the dough to make it more tidy, brush a little water on top of the white dough.|
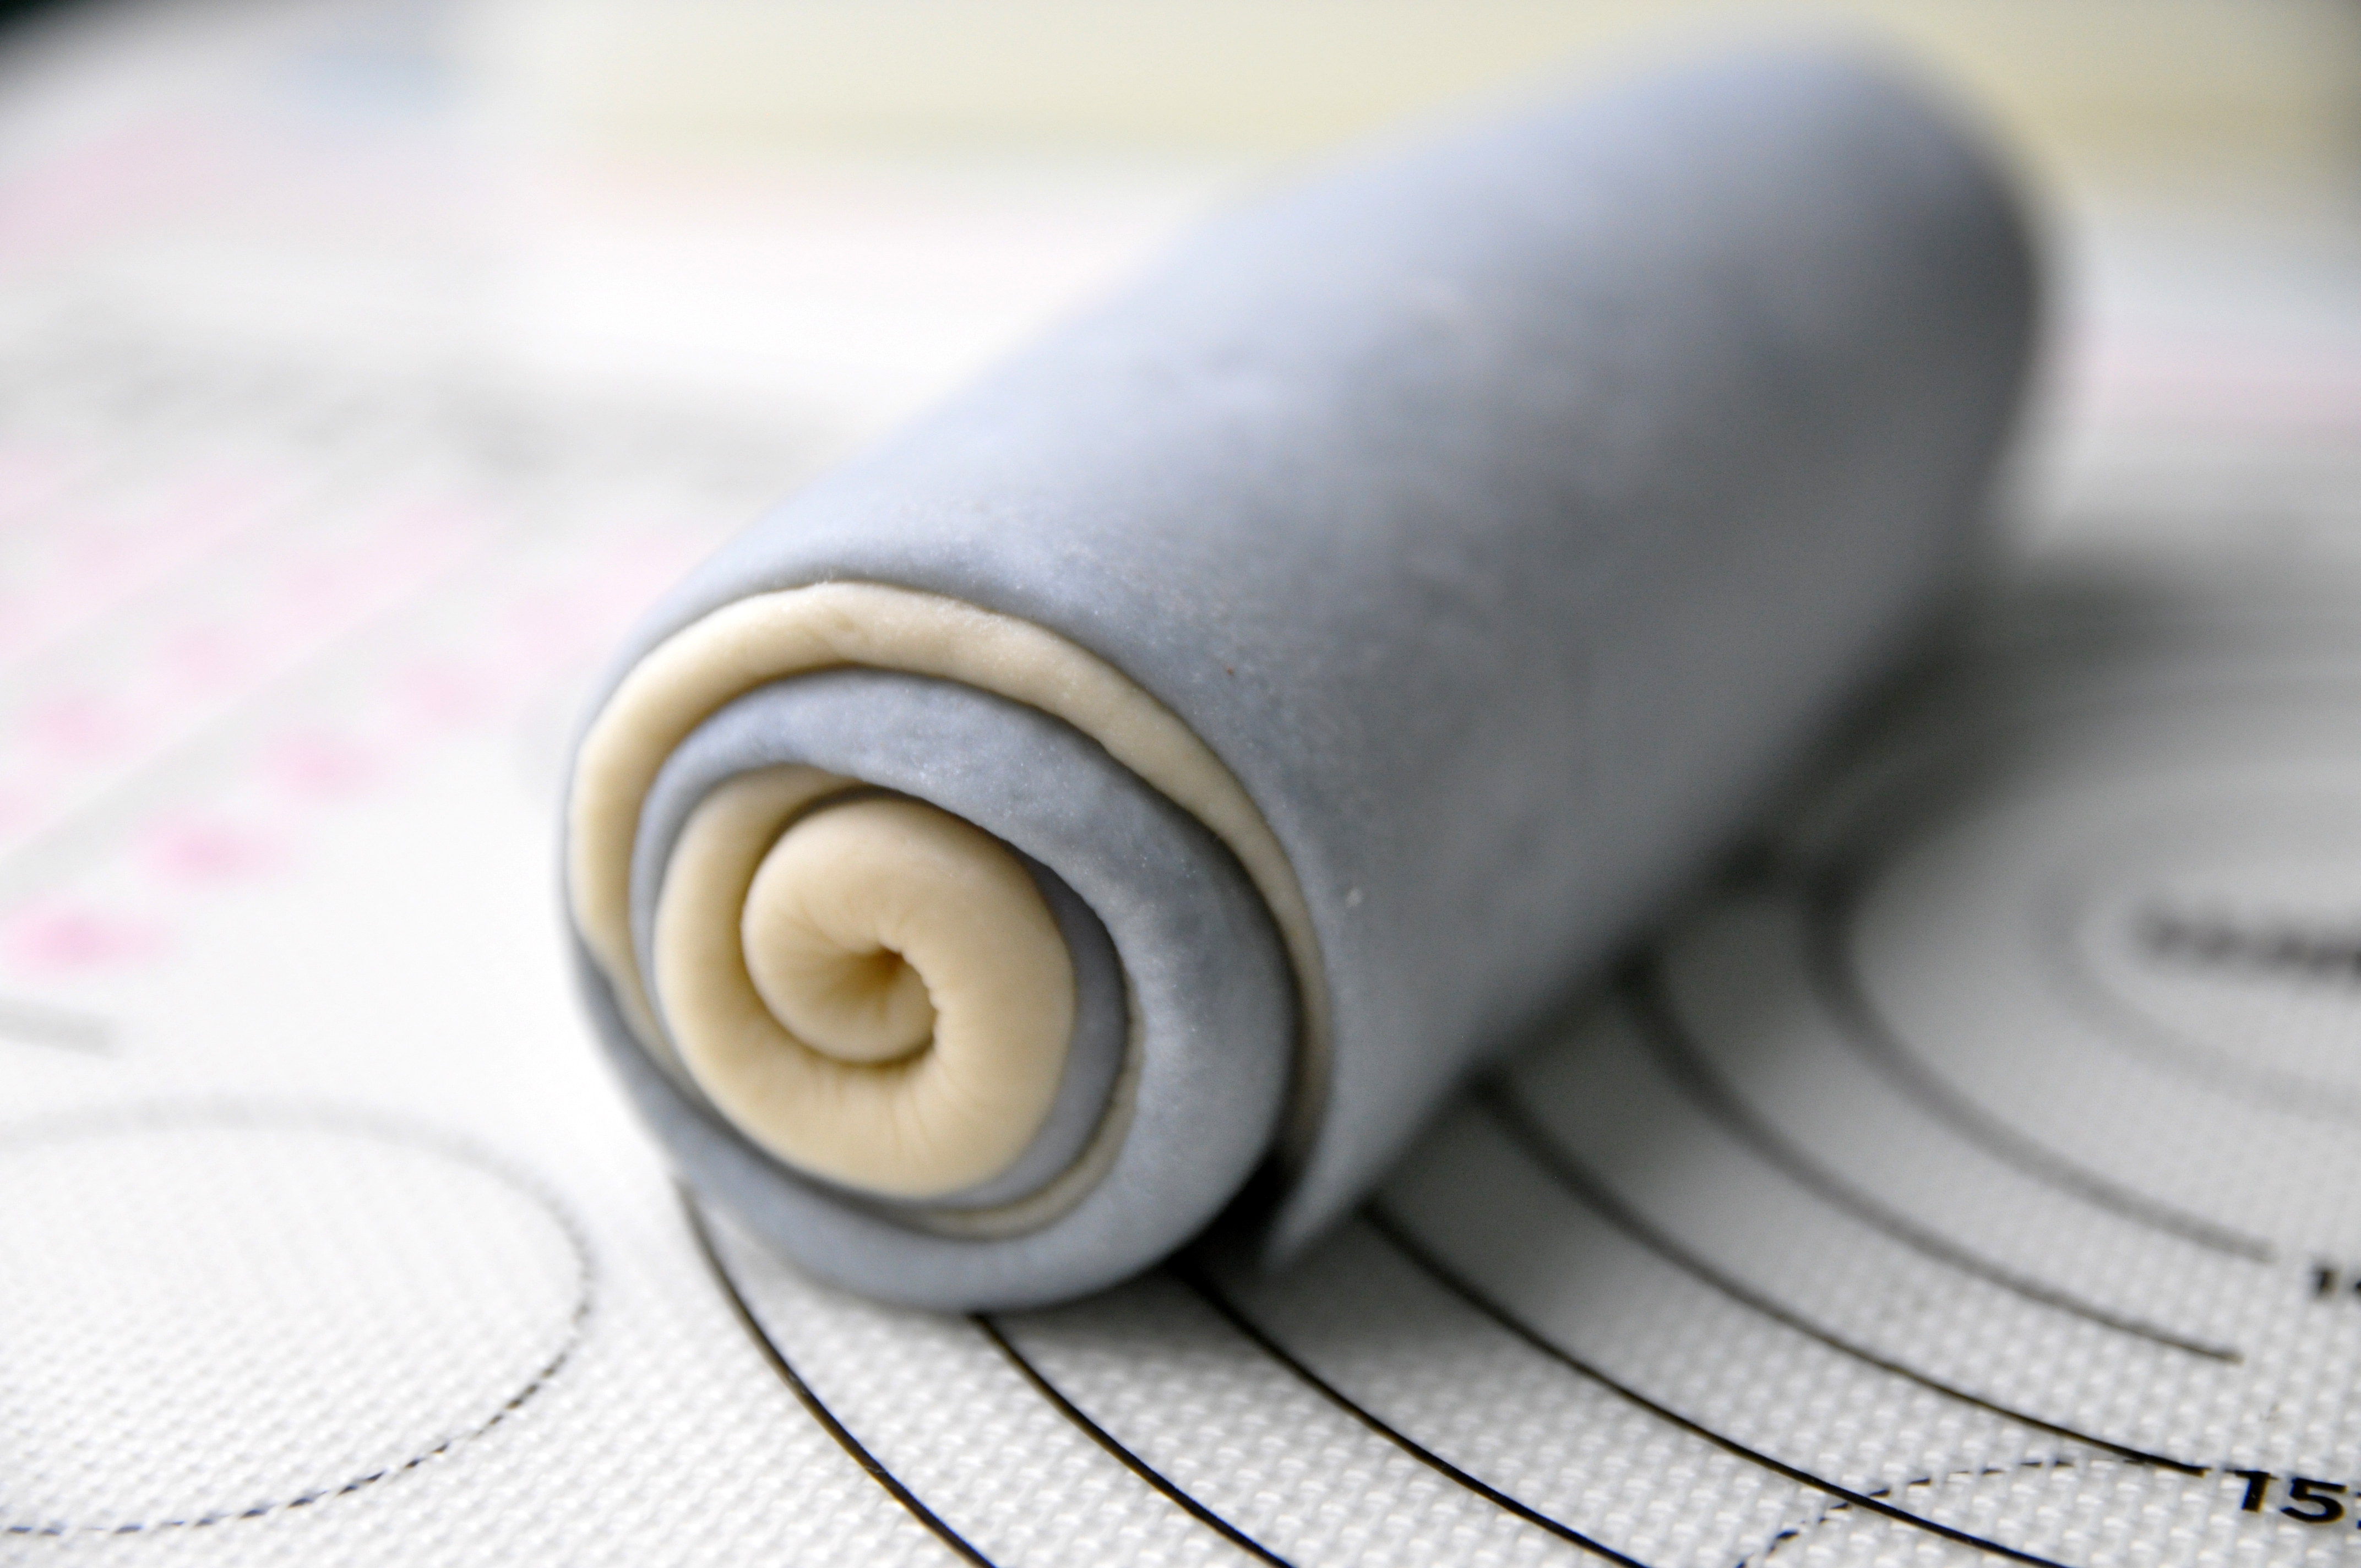
    Starting from the side near you, roll them up tightly into a log.
    Mark the dough into 5 equal pieces (you will have 2 extra ends).
  7. Cutting
    The best way to do this is to use unflavoured dental floss, where as a knife kind of pushes from the top down and squished the slices. You can also use serrated knife to do this.
  8. Detailing
    Place each cut spiral mantou on each parchment paper.
    Always cover all the dough with a plastic wrap to prevent the dough dry while they are waiting working on the details.
    When attaching small details, make sure to apply just a bit of water, coz the dough will not stick firmly if too much water is used.
    – Face: roll some white dough thinly, cut with oval shape cutter ,apply a thin layer of water as a glue, stick it to the front side of the mantou.
    – Ears: roll some blue and small pink dough into a teardrop shaped, stick and press the pink dough on top of the blue dough. Cut the sides of the dough and stick them each side of the head.
    – Eyes, nose and eyebrows: roll some black dough, place and stick it according to position.
    – For the Hair: cut some brown dough with star shape cutter and stick it on top of the head.
    – Mark his face line verticaly from hair down to face with blade tool.
  9. Final Proof
    After finish with all the details, cover mantou with a clear container or cling wrap and set it aside to proof.
  10. Prepare steamer
    Preheat the steamer (the water level should be no more than 3 cm deep as excessive steam will ruin the look of the buns).
    Wrap the lid with kitchen towel to prevent the water drops to the buns.
  11. To check if the dough has been optimally proofed
    The dough should look larger in size. rounded and airy, they also feel soft and spring back slowly when the surface is touched.
  12. Steaming
    Arrange the buns in the steamer and place the lid. Place a chopstick under the lid to create a small gap to allow the steam to escape. Steam over a medium heat for about 10-12 minutes.
  13. Turn off the heat, let the buns rest in the steamer for 3 minutes and then remove the buns, serve them immediately or place on a wire rack to cool completely before you store them (this will prevent the bottom of the steamed buns from getting soggy).


NOTE

  1. If you keep them at room temperature in an airtight container, they will stay soft moist on the next day.
  2. You may keep them in the fridge for up to 4 days or in the freezer for up to 2 months.
  3. You may make lots of these mantou ahead of time and freeze it. To serve fridge or freeze mantou; steam for 10 minutes or wrap mantou with cling film and microwave on high for 1 minute.

Martabak (Indonesian Thick Pancake)

Hey Guys, today we are making these “Indonesian Thick Pancake”. These thick sweet pancakes are known as Martabak, it was one of the most famous street food in Indonesia.
They are usually lining up on the street at night to get this Martabak as a midnight snack.

These thick yummy pancake characterized by its honeycomb textures and the sweet decadent stuff like chocolates, condensed milk, butter, cheese, peanuts, Nutella, etc.
It really doesn’t require any fancy ingredients to make it.

There are many recipes to make Martabak, some of them used Baking Soda as a leavening agent.
I personally not prefer to use Baking Soda in the recipe, coz it’s a base or alkaline ingredient, which naturally has a bitter taste.

A popular and indulgent choice of toppings for Martabak in Indonesia includes butter, condensed milk, chocolate rice and shredded cheese -which is my favorite!

I love this martabak so much because they are so soft, spongy, the rich of the butter and sweet mild savory combination was truly amazing!!!

The sides and bottom of the pancake should be nicely brown and the middle of the pancake is lightly springy when you touch it.

Crispy and golden brown on the out side, but moist in the inside. It’s really easy and comforting, especially for us who stay at home 24/7.

Making Martabak is about patience and many many trial and errors. Never give up, keep practice Guys! And once get the hang of it, you will always want to make and crave it! Enjoy the recipe!!

MARTABAK (INDONESIAN THICK PANCAKE)
Yield: One 8-inch round pan
Active time: 1/2 hour
Total time: 1 hour

INGREDIENTS
Batter:

  • 1 teaspoon Instant Yeast
  • 1 teaspoon Granulated Sugar
  • 25 grams Slightly Warm Milk (too hot will kill the yeast)
  • 100 grams Cake Flour
  • 1 tablespoon Granulated Sugar
  • 1/4 teaspoon Vanilla Extract (optional)
  • 25 grams Eggs
  • 100 grams Water
  • 45 grams Salted Butter (melted)
  • 1/4 teaspoon Baking Powder

Filling:

  • Pure Creamy Butter (butter in a can)
  • Condensed Milk
  • 100 grams Cheddar Processed Cheese Block
  • Chocolate Rice Sprinkles

INSTRUCTIONS

  1. To activate the yeast; In a medium bowl, combine warm milk, 1 teaspoon of sugar and the yeast. Allow to stand for about 5-10 minutes until the mixture begins to foam.
  2. In a large bowl combine the flour, sugar, eggs, water. Mix until just combined. Stir in the activated yeast, mix well. Pour in the melted butter, mix until smooth and no lumps remains (you will have a thin, shiny batter.
    Cover the bowl and set aside for about 30 minutes (the volume of batter will increase and have air bubbles all over the surface).
    In the meanwhile, you can prepare your favorite fillings.
  3. Prepare 8 inch non-stick pan, make sure the pan has a glass lid so that you can check the pancake while cooking it.
    Heat the pan over medium high heat (it’s really important to preheat the skillet fully before you add the batter, or it won’t rise and get those honeycomb textures).
    To test whether the pan is hot enough; a drop of water thrown into the pan should sizzle right away.
  4. Once the pan is hot and ready, add baking powder into the batter. Mix it well and pour the batter immediately into the pan, don’t let the batter sit around for too long after the baking powder is in.
    Very gently slightly turn the pan around in circular motion so the batter thinly coat the side of the pan (this will form a nice crust later and that’s one of the best part of martabak).
  5. Let it cook on medium high heat until the bubbles came out into the entire surface and then reduce the heat immediately to the lowest setting.
    Please note, never use high heat because it could burn the bottom of pancake while cooking.
  6. When the edges of the pancake begin to look dry, sprinkle the top with 1 tablespoon of sugar and then cover the pan with the lid. Let it cook for about 5 minutes or until the center of pancake surface is fully dry and cooked.
  7. Remove pancake from the pan and place it on a cutting board. Spread a generous amount of pure creamy butter on top of the pancake. Cut them into half before you start adding the filling.
  8. Add your favourite fillings (grated cheese, chocolate rice, etc).
  9. Drizzle with some condensed milk.
  10. Gently fold half of the pancake to the other half to form a sandwich.
  11. Spread with some more pure creamy butter on top (you don’t have to do this if you feel it’s too oily, but actually it’s the main thing that makes the martabak more appealing and delicious)
  12. Cut them into pieces according to your preference’s size, traditionally, they will cut them into these square shapes. Don’t forget to wipe your knife with a clean damp kitchen towel between each cut, so the filling doesn’t stick everywhere.

    NOTES
  1. Making Martabak is about patience and many many trial and errors. Pay more attention to the heat, it’s very critical.
    Never use high heat to cook Martabak, because it could burn the bottom of the pancake before it’s completely cooked. Once the entire top surface of the pancake has bubbles, reduce the heat to the lowest setting to continue cooking.
  2. I will recommend to use heavy thick high quality non-stick skillets if possible.
    If you use non-stick regular pans, apply a thin layer of oil might be needed and you will need to peek the bottom part occasionally as they generally burn more easily.
  3. After mixing the batter with baking powder, immediately pour the batter to the heated pan for optimum results. So make sure by this time, the heated pan is ready. 
  4. Instead of using Pure Creamy Butter, you can substitute it with regular salted butter.
  5. Best serve immediately while still warm. You can store left over in the fridge for 3-4 days.
  6. To reheat; 200° C oven for 10-15 minutes or 1000 W microwave for 1 minute (most of the fillings will be melt).

Lovely Taiwanese Pineapple Cakes/ Tarts

Hi Everyone, today we are making these “Lovely Taiwanese Pineapple Cakes”.
It is a crumbly and nearly melt-in-the-mouth pastry with the pineapple jam as the filling inside.

The difference with the Singaporean/ Malaysian pineapple tart is they are typically larger and made in square or rectangle shape.

I personally prefer the Taiwanese version coz the pastries have a rich distinctively crumbly milky taste and filled with a generous portion of sweet sticky chewy pineapple filling inside.

Pineapple cakes filling from commercial manufactures usually made of winter melon and Maltose Syrup so that the filling is extra sweet, heavy and sticky, which is not healthy.

They usually substitute all or part of the pineapple with winter melon, a vegetable in the squash family that is much cheaper than pineapple.

Since winter melon has little flavour, artificial flavours and colours are added to the pastries to make them attractive to consumer, and then Maltose syrup has been added to stiffen the fillling.

For this reason, I would like to show you how to make the healthier style of Taiwanese Pineapple Cakes which is hold up pretty well, so adorable and taste much fresher.

A lot of research went into perfecting these treats. But the end result was wonderful.
The key is the exterior, that’s how it will remain even after it is baked so you want the dough to be as smooth as possible. 

Pineapple Cakes before baking

So I actually found two versions of the crust that I liked, and there’s no need to put them in the fridge at all.

The first one I called a “basic dough” for the character’s body. It’s buttery, soft, yet also malleable and sturdy enough to hold its form.
And the second dough that I called the “colouring dough”. It’s soft and easy to work with, even for small details and also colour well with any kind of edible food colouring.

Is there anybody that wouldn’t want to box these as a present ? They are so cute, tasty, photogenic, everthing you could ever want!

They taste amazing when served slightly warm and paired with a cup of hot tea.
The buttery crust is rich and crumbly, filled with fruity sweet sour, chewy and sticky pineapple filling, they are absolutely delicious.

I really hope you Guys give it a try, they are a lot of fun to put together and they are pretty simple too! Love you all!!

LOVELY TAIWANESE PINEAPPLE CAKES
Yield: 10 pieces
Active time: 1 hour
Total time: 2 1/2 hours

INGREDIENTS
Pineapple Filling

  • 500 grams Pineapple (Chopped)
  • 120 grams Granulated Sugar
  • 20 grams Unsalted Butter
  • 30 grams Glutinous Rice Flour

Basic Dough

  • 100 grams Salted Butter (Cold)
  • 12 grams Icing Sugar
  • 22 grams Egg Yolks
  • 152 grams All-Purpose Flour
  • 24 grams Milk Powder

Colouring Dough

  • 25 grams Salted Butter (Cold)
  • 7 grams Condensed Milk
  • 3 grams Egg Yolks
  • 38 grams All-Purpose Flour
  • Food Colouring (Red, Soft Pink, Black, White)

INSTRUCTIONS
Pineapple Filling

  1. Cut off the pineapple skin, took off the core and coarsely cut them into chunks (if you use canned pineapple, make sure to adjust the sugar level. They will take longer to cook coz the heavy water content in the canned pineapple).
  2. Transfer the chunks into a non-stick pan, add in the sugar (since the sweetness of each pineapple is different, feel free to adjust the amount of the sugar accordingly). Cook over medium high heat. Stirring constantly until most of the moisture has evaporated. Don’t forget to adjust the heat level based on the water content that was left in the pan.
    *I suggest using a non-stick pan as it is sticky after when it becomes concentrated.
  3. When the pineapple is about to dry, looks translucent and a bit brownish, lower the heat, add in the butter. Stir continously until the butter melted and incorporated in the pineapple (the butter makes the pineapple fillings smoother and easier to handle during wrapping).
  4. For the binder, sprinkle in some of the glutinous rice flour. Add it gradually, to make sure that the flour are distribute evenly. Mix until well combined.
  5. Take it off from the heat, spread the fillings thinly on a large plate to cool completely.


Basic Dough

  1. In a large bowl, cream the butter and icing sugar until light and smooth.
  2. Add in the egg yolks, mix well 
  3. Pour in All-Purpose Flour and milk powder, mix until all the ingredients just combined and create a dough ball (do not overmix to avoid the formation of gluten, which will make the pastry less flaky).
  4. Cover them with a plastic wrap to prevent the dough dry. Set aside


Colouring Dough

  1. Combine the butter, condensed milk and egg yolks, mix well.
  2. Pour in the all-purpose flour, mix until it’s form a smooth dough.
  3. Colour it as needed (remember to always cover the dough with a plastic wrap to keep their moisture).


Wrapping, Decorating and Baking

  1. Divide pineapple filling into portions of 20 grams each, and basic dough 25 grams each.
  2. Roll each portion of pineapple filling into a ball.
  3. Flatten a portion of basic dough (you can do this in your palm or with a small rolling pin).
  4. And then place a portion of filling into the centre of the flattened dough. 
  5. Gently wrap the dough around the filling, pinching away and setting aside excess dough at the top and where the edges meet. 
  6. Gently roll the filled dough between your palms to form a smooth oval ball. 
  7. Using some basic dough and white colouring dough for the ears.
    Apply some white colouring dough for the face.
    Black dough for the nose, mouth and eyes.
    Soft pink for the cheeks and tounge.
    Using love shape plunger cutter to create the heart shape.
    And finally, use some basic dough to create her hands and legs.
    *Make sure the details sticks really well otherwise it will tilted or fall down while baking.
  8. Bake in the preheat 160°C oven for 20 minutes.
    Remove from the oven, allow  to cool slightly on the pan for about 20-25 minutes, and then transfer them onto a cooling rack to cool completely.


NOTES

  1. The dough will expand a bit when baked in the oven.
  2. You can use any food colouring for the “Colouring Dough” (powder, gel, liquid).
  3. Store the cakes at room temperature in an airtight container, the crust will have become more tender.
  4. Pineapple cakes turning mouldy even when stored in an airtight containers is due to the presence of too much moisture.
    Store pineapple cakes which are cooled to room temperature in an airtight container away from the sunlight for 3-4 days.
    Keep them refrigerated for up to 1 months.


Pao De Queijo (Chessy Dip Chewy Cheese Balls)

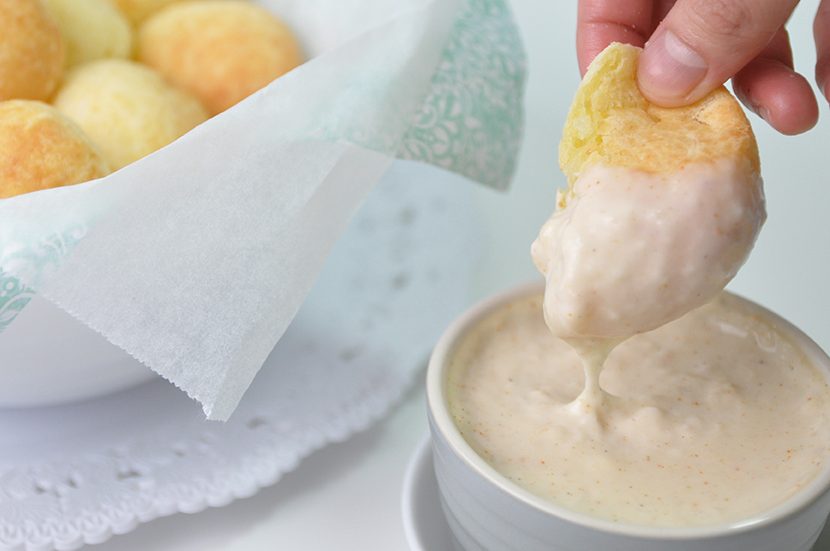
Hellooo friends and welcome back!! Today we are making some delicious “Chessy Dip Chewy Cheese Balls”  a.k.a “Pao de Queijo“.

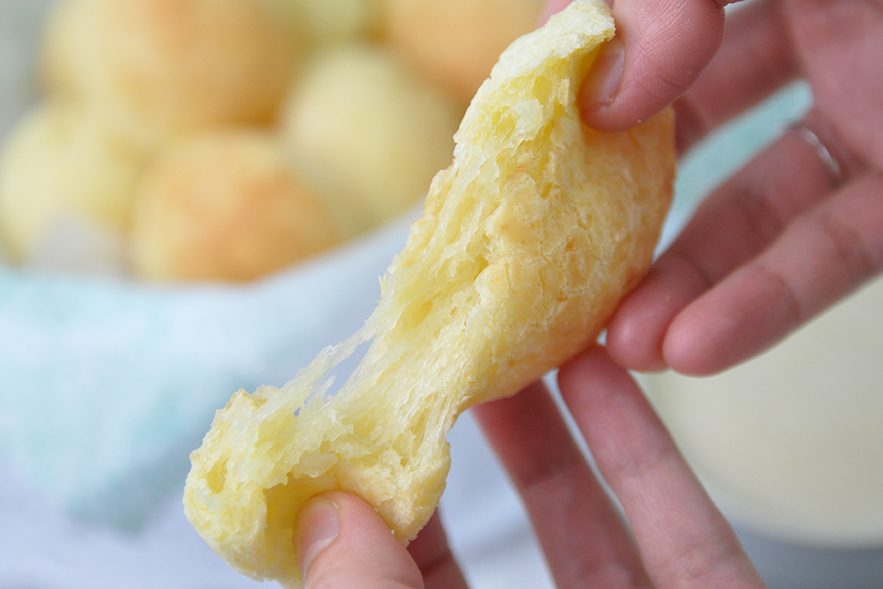
It was crunchy outside but amazingly soft and chewy inside, these little cheese balls with their addictive cheesiness, they are super easy to make at home.

These Brazilian Cheese Bread is tasty as it gets, since they are so flavorful due to the Cheese and the Tapioca Flour.

It’s really the most comforting and satisfying snack for a Cheese Lover .
These flavor was so haunting and I still dream about it. 🤤

However, it’s even better if you serve them with  these mild creamy and velvety chessy dip sauce.

🥲 I want !!

The recipe is super easy, fail proof and absolutely mouthwatering. Try to make these at home and go enjoy your ooey gooey “Pao de Queijo” !

WATCH HOW TO MAKE Pao De Queijo (Chessy Dip Chewy Cheese Balls)


CHESSY DIP CHEWY CHEESE BALLS (PAO DE QUEIJO)
Yield: 16 pieces
Active time: 20 minutes
Total time: 1 hours

INGREDIENTS
🧀 Cheese Balls
120 grams Milk
80 grams Water
3 tablespoons Vegetable Oil
200 grams Tapioca Starch
50 grams Eggs (beaten)
80 grams Parmesan Cheese (Grated)

🧀 Cheesy Dip
160 grams Milk
2 ⅔ teaspoons All-Purpose Flour
1/4 teaspoon Salt
1/4 teaspoon Ground Black Peper
1/4 teaspoon Ceyenne Pepper
40 grams Cheedar Cheese (Grated)

INSTRUCTIONS
🧀 Cheese Balls

  1. Preheat the oven to 180 C/ 350 F.
  2. In a medium saucepan, combine the Milk, Water and Vegetable Oil.
    Heat the mixture until just before it begins to boil, then take it OFF from the heat.
  3. Place the Tapioca Starch in a large bowl,
    Pour the Milk Mixture into a bowl of Tapioca Starch, then quickly combine the mixture (BE CAREFUL the mixture is quite hot, you can use a fork or wodden spoon to mix this).
  4. Add the beaten Eggs and continue mixing
  5. When the dough is cool enough to touch, you can knead it by hand
  6. Add the grated Parmesan Cheese; continue kneading the dough until the Cheese is mixed evenly.
  7. Take about 1 tablespoonful of the dough (about 35 grams each) and shape it into a ball.
    Place Cheese Balls onto a baking sheet lined with a parchment paper (Don’t worry if the balls are uneven, they will become round while baking).
  8. Bake it for about 20 minutes. Place the balls onto a cooling rack to cool down a bit.

🧀 Cheesy Dip

  1. In a medium saucepan combine Milk, Flour, Salt, Black Pepper and Cayenne Pepper (If you don’t like spicy, you can omit the Cayenne Pepper).
  2. Bring to a boil over MEDIUM heat, stirring constantly until slightly thickened. Remove from heat, add the grated Cheedar Cheese, stir until well combined.


NOTES

  1. Some people use All-Purpose Flour to make this; I personally don’t recommend it because you won’t get the chewy texture that you are you are looking for.
    So, better stick with the Tapioca Starch.
  2. You can adjust and add the amount of Cheese if you want.
  3. It’s best to serve it hot, coz it will be a bit tough when it’s gets cold.
  4. To reheat, either Microwave them on a paper towel for about 20 seconds (they won’t be crispy at all),
    OR if you want that crispy-chewy texture, pop them in a 350 F oven for about 8-12 minutes. Keep an eye on them so you don’t end up burning them.

Homemade Healthy Caramel Popcorn (No Bake) Free of Corn Syrup and Baking Soda

Hi Everyone, today we are making these “Homemade Healthy Caramel Popcorn” .
This Easy Homemade Caramel Popcorn is super delicious, it’s buttery, crunchy, sweet, caramely and salty all at once.

I love everything about this recipe, especially that it only requires a few inexpensive ingredients that I usually have on hand and it could not be easier to make ☺️

It’s pretty foolproof, and you DON’T need Baking Soda, Corn Syrup or a Candy Thermometer like a lot of Caramel Popcorn recipes call for.
In my opinion, this is a healthier way to make Caramel Popcorn.

😉 Unpopped popcorn kernels are super easy to find. You can generally find them at the supermarket.

I love to buy an expensive container of white kernels from Bob’s Red Mill.
That’s because Bob’s Red Mill Whole White Popcorn Kernels are contain the perfect moisture content for optimum popping.

When these premium kernels pop, they burst their hulls and transform into wonderfully fluffy blossoms of corn with a delightful crunch. https://www.bobsredmill.com/white-popcorn.html

🤩 are you ready for movie night??

I don’t know about you, but Caramel Popcorn and I are BFF’s.
It’s a super easy snack for movie night, or perfect to package up and give as gifts around the holidays!

WATCH HOW TO MAKE NO BAKE CARAMEL POPCORN


NO BAKE CARAMEL POPCORN
Yield: 8 Cups
Active time: 15 minutes
Total time: 1/2 hours

INGREDIENTS
🍿 Popcorn
100 grams Popcorn Kernels
2 tablespoons Vegetable Oil

🍿 Caramel
120 grams Granulated Sugar
30 grams Unsalted butter
1/4 teaspoon Salt


INSTRUCTIONS
🍿 Popcorn
Pour the Popcorn Kernels into 13-inch wok or bigger, then add in the Vegetable Oil, pop the lid on.
When popping starts, lower the heat to MEDIUM.
When popping slows down, turn OFF heat.
Wait till popping stops completely (which is when you think it’s stopped, plus 30 seconds) before removing cover.
Transfer corn to a bowl.

🍿 Caramel

  1. Pour Sugar into a wok. Over MEDIUM heat, cook till sugar starts to melt.
    Swirl wok to heat evenly till melted Sugar is reach just lovely rich amber colour (never stir the caramel otherwise it crystallizes)
    **Be carefull DO NOT over cooked or you might burnt the sugar
  2. Reduce heat to LOW, add Butter; stir till thoroughly mixed.
    Add Salt, mix well
  3. Tip Popcorn into wok.
    Caramel may now thicken because popcorn is cold or at most warm.
    Working fast, toss till corn is evenly coated. Turn OFF heat.
  4. Transfer Popcorn to a bowl, break into small pieces.
    Taste and sprinkle with more Salt if necessary.
    Serve immediately or keep in airtight container.

NOTES
With homemade Popcorn, you can adjust the sweetness to your preference.
I don’t have a sweet tooth, so for me this is just a perfect amount of Caramel.
Don’t reduce the amount of Sugar because the popcorn won’t be crunchy if there’s too little Caramel.
If you do have a sweet tooth, you can double the Caramel recipe.

Kawaii Mitarashi Dango

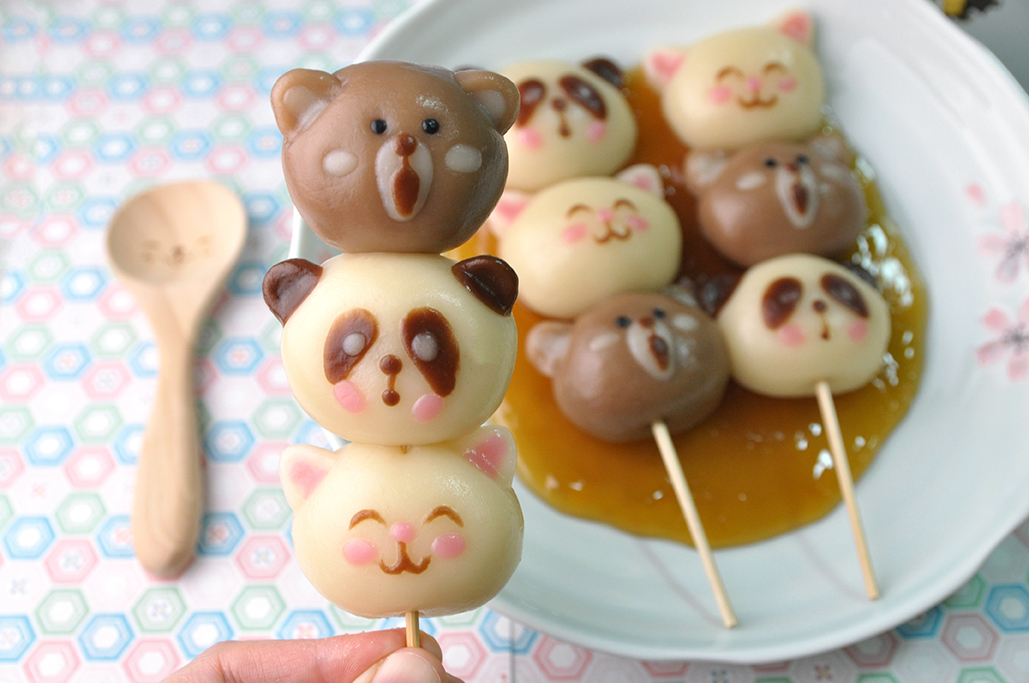
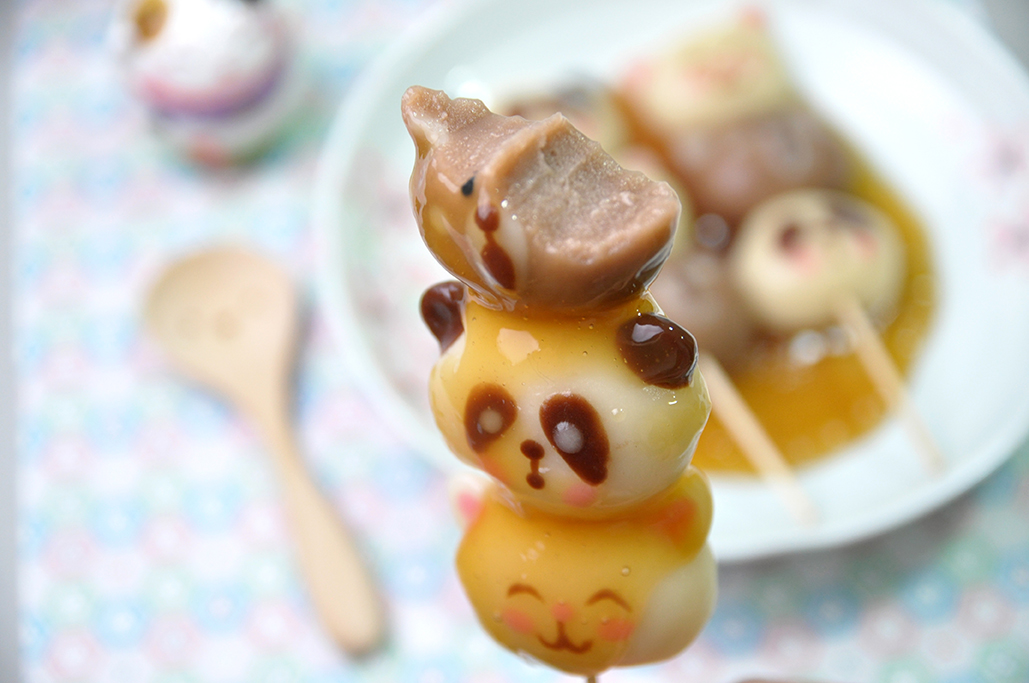
Hi Guys, today we are making these adorable “Kawaii Mitarashi Dango”.  Have you ever eaten Japanese confectionery DANGO? Small round sweet dumpling balls are skewered on bamboo sticks and covered with a gooey brown sauce.  

Mitarashi dango are my favorite traditional sweet, they are quite satisfying without being overly sweet 🤤

The shiny brown colored sauce (which is called Mitarashi Sauce) is sweet and savory at the same time.
It goes perfectly with the bland, slightly chewy Dango or dumplings (Dango is the name for unfilled solid dumplings.)

This traditional Dango dessert is not as difficult as you may think. I hope you enjoy these traditional snacks and a taste of history today!

WATCH HOW TO MAKE KAWAII MITARASHI DANGO


KAWAII MITARASHI DANGO
Yield: 18 pieces
Active time: 1 1/2 hour
Total time: 2 hours

INGREDIENTS
🍡 Dango
240 grams Glutinous Rice Flour
60 grams Icing Sugar
260 grams Japanese Silken Tofu
Cocoa Powder
Food Colouring (Black, Red)

🍡 Mitarashi Sauce
130 grams Water
20 grams Soy Sauce
10 grams Corn Starch
45 grams Brown Sugar


INSTRUCTIONS
🍡 Dango

  1. In a large bowl, mix together Glutinous Rice Flour, Icing Sugar and Japanese Silken Tofu. Simply mix the ingredients together until it’s form a dough ball.
    *If the dough is too dry, you can add more tofu and if it’s too sticky to handle just add more Glutinous Rice Flour.
  2. Once the dough reach the right consistency, you can start to colouring them (for the extra flavor, instead of using food colouring I’m using Cocoa Powder for the brown colour).
    *You can create any design and colour you want, just take note that after boiling, the colour will be darker than before, so be mindfull with the colour.
  3. Take about 20-25 grams of dough and roll it into a ball shape (for Teddy Bear, Lucky Cat and Panda head).
    Place EACH head onto a small piece of Greaseproof Paper, then add the details as shown in the video.
  4. To cook Dangos
    After finish with all the design, bring a small pot of water to a boil, then lower the heat to a simmer.
    Carefully lift the Greaseproof Paper; place the dangos into the simmering water (you can cook a few of them at a time). Remove the floating Greaseproof Paper.
  5. When Dangos start to float, that means they are ready to be picked up! (it will takes for about 3-5 minutes).
    Scoop them out and place it into a bowl of ice water so they don’t stick together.
  6. After cooling down a bit, take out the Dangos from the ice water, then simply stick the Dango into a skewer. Make sure that you stick it right in the middle of the head

🍡 Mitarashi Sauce
Put all the mitarashi ingredients in a saucepan, then set on a medium heat and bring it to a boil; Keep stiring until the sauce has thickened.
Pour it onto the Dangos and serve.

NOTES

  1. Dango comes with many different varieties, so they are usually named after the various seasonings served on or with it.
  2. In Japan, this Dango is easily found in markets or convenience stores and I think you also might find it at Japan store in your country.
  3. Some people use water to make these, but I’m prefer to use Tofu for a hint of extra flavor and it will give the Dangos a light and fluffy texture.
  4. It’s best to serve it hot, coz the colder it gets, the chewier it will become.
  5. Put the Dango in an airtight container and keep at room temperature up to 2 days.
    If you live in hot place, I recommend to put them in an airtight container or a ziplock bag and store them in the refrigerartor.
    If you can’t eat them after a day or 2, you might try freezing them (you can keep them for about a month in a freezer).
    When you want to eat them, It is the best to thaw them naturally at room temperature (this takes about 30-60 minutes) or you can Microwave it.
  6. As for the uncooked Dango, although you can freeze them in ziplock bag for up to 3 months, these method will dry them out and they cracked slightly around the edges.
    They did cook as per normal once they were dropped into the boiling water, but the cracked edges are not as perfect as you’ll like them to be, so better not freeze them too long.

Double Dark Chocolate Cupcakes

Hellloooo friends!!! Today we are making this “Double Dark Chocolate Cupcakes” This has been my go-to dark chocolate cupcake recipe for years now 😀 It makes the softest, PERFECTLY CHOCOLATY, moist and fluffy cupcake paired with whipped dark chocolate ganache frosting”.

The batter isn’t as thick as you would think. We don’t really want a super thick chocolate batter because that would yield a cupcake similar to brownies. Dense. We don’t want dense! We want spongey, cakey, and rich. So the batter is thin.

The chocolate cupcake just melts in your mouth, they are light and fluffy and stay moist for days. Seriously Guys, no other cupcake recipe can compare! I hope you make these Moist Chocolate Cupcakes and I know you Guys are going to love them!! Look forward to more videos coming soon 😊

DARK CHOCOLATE CUPCAKES
Yield: 6 pieces
Active times: 1 hour
Total time: 2 hours

INGREDIENTS
Cupcakes:

  • 30 grams Cocoa powder
  • 1/4 + 1/8 teaspoon Baking soda
  • 90 grams Boiling water
  • 45 grams Unsalted butter (melted)
  • 35 grams Vegetable oil
  • 150 grams Granulated sugar
  • 1/8 teaspoon Salt
  • 40 grams Eggs
  • 15 grams Egg yolks
  • 45 grams Heavy whipping cream
  • 95 grams All-purpose flour

Whipped Chocolate Ganache Frosting:

  • 80 grams Heavy whipping cream
  • 160 grams Dark Chocolate
  • 1 tablespoons Rhum (optional)

INSTRUCTIONS
Cupcakes:

  1. Preheat oven to 350 degrees Farenheit.
  2. In large heat proof mixing bowl, whisk together cocoa powder, baking soda and boiling water. Whisk until bubbling subsides and mixture is well blended, allow to cool for 5 minutes, set aside.
  3. Meanwhile, in a separate large mixing bowl, blend together melted butter, vegetable oil, granulated sugar and salt until well combined. Mix in egg and eggs yolk. Blend in lukewarm cocoa mixture. Then blend in heavy cream. Finally add flour and blend until well combined.
  4. Divide batter among 6 paper lined muffin cups filling each about 2/3 full. 
  5. Bake in preheated oven until toothpick inserted into center comes out clean, about 17 – 20 minutes. 
  6. Remove from oven and allow to cool in muffin pan several minutes before transferring to wire rack to cool.
  7. Cool completely then frost with whipped dark chocolate ganache frosting.

Whipped Dark Chocolate Ganache Frosting

  1. In a double boiler or in the microwave, melt dark chocolate and heavy cream together and stir until smooth.
  2. Let it cool in the fridge for about 1 hour or until you can spoon some out and keeps it’s form.
  3. Place in your hand mixer, add some rhum (as desired), whip until stiff. It should take for about 4-5 minutes.
  4. Pipe onto cooled cupcakes and top with sprinkles (optional).

NOTES

  • Store unfrosted cupcakes in an airtight container for up to seven days in the refrigerator or keep on the counter for two days.
  • Remove the cupcakes from the refrigerator an hour to two before you intend to eat them to allow them to come to room temperature.
  • The general rule is that classic ganache may stay at room temperature for up to 2 days then must be refrigerated. If you’d rather be safe (which I recommend), keep it refrigerated for all storage. 
  • Ganache can be frozen for up to 1 month. Thaw in the fridge then let come to room temperature before using.

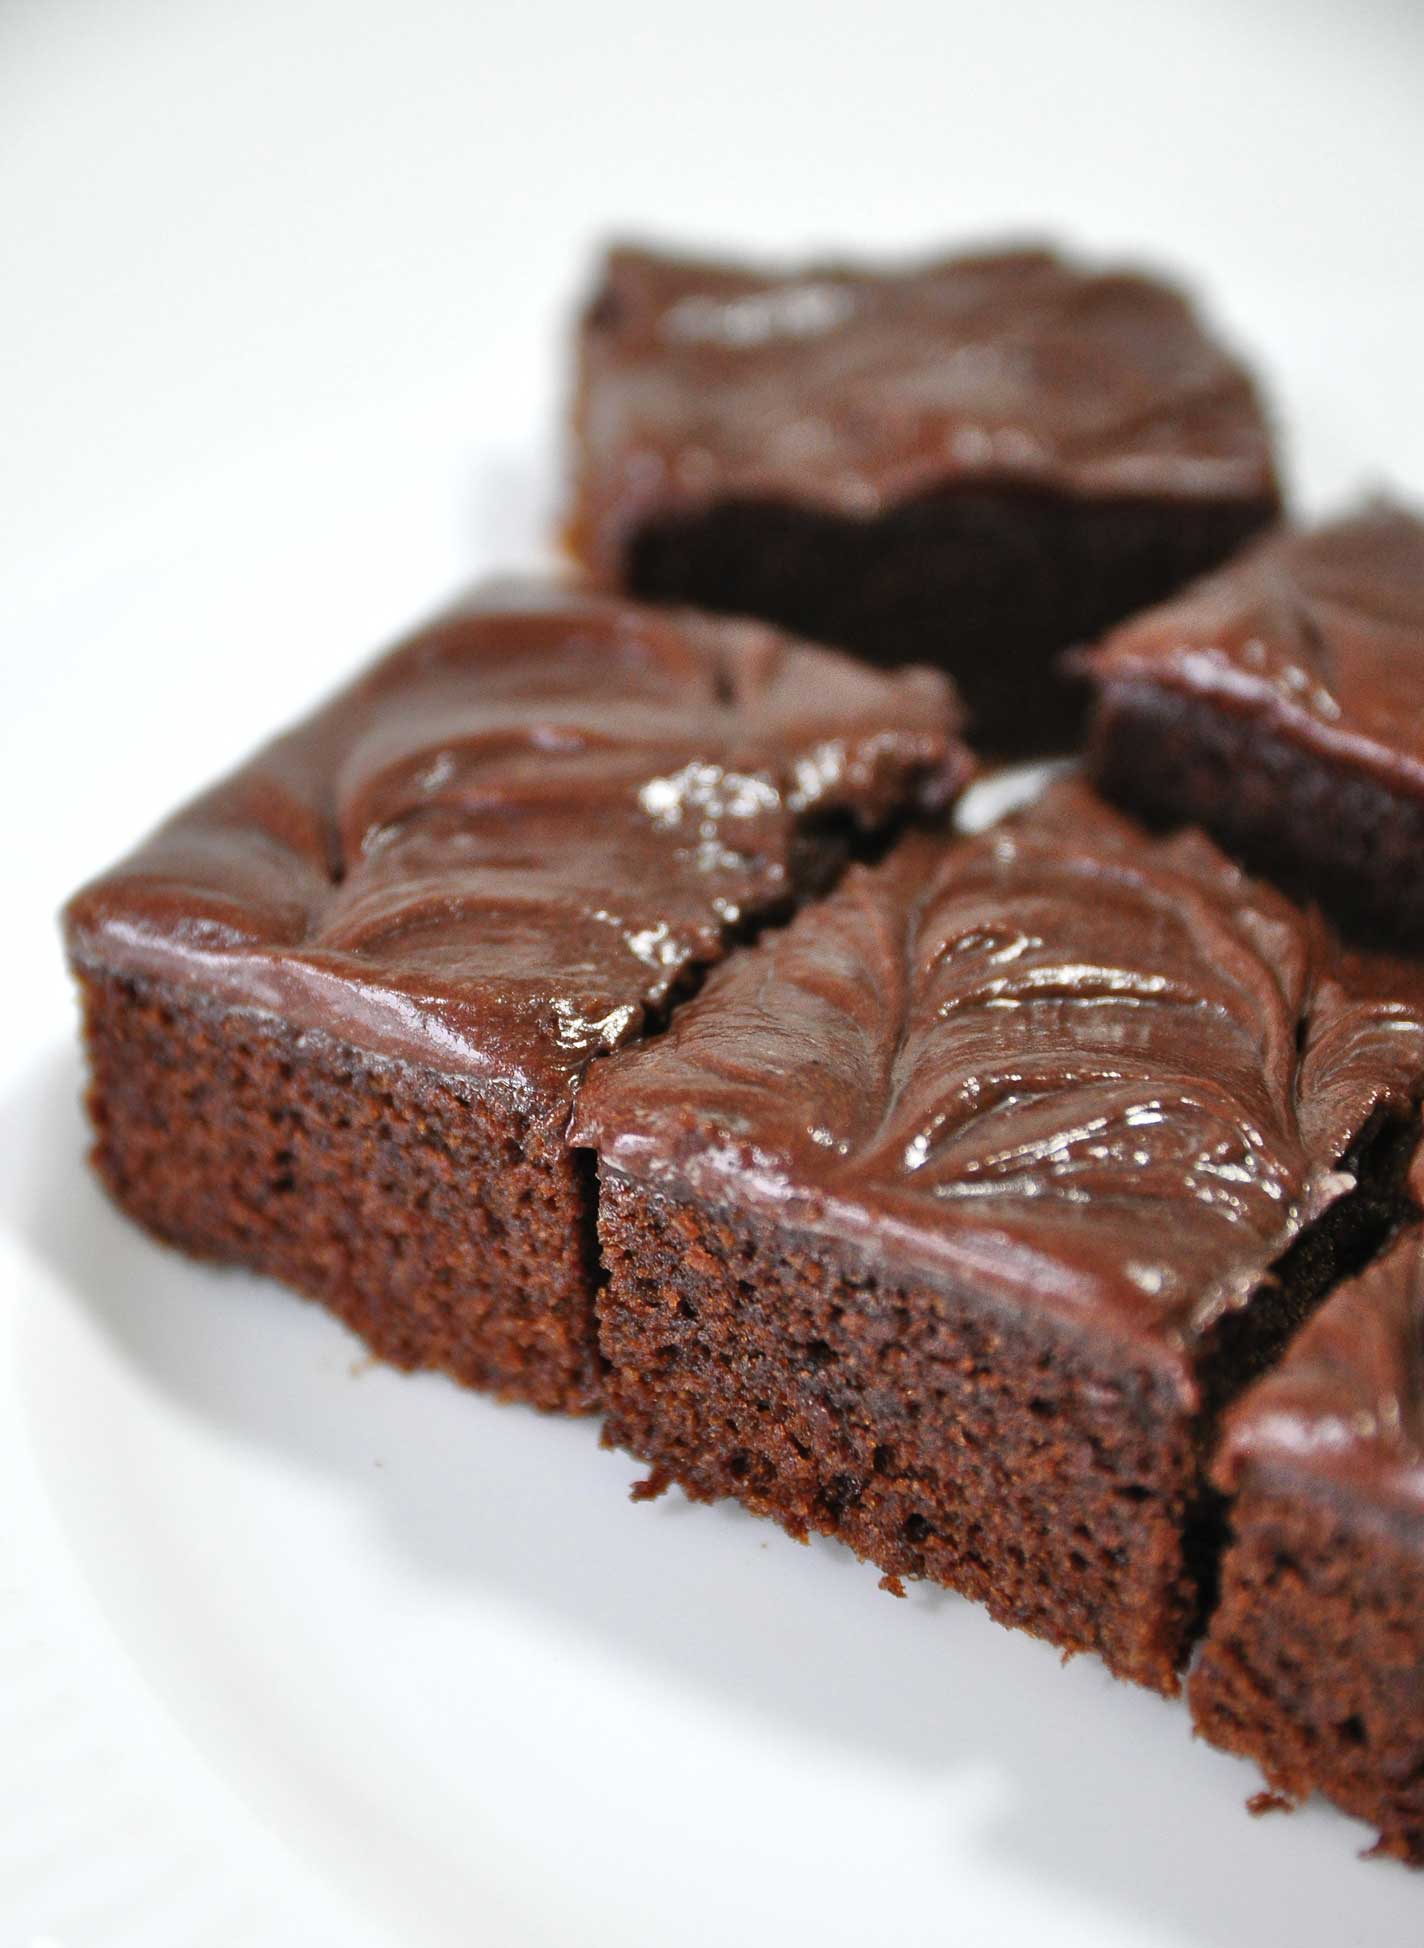
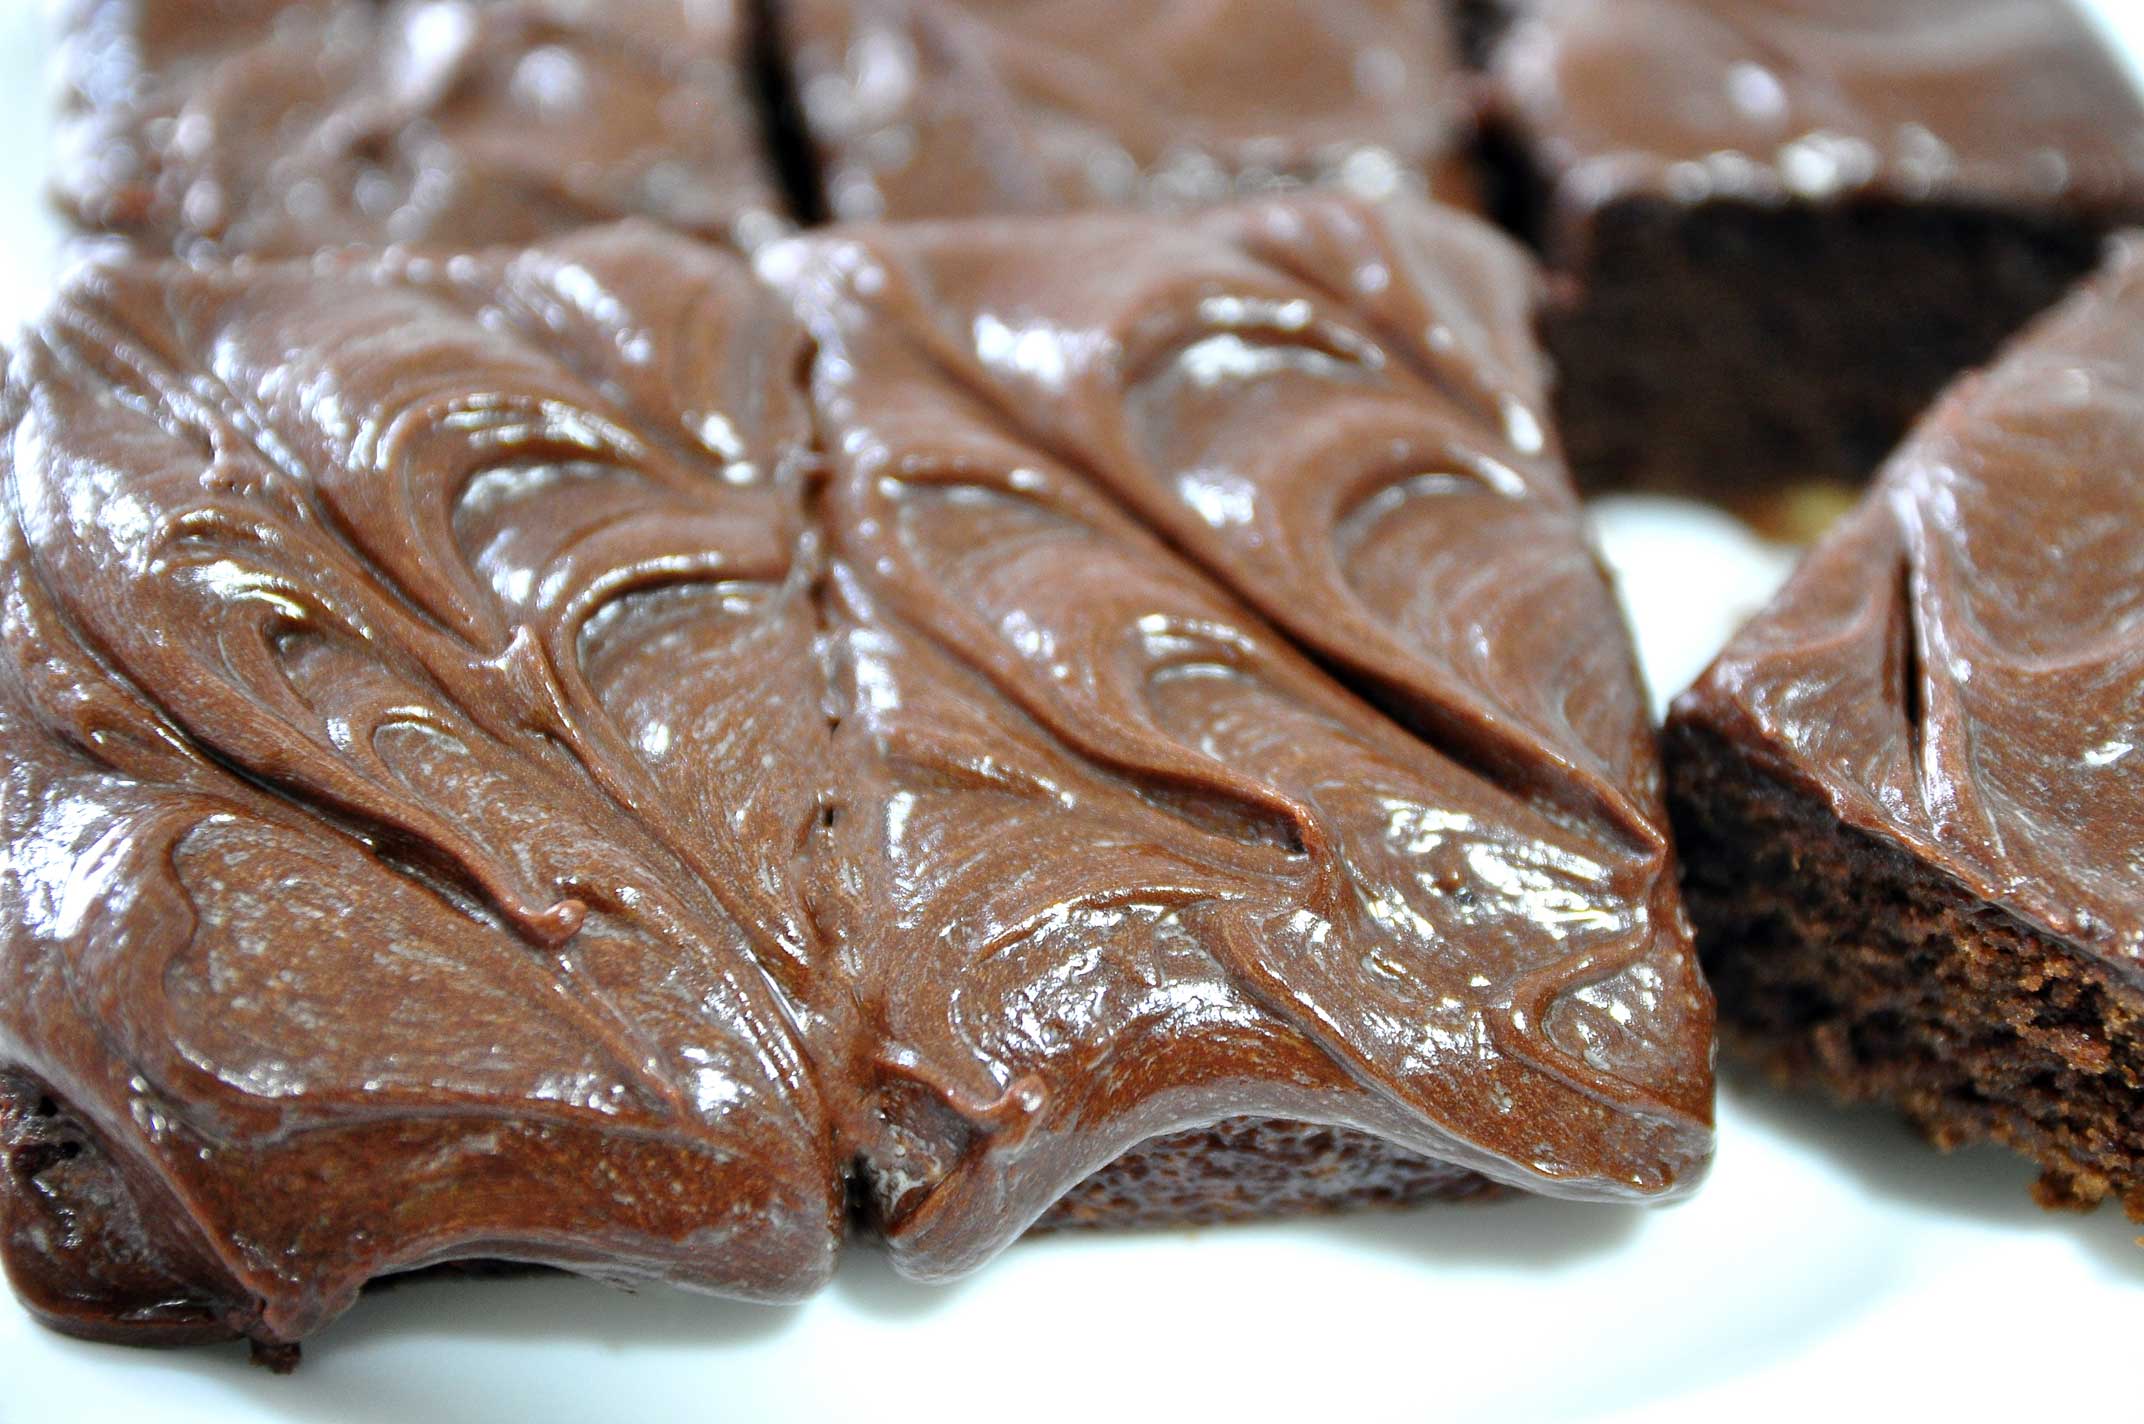
Chocolate Fudge Brownies

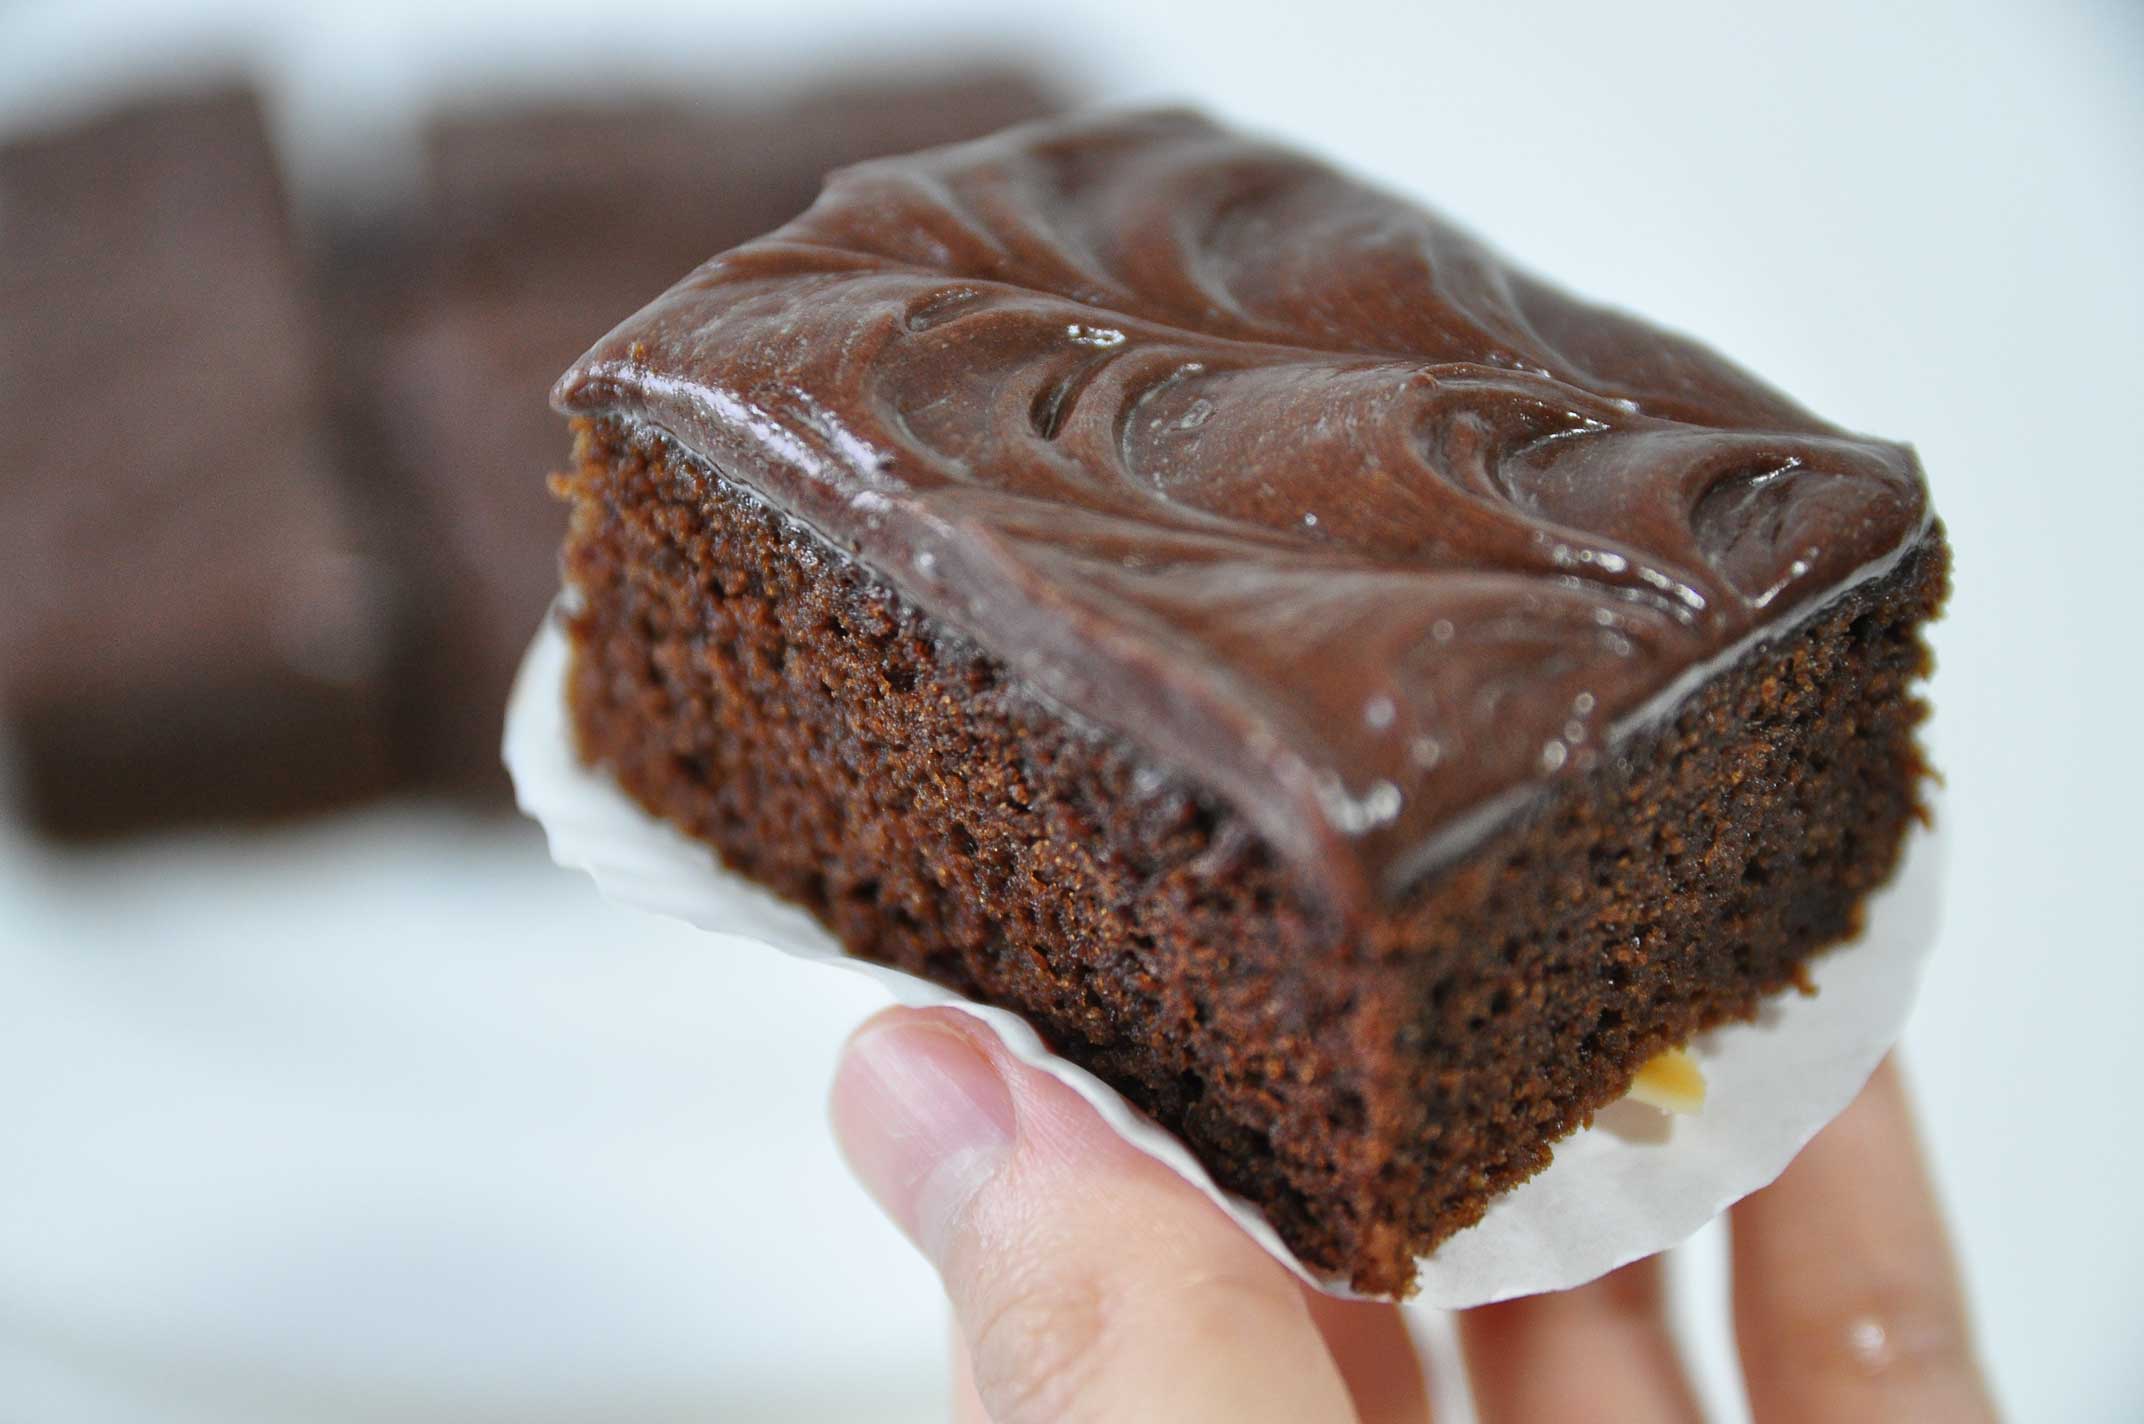
Hi Guys!!! how are you today?? Today we are making some Chocolate Fudge Brownies that I promise taste just as good as they look 🙂
After testing what feels like a lifetime of brownies, these FINALLY came out a perfect texture, and have been made weekly ever since.

These Brownies are so chewy and gooey with the addition of Fudge Icing on top you can’t go wrong! For those of you prefer a less sweet, more “adult style” icing I urge you to try them with Ganache Icing (you can find the recipe below)!


Just one bowl and 5 minutes bringing it all together to make the BEST freaking brownies you’ve ever eaten in this lifetime. I hope you enjoy the recipe and see ya soon!!!


CHOCOLATE FUDGE BROWNIES
Yield: 7-inch square pan
Active times: 1 hour
Total time: 1 1/2 hours

INGREDIENTS
Brownies

  • 42 grams all-purpose flour
  • 1/2 teaspoon baking powder
  • 1/4 teaspoon salt
  • 113 grams semi sweet baking chocolate
  • 75 grams unsalted butter
  • 100 grams granulated sugar
  • 2 eggs (100 grams)
  • 15 grams chopped nuts (as desired)


Fudge Icing

  • 13 grams granulated sugar
  • 1 tablespoon water
  • 8 grams corn syrup
  • 18 grams cocoa powder
  • 6 grams vegetable oil
  • 5 grams shortening
  • 16 grams corn syrup
  • 45 grams unsalted butter
  • 20 grams icing sugar

Chocolate Ganache Icing (less sweet “adult style” icing)

  • 80 grams Heavy whipping cream
  • 160 grams Dark Chocolate


INSTRUCTIONS
Brownies

  1. Preheat oven to 350 F/ 180 C.
  2. In a microwave safe bowl or over a double boiler melt the butter and the chocolate together (if using the microwave, on medium power 15-25 seconds at a time and stirring between each interval).
  3. Whisk together flour, baking powder and salt, set aside.
  4. In a large bowl, combine the sugar and the eggs. Whisk together vigorously to incorporate evenly. Add the melted chocolate and butter mixture, mix. Then add all of the dry ingredients at once and mix just until incorporated.
  5. Pour entire batter in prepared pan.
  6. Sprinkle nuts as desired.
  7. Bake for 17-20 minutes or until a toothpick inserted into center produces a moist crumb. Let it cool completely in a pan.
  8. When completely cooled, ice with fudge icing.

Fudge Icing

  1. For the simple syrup, combine the first 3 ingredients (sugar, water and 8 grams of corn syrup). Boil for about 2-3 minutes then pour into a bowl and allow to sit in the freezer to rapid cool while you gather the other ingredients.
  2. In a large mixing bowl with, add the cocoa powder and cooled but still warm simple syrup and mix until it forms a firm mass. Add the vegetable oil, shortening, butter and 16 grams of corn syrup and mix well. Then add the sifted confectioners sugar a little bit at a time and mix until smooth.

Chocolate Ganache Icing

  1. In a double boiler or in the microwave, melt dark chocolate and heavy cream together and stir until smooth.
  2. Once cooled, just spread the icing on the brownies .

NOTES

  • Iced brownies in an airtight container, at room temperature best eaten within 1 to 2 days.
  • A whole pan’s worth, uncut and well wrapped in plastic, will keep at room temperature for up to 3 days, 5 days in the refrigerator, and up to 3 months in the freezer.
  • To thaw the frozen brownies leave the cut up brownie squares to thaw at room temperature for two to three hours, then reheat the brownies using a microwave or a toaster.