Homemade Assorted Biscuits|Inspired by Kong Guan

Hey Guys, today we are making these “Homemade Assorted Biscuits”.

As a 90s kid, Khong Guan was my favourite brand for snacks. A huge tins of assorted biscuits which contain at least 5 varieties of biscuits with plain and sugar icing swirl in the middle.
I don’t know if children nowadays still take Khong Guan, but for my generation and before me, this is what our childhood was made of. 

Classic Kong Guang Biscuits

My personal favourite are their cream sandwiches. These bit-sized little biscuits are addictive and are really tasty, specially the creamy chocolate flavour.  I grew up with them and it’s still as tasty as before.

The cream biscuits are buttery, and slightly sweet, without being excessively oily like many of the other biscuits on the market. 

As I grew up and learned baking, I still love them, but I try to avoid consuming any artificial food flavours as much as I can.

So I was thinking of making my own healthier version of assorted biscuits. With this recipe, you can make 6 flavours with 1 dough.
The flavours are endless, feel free to make any flavour you like, just remember that you need to combine the flavour ingredient with hot milk first before you mix it into the dough.

Cookie Cutter Collection

You can create any shape you want, these are some cookie cutter collection that I had.
The round and square brown colour vintage style cookie cutter with embossing words in the middle (I bought in Daiso) are my favourite, it’s really similar to the real Kong Guan biscuits.

Raw Dough

I am using 3 mm thickness ring for the rolling pin. Try not to roll more than 4 mm thick as the dough will be rise up while baking. 

It’s not necesarry to spare a lot of space in between the biscuits, coz the dough doesn’t tends to spread while baking

Look how beautiful this vintage biscuits!

And please note that always bake equally sized biscuits together to make sure they are cook in the same time. 
If you mix different sizes, the small ones are already cooked when the larger ones are still raw in the middle.

Light and crispy texture

Some people like to have them just plain without any icing. I personally love to fill them with some creamy icing as a sandwich biscuits to bring back some memories of my childhood days. 

Beautiful Vanilla Flavour

You can use small spatula to apply the filling, I found that using piping bag is easier for me, so I can reach the edge of the biscuit.

Perfecto!

No need to be so perfect, and if you have a huge sweet tooth, you can add a little bit more icing and vice versa.

Chocolate flavour is a must!

I like to apply huge filling for my chocolate sandwich biscuits because it’s so… yummy…

Matcha for green tea lovers

Some matcha flavours for green tea lovers? The bitterness from the green tea powder perfectly balance the sweetness of the icing sugar.

I love coffee so much, specialy with this adorable Rilakkuma cutter

And if you have a cute cookie cutter it will be even more perfect!

How about some fresh fruity rappberry?

Gets bored with sweet and bitter flavours? Add some fresh sour fruity flavour to compliment the biscuits.

Blue Pea Almond make the biscuits more interesting!

Last and the most important; create 1 flavour that makes people curious, your biscuit box will be so much fun!

Place them in individual cupcake case and store in an airtight jar or maybe a vintage box.

My favourite way to eat them was to bite off the biscuit before the icing sets hard so the icing melts in my mouth.
It’s really light in texture, crunchy, not too sweet, heavenly assorted sandwich biscuits! I’m sure your kids are gonna love them so much!

Looking for special gift for someone? These homemade biscuit box works best!!
I hope that you will enjoy the recipe, Love You Guys!


HOMEMADE ASSSORTED BISCUITS
Yield: 18 pieces sandwich biscuits
Active time: 1 hours
Total time: 2 hours

INGREDIENTS
Biscuit Dough:

  • 260 grams All-Purpose Flour
  • A pinch of Salt Less than
  • 1/2 teaspoon of Baking Soda
  • 1/2 teaspoon Vanilla Extract
  • 60 grams Unsalted Butter
  • 150 grams Condensed Milk
  • 4 tablespoon Milk (hot)
  • Food Colouring and Flavouring


Creamy Icing Filling:

  • 100 grams Canned Butter
  • 125 grams Icing Sugar
  • 1 teaspoon Vanilla Extract
  • Food Colouring and Flavouring

INSTRUCTIONS
Biscuit Dough

  1. In a large bowl mix all the dry ingredients (flour, salt and baking soda).
  2. Add in the unsalted butter, rub in with your fingers until the mixture looks like fine crumbs.
  3. Pour in the condensed milk, stir a while with a spatula, then using your hand continue kneading, gather all the small crumbs until the dough comes together and form a smooth ball (do not over mixed or it will end up with a tough biscuits).
  4. Divide the dough into 6 equal portions (78 gr each), always cover the dough with a plastic wrap so it doesn’t dry up.
  5. To create flavour variations
    I suggest working on the dough one flavour at a time so the dough won’t sit to long and becomes greasy.
    – Vanilla: add 1 portion of the dough with 2 teaspoon of hot milk, mix well.
    – Chocolate: diluted 2 teaspoons of cocoa powder with hot milk, mix it with 1 portion of the dough.
    – Matcha: diluted 1/2 teaspoon of Matcha Powder with hot milk, mix it with 1 portion of the dough. – Coffee: diluted 1 teaspoon of instant coffee with hot milk, mix it with 1 portion of the dough.
    – Raspberry: diluted a bit of red food colouring with hot milk, mix it with 1 portion of the dough.
    – Almond: diluted 1/4 teaspoon of blue pea powder with hot milk, mix it with 1 portion of the dough.
  6. To roll the dough
    To maintain each shapes make sure that every pieces cut on top on their own greaseproof paper that will be bake later.
    The dough is quite sticky, I suggest to place the dough in between greaseproof paper so in won’t stick to the rolling pin.
    Using 3 mm thickness ring for the rolling pin, roll the dough and cut it with cookie cutter.
    * Try not to roll more than 4 mm thick as the dough will be rise while baking.
    It’s not necesarry to spare a lot of space in between the biscuits, coz the dough doesn’t tends to spread while baking.
  7. Bake them in the preheated 160 C oven for about 10-12 minutes, depending on size or until golden brown around the edges.
  8. Take it off from the heat and transfer to a rack until cooled completely.

Creamy Icing Filling

  1. Simply combine the canned butter, icing sugar and vanilla extract. Mix them until completely smooth.
  2. Divide into 6 equal portions (40 gr each), add in the extracts or flavour powder:
    – Cocoa: add 2 tsp cocoa powder to 1 portions of icing
    – Matcha: add 1 tsp matcha powder to 1 portions of icing
    – Coffee: diluted 1/2 tsp of instant coffee, add in with 1 tsp of cocoa powder to 1 portion of icing.
    – Raspberry: add 1/2 tsp of raspberry powder to 1 portion of icing
    – Almond: add 1/4 tsp of blue pea powder and 1/2 tsp of almond extract to 1 portion of icing.

Assembly
Sandwich the plain biscuits with the icing filling and vice versa, place it in an airtight jar, Let it sets hard for at least 2 hours before eating.

NOTES

  1. Always bake equally sized biscuits together to make sure they are cook in the same time.
    If you mix different sizes, the small ones are already cooked when the larger ones are still raw in the middle.
  2. Don’t re-roll dough more than 2 times or it will become tough.
  3. Make sure that you store the biscuits in an airtight jar or container, so the crunchiness can last longer.
  4. For the filling; you can substitute canned butter with either margarine, shortening or ghee if you like.
  5. Stored properly, biscuits should last for up to 2 week at room temperature.

Sumikko Gurashi Mochi Browniesicle

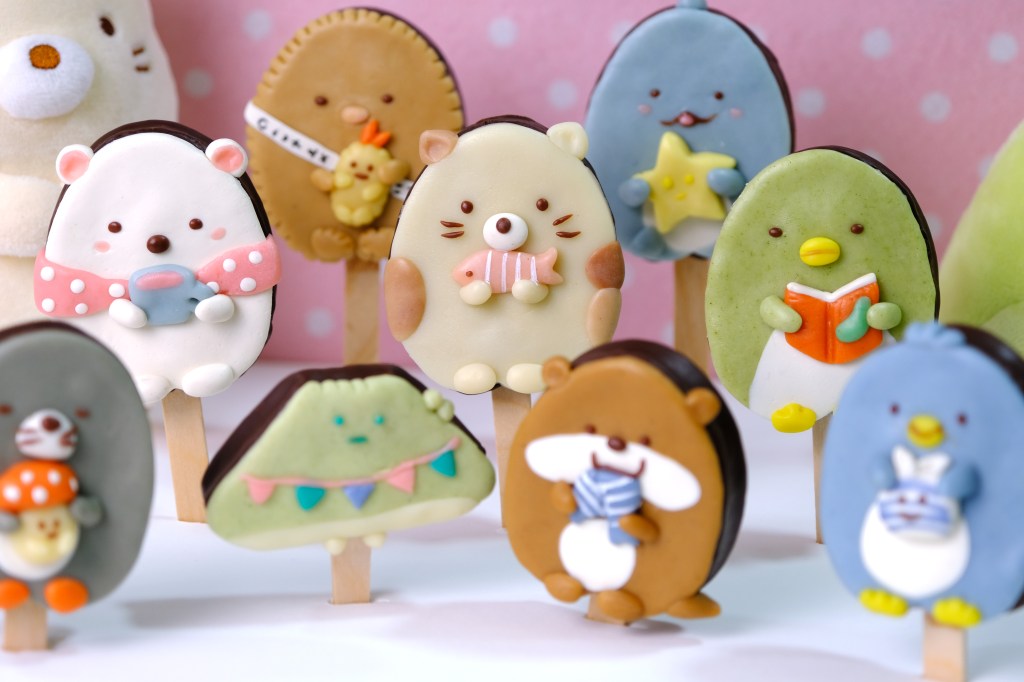
Hey Guys, today we are making these “Sumikko Gurashi Mochi Browniesicle”. Adorable chocolatey fudgy chewy brownie on a stick.

They are the perfect blend of “Japanese Butter Rice Cake” with “Classic Brownies”, crispy on the outside and ooey-gooey mochi-licious on the inside.
They look just like traditional brownie but a lot less sweet than normal brownies.

Are they so Kawaii?

It’s important to use glutinous rice flour (or Mochiko — sweet glutinous rice flour) for these brownies. It does not contain gluten and gives us the chewy, sticky mochi texture that we want.

These brownies come together quickly, paired with melted and modelling chocolate, pack a serious chocolate punch!

The exterior is similar to Brownie, but the interior is chewy like Mochi

Look! It has a crackly shiny crust, crispy edges and also a rich chocolate flavour and a chewy texture. It is the perfect blend of brownie and mochi.

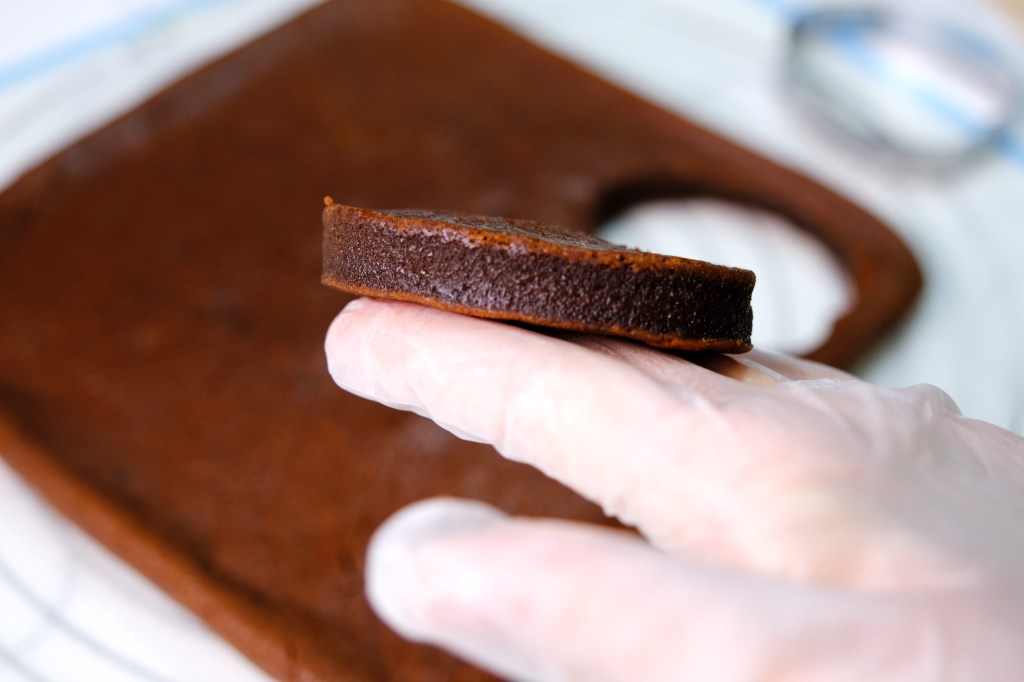
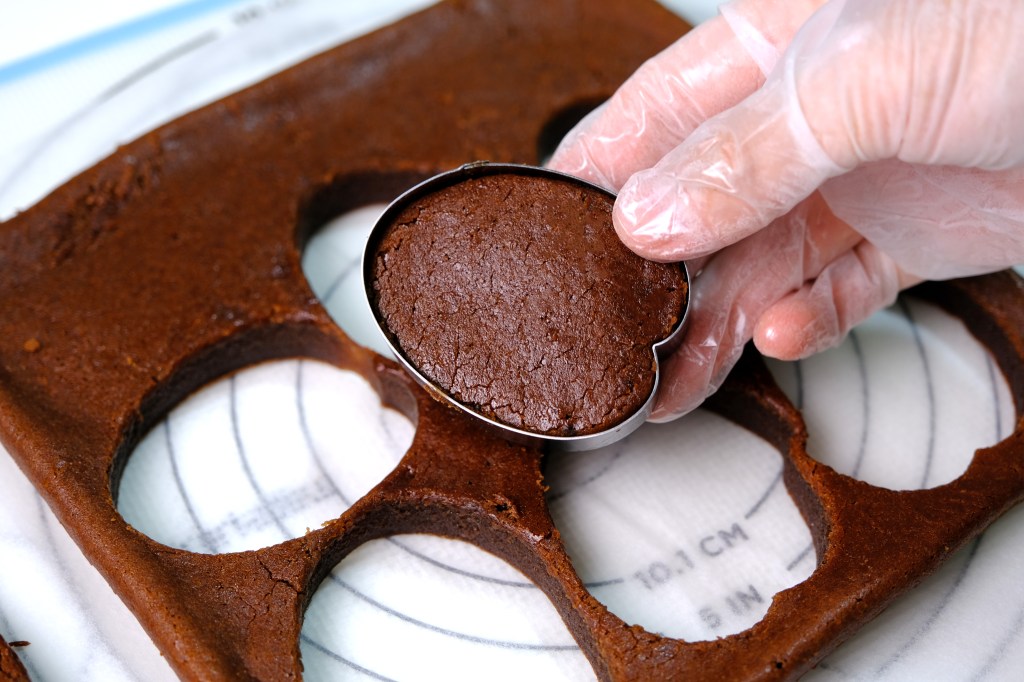
And when still hot, they are more sticky and difficult to cut, so make sure the brownies cool completely before cutting.

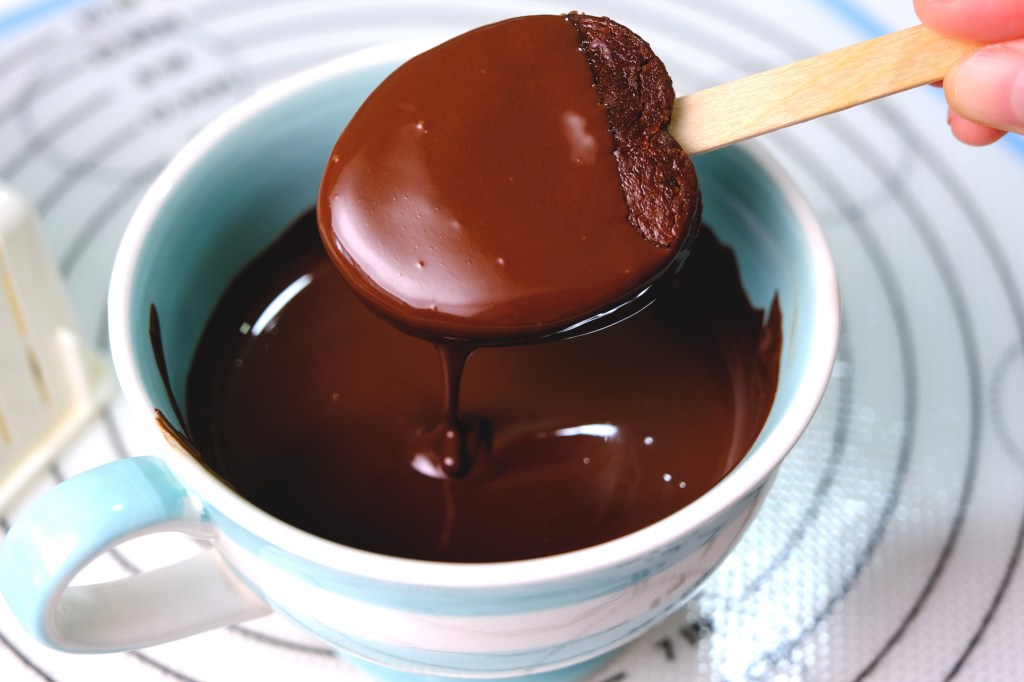
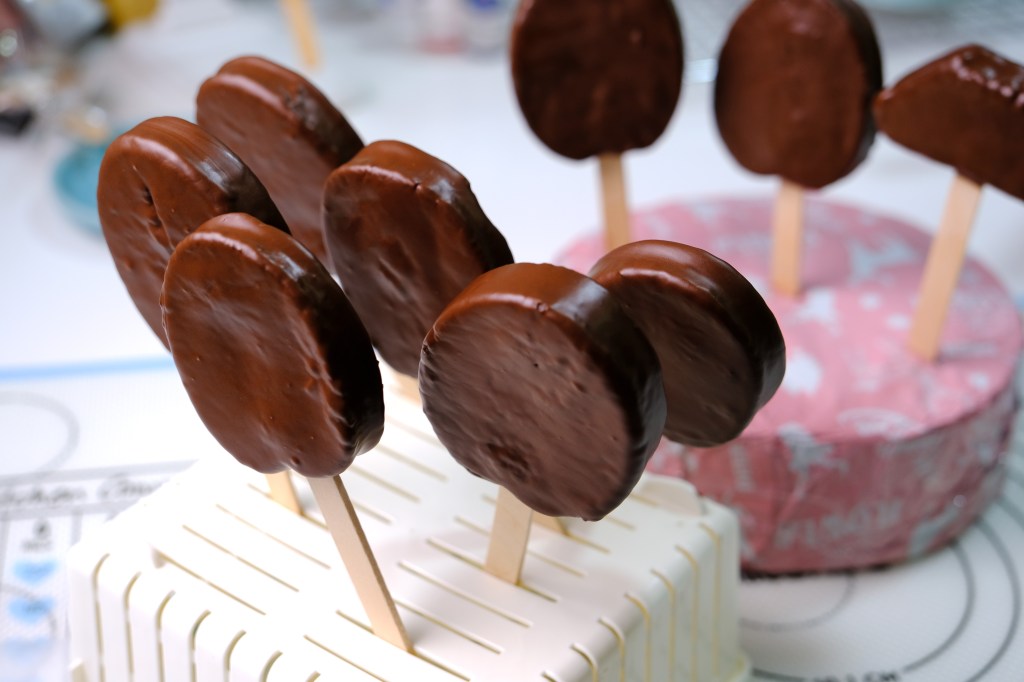
Then simply insert regular popsicle stick into the base of the brownie, cover them with melted dark chocolate and then decorate each character with modelling chocolate.
I love modelling chocolate so much as they are really flexible mouldable delicious clay and there’s no special food colouring require to color the chocolate.

It’s not necessary to use expensive Couverture Chocolate, I found a good dark and white compound chocolate (or candy melts) works best for texture and still tastes pretty good.

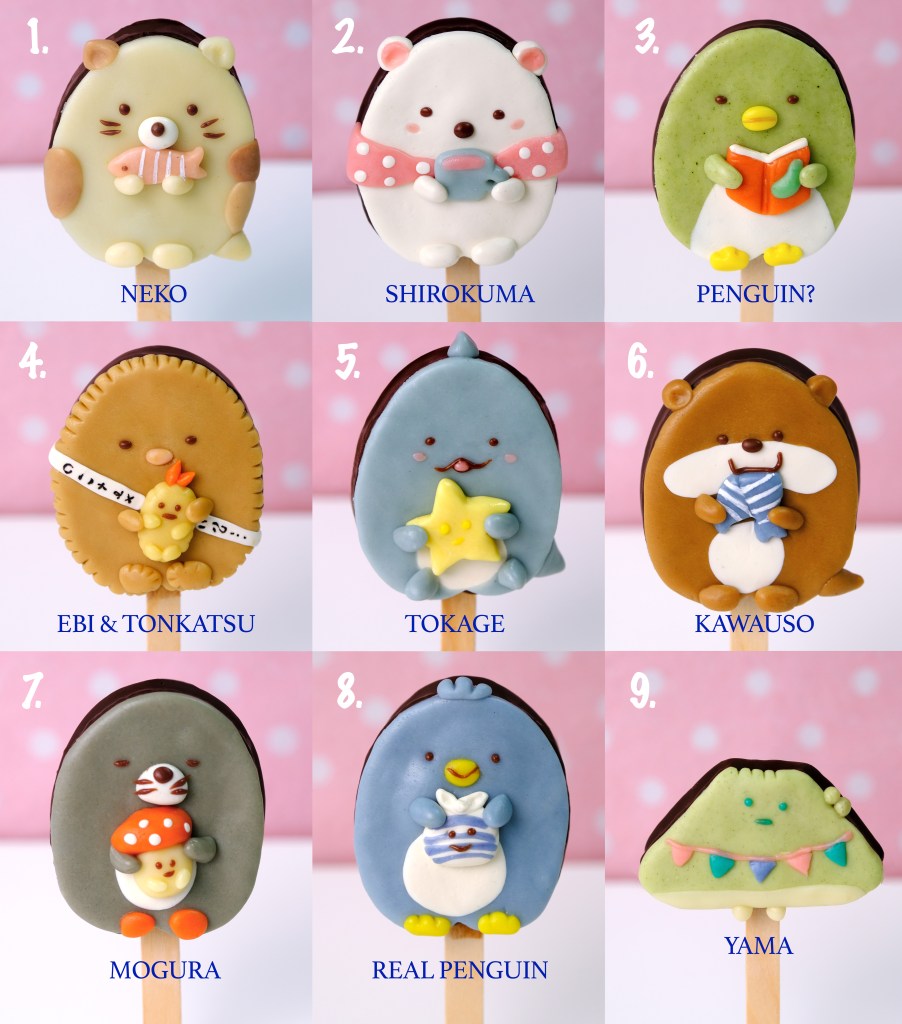
I will create my favorite 9 characters: 5 larger pieces for the main characters “Sumikko”, 3 smaller side characters “Minikko” and 1 piece for lovely Mount Fuji “Yama”.
It can be any design or character you want… The sky is the limit!

And can you imagine, what do you get when Mochi and Chocolate Brownies get together???
I’m sure after you tasted it, you may never want to go back to eating plain fudge brownie ever again!

Which one is your favourite character?

They are a perfect gift, dessert or snack for when you get the nighttime munchies, and make sure you pour yourself a really nice glass of cold milk or hot coffee. Because you can’t have brownies without milk or coffee, just like cookies.

Very Chocolatey Ooey-Gooey Mochi-licious on the inside

I hope that you give this recipe a try , it’s really fun, so tasty and I’m sure you are gonna love them.
For all the chocolate lovers out there, enjoy the recipe and happy baking!
Love You All!!

SUMIKKO GURASHI MOCHI BROWNIESICLE
Yield: 9 pieces (8-inch Square Pan)
Active time: 3 hours
Total time: 4 hours

INGREDIENTS
White Modelling Chocolate:

  • 300 gr White Chocolate Compound or White Candy Melts
  • 70 gr Corn Syrup
  • Food Colouring


Mochi Brownies:

  • 35 gr Unsalted Butter
  • 190 gr Milk
  • 35 gr Vegetable Oil
  • 125 gr Brown Sugar
  • 1/2 teaspoon Vanilla Extract
  • 30 gr Eggs
  • 150 gr Glutinous Rice Flour
  • 20 gr Cocoa Powder
  • 1 teaspoon Baking Powder
  • 1/8 teaspoon Salt

INSTRUCTIONS
Modeling Chocolate

  1. Melt the chocolate in the microwave or a double boiler (let it cool to the touch). Add the corn syrup, stir just until it turns into a thick, smooth paste.
  2. Pick up the dough as soon as you can easily handle it and knead it over the bowl (knead out as much oil as possible).
  3. Pat the surface of the dough with some paper towel to sop up the oil (pat the dough quickly because the dough is quite sticky at this stage, if the paper sits too long it will get stuck in it).
  4. Once patted dry, wrap it tightly in plastic. Store in an airtight container.
    Allow the dough to sit 8-10 hours at room temperature or at least 1 hour in the fridge to set faster.


Mochi Brownies

  1. Preheat the oven to 180° C, grease and line pan with parchment paper.
  2. Place the unsalted butter and milk in small pan, cook over medium low heat until the butter melted. Take it off from the heat and pour it into a bowl.
    Add in the oil, sugar and vanilla extract, mix until all the sugar dissolved and well combine.
    Allow to cool slightly before you add the egg yolks (we don’t want it turned into scramble eggs).
  3. In another bowl combine all the dry ingredients, mix well.
    Pour in milk mixture onto the dry ingredients, do not over mix, whisk until just combined and no lumps remain.
  4. Pour the batter into the prepared pan (the batter will be on the thinner side).
    Tap few times to remove air bubbles and then bake for about 20-25 minutes or until toothpick inserted to the center comes out clean.
  5. Take it off from the heat, remove it from the pan, peel the parchment paper and let them cool completely on a cooling rack.


Decorate

  1. Cut mochi brownie according to the template.
  2. Insert regular popsicle stick into the base of the brownie until it’s about almost to the top.
  3. Dip them into a melted dark chocolate, tap a bit to get off any excess, stand these brownies up in a block of Styrofoam until the chocolate is completely hardened.
  4. Colour modelling chocolate as needed and start decorate the browniesicle (kindly follow video instructions)

NOTES

  1. When still hot mochi brownies are more sticky and difficult to cut, so make sure it cool completely before cutting.
  2. Remember when making or working with modelling chocolate are to never overheat and never overwork the mixture when it’s warm. On extremely hot days have a shelf in the freezer set aside so you can pop the piece/pieces you are working on in the freezer for a few minutes to firm up before you continue to work on it.
  3. There is no special food colouring required to colour Modeling Chocolate.
    Modeling Chocolate already has liquid in it (corn syrup) so adding more won’t hurt. I like to use regular gel food colours like Americolor.
  4. Mochi browniesicle serve freshly made.
  5. To store; 2 days at room temperature, 3 days in the fridge or freezer for up to 1 month.
  6. Please note; after 2 days in the fridge or 1 day in the freezer, they will lose the chewiness and the texture will becomes like normal brownie.

Quick and Easy Nerikiri Wagashi

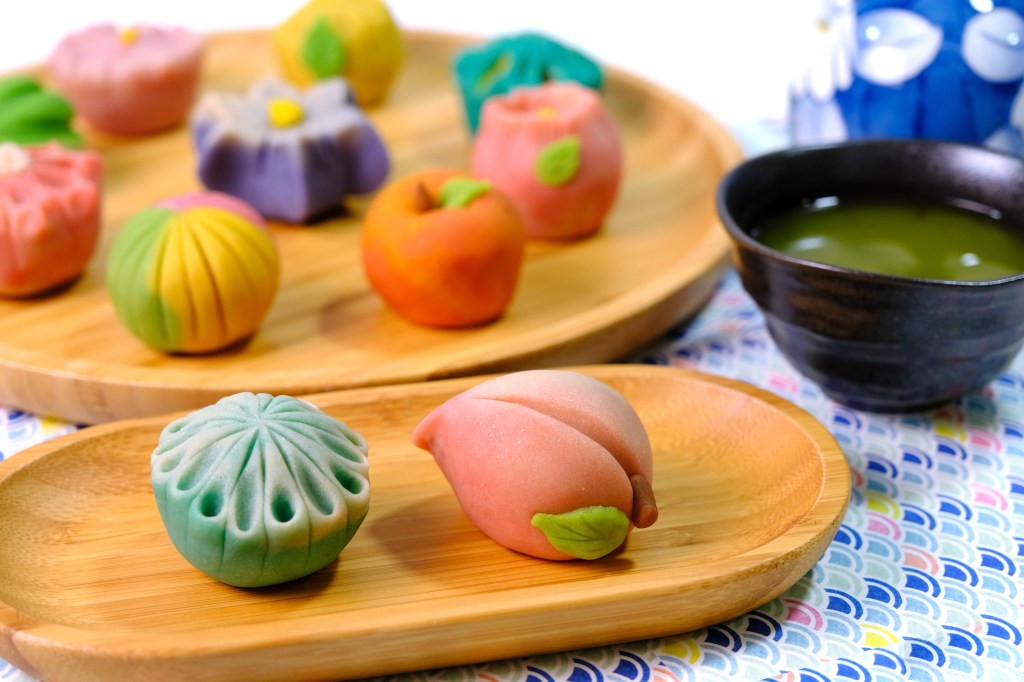
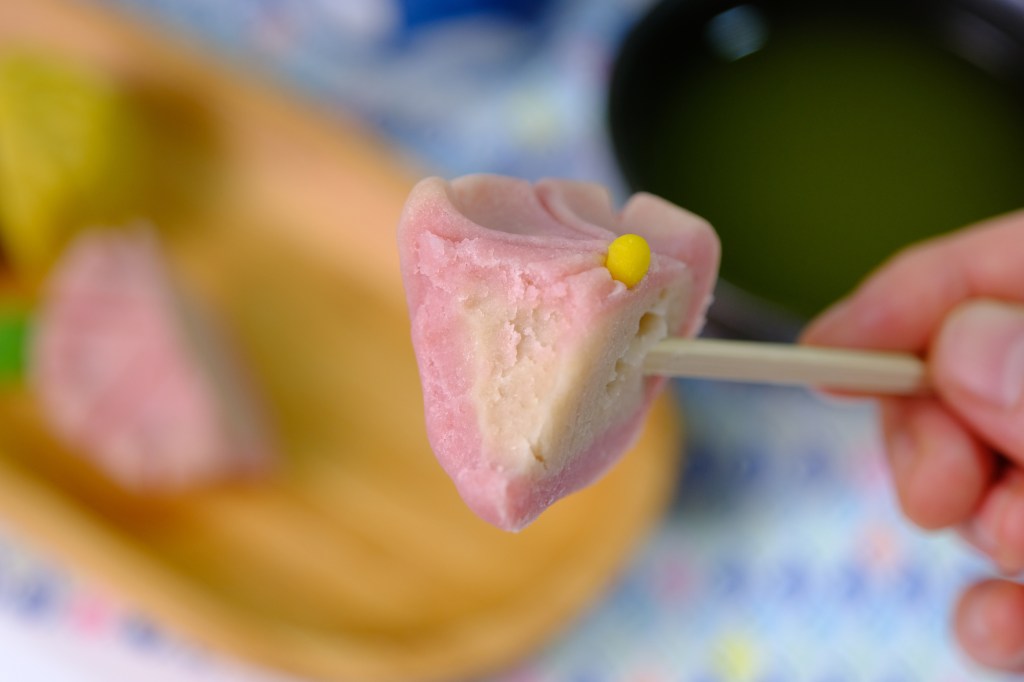
Hey Guys, today we are making these beautiful Japanese dessert “Nerikiri Wagashi”. The word of wagashi refer to Japanese traditional sweet which are delightful tea treats eaten across Japan.

Compare to the other type, I found that Nerikiri is the most artistic and interesting wagashi that meticulously hand-carved.

Shiro-An (White Bean Paste)

The outside layer Nerikiri dough made by combining white bean paste  called Shiro-An with the soft mochi dough called Gyuhi. 

By adding Gyuhi, it adds a smooth chewy texture to it. A very moldable malleable type of paste that can be design into various shapes.

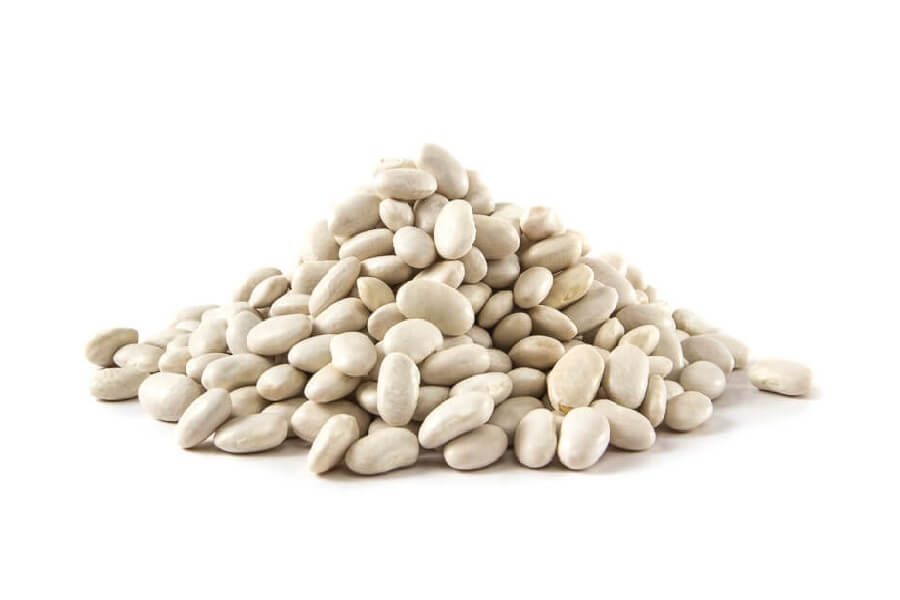
Lima Beans

And while you can easily buy red bean paste in Japanese or Asian grocery stores, premade white bean paste almost impossible to find outside of Japan. 

It’s actually quite simple to make from fresh Lima or Navy beans, but that kind of beans are also hard to find and the process does take some time.

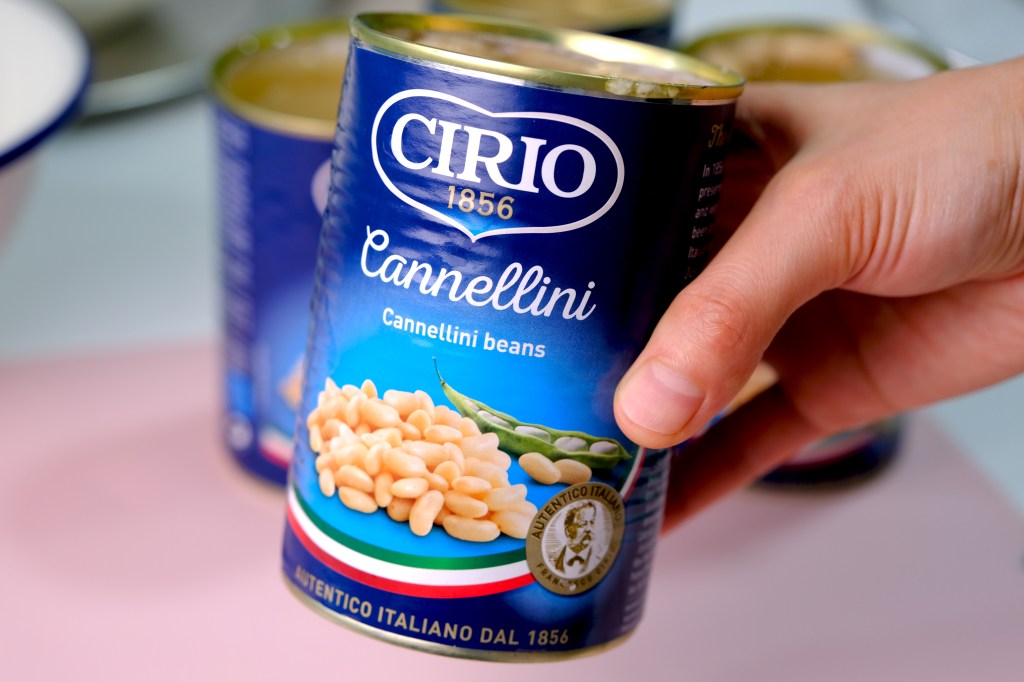
Cannellini Canned Beans

In this recipe, I will show you how to make Quick and Easy Nerikiri dough using Cannellini Canned Beans.
With this method you can skip a few step of making fresh white bean paste from scratch, the process will be faster and even simpler.

The beans slightly beige in colour

It won’t be as white as the authentic fresh Nerikiri Dough, the colour will be slightly beige, but still taste really good.

We will be use back side of flour sifter to separate the skin from the bean paste, but if you don’t have it on hand, just use regular strainer. It will be harder and more time consuming, but still works well.

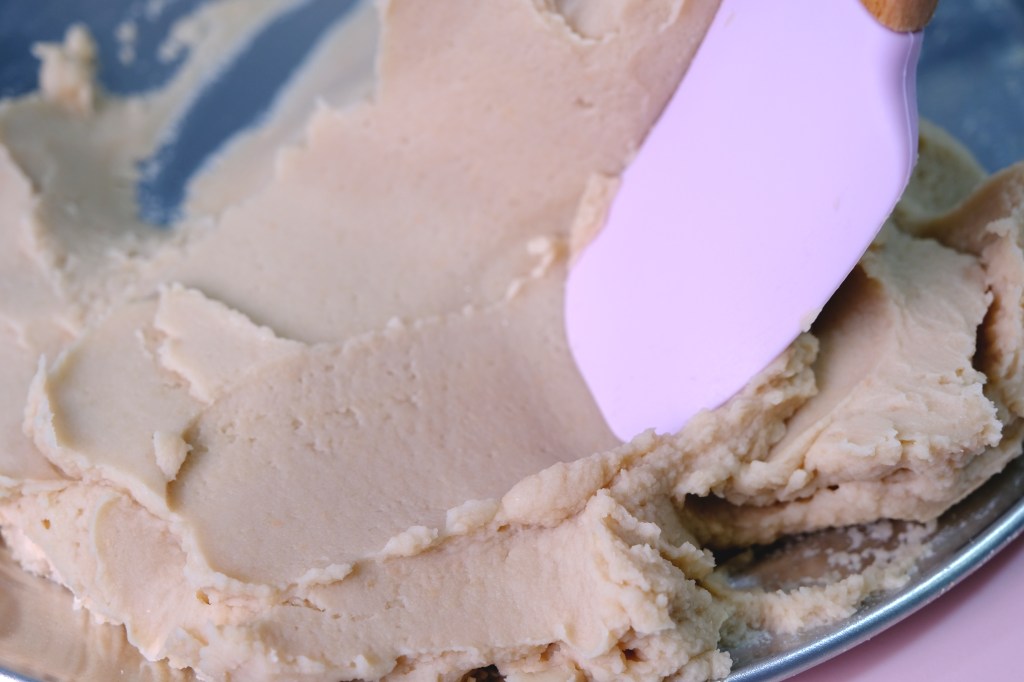
Look! The bean paste is so soft and creamy with slightly beige in colour.

Smooth White Bean Paste

You can choose to color the Shiro-An or Nerikiri dough with either natural colors like powders made from the vibrant red beetroot, cocoa powder and matcha or even food colouring

Whenever I make Nerikiri I try to use natural food colouring as much as I can. It’s not just because healthier, yet the fragrance and flavour also makes your sweets more appetising and delightful to enjoy.

And for the tools, there are specific traditional tools used in shaping the Nerikiri.
This wooden triangle stick is one of the most common wagashi tools that are not easy to come by. It has 3 different shapes in one stick and cost around 3000 to 4000 yen.

Wagashi Wooden Triangle Stick

I personally a fan of the plastic fondant or clay modelling tools as they are cheaper and easier to find. Compare to triangle stick, they even have so many different shapes that allow us to create more various forms.

Modelling Fondant and Clay Tools

Each piece of Nerikiri are unique and has their own names; A cherry blossom, fireworks, chrysanthemum, papple pear.

It’s an art form that serves meaningful purposes and traditions of the Japanese culture.

They are delicate and beautiful, SO MUCH! that you may actually find it hard to eat in the end. 
I’m usually keeping my homemade nerikiri in my freezer to show off to all my family before I finally decide to enjoy them with my tea!

Even though nerikiri are not your everyday snacks, They are  perfect for the festive seasons as gifts.

A box of 10 edible art pieces can brighten up anyone’s day.

And don’t forget, once we finished we got to enjoy some matcha green tea with the elegant sweets we had made.

Nerikiri being slightly sweeter than other typical Japanese traditional sweets. 
It’s perfectly complement the matcha, it’s balance the sweetness with a little bit bitterness of the tea creating a harmonious flavour palette that enhances the already amazing tea ceremony experience.

The texture is really soft, it’s much more firm, not too chewy like dango and you can really taste the white bean paste.

It’s very light, much softer than the typical red bean.

I hope that you will love the recipe, take your time to finish this process nicely, enjoy the art of beautiful Nerikiri!

QUICK AND EASY NERIKIRI WAGASHI
Yield: 10-12 pieces (about 55-60 grams each)
Active time: 3 hours
Total time: 3 1/2 hours

INGREDIENTS

Shiro-An (White Bean Paste):

  • 960 grams Cannellini Canned Beans (4 cans)
  • 200 grams Granulated Sugar


Gyuhi (Soft Mochi Dough):

  • 32 grams Glutinous Rice Flour
  • 44 grams Water

Food Colouring

INSTRUCTIONS
Shiro-An (White Bean Paste)

  1. Strain and place Cannellini Beans in a large heatproof bowl, then pour enough of the boiling water to cover the beans for about 1-inch.
    Soak the beans for about 10 minutes, then transfer to a fine-mesh strainer to drain. 
    Rinse the beans under cold running water and drain.
    *Soaking and rinsing purpose is to remove some of the beany smell and taste.
  2. To mash the beans
    Set the flour sifter upside down on top of a flat tray, using spatula or rice spoon press the beans against the walls of the sifter to separate the skin from the bean paste.
    Continue to smash and push the beans against the sifter in a side to side motion until you have pressed all the beans through the mesh. A lot of skins will be left behind on the top of the sifter, these can be discarded.
    *You can use regular strainer to do this.
  3. Place the bean paste onto heavy bottomed non-stick pan, add in the sugar, cook over medium heat stirring constantly until all the sugar melted.
    It will be wet at first as the sugar melts, keep stirring until it gets drier.
    *I took about 50 minutes to cook this, if you have bigger pan that will be a good option coz in larger surface, the water will evaporate faster, so you can shorten the cooking process.
  4. When the dough starts to dry, lower the heat while keep stirring so it doesn’t gets burn.
    The dough is done when it’s forming a thick paste and you can see a few dry doughs left on the bottom and sides of the pan.
    At this point, you should be able to make a lasting indentation in the bean paste with your finger and the paste should not stick to your hands. If it still very sticky, cook for about 5 or 10 minutes longer.
    * Important Tip: Make sure that you remove enough water out of Shiro-An before you mix it with the Gyuhi coz if it still contains too much water while mix it with Gyuhi, the final Nerikiri dough will become watery, too soft, hard to shape, and there’s no turning back.
  5. Take it off from the heat and spread the Shiro-An inside the pan to cool completely (some moisture will evaporate while doing this). 
    *Please note, any dough or bean paste or wagashi should not be exposed to air too long, coz if it dries too much, it will gets hard and it won’t be easy to moistened or softened.
  6. Once it cools down at room temperature, spare the 200 grams of Shiro-An for the filling (cover in a plastic wrap) and keep the rest for Nerikiri Dough.

Nerikiri Dough

  1. To make the Gyuhi (Soft Mochi Dough)
    In a small pan, combine the glutinous rice flour and water. Mix until no lumps remain.
    Cook over medium low heat, keep stirring until the mixture becomes a bit transparent, sticky and thick, remove from the heat and let it cool a bit.
  2. To combine Shiro-An and Gyuhi
    The ratio of Shiro-An and Gyuhi should be 10 by 1;  for example if I have 500 grams of Shiro-An, I need around 50 grams of Gyuhi.

    Cut the Gyuhi into small pieces and place them into the Shiro-An, mix well until uniform in texture. 
    Squish the dough together with your hands for about 2 minutes until the mixture is soft and pliable (the dough should not stick to your finger too much). 

    Transfer the dough onto a clean cotton cloth, using your hands fold and knead the dough inside the cloth (repeat this process a few times for about 1 to 2 minutes).

    Then pull and tear the dough into small pieces, place them inside the cotton cloth, let them rest for 1 minute.
    After 1 minute, gather all small pieces together and knead again for 1 minute (you will notice that the dough will become smooth and really soft). Immediately cover the dough in a plastic wrap.
  1. Proceed with colouring, shaping and moulding according to the video.
    *Please note 1 portion Nerikiri will need 20 grams of Shiro-An (white bean paste) filling and 35 grams of Nerikiri Dough.

NOTES

  1. Nerikiri dough and Shiro-An can be made ahead of time, tightly sealed and frozen up to 1 month or refrigerate for up to 4 days. It can be easily reheated until it’s pliable again and ready to use.
  2. I highly recommend to divide Nerikiri Dough into each serving (35 gr each), wrap them individually with a plastic wrap and then store them in the freezer (in an airtight container) to use later.
  3. When making Nerikiri, always prepare some cooked glutinous rice flour (cook in the pan for 5 minutes) and vegetable oil to prevent stickiness.
    *If you feel the dough a bit soft and sticky, add a little bit of cooked glutinous rice flour or you can apply a little bit of vegetable oil on your palm and the tools to prevent stickiness.
  4. It’s completely up to you to decide how you want the wagashi to turn out. Kindly color and flavor your Nerikiri Dough and Shiro-An filling according to your preference.
    I like to use natural food colouring for Nerikiri because besides it gives beautiful colours, the fragrance and flavour makes your sweets more delightful to enjoy.
  5. To store Nerikiri; fridge for up to 5 days and 1 month in the freezer.
  6. To defrost
    Whenever you need want to make several “Nerikiri Wagashi”, take a few portions out from the freezer, thaw them on the counter at room temperature. Don’t open the plastic wrap while defrost, press the dough once in a time until you can feel that it soft and pliable again. Unwrap the dough, knead a while then you can use them.

Neapolitan Mochi Ice Cream


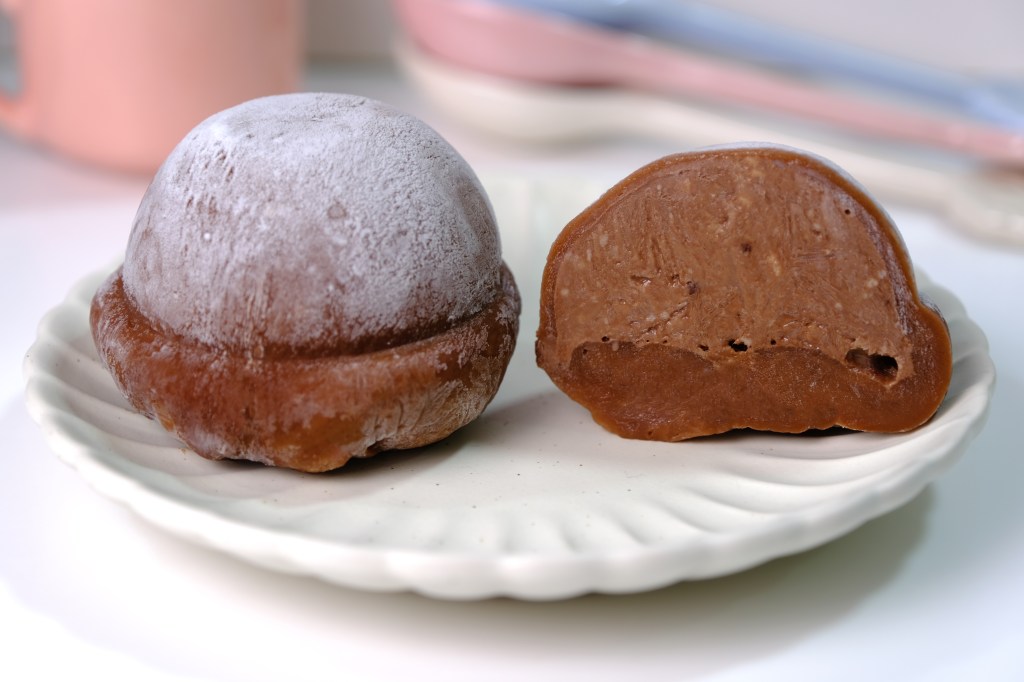
Hi Guys, today we are making these “Neapolitan Mochi Ice Cream”. It’s a soft sticky chewy sweet rice dough with an ice cream filling inside.
It’s been my all time favorite dessert since I was 15th, and you’ll be surprise to see how Kids love it so much.

These popular Japanese dessert is fairly easy to make at home. The famous brand that you can purchase in Japan is Lotte brand “Yukimi Daifuku”.

NO-CHURN Homemade Ice Cream without Eggs, Whipped Cream or Condensed Milk

Most of people use store bought ice cream to save time.
I personally love to make my own No-Churn ice cream for the fillings. Delicious creamy ice cream without any eggs, whipped cream nor condensed milk; and you can have 2 ice cream flavours in 1 go; The yummy chocolate flavour and vanilla almond to represent the traditional Neapolitan taste.

Vanilla Almond Soft Pink Mochi Dough

And YES, it’s always Shiratanako or Mochiko flour for making the best mochi dough. But for most of people is really hard to find them specially in Asian grocery stores and online.
That’s why I decided to substitute it with glutinous rice flour; there will be a difference in texture, but still taste great.

Yummy Chocolatey Mochi Dough

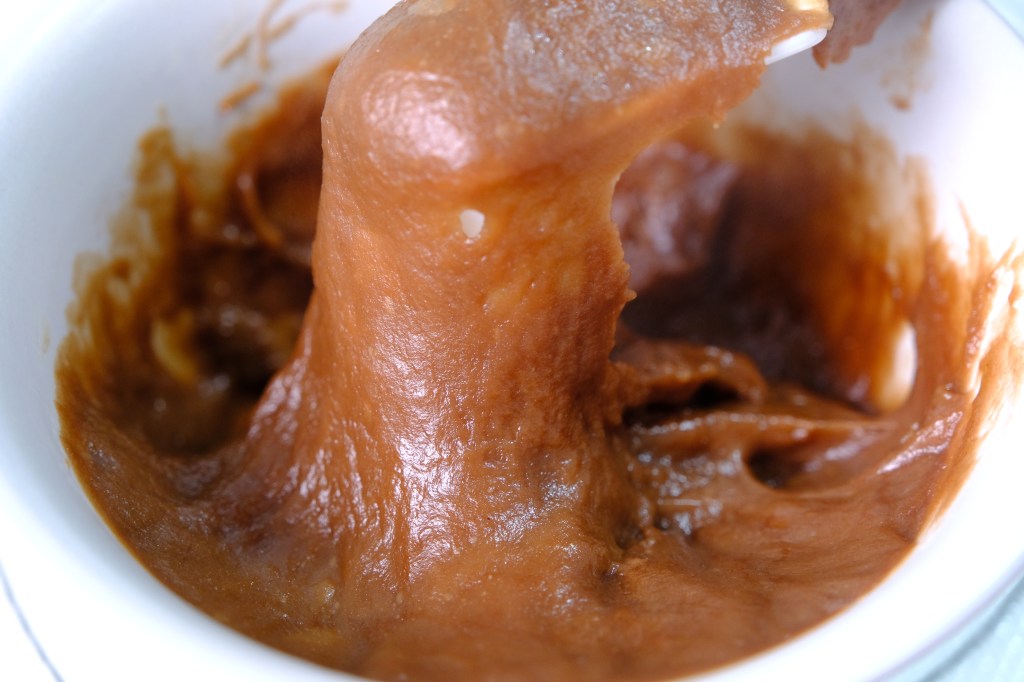
I don’t recommend to store the mochi dough in the fridge to speed up the cooling process, coz it will leads to condensation. The moisture will trap inside the dough and ends with sticky wet dough surface, it will be troublesome- hard to handle.

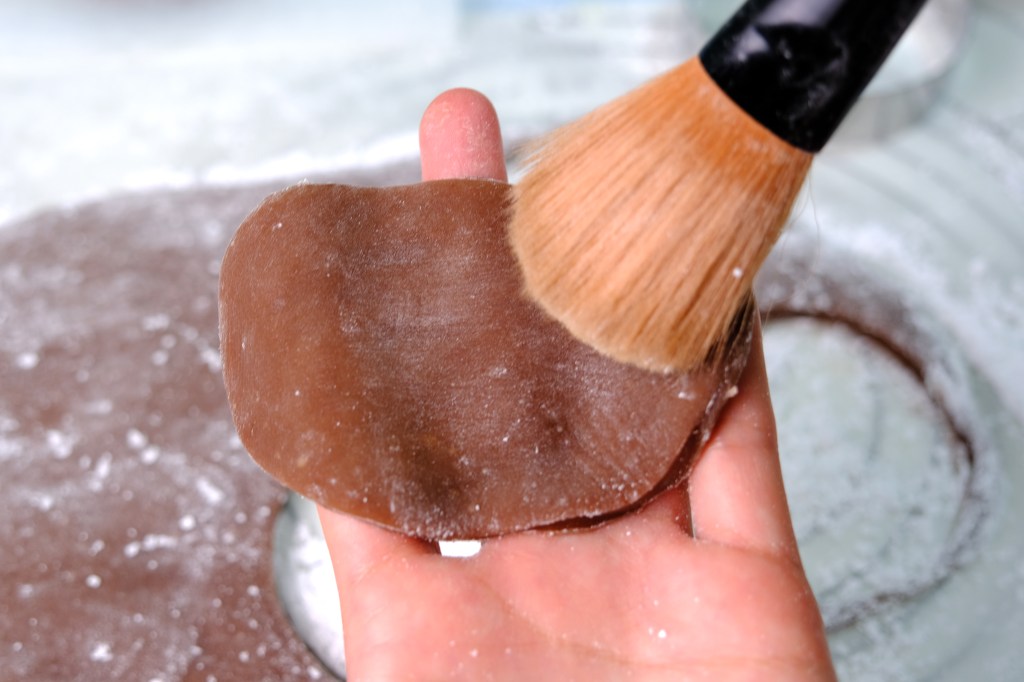
Soft Brush to Remove Excess Starch

The texture of the soft mochi so memorable and it can also be flavoured as a complement to the ice cream filling. It is quite chewy and sticky, so make sure that you have enough corn or potato starch to help manage the stickiness.

I loved the soft and chewy texture of this refreshing treats.
Is there any food happier and cuter than mochi? It’s subtly sweet and a pillowy-soft chew.
You can also add a few drops of food coloring to the mochi dough or natural food dyes, the sky’s really the limit.

This is only a basic ice cream mochi recipe, waiting to be dressed up however you like. Add about a teaspoon of matcha powder to make green tea mochi, or a flavored extract to the wet ingredients to flavor it to your liking.

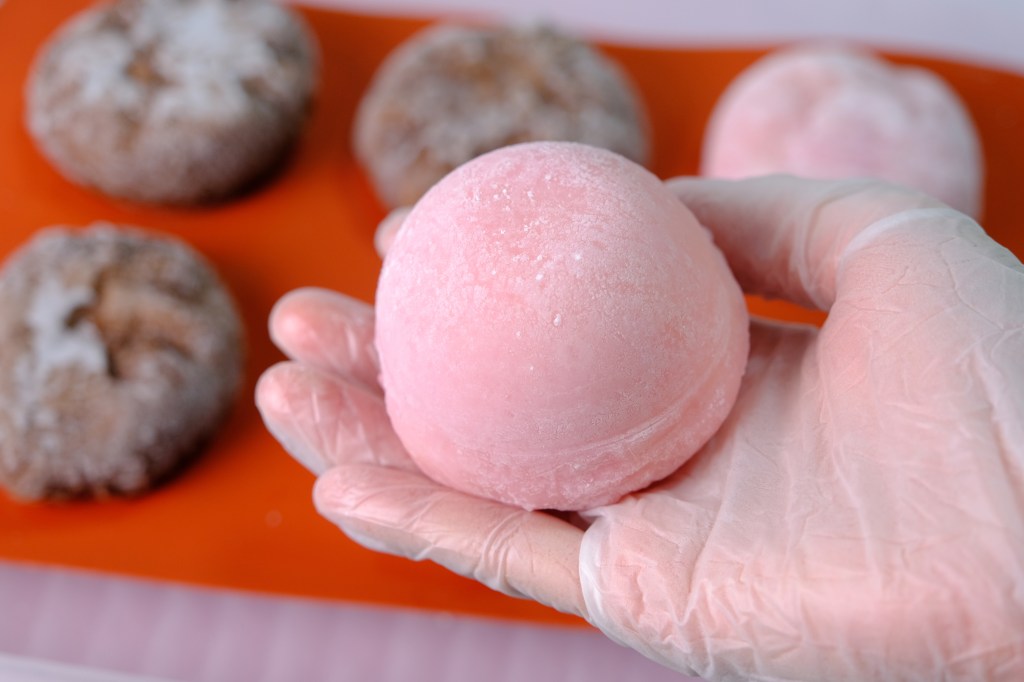
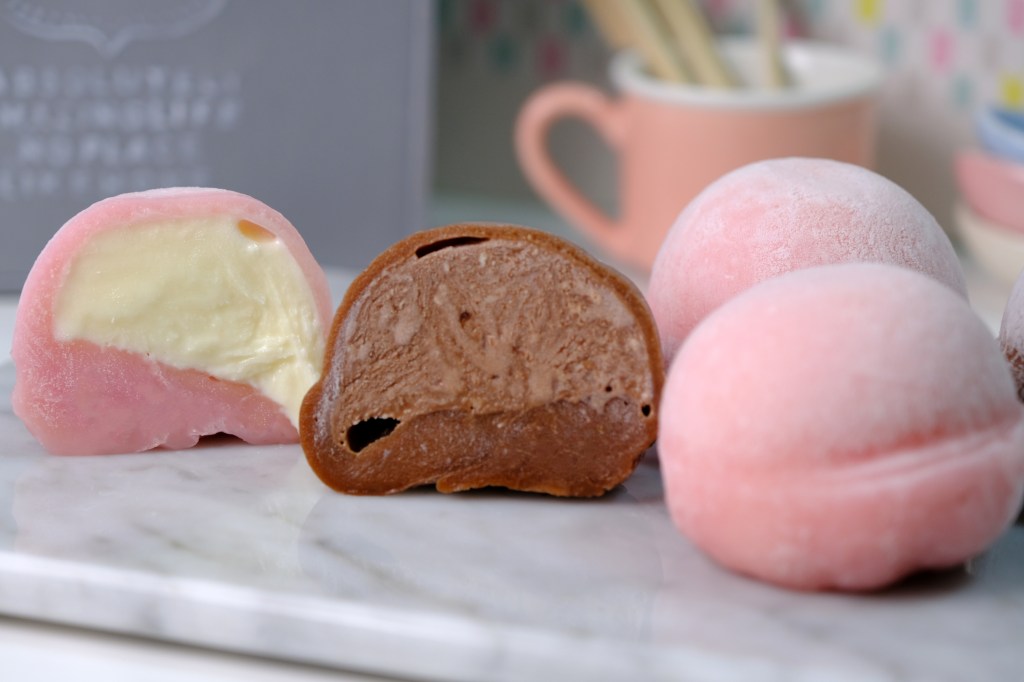
Chocolatey Mochi with Chocolate Ice Cream Filling

The ice cream is creamy, not too soft and not overly sweet; and the chewy mochi itself not too sticky or floury in flavor.

Vanilla Mochi with Vanilla Almond Ice Cream Filling

You can do as many flavours and colours as you want.
Imagine your kids smiling faces when they bite into their favorite ice cream inside the soft mochi shell.

This will make a really cool summer treat and a really fun cooking project with your children.

If you want to make it for some kind of party, such as barbecue or something I think it would be a perfect dessert. I hope Guys enjoy this recipe!

NEAPOLITAN MOCHI ICE CREAM
Yield: 6 pieces (60 ml each)
Active time:  1 hours
Total time: 9 hours

INGREDIENTS
Ice Cream Mixture:

  • 240 gr Milk
  • 30 gr Granulated Sugar 
  • 48 gr Milk Powder
  • 10 gr Corn Starch
  • 30 gr Milk
  • 1 tsp Vanilla Extract 
  • 1 tbs Cocoa Powder
  • 1 tbs Hot Water


Vanilla Almond Mochi Dough:

  • 115 gr Water
  • 40 gr Milk
  • 40 gr Granulated Sugar
  • 15 gr Vegetable Oil
  • 1/8 tsp Beetroot Powder or Pink Food Colouring
  • 1/4 tsp Vanilla Extract
  • 1/2 tsp Almond Extract
  • 80 gr Glutinous Rice Flour


Chocolate Mochi Dough:

  • 115 gr Water
  • 40 gr Milk
  • 40 gr Granulated Sugar
  • 15 gr Vegetable Oil
  • 1/2 tsp Vanilla Extract
  • 2 tsp Cocoa Powder
  • 80 gr Glutinous Rice Flour

Corn or Potato Starch 


INSTRUCTIONS
Ice Cream Mixture

  1. Prepare the silicone mould (if you use small plastic cup, glass or cupcake pan, make sure that you line the mould with cling wrap so it’s easier when unmould the ice cream).
  2. In a medium pan, combine 240 grams of milk, sugar and milk powder, mix until no lumps remain.
    Cook over medium heat until simmering, stirring constantly to avoid the mixture burning. 
  3. In the meanwhile, in a small container combine the corn starch, 30 grams of milk and vanilla extract, mix well.
    Gently pour the corn starch mixture to the simmering milk mixture, continue whisking until the mixture starts to boil and thickened.
  4. Remove from the heat, divide half of the mixture to the 3 cavities of the mould.
    Mix the remaining mixture with cocoa powder that has been diluted with some hot water.
    Divide this chocolate mixture to the rest of cavities.
  5. Cover and store them in the freezer for at least 6 hours or preferably overnight to harden.
  6. Unmould the ice cream; place them in the container that has been lined with parchment paper so it won’t stick to the surface. Pop them again in the freezer while continue with the mochi dough.


Mochi Dough
Microwave Method

  1. In a microwave safe bowl, mix all the ingredients until well combined.
  2. Cover the bowl with a cling wrap, microwave it on high heat for 1 minute, take it out and stir with a wet rubber spatula, cover again and microwave it for another 1 minute (we will know that the mixture is well cooked when all the colour is semi translucent).

*For the chocolate mochi dough; strain the mixture before microwave it to make sure there’s no lumps remain.

Steaming Method

  1. In a medium bowl, mix all the ingredients until well combined.
  2. Place the bowl in the preheated steamer (cover the steamer lid with a towel so the condensation won’t drop into the mochi mixture) and steam for about 20 minutes (stir it with a wet rubber spatula at halfway cooking and cover it again to finish cooking). 


ROLLING

  1. Cover the work surface with a piece of large parchment paper and dust with generous amount of corn or potato starch (if you are worried about eating raw starch, heat the starch in the pan for about 5 minutes).
  2. Transfer the hot cooked mochi dough onto a parchment paper and sprinkle more starch on top of the dough.
  3. Using your palm gently press and spread the dough onto a long rectangular shape, about ¼ inch thick (until it’s big enough to fit into 3 pieces round circles shapes).
  4. Let the dough rest for about 45 minutes to 1 hour until the mochi is set and cooled down completely.


ASSEMBLY

  1. Using round cutter, divide the mochi dough into 3 pieces for each flavour. Pick up one circle of dough, gently brush off the starch on both sides.
  2. Brush the mould with some starch to prevent stickiness and then lay the dough in the center of the mould
  3. Working with one scoop of ice cream at a time, (keep the rest in the freezer so they don’t melt), place one ice cream scoop in the center of the mochi dough and gently press the dough around the ice cream. Pinch the edges of the mochi to seal it. 
  4. Continue with remaining dough and ice cream (try to work fast or else the ice cream will starts to melts it will end up as a puddle on your hands).
  5. Cover and store them in the freezer for at least 1 hour before serving.

*If your use other than silicone moulds, make sure that you cover the finished ice cream mochi individualy in a cling wrap to prevent stickiness and then place them back into the mould to keep the shape.


NOTES

  1. Feel free to double or triple the recipe; more dough means longer time to cook the mochi dough.
  2. I don’t recommend to store the mochi dough in the fridge to speed up the cooling process, coz it will leads to condensation, the moisture will trap inside the dough and ends with sticky wet dough surface, it will be hard to handle it.
  3. It’s important to have a size of mochi dough that is just big enough to surround the ice cream, coz too much extra dough hanging off which will taste a bit hard once it frozen. 
  4. Mochi ice cream can be kept in an airtight container in the freezer for up to 1 week. When you’re ready to eat, let them sit out for at least 15 minutes to soften before biting in! 
  5. Recipe variations:
    – Matcha: Mix in 1 1/2 tsp of matcha (green tea powder) to the vanilla ice cream mixture (omit vanilla and almond extract)  and 1 tsp to the plain mochi dough (omit the beetroot powder).
    – Coffee: Mix in 1 tsp of instant coffee to the vanilla ice cream mixture (omit almond extract) and ½ tsp to the plain mochi dough (omit the beetroot powder).

My Melody Taiwanese Savory Mooncake

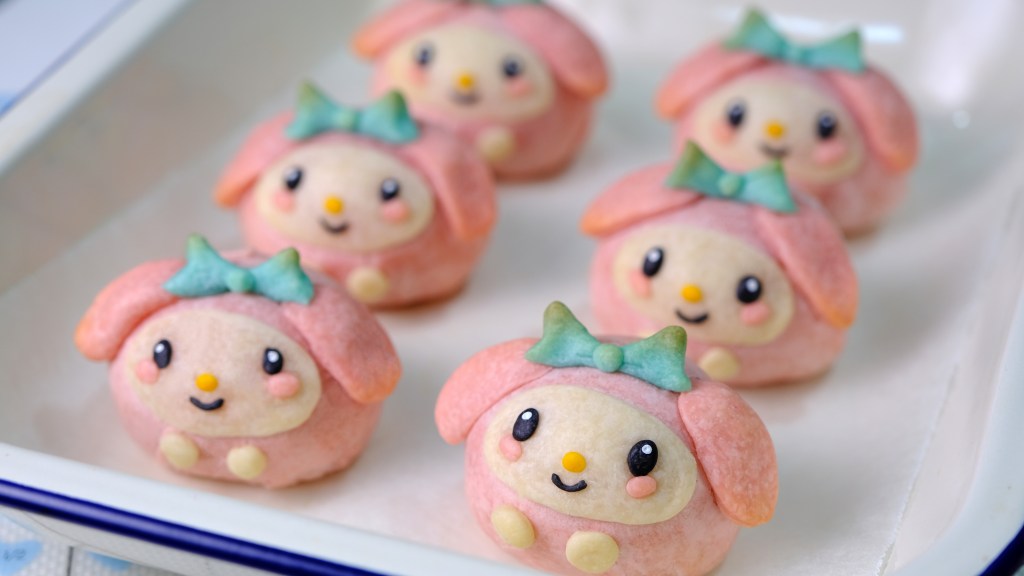
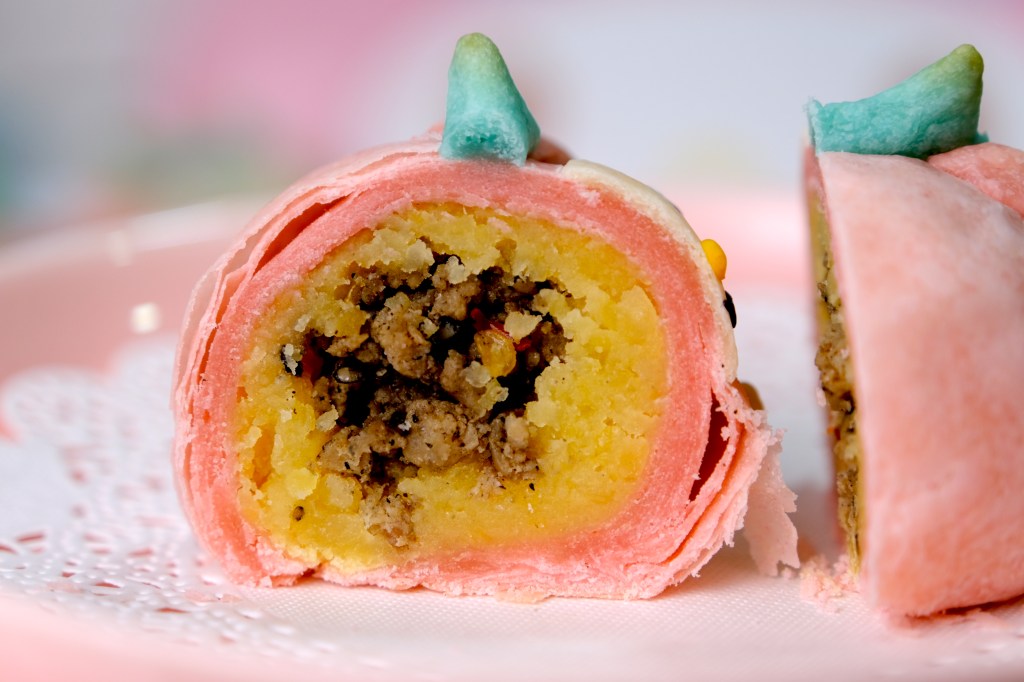
Hi Guys, today we are making these “My Melody Taiwanese Savory Mooncake”. It’s a flaky crust moon cake with the savoury sweet fillings inside which has a really unique texture.

Unlike the common traditional mooncake that are sweet, some spicy braised meat was added to the mung bean paste as a filling, they blends really well, the savoury perfectly complement the sweetness.

Crispy crust outside, Sweet spicy salty filling inside

You have some bits to bite in the smooth fillings, the savoury pairs the sweetness perfectly, the crunchiness of the layer crust even make it more special.

You can actually omit the meat portion if you wish too, but that’s what makes it special in my opinion. And if you are not preparing this for moon cake festivals, it’s definitely a good snack or a nice breakfast item.

Look how adorable they are!

The beautiful flaky crust itself created by combining 2 different type of dough which is called water and oil dough that has been layered by rolling and folding similar in making puff pastry dough.

Feel free to create any design you like but always remember that for the combined dough, you need to make the oil dough colour slightly lighter than the water dough so it doesn’t show on the surface of the water dough when you roll it.

So this is how we combine the dough;
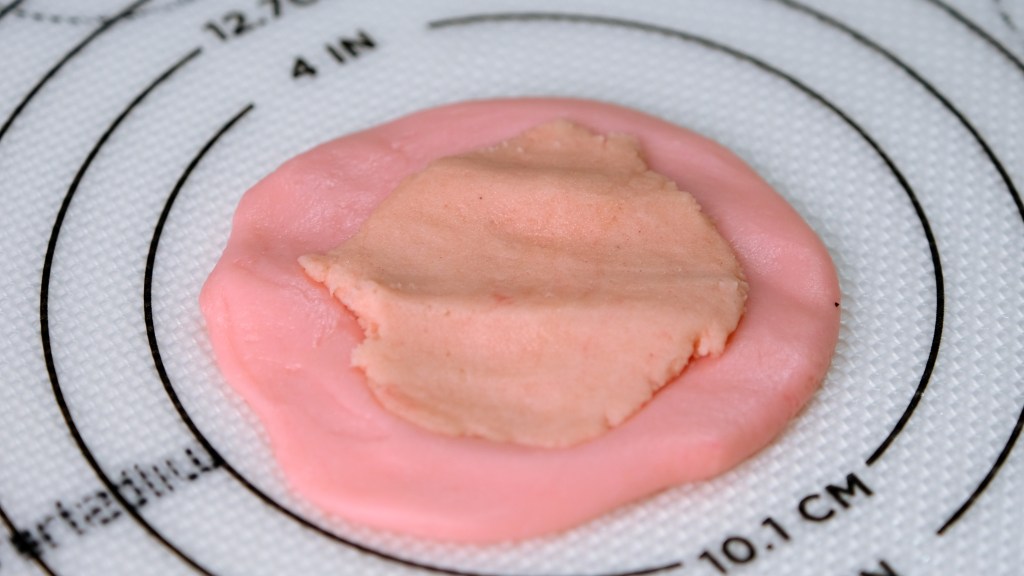
Lightly press down to flatten the water dough and place the oil dough in the center of the water dough. Fold the combined dough like an envelope, seal all the seam and shape it round again.
Cover and let them rest for at least 10 minutes so the gluten can relax a bit.

Place oil dough in the center of the water dough

After resting, take one combined dough, using rolling pin, roll the dough into a long rectangular shape as evenly as possible, don’t press it too hard as you might tear the water dough membrane, about 3 mm thick is enough (pic. 1)
And then roll it up like you are preparing swiss roll (pic. 2)


Then turn the swiss roll direction with the shorter side pointing at you, using rolling pin roll it again into a long rectangular shape (pic. 3 & 4)

*One important tip when you roll the dough is always make sure that your rolling pin is clean from any dough flakes coz it will attracts the water dough surface which can cause a lot of cracks on the mooncake later.


And finally, roll it up again like a swiss roll (pic. 5 & 6)


Please note the colour will be much lighter when baked in the oven.
The minced meat is slightly on the salty side to compliment the sweet of the mung bean paste. If you prefer more spicy, feel free to add more chili or for a bigger kick, you can add a teaspoon of cayenne pepper, that will be great too!

And if the times permit, you even can prepared this meat the night before and store them in the fridge to let the flavor develops, it will taste even better.

Oh I love My Melody so much, they are my favorite Sanrio character since I was a child.

They taste amazing when served slightly warm and paired with a cup of hot tea or maybe your favorite coffee.
They are so adorable, tasty and also satisfying with their unique texture, it’s really hard to describe unless you have a chance to taste it

The recipe is rather long winded but it is rewarding coz they are so pretty and delicious.
I really hope you Guys give it a try coz this mooncake really suit my taste buds and I have to stop myself for further eating.

And if you want; you can share your creations with me with the “hastags bembumkitchen”, I really love to see all your creativity and I’ll make sure to give a like or thumbs up!

Enjoy the recipe, Love you All!!

MY MELODY TAIWANESE MOONCAKE
Yield: 10 pieces
Active time:  3 hours
Total time: 4 hours

INGREDIENTS
Mung Bean Paste:

  • 100 gr Split Yellow Mung Beans
  • 100 gr Hot Water
  • 75 gr Granulated Sugar

Braised Meat:

  • 100 grams Minced Pork
  • 1 tbs Corn Flour
  • 1 tsp Garlic (Minced)
  • 1 tsp Ginger (Minced)
  • 1/2 tbs Onion (Minced)
  • 1/2 tbs Rice Wine
  • 2 tbs Soy Sauce
  • 1 tsp Chopped Chilli Padi
  • 1/2 tsp Five Spice Powder
  • 1/4 tsp White Pepper
  • 1/4 tsp Salt
  • 2 tsp Sugar
  • 1/2 tbs White or Black Sesame Seeds

Water Dough:

  • 200 gr All-Purpose Flour
  • 50 gr Shortening
  • 20 gr Icing Sugar
  • 100 gr Cold Water
  • Food Colouring (Pink, Black, Blue, Yellow)

Oil Dough:

  • 75 gr Cake Flour
  • 35 gr Shortening
  • Pink Food Colouring


INSTRUCTIONS
Mung Bean Paste

  1. Wash mung beans in several rinses of water until the water runs clear, then soak them in a hot boiling water for 30 minutes (the water will be absorbed and the beans gets bigger). 
  2. Preheat the steamer, bring water to a boil and then steam the soaked beans for about 30 minutes or until it can be easily mashed.
  3. Pour the beans into a non-stick pan, add in the sugar, cook over medium low heat (it will be wet at first as the sugar melts,keep stirring until it gets drier).
    Using a spatula, press the beans until it resembles a thick paste (as the water evaporates, the beans will no longer be sticky).
    Feel free to use blender or immersion blender if you prefer a really fine paste.
  4. Take it off from the heat, cover it with a plastic wrap, store in the fridge to firm up.


Braise Meat

  1. Sprinkle corn flour to the meat before cooking (it will helps prevent overcooking and toughening of the outer layers so the result will be more tender and flavourful).
  2. In a medium pan, heat 2 tablespoons of vegetable oil, add in the minced garlic and onion, cook until golden brown.
    Add in minced pork, continue cooking until it change in colour.
    Pour in the rice wine and soy sauce, stir well.
    Add in the rest ingredients and mix until well combined.
    *Feel free to add more chili or cayenne pepper if you like more spicy.
  3. Cover and store them in the fridge to let the flavor develops.


Water Dough

  1. In a medium bowl, combine all the ingredients, stir until it forms a sticky dough.
  2. Lightly transfer to a work surface and knead until it forms a smooth dough. 
  3. Divide the dough for each details, color as needed
  4. Cover each colours with a cling wrap and let it rest for at least 20 minutes.


Oil Dough
Mix the flour and shortening, add in the pink food colouring (this oil dough colour must be slightly lighter than the water dough for the base of My Melody’s head).
Keep mixing until it forms a soft dough (it can be slightly sticky). Cover it with a plastic wrap to prevent the dough dry.


COMBINE, ROLL & BAKE

  1. Divide the bean paste into 10 equal portions (25 gr each), shape it into a ball.
    Using your thumb press the center of the bean ball to create a hole. Insert about 1-2 tsp of the braised meat filling in the center, and then wrap and seal. Perform the same for the remaining 9 portions.
  2. Combine 2 dough:
    Divide the “soft pink” water dough and oil dough into 10 equal pieces (19 grams water dough, 11 grams oil dough).
    Lightly press down the water dough to flatten and place the oil dough in the center of the water dough.
    Fold the combined dough like an envelope, seal all the seam and shape it round again. Continue with the rest dough.
    Cover and let them rest for at least 10 minutes so the gluten can relax a bit.
  3. Roll the combined dough:
    Take one combined dough, using rolling pin, roll the dough into a long rectangular shape as evenly as possible (don’t press it too hard as you might tear the water dough membrane), 3 mm thick is enough. 
    Roll it up like you are preparing swiss roll.
    Turn the swiss roll direction with the shorter side pointing at you, using rolling pin roll it again into a long rectangular shape. Then roll it up again like a swiss roll.
    Set aside, cover it up while continue with the rest dough.


FILL  & DECORATE

  1. Fill
    Take one of the swiss roll dough, using rolling pin, flatten it into a circle shape.
    Flip the dough, place one portion of a bean ball at the center of the dough, and start covering the bean ball from all sides, rotate while tighten your palm, make sure the skin and filling stick together evenly.
    Seal all the seam. Shape the mooncake a bit oval as My Melody’s head. Repeat this process for the rest of the Mooncake.
  2. Decorate
    Add details according to My Melody’s Head, add the spark of her eyes with some white food colouring

BAKE
Bake in the preheated 170°C oven for about 15-18 minutes.
Remove from the heat, allow to cool slightly on the pan for about 10-15 minutes then transfer to a cooling rack to cool completely.


NOTES

  1. Don’t let the water dough sit too long coz it will release the oil and cause a lot of crack on the mooncake surface later.
  2. Best serve 20 minutes freshly baked. 
  3. To store in an airtight container; 1 day at room temperature, 1 week fridge, 1 months freezer.
  4. To reheat; 180°C oven for about 5-10 minutes

Traditional Orange Nian Gao (Quick & Easy Way)

Hi Guys, today we are making these “Traditional Orange Nian Gao”. A symbol of a high year, an increase in prosperity and a good luck.
Despite numerous varieties, my favorite will always be the West Java Indonesian Nian Gao which they called “China Cake”.

It’s made by mixing the glutinous rice flour, pure Gula Malacca, salt and water, then add in the minced orange peel to the mixture.
By using pure gula malacca and orange peel not only so much better in flavour, but it also has a lovely fragrance.

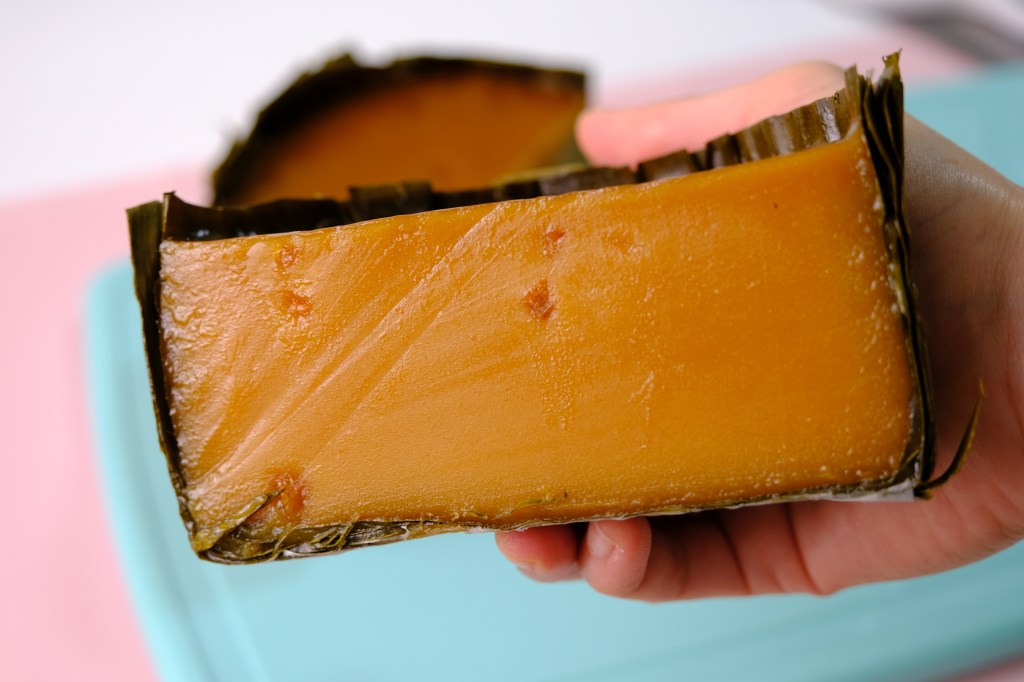
Look how soft and chewy this Nian Gao!

The color of course much darker and after so many hours of steaming, it will turn very dark, almost of a similar sweet cake, Dodol.

Mold layering with banana leaves

Some people use greaseproof paper or even food grade plastic for layering the moulds,
I personally love to use banana leaves simply because it’s natural and healthier and also add more delightful fragrance to your Nian Gao.

Japanese Yuzu Peel

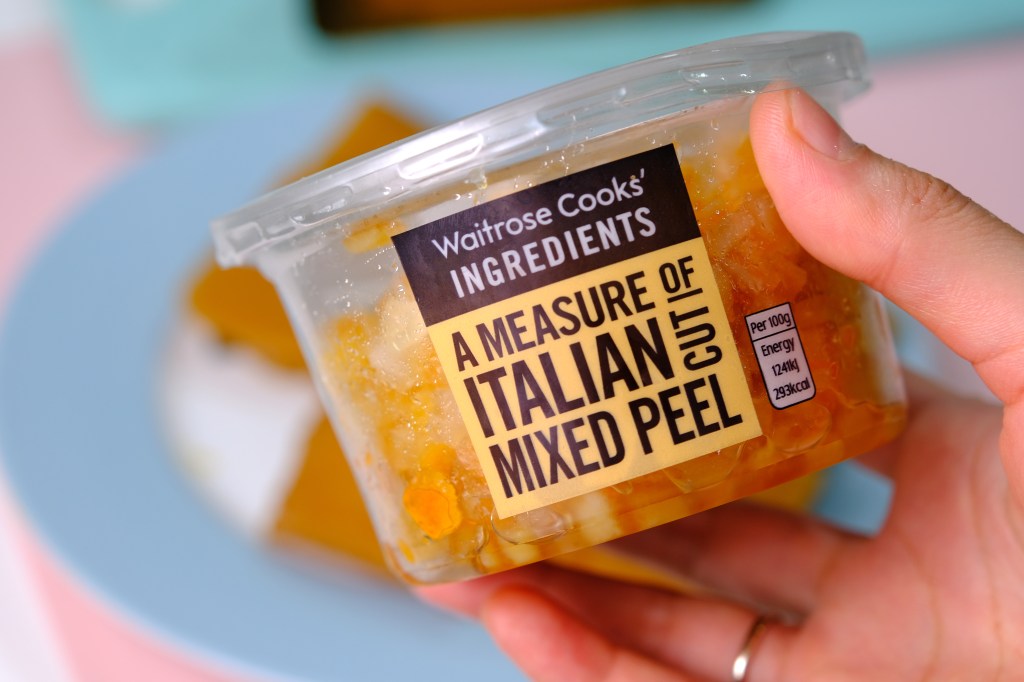
And for the orange peel, I am using Japanese minced dried yuzu peel here or you can substitute it with Italian mixed peel. It also works well.

Italian Mixed Peel

The Nian Gao will still appear very soft at the end of cooking time, we need to let them cool down completely, let it sit at room temperature in a plastic container or wrapper for at least 24 hours before unmoulding.

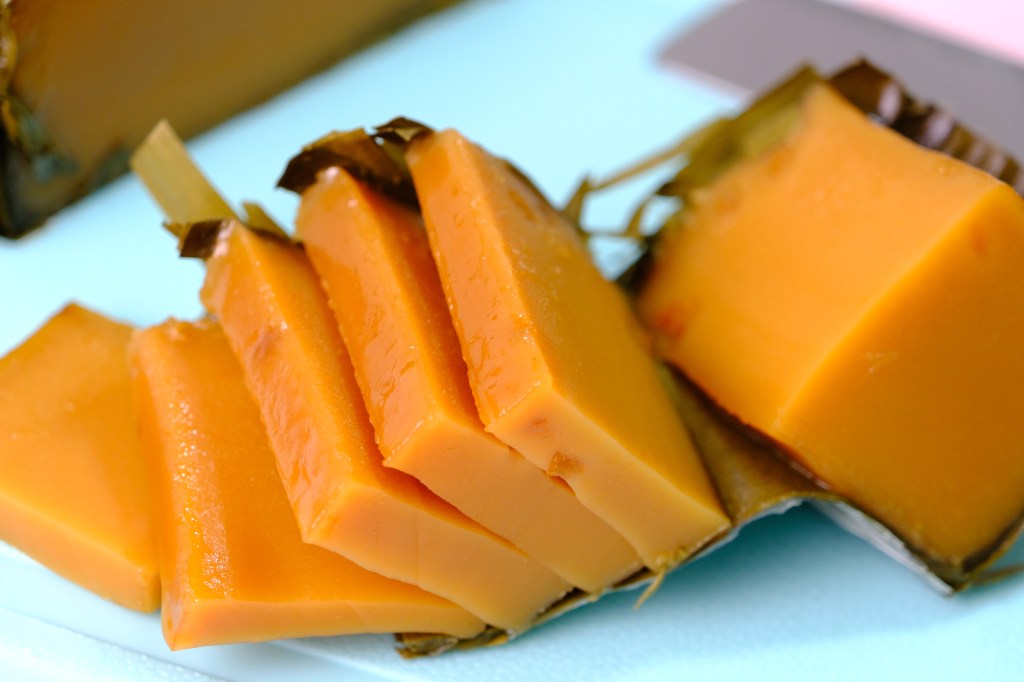
Beautiful Sliced Nian Gao

You can eat the rice cake once it’s steamed, just remember that it’s very sticky and gooey when it’s hot.
The best way to enjoy this Sweet Rice Cake is wait for it to cool. They will be slightly firmer or you can store them in the fridge so it will firm faster and easier to sliced them.

So pretty! This is almost similar as the one sold in the store

Nian Gao also a popular gift when visiting family and friends during the chinese new year celebration.
If you have plan to make this as a present, you can simply cover the top with a piece of acetate film with some Chinese New Year sticker on it, and before you stick them, make sure that you apply some vegetable oil onto the acetate film so it will be easier to remove later.

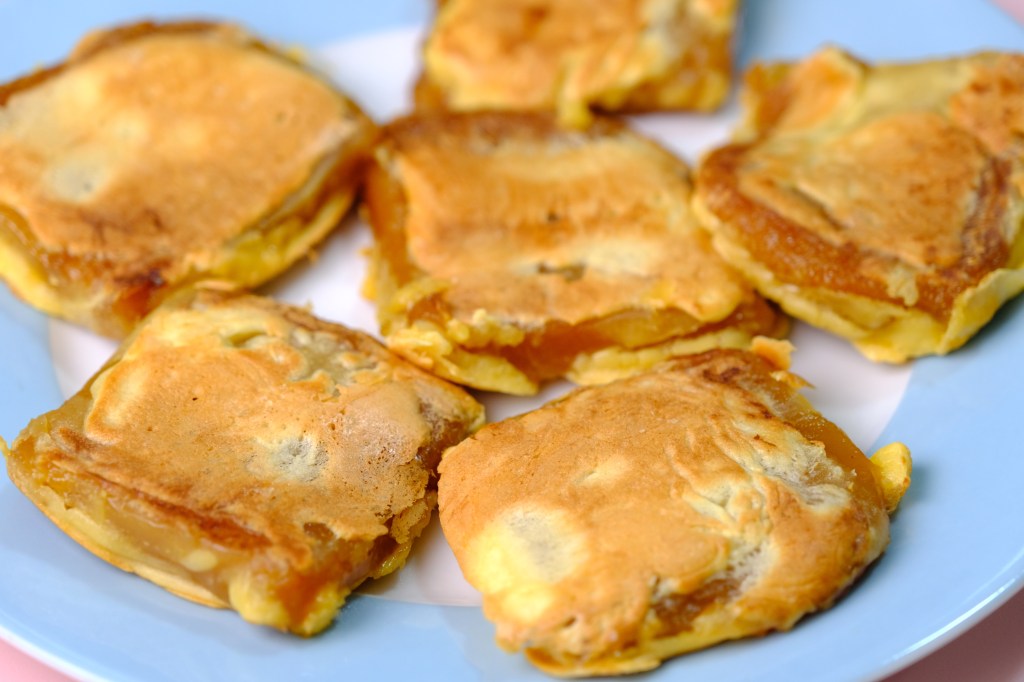
Pan-Fried Nian Gao

And when ready to serve them just reheat with steamer or microwave if you want to eat them plain or you can follow my Pan-Fried or Steamed Coconut Nian Gao recipe, a great way to use leftover Nian Gao from Chinese New Year. It’s really good!

Look at the Interior!

Look!! Light and airy thin batter coating the outside of the nian gao, while soft, chewy and stretchy Nian Gao on the inside.

Steamed Coconut Nian Gao

And for the Steamed Coconut Nian Gao also quite easy and so delightfull, and it’s perfect for coconut lovers.
You just need to steam the grated coconut for about 10 minutes, add in the salt, and simply fully coat the softened nian gao with grated coconut.
How cool is that?

Whishing you a happy and prosperous Chinese New Year! It’s time to celebrate the hard work, a time for families to reunite, feast, give thanks and rejoice.
I hope you enjoy these recipe as much as I do, Love You All!

TRADITIONAL ORANGE NIAN GAO
Yield: Three 5-inch Round Pans or (One 6-inch, One 5-inch and One 4-inch) 
Active time:  1 1/2 hours
Total time: 4 hours

INGREDIENTS
Molds:

  • Three 5-inch Round Pans or (One 6-inch, One 5-inch and One 4-inch) 
  • Banana Leaves
  • Rubber Band 


Nian Gao Batter:

  • 550 grams Gula Malacca
  • 700 grams Water
  • 1/2 teaspoon Salt
  • 600 grams Glutinous Rice Flour
  • 3 tablespoons Orange Peel


Pan-Fried Nian Gao (For 1 Pan):

  • One 5-inch Nian Gao (Sliced)
  • 50 grams All-Purpose Flour
  • 1/2 teaspoon Baking Powder
  • 1/4 teaspoon Salt
  • 50 grams Eggs
  • 3-6 teaspoons Ice Water


Steamed Coconut Nian Gao (For 1 Pan):

  • One 5-inch Nian Gao (Sliced)
  • 250 grams Grated Coconut
  • 1 teaspoon Salt


INSTRUCTIONS
Molds

  1. Remove the center hard part of the banana leaves (you can use greaseproof paper or food grade plastic). Clean the leaves under running water.
  2. Blanch the banana leaves in hot boiling water for about 5 minutes to soften it so it won’t tear easily (alternatively you can soften it by heating over a stove). Pat them dry.
  3. Using the moulds as a guide, measure the length and width of the leaves.
    The width should be 2 times of the height of the moulds, and the length should be enough to cover the circumference of the mould. Cut off the excess.
  4. Wrap the leaves around the mould, covering half of the outer rim.
    Secure the position of the leaf by putting a rubber band around the rim of the container. Insert the remaining part of the leaves into the mould. 
    * Please note that the leaves should cover the inner wall and at least half of the bottom part.
    To help shape the inside part of the mould, insert a smaller round container into the mold and press the leaves against the base and the inner wall of the mold.
    Repeat the same process by adding two more leaves. Don’t be confused if the leaves is too small, you can still use it by patch them to one another.
  5. For the bottom part, cut 2 pieces of round shaped leaves with the diameter slightly bigger than the base and then insert and press against the bottom to cover the base completely. 

Nian Gao batter

  1. Place gula Malacca, salt and water in a saucepan and bring to a gentle simmer, until the sugar completely melted. 
  2. Once melted, remove from the heat, strain the mixture and let it cool completely.
    In the meantime, prepare the steamer by bringing the water to a rolling boil.
  3. After the sugar mixture cooled down, gradually pour it into the glutinous rice flour, stirring in between until the mixture is smooth. Strain the mixture to make sure there’s no lumps persist.
  4. Pour the mixture onto the moulds (do not fill the mould all the way to the top, leave half inch clear space to top of the pan).
  5. Sprinkle 1 tablespoon orange peel for each mould, tap the mould for a few times, cover each moulds with aluminium foil to prevent the water condensation drops to the Nian Gao.
  6. Place inside the steamer and steam on medium heat for 2 hours (you may need to refill the water throughout the cooking process, don’t let it dry out).
  7. Take it off from the heat, remove the aluminium foil immediately and then let it sit on a cooling rack to cool completely before storing.
  8. Wrap in a plastic container for at least 24 hours before unmoulding.
  9. Unmould and cut of the excess banana leaves, leave about 1-2 cm from the edge of the Nian Gao.


Pan Fried Nian Gao

  1. Slice the Nian Gao in a square shape about 1/4-inch thickness.
  2. In a medium bowl mix the all-purpose flour, baking powder and salt. Add in the eggs and mix until just combined.
  3. Gradually mix in the ice water, don’t add the ice water all at once, start by adding 1 teaspoon at a time until you get the perfect consistency (not too thick or too watery).
    Dip Nian Gao slices to the batter.
  4. On a medium heat, apply some margarine to the pan (if you use butter, add some vegetable oil to avoid the butter burning).
  5. Pan fry the Nian Gao until golden brown on both sides, press once in a while to check whether the inside cooked well (control the heat so the batter won’t get burn while the Nian Gao on the inside isn’t soft and chewy just yet).


Steamed Coconut Nian Gao

  1. Slice the Nian Gao in a square shape about 1/4-inch thickness, steam or microwave it until a bit sticky and soft.
  2. Steam the grated coconut for about 10 minutes. Add in the salt, stir well.
  3. Coat the softened Nian Gao with salted grated coconut.

NOTES

  1. Yes you can eat the Nian Gao once it’s steamed, but it will be very sticky and gooey when it’s hot.
  2. The best way to enjoy this Nian Gao is wait for it to cool.
    At day 3, usually the this cake will be much more firm or you can store them in the fridge so it will firm faster and easier to sliced them. And when you cut, don’t forget to apply some vegetable oil to your knife or any kitchen tools to prevent stickiness.
  3. To store Nian Gao; 2 days at room temperature, 1 week in the fridge, 6 months in the freezer.
  4. Pure Gula Malacca should be dark in colour and pliable to touch. Hard lighter colour gula malacca have likely been mixed with cane sugar.

Salted Caramel Mexican Coffee Buns (Tangzhong Method)

Hey Guys, today we are making these “Salted Caramel Mexican Coffee Buns”. A sweet buns which is basically made with coffee topping and butter filling.

It’s actually originated in Malaysia and quite popular around Asia. Papparoti and Rotiboy are the most famous brands for these delicious coffee-coated buns, while in Singapore was popular with Roti Mum.
They even customized the buns with other flavours combination such as chocolate, cheese, kaya and peanut

The familiar and alluring smell of the coffee buns will always be the first scent that greets the nose and they go perfectly well with coffee, hot coffee preferably.

The aroma of this Mexican coffee bun is really tantalizing and makes you just want to eat it piping hot.

Tanzhong Starter

In this recipe, I’m gonna show you how to use Tangzhong Method in bread making. One of the most reliable method to produce soft and fluffy breads. This method contributes to the ultra airy, pillowy texture of this bread.

Tangzhong starter or called roux starter is basically a liquid (milk or water) and flour that is being cooked into a paste and then incorporated into the dough.

Windowpane test

Some people (I used to) scared of making bread and the FAQ is “How to tell if your bread dough is fully kneaded?”

Actually, we can check to see if your dough is well-formed by doing the windowpane test by stretch it out into a thin membrane without breaking it. That’s an indication that the gluten is
well-formed.

Magical Coffee Topping

For the Coffee Topping, YES! you can substitute it with espresso powder if you don’t have instant coffee on hand, but I really don’t recommend it coz it will make your buns taste a lot less flavorful

So.. try stick to instant coffee!
Use the best instant coffee you can get coz this is the thing that will spell the difference for your coffee buns.

Perfect Homemade Caramel for the Bread Filling

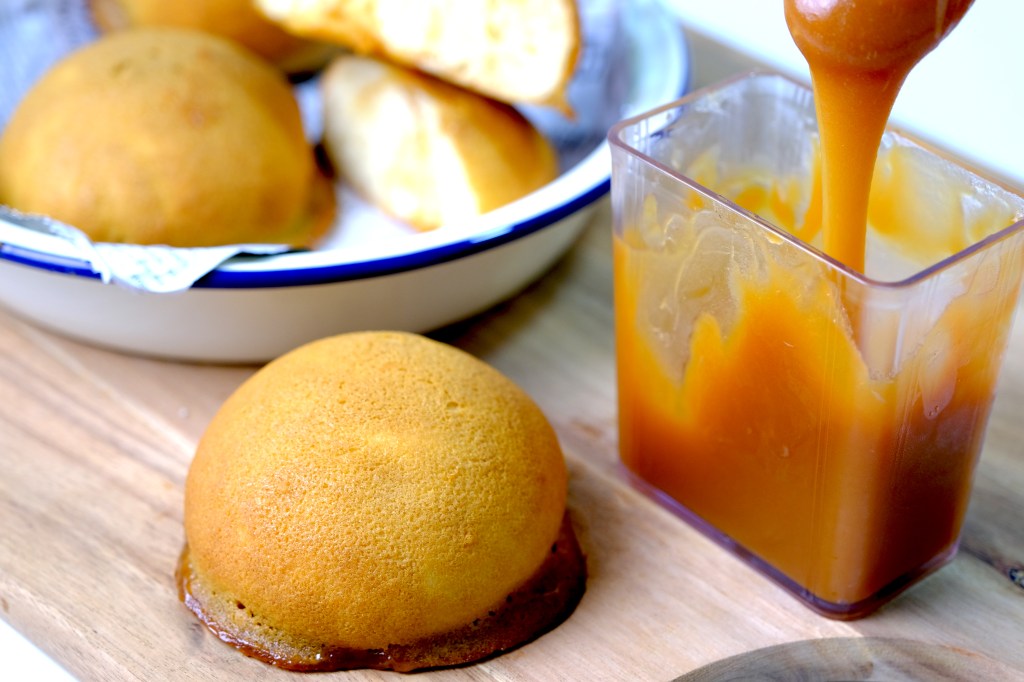
And instead of butter, I will use my homemade salted caramel sauce for the bread filling, which is so tasty. It’s melty and slightly savory against the sweet cookie crust and buns!

The combination of the soft bread with the sweet, salty, velvety smooth caramel sauce is completely divine!

This caramel sauce is so good! Left over can be refrigerated for up to 1 month and taste great on everything, especially for your favorite ice cream sundaes.

The Sweet Aromatic Coffee Shell for the Buns

Please note, you don’t want to pipe down this beautiful aromatic mixture all the way because that will be WAY too much topping, coz once you put these into the oven they will melt downwards and form a coffee shell over the buns.

If you pipe until the bottom, the topping will just ooze down all over the place.

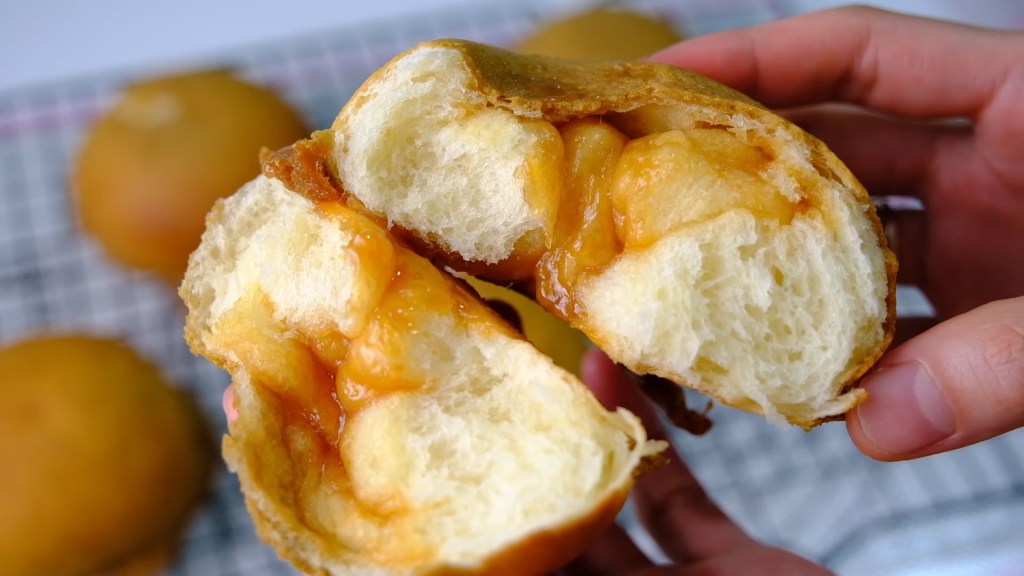
The Caramel Inside is Melty, It’s Leaked out as they Baked

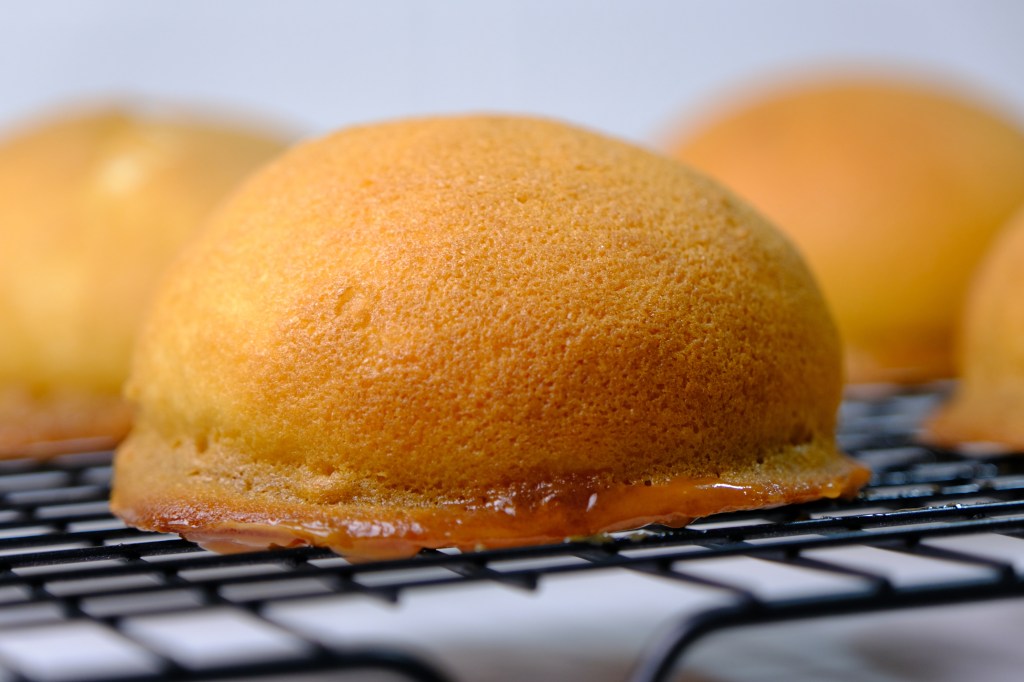
Look how amazing these buns are! It not too oily and It doesn’t flattens at all.

The caramel inside is melty, it’s leaked out as they baked, the gooey crusty texture on the bottom of the buns intensely flavorful and so aromatic. Just one whiff of these is enough to make my mouth watery! They are so difficult to resist.

I don’t think making these buns are difficult, although they do require some time and a number of steps.

If you keen to sell these, this a good choice to start baking business ideas in my opinion coz the ingredients quite cheap and it’s easy to produce. This bread also addicting for some people, that’s a good thing!

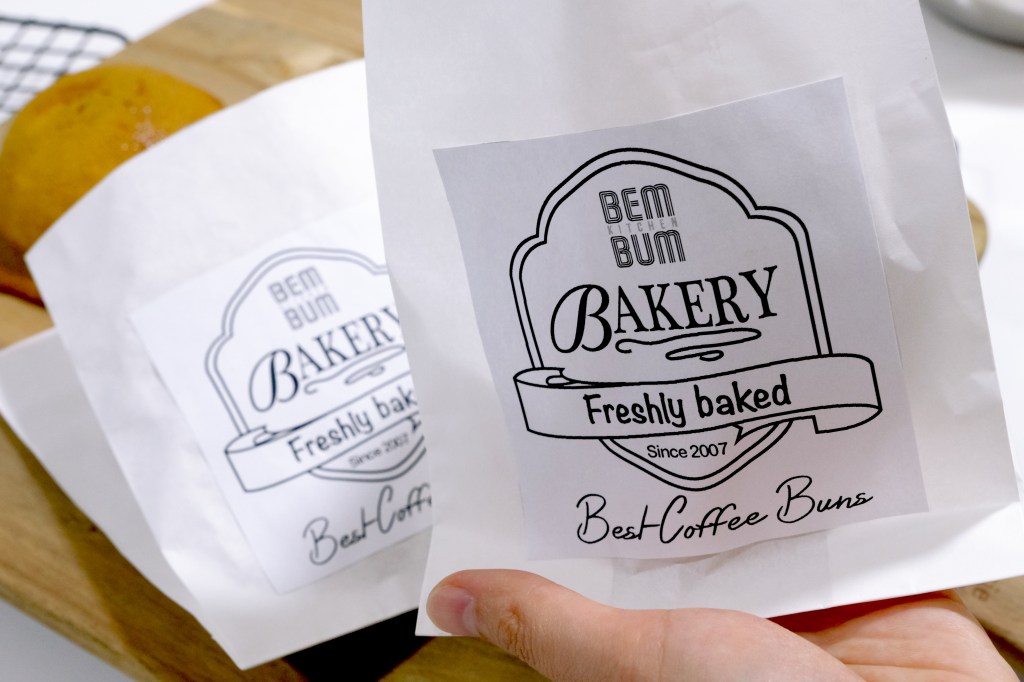
Simple DIY Packaging

And Yes, packaging is really important for selling point, but the main key of success still on the taste of our baking goods.

As home bakers, we don’t need to produce such a mass packaging for starter which can cost a lot of money. Yet, we can simply use ready made paper bag or even make DIY packaging with our own design, like what I did here.

Pillowy Soft, Moist and Creamy Interior

These bread has a perfectly moist, creamy interior with a crisp outer crust. Crispy on the outside, soft bread in the inside, with an additional salted caramel in the center of the soft bun.
Oh I Love Caramel so much! It’s really addictive and they really gone too fast.

I hope you will enjoy the recipe of these memorable taste of the caramel coffee-coated buns and let’s spread the love for coffee buns!

SALTED CARAMEL MEXICAN COFFEE BUNS
Yield: 5 Pieces 
Active time:  1 1/2 hour
Total time: 5 hour

INGREDIENTS
Caramel Filling:

  • 100 grams Granulated Sugar
  • 40 grams Unsalted Butter
  • 60 grams Heavy Cream
  • 1/2 teaspoon Salt


Coffee Topping:

  • 3/4 teaspoon Instant
  • 1/4 teaspoon Hot Water
  • 1/4 teaspoon Vanilla Extract
  • 25 grams Unsalted Butter
  • 25 grams Granulated Sugar
  • 25 grams Eggs
  • 25 grams Cake Flour


Tangzhong Starter:

  • 10 grams Bread Flour
  • 60 grams Water


Bread Dough:

  • 120 grams Bread Flour
  • 30 grams Cake Flour
  • 10 grams Milk Powder
  • 20 grams Granulated Sugar
  • 3 grams Instant Yeast
  • 15 grams Eggs
  • 45 grams Water
  • 40 grams Tangzhong Starter
  • 1/4 teaspoon Salt
  • 10 grams Unsalted Butter


INSTRUCTIONS
Caramel Filling

  1. In a medium heavy pan, heat the sugar over medium heat until melted, swirl the pan occasionally. Continue cooking until the sugar has reached a deep amber color (almost a reddish-brown colored and have a slight toasted aroma).
    * Be careful, at this point the caramel can go from perfect to burnt in a matter of seconds, so keep a close eye.
  2. When the caramel reaches its sweet spot, turn off the heat, add in the butter (watch out, it will bubble up). Stir until the butter is completely melted. 
  3. Remove it from the heat, slowly pour in the cream (be careful, it will bubble up ferociously). Whisk until all of the cream has been incorporated and smooth.
  4. Add in salt, stir well. Set aside to cool for about 10-15 minutes, pour into your favorite glass jar, let it cool completely, close the lid and store in the fridge to harden it.

Coffee Topping

  1. Dissolve instant coffee with a small amount of hot water, add in vanilla extract, set aside.
  2. In a medium bowl, beat the butter and sugar until fluffy and pale in color. Gradually add in the eggs, mix well.
  3. Add in the coffee mixture and mix, fold in the flour and mix until smooth.Transfer the mixture into a piping bag and chill in the fridge to firm up.

Tangzhong Starter

  1. In a medium pan, mix the bread flour and water until no lumps remain.
  2. Cook over medium low heat, keep stirring until the mixture turn into a sticky paste (be careful not to burned the paste).
  3. Take it off from the heat, cover it with plastic wrap, pressing the wrap onto the surface of the mixture to prevent the skin form on the surface, let it cool completely.

Bread Dough

  1. In a large bowl, mix the bread flour, cake flour, milk powder, sugar and yeast. Add in the eggs, water, Tangzhong Starter and salt. Mix for a minute until a sticky dough forms.|
    Add in the softened butter and fold it into the dough with your hands until well combined.
    *It will be sticky at first, it’s not necessary to add additional flour and then end up with a tough bread.
  2. Transfer the dough onto a work surface and continue kneading (10-15 minutes), feel free to use electric mixer. As you knead the dough, it will be less and less sticky, knead until the dough becomes smooth and elastic.
    * Check if your dough is well-formed by doing the Windowpane Test; Take a little bit of dough, stretch it out into a thin membrane without breaking it. That’s an indication that the gluten is well-formed.
  3. Round and place the dough into a clean grease bowl. Cover with a plastic wrap and let it rise until it almost doubles in size.
  4. Punch down the risen dough, divide dough into 5 equal pieces (55 grams each)
    Roll each dough into round, pull around the edges, tuck underside into itself.
    Hold and roll the dough with our hands in “C” shape, give a little pressure on it, smoothing top and sides at same time as turning.
    Cover each roll with plastic wrap and let it rest for about 10-15 minutes (to relax the gluten).
  5. After being rested,  flatten each ball into a disc, place a half tablespoon caramel filling in center, enclose it by pulling the seams of the dough over and around it.
    Hold and roll the dough with our hands in “C” shape into a ball and place it on baking sheet lined with parchment paper (spare at least 3-inches space around each buns as they will expand during final proof and while baking).
  6. Cover the shaped buns with plastic wrap or kitchen towel, let them rise for 30 to 40 minutes or until almost double in size.
    In the meantime take out your coffee toppings from the fridge and preheat the oven to 180°C.
  7. Once the buns has risen, pipe the coffee topping in a tight circular pattern. Starting from the top of the buns down to about the middle part of the sides of your coffee buns.
    *Don’t pipe down all the way because that will be WAY too much topping which will just ooze down all over the place.
  8. Bake the buns for about 12-15 minutes. Take it off from the heat, transfer and let them cool completely on the cooling rack.

NOTES

  1. I don’t recommend to use espresso powder for the coffee toping coz it will make your buns taste a lot less flavourfull.
  2. To proof the dough in cold days; place them in the preheated 60°C oven that has been turned off.
  3. Buns best eaten freshly baked while still warm. You can store them in the fridge for 2 days.
  4. Reheat; in the preheated 180°C oven or toaster for obout 5-7 minutes, take it out.
    The top will soft at first, let them sit for about 5-10 minutes, it will become crispy.

Molang & Piu Piu Jiggly Pudding

Hey Guys, today we are making these Molang and Piu Piu Jiggly Pudding. A light, smooth, firm-yet-soft milky pudding pairs with chocolately creamy chocolate custard.

Unmould Pudding

This type of puddings are quite soft.
So I suggest to prepare them 1 day in advance to make sure that they are firm enough before we unmold them.

Creamy Chocolate Custard

This supersilky and chocolately chocolate custard quick and easy to make, it’s creamy and delicious and is kid friendly.

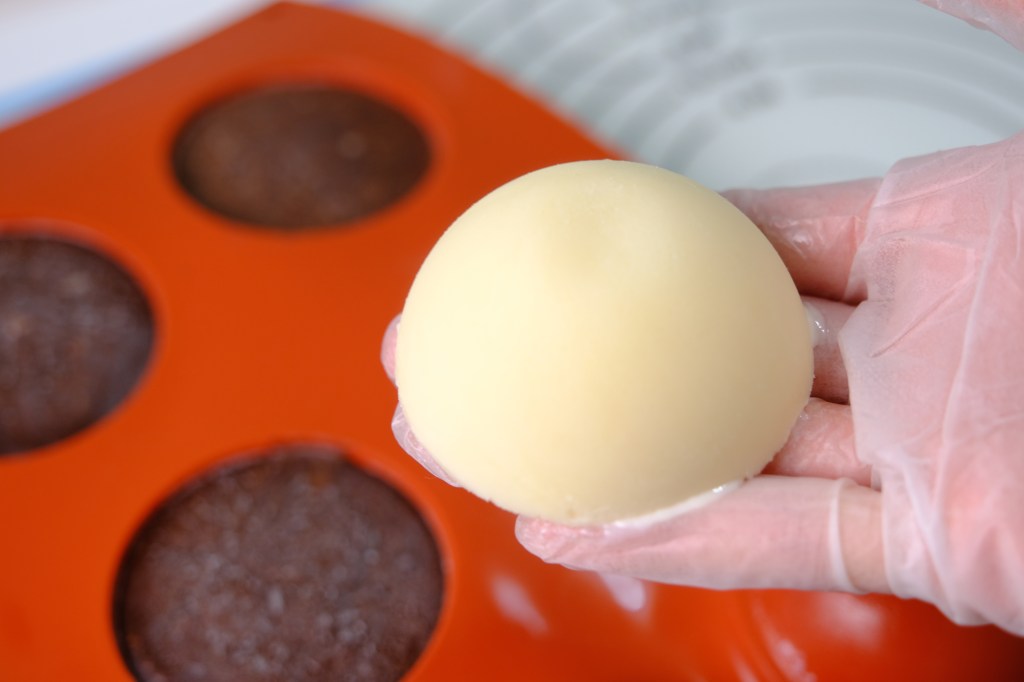
Edible Chocolate Cup

And to make it more special, we will serve them in individual edible chocolate cup. I am using these 4 oz half-sphere silicone mould for the the cups and donut silicone mould for the cup saucers.

If you not keen to buy this kind of mould, kindly substitute them with silicone cupcakes liner or maybe other shape and you can simply pipe circle chocolate decorations on parchment paper to create the saucer.

To kind of fancy the cup up, I dip the rim of the chocolate cup into the melted chocolate and then dip that into the nonpareils. Isn’t that beautiful?

Chinese Tea Cup

And for the pudding moulds, I found that my pretty chinese tea cup and this super tiny measuring cup suits perfectly for this kind of project.

Super Tiny Measuring Cups

Look how small and adorable they are!! They are perfect coz they have a round bottom shape, quite similar to our lovely character’s head.

What I love about this pudding is that it’s not too sweet and it’s pretty light. There’s something so satisfying about spooning out that first bite.
It should keep it’s shape on your tongue and until you sink into it, it will dissolve into a velvety smooth melty bite.

It’s really an easy, simple, yet stunning dessert. You can make them ahead of time and serve on a dinner party.
I hope you give the a try and I’m sure that everybody will love them!

MOLANG & PIU PIU JIGGLY PUDDING
Yield: 2 portions
Active time:  1 hour
Total time: 8 hour

INGREDIENTS
Pudding:

  • 20 grams Cold Water
  • 4 grams Gelatine Powder
  • 20 grams Granulated Sugar
  • 115 grams Milk
  • 1/2 teaspoon Vanilla Extract (optional)

Chocolate Custard:

  • 20 grams Granulated Sugar
  • 2 teaspoons Cocoa Powder
  • 2 teaspoons Cornstarch
  • A pinch of salt
  • 12 grams Egg Yolks
  • 160 grams Milk
  • 1 teaspoon Unsalted Butter
  • 2/3 teaspoon Vanilla Extract/ Rhum


Decoration:

  • White Chocolate Compound
  • Dark Chocolate Compound
  • Food Colouring (Pink Rose, Yellow)


INSTRUCTIONS
Prepare the templates and moulds

  1. For Templates
    Print some templates for Molang and Piu Piu details. Stick some greaseproof paper on top of the templates, then apply some shortening to the greaseproof paper to prevent the chocolate stick to the paper surface.
  2. Pudding Mould
    Prepare pudding mould for Molang and Piu Piu that have a round bottom shape (quite similar to our lovely character’s head, for example chinese tea cup).
  3. Edible Cups and Saucers Mould
    You can use 4 oz half-sphere silicone mould or silicone cupcakes liner and maybe other shape for the the cups and donut silicone mould for the cup saucer (or manually make simple circle chocolate decorations on parchment paper for these saucer).


Pudding

  1. Bloom the gelatine with cold water and let it stand for about 3-5 minutes.
  2. In a medium sauce pan, mix the milk and sugar. Cook until the mixture simmering or reach about 60°C. 
  3. Mix in the bloomed gelatine into the milk, stir until well combine.
  4. Pour the white pudding mixture into Molang mould, colouring the rest with a bit of yellow food colouring for the Piu Piu, and then pour the yellow mixture into Piu Piu’s mould.
  5. Store them in the fridge for at least 6 hours (preferably over night).


Custard

  1. In a medium saucepan, mix the sugar, cocoa powder, corn flour and salt. Add in the egg yolks and mix until just combined.
  2. Gradually pour in the milk and whisk until no lumps remain.
  3. Cook the mixture over medium heat, keep stirring until it starts to boil and the mixture thickens. Take it off from the heat, add in the unsalted butter and rum or vanilla extract, mix well.
  4. Strain the custard to get rid of any lumps. 
  5. Let it cool about 5-10 minutes. Cover the surface with plastic wrap, pushing it directly on top of the mixture (make sure there are no air pockets, to prevent skin formation on top of custards). 
  6. Let it chill in the fridge for about 2 hours.


Character Details
Melt some white and dark chocolate compound, colouring as needed, pour each colour into a piping bag then trace characters details onto a parchment paper. Let them set hards in the fridge for about half hour.


Edible Chocolate Cups and Saucers
Cups; Pour melted rose pink colour chocolate compound fill up our moulds here, fill it right up to the top.  Flip it right over to make sure all the excess drips out, scrape the edge of any of that excess (we don’t want it to be a real jagged looking cup).
Repeated this 2 times, make sure you let these set in between each layer.
Saucer; Fill about half of the donut mould
*Store both cups and saucer for about 10 minutes in the fridge so they are completely solid and sets.


ASSEMBLY

  1. Unmould the Cups and Saucers
    Pull that silicone away from the chocolate, being very careful not to crack the chocolate.
    To fancy the cup; dipped the rim of the chocolate cup into the melted chocolate and then dip that into the nonpareils.Stick the cup onto the saucers with some melted chocolate.
  2. Crush some marie biscuit for layering in between the custard to add crunchiness and strengthen the base of the pudding so it won’t sink too much (can substitute with digestive or oreo).
  3. Pour about 2 tablespoons of chocolate custard into the edible cup, sprinkle about 1 tablespoon of crushed marie biscuits, spread another layer of custard evenly over the biscuits. 
  4. Slowly and carefully unmould Molang and Piu Piu pudding then place the pudding on top of the custard.
  5. Stick all the details.


NOTES

  1. Prepare the pudding 1 day in advance to make sure that they are firm enough before we unmold them.
  2. You can make the pudding and custard ahead of time (store them in the fridge for 2-3 days).
  3. You can use Candy Melts for Chocolate Compound.
  4. If you made edibles cups and saucers in advance, I suggest to store them at room temperature in an airtight container, so there is no moisture when served.
  5. For the presentation purpose; I recommend to assembly these dessert directly before serving to make sure that the biscuits don’t get mushy so the pudding doesn’t sink into the custard.

15 Minutes Quick and Foolproof Pizza Dough

Hey Guys, today we are making these “15 Minutes Quick and Foolproof Pizza dough” that rises quickly and makes incredible homemade pizza! It comes together in just minutes, you really doesn’t need a long rising time to make a fabulous pizza.

This pizza dough is fantastic with part whole wheat flour or all white flour, it also doubles, triples and even quadruples beautifully.

The dough is easy to work with and it’s a great last minute family dinner that you can prepare within 30 minutes from start to finish.

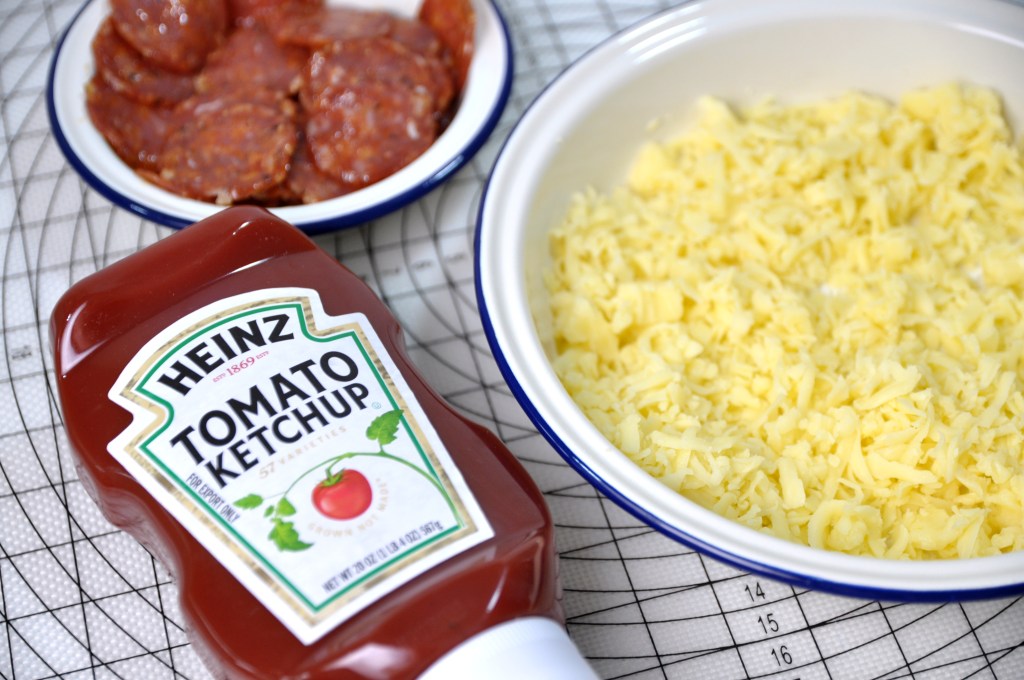
My favorite quick and easy toppings

There are also no rules about the kinds of toppings you put on your pizza. Choose ones you love. Don’t put yourself at risk of getting sick. When using toppings like sausage, chicken, steak, mushrooms or bacon, always cook them before preparing your pizza.
Keep in mind that more toppings generally mean more cook time.

It’s crispy around the edges, it’s soft and folds perfectly and of course the caramelized cheese and pepperoni even makes it more delicious!

Beautiful golden crust that’s super crispy around the edges and not soggy at the bottom, just nice!

Smells like heaven! It’s salty, spicy, crunchy…a bit sweet, It’s really good!!
I hope that you will enjoy the recipe!

15 MINUTES QUICK FOOLPROOF PIZZA DOUGH
Yield: 1 Regular Pizza
Active time: 15 Minutes
Total time: 30 Minutes

INGREDIENTS
Pizza Dough:

  • 120 grams Warm Water
  • 1/2 tablespoon Granulated Sugar
  • 1/2 tablespoon Vegetable Oil
  • 1/2 tablespoon Instant Yeast
  • 195 grams All-Purpose Flour
  • 1/2 teaspoon Salt

Sauce & Toppings:

  • Tomato Ketchup
  • Mozzarella Cheese
  • Salami(Pepperoni)
  • Parsley Flakes

Condiment: Cheddar Cheese and Chili Flakes Chili Sauce

INSTRUCTIONS
Prepare the Oven and Pan
Crank your oven up as high as it goes.
The closer you can get to 260°C, the better.
Flip a rimmed baking sheet upside down, place it in the oven and preheat it for about 30 minutes before baking.

Pizza Dough:

  1. Mix the water, sugar, oil and the yeast. Add the flour and mix until just combined, pour in salt and stir until a soft dough forms. The exact flour amount will vary, the dough should be soft and smooth, not leaving a residue on your fingers but not super stiff either. Not too sticky and definitely not overfloured.
  2. Pour the dough onto a work surface, knead it for about 5 minutes, then shape it into a ball. Place the dough in a greased bowl, cover it with a plastic wrap and let it rest for about 10 minutes to relax the gluten.
  3. Shape the dough into pizza Roll the dough onto a piece of parchment paper (you can stretch the dough with your hands, your fingers and kind of spread it or even use a rolling pin). If you want it a little bit thinner, feel free to roll it out more.
  4. Pizza toppings Spread 3-4 tablespoons of red sauce (no-cook blender sauce), Tomato Ketchup is the best option. Pesto or rich Ricotta are wonderful substitutes as well. Sprinkle generously amount of grated mozzarella all the way around, place pepperoni on top (make sure everyone gets one per bite), then sprinkle with some more mozzarella and parsley flakes.
  5. To Bake Place the pizza onto the middle of the hot baking sheet, bake for about 10-15 minutes until the cheese is a nice dark deep brown and the crust is like a golden brown as well.
  6. Take it off from the heat, serve immediately or transfer it to a cooling rack so the bottom not become soggy.

NOTES

  1. Do not add salt directly to the yeast because it will kill the yeast.
  2. I always use 1/2 or up to 3/4 whole wheat flour with good results (I let it knead for a few minutes longer).
  3. This recipe doubles, triples and quadruples really well. Keep an eye on the flour if increasing the recipe. You want a soft, smooth dough – not too sticky and definitely not overfloured.
  4. Don’t put yourself at risk of getting sick. When using toppings like sausage, mincemeat, chicken, steak, or bacon, mushrooms always cook them before preparing your pizza.
    Keep in mind that more toppings generally mean more cook time.
  5. To store; place the pizza in an airtight container, fridge for 3-5 days, freezer for up to 6 months.
  6. To reheat; in the preheated 180° C oven for 10 minutes, microwave for 30 seconds to 1 minutes.

Perfect Fluffy Pancakes | With Homemade Maple Syrup

SIMPLE. EASY. QUICK. FLUFFY. The Perfect Fluffy Pancakes recipe you will fall in love with!
I’ve tried so many recipes using milk or buttermilk but none of it as fluffy as this recipe. These homemade Greek Yogurt Pancake so delicious and incredibly quick to whip up.

Do not overmix the batter, a few small lumps is perfect!

It all starts with the batter! The key to light and fluffy pancakes is mixing just until combined, it’s important not to over mix.

Don’t use electric beaters or a mixer, just whisk it by hand until it’s generally smooth, but you still can see a few small lumps. That way you know you’ll have tender fluffy light pancakes.

Cook until small bubbles appear on the surface and the edges lose it’s shine

You can add some toppings to the batter directly before flipping; such as Blueberries, Chocolate chips, slices bananas, nuts anything you like . Just drop them on the top of the pancake, distribute them evenly.

When you can see small bubbles appear on the surface and the edges lose it’s shine, that way you know it’s cooking from underneath and they are ready to flip (it will takes for about 1-2 minutes).

Homemade Maple Syrup can be store 2 months in the fridge

I love to pair them with my Homemade Maple Syrup. This Maple Syrup is low budget, simple, easy to make and it taste like pure Maple Syrup, how cool is that?

If you don’t like to use my Canadian style Maple Syrup, feel free to serve them with your favorite Nutella, fruit jams, chocolate sauce, caramel syrup or maybe a bit savory like cheese if you want.

Look how fluffy those are!

I love everything about these pancakes, they turns out perfect every single time! An amazing fluffy and light texture, they make me hungry as soon as I see them.

They are so tender and warm.
If you are making these on the weekend and you have a few extra left, just keep them in the fridge.
When it comes to Monday morning when you are in a hurry, just take them out from the fridge, pop  in the microwave or toaster for a few seconds, and you have got a quick breakfast on the go!

Start your mornings with these perfect pancakes, I’m sure that you will love them!

PERFECT FLUFFY PANCAKES (WITH HOMEMADE MAPLE SYRUP)
Yield: 10-12 pieces
Active time: 1/2 hour
Total time: 1 hour

INGREDIENTS
Maple Syrup:

  • 160 grams Granulated Sugar
  • 20 grams Granulated Palm Sugar
  • 2 teaspoons Honey
  • 140 grams Water
  • 2 teaspoons Vanilla Extract
  • 1 teaspoons Maple Extract (optional)


Pancakes Batter:

  • 195 grams All-Purpose Flour
  • 1 tablespoon Granulated Sugar
  • 1/2 + 1/4 teaspoon Baking Powder
  • 1/4 + 1/8 teaspoon Baking Soda
  • 1/4 teaspoon Salt
  • 180 grams Plain Greek Yogurt
  • 180 grams Milk
  • 75 grams Whole Eggs
  • 3 tablespoons Vegetable Oil


INSTRUCTIONS
Maple Syrup

  1. In a medium saucepan, combine the granulated sugar, granulated palm sugar, honey and water.
  2. Bring the mixture to boil, then reduce the heat to low. Cover the pan and allow it to simmer for about 15 minutes.
  3. Take it off from the heat and let it cool for 20 minutes.
  4. Stir in the extracts, mix well.
  5. Let the syrup cool completely before pour them in a jar or containers. You can store them for up to 2 months in the fridge.


Pancakes Batter

  1. In a medium bowl whisk together all the wet ingredients; Greek Yogurt, milk, eggs and vegetable oil, set aside.
  2. In another large bowl combine all the dry ingredients; the flour, sugar, baking powder, baking soda and salt.
  3. Pour the wet ingredients to the dry .
    The key to light and fluffy pancakes is mixing just until combined (don’t use electric beater or mixer, just whisk it by hand).
    Do not over mix, whisk until it’s generally smooth but you still can see a few small lumps.
  4. To cook
    On a medium heat, preheat a nonstick pan until a drop of water sizzles. Pour batter into rounds (about 3-4 tablespoons).
    Cook until small bubbles appear on the surface and the edges lose it’s shine (it will takes for about 1-2 minutes).
    *At this point you can add some toppings to the batter directly (blueberries, chocolate chips, slices bananas, nuts anything you like). Just drop them on the top of the pancake, distribute them evenly.
  5. Flip the pancakes and then cook for another minute or so until golden and cooked through. Repeat with remaining batter.

NOTES

  1. For the Pancake Batter;You can substitute the vegetable oil with melted unsalted butter, it will gives the pancakes a bit more flavor.
    Sour cream subs great for the greek yogurt, or you can use regular plain yogurt.
  2. Store leftover pancakes in an airtight container. They’ll be good in the refrigerator for 2-3 days, or you can freeze for up to 3 months.
  3. To reheat Pancakes
    Microwave: 20 seconds to 1 minute
    Oven: 10 minutes in the preheated 180°C
  4. Maple syrup can be store in the fridge for up to 2 months.