Rich Moist Old-Fashioned Chocolate Fudge Cake

Chocolate Cake is a staple of every self-respecting tea table in England.
On a busy day, this Old-Fashioned Chocolate Fudge Cake is my go-to recipe to satisfy my cravings.

Frosted with a rich chocolate frosting! Get a large class of milk ready for this one 😇

This homemade chocolate cake recipe is super easy to prepare in one bowl for a deliciously moist and fluffy chocolate cake.
Classic Chocolate Fudge Cake that is rich in flavor and not too sweet.

What I love most about this cake is how EASY it is to make, you don’t even need a mixer!
All you need is a big bowl and a whisk and it tastes heavenly too 😇

Try it the next time you feel like baking a Chocolate Cake, I´m sure you will love it!

Raw Cacao Powder is my favorite when making Chocolate Cake, it tastes fruity, sweet with a hint of citrus. But if you prefer a more bitter dark chocolate taste, you can also use Dutch Processed Cocoa Powder.
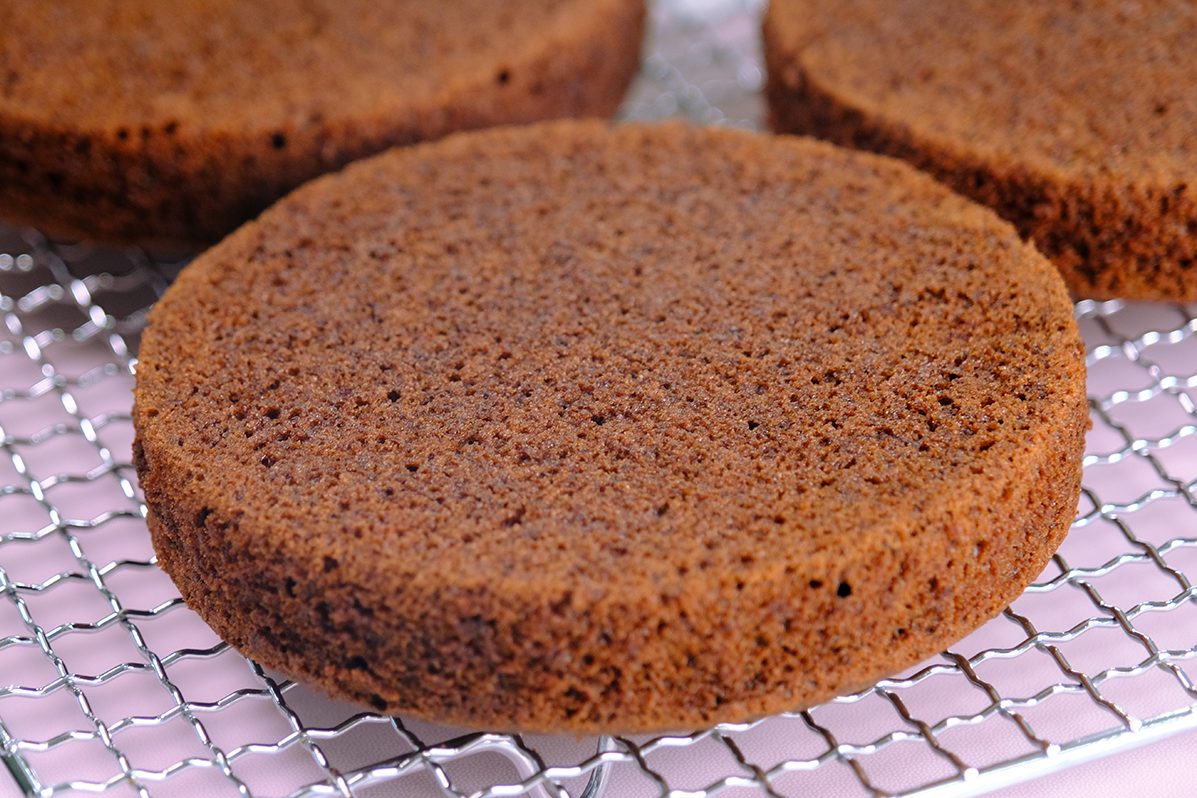
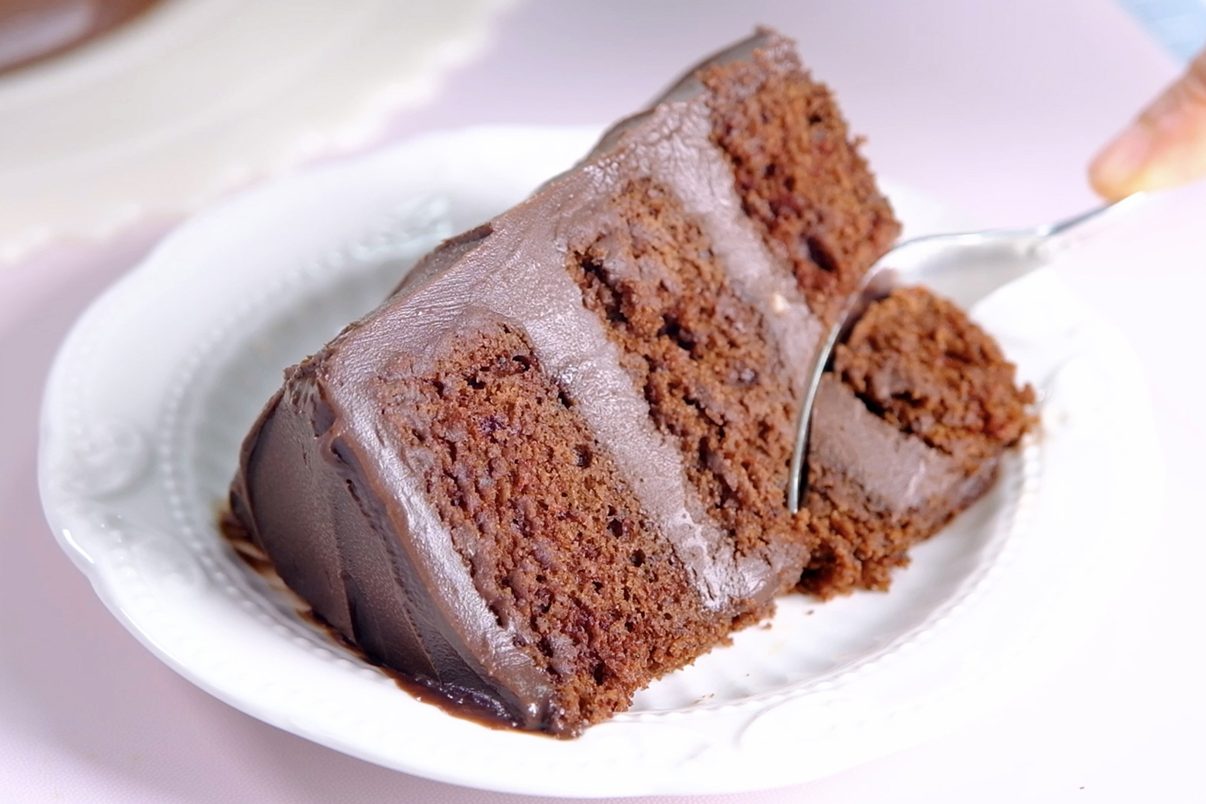
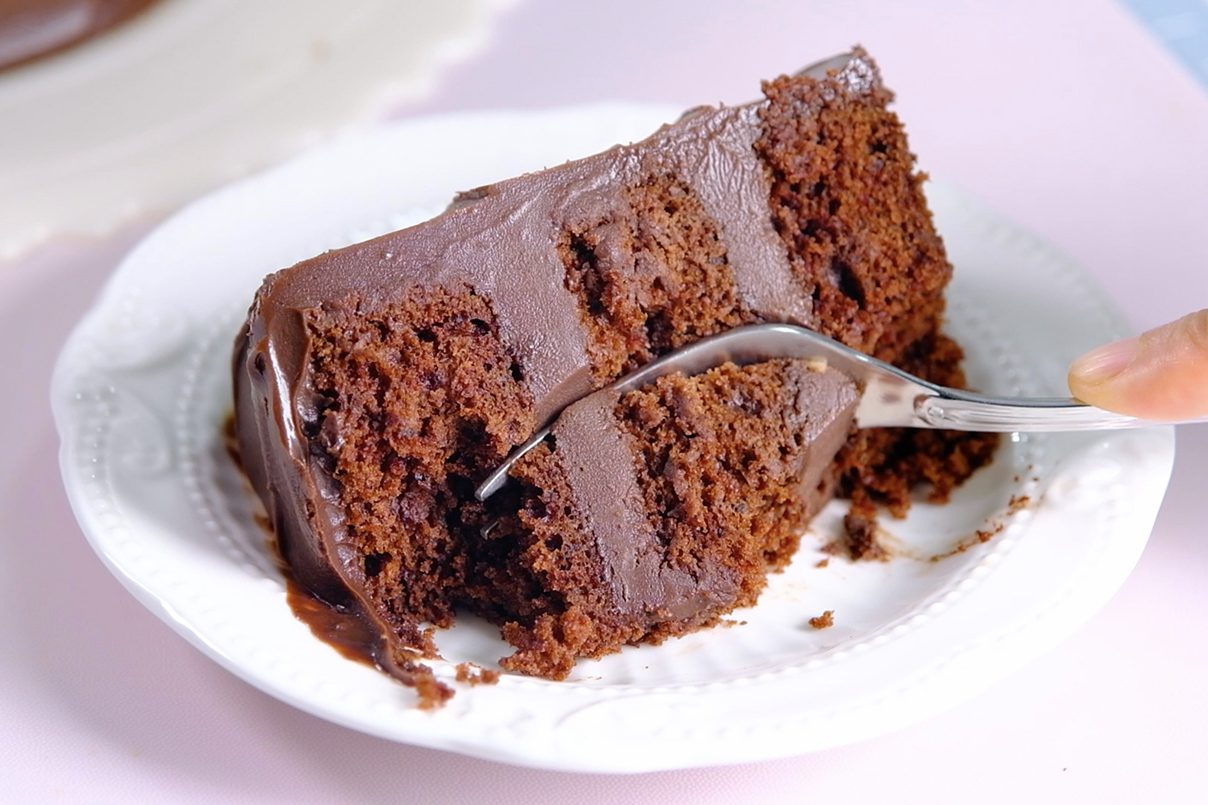
The cake has a very soft and moist crumb 😍

The rich and silky chocolate frosting is also easy to make, but does need one hour to set up.

Smooth, rich, and deeply chocolatey… 🥲

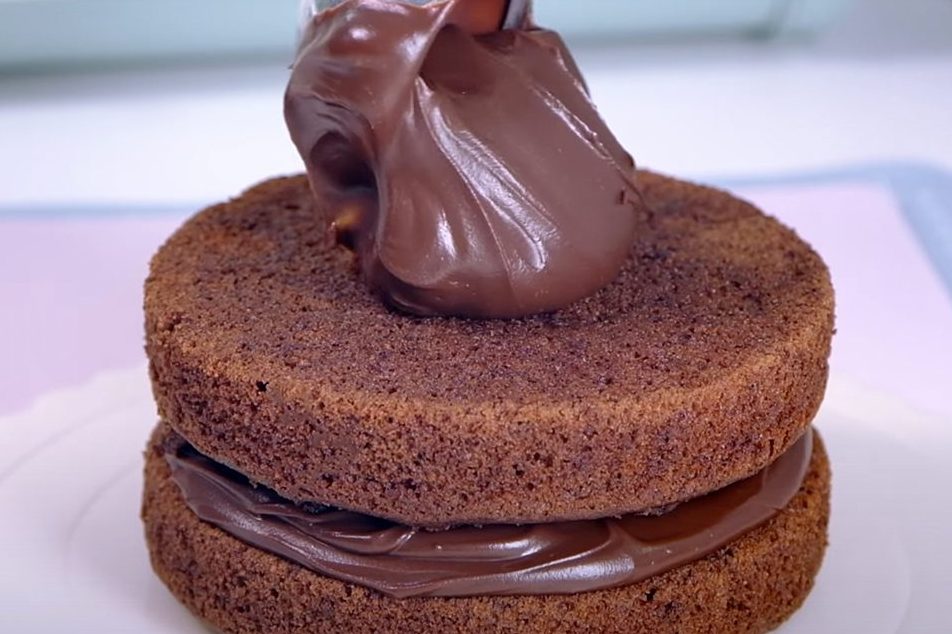
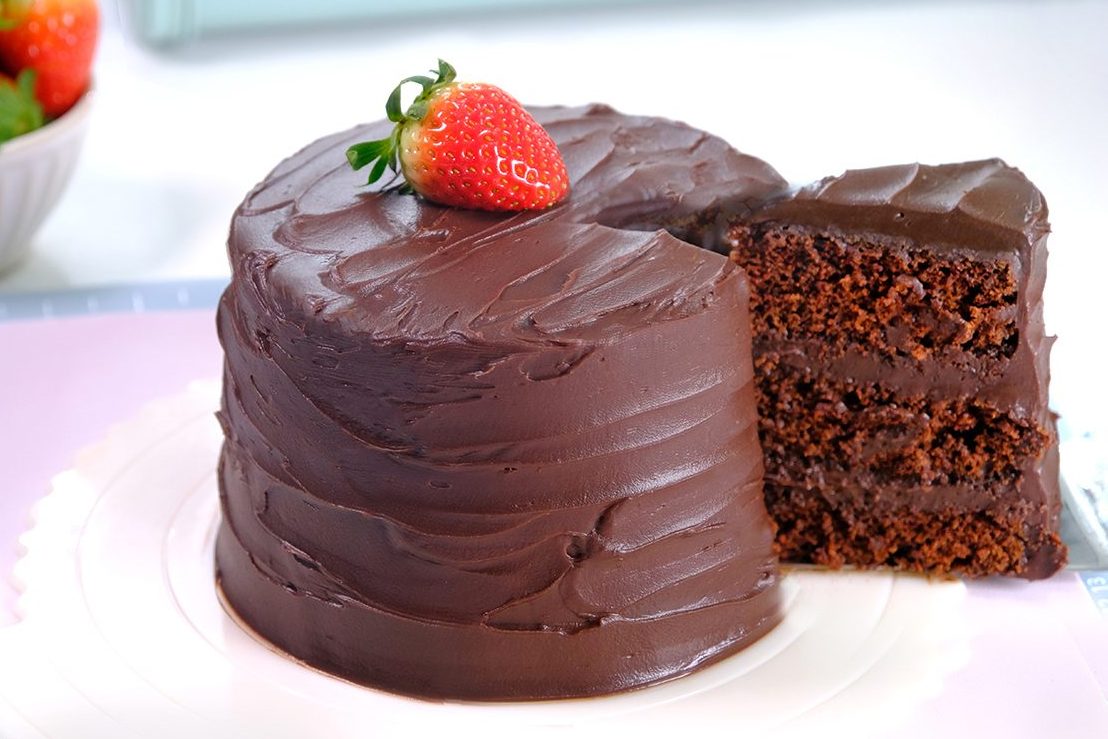
LOOK! how luscious this chocolate frosting is 🤤

If you’re making this frosting for a lover of bittersweet, darker chocolate, go ahead and use 70% Dark Couverture or Baking Chocolate.
😱 !!!
😋
🤪 can wait to eat !!!
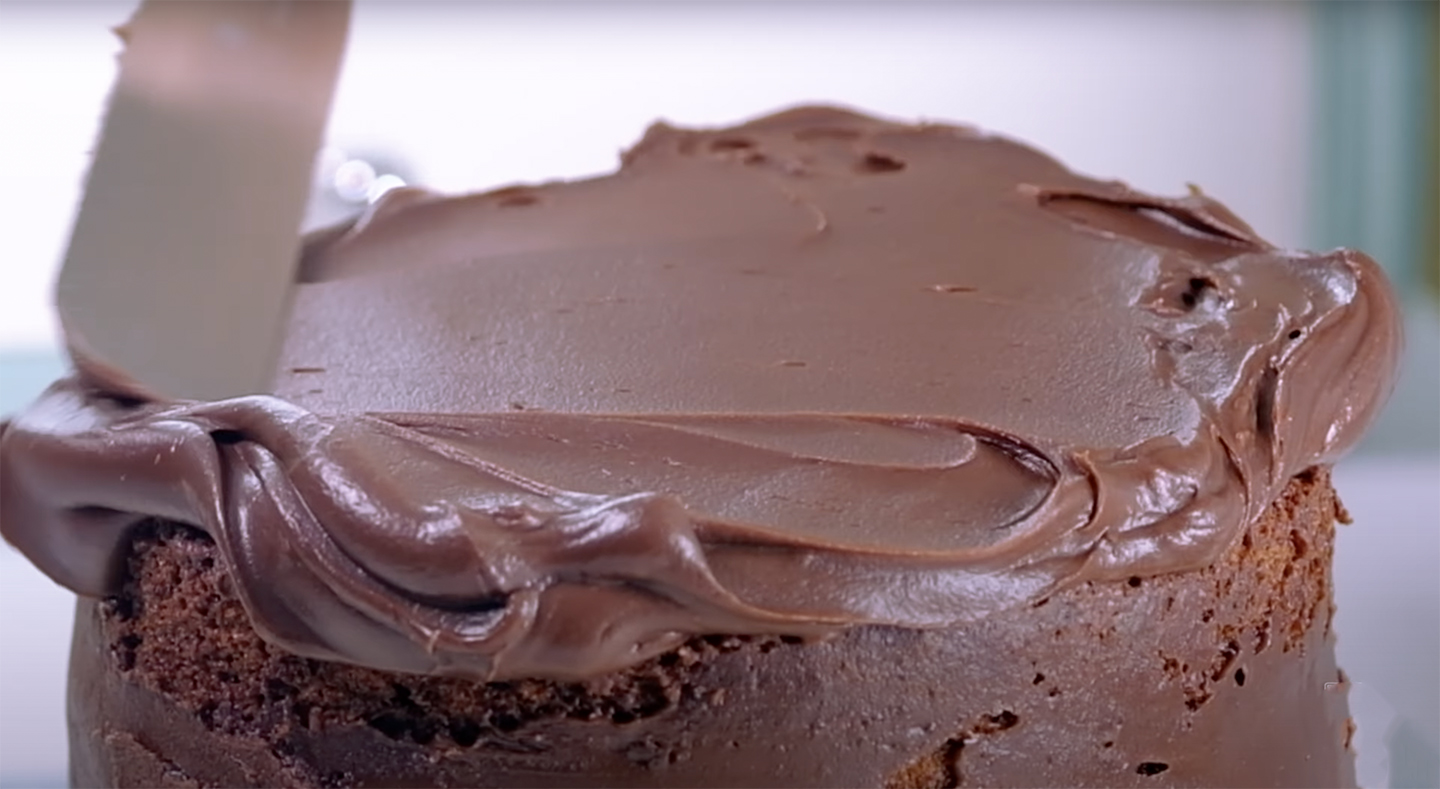
This is the easiest technique to ice a beautiful classic Chocolate Cake

The cake is very light and moist.

And the silky smooth Chocolate Frosting is so creamy 🤗

And after 1 day in the fridge, the cake tasted even better ...
The cake after 1 DAY IN THE FRIDGE 🧐

The frosting become super fudgy and the texture of the cake becomes nice and thick

🙃 One slice is never enough …

It has a perfectly soft and tender crumb, an incredibly luscious chocolate flavor, and melt-in-your-mouth moisture.

It’s easy to make and sure to impress all chocolate lovers!

Kids will definitely fall in love with it! 😍 🥰 😘

I hope you will give it a try and I can’t wait to hear what you guys think.
🍫 Love you All and Happy Baking!

WATCH HOW TO MAKE “RICH Moist Old-Fashioned Chocolate Fudge Cake”

RECIPE

OLD-FASHIONED CHOCOLATE FUDGE CAKE
Yield: One 14 cm diameter Round Cake (3 layers)

INGREDIENTS
🎂 Fudge Frosting
322 g Dark Chocolate Compound/Semisweet Baking Chocolate (chopped)
255 g Whipping Cream
45 g Greek Yogurt/ Sour Cream

*If you’re making this frosting for a lover of bittersweet, darker chocolate, go ahead and use 70% Dark Couverture or Baking Chocolate.

🎂 Chocolate Cake
113 g Whole Milk (room temperature)
1 ½ tsp White or Apple Cider Vinegar/ Lemon Juice
115 g All-Purpose Flour
1/2 tsp Baking Soda
25 g Raw Cacao Powder/ Dutch Processed Cocoa
65 g Unsalted Butter (room temperature)
125 g Caster Sugar
75 g Eggs (room temperature)

*Raw Cacao Powder is my favorite when making chocolate cake, it tastes fruity, sweet with a hint of citrus; but if you prefer a more bitter dark chocolate taste, you can also use Dutch-Processed Cocoa Powder


INSTRUCTIONS
🎂 Fudge Frosting

  1. Combine chopped Chocolate with Whipped Cream in a heatproof bowl
  2. Fill a medium saucepan with 1 inch of water and let it boil to create a water bath
  3. Place the bowl of chopped Chocolate and Whipped Cream over the water bath
    Make sure that the bottom of the bowl doesn’t touch the boiling water (the steam will slowly melt the chocolate)
  4. Once it’s completely melted, remove from heat; add Greek Yogurt; Stir well (Yogurt will lighten the sweetness of the chocolate)
  5. Cover the bowl with a cling wrap and let it cool in the fridge for 1 hour to set

🎂 Chocolate Cake

  1. Preheat the oven 160°C fan/ 180°C/ gas mark 4
  2. Grease three 14 centimetre diameter round pans (4 cm tall), adding a circle of parchment paper to the bottom of each pan
  3. For the Buttermilk
    Simply combine the Milk and Vinegar; Stir well, let it sit for 5 minutes; set aside *The acids in Buttermilk will react with the leavening agent, producing a light, fluffy cake texture and tender crumb
  4. In another bowl, sift all the dry ingredients (All-Purpose Flour, Baking Soda and Raw Cacao Powder); set aside
    * Sifting the dry ingredients will help remove any lumps in the Cocoa Powder and Baking Soda
  5. In a large mixing bowl, using a baloon whisk creaming the Unsalted Butter and Caster Sugar until pale and fluffy This process will take for about 5 minutes
  6. Then add in Eggs, mix well
  7. Add the dry ingredients alternating with the Buttermilk (3 additions of dry ingredients and 2 additions of Buttermilk; begin and end with dry ingredients) Mix until just combined DO NOT OVER MIXED
  8. Scrape the bottom of the bowl to make sure the batter is mixed well
  9. Divide the batter evenly between the 3 pans (About 170 grams each)
  10. Tap the pan a few times to remove air bubbles; then bake in the preheated 160°C fan oven on the middle rack for 15 minutes
  11. Once it’s done, let it cool in the pan for about 5 minutes; then turn it over and leave it cool completely on a cooling rack (make sure it’s completely cool before adding the frosting)

NOTES

  1. Store the cake in an airtight container in the fridge if not serving immediately
  2. The cake taste best if consumed within 3 days of baking, but will last for up to 1 week if stored in the fridge
  3. Serve at room themperature; keep away from heat and direct sunlight
  4. You can freeze the cake and it can be stored in the freezer for up to 2 months.
  5. To freeze: wrap the cake well in plastic wrap and then in foil to prevent freezer burn. 
    To thaw: move the cake to the refrigerator overnight to slowly defrost. 

Mocha Mousse Cake

Not only this cake is so tasty, but it also has two of my favourite things that I need every day; coffee and dark chocolate. This one is for all the chocolate and coffee lovers.

This is definitely not a quick recipe as it has a few different elements However, it is also not highly technical or complicated (this cake requires a little patience 😉).

One important tip when making it, make sure that you bake the Chocolate Sponge Cake in advanced so it has time to cool because Mousse is very susceptible to heat.
Don’t rush the chilling times. If anything is too warm when assembled, it will melt and you won’t get that light and fluffy mousse texture.

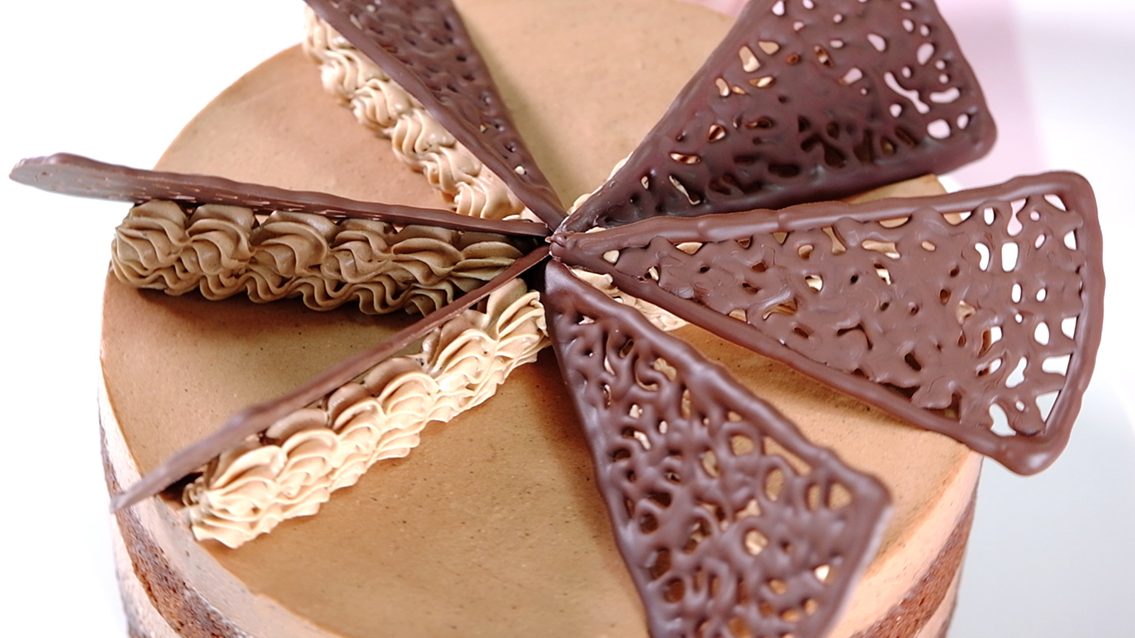
Chocolate cake is incomplete without decoration, don’t you agree? 😉

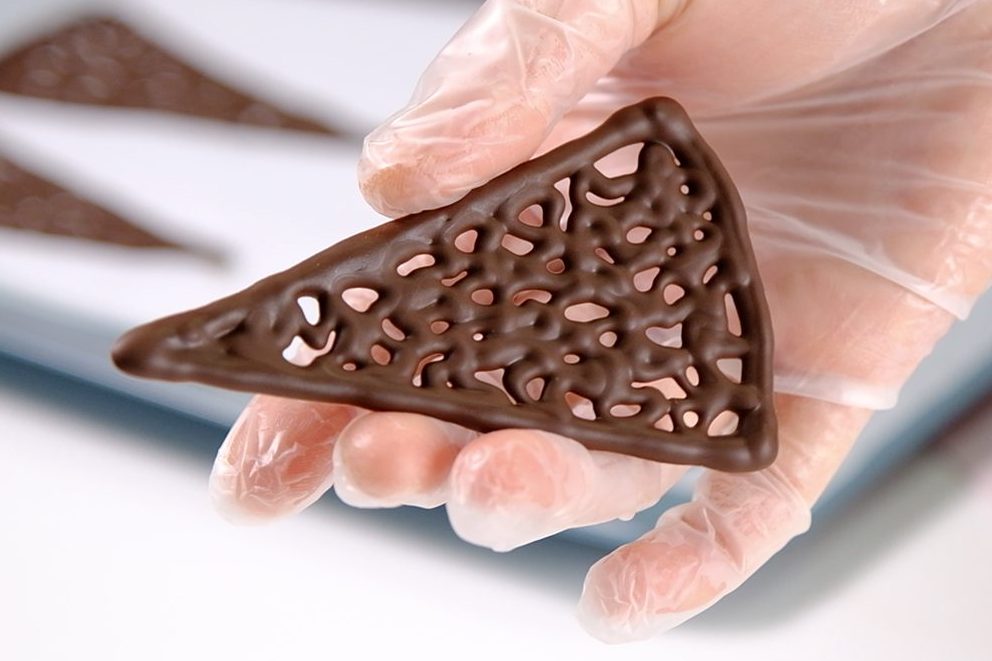
And if you like to decorate the cake, I will show you the simplest way to make an attractive chocolate decorations.

This chocolate decorations is best frozen at 17 to 21 degrees Celsius.
Once it’s done, let it harden at room temperature for best results. It will take longer, but this way the chocolate can maintain its shape and shine.

So pretty!! 🥰

If the room temperature is too warm, the only way is to put it in the fridge, however the chocolate will sweat and lose its shine.

This cake is delicious and creamy … 😍

Chocolate and coffee have always made such a great pair and it is heavenly

🤤

This rich chocolate cake is light, fluffy, and decadent…

The mocha mousse is creamy and airy, brings some softness to this cake.

I hope you can share this beautiful cake with someone you love 😘

WATCH HOW TO MAKE “MOCHA MOUSSE CAKE”

RECIPE

MOCHA MOUSSE CAKE
Yield: One 16 cm Diameter (7,5 cm tall) Cake

INGREDIENTS
🍫 Cake
7-Inch Fluffy Moist Chocolate Sponge Cake 

🍫 Sugar Syrup
25 g Caster Sugar
25 g Coffee Liquid
1 tsp Dark Rum 


🍫 Mocha Mousse
30 g Coffee Liquid (cold)
5 g Gelatine Powder
70 g Dark Chocolate 60% (chopped)
100 g Coffee Liquid
40 g Milk
200 g Heavy Whipping Cream
1 tsp Finely Ground Coffee 


🍫 Decorations
150 g Dark Chocolate Compound
Chocolate Buttercream

INSTRUCTIONS
Cake

  1. Bake the Chocolate Sponge Cake in advance so that it has time to cool as Mousse is very susceptible to heat.
  2. Once the sponge is baked, transfer it to a cooling rack and leave to cool completely.
  3. Wrap the cooled sponge cake in a cling film and Ziplog Bag then let it rest overnight in the fridge.
    This will ensure that all the moisture is sealed and the sponge is perfect firm texture for trimming and layering.

    NOTES: If you are in a hurry or have to make the cake on same day, let the cake cool for at least 30 minutes before wrapping and place in the fridge to chill.
    Don’t rush the chilling times.
    If anything is too warm when assembled, it will melt and you won’t get that light and fluffy mousse texture.


Sugar Syrup & Mocha Mousse

  1. Start by brewing your favourite coffee
    1 tablespoon of ground coffee with 155 grams hot water (we will need 155 grams of coffee liquid)
    Let it cool completely.
    * If you want a stronger coffee taste, you can use 2 tablespoons of ground coffee
  2. Finely chop the Dark Chocolate
    Place the chopped dark chocolate in a medium sized heatproof bowl (I recommend using 60% dark chocolate for a divine taste or you can use Dark Chocolate Compound)
  3. Once the coffee liquid has cooled, divide it into 3 portions
    – First for the Sugar Syrup
    Mix 25 grams Coffee Liquid with Caster Sugar; stir until all the sugar dissolved
    Add Dark Rum for extra kick (if you don’t want alcohol in your cake, you can just omit it)
    – Second to bloom the Gelatine
    Mix 30 grams of Coffee Liquid with Gelatine, set aside
    – Third
    Place the remaining 100 grams of Coffee Liquid with milk in a medium sauce pan
    Cook over medium heat;
    Once it starts to bubble, pour this mixture over the chopped Chocolate;
    Stir until the chocolate has fully melted into the liquid;
    Immediately add the bloomed Gelatine and mix again until everything is dissolved;
    Then let it cool completely (please note, this mixture needs to be fully cooled but not stiff
    before you fold into the Whipped Cream; It will take for about 30 minutes to 1 hour)
  4. In the meantime, we can prepare the cake layers and moulds to assemble them

    Cake Layers
    Cut the chilled Chocolate Sponge Cake into two equal layers, about 1-inch thick (you can use the top of the cake for other purposes)
    Place the ring mould on top of the cake;
    Using the outside edge of the ring mould as a guide, trim the sides of the cake (use a sharp knife)
    * This trimming method ensures there are no gaps between the cake and the ring so the mousse doesn’t leak over the sides
    Once it’s done, wrap cake layers in a cling wrap to prevent from drying out

Mould for assembly
Cover one side of the ring mould with a cling wrap (the side with the cling wrap is the bottom of
the cake). Place this ring on a sturdy cake board.
Then place a sheet of Reusable Non-Stick Baking Paper on the bottom for easy removal.
* Remember to prepare this first; Don’t let by the time the mousse starts to sets, the ring isn’t
ready yet; That would be a disaster!

5. Once the coffee-chocolate mixture cooled to room temperature, we can start beating the
Whipped Cream. On medium-high speed, whip the cream until stiff peaks form.
* I highly suggest to whip the cream over an ice bath, this will helps stabilized the cream longer;
Especially when the weather is hot and you’re whipping by hand

6. Using a wide rubber spatula, gently fold the cooled coffee-chocolate liquid into the Whipped
Cream in two additions
* Don’t stir the mixture or you will deflate the cream and make a dense filling

7. Add finely ground Coffee, mix well; Then immediately remove the bowl, don’t let the mousse sit
too long and harden in the ice bath; then we are ready to assembly the cake


ASSEMBLY THE CAKE

  1. Place the first cake layer to the lined plate ring mould
  2. Brush with some Coffee Sugar Syrup (this will keep the cake moist and add extra flavour to the cake)
  3. Pour half of the Mocha Cream over the first layer (use the back of the spoon to smooth out and bring it all the way to the edges)
  4. Place the second layer of cake over it (press down on the top layer of cake so that it lies level and firmly on the mousse)
  5. Repeat the same process for remaining syrup and mousse
  6. Once it’s done, place the cake back in the fridge for at least 8 hours or preferably overnight


MAKING CHOCOLATE DECORATIONS
(kindly watch the video for completed instructions)

  1. Place a piece of non-stick baking paper on top of the template, secure them with some tape
    Feel free to use any design according to your taste
  2. Place the bowl of chopped dark chocolate over a pan of hot water, make sure that the bowl doesn’t touch the water
  3. Stir the chocolate until it’s completely melted without any lumps (don’t let the water drip on the chocolate, it will cause it to seize, becoming stiff and grainy instead of smooth and silky)
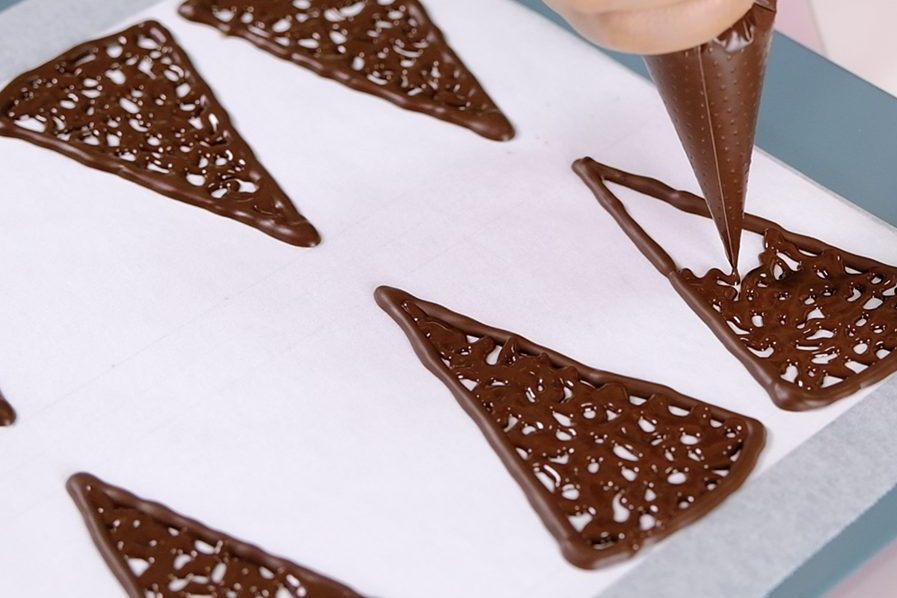
  4. Pour the melted chocolate into a piping bag
    Trace the shapes according to the template
    When tracing it, make sure the outer frame is thicker so they don’t break when lifted
  5. Chocolate is best frozen at 17 to 21 degrees Celsius
    Once it’s done, let it harden at room temperature for best results. It will take longer, but this way the chocolate can maintain its shape and shine
    * If the room temperature is too warm, the only way is to put it in the fridge, however the chocolate will sweat and lose its shine


UMOULD AND FINISHING
(kindly watch the video for completed instructions)

  1. After 8 hours in the fridge, the mousse has hardened
    To unmould, place the ring mould on an inverted 6-inch round baking pan
  2. Peel away the cling film
  3. Then using hot towel, wrap around the outside of the ring for a few seconds to loosen it
    Gently push the ring down
  4. Then carefully transfer the cake to a display plate
  5. Beautify with some buttercream and chocolate decorations

NOTES

  1. Always store the cake in the fridge
  2. This cake can be made a day or two in advance, but I recommend eating it within 4 or 5 days

Chocolate babka (QUICK & EASY)

“Babka” A sweet, braided bread that has ribbons of chocolate running throughout it.
And while the original Babka texture is a bit dense like typically a cakey bread; my ideal Babka version is a soft and fluffy bread twisted with homemade chocolate filling inside which is not overly sweet.

Unlike the common method, this recipe no need to proof the dough twice or overnight; A stunning loaf, quick and easy, how wonderful is that?

For the filling, I highly recommend to use dutch cocoa powder simply because it will give you a darker, more bittersweet experience and also has a more intense chocolate flavour.

This chocolate filling is not too runny, has a beautiful consistency and quite manageable.
You can sprinkle some chocolate chips or even toasted chopped nuts on the top if you want, I just like it the way it is “Simply is the best!“.

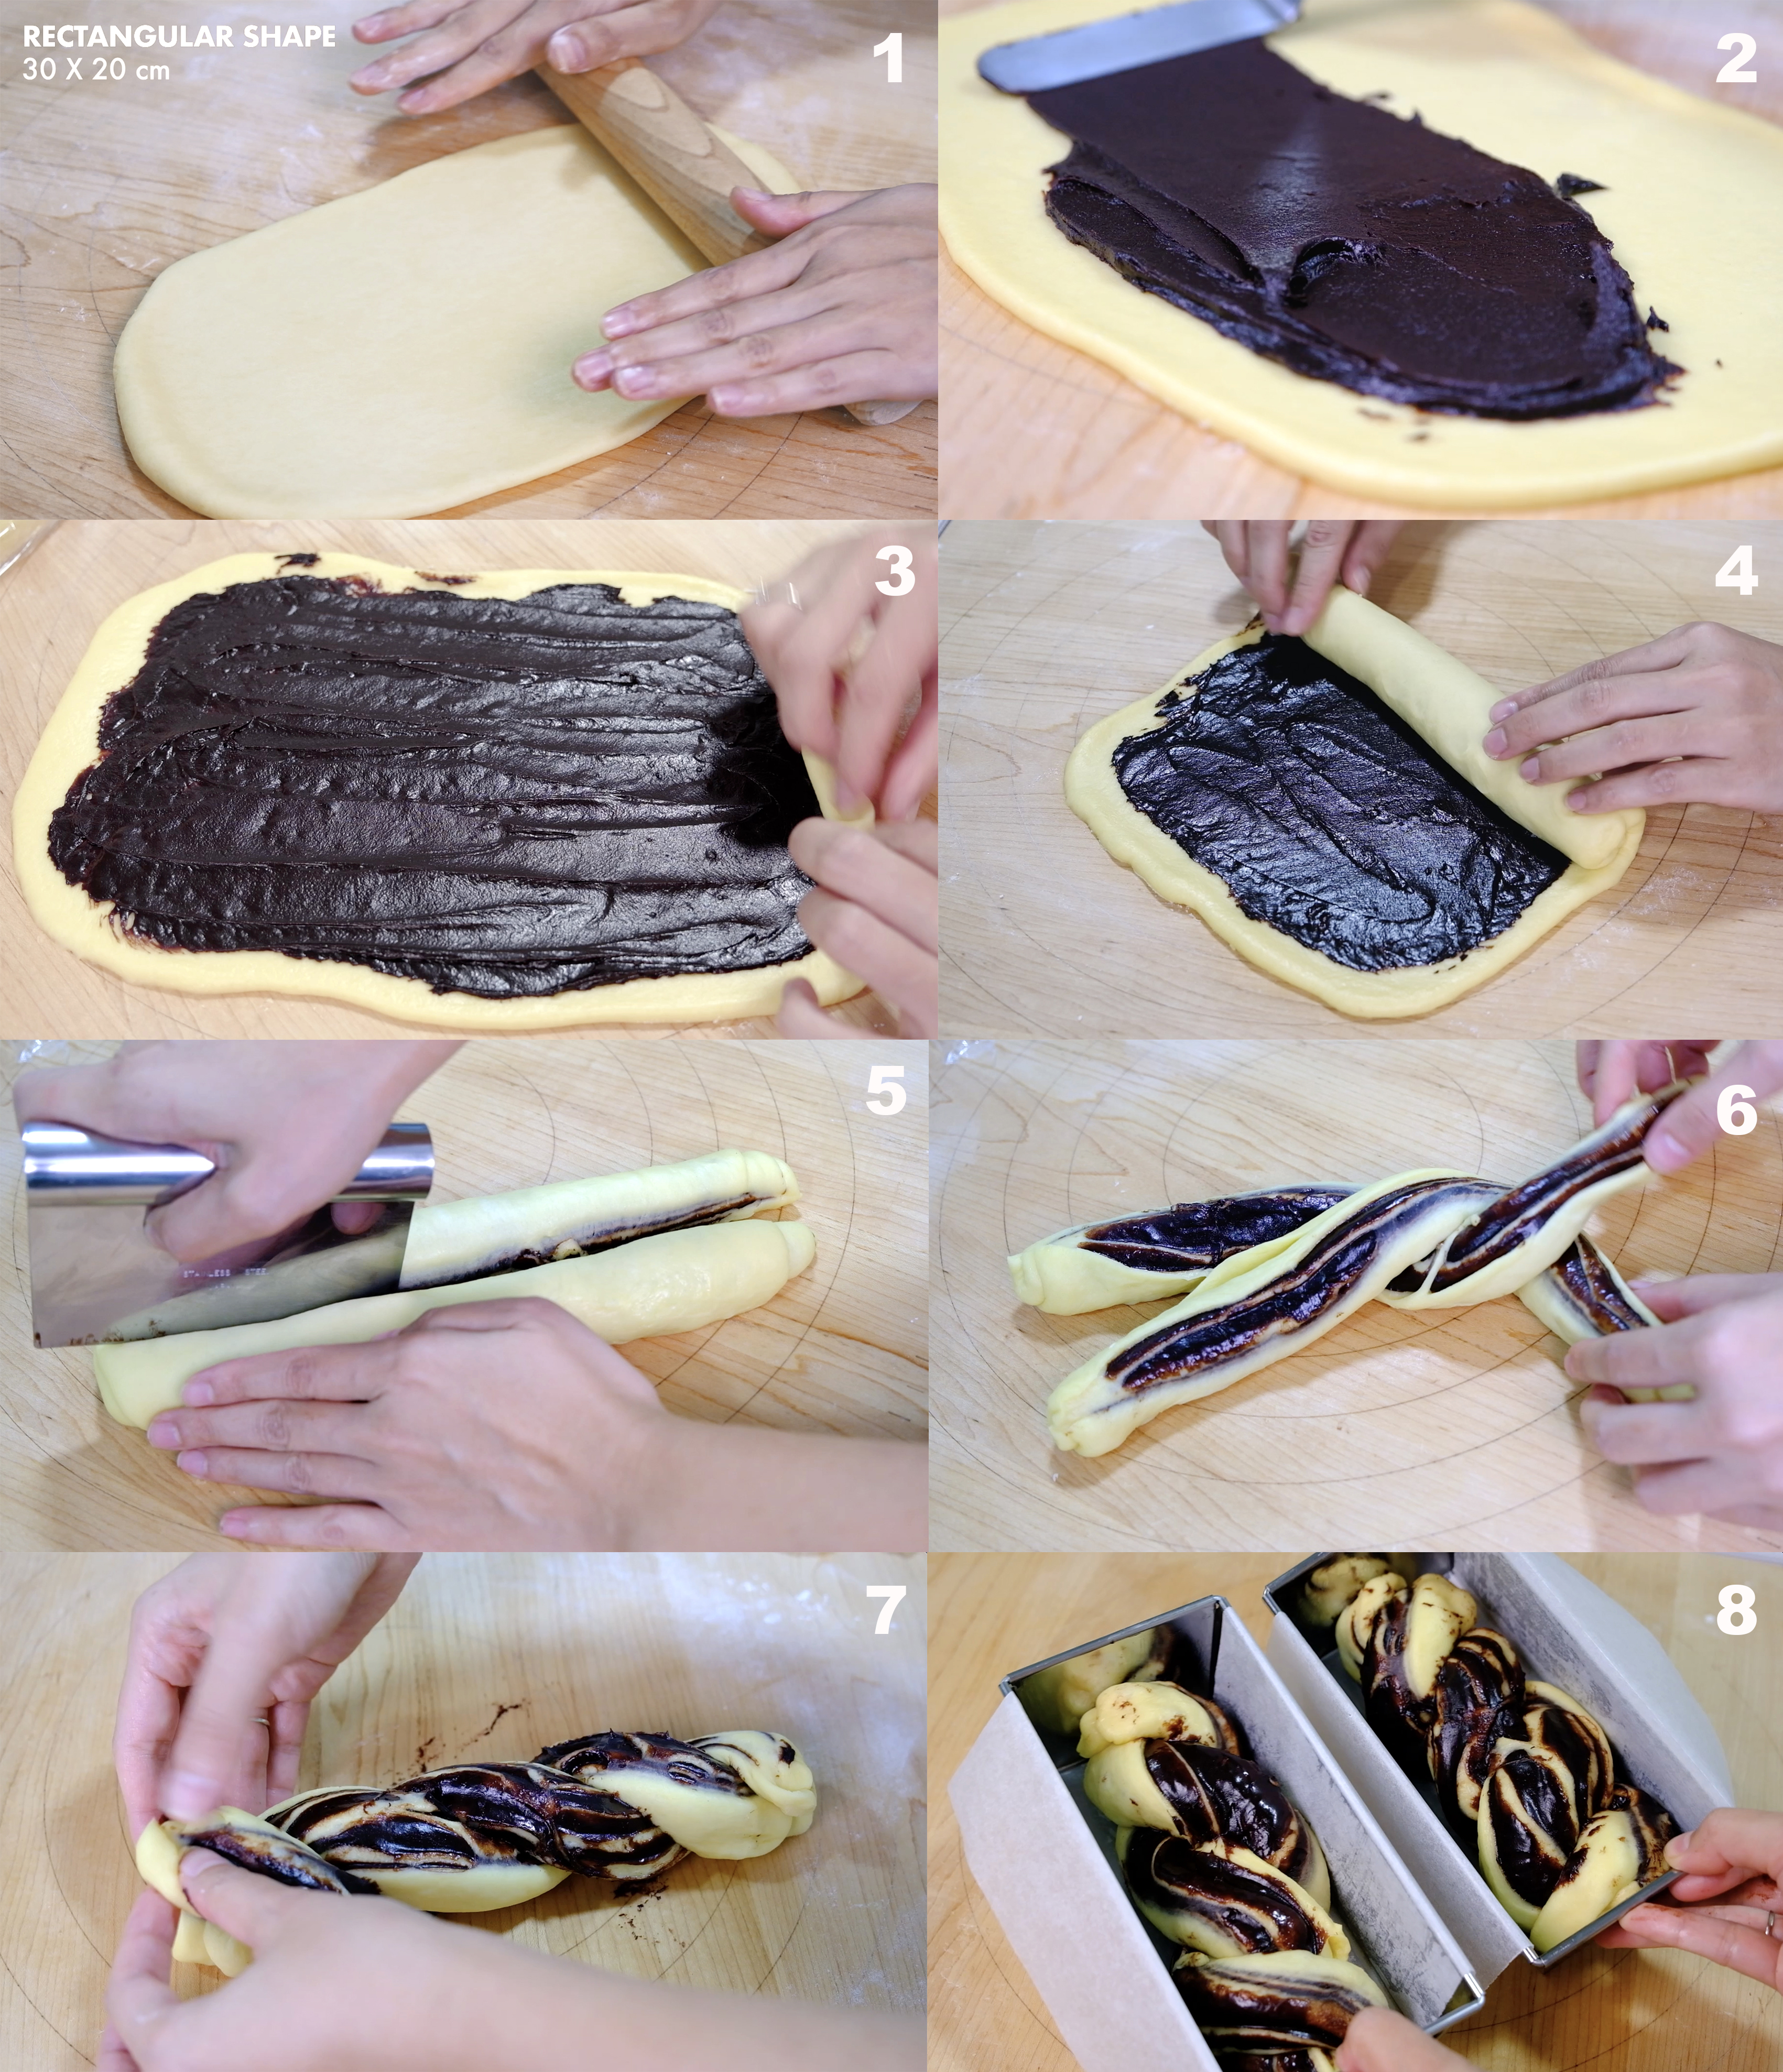
Steps to create Babka fascinating shapes

It’s worth the effort and patience, especially when you make two loaves, like in this recipe. You can save the second loaf in the freezer or give it away to show off your hard work.

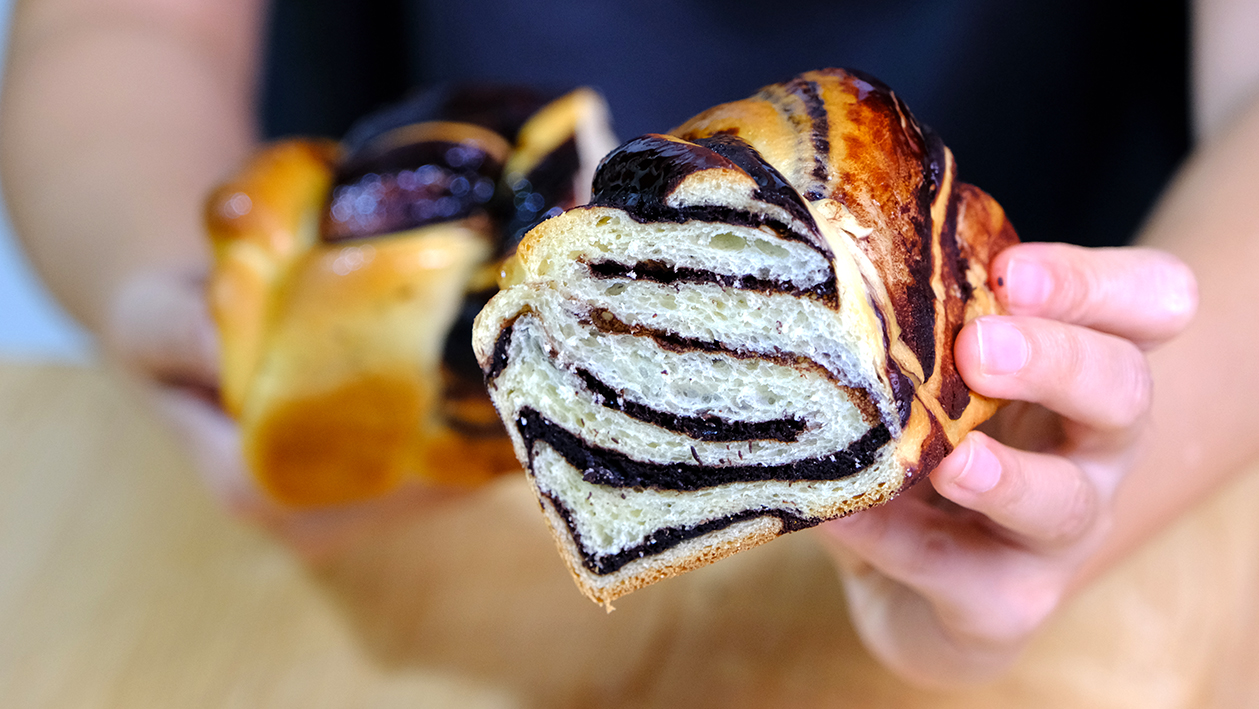
It always looks stunning, no matter how messy the shaping was. I like to have a nice bite in the middle because the chocolate is piling up there.

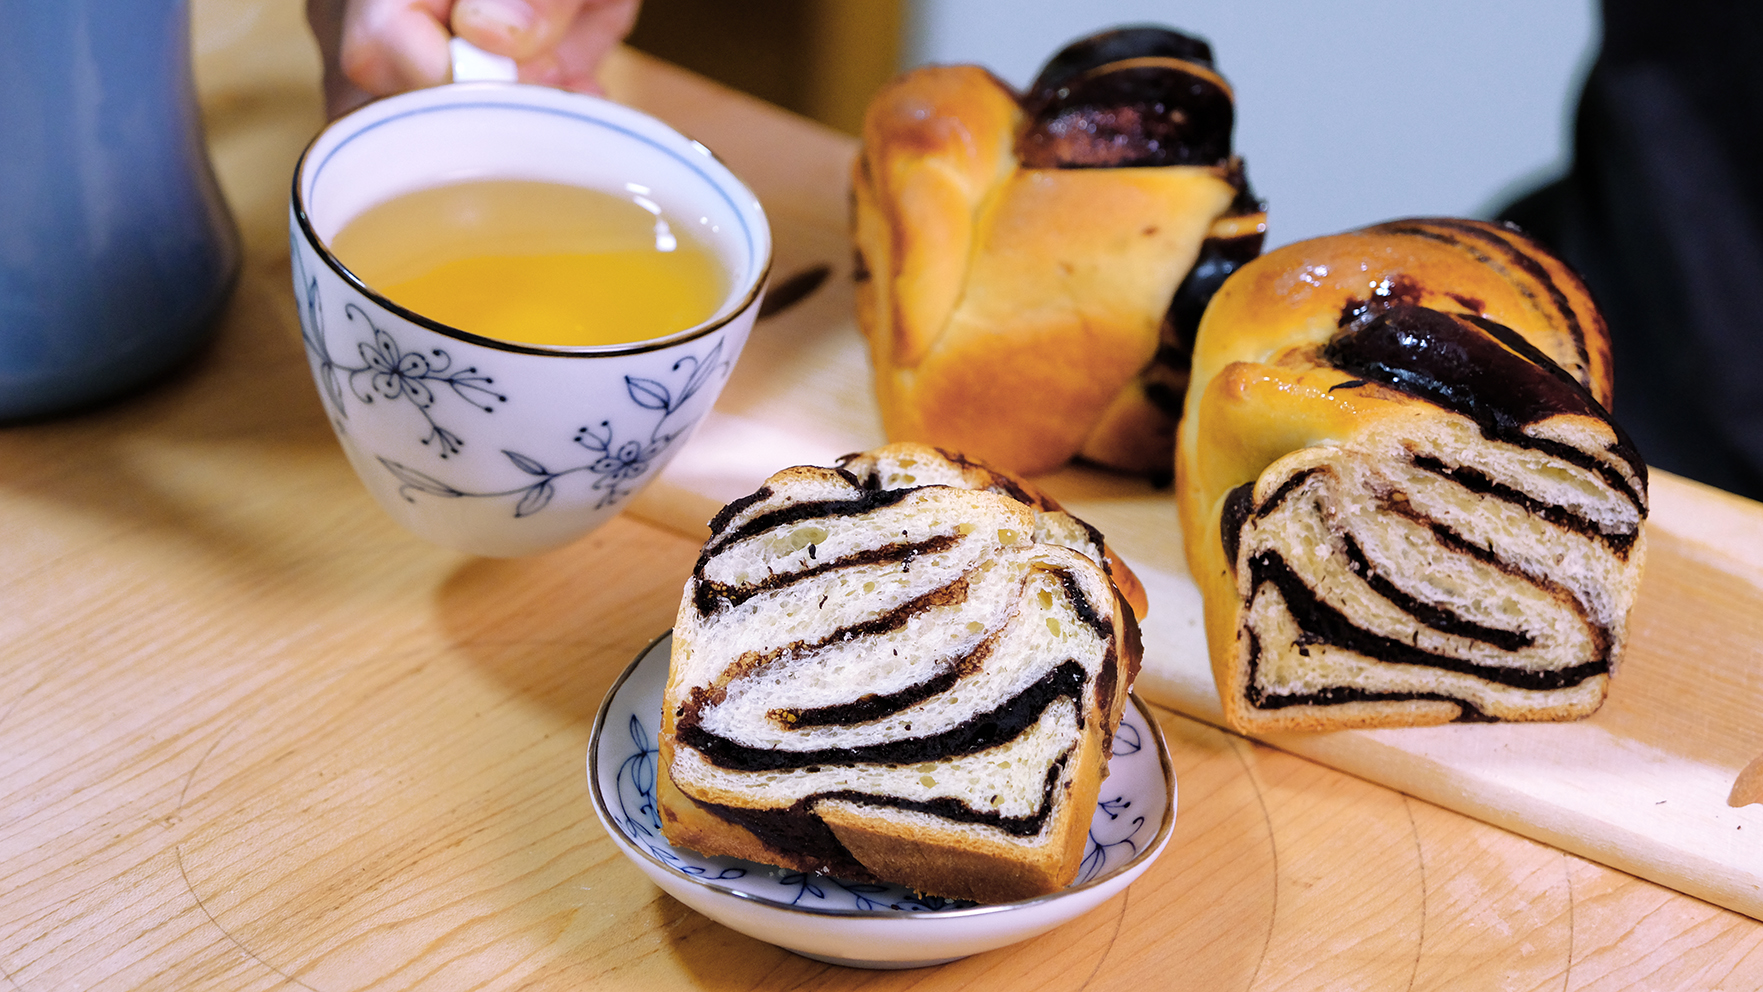
The bread texture is so soft and fluffy with a rich smooth chocolate filling inside. I’m sure no one is able to resist a warm piece of this chocolate Babka.

I hope that you enjoy my version of Babka, it always feels homey and comforting.
LOVE you All!!


CHOCOLATE BABKA
Yield: 2 Loafs 
Pan size: 17x8x6 cm
Active time: 1 hour
Total time: 2 hours

INGREDIENTS
Chocolate Filling

  • 20 g Dutch Cocoa Powder
  • 25 g All Purpose Flour
  • 50 g Caster Sugar
  • 90 g Milk
  • 12 g Unsalted Butter

Bread Dough

  • 110 g Bread Flour
  • 110 g All Purpose Flour
  • 1 tsp Instant Yeast
  • 25 g Caster Sugar
  • 15 g Milk Powder
  • 1/2 tsp Salt
  • 30 g Ice Water
  • 65 g Cold Milk
  • 45 g Eggs
  • 35 g Unsalted Butter

Sugar Glaze

  • 20 g Caster Sugar
  • 15 g Water

INSTRUCTIONS
Chocolate Filling

  1. In a medium non-stick pan, sift in the cocoa and flour (don’t skip this sifting step else you might end up with a lumpy chocolate filling).
  2. Pour in the sugar and milk, whisk all together until they become really smooth.
  3. Add in the butter; cook over medium heat and keep stirring. 
    When the mixture starts to thicken lower the heat, continue stirring until the mixture resembles a chocolate jam (be careful not to burn it).
  4. Take it off from the heat, let the mixture cool completely.

Sugar Glaze
In a small pan combine the sugar and water stir until the sugar dissolved, let it simmer for about 2 minutes; take it off from the heat.

Prep the baking pan
Grease the bottom and sides of the pan with some butter, line it with a parchment paper and grease it again.

Bread Dough

  1. In a large bowl combine the both flour, instant yeast, sugar and milk powder,mix well.
  2. Add in the salt and mix (always add the salt last to make sure it doesn’t have direct contact with the yeast).
  3. Pour in the ice water, along with milk and eggs. Mix well, make sure everything is well incorporated.
  4. Add in the butter and mix until just combine.
  5. Cover and let it rest to let the gluten bonds and begin forming for about 15 minutes.
  6. Place the dough onto a work surface and start kneading the dough (you can use a stand mixer for this process)
    *The mixture is gonna be really wet and really sticky. If you are doing this by hand resist the urge to add any flour. The idea is just to push it around to stretch all of that gluten; this is where we are begin to develop the structure for the dough.
  7. After 15 minutes kneading, you see that the ball is coming together;
    To make sure whether the dough is ready, we can do the windowpane test; take a small ball of the dough and stretch it into a square. Keep on stretching until it becomes a thin film in the middle without breaking. The dough must be thin enough to pass light through it. If it is obtained without any tear, then your dough is properly kneaded.
  8. Divide the dough into 2 equal pieces. Roll each dough into a smooth ball; cover it and let the gluten rest for about 15 minutes.
  9. Preheat the oven to 180°C.
  10. To create Babka shapes
    – Take 1 portion of the dough to a lightly floured work surface and roll it into a rectangular shape (30×20 cm).
    – Place half portion of the chocolate filling to the center of the dough, spread it evenly (spare for about 1 cm around the edges so the chocolate won’t get mess when you roll it).
    You can sprinkle some chocolate chips or even toasted chopped nuts on the top if you want
    – And to rolled up; starting from the short side closest to you just gently lift up the dough and then move forward rolling it up nice and tight.
    – Using bench scraper or knife; cut the dough in half length wise.
    – Position each half parallel to each other with the chocolate cut sides facing upwards. Then set the other halves on top in the opposite direction to form a cross; twist the halves together, keeping the cut sides facing up, and tuck the ends under. 
  11. Gently transfer the babka into the prepared pans; cover it with plastic wrap or a clean tea towel and let the dough rise at room temperature until almost doubled in size. Repeat with the second piece of dough.
  12. Bake them for about 20-25 minutes, until golden brown on top (if you have a thermometer, you are looking for an internal temperature of about 200ºF/93ºC).
  13. After baking, brush the sugar glaze on top of the Babka immediately (we want to do that while it’s hot because it does help to absorb it). It not only makes the babka exterior shiny but helps keeps the bread from drying out.
  14. Take it out from the pan and let them cool completely on the cooling rack.


    NOTES
  1. If you have a very cold room, you can place a tray of a boiling water in the bottom of your switch off oven and put your Babka pan on the top rack, just to create warm humid environment for proofing the Babka.
  2. Store the cooled Babka, wrapped in plastic wrap or in an airtight container on the counter for up to 2 days or fridge for 4 days.
    You can reheat slices in the microwave for a few seconds or pop the whole loaf in the oven for a few minutes.
  3. Babka also freezes well; once cooled, wrap the loaf in a couple of layers of plastic wrap or in an airtight container; it can be stored in the freezer for up to 1 month.
    Defrost at room temperature, still wrapped. Before serving, you can reheat it in a 160°C oven for about 10 minutes, until it’s warm and the chocolate is melty.

Sumikko Gurashi Mochi Browniesicle

Hey Guys, today we are making these “Sumikko Gurashi Mochi Browniesicle”. Adorable chocolatey fudgy chewy brownie on a stick.

They are the perfect blend of “Japanese Butter Rice Cake” with “Classic Brownies”, crispy on the outside and ooey-gooey mochi-licious on the inside.
They look just like traditional brownie but a lot less sweet than normal brownies.

Are they so Kawaii?

It’s important to use glutinous rice flour (or Mochiko — sweet glutinous rice flour) for these brownies. It does not contain gluten and gives us the chewy, sticky mochi texture that we want.

These brownies come together quickly, paired with melted and modelling chocolate, pack a serious chocolate punch!

The exterior is similar to Brownie, but the interior is chewy like Mochi

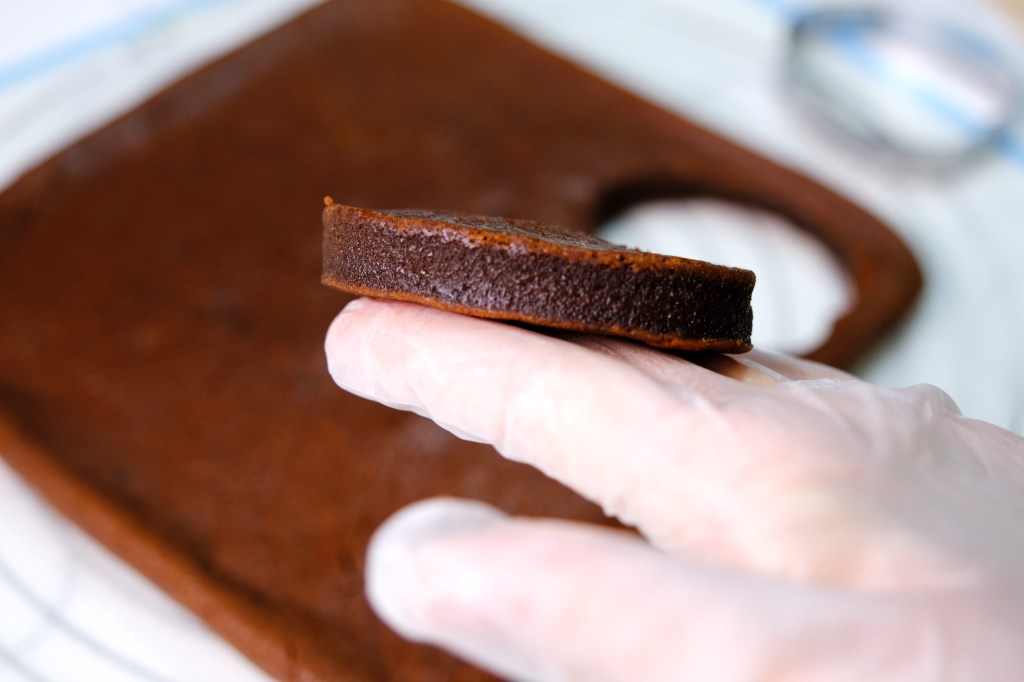
Look! It has a crackly shiny crust, crispy edges and also a rich chocolate flavour and a chewy texture. It is the perfect blend of brownie and mochi.

And when still hot, they are more sticky and difficult to cut, so make sure the brownies cool completely before cutting.

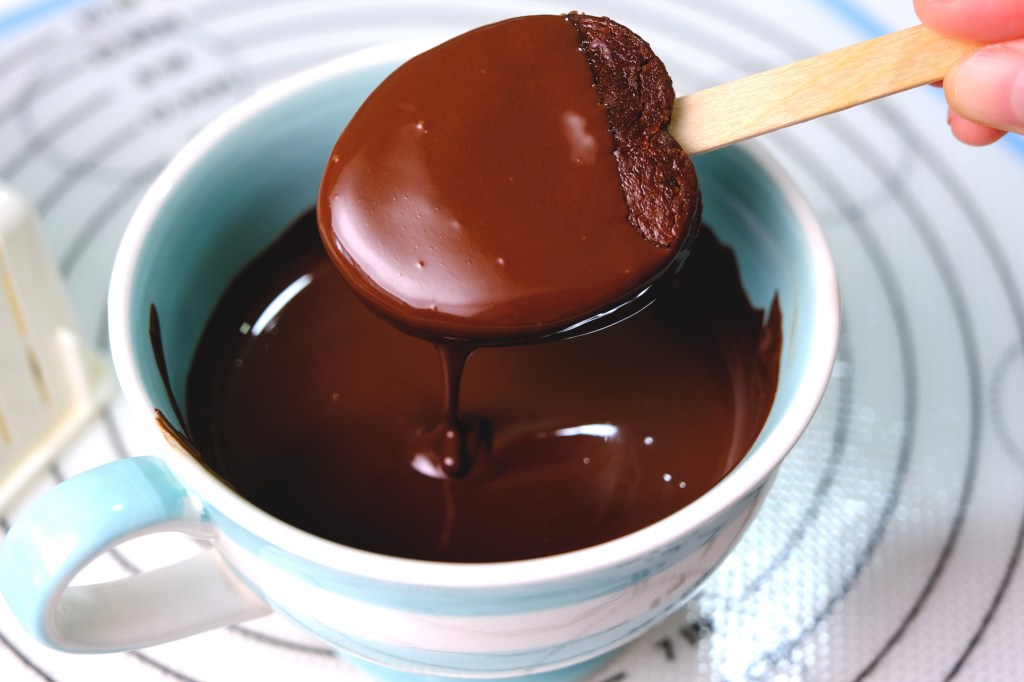
Then simply insert regular popsicle stick into the base of the brownie, cover them with melted dark chocolate and then decorate each character with modelling chocolate.
I love modelling chocolate so much as they are really flexible mouldable delicious clay and there’s no special food colouring require to color the chocolate.

It’s not necessary to use expensive Couverture Chocolate, I found a good dark and white compound chocolate (or candy melts) works best for texture and still tastes pretty good.

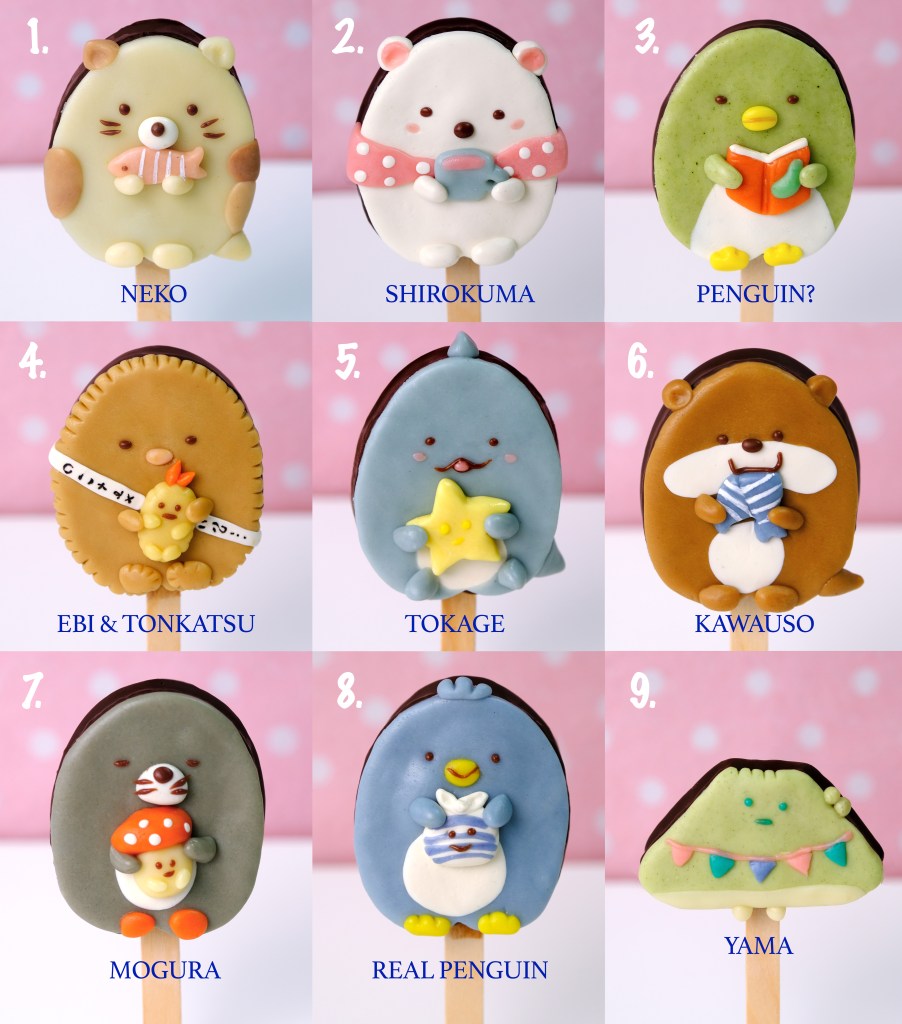
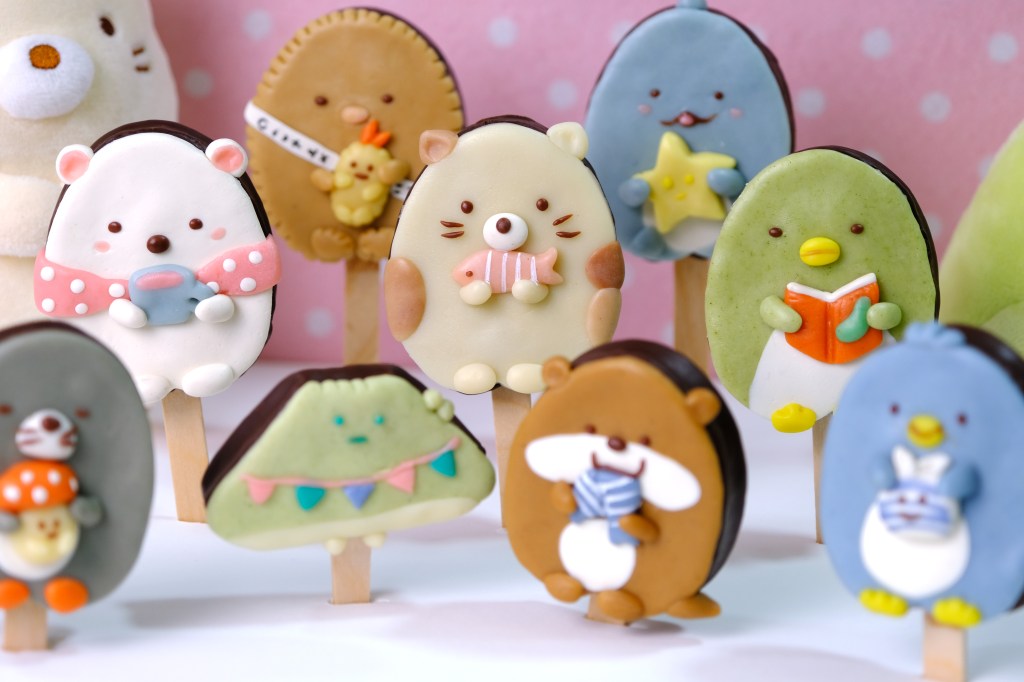
I will create my favorite 9 characters: 5 larger pieces for the main characters “Sumikko”, 3 smaller side characters “Minikko” and 1 piece for lovely Mount Fuji “Yama”.
It can be any design or character you want… The sky is the limit!

And can you imagine, what do you get when Mochi and Chocolate Brownies get together???
I’m sure after you tasted it, you may never want to go back to eating plain fudge brownie ever again!

Which one is your favourite character?

They are a perfect gift, dessert or snack for when you get the nighttime munchies, and make sure you pour yourself a really nice glass of cold milk or hot coffee. Because you can’t have brownies without milk or coffee, just like cookies.

Very Chocolatey Ooey-Gooey Mochi-licious on the inside

I hope that you give this recipe a try , it’s really fun, so tasty and I’m sure you are gonna love them.
For all the chocolate lovers out there, enjoy the recipe and happy baking!
Love You All!!

SUMIKKO GURASHI MOCHI BROWNIESICLE
Yield: 9 pieces (8-inch Square Pan)
Active time: 3 hours
Total time: 4 hours

INGREDIENTS
White Modelling Chocolate:

  • 300 gr White Chocolate Compound or White Candy Melts
  • 70 gr Corn Syrup
  • Food Colouring


Mochi Brownies:

  • 35 gr Unsalted Butter
  • 190 gr Milk
  • 35 gr Vegetable Oil
  • 125 gr Brown Sugar
  • 1/2 teaspoon Vanilla Extract
  • 30 gr Eggs
  • 150 gr Glutinous Rice Flour
  • 20 gr Cocoa Powder
  • 1 teaspoon Baking Powder
  • 1/8 teaspoon Salt

INSTRUCTIONS
Modeling Chocolate

  1. Melt the chocolate in the microwave or a double boiler (let it cool to the touch). Add the corn syrup, stir just until it turns into a thick, smooth paste.
  2. Pick up the dough as soon as you can easily handle it and knead it over the bowl (knead out as much oil as possible).
  3. Pat the surface of the dough with some paper towel to sop up the oil (pat the dough quickly because the dough is quite sticky at this stage, if the paper sits too long it will get stuck in it).
  4. Once patted dry, wrap it tightly in plastic. Store in an airtight container.
    Allow the dough to sit 8-10 hours at room temperature or at least 1 hour in the fridge to set faster.


Mochi Brownies

  1. Preheat the oven to 180° C, grease and line pan with parchment paper.
  2. Place the unsalted butter and milk in small pan, cook over medium low heat until the butter melted. Take it off from the heat and pour it into a bowl.
    Add in the oil, sugar and vanilla extract, mix until all the sugar dissolved and well combine.
    Allow to cool slightly before you add the egg yolks (we don’t want it turned into scramble eggs).
  3. In another bowl combine all the dry ingredients, mix well.
    Pour in milk mixture onto the dry ingredients, do not over mix, whisk until just combined and no lumps remain.
  4. Pour the batter into the prepared pan (the batter will be on the thinner side).
    Tap few times to remove air bubbles and then bake for about 20-25 minutes or until toothpick inserted to the center comes out clean.
  5. Take it off from the heat, remove it from the pan, peel the parchment paper and let them cool completely on a cooling rack.


Decorate

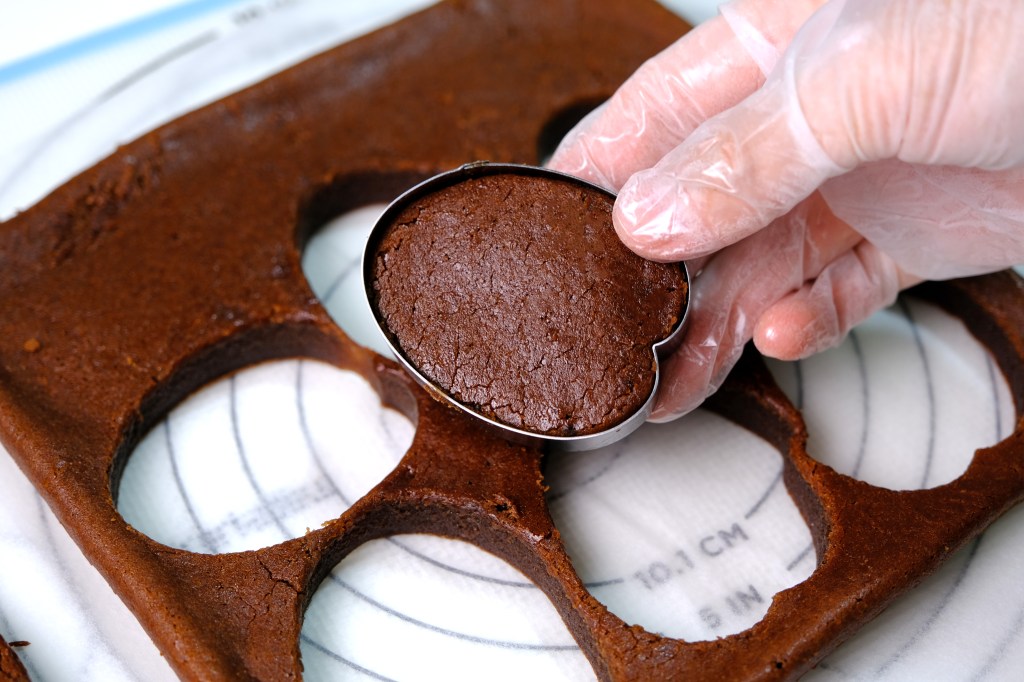
  1. Cut mochi brownie according to the template.
  2. Insert regular popsicle stick into the base of the brownie until it’s about almost to the top.
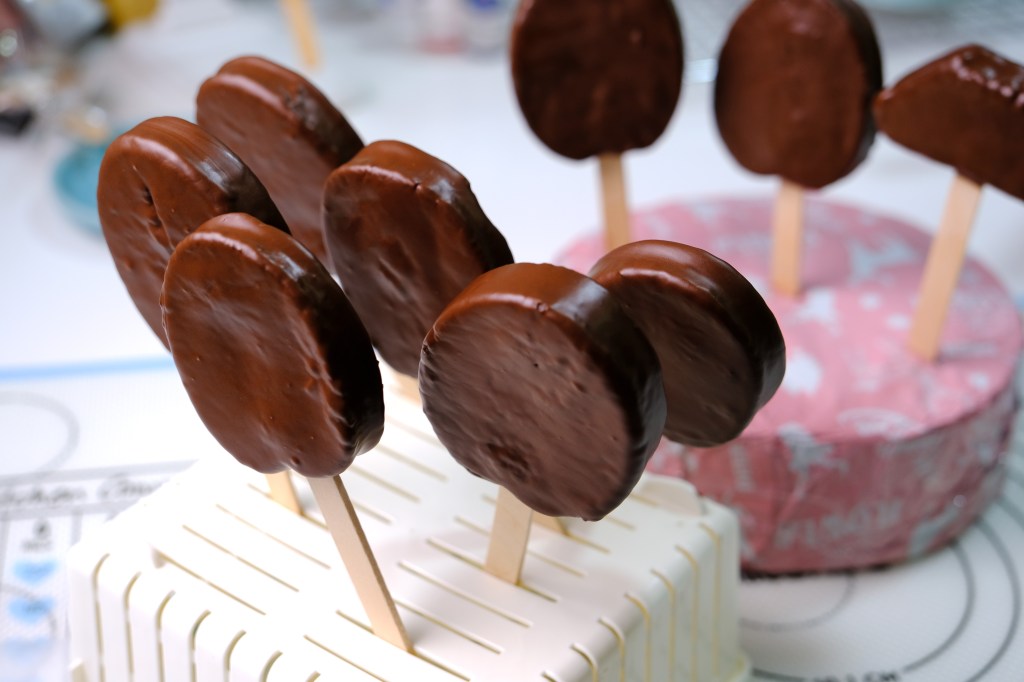
  3. Dip them into a melted dark chocolate, tap a bit to get off any excess, stand these brownies up in a block of Styrofoam until the chocolate is completely hardened.
  4. Colour modelling chocolate as needed and start decorate the browniesicle (kindly follow video instructions)

NOTES

  1. When still hot mochi brownies are more sticky and difficult to cut, so make sure it cool completely before cutting.
  2. Remember when making or working with modelling chocolate are to never overheat and never overwork the mixture when it’s warm. On extremely hot days have a shelf in the freezer set aside so you can pop the piece/pieces you are working on in the freezer for a few minutes to firm up before you continue to work on it.
  3. There is no special food colouring required to colour Modeling Chocolate.
    Modeling Chocolate already has liquid in it (corn syrup) so adding more won’t hurt. I like to use regular gel food colours like Americolor.
  4. Mochi browniesicle serve freshly made.
  5. To store; 2 days at room temperature, 3 days in the fridge or freezer for up to 1 month.
  6. Please note; after 2 days in the fridge or 1 day in the freezer, they will lose the chewiness and the texture will becomes like normal brownie.