
“Babka” A sweet, braided bread that has ribbons of chocolate running throughout it.
And while the original Babka texture is a bit dense like typically a cakey bread; my ideal Babka version is a soft and fluffy bread twisted with homemade chocolate filling inside which is not overly sweet.
Unlike the common method, this recipe no need to proof the dough twice or overnight; A stunning loaf, quick and easy, how wonderful is that?

For the filling, I highly recommend to use dutch cocoa powder simply because it will give you a darker, more bittersweet experience and also has a more intense chocolate flavour.
This chocolate filling is not too runny, has a beautiful consistency and quite manageable.
You can sprinkle some chocolate chips or even toasted chopped nuts on the top if you want, I just like it the way it is “Simply is the best!“.
It’s worth the effort and patience, especially when you make two loaves, like in this recipe. You can save the second loaf in the freezer or give it away to show off your hard work.

It always looks stunning, no matter how messy the shaping was. I like to have a nice bite in the middle because the chocolate is piling up there.
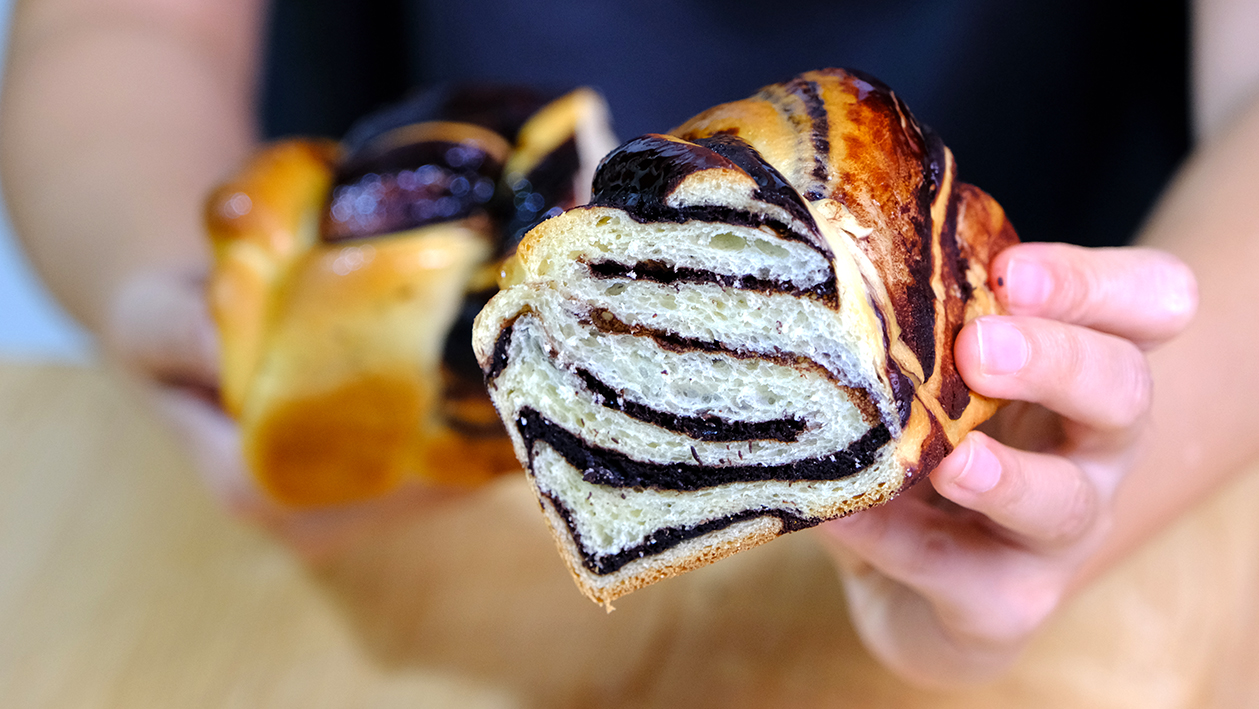
The bread texture is so soft and fluffy with a rich smooth chocolate filling inside. I’m sure no one is able to resist a warm piece of this chocolate Babka.
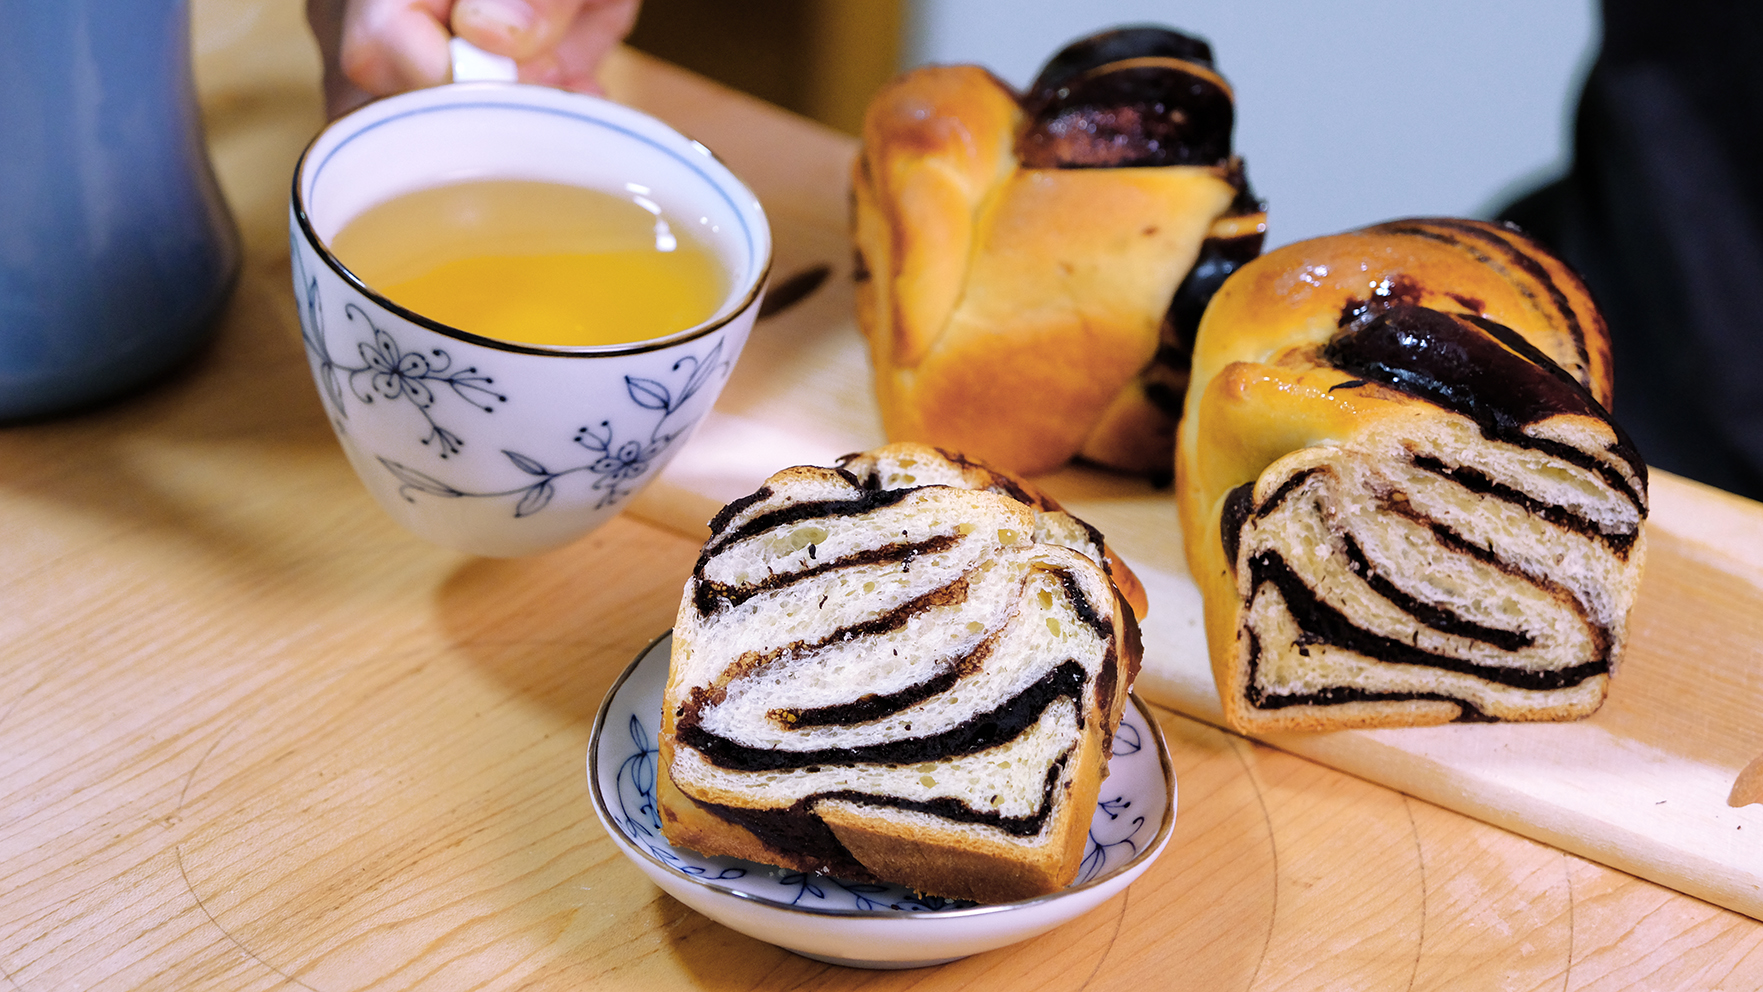
I hope that you enjoy my version of Babka, it always feels homey and comforting.
LOVE you All!!
CHOCOLATE BABKA
Yield: 2 Loafs
Pan size: 17x8x6 cm
Active time: 1 hour
Total time: 2 hours
INGREDIENTS
Chocolate Filling
- 20 g Dutch Cocoa Powder
- 25 g All Purpose Flour
- 50 g Caster Sugar
- 90 g Milk
- 12 g Unsalted Butter
Bread Dough
- 110 g Bread Flour
- 110 g All Purpose Flour
- 1 tsp Instant Yeast
- 25 g Caster Sugar
- 15 g Milk Powder
- 1/2 tsp Salt
- 30 g Ice Water
- 65 g Cold Milk
- 45 g Eggs
- 35 g Unsalted Butter
Sugar Glaze
- 20 g Caster Sugar
- 15 g Water
INSTRUCTIONS
Chocolate Filling
- In a medium non-stick pan, sift in the cocoa and flour (don’t skip this sifting step else you might end up with a lumpy chocolate filling).
- Pour in the sugar and milk, whisk all together until they become really smooth.
- Add in the butter; cook over medium heat and keep stirring.
When the mixture starts to thicken lower the heat, continue stirring until the mixture resembles a chocolate jam (be careful not to burn it). - Take it off from the heat, let the mixture cool completely.
Sugar Glaze
In a small pan combine the sugar and water stir until the sugar dissolved, let it simmer for about 2 minutes; take it off from the heat.
Prep the baking pan
Grease the bottom and sides of the pan with some butter, line it with a parchment paper and grease it again.
Bread Dough
- In a large bowl combine the both flour, instant yeast, sugar and milk powder,mix well.
- Add in the salt and mix (always add the salt last to make sure it doesn’t have direct contact with the yeast).
- Pour in the ice water, along with milk and eggs. Mix well, make sure everything is well incorporated.
- Add in the butter and mix until just combine.
- Cover and let it rest to let the gluten bonds and begin forming for about 15 minutes.
- Place the dough onto a work surface and start kneading the dough (you can use a stand mixer for this process)
*The mixture is gonna be really wet and really sticky. If you are doing this by hand resist the urge to add any flour. The idea is just to push it around to stretch all of that gluten; this is where we are begin to develop the structure for the dough. - After 15 minutes kneading, you see that the ball is coming together;
To make sure whether the dough is ready, we can do the windowpane test; take a small ball of the dough and stretch it into a square. Keep on stretching until it becomes a thin film in the middle without breaking. The dough must be thin enough to pass light through it. If it is obtained without any tear, then your dough is properly kneaded. - Divide the dough into 2 equal pieces. Roll each dough into a smooth ball; cover it and let the gluten rest for about 15 minutes.
- Preheat the oven to 180°C.
- To create Babka shapes
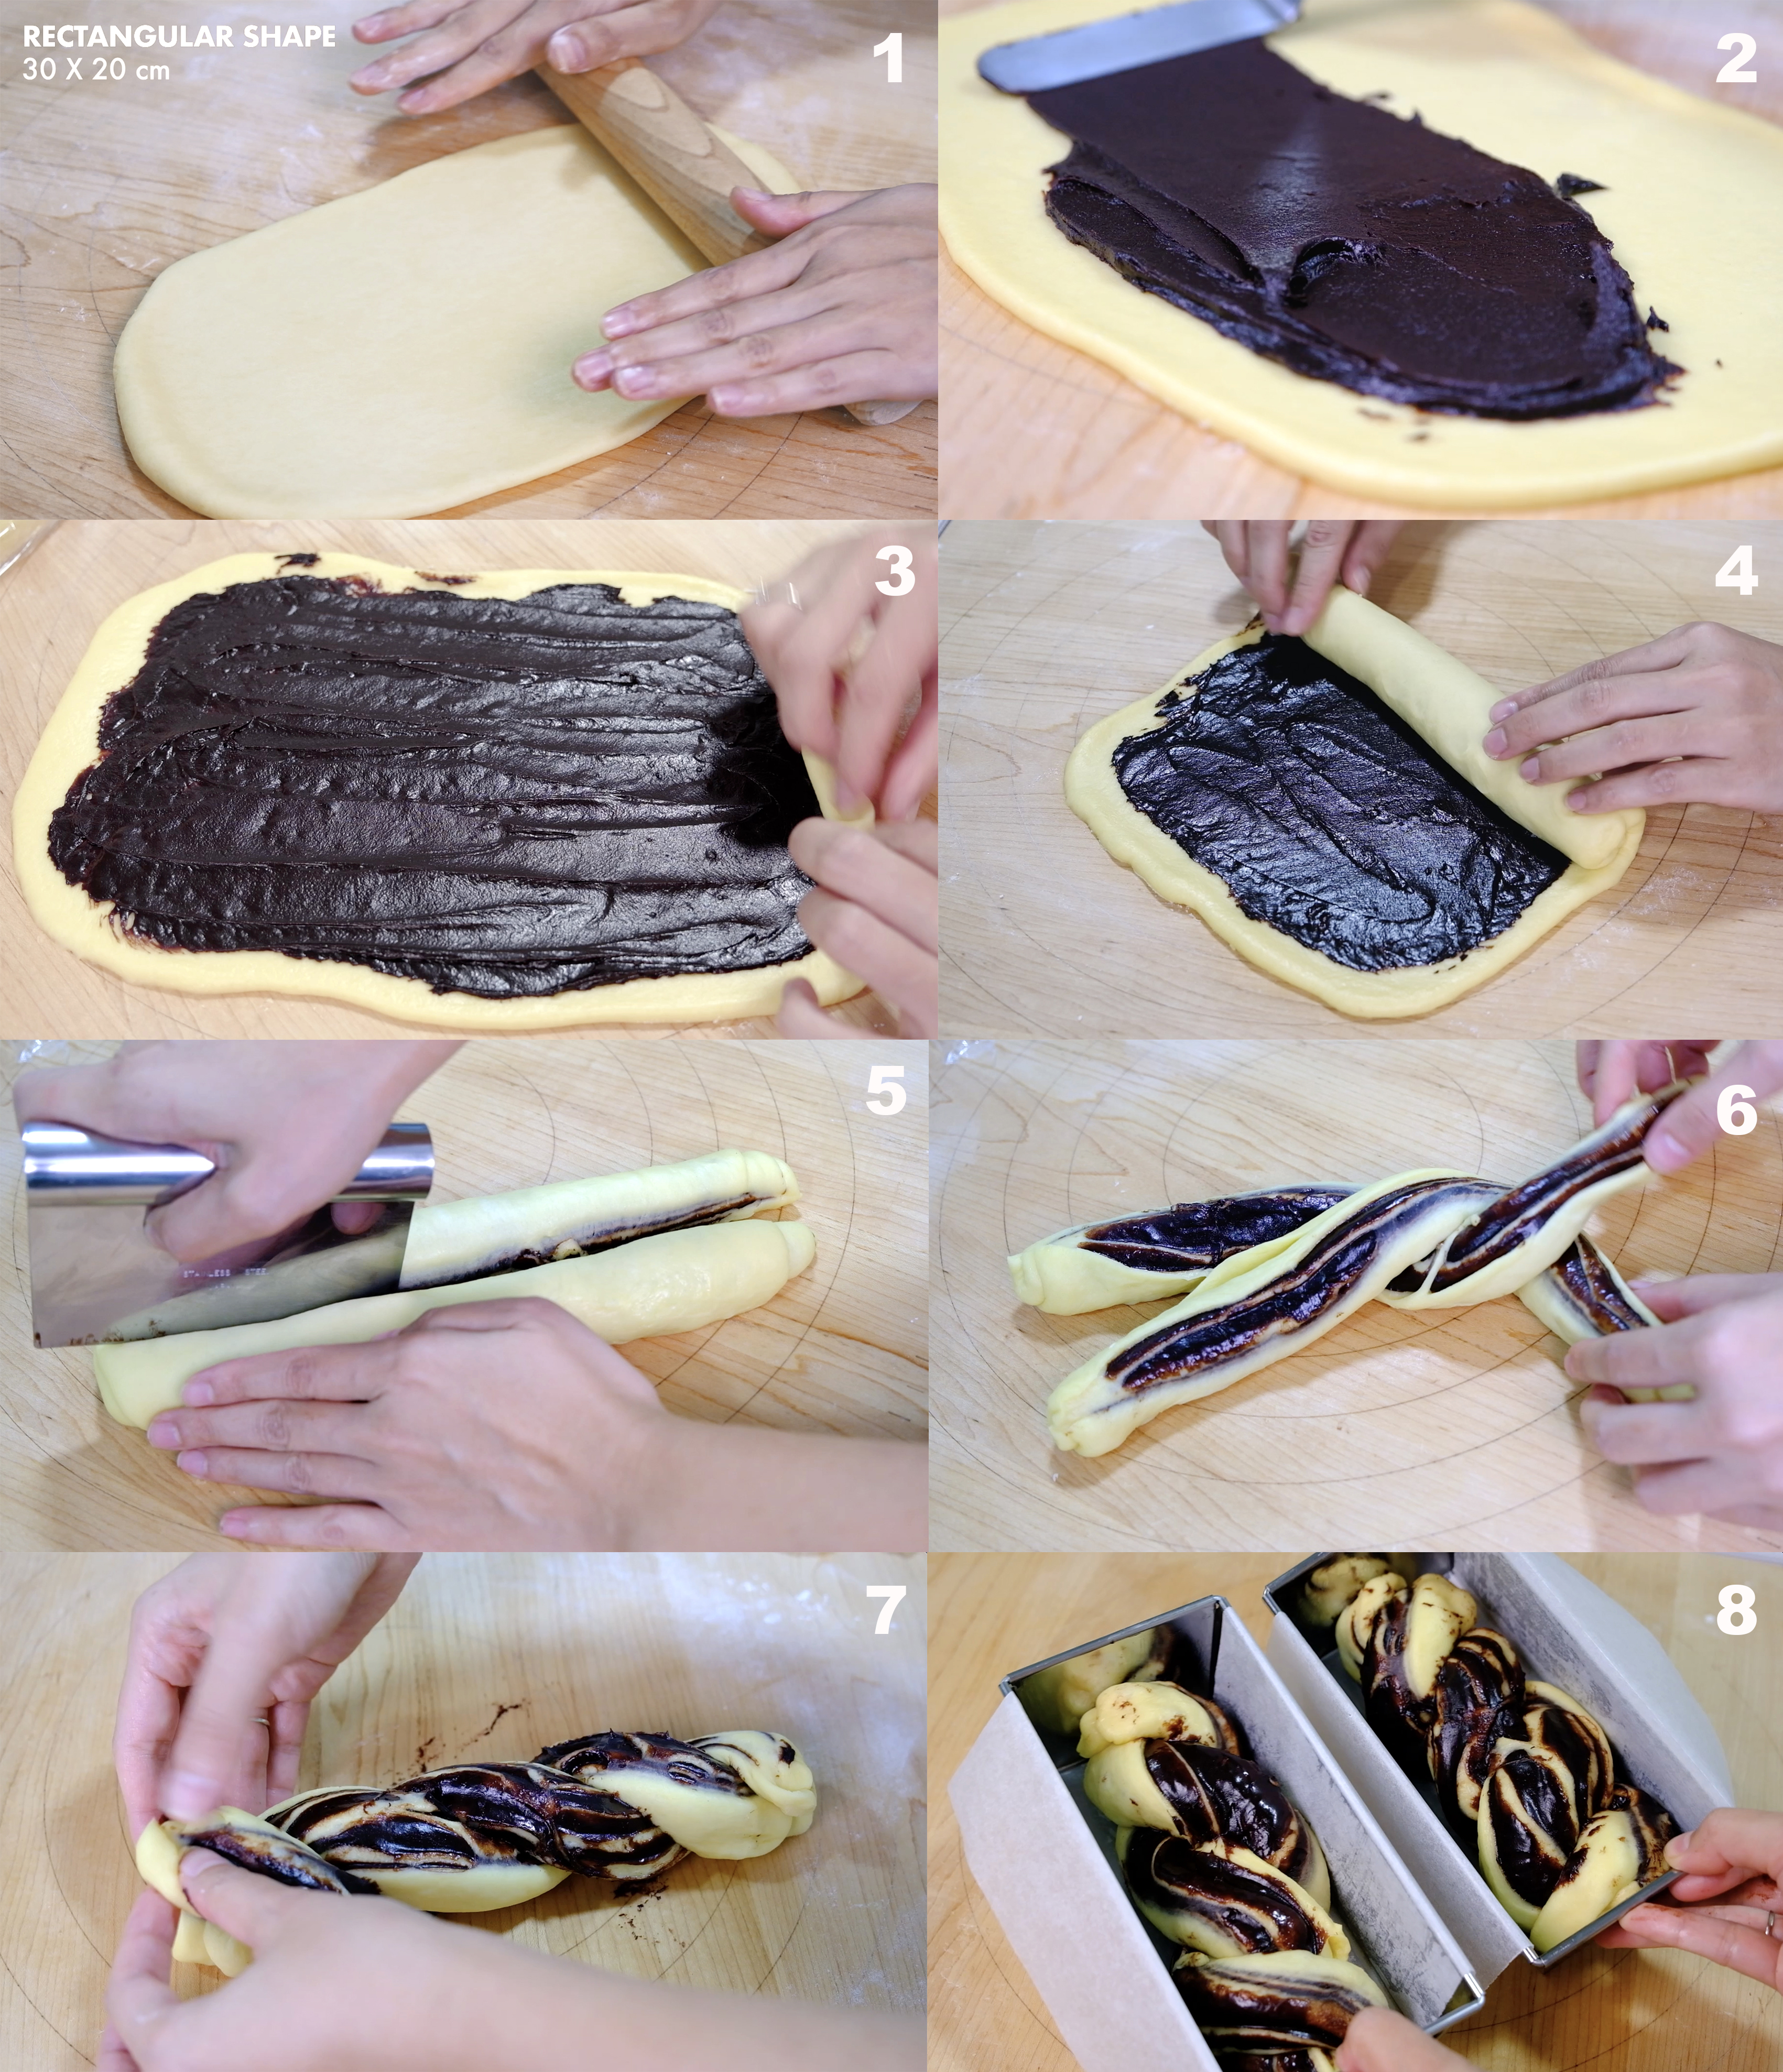
– Take 1 portion of the dough to a lightly floured work surface and roll it into a rectangular shape (30×20 cm).
– Place half portion of the chocolate filling to the center of the dough, spread it evenly (spare for about 1 cm around the edges so the chocolate won’t get mess when you roll it).
You can sprinkle some chocolate chips or even toasted chopped nuts on the top if you want
– And to rolled up; starting from the short side closest to you just gently lift up the dough and then move forward rolling it up nice and tight.
– Using bench scraper or knife; cut the dough in half length wise.
– Position each half parallel to each other with the chocolate cut sides facing upwards. Then set the other halves on top in the opposite direction to form a cross; twist the halves together, keeping the cut sides facing up, and tuck the ends under. - Gently transfer the babka into the prepared pans; cover it with plastic wrap or a clean tea towel and let the dough rise at room temperature until almost doubled in size. Repeat with the second piece of dough.
- Bake them for about 20-25 minutes, until golden brown on top (if you have a thermometer, you are looking for an internal temperature of about 200ºF/93ºC).
- After baking, brush the sugar glaze on top of the Babka immediately (we want to do that while it’s hot because it does help to absorb it). It not only makes the babka exterior shiny but helps keeps the bread from drying out.
- Take it out from the pan and let them cool completely on the cooling rack.
NOTES
- If you have a very cold room, you can place a tray of a boiling water in the bottom of your switch off oven and put your Babka pan on the top rack, just to create warm humid environment for proofing the Babka.
- Store the cooled Babka, wrapped in plastic wrap or in an airtight container on the counter for up to 2 days or fridge for 4 days.
You can reheat slices in the microwave for a few seconds or pop the whole loaf in the oven for a few minutes. - Babka also freezes well; once cooled, wrap the loaf in a couple of layers of plastic wrap or in an airtight container; it can be stored in the freezer for up to 1 month.
Defrost at room temperature, still wrapped. Before serving, you can reheat it in a 160°C oven for about 10 minutes, until it’s warm and the chocolate is melty.