ANGRY BIRDS MELONPAN (TANGZHONG METHOD)

Can you believe that this cute little things is edible?
YES, today we are making these cute Angry Bird Melonpan.
Melonpan are Japanese sweet buns covered with a thin layer of cookie dough; crispy on the outside, soft and fluffy on the inside.
I will use a Tangzhong method in this recipe, it creates an incredibly soft and stay fresh longer bread.

Look how adorable he is!

If you notice; Melonpan and Pineapple Bun from Hong Kong are very similar.
By comparison, the Japanese style is lighter in weight and taste, slightly drier and has a firmer outer layer (the cookie crust on top) which resists flaking; unlike its Hong Kong counterpart, whose top cookie crust tends to flake easily.
The Hong Kong version is also moister, and is generally soft on the outside and inside, with a stronger butter flavour.

With origins in Japan’s Yukone (or Yudane), Tangzhong is a yeast bread technique popularized across Asia.
For the Yudane method, boiling water is used to scald the flour instead of cooking over the fire.

Tangzhong mixture

They are both quite similar; it involves cooking a portion of the flour and liquid in the recipe into a thick slurry prior to adding the remaining ingredients, resulting in soft, fluffy bread.

Place the Melonpan with the cookie dough facing downwards

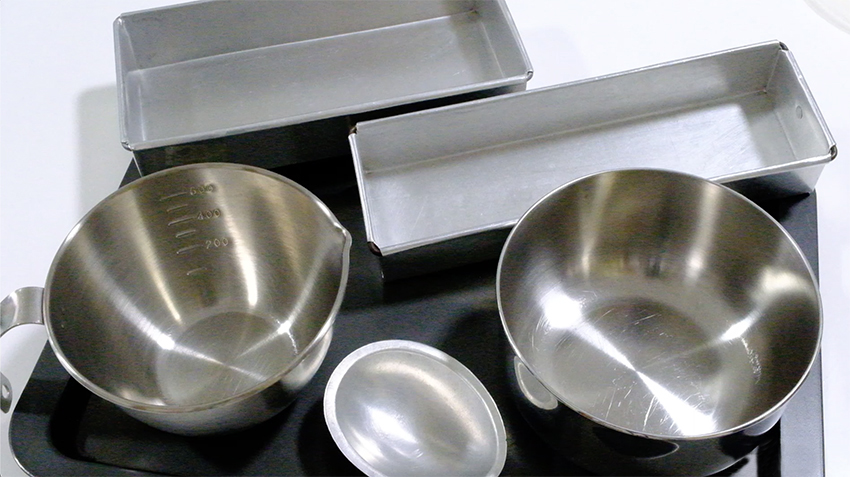
You will need half sphere mold to resembles the bird’s head.
I found that this silicone mold is the best option, the bread will release easily, you don’t have to worry that the crust will stick to the pan.

Look! the colour is beautiful and the shape is great. If you tap the top and hear the sound of the crust, you will know that it’s really crispy.

Make sure that you don’t over baked the details

And for the details, shortening based cookie dough is the easy and fast way to create the details. The dough is easy to work with, there’s no need to be chilled.

I’m prefer to bake the eyes and wings on top of the round shape of the sphere mould rather than a flat baking pan so the shape will stick perfectly to the head.

And if you notice, our lovely Angry Birds have a black circle around their eyes. I am using black food colouring mixed with Vodka, you can also use edible pen.

You can make various facial expressions for them. Some with close mouth and some open mouth 😂.

😳 I’m in love with the fat one!

Which one do you like? 🙄

They all look so adorable… I personally can’t bear to eat them 😓🤧😭

The top cookie crust is buttery and crispy with the soft and spongy Matcha bread on the inside.
I hope that you will enjoy the beauty of this Melonpan.
Love you All !! 💋

ANGRY BIRD MELONPAN
Yield: 5 Melonpan
Active time: 1 hours
Total time: 3½ hours

INGREDIENTS
Cookie Dough:
35 g Unsalted Butter
50 g Caster Sugar
35 g Eggs
120 g Cake Flour
1/4 +1/8 tsp Baking Powder (Double Acting)
1/4 tsp Matcha Powder
Mint Green & Yellow Food Colouring

Bread Dough:
Tangzhong: 40 g Milk + 8 g Bread Flour
135 g Bread Flour
20 g Caster Sugar
1/2 tsp Instant Yeast
1½ tsp Matcha Powder
A pinch Salt
25 g Eggs
50 g Milk
25 Unsalted Butter
Egg whites & Caster Sugar 

Details Dough:
30 g Shortening
40 g Caster Sugar
15 g Eggs
1 tsp Milk
75 g All-Purpose Flour
1/4 +1/8 tsp Baking Powder (Double Acting)
A pinch of Salt
Food Colouring (Black, Mint Green, Yellow, Turquoise,
Orange)

Sugar Glue
50 g Caster Sugar
25 g Water

INSTRUCTIONS
Cookie Dough

  1. Simply mix the butter and sugar until pale and creamy.
  2. Add in the eggs and mix.
  3. Pour in the sifted dry ingredients (cake flour, baking powder, matcha powder) and mix.
    Before everything is well incorporated, add some mint green and yellow food colouring to create colour shades that looks like Angry Birds.
  4. Knead well until the colour is even (try not to over-mix the dough, we want to keep the flaky crust on top).
  5. Place the dough on the cling wrap, cover it and then store it in the fridge for about 1 hour.

Bread Dough

  1. Tangzhong Mixture
    In a small non-stick pan, combine the 40 g milk and 8 g bread flour. Mix really well until no lumps visible.
    Cook over medium heat, continue stirring. Once you see that the mixture start to thicken, lower the heat and continue cook until it become a thick paste (be careful not to burn it).
    Take it off from the heat and let it cool until warm for about 5-10 minutes, set aside.
  2. Then in a large bowl combine the 135 g bread flour, sugar and yeast. Mix well.
  3. Add in the matcha powder and salt (always add the salt last so it doesn’t come into direct contact with the yeast – salt can kill the yeast).
  4. Pour in the eggs, along with 50 g milk and the Tangzhong batter; mix until just combined.
  5. Cover and let it rest for about 15 minutes (this resting time is to give time for the gluten to form its own).
  6. After 15 minutes, add in the butter. It seems too many butter at first but after 1-2 minutes the butter is all mixed into the dough.
  7. Knead by stretching it
    In a bowl; lift the dough, toss and fold for about 5 minutes.
    Then cover it again (if your dough now isn’t smooth enough, cover it too), wait for about 10 minutes and continue stretching it for another 3 minutes (you can feel that the dough become really smooth).
  8. Place the dough into a clean grease bowl, cover it and let it rise until doubled in size for about 1-2 hours (proofing time depending on room temperature, it may take longer or may not take that long).

Shaping the cookie dough
Prepare 5 pieces (13 x 13 cm) of plain parchment paper and a piece with a 10 cm round shape as a guide.
Take cookie dough out of the fridge and divide it into 5 equal portions; roll each dough into a smooth ball.
To shape the dough; place 1 all of the cookie dough onto a 10 cm guide of parchment paper, cover with another parchment paper. Using flat surface press the dough gently into a 10 cm disk, turn it over and then cover the finished dough with a plastic wrap to prevent the dough dry.

Create the Melonpan

  1. After for about 1 hour, the bread dough has risen to doubled in size. Punch the dough, press out the air, divide the bread dough into 5 equal portions.
  2. To create the Melonpan
    Take 1 portion of the bread dough, press out the air. Pull around the edges, tuck underside.
    And then hold and roll the dough with your hands in C shape, give a little pressure until it create a smooth ball.
    Brush the top lightly with the egg white. Place a piece of a round 10 cm cookie dough to the top; make sure it’s in the centre. Adjust according to the shape, gently press to cover the entire outer edge of the bread dough.
  3. Dip and coat the cookie dough surface with the caster sugar and then gently place the Melonpan into a silicone mould with the cookie dough facing downwards.
  4. Cover the Melonpan with a kitchen towel and then let the dough rise for another 30-45 minutes until puffy and risen almost doubled in size.
  5. Bake them in the preheated 170°C oven for about 18-20 minutes
  6. Take it off from the oven, let it sit in the mould for about 5 minutes (to let the cookie crust firm up a bit) then gently remove it from the pan. Let it cool completely on a cooling rack.


Details Dough

  1. In a medium bowl, cream the shortening and sugar until pale and creamy.
  2. Pour in the eggs and milk, stir well (make sure that all that liquid incorporated into the butter and sugar).
  3. Add in the sifted dry ingredients (all-purpose flour, baking powder and salt) and mix until well combined.
  4. Divide the dough and colour it as needed.
    50 g White for the eyes
    40 g Orange for the feet and mouth
    30 g Green for the wings
    15 g each Turquoise and Black for the inner part of the eyes
  5. Create the details (kindly follow video instructions)
  6. Bake them in the preheated 160°C oven for about 8-10 minutes (please pay attention, make sure that you don’t over baked the details.
  7. Take it off from the oven and let them cool completely on the pan.

Sugar Glue
In a medium saucepan, combine water and sugar. Cook until bubbly and start to thicken.
Remove the mixture from the stove, but still keep it warm. This can be done by placing the small saucepan in a large saucepan filled with hot water.

Attach the details
If you notice, our lovely Angry bird have a black circle around their eyes. I am using black food colouring mixed with Vodka to draw the black line around the eyes, you can also use edible pen.
Attach all the details with some sugar glue.

NOTES

  1. Once the bread is cooled completely, individually wrap it in plastic to prevent it from drying.
    Place them in an airtight container or bag store in the fridge for up to 3 days, freeze for up to a month.
  2. To reheat
    Fridge; place at room temperature for 30 minutes and then bake it in the oven at 350ºF (180ºC) for about 5- 10 minutes until crispy on the outside.
    Freezer; defrost overnight in the refrigerator, take it out to room temperature for 30 minutes and then bake it in the oven at 350ºF (180ºC) for about 5- 10 minutes until crispy on the outside.

Chocolate babka (QUICK & EASY)

“Babka” A sweet, braided bread that has ribbons of chocolate running throughout it.
And while the original Babka texture is a bit dense like typically a cakey bread; my ideal Babka version is a soft and fluffy bread twisted with homemade chocolate filling inside which is not overly sweet.

Unlike the common method, this recipe no need to proof the dough twice or overnight; A stunning loaf, quick and easy, how wonderful is that?

For the filling, I highly recommend to use dutch cocoa powder simply because it will give you a darker, more bittersweet experience and also has a more intense chocolate flavour.

This chocolate filling is not too runny, has a beautiful consistency and quite manageable.
You can sprinkle some chocolate chips or even toasted chopped nuts on the top if you want, I just like it the way it is “Simply is the best!“.

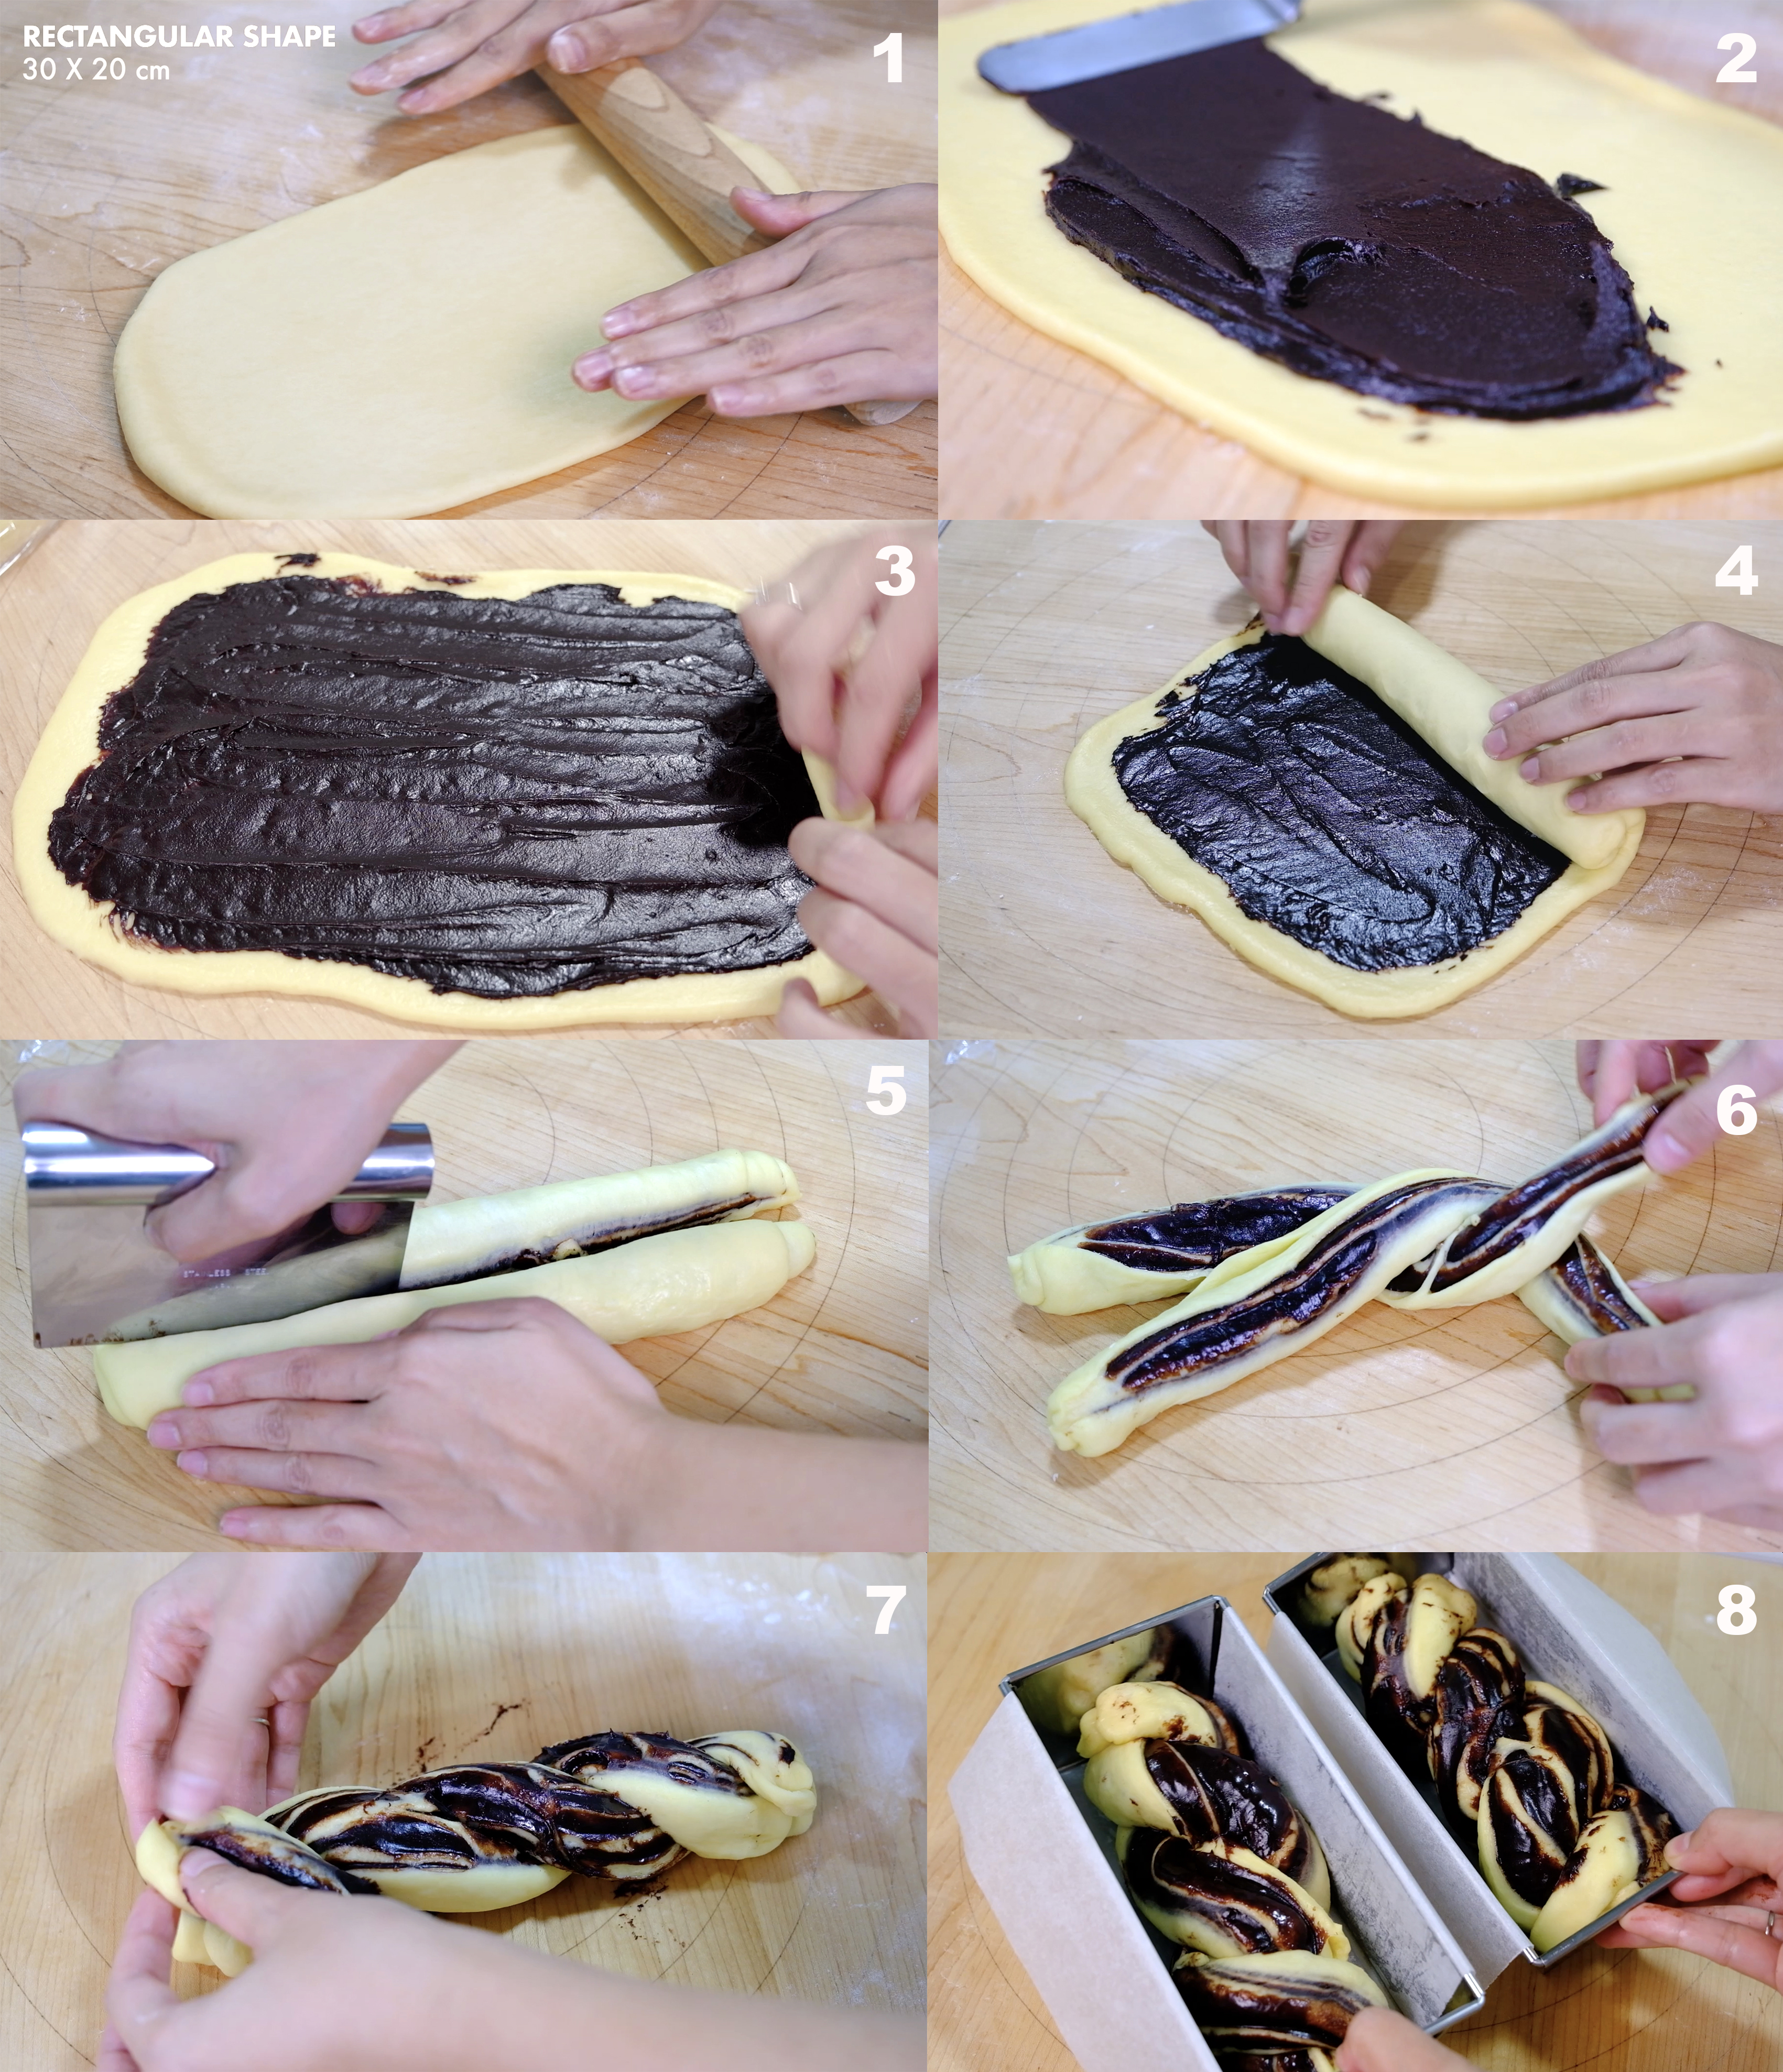
Steps to create Babka fascinating shapes

It’s worth the effort and patience, especially when you make two loaves, like in this recipe. You can save the second loaf in the freezer or give it away to show off your hard work.

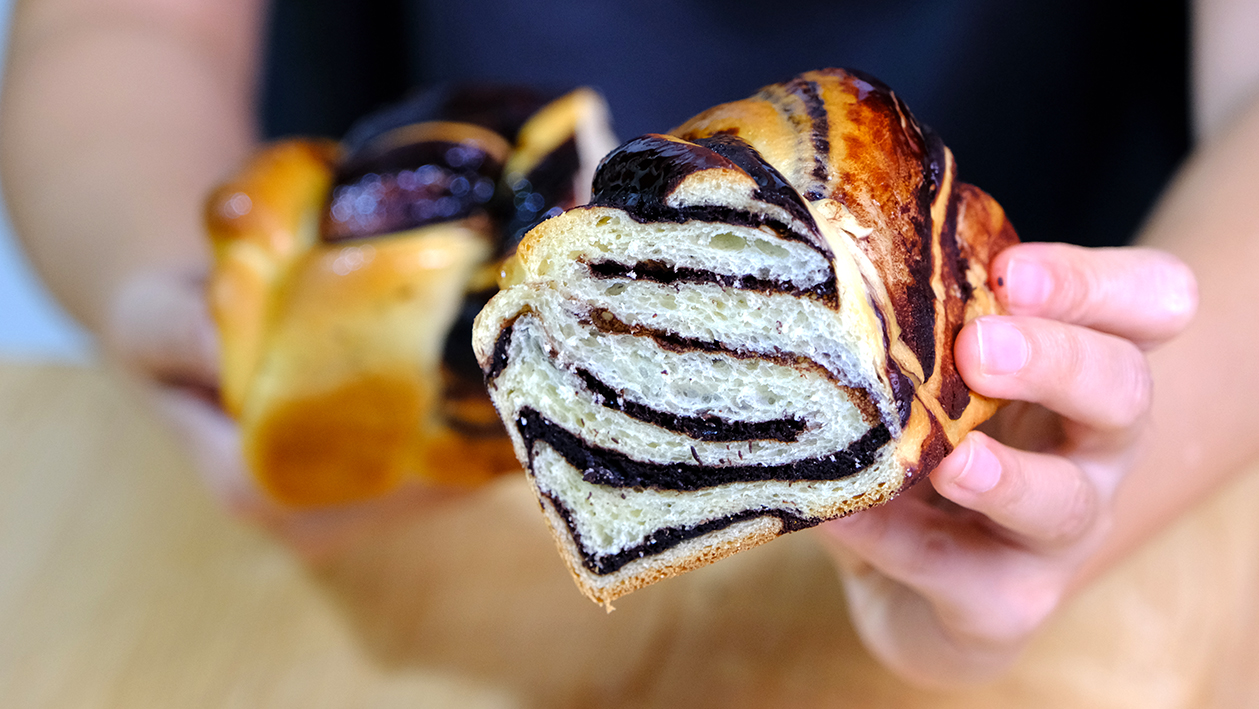
It always looks stunning, no matter how messy the shaping was. I like to have a nice bite in the middle because the chocolate is piling up there.

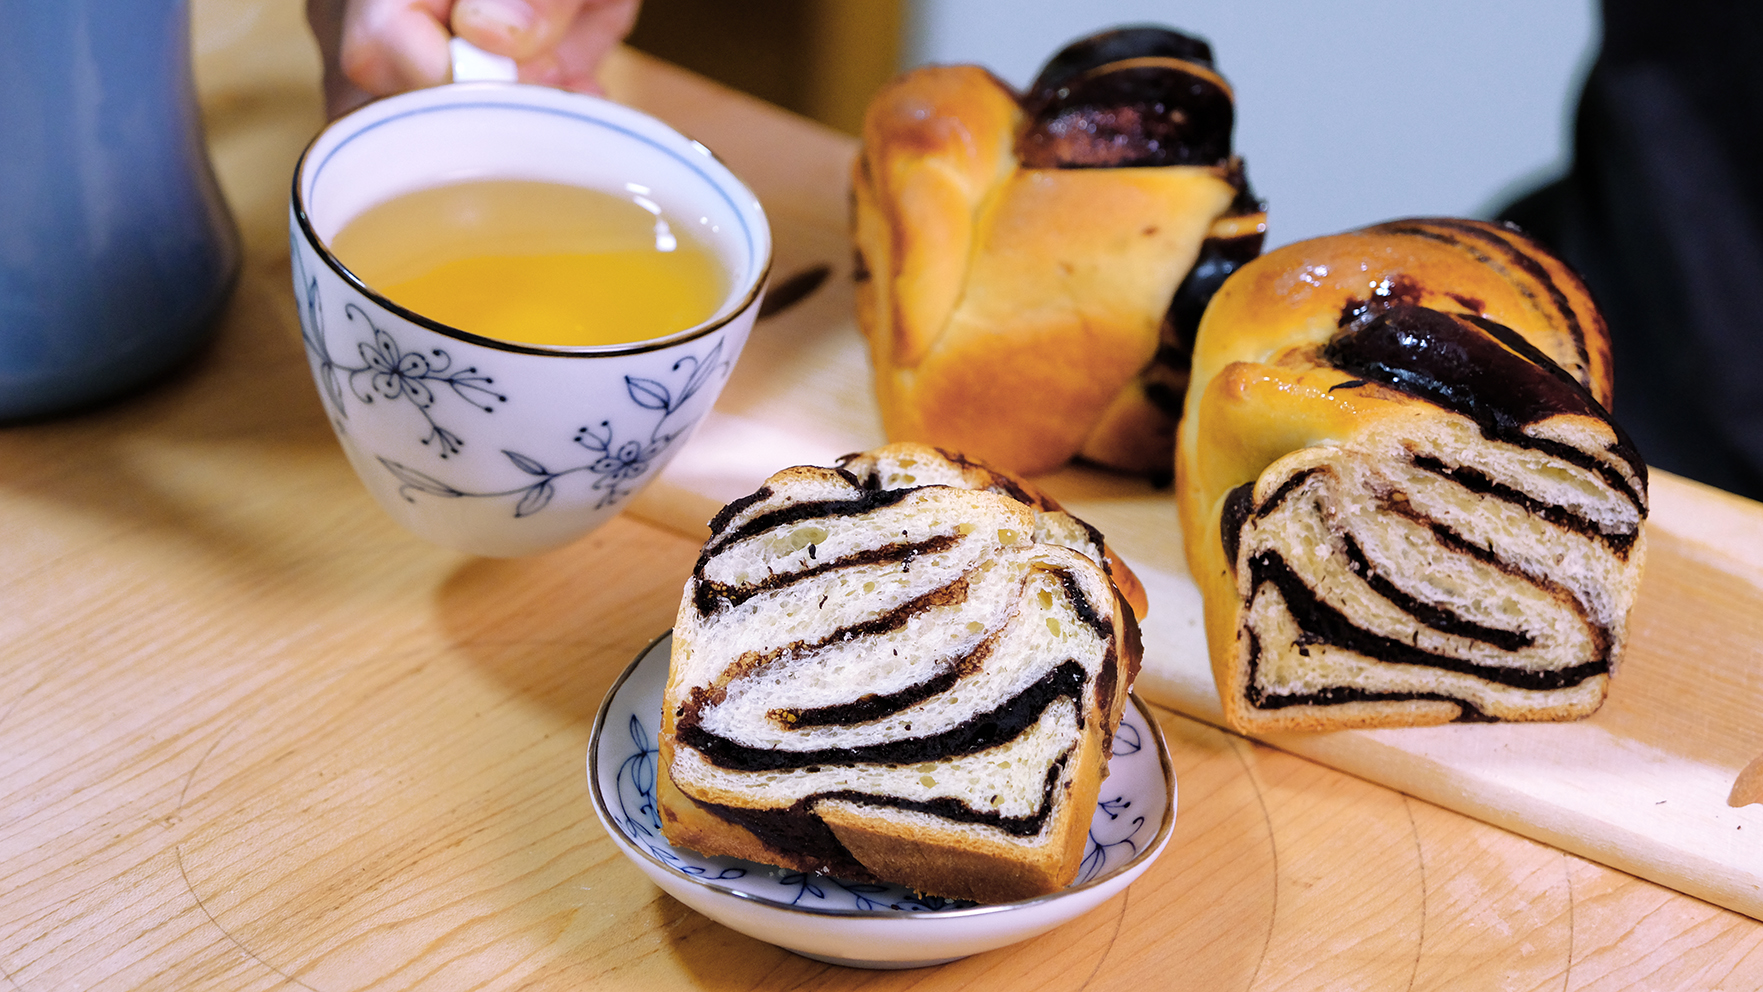
The bread texture is so soft and fluffy with a rich smooth chocolate filling inside. I’m sure no one is able to resist a warm piece of this chocolate Babka.
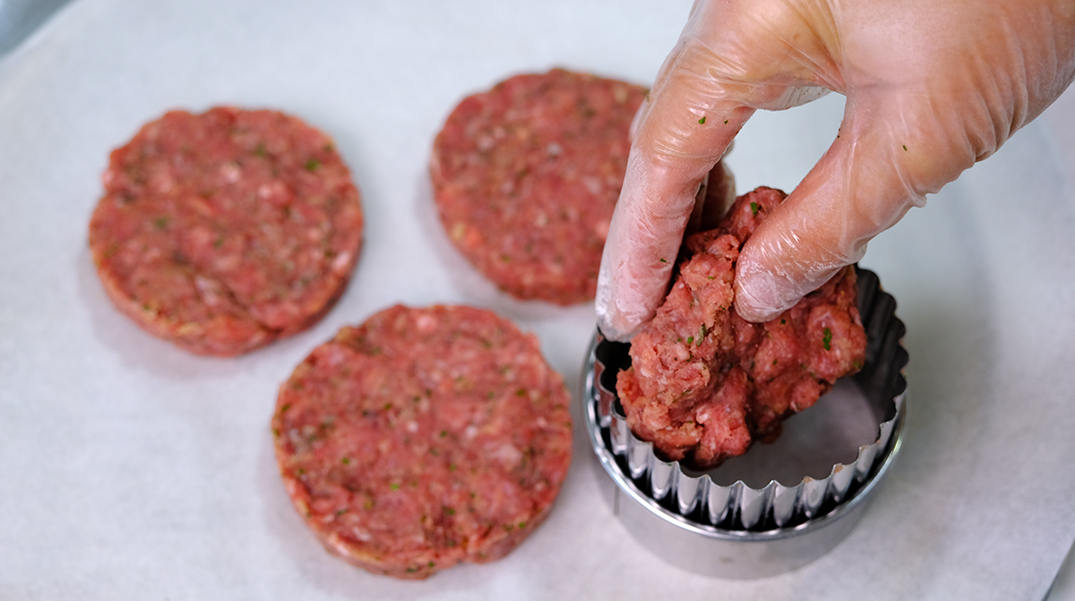
I hope that you enjoy my version of Babka, it always feels homey and comforting.
LOVE you All!!


CHOCOLATE BABKA
Yield: 2 Loafs 
Pan size: 17x8x6 cm
Active time: 1 hour
Total time: 2 hours

INGREDIENTS
Chocolate Filling

  • 20 g Dutch Cocoa Powder
  • 25 g All Purpose Flour
  • 50 g Caster Sugar
  • 90 g Milk
  • 12 g Unsalted Butter

Bread Dough

  • 110 g Bread Flour
  • 110 g All Purpose Flour
  • 1 tsp Instant Yeast
  • 25 g Caster Sugar
  • 15 g Milk Powder
  • 1/2 tsp Salt
  • 30 g Ice Water
  • 65 g Cold Milk
  • 45 g Eggs
  • 35 g Unsalted Butter

Sugar Glaze

  • 20 g Caster Sugar
  • 15 g Water

INSTRUCTIONS
Chocolate Filling

  1. In a medium non-stick pan, sift in the cocoa and flour (don’t skip this sifting step else you might end up with a lumpy chocolate filling).
  2. Pour in the sugar and milk, whisk all together until they become really smooth.
  3. Add in the butter; cook over medium heat and keep stirring. 
    When the mixture starts to thicken lower the heat, continue stirring until the mixture resembles a chocolate jam (be careful not to burn it).
  4. Take it off from the heat, let the mixture cool completely.

Sugar Glaze
In a small pan combine the sugar and water stir until the sugar dissolved, let it simmer for about 2 minutes; take it off from the heat.

Prep the baking pan
Grease the bottom and sides of the pan with some butter, line it with a parchment paper and grease it again.

Bread Dough

  1. In a large bowl combine the both flour, instant yeast, sugar and milk powder,mix well.
  2. Add in the salt and mix (always add the salt last to make sure it doesn’t have direct contact with the yeast).
  3. Pour in the ice water, along with milk and eggs. Mix well, make sure everything is well incorporated.
  4. Add in the butter and mix until just combine.
  5. Cover and let it rest to let the gluten bonds and begin forming for about 15 minutes.
  6. Place the dough onto a work surface and start kneading the dough (you can use a stand mixer for this process)
    *The mixture is gonna be really wet and really sticky. If you are doing this by hand resist the urge to add any flour. The idea is just to push it around to stretch all of that gluten; this is where we are begin to develop the structure for the dough.
  7. After 15 minutes kneading, you see that the ball is coming together;
    To make sure whether the dough is ready, we can do the windowpane test; take a small ball of the dough and stretch it into a square. Keep on stretching until it becomes a thin film in the middle without breaking. The dough must be thin enough to pass light through it. If it is obtained without any tear, then your dough is properly kneaded.
  8. Divide the dough into 2 equal pieces. Roll each dough into a smooth ball; cover it and let the gluten rest for about 15 minutes.
  9. Preheat the oven to 180°C.
  10. To create Babka shapes
    – Take 1 portion of the dough to a lightly floured work surface and roll it into a rectangular shape (30×20 cm).
    – Place half portion of the chocolate filling to the center of the dough, spread it evenly (spare for about 1 cm around the edges so the chocolate won’t get mess when you roll it).
    You can sprinkle some chocolate chips or even toasted chopped nuts on the top if you want
    – And to rolled up; starting from the short side closest to you just gently lift up the dough and then move forward rolling it up nice and tight.
    – Using bench scraper or knife; cut the dough in half length wise.
    – Position each half parallel to each other with the chocolate cut sides facing upwards. Then set the other halves on top in the opposite direction to form a cross; twist the halves together, keeping the cut sides facing up, and tuck the ends under. 
  11. Gently transfer the babka into the prepared pans; cover it with plastic wrap or a clean tea towel and let the dough rise at room temperature until almost doubled in size. Repeat with the second piece of dough.
  12. Bake them for about 20-25 minutes, until golden brown on top (if you have a thermometer, you are looking for an internal temperature of about 200ºF/93ºC).
  13. After baking, brush the sugar glaze on top of the Babka immediately (we want to do that while it’s hot because it does help to absorb it). It not only makes the babka exterior shiny but helps keeps the bread from drying out.
  14. Take it out from the pan and let them cool completely on the cooling rack.


    NOTES
  1. If you have a very cold room, you can place a tray of a boiling water in the bottom of your switch off oven and put your Babka pan on the top rack, just to create warm humid environment for proofing the Babka.
  2. Store the cooled Babka, wrapped in plastic wrap or in an airtight container on the counter for up to 2 days or fridge for 4 days.
    You can reheat slices in the microwave for a few seconds or pop the whole loaf in the oven for a few minutes.
  3. Babka also freezes well; once cooled, wrap the loaf in a couple of layers of plastic wrap or in an airtight container; it can be stored in the freezer for up to 1 month.
    Defrost at room temperature, still wrapped. Before serving, you can reheat it in a 160°C oven for about 10 minutes, until it’s warm and the chocolate is melty.

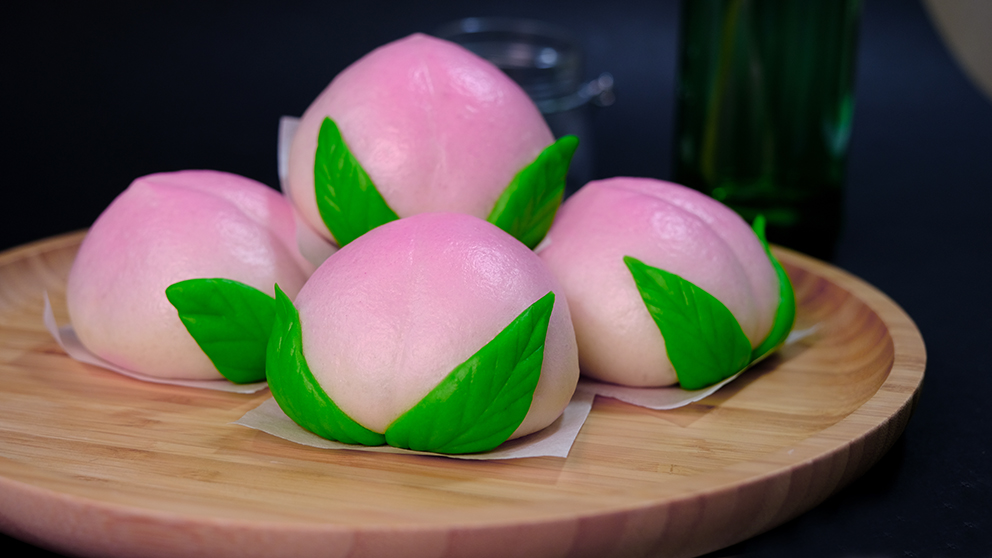
Longevity peach buns “Shou tao bao”寿桃包


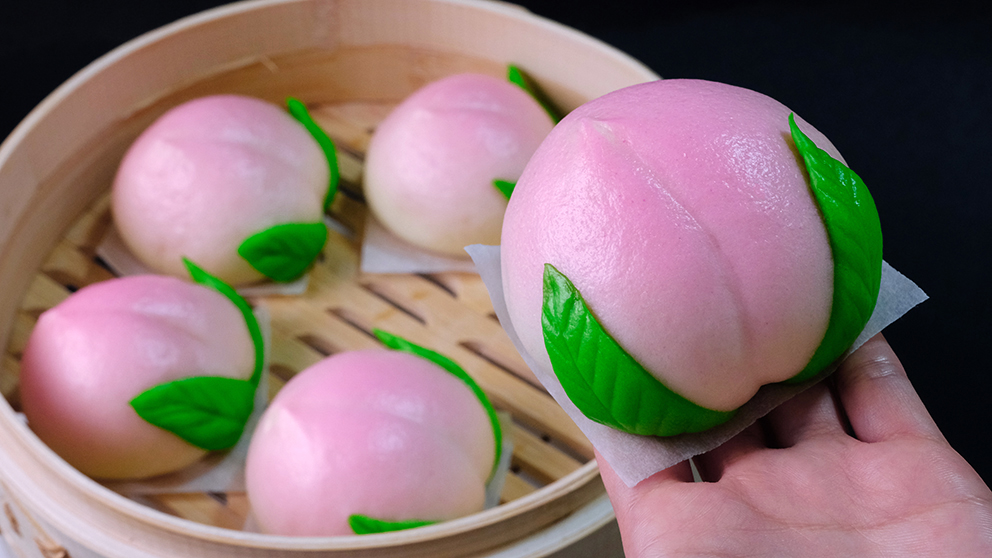
Longevity Peach Buns “Shou Tao Bao” 寿桃包 is a representation of Peaches of Immortality.
It is typically served to elders on their birthday as a cake or gift that symbolises long life and wishes of good health.


Traditionally, these buns are piled at least knee high on a tray.
I remember seeing this buns in my grandparents birthday when I was a kid; and I thought they were the cutest thing, I really loved the shape and their colour; And now when I grew up, I love eating and enjoy making them as well ☺️ .


The bun is really soft and fluffy but still a bit chewy with the creamy red bean paste filling inside; fragrant and not too sweet, just the way I like them.
In this recipe, I also will share a few tips to make this beautiful red bean paste. The method is not only faster but also produces a fragrant and flavourful filling.


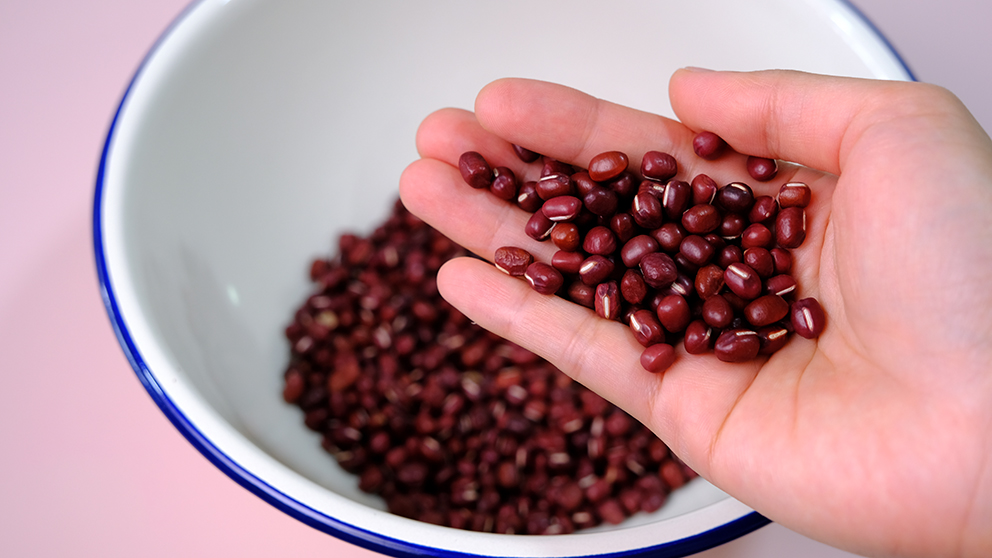
And when it comes to beans; people will debates whether need or no need to soaked the beans overnight.

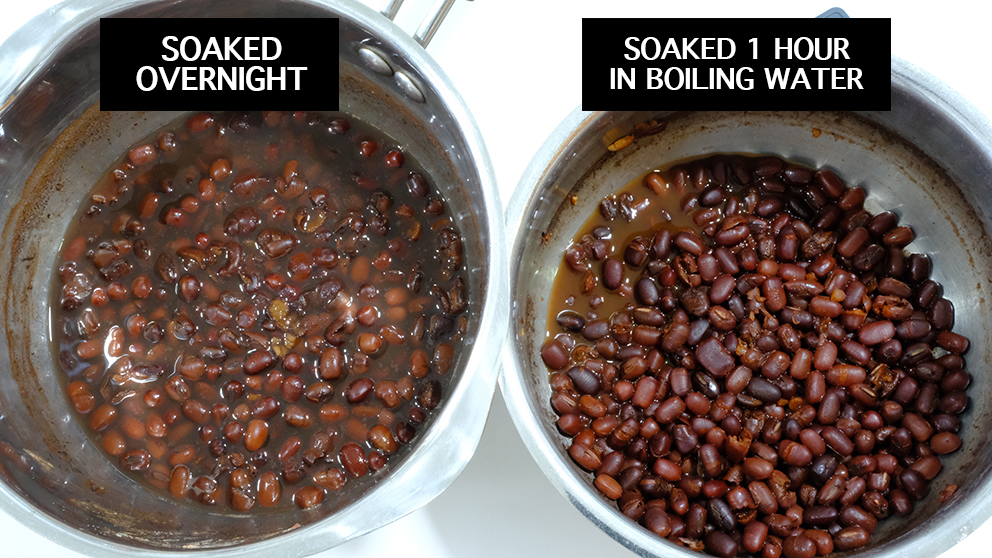
After testing, I found that the 1 hour soaked beans in the hot boiling water cooked just 5 minutes faster than the overnight soaked ones; So… why bother soak overnight?

Another differences is after cooking; 1 hour soaked beans absorb more water than the overnight soaked ones

ADDING SALT IN THE BEGINNING
We will add some salt to the beans soaking liquid. By adding salt at the beginning of cooking create more tender results.
A bit of salt is also used as a flavour enhancer, increase sweetness and umami; so instead of increasing the amount of sugar, add a pinch of salt to enhance the sweetness first.

DON’T THROW THE SOAKING LIQUID!
After soaked the beans in hot boiling water for 1 hour, there’s no need to rinse or change the water Coz the beans cooked in the soaking liquid were much more flavourful, had a prettier, darker colour, and retained their texture better.


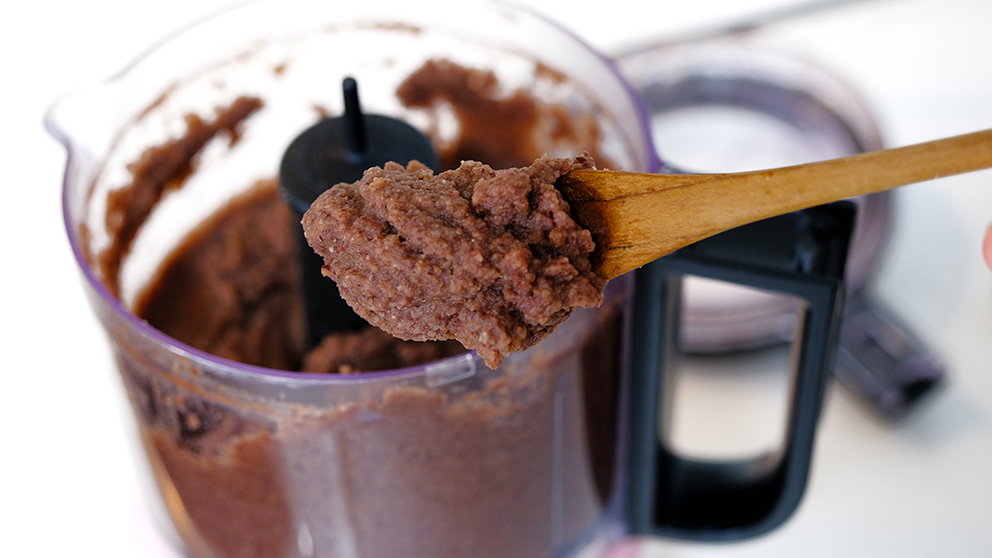
Then using food processor or immersion blender; grind the cooked beans into a fine paste and add some sugar to it.
In general, the beans to sugar ratio for is 1 to 1 (an equal amount). This sugar will preserve the paste for a longer time.
I don’t like it too sweet; so in this recipe I have already reduced the sugar to suit my taste bud; kindly add or reduce the amount of sugar according to your taste.

This Red Bean Paste paste will continue to thicken as it cools
 

NO NEED TO REST THE BUNS DOUGH
Once the dough is ready, you can use it immediately. There’s no need to rest the dough because by proofed it twice will cause a lot of bumps or air bubbles on the surface, we don’t want that happened


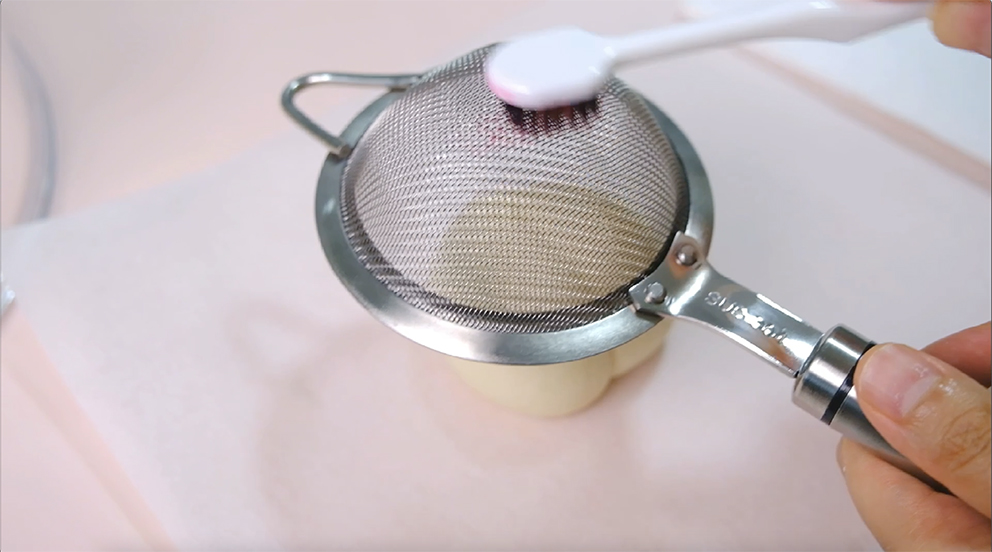
And to create the pink shades of the buns, there’s no better way than these old school method; using a toothbrush and tea strainer.
It’s actually an old school method that I’ve learned when I was in primary school 😄.

FOR BEAUTIFUL EVEN COLOUR, DON’T RUSH THIS PART
Dip the toothbrush to the colouring mixture and then tap off the excess onto a kitchen towel; else it might drops and ruin the look of your buns.
Hold the strainer upside down 2 cm above the bun and then gently brush the toothbrush over the back of the strainer in a circular motion. 
You can repeat the same process a few times until you get the desire colour shades.

I highly recommend to brush each bun one by one for an even colour

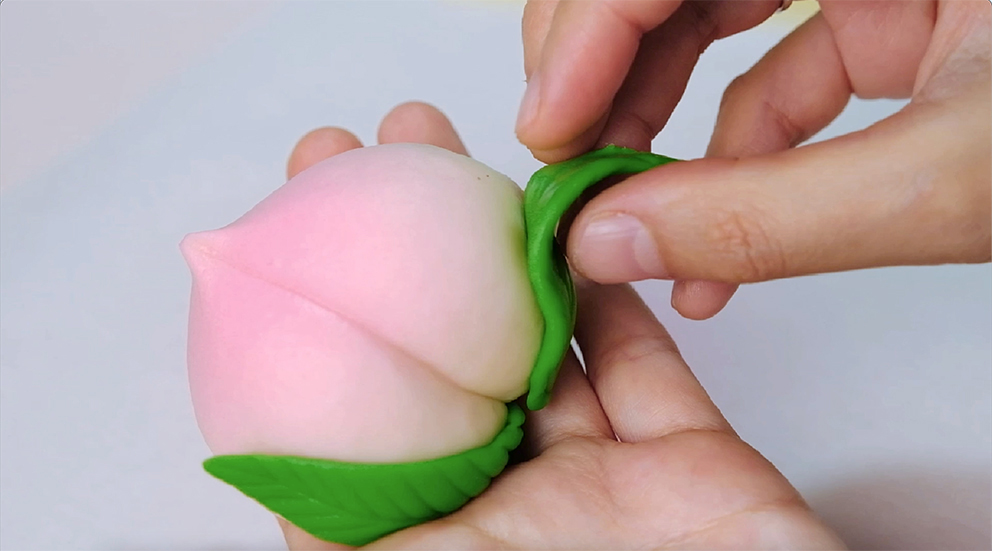
Some people attach the leaf first before they brush the pink shades. I prefer the other way around; so the pink food colouring won’t stain the leaves.


What do you think; is it cute enough to mimicking the shape of the peach? 🥲


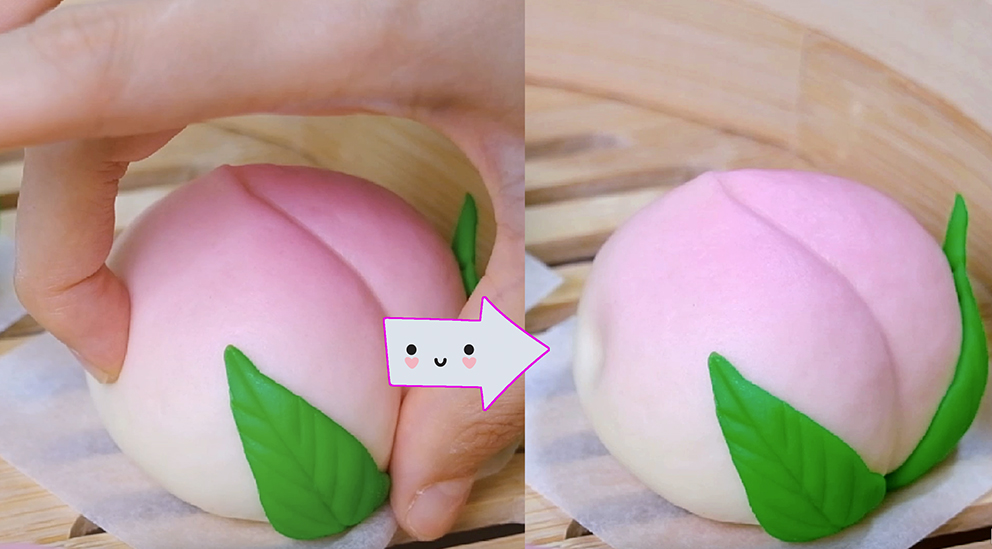
And when you proof them, make sure that you give some space in between the buns so they won’t stick one another after fermentation or steaming.
Please pay attention, proofing time depends on room temperature, it may take longer or may not take that long.


After fermentation, the proofed buns should feel lighter and rise about 50% of their original size
And if you gently press it with your finger, the dough will make indentation and be able to slowly bounce back into shape.


ONLY WELL-PROOFED BUNS ARE FLUFFY
Make sure that you don’t overproof the buns; over-proofed bun is likely to have a very open crumb structure.
Due to the development of excess CO2 during the proofing stage, the gluten ends up being over-stretched, and unable to hold up the internal structure of the buns.
You might just have a deflated buns with very coarse and crumbly texture.


CHOOSE THE RIGHT STEAMER
Bamboo steamer is the best choice in my opinion; because their lids don’t collect condensation
If you are using metal or plastic steamer, make sure that you cover the lid with a piece of cloth so the condensation during steaming won’t ruin the look of your buns.


DO NOT OPEN THE LID DIRECTLY AFTER STEAMING
After steaming, turn off the heat and do not open the lid immediately; make sure that you leave the lid on for another 3 minutes; the buns might deflate without the proper resting.


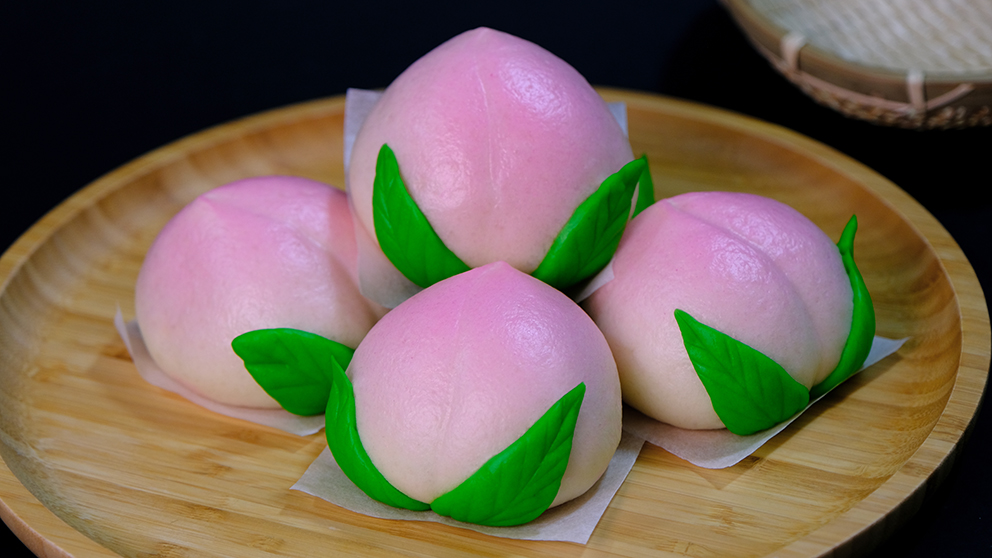
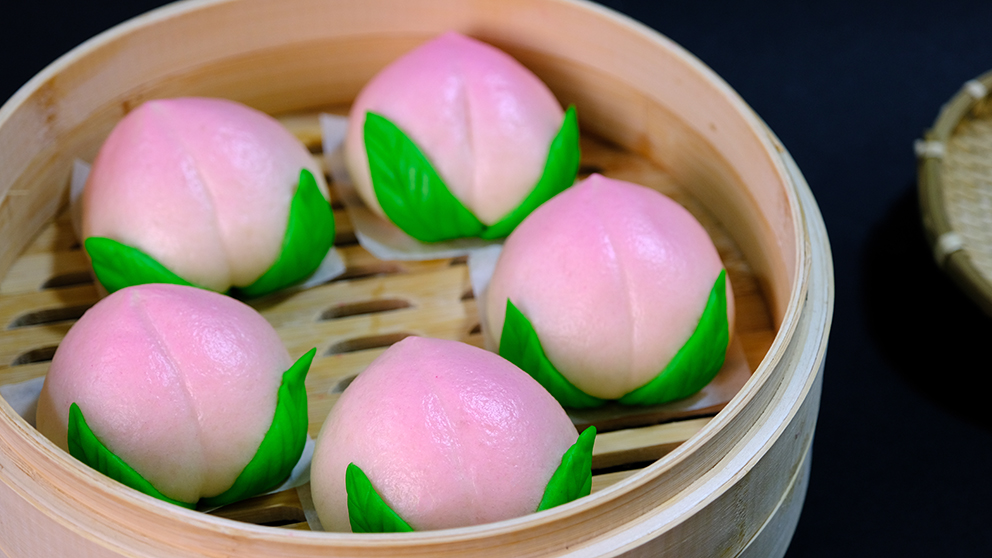
After 3 minutes…😱 fluffy peach, plump and beautiful birthday buns.

They are so lovely…😳😘


I hope these buns will light up faces and brings happiness and joy for your loved ones; Wishing them always be healthy and live a long life.

LONGEVITY PEACH BUNS
Yield: 5 buns
Active time: 2 hours
Total time: 5 hours

INGREDIENTS
Red Bean Paste:

  • 60 g Red Bean
  • 1/8 tsp Salt
  • 1000 ml Water
  • 40 g Granulated Sugar
  • 10 g Vegetable Oil
  • 5 g Glutinous Rice Flour
  • 2 tbs Water

Buns Dough:

  • 85 g Cold Milk
  • 1/2 tsp Instant yeast
  • 15 g Caster Sugar
  • 150 g All Purpose Flour
  • 4 g Vegetable Oil


Colouring

  • Food Colouring (pink and green)
  • Toothbrush
  • Tea Strainer

INSTRUCTIONS
Red Bean Paste

  1. Rinse the beans and transfer it to a large pot.
  2. Add in the salt and water – bring it to a boil; then take it off from the heat and let it rest for 1 hour.
  3. After 1 hour, don’t forget to take the lid off – put it back to the stove (no need to rinse or change the water) and continue cooking on medium low heat until the beans are tender and creamy.
    *The water will evaporate during cooking, adding more water as necessary to keep beans submerged.
  4. After for about 1 ½ hours, pick 1 bean and mash it with your fingers; if it’s mashed easily, it’s done.
  5. Transfer beans to a food processor along with their cooking liquid (you can use regular or immersion blender).
    If you find it too dry, kindly add 1-2 Tbsp of water as needed to help the spinning process.
    Run the food processor until the beans become a fine paste.
  6. Pour the fine paste into the non-stick pan.
    On medium-low heat, add in the sugar along with oil and glutinous rice flour that has been diluted with some water.
    Mix it really well and keep stirring for about 10-15 minutes until the mixture start comes together and doesn’t stick to the pan.
  7. Take it off from the heat (don’t worry if it’s still a bit loose, this paste will continue to thicken as it cools.
  8. Spread onto a flat baking sheet; cover it with a cling wrap to prevent from drying out, open a little gap so the steam can escape and let it cool completely.
    *Make sure the paste cool completely before you fill it into buns dough.


Buns Dough

  1. In large bowl, mix the cold milk along with instant yeast and sugar. Stir well until the sugar is completely dissolved and there’s no granules visible.
  2. Add in the flour and mix everything together, gather all small crumbs until it creates a dough ball.
  3. Pour in the vegetable oil.
    It seems too many oil at first; collect all the oil in the bowl, and then continue kneading on a work surface for about 1 minute.
  4. When you feel that the oil start to absorb completely; roll the dough into a long shape (moving the hand up and down as you roll to lengthen it).
    Then take left and right ends and fold it to the centre of the dough (repeat the same process 2 times). The dough gradually will become really smooth.
    *Do not overwork, this kneading process will only takes for about 3 minutes.
  5. Once the dough is ready, you can use it immediately. There’s no need to rest the dough because by proofed it twice will cause a lot of bumps or air bubbles on the surface, we don’t want that happened.


Fill & Shape

  1. Spare 20 grams of the dough for the peach leaves and divide the rest into 5 equal pieces (about 47 g each).
    *Please do remember always cover the buns with a plastic wrap to prevent from drying out.
  2. Take 1 portions of the dough, press into a thick disk.
    Using rolling pin, roll back and forth onto rectangular shape, fold into 2 equal pieces, turn it 90° angle and repeat the same process 2 times.
  3. Then roll the dough into a square shape, grab the dough with my left hand and rolling pin on the other hand.
    Using rolling pin roll up and back flatten the edges of the dough while turn the dough a little by little (middle part should be slightly thick).
  4. Place 1 portion of the red bean paste filling to the centre of the dough; gather the sides to enclose the bun and pinch to seal.
  5. To shape the buns into peaches
    – Flip the filled bun so the seam side is down and shape it to a smooth oval ball. 
    – Using your palms form a peak on the top.
    – To make the seam of the peach, gently press the bench scraper in to create a line along the arch; pinch the top, mimicking the shape of the peach
  6. Cover the filled buns with a plastic wrap and repeat this process with the rest of the dough and fillings.
  7. For the bun leaves
    Colour the 20 grams left over dough with green food colouring and divide it into 10 equal pieces (2 gr each).
    Take one portion of the green dough and shape it into a cone.
    Using bend scraper, flatten the cone. Form a line in the centre and create the leaf vein patterns tilts towards the cone.

Colour & Decorate

  1. To create the pink shades of the buns, simply mix some water with a few drops of pink food colouring.
    Dip the toothbrush to the colouring mixture; tap off the excess onto a kitchen towel.
    Hold the strainer upside down 2 cm above the bun; then gently brush the toothbrush over the back of the strainer in a circular motion (repeat the same process until you get the desire colour shades).
  2. Attach the leaves onto each peach bun with a dab of water (a pair for one bun) and place each bun onto a piece of parchment paper.


Proof & Steam

  1. Place the finished buns in the steamer; make sure that you give some space in between the buns so they won’t stick one another after fermentation or steaming.
    Cover and allow to rise for about 15-45 minutes.
    *Please pay attention, proofing time depends on room temperature, it may take longer or may not take that long (in the meantime you can start preheat your steamer).
  2. After fermentation, the proofed buns should feel lighter and rise about 50% of their original size.
    If you gently press it with your finger, the dough will make indentation and be able to slowly bounce back into shape.
  3. Over medium high heat; steam the buns for about 10-12 minutes.
    *If you are using metal or plastic steamer, make sure that you cover the lid with a piece of cloth so the condensation during steaming won’t ruin the look of your buns
  4. After 10 minutes, take the steamer off from the heat; do not open the lid and let it sit for another 3 minutes; serve.

NOTES

  1. If you’re not using the red bean paste right away, you can transfer the red bean paste in an airtight container and store in the refrigerator for up to 3-4 days or in the freezer for up to 2 months.
  2. Before freezing, divide the red bean paste into small portions so that you can be flexible on how much to use each time. When you’re ready to use, you can defrost in the fridge overnight.
  3. The buns can be stored in the fridge for 5 days, or frozen for a month.
  4. I highly recommend to reheat the buns in the steamer; place the frozen peach buns on a plate.
    Put the plate on top of the trivet in the steamer and let them steam over high heat for 10 minutes or until heated through.
  5. If you want to reheat in the microwave; place the steamed buns on a plate.
    Wet some paper towel, wring out excess water and place this on top of the steamed buns and microwave on high for 30 seconds; add the time as needed until heated through.

Kawaii Mini Burger


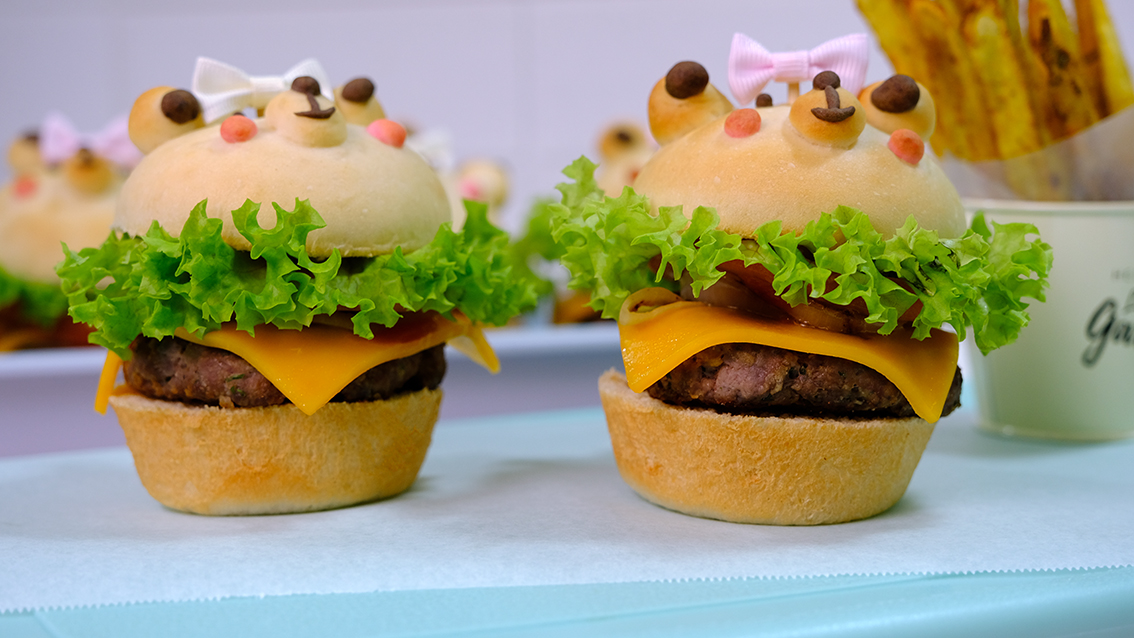
Today I’m gonna share with you my “Kawaii Mini Burger”.
These mini burgers will melt hearts and warm stomachs; they are so teeny-tiny, cute and absolutely delicious. 


The bun is entirely homemade, soft and fluffy; with juicy patty inside and all the delicious toppings and sauce… so Yummy!!
They are perfect to serve up at a party or just a snack for your love ones.

(18.5×26.5×3)cm Cupcake Pan

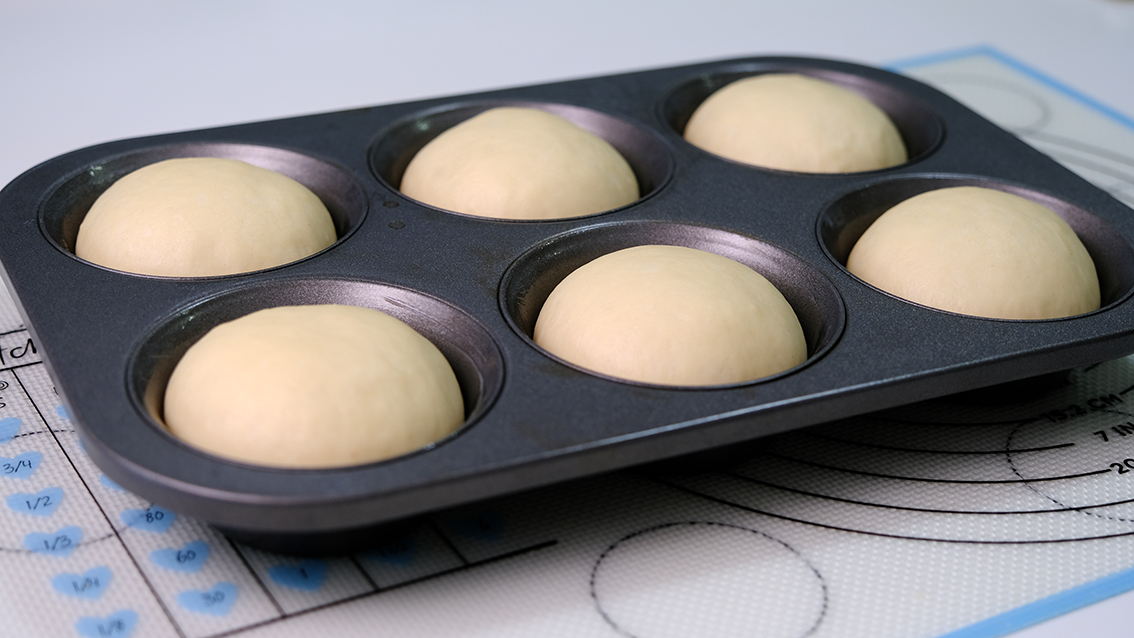
For the buns, you can make buns using ring moulds and they can be scaled to any size that you like, I found that this regular cupcake pan fits perfectly and easier to get.


To avoid over-proofing, I usually start adding the details when the buns has increase the volume 40-50 percent. If you see from the side, the top of the dough is more or less parallel with the top surface of the pan.


And while we adding the details the dough will continue to rise, so try to finish them as soon as possible.


You don’t want to over bake your lovely buns, if they are too dark they won’t look good on your burger.

Oh… look how cute they are!

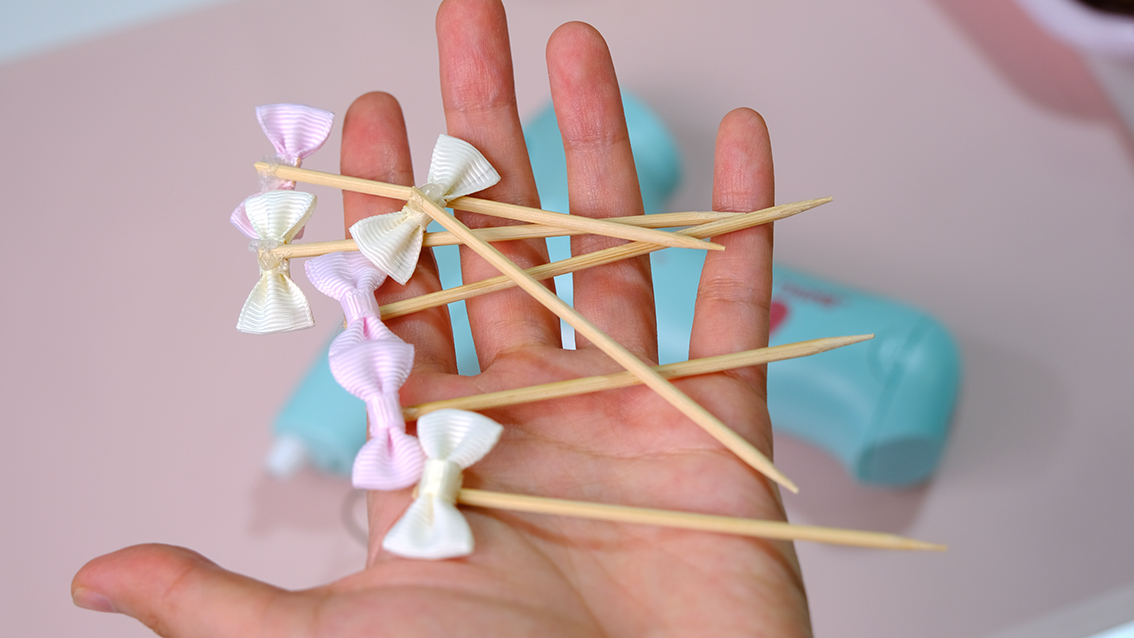
And to keep everything from falling apart, I create my own DIY toothpick so it’s easier to “grab and eat”.


It’s not only make it even cuter, but also look more elegant and fancy

These custom toothpicks really take your food presentation to the next level.


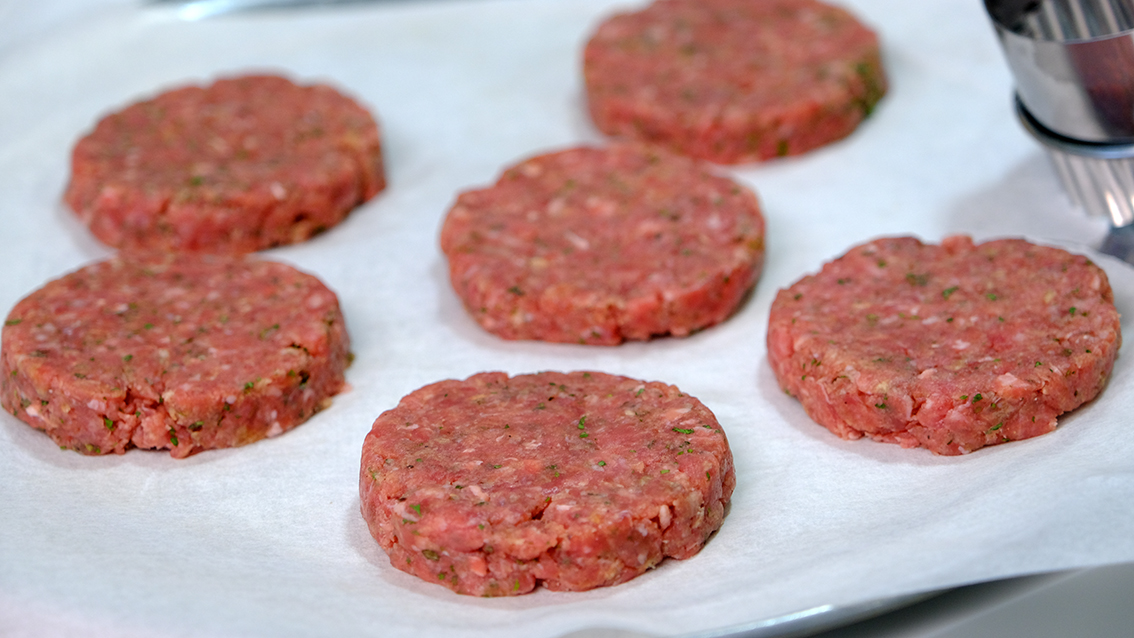
You can shape the patty with your hands, I’m prefer to use ring mould, it really helps me to make my burgers look perfect like the ones you get in restaurants.


Some people use a lid from a jar as a mould. Just make sure that you find a lid that is slightly bigger than the size of your burger bun coz shrinkage happens throughout the cooking process.


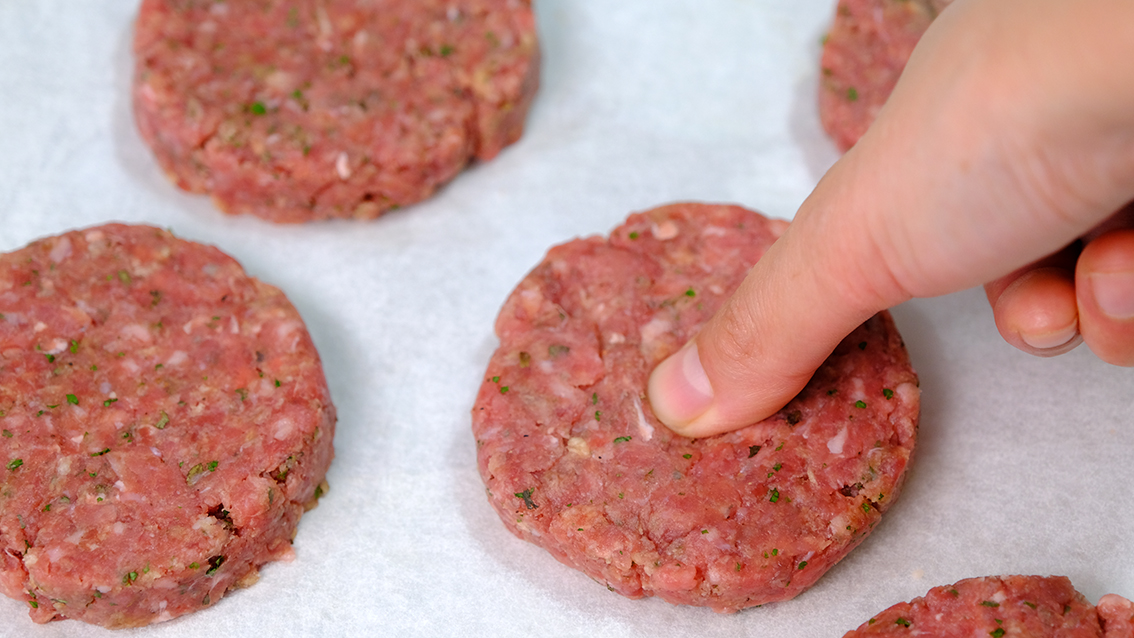
And before you cook it, give a thumbprint indentation to the center of each patty, this will helps the patty hold it’s shape—rather than swelling.


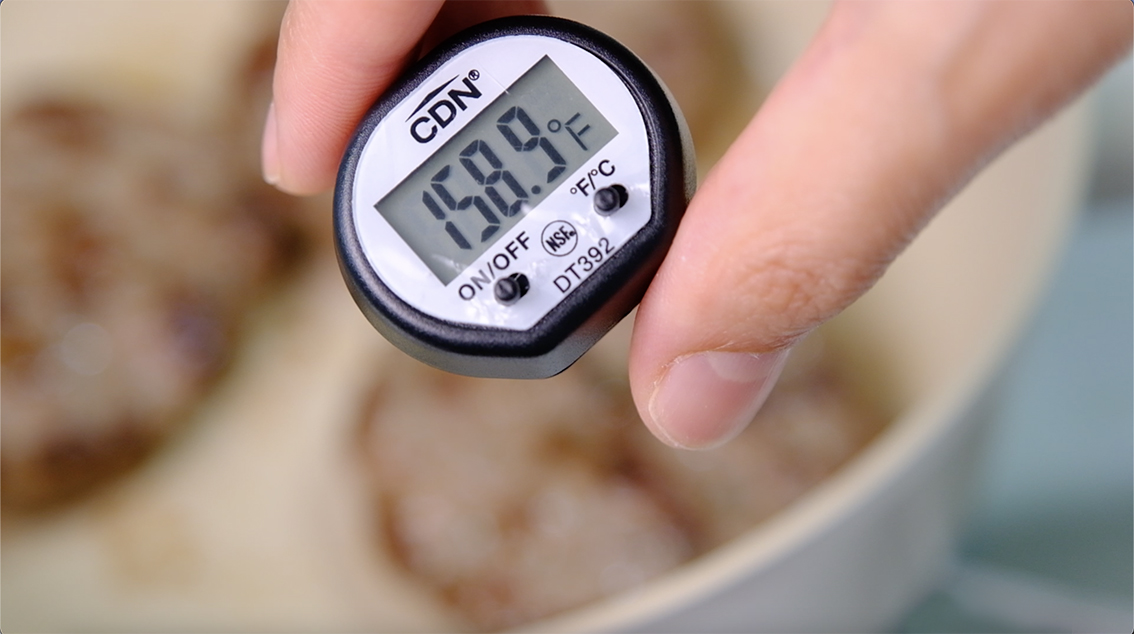
The best way to tell when it’s done is by using a thermometer without splitting the middle.


Cook until a thermometer reads 160°F.


Besides tomato ketchup, one of the best condiment that I always used when making burger is this wasabi mayo.

I remember having this sauce in a morning burger when I was in Japan and I really love it so much!
You can use either wasabi powder or paste, for me it does taste pretty similar.
If you are a wasabi lover, I promise it will taste really great!

Wasabi Paste

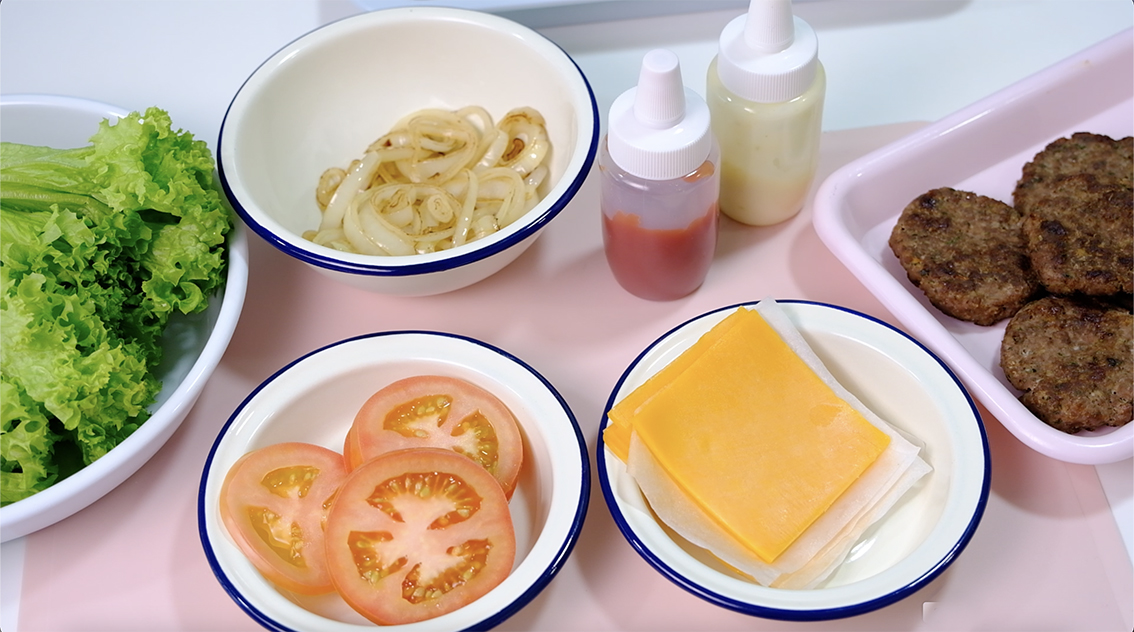
All the ingredients is well prepared; the patties, sharp cheddar cheese, tomatoes, onions, some lettuce, the sauce…

Toppings and Sauce

And of course our adorable burger buns !


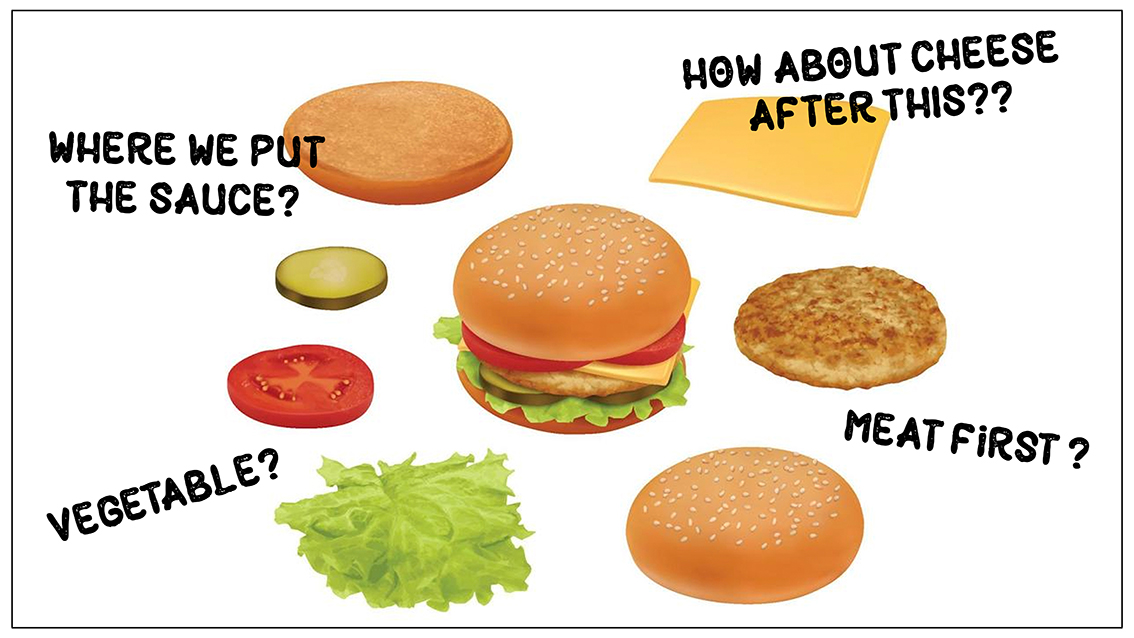
And before we start to stack them, do you know that are many ways to stack the burgers??
If you pay attention to the emojis, each of them arrange the burger in a different order.


Initially I also thought is this thing important?
Then I was really surprised that 2 burger with identical ingredients but different stack orders can result in 2 different taste.


After a few experiment and testing, I decide to use the “Burger King Whopper” stack method as it produce more stable and flavourful burger.


Ok back to our Whopper stack burger, so you will cut half of your tinny buns and stack all the toppings and sauce.


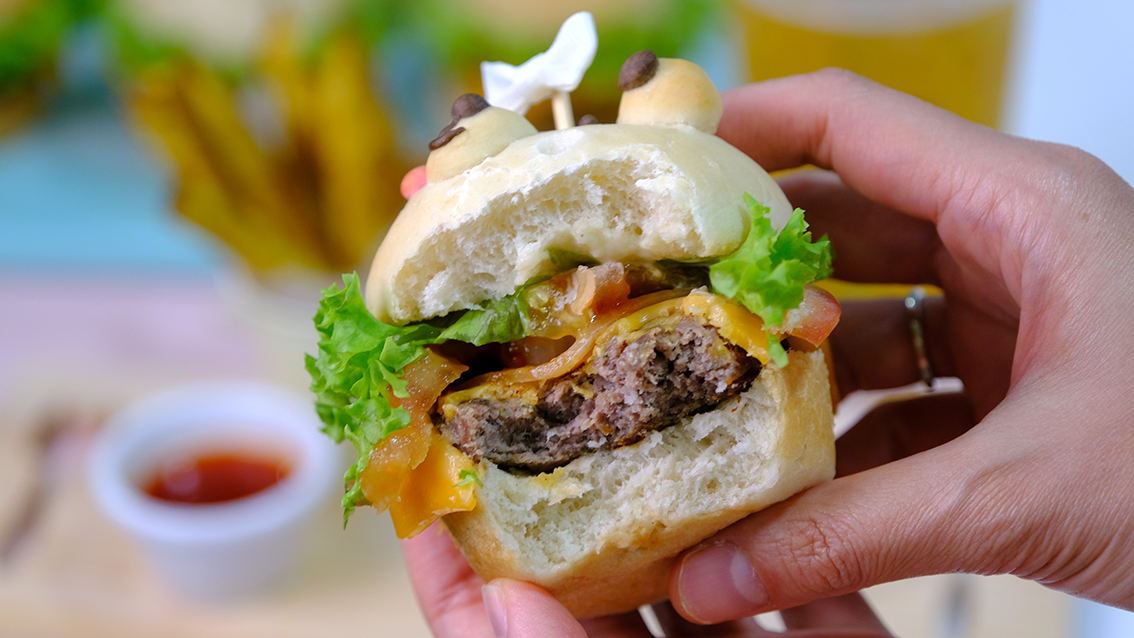
Look how beautiful this burger buns!

Soft beautiful bun

Please do remember the stack order (this will come out in the test! KIDDING 😅) :
1. The bottom of the bun
2. Juicy patty
3. A piece of sharp cheddar cheese
4. Tomato ketchup
5. Some grilled onion
6. A slice of tomato
7. A bunch of fresh lettuce
8. My beautiful wasabi sauce
9. The cute teddy bear head bun
10. And finally secure it with her pretty hair ribbon 

The Scrumptious Sweet Potato Fries

And of course, no burger is truly complete without having a side of scrumptious fries! 
These healthy baked sweet potatoes so tasty, they are caramelised on the outside and tender on the inside. I love it so much!
And as for the seasoning, you can keep it simple or even add more flavor with spices. 
A pinch of curry powder, garlic, and cayenne pepper would be a nice touch. It was the perfect combination of heat and sweet.


They are look not only delicious but also so sweet, I’m sure that everyone and specially kids will love it so much.


The bun is entirely homemade, soft and fluffy, while the burger patty is juicy and tender.


And how about some cold beer for adults?


I hope that you give them a try, they are really a lot of fun to put together.


You can create your own design with a different flavour; replace the beef with juicy grilled chicken patty, change the sauce with sweet and savoury teriyaki sauce;
Whatever you like! THE SKY’S THE LIMIT


I hope that you enjoy the recipe!! LOVE YOU ALL!!


KAWAII MINI BURGER
Yield: 6 burgers
Cupcake pan dimensions: (18.5×26.5×3)cm
Active time: 2 hours
Total time: 2 1/2 hours

INGREDIENTS
BURGER BUNS ( 6 burgers, 55 grams each)

  • 200 g Bread Flour
  • 1 tsp Instant Yeast
  • 25 g Granulated Sugar
  • 8 Milk Powder
  • 1/2 tsp Salt
  • 120 Cold Water
  • 15 Unsalted Butter


SWEET POTATO FRIES

  • 750 g Sweet Potatoes
  • 1 Egg White (30 g)
  • 1 tsp Vegetable Oil
  • 1 tsp Curry Powder (optional)
  • 1/2 tsp Salt
  • 1/4 tsp Ground Black Pepper
  • 1/4 tsp Garlic Powder
  • 1/8 tsp Cayenne Pepper (optional)


PATTIES (6 patties, about 55 grams each)

  • 250 g Beef (Ground Chuck)
  • 15 g Eggs
  • 25 g Bread Crumbs
  • 25 g Parmesan Cheese (grated)
  • 1 tsp Dried Parsley
  • 1/2 tsp Dried Basil
  • 1/4 tsp Salt
  • 1/4 tsp Garlic Powder
  • 1/8 tsp Ground Black Pepper


TOPPINGS & ASSEMBLY

  • Sharp Cheddar Cheese
  • Tomato Ketchup
  • 1 Onion (grilled)
  • 1 Tomato (thin slice)
  • Lettuce
  • Wasabi Sauce (3 tbs Mayonaise + 3 tsp Wasabi Paste)
  • DIY Toothpick

INSTRUCTIONS
BURGER BUNS

  1. Grease the pan with generous amount of butter; cupcake pan dimensions: (18.5×26.5×3)cm.
  2. In a large bowl combined the flour, instant yeast, sugar and milk powder; mix well.
    Add the salt and mix (adding the salt last to make sure that it doesn’t come into direct contact with the yeast; salt can kill the yeast).
  3. Pour ice water into the flour mixture (ice water slows down the fermentation so we have more time to decorate the buns).
    Don’t knead the dough at this time, just mix water and flour mixture until it forms a cohesive ball
  4. Cover and let the dough rest for about 10 minutes.
    After 10 minutes you can feel that the dough become more stretchy and pliable.
  5. Place the dough on the work surface, add in the butter and start kneading the dough.
    The dough is really sticky at this point, that’s totally fine, don’t be tempted to add more flour to it; just continue kneading it until you get a smooth ball (it takes for about 10 minutes).
    *You will know whether the dough is ready by doing the windowpane test; if you can stretch the dough into a thin translucent membrane without breaking it that means the gluten is well developed and your dough is done.
  6. Weigh 6 portions of the dough, 55 grams each (there will be leftover dough for the details, some plain dough for the Bear’s ears, colour a bit with dark brown for the eyes, nose and mouth; and another pink for bear’s lovely cheek).
    Cover all the dough in a plastic wrap to prevent from drying out and let them rest for about 5 minutes.
  7. After 5 minutes, take 1 portion of the dough, flatten it with the palm of your hand to remove any air bubbles, pull all creases to the back; place it on a work surface and then roll and shape it into a smooth ball. Continue with the rest dough.
  8. Place the buns onto a greased cupcake pan, cover it with a kitchen towel and let them half proof for about 20-30 minutes. 
  9. In the meantime; Preheat the oven to 170°C.
  10. After 30 minutes, you will see that the dough noticeably puffy and increase the volume 40-50 percent. If you see from the sides, the top of the dough is more or less parallel with the top surface of the pan.
    Now you can start adding the detail (while we adding the details the dough will continue to rise, so try to finish them as soon as possible):
    – Roll some plain dough for the Bear’s ears and then the center of her face
    – Using some dark brown dough to create the inner part of the ears, her tiny nose, two little eyes and mouth.
    – A bit of pink dough for her shy cheek
  11. After finish with all the details, you can check whether the buns is fool proof; if you press the dough then the indentation slowly springs back half-way, that means the dough is well proved and ready to bake.
  12. Bake them in the preheated 170°C oven; turn on your alarm and check them out right after 10 minutes baking. Do not over bake, if they are too dark they won’t look good on your burger. Once it’s done, take it out from the pan and let it cool completely on a cooling rack.


SWEET POTATO FRIES

  1. Preheat the oven to 200°C.
  2. If you leave the skin on, make sure that you wash and scrub them well before you cutting or cooking it; pat them dry.
  3. Cut the fries; I recommend a width between 1/4- and 1/2-inch.
  4. In a large bowl whisk the egg whites until foamy, add a bit of vegetable oil and coat the fries (this egg whites mixture acts as a binding agent so all the spices will stick well to the fries).
  5. Toss the sweet potatoes with the rest ingredients (salt, pepper and spices).
  6. Place the fries on parchment lined baking sheets (try not to overlap the fries for even baking). Bake them for 20 minutes.
    After 20 minutes, flip the fries; return to the oven and bake it for another 15-20 minutes.
  7. Serve immediately.
    *The browner they are, the crispier they will be, but if they get really dark, they will be a bit hard because of the natural sugars of the sweet potatoes caramelizing. Oven may vary, So watch carefully.

PATTIES

  1. Season ground beef with all the ingredients; mix really well and divide it into 6 patties. 
  2. Place 1 portion of ground beef inside the 7 cm diameter ring; press the meat down, make sure it spread evenly.
    *You can shape the patty with your hands, I’m prefer to use ring mould, it really helps me to make my burgers look perfect like the ones you get in restaurants (some people use a lid from a jar as a mould, just make sure that you find a lid that is slightly bigger than the size of your burger bun coz shrinkage happens throughout the cooking process).
  3. Before you cook it, give a thumbprint indentation to the center of each patty (this will helps the patty hold its shape—rather than swelling).
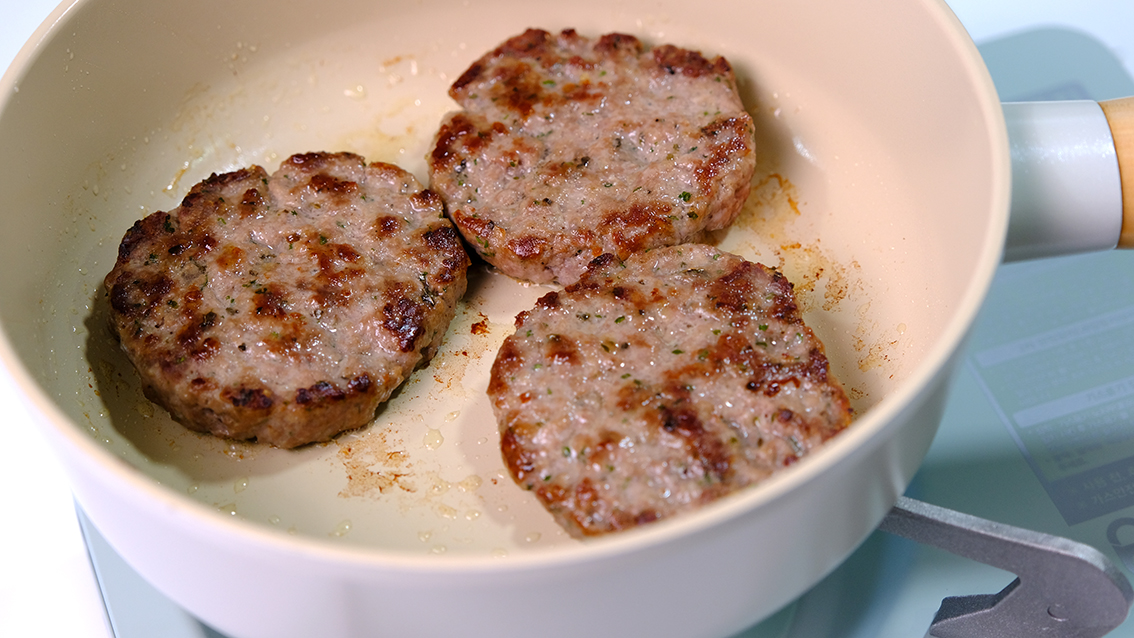
  4. Over medium heat, cook for 2-3 minutes on each side. The best way to tell when it’s done is by using a thermometer without splitting the middle; cook until a thermometer reads 160°F.
    *Don’t forget to fry your onion for toppings.

ASSEMBLY
Stack Orders :
1. The bottom of the bun
2. Juicy patty
3. A piece of sharp cheddar cheese
4. Tomato ketchup
5. Some grilled onion
6. A slice of tomato
7. A bunch of fresh lettuce
8. My beautiful wasabi sauce
9. The cute teddy bear head bun
10. And finally secure it with her pretty hair ribbon 

NOTES

  1. To store buns; in an airtight container 4 days in the fridge, 2 week in the freezer.
  2. To defrost the buns; pull the bag out of the freezer and leave it on the counter at room temperature (a single bun may need 15 to 20 minutes to defrost).
    Take out the buns from the bag and toast the buns in the preheated 180°C oven for 5-10 minutes, or just long enough to warm them through.

Princess Pandan Rose Mousse Cake


Hey Guys, how do you enjoy your afternoon tea?
My perfect afternoon tea is to have a cup of Cappucinno and a piece of my favorite buttercream layer cake.
A layered of soft cotton cake with rose mousse filling in between, covered and decorate with a silky smooth Italian Meringue Buttercream…here you will find a fanciful realm of enchanting sweet treats in these vintage style “Pandanus Rose Cake”.

I always fall in love with the vintage style buttercream cake with the piped ruffles and borders, it reminds me of my 1980’s birthday cake.

1.5cm – 2 cm Hot Water Bath 

This cake will be bake in a water bath. The benefit of water bath is that it will moderate the baking temperature and the cake texture will be very moist too.  

I love this Pandan Powder SO MUCH!

For the flavouring, you can use pandanus paste. I found this natural pandan powder is really great for baking. 


It’s adds natural green coloring and fresh pandanus aroma.


The cake is light and moist and not to sweet…


Paired with rose mouse filling inside so tasty and flavorful…


And this buttercream also so soft melts in your mouth…


For the mousse filling, I highly suggest to use this natural rose water rather than artificial one, you really can tell the difference.


I love to called it English Style Princess Birthday Cake ☺️ ! That enticing smell makes your mouth water.


Hm..mm this cake makes me so happy and I feel like a princess 👸


Enjoy your afternoon tea with this fluffy, fragrant Pandan Rose Layer Cake, I hope that you will enjoy it as much as I did….

PANDAN ROSE MOUSSE CAKE
Yield: One 6 Inch Square Cake
Active time: 1 1/2 hours
Total time: 3 hours

INGREDIENTS
Rose Mousse Filling

  • 2/3 teaspoon Unflavoured Gelatine
  • 20 grams Water
  • 75 grams White Baking Chocolate (Compound or Couverture)
  • 30 grams Milk
  • 160 grams Heavy Cream
  • 5 grams Icing Sugar
  • 1/2 teaspoon Beetroot Powder or Pink Food Colouring
  • 5 drops Pure Rose Water 


Pandan Sponge Cake

  • 85 grams All-Purpose Flour
  • 1/4 teaspoon Double Acting Baking Powder
  • 60 grams Salted Butter
  • 60 grams Milk
  • 1 teaspoon Vanilla Extract
  • 100 grams Egg Yolks
  • 1 teaspoon Pandan Powder or Pandan Paste
  • 140 grams Egg Whites
  • 1/2 teaspoon Vinegar or Lemon Juice
  • 60 grams Caster Sugar


Italian Meringue Buttercream

  • 160 grams Egg Whites
  • 300 grams Granulated Sugar
  • 180 grams Water
  • 150 grams Unsalted Butter
  • 420 grams Shortening
  • 1 tablespoon Vanilla Extract
  • Green Food Colouring

INSTRUCTIONS
Rose Mousse Filling

  1. Bloom the gelatine by sprinkling it over cold water and let it stand for 5 minutes.
  2. Melt the white chocolate.
    Heat the bloomed gelatine and the milk in the microwave or on the stove (DO NOT BOIL).
  3. Add the hot milk into the melted chocolate, whisk vigorously to a smooth paste.
    Mix in the melted bloomed gelatine and whisk again until smooth.
  4. In another bowl, whip the heavy cream with the icing sugar until they reach medium firm peaks (don’t over whip it, else it will first turn grainy and then to butter).
  5. Take about 1/3 of the whipped cream to lighten the chocolate mixture, then gently fold in the remaining cream.
  6. Add some beetroot powder and a few drops of rose water, mix until well combined. 
  7. Store in the fridge for at least 2 hours to firm up.


Pandan Sponge Cake

  1. Preheat the oven to 160°C.
    Line your pan with parchment paper (make sure you have enough parchment overhang to cover up the entire inside of the baking pan).
  2. Sift the flour and baking powder, set aside.
  3. For the Egg Yolk Batter
    Melt the butter until start to bubbly, take it off from the heat, add 2/3 of the flour mixture and keep stirring until smooth.
    Add the milk and vanilla extract, mix well
    Add the egg yolk and mix
    Pour in the last portion of flour mixture and mix until really smooth
    Add pandan powder, mix well; Set aside.
  4. For the Meringue
    In a large bowl (make sure your bowl is clean and grease free) whisk egg white until frothy, add the vinegar and continue to beat until foamy; gradually add in the sugar and whisk until firm peaks formed (the peak will hold and fold back slightly when you turn your whisk upside down).
  5. Add 1/3 of meringue to the egg yolk batter, mix well;
    And then pour the yolk batter to the rest meringue, fold gently in one circular motion until well incorporated.
  6. To Bake
    Pour the batter into a prepared pan (slowly and from about 30 cm high so that air bubbles burst as they flow out of bowl)
    Tap the pan against worktop 3-4 times to remove air bubbles.
    Wrap the bottom part of the pan with aluminium foil so that the water doesn’t get into the pan. 
    And for a Water Bath; place the cake pan within a larger pan and pour hot water into the outer pan until it comes up to a level of 1.5cm – 2 cm. 
    Place the whole thing in the oven and bake them in the preheated oven for 70 minutes.
  7. After 70 minutes, turn off the oven. Remove the water bath and return the cake into switched off oven to continue baking for another 10 minutes.
  8. Once it’s done, drop the pan at a height of 10 cm onto a table top (this will prevent cake from sinking). Unmould immediately, peel off the baking paper and re invert onto a rack to cool completely.

Italian Meringue Buttercream

  1. Place egg whites inside the stainless steel mixing bowl with the whisk attachment (make sure your bowl is clean and grease free).
  2. For the Sugar Syrup
    Pour the sugar and water in a large heavy bottom sauce pot; cook over high heat until the sugar dissolved and reaches 240°F.
    Always extra precautions while working with hot sugar syrups!
  3. For the Meringue
    As soon as the sugar mixture reached 240° F remove it from the heat; turn on the mixer to medium high speed to get the egg whites frothy and gaining volume.
    Once the egg whites are starting to get white in color, slowly and carefully pour the hot sugar syrup into the whipping egg whites (try to avoid splashing the syrup onto the whisk attachment or you will be making spun sugar as it hits the sides of the metal bowl).
    Continue whipping until the mixture has cooled completely (mine takes for about 15 minutes) before you add the butter and shortening or you will have Butter soup!
  4. Once the meringue is cool to the touch, slowly add the butter and shortening, add in vanilla extract (the mixture will look as if it’s broken and curdled at first NO NEED to be panic this is natural, it will come back together eventually, just continue mixing until the mixture is smooth).
  5. Colour the buttercream with a bit of green food colouring.

ASSEMBLY THE CAKE

  1. Cut the cake into 3 even layers.
  2. Pour the mouse and buttercream into a pipping bag with a number 12 tip.
  3. Place the first layer on a cake board; pipe a double dam of buttercream all away around the cake (this dam is going to help the mousse filling from seeping out).
    Pipe the rose mousse in the center (you want to make sure that your filling is at the same height over your dam buttercream, so when you stack the layer it continues to stay even all the way up).
  4. Place the second layer, repeat the same process with the second layer.
  5. Place the last layer, cover it all with the buttercream. Decorate according to your preference.

NOTES

  1. For the cake; try to use room temperature egg whites, this will yield more volume.
  2. Over beating meringue may cause the cake to crack, while under beating will cause the cake to collapse or it may not rise much.
  3. Mousse made with whipped cream, so it must be kept refrigerated at all times. Store in an airtight container for up to 8 days.
  4. To store Italian Meringue Buttercream; 2 weeks in the fridge, 2 months in the freezer.
  5. To Defrost Buttercream
    Take it out several hours before you need it and let it get to room temperature.
    Then put it on the mixer on low speed and let it mix (it will look curdled at first, don’t be alarmed this is natural, it will come back together eventually). You can turn the speed up to medium high and it will mix out smooth.
  6. To store the final layer cake; Store in the fridge (in an airtight container) for up to 3 days.

Doodle Icebox Cookies

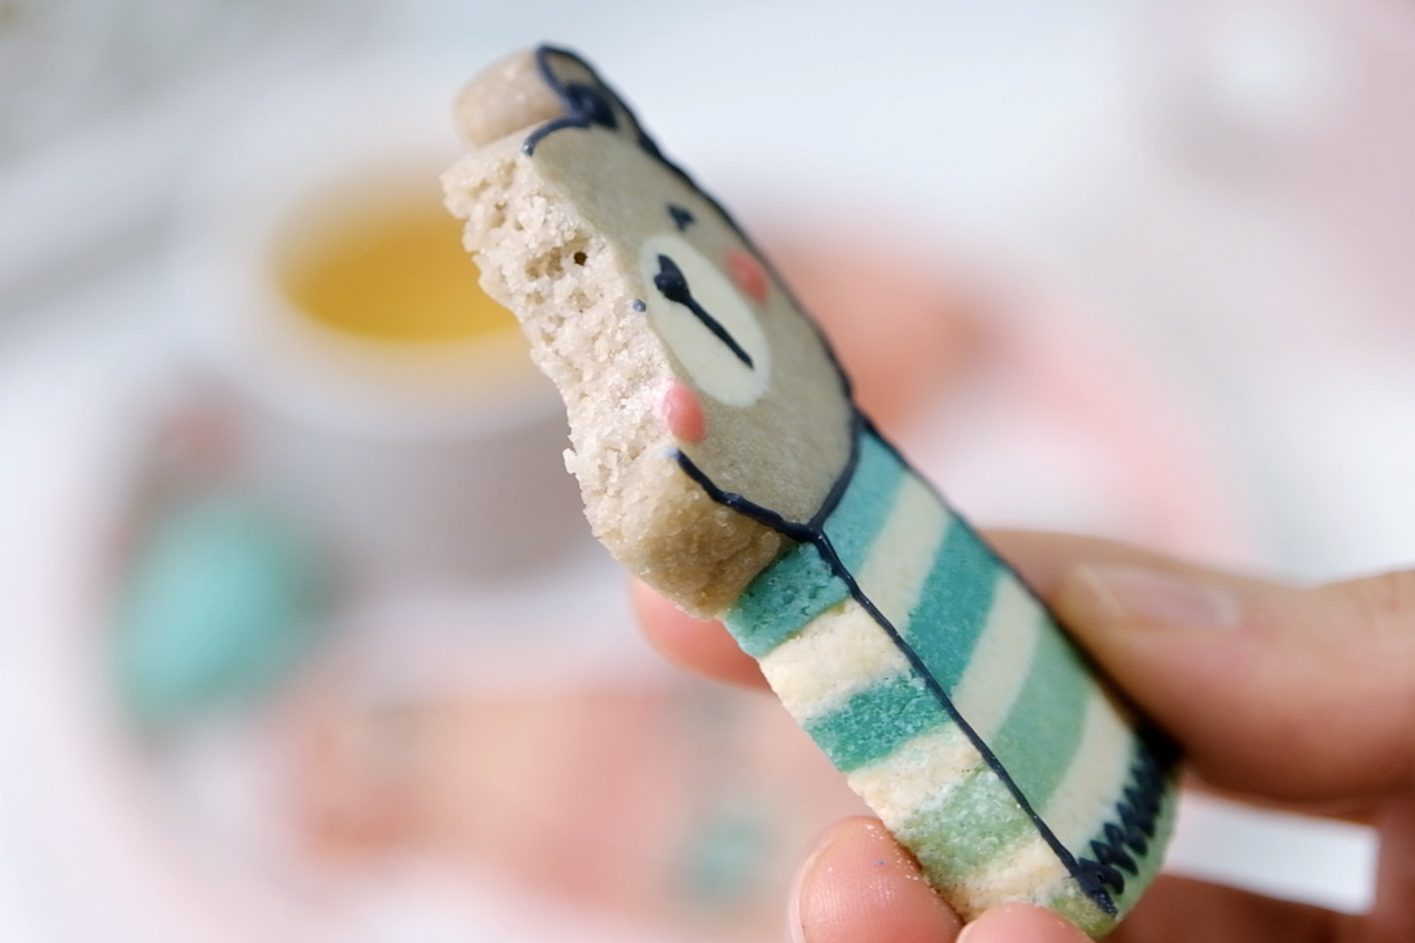
Hi Guys, have you ever tried making icebox cookies? The cookie dough is shaped into a specific design, freeze until firm, then sliced and baked.

Yes you need to plan well for these and it is a little complicated task, but it’s a lot of fun making these! They also not overly sweet, hold their shape and bake up perfect every single time.

This shortening based cookie recipe is easy to make, it doesn’t require any dough chilling, easy to work with (as it’s melting point is higher than butter), so it doesn’t soften as quickly while you handle it.

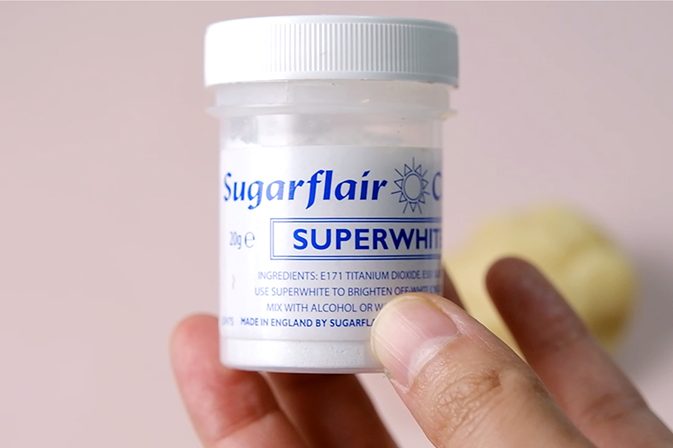
I use superwhite powder from Sugarflair for white bright colour

You will need some food colouring to dye your cookie dough. Try to use natural dyes as much as possible such as cocoa powder for brown, beetroot for pink or matcha powder for green colour.

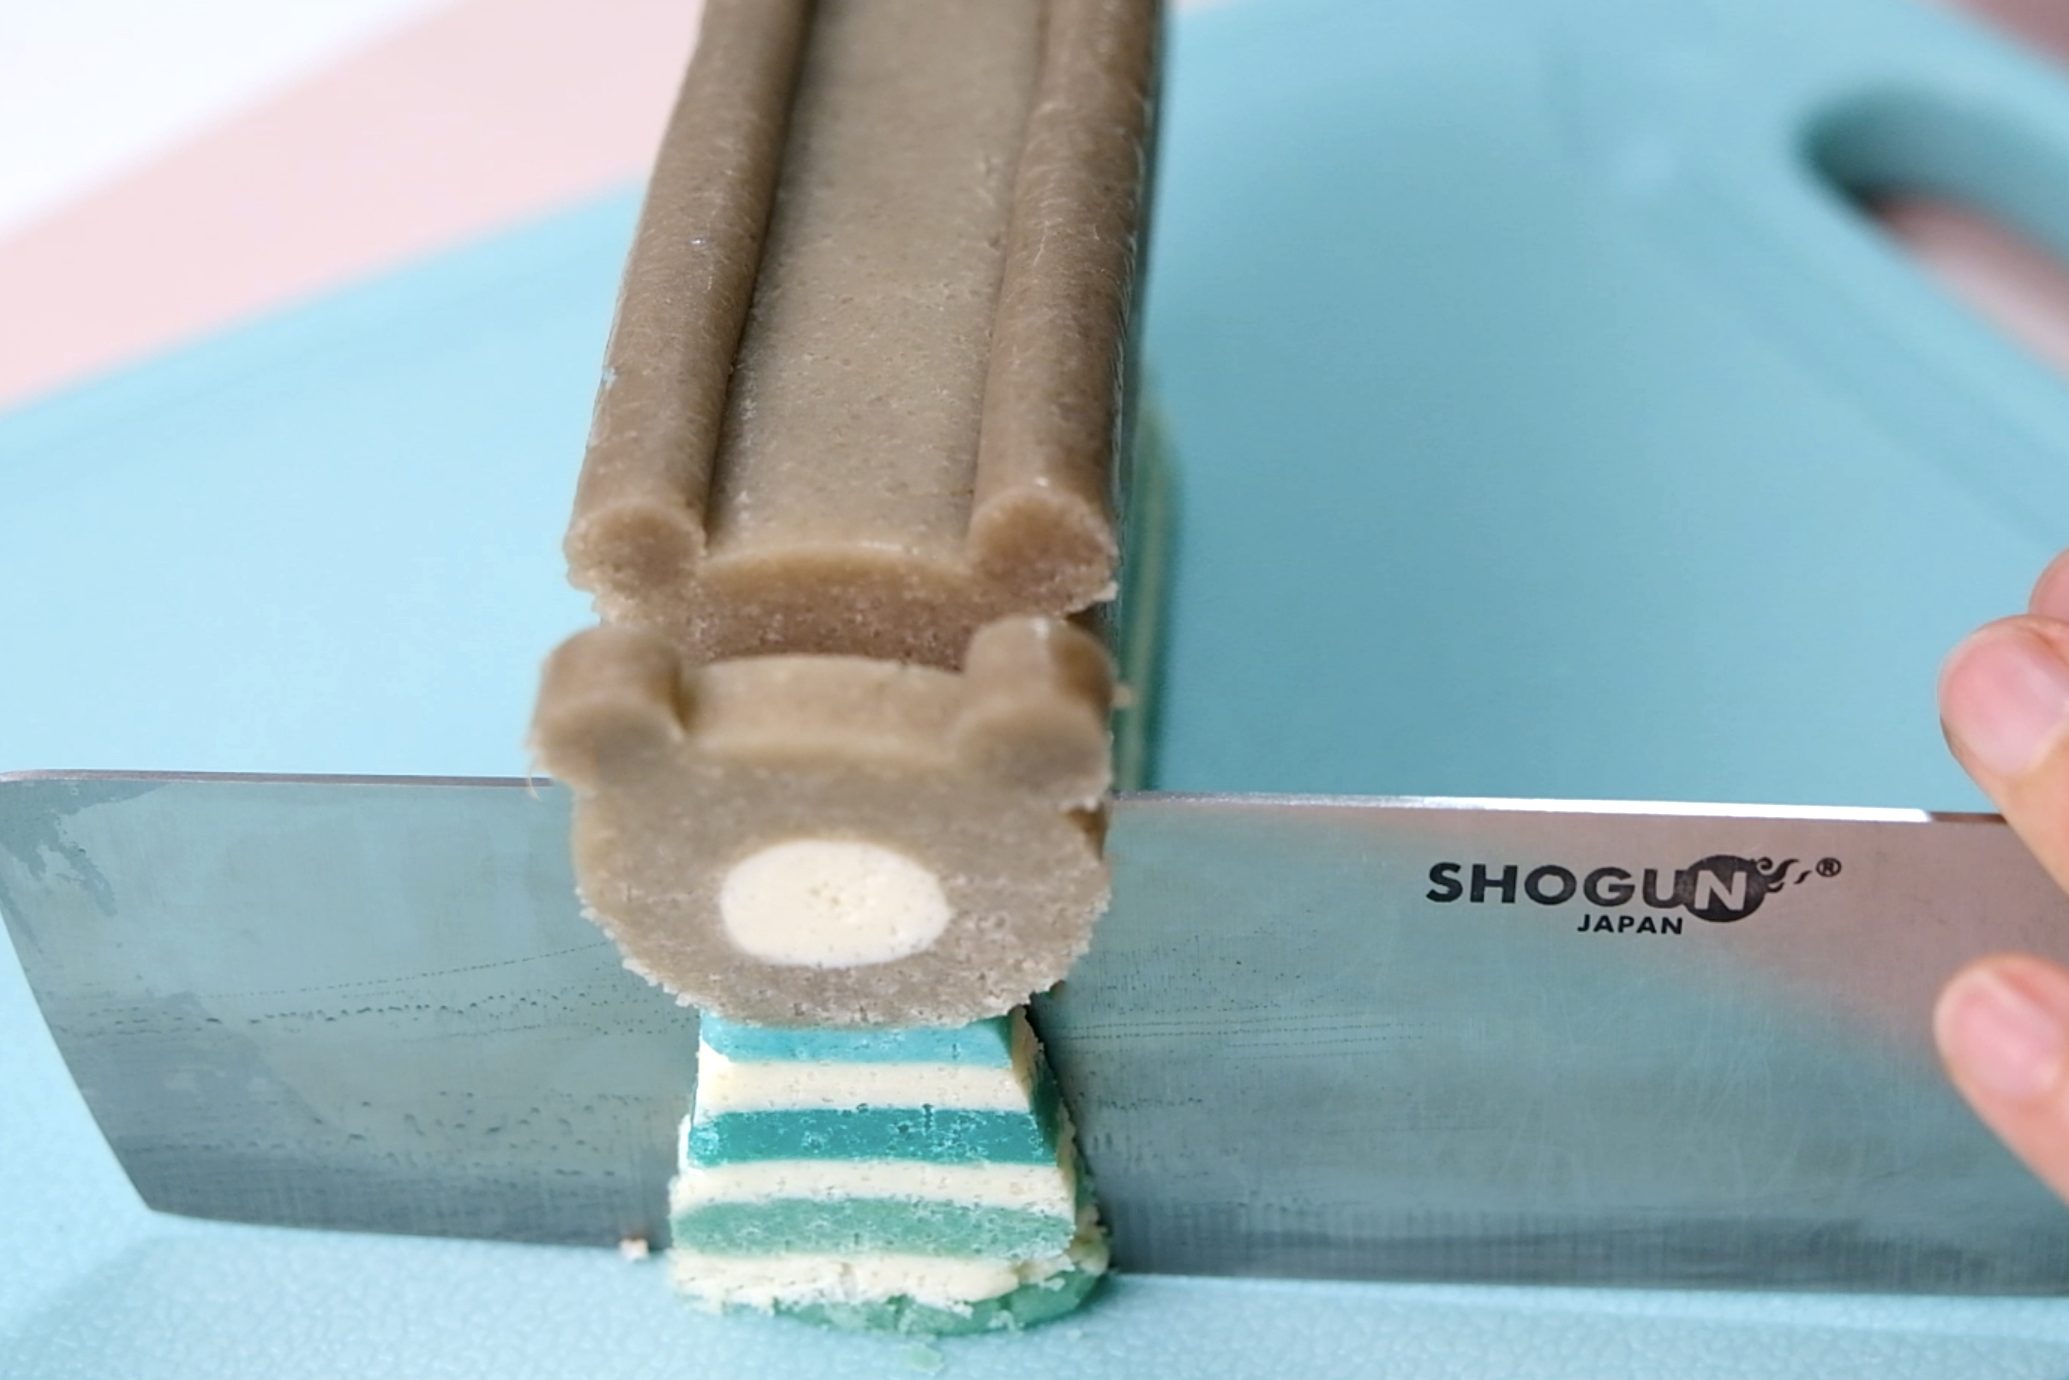
Make sure that you use a very sharp knife

And while this dough doesn’t technically have to be chilled, chilling it can make it easier to cut out more intricate shapes and transfer them to your baking sheet.

Slicing the first piece is always so exciting! I get a little nervous, too 😥.
Look at that awwwwww!!! 🤣😱🤗

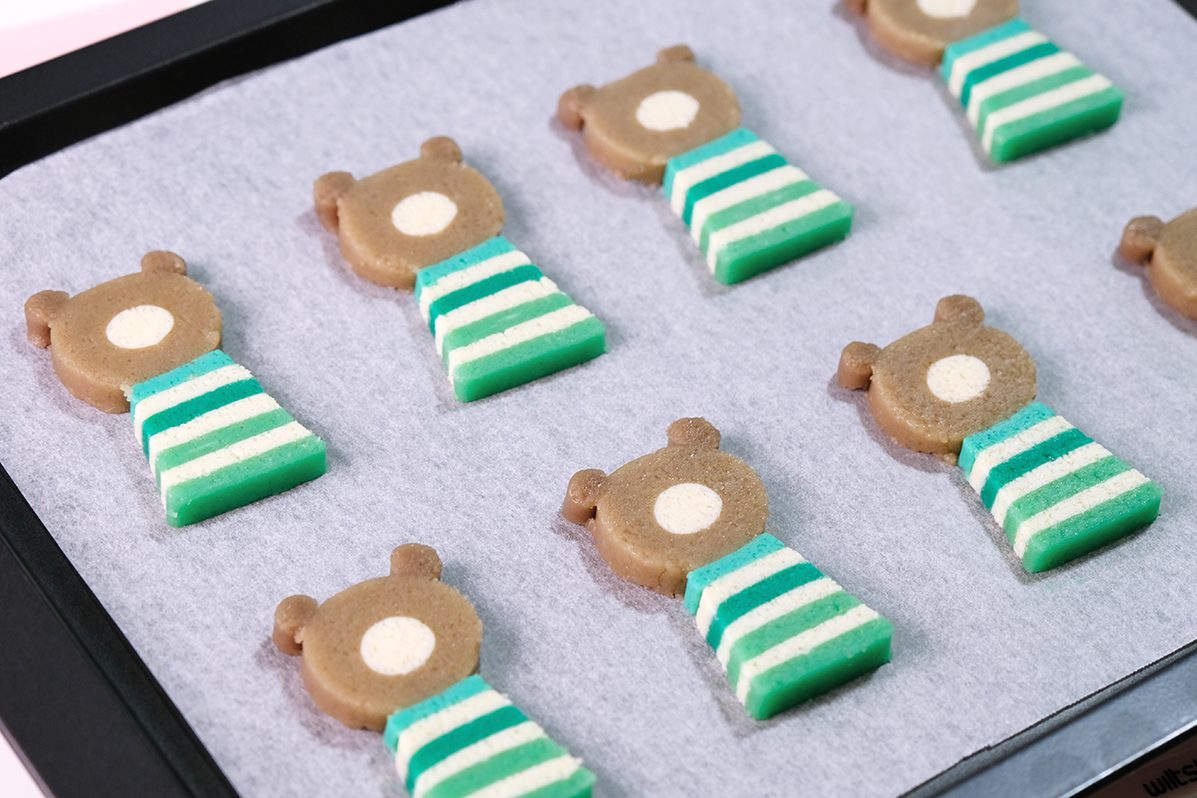
Don’t forget to chill the cookies in the fridge for about 30 minutes before baking to maintain the details, and don’t forget rotating your pans halfway through baking.
When bake, leave at least 1-inch of spare in between the cookies, the dough won’t spread but will puff a bit.

Don’t throw the dough scraps, you can definitely reuse it. Roll and cut them with your favorite cookie cutter, I love to shape them with this tiny flower shape tart mould as a decoration.

The baking time will vary depending on the size, bake the cookies until the the bottom edges are just lightly browned. We don’t want overcooked the cookies as the colour detail is really crucial.
When take out from the oven,cool them on the baking sheets for 5 to 10 minutes and then transfer to a wire rack to finish cooling.

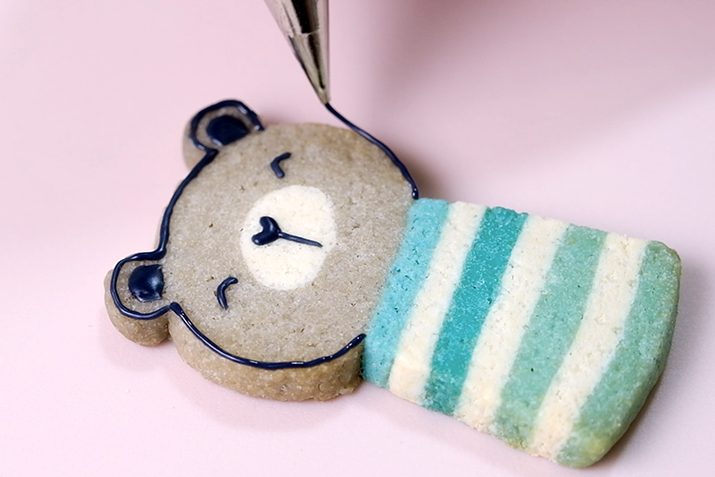
And for the details and outline, I choose royal icing coz it sets a little bit harder and it’s pretty simple.
Royal icing is all about consistency, so depending on how you want to decorate yours, for example, this cookies I will go with the thicker consistency for more of lining things out.

No. 1 round noozle

I suggest to use no. 1 round noozle for this delicate details and you can use small damp brush to correct the details.

Look how cute they are! 🥰

Arh…SUPER cute!

Around these holiday season, is there anything more iconic than these cute doodle icebox cookies?

You can make many people smile with these cookies!
They are perfect for casual gifts for your friends. Wrap them into a beautiful box or maybe in a homemade bag, like this.

The cookies are crispy on the outside, not overly sweet and not too hard in the inside.
Hmm.mmm so yummy !!!
These cookie may be stored in an airtight container at room temperature for up to one week.

I hope that you enjoy the recipe and have some beautiful moments with your family in this lovely season!
💗 LOVE YOU ALL💞

DOODLE ICEBOX COOKIE
Yield: 24 pieces
Active time: 3 1/2 hours
Total time: 6 hours

🌿 Cookie Dough
170 g Shortening
200 g Granulated Sugar
50 g Whole Eggs
2 tbs Milk
1/2 tsp Almond Extract
380 g All-Purpose Flour
2 tsp Double Acting Baking Powder
1/2 tsp Salt
Food Colouring (Pink, Turquoise, White, Brown)

🌿 Royal Icing
120 g Icing Sugar
3 tsp Milk
1 tsp Light Corn Syrup or Honey
1/4 tsp Almond Extract
Food Colouring (Black, Pink, Turquoise)

INSTRUCTIONS
🌿 Cookie Dough

  1. Cream the shortening and sugar together until well combined for about 3 minutes (there are gonna be much fluffier when you’re done).
  2. Add in the eggs, along with milk and extract. Mix until all that liquid is well incorporated into the butter and sugar.
  3. Add the sifted dry ingredients; the all-purpose flour, baking powder and salt. Mix well (the mixture will be a little bit crumbly at first, but keep mixing and it will come together just fine). Note: To get a flakey and snappy cookies, don’t overwork this mixture; you’re kind of just incorporating the flour.
  4. This cookie dough is ready to use (it doesn’t require any dough chilling), colour your cookie dough and to shape it ~ kindly follow instructions according to the video.
  5. Store the completed cookies in the freezer for at least 30 minutes.
  6. Cut the frozen cookies for about 5 mm thick (make sure that you use a very sharp knife), place it on a baking try and then store them in the fridge for 30 minutes before baking (to maintain the details).
  7. Bake them in the preheated 160°C oven (baking time will vary depending on the size); and don’t forget rotating your pans halfway through baking.
    * Bake the cookies until the the bottom edges are just lightly browned (don’t overcooked the cookies as the colour detail is really crucial).
  8. When take out from the oven,cool them on the baking sheets for 5 to 10 minutes and then transfer to a wire rack to finish cooling.

🌿 Royal Icing

  1. Simply combine all the ingredients together. You do wanna work a little bit quickly with royal icing coz it will sets hard or else cover it with clingwrap.
    *Note: If it’s too runny, add some icing sugar and if it’s too thick, add the amount of milk 1/4 teaspoon at a time until you reach the desire consistency.
  2. Colour it, transfer to a piping bag and then draw the outline . Use a damp brush to correct the details.

🌿 Notes
Baked cookies may be stored in an airtight container at room temperature for up to 1 week. Make sure to let the icing fully harden before stacking the cookies. It also freeze well for up to 3 months, thaw to room temperature before serving.

Char Siu Bao (BBQ Pork Filled Buns)


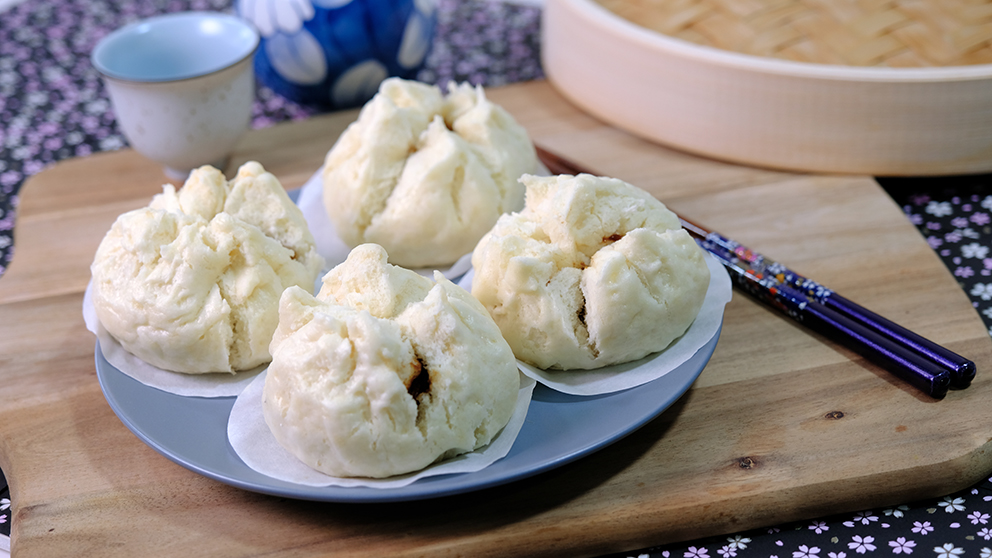
Char Siu Bao 叉烧包 considered as one of the “Four Heavenly Kings of Dim Sum” in China. Compared to regular Chinese buns, Char Siu Bao has distinctly different fragrance and texture and also sweeter taste.

This steamed buns is one of the essential Dim Sum that really brings my childhood memories.
The Soft, fluffy steamed buns filled with Chinese BBQ pork (Char Siu Pork) and the slurry sweet and savoury Char Siu Sauce.


Unlike the other common recipe that needs 2-3 days, this recipe only takes less than 24 hours to make it.
The following diagram is a guide so you can get the idea how’s the process and what we need to prepare to make these beautiful buns.

Diagram the Process of Char Siu Bao Making

It’s very important to choose the right flour and leavening agent, otherwise the buns won’t rise well and white bright in colour

This recipe has been through so many trial and error. After some testing and tweaking, 
I found that the key to a snowy white buns is this unbleached cake flour,

Unbleached Cake Flour that I used in the recipe

a good brand of double acting baking powder,

Make sure that you use “Double Acting Baking Powder”

and also special leavening agent called Ammonium Bicarbonate that helps the buns crack to the tops.

Be careful when adding this type of leavening, make sure that you measure it correctly; too much Ammonia will cause an extremely intense unpleasant ammonium smell in the dough

This chemical compound releases a large amount of carbon dioxide gas when heated
forcing the dough to crack open

Some recipes state that it’s crucial to use natural sourdough; but when testing, I found that instant yeast is easier with similar results.

Slurry Char Siu Sauce for the Filling

The filling of these buns consist of Char Siu Pork and slurry Char Siu Sauce.
Some people called it a slurry, some people call it a sauce, but whatever you called it, it’s the star of the show; and it’s what makes Char Siu Bao, “Char Siu Bao”.

Look how beautiful this Char Siu Pork!

One of the things that makes Char Siu Pork so tasty is a rich Marinade Sauce.
You can use store bought but I found creating your own marinade sauce makes the pork richer, smokier and more aromatic.

Some people use either shoulder, butt or neck part; it really depends on personal preference.
I’m prefer pork belly because it was the best part, they are more juicy and less likely to dry out.

I use baking pan and cooling rack on top for roasting
Line baking pan with some grease proof paper to prevent the sugar residue stick to the pan

There are also a few ways to roasting the pork. I found the simple and easy way to cook your pork is to roast it in the oven. Just get creative – the air should be able to circulate underneath the pork.


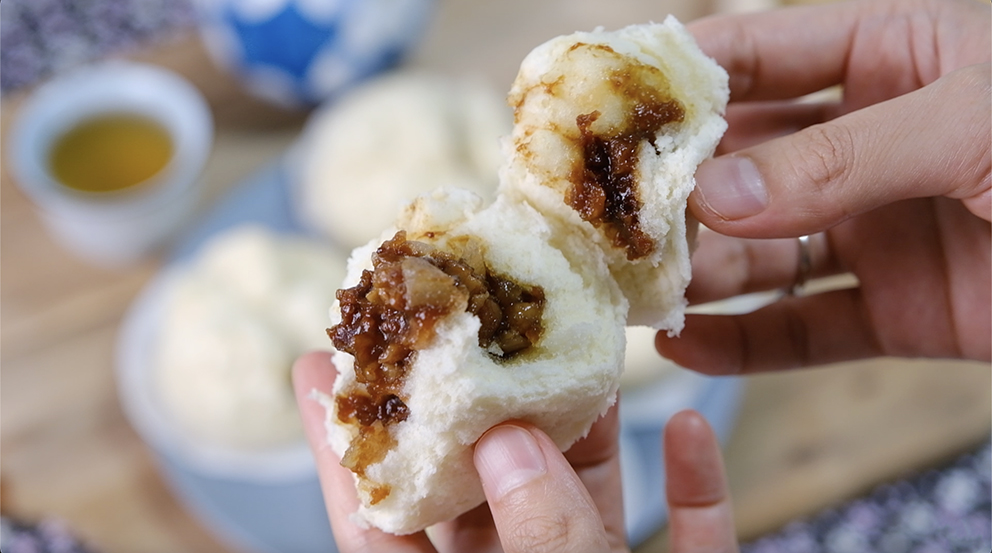
The steamed foreskin is just soft and smooth, and slightly cracks to reveal the barbecue stuffing, sending out the smell of barbecue.


The filling is luscious, sweet and delicious; juicy and sweet bbq pork is wrapped in soft and pillowy Chinese steamed buns.


These looks really addictive with such a flavourful filling nestled in the soft, pillowy bun. You won’t be able to forget this feeling and will crave it all the time.
I hope that you enjoy the recipe!

CHAR SIU BAO
Yield: 6 pieces
Active time: 4 hours
Total time: 19-20 hours

INGREDIENTS
Mother Dough

  • 25 g Unbleached Cake Flour
  • 1/6 tsp Instant Yeast
  • 20 g Water


Barberque Pork

  • 250-300 g Pork Belly
  • 2 tbs Vegetable Oil
  • 2 tbs Ginger (Minced)
  • 4 tbs Green Onion (Chopped)
  • 300 ml Water
  • 2 tbs Rice Wine
  • 1½ tbs Light Soy Sauce
  • 1 tsp Dark Soy Sauce

  • 5 Star Anise
  • 1 Cinnamon Stick
  • 2 Cardamom Pods
  • 6 Whole Cloves
  • 2 Liqorice Root
  • 1 Luo Han Guo (Monk Fruit)
  • 1/4 tsp Ginger Powder
  • 25 g Rock Sugar
  • 1/2 tbs Liquid from Red Bean Curd
  • 1½ tbs Red Miso Paste
  • 1/2 tsp Red Yeast Rice Powder or Paprika Powder
  • 1½ tbs Honey
  • Additional Light Soy Sauce for Marinate


Basting Sauce
Equal part honey and marinade sauce


Starter Dough

  • 24 g Mother Dough
  • 72 g Unbleached Cake Flour
  • 42 g Water


Slurry Sauce (for the filling)

  • 2 tbs Vegetable Oil
  • 1/4 Onion (Chopped)
  • 2 Scallion (Chopped)
  • 40 ml Water
  • 1/2 tbs Light Soy Sauce
  • 1/2 tsp Dark Soy Sauce
  • 1/4 tsp Red Miso Paste
  • 3/4 tbs Sweet Soy Sauce
  • 1 ½ tbs Caster Sugar
  • 1/8 tsp Salt
  • 1 tsp Sesame Oil
  • 1/2 tbs Corn Starch
  • 1/2 tbs Unbleached Cake Flour
  • 1/2 tbs Potato Starch
  • 30 ml Water


Final Dough

  • All Starter Dough (138 g)
  • 50 g Caster Sugar
  • 10 g Water
  • 1/5 tsp Ammonium Bicarbonate
  • 1/5 tsp Baking Soda
  • 80 g Unbleached Cake Flour
  • 1/2 tsp Cream of Tartar
  • 1⅔ tsp Double Acting Baking Powder
  • 6 g Shortening

INSTRUCTIONS
DAY 1 (7:00 p.m.)

Mother Dough

  1. Simply mix the Unbleached Cake Flour, instant yeast and water; stir until just combined.
  2. Cover the bowl with a plastic wrap, store it at warm place (68-72°F/ 20-22°C), and then let the dough ferment for 12 hours.


Marinade Sauce

  1. Fry the ginger and green onion with some vegetable oil for about one to two minutes until they’re fragrant but definitely not burnt.
  2. Pour in the water along with rice wine, light soy sauce, dark soy sauce and all the herbs and spices. Bring the mixture to boil, let it simmer until the mixture reduce to about half cup.
  3. Strain the mixture to remove all the herbs and spices; pour the liquid back into the saucepan.
  4. Add the rest ingredients into the liquid; ginger powder, rock sugar, liquid from red bean curd, red miso paste and red yeast rice powder.
    Cook over medium low heat until the sugar melted, once the sugar dissolved, turn off the heat, add in the honey, and stir until well combined.
  5. Pour the sauce into a jar or container and then store it in the fridge until you are ready to use it. 


Marinate the Pork

  1. Wash the pork, wipe off all the excess water with a paper towel, poke both sides of the pork with meat tenderizer (you can use either fork or a few skewers, that’s also works well). The holes will help the marinade sauce seep into the pork.
  2. Place the pork belly into a ziplog bag or a container, add 3 parts marinade sauce and 1 part light soy sauce.
    Seal the bag and do a little massage to make sure the marinade sauce is even and then store it in the fridge for at least 4 hours (max 12 hours).

DAY 2 (7:00 a.m.)
Starter Dough
After 12 hours, our mother dough is ready, you can see so many small bubbles and smell a bit sour.
Please note that for 1 batch of the recipe, we only use 24 g of the mother dough, you can throw the rest.

  1. Add the flour and water to the 24 g of the mother dough, mix until it forms a dough ball.
  2. Grease the bowl with a little bit of vegetable oil, place the dough inside the bowl, Cover with a cling wrap and then store it back to the warm place (68-72°F/ 20-22°C) for about 6-8 hours.


Roast the Pork

  1. Preheat the oven to 130°C .
  2. Line baking pan with some grease proof paper (to prevent the sugar residue stick to the pan), place a cooling rack on top of the baking pan.
    Just get creative – the air should be able to circulate underneath the pork.
  3. Place the pork on a roasting tray and then roast it for 1 hour
    Keep flipping and basting every in 15 minutes (the basting sauce was simply equal parts honey and Marinade Sauce).
  4. Once it’s done, brush the pork one more time with vegetable oil and let it rest for at least 30 minutes before cutting


Slurry Sauce (For the Filling)

  1. To begin, we have to make the scallion oil;
    In a pan combine vegetable oil, onion and scallion on medium heat; fry for about one to two minutes until fragrant and then take out the onion and scallion.
    Don’t throw the delicious scallion and onion, you can add later to your dishes.
  2. Pour in some water into the scallion oil along with light soy sauce, dark soy sauce, red miso paste, sweet soy sauce, sugar, salt and sesame oil (let it simmer for 1 minute).
  3. To thicken the sauce; in a small bowl combine corn starch, cake flour, potato flour and water (make sure that you mix it really well before you pour it to the mixture ).
    Pour thickening into the simmering mixture, continue stirring until the mixture is thicken and a bit translucent.
    Take it off from the heat, pour the mixture into a bowl, cover it with a cling wrap and then keep it in the fridge for at least 30 minutes to firm up (preferably 2 hours).


Combine the Filling
The ratio for the filling is equal part Char Siu Pork and slurry Char Siu Sauce.
After 2 hours in the fridge the consistency of slurry Char Siu Sauce turned similar to jelly.
Thinly slice the pork and remove the tough skin (you can keep some for your delicious Char Siu Rice). Coarsely chop the rest, combine it with slurry sauce and mix it really well.
Cover with a cling wrap and store this pork filling in the fridge while waiting for the final dough.


DAY 2 (1:00 P.M.)
Final Dough
After for about 6 hours you can see the starter dough has a lot of bubbles and it’s doubling in size.
This bubbly sponge texture is carbon dioxide produced by the yeast which makes the buns very soft.

  1. Add the sugar and water into the starter dough; mix well.
    After a couple minutes of mixing, the sugar will ‘melt’ into the dough and it should be more liquid-y.
  2. Add baking soda and Ammonium Bicarbonate (this chemical compound releases a large amount of carbon dioxide gas when heated forcing the dough to crack open).
    Please note: Be careful when adding this type of leavening, make sure that you measure it correctly. 1/5 tsp is about less than ¼ tsp (too much Ammonia will cause an extremely intense unpleasant ammonium smell in the dough).
    Mix for about 1-2 minutes (it’s really important that ammonium and baking soda is completely mixed with the dough); “Take your time, don’t rush this part”.
  3. Add the sifted Unbleached Cake Flour, Cream of Tartar and Baking Powder; mix well.
    Gather all small crumb, be careful not to over-knead the dough, you’re just looking for the dough to come together and stop sticking.
  4. Finally, add in the shortening and knead until just combined
  5. Cover the dough with a cling wrap for about 5 minutes to relax the gluten and don’t forget to preheat your steamer. 

Wrapping the Bao

  1. Divide the dough into 6 equal pieces (it’s about 50 g each).
  2. Take 1 portion of the dough, press into a thick disc.
    Grab the dough with your left hand and rolling pin on the other hand, using rolling pin roll up and back, flatten the edges of the dough while turn the dough a little by little (flatten the edges of the dough to a 10 cm circle); the center part should be slightly thick.
  3. Add about 30 gr of the pork filling to the center of the dough.
  4. Pinch one side of the dough and then pleat the dough around the filling in a circular motion while using your left hand thumb lightly pressing the filling downwards.
    Once you get to the end, press with force and pinch at the top of the bun to make sure everything is well sealed “kindly watch the video for more details“.
  5. Place each buns onto an individual greaseproof paper (always cover the buns with a plastic wrap to prevent the skin from dying out).


Steaming
Place the buns into the preheated steamer;
Over high heat, steam the buns immediately for about 10-12 minutes.
Take it off from the heat and serve immediately.

NOTES

  1. I highly recommend to use bamboo steamer because it doesn’t collect condensation, so you never have to worry about water dripping onto your buns.
    If you’re using metal or plastic steamers, I suggest to cover the lid with a piece of cloth, to absorb the condensation during steaming; otherwise the dropping water could affect the look of your buns.
  2. Char Siu Bao crave high heat, NEVER ever open the steamer lid during the steaming process else it won’t rise perfectly.
  3. Some people claims that add vinegar to the steaming water will make buns whiter,
    I personally didn’t find that method is useful.
  4. The best taste and texture of Char Siu Bao, serve them straight out of the baskets while they’re steaming hot.
    If there are any left, put them in an airtight container/bag and store in the fridge for up to 3 days or 1 month in the freezer.
  5. To reheat; Steam for 5-10 minutes or microwave for 1-2 minute.

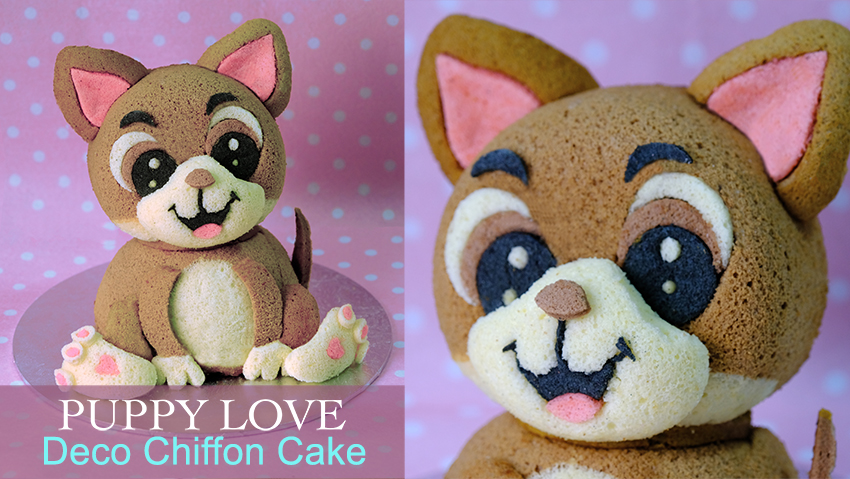
Puppy Love Deco Chiffon Cake

Chiffon cakes are typically baked in standard tubed pans.
But did you know…
You can also bake them in all sorts of exciting shapes or sizes and give them patterns or decorations created using the same cake batter as well.

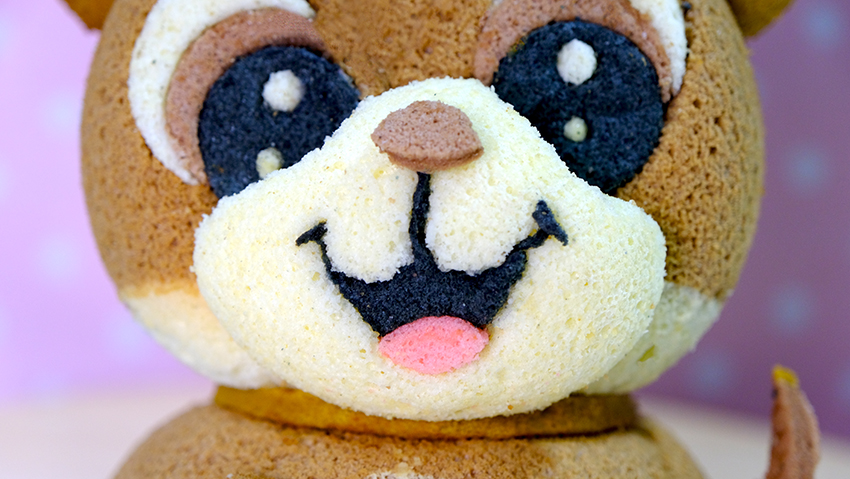
These “Puppy Love Deco Chiffon Cakes” are pretty enough to stand alone as the centrepiece at a party and a perfect surprise gift for your loves one.

You can print this A4 template as a size guide

Template in an actual cake size is very important as a size guidelines, especially when cutting the cake details
Another thing that you will need to prepare is the pan or mould which as much as possible represents the shape of each puppies details. It can be baked in a variety of moulds, such as glass, metal, silicone and paper cones.

Various pans that I used for this project

For example, I will use some egg shape pans to create the mouth, feet, hands and ears. 

I also need shallow baking pans for baking the thin layer used for decorating purpose.
The size of the shallow pan that we used is depend on the decoration required, for example if very little decoration required then the smaller pan is used.

Another pans that we use here is 5-inch, 6 cm deep round pan for the head and also 750 ml stainless steel cup for the body (wonder mold doll cake which is similar to this works well too).

Make sure that you prepare all the pans in advance and preheat the oven so the batter won’t sit too long, allowing air bubbles to escape and deteriorate.

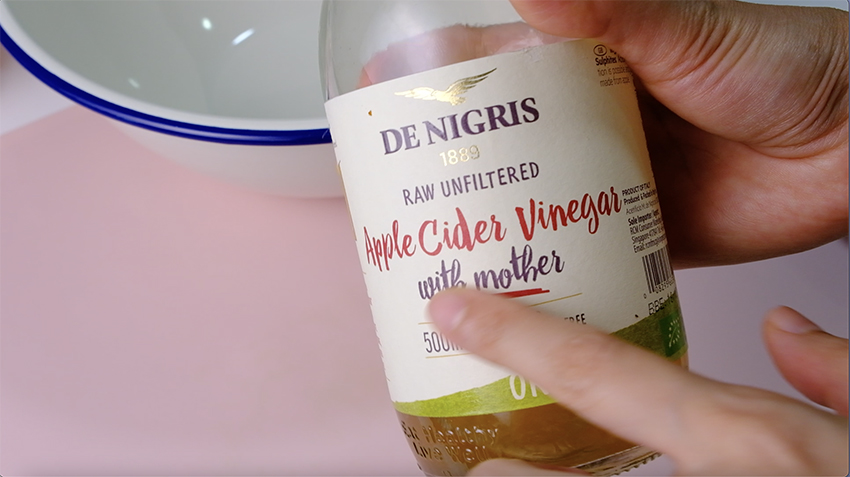
Vinegar to clean the bowl from grease

For meringue batter, I highly recommend to wipe the bowl and beater attachment with lemon juice of vinegar to make sure that it’s clean and grease free as the presence of grease may affect the foaming properties of the egg whites.

Invert the pan during cooling stage

Once it’s baked, it’s important to invert the pan immediately on the cooling rack layered with greaseproof paper and let them cool completely.
Moulds with a bigger volume are preferably inverted during the cooling stage so that gravity can help pull the cake to its maximum height before the cake structure stabilizes.
On the other hand smaller moulds, inverting does not make a difference to the height of the cooled cake.

Pockey stick and bubble tea straw as buffer to support the head

And because of the structure of chiffon cake not as strong as any other type of cake, it was a good idea if we can add some buffer around the body part to support the weight of the Puppie’s head.
how about some delicious pockey stick? since it was edible and sturdy enough (use pockey part which is covered with chocolate).

Another important tip, when it comes to stacking cakes I always use bubble tea straw in the middle as a centre pole to helps stabilize the cake structure (wooden chopstick works well too).

Always cover each part of chiffon cakes with plastic wrap during the process to prevent from drying out.

Handsome BOY!

OH.. MY lovely Puppy !!!

LOOK how gorgeous he is!

I’m sure that people will fall in love once they see him!

😊 😃 😀

The cake is so fluffy, low in sugar and very tasty, these are healthy treats suitable for people of all ages. It’s a very light and simple, yet delicious cake

🤤 SLURP….

I hope that once you recreating these recipe, you will have more confidence to create your own stunning design.
Thank you so much for staying with me…
LOVE YOU ALL!!


PUPPY LOVE DECO CHIFFON CAKE
Yield: 1 Deco Chiffon Cake (Width: 17 cm, Height: 25 cm)
Active time: 2 1/2 hours
Total time: 4 1/2 hours

INGREDIENTS
Egg Yolk Batter:

  • 50 grams Egg Yolks
  • 25 grams Caster Sugar
  • 100 grams Vegetable Oil
  • 100 grams Water
  • 1 teaspoon Vanilla Extract
  • 150 grams Cake Flour
  • 1/4 teaspoon Salt

Meringue Batter:

  • 350 grams Egg Whites
  • 1/2 teaspoon Cream of Tartar
  • 100 grams Castor Sugar
  • Food Colouring (soft pink, brown, black, yellow)

Pans/ Moulds:

  • 6 pieces Egg Pans (@50 ml)
  • 2 Rectangular Pan (22 cm x 10 cm) & (25 cm x 7,5 cm)
  • 1 Round Pan (12 cm diameter, 6 cm height)
  • 1 Wonder Pan (750 ml)

Edible Glue

  • 3 tablespoons Icing Sugar
  • 1 teaspoon Water

INSTRUCTIONS
Pans

  1. Grease the bottom part of the 2 rectangular pan with some butter and layered with parchment paper for easy release.
  2. Don’t grease the Egg, Round and Wonder pan.


Cake Batter

  1. Preheat the oven to 150° C.
  2. Egg Yolks Batter
    In a medium bowl, beat the egg yolks and sugar until pale, thick and creamy (ribbon stage). Add in the oil, water and vanilla extract, mix well.
    Gradually add sifted flour along with salt, whisking until just evenly mixed, set aside.
  3. Meringue Batter
    Wipe the bowl and beater attachment with lemon juice of vinegar to make sure that it’s clean and grease free (the presence of grease may affect the foaming properties of the egg whites).
    Pour in the egg whites along with cream of tartar to the bowl, using electric hand mixer whisk at high speed until foamy. Add in half of the sugar and whisk until soft peaks form.
    Then add in the remaining sugar, continue whisking until it reach a stiff peaks.
  4. Fold the meringue into the egg yolk batter in 3 batches, gently fold it with hand whisk in one direction.
    Mix after each addition until no white streaks visible and well combined.
    Make sure there’s no egg yolk mixture left at the bottom of the bowl.
  5. To Colour and Bake
    FIRST BATCH (wonder and round pans);
    Draw the white part of the puppies body and head with some plain batter (please refer to the template) for about 1/2 cm thick (make sure it’s an even thickness) and bake them immediately in the preheated 150 °C oven for about 3 minutes.
    *I suggest to place the pan vertically while baking this, to make sure the batter stays in place.
    SECOND BATCH (2 rectangular pans);
    – Divide 22 cm x 10 cm rectangular pan into 2 equal sections, place soft pink and plain batter side by side for about 25 grams each.
    – Divide 25 cm x 7,5 cm rectangular pan into 3 equal sections, place soft brown, dark brown and black batter side by side for about 20 grams each.
    Tap the pans a few times to flatten the surface and then bake them immediately in the preheated 150°C oven for about 15-20 minutes or until it doesn’t stick to your hands when you touch it.
    * Once it baked, invert sheet cakes immediately onto a cooling rack layered with greaseproof paper and let it cool completely.
    THIRD BATCH (6 egg, wonder and round pans)
    Fill 3 egg shape pans with plain batter and another 3 with dark brown batter for about 20 grams each.
    Colour the rest of the batter with dark brown colour and divide them onto wonder and round pan.I suggest to fill the pan almost to the top rather than ¾ full so we can achieve full round head and body shapes.
    Tap the pan a bit to remove air bubbles and bake them in the preheated 150°C oven (please note the bigger the pan, the longer it will takes)
    – 25 minutes for egg pans
    – 35 minutes for round pan
    – 40 minutes for wonder pan, reduce the heat to 140°C and continue baking for another 10 minutes or until toothpick inserted comes out clean.
    * Once it’s baked, invert them immediately on the cooling rack layered with greaseproof paper and let them cool completely.

Edible Glue
Simply mix icing sugar with water and mix until well combined.

To Unmold the Cake
Gently pull cake away from sides of pan to loosen the cake and peel greaseproof paper from the sheet cake.
* Always cover each part of chiffon cakes with plastic wrap during the process to prevent from drying out.

DETAILS & ASSEMBLY
Kindly follow template and instructions in the video (for the body buffer, use pockey stick which is covered with chocolate otherwise it will be mushy)

NOTES

  1. To colour the cake; try to use natural food colouring such as cocoa powder, charcoal or matcha powder as much as possible (diluted with a bit of hot water before adding to the batter).
  2. Cream of tartar is used for stabilising egg whites, it also helps to increase the volume of meringue.
    *You can substitute cream of tartar with lemon juice or vinegar (replace every ½ tsp cream of tartar with 1 tsp lemon juice or vinegar).
  3. Chiffon cakes can be baked in a variety of moulds, such as glass, metal, silicone and paper cones.
    *Never use non-stick baking pan for chiffon cakes.
  4. Never grease the pan (except pans for baking the thin layer used for decorating purpose) coz this type of cake needs to cling to the sides of the pan to enable rising during baking.
  5. Moulds with a bigger volume are preferably inverted during the cooling stage so that gravity can help pull the cake to its maximum height before the cake structure stabilizes”
  6. Oven mays vary, if the chiffon cake browns, hiding the colour/pattern, try reducing the oven temperature by 10°C each time until you get the right temperature.
  7. To store
    Always keep chiffon cakes well wrapped up or in airtight container to prevent them from drying out.
    Store in airtight containers, chiffon cakes will keep up to 2 days at room temperature or up to 5 days refrigerated.

Light Banana Layer Cake

“I still have a hard time resisting a piece of this first thing in the morning…“
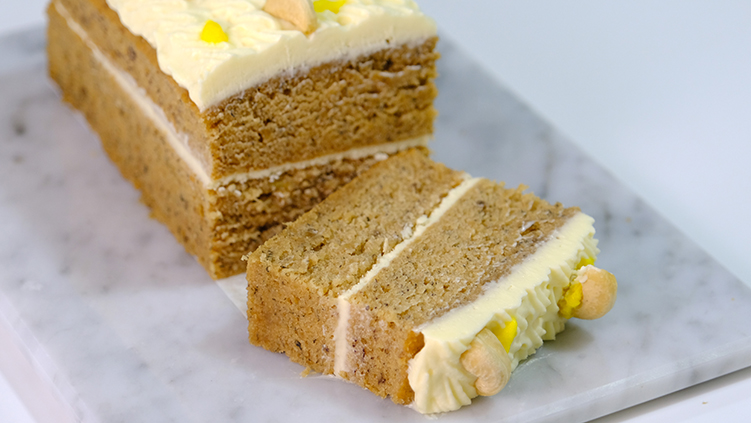
Unlike the traditional dense banana bread, this one is so soft and fluffy, almost a cake-like texture.

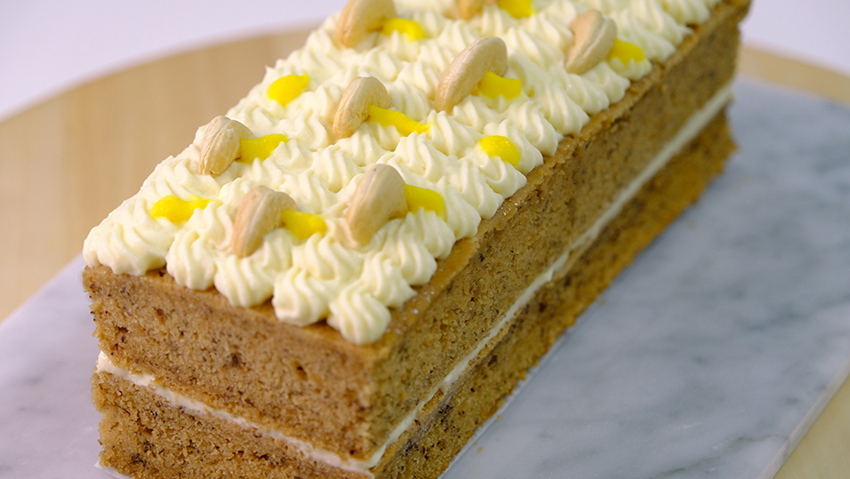
Banana layer cake filled with creamy cream cheese frosting, they are also not overly sweet, if you are banana lover, this one really is a must-try.

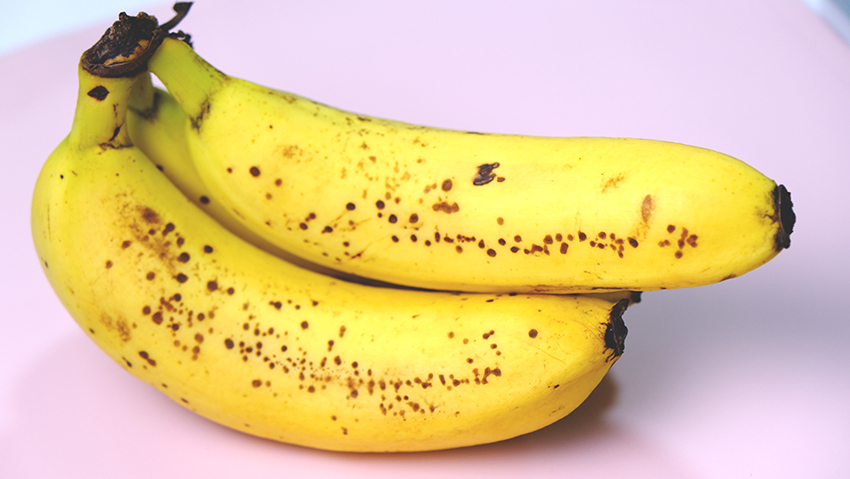
Ripe banana which I used

When it comes to baking with bananas, most people like to use soft, overripe bananas with peels that are covered in brown spots are because they’re sweet and have a strong banana flavor.
I personally don’t like to use overripe banana because it will add the sweetness to the cake. Ripe bananas with a bit of dark spots just perfect for me.

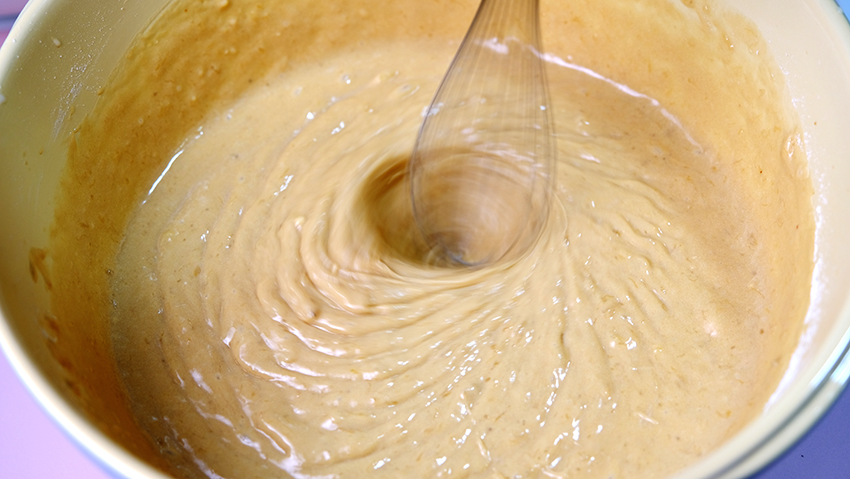
Gorgeous banana batter

For this cake I wanted an airy, light, fluffy cake and not something resembling the texture of banana bread. I’m telling you, it does not disappoint!

Creamy cream cheese frosting

 It’s everything you love about cream cheese frosting– tangy and sweet, but not as tooth-decaying sweet as buttercream. Creamy, light, silky, smooth…. Yep, all of the above

Look! This is such a delicious cake, it’s light and moist.

You can serve it right away or refrigerate it for at least half hour for a cleaner cut.

Beautiful texture layer cake, intense banana flavour with a luscious homemade creamy frosting, it’s really a wonderful cake and disappeared in no time.
Happy baking!!

LIGHT BANANA LAYER CAKE
Yield: 25 cm x 16 cm pan
Active time: 1 hours
Total time: 2 1/2 hours

INGREDIENTS
Banana Cake:

  • 60 grams Unsalted Butter (softened)
  • 30 grams Vegetable Oil
  • 100 grams Granulated Sugar
  • 50 grams Light Brown Sugar
  • 75 grams Eggs
  • 1/2 teaspoon Vanilla Extract
  • 185 grams Mashed Ripe Bananas
  • 1 teaspoon Lemon Juice
  • 215 grams All-Purpose Flour
  • 1/2 teaspoon Baking Soda
  • 1/4 teaspoon Salt
  • 175 grams Butermilk

Cream Cheese Frosting:

  • 120 grams Unsalted Butter
  • 120 grams Cream Cheese
  • 30 grams Icing Sugar


INSTRUCTIONS
Banana Cake

  1. Preheat the oven to 160°C.
  2. Grease the pan and line it with parchment paper.
  3. In a medium bowl, combine the flour, baking soda and salt, set aside.
  4. Place ripe bananas in a bowl, add 1 teaspoon of lemon juice, mash it until smooth.
  5. In another bowl, combine the butter, half portion of vegetable oil, granulated sugar and light brown sugar. Whip on medium-high speed until pale and fluffy. Stir in the remaining vegetable oil and mix. Blend in the eggs and Vanilla extract. Add mashed banana, mix well
  6. Slowly add the flour mixture alternating with buttermilk in 3 separate batches, beginning and ending with the flour mixture; mixing just until combined after each addition.
  7. Once the batter is well combined, pour it into prepared pans, spread to an even layer.
  8. Bake it in the preheated 160 C oven for about 35 – 40 minutes or until toothpick inserted into center comes out clean.
  9. Take it off from the pan, peel the parchment paper allow it to cool completely on the cooling rack.

Cream Cheese Frosting

  1. In a medium bowl whip the cream cheese a while until it a bit fluffy.
  2. Add in the softened butter, and beat until creamy and well combined.
  3. Pour in the icing sugar and vanilla extract, continue mixing until smooth and no lumps remain.
  4. Put the frosting into the piping bag with a start tip and store it in the fridge for at least half hour so it will firm up a bit


ASSEMBLY
Cut the cake into 2 equal long pieces. Place the first layer onto long platter, pipe a layer of frosting on top of itand then place another layer on top of the frosting. Clean up the sides a bit, decorate the top of the layer cake with the remaining frosting.

NOTES

  1. You can use store-bought buttermilk or simply make your homemade buttermilk by mixing 170 grams of milk with 3/4 tablespoon of vinegar, let it sit 5 minutes before adding to the batter.
  2. If you use overripe banana, it will add the sweetness to the cake.
  3. To store: 3 days in the fridge, 1 month in the freezer;
    Please note that the texture of the cake may change slightly once thawed. Allow to rest at room temperature about 10 – 30 minutes before enjoying.

Marshmallow Cupcakes Candy

Soft, fluffy, pillowy and an entertainingly bouncy…
Homemade marshmallows may take a little time to prepare, but I’m sure once you spoil yourself with the homemade version, you may never go back to store-bought again. 

Can’t help bitting it!

These beautiful “Marshmallow Cupcakes Candy” are perfect for a birthday party, valentines day, baby shower, or even a wedding.

Thing that you will need to prepare in advance

And because marshmallow sets really quickly, it’s a good idea if we can prepare all things that we need in advance.
You can use hand mixer to make it, however stand mixer is the best choice in my opinion, it’s safer since we are working with a really hot sugar syrup.

Infrared Gun

Candy thermometer is important in making marshmallow candy, to check the correct temperature, or if you have infrared gun this also works well.

Why use silicone moulds?
Because it’s so much easier to remove your marshmallow from the moulds, any shape of silicone moulds works great.
Don’t forget to grease the silicone moulds with either baking spray, butter or oil for easy release.
I only dusted the moulds lightly with coating mixture, it just works great for me.

How to prevent the batter sets really quickly?
While you pour your marshmallow batter into the mould, we need to keep the batter stays liquid so it can fill up the entire space inside the mould.
I found that a double boiler method helps a lot.
So what I usually do is I place the bowl over the hot boiling water pot, by doing this, the steam stays trapped between the two pots will heats the marshmallow and liquefy the mixture.

The consistency of marshmallow when pouring into the mould need to be liquid

How to unmold?
Dust the work surface with generous amount of the coating mixture, then carefully peel the cupcake mould.

You might need to apply some coating mixure on your hands as well

Pop the pretty marshmallow out of the molds and give them a good dusting of coating mixture to cover completely.

Then gently pick up the marshmallow, pat the surface to remove excess coating.
If you still feel a bit too much coating, you can just brush it away especially on the folding sections.

Oh.. it’s really feels good, it’s bouncy and the texture so soft and pillowy.
It’s much creamier in texture and you can customize this recipe to make any flavor marshmallow you would like .
I do hope that you have a chance to make this, coz there are really nothing more pleasurable than bitting into a homemade marshmallow.

MARSHMALLOW CUPCAKES CANDY
Yield: 5 medium cupcakes
Active time: 1 hours
Total time: 3 hours

INGREDIENTS
Coating:

  • 100 gr Icing Sugar
  • 70 gr Corn Flour

Marshmallow Batter:

  • 16 gr Gelatine Powder
  • 80 gr Cold Water
  • 100 gr Granulated Sugar
  • 60 gr Corn Syrup
  • 40 gr Cold Water
  • 60 gr Corn Syrup
  • Blue and Red Food Colouring

INSTRUCTIONS
Coating
Simply sift the icing sugar with some corn flour.

Prepare the Mould
Grease the cupcake silicone moulds with either baking spray, butter or oil for easy release (I just dusted the moulds lightly with coating mixture, it works great for me).

Marshmallow Batter

  1. To bloom gelatine
    Sprinkle the gelatine powder over 80 grams of cold water, give a little stir and let it sit for about 5 minutes.
  2. Microwave the bloomed gelatine for 30 seconds so it will be liquid, then pour it into the mixer along with the first batch of the corn syrup.
    Put your mixer on low speed (Kitchen Aid speed 2) just to keep it moving while waiting for the sugar syrup.
  3. In a medium sauce pan, combine the sugar, second batch of corn syrup and 40 grams of cold water (you don’t need to stir it, the corn syrup will helps the sugar from crystallising).
    Place your candy thermometer and then cook over medium heat until it reach 116°C.
  4. When the sugar syrup reach 116°C, take it off from the heat, slowly and carefully drizzle the sugar syrup down the sides of the mixing bowl. Make sure that it doesn’t touch the whisk.
  5. Once you add in all your sugar syrup, turn the mixer to medium speed (Kitchen Aid speed 6) and set your timer for 5 minutes.
  6. After 5 minutes, speed up the mixer to medium high (Kitchen Aid speed 8) for another 2 minutes.
  7. Divide the mixture into 2 equal portions, colour 1 batch with blue and another one with pink.
  8. Pop the pink mixture into a piping bag with a star nozzle.
  9. If the blue colour mixture start to sets hard before you piping it;
    Try to use double boiler method by placing the blue colour mixture bowl over the hot boiling water pot (the steam stays trapped between the two pots will heats the marshmallow and liquefy the mixture, keep stirring until you get the desired consistency.
  10. Pour the blue mixture into a piping bag, divide onto 5 cavities of the moulds evenly. Then working quickly, pipe the pink swirls mixture on top of the blue mixture.
  11. Sprinkle some sugar decoration or dragees before the marshmallow sets hard.
    Let the marshmallow sit uncovered at room temperature for at least 2 hours before coating.
  12. To Coat
    Using stainer, dust the work surface with generous amount of coating mixture (you might need to apply some on your hands as well).
    Carefully peel the cupcake mould, pop out the marshmallow onto the work surface, then give more coating mixture on top of the marshmallow.
    Gently pick up the marshmallow, pat the surface to remove excess coating.
    If you still feel a bit too much coating, you can use silicone brush just brush it away, especially on the folding sections.

NOTES

  1. You can substitute corn syrup with either glucose, golden syrup or even honey if you want.
  2. It’s really important not to boil the sugar syrup any further than 116°C, otherwise you will end up with chewing sugar syrup that’s really hard to work with.
  3. Weather does affect marshmallow making, the ideal weather is cooler, drier conditions.
    If you make this on a rainy day, they tend to take a little bit longer to set unless you can place them in an air conditioner room to speed up the process.
  4. If kept in a dry place at cool room temperature, they should keep for about a month in an airtight container.